
1. Matte Black Frameless Glass With Soft Greige Tile Grid
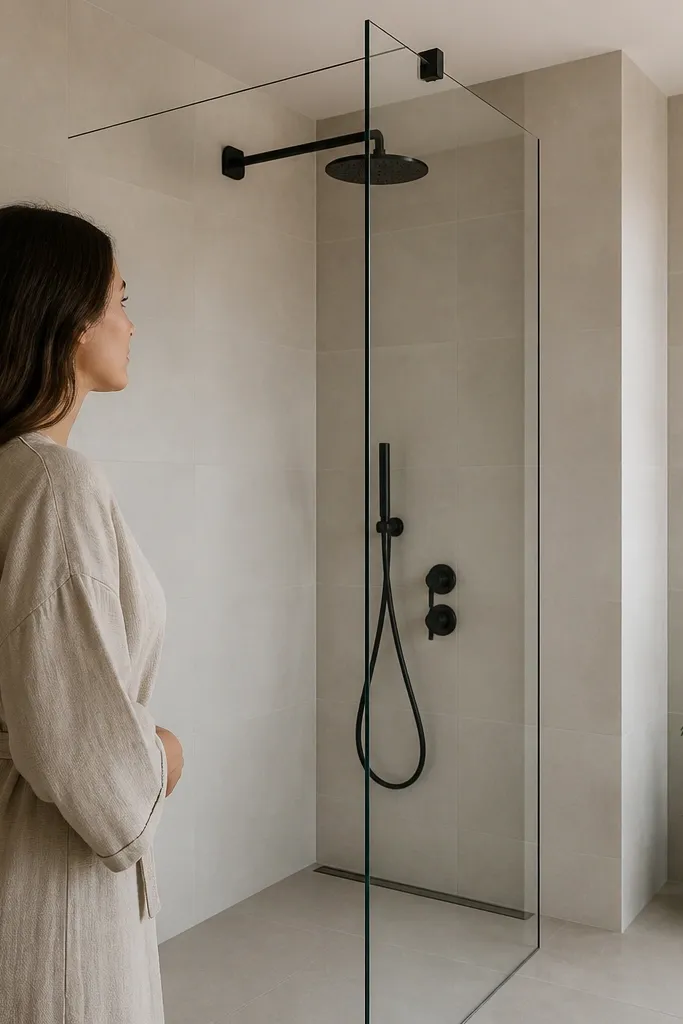
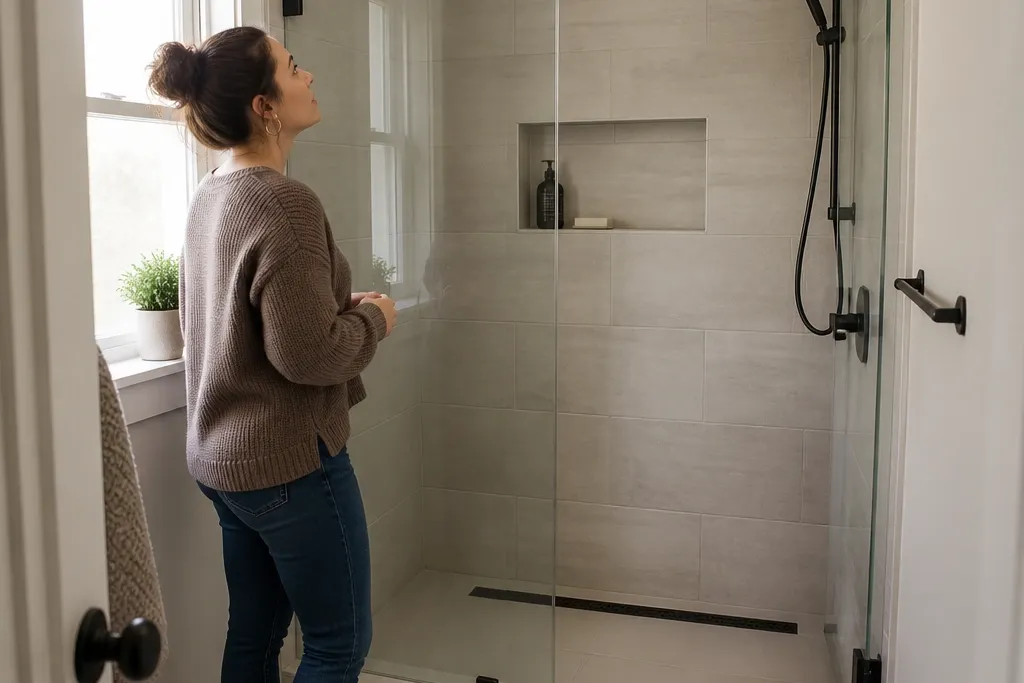
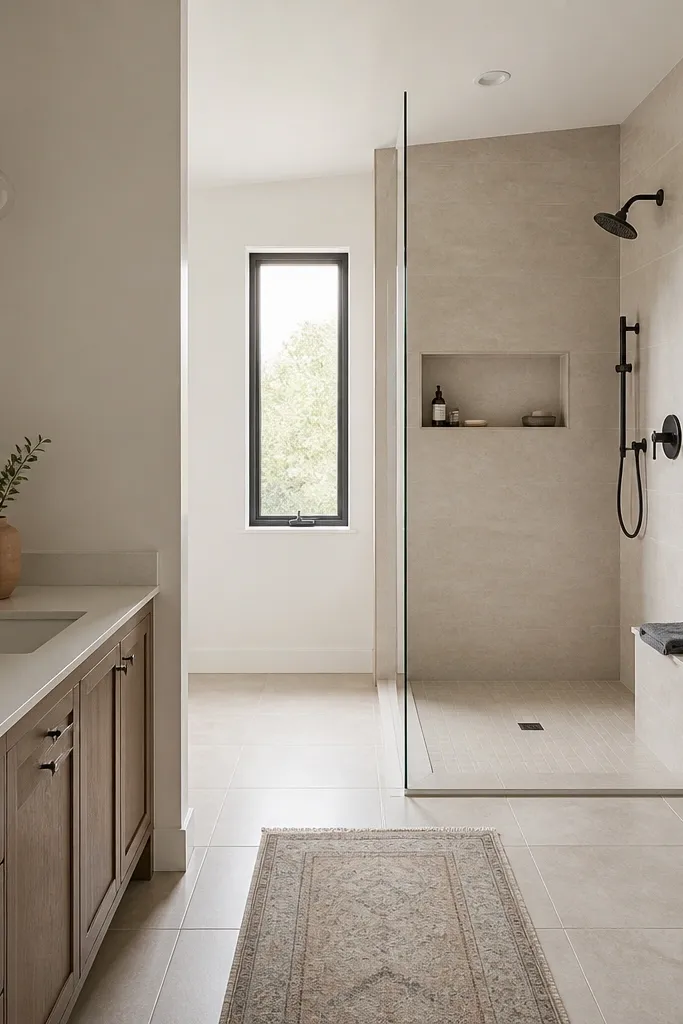
This look is the cleanest modern trick for a tiny bathroom: frameless glass removes the visual box, and matte black hardware gives you that sharp “designed” edge. Use soft greige wall tile in a straight grid with light matching grout so the shower walls look smooth and uninterrupted. Add a narrow black line at the glass edge with a matching black handle or towel bar. The result reads larger, brighter, and more current even if you didn’t change the vanity.
Editor's noteWhen you pick tile, hold two sample pieces side-by-side with your grout sample under your bathroom light — the wrong match can look dusty fast.
Measure the shower opening width and height before ordering glass. Install the shower pan and waterproofing first, then set wall tile starting from the highest visible row so the cuts land near the corners. Order a frameless glass panel system sized to your opening, and use matte black hardware that matches the faucet finish. Finish with caulk at all changes of plane and keep grout lines consistent across the glass line.
Skip thisDon’t choose grout that’s darker than the tile — it makes the shower look smaller and messier.
2. Herringbone Accent Band Behind the Shower Valve
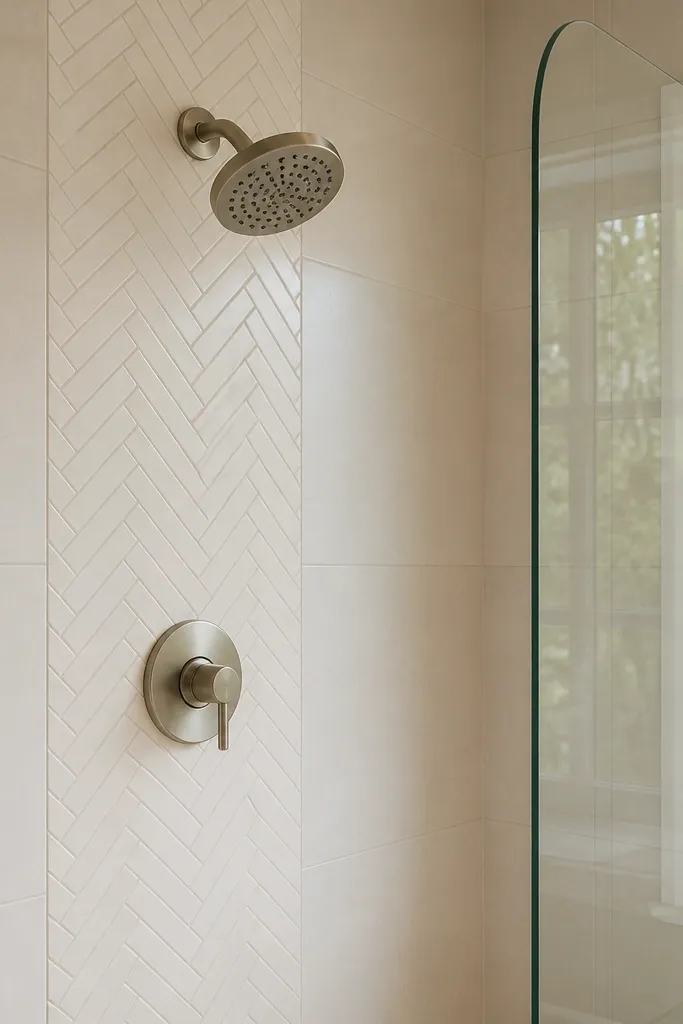
A single herringbone band gives you modern movement without covering the whole room in pattern. Keep the surrounding walls simple — think large white or warm white tiles with thin, matching grout. Place the herringbone directly behind the valve so the eye lands on one intentional focal point. This is a great option when your bathroom is narrow because the rest of the shower stays calm.
Editor's noteUse a laser level for the band edges so the herringbone lines don’t drift into a crooked look.
Pick a base wall tile that you can lay in a straight grid with minimal fuss, then choose herringbone tiles in a similar color family. Dry lay the herringbone band on the floor to confirm the rhythm and size, then mark your centerline on the wall for the valve area. Waterproof, then tile the base walls first, leaving the accent area ready for the herringbone band. After setting, grout the whole shower using matching grout, and seal the tile edges where they meet the glass or trim.
Skip thisAvoid mixing two different tile thicknesses between the base and the herringbone — it creates a step you’ll see every day.
3. Linear Drain Shower Floor With Same-Tone Large Tiles
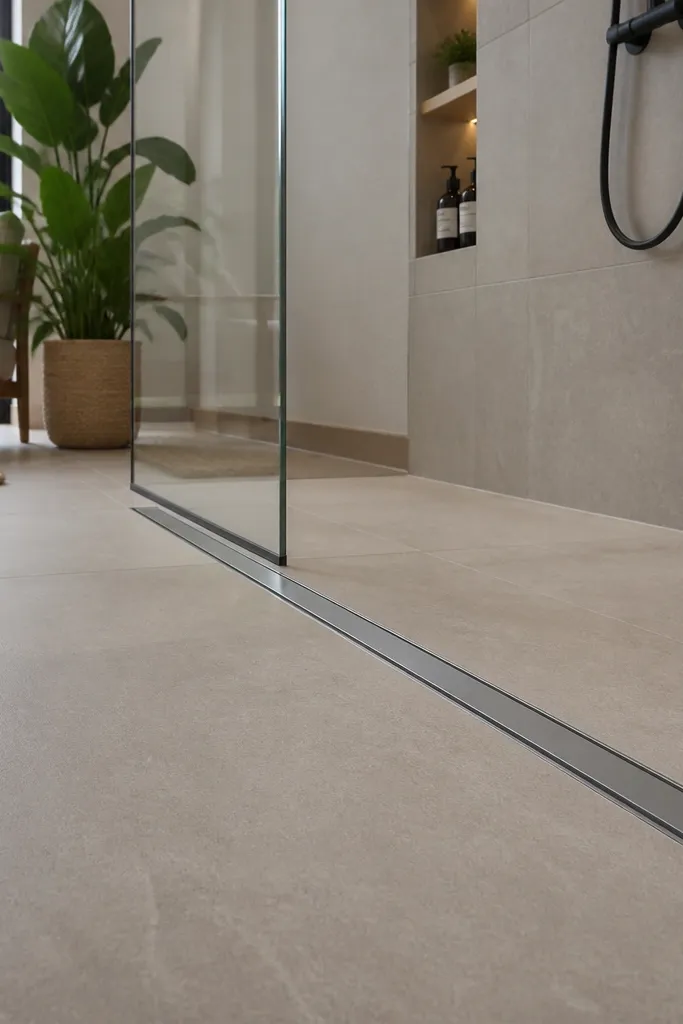
If you want the shower-only remodel to scream modern, a linear drain helps because it creates that long, clean line across the floor. Pair it with same-tone large-format tiles so the floor looks continuous and easy to clean. The look is sleek, and it also helps visually because the eye reads fewer break lines. This is a strong pick when your bathroom already has a busy vanity or counter and you want the shower to be the calm anchor.
Editor's noteBefore you tile, do a dry-fit with two courses of tile and check the slope with a straightedge so you don’t end up with thin, ugly cuts near the glass.
Choose a linear drain system that matches your shower dimensions, then plan the slope so water heads toward the drain with no weird low spots. Waterproof the subfloor and install the drain per the manufacturer instructions, then set the floor tiles from the far wall toward the drain line. Use spacers that match the tile system and keep grout lines tight so the floor looks like one plane. Finish by installing the glass door and sealing all perimeter joints with a mildew-resistant caulk.
Skip thisDon’t skip leak testing — a small bathroom floor is unforgiving if waterproofing fails.
4. Wall-To-Wall Quartz-Look Tile Panels With Recessed Niche
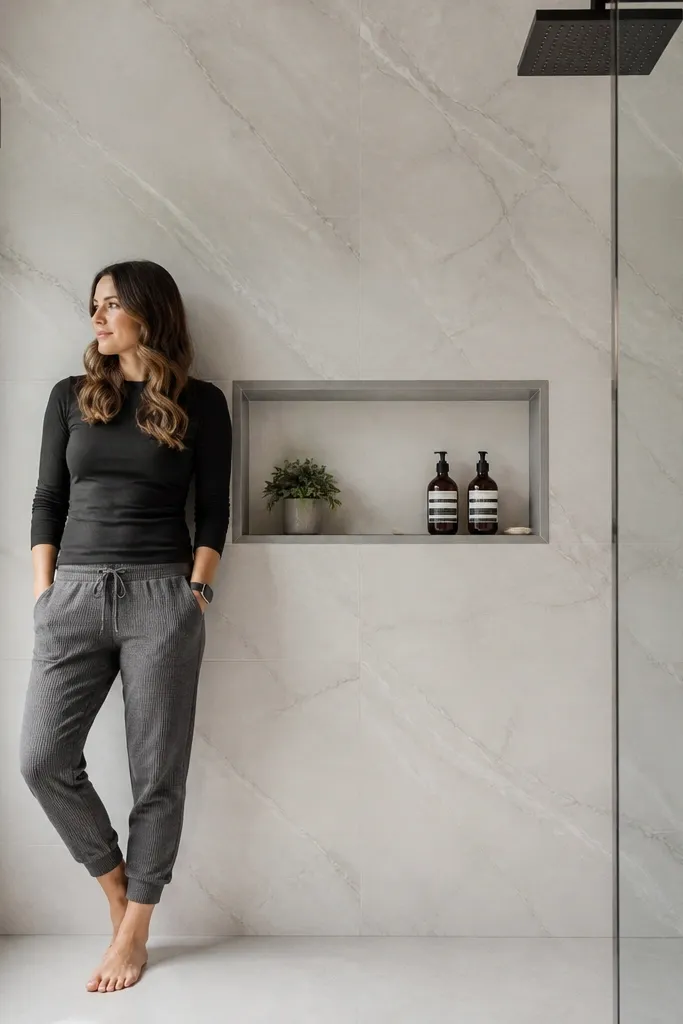
Quartz-look tile panels make the shower feel like a single material surface, which is exactly what modern bathrooms do in small spaces. Add a recessed niche so you get storage without adding clutter on the wall. Keep the niche framed with the same tile or a slightly darker matching tile so it looks intentional. This combination makes the shower practical and photogenic because the niche reads clean and the walls look smooth.
Pick quartz-look tile with long, consistent veining and choose a grout color that blends into the background stone tone. Frame the niche location before waterproofing, including exact niche depth so the tile doesn’t protrude. Waterproof the entire shower envelope, then tile the walls in large panels or a consistent grid that lines up with the niche edges. Set niche shelves after tiling with a waterproof shelf material and seal all niche corners thoroughly.
Use a niche shelf that has a slight slope so water doesn’t sit in the back corner.
Don’t install a niche after waterproofing — cutting and patching later is where leaks start.
5. Black and White Contrast Tile With Rounded Glass Corner
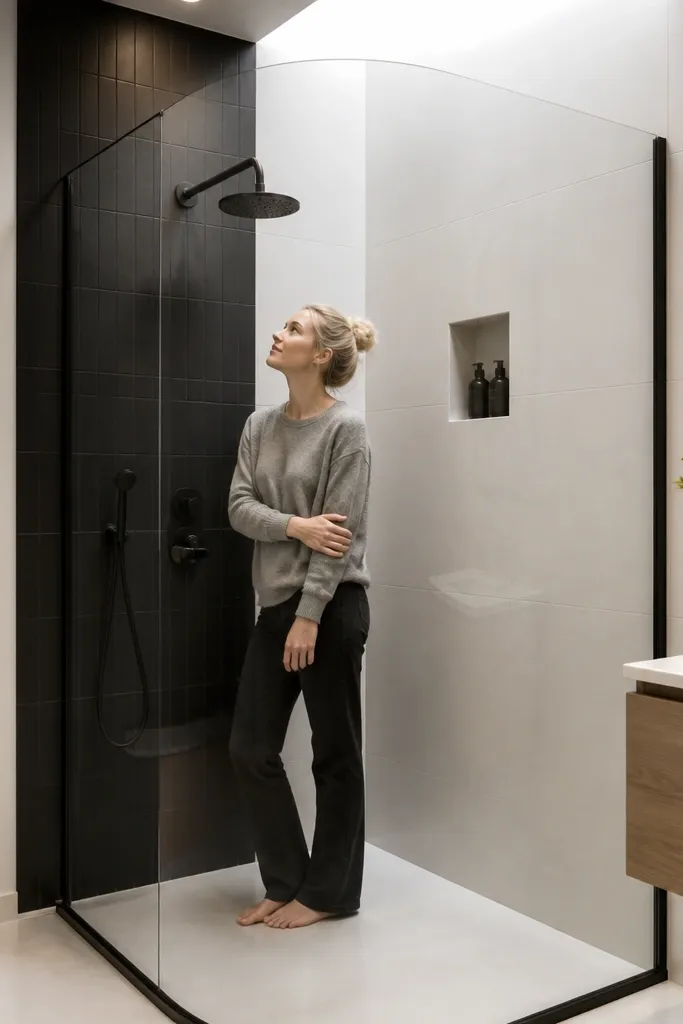
High-contrast black and white looks modern, but in small bathrooms you need control. Keep the black as a vertical stripe on one wall and the rest white so the room doesn’t feel chopped up. Pair it with a glass corner panel that has a gentle curve or a clean corner profile so the edges look soft. This creates a strong “designer” look from the doorway while keeping the shower visually organized.
Editor's noteDo a mock layout on the floor and stand back across the bathroom — that’s how you catch awkward stripe placement.
Mark the stripe width based on your tile size so you don’t end up with a half-tile at eye level. Waterproof and tile the white field first to lock in your grid, then install the black stripe with straight alignment using a level or laser. Order a glass corner enclosure that fits your exact opening — curved profiles need accurate measurements. Seal the stripe edges and finish with caulk at the glass line to prevent water staining.
Skip thisAvoid full black walls — they absorb light and make tiny showers feel like a closet.
6. Matte White Tile, Brass Trim, and One Vertical Slat Accent
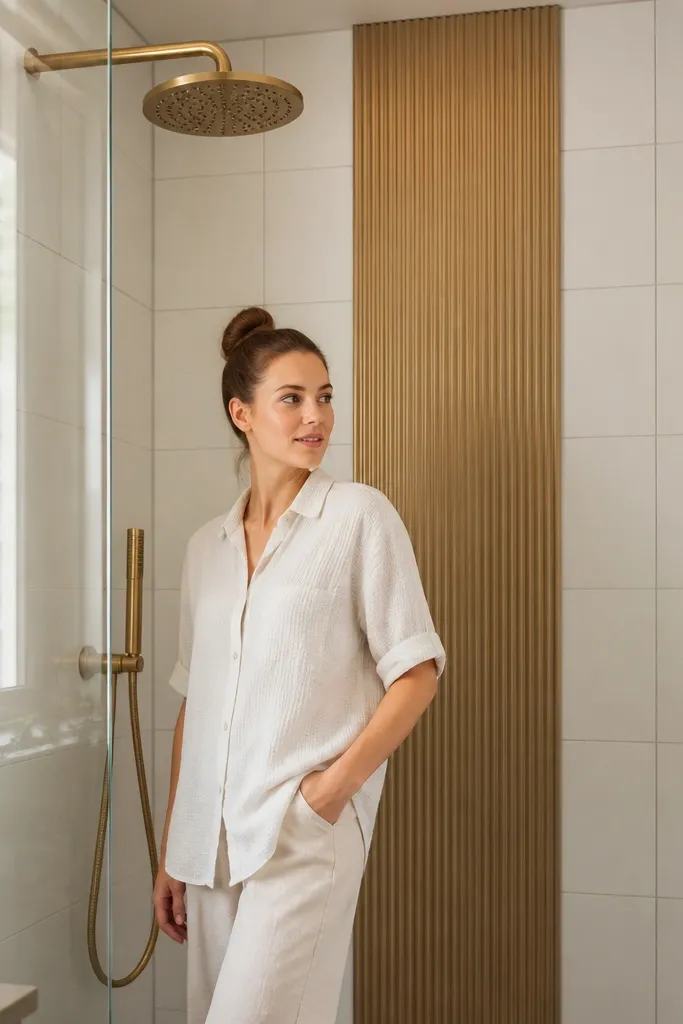
Modern doesn’t have to be all black. Matte white tile with warm brass trim looks fresh and upscale, and it photographs better than people expect because it reflects light softly. Add one vertical slat accent panel on the far wall (not the valve wall) so the texture reads modern without turning the shower into a pattern explosion. Keep your grout light and your glass minimal so the brass becomes the hero.
Choose a matte white tile with a finish that doesn’t glare and a brass trim profile sized to your tile thickness. Waterproof the shower walls, then set the main tile field in a straight grid with matching light grout. Install the vertical slat accent after the field tile so the lines line up cleanly with your grout joints. Finish with brass trim at corners and glass edges, then use a silicone caulk made for wet areas.
Test brass finishes under bathroom lighting — some look too yellow next to warm bulbs.
Don’t mix multiple metal tones — brass plus silver hardware makes the whole shower look unfinished.
7. Warm Taupe Tiles With Micro-Linear Grout Lines
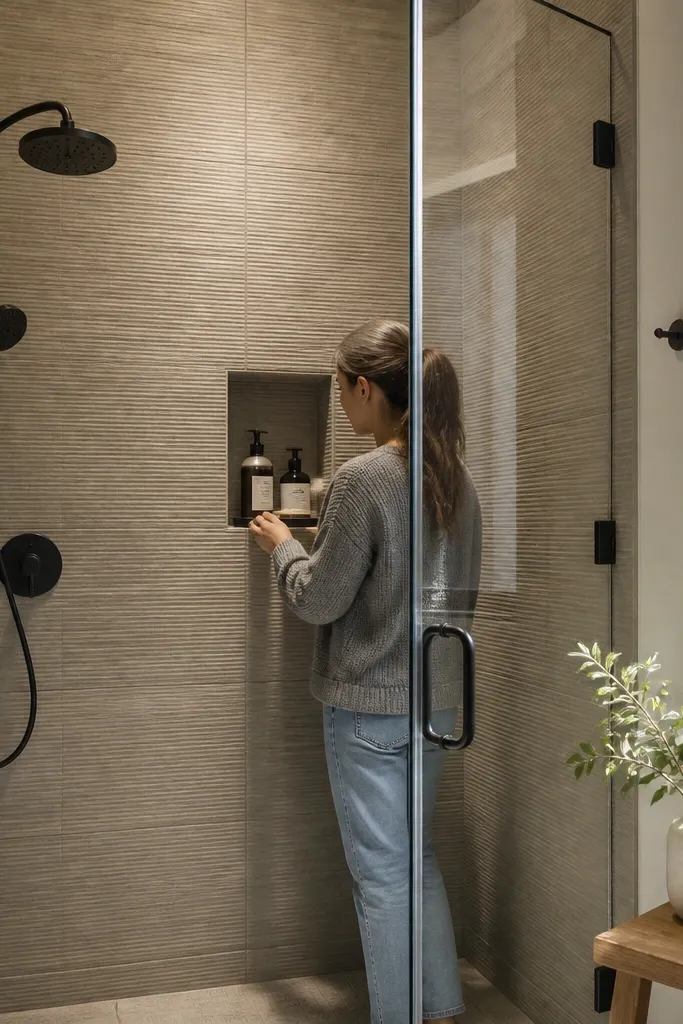
Warm taupe is the “calm modern” choice when you want the shower to feel spa-like without going white. The modern look comes from tight, consistent grout joints and a tile size that covers well with fewer cuts. If you use a tile that looks slightly textured, it also hides water spots better than glossy finishes. This is a smart pick for small bathrooms that already have wood or warm-toned floors.
Editor's noteIf your bathroom has hard water, choose a tile finish that is matte or satin — it’s easier to keep looking clean.
Pick a taupe tile with a consistent surface and choose grout that matches the tile tone, not just the color name. Set tile with spacers that keep grout lines uniform, and use a leveling system if your subfloor is even slightly uneven. Dry lay around the glass and valve so you don’t end up with narrow slivers at the edges. After grouting, seal if your tile requires it and run a bead of caulk where tile meets glass and trim.
Skip thisAvoid thick grout joints — they create shadow lines that make the shower look smaller.
8. All-Glass Shower With No Side Wall Reveals
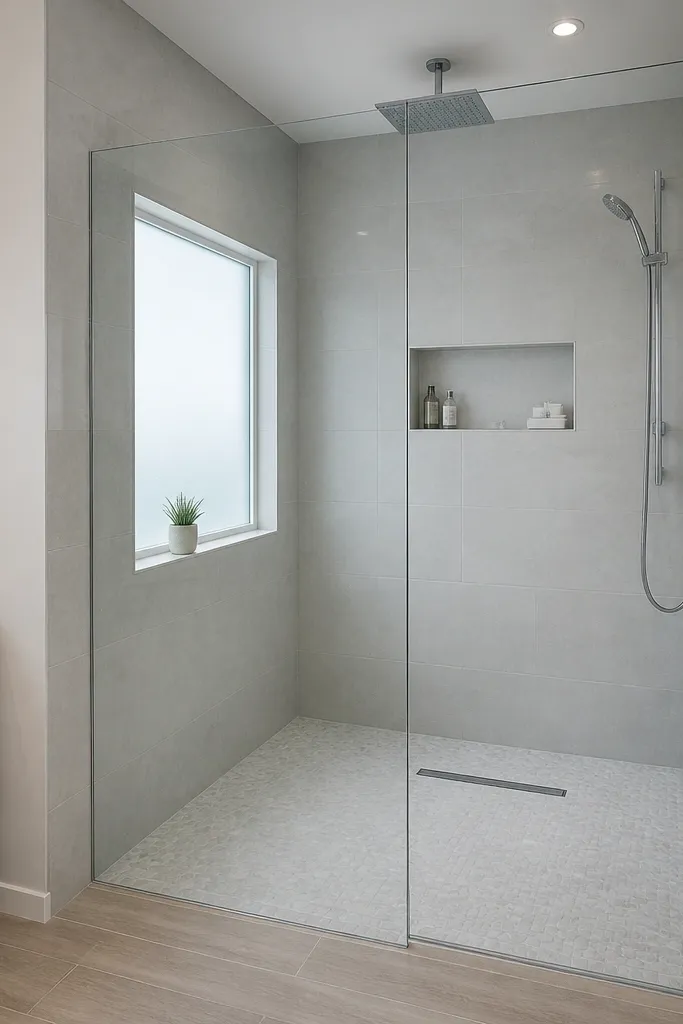
This is the cleanest visual trick for tight spaces: reduce the number of visible wall reveals and let glass do the work. Use a shower layout where the glass aligns with the edge of tile so you don’t see patchwork or wide trim gaps. Pair it with large tiles on the walls so the shower reads like one smooth plane. The effect is modern and airy even when the room itself is small.
Editor's noteUse a pencil-marked tile layout and take photos mid-install — it’s the fastest way to confirm glass alignment before ordering final panels.
Plan the shower enclosure layout before you tile so you know where glass edges will land on finished tile. Waterproof and tile the shower walls with consistent tile alignment, then confirm the glass measurement against finished tile thickness. Install glass panels with the correct gasket type and use clear caulk only where it belongs — never over grout joints. Finish with a clean threshold or low-profile pan transition so the floor line stays straight.
Skip thisDon’t tile first and measure glass later — tile thickness changes can lead to visible gaps.
9. Black Hex Floor Tile and Large White Wall Tile
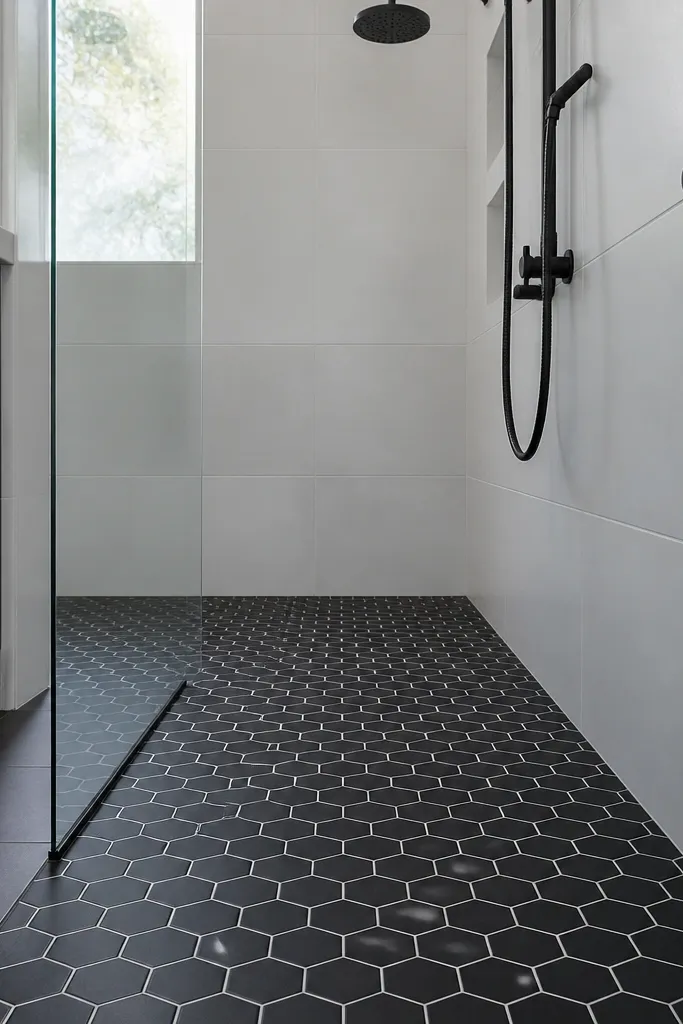
Hex tile on the floor looks modern when the walls stay simple. Keep the walls large and light, and let the floor pattern do the talking. The shower feels intentional because there’s one strong graphic element, not a pattern everywhere. This works in older bathrooms where the floor transition is a visible problem — the hex pattern makes the floor area look planned.
Choose a hex floor tile in black with a finish that cleans easily and a grout color that blends with the tile. Install a shower pan first, then dry lay hex tiles to confirm orientation and where the points land near the drain. Waterproof the walls, then tile walls with large-format white tile to minimize extra lines. Grout carefully so hex edges stay crisp, then seal any necessary grout and caulk the floor-to-wall changes of plane.
Use a tile saw with a sharp blade for clean hex cuts near the drain — rough edges stand out fast on black tile.
Avoid mixing hex sizes — multiple hex sizes look dated and uneven.
10. Teal Glassy Wall Tile With Clear Minimal Grout
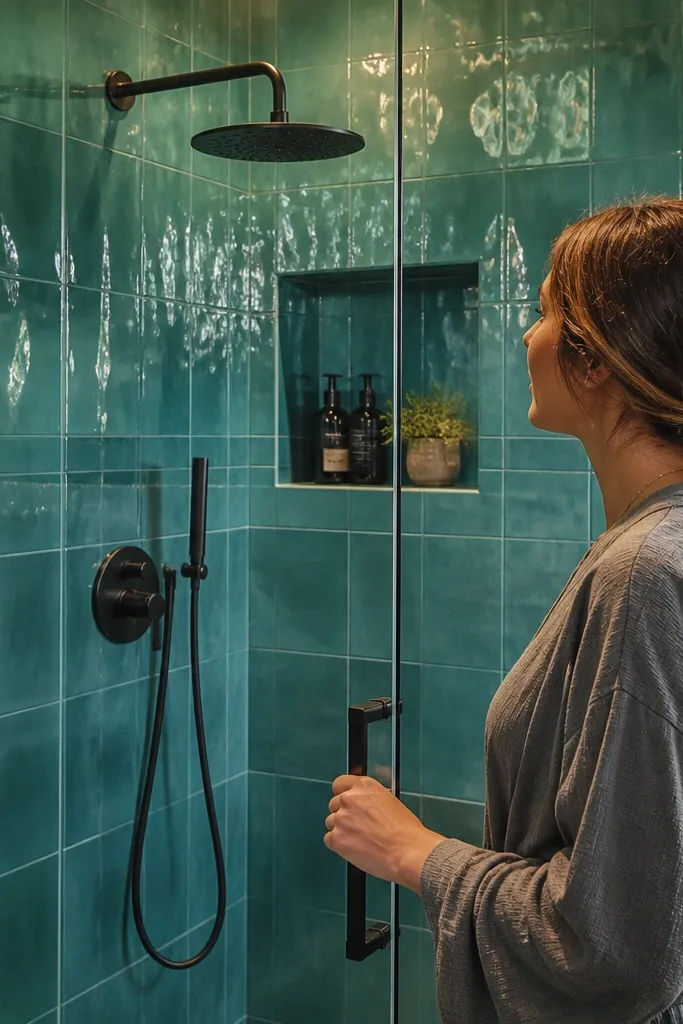
Glassy teal tile looks modern because it catches light and creates depth in a small shower. Keep the grout minimal and close in color so it doesn’t create a grid that fights the shine. Use matte black or brushed nickel hardware to keep it from looking too “kitchen backsplash.” This is a great pick when the bathroom is otherwise neutral and you want the shower to be the color focal point.
Editor's noteTurn on your bathroom lights and check the tile samples at night — glossy tiles can look deeper under warm bulbs.
Pick a teal tile with a consistent sheen and choose a grout that matches the tile shade closely. Waterproof the walls, then tile with a straight layout and consistent spacers to keep reflections even. Install the niche (if you add one) with the same tile so the color flow stays uninterrupted. Seal grout if the product requires it, and caulk only at corners and glass edges using a mildew-resistant bathroom silicone.
Skip thisDon’t use bright white grout with teal — the grid effect can look harsh in small spaces.
11. Oversized Porcelain Slabs With Tiny Field Tiles Around the Door
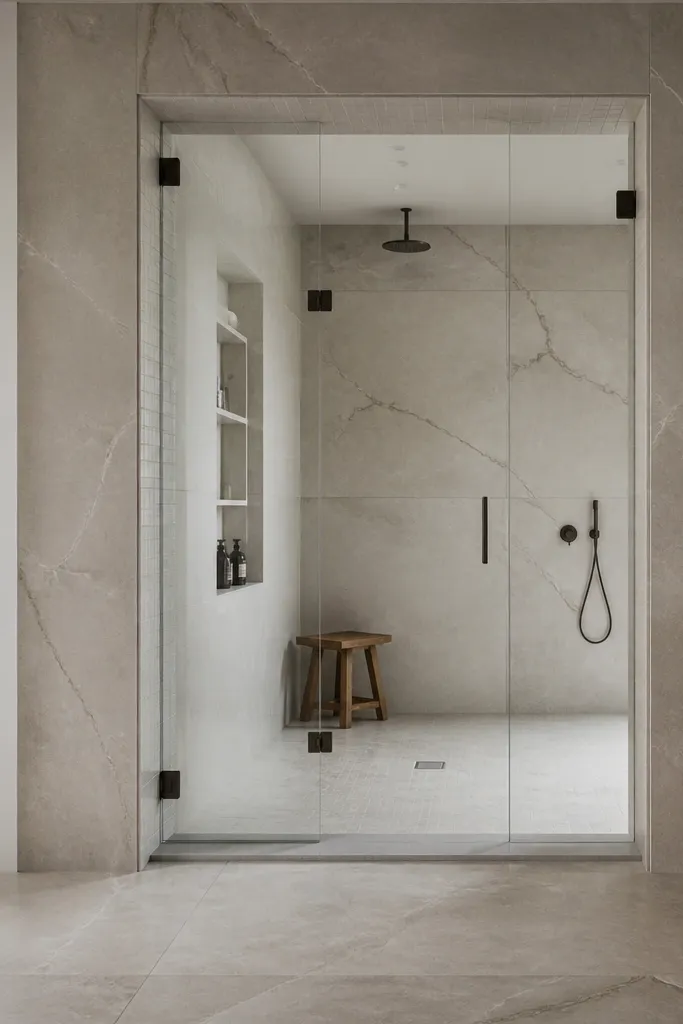
Oversized porcelain slabs are the fastest way to get that modern “monolithic” look. In small bathrooms, the slab effect matters because it reduces visual breaks. Use slab-look tile on the main walls, then switch to smaller field tiles only around the door opening area where you need tighter cuts and better alignment. It looks intentional and makes the shower feel like a custom build.
Editor's noteIf your tile has large-format warping, use a flat trowel and check flatness often — slab-look tile shows every ripple.
Plan your slab layout before waterproofing so seams land where they’re least visible. Cut slab-look tiles carefully and dry lay each wall to confirm seam placement around the valve and glass. Waterproof and tile the slab areas first, then use smaller tiles at the door opening and trim zones for clean edges. Finish with matching grout and caulk at the glass line to keep water out.
Skip thisAvoid forcing seams to land in the most visible corner — it looks like a patch no matter how good the tile is.
12. Wood-Look Shower Bench and Light Stone Tile Walls
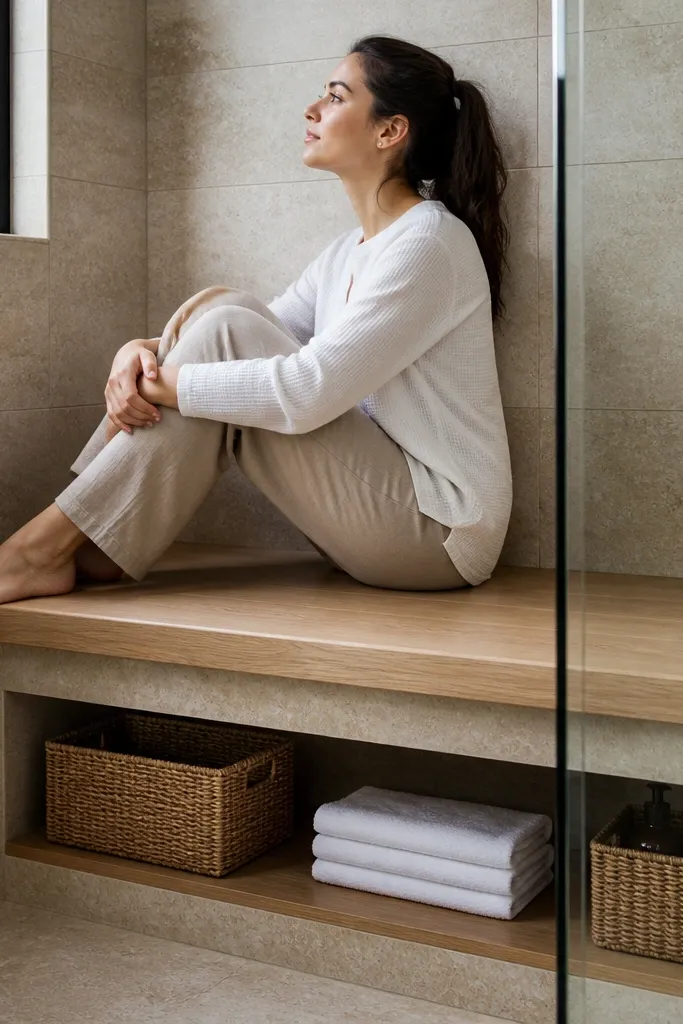
A wood-look bench adds warmth to a modern shower without turning the whole room into a cabin. Keep the walls light stone-look tile so the bench reads as a single feature. In a shower-only remodel, a bench is also practical storage for shampoo bottles and a place to shave without clutter. Make it built-in and waterproof so it looks integrated, not like an accessory.
Editor's notePick a wood-look surface with a matte finish — glossy wood-look tiles show water marks instantly.
Choose a waterproof bench system or build a bench with waterproof board and a proper slope so water drains. Waterproof the entire shower area, then tile the walls with light stone-look porcelain. Tile the bench with the same stone tile on the face and a wood-look tile or waterproof wood-look surface on the top. Seal all bench corners and transitions, then caulk the perimeter where tile meets glass and trim.
Skip thisDon’t use untreated wood or “waterproof” spray products as the bench surface — tile benches need real waterproof layers.
13. Side-Lit Mirror Panel Over the Vanity With Shower-Only Focus
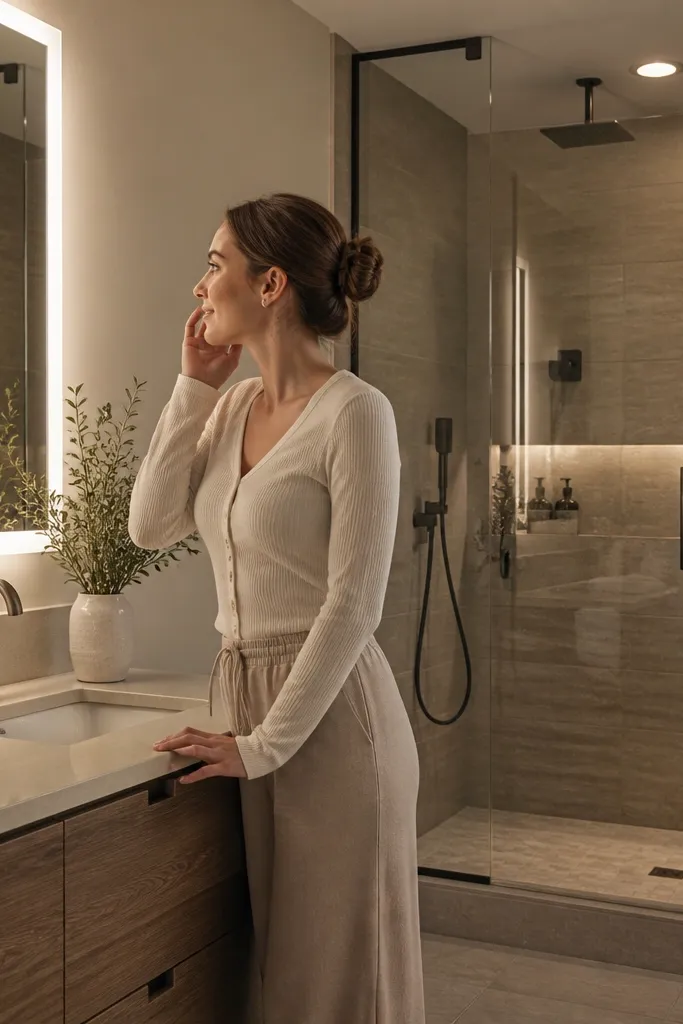
Even though you’re remodeling only the shower, lighting makes the whole bathroom feel newer. A side-lit mirror panel next to the shower makes the tile and glass look cleaner because it reduces harsh shadows. Pair it with a simple shower enclosure — frameless glass and calm tile — so the mirror becomes the secondary modern detail. This is a smart move if the vanity area is staying put and looks a little tired.
Editor's noteUse 3000K or 3500K bulbs for a warm modern bathroom — cooler bulbs can make tile look gray.
Confirm your mirror electrical requirements and plan the switch location before tiling the shower. Install the mirror with the correct mounting hardware and verify it’s level with a laser. Choose shower tile with grout that matches closely so the light doesn’t exaggerate contrast. After the shower is waterproofed and tiled, adjust the mirror lighting temperature to match the bathroom bulb tone so whites look consistent.
Skip thisAvoid placing bright overhead lighting only — harsh shadows make the shower corners look dirty even when they’re clean.
14. Vertical Tile Stacking With a Single Horizontal Shelf Line
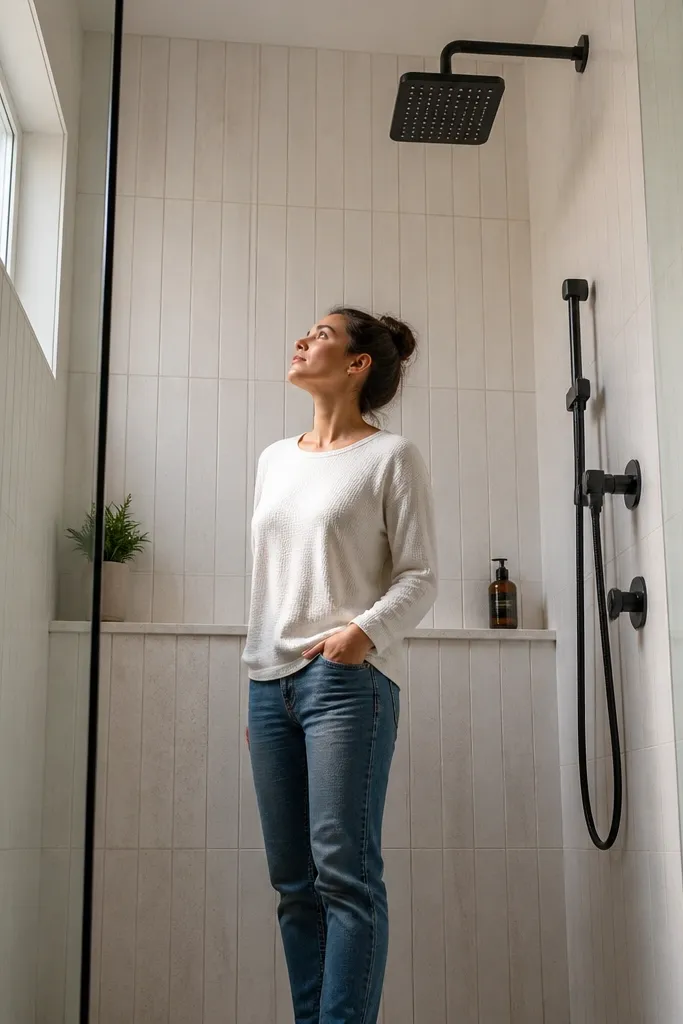
Vertical tile stacking makes small showers feel taller, and it also hides how tight the layout is. Keep the walls in a vertical stagger or uniform running pattern, then add one built-in shelf line at a consistent height. The shelf line gives you storage without clutter and adds a modern horizontal reference point to balance the vertical look. This design photographs well because it creates strong geometry.
Editor's noteDry lay the vertical tile pattern on the floor and mark where grout lines will hit the valve — it keeps the geometry crisp.
Pick a tile size that reads vertical when installed, and decide your shelf height before waterproofing. Build or frame a niche/shelf box with waterproof board, then waterproof the entire shower enclosure. Tile the walls with the vertical pattern first, leaving the shelf opening ready for installation. Set the shelf tile and grout, then seal all shelf edges and caulk where tile meets glass.
Skip thisDon’t let shelf height drift — if it’s off by even a few millimeters, it ruins the clean modern lines.
15. Concrete-Look Shower With Soft Curved Bench Edge
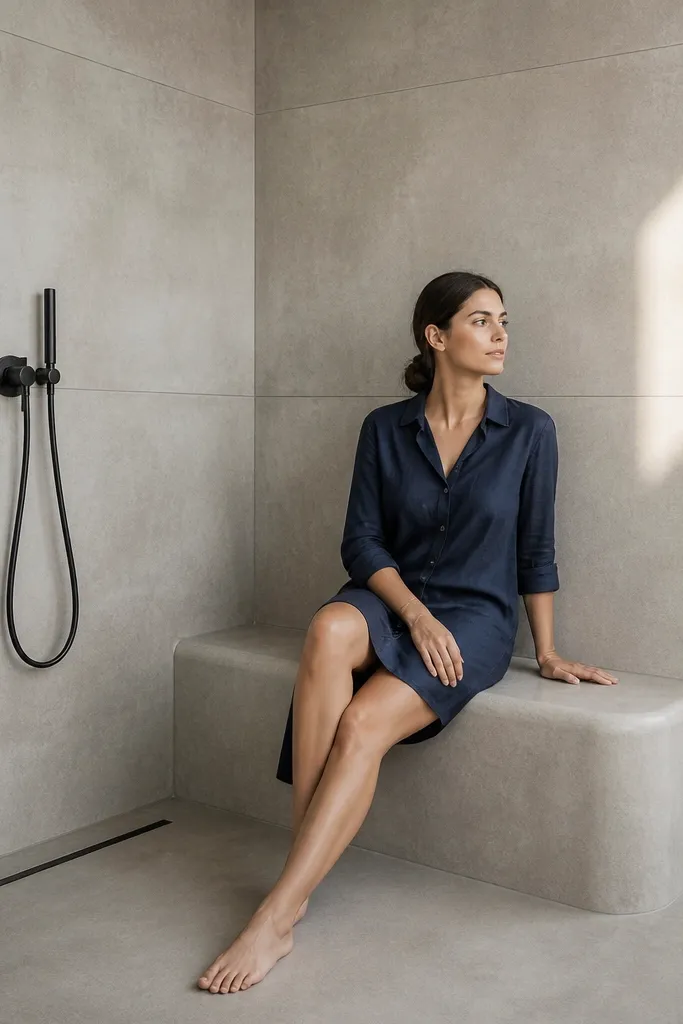
Concrete-look tile brings modern texture, but it needs a clean shape to avoid looking harsh. Pair concrete-look walls with a soft curved bench edge or curved corner trim so the shower feels more human and less industrial. Keep the floor calmer with a matching concrete-look tile and a simple linear drain if you’re going for the full modern vibe. This is a strong option for bathrooms with gray floors or modern black fixtures.
Editor's noteUse a grout that’s close to the tile tone, not lighter — concrete-look tile gets messy when grout contrasts too much.
Choose a concrete-look porcelain tile with consistent color variation so the wall reads cohesive. Waterproof the shower walls and bench base, then tile using a straight grid with tight grout lines to keep it modern. For the curved bench edge, use a pre-formed waterproof bench kit or a properly fabricated curved form — don’t improvise with thin backer board. After tiling, grout, seal if required, and caulk all corners where water collects.
Skip thisAvoid glossy concrete-look tile — it looks like wet cement and shows every smear.
16. All-White Shower With Brushed Nickel and a Thin Dark Grout Line
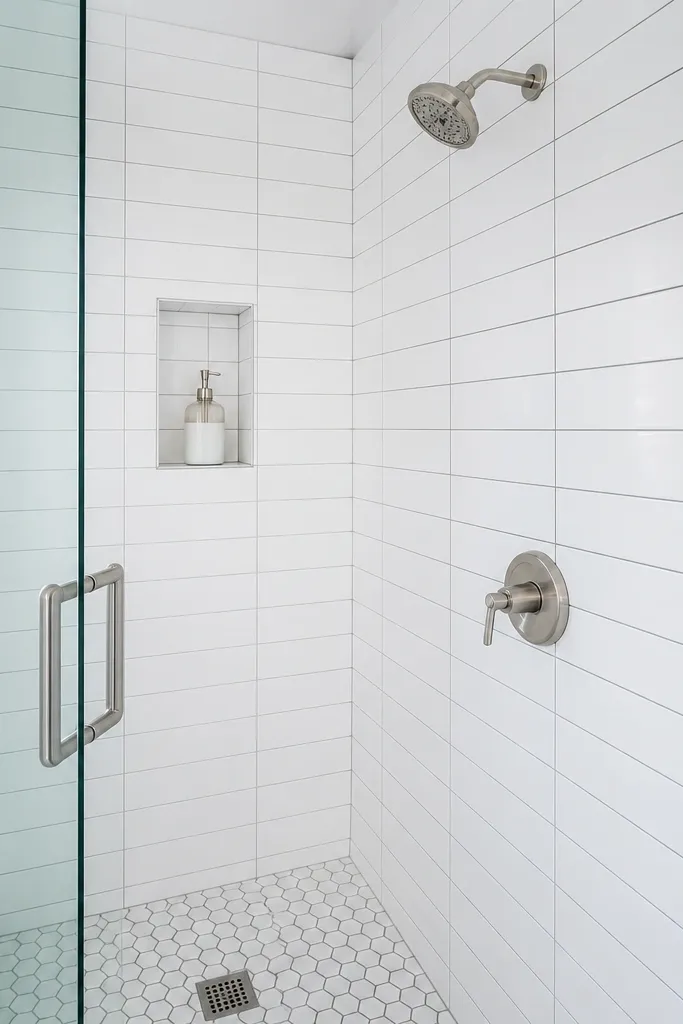
This one is for people who want “bright clean” but still want modern structure. Use all-white wall tile, brushed nickel hardware, and a thin dark grout line that’s subtle, not dramatic. Keep the glass clear with minimal frame so the contrast stays controlled. The dark grout line adds definition to a tiny shower without turning it into a checkerboard.
Editor's noteUse a grout release or grout-safe cleaner during install so you don’t spend hours scrubbing white haze later.
Pick white tile with a consistent finish and choose a grout shade that’s one step darker than the tile color. Waterproof, then tile with tight spacers and check alignment across the valve wall and glass edge. Install the shower door frame carefully so the grout lines stop cleanly at the glass line. After grouting, clean residue thoroughly and seal the grout if your tile product recommends it.
Skip thisDon’t go too dark on grout — if it looks charcoal, it will read heavy in a small bathroom.
17. Two-Tone Shower Wall: Light Floor, Dark Mid-Wall Band
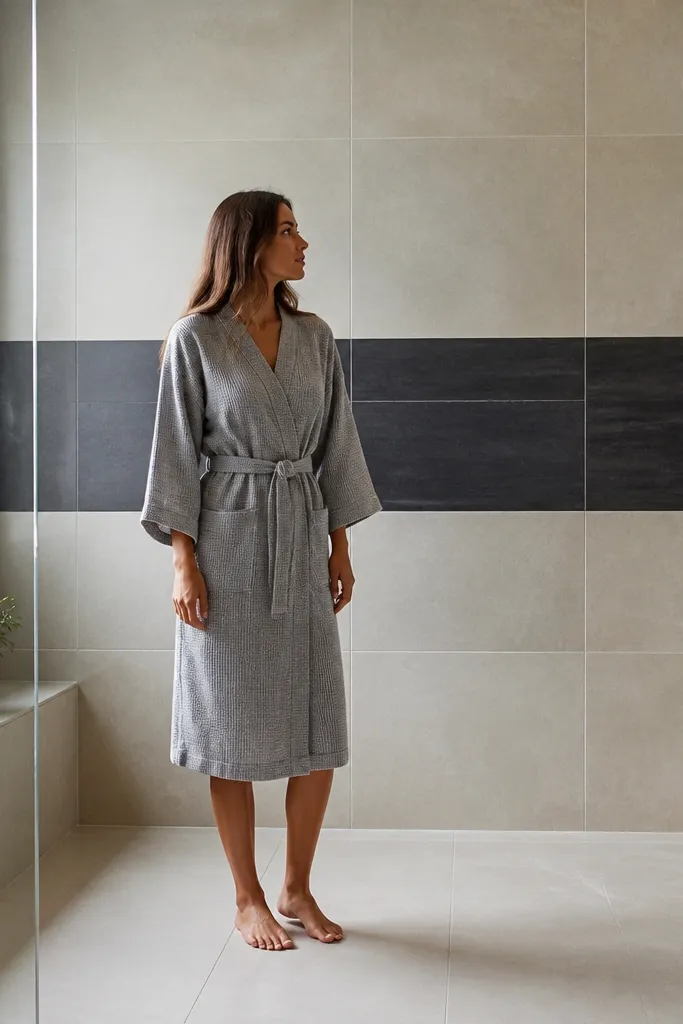
A two-tone wall is modern because it creates a clean horizontal reference line. Keep the floor and lower half light so the shower feels open, then add a dark mid-wall band to create depth. This also hides soap residue better than all light surfaces because the band breaks up staining visibility. The trick is to keep the band straight and narrow — thick bands can make the shower feel shorter.
Editor's noteUse the shower valve height as your visual anchor — place the band so it sits around mid-torso level when you stand in front of the shower.
Choose two tile colors that share the same undertone so the contrast looks designed, not mismatched. Waterproof the shower walls, then tile the lower light portion up to your planned band height. Install the dark band as a single straight course, then complete the upper wall with the light tile. Use a straightedge to set the band edge and caulk the top of the band at the change of plane where appropriate.
Skip thisAvoid a band that hits the same height as the valve — it splits the focal point.
18. Pebble-Look Floor Tile With Matte Wall Tile Calm
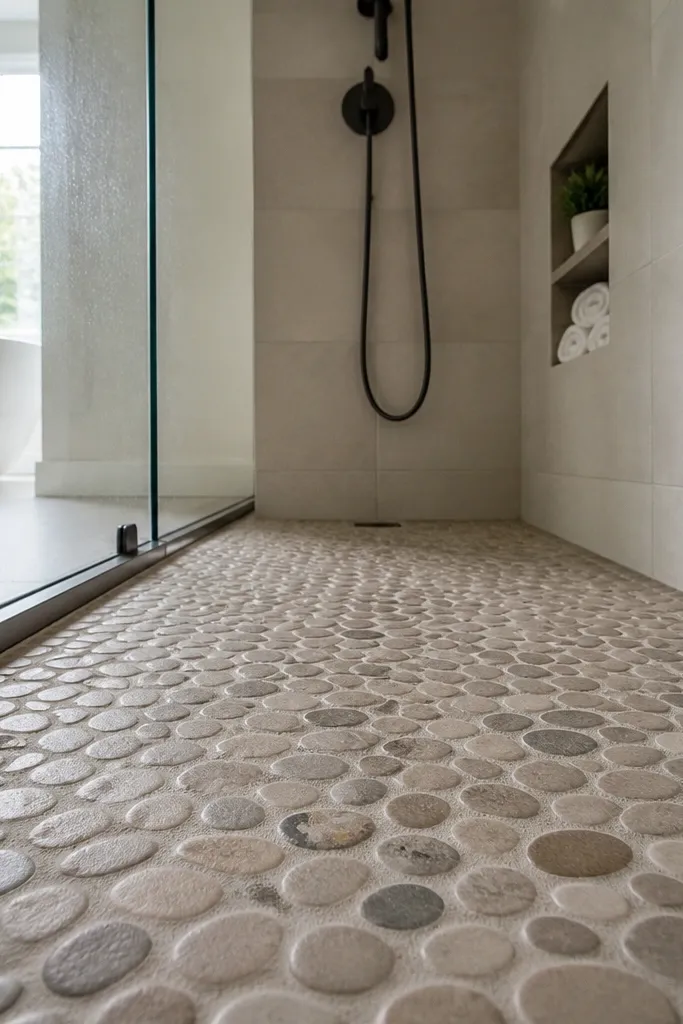
Pebble-look floors feel modern-spa when the walls stay matte and simple. The floor texture adds visual interest and a subtle “luxury” feel without needing fancy wall patterns. Use matte wall tile in a light neutral so the pebbles don’t look too busy. Pair it with frameless glass and minimal trim so the shower reads clean, not cluttered.
Select a pebble-look floor tile sheet that has consistent pebble size and spacing so the grout lines stay uniform. Install the shower pan and waterproofing, then set the pebble sheet carefully — press evenly and trim edges cleanly around the drain. Tile the walls with a matte large-format tile in a straight grid. Grout the pebble floor with the recommended grout type, then seal if required and caulk at the perimeter.
Before grouting, run your hand over the floor — any raised edges will catch dirt and look messy fast.
Don’t use glossy walls with pebble floors — the shine plus texture usually looks chaotic in small bathrooms.
19. Shower-Only Remodel With Pocket Niche and Hidden Soap Shelf
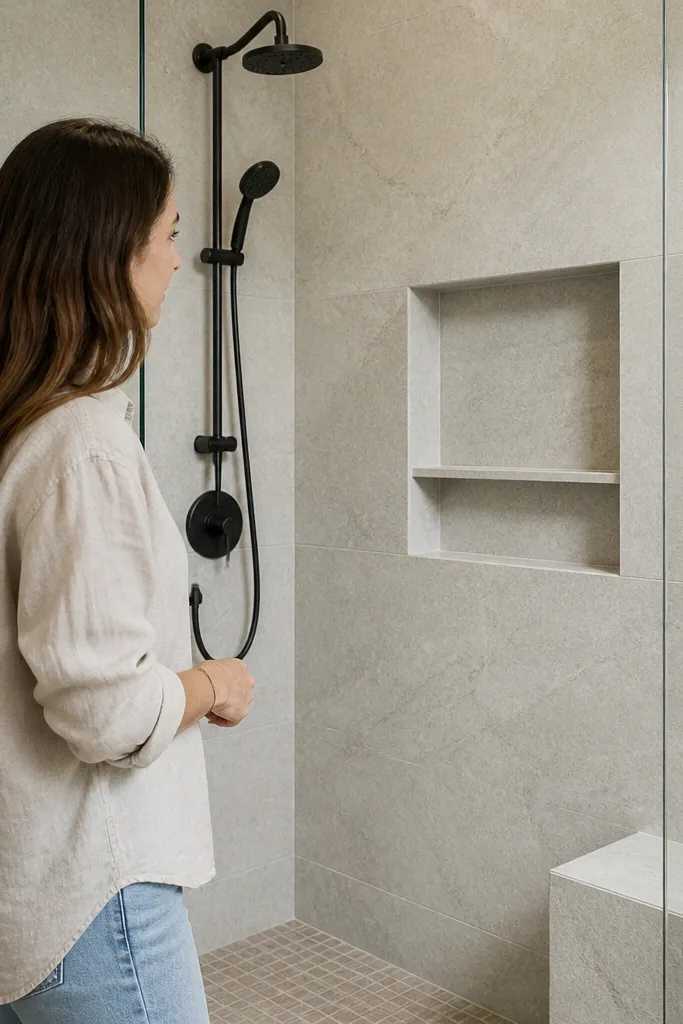
A pocket niche plus a hidden soap shelf is the modern storage combo that keeps the shower wall looking uncluttered. You get a place for bottles, but you don’t see random plastic containers because everything sits in tile. This works especially well in small bathrooms because every inch of wall space matters. Keep the niche walls the same tile as the shower to maintain that smooth, designed look.
Editor's noteUse a shelf that slopes slightly forward so soap doesn’t sit in a puddle.
Choose niche dimensions that fit real bottles — plan roughly 12-16 inches tall and 6-8 inches wide depending on your tile size. Frame the niche opening with waterproof board and waterproof it before tile. Tile the shower walls with the niche integrated so the tile lines wrap cleanly around the niche frame. Add a built-in soap shelf inside or just below the niche, then seal the shelf corners and caulk the edges where water collects.
Skip thisAvoid a niche that’s too shallow — it looks like a design detail but it’s useless for daily bottles.
20. Steam-Glass Shower Door With Full-Height Porcelain Tile Frames
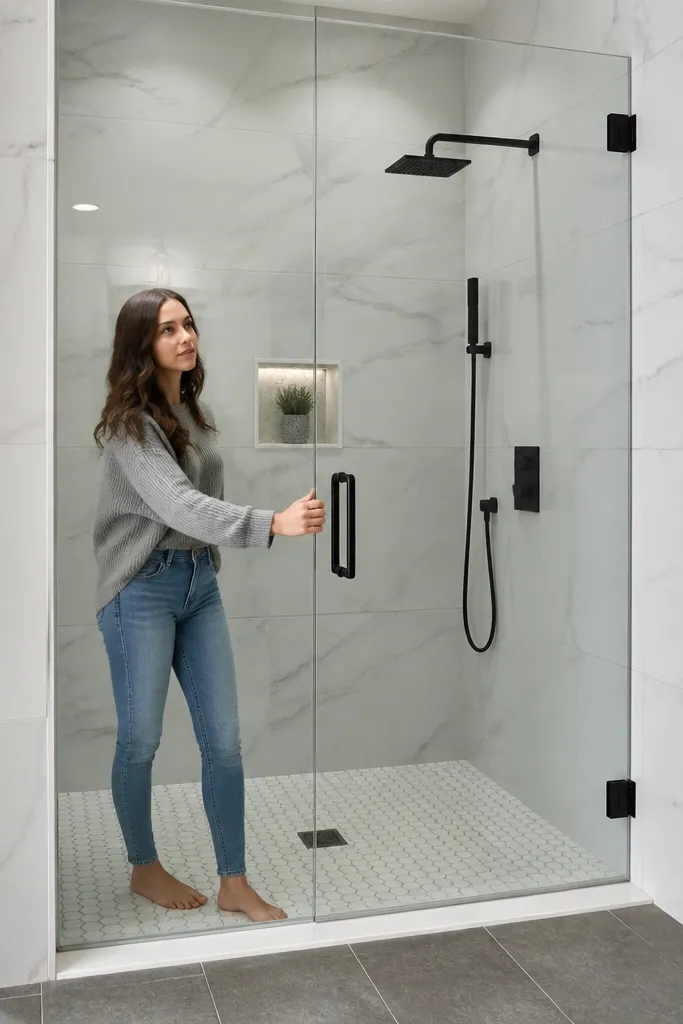
This is a shower-only small bathroom remodel look that makes the space feel wider without going plain. The trick is treating the shower opening like an architectural “window” by adding full-height porcelain tile frames on both sides, then using a clear steam-glass door so the view stays open. Choose a porcelain body with a subtle satin sheen (not high gloss) and grout that matches the tile — it reads as one continuous wall plane. In a small bath, that framing effect pulls focus to the shower and hides the messy edges that usually show up around remodels. The build is DIY-friendly if you’re comfortable with backer board and waterproofing, and it’s a weekend-scale project for a confident tiler plus a day for dry times.
Editor's noteUse a grout color that matches the tile base shade and keep the joint consistent — the frame only looks intentional if the lines never drift. Before sealing glass, run a thin bead of painter’s tape along the tile edge so you get a clean, sharp seam.
1) Build the tile frames first: install cement board or foam backer on the shower walls up to the ceiling height, then create two tiled side returns that run full height. Make the returns about 2 to 3 inches wide so they read as frames, and keep them plumb with a 1/16-inch level check every 16 inches. 2) Waterproof and tile: apply a sheet membrane or liquid waterproofing system over the backer, then tile the frames and shower walls in one direction so the grout lines stay straight across the whole opening. Use a 1/16-inch grout joint and dry-set spacers to keep the “frame” edges crisp. 3) Install the steam-glass door after tiling is fully cured: set the door track or hinge hardware on the manufacturer’s recommended mounting points, then seal the perimeter with the correct clear silicone rated for wet areas. 4) Finish the look: caulk the frame-to-glass seam with a thin continuous bead and wipe the excess immediately so it doesn’t haze the glass.
Skip thisDon’t mount any door hardware before tile and waterproofing cure — you’ll end up with cracked grout at the hinge or track points.



