
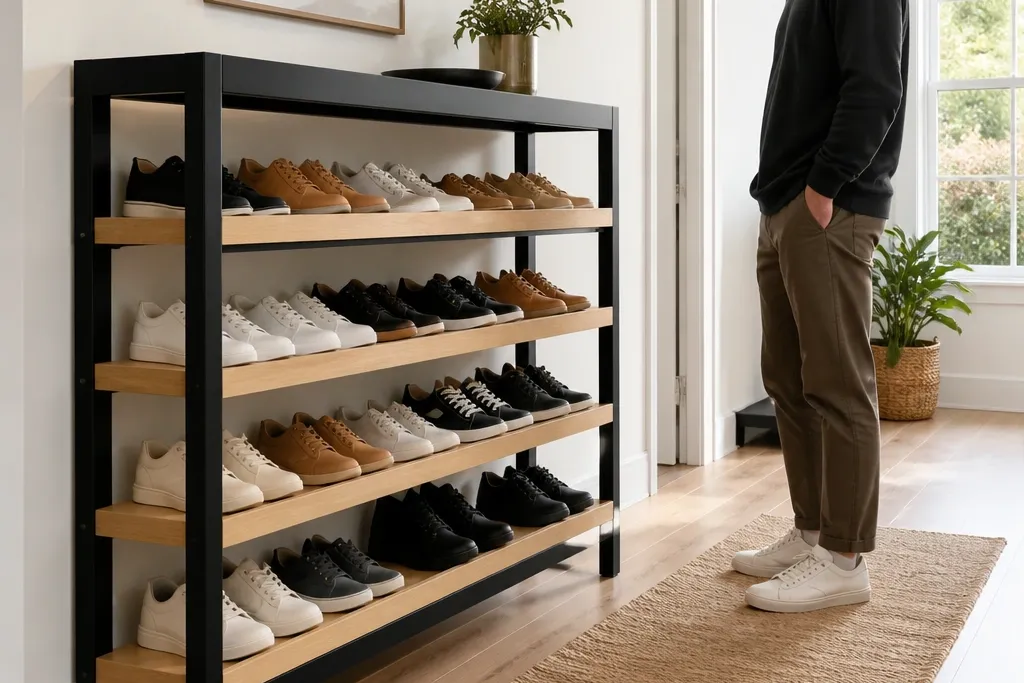
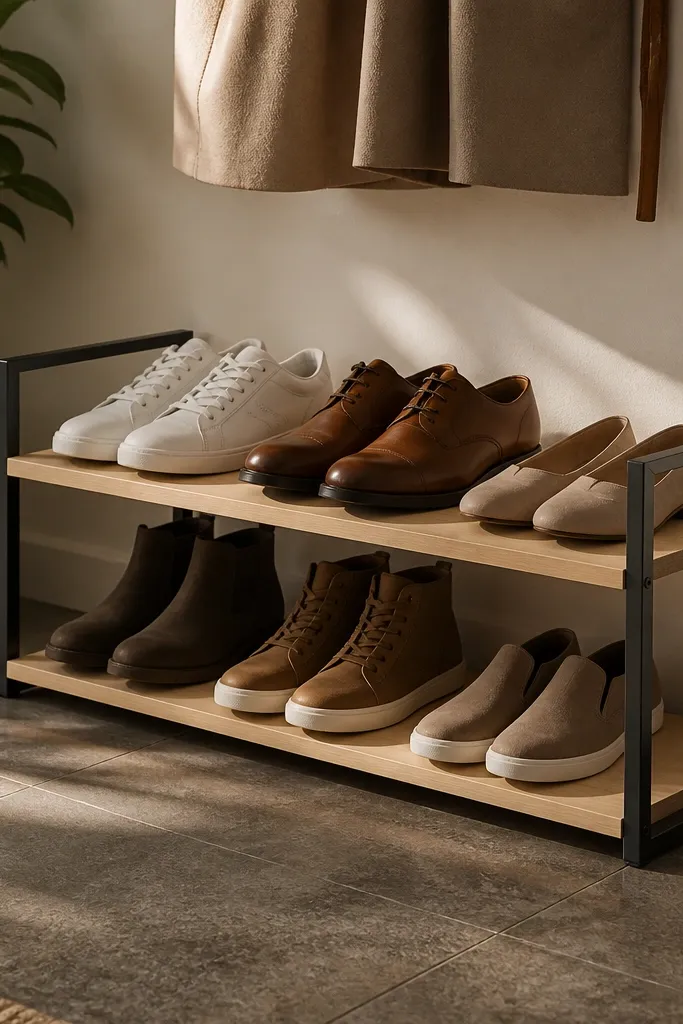
1. Matte Black Steel + Light Wood Floating Shoe Bench
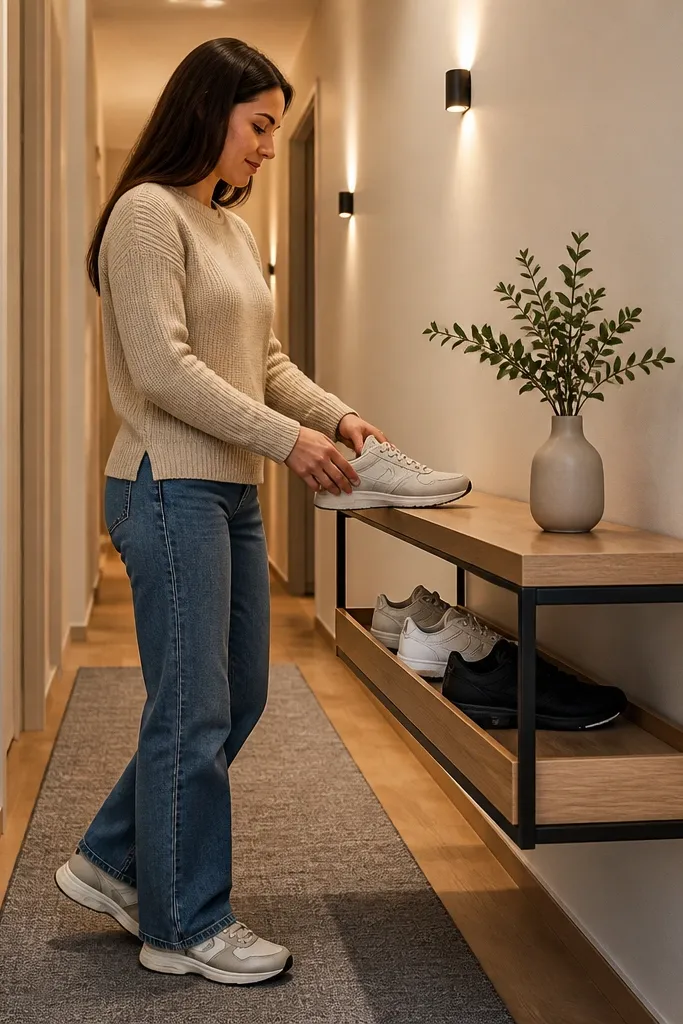
This is the sleekest option for a hallway because it looks like furniture, not storage. The frame stays thin and straight, while the light wood shelves keep it warm and modern. It also solves the “shoes spill forward” problem with a front edge that’s slightly raised, so sneakers sit where you put them. Build it with a bench top for a place to set keys or a tray, which makes the whole entry look finished. Skill level is moderate because you’re aligning brackets and keeping everything level, but the materials are basic and the result is clean in photos.
Start by cutting two side rails from 2x2 steel angle or sourcing pre-cut steel, then add three to four shelf supports using metal L-brackets at equal spacing. Use 3/4-inch plywood for shelves, cut to about 30-36 inches wide and 10-12 inches deep, then sand edges until smooth. Mount the frame to studs, not drywall, and set the shelf brackets so the top surface is level across the full span. Finish the steel with matte black spray paint made for metal, and seal the plywood with a clear matte topcoat for a low-glare look.
Use a laser level or a long straightedge to mark shelf heights before drilling — crooked lines ruin the “modern” look.
Don’t mount into drywall anchors; the rack will wobble and the shelves will look off even if they’re level.
2. Slanted Cedar Shoe Rack with Hidden Toe Clips
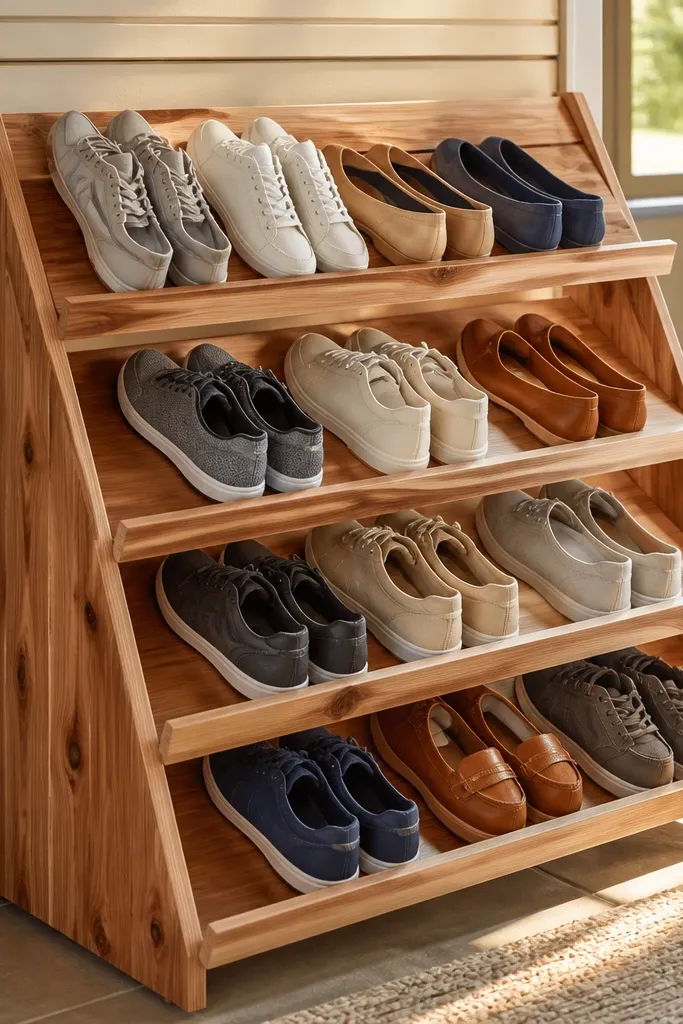
A slanted rack makes shoes look arranged instead of stacked. Cedar is photogenic because it has warm tone variation, and the grain reads premium without needing fancy hardware. The angled design also helps shoes dry faster and keeps toes pointing the same direction, which looks tidy from across the room. Toe clips hide inside the front lip, so you get a clean front line. This is best for sneakers, flats, and light boots, and it’s a great choice if you want an aesthetic rack that still handles daily use.
Cut a base panel from 3/4-inch plywood and add two side cheeks that create a 15-20 degree slant. Build the front lip as a separate strip attached with screws from underneath so the front face stays smooth. Add small wood toe clips inside the front lip using 1/2-inch spacers so shoes stop at a repeatable position. Sand everything to 220 grit, then finish cedar with a matte clear coat or a light stain so the grain stays visible.
Make one test shoe stop at the exact position you want, then measure from that point to copy spacing for the rest.
Don’t make the slant too steep; shoes slide and the front row looks sloppy.
3. Recessed Wall Nook Shoe Rack with Flush Doors
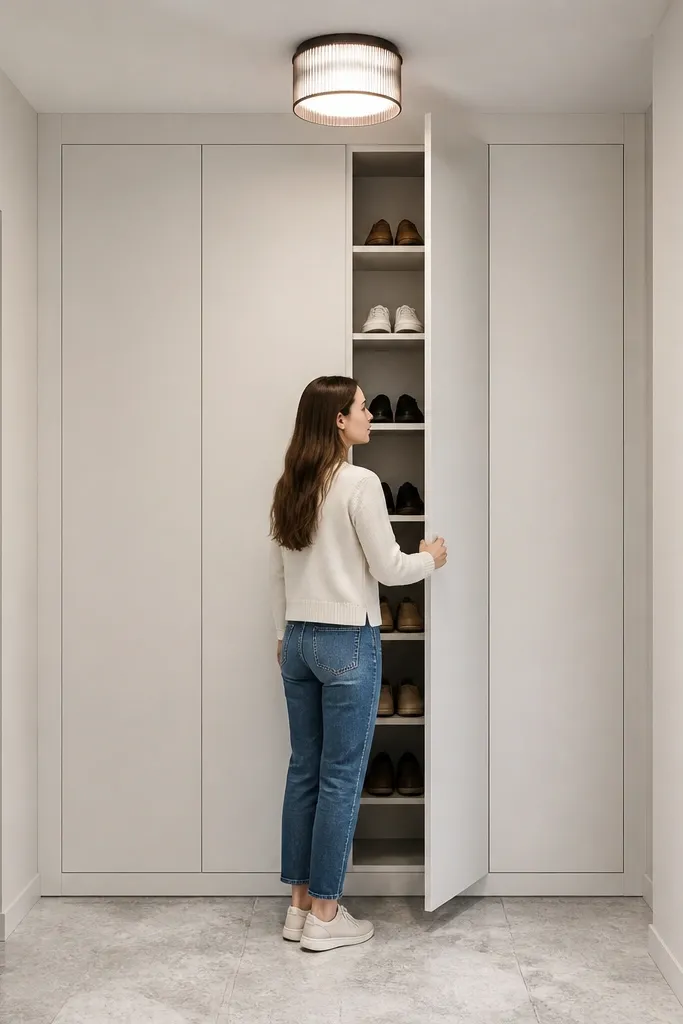
If you hate seeing shoes, recessed storage is the cleanest visual trick. Flush doors keep the front surface looking like built-in cabinetry, and that’s what makes it feel modern. The shelves inside can be shallow and still work because the doors hide clutter. This layout also makes the rack feel intentional in a tight entryway where floor space is limited. It’s best if you have a wall you can modify and want a furniture-grade look without open display.
Frame the nook using 2x3 or 2x4 lumber, keeping the interior depth around 12-14 inches for a mix of sneakers and short boots. Install three to five shelves from 1/2-inch plywood at consistent spacing, then add a back panel or thin hardboard for a smooth interior. Mount flush slab doors using concealed hinges so the door face sits flat with the surrounding wall. Finish by painting the doors and frame in a satin cabinet paint so scuffs wipe clean.
Use consistent shelf spacing by measuring from the same reference point on every shelf panel before screwing anything down.
Don’t install doors before you confirm the opening is square; a slight twist makes flush doors look crooked.
4. Pegboard Grid Shoe Rack with Color-Keyed Dividers
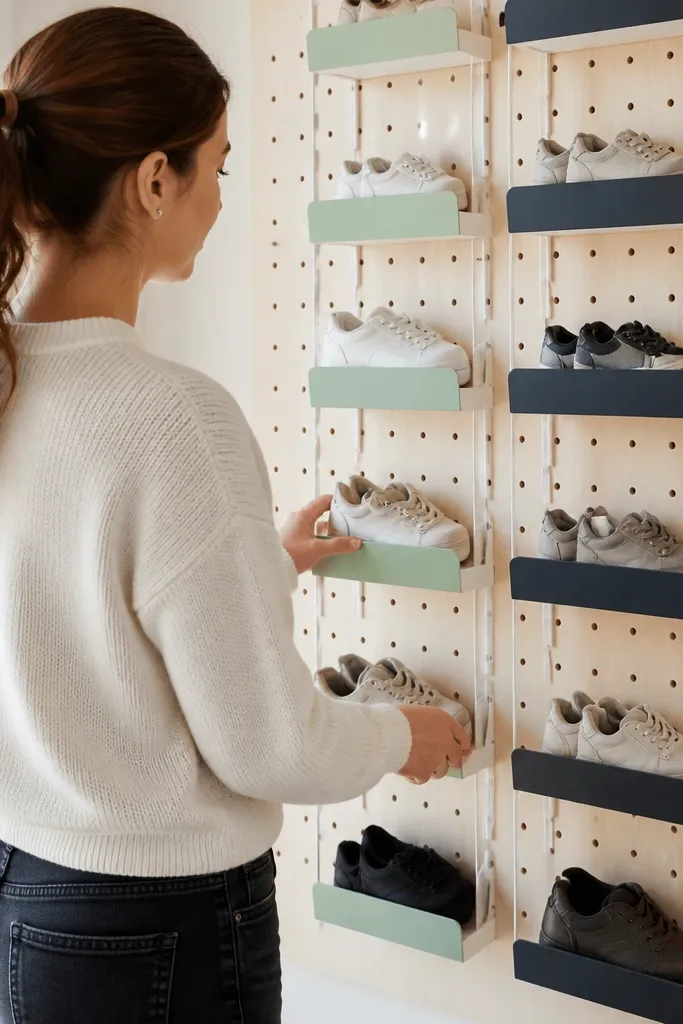
Mount a sheet of 1/4-inch or 3/8-inch pegboard to studs, then install a border frame using 1x2 wood so edges look finished. Add adjustable divider pegs or custom wood dividers cut to about 6-7 inches tall depending on shoe height. Paint the pegboard matte (black, warm gray, or off-white) and seal it so it wipes clean. Build dividers from thin plywood strips, then add a small lip so shoes can’t slide out.
Pegboard looks modern when it’s treated like a grid, not a craft board. The clean rows of dividers let you separate sneakers by type, and you can make it look intentional with a limited color palette. This is also one of the easiest options to build because pegboard hardware is modular. It’s great for small apartments where you want quick organization without a big woodworking project. For photos, the grid lines are the selling point — everything lines up.
Skip thisDon’t leave raw pegboard edges; unfinished edges kill the modern look fast.
Editor's noteGroup shoes into two heights and set divider heights accordingly; it looks cleaner than one-size dividers for everything.
5. Walnut Veneer Veneer-Look Stack Rack with Offset Layers
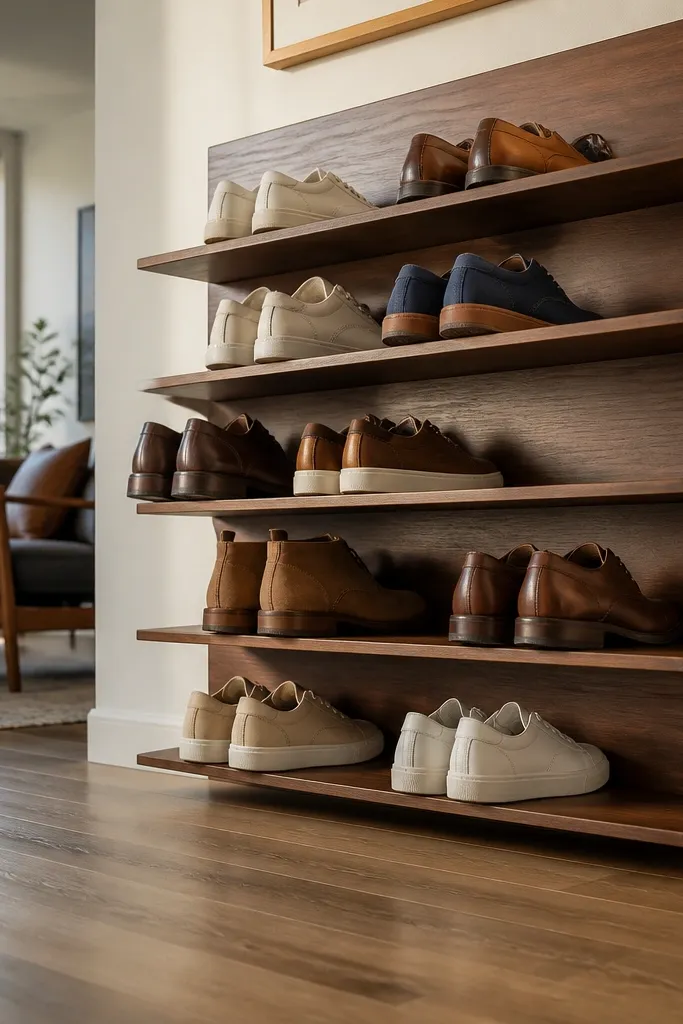
This design looks sleek because it uses offset layers like a modern display shelf. The shoes sit in shallow pockets, so you see the silhouette clearly without a bulky wall of shelves. A walnut tone finish gives that “designer” look even when the build uses plywood. Offset placement also reduces the visual heaviness that comes with straight rows. This works best for sneakers and loafers, and it’s a good pick if you want a rack that reads like decor.
Cut plywood shelves into short platforms about 10-12 inches deep, then create a series of supports that place each platform slightly forward compared to the one below. Space platforms so each pocket gives about 6-7 inches of vertical clearance for sneakers. Use dowels or pocket screws to lock supports into place, then sand all edges to round-over with a 1/4-inch radius bit. Finish with a walnut stain on birch plywood, then seal with matte polyurethane.
Offset layers look better when the offsets are consistent; mark a repeatable measurement on a scrap and copy it for every shelf.
Don’t use glossy finish; it highlights scratches and makes the rack look used instead of sleek.
6. Oak Slat Shoe Rack with Removable Side Panels
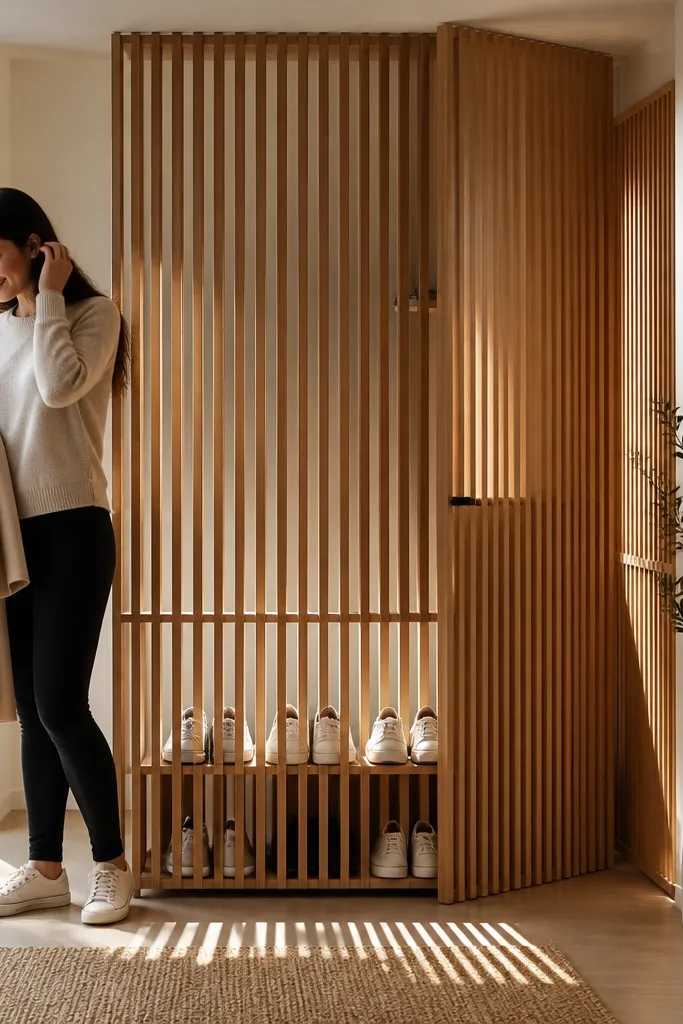
Slats look modern because they create a clean rhythm and let light pass through. This rack uses oak slats across the front and side panels so it feels airy, not bulky. Removable side panels keep it practical for cleaning and for swapping shoe sizes seasonally. The slats also stop shoes from pooling together, since each pair sits in its own narrow lane. It suits entryways, closets, and mudrooms where you want organization that still looks light and stylish.
Build a rectangular frame from 1x2 oak or oak plywood strips, sized around 36 inches wide and 12-14 inches deep. Install slats spaced about 1.5-2 inches apart on the front and optionally on the sides, then add a back cleat so shoes stay aligned. Make side panels removable using two screws into threaded inserts so you can remove them without stripping wood. Sand to 180-220 grit, then finish with a matte oil or clear matte topcoat for an even tone.
Use a slat spacing jig so every line is identical; slat racks look best when the grid is perfect.
Don’t make slats too far apart; wide gaps make shoes slump and break the neat look.
7. Industrial Pipe and Leather Strap Shoe Rack
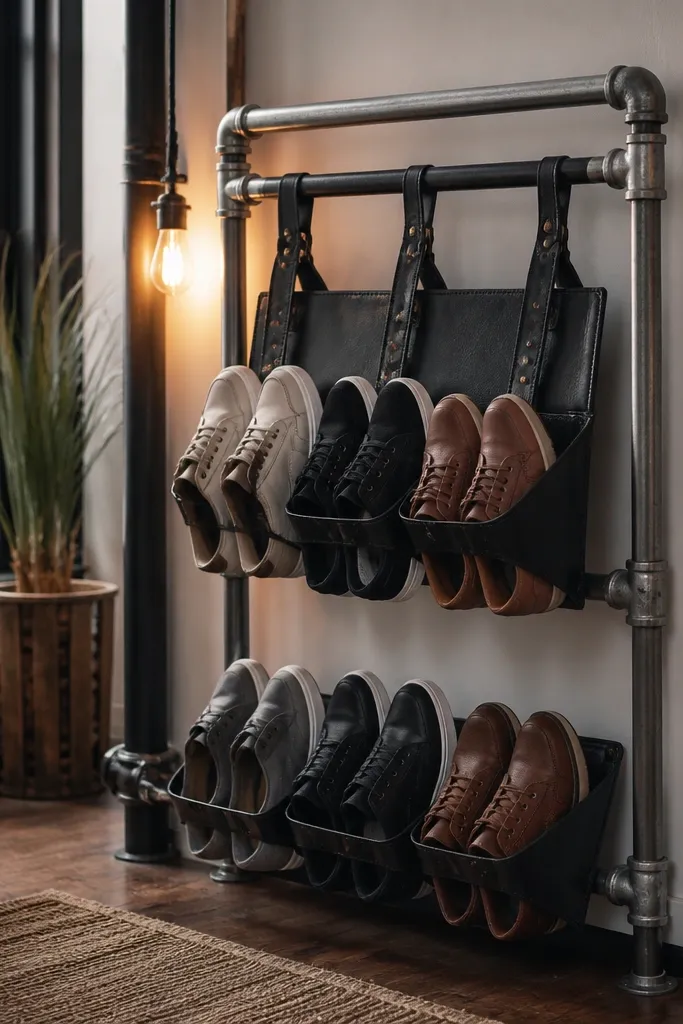
This one looks sleek because it mixes thin metal lines with soft leather, not heavy chains or bulky frames. The leather straps hold shoes by the sides and keep each pair upright, so the rack stays orderly even when you’re rushing. Use it for sneakers and flats; it’s not ideal for tall boots unless you add taller straps. It’s also a space-saving option because the straps hang in a vertical plane instead of requiring deep shelves. If your style leans modern-industrial, this is a standout.
Cut or assemble two vertical pipe uprights and two horizontal rails, then add three to five strap attachment points along the rails. Use leather straps cut to about 14-18 inches long depending on how high you want shoes to sit, then punch holes for rivets or Chicago screws. Attach straps so they’re taut but not overstretched, and add a small wooden or metal bar at the bottom edge to stop straps from twisting. Finish the wood base (if you add one) with matte clear coat, and spray paint the pipes matte black or gunmetal.
Lay one pair of shoes on the straps, then mark strap length with the shoes actually in place so the fit is perfect.
Don’t skip a bottom stop bar; loose straps twist and shoes slide out.
8. Corner Triangle Shoe Rack with Continuous Shelf Lines
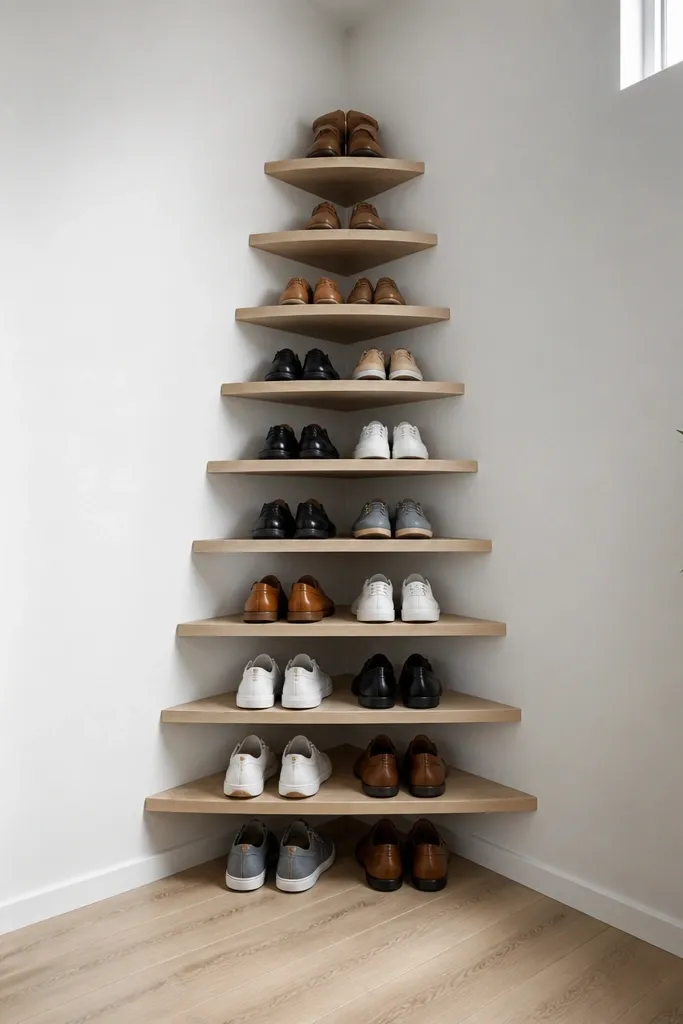
Measure the corner and build a right-triangle frame using plywood or ripped boards, with each shelf forming a consistent triangle shape. Set the shelves at about 7 inches vertical clearance for sneakers, and use a slightly larger clearance if you store taller shoes. Assemble the frame with wood screws and glue, then add a back panel for rigidity. Sand edges and finish with a matte paint or matte clear coat so the triangle reads crisp.
Corners waste space, so a triangle rack is a smart way to make the room look tidier without eating wall length. The modern look comes from continuous shelf lines that flow from one side to the other instead of separate boxes. This design holds several pairs while keeping the overall footprint slim. It also hides the clutter because shoes are angled toward the corner rather than facing outward. Great for entry corners, small hallways, and apartments where every inch counts.
Skip thisDon’t leave the back open if the rack is freestanding; shoes will push it and it’ll look crooked.
Editor's noteUse a template for each shelf so the triangle edges match exactly; mismatched angles look messy in photos.
9. Slim Cabinet Shoe Rack with Glass-Front Upper Shelf
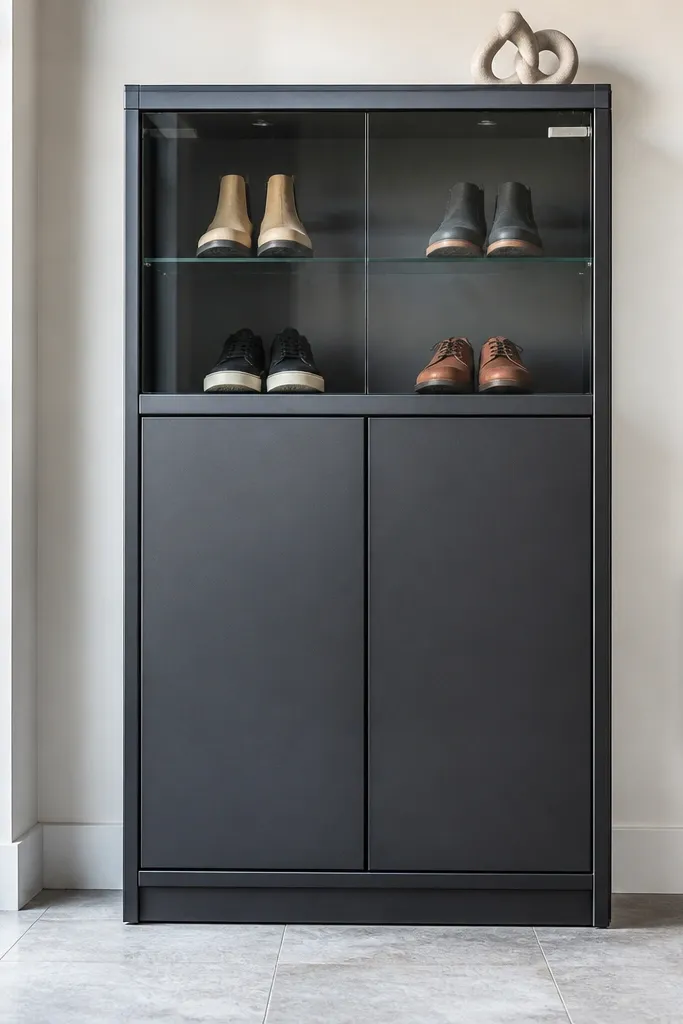
Build a tall slim cabinet frame from 3/4-inch plywood, about 10-14 inches wide and 36-48 inches tall. Install an upper shelf and door opening for glass, then add a lower door with shelves inside for closed storage. Use 1/4-inch tempered glass held with a simple frame or glazing tape, then add magnetic catches for door alignment. Paint the cabinet with cabinet-grade paint and finish hardware with brushed nickel or matte black.
This is a “modern display cabinet” move. The upper glass-front section lets you show a neat set of favorite shoes, while the lower closed storage hides the rest. That contrast reads upscale and keeps your entryway from looking cluttered. The cabinet shape is also clean: narrow width, straight sides, and flat doors. Build it if you have a wall you want to dress up and you’re willing to do a little cabinet hardware work for a real furniture look.
Skip thisDon’t use thin, wobbly door frames; glass cabinets look cheap when the door flexes.
Editor's noteKeep glass sections at eye level; it makes the rack look like intentional decor instead of random storage.
10. Two-Tone Shoe Rack with Vertical Divider Panels
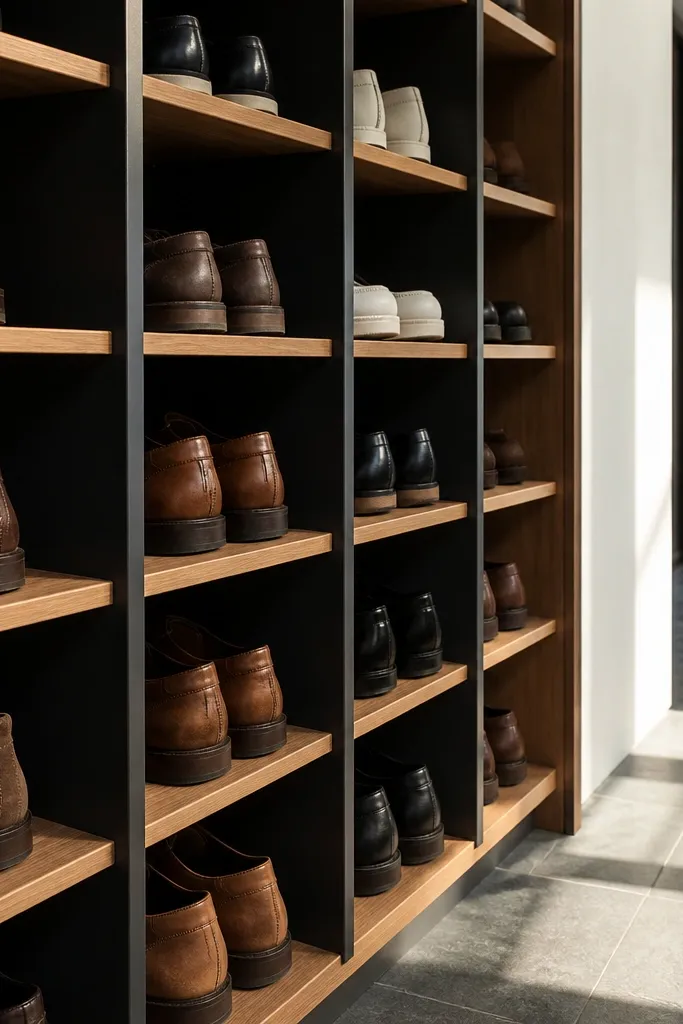
Two-tone designs look modern when the divider lines are crisp. This rack uses vertical divider panels to separate pairs, so shoes never lean into each other. The visual effect is clean because each lane forms a straight column. Use one neutral body color and one contrasting divider color like charcoal with warm oak or off-white with black trim. It’s a great choice if you want open storage but still want a “designed” look from the front.
Build a rectangular base and back frame from plywood, then add vertical dividers spaced about 5-6 inches apart depending on shoe width. Make the dividers from thinner plywood strips, then attach them square so the lanes look uniform. Paint the main body in satin off-white or charcoal and paint dividers in the opposite color after sanding and priming. Seal with a matte topcoat so the painted surfaces handle daily sliding without glossy glare.
Use painter’s tape to mask divider edges for sharp lines; freehand painting makes the whole rack look less modern.
Don’t skip primer on painted MDF or plywood; chips around shoe contact points look awful.
11. Magnetic Front Strip Shoe Rack for Quick Grab Pairs
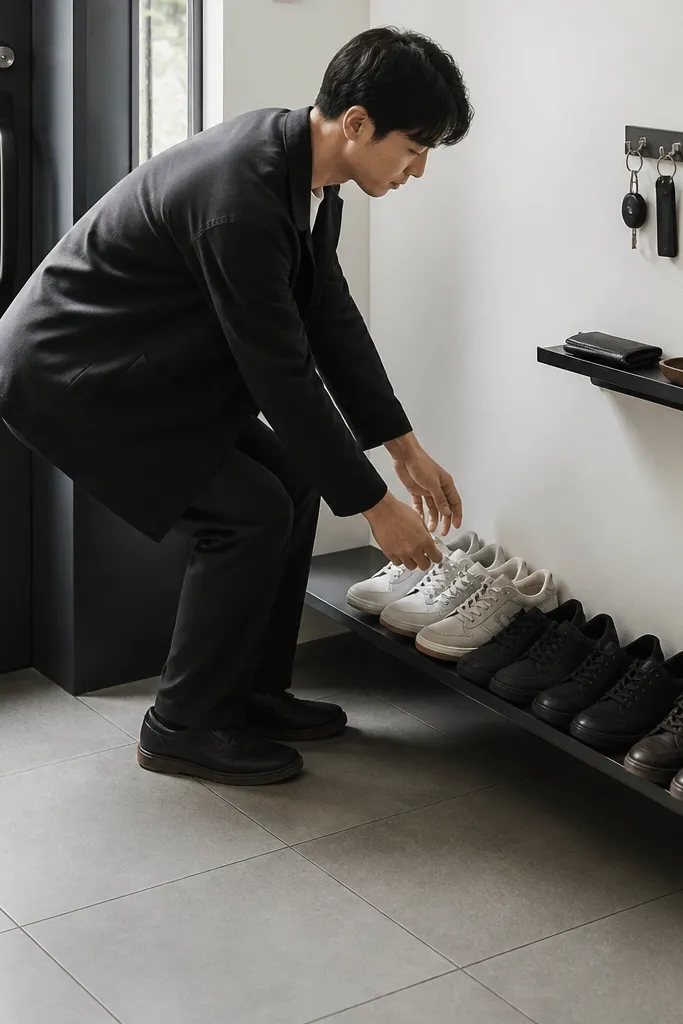
Build a shallow frame from 1x3 or 3/4-inch plywood, about 12 inches deep, with three internal shelves or a single long shelf. Install a thin metal strip behind a wood front rail, then attach rare-earth magnets to the underside of the rail so shoes get gently held. Add a thin felt or rubber strip where shoes touch metal so it doesn’t scratch. Finish the wood rail with matte varnish and paint the metal strip black.
This idea keeps the front edge clean while still controlling shoe position. A magnetic front strip acts like a subtle stop, so shoes sit at the same angle and don’t spill forward. The look is sleek because there’s no bulky lip or visible clips, just a thin line at the front. It’s perfect for daily pairs you grab in and out of the door. Build it with a minimal frame and it looks like a modern bench accessory, not a shoe organizer.
Skip thisDon’t put magnets on bare metal that can rust; cover metal with paint or a thin seal coat.
Editor's noteTest magnet strength using one shoe and adjust placement until the shoe holds without forcing you to yank it out.
12. L-Shaped Entry Shelf Shoe Rack with Under-Shelf Hooks
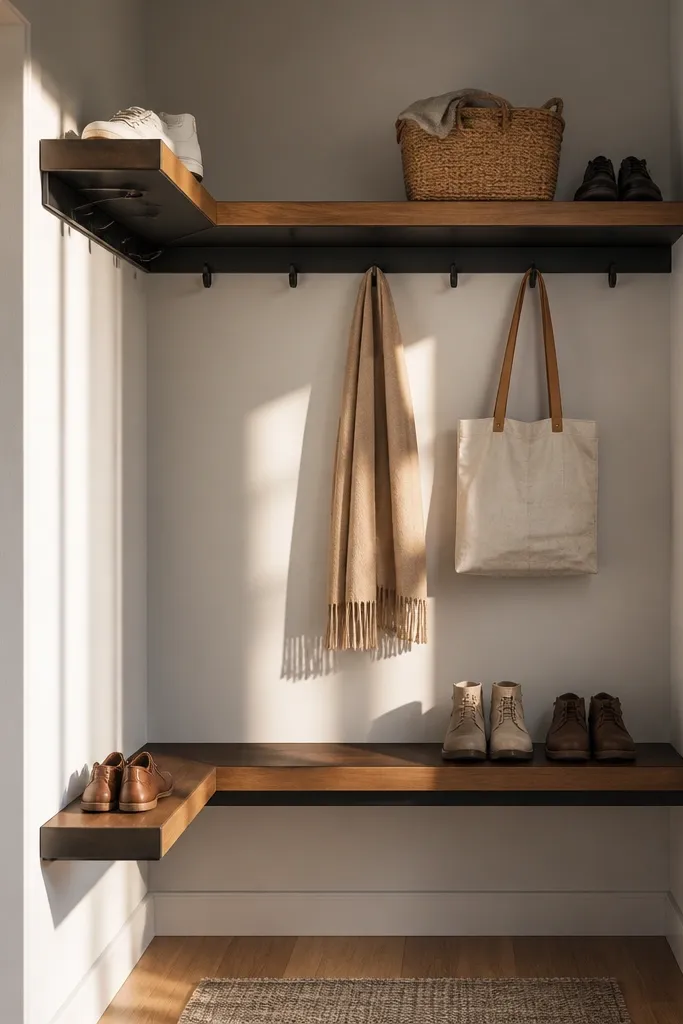
Plan an L shape using two perpendicular shelves, each about 10-12 inches deep and long enough for 3-4 pairs. Build the main supports from plywood side panels and add a back cleat into studs for stability. Install under-shelf hooks spaced about 3-4 inches apart using screws into the shelf underside. Finish with matte paint or clear matte coat, then sand edges so the corners look crisp rather than rough.
An L-shaped rack looks modern because it follows the geometry of your entryway. It also gives you a combined landing zone: shoes sit on the shelves, and small items hang under the shelf so the entry stays clean. For photos, the L shape makes the structure feel intentional and architectural. Choose a matte finish and keep the shelf edges squared for that sleek look. This works best when you have a wall corner or a narrow run of space along a hallway.
Skip thisDon’t mount hooks into thin end grain; it cracks and the rack looks worn quickly.
Editor's noteMake the hooks removable with screws into inserts so you can reconfigure the rack later without rebuilding.
13. Angled Boot Rack with Rotating Shelf Inserts
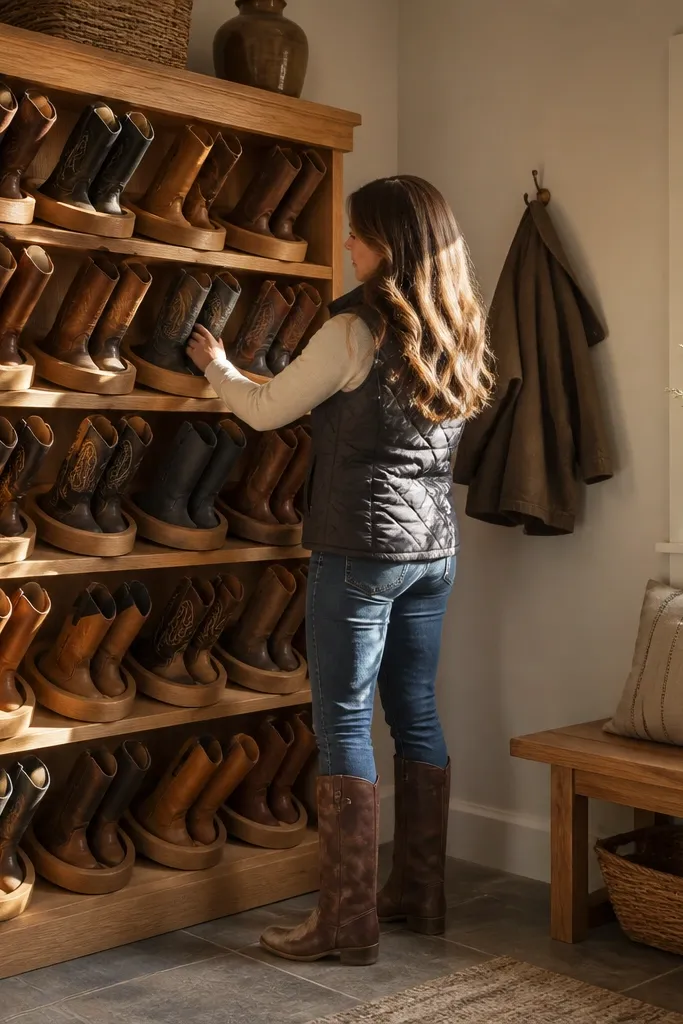
Build a base frame from 3/4-inch plywood and cut two angled supports per slot so the shelf insert sits at 20-25 degrees. Use a lazy susan-style bearing or small rotating hardware for each insert, then attach the insert shelf to rotate smoothly. Make each insert with a front notch so the boot shaft doesn’t slide forward. Seal the wood with matte clear coat and add a thin felt strip on the contact points to protect boot leather.
Boot storage looks messy when boots lean and flop. This design keeps boots angled at a steady angle using rotating shelf inserts, so each pair faces the same direction. The rotating inserts also make it easier to grab a pair without moving everything else, and that’s what keeps the rack looking tidy. The modern look comes from the uniform angle and the clean circular motion hidden behind the shelf face. It’s best for tall boots that need structure and for closets where you want a system, not chaos.
Skip thisDon’t skip the notch; without it, boots drift forward and the rack stops looking organized.
Editor's noteKeep each insert width consistent so boots don’t crowd; measure the widest boot shaft you own and build around that.
14. Modular Drawer-Front Shoe Rack with Pull Handles
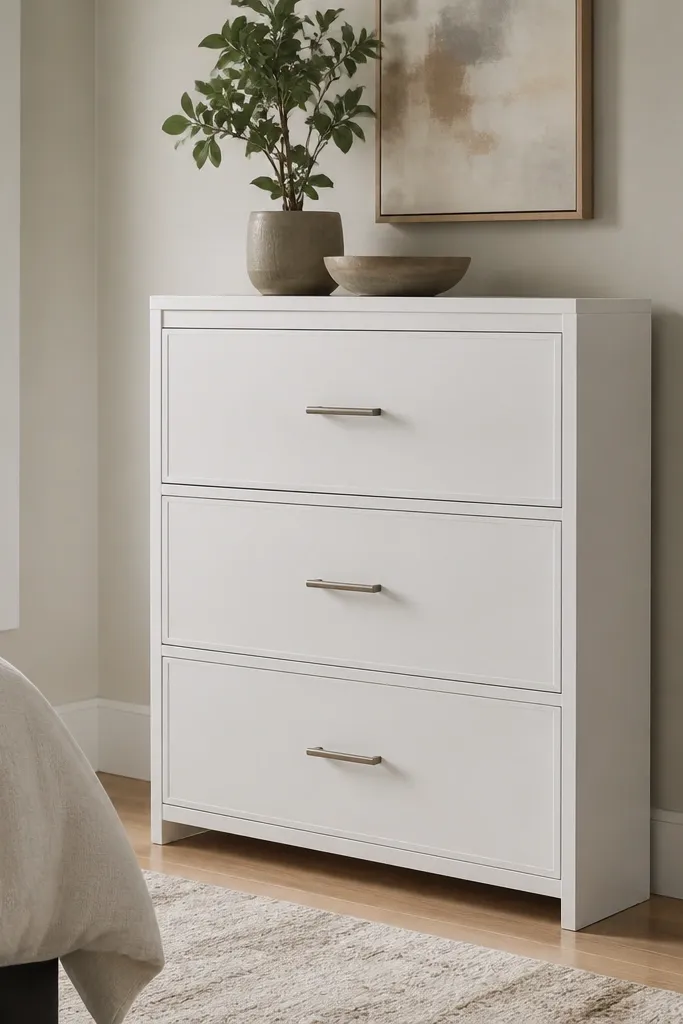
Build a cabinet base from plywood and cut drawer boxes sized for 6-7 inches of shoe height per drawer. Install drawer slides rated for the weight you expect, then mount drawer fronts so gaps are even around the edges. Add a simple shoe stop board inside each drawer so shoes sit at the same depth. Finish with satin paint and install slim bar pulls or recessed pulls for a modern look.
Drawer-front shoe storage looks modern because it hides everything. No open shelves, no visible stacks, no visual clutter. The clean front lines read like a dresser, which works in entryways and bedrooms. This also protects shoes from dust and keeps the rack easy to clean. Build it as two or three modules so you can grow the system when shoe collection expands. If you want the sleekest aesthetic with the least daily fuss, this is the one.
Skip thisDon’t overload drawers with tall boots; drawers warp and the front line starts to look uneven.
Editor's noteUse a spacer jig to set consistent drawer gaps; uneven gaps make even a good build look homemade.
15. Rattan-Panel Shoe Rack with Black Frame Grid
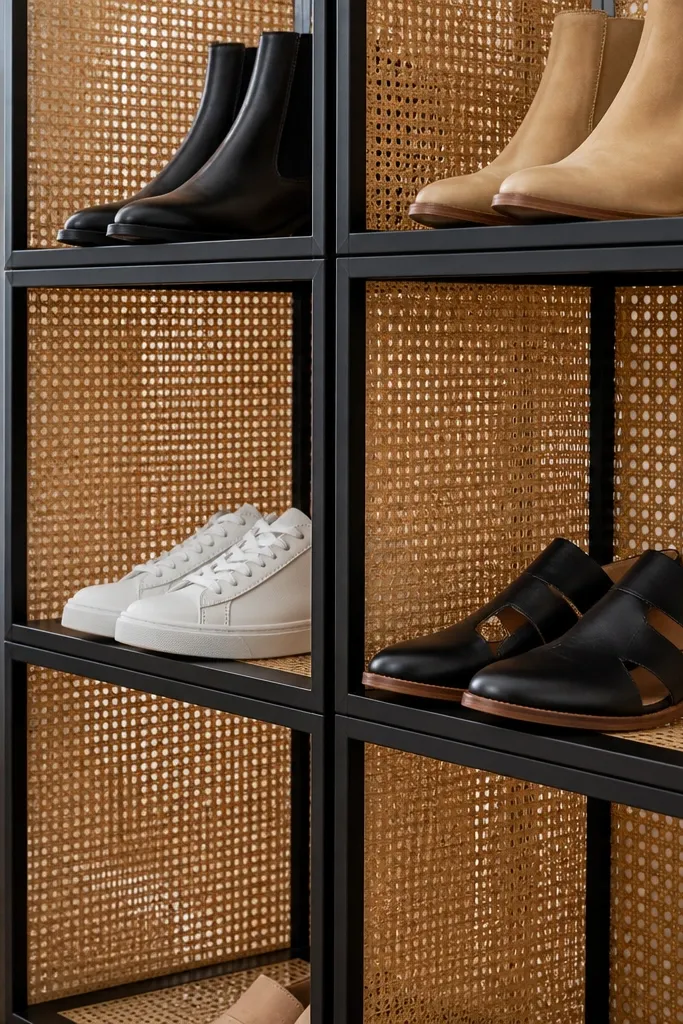
Build a rectangular frame from 1x2 wood or thin metal, then create shelf bays about 6-7 inches tall. Install rattan panels as the back and optional side inserts using staples or small trim strips so edges look neat. Add a front rail to keep shoes from sliding forward. Sand and finish the frame in matte black, then seal rattan lightly with a clear matte finish so it wipes clean.
Rattan panels add texture without making the rack look bulky. Pair a black metal or black-painted wood grid with rattan backing, and the shoes look framed instead of dumped into open shelves. The airflow helps shoes dry, and the rattan keeps the whole piece from looking flat. This is a strong modern look if your room has natural wood, beige textiles, or light walls. It’s best for sneakers, sandals, and flats where you don’t need deep vertical clearance.
Skip thisDon’t skip a front rail; rattan backs alone don’t stop shoes from sliding.
Editor's noteCut rattan slightly oversized and trim after installation; it helps you get tight, clean edges.
16. Floating Shelf Shoe Rack with Hidden Cleat Supports

Mark studs and cut a back cleat strip from 1x3 that runs the length of the rack. Install cleat strips for each shelf at equal spacing, then screw shelves onto the cleats from above using countersunk screws. Cut shelves from 3/4-inch plywood, sand edges, and add a thin front lip strip if you want a stop for shoes. Finish with matte paint or clear matte coat so the shelf faces are low-glare.
Floating shelves look modern because there’s almost no visible hardware. This rack uses hidden cleat supports so the front stays clean and the shelves look like they’re floating off the wall. It also gives you a customizable layout where you can set shelf heights for different shoes. The look is sleek in photos because the shelf faces are uninterrupted lines. Skill level is moderate because hidden supports need accurate measurements, but the build is straightforward woodworking.
Skip thisDon’t rely on single screws per shelf; use multiple screws so the floating look stays rigid.
Editor's noteDo a dry-fit with one shelf first and confirm the gap lines match before installing the rest.
17. Modular Vertical Slat Shoe Rack with Interlocking Bases
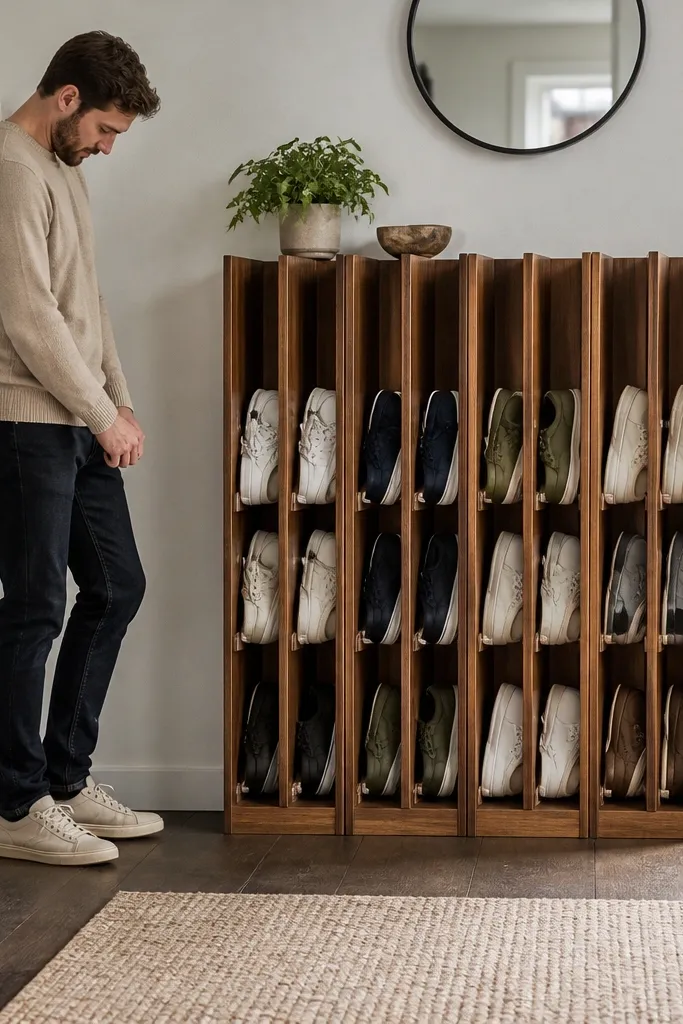
Build modular base blocks from 3/4-inch plywood with interlocking notches so each module locks into its neighbor. Add vertical slats on top of the base, spacing about 2 inches apart for sneakers and slightly tighter for flats. Create shelf surfaces using thin boards or a back ledge so shoes rest securely. Finish with matte paint on slats and a clear matte topcoat on wood surfaces so the lines stay clean.
Vertical slats scream modern when they’re consistent and spaced evenly. This rack uses an interlocking base system so you can expand it later without rebuilding the whole unit. The slats separate shoes into narrow lanes, which keeps the front row looking crisp instead of messy. It’s also a good option for people who rotate shoe types seasonally because you can rearrange modules. The look is photogenic because you get straight lines and a strong silhouette from multiple angles.
Skip thisDon’t make modules too light; a flimsy base makes the slats look wobbly and cheap.
Editor's noteUse one slat spacing measurement and repeat it with a spacer block; hand-eye spacing creates uneven lanes.
18. Backless Shoe Rack with Angled Side Rails for a Gallery Look
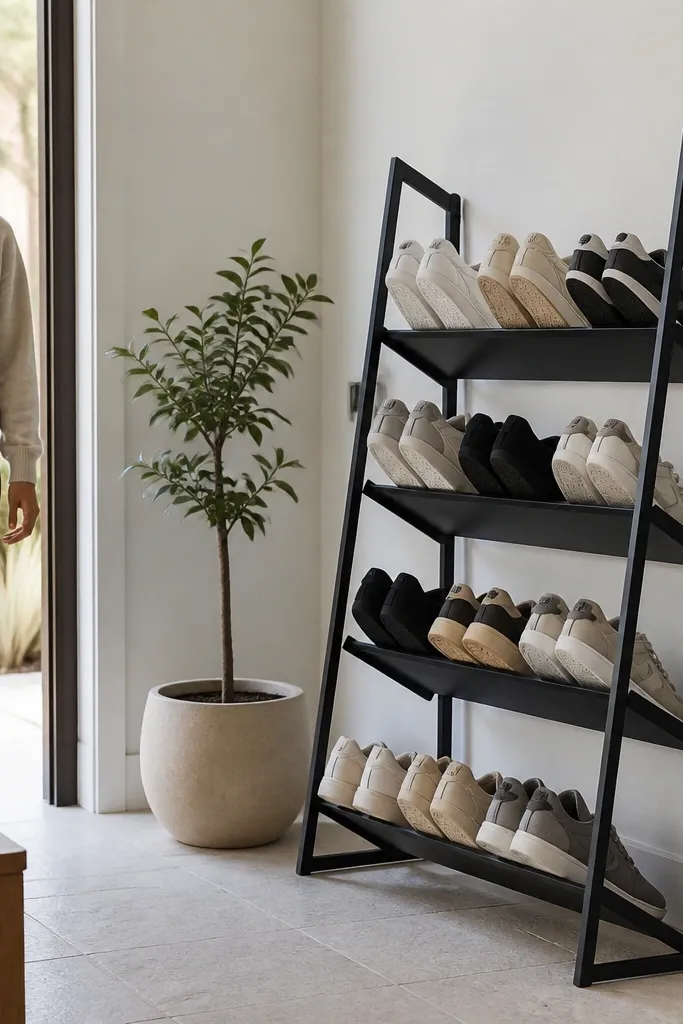
Backless racks look modern because they feel lighter and more “gallery” than bulky storage. Angled side rails keep shoes from slipping and create a clean visual boundary. This design works well when you want open display but still want order — each shoe pair sits in a defined pocket. It’s especially good for narrow spaces where a full back panel would look heavy. If your goal is sleek and photogenic, this gives you that clean outline in photos.
Build two angled side rails from plywood strips cut to match your desired angle, around 10-15 degrees. Add internal cross supports spaced for 6-7 inches of clearance per row, then attach shallow shelf boards on top. Leave the back open for the gallery look, but add enough cross bracing so it doesn’t rack. Sand and finish with matte paint or matte clear coat, and add rubber feet under the base for stability.
Add a thin front stop strip so shoes don’t slide forward when you set them down quickly.
Don’t skip bracing; backless racks twist and the modern straight lines turn into a wavy mess.
19. Single-Board Slanted Rack with Stained Wood and Brass Pegs
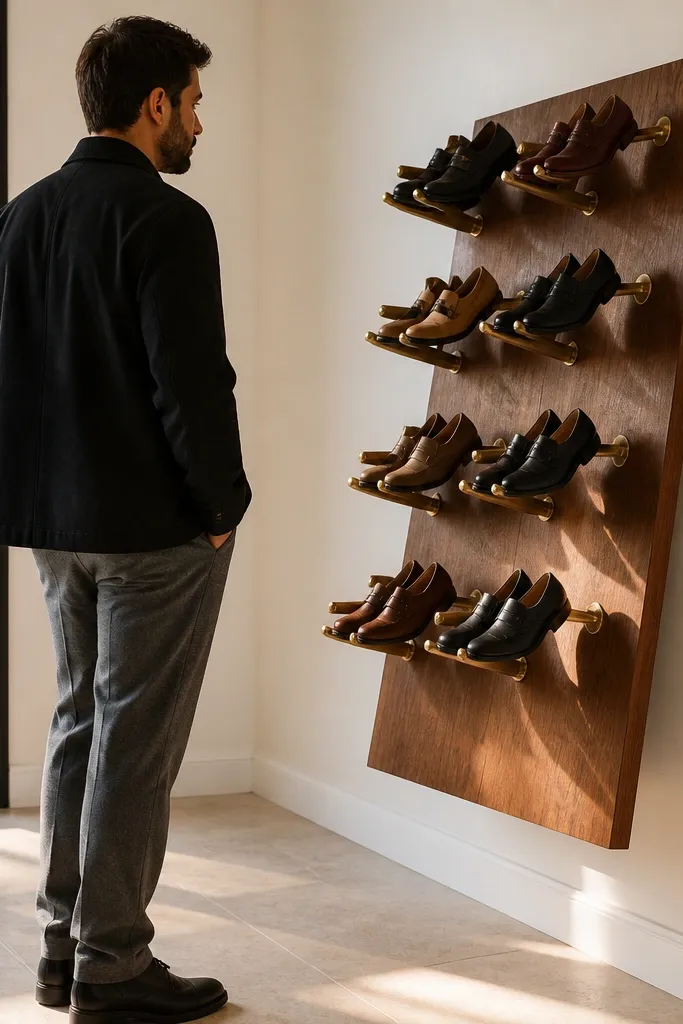
This looks sleek because it’s built around one continuous wood plane with hardware that reads minimal. Brass pegs add a clean accent without adding bulk, and they help shoes sit at consistent angles. The single-board approach keeps the silhouette simple, which is exactly what modern shoe rack ideas should deliver. It’s also a good beginner build if you’re comfortable cutting angles and drilling holes accurately. Great for flats and sneakers where you want an art-like storage piece.
Cut a single slanted board from 3/4-inch hardwood or plywood with a hardwood veneer face, then sand the front edge smooth. Drill a line of holes for brass pegs at consistent spacing, about 2-3 inches apart depending on shoe width. Insert pegs so they act as toe stops, then finish with a stain that matches your room palette and seal with matte topcoat. Mount the board securely to studs using a hidden cleat so the board sits level at the bottom.
Mark hole spacing using a physical template strip so every peg sits in the same grid.
Don’t use shiny brass without a matte clear coat; glare and fingerprints make it look messy fast.
20. Two-Level Entry Rack with Hidden Cable-Style Rails
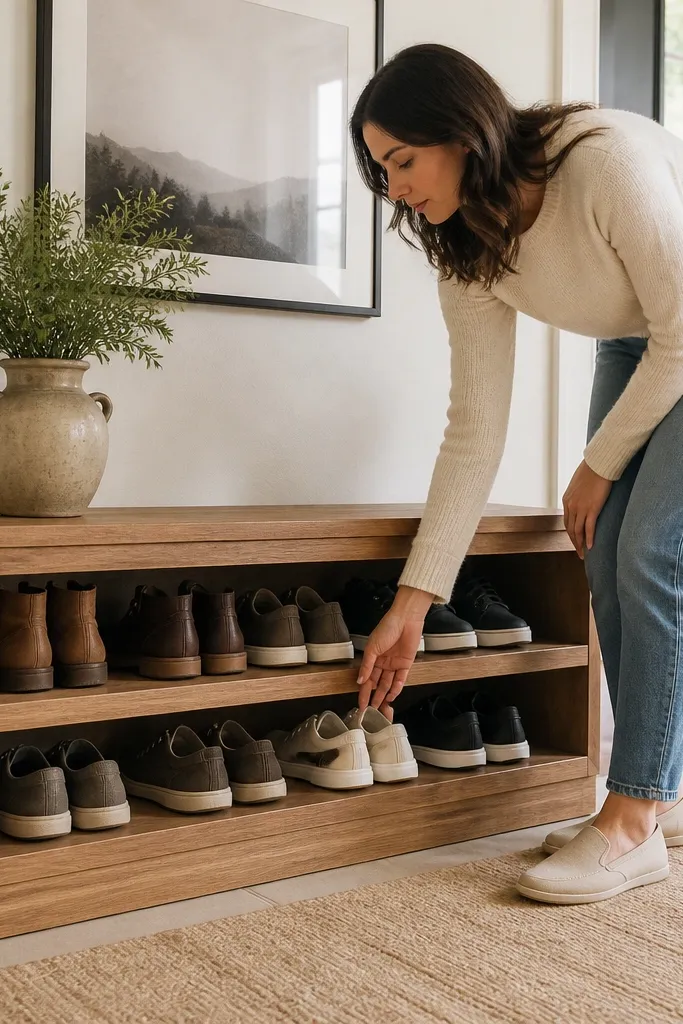
Install two vertical mounting rails into studs, then attach horizontal shelf supports using the rail system hardware. Cut two shelves from 3/4-inch plywood sized to about 36 inches wide and 10-12 inches deep. Set the bottom shelf for 6-7 inches clearance and the top shelf for 7-10 inches depending on your shoes. Finish shelves with matte paint or clear matte coat, and add a slim front lip to stop shoes from sliding.
Cable-style rails sound technical, but the look is simple: hidden supports that keep shelves straight. This two-level rack is ideal for entries because it gives you a bottom row for daily shoes and a top shelf for seasonal pairs. The modern look comes from the clean front face and the even shelf spacing, not from visible brackets. It also handles different shoe heights better than fixed open shelves because rails can be placed where you need them. Build it if you want sleek storage with adjustable flexibility.
Skip thisDon’t mount rails into only the drywall; the rack will sag and the modern lines will drift.
Editor's notePre-mark shelf heights on the wall with painter’s tape so the rails go in straight before you start drilling.



