
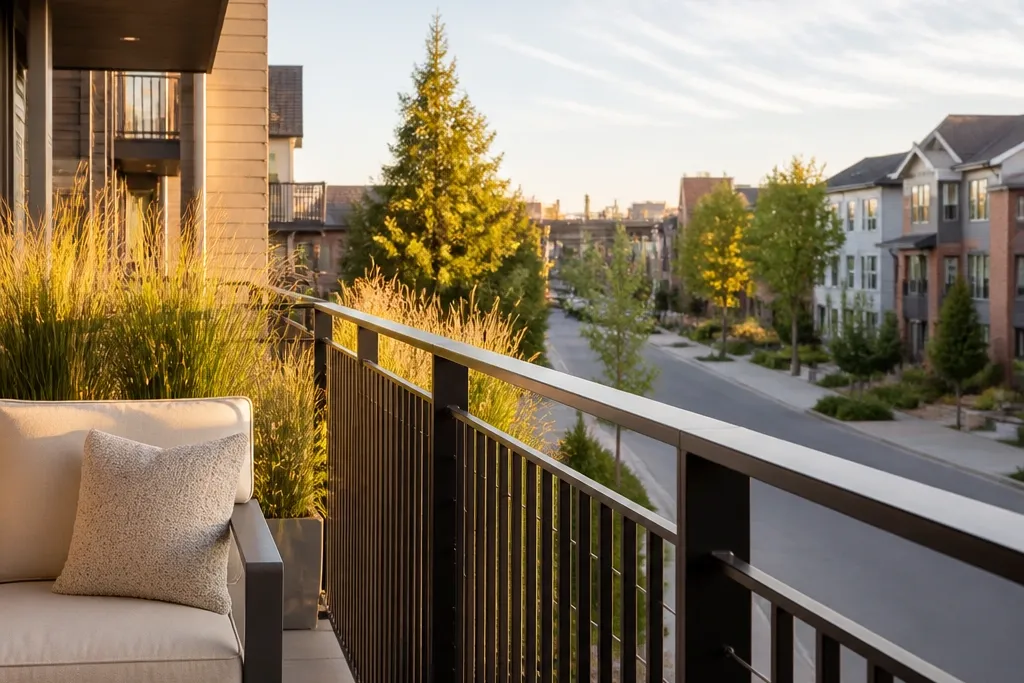
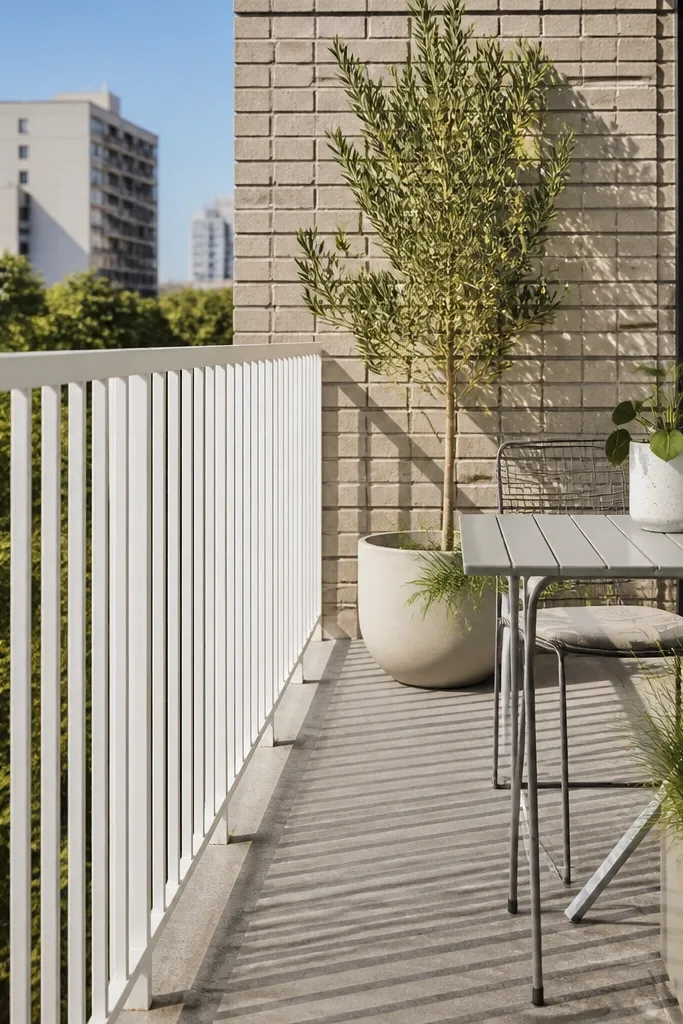
1. Matte black cable rail with a thin top cap
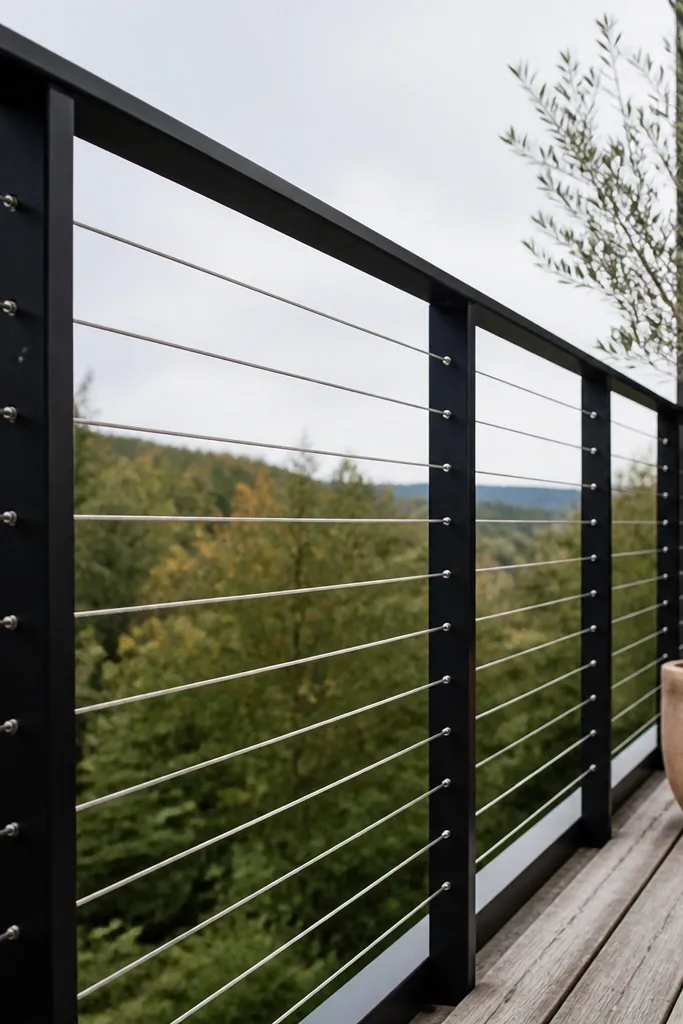
Cable rail is one of the cleanest modern outdoor balcony railing design looks because it removes visual bulk. The trick is keeping the top rail slim and matte so it doesn’t reflect and glare in daylight. Use stainless cables tensioned evenly so the lines stay straight from post to post. This works best on balconies where you want openness — think city views, a garden below, or any space where you don’t want the railing to block the scene.
Start by laying out your post spacing and marking cable locations on each post at the same heights. Install powder-coated posts first, then drill through the posts (or use pre-drilled cable terminals) at the exact cable heights. Thread stainless cable, attach terminals, tension each run to the same tightness, then trim and cap the ends. Finish by checking that cables line up vertically in each bay and that the top rail sits level all the way across.
Editor's noteUse a simple laser level line to confirm top rail height before you tighten anything.
Skip thisDon’t eyeball cable heights — uneven cable runs scream DIY in photos.
2. Warm cedar slats with a black steel frame
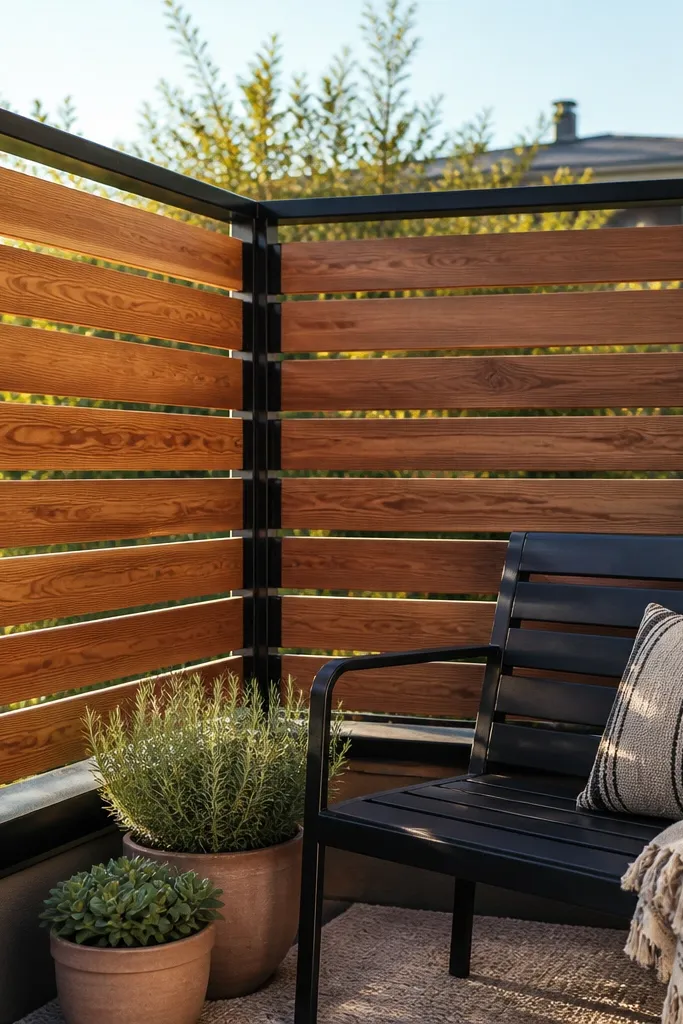
Horizontal cedar slats give you privacy without the heavy look of solid panels. The black steel frame makes the wood read modern instead of rustic. Cedar also looks great outdoors because it has a soft grain that catches light without looking shiny. This style suits balconies that need partial screening from neighbors while still keeping the space bright.
Build a steel perimeter frame with level top and bottom rails, then mount vertical steel uprights at your chosen bay width. Cut cedar slats to identical lengths and keep them uniform by using a stop block on your saw. Install slats with stainless exterior screws and small spacer blocks so your gaps stay consistent across every bay. Seal the cedar with an exterior penetrating oil, then re-check slat alignment after the first dry day.
Editor's notePre-drill every slat for screws so the cedar doesn’t split and the face stays straight.
Skip thisDon’t use untreated wood — it will warp and look uneven within a season.
3. Clear tempered glass panels with slim aluminum posts
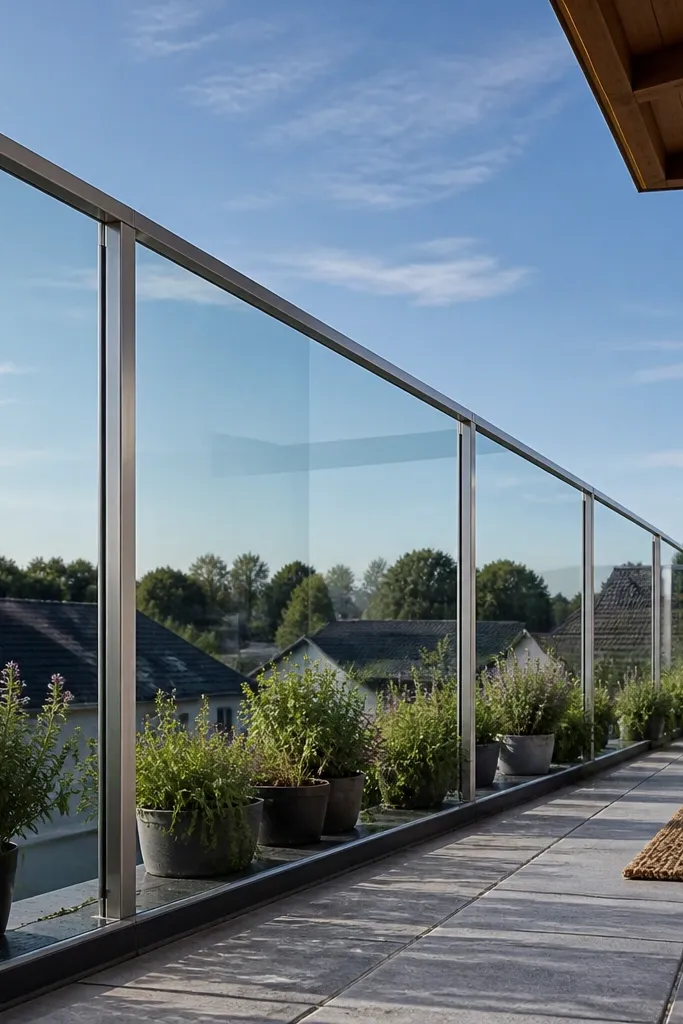
Glass creates a modern “no barrier” look while still cleaning up the visual noise of old railings. The key is slim aluminum posts and a simple top rail so the glass reads like one continuous plane. Choose tempered, exterior-rated glass and use proper point-fixing or channel systems so it stays rigid. This is ideal for balconies with views and for anyone who wants the railing to disappear.
Measure the run length and plan panel widths so the posts land evenly. Install slim aluminum posts first, then fit the glass using the manufacturer’s hardware — point-fixing or top-and-bottom channels. Keep panel edges aligned by using spacers and temporary leveling shims during installation. Finish by tightening fittings evenly and sealing the exterior joints with exterior-rated glazing sealant where required.
Before final tightening, dry-fit each panel and mark alignment so you don’t fight it mid-install.
Don’t use bargain glass — thin panels flex and look wavy immediately.
4. Matte white powder-coated aluminum with vertical bars
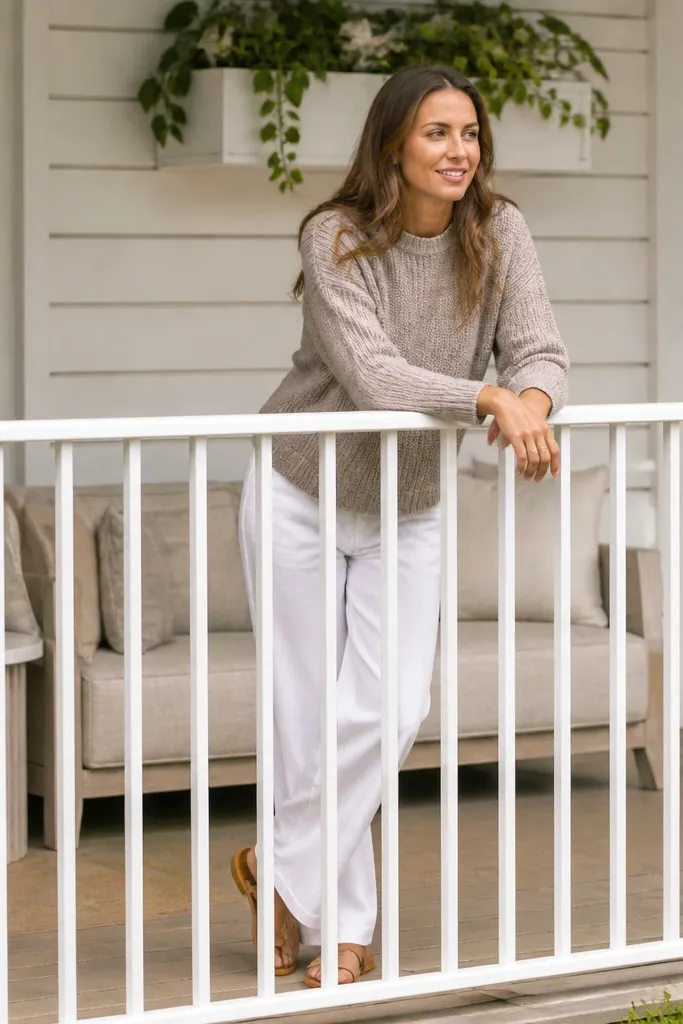
Vertical bars in a matte white finish look crisp, modern, and airy. White railings also brighten shaded balconies, which helps your whole outdoor area look cleaner in the light. This style works especially well with light siding, modern planters, and neutral outdoor furniture. Keep the bar thickness slim and the spacing consistent so it reads like a single designed grid.
Choose aluminum bars that match your desired visual thickness, then plan post spacing so the bars land evenly. Mount posts at your measured spacing, then attach top and bottom rails to lock everything in. Install vertical bars using a jig or measured spacers so each gap is identical. Finish with powder-coated touch-ups on any drilled or cut spots to prevent corrosion.
Editor's noteIf you’re working alone, clamp a straight 2x4 as a temporary guide to keep bars aligned while you fasten.
Skip thisDon’t let the bottom rail sag — the whole grid looks off even if posts are straight.
5. Black wrought look without the bulk (flat bar grid)
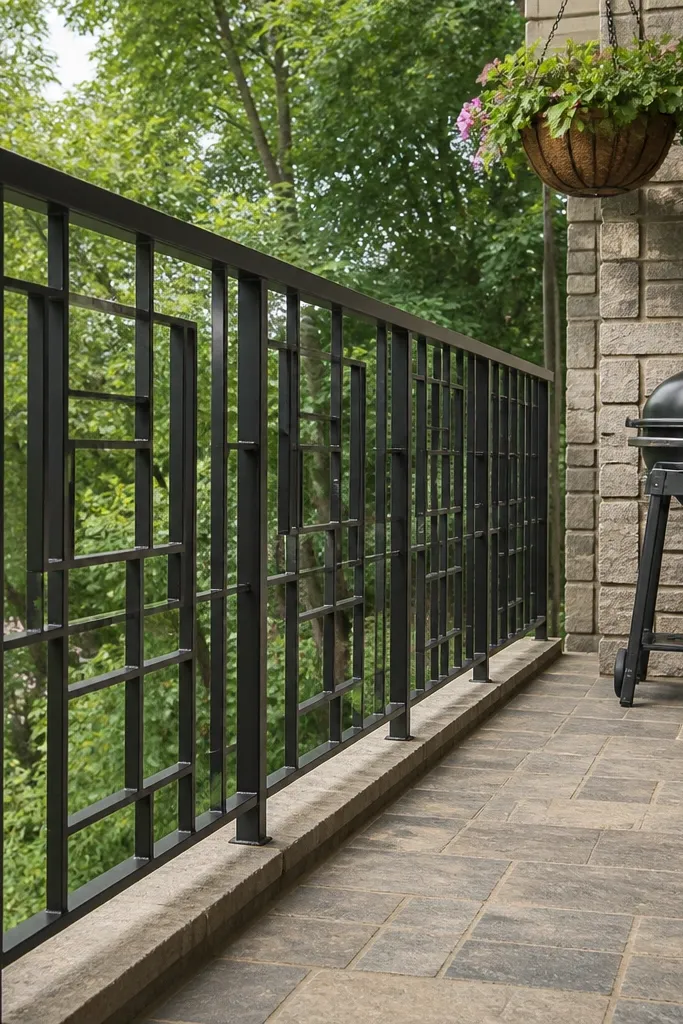
You can get that classic “wrought” vibe without the heavy scrollwork that dates balconies fast. Flat bar grid railings look modern because the lines are straight and the negative space is controlled. It’s also easier to build than decorative iron — fewer curves, less fitting, cleaner sightlines. This suits balconies that want style but still need durability in rain and wind.
Cut flat bars for verticals and horizontals and lay them out on a flat surface to confirm the grid. Build a top rail and end posts, then weld or bolt the grid into place with consistent spacing. Paint with a powder coat or a two-part metal primer plus exterior enamel if you’re not powder coating. Install the railing with stainless anchors and check level across the full run.
Use a cardboard template of your spacing gaps — it’s faster than measuring every bay twice.
Don’t mix bar thicknesses — the grid loses that sharp modern look.
6. Stainless cable + wood slat hybrid
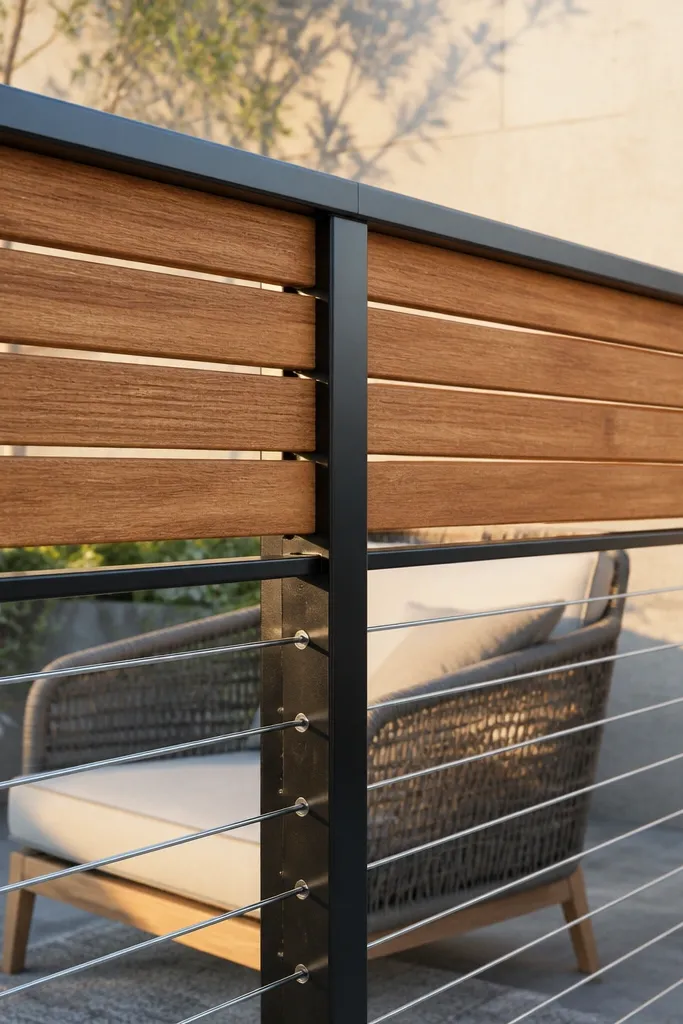
A hybrid rail gives you the best of both worlds: warmth up top and openness below. Put wood slats in the upper band for privacy and a clean cable run underneath so the lower view stays open. This reads modern because the materials are separated into clear zones instead of blended randomly. It’s a great choice for balconies where you want to block faces from sight at eye level but keep the space light.
Plan two zones with a straight horizontal line across each bay, then install your posts and top rail first. Mount wood slats for the upper band using stainless screws and spacers so gaps stay even. Install cable terminals for the lower zone and tension cables with identical spacing. Seal wood with an exterior finish and make sure the cable line heights match across every bay.
Editor's notePre-finish the wood slats before assembly to get clean edges and better protection.
Skip thisDon’t place wood in the middle of the run — it makes the railing look chopped.
7. Two-tone railing with a walnut-stained wood top rail
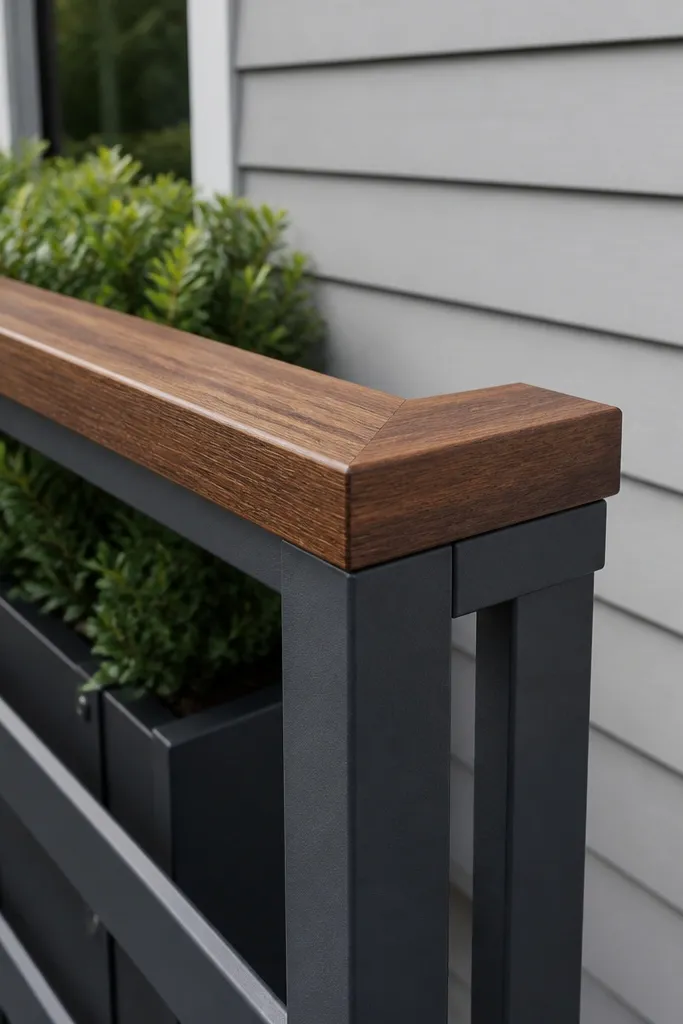
Two-tone railings look expensive when the colors are deliberate, not random. A walnut-stained top rail warms up a dark metal body and makes the whole balcony feel styled instead of generic. Choose a matte dark for the metal (charcoal, not glossy black) so the wood becomes the visual focus. This works well with modern outdoor furniture in black, gray, or natural woven tones.
Install the metal posts and infill first, then size the wood top rail to run continuously across the span. Use a laminated exterior wood top rail or build a box-style top for stiffness so it doesn’t sag. Mount it with hidden brackets underneath and stainless fasteners through pre-drilled pilot holes. Apply a stain rated for exterior use, then finish with a UV-protective clear coat.
Editor's noteCut the wood ends with a slight chamfer so water doesn’t sit in a sharp corner.
Skip thisDon’t use interior stain — outdoor UV turns it blotchy fast.
8. Aluminum slat screen railing with 45-degree shadow gaps
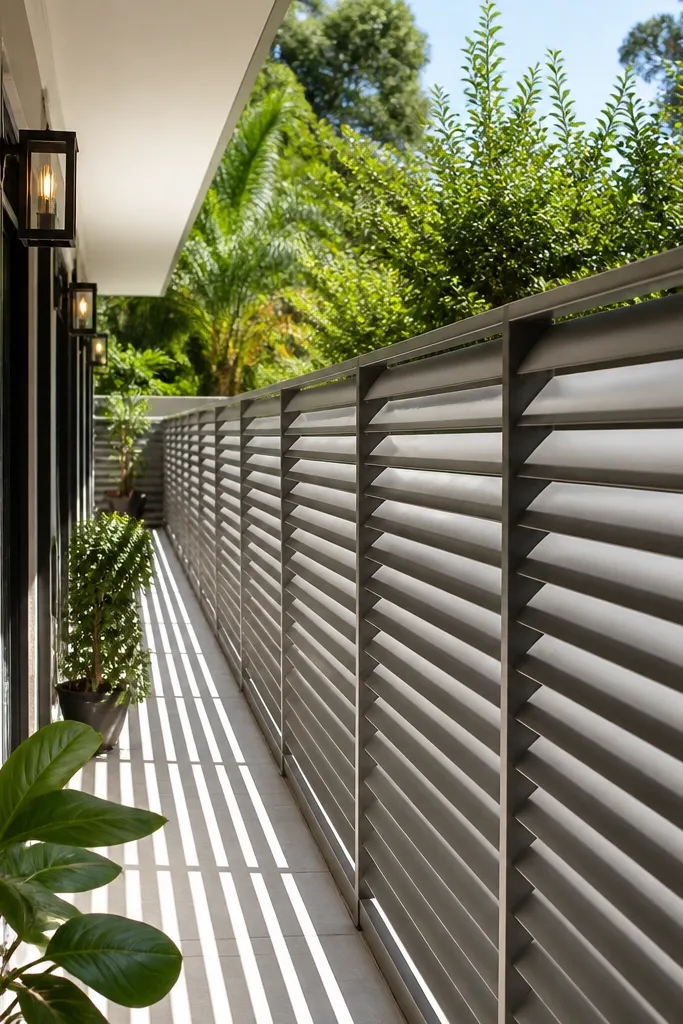
Angled slats create depth even when you keep the railing slim. The modern look comes from the shadow gap — the space between each slat makes a repeating pattern that reads clean in daylight photos. Aluminum is also low-maintenance and holds up to weather better than bare steel. This style is ideal for privacy without making the balcony feel enclosed.
Decide your slat angle and spacing, then cut aluminum slats to identical lengths with a miter saw and proper blade. Build a frame with mounting rails that match the angle so slats sit consistently. Install slats using hidden fasteners or countersunk screws, keeping the gap uniform with spacers. Finish with a powder-coated finish and seal any cut ends if the coating system requires it.
Use a spacer block the thickness you want between slats and clamp it while you fasten each one.
Don’t vary the angle bay to bay — the shadow pattern turns uneven.
9. Horizontal slat railing with a continuous aluminum cap
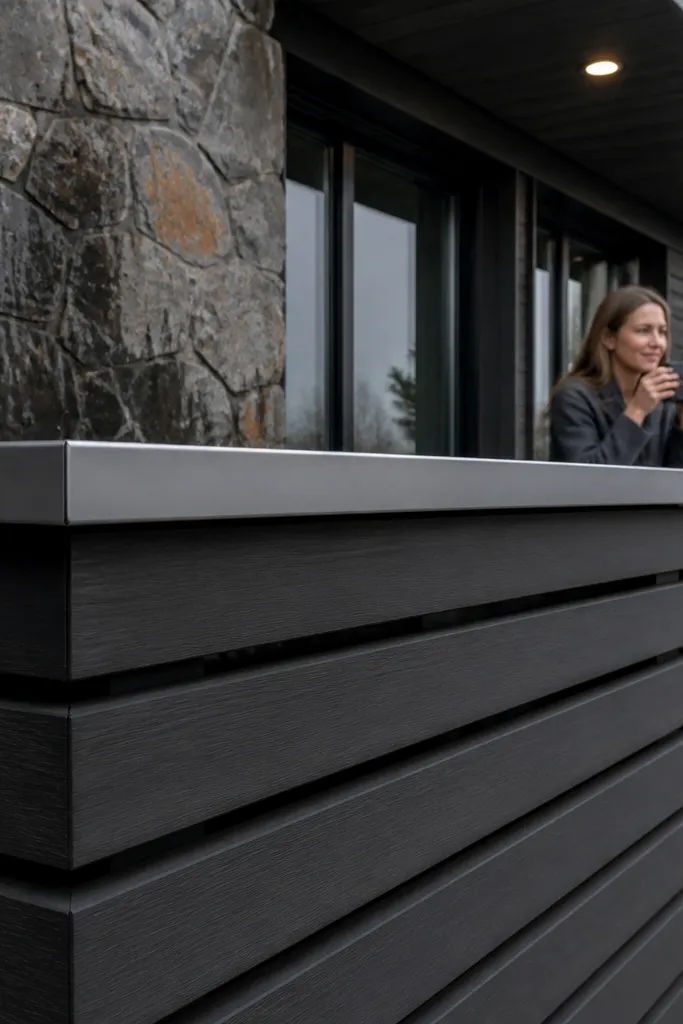
A continuous cap makes horizontal slat railings look intentional and finished. Without it, the top edge can look jagged or uneven. The cap also protects the slat ends from water getting into the ends of wood or the seams of metal. This design suits balconies that need a smoother, more modern silhouette and good rain protection.
Install posts and a level top mounting rail, then attach the aluminum cap frame first. Mount your horizontal slats underneath with spacers so the gaps match across each bay. Use stainless fasteners and pre-drill if you’re using wood slats. Seal the top rail joints and any exposed wood ends, then check the cap overhang is consistent from side to side.
Editor's noteCut slats slightly shorter than the bay width so expansion never pushes against posts.
Skip thisDon’t lock slat ends tightly — wood movement shows up as warping.
10. Reeded glass panels with a matte black frame
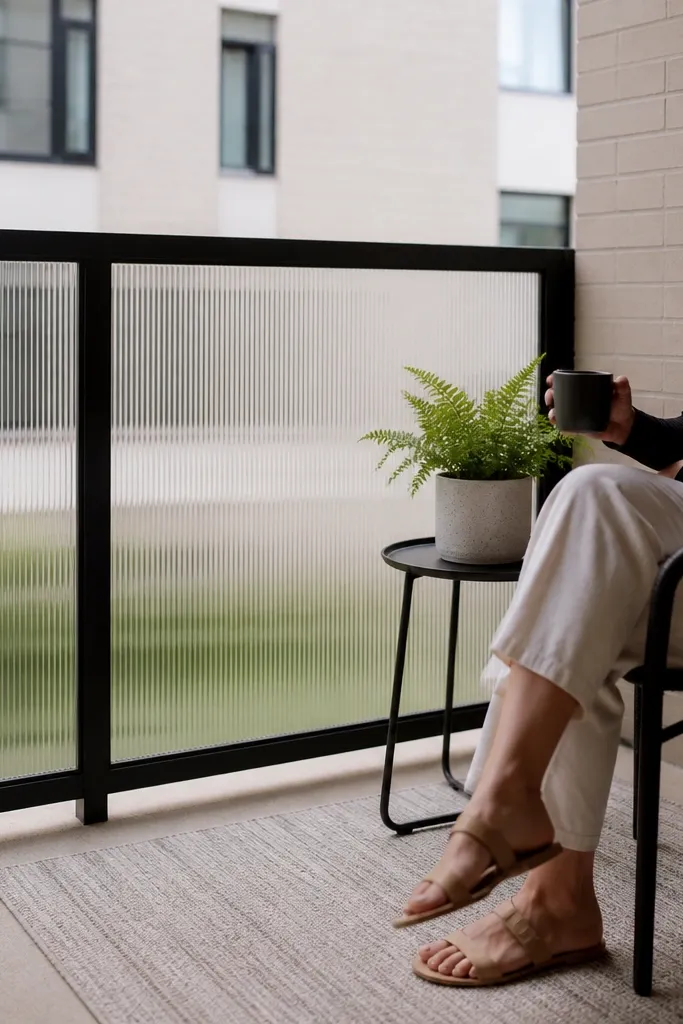
Reeded glass adds texture and privacy without turning the railing into a solid wall. The modern part is the matte black frame paired with a clean panel layout, so the texture reads as a design feature. This is great for balconies facing neighboring windows where you want visual separation but still want light. It also photographs well because the glass catches highlights in a controlled way.
Plan panel sizes so the textured glass sits evenly within the frame. Install matte black aluminum or steel posts and rails, then fit reeded glass using an exterior glazing system with correct gaskets. Set each panel with the same spacing using shims so the texture lines look straight across bays. Seal the exterior edges and verify the railing stays square before final tightening.
Editor's noteWipe glass with a streak-free cleaner before sealing so you don’t trap residue under trim.
Skip thisDon’t skip gaskets — glass edges can rattle and stain over time.
11. Minimal U-channel steel with vertical infill rods
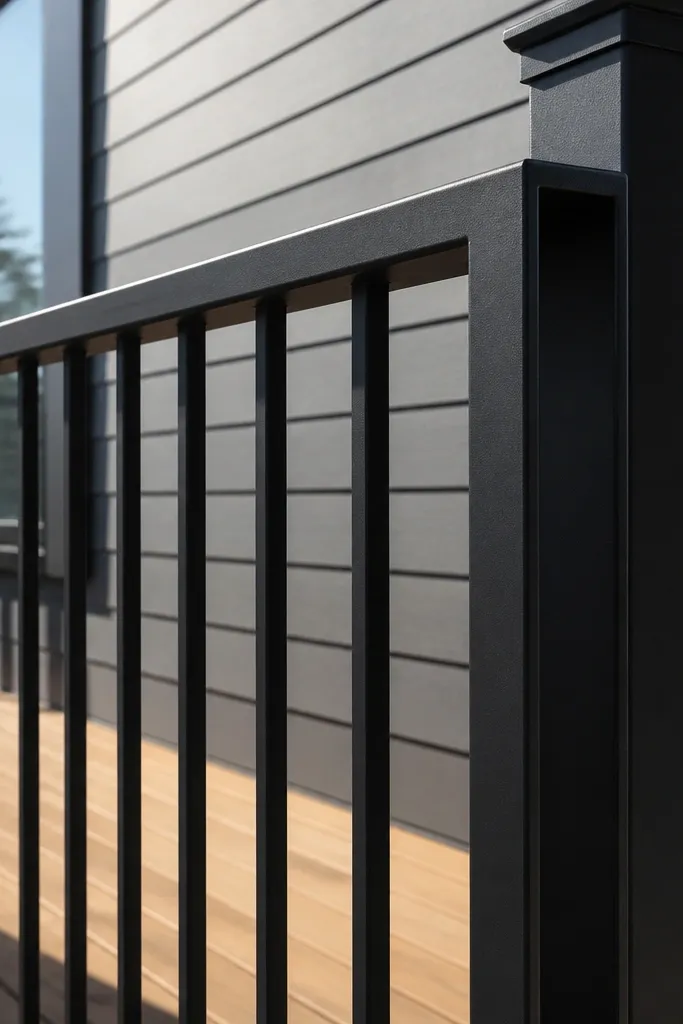
This is the “less hardware, more line” approach to modern outdoor balcony railing design. A U-channel frame keeps edges sharp and makes the railing look lighter than it is. Vertical infill rods give airflow and a clean grid without the mass of thick pickets. This works well for balconies with modern siding and simple landscaping lines.
Cut and assemble U-channel sections for top and bottom rails, then install end posts plumb. Attach vertical rods at a uniform spacing using pre-measured brackets or drilled holes in the rails. Tighten everything while the frame is held level, then paint with a metal primer and exterior-rated finish or powder coat. After curing, check for sharp edges and cover any cut ends with end caps.
Editor's noteUse a single spacer plate for rod spacing — it prevents gradual drift over long runs.
Skip thisDon’t rely on flexible brackets — they bow and the vertical lines look crooked.
12. Charcoal horizontal slats with vertical side fins
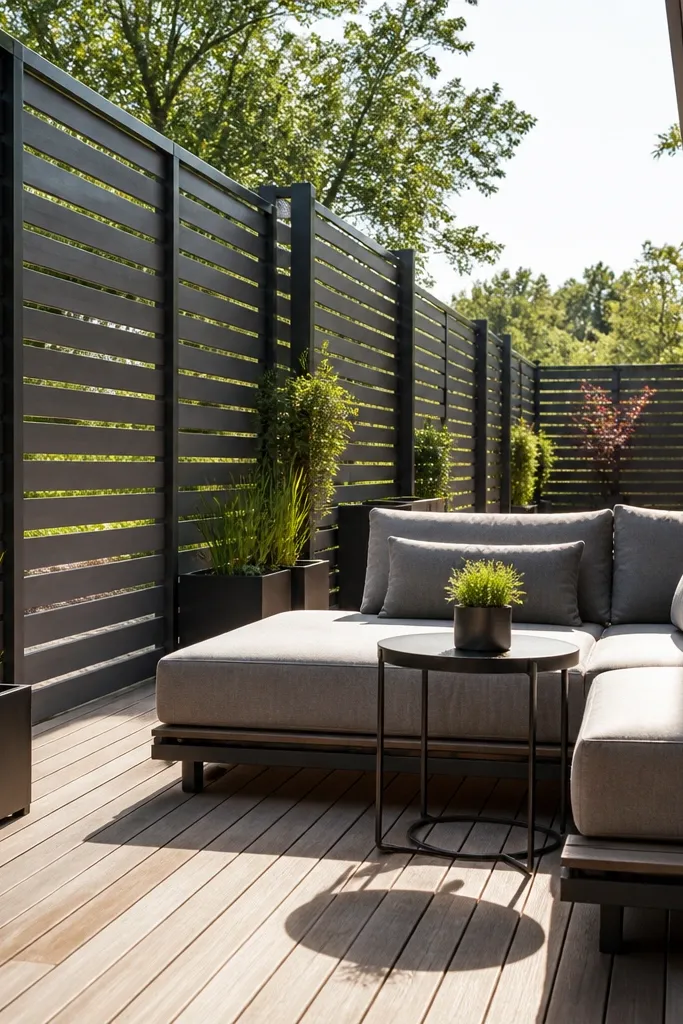
Horizontal slats do the heavy lifting, but the vertical side fins add a modern “architectural” rhythm. The fins break up the long line so it doesn’t look flat, especially on wide balconies. Use charcoal metal slats or sealed exterior wood in a dark finish. This design suits balconies that need visual interest from across the yard without turning into clutter.
Install a frame with evenly spaced posts and a level top rail. Mount horizontal slats with consistent gaps using spacers, then add vertical fins as accent pieces at set intervals. Fasten fins with concealed brackets so the faces stay clean. Seal or paint the entire assembly, then inspect the fin-to-slat alignment from multiple viewing angles.
Mark fin positions with painter’s tape across the slats so your spacing stays even.
Don’t overdo the fins — too many breaks the clean modern line.
13. Powder-coated aluminum lattice panel inserts
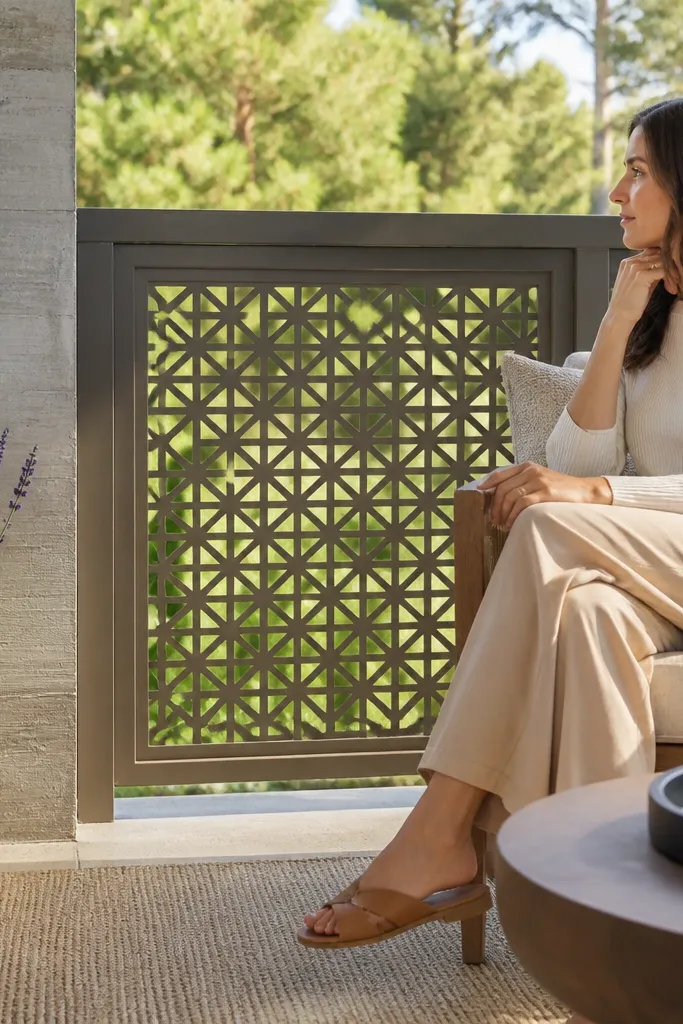
Lattice inserts give you pattern and privacy while keeping the railing light. The modern look comes from using clean, geometric lattice and powder-coated aluminum in a flat color like bronze-gray or matte black. This works well for balconies where you want airflow but also want to soften the hard lines of concrete or brick. It’s also a good option when you want a DIY-friendly build that doesn’t require glass fabrication.
Build a basic rectangular frame using aluminum or steel rails and posts. Cut lattice panels to fit each bay with a small clearance for expansion. Secure panels using screws through the frame with rubber gaskets or exterior sealant so the metal doesn’t touch directly. Finish by touching up any cut edges and checking that panel faces sit flush and square.
Editor's noteUse pre-cut panel sizes and plan your bays around them so you avoid awkward trimming.
Skip thisDon’t mount lattice without clearance — it will warp and rattle in heat.
14. Wood and metal top rail with hidden mounting brackets
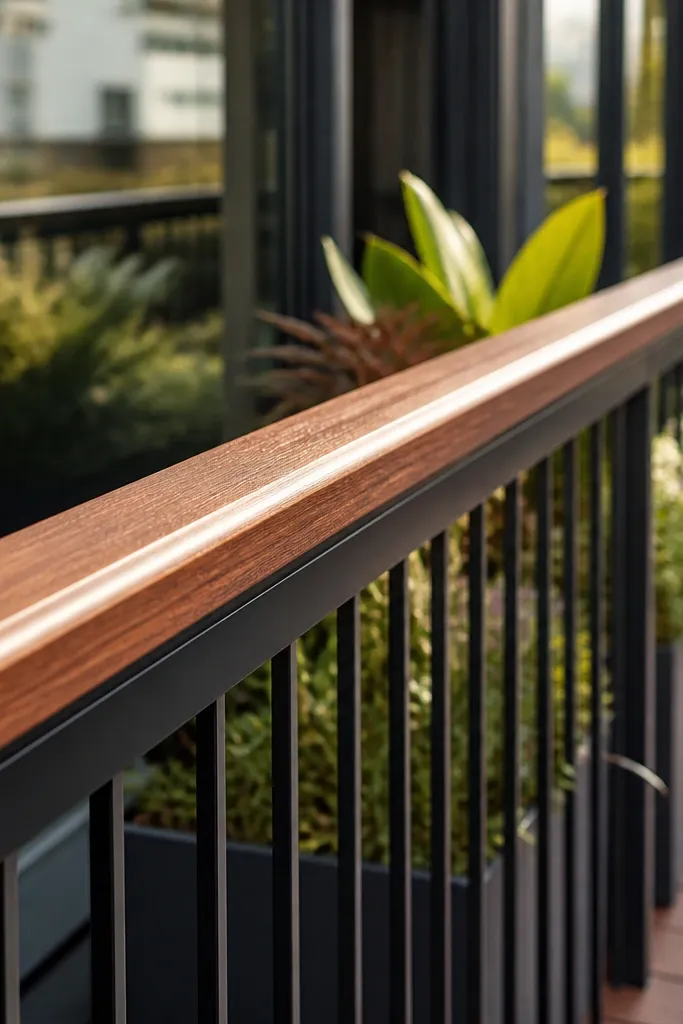
This design is about the finish details. A wood top rail feels warm and modern when it sits over a dark metal frame with hidden brackets underneath. The infill can be simple — vertical bars or cables — because the top rail carries the aesthetic. It’s great for balconies where you want a “designer” look without complicated patterns.
Choose a top rail design that spans the bay without visible hardware — then install the metal frame first. Mount hidden brackets to the metal using stainless hardware, then attach the wood top rail over them. Pre-drill the wood and countersink screw heads so nothing shows on top. Seal the wood with an exterior system and verify the rail has slight drainage so water doesn’t pool at ends.
Editor's noteIf water pools at the ends, you’ll get dark staining — add small end drip features before sealing.
Skip thisDon’t use exposed screws on the top — they collect water and look messy fast.
15. Clear polycarbonate panels with a slim black frame
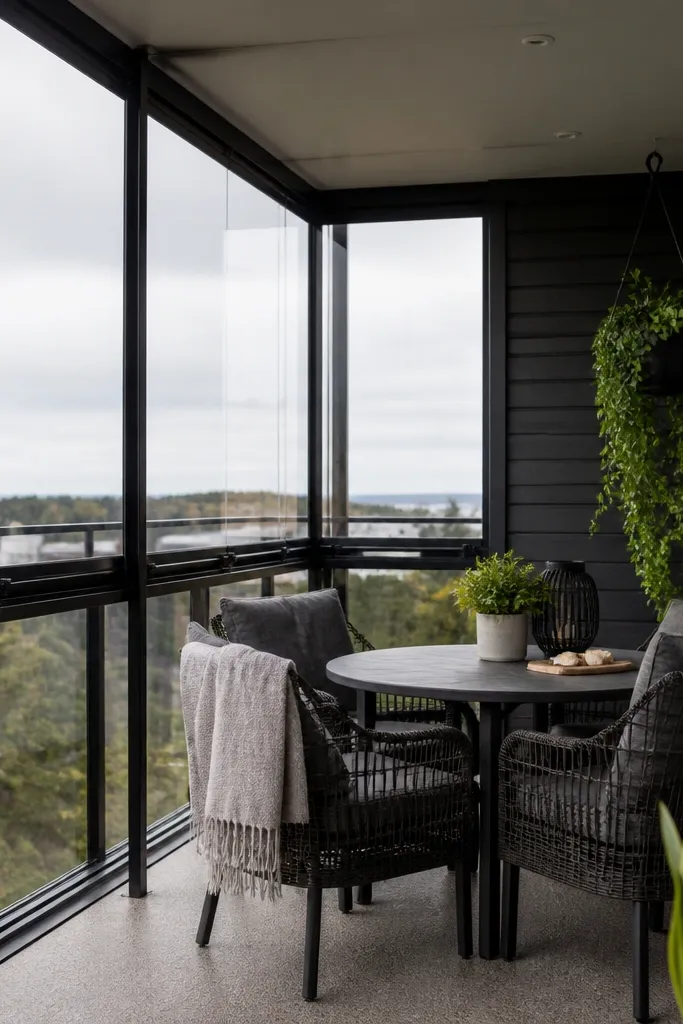
Polycarbonate gives you the look of glass with less weight and easier DIY installation. A slim black frame keeps it modern and prevents the panels from looking like a temporary storm cover. This is a smart choice for covered balconies where you still want wind and splash protection but don’t want heavy glass work. It also photographs well because the lines stay straight and the panel surface stays clear.
Measure each bay and cut polycarbonate panels with a fine-tooth blade, then deburr edges. Install a slim frame with top and bottom channels, then insert panels with the correct gasket strips so they don’t scrape or crack. Leave expansion gaps at edges so the panel can move with temperature changes. Secure the top trim and check for alignment, then clean the surface to remove any dust before final tightening.
Editor's noteUse the manufacturer’s recommended gasket thickness — it prevents rattling and stress points.
Skip thisDon’t overtighten screws — polycarbonate can crack at stress points.
16. Terracotta slat accents on a neutral railing body
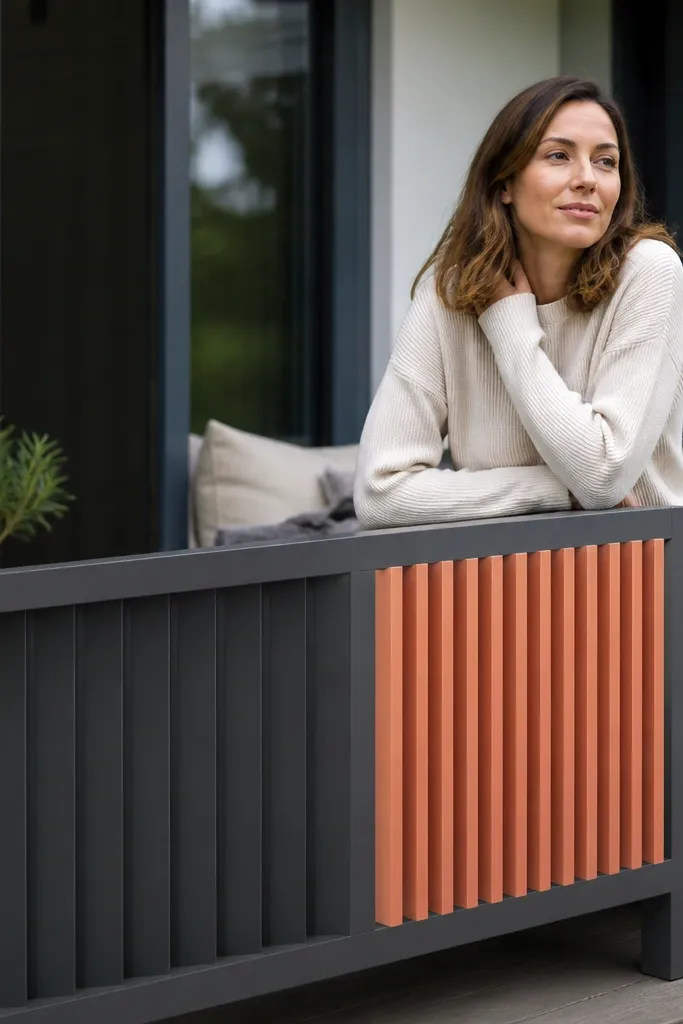
Color blocking can look modern if you keep it controlled. Use a neutral metal railing body (matte black or light gray) and add terracotta slat accents in one or two bays. The warmth of terracotta brings the balcony to life in photos without turning the whole railing into a loud pattern. This style works best when your outdoor space already has warm tones like terracotta pots, tan cushions, or natural stone.
Install the neutral railing frame and infill first so your base is straight and level. Decide which bays get terracotta slat accents, then cut slats to the exact bay width and height. Mount accents with the same spacing as the rest of the railing so it reads intentional. Seal terracotta slats or use exterior-rated composite slats, then finish with a protective top coat.
Editor's noteMatch the slat thickness to the rest of your visual hardware so the accents don’t look pasted on.
Skip thisDon’t add color accents in every bay — it looks busy, not modern.
17. Stone-gray composite privacy panels with narrow gaps
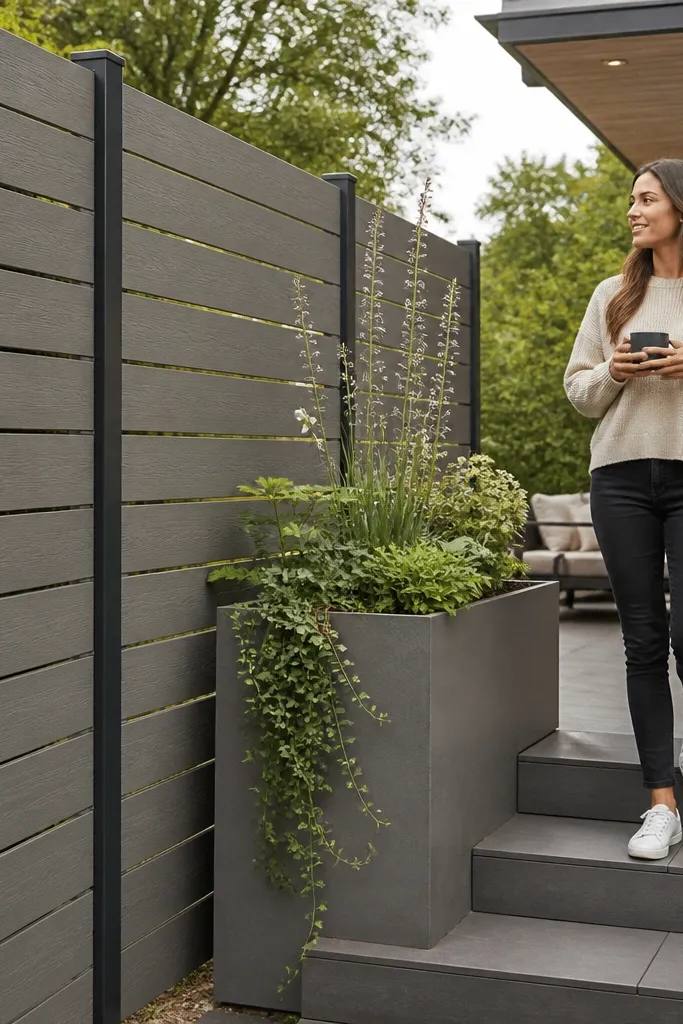
If you want privacy but still want modern outdoor balcony railing design, use composite panels with narrow, consistent gaps. The stone-gray finish looks clean and hides scuffs better than glossy paint. This design is photogenic because it gives a smooth, uniform surface with a repeating slit pattern. It suits balconies facing busy streets where you need more screening than cables provide.
Build a frame with posts and top/bottom rails, then cut composite panel sections to fit each bay. Mark and cut narrow vertical gaps with a guide so each opening is the same width. Fasten panels using exterior screws and gaskets where needed to reduce vibration. Apply a matching exterior finish or use color-through composite if your product requires no painting, then check that panels sit flush and square.
Editor's noteDry-fit panels and mark any bow before fastening so you don’t lock in a twist.
Skip thisDon’t use wide random gaps — the pattern loses the modern, designed look.
18. Stainless picket railing with brushed finish
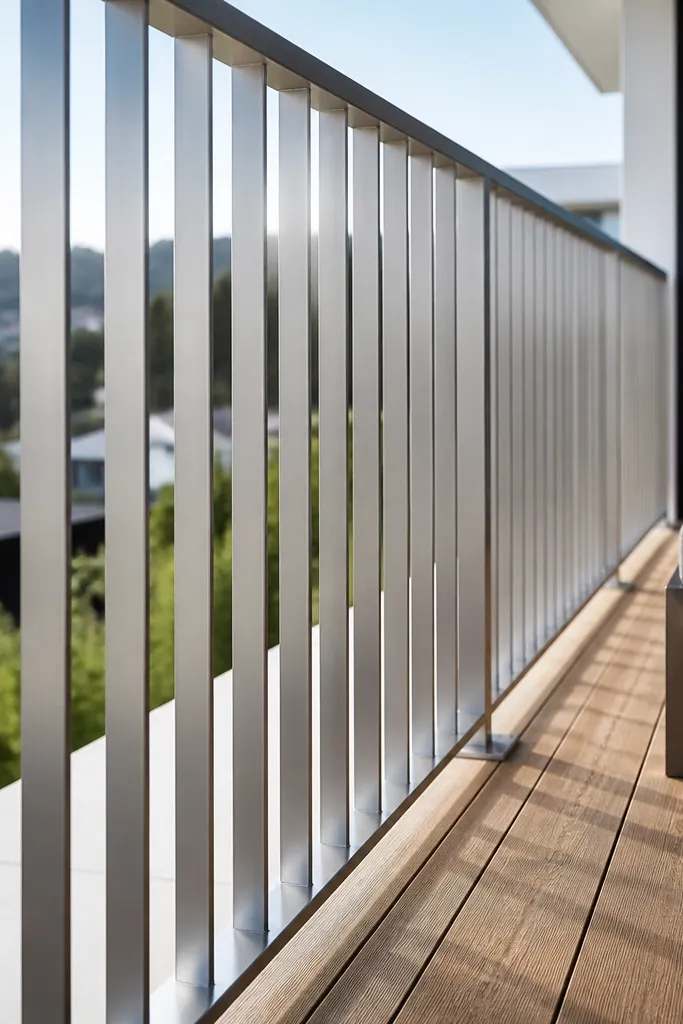
Brushed stainless pickets feel modern because the finish is subtle and the lines are precise. It’s also durable and doesn’t need paint touch-ups like powder-coated surfaces. Keep the pickets slim and spacing uniform so it reads like a clean fence, not a tangled bundle. This style is ideal for balconies with contemporary architecture and minimal landscaping clutter.
Choose brushed stainless pickets and a top rail that matches thickness and color. Install end posts and bottom anchoring first, then attach top rail to lock alignment. Mount pickets using a spacer jig that sets both gap and alignment. Secure with stainless hardware and check level and plumb across the full run before you tighten final fasteners.
Editor's noteUse a jig spacer made from scrap metal — it keeps gaps identical even when you’re tired.
Skip thisDon’t mix brushed and polished pieces — the mismatch shows in harsh light.
19. Black horizontal slat railing with a frosted privacy insert
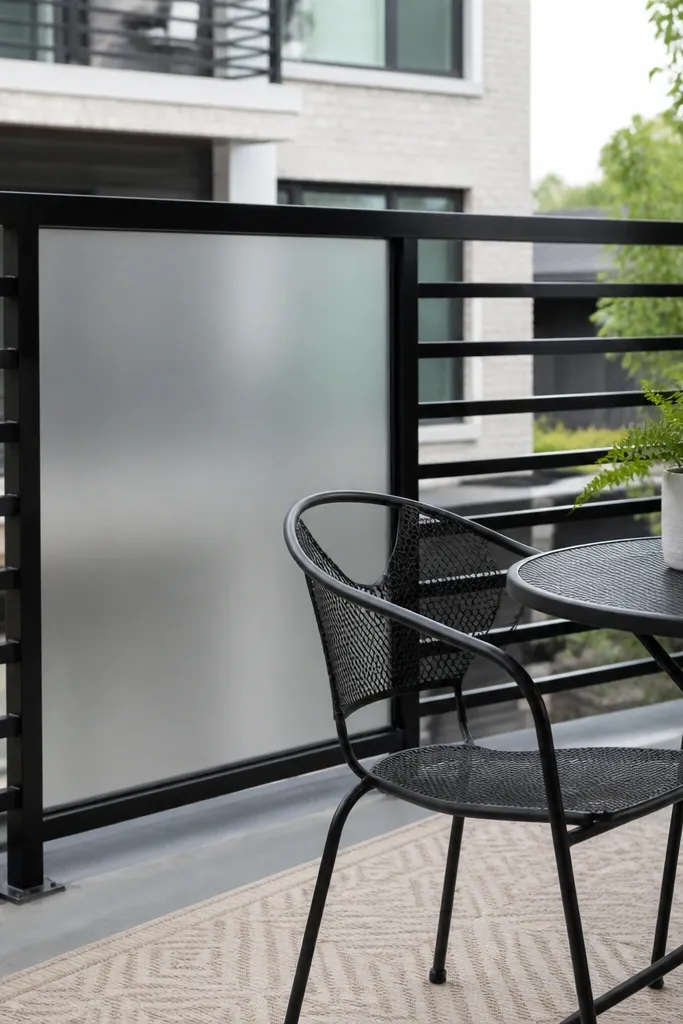
This design adds privacy where you need it without making the entire railing opaque. The horizontal slats keep the modern lines, while a frosted insert creates a soft block of privacy that still looks stylish. Frosted panels also hide fingerprints better than clear surfaces, which helps the railing look clean longer. It suits balconies near neighbors or high-visibility walkways where you want targeted screening.
Install the slat frame and keep your slat spacing consistent across the run. Pick one bay for the frosted insert and frame an opening with top and bottom rails sized to the panel. Mount the frosted panel using glazing gaskets so it doesn’t rattle and so edges stay protected. Seal any frame joints, then wipe the frosted surface clean before final inspection.
Plan the insert height around eye level so privacy is actually useful, not decorative.
Don’t place the insert off-center in a bay — it looks accidental in photos.
20. Matte olive green metal railing with vertical slats
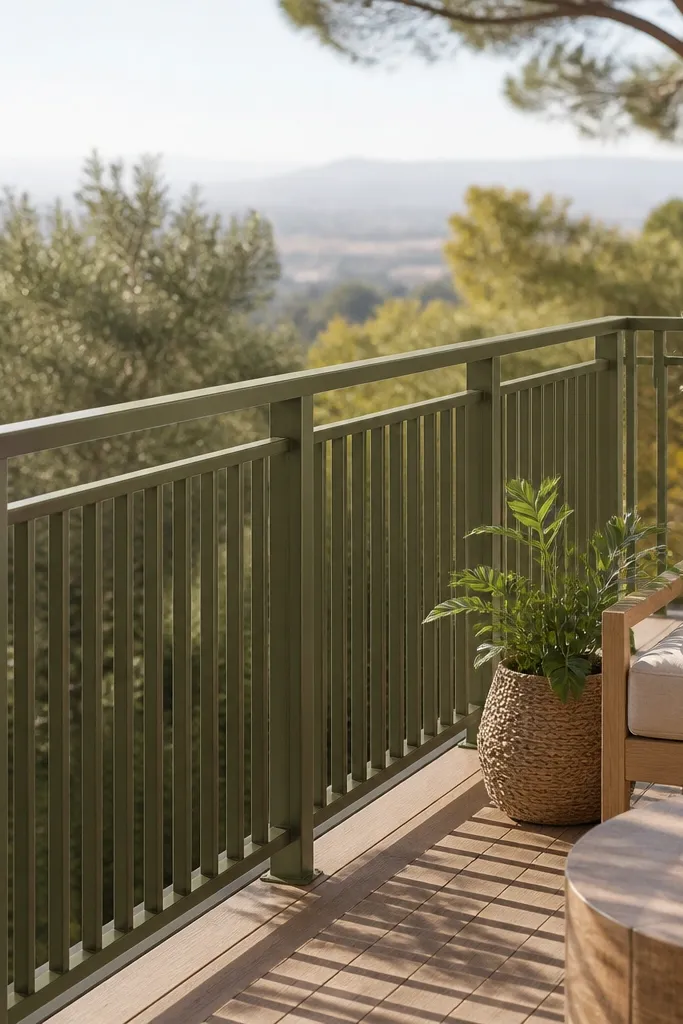
Olive green feels modern when it’s matte and paired with simple geometry. Vertical slats in matte olive look great with greenery, wood decking, and neutral outdoor fabrics. The color gives warmth without the heaviness of dark brown, and it hides minor scuffs better than light colors. This style works for balconies that want a softer look while still looking architected.
Pick powder-coated or properly primed and painted metal with a matte finish, then install end posts and a level top rail. Mount vertical slats with identical spacers, keeping the spacing tight enough to look uniform from a distance. Use stainless fasteners and cover any cut edges with touch-up paint. After installation, check for consistent height across slats and re-tighten any hardware that settled as you worked.
Editor's noteUse a scrap spacer set for both width and thickness so your slats don’t drift during fastening.
Skip thisDon’t choose glossy paint — it looks dated and shows glare in afternoon sun.



