
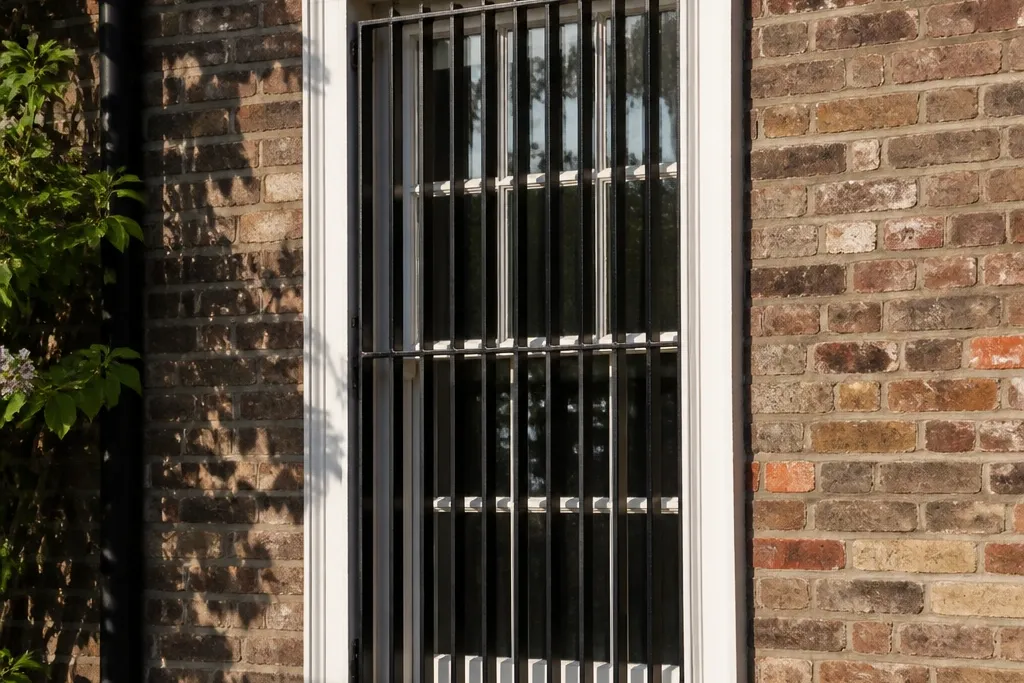

1. Matte Black Slim Vertical Rails with Three Horizontal Steps
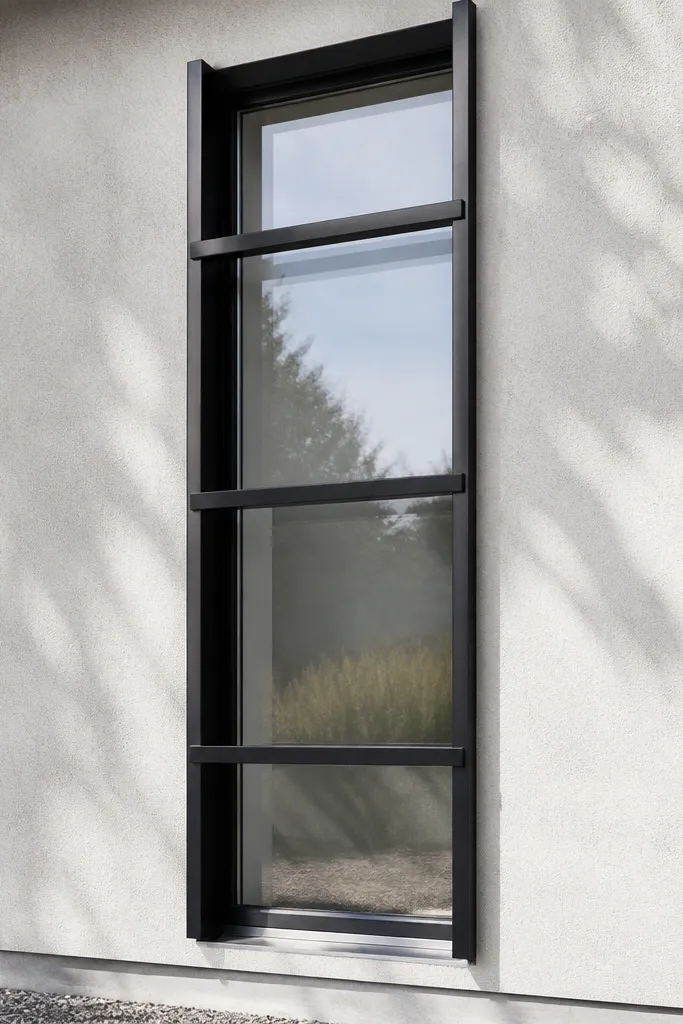
This design reads modern because it keeps most of the window open and repeats only a few lines. Two tall vertical rails create a clean spine, then three horizontal bars act like steps that visually anchor the panel. The look is especially good on windows with slim trim or a flat facade where you want the grill to match the geometry. Use matte black so the bars look flat and crisp instead of shiny and busy. It’s a great pick for bedrooms and stair landing windows where you want privacy without turning the window into a cage.
Start by drawing the panel layout on paper using your measured window width and height. Install four corner posts or a perimeter frame first, then weld two vertical rails centered with equal gaps from the sides. Add three horizontal bars across the rails at evenly spaced heights, keeping the top and bottom margins equal so it looks intentional. Finish by capping every cut bar end and sanding welds smooth before coating.
Use a square jig or a scrap MDF template to hold the rails perfectly parallel while you tack-weld.
Avoid mixing bar spacing on the top and bottom rows — it makes the whole panel look homemade.
2. Charcoal Flat-Bar Grid with 100mm Square Openings
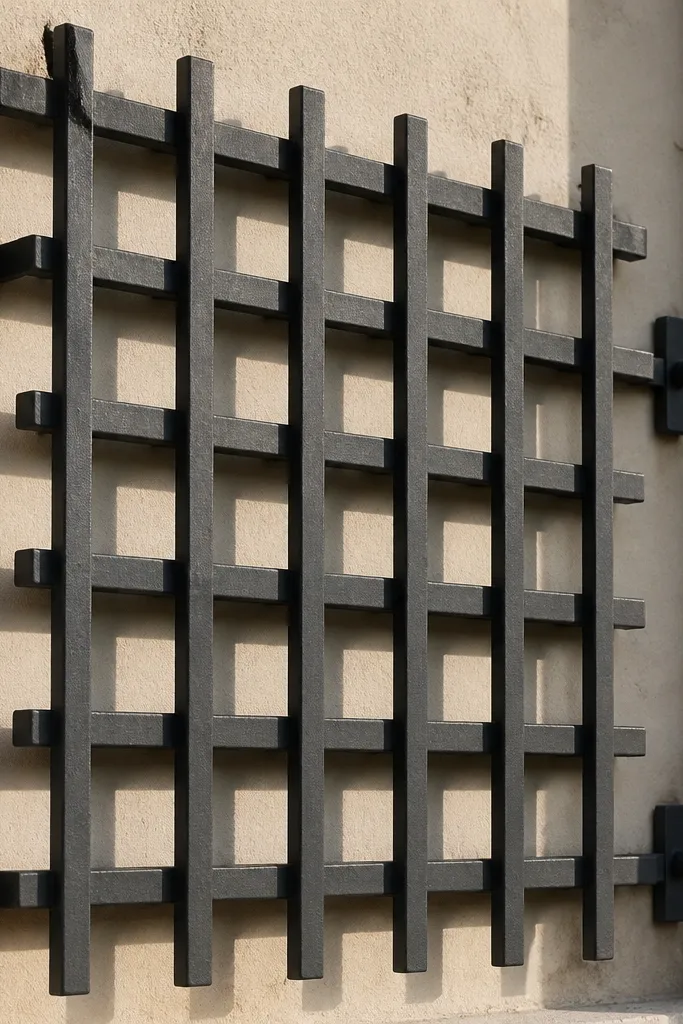
A grid is the easiest way to get modern minimalist window grill design, because the pattern is predictable and the silhouette stays clean. This version uses flat bar so the lines look crisp and not round and bulky. Aim for square openings around 100mm so the grid looks balanced at street distance. Charcoal hides minor weld texture better than pure black, which matters if you’re learning. This is a strong choice for front-facing windows where you want the grill to look like a designed architectural element.
Measure the clear opening and decide on your target opening size — for example 100mm squares. Subtract bar thickness from the opening width and height to calculate how many bays you can fit cleanly. Weld a perimeter frame, then mark and tack the flat bars in a grid, checking squareness after the first row. Once everything is aligned, weld fully, grind welds, cap ends, and powder coat or paint in a matte charcoal tone.
Dry-fit the grid with clamps before any final welds so you can fix one misalignment early.
Don’t choose random spacing because it “looks okay up close” — the grid will look off from the sidewalk.
3. Bronze Frame Border with Center Diamond Lite Motif
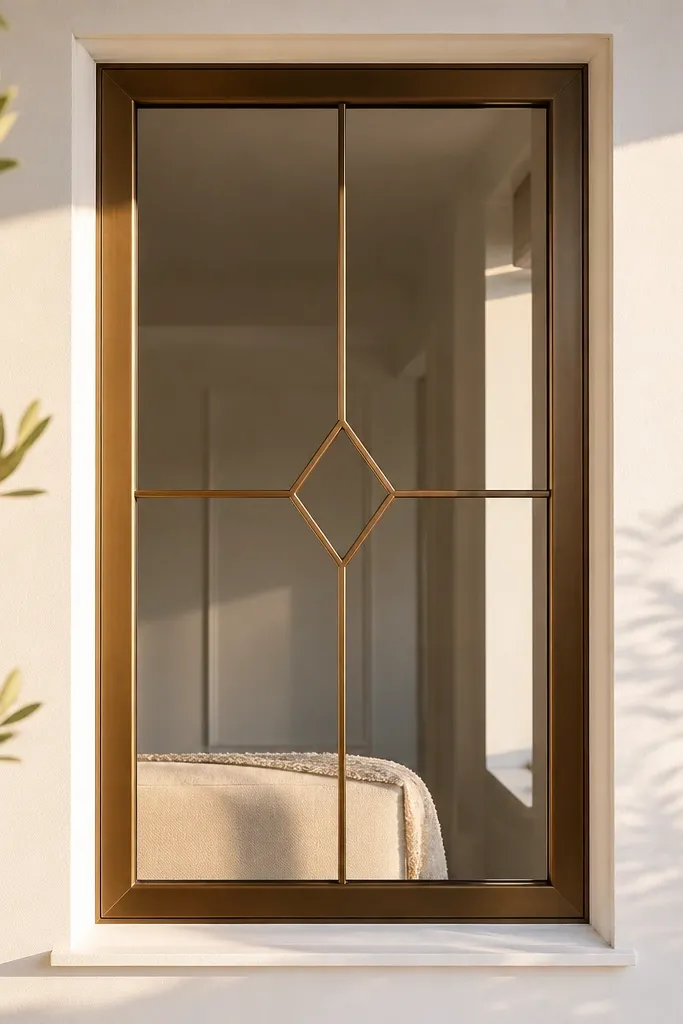
This one stays minimalist by using a simple border and only a tiny decorative move in the center. The diamond motif adds visual interest without cluttering the whole window. Bronze tones look warmer than black and look great against white, cream, and light gray facades. It also photographs well because the warm metal catches light differently than flat matte paint. This design works for living rooms and entry windows where you want a little personality but still clean lines.
Build a perimeter frame with flat bar or square bar cut to exact window dimensions. Inside the frame, mark the center and add a diamond using two crossed bars cut to the same length. Keep the diamond small — roughly 25-35% of the panel height — so it stays “accent,” not a full feature. Weld, grind smooth, and make sure the diamond sits perfectly centered before coating in bronze.
Make the diamond from the same bar stock as the frame so the thickness stays consistent visually.
Don’t let the diamond touch the inner grid lines or frame — keep a clean air gap around it.
4. Matte Whitewash Iron with Thin Horizontal Bands (Modern Farmline)
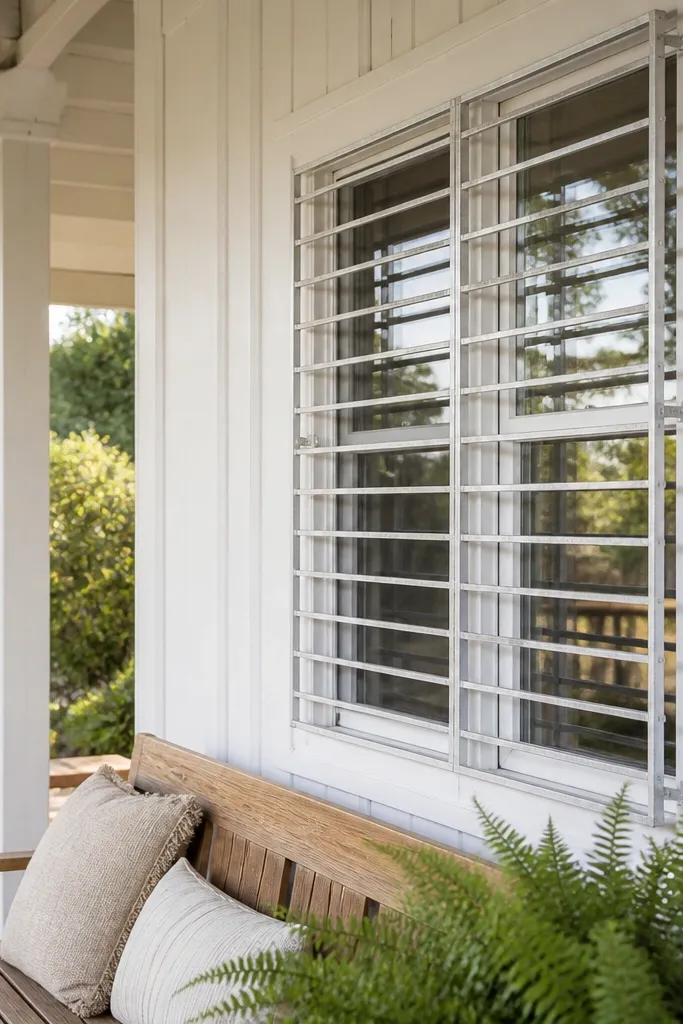
If your facade is light and you want something that still reads modern, thin horizontal bands in a washed gray finish look sharp. This style uses fewer vertical lines so the window feels wider and brighter. The trick is keeping the bands thin and evenly spaced, with a subtle perimeter border to keep it framed. It looks great on cottages, older homes, and smooth stucco walls where black can feel too harsh. It’s also a good choice if you want privacy but still want strong outward visibility.
Start with a perimeter border frame, then plan 3-6 horizontal bands based on your window height. Use spacer marks so every band sits at equal intervals and stays parallel. Tack-weld the first band, check flatness with a straightedge, then tack the rest. Once aligned, weld fully, grind carefully, and apply a primer plus a topcoat that matches the washed gray look you want.
Use a straightedge on a flat surface during tacking so you don’t lock in a slight wave.
Avoid thick bands — they make the window feel boxed in, especially with light trim.
5. Black Rectangular Frame with Two Side Cantilever Panels

This design looks modern because it uses asymmetry in a controlled way: two side cantilever panels that mirror each other, plus a clean outer frame. The open center keeps the view airy, while the side panels add structure and a strong silhouette. Matte black makes the negative space stand out, and the border keeps it from looking like random bars. It’s a good fit for tall narrow windows where you want vertical emphasis without a full grid. The look also hides small wall irregularities better than super-symmetrical patterns.
Build the outer rectangle to your window dimensions, then create two side panels using vertical bars welded to short horizontal supports. Position the side panels with a consistent gap from the border so the center opening stays clean. Weld the side panels to the outer frame, then add two or three light horizontal bars only if you need extra rigidity. Grind, cap ends, and coat in matte black.
Clamp the side panels to the outer frame before welding and re-check the parallel gap using tape measures.
Don’t add too many cross bars in the center — that kills the airy look.
6. Satin Steel Grid with Rounded Corners Frame

Rounded corners soften the hard geometry and make the grill feel modern instead of industrial. This version uses a satin steel finish and a small grid so the window doesn’t look heavy. The rounded frame corners read more architectural, especially on doors and windows with rounded trim details. Use satin steel if you have warm-toned brick or wood siding; it looks less stark than black. It’s also easier to keep visually clean because light dust doesn’t show as sharply as on matte black.
Start by making a perimeter frame with a rounded-corner method using pre-bent sections or careful cut-and-weld pieces. Inside, mark a tight grid using a consistent opening size like 90mm. Weld the grid to the frame, ensuring the corners stay smooth and the bars don’t distort. After grinding and smoothing, coat with a satin metal finish rated for outdoor exposure.
If you’re rounding corners with welded segments, grind the transitions before coating so the curve looks continuous.
Don’t leave sharp weld ridges on the rounded corners — they catch light and look messy.
7. Black Vertical Ladder Bars with Centerline Crossbar
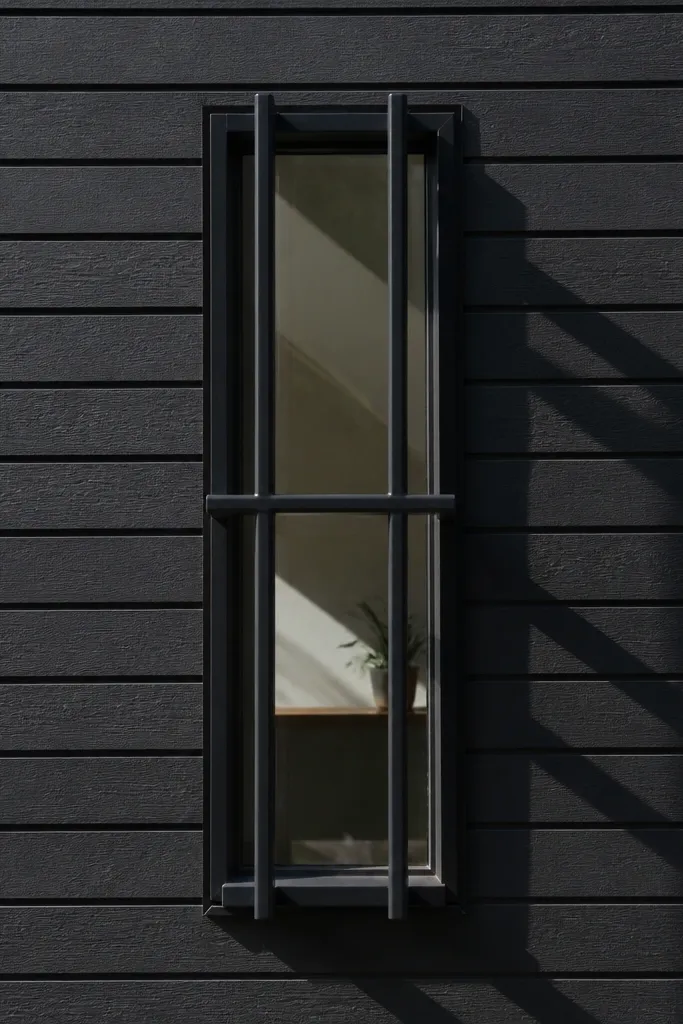
This design is minimalist because it uses vertical “ladder” bars and one single horizontal crossbar for balance. The crossbar sits at the centerline so the panel looks symmetrical and clean. It’s a strong choice for modern minimalist window grill design when you want privacy but don’t want a full grid. Keep the bars evenly spaced and use a thick enough bar to look solid. Matte black keeps it crisp and makes the bars look like graphic lines.
Editor's noteUse identical spacers for every vertical gap so the pattern doesn’t drift as you go.
Measure your window and decide how many vertical bars fit with your target spacing (again, 90-120mm looks right). Weld a perimeter frame, then tack the vertical bars between the sides using a spacing jig or spacers. Add the center horizontal bar by marking the exact mid-height and clamping it before welding. Grind welds smooth, cap ends, then finish with matte black powder coating or outdoor paint system.
Skip thisAvoid a crossbar that’s not centered — a tiny offset reads very obvious in photos.
8. Matte Graphite Grid with Slim Diagonal Braces (No Full X)
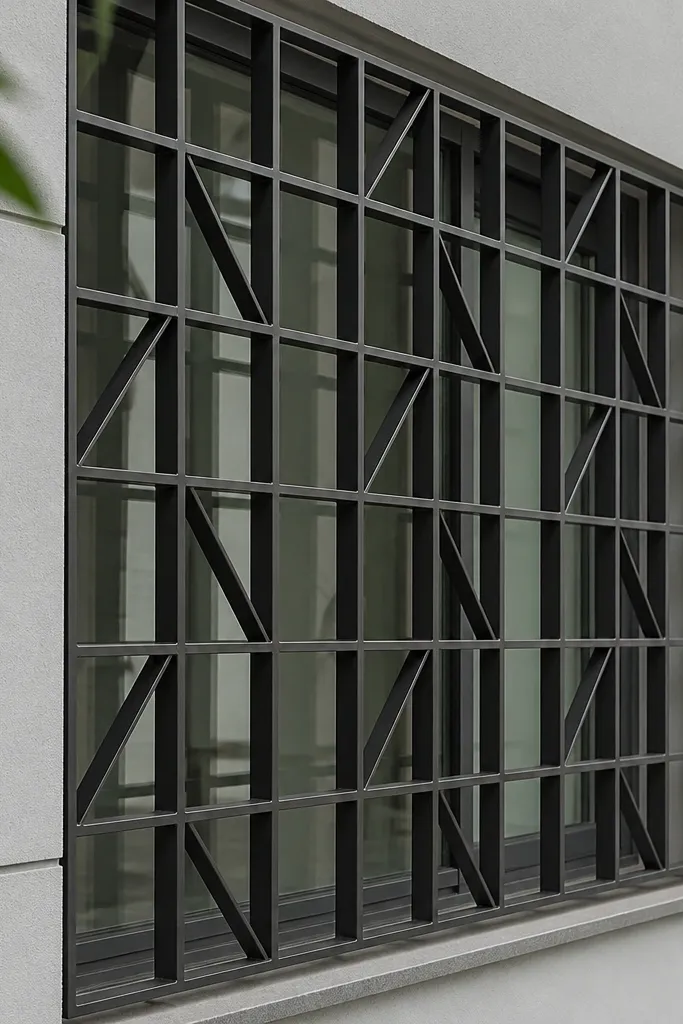
This version keeps the grid but adds diagonal braces in each bay for a modern engineered look. The key is not doing a full X across the whole window; instead, use short diagonals so it stays light and minimalist. Matte graphite is a smart color because it looks expensive but forgives minor imperfections. The diagonal lines make the grill look more dynamic and less like a basic fence. This is great for larger windows where a plain grid can feel too flat.
Build the perimeter frame, then install the grid lines first using consistent spacing. For each bay, add one diagonal brace bar from corner to corner but keep it short enough that it doesn’t crowd the next bay. Tack, check alignment across multiple bays, then weld. Finish by grinding, capping ends, and coating in matte graphite.
Cut diagonals using a template so every angle matches — one mismatch ruins the pattern rhythm.
Don’t use too-thick diagonal bars — they overpower the minimalist grid.
9. Bronze Two-Column Frame with Perforated Dot Insert
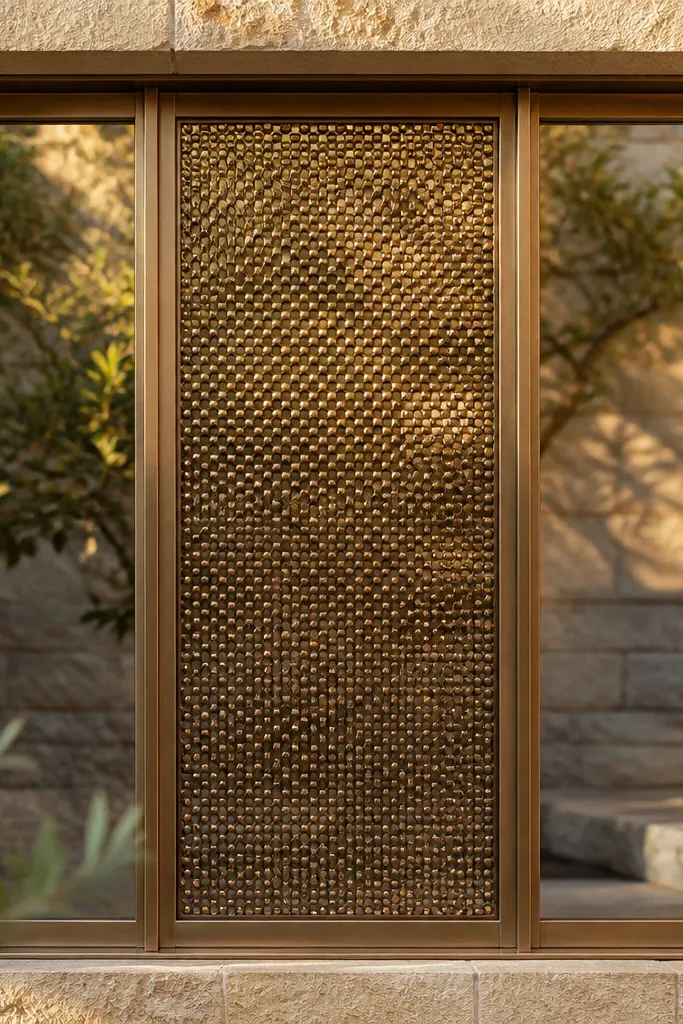
A dot insert is a clean way to add texture without turning the grill into a decorative mess. This design uses two vertical columns and a perimeter frame, then includes a small perforated panel or welded dot cluster in the center. Bronze makes the dots look intentional, like a modern lantern detail. It’s photogenic because the dots create a subtle shadow pattern. This works on front windows where you want a softer privacy effect and a more design-forward facade.
Start with a perimeter frame and weld two vertical columns centered. Create a dot insert panel: either a perforated sheet cut to fit the center area or a welded arrangement of small round bars. Clamp the insert so it stays square, then tack weld at corners and along edges. Grind sharp spots, cap any exposed bar ends, and powder coat in bronze so the dots keep their crisp edges.
Keep the dot insert height around 40-50% of the window height so it reads as an accent.
Avoid random dot spacing — keep the pattern grid-like or it looks messy.
10. Black Flat-Bar Border with Center Horizontal Slat Band
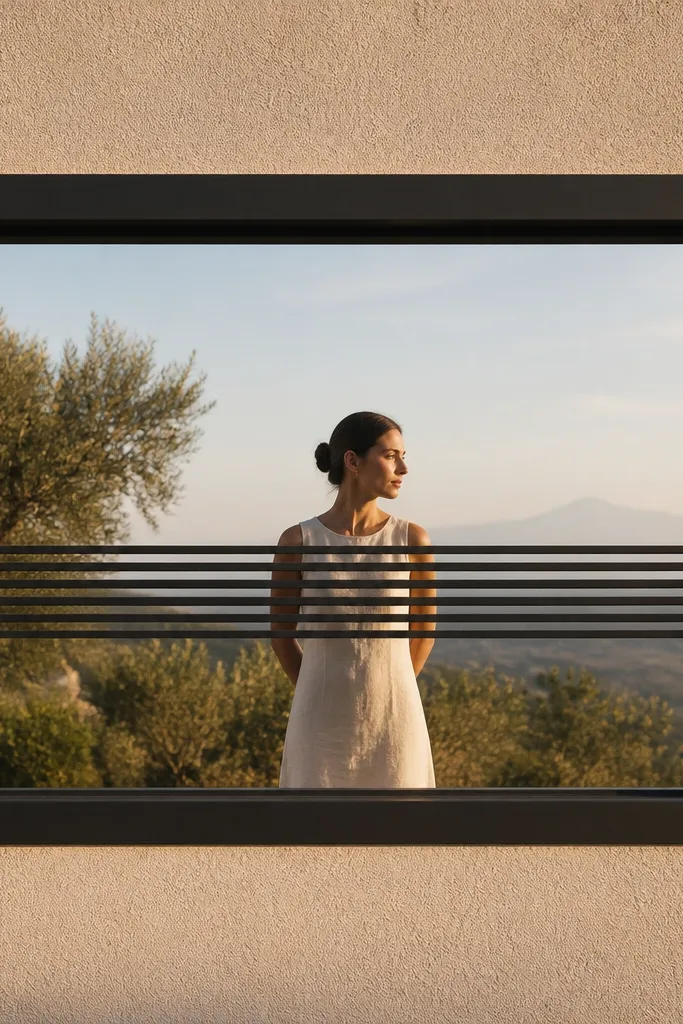
This is a minimalist statement: a thick border and a single center band of horizontal slats. The rest stays open, so the window doesn’t look overcrowded. The band adds privacy and visual weight exactly where the eye lands. Matte black makes it look like modern metalwork rather than a DIY cage. It suits large windows and wide facades where you want a graphic, horizontal emphasis. The shape also plays nicely with modern siding and smooth plaster walls.
Build a rectangular border frame using flat bar sized to your desired thickness look. Inside, mark the center band zone and weld three to five horizontal slats across the inner opening. Keep consistent spacing between slats, and ensure the band edges sit parallel to the border. Weld everything, grind welds smooth, cap ends, then coat in matte black.
Use a spacer strip for slat spacing so the band looks perfectly even.
Don’t let the border bar thickness vary — even small differences show in photos.
11. Charcoal Open Frame with Four Corner Squares
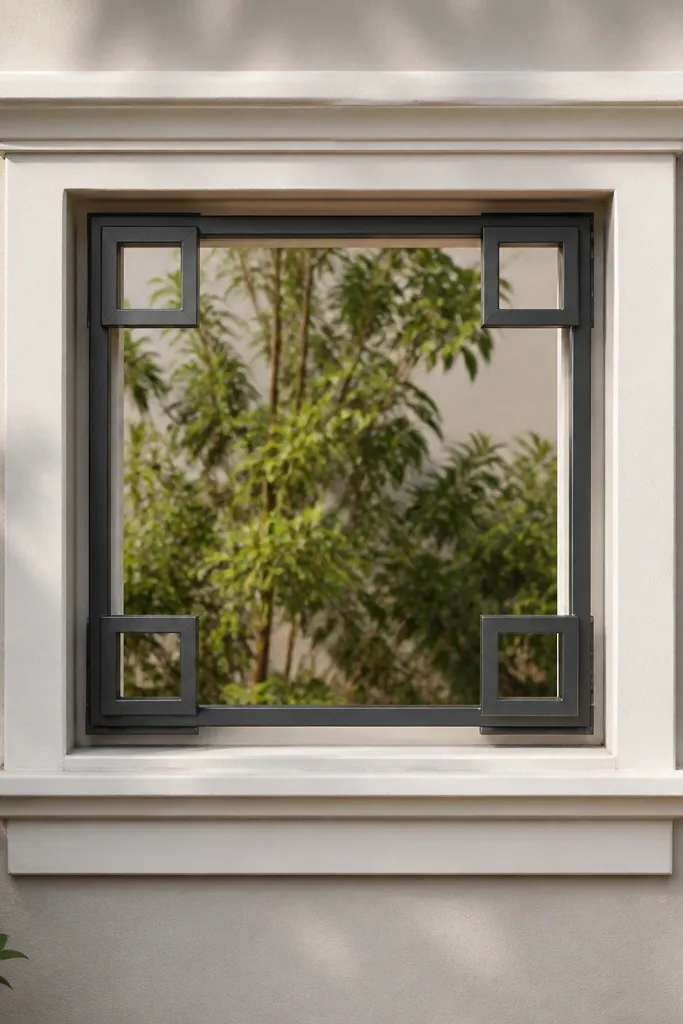
This design is minimalist because it uses only corner anchors, leaving the center completely open. Four corner squares give the eye reference points, so the grill still reads structured. Charcoal looks clean and modern against light walls, and the open center keeps the window feeling airy. It’s a good option for side windows where you want a design element without blocking the view too much. The silhouette is very photogenic because the grill looks like a frame with subtle geometry.
Editor's noteMeasure corner block size as a percentage of window height (around 12-18%) to keep proportions right.
Start with an outer perimeter frame sized to the window. Then weld four small square “corner blocks” — one at each inner corner — using short lengths of bar. Leave the center open with no additional lines so the look stays clean. Grind and cap ends, then coat in charcoal matte for a flat, architectural finish.
Skip thisAvoid adding extra bars “just for strength” — strength is handled by thicker border framing and solid mounting.
12. Matte Black Perimeter Frame with Centered Vertical Bar Trio
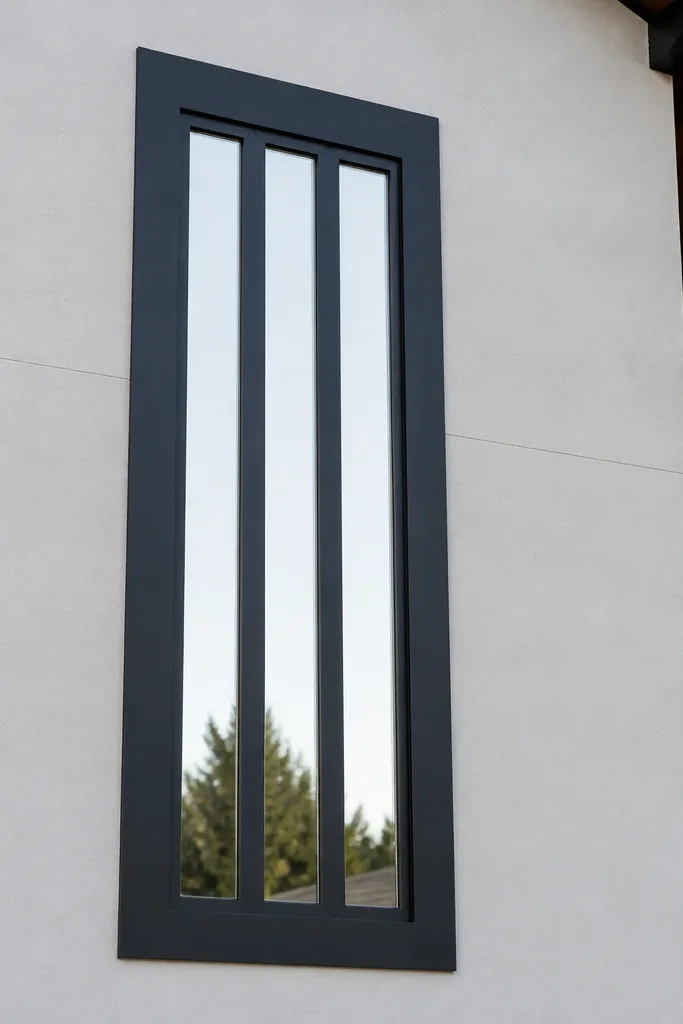
Three centered vertical bars are a minimalist way to add privacy while keeping the window open. The perimeter frame makes the whole panel look finished, and the trio gives a clear graphic rhythm. Matte black keeps it sharp and modern, and it looks great on tall windows where vertical lines already exist in your facade. This is also a smart choice if you have decorative window trim — the grill won’t fight it because it only adds vertical accents. Great for offices, hallways, and bedrooms where you want clean curb appeal.
Build the outer frame first with straight, square cuts. Mark the center and place three vertical bars with equal spacing, then tack-weld them to the inner sides or to a hidden internal support bar. Add a small top and bottom cross tie only if needed for rigidity, keeping the design visually simple. Grind welds smooth, cap ends, then coat in matte black.
If your window is wider than 1.2m, use a hidden center tie behind the bars so it doesn’t flex.
Avoid uneven spacing between the trio bars — it makes the pattern look casual.
13. Satin Bronze Micro-Grid with Thin Border
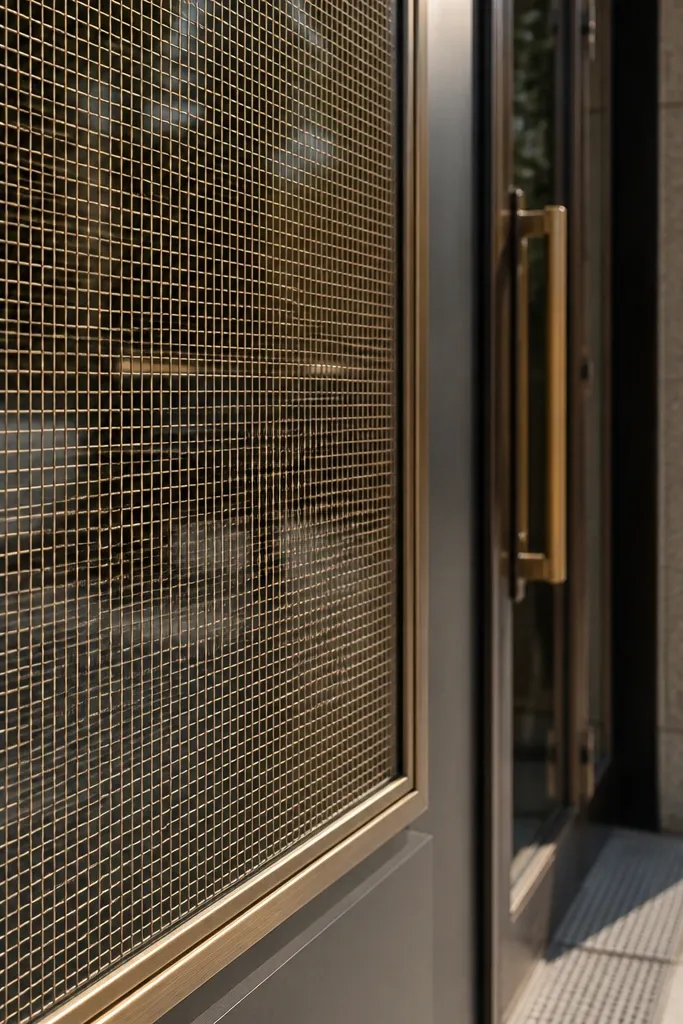
A micro-grid looks modern because the pattern is fine and controlled, not chunky. Satin bronze adds warmth without going flashy, and a thin border keeps it from looking heavy. This design is ideal for storefront-like windows or entry windows where you want privacy but still want a clear view. It’s also very photogenic because the small grid creates texture and soft shadowing. Use it when you want the grill to blend into the facade while still reading as intentional metalwork.
Choose your opening size for the micro-grid, like 60-75mm squares, based on your window scale. Weld a thin perimeter border, then mark and tack the micro grid using spacers for consistency. Weld fully, grind smooth, and check the panel for any twist by placing it on a flat surface. Finish with satin bronze powder coating so the fine lines stay crisp.
Do a quick “shadow check” by holding the panel at window height — micro-grids show misalignment in shadows.
Don’t use thick bar stock for micro-grid — it makes the pattern look like a fence.
14. Matte Black Frame with Two Horizontal Louvers (Staggered Spacing)
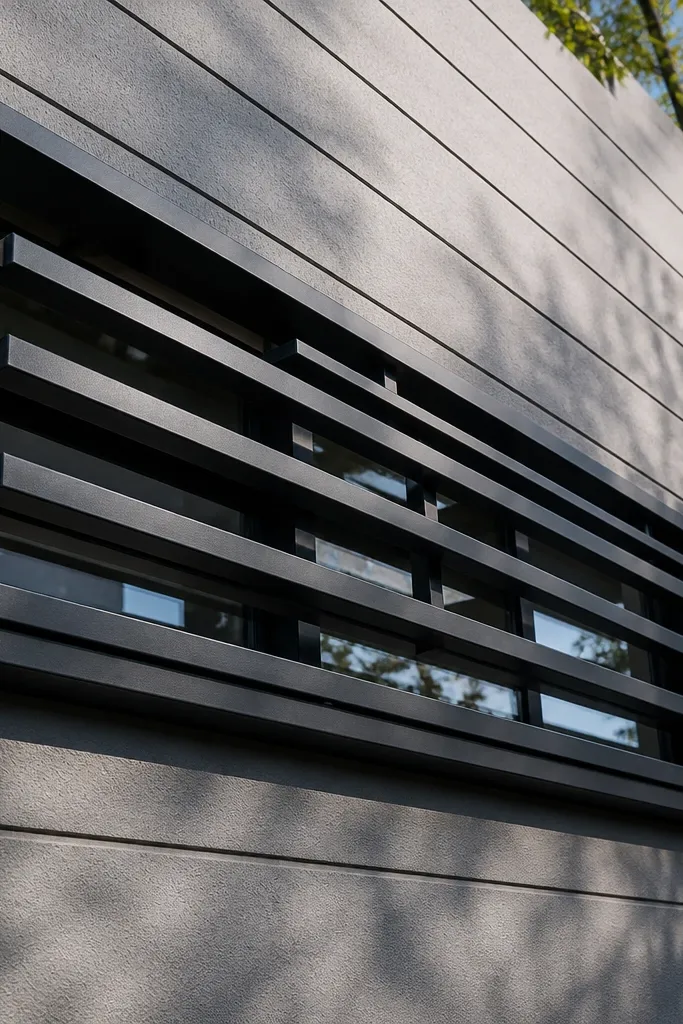
Two horizontal louver-like bars create a modern, architectural look without turning the window into a grid. The staggered spacing between the bars adds depth, and matte black keeps the silhouette clean. This design is great if you have a modern facade with strong horizontal lines, like siding boards or stone ledges. It also works for smaller windows where a full grid would overpower. The look is minimalist but still has enough structure to look deliberate from the street.
Editor's noteKeep the offset small — about 10-15mm — so it reads as a subtle louver, not a bulky step.
Start with a perimeter frame and mark two horizontal zones across the inner opening. Build the louver effect using two sets of horizontal bars that are slightly offset, creating a layered line. Tack the first set, then clamp the second set so the offset is consistent across the width. Weld, grind smooth, cap ends, and coat matte black.
Skip thisAvoid large offsets — they create shadows that look uneven and DIY.
15. Graphite Square Frame with Centered Vertical Slit and Corner Stops
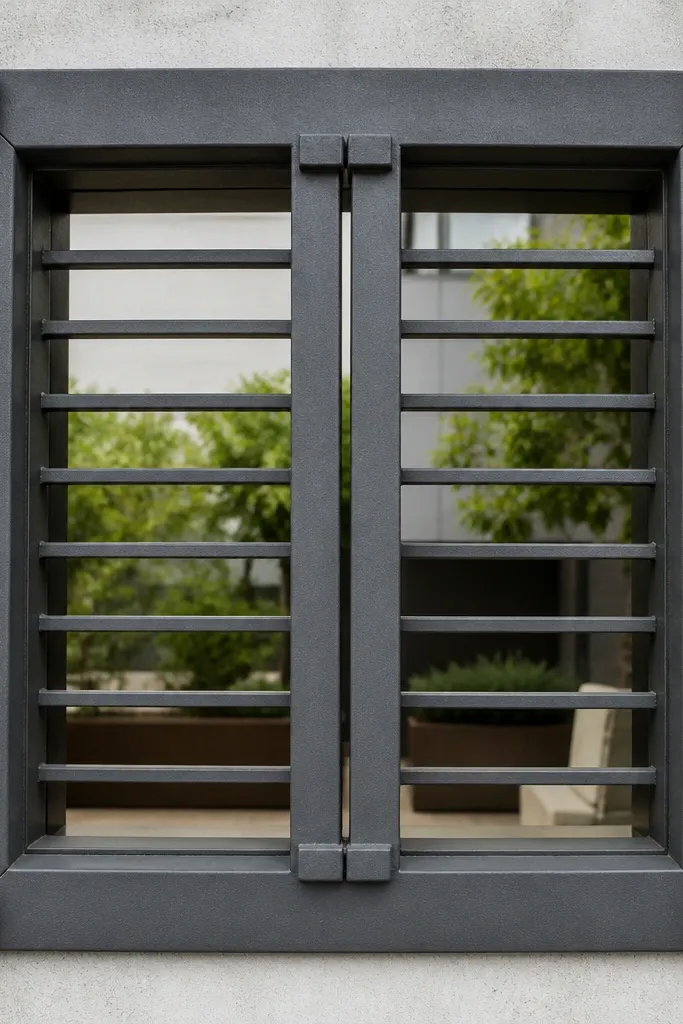
This design uses a centered vertical slit created by a gap between two bars, plus corner stops that frame the panel. It’s minimalist with a strong modern graphic, and it keeps the window visually open while still giving a clear grill shape. Graphite looks modern and hides minor texture better than pure black. This works well on tall, narrow windows because the slit echoes the vertical proportions. It’s also a good choice when you want a unique look that isn’t just a grid.
Editor's noteUse a single spacer strip for the slit gap while tacking the center bars.
Build a square inner frame using flat bar or square bar cut to your window size. Add two vertical bars close together in the center leaving a narrow gap for the “slit,” then weld small corner stop blocks at the inner corners. Make sure the slit gap is consistent top-to-bottom by measuring with a feeler gauge or spacer. Grind, cap ends, and coat in graphite matte.
Skip thisDon’t make the slit gap too wide; it stops reading as a slit and starts reading as missing bars.
16. Black Perimeter Frame with Three Stacked Center Squares
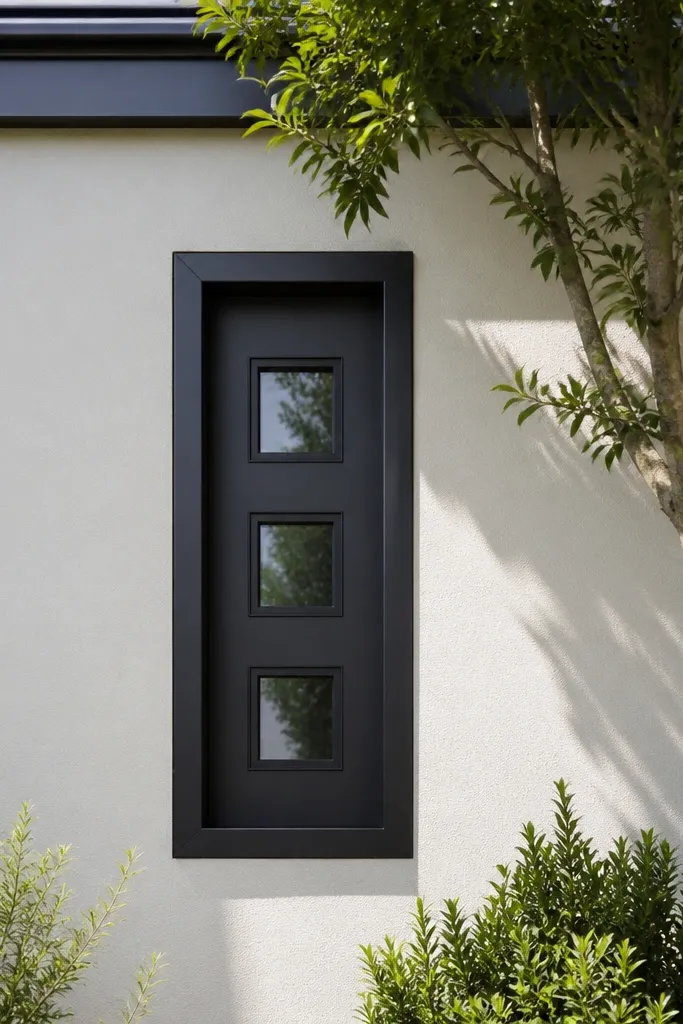
Stacked squares are a clean way to add pattern without clutter. This grill keeps a simple perimeter frame, then places three small square accents vertically in the center. The squares create a clear visual cadence that looks modern against flat siding or smooth walls. Matte black makes the squares look like graphic stamps. It’s good for medium windows where you want a little design detail but still want an open feel. The pattern also photographs well because it creates strong, straight-edged shadows.
Editor's noteMake the squares the same size and use equal spacing between them — that symmetry is what makes it look designed.
Build the outer border frame first and keep it perfectly square. Inside, mark the centerline and place three square frames or welded square blocks stacked with equal gaps. Weld each square block to the inner frame so the edges line up cleanly. Grind welds smooth, cap ends, then powder coat matte black to finish.
Skip thisAvoid mixing block sizes — the stacked pattern should feel intentional.
17. Warm Bronze Borderless Look with Hidden Back Supports
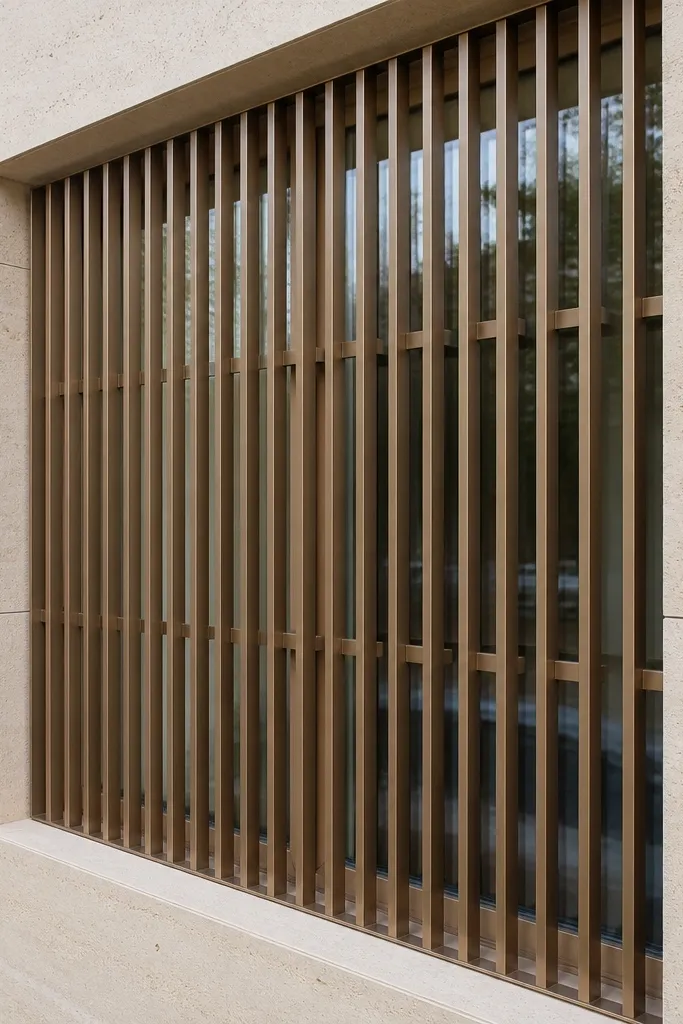
A borderless look can still be modern minimalist, but it only works if the structure is straight and rigid. This design uses a frame-like appearance created by bar alignment, while the actual border is hidden behind the bars. Warm bronze keeps it flattering and less stark than black. The front looks airy because there’s no heavy perimeter bar, but the hidden supports prevent flex. This is a smart choice for modern minimalist window grill design when you want the grill to look lighter and more “floating” against the wall.
Cut and align the main vertical and horizontal bars to your spacing plan, then build a hidden back frame using thicker supports behind them. Weld the front bars to the hidden supports so the front faces stay clean with no thick border. Use clamps and a flat surface to keep everything straight before welding. Grind only the front joints as needed, cap ends, then coat in warm bronze.
Take extra time aligning on a flat table — borderless designs show every ripple immediately.
Don’t skip hidden supports; borderless fronts flex and look sloppy fast.
18. Matte Black Rectangular Frame with Centered Crosshatch Panel (Tiny)
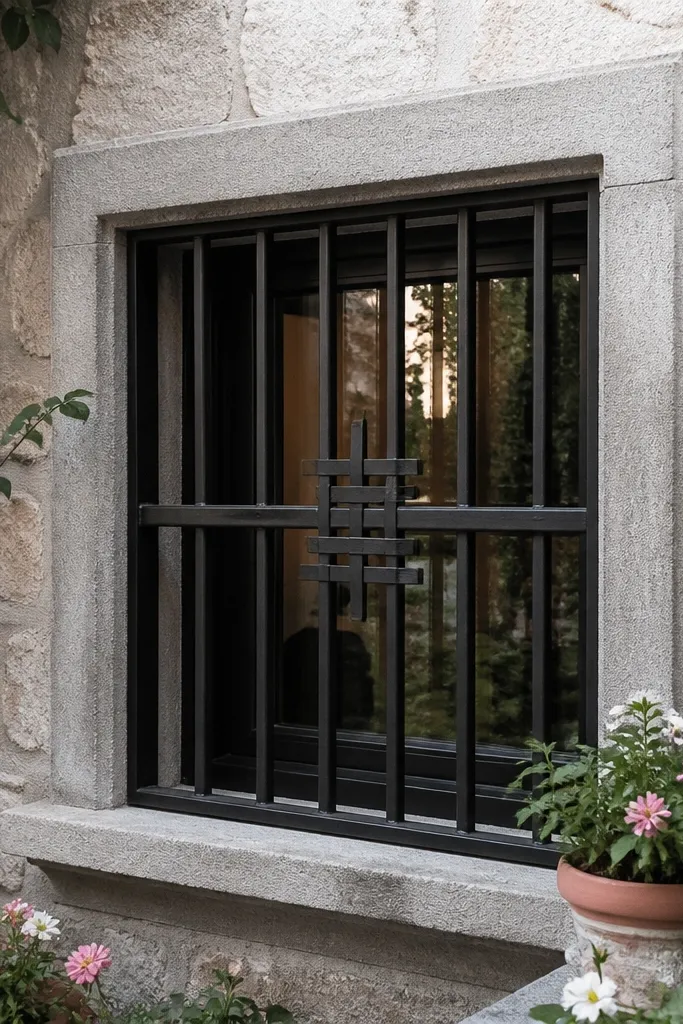
A tiny crosshatch panel gives you texture without taking over the window. The outer frame keeps the overall shape modern, and the small crosshatch reads like a focused design element. Matte black makes the crosshatch look sharp and graphic rather than ornate. This works well when you want privacy but you still want a mostly open window look from the street. It’s also good for entry windows where you want one “feature” area instead of a full grid.
Build a full perimeter frame first. In the center, mark a smaller rectangle area and weld a crosshatch inside it using diagonal bars at consistent angles. Keep the crosshatch area about 35-45% of the window height, so it doesn’t become a full grid. Weld, grind, cap ends, and coat matte black.
Use an angle jig or a marked board for diagonal cuts so the crosshatch lines stay consistent.
Avoid a crosshatch that reaches the frame edges — it makes the design feel crowded.
19. Charcoal Vertical Slats with a Thin Top Cap and Bottom Foot Rail
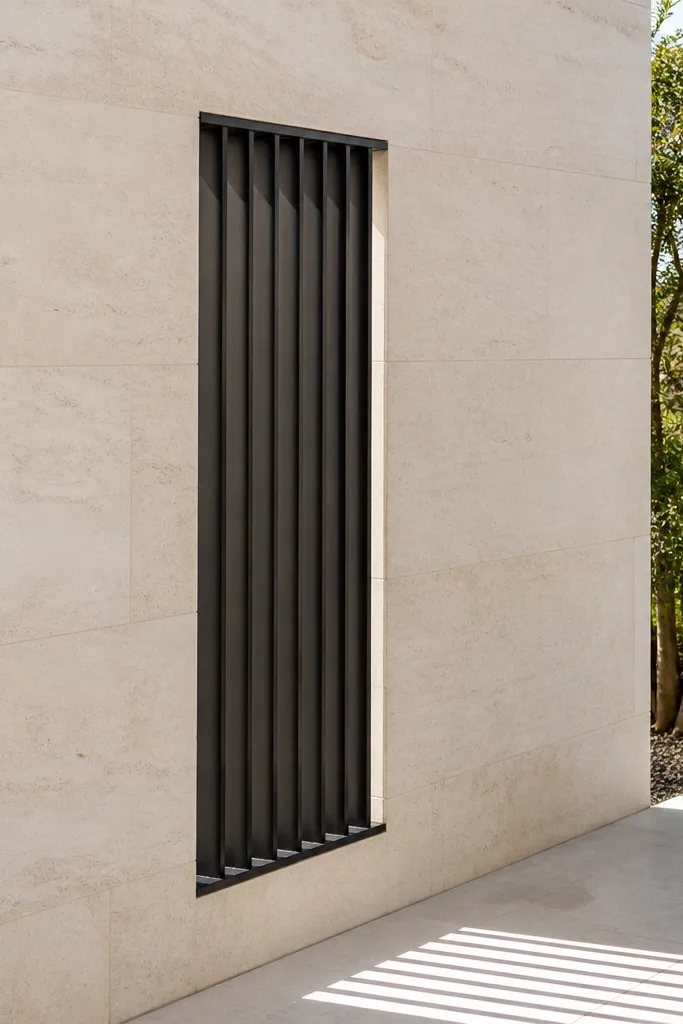
Vertical slats with a thin top cap and bottom foot rail look clean because they mimic architectural louvers and keep the lines simple. This design is minimalist but still structured, with the rails giving a crisp top and bottom edge. Charcoal is forgiving and looks modern against most colors. It’s great for narrow windows and for facades where you already have vertical elements like siding seams. The result is a grill that reads like a designed system, not a collection of bars.
Measure the window clear opening and decide your slat spacing for 90-120mm gaps. Weld a perimeter frame, then add a thin top cap rail and bottom foot rail inside the frame. Weld vertical slats between the rails with spacers so spacing stays even. Grind, cap ends, and finish with charcoal matte powder coating.
Use the same bar stock for slats and rails so the thickness looks intentional and consistent.
Don’t make the top cap much thicker than the bottom rail — it looks top-heavy in photos.
20. Oil-Rubbed Scroll Corners with Flat-Bar Center Slats
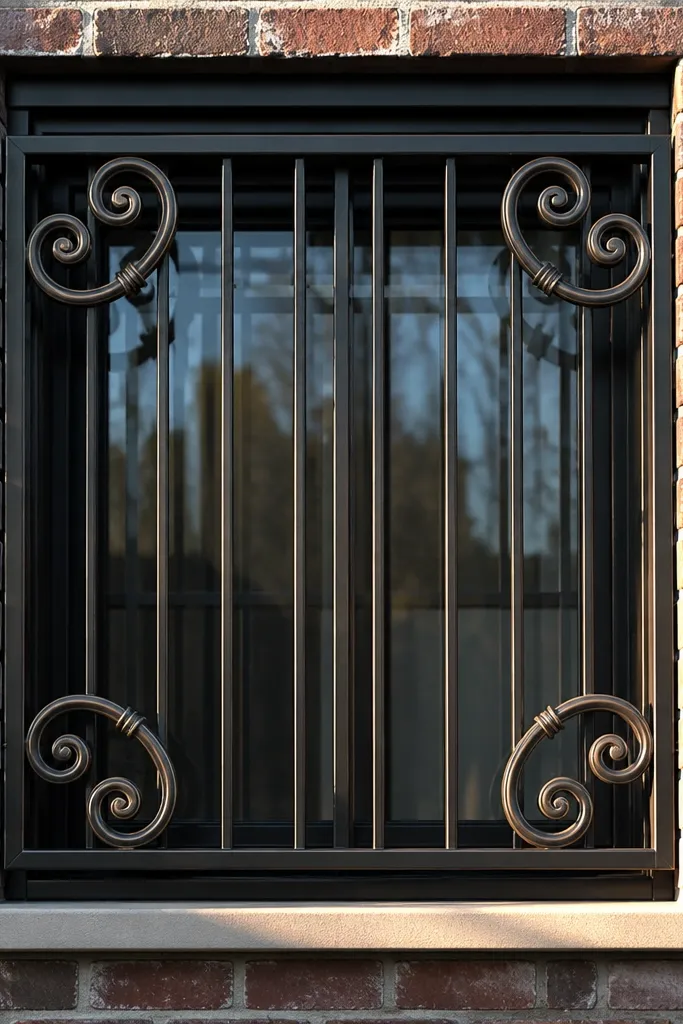
This design gives you a modern minimalist window grill design look without feeling plain. The center is straight and orderly with slim flat-bar slats, while the corners add just enough curl to read as intentional design from the street. It’s great when your window is already visually busy (masonry joints, brick texture, or tall sidelights) because the center lines calm everything down. Use oil-rubbed bronze and keep the slats thin for that tailored, facade-friendly finish that photographs well in mixed light. It’s a mid-skill build: you’re welding straight members plus two mirrored corner shapes, not doing a full decorative scroll panel.
Editor's noteMake one spacer block for your slat gaps and leave it attached with tape while you tack-weld. It keeps the spacing identical after you remove the temporary clamps.
Step 1 — Lay out the frame first: measure the opening and plan for 25-30 mm reveal on each side, then cut a perimeter rectangle from 25 x 3 mm flat bar. Weld four mitred corners, check it on a flat surface for twist, then add two internal horizontal “tie bars” from 20 x 3 mm at about 1/3 and 2/3 of the height. Step 2 — Build the center slats: space 12 mm openings with 20 x 3 mm flat bars, and keep the slats parallel — use a spacer block the width you want for repeatable gaps. Weld the slats only to the tie bars and the perimeter frame, then fit the scroll corner pieces last — use pre-cut scroll corner forgings or cut simple 90-degree curl shapes from 8 mm flat bar and weld them at the outer corners. Step 3 — Finish: grind welds flush on the face only, clean with degreaser, then paint with a metal primer and an oil-rubbed bronze topcoat (spray or brush). Let it cure fully before install, and add foam weather strip on the back edges so it doesn’t rattle against the window trim.
Skip thisDon’t weld the scroll corners first — tack the center slats and tie bars, then fit the corners so the whole frame stays square.



