
1. Wall-Mounted Slab Headboard in Warm White Plywood
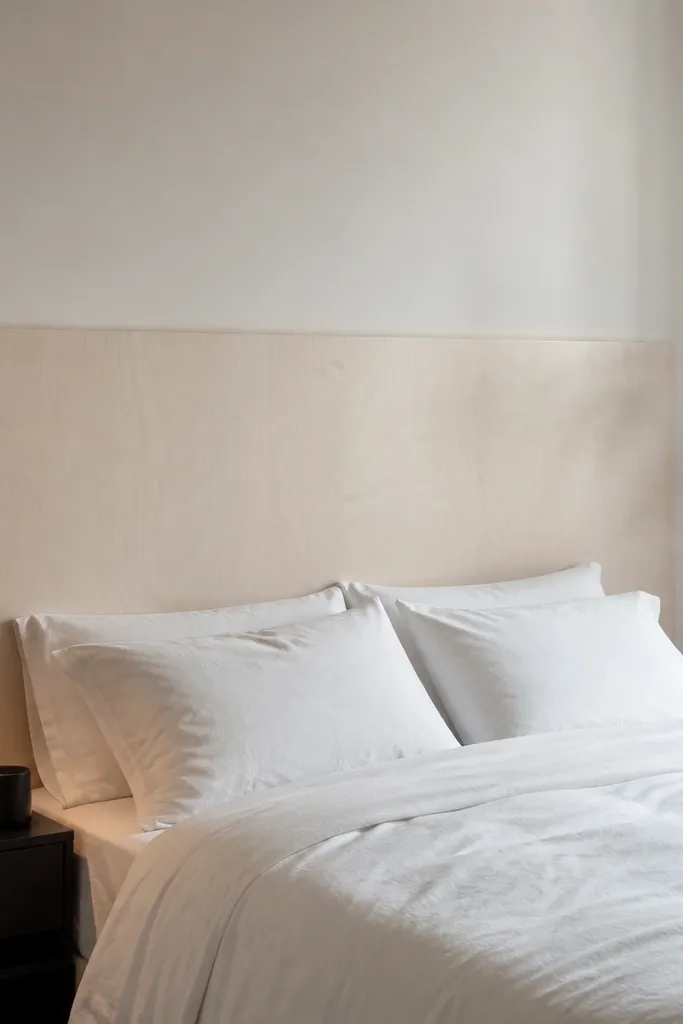
This is the cleanest “modern minimalist headboard” move because it reads like built-in furniture. A single flat slab keeps the lines sharp, and warm white plywood avoids the cold, sterile look that some painted boards get. The surface finishes matter — a smooth, low-sheen top coat makes it look intentional, not hobby-made. It’s best for rooms with simple bedding and solid wall paint where you want the headboard to be the only strong shape.
Cut 3/4-inch plywood to your target width and height, then dry-fit it against the wall above the bed. Sand the faces to 180 grit, fill any seams or screw holes with wood filler, and sand again. Mount using a French cleat or a straight ledger board anchored into studs, then hang the panel so it sits flush. Finish with two coats of a low-sheen cabinet paint (or a primer then paint) and lightly sand between coats for a smooth look.
Editor's noteUse painter’s tape to mask a crisp border line before your final coat — it makes the edges look factory-clean.
Skip thisDon’t mount plywood directly to drywall with only anchors; it looks loose and chips at the edges.
2. Vertical Slat Headboard with Walnut Stain and Black Brackets
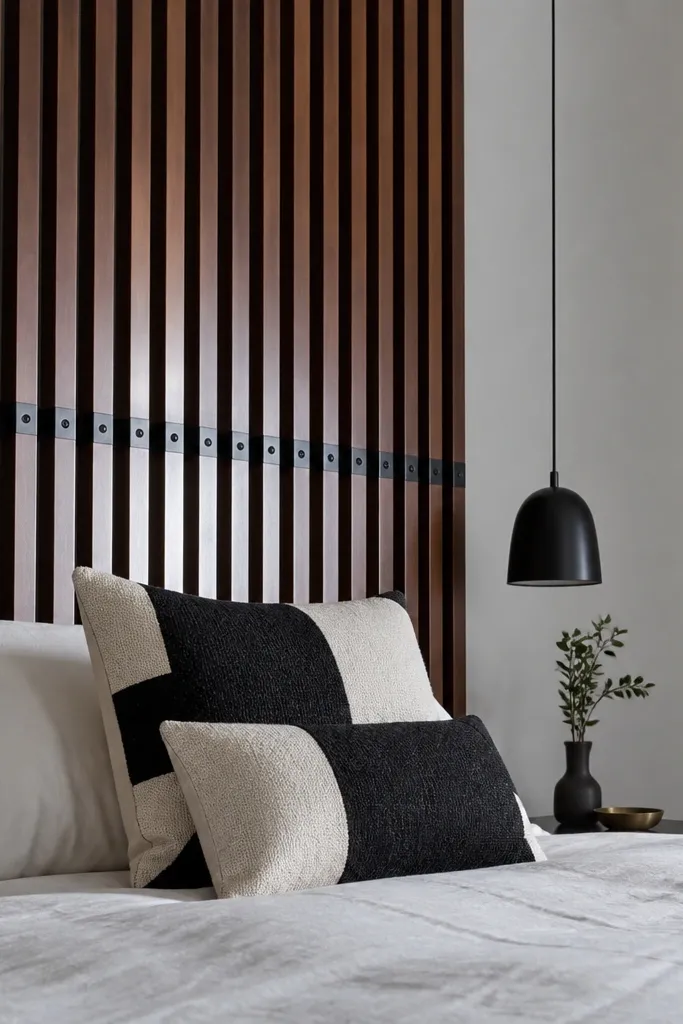
Vertical slats add modern structure without turning into farmhouse. Walnut stain gives depth and warmth, while black brackets keep it crisp and graphic. The spacing between slats is the secret: too tight looks heavy, too wide looks flimsy. This style photographs well because the light catches the slat edges and creates a clean shadow pattern.
Use 1x2 boards for slats, cut to your headboard height, and plane/sand them to consistent thickness. Space slats about 1/4 inch apart on a back frame made from 1x3 rails, then pre-drill and screw the slats to the rails. Stain with a walnut tone, wipe off evenly, and seal with a matte polyurethane to reduce glare. Mount the back frame to studs with two or three black L-brackets, keeping the frame perfectly level before you tighten everything.
Dry-fit one slat spacing on scrap and hold it against your wall lighting; the shadow pattern is the whole look.
Don’t skip pre-drilling — thin slats split when you drive screws near the edges.
3. Floating Bed-Frame Headboard with Hidden Support Rails
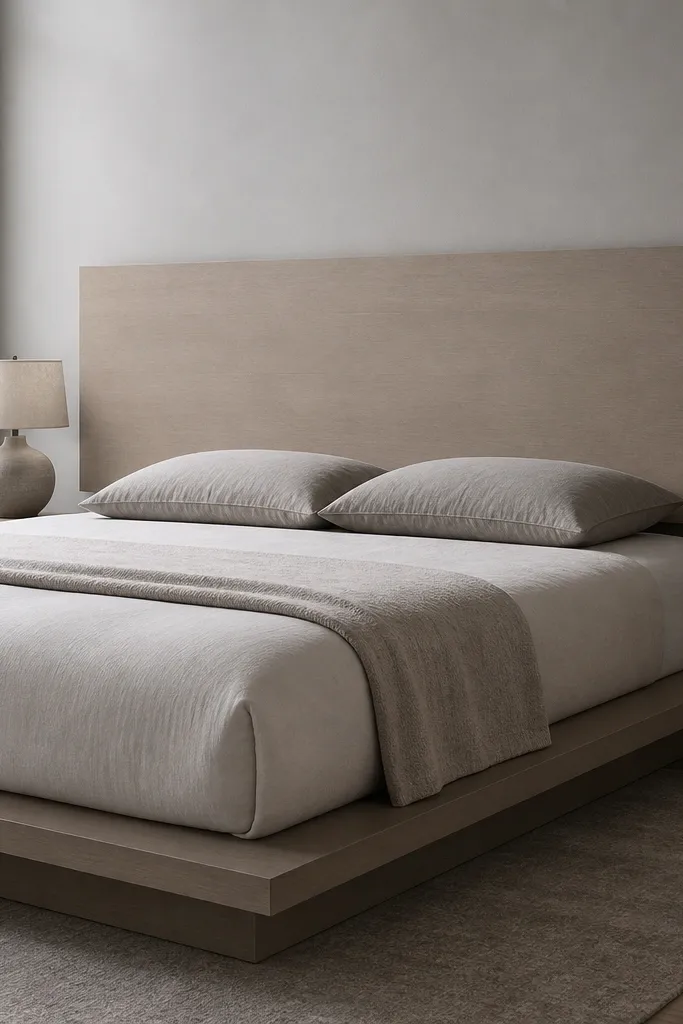
If you want minimalist with a “designer” feel, a bed-frame-mounted headboard panel gives you that built-in look without wall drilling. The floating effect comes from keeping the visible face clean and using hidden rails behind the panel. This works especially well if you have a platform bed or a frame that already has a solid back support. It’s also great for small rooms because the design doesn’t visually widen the space.
Measure the top width of your bed frame and build a backer panel from 1/2-inch plywood cut to fit between the frame rails. Attach hidden support rails to the bed frame using metal angle brackets so the panel sits at your chosen height. Screw the panel to the rails from behind, then fill and sand any screw heads. Paint or finish the face, then add weather stripping or felt tape where the panel touches the frame to prevent rattling.
Editor's noteUse felt tape on the contact points even if it feels solid — it stops vibration noise at night.
Skip thisDon’t rely on long screws through the panel face; visible hardware kills the minimalist look.
4. Cane Webbing Headboard in Matte Black Frame
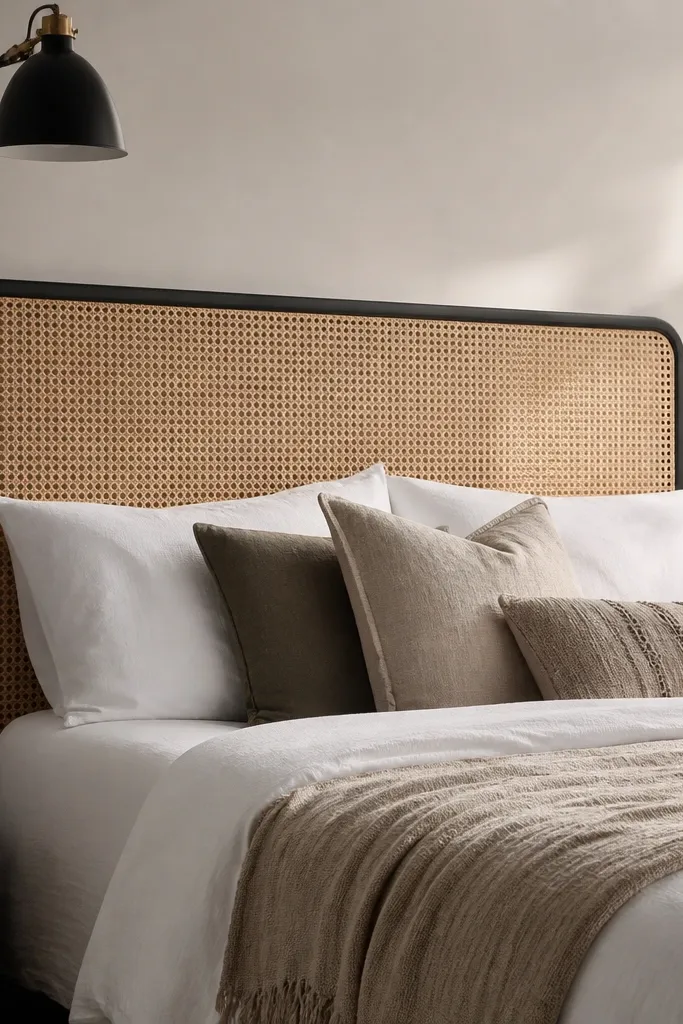
Cane webbing brings texture and airflow while staying light visually. The modern minimalist version uses a matte black frame so the pattern feels intentional, not vintage. It also hides minor wall imperfections because the texture draws the eye. This headboard looks great with white bedding and black metal accents, and it’s surprisingly forgiving if your wall isn’t perfectly flat.
Build a rectangular frame from 1x2 or 1x3 boards, miter the corners for crisp lines, and sand smooth. Spray paint the frame with matte black metal or furniture paint after priming. Stretch cane webbing across the back and secure it with small upholstery tacks or a staple gun, pulling tight as you go. Mount to the wall with two cleats or to the bed frame with brackets so the webbing stays taut and doesn’t sag.
Editor's notePull the cane tight in small increments and re-check squareness; cane looks best when the grid stays straight.
Skip thisDon’t over-saturate the webbing with finish; it can warp and dull the pattern.
5. Linen-Tufted Panel Headboard with Flat Buttons
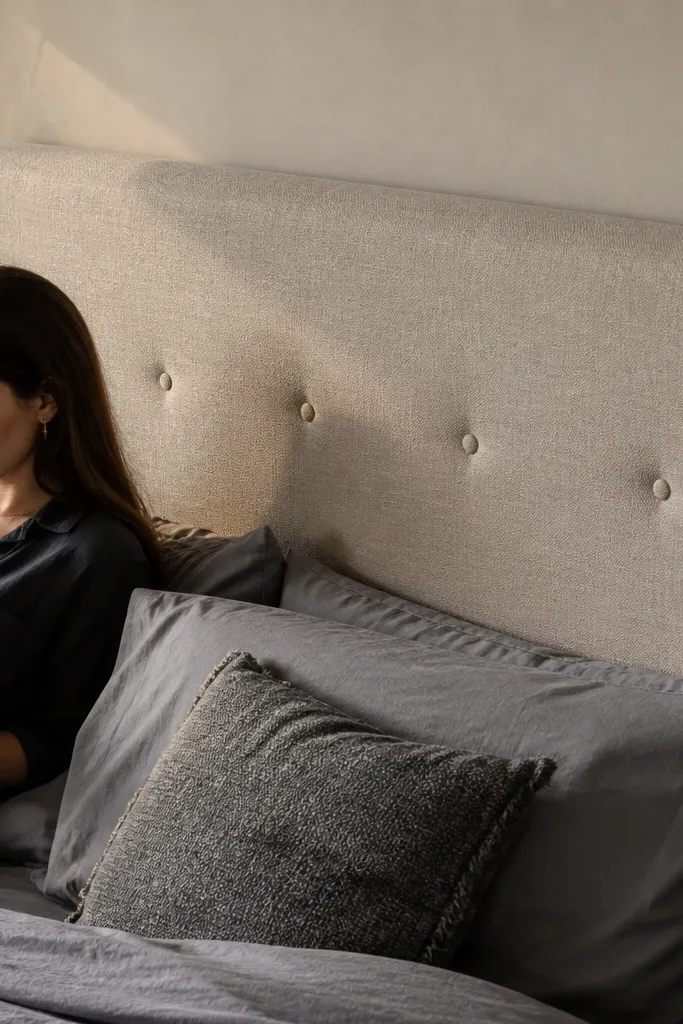
Tufting sounds like “fancy,” but flat, minimal tufting can look modern. Use a tight, small-scale pattern so it reads as texture rather than ornament. Linen fabric keeps the surface soft and warm, and the structured foam backing makes it feel substantial without bulky padding. This is a good choice if your room already has neutral bedding and you want the headboard to add comfort and depth.
Cut a plywood base to your headboard size, then wrap it with high-density foam (about 1 inch thick) and add a thin batting layer on top. Mark a simple grid for tuft points spaced evenly, then drill pilot holes through the base and insert button hardware. Pull your linen taut, staple on the back, and install the buttons so the fabric dips are shallow and even. Finish the back edge with a clean fabric trim and mount using wall cleats or bed-frame brackets.
Editor's noteKeep button spacing consistent across the entire panel; one uneven row makes the whole design look DIY.
Skip thisDon’t use deep, dramatic tufting — it turns minimalist into old-school unless the room has matching traditional decor.
6. No-Tuft Upholstered Headboard with Clean Edge Piping
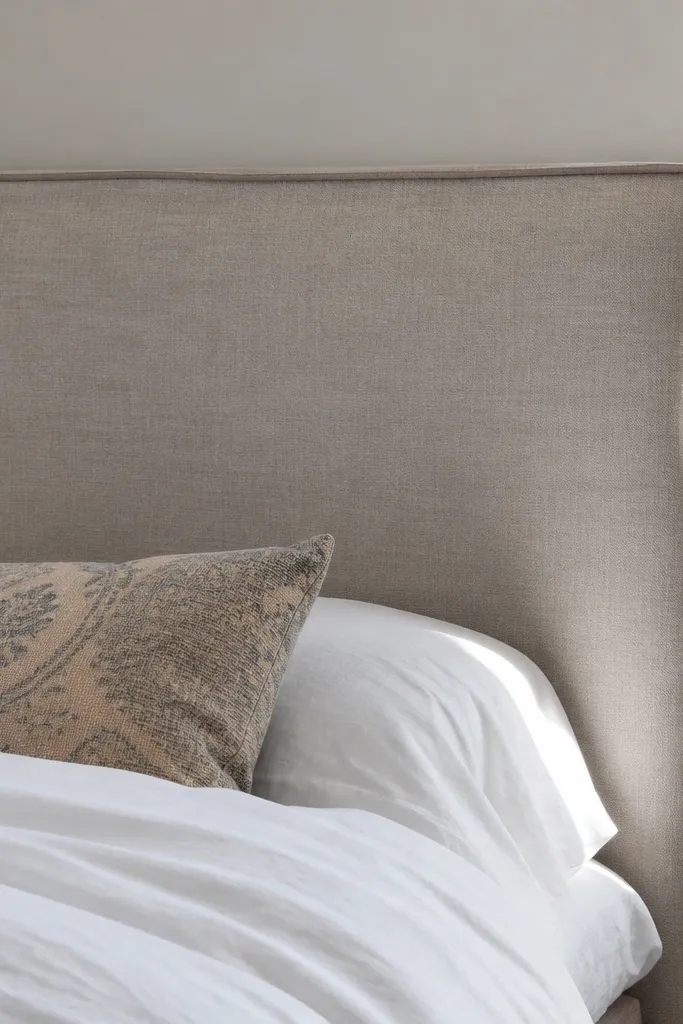
This is minimalist upholstery done right: no buttons, no repeating pattern, just a clean upholstered rectangle with piping. Piping makes the edge line look sharp in person and in photos, even when the fabric is soft. Pick a medium-weight linen or performance fabric in greige or oat for a calm look. It’s a great option if you want comfort but hate the “button board” look.
Cut plywood to size and attach foam with spray adhesive, then add batting for a smooth top. Lay your fabric face-down, center it, and wrap around the edges with staples 1-2 inches apart. Install piping around the perimeter by tucking it into the seam line before stapling, then trim excess fabric. Mount with wall studs cleats or with bed-frame brackets, then check that the headboard sits straight without bowing.
Editor's noteChoose piping cord that matches your fabric undertone (warm with warm, cool with cool) so the line stays subtle.
Skip thisDon’t stretch fabric unevenly; puckers show up fast under bedroom lighting.
7. Reeded Acrylic Headboard with Frosted Finish
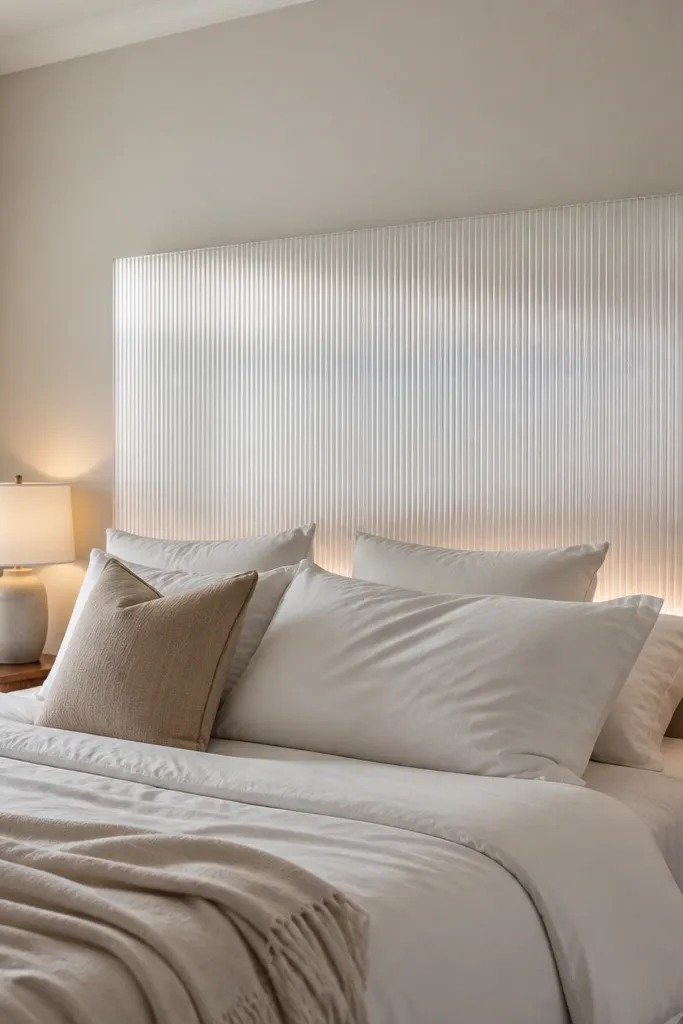
If you want modern minimalist with a little “wow,” reeded acrylic gives you a subtle light pattern without painting or upholstery. Frosted finish keeps it private and soft, while the reeding adds dimension that reads premium in daylight. This style works best in rooms with neutral walls and simple lamps because the headboard is the visual texture. It’s also great if you want something easy to clean.
Order or cut a frosted reeded acrylic sheet to size, then build a slim frame from aluminum angle or painted wood trim. Drill mounting holes using a plastic-safe bit and deburr edges to prevent cracks. Mount the acrylic to the frame with rubber gaskets so it doesn’t stress-crack. Finish the frame with matte paint and install using wall anchors into studs or a cleat system.
Editor's noteUse rubber washers between acrylic and hardware; acrylic hates point pressure.
Skip thisDon’t overtighten screws — stress marks show and the panel can crack.
8. Matte Charcoal Slatted Headboard with Micro-Spacing
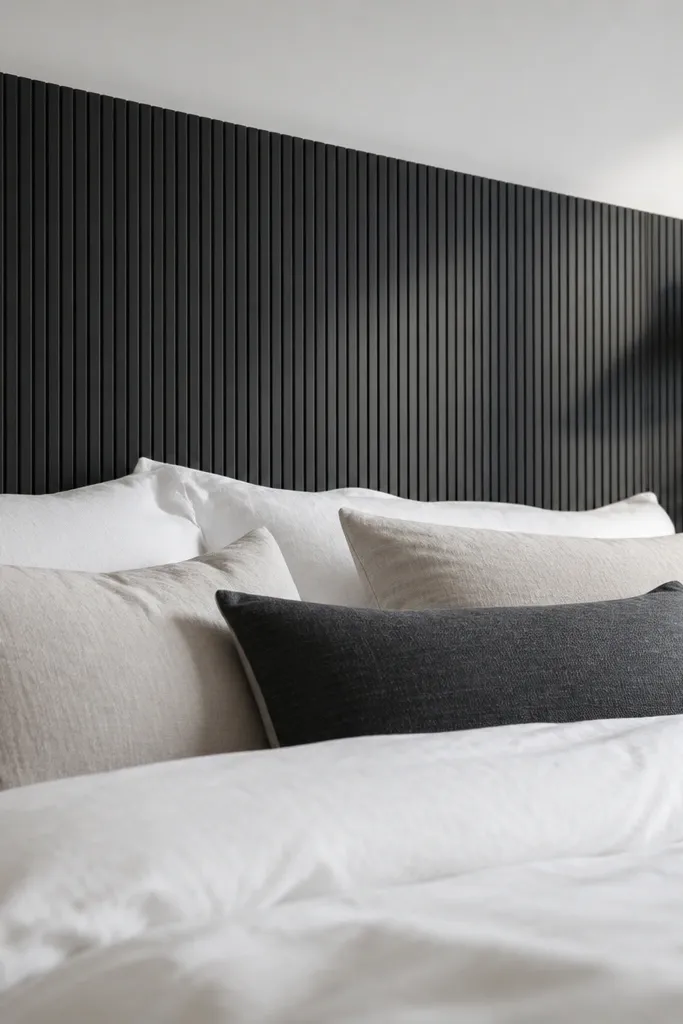
Micro-spacing slats make the headboard look like a single material sheet rather than separate boards. The result is a graphic, modern surface that still has depth. Matte charcoal hides minor marks and looks clean against white bedding. This is a strong choice for monochrome bedrooms that need a texture layer without adding color.
Make a back frame from 1x3 rails and attach slats using consistent spacers, aiming for around 1/8 to 3/16 inch gaps. Sand the entire assembly, then spray or brush on a matte charcoal stain or paint designed for wood. Seal with a matte top coat so it doesn’t reflect overhead lights. Mount to studs using two or three brackets and keep the top edge perfectly level.
Editor's noteUse identical spacer offcuts every time; tiny spacing differences show up when the light hits.
Skip thisDon’t use glossy paint; it turns slats into shiny stripes and looks cheaper.
9. Oversized Leaning Panel Headboard with Upholstered Face
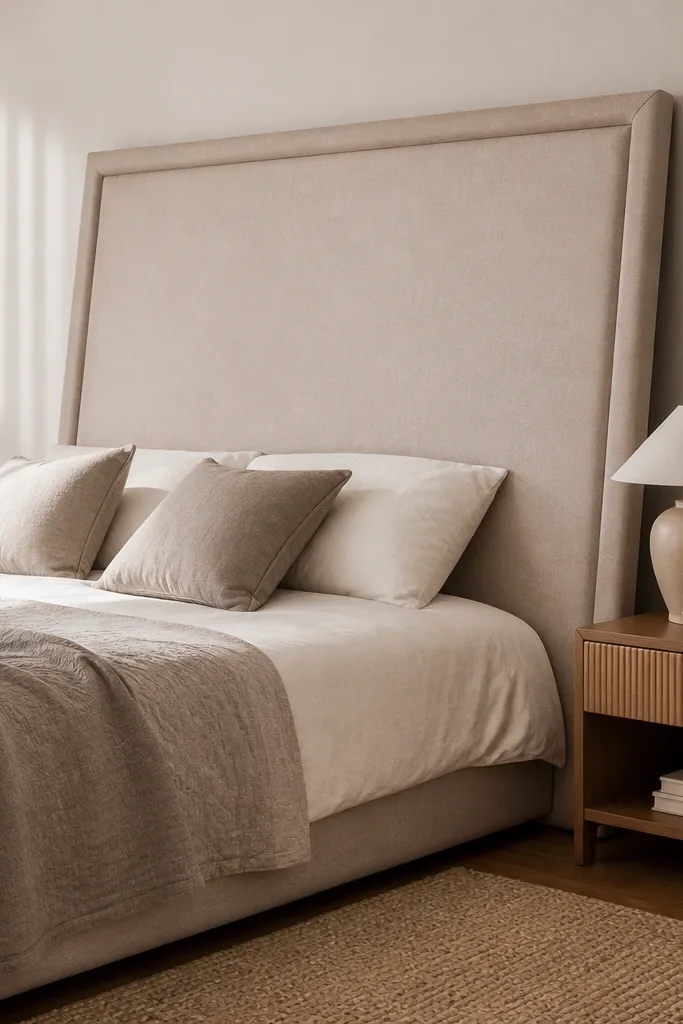
Leaning headboards are the rental-friendly route that still look intentional. By making the panel slightly oversized and adding a crisp border, you get the modern minimalist silhouette without wall mounting. Upholstered fabric softens the look and makes the bed feel more comfortable. This works well when you can’t find studs or you don’t want to deal with patching.
Cut a large panel from 3/4-inch plywood and wrap it with 1-inch foam plus a thin batting layer. Cover with a linen or performance fabric and wrap the edges tightly, stapling on the back for a clean perimeter. Add a simple border trim to hide staples and create a crisp frame look. Lean it against the wall behind the bed and secure the top with a removable strap or furniture anti-tip hardware.
Editor's noteAdd non-slip pads on the floor where the panel touches; it keeps the panel from creeping overnight.
Skip thisDon’t make the panel too narrow; a thin panel reads flimsy even if the fabric is expensive.
10. Reclaimed Wood Frame Headboard with One Clean Center Panel
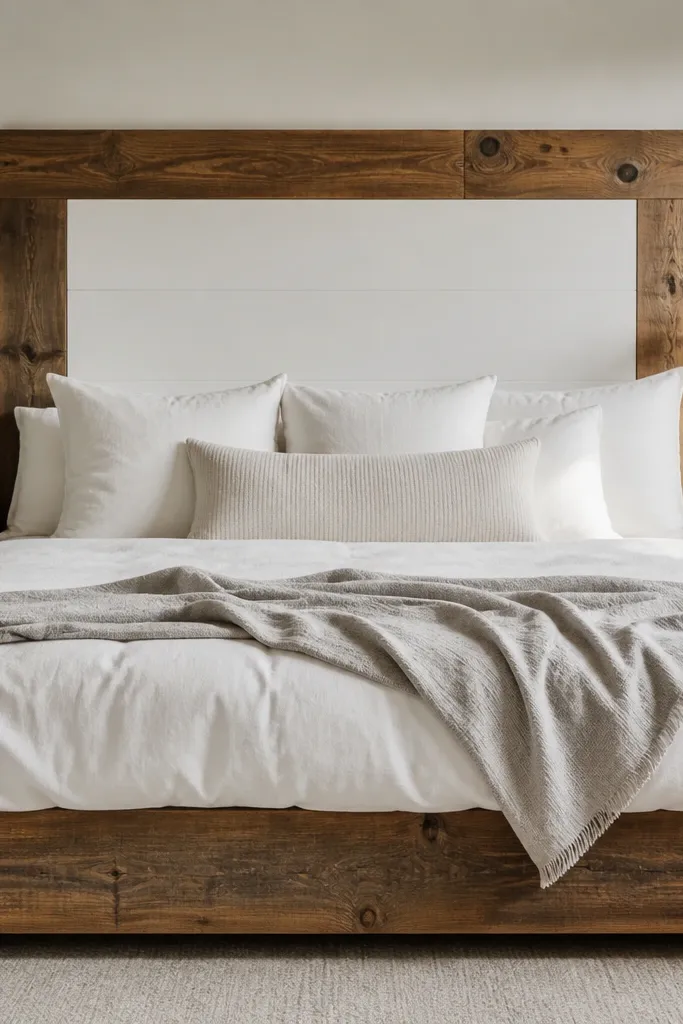
Reclaimed wood looks modern only when you control the chaos. This design uses reclaimed lumber for the outer frame, but the center is a smooth, painted panel so the overall look stays minimalist. It gives you grain and character without turning the headboard into a collage. This is a good fit if your bedroom has modern bedding but you still want warmth from wood.
Build a rectangular frame using reclaimed boards, sand down to remove roughness, and cut to a consistent outer size. Fill gaps lightly and keep the face of the frame smooth. Paint the center panel (plywood) in a neutral like off-white, then attach it behind the frame with small screws or wood glue. Mount the whole piece to studs with a cleat so the reclaimed frame stays stable and level.
Editor's noteKeep reclaimed pieces on the frame only; the center panel should be smooth for the minimalist read.
Skip thisDon’t leave reclaimed ends sharp; splinters and uneven edges show up in close photos.
11. Horizontal Slat Headboard with Light Gap Line
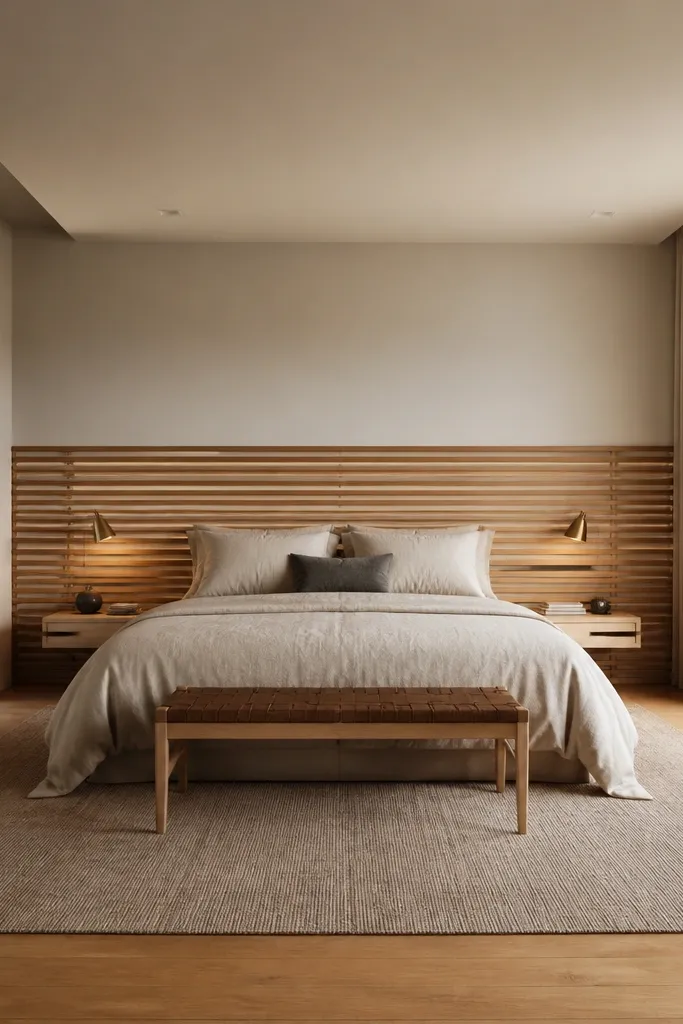
Horizontal slats make a room feel wider and calmer, especially in long bedrooms. The modern minimalist version uses a thin, consistent gap line so the slats read as a single band of texture. Light wood tones keep the look airy and reduce visual weight. It’s a smart choice if your room already has vertical elements like curtains or shelving.
Cut slats from 1x2 boards and sand them smooth, then build a backer frame with 1x3 rails. Mark and space slats evenly, then screw from the back into the rails. Stain in a light tone (like natural oak) and seal with matte finish. Mount with brackets into studs, using a level to align the top rail so the whole pattern stays straight.
Paint the backer rails the same color as the slats so any tiny shadows still look cohesive.
Don’t vary slat lengths; even one short slat makes the pattern look handmade.
12. Matte Limewash Headboard Panel on Plywood Backer
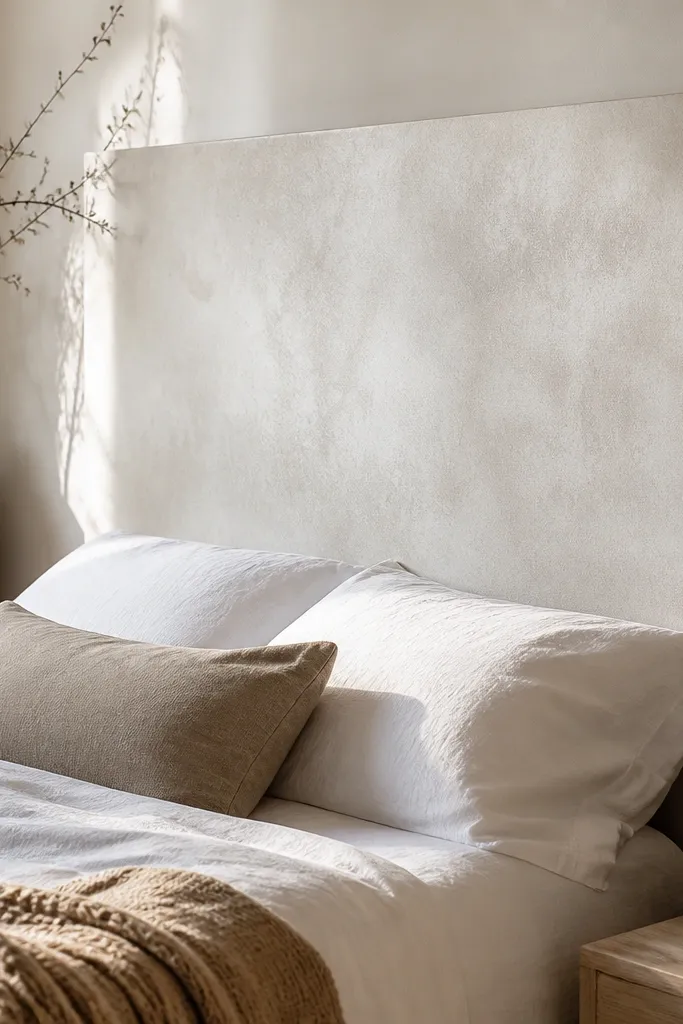
Limewash texture reads modern when it’s controlled and matte. It gives you a slightly mottled surface that looks expensive, but it still stays in the minimalist family because there’s only one color story. This is best in rooms with natural light, where the texture changes subtly through the day. Pair it with simple wood bed frames and plain bedding for the clean look to land.
Sand plywood to 150-180 grit, then seal with a primer meant for masonry-style finishes. Apply limewash in thin passes with a wide brush, keeping strokes in one direction for a consistent texture. Let it dry, then add a second coat for depth without turning glossy. Mount the panel to studs with a cleat or ledger and add felt spacers between wood and wall to prevent scuffs.
Test limewash on a scrap board first and match your room lighting; texture can turn too gray or too warm fast.
Don’t apply thick coats; thick limewash looks streaky and uneven instead of soft.
13. Oversized Grid Headboard with Thin Wood Bars
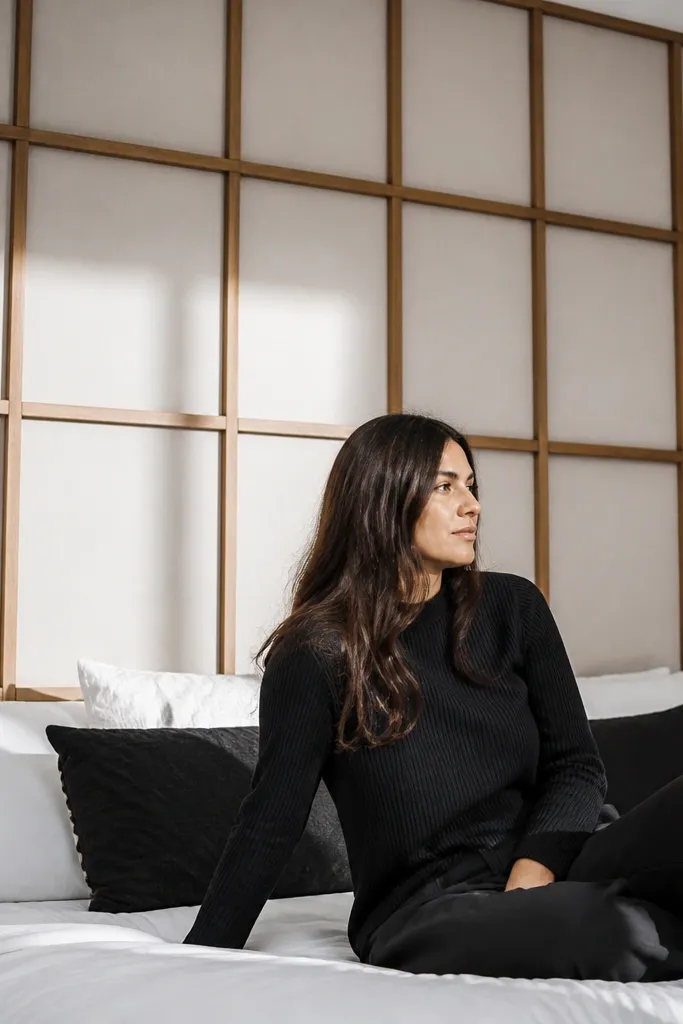
A thin-bar grid is minimalist architecture in bedroom form. It adds structure without upholstery, and the grid lines create a modern visual rhythm. Use a neutral backing panel so the grid reads crisp, not busy. This works great if your room has plain walls and you want something graphic that still feels calm.
Cut a plywood backing panel to size and paint it in a neutral matte color. Cut thin wood bars (like 1/2-inch strips), sand edges smooth, and arrange them into a grid with consistent spacing. Screw bars into the backing from behind or use wood glue plus pin nails if the backing is thick enough. Mount with cleats or brackets and check squareness by measuring diagonals before the final fasteners.
Keep the grid line spacing consistent across the whole panel, even if it means adjusting your headboard size slightly.
Don’t eyeball it; crooked grid lines look worse than any other DIY flaw.
14. Fabric-Wrapped Cork Board Headboard with Clean Frame

Cork board is underrated for headboards because it absorbs sound and gives a comfy surface for leaning. Wrap it in fabric and you get a minimalist look with a soft, quiet texture. Add a simple frame so it reads like a designed piece, not a craft project. This is a good choice for apartments where echo and noise matter, and for people who read in bed.
Cut cork board to your headboard size and attach it to a plywood backing for stability. Stretch fabric over the cork with tight tension and staple on the back, smoothing as you go. Add a simple wood frame around the edges to cover staples and create crisp lines. Mount to studs with a cleat system, and use felt pads behind the frame to stop rubbing marks.
Use upholstery fabric with a tighter weave; it looks smoother and holds tension better than thin cotton.
Don’t skip the plywood backing; cork can warp and the fabric tension won’t stay even.
15. Felt Panel Headboard in Charcoal with Straight Seams
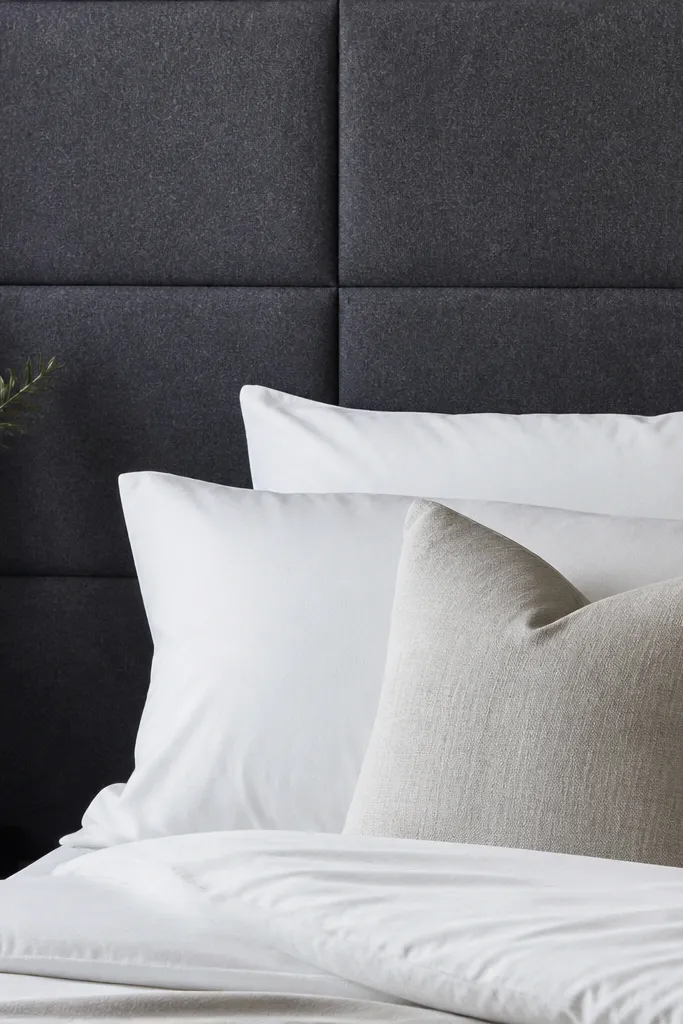
Felt is one of the easiest ways to get a modern minimalist look because it hides minor surface imperfections and looks clean at every angle. A charcoal felt panel reads grounded and cozy without adding visual clutter. Straight seams keep it graphic and intentional, especially if you use a double layer or add a contrasting seam line. This works well in bedrooms with wood floors and simple lighting.
Cut a plywood base, then adhere foam or a felt backing layer so the felt has body. Wrap charcoal felt around the front and fold neatly at the corners, then staple on the back. If you want seam lines, add a fitted fabric face using straight stitch seams and trim edges flush before wrapping. Mount using wall cleats or bed-frame brackets, and keep the top edge flat and level.
Editor's notePress seams with a warm iron through a pressing cloth; it makes felt edges look sharper.
Skip thisDon’t use low-density craft felt; it pills and looks fuzzy instead of crisp.
16. Matte White Panel with Hidden LED Strip Behind the Top Edge
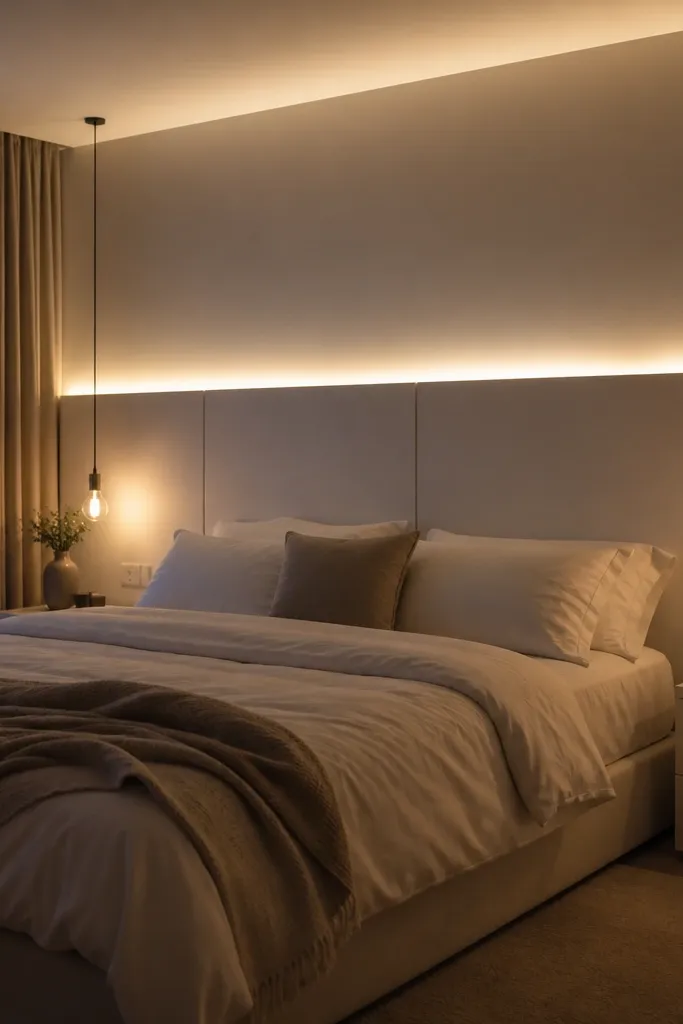
Minimal doesn’t have to be flat. A hidden LED strip behind the top edge adds a soft glow that makes the headboard look built into the wall. Keep the headboard face simple and matte so the light reads as atmosphere, not as gadget lighting. This looks incredible in bedrooms with warm bulbs and neutral curtains. The project is also practical: it gives you bedside light without a harsh lamp.
Build a plywood headboard panel with a shallow channel behind the top edge about 1/2 inch deep. Paint the panel matte white, then mount the panel to studs with a cleat. Install a warm white LED strip in the channel and cover it with a diffuser strip or translucent acrylic to prevent visible hotspots. Wire to a low-voltage driver and add a simple inline switch you can reach from the side of the bed.
Use 2700K LEDs and a diffuser; direct LEDs look spotty against a matte face.
Don’t place the strip too close to the face; you’ll see bright lines in photos.
17. Leather-Look Vinyl Panel Headboard with One Center Channel
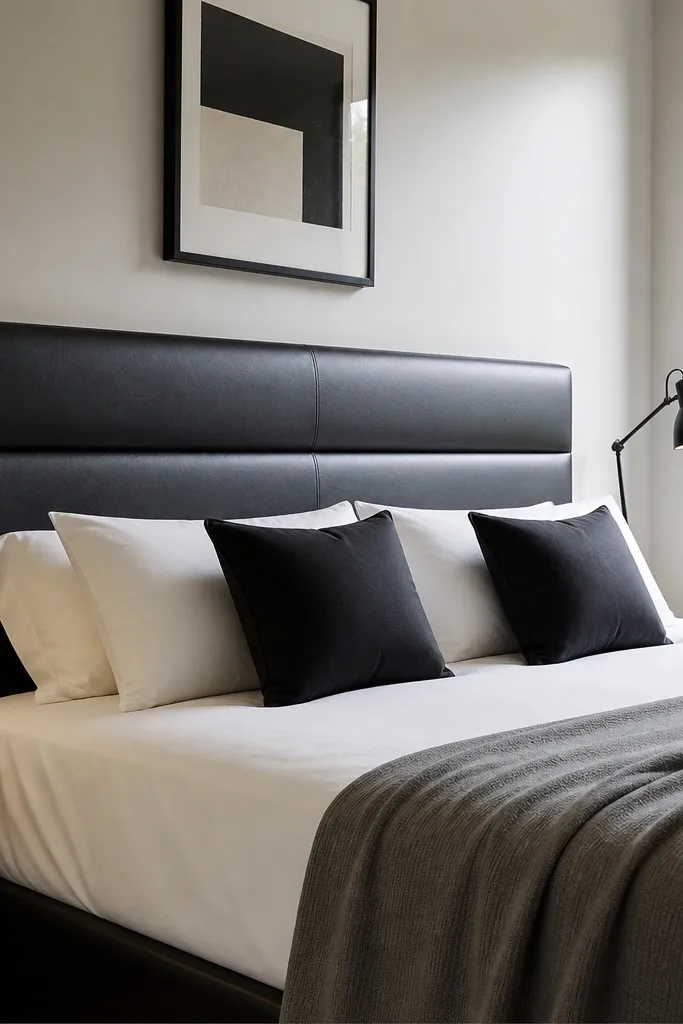
Leather-look vinyl gives you a smooth, modern surface that cleans easily and looks sharp with metal hardware. The trick is keeping the detailing minimal — one center channel line looks intentional and frames the bed without turning into a tufted pattern. This headboard suits people who want a sleek look but still want something comfortable to lean on. It also works well in guest rooms where you need durability.
Cut a plywood base and foam it with a thin layer so the vinyl doesn’t feel hard. Wrap vinyl taut and staple on the back, trimming cleanly at corners. Create a single center channel by applying a narrow strip of matching vinyl or by sewing a simple fabric channel and gluing it in place over the face. Mount with wall cleats or bed-frame brackets, and add a small felt barrier between hardware and the vinyl edges.
Editor's noteStretch vinyl evenly and use a heat gun carefully on corners so it lays flat without wrinkles.
Skip thisDon’t use glossy vinyl; it reflects light and makes the minimalist face look cheap.
18. Matte Black Metal Grid Headboard with Thin Wire Lines
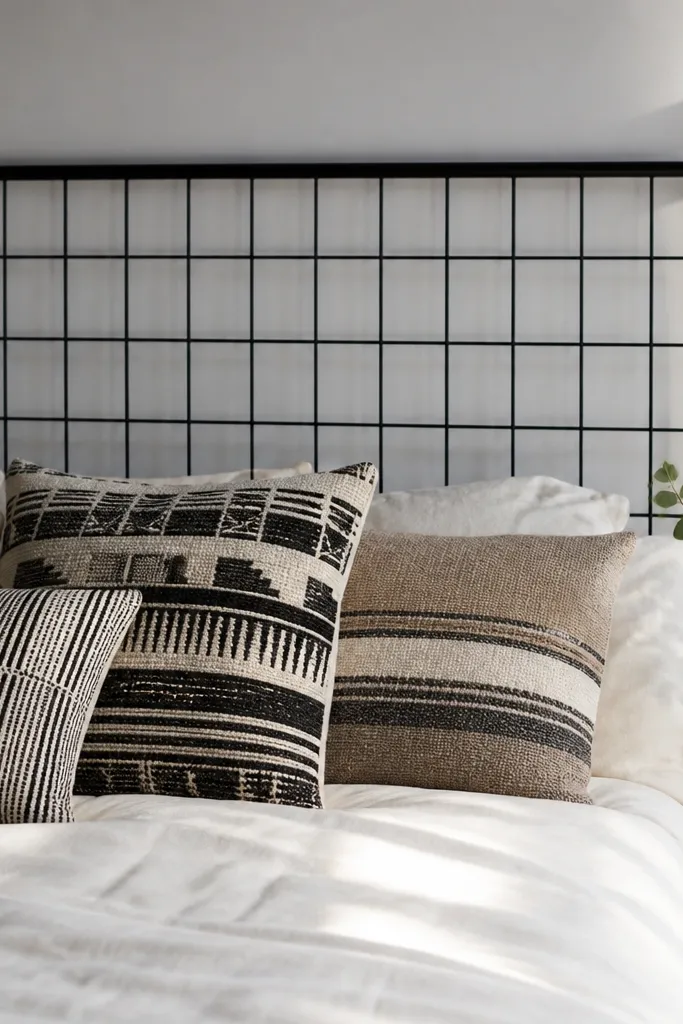
A metal grid headboard is minimalist because it’s basically linework. The open negative space keeps the bed from feeling heavy, and matte black ties into modern lighting and hardware. This also gives you a strong graphic background for patterned pillows. It’s best when your wall color is simple and you want a high-contrast look without using a loud color.
Build a rectangular frame from thin metal angle or wood trim lined with metal paint, then attach a wire grid inside using brackets and zip ties rated for indoor use. Spray paint the entire assembly matte black after you assemble it so the grid matches the frame. Mount to wall studs with two heavy-duty picture hangers or a cleat system designed for metal. If you want comfort, add a thin removable cushion panel behind the grid using hook-and-loop.
Keep the grid line thickness consistent — thin, even lines read modern; thick mixed lines read messy.
Don’t skip a mounting plan; metal grids wobble if they’re only held by drywall anchors.
19. Two-Tone Headboard with Bottom Wood Band and Upper Matte Panel

Two-tone designs feel modern when the split is clean and the colors are controlled. Use a matte painted upper panel and a stained wood band at the bottom so the headboard looks like a built-in wall feature. This is great for rooms where your bedding has one dominant neutral and you want the headboard to echo it. The horizontal band also helps visually align with pillows and duvet seams.
Cut plywood for the full headboard size, then mark a straight horizontal line where the wood band starts. Paint the upper section matte in a neutral like soft white or greige, letting it fully cure. Build a bottom band from stained slats or solid wood, then attach it with wood screws from underneath or with hidden brackets. Mount the finished panel to studs with a cleat and check the split line is level before final tightening.
Editor's noteUse a long level or laser line for the split — a crooked band destroys the whole “clean” look.
Skip thisDon’t choose two colors that clash undertones; warm paint + cool wood looks off immediately.
20. Oversized Floating Bookshelf Headboard with Hidden Storage Shelf
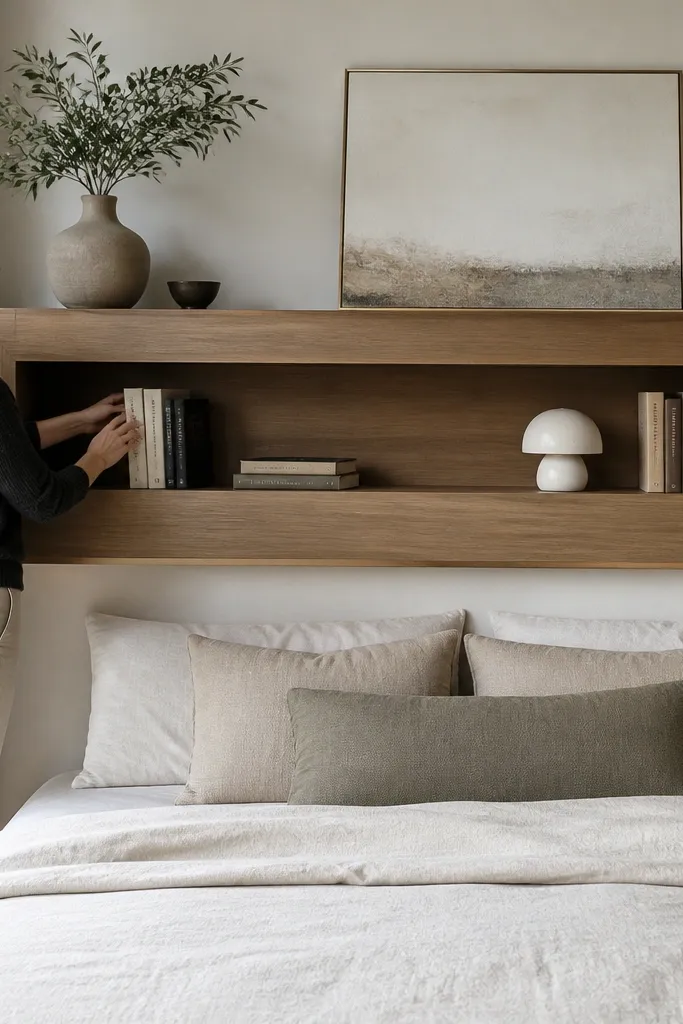
This one is minimalist but functional: a simple floating shelf line above your bed with a hidden storage compartment behind it. It looks modern because the shelf is the only horizontal element, and the rest stays clean. You get a place for books or a lamp without adding bulky nightstands. This works especially well in small bedrooms where you want storage but hate clutter.
Build a headboard panel from plywood and mount it to studs with a cleat. Attach a shallow floating shelf on top using a hidden bracket system so the underside stays clean. For storage, add a thin recessed compartment behind the shelf by using an internal divider and a hinged access panel on the back or bottom edge. Finish the shelf and panel with matte paint and seal edges so it’s durable.
Keep the shelf depth around 6-7 inches so items don’t look messy in photos.
Don’t make the shelf too deep; it turns into a catch-all and ruins the minimalist look.



