
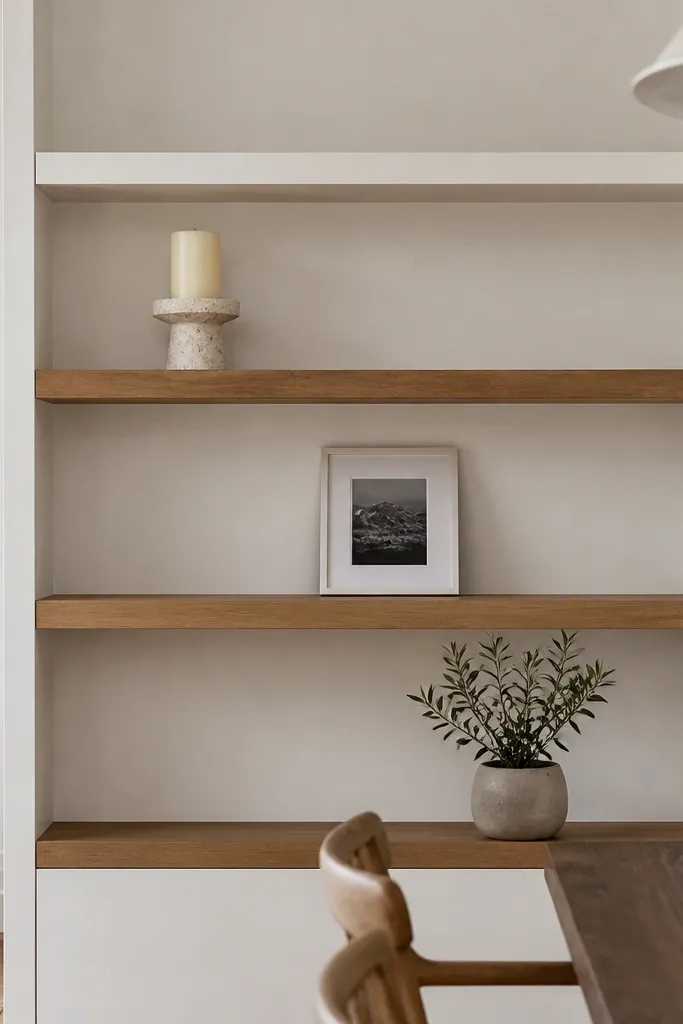
1. Oak slat back shelves with a 10-inch depth
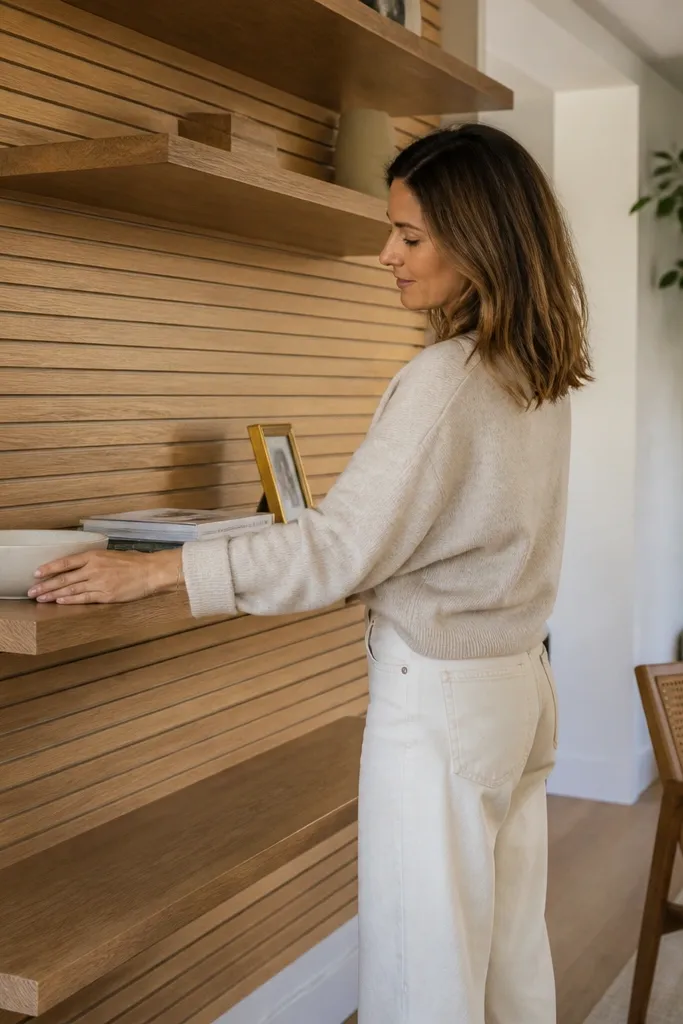
This look is clean from across the room because the back surface has horizontal rhythm, not busy patterns. The slats also hide small wall flaws and make the shelves feel “built” even when your wall isn’t perfectly flat. Use a warm oak tone so it plays nicely with modern living room woods and light floors, and keep the shelf fronts simple — a thin face with a shadow gap. Styling stays easy: lean books spine-out, then add a couple of ceramic pieces that repeat in color. The result reads modern minimalist built in shelves living room without going sterile.
Start by building a rectangular frame from 3/4-inch plywood uprights and a level ledger screwed into studs. Install a slat back using 1x2-inch strips cut to length with 1/4-inch spacing, then glue and nail them to the frame back. Cap the openings with shelf boards cut to 10 inches deep, using a stiffener strip under each shelf if your span is over 30 inches. Finish the oak with a water-based clear satin to keep it light and modern, then add a slim face trim to create the shadow reveal.
Editor's noteDry-fit a scrap face trim and check the shadow reveal from 6 feet away before you commit to the final thickness.
Skip thisAvoid painting slats white if your room has warm wood trim — it usually looks mismatched instead of intentional.
2. Painted MDF box shelves with zero visible hardware
If you want the crispest minimalist look, painted MDF box shelves are the easiest way to get perfectly flat fronts. The “box” style hides the underside and side edges, so nothing looks rough or unfinished. Keep everything matte — eggshell or full matte paint — because glossy shelves show every finger mark and dust line. This also works when you need the shelves to look calm while you store everyday items on the lower levels. Guests see clean geometry first, then they notice the decor.
Measure your wall run and build a full backer frame from 3/4-inch plywood, anchored into studs with 2-1/2-inch screws. Cut MDF panels for the shelf faces and sides, then assemble with wood glue and brad nails so the edges stay tight. Mount the whole unit as a single section when possible, using a level rail at the bottom to lock alignment. Finish by filling seams, sanding to 180 grit, then paint two coats of primer plus two coats of matte trim paint.
Use a long straightedge to check for wall dips before you build — shim behind the frame instead of forcing the shelves to sit crooked.
Avoid relying on caulk alone to hide gaps; it cracks along MDF seams if the frame shifts.
3. Floating shelves with a built-in shadow rail
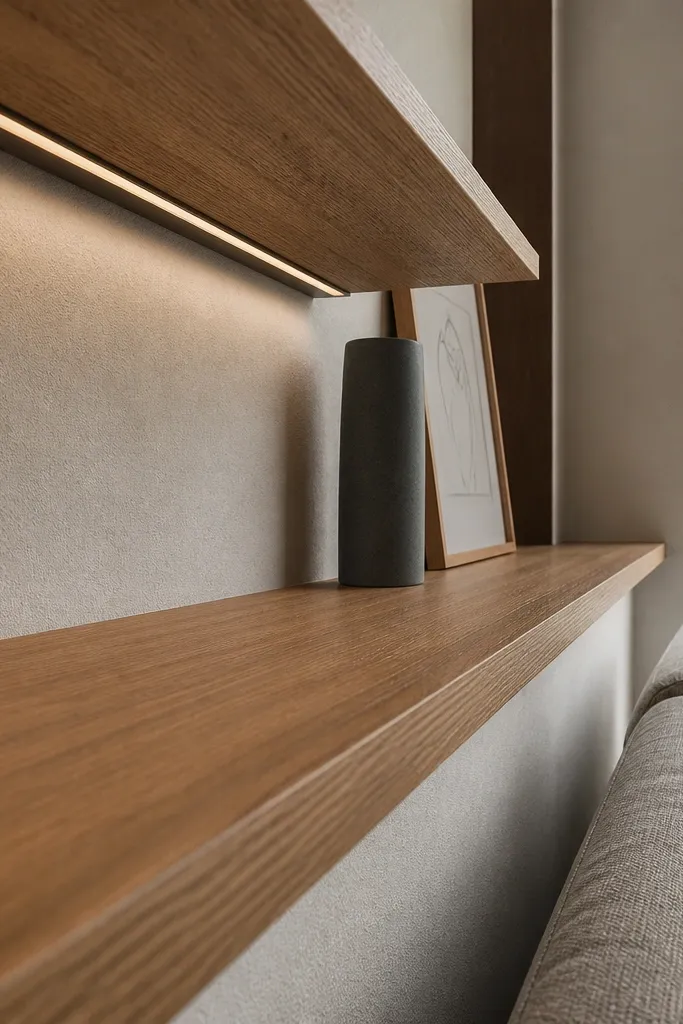
This is the modern minimalist built in shelves living room look people think is “easy,” but the beauty comes from the shadow rail detail. A shadow rail creates a deliberate gap that makes the shelf look lighter and more architectural. It also hides the mounting bracket so the shelf reads like it’s floating. Use this for shorter shelf spans and for rooms where you want a lighter, less bulky wall presence. It’s photogenic because the shadows stay consistent across the run.
Build a hidden mounting rail using a ledger made from 2x2 screwed into studs, then attach support cleats spaced every 16 inches. Cut shelf boards to your chosen depth (9-10 inches) and rout a small notch on the underside so the shelf sits cleanly over the rail. Add a thin face strip underneath as the shadow rail to create a 3/8-inch gap line. Sand, seal, and finish with a hardwax oil or satin polyurethane to keep it smooth and durable.
Editor's noteChoose shelf lengths that keep the span under 30 inches if you want no sag without extra stiffeners.
Skip thisAvoid using only two mounting points per shelf; the board will “oil-can” and sag over time.
4. Tall ladder-style built-ins with closed lower cabinets
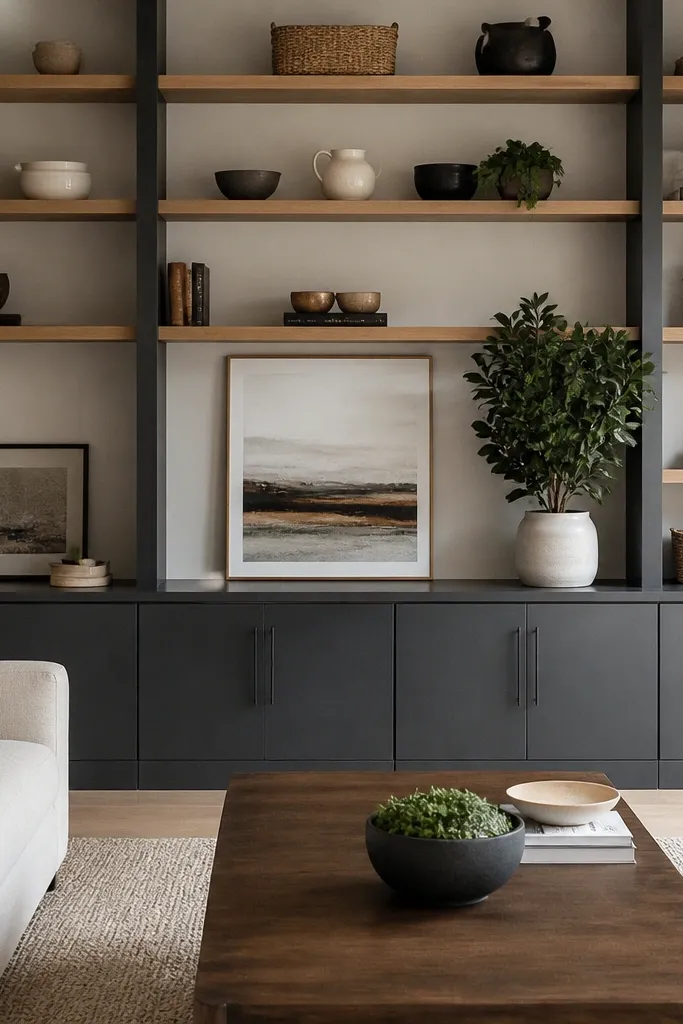
This design looks modern and composed because it mixes open display with closed storage in one wall system. Keep the lower cabinets closed to hide remotes, blankets, and clutter that makes minimal styling hard. The ladder openings create a vertical rhythm that frames artwork or a large plant. It’s especially good for living rooms where guests will look at the wall straight-on, since the structure reads intentional. You get the wow-factor without needing perfect decor every day.
Plan your layout with a 3/4-inch plywood carcass for the base cabinets and a matching frame above for the ladder openings. Build the base first: install face frames or inset doors, then add adjustable shelves inside. For the open section, attach vertical dividers at a consistent spacing (like 18 inches) and keep shelf depth at 10 inches. Finish everything in the same paint color or wood stain, then add thin trim to unify the seams.
Use soft-close hinges rated for 3/4-inch overlay or inset depth so door gaps stay tight and the look stays clean.
Avoid mixing three finishes on one wall; pick one paint and one wood tone max.
5. Black stained built-ins with brass shelf pins
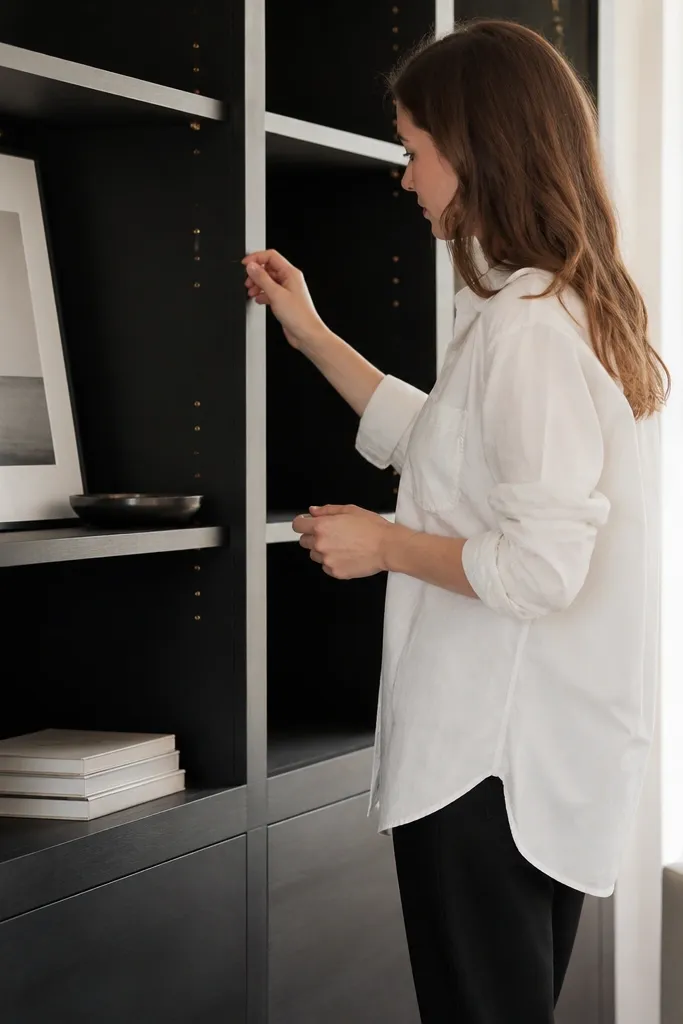
Black built-ins read modern the moment they hit the wall, especially if your room has light walls and warm flooring. Brass shelf pins add a subtle highlight without turning the whole thing into a “decor” piece. Keep the shelf faces flat and wide — no ornate molding — so the brass reads like hardware, not decoration. This is a strong choice when your living room has a black TV, black picture frames, or dark metal lighting. The contrast makes decor pop and photographs well.
Use 3/4-inch plywood for the carcass and shelves, then edge it with matching veneer or hardwood strips so staining looks even. Drill shelf pin holes with a jig so the spacing is identical across all sides; use 1/4-inch holes at consistent vertical intervals. Stain with a black dye stain first, then topcoat with satin water-based clear. Install the carcass into studs, then add the shelf boards on the brass pins and lock the back with a thin back panel for rigidity.
Test your black stain on a scrap panel because some plywood can go bluish — adjust with a warmer tone clearcoat.
Avoid high-gloss clear on black; it shows every fingerprint and dust streak.
6. White oak veneer built-ins with a slim face cap
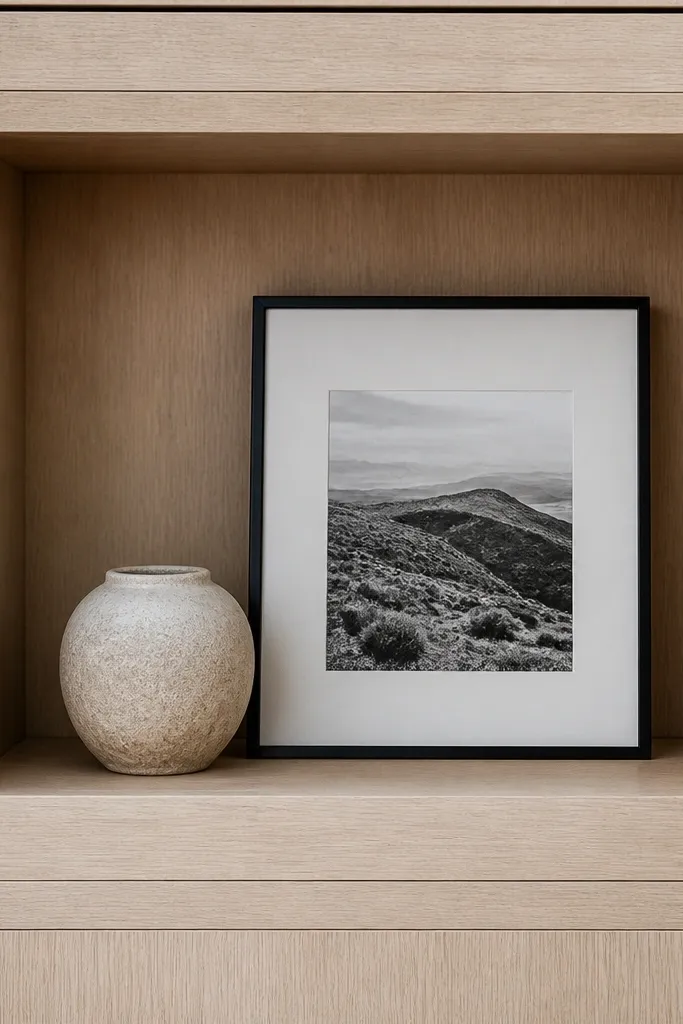
Veneer gives you that expensive wood look without the thickness and weight of solid boards. A slim face cap makes the shelf openings feel crisp and modern because the wood doesn’t look chunky. This is a great option if your living room has oak floors, light beige walls, or natural textiles and you want the built-ins to blend, not dominate. Keep the stain light to medium so it stays airy. The wow comes from the straight grain look and the thin trim line.
Build a plywood carcass with 1/4-inch veneer-ready surfaces, then apply matching veneer to the face panels and shelves. Use a slim face cap strip, around 3/4 inch wide, to define the openings, and keep the face flush across the run. Install the frame to studs with a level rail at the bottom, then add the shelves after the frame is secure. Finish with a clear satin oil or water-based topcoat to protect the veneer and keep the grain from looking dull.
Use veneer matching for the face panels so the grain direction stays consistent across the whole run.
Avoid skipping edge banding; raw plywood edges look cheap once the clearcoat hits them.
7. Two-tone built-ins with warm wood shelves and white frames
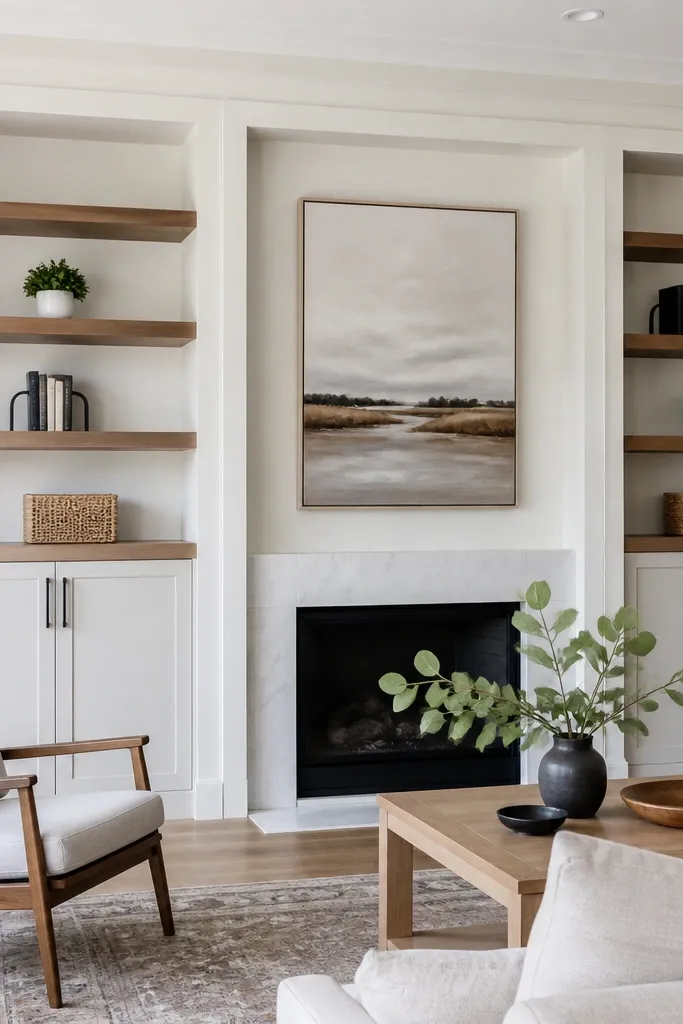
Two-tone built-ins look designer because you separate structure from display. Put warm wood on the shelves and keep the frame white (or off-white) so the wall doesn’t feel heavy. This design is especially good for modern minimalist built in shelves living room setups where you want brightness but still want warmth for books and decor. The eye lands on the shelf contents, while the white frame keeps the overall layout clean. It also hides minor wall color variation better than a single finish.
Build the frame from painted plywood or MDF, then leave the shelf boards separate so you can stain or finish them differently. Cut shelf boards to 9-11 inches deep, then sand and stain them to a warm tone that matches your flooring or coffee table. Assemble by screwing the frame to studs, then install shelves on cleats or shelf brackets that you can hide behind the face. Finish the white frame with primer plus two coats of matte or eggshell, and finish the wood shelves with a durable satin topcoat.
Before staining, seal the shelf boards with a conditioner or sanding sealer so the color doesn’t blotch around end grain.
Avoid staining the shelves darker than the trim — the contrast can look accidental instead of intentional.
8. Recessed display niches with 3-inch inner ledges
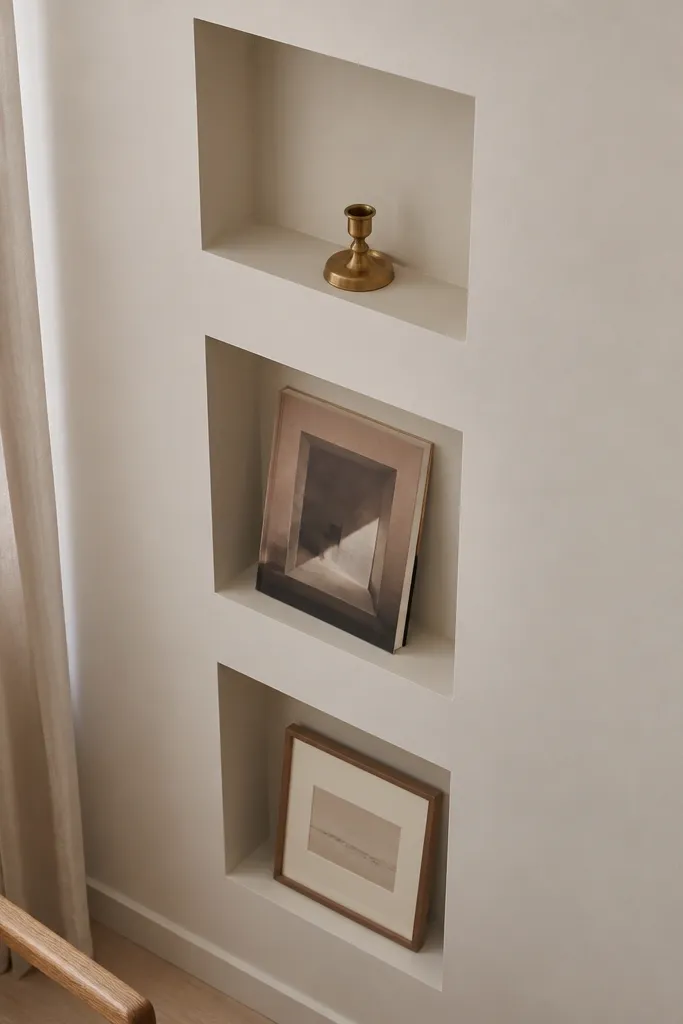
Recessed niches look high-end because they create depth without adding bulky shelves. The inner ledge is narrow, around 3 inches, so you can place small sculptures, frames, or candles without cluttering the niche. This is a strong choice for minimalist living rooms where you want decor to feel curated but not crowded. The niches also photograph well because the shadow lines are built-in. It’s a clean way to make a long wall feel designed even if you don’t need storage.
Mark a grid on the wall based on your preferred niche height and width, then install a stud framework that matches those openings. Add drywall or hardboard backers to create clean recess depths, then install a narrow shelf ledge inside each niche. Keep the ledge thickness around 3/4 inch and finish it to match the rest of the built-in. Finish with paint that matches your wall trim for the recessed areas, then caulk seams carefully so the lines stay sharp.
Use painter’s tape to mask niche edges before painting so the shadow line stays crisp.
Avoid making niches too wide; shallow niches look like empty boxes and feel unfinished.
9. Full-height wall of shelves with a continuous top beam
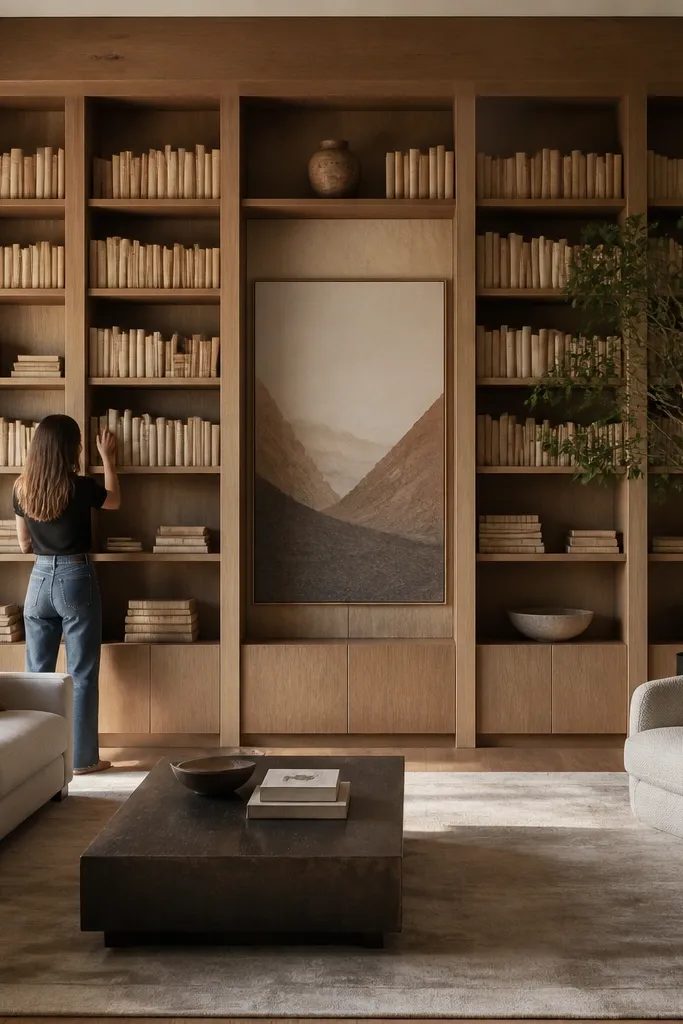
A continuous top beam makes the whole wall feel architectural. It visually ties every shelf section together, so the system reads modern even when you have multiple openings. This is perfect when your ceiling height is over 8 feet and you want vertical storage without adding a tall cabinet that dominates the room. Keep shelf depth around 10 inches so it doesn’t look bulky high up. Guests will remember the clean, long line more than the individual shelves.
Build a full-height framework from plywood panels or pre-cut carcasses, anchored to studs at multiple points. Install a top beam strip first — around 2 inches tall — so every vertical panel aligns off the same reference. Add shelf boards at consistent heights using cleats or a hidden rail system to keep them level. Finish with either matte paint or a matching stain and topcoat, then add a thin trim line where the beam meets the wall.
Editor's noteIf you’re going full-height, plan for baseboard removal or notch the frame so the bottom line stays straight.
Skip thisAvoid random shelf heights; the beam only looks intentional when spacing is consistent.
10. Book-matched veneer shelves for a gallery wall feel
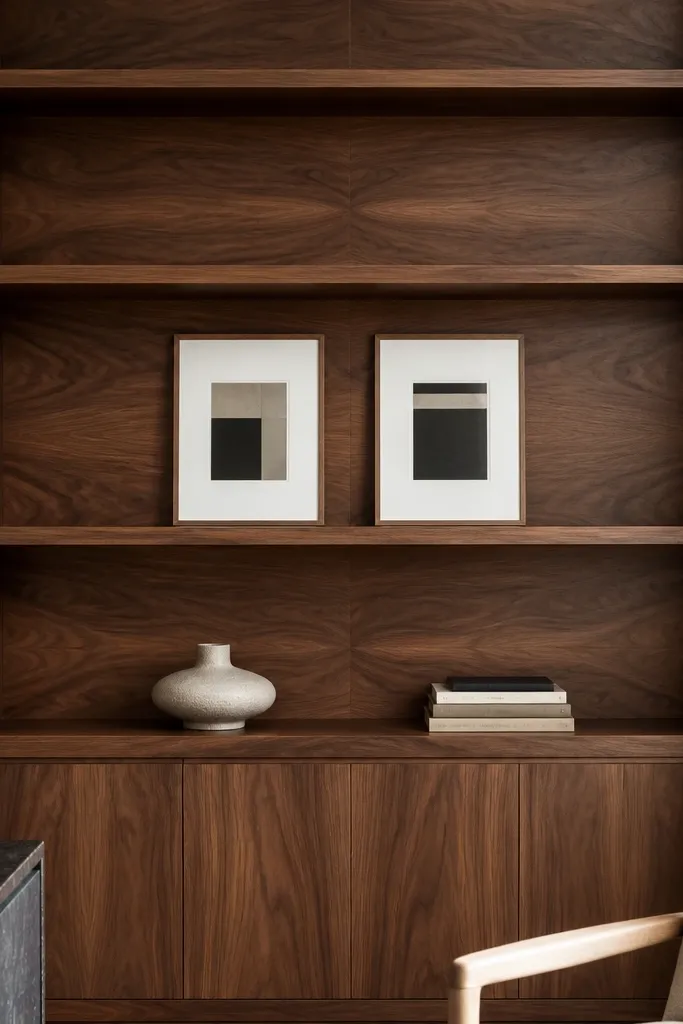
Book-matched veneer makes built-ins look gallery-grade because the grain symmetry reads calm and intentional. This style is best when your shelves are the star, not when they’re just background storage. It works in modern minimalist built in shelves living room spaces where you want the wall to feel like a curated display for art books, framed photos, and a few objects. Keep the shelves simple and let the veneer do the talking. The look is photogenic because the grain pattern catches light in a soft, even way.
Choose a veneer sheet that you can book-match across each face panel, then cut face panels slightly oversized and trim after glue-up. Build the carcass first using 3/4-inch plywood, then attach veneered face frames to the openings. Install shelf boards at planned heights, and keep depth at 9-10 inches for a sleek profile. Finish with a clear satin topcoat and seal edges so the veneer doesn’t lift around corners.
Use a bright lamp at a low angle during finishing to check for uneven sheen on veneer faces.
Avoid cheap thin veneer without a good backing; it chips at edges and looks rough under clearcoat.
11. Curved corner built-ins with a gentle radius
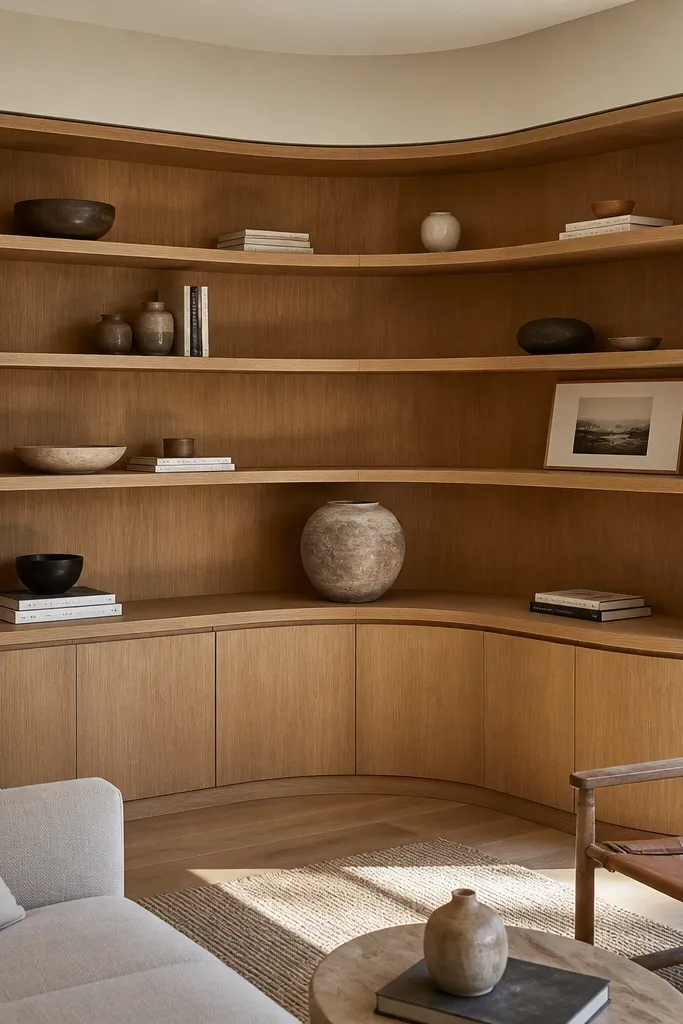
Corner built-ins look modern when the lines soften instead of breaking into sharp angles. A gentle radius — think 12 to 18 inches — lets the shelves wrap the corner and creates a continuous flow. This is ideal for living rooms with an L-shaped layout where guests see the corner from multiple angles. The curved face also photographs well because it creates highlights and shadows that feel intentional. Keep shelves open and uncluttered so the curve stays the focus.
Build a curved frame using laminated plywood strips or pre-cut flexible panels for the side walls, then anchor into studs around the corner. Install a continuous face radius using MDF strips bent with steam or using laminated layers. Set shelf depth at 10 inches and add internal support cleats every 12-16 inches to prevent sag. Finish the curve with sanded filler on seams, then paint or apply stain to match the rest of the room trim.
Editor's noteMake a cardboard template for the radius and test it against the corner before you cut any panels.
Skip thisAvoid tight radii under 10 inches; they look cramped and are harder to finish cleanly.
12. White slab shelves with thin black metal side rails
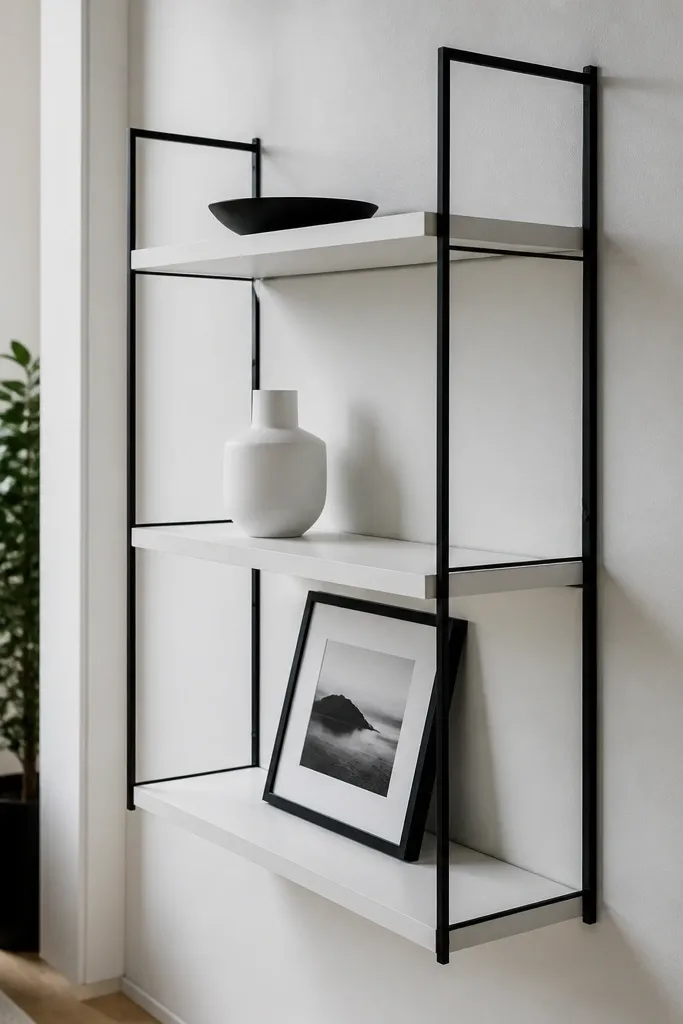
This is a modern minimalist built in shelves living room look that mixes warm structure with crisp contrast. The black metal side rails make the unit feel lighter than a full wood surround, and they add a sharp line that reads intentional. Use white shelves for a clean base, then keep the decor minimal: monochrome frames, matte ceramics, and a single plant. It’s also great if your living room has black picture lighting or a black console. The metal rails help the whole wall look “designed,” not just built.
Install a ledger into studs, then mount slim black metal side rails at consistent vertical points using a level. Use 3/4-inch plywood or MDF slab shelves cut to depth (9-10 inches), and attach them to the rails with hidden brackets. Add a thin back panel to stop items from falling and to stiffen the run. Paint the shelves white with a cabinet-grade finish, then touch up metal rails with matte black spray paint.
Editor's noteUse a template jig to mark bracket positions so every shelf sits the same distance from the rail edges.
Skip thisAvoid glossy white; it reflects room lights and can look uneven next to matte walls.
13. Lower cabinet drawers with open top shelves
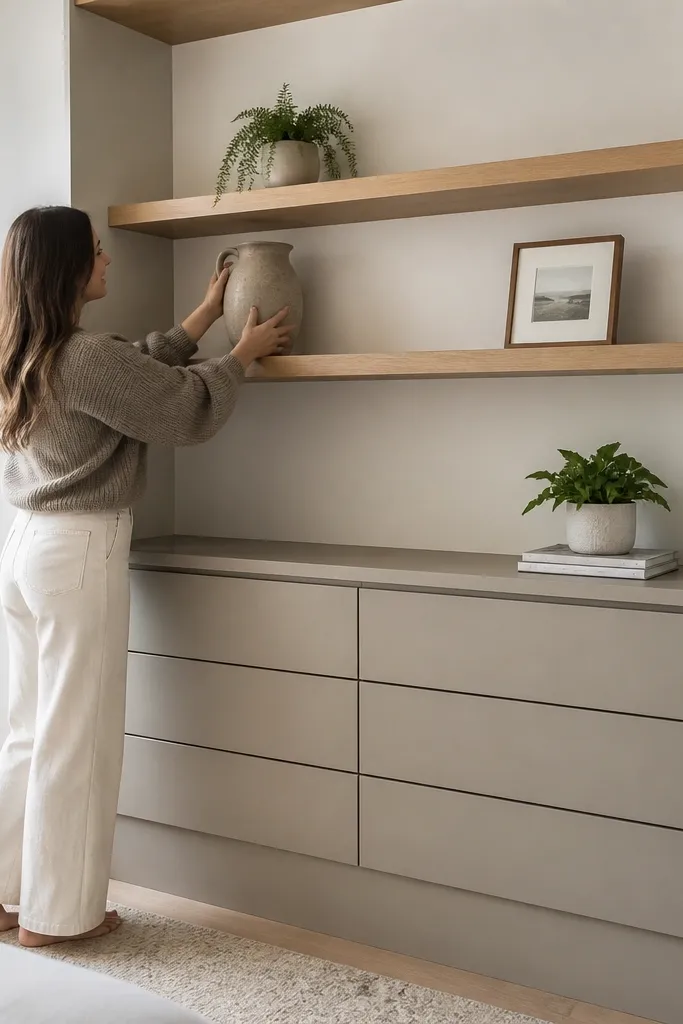
Open shelves look great until you store too much and the wall starts to look messy. This layout fixes that by pairing open top shelves with drawers below, so daily clutter stays behind closed fronts. Guests still get the wow of a modern minimalist built in shelves living room — clean shelf lines — but you keep the function of a storage wall. Choose drawer pulls that are flush or nearly flush so the front stays smooth and modern. It’s also a smart choice for living rooms that double as workspaces.
Frame the entire wall run using 3/4-inch plywood, then build or buy drawer boxes sized to your opening widths. Install the drawer slide rails first so the drawer fronts align, then add the drawer faces and level them. Above, install shelf boards at 12-14 inch spacing, keeping depth at 10 inches. Finish the shelf faces and drawer fronts in the same paint or wood tone, then add a thin trim line around the whole built-in.
Editor's noteUse full-extension soft-close drawer slides so the drawers feel premium and stay quiet.
Skip thisAvoid tall open shelves above drawers if you want minimal styling; tall openings invite clutter.
14. Asymmetrical staggered shelves with consistent depth
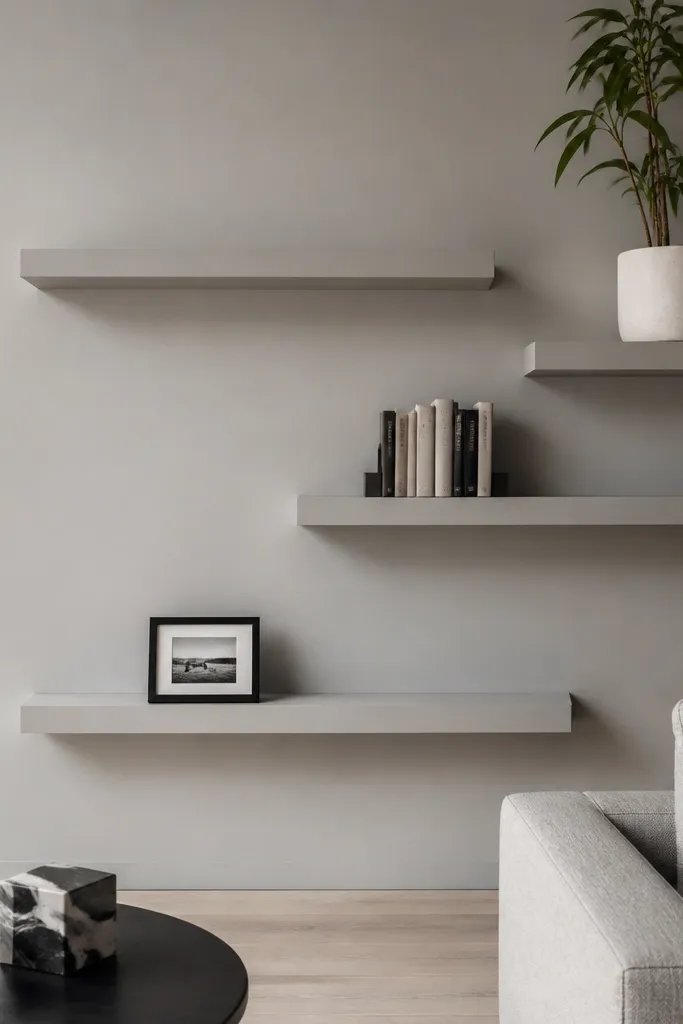
Staggered shelves can look modern instead of messy when you keep depth consistent and control the reveal. This design uses different shelf heights but keeps the same shelf depth and face thickness, so the wall still reads clean. It works when you want to display a mix of book sizes, framed photos, and a few tall plants without forcing everything into equal spacing. The trick is to choose a pattern that feels intentional: one tall element centered, then shorter shelves to the sides. It looks great in photos because the stagger creates a rhythm of shadows.
Mark a layout grid on the wall and decide each shelf height based on your decor — keep the depth at 10 inches across every shelf. Build a hidden frame with vertical cleats or a ledger system, then attach each shelf board to the cleats at its measured height. Use a face trim to create a consistent reveal around every shelf opening, even though the heights differ. Finish with matte paint or satin stain and seal all cut edges to prevent moisture swelling.
Editor's noteDry-layout your decor on the floor at the same heights before you cut shelves — it prevents the “looks off” problem later.
Skip thisAvoid random spacing; if the heights don’t follow a pattern, guests read it as unfinished.
15. In-wall TV edge shelves with a thin center reveal
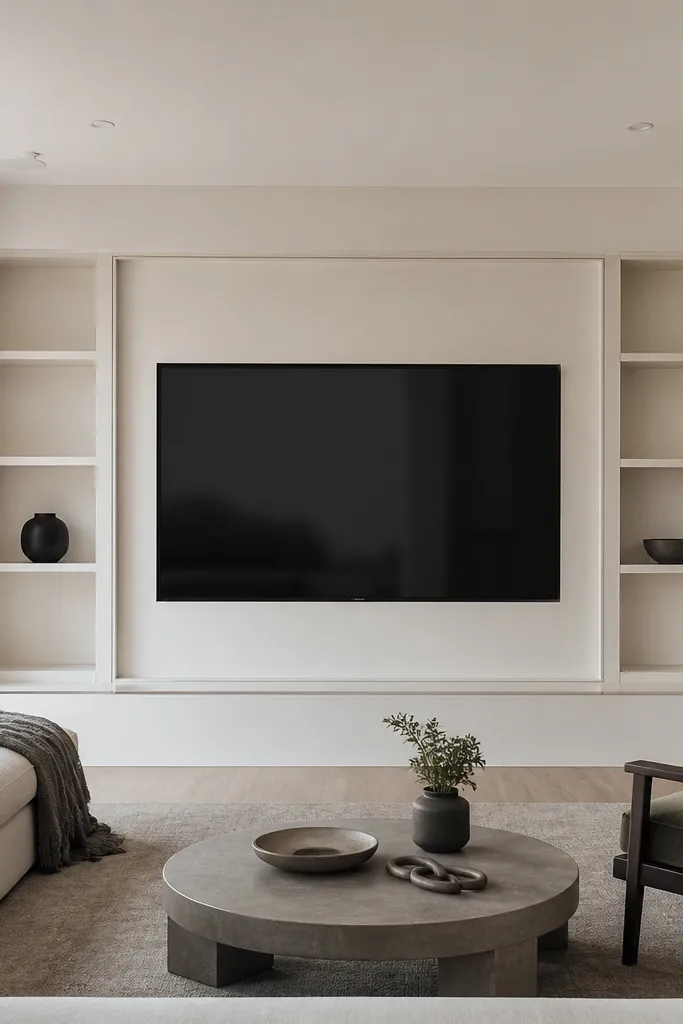
If your living room has a TV wall, the built-ins should frame it like a picture — not fight it. This look uses shelves only on the sides of the TV or as a narrow ledge around it, keeping the center clean. A thin center reveal — a narrow gap between the TV surround and shelf frame — makes the whole setup feel intentional and modern. It’s also a practical way to store remotes and small devices in lower cabinets while keeping the TV area visually quiet. The shelves look minimal but still give you display space.
Frame the TV wall surround using 3/4-inch plywood and anchor it to studs so it stays rigid. Build side shelf boxes at 9-10 inch depth and keep the face thickness consistent, then leave the center area open and clean. Install a lower cabinet or drawer section for devices, then add a thin back panel behind the shelves. Finish everything in matte paint or a wood tone that matches your living room trim, and route a cable channel inside the frame before you close it up.
Plan your TV mount height and account for the thickness of the backer and shelf face so the TV isn’t too recessed.
Avoid placing shelves directly behind the TV’s airflow path; keep heat ventilation space.
16. Walnut shelves with clear back panels for a light look
Walnut looks expensive, but it can get heavy if the whole wall is dark. This version keeps the wall light by using clear back panels behind the shelves, so the space doesn’t feel like a dark box. The walnut shelves still add warmth and depth, and the clear panel keeps light moving through the wall. This is a great minimalist built-in choice for rooms with lots of daylight. It also makes decor look more intentional because the background stays clean and consistent.
Build the frame from plywood and install shelf boards at 10 inches depth, then stain or finish the shelves walnut. Add clear back panels using acrylic or thin clear polycarbonate cut to fit each opening; secure with small hidden screws or a thin rail. Seal the back edges so you don’t get sharp contact points against the acrylic. Finish the frame in a light paint or a neutral matte so the walnut stays the focus.
Editor's noteUse a microfiber cloth and mild cleaner on clear panels; smudges show instantly in daylight.
Skip thisAvoid cheap brittle acrylic; it can bow and crack around screw points.
17. Textured plaster surround with smooth shelves
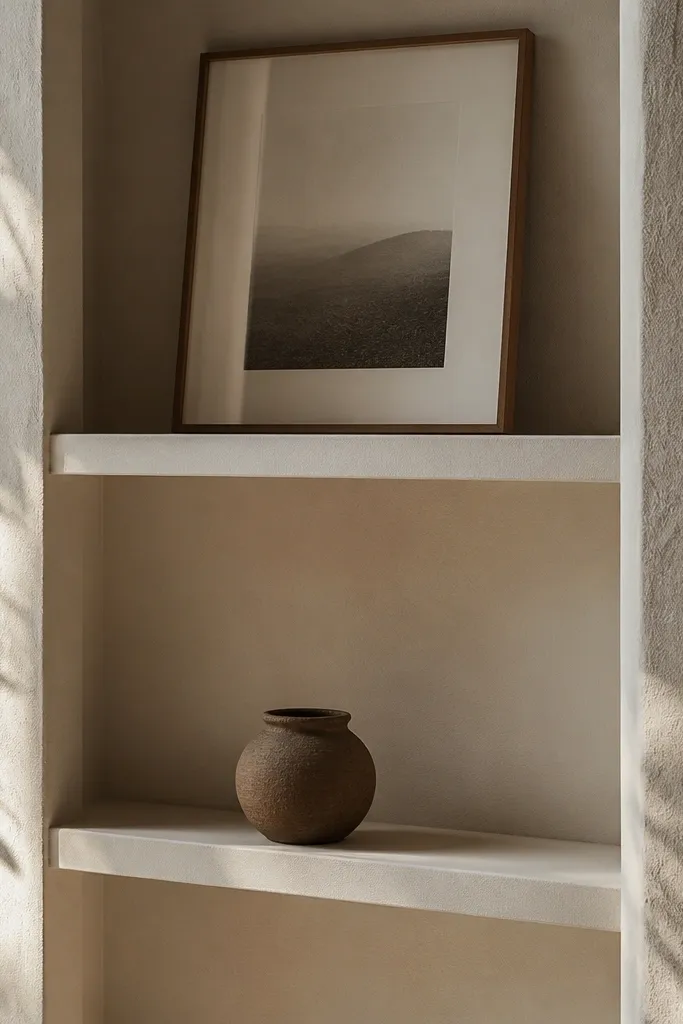
This look is modern because it mixes smooth shelf planes with a textured wall surround. The shelves stay minimal and easy to style, while the plaster texture gives the wall depth without cluttering the shelves themselves. It’s photogenic because the texture catches light and creates soft shadows around the openings. Keep the shelves smooth — wood or painted — so the contrast feels intentional. This is a good choice when you want your built-ins to look like part of the architecture, not just furniture attached to drywall.
Build the shelf frames first from plywood and install them level into studs. Apply a plaster base coat around and between the openings using a trowel, then texture it with a controlled finish pattern like a light Venetian-style swirl or a fine knockdown. Keep the shelf areas smooth by masking edges and using a straight trim line. After the plaster cures, paint or seal it in a neutral tone and finish shelves with a durable topcoat.
Editor's noteMask shelf edges carefully and remove tape before the plaster fully sets so the line stays sharp.
Skip thisAvoid plaster over moving frames; if the frame flexes, the plaster will crack.
18. Rift-sawn oak shelves with a vertical grain face
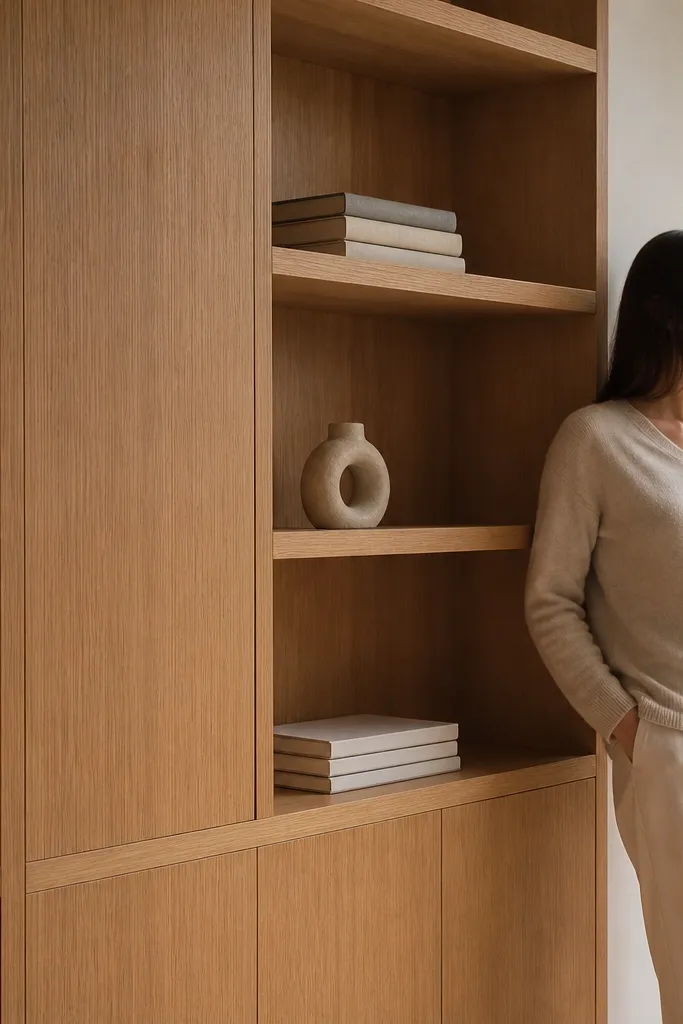
Rift-sawn oak gives you straight, fine grain that reads calm and modern. Pair that with vertical grain face panels, and the whole built-in looks tailored, not rustic. This is a smart pick for a modern minimalist built in shelves living room because the grain pattern is subtle and consistent, so your decor still leads. Keep the openings simple and avoid extra molding so the grain stays the texture. Guests will notice the wood quality because it looks uniform across the run.
Use rift-sawn oak for face panels and shelf edges, then build the internal carcass from plywood for stability. Install the face frame flush to the carcass and keep reveal gaps consistent using spacer shims. Add shelf boards cut to 10 inches depth and support them with cleats every 16 inches for long runs. Finish with a clear satin conversion varnish or water-based topcoat so the grain stays crisp without turning amber too fast.
Editor's noteChoose your oak boards with similar color temperature so you don’t get patchy warmth across the face panels.
Skip thisAvoid mixing rift-sawn and quarter-sawn pieces in the same visible face; the grain rhythm looks off.
19. Stone-look laminate shelves on a matte white frame
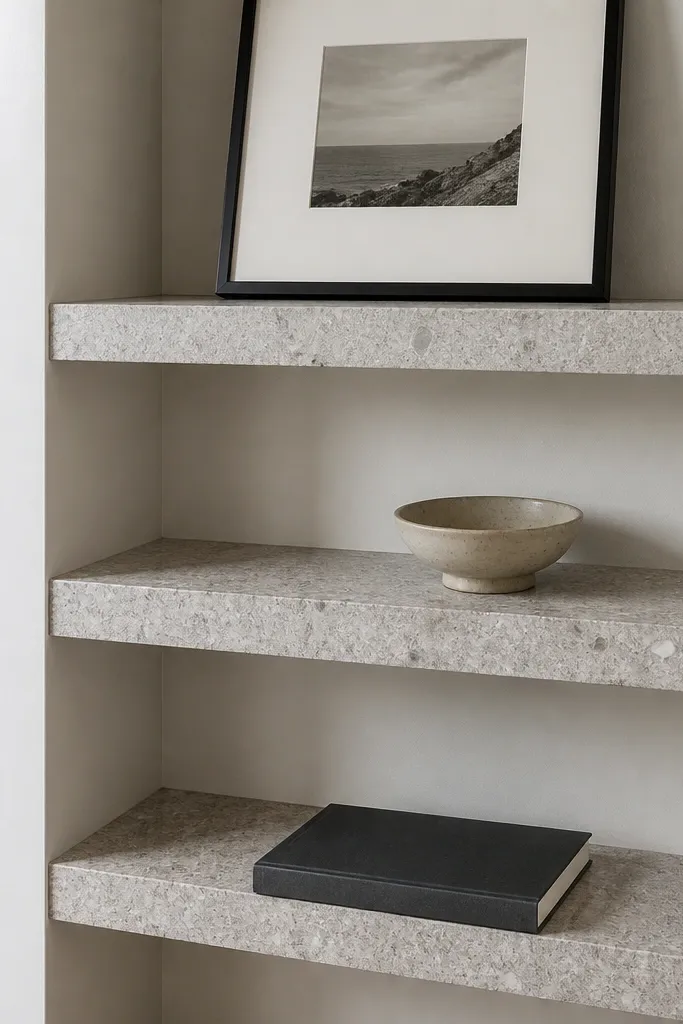
Stone-look laminate gives you a modern, high-contrast surface without the maintenance of real stone. The matte white frame keeps the wall minimal, while the stone pattern adds visual interest right where guests look — on the shelves themselves. This is great for minimalist living rooms that need a stronger material statement but don’t want dark wood. Keep the shelf surface clean and flat, and style with simple shapes so the pattern doesn’t compete. It photographs well because the laminate has consistent speckling and doesn’t show minor scratches as fast.
Build the frame from plywood and paint it matte white with cabinet-grade paint. Cut shelf boards to your depth (9-10 inches) and laminate the top surfaces using contact adhesive or heat-activated laminate. Wrap the laminate edges with matching edge trim so the look stays clean. Mount the shelves on hidden cleats or brackets inside the frame, then seal any exposed core edges to prevent swelling.
Laminate edges last longer when you seal the MDF core with shellac before installing the trim.
Avoid leaving MDF edges raw under laminate; they can swell and telegraph through the finish.
20. Minimal open shelves with a hidden wire race behind the back
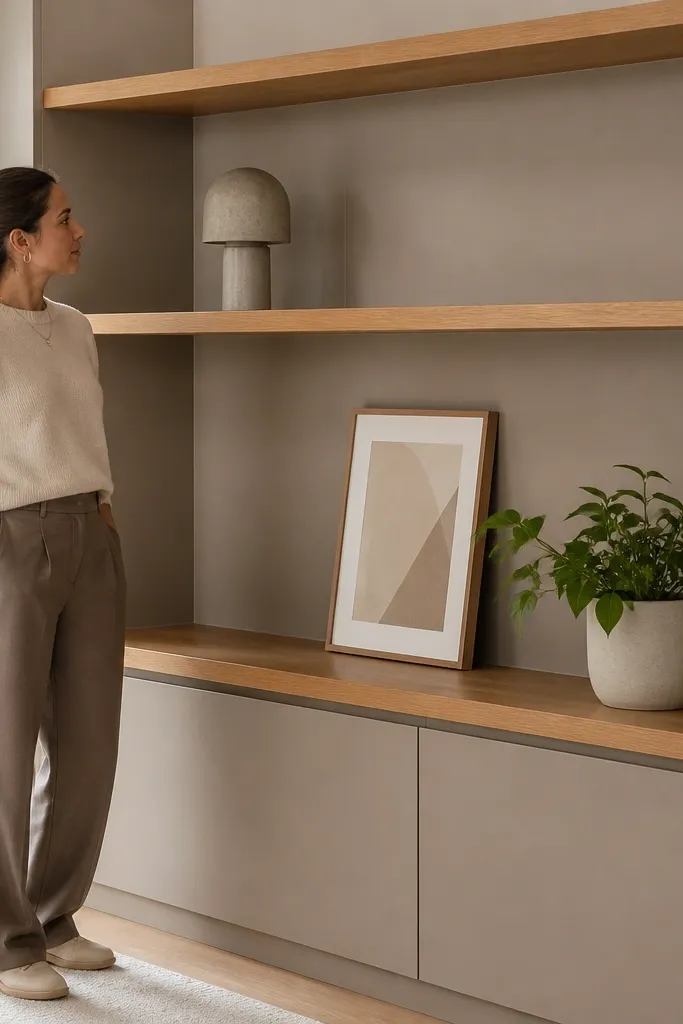
A modern minimalist built in shelves living room can look messy fast because of visible cords, power strips, and cable runs. This design keeps the shelves visually clean by building a hidden wire race behind the back panel. You get open display space, but you can still power a lamp, LED light strips, or small devices without clutter. It’s photogenic because the back stays smooth and free of cable shadows. This is especially useful if you add under-shelf lighting or if your decor includes a charging dock.
Build the shelf frame with a shallow chase space behind the back panel, leaving 1-1/2 to 2 inches for wire bends. Install a removable back panel or a thin access panel so you can service cables later. Route wiring through a cable raceway inside the chase, then mount your shelves to internal cleats so no brackets show. Finish with a smooth back panel and paint it the same color as the wall or frame so the background disappears.
Leave a service loop of 8-12 inches in the chase so you can pull devices out without re-wiring.
Avoid stapling wires directly to the back panel; vibration and sharp edges can damage insulation.



