
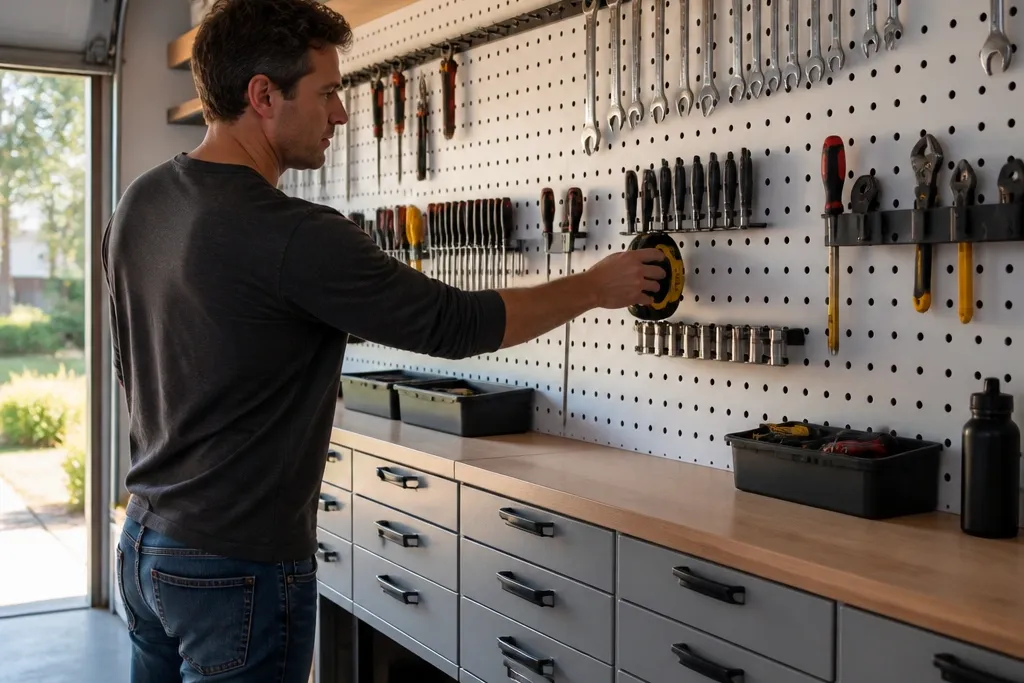
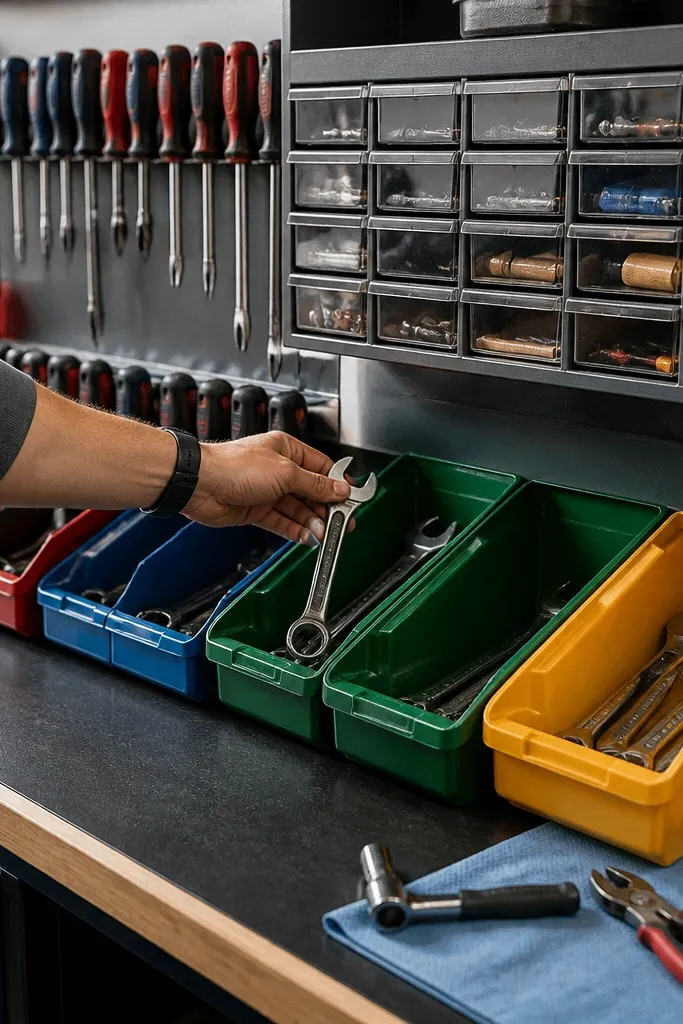
1. Two-Tone Shadow Board for Hand Tools
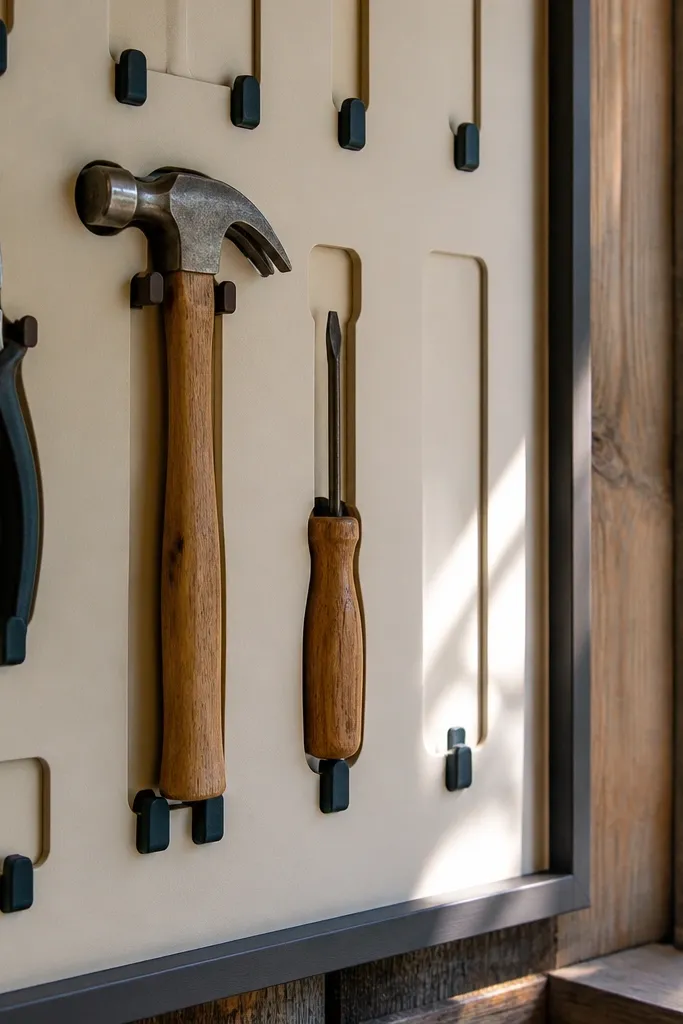
This is the cleanest way to get fast finds because every tool sits inside a visual “frame.” Use a light background board with darker hooks so your eye reads the outline first and the tool second. It also looks sharp when you’re done working because empty spaces still look organized. For materials, use 1/2-inch MDF or plywood painted in a matte finish, then add metal hooks and a thin edge trim so the board doesn’t look flimsy. Skill level is basic carpentry and simple cutting, and the build takes about a weekend if you measure carefully.
Start by laying out your top 10-20 hand tools in a grid on the wall at 48 inches height for the handles. Cut a backing panel from 1/2-inch MDF or plywood, then sand, fill screw holes, and paint the background with matte paint. Mark tool positions by tracing the outline onto paper, transfer to the board, then mount hooks so the tool hangs with the same clearance each time. Finish by sealing the board with a clear topcoat if you’re using a tool that can drip oil.
Make hooks slightly smaller than the handle width so tools “snap” into place instead of sliding.
Don’t guess hook spacing — measure one tool, then copy the spacing across the board.
2. Clear-Lid Hardware Drawers for Bits and Blades
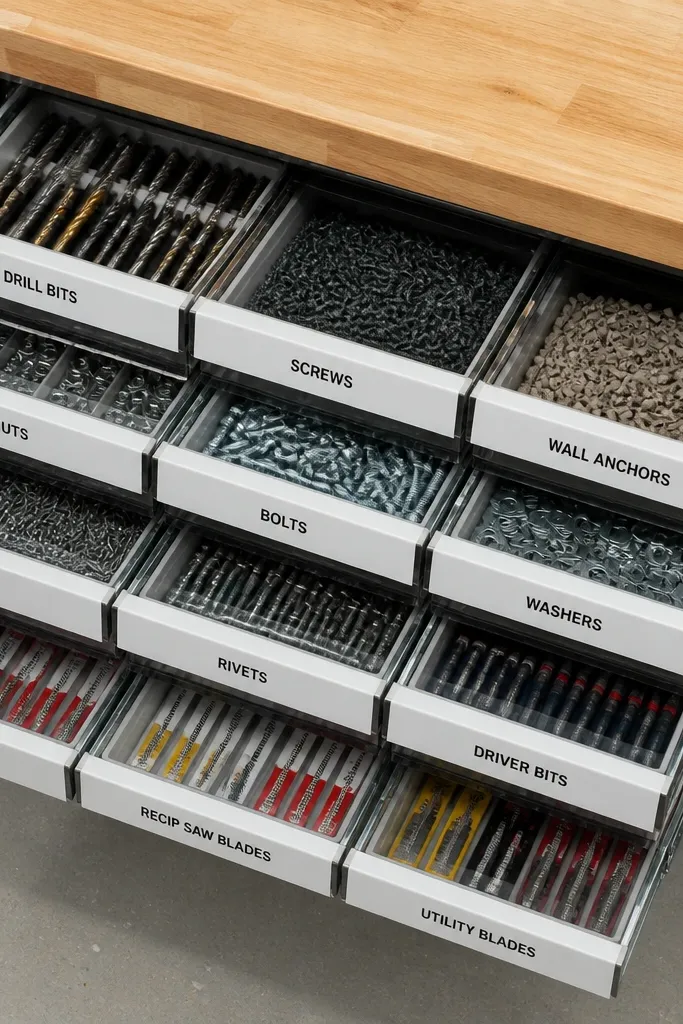
Small parts kill speed because they get mixed. Clear-lid drawers solve that by letting you see the contents without opening anything, and the drawer keeps everything aligned. The look is modern when you use identical drawer fronts and consistent labeling, like black text on white or white labels on black bins. Go with bins that are sized for your real categories: drill bits, spade bits, blades, and sanding accessories. This works best in a garage workbench zone or along a side wall where you can stand and scan.
Editor's noteUse color labels for size groups (for example, yellow for 1/4-3/8 inch) to cut scan time.
Start by measuring the drawer opening and choosing plastic or acrylic bins that fit with a small gap so lids close smoothly. Install drawer slides if you’re building from scratch, or use existing base cabinets and add drawer organizers. Label each bin with a simple category and size range, then load items by size order so you can grab the right one without rummaging. Finally, mount the drawer unit so the drawer face sits around waist height for fast access.
Skip thisDon’t use one giant bin for all bits — mixed sizes always slow you down.
3. Vertical Long-Handle Rack with Tool Caps
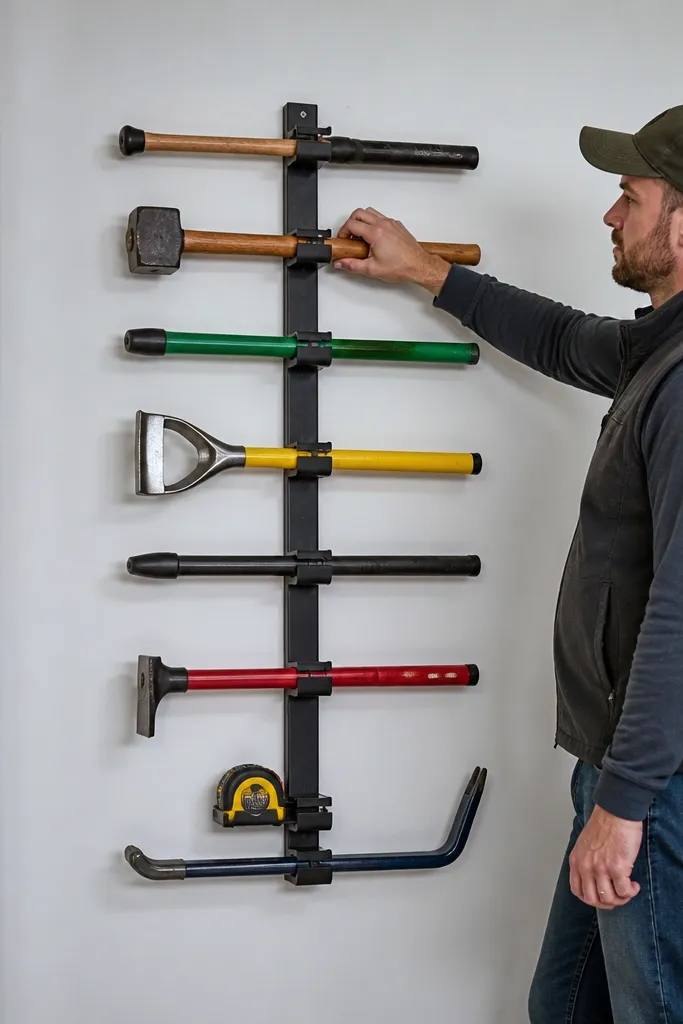
Long-handled tools look messy when they lean or hang at random angles. A vertical rack keeps everything straight, protected at the tips, and fast to pull because the handles line up in a single column. It also protects your wall and the tool ends from damage. For a modern look, use powder-coated metal brackets or a painted plywood backer with evenly spaced uprights. This is ideal for rakes, shovels, brooms, and yard tools in a garage bay where you want them out of the way but still visible.
Start by measuring the tallest tool so you know the rack top height and leaving 2-3 inches of clearance for the handle. Install a backer board or metal rail to studs, then mark bracket spacing so each tool has its own slot. Add U-shaped clamps or vertical hooks with rubber or foam tool caps on the bottom end to prevent scratches. Load tools in order and check that handles clear each other when you pull one out.
Put the heaviest tool in the center slot — it keeps the rack from feeling “off” visually and mechanically.
Avoid mounting into drywall anchors — use studs or you’ll fight wobble every time you grab a tool.
4. Pegboard Upgrade with Numbered Zones
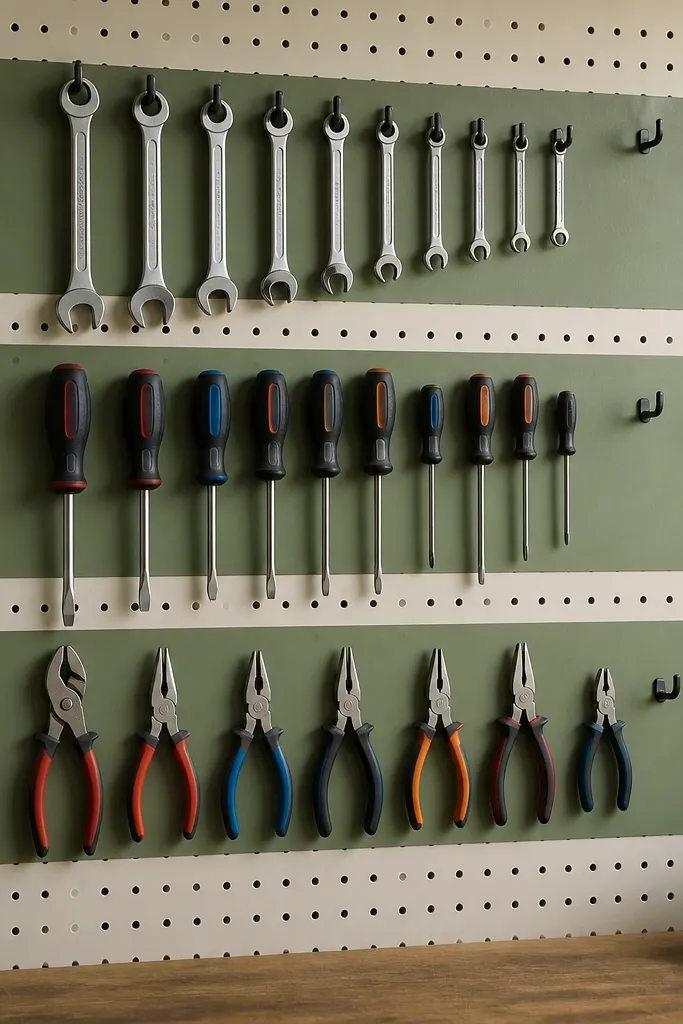
Pegboard can look great, but only when you stop treating it like a free-for-all. Numbered zones turn it into a fast-find system because you’re not “looking for a hook,” you’re looking for a section number. Use wide horizontal bands of paint or vinyl over the pegboard, then place tools inside each band based on the job you do. This keeps the aesthetic clean and the workflow obvious from across the garage. It’s also fast to build because you’re using the pegboard as your layout grid.
Editor's noteUse the same hook style everywhere in one zone so the board looks intentional, not patched.
Start by choosing pegboard size and painting it the base color, then add two or three horizontal color bands using painter’s tape. Mount the pegboard to studs so the sheet sits flat. Sort tools into groups and assign each group a band number, then mount hooks so handles align along the same vertical line. Add a small label strip under each band number for the tool category.
Skip thisDon’t mix hook lengths randomly — it makes tools drift and makes empty spaces look chaotic.
5. Workbench Side Rail for Measuring Tools
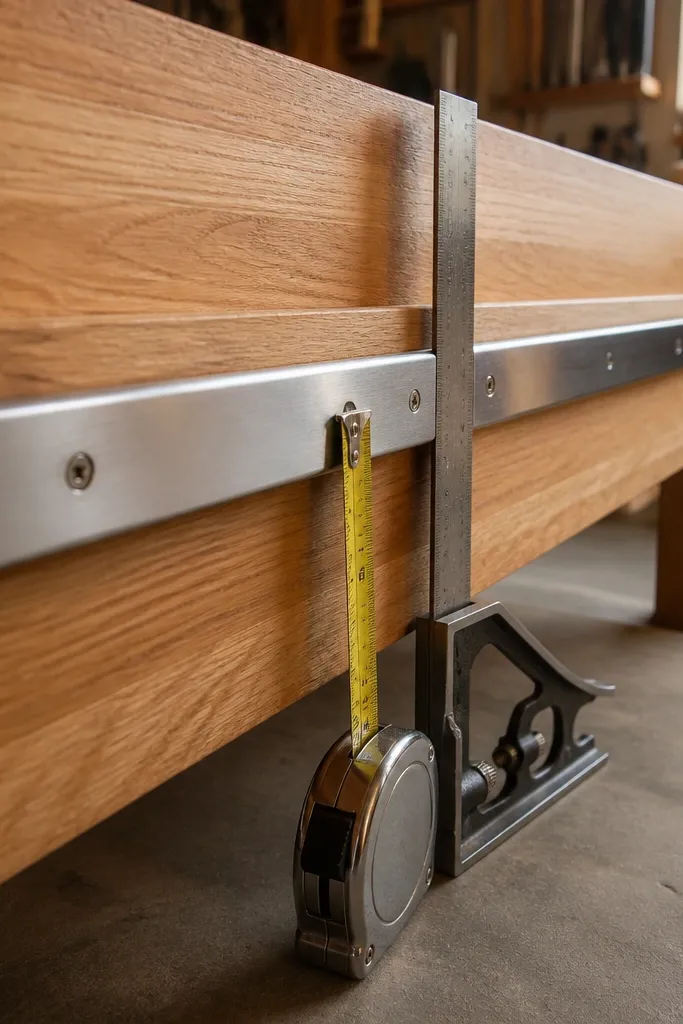
Measuring tools are the fastest to lose because they sit flat in drawers or get leaned behind other items. A side rail storage setup keeps them upright and visible, so you grab a tape measure or square without rummaging. Keep it modern by using a single metal rail color and mounting it straight along the bench edge. Levels and squares also benefit from vertical storage because it reduces scuffing on the bench. This works best on a workbench wall where you naturally stand during layout and cuts.
Editor's noteUse a rubber-lined cradle for levels so they don’t rattle and chip paint.
Start by mounting a metal slotted rail or painted plywood strip to the wall at 52 inches from the floor. Install holders sized for your exact tools: tape measure hooks, level cradle brackets, and a flat holder for squares. Position the tape measure hook at the most reachable height and keep the heavier level in the lower section. Finally, add a small lip or stop at the top edge so tools don’t slide down.
Skip thisSkip “one-size” holders if your tools vary — mismatched fits make tools fall out.
6. Fold-Down Tool Mat on a Swing Frame
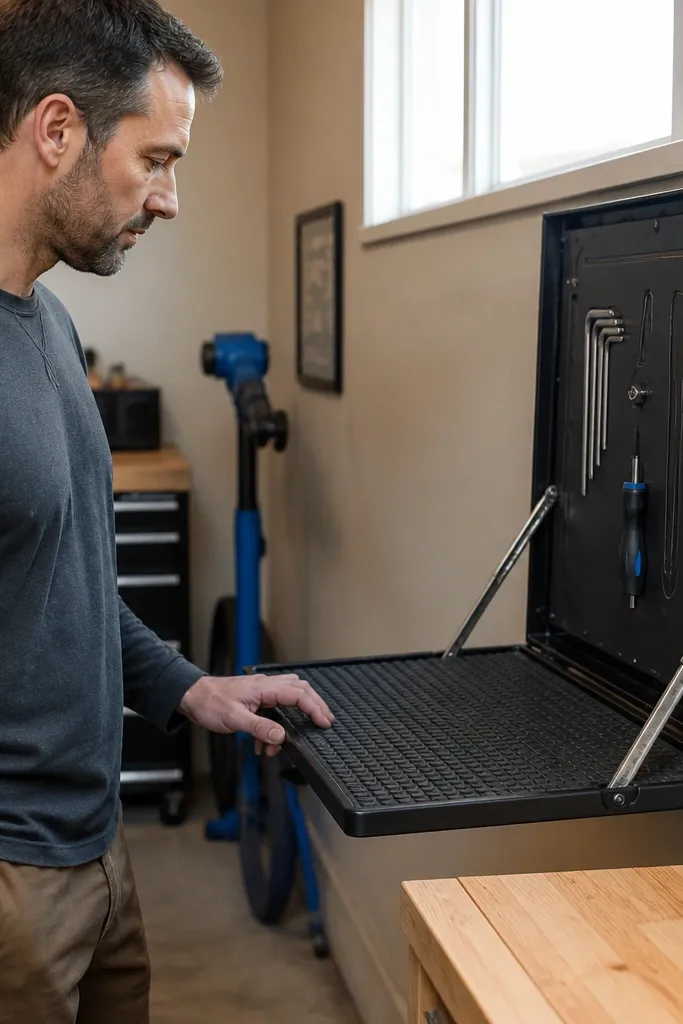
If you work on small projects, a fold-down tool mat keeps tools in one place without permanent wall clutter. The swing frame looks clean because it’s mostly flat and hidden until you need it, and the mat creates a consistent “put it back here” surface. This is great for hand tools you use during quick repairs: screwdrivers, wrenches, hex keys, and small pliers. It also keeps the garage floor clear, which helps the whole space look tidy. Skill level is moderate DIY because you’re building a hinge and latch, but the result is very photogenic.
Start by choosing a mat surface: thick rubber or a sealed canvas with a non-slip backing. Build a rectangular frame from 1x2 lumber, then attach hinges to mount it to the wall or inside a cabinet opening. Install a latch or magnetic catch so the mat stays flat while you work. Add tool pockets or hook-and-loop strips on the mat so each tool has a home and doesn’t slide when you flip it down.
Use a hinge with a built-in stop so the frame doesn’t slam the wall and chip paint.
Don’t use a thin mat — it curls and makes tools slide during use.
7. Power Tool Dock with Cord Clips and Bit Tray
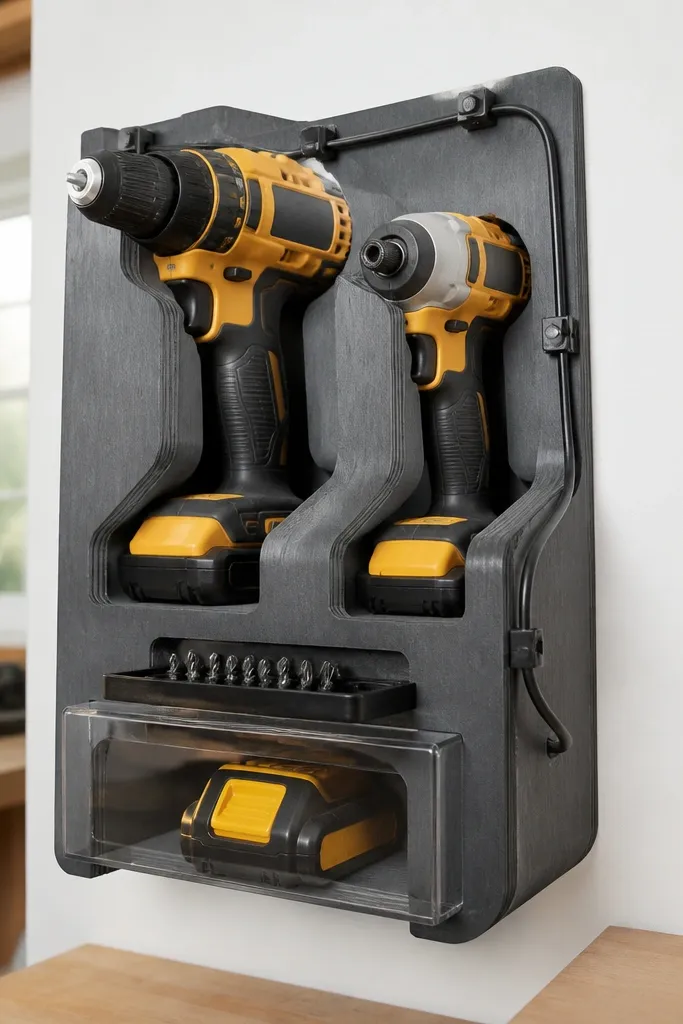
Power tools look best when cords and accessories don’t hang randomly. A dock with cord clips keeps the tool body clean and makes the whole setup feel intentional. Add a small bit tray under or beside the dock so you can grab the bit you need without searching for it. Use a painted plywood backer with recessed tool cradles so each tool sits at the same angle. This is ideal for drill/driver combos, impact drivers, and sanders. It’s a half-day build if you keep it simple with pre-made cradles and just cut the backer panel.
Editor's noteRoute the cord clip positions so the cord stays slack when the tool is pulled out, not stretched.
Start by measuring each tool’s base and handle profile so you can build cradles that grip firmly. Cut a plywood backer panel and paint it, then mount a tool cradle using screws into studs. Install cord clips along the side so the cord wraps neatly and doesn’t snag when you pull the tool. Add a small bit tray made from a shallow box or metal organizer and secure it with screws.
Skip thisAvoid mounting cradles too tight — if you have to force the tool in, you’ll stop using the dock.
8. Magnetic Tool Strip for Hex Keys and Screwdriver Bits
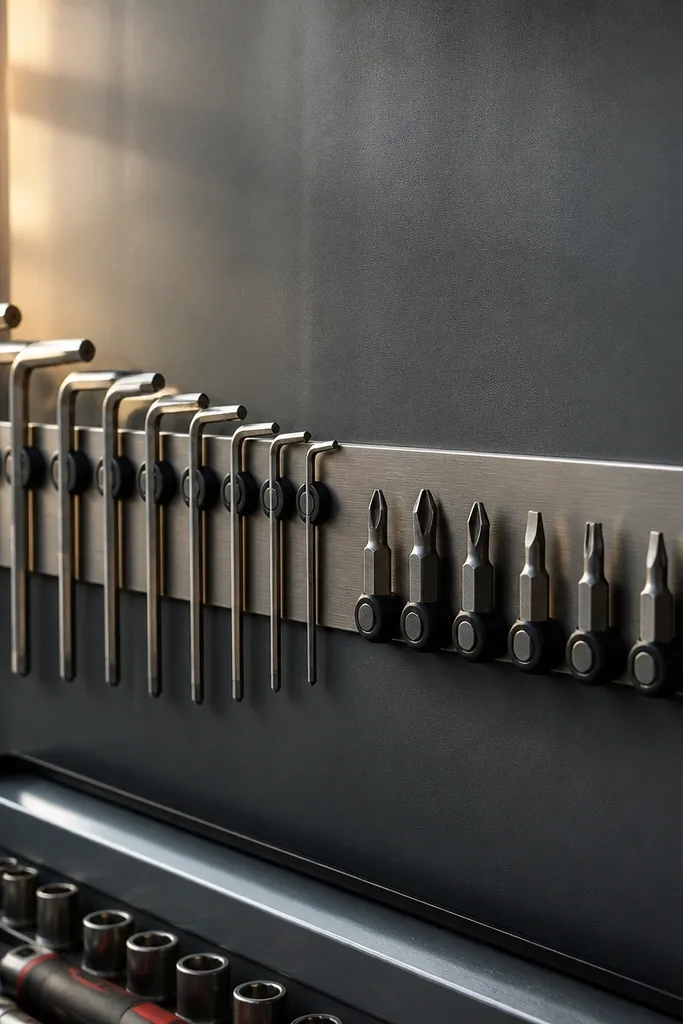
Magnetic storage is the fastest for small metal tools because you can see the shapes instantly. For a modern look, mount a wide strip on a matte board and keep spacing consistent so the tools line up like a set. Use magnetic rails with strong backing and add foam or rubber bumpers so the tools don’t clack. This setup is best for hex keys, screwdriver bits, and small wrenches you grab mid-project. It looks clean even when the tools are out because the line stays straight.
Start by choosing a magnetic strip length that matches your most-used set of bits or hex keys. Paint or seal the mounting board, then screw the board into studs. Attach the magnetic strip and test pull strength with your heaviest tool so it doesn’t fall. Arrange tools in size order and add small index labels under the strip for quick scanning.
Stick a thin strip of painter’s tape on the board, then arrange tools on the tape before you commit — it makes spacing painless.
Don’t mount magnets onto MDF without sealing — moisture and dust can make the surface look worn.
9. Clear Bin Wall for Cleaning Supplies with Color Labels
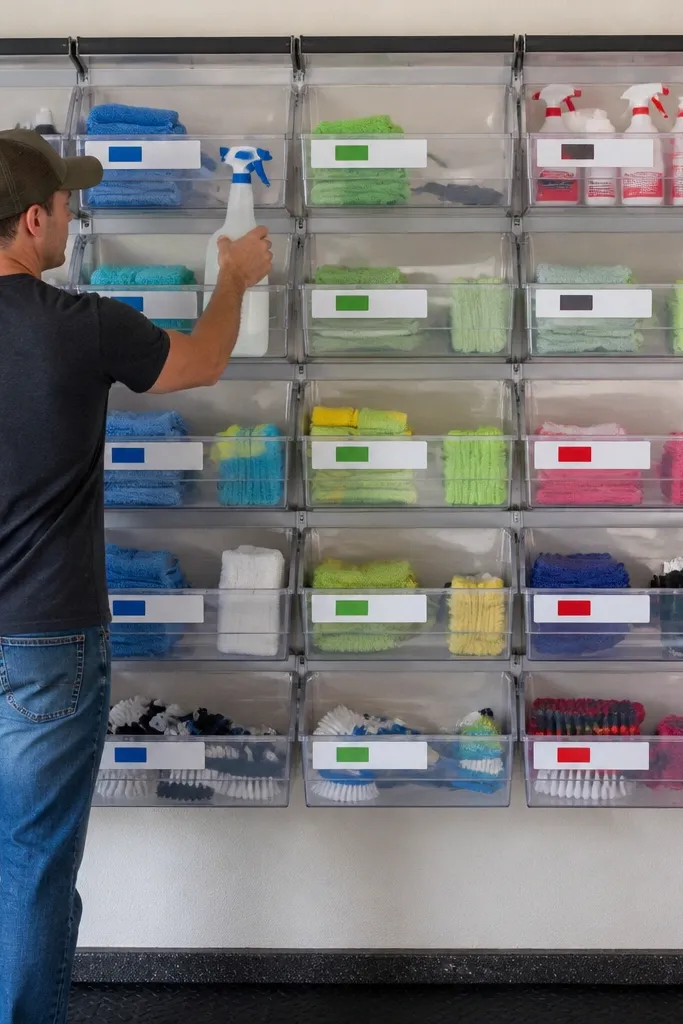
Cleaning supplies end up everywhere because they’re used between tasks. Clear bins keep them visible and grouped, while color labels make it fast to pick the right one without reading tiny text. The look is modern when all bins match and the labels are uniform size and font. Use this for shop rags, brush types, solvent wipes, and gloves. It also keeps chemicals contained and off the floor, so your garage looks better even when you’re mid-project.
Editor's noteUse a matte label background and keep the text big — it reads from across the garage.
Start by selecting bins with the same footprint and choosing a label system you can repeat. Mount a board to studs, then attach bin rails or screws through the bin’s back mounting points. Label each bin with a bold category and, if needed, a safety note like “gloves” or “solvent wipes.” Organize by frequency: top row for grab-now items, bottom row for refills.
Skip thisDon’t mix open-top bins with lidded bins on the same wall — it looks messy fast.
10. Ladder Hook Rack with Angled Cradle
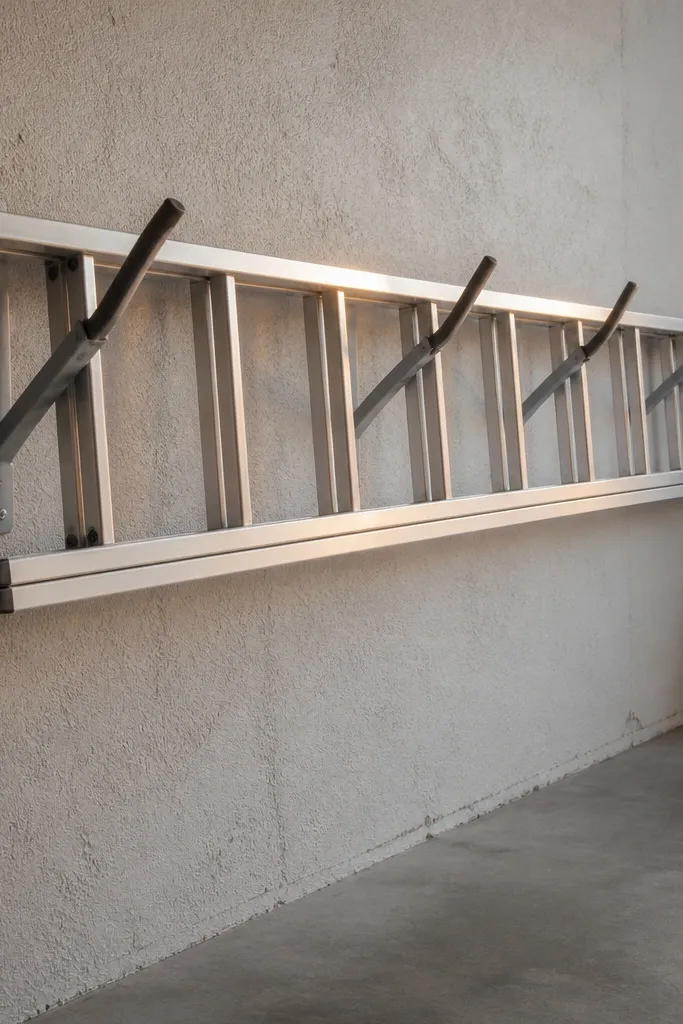
A ladder is awkward to store and it dominates the visual space. An angled cradle rack looks intentional and keeps the ladder off the floor without leaning it in a random direction. The modern part is in the clean geometry: consistent angle, padded contact points, and a tidy line of mounting hardware. Store step ladders or extension ladders with enough clearance so you can still open the garage door without interference. This is for garages with a dedicated wall where you can mount heavy hardware into studs or concrete.
Start by choosing an anchor method that matches your wall type: studs for drywall, or masonry anchors for concrete. Mark the ladder contact points and decide the cradle angle so the ladder rests securely without slipping. Build or buy a cradle made from metal with rubber padding, then mount it level and plumb. Add a second hook or tie point near the top so the ladder can’t rock when you grab it.
Pad the contact points with closed-cell foam so paint doesn’t get chewed up.
Skip “one hook” storage — ladders shift and the look turns sloppy quickly.
11. Tool Drawer Inserts with Shadow Edges
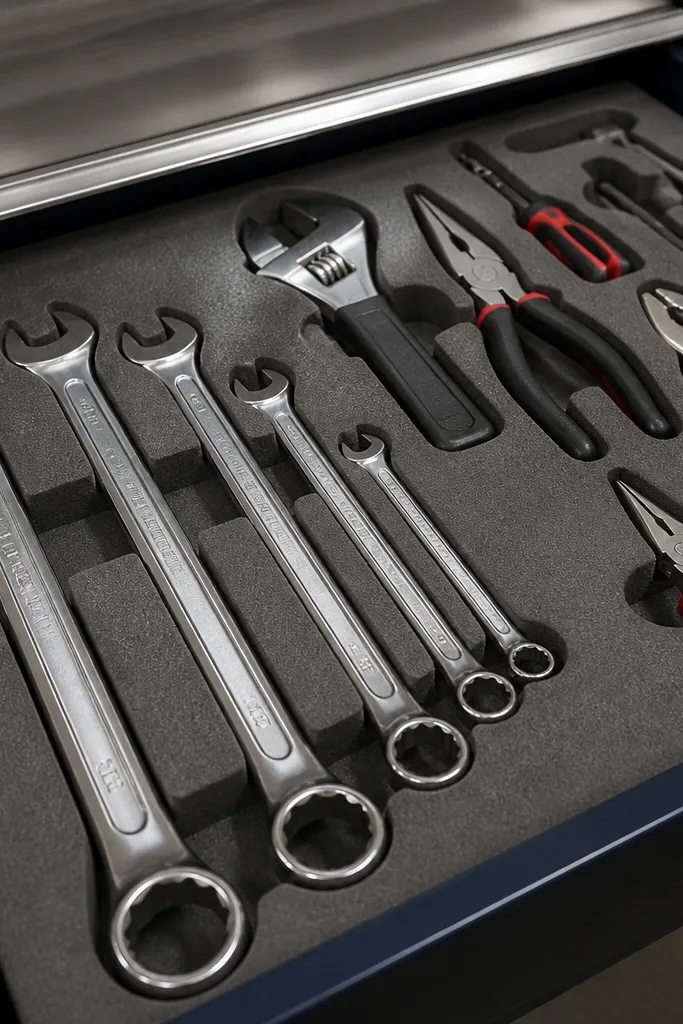
If your tools live in drawers, you already know the frustration: everything gets mixed and you spend time hunting. Drawer inserts with shadow edges fix that by creating a molded outline that your tool sits into. The look is modern because the drawer face stays clean while the inside is organized like a set. Use this for screwdrivers, pliers, wrenches, and driver bits. Skill level is medium because you’re cutting inserts, but the build is straightforward with foam board, plywood, or EVA foam depending on your budget.
Editor's noteMake shallow “lip” edges around the cutouts so tools don’t pop out when you pull the drawer.
Start by measuring your drawer interior and picking insert material: EVA foam for grip or thin plywood for structure. Trace each tool outline on the insert, then cut slots so the tool sits below the top edge by about 1/2 inch. Test fit and adjust until the tool sits snug without forcing. Install the insert so it can’t slide, then add a label strip on the drawer face for fast category ID.
Skip thisDon’t cut insert cavities too tight — tools should slide in with light pressure, not hammering.
12. Wall-Mounted Wrench Organizer with Depth Stops
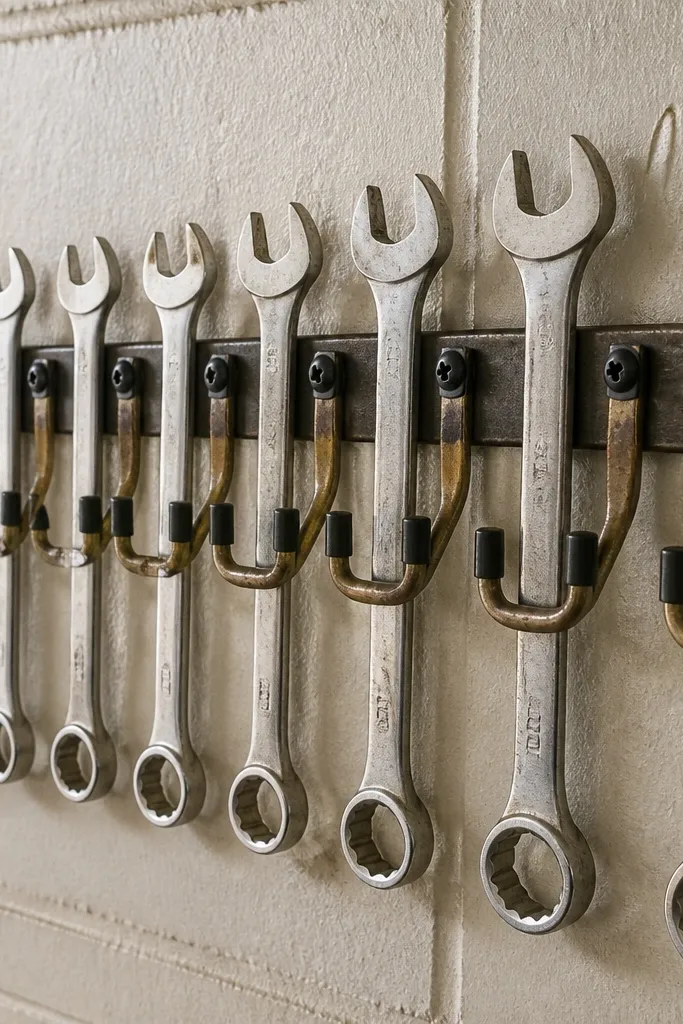
Wrenches look small until you try to keep them organized. A wall-mount holder with depth stops makes each wrench sit at the same depth so the head profiles line up cleanly. That alignment is what makes the setup look high-end instead of cluttered. Use metal U-holders or 3D-printed stops with a rubber pad so wrenches don’t chip. This is best for a set of combination wrenches or sockets on wrenches you use daily. It’s also quick to build if you use a pre-made rail and just customize spacing.
Start by sorting your wrenches and measuring the widest point of each head. Mount a backer panel to studs, then mark holder points so handle openings line up in a straight column. Install holders with a rubber pad and add a stop block behind the head so every wrench sits the same depth. Finish by labeling the range on the board edge so you can grab the right size without reading markings on the wrench.
If you mix metric and SAE, put them in separate rows so the visual scan stays fast.
Avoid hanging wrenches by the handle only — they twist and ruin the neat look.
13. Socket and Ratchet Display on Magnetic Rail
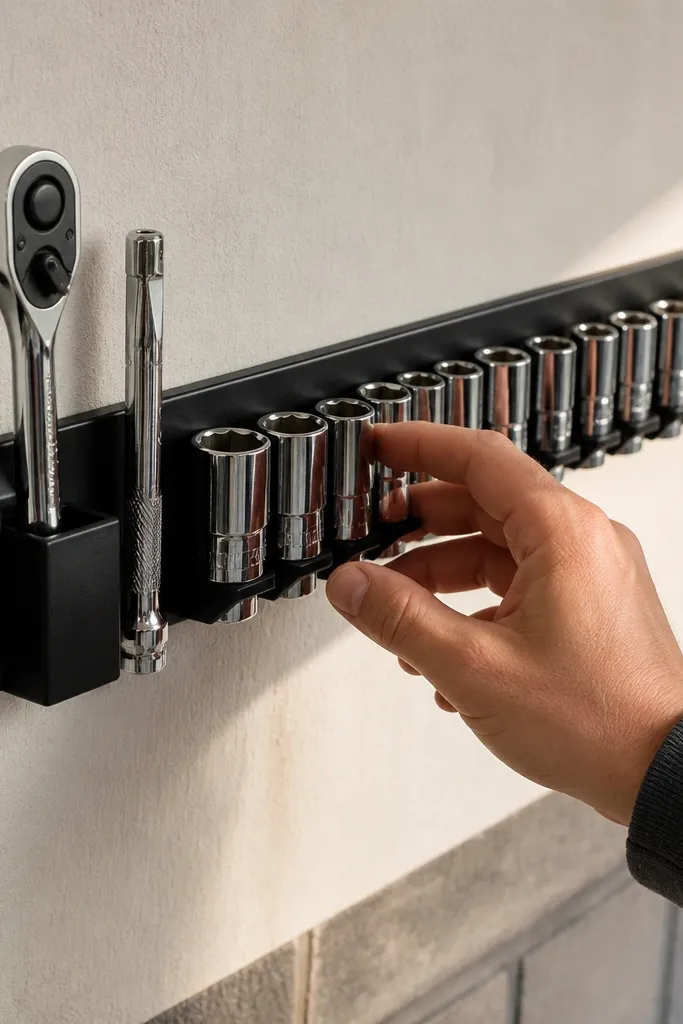
Sockets are the definition of “looks messy when mixed.” A magnetic rail display keeps each socket in a straight line and makes the set look like a kit, not a pile. Pair it with a small pocket for the ratchet and extension so you’re not hunting for the driver. For the modern look, use a dark rail on a light wall and add white labels with black text. This setup is perfect for garages where you want the tool wall to look good year-round. Build time is short and adjustments are easy because magnets let you re-space.
Start by laying out your socket sizes in order on the wall with painter’s tape so spacing looks balanced. Mount the rail to studs and use a level so the line stays straight. Attach socket holders or magnets based on socket weight and test pull strength. Add label stickers or engraved tags under each group so you can grab by size.
Group sockets by size range in blocks, not one long chain, so scanning is faster.
Don’t mount the rail too high — if you can’t reach comfortably, the system becomes decorative instead of useful.
14. Cord-Managed Air Hose Reel with Tool Hook Strip
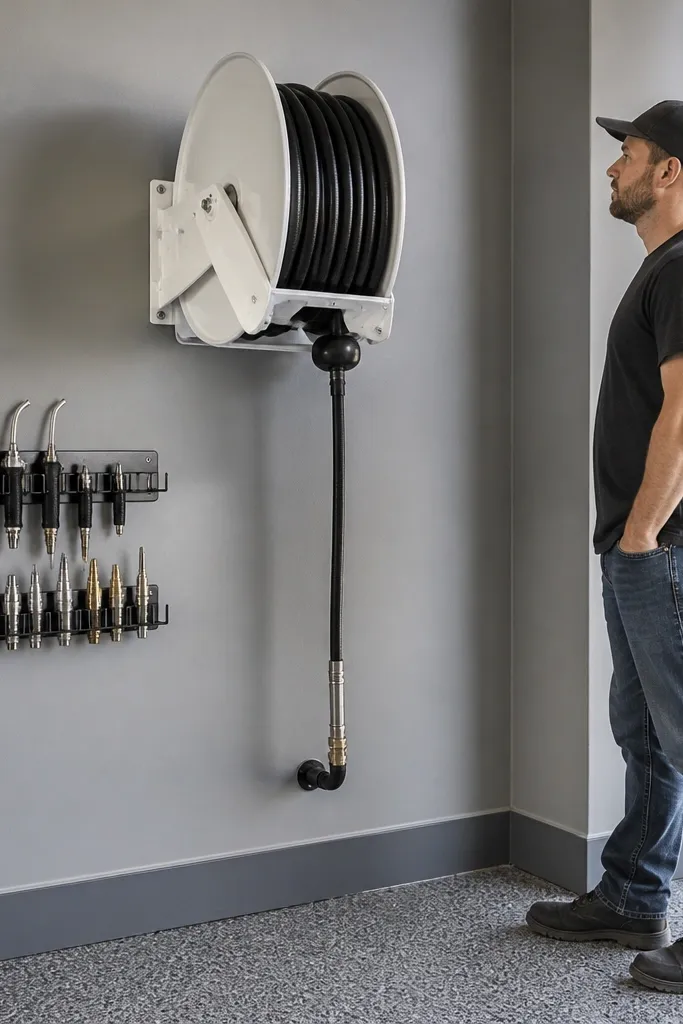
Air hose mess is one of the fastest ways a garage loses its clean look. A cord-managed hose reel keeps the hose neatly wrapped, and a small hook strip on the side keeps nozzles, blow guns, and cleaning tips together. This is a modern combo because the reel gives you a centered visual anchor and the hooks make accessories look intentional. It also reduces tangles, which means faster use during cleaning or inflating tires. This works best in a garage corner with clear wall space next to the reel mounting point.
Editor's noteWrap the last foot of hose neatly and secure it with a Velcro tie so the visual stays clean.
Start by choosing a reel with mounting hardware rated for your hose weight and length. Mount the reel into studs or concrete and check that the hose reaches your work area without overstretching. Add a small strip of hooks or a shallow rail next to the reel for your nozzle set. Hang accessories by size and add a simple label so the blow gun isn’t wandering back into a bin.
Skip thisSkip wall-mounted hooks on the reel itself without clearance — tools hit the hose during wrap.
15. Painted Vertical Peg Rack for Screwdrivers and Pry Tools
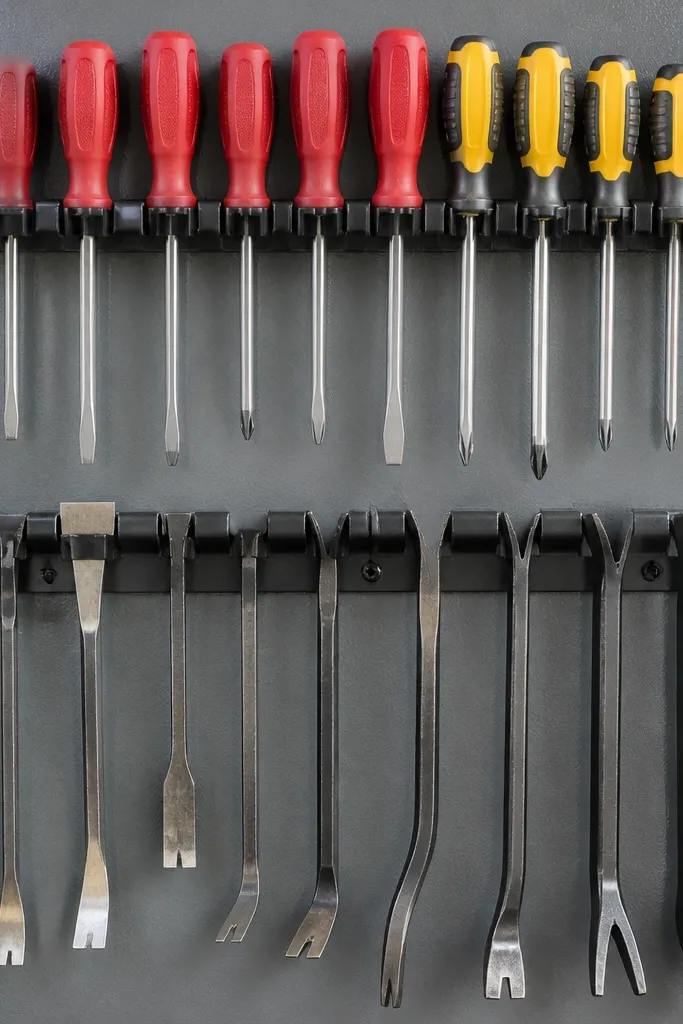
Screwdrivers and pry tools get thrown in bins, then you spend time digging for the right flathead or pry bar. A vertical peg rack keeps them upright and aligned, so you can spot blade shapes quickly. The look is modern when the backing is painted and the hooks are uniform, not a mix of random chrome. Use this for screwdrivers, pry bars, and small chisels if they fit. It suits garages where you want a dedicated “hand tool wall” that stays tidy during active projects.
Editor's noteUse rubber-capped hooks so metal tools don’t clack and chip the paint.
Start by painting a large pegboard or plywood sheet matte and letting it cure fully. Mount it to studs and mark two vertical columns for your most-used tools. Install hooks sized for handle thickness and add a spacer behind long pry tools so they don’t scrape the wall. Place blades in order with consistent gaps and add small label cards at the bottom of each column.
Skip thisAvoid leaving big empty gaps — fill the visual rhythm with consistent spacing even if you have fewer tools.
16. Rotating Wall Bin Carousel for Small Hardware
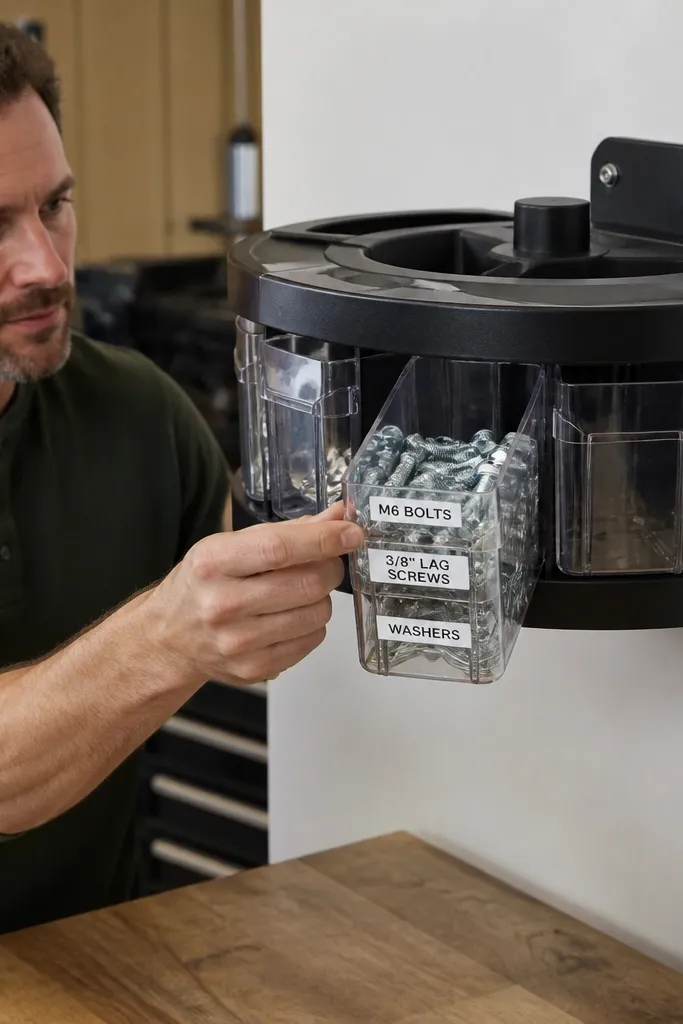
Small hardware storage looks good when it’s controlled. A rotating bin carousel gives you a compact wall footprint and makes fast finds feel automatic because you spin to the right bin instead of digging. Pick a carousel with clear bins and add labels with size and type, like “M6 bolts” or “3/8 lag screws.” This is ideal for anchors, washers, specialty fasteners, and starter kits you use during repairs. It’s also photogenic because the bins create a neat circle pattern on the wall.
Editor's noteUse a label template with the same font size for every bin so the carousel looks uniform.
Start by selecting a carousel unit that mounts to a wall plate and supports your bin sizes. Install the base plate into studs at a height where you can spin it while standing, around 50 inches. Label each bin before mounting so the text is straight and readable. Fill bins by category and keep one bin reserved for “misc fasteners you sort later” so you don’t mix everything.
Skip thisDon’t overfill bins — if lids flex, they crack and the look gets sloppy fast.
17. Corner Tool Ladder with Matching Color Slats
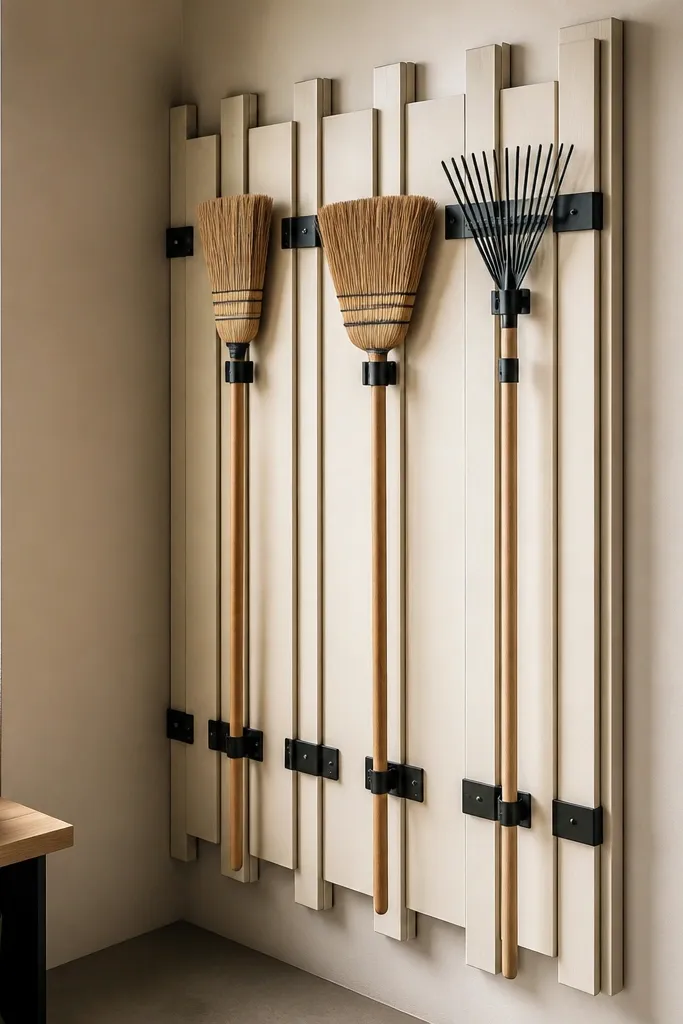
Corners waste space unless you turn them into a storage feature. A corner tool ladder uses slats to create multiple vertical “lanes,” so tools hang in straight lines and the whole corner looks designed. It’s modern because the slats can match the wall color and the tools become the contrast. Use it for brooms, rakes, rags, and long-handled cleaning tools. This is best for garages where a straight wall storage system would leave dead space in the corner.
Editor's noteKeep the lanes wider than the thickest handle so tools don’t scrape each other when you pull them.
Start by measuring the corner angle and selecting a backer material that can sit flush, like plywood cut to fit. Install the backer to studs on both walls, then add slats or vertical rails to create lanes. Mount tool holders to each slat with consistent spacing so handles line up. Finish by adding rubber edging on tool contact points to prevent scratches.
Skip thisAvoid thin slats that flex — tools will drift and the corner will look messy.
18. Pegboard Cabinet Inserts for Tape, Blades, and Gloves
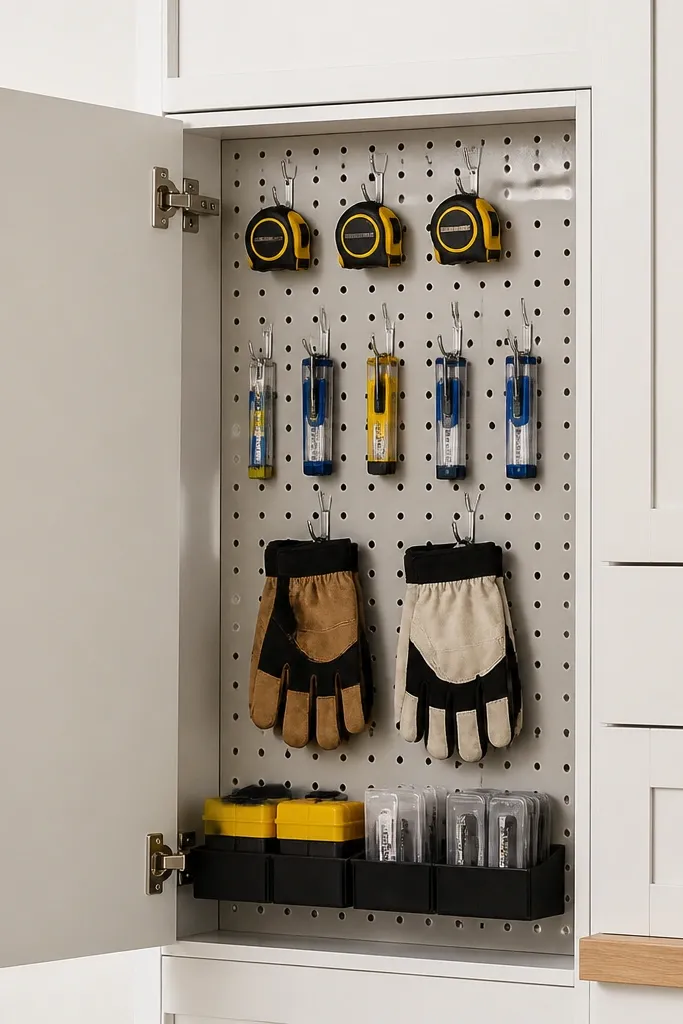
If your pegboard is open, small items disappear into clutter. Pegboard cabinet inserts fix that by giving you a clean front door while still keeping everything mounted and visible when you open it. You get the fast-find benefit for tapes, blades, gloves, and shop rags without leaving loose items on the wall. It also looks modern because the doors create a uniform face. This is a great addition to any pegboard wall where you want a tidy look but still need quick access.
Editor's noteUse a soft-close hinge if you’re building from scratch so the doors don’t slam and shake the pegboard.
Start by building or buying small cabinet inserts sized to your pegboard spacing. Mount the pegboard first, then attach the cabinet inserts to studs so the weight stays supported. Inside, add small hooks for tape measures and blade holders, plus a vertical pocket for gloves. Label the inside shelves with simple tape labels and test door closure with tools inside to avoid rubbing.
Skip thisDon’t store heavy items in small cabinets mounted only to pegboard — anchor to studs.
19. Sanding Station Tray with Color-Coded Grit Cards
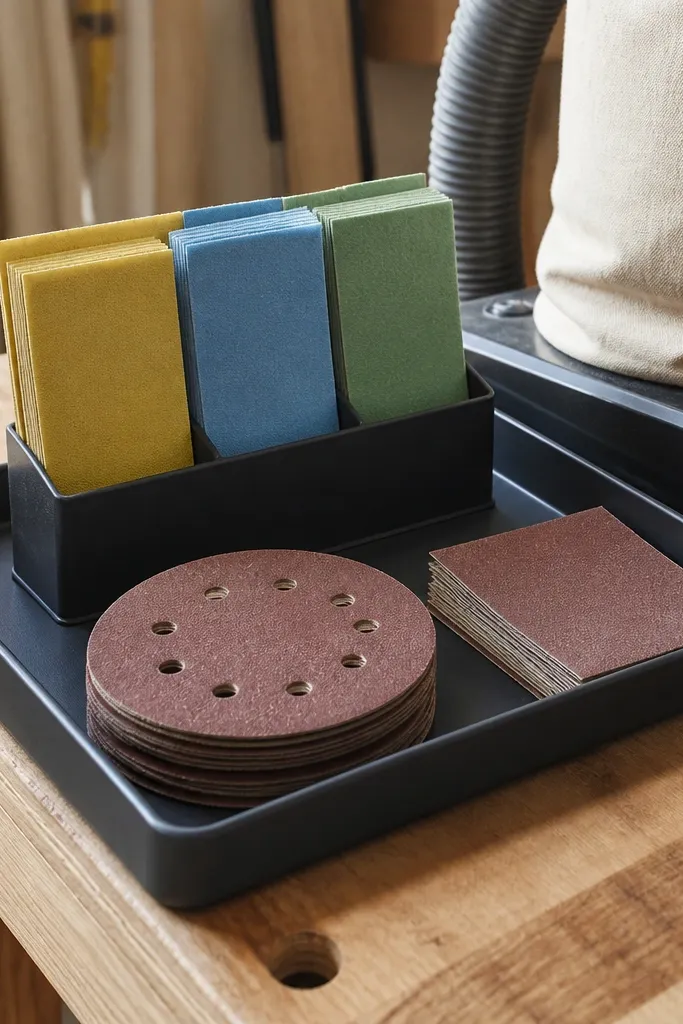
Sanding storage gets chaotic because grit mixes and labels fade. A sanding station tray keeps pads and paper organized, and grit cards make it instant to choose the right level. Make it modern by using a shallow tray with a matte finish and adding color-coded tags that don’t look like a school project. This setup is photogenic because it’s orderly and the stacks create strong visual lines. It suits garages with a dedicated sanding area near a bench or power sander.
Editor's noteWrite grit numbers on the cards with permanent paint marker, then seal with clear coat so they don’t rub off.
Start by choosing a tray size that matches your most-used sanding pads and cut a base board to fit it. Create shallow compartments using thin plywood strips so stacks stay upright. Add color cards or labels for each grit range and mount them on the tray front. Finally, store paper rolls in a separate vertical sleeve so they don’t crush the pads.
Skip thisAvoid mixed stacks — if two grits touch, you’ll grab wrong and waste time.
20. Magnetic Knife-Style Holder for Utility Knives and Blades
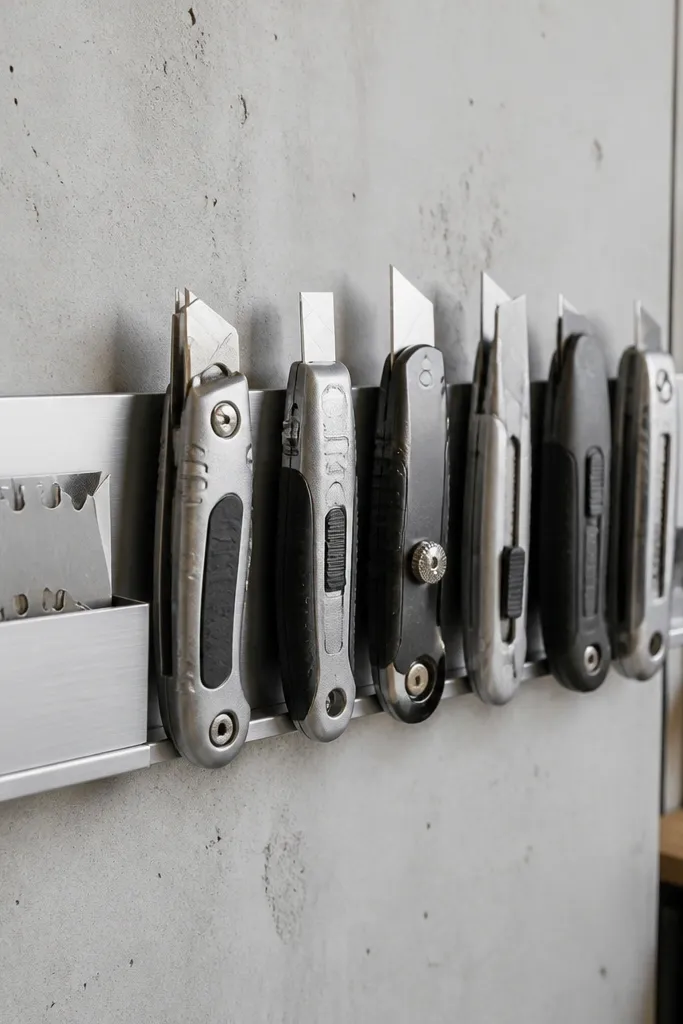
Utility knives and extra blades are small, sharp, and easy to lose. A slim magnetic holder makes them visible and keeps replacements in a dedicated spot so you stop rummaging through drawers. The look is modern because the holder is narrow and the tools line up like a set. Add a small compartment for extra blades so they don’t scatter. This is best for a workbench wall where you grab knives during cutting, trimming, and packaging tasks.
Start by choosing a magnetic holder strip sized for your knife thickness and blade storage container. Mount the strip to a sealed board and screw it into studs. Add a small plastic or metal blade box next to the magnet and label it. Place the knives in a consistent direction so the handles align and the blades don’t cover the label.
Use a board with a clear topcoat so adhesives and blade residue wipe clean.
Don’t store loose blades in open cups — they fall and the whole system looks unsafe.
21. Wall-Mounted Broom and Mop Station with Drip Trays
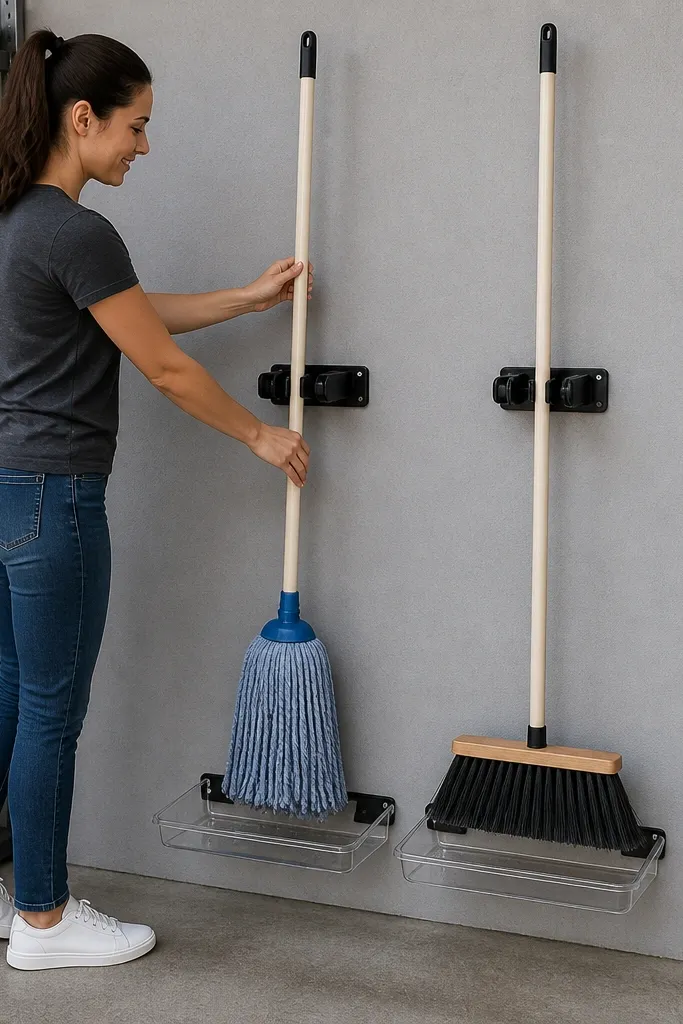
Wet mops and drippy brooms ruin the look fast. A wall-mounted station with drip trays keeps the floor clean and makes the tools hang straight. The modern aesthetic comes from matching hangers and a tray that catches water in one place. Use it for brooms, mops, squeegees, and microfiber heads. This also helps with fast finds because you see the exact mop head type you need instead of digging through a stack.
Start by mounting a backer to studs at about 54 inches for handles and enough clearance below for the drip tray. Install broom and mop hangers with rubber grips so the handles don’t slide and the heads don’t hit the wall. Add a drip tray sized to the mop head width and slope it slightly toward a drain or removable cup. Finish by keeping microfiber heads in a separate labeled bin so they don’t end up wet on hooks.
Use a removable tray insert so you can empty it in seconds without moving the whole station.
Skip drip protection — hanging wet tools directly on hooks makes the wall look stained.
22. Tool Roll Hooks for Wrenches and Pliers (Folded Storage)
A tool roll looks good when it’s stored like a system, not shoved into a corner. Hooks that hold the roll vertically keep it clean and let you grab the whole kit for quick jobs. Add small labeled patches or a simple tag strip so you know what’s inside without unrolling. This is a modern option for people who don’t want a massive wall of individual tool outlines. It’s ideal for tool sets you take out to the driveway or for “small job” kits.
Editor's noteUse two hooks, not one — it keeps the roll straight and stops it from twisting.
Start by choosing a roll size that fits your most-used tools and has a flat folded face. Mount two or three heavy-duty hooks on a board at 50-60 inches so the roll hangs without dragging. Add a label tag system on the roll flap using fabric-safe labels or stitched tags. Store replacement items in a small drawer or bin next to the roll so the kit stays complete.
Skip thisAvoid storing the roll on a hook that pinches the fabric — it wears out and looks bad quickly.
23. Socket Organizer Board with Numbered Peg Holes
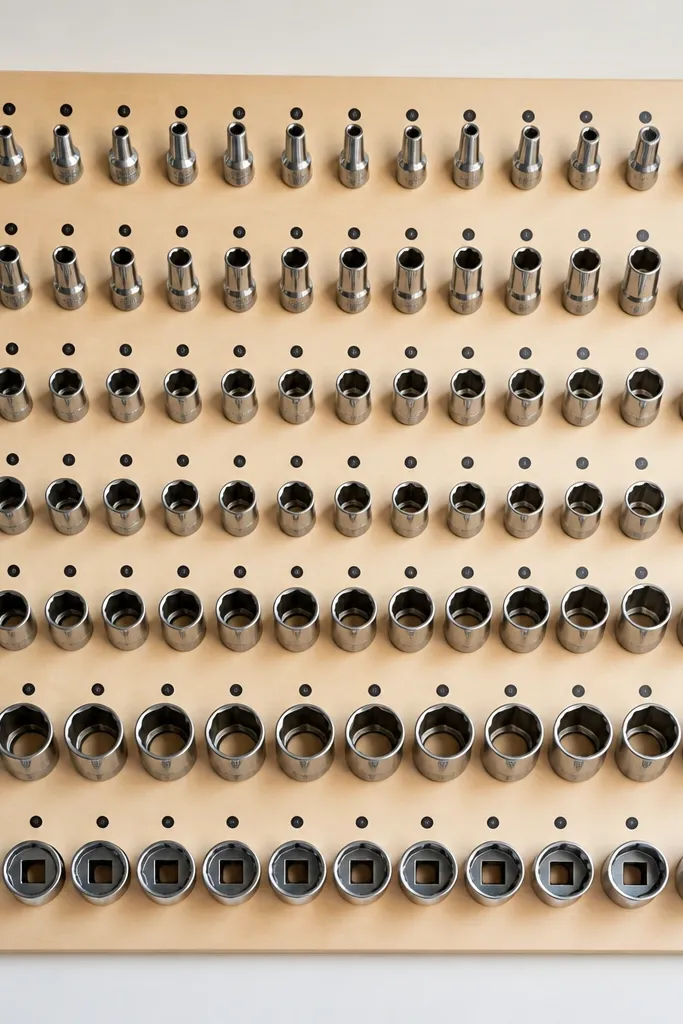
If you want sockets to look like a gallery wall, go with a numbered peg-hole board. Each socket has a single hole, so you can scan by number instead of hunting by size stamps. The look stays modern because the board is flat, the spacing is consistent, and the numbers create a clean rhythm. Use it for common socket sizes and for extensions you grab with the ratchet. This works best when you mount the board near your bench so you can grab sockets without walking back and forth.
Editor's noteDrill test holes on a scrap board first so you don’t ruin a full panel with mis-sized pegs.
Start by marking your socket sizes and choosing a board width that fits your set with equal spacing. Drill peg holes based on socket diameter, then mount the board to studs at 48-52 inches height. Paint the board matte and add a number label under each peg hole so the size is readable. Hang sockets with the ratchet and extensions in a separate labeled row so the workflow is obvious.
Skip thisDon’t skip labeling — a perfectly spaced board still fails if you can’t read sizes fast.
24. Cable and Tool Battery Charging Station with Clear Front
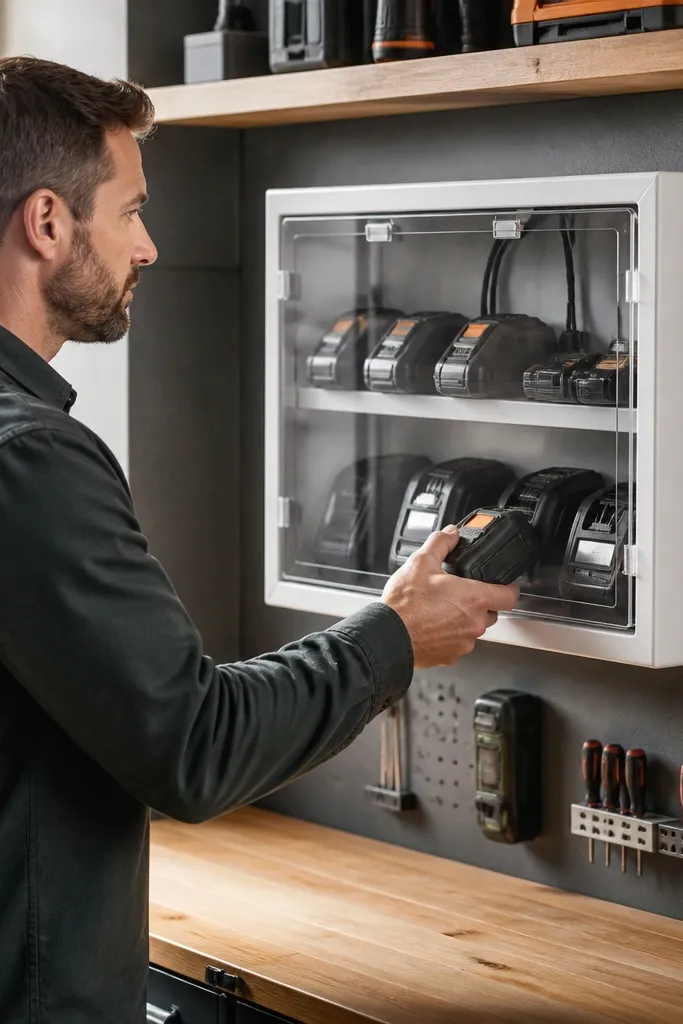
Charging clutter looks awful and it blocks fast finds because batteries and chargers are scattered. A charging station with a clear front keeps everything visible and clean, while the enclosed box reduces dust buildup. It also makes your tool wall look intentional because cords are routed into one place. Use this for cordless drill/driver batteries, charger bricks, and small accessories like extra chargers for lights. This is a great upgrade for garages where power tools are used regularly and need consistent storage.
Editor's noteAdd a small vent gap near the top so chargers don’t trap heat inside the box.
Start by building a shallow cabinet box from plywood with a clear polycarbonate front panel. Route a power strip inside the box and secure the charger bricks with Velcro or screws so they don’t slide. Cut cable pass-through holes and install grommets so cords don’t get pinched. Mount the station at bench height and label each battery slot with the tool it belongs to.
Skip thisAvoid putting chargers in a fully sealed box with no ventilation — heat shortens the life of electronics.
25. Floor-to-Ceiling Tool Crib with Labeled Drawer Fronts

This is the fastest way to grab the right tool without digging — you pull a drawer, the drawer front tells you what is inside, and the tool stays visible behind a clear face or mesh. A floor-to-ceiling “crib” structure keeps the footprint tight while giving you a clean, modern block of storage that looks intentional, not cluttered. It fixes the garage problem where tools get tossed on shelves and you waste time hunting for the one bit or wrench you need. Build it with simple plywood, drawer slides, and matching drawer fronts so it looks sharp in daylight. This suits a single wall in a one-car garage, a workshop corner, or anywhere you want fast finds with a tidy, photogenic layout. Plan on a weekend if you can measure straight and cut accurately; it is very doable for a confident DIYer who owns a circular saw or table saw.
Editor's noteUse a scrap spacer the exact thickness of your desired reveal (like 1/8-in) and clamp it while you screw in each slide. That one step makes every drawer front line up.
1. Build the carcass from 3/4-in plywood: make a 12-in deep cabinet with 3/4-in back panel and 1x2 internal cleats for the drawer runners. Cut it tall enough to hit your ceiling line (common is 84 in) and divide the interior into 5-7 drawer openings using vertical dividers at the widths you want. Install full-extension drawer slides at a consistent height across all openings, with the slide bottoms aligned so drawer fronts sit level. 2. Make drawers from 1/2-in plywood sides and bottoms, sized to leave a 1/8-in reveal around each drawer front. For drawer visibility, add a clear polycarbonate panel in the front opening (or a hardware-mesh insert) and attach a labeled drawer front board on top of it. Finish the carcass in a matte paint (chalky garage-friendly white or light gray) and spray the drawer fronts in a matching satin color; add vinyl label strips or printed label tags protected with clear tape. 3. Anchor the cabinet to studs with L-brackets or through-screws at the top and mid-height, then add a simple anti-tip strap if you have kids or pets. Add a rubber bump strip where drawers meet the frame to keep them from rattling.
Skip thisDon’t skip checking slide alignment with a straightedge across the cabinet — crooked slides make drawers bind and ruin the clean look.



