
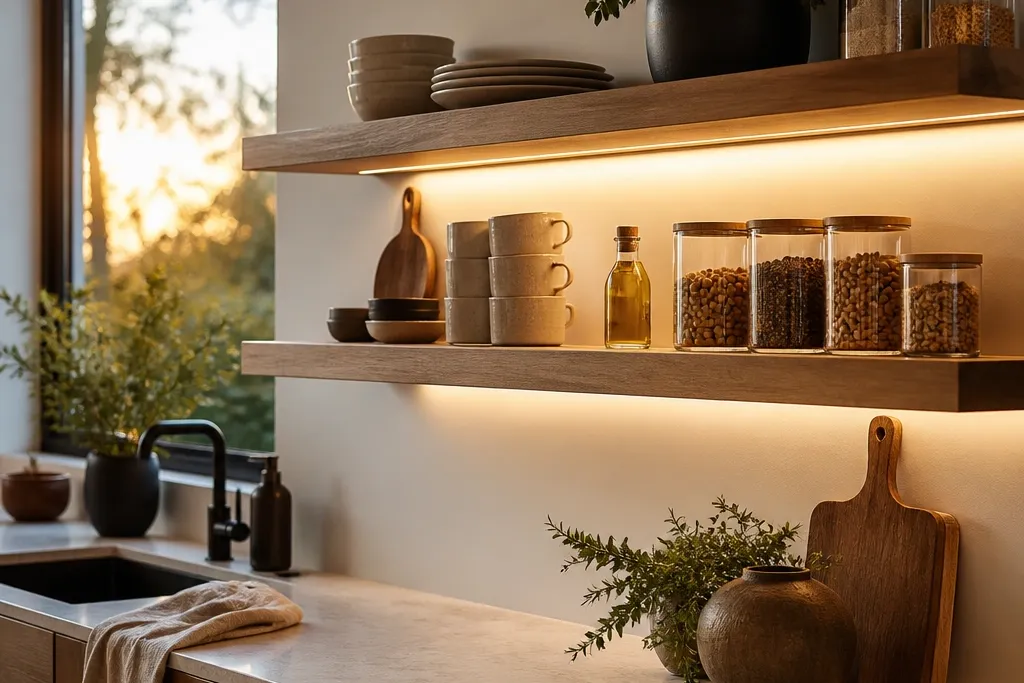
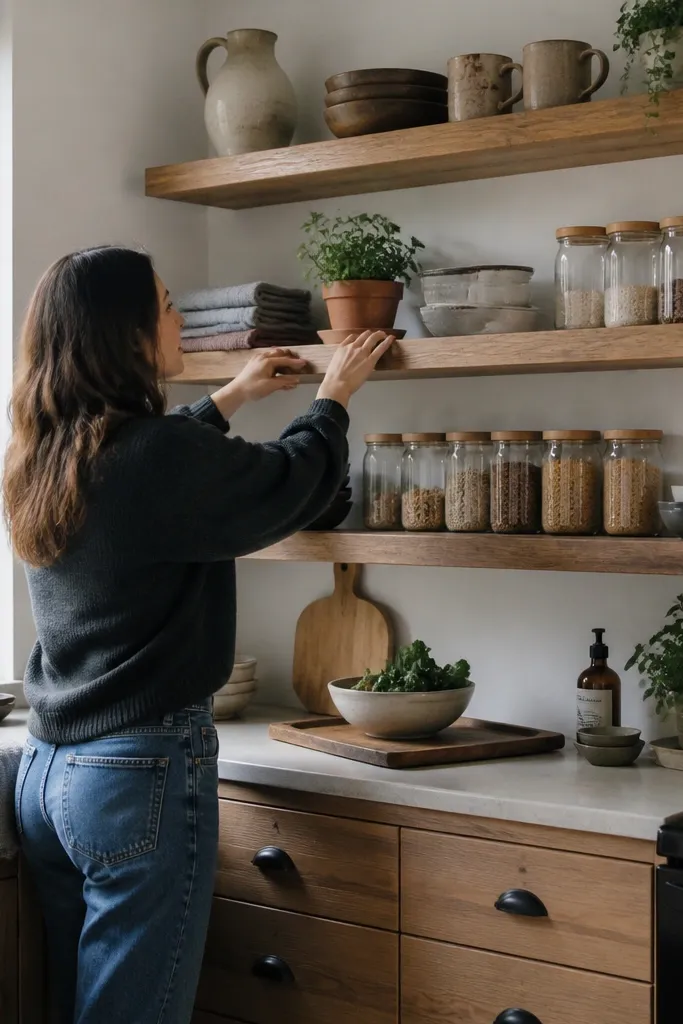
1. Matte Black Rail Shelves with Light Oak Planks
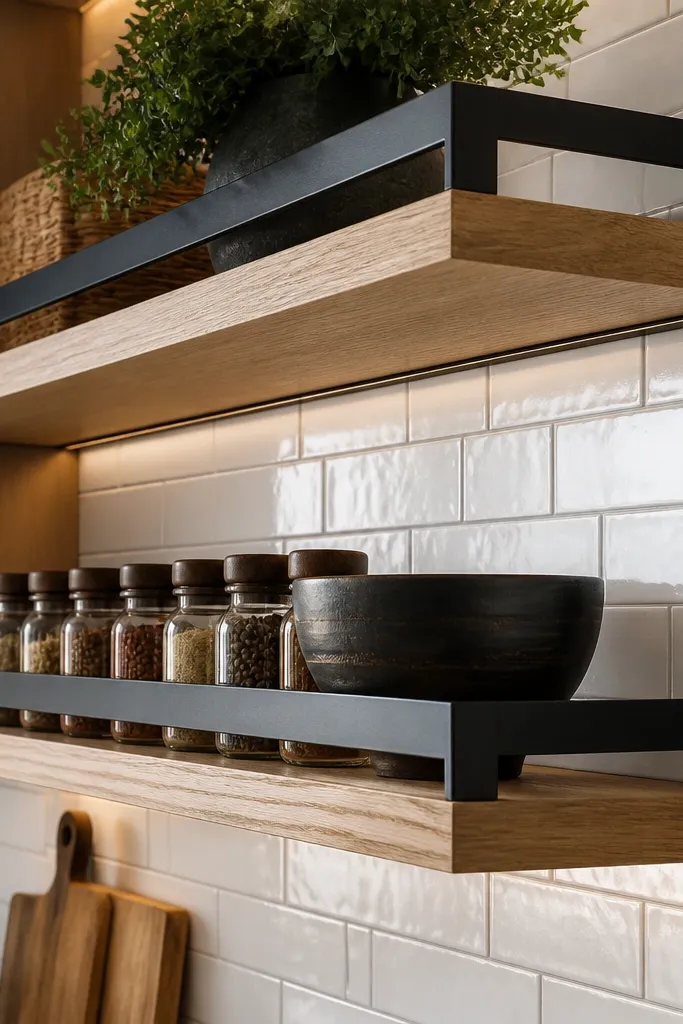
This look is modern and tidy because the black rail visually “organizes” the wall. Pairing matte black hardware with light oak planks gives contrast that photographs cleanly, even under warm kitchen lighting. The shelf boards should be thick enough to read solid — aim for 1-1/4 in to 1-1/2 in boards, not thin strips. Use satin finish on the oak so it doesn’t glare like glossy varnish. It’s a smart fit for kitchens with white cabinets, light counters, and a few black accents like faucets or cabinet pulls.
Editor's noteDry-fit one shelf board on the rail before you commit to the finish coat so you can confirm level and overhang.
First, mark your studs and install a metal rail level across the wall at the height you want the bottom shelf. Use 1/4 in pilot holes into studs and secure the rail with the manufacturer’s screws. Cut oak boards to the same length (keep them within 1/16 in of each other for a crisp line). Then drill concealed bracket holes or use the rail’s matching hangers so the shelf sits flat and flush. Finish by sanding to 180 grit and applying 2-3 coats of water-resistant satin polyurethane, letting each coat dry fully before mounting.
Skip thisDon’t use glossy polyurethane — it reflects overhead lights and makes imperfections obvious.
2. White Painted Floating Shelves with Hidden Backer Board
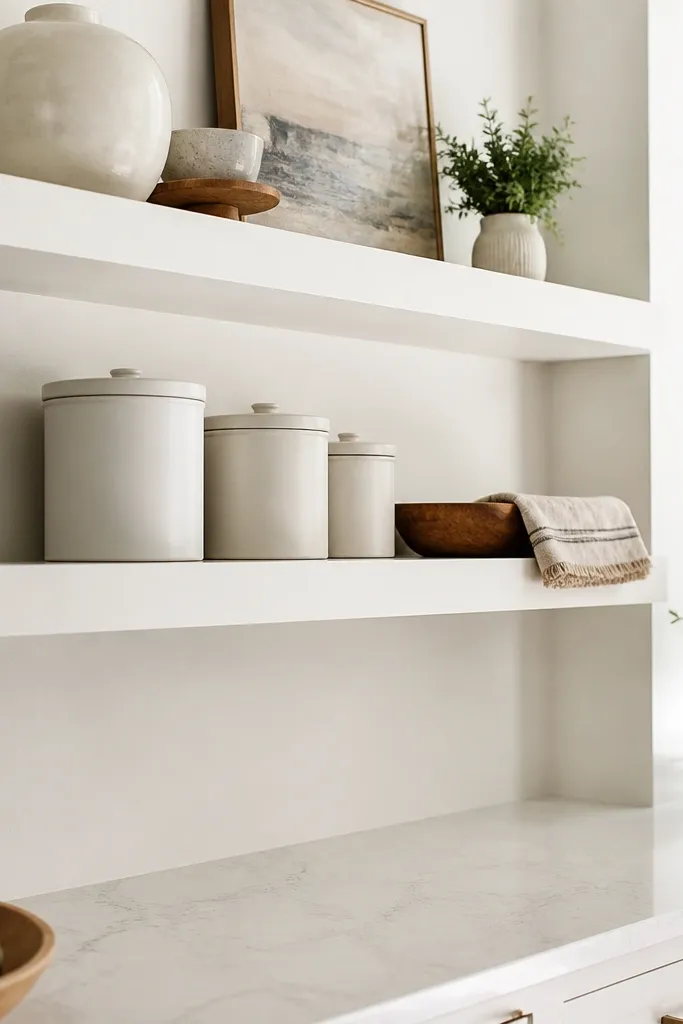
If you want the “floating” illusion without exposed hardware, a backer board strategy is clean. The shelves appear to float because the support is behind the shelf and the front face stays uninterrupted. White painted shelves look sharp next to pale countertops and keep the wall feeling bright. Use a durable cabinet-grade paint system because kitchens get wiped often and steam can scuff softer finishes. This setup is great for kitchens that already have white cabinetry and you want the shelves to blend, not steal attention.
Editor's noteUse a foam roller for the paint topcoats — it reduces brush marks on the shelf faces.
First, cut a backer board strip (like 1/2 in thick) to run behind the shelf line and mount it to studs using construction screws. Level it carefully because it controls every shelf above it. Then cut shelf boards to size and install them onto the backer using pocket screws from underneath or through pre-drilled pilot holes. Prime the shelves with a bonding primer, then spray or roll two coats of cabinet enamel paint. After the final coat cures, add a thin clear topcoat if you want extra wipe resistance.
Skip thisSkip MDF unless it’s properly sealed — raw edges drink moisture and swell.
3. Walnut Shelves with Brass Peg Hardware Lines

This one reads modern because the hardware repeats in a clean grid. Walnut adds warmth and depth, while brass pegs catch light without looking flashy. It’s also practical: pegs make it easy to adjust shelf height later if you change your jar collection. The walnut should be finished matte or satin to avoid looking “plasticky.” This is a strong choice for kitchens with warm wood tones, black appliances, or brass fixtures.
Start by choosing a pegboard rail system or concealed slotted supports that match your shelf thickness. Cut walnut boards to length and sand to 220 grit for a smooth finish. Install the peg rails into studs with level marks so the peg holes line up perfectly. Attach the shelf boards by placing them on the pegs or into the support slots, then confirm the shelf sits flat with no twist. Seal walnut with a matte water-resistant finish, then buff lightly after curing for a uniform sheen.
Keep shelf spacing consistent: match peg rows so your jars line up like a grid.
Don’t use thick oil-only finishes without a topcoat — they can feel soft and scuff.
4. Charcoal Floating Shelves with Concrete-Style Finish
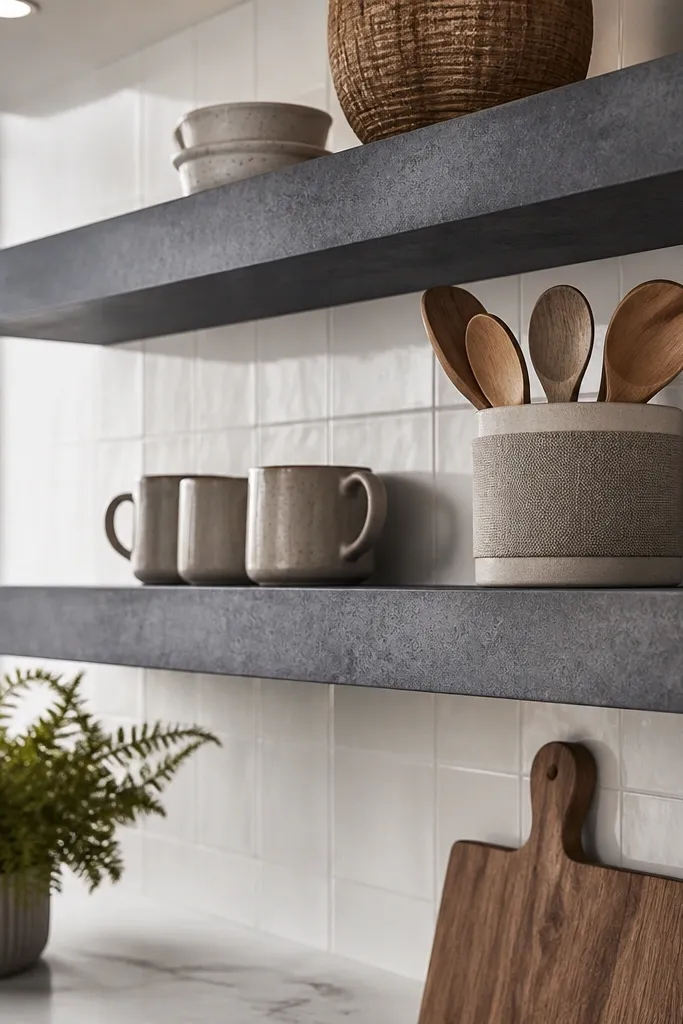
Concrete-style finishes look modern and hide tiny surface imperfections from construction. The textured surface also takes kitchen lighting more softly than glossy paint. Charcoal shelves work especially well if your backsplash is white tile, your counters are light stone, or you have black cabinet hardware. You’ll want shelves thick enough to feel substantial, and the texture should be consistent across the face so it looks intentional. This is a great option if you want the shelves to act like a design element, not just storage.
First, cut shelf boards and apply a bonding primer to seal the wood. Mix or apply a concrete-effect coating system, following the recommended dry times between coats. Use a small foam roller and keep your direction consistent so the texture pattern doesn’t look patchy. Install concealed brackets or a hidden rail system so the shelf edge stays clean. Finish by sealing the textured coating with a clear water-resistant topcoat made for textured surfaces.
Test the concrete finish on a scrap board the same thickness before you commit to the wall shelves.
Avoid skipping the textured topcoat — steam can dull the finish.
5. Staggered Two-Tier Shelves in Light Beech
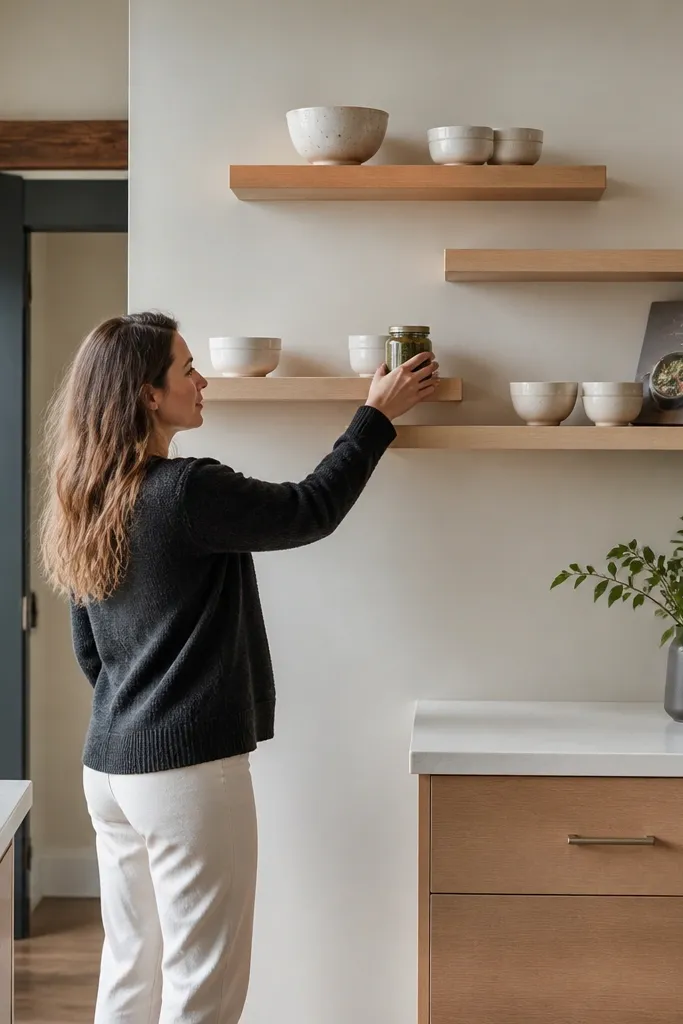
Staggered shelves look modern because they break the strict rectangle grid and create movement. Light beech keeps the look airy, even with two tiers, so your wall doesn’t feel heavy. This layout is best when you have a narrow wall section where one long shelf would feel too flat. Staggering also helps with styling: you can place everyday items on the lower shelf and decorative pieces on the higher one without everything competing. It photographs well because the negative space between tiers shows up clearly.
First, plan the stagger: mark two shelf lines at different heights with a consistent vertical gap. Install hidden supports or a rail system at both levels, keeping alignment tight using a laser level if you have one. Cut both shelf boards from the same beech stock and sand to 180-220 grit. Mount the lower shelf supports first, then mount the upper supports to match the stagger offset. Seal with a satin water-resistant finish and let it cure fully before loading items.
Keep the stagger offset small (2-3 in) so the wall still reads clean, not chaotic.
Don’t make one shelf dramatically deeper than the other — it makes the stagger look accidental.
6. Floating Shelf with Built-In Spice Tray Edge
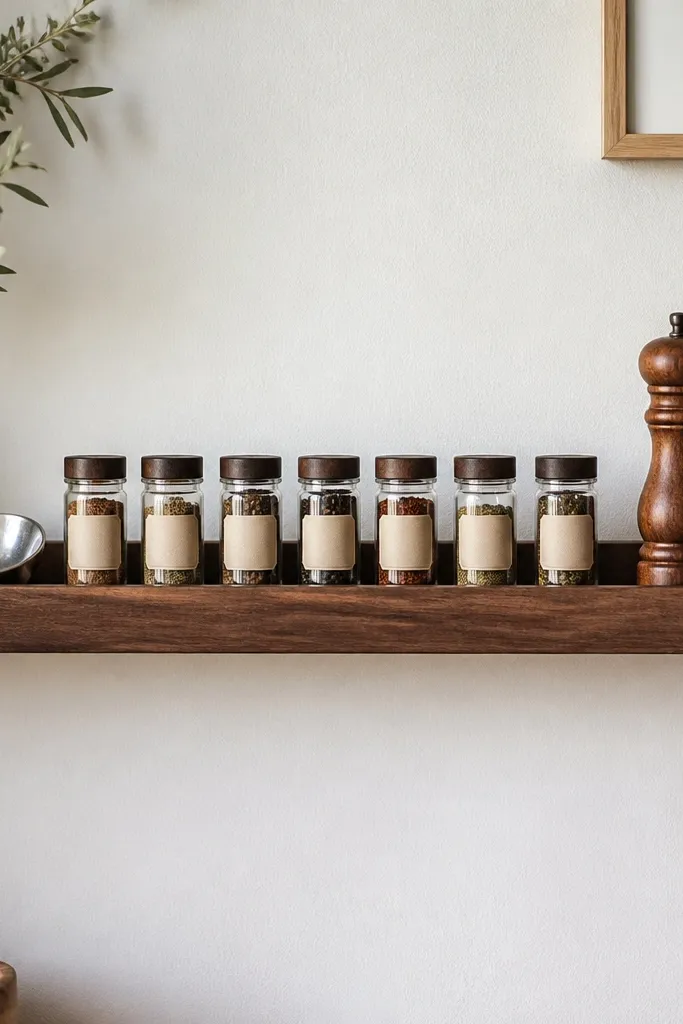
This is modern Floating Shelves Kitchen done for daily use. The built-in tray edge keeps small items from sliding and gives you a neat “line” across the front. It makes the shelves look intentional even when you’re swapping spices weekly. Use a finish that wipes clean and a shelf edge that’s sturdy enough to handle jar bottoms without wobble. This project suits kitchens where you want spices within arm’s reach but hate clutter on the counter.
First, choose shelf boards around 10-12 in deep and cut a shallow tray lip piece (about 1-1/2 in tall) to mount along the front edge. Pre-drill and glue the lip, then screw from underneath so the front stays clean. Install concealed brackets or a hidden rail so the shelf face stays uninterrupted. Sand all edges smooth and round the top of the tray lip slightly so jar lids don’t catch. Seal with a water-resistant clear coat made for kitchens, then cure before adding jars.
Round the tray lip edges with a small hand plane or sandpaper block so it feels smooth, not sharp.
Don’t leave the tray lip too tall — it blocks sightlines and makes the front look bulky.
7. Slat-Back Floating Shelves for a Warm Modern Look

A slat back makes floating shelves look expensive because it adds depth behind the items, not just on the shelf surface. The shelves still float because the support is hidden, but the slats give a structured backdrop that makes jars and mugs look styled. It’s a modern kitchen trick: the eye reads the vertical lines and feels “order” even with everyday items. Use light wood slats with a matte finish so the background doesn’t glare. This works best in kitchens with neutral walls where you need some texture.
Editor's noteUse the same wood tone for slats and shelves if you want calm, or a slightly darker slat if you want contrast.
First, install a hidden rail or concealed supports at the correct height. Then mount a thin slat back panel behind the shelf line using small spacers so each slat has even gaps. Cut shelf boards and attach them to the supports so they sit in front of the slats without rubbing. Sand and finish the shelf boards and slats separately so the slats don’t get gloss marks. Seal both with a kitchen-safe matte water-resistant finish.
Skip thisDon’t use deep slats — bulky spacing behind jars makes the wall look messy.
8. Two-Shelf Row with Brass Standoffs and White Oak
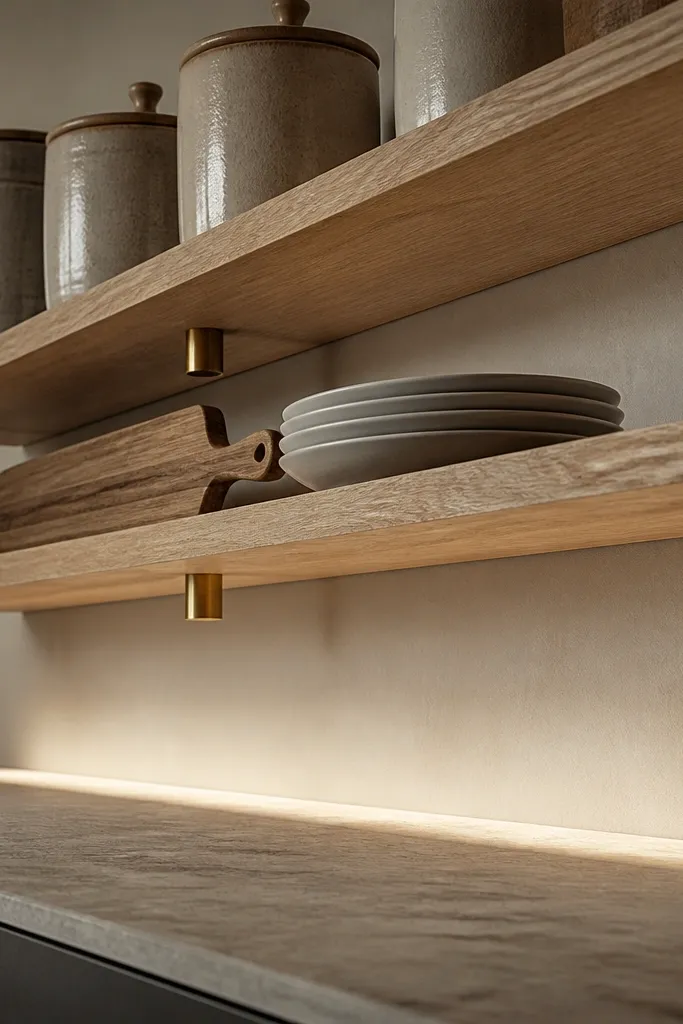
Brass standoffs create a controlled gap under the shelf, which reads modern and intentional in photos. White oak keeps it bright and warm, while the brass adds a gentle glow. This design is great for kitchens where you want the shelves to look like furniture, not wall art. The standoff spacing also helps you avoid sag over time if you use longer shelf lengths. It’s a good fit for placing cookbooks, mixing bowls, and a few canisters that you actually use.
Editor's noteFor long shelves, add one extra standoff in the middle — it prevents droop that shows up under kitchen light.
First, cut your oak shelves to length and sand to 220 grit. Install standoff anchors into studs at measured intervals, keeping the spacing even so the shelf doesn’t twist. Slide the shelf onto the standoffs and tighten the screws from underneath. If you want a true floating look, use a backer strip so you don’t see any support hardware from the front. Finish with 2-3 coats of satin polyurethane, then let it cure before styling.
Skip thisDon’t rely on anchors alone for standoff systems — use studs for support.
9. Smoked Glass Shelf Insert on a Floating Frame
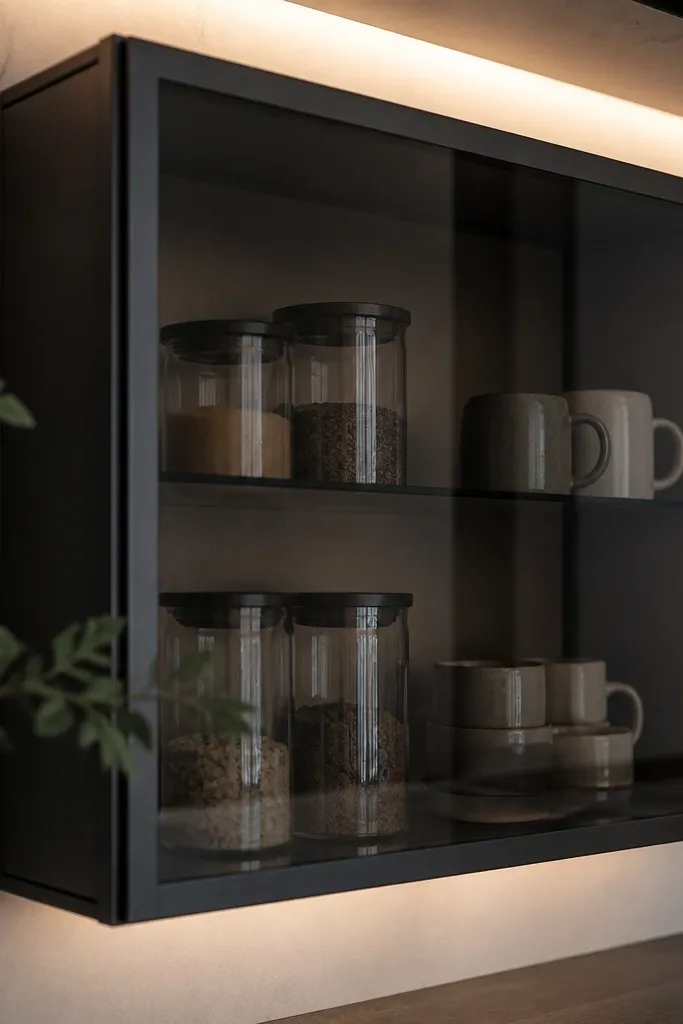
If you want the most modern look, add a smoked glass insert. It makes the shelf feel lighter visually and adds depth behind items like clear canisters and ceramic mugs. The trick is pairing glass with a sturdy hidden frame so it feels solid, not fragile. Smoked glass also hides minor clutter because it visually softens the items behind it. This setup looks best in kitchens with clean lines and neutral tones where the shelf can act like a design element.
Editor's noteUse clear silicone glazing tape made for glass — it prevents squeaks and keeps the insert stable.
First, build a simple floating frame from wood (like 1x2 boards) sized to the shelf opening. Use concealed brackets to mount the frame to the wall, keeping the front edge perfectly level. Cut smoked glass to fit the opening with a professional glass shop so edges are safe and measured precisely. Install the glass using manufacturer-recommended glazing tape or clips inside the frame. Seal and finish the wood frame with a matte water-resistant clear coat; then add a thin lip so items don’t slide forward.
Skip thisDon’t DIY glass cutting for this — the edge quality matters for safety and clean lines.
10. Beveled Edge Floating Shelves in Off-White
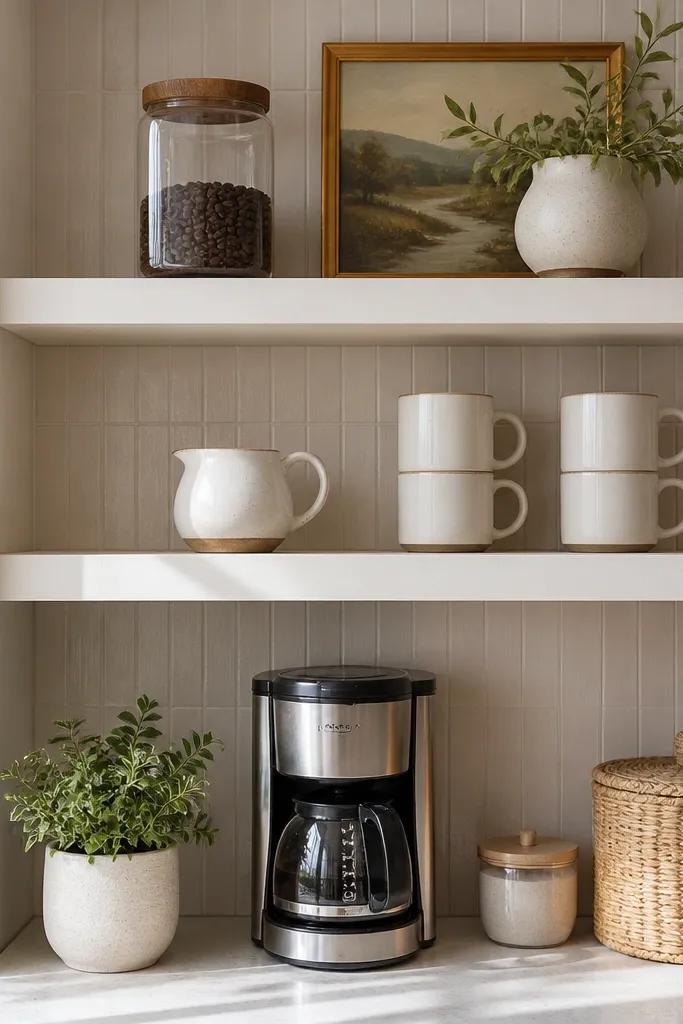
Beveled edges make shelves look more architectural. Even simple off-white paint turns into a premium finish when the shelf front edge catches light instead of staying flat. This idea works especially well above a coffee station or near a sink where you want bright, clean storage without dark contrast. Keep the shelves matte so the bevel reads as a crisp line, not a glare. It’s also forgiving: minor wall imperfections show less with the bevel.
Editor's noteUse painter’s tape as a guide for bevel paint and keep the edge crisp by cutting paint before it fully dries.
First, cut shelf boards and route a shallow bevel on the front edge (around 1/8-1/4 in depending on your board thickness). Sand thoroughly, then prime and paint with cabinet-grade off-white paint. Install hidden brackets or a concealed rail so the shelf face stays uninterrupted. Mount the shelf boards using screws from underneath or through the bracket system, then check the bevel line is consistent across the row. Seal with a matte topcoat that resists water spots.
Skip thisAvoid high-gloss — it turns the bevel into a spotlight for every tiny scratch.
11. Live-Edge Walnut Floating Shelves with Minimal Hardware
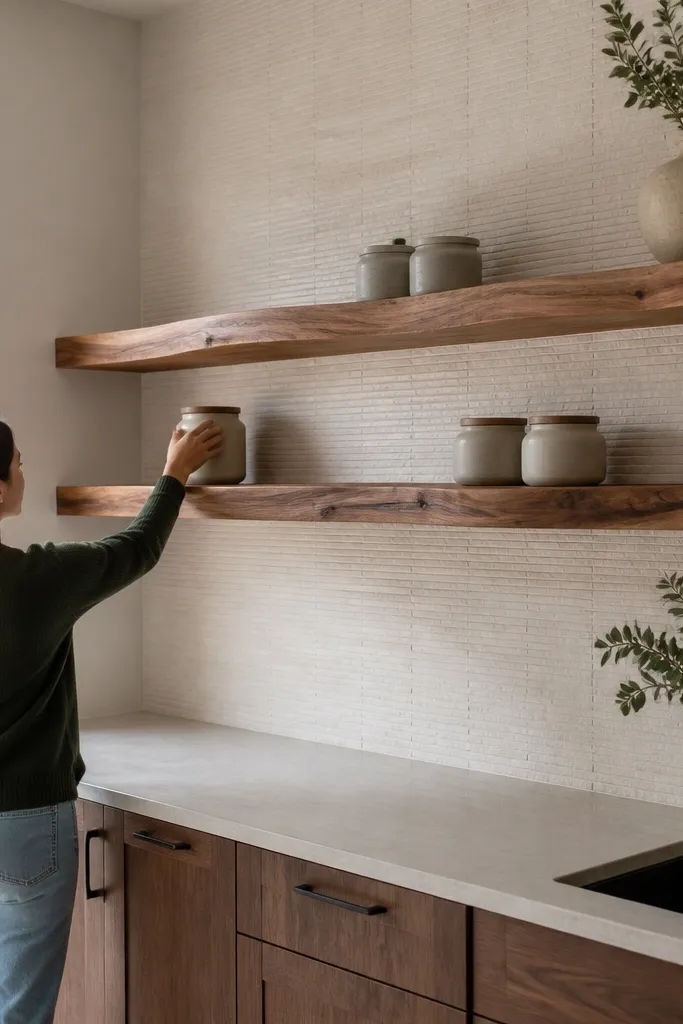
Live-edge walnut gives you instant character, and the modern part comes from minimal, hidden hardware. The shelves look organic from the front, but the mounting stays clean so the kitchen doesn’t feel rustic in a messy way. The key is choosing live edge boards that are stable and not too wavy — you want the curve, not the wobble. Finish in matte to keep the natural grain from looking oily. This is a strong fit for kitchens with simple cabinet fronts where you want one standout feature.
Editor's noteAdd a small back cleat or stop if the shelf has a slightly irregular underside so items don’t slide toward the wall over time.
First, inspect boards for twist and stability; pick walnut slabs that sit flat without rocking. Seal the live edges with a thin coat of wood conditioner or sanding sealer before topcoat so the grain doesn’t drink finish unevenly. Install concealed brackets or a hidden rail system that can support the board weight along the mounting zone. Mount the board so the live edge sits centered and the shelf stays level even if the board has subtle natural variation. Finish with 2-3 coats of matte water-resistant clear, sanding lightly between coats.
Skip thisDon’t choose a slab that’s too thin — live edge boards need thickness to look intentional.
12. Stainless Trim Floating Shelves on Maple
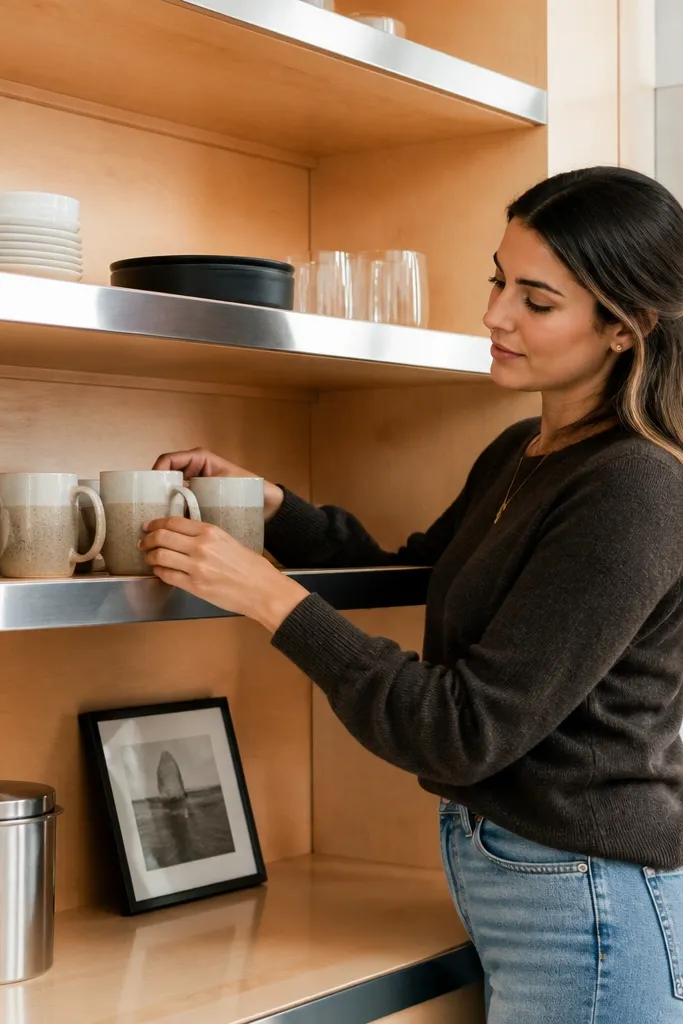
Stainless trim is the quickest way to make floating shelves look like kitchen built-ins. Maple gives a smooth, warm base, while the slim metal edge gives a modern line that matches appliances and sinks. This project looks best when the trim is straight and the shelf face is clean — no wood knots showing through if you want a sleek vibe. It’s also practical: stainless is easy to wipe when you splatter oil while cooking. Great for modern kitchens with stainless hardware.
Editor's notePre-drill tiny holes for stainless trim — it prevents bending and keeps the line straight.
First, cut maple shelves and sand to 180-220 grit. Apply a water-resistant clear finish or a light stain plus topcoat so the wood looks even. Install concealed brackets so the shelf face stays smooth, then attach stainless edge trim along the front using screws from underneath or a hidden channel system. Make sure the trim line is perfectly straight using a chalk line before drilling. Seal any exposed wood ends around the trim area to prevent moisture absorption.
Skip thisDon’t skip sealing the maple ends — they soak moisture and get uneven over time.
13. Ribbed White MDF Shelves with a Floating Shadow Line
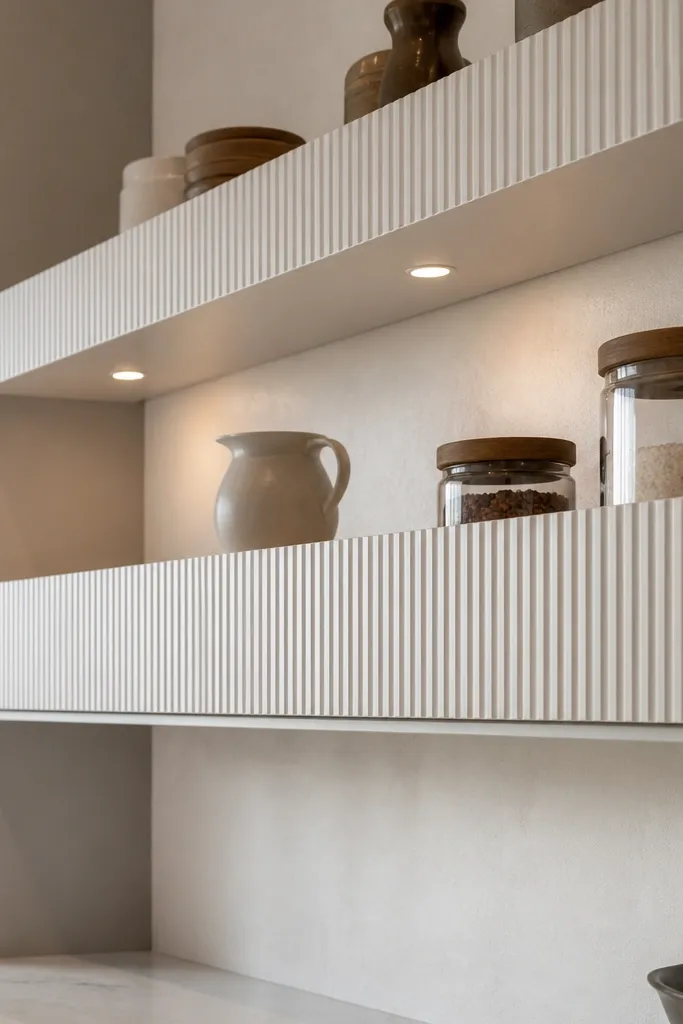
Ribbed shelves look modern because the surface texture adds depth, even when the shelves are empty. Pairing that with a shadow line gap makes the shelf read floating. The white color stays crisp and matches bright kitchens, but the ribs keep it from looking flat. This is a styling-friendly option: it looks great with uniform canisters and a few ceramic pieces. It also hides minor scuffs better than smooth finishes because scratches blend into the texture.
Editor's noteUse a high-build primer — it fills tiny MDF pores so the white stays uniform.
First, build shelves using MDF panels cut to size, then apply a ribbed texture using a router bit pattern or pre-made ribbed panel stock. Sand edges smooth so the ribs don’t chip. Install a concealed rail or hidden wall bracket system that leaves a small 1/4 in shadow gap behind the shelf. Prime with a high-build primer and paint with cabinet-grade enamel. Let the paint cure fully before you mount decor so the surface doesn’t mark from handling.
Skip thisDon’t rush paint curing — textured MDF dents easily when you slide items onto the shelf.
14. Blackened Steel Shelves with Oak Inset Back Panel
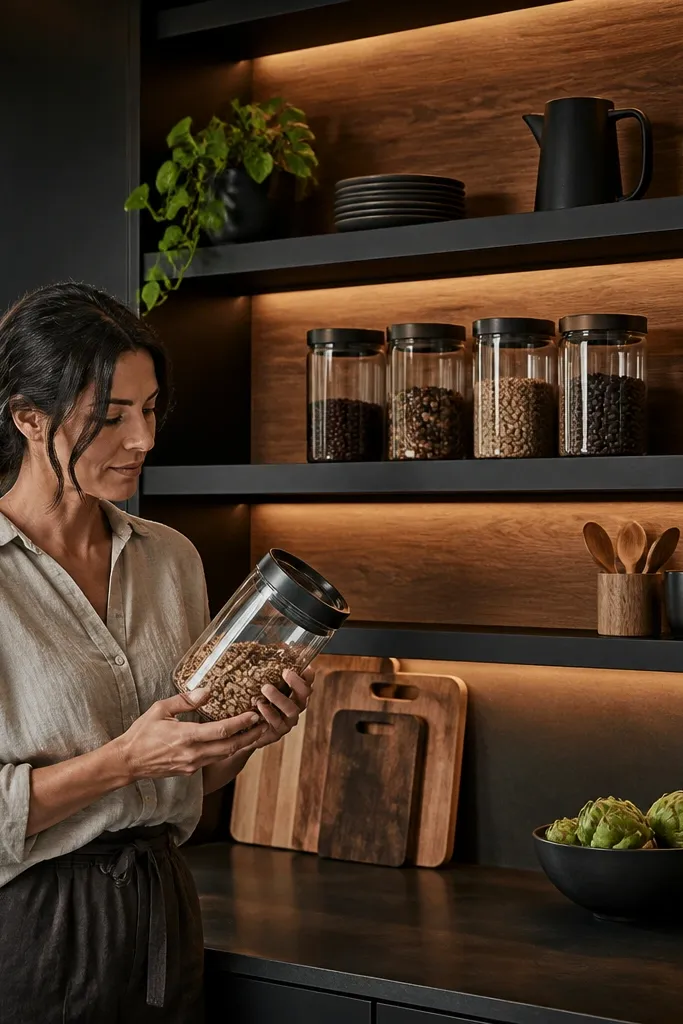
Blackened steel shelves look sharp and modern because the finish has depth and resists kitchen grime. The oak inset back panel warms the scene so it doesn’t feel like an industrial shop. This idea is photogenic because you get contrast: dark shelf faces with a light back that frames jars and mugs. Keep the shelf lengths moderate if you want crisp lines and minimal sag. It suits kitchens with black accents, dark countertops, and simple backsplash patterns.
First, source or build shelf frames from blackened steel (or coat steel with a heat-safe finish if you’re fabricating). Add an oak back panel behind the shelf line using spacers so it sits recessed. Mount the steel shelf to studs using steel brackets hidden behind the back panel. Cut oak to match the opening and sand to 180 grit before sealing with satin clear. Finish by wiping the steel with the correct cleaner and applying a protective topcoat made for the finish you chose.
Use a recessed back panel gap of about 3/8 in so dust doesn’t collect in a tight seam.
Don’t place steel directly against unsealed wood — moisture can stain the oak.
15. Floating Corner Shelves with a 45-Degree Modern Cut
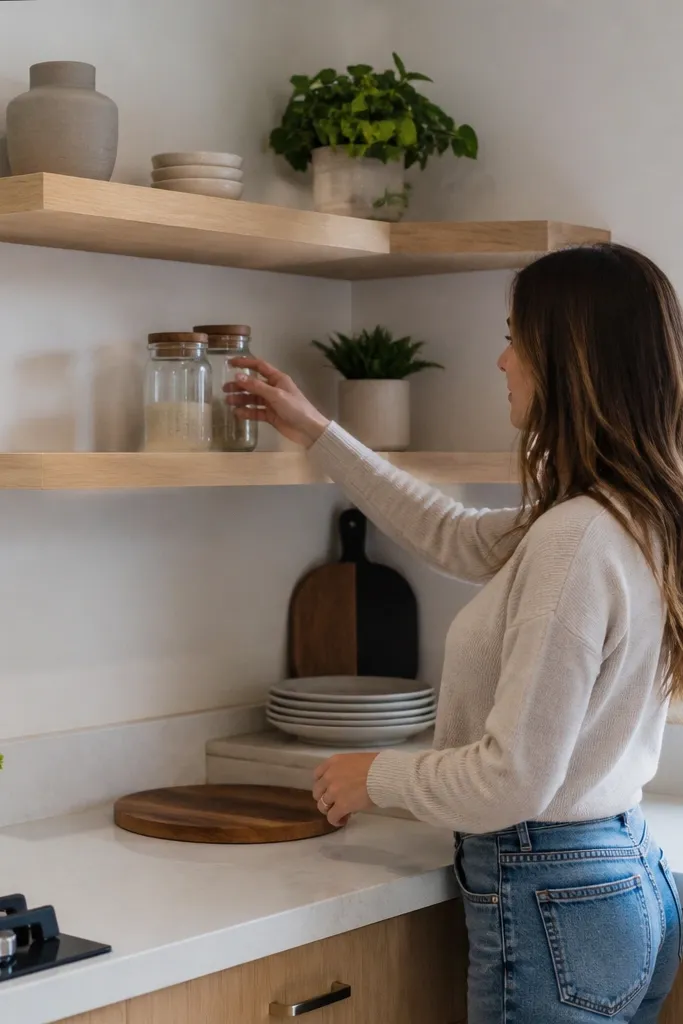
Corner shelves make your kitchen feel custom without adding more wall clutter. The modern part is the 45-degree cut where the shelves meet — it looks intentional and clean in photos. Use a light wood finish or a matte painted finish so the corner doesn’t look dark and cramped. This setup is ideal for filling awkward corners near a breakfast nook, or above a small coffee cart area. It also lets you keep frequently used items visible without turning the counter into a storage zone.
Editor's noteUse a miter saw stop block to keep both shelves identical so the seam line stays crisp.
First, measure the corner and plan your shelf depth so the items fit without hitting the walls. Cut boards with 45-degree miter joints for the front edges, and keep the joint tight by dry-fitting before finishing. Install concealed corner supports into studs on both walls, using a level to keep the shelf top plane consistent. Mount the shelves by attaching the boards to the supports first, then secure the miter joint with wood glue and small hidden fasteners. Finish with a satin water-resistant clear coat or cabinet enamel paint.
Skip thisDon’t rely on miter glue alone for long-term stability — support the shelf from underneath at both walls.
16. Long Narrow Floating Shelves for a Clean Coffee Bar
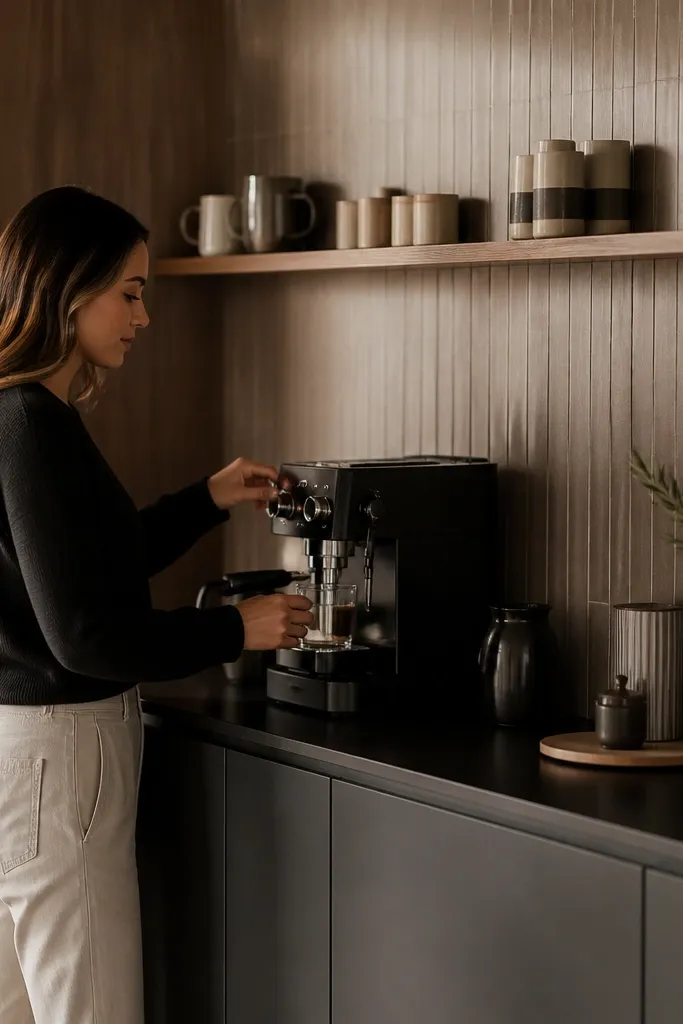
Long narrow shelves look modern because the proportions are controlled. A coffee bar needs quick access, but wide shelves can look bulky above a machine. Keep the shelves narrow — around 6-8 in deep — and use them for cups, small canisters, and a few decor pieces. This idea photographs well because the vertical spacing and slim line read like a built-in unit. Finish in matte white or light oak so it matches your counter and keeps the area bright.
Editor's noteIf your cups are tall, measure one cup height plus clearance and set shelf spacing accordingly before you cut wood.
First, decide your coffee bar height and mark two shelf levels with consistent vertical spacing for cups and canisters. Install hidden rails or concealed brackets into studs, keeping the rail straight across the full length. Cut shelves narrow and long, then sand and finish with matte water-resistant coats. Mount the shelves and check the front edge sits level from multiple angles since long shelves show even slight dips. Add a small back lip so cups don’t slide when you wipe the surface.
Skip thisAvoid deep shelves in a coffee bar — they crowd the machine and make the wall look heavier.
17. Wood Shelf with Tile Backing for a Modern Counter Moment
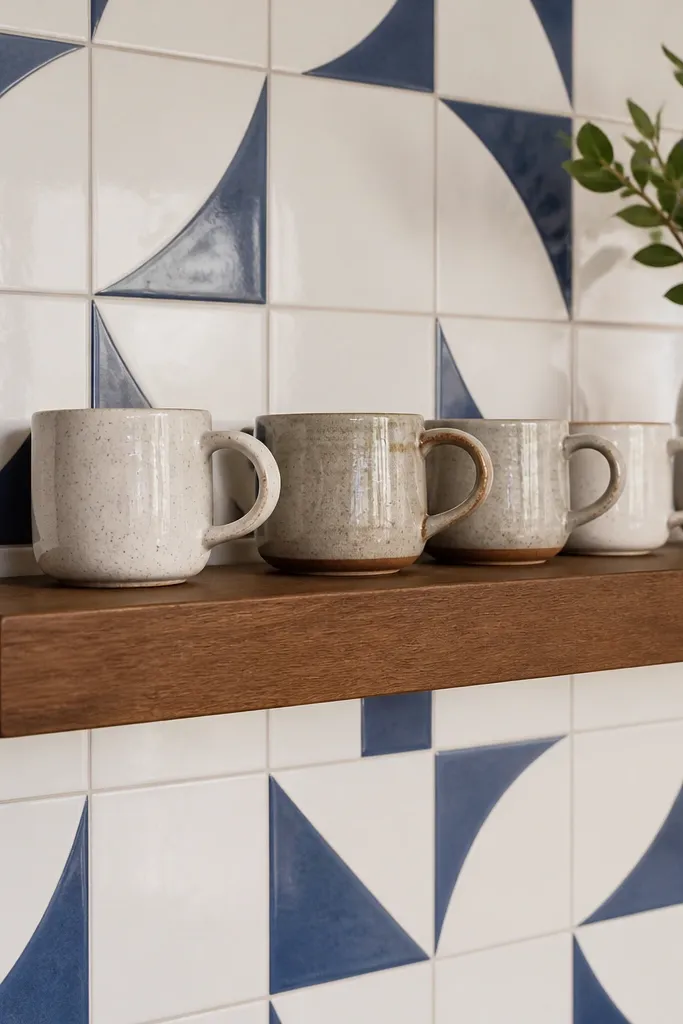
Tile backing turns a floating shelf from “storage” into a design moment. The shelf sits in front of tile, which creates a crisp, clean background that makes the shelf look more architectural. It’s especially good over a backsplash area where you want visual structure without adding cabinets. Keep the shelf simple — straight grain wood or matte paint — so the tile pattern stays the star. This project is perfect for modern kitchens with subway tile, small mosaic, or a single bold tile strip.
Editor's noteUse painter’s tape to mask the tile edges and keep caulk lines straight and thin.
First, pick the tile section you want to show and plan shelf height so it doesn’t clash with outlet placements. Install concealed brackets into studs or a ledger board behind the tile line, not into tile. Then build the shelf from wood and pre-seal it so grout moisture doesn’t affect it. Mount the shelf so it sits centered and level, using spacers if needed to avoid contact with tile edges. Finish the wood with satin polyurethane and caulk any small gaps between shelf and tile for a clean seam.
Skip thisDon’t screw into tile for the main load — it cracks and loosens fast.
18. Oak Floating Shelves with Brass Edge Banding
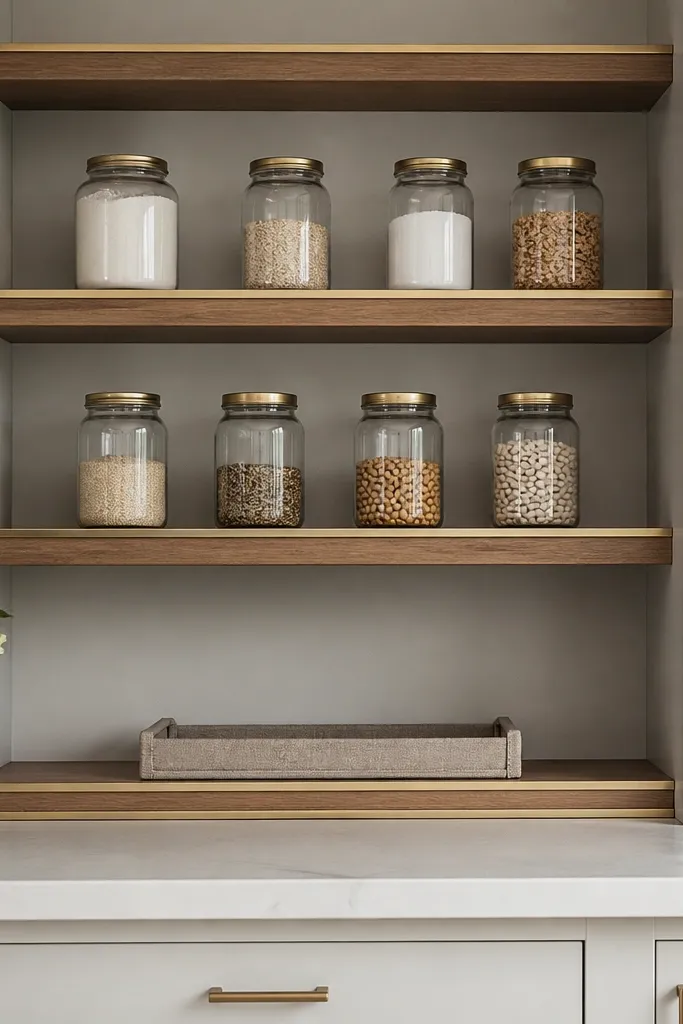
Edge banding makes oak look sharper without needing a complicated design. The brass line along the front catches light and frames the shelf face like picture framing. It also hides small edge imperfections from sanding and cut marks. This is a modern Floating Shelves Kitchen idea for people who want warmth but still want a clean, designer look. It works great above a white backsplash or near a stainless sink where metal accents already exist.
First, cut oak boards to size and sand to 180-220 grit. Apply a thin brass edge banding strip using a heat-activated veneer system or a metal trim channel, then trim the edges clean. Install hidden mounting brackets so the shelf appears to float with no visible hardware. Seal the oak with satin water-resistant polyurethane, keeping the finish even across the front and sides. After curing, wipe down with a microfiber cloth so the brass line stays clean and doesn’t look smudged.
Use a sharp utility blade to trim banding flush — dull blades leave ragged edges.
Don’t skip sanding between coats; roughness shows through on brass-adjacent edges.
19. Smoked Oak Shelves with Vertical Groove Texture
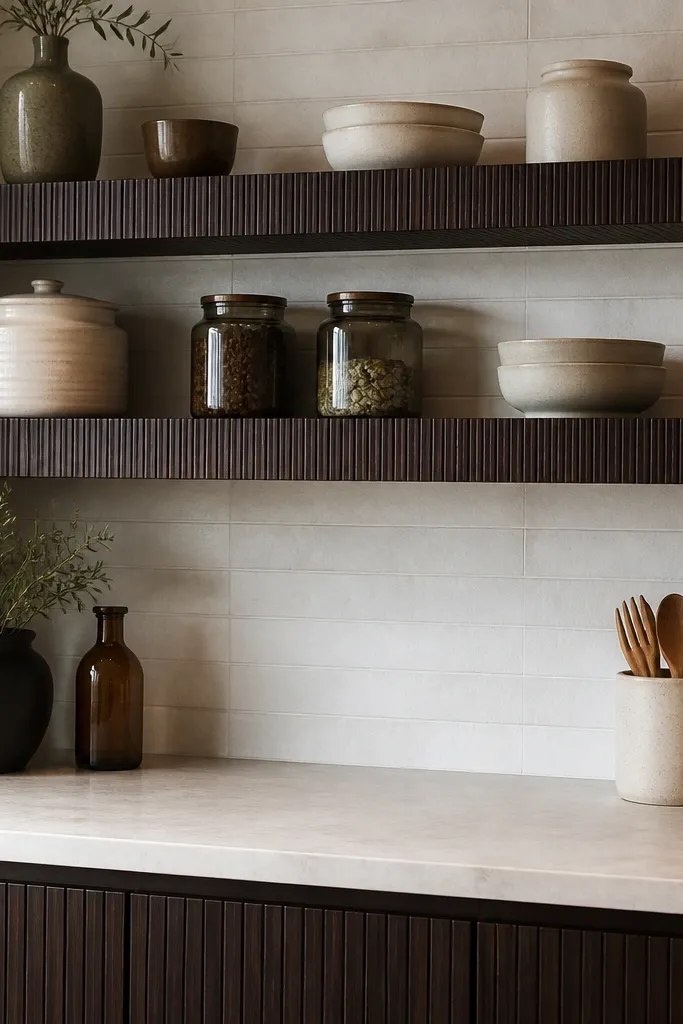
Vertical grooves make shelves look modern because the surface has a built-in pattern. Smoked oak adds depth so the shelves look intentional even when you have a few neutral jars. The grooves also hide minor scuffs from daily use better than smooth boards. Keep the hardware hidden so the grooves do the visual work. This is a good fit for kitchens with gray counters, black fixtures, or a warmer neutral palette where you want texture without loud color.
Editor's noteStain in the direction of the grooves and wipe consistently; uneven wiping looks streaky in the grooves.
First, select oak boards and cut them to your shelf length, then mark evenly spaced groove lines. Use a router with a straight bit to cut shallow vertical grooves, then sand the grooves lightly so edges don’t feel sharp. Install concealed brackets or a hidden rail system so the shelf face stays clean. Apply a smoked stain evenly, then follow with 2-3 coats of satin water-resistant clear finish. Let everything cure fully before styling so the grooves don’t trap dust or finish residue.
Skip thisDon’t make grooves too deep; deep grooves collect grime and look dirty quickly.
20. Two-Layer Shelf with Lower Tray and Upper Display
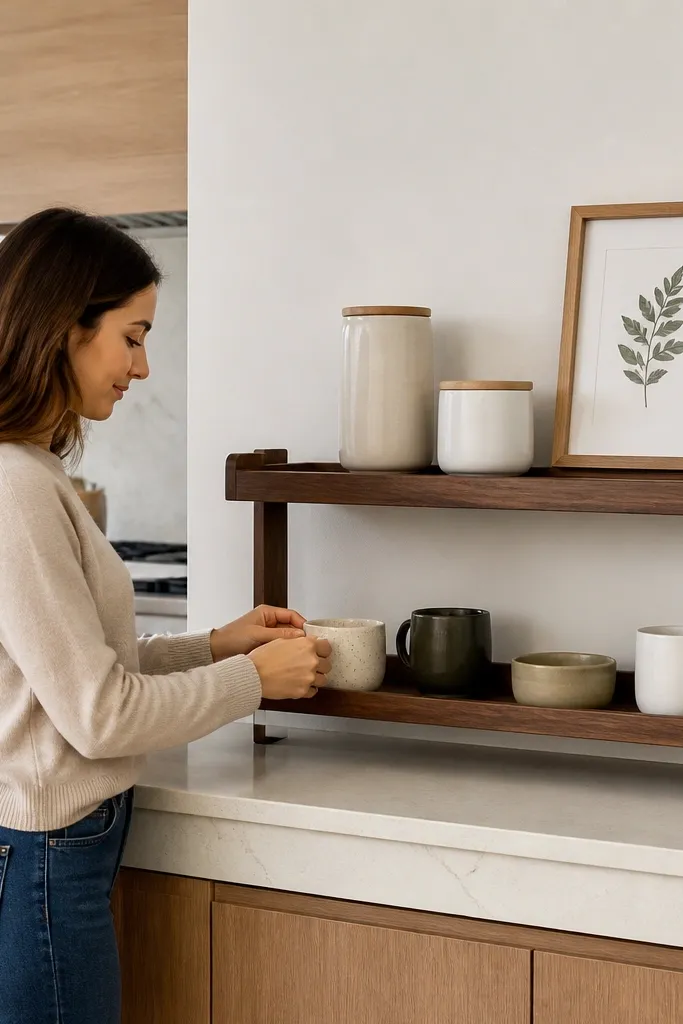
Two-layer shelves solve a real kitchen problem: mixing everyday items with decor without clutter. The lower tray holds mugs or small bowls, while the upper display line holds a couple of canisters and a framed print. The modern look comes from clean separation and consistent spacing — you can style both levels without everything blending together. Choose a matte finish and keep the profile slim so the shelf doesn’t look bulky under cabinets. This is ideal for kitchens where you want a functional shelf but still want it to photograph like a set.
First, build one main shelf board and add a lower tray lip (about 1-1/2 in) on the front edge, then add a second, thinner display ledge on top if you want a distinct tier. Install hidden brackets so the combined profile stays flat to the wall. Sand all edges smooth and round the tray lip top surface so mugs don’t scrape. Finish with matte water-resistant clear or paint plus topcoat. Mount after the finish cures and then arrange items by size so the upper shelf stays visually light.
Use matching container heights so both levels look aligned in photos.
Avoid mixing tall and short decor on the upper ledge — it makes the shelf look crowded.



