
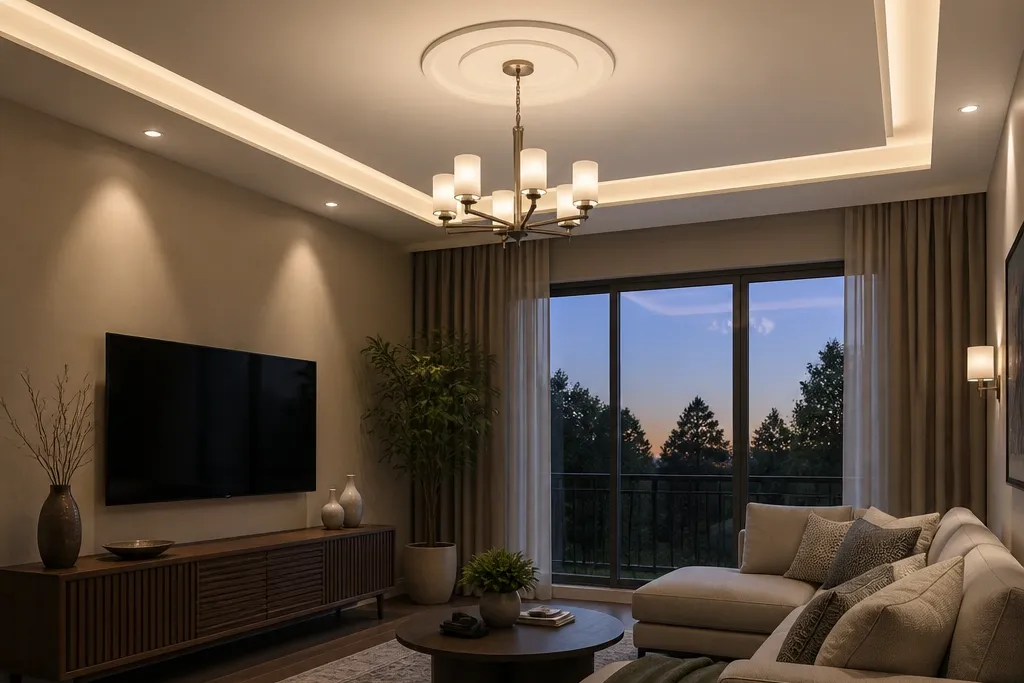
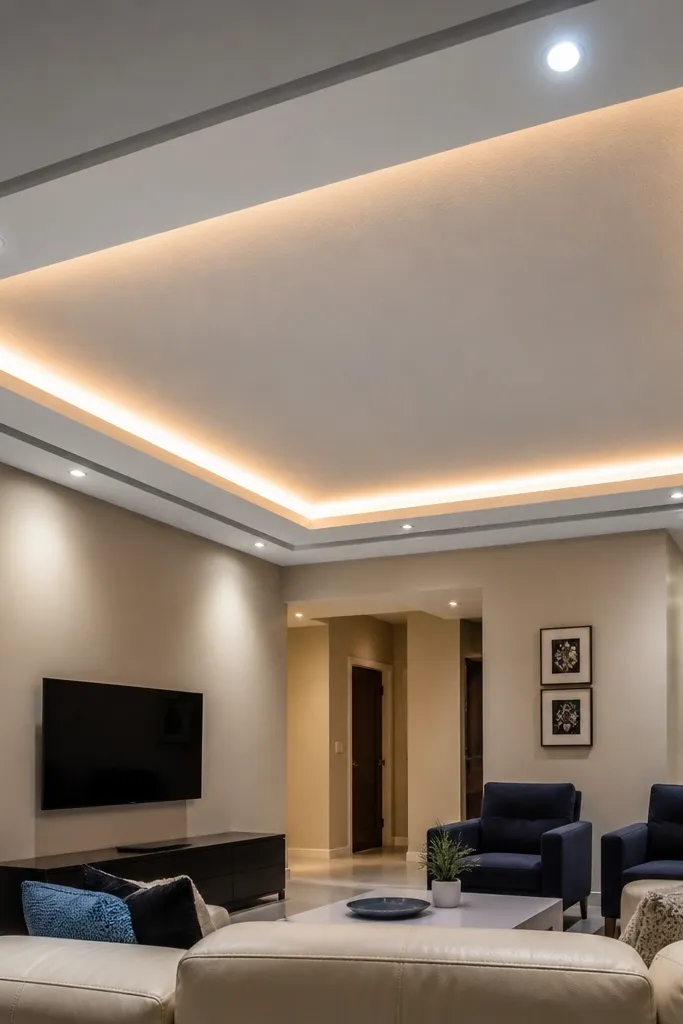
1. Boxed Tray with Perimeter LED Shadow Gap
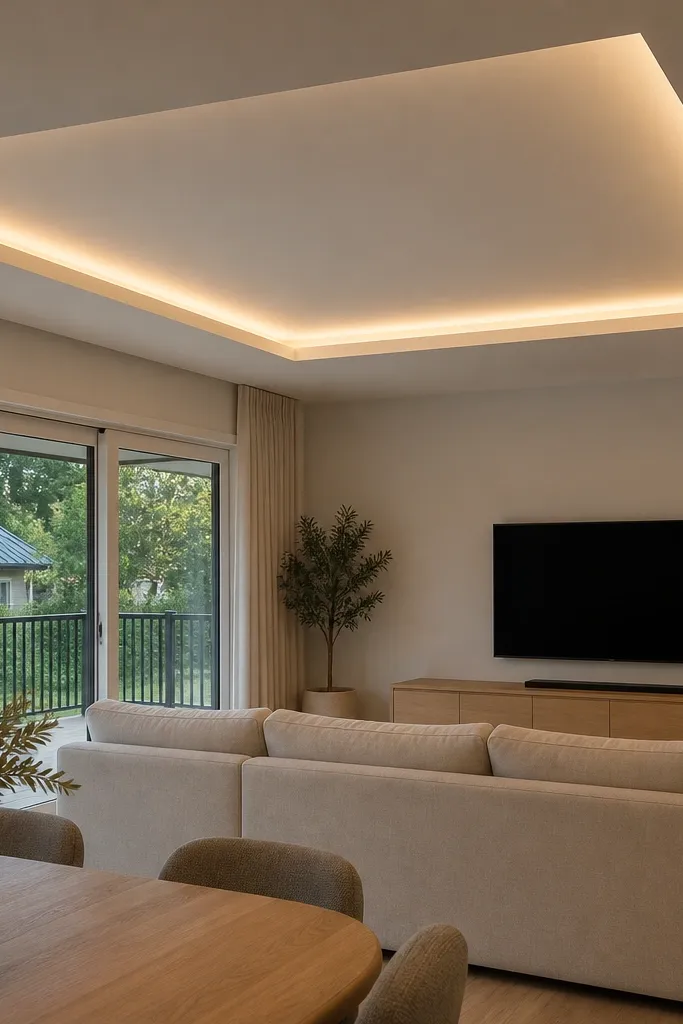
This is the safest modern False Ceiling Living Room design because it makes your ceiling look intentional without adding clutter. The boxed tray frames the center of the room, while the LED strip sits on a slightly recessed ledge to create a shadow gap. That shadow line is what makes the ceiling look layered and premium instead of flat. Use a warm white LED at around 2700K-3000K so the POP surface doesn’t look blue. Skill level is beginner-friendly if you can cut level lines and keep joints clean; time is about 4-7 days depending on curing and paint.
Start by marking a level perimeter line 2.5-3.5 inches below your existing ceiling. Fix the metal sections for the outer box first, then build the inner tray frame so it sits 1-1.5 inches lower than the outer edge. Leave a small recess for the LED strip so you get a visible shadow gap, then run the wiring through the ceiling cavity. After POP finishing and sanding, prime and paint with two coats of interior acrylic emulsion for a smooth, even sheen.
Editor's noteUse a chalk line and a laser level for straight edges — a tiny slant shows up hard under LED lighting.
Skip thisDon’t place the LED directly facing downward; it kills the shadow gap and looks cheap.
2. Double-Tier Center Drop with Circular Medallion
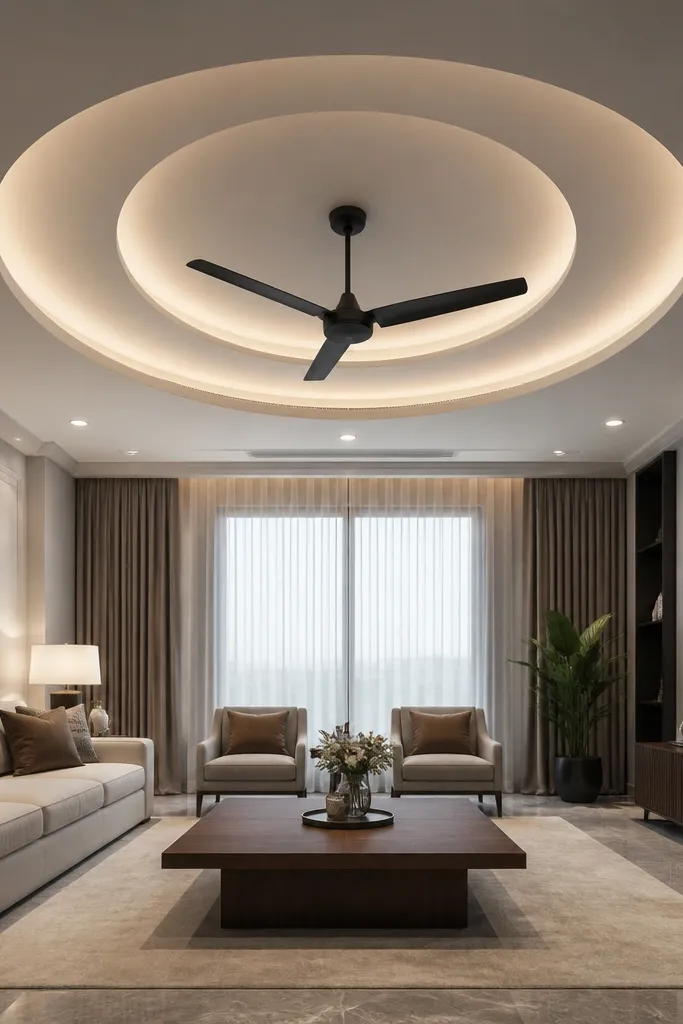
If you want the living room to look “designed” in one glance, a double-tier center drop does it. The outer tier keeps the ceiling clean, while the second tier pulls focus to the center where your chandelier or ceiling fan sits. A circular medallion breaks the geometry and gives the design a modern-soft focal point. This looks best in living rooms where the seating is centered and you have a clear focal wall. It’s medium difficulty because you must keep the circle round and the drop heights consistent.
Mark the outer tier perimeter 3-4 inches down, then build the second-tier ring about 1-1.5 inches below the outer box. Create the medallion using a template for the circle radius so it stays symmetrical from all angles. Install spotlights evenly around the inner tier so light doesn’t pool only in the center. Finish with POP skimming on the tiers and medallion, then sand smooth and paint in matte white to avoid glare.
Cut the circle template from thick plywood and trace it twice before installing POP — roundness matters under light.
Don’t cram too many downlights; dense clusters create harsh hotspots around the medallion.
3. Perimeter LED + Four Corner Mini Steps
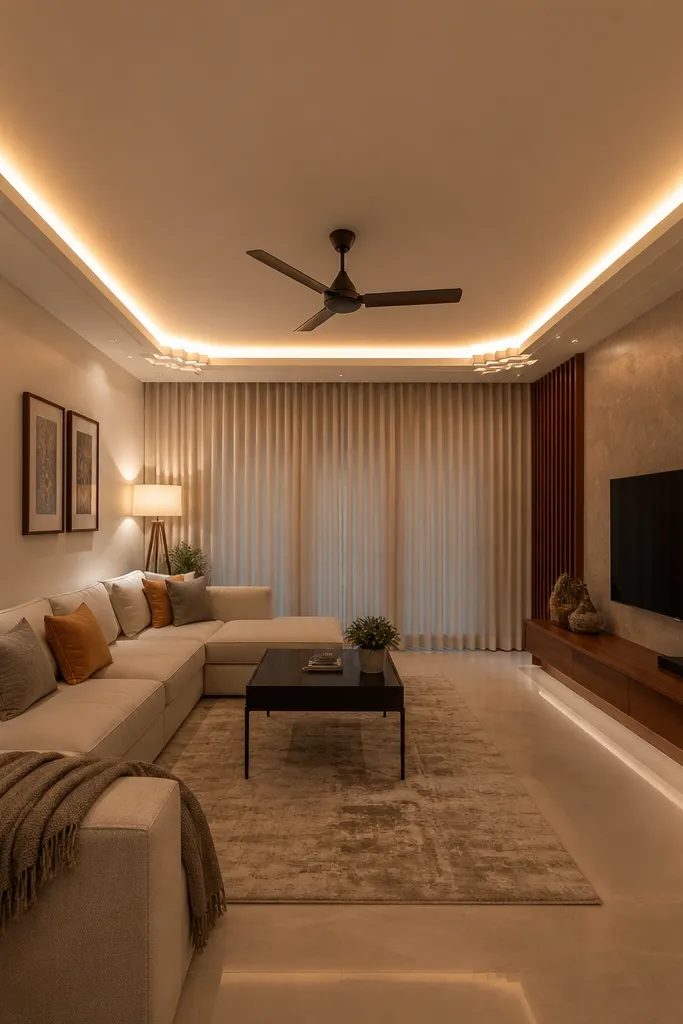
This design is great for living rooms that feel square and plain. The perimeter LED gives the room a modern glow, while the four mini steps at the corners add visual rhythm without turning the ceiling into a complicated pattern. The corner steps also help hide wiring junctions because you can build those areas with extra thickness. It’s a strong choice for medium-sized rooms where you don’t want a big center drop. The build is manageable for DIYers who can maintain straight lines and consistent spacing.
Draw the main perimeter box line at a 2.5-3.5 inch drop, then install the outer frame. Build a thin inner ledge for the LED strip so the light runs around the room evenly. At each corner, add a small rectangular step that is about 1 inch deeper than the inner ledge, keeping the edges sharp. Finish the steps with POP, sand, prime, and paint; then mount the LED strip and test before final paint touch-ups.
Editor's noteTest LED brightness with a temporary connection before POP finishing so you don’t redo work after sanding.
Skip thisAvoid uneven corner step depths — the ceiling looks crooked once the LED turns on.
4. Geometric Grid Panels with Concealed Strip
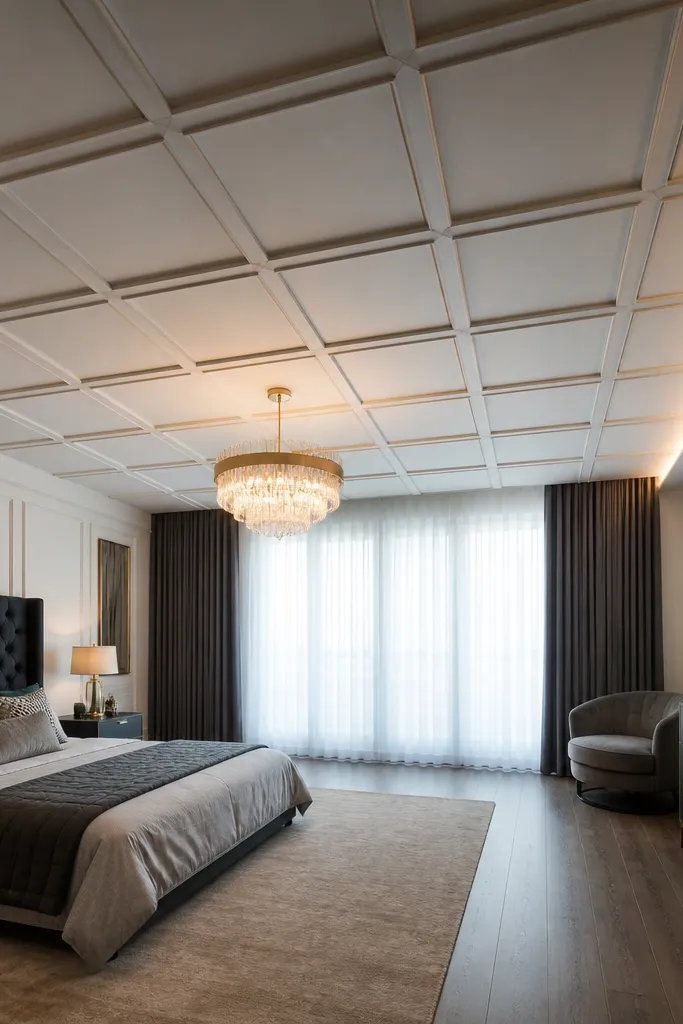
A geometric grid makes a modern False Ceiling Living Room look architectural, especially if your walls are simple. The trick is to keep the grid tight and uniform, not random. POP grid panels with a concealed strip along one side create a clean highlight line that makes the shapes pop. This works best when your living room has a large blank wall or a TV unit with straight edges, because the ceiling mirrors that style. Difficulty is medium because panel spacing and level control are everything.
Plan a grid using a simple measurement rule: keep each panel width within 18-30 inches so it looks balanced. Build the base drop at 3-4 inches, then install diagonal or square frame sections for the grid. Add a concealed strip channel along the perimeter border that feeds light into the panel edges. Apply POP for panel surfaces, sand flush, and paint with matte finish so the grid lines stay crisp rather than glossy.
Editor's noteMark every grid line with measurement before you install any POP — once it’s sheeted, changing spacing is painful.
Skip thisDon’t make panels too small; tiny grid boxes look busy and cheap under downlights.
5. Wave-Lip Perimeter with Downlights
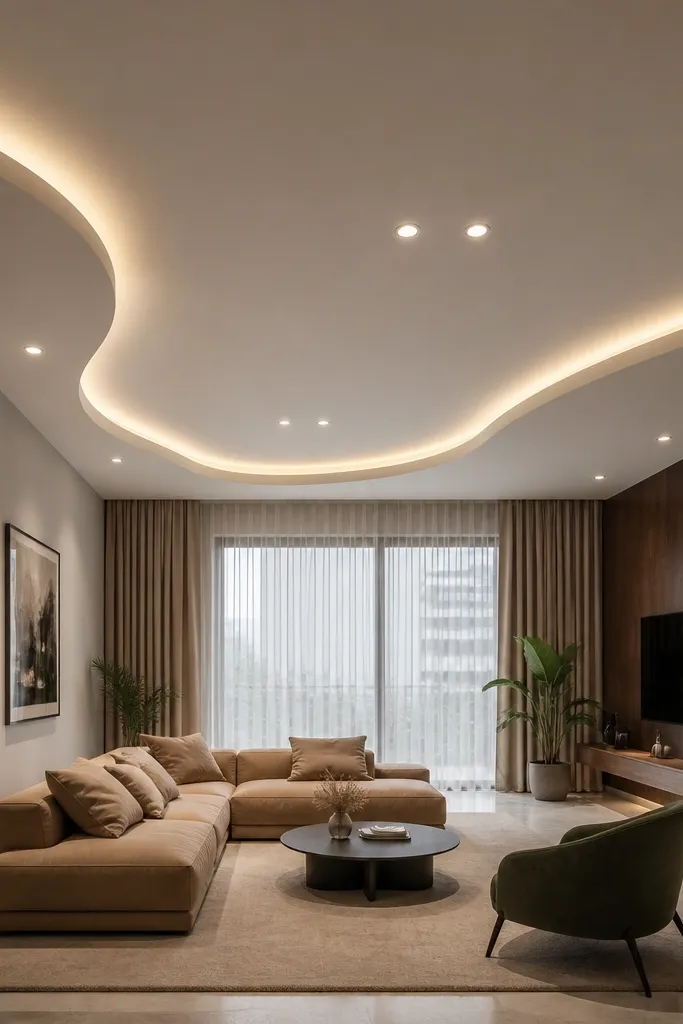
If you want curves but still want it modern, go for a wave lip only on the perimeter. This keeps the ceiling elegant without turning the whole room into a swirl pattern. The wave lip creates a soft shadow gradient when you add downlights or a thin strip behind it. It’s a good match for living rooms with soft furnishings — think curved sofa arms or rounded décor. DIY difficulty is medium because the wave needs smooth formwork and consistent curves.
Lower the perimeter 3 inches and build the base frame first. Create the wave lip using flexible strips and pre-marked curve points so the POP surface follows a smooth arc. Keep the wave thickness consistent, about 1 to 1.25 inches, for clean edges. Place downlights in a symmetrical layout with equal spacing from the wave ends, then finish, sand, prime, and paint evenly.
Editor's noteUse a template for the wave profile and check the curve from two angles before POP application.
Skip thisAvoid multiple wave layers — two wave patterns stacked usually look messy and dated.
6. TV Wall Focus: Half-Frame Ceiling with LED
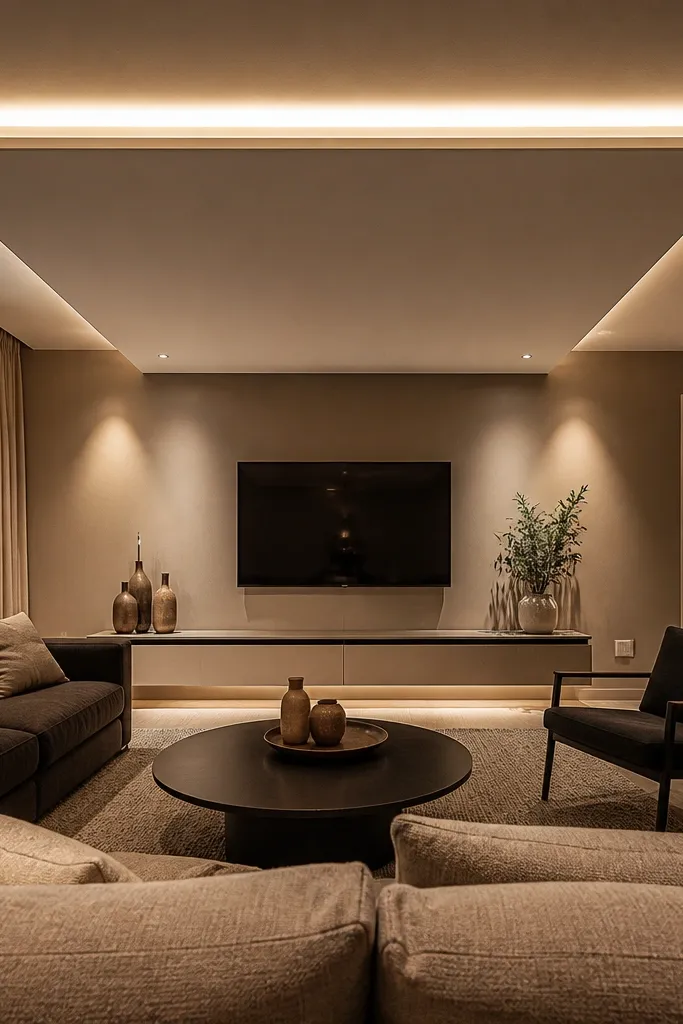
This is for the common living room problem: one side feels heavy because the TV wall has décor, while the ceiling stays plain. A half-frame ceiling pulls attention toward the TV and makes the room look balanced from the sofa. The LED line tucked into the frame adds a modern halo effect along the seating sightline. It’s visually striking even in small rooms because the design is directional, not centered. Difficulty is medium because your drop height must match the TV wall line visually.
Mark the drop height at 3 to 3.5 inches on the TV side, then keep the opposite side slightly higher by about 1 inch for a modern asymmetry. Build a frame that follows the TV unit width and extend it 6-10 inches beyond each side. Install LED channel inside the frame so the light washes toward the wall, not the ceiling. Add 4 to 6 downlights arranged to keep the TV area bright without glare, then POP finish, sand, prime, and paint.
Editor's noteMeasure from the sofa eye level to the ceiling edge; it helps you decide how wide the frame should be.
Skip thisDon’t center the half-frame if your seating is off-center — it will look wrong from the main viewing angle.
7. Center Starburst with LED Ring
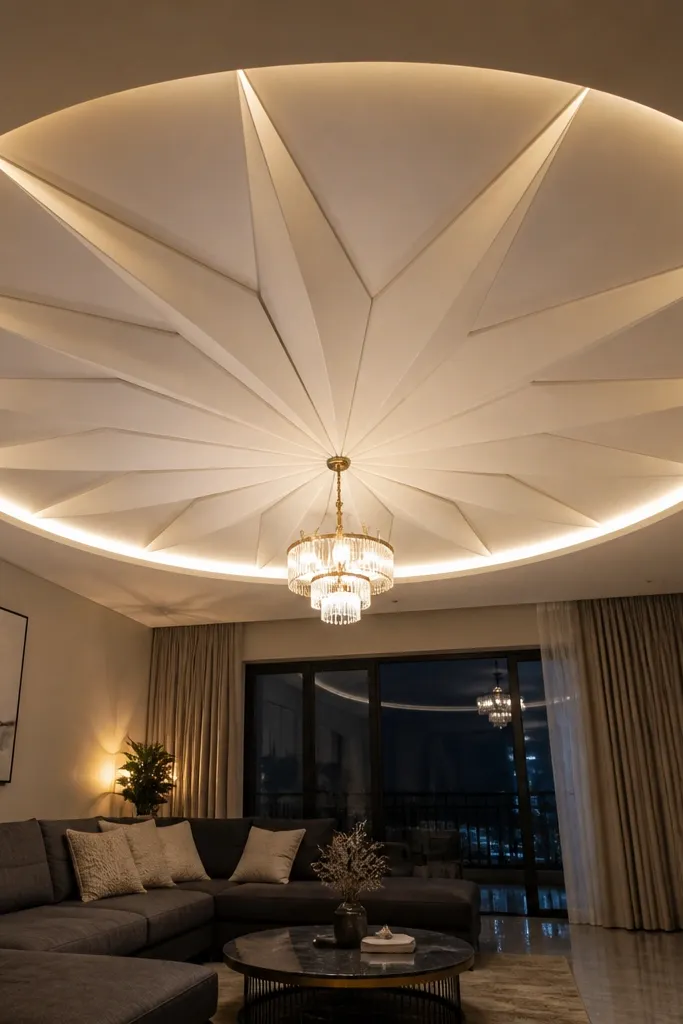
A starburst center reads modern when you keep it crisp and symmetrical. The outer ring LED makes the design glow even at night, while the starburst pattern gives a focal point without covering the entire ceiling. This looks best when you have a plain ceiling fan or a small chandelier — the ceiling becomes the hero. It’s medium skill because the starburst geometry must be accurate for clean edges. It also suits rooms with neutral wall colors so the ceiling pattern stands out.
Build a base drop at 3.5 inches and keep it simple. Create the starburst using POP strips cut to fixed lengths and angles, then mount them on a circular base ring. Add an LED ring inside the circular boundary so the light stays contained and doesn’t spill across the ceiling. Install a few downlights around the edges to reduce dark corners, then sand and paint the entire ceiling in matte white.
Editor's noteUse a metal angle template for each star arm so all points hit the same angle and the star stays sharp.
Skip thisAvoid thick borders around the starburst; they make the pattern look heavy and old-fashioned.
8. Slim Perimeter Border with Floating Inner Rectangle
This design is clean, modern, and great for smaller living rooms where you don’t want a big drop. The slim perimeter border gives you structure, and the floating inner rectangle creates that “layered” look through a shadow gap. It looks especially good with warm lighting because the inner rectangle edge glows slightly. Keep the ceiling white and matte so the shadow lines show up clearly. Difficulty is beginner to medium depending on your ability to keep the rectangle corners perfectly square.
Set your main perimeter drop at 2.5 to 3 inches, then install a narrow border frame. Build an inner rectangle frame that sits 1 to 1.2 inches lower than the border so you get a shadow gap. Run a concealed LED strip in the border recess aimed toward the inner rectangle edge. Add 2-4 downlights in the inner rectangle area, then finish POP surfaces, sand, prime, and paint.
Check corner squareness with a tape measure from corner to corner diagonals. Match the diagonals to keep it perfect.
Don’t make the floating rectangle too close to the border; narrow gaps create a weak shadow line.
9. L-Shaped LED Channel for Long Rooms
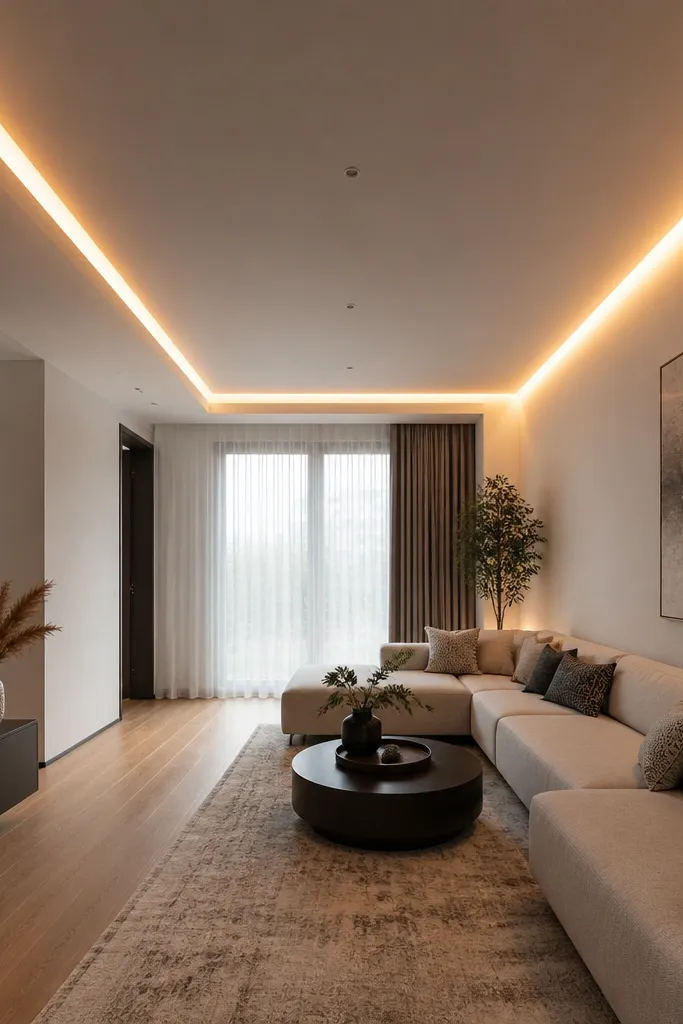
Long living rooms look awkward when the ceiling lighting is centered. An L-shaped LED channel guides the eye along the room length and makes the space feel more even. The POP structure stays minimal, so you still get a modern False Ceiling Living Room look without heavy ornament. This is a smart pick for layouts where the sofa sits along one side. Skill level is medium because you must plan LED routing and keep the L-line crisp.
Lower the ceiling 3 inches on the longer side and build a rectangular base frame. On one end, create the L turn by dropping the channel depth slightly so the LED line stays continuous. Install LED strip inside the L channel and use frosted diffuser for even glow. Place downlights in a staggered grid along the longer axis so you don’t get bright bands, then complete POP finishing and paint.
Editor's noteUse a diffuser channel cover — raw LED dots show through POP highlights and ruin the clean look.
Skip thisAvoid placing the LED where it points straight at the viewer; it creates glare on the ceiling.
10. Coffered Ceiling with Four-Rail Division
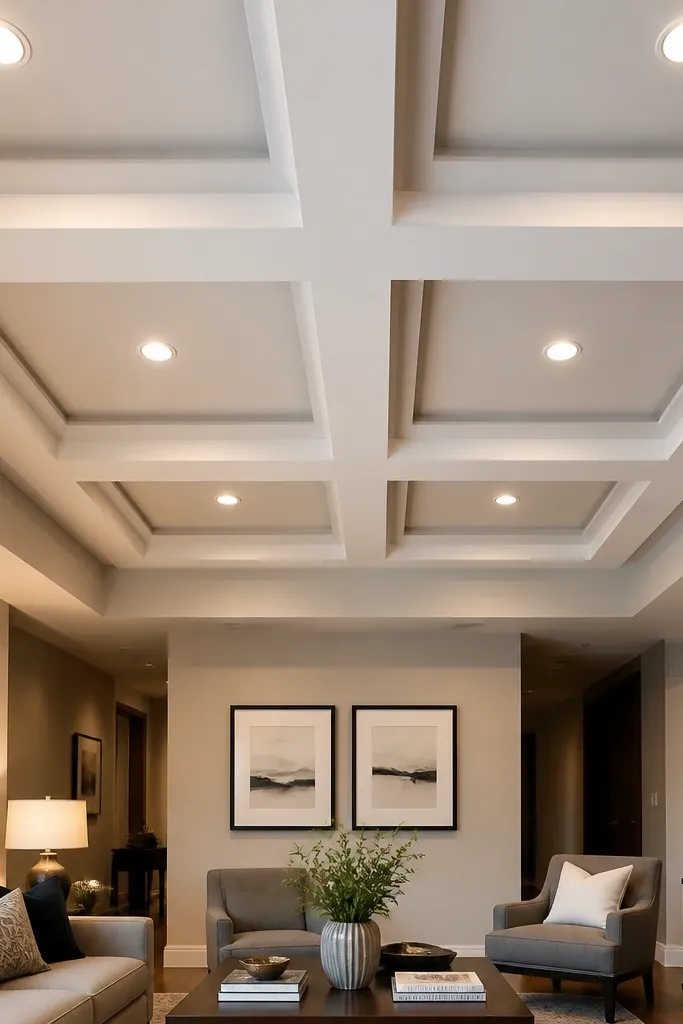
Coffered ceilings look modern when the rails are thin and the spacing is consistent. This design divides the ceiling into four main rectangles, giving structure and depth without loud patterns. The beauty comes from shadows created by the recessed coffer depth, especially under downlights. It’s ideal when your living room has a big central area and you want a balanced, symmetrical look. Difficulty is medium since you must keep rails level and evenly spaced.
Drop the ceiling 3.5-4 inches to create enough depth for clean coffer shadows. Build the outer frame, then install four main rails that create a rectangular cross — keep the rails parallel and square. Create recessed coffer panels by adding POP surface layers that sit 1 to 1.25 inches lower than the rails. Install downlights along the rail lines and keep their spacing equal from the center. Sand, prime, and paint in matte white so the shadows stay visible.
Mark rail positions using measurements from two opposite walls, not from one side only.
Don’t over-deepen the coffers; too much depth makes the ceiling look like a box and reduces height.
11. Floating Step Columns Around Perimeter
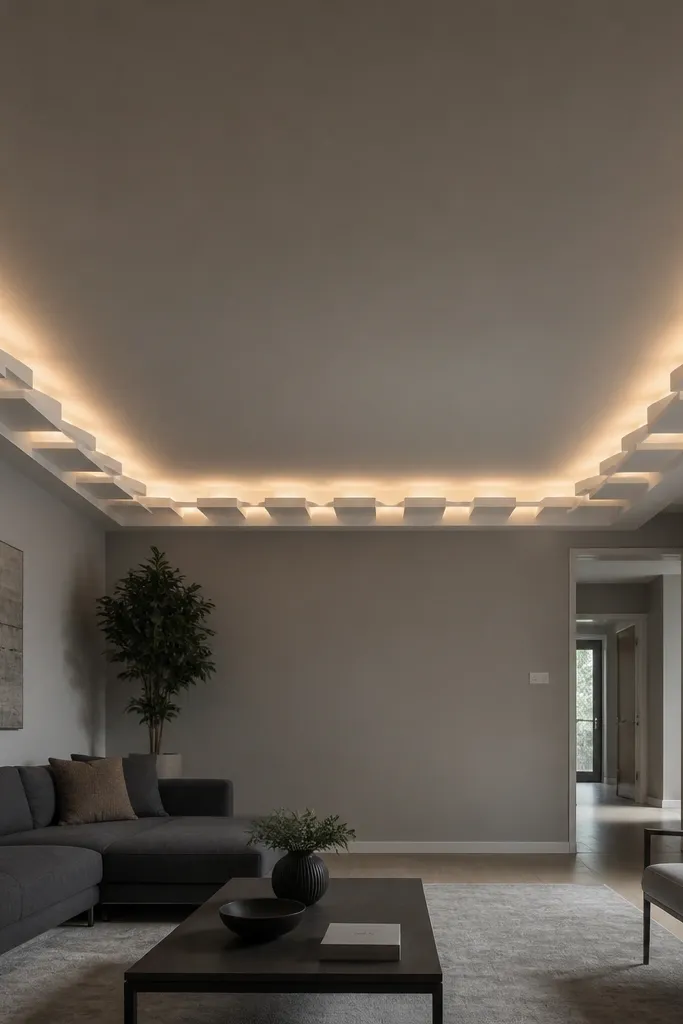
This one looks high-end because it creates depth along the edges, even though the center stays clean. You build small floating step columns around the perimeter — each step catches light and makes the ceiling feel sculpted. It’s a good choice for living rooms with plain walls because the ceiling adds texture without heavy center patterns. Keep the steps consistent in size and spacing for a modern result. Skill level is medium; you need clean repeatable measurements.
Set the base drop at 3 inches. Build a perimeter border frame, then add repeating step “columns” every 24-30 inches along each side. Each step should drop about 0.75 to 1 inch deeper than the border to create a visible shadow. If you want extra glow, place a concealed LED strip behind the border aimed at the steps. Finish with POP skimming, sand smooth, prime, and paint.
Editor's notePre-measure one step module and use it as your repeat unit — consistency is the entire look.
Skip thisAvoid random spacing; uneven gaps make the ceiling look hand-done instead of designed.
12. Textured POP Panel Center with Clean Border
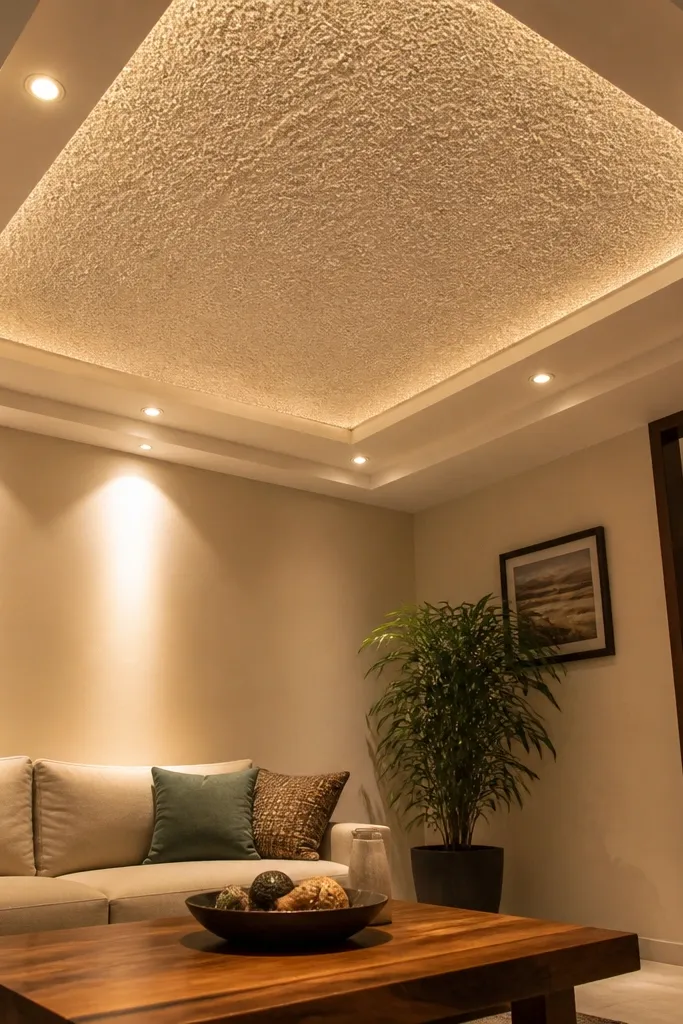
This design adds an aesthetic trick: surface texture. Keep the border smooth and modern, then use a subtle textured POP panel in the center to catch light differently through the day. It’s especially photogenic under warm downlights because the texture creates tiny highlights rather than glare. This option is great if you want something more interesting than plain white without adding extra shapes. Difficulty is medium because texture finishing needs patience and even sanding.
Build the base border drop at 3 inches and keep the border edges crisp. Create a center panel area by installing a recessed frame, then apply POP surface and use a controlled texture tool pattern. Let it cure fully before sanding; you want texture edges intact, not rounded off. Paint the textured area with matte white so the texture stays readable. Add 4-6 downlights positioned to highlight the panel from above, not from the sides.
Test paint on a small scrap of the same POP mix so you know how the texture will read once matte dries.
Don’t use glossy paint over texture; it turns highlights into glare and hides the pattern.
13. Mirror-Symmetry Side Ramps with LED Wash
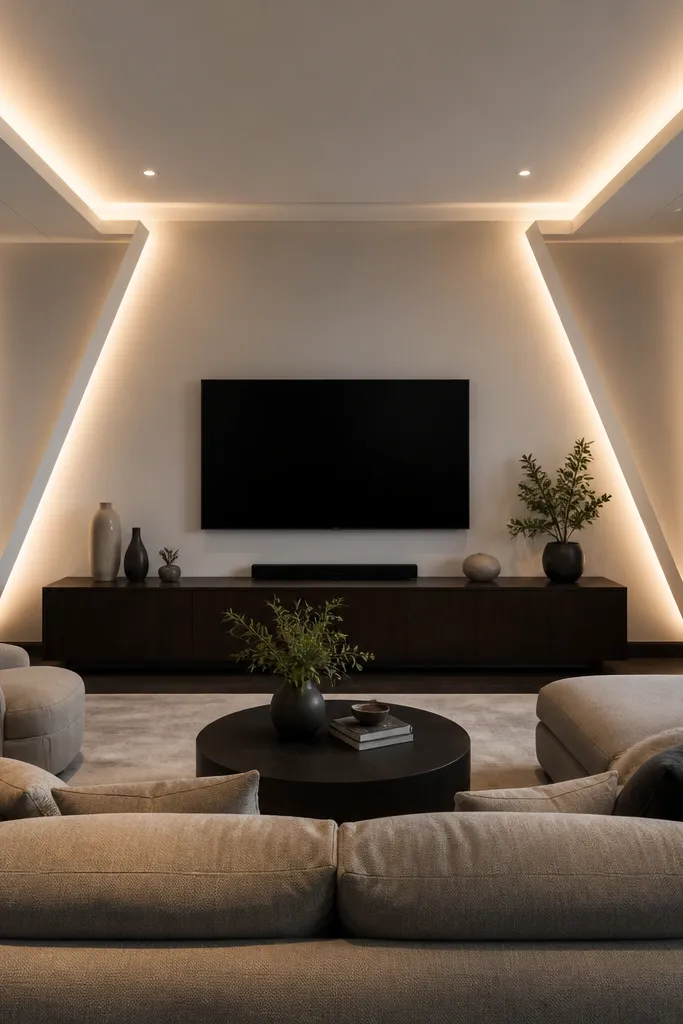
Side ramps create a dramatic look without needing a big central medallion. You build two mirror-symmetric slanted POP ramps on opposite sides, then hide LED strips so light washes toward the center. This gives a modern False Ceiling Living Room a “cinema” feel while staying clean and geometric. It works best when your room has a seating arrangement that faces the center. Difficulty is medium to advanced because ramp angles must be consistent on both sides.
Drop the ceiling to about 3.5 inches at the outer perimeter. Build two parallel ramp frames on left and right, keeping them mirror-symmetric by measuring from both walls. Hide LED strip behind the ramp edge with a diffuser so light spreads smoothly. Keep the center area flat to avoid crowding, then install downlights near the ramp transitions for even brightness. Finish, sand, prime, and paint with matte to preserve shadow gradients.
Editor's noteUse a long straight edge during POP application to control ramp flatness and avoid wavy surfaces.
Skip thisDon’t guess ramp angles; small differences show up instantly once LED wash is on.
14. Minimal Three-Slot Ceiling with Single LED Line
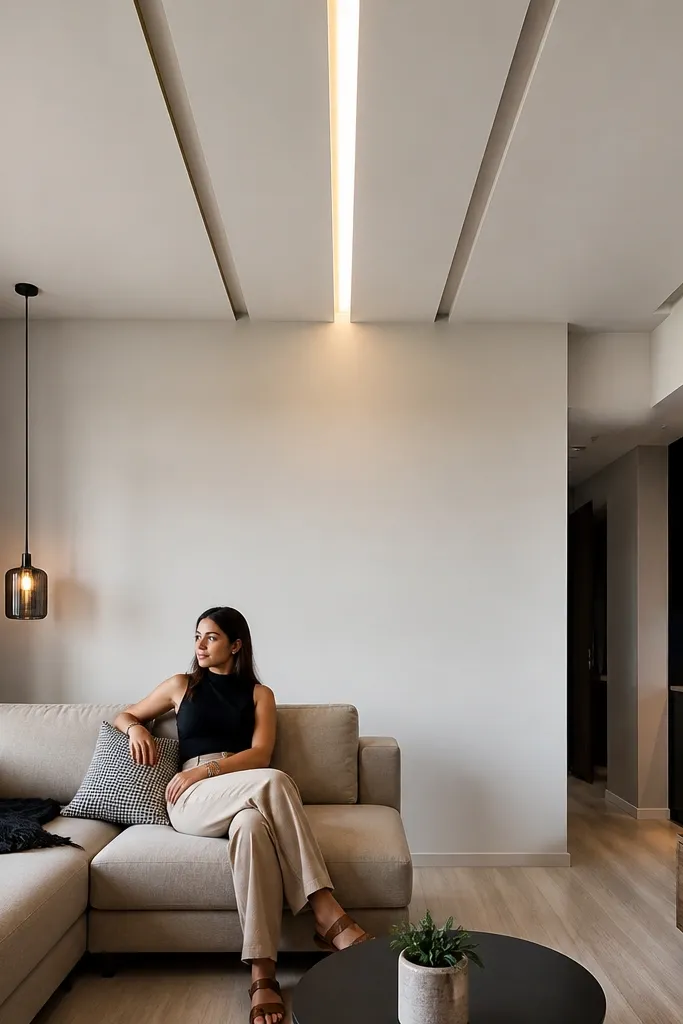
If you hate busy ceilings, this is the modern approach: three clean slots and one LED line. The slots create depth and guide the eye, while the LED line adds a gentle glow without heavy patterns. This design looks sharp in photos because it has strong lines and minimal ornament. It suits smaller living rooms, apartments, and spaces with modern furniture where you want the ceiling to stay quiet. Difficulty is beginner-friendly because the geometry is simple.
Set the base drop at 2.5-3 inches. Create three parallel slot recesses using metal channels and POP layers so each slot has the same width and depth. Install a concealed LED strip along one side of the slots, preferably with a diffuser to avoid dotting. Add two or four downlights spaced evenly so the slots don’t cast too much shadow. Sand flush edges, prime, and paint two coats for a uniform finish.
Editor's noteKeep slot widths consistent within 1/8 inch. That’s the difference between modern and handmade.
Skip thisAvoid mixing slot widths — it kills the clean, modern rhythm.
15. Round Outer Border with Center Square Frame
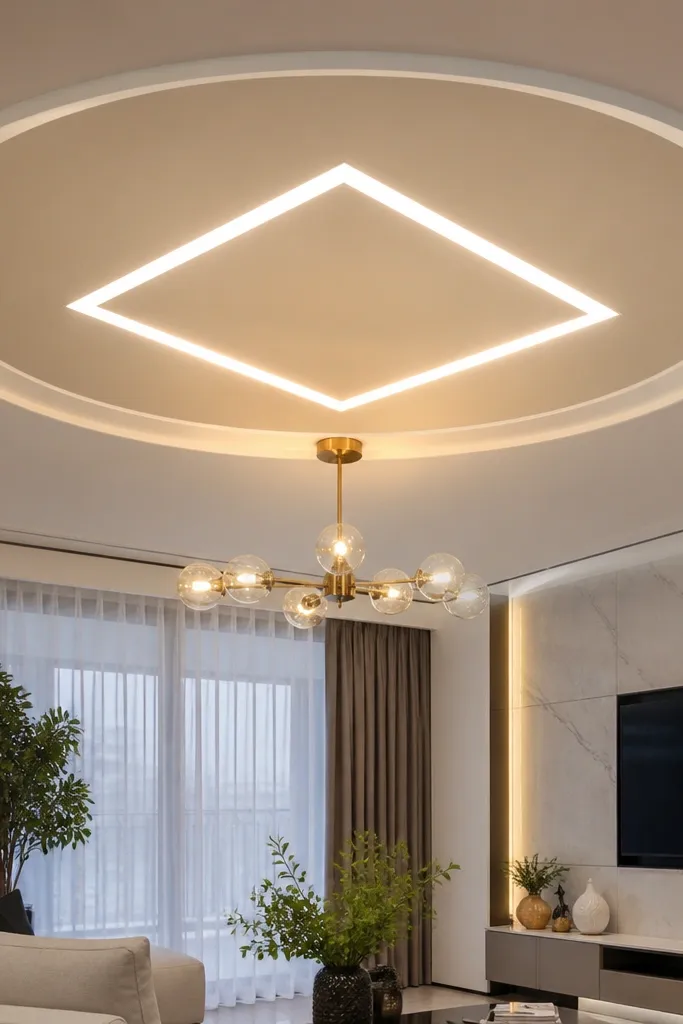
This mix of shapes looks bold but still modern when you keep proportions tight. A round outer border softens the ceiling, while a square inner frame keeps it structured. Add LED inside the ring so the light outlines the square edges — that contrast is what makes it photogenic. This works for living rooms with both round décor and straight furniture lines. Difficulty is medium because you’re building two different frames accurately.
Lower the ceiling 3-4 inches and build the outer circular border using a measured radius template. Install a square inner frame that sits about 1-1.5 inches lower than the outer ring so LED can glow into the gap. Place LED strip around the inner square edge in the recess, then keep downlights around the perimeter for even illumination. Finish POP on the outer ring and inner square, sand carefully, prime, and paint matte white.
Use a radius compass method for the circle — it’s faster than trying to eyeball a curve.
Don’t let the square and circle drift off-center; alignment is what makes the design look intentional.
16. TV Back Lighting Trench with Thin POP Border
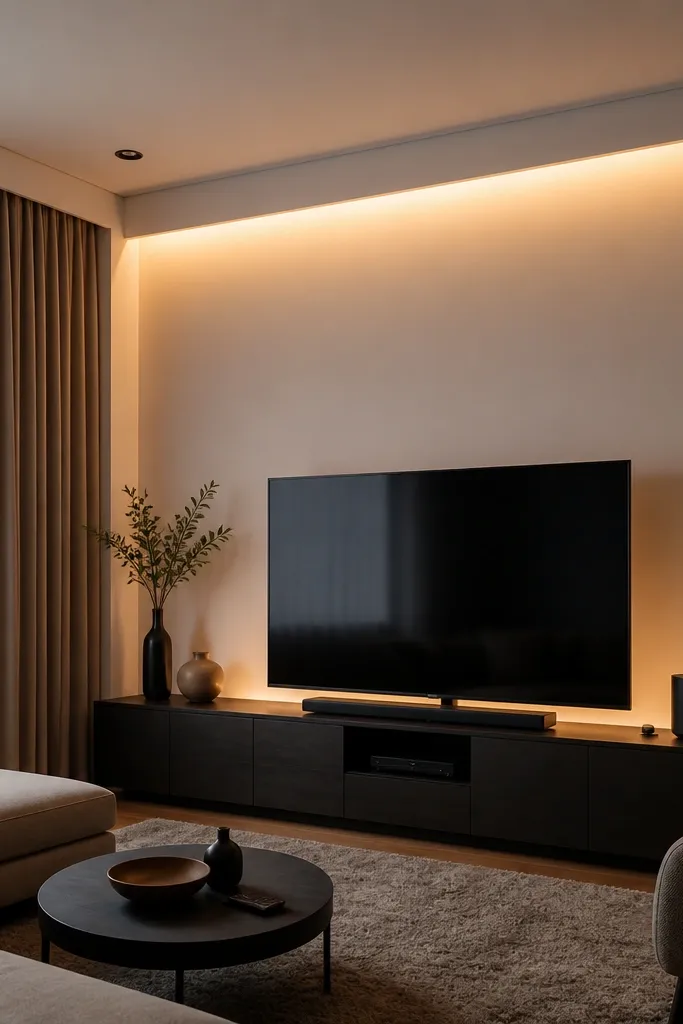
This is a modern False Ceiling Living Room design that targets the TV corner problem: glare and dead ceiling space behind the unit. A thin POP border keeps the ceiling clean, while a recessed trench behind the TV side hides LED and creates a controlled glow. The result is a sharp, layered look without big drops all over the room. It’s best for rooms with a wall-mounted TV and a sofa directly opposite. Difficulty is medium because you must coordinate the LED trench with the TV unit width.
Mark a thin ceiling border line 2.5-3 inches down and keep it straight and level. Build a recessed trench on the TV side, about 1-1.25 inches lower, with a channel for LED strip. Run LED wiring through the cavity and keep the diffuser facing away from direct sight to avoid glare. Add small downlights in the center area to keep the room bright. POP finish the border and trench edges, sand, prime, and paint.
Match the trench width to the TV unit width plus 6-8 inches on each side — it looks balanced from the sofa.
Avoid bright LED settings aimed at the ceiling; it creates a harsh band on walls.
17. Cross Pattern Frame with Four Downlight Corners
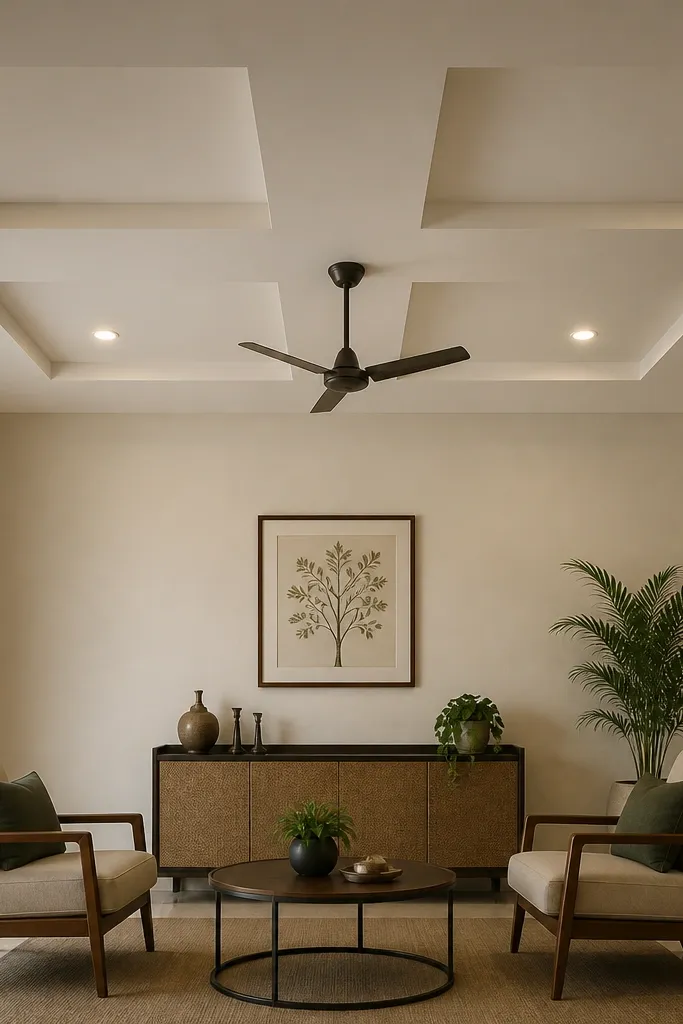
Cross frames look modern when the arms are clean and symmetrical. You get a strong visual structure that guides the eye to the room center, and the four downlights at corners of the center area create a balanced glow. This design works well in square living rooms and rooms with centered seating. It’s also a good option when you want a ceiling that looks graphic in photos. Difficulty is medium because the cross lines must be level and evenly spaced.
Drop the ceiling 3.5 inches and build the outer border frame first. Add two perpendicular inner rails to form the cross, then define a recessed center panel area that sits about 1 inch lower than the rails. Place four downlights at the recessed center corners, keeping equal distance from the center. Finish with POP on all edges, sand smooth, prime, and paint matte white to keep shadows crisp.
Use a string line to verify the cross is centered before POP finishing. Once you skim, shifting is hard.
Don’t add extra decorative strips on top of the cross; it becomes cluttered quickly.
18. High-Low Corner Drops with LED Uplight
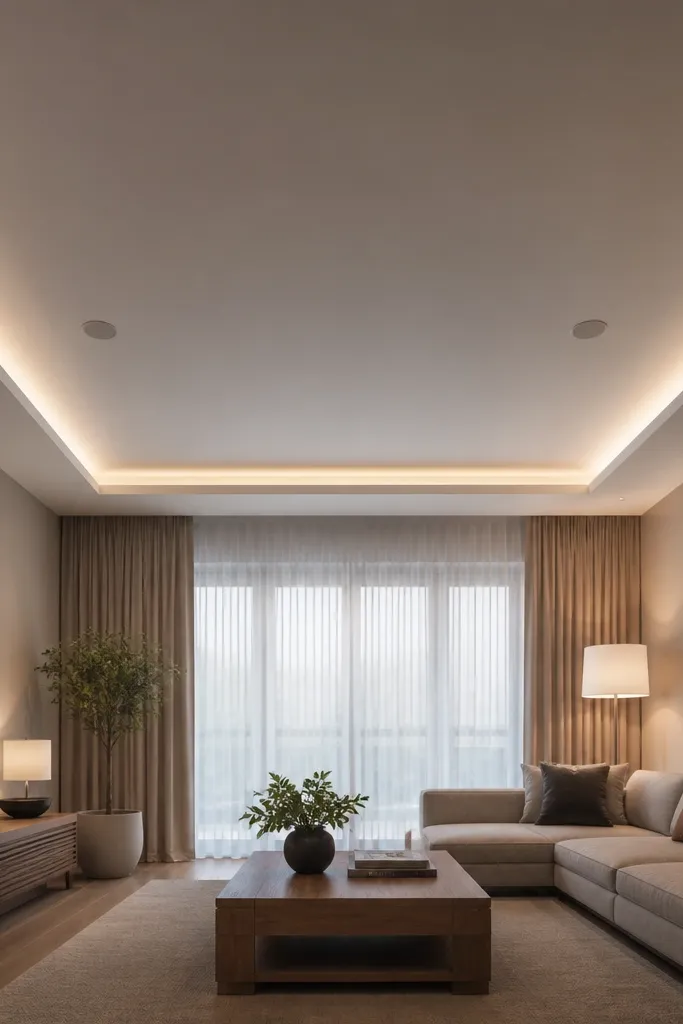
High-low corner drops add drama while keeping the center of the ceiling visually higher. The contrast makes the room feel more open, and the LED uplight hides in corner pockets so the glow feels soft. This is a great modern False Ceiling Living Room design for rooms with slightly low ceilings where you still want impact. It looks best with neutral walls and a simple sofa color. Skill level is medium because you’re building different heights across the ceiling.
Mark a center ceiling height line that drops only 2-2.5 inches, then set the corners at 3.5-4 inches. Build the perimeter and frame the corner drop boxes first so they sit lower, then extend frames toward the center. Create corner LED pockets with a diffuser so uplight bounces off the ceiling surface instead of blasting outward. Add downlights in the center area for even illumination, then POP finish all height steps and sand smooth before painting.
Editor's noteKeep the step edges thin and sharp; thick edges make corner drops look bulky.
Skip thisAvoid large height differences if your room is already short; it makes the ceiling oppressive.
19. Crown Cove Ceiling with Zigzag POP Fascia and Warm LED
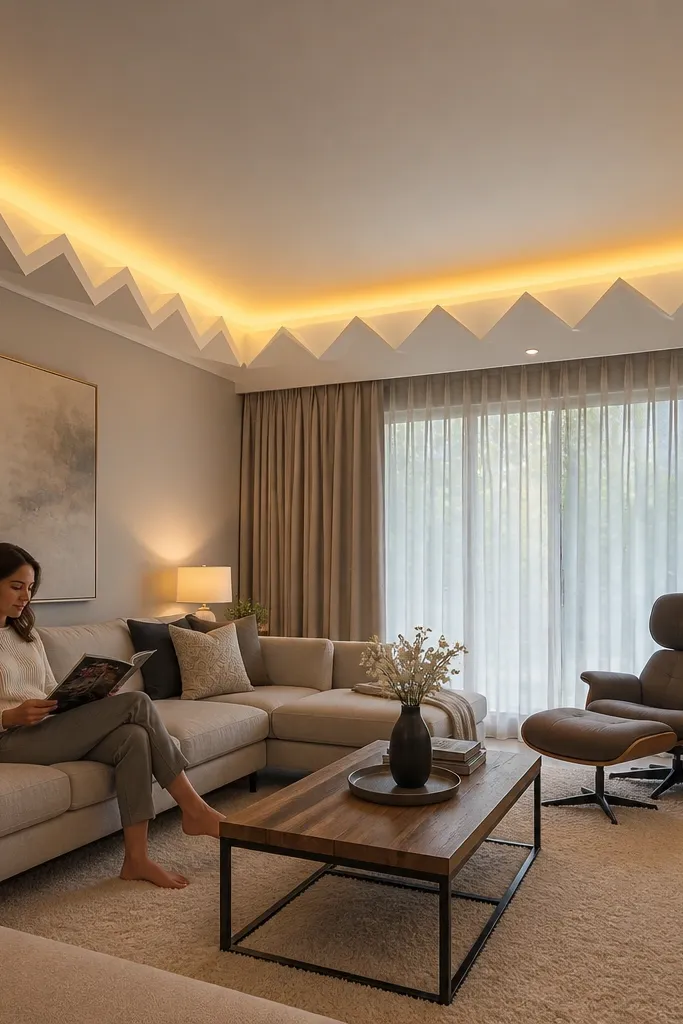
This design gives you a modern False Ceiling Living Room look without going flat and boring. The crown cove hides a warm LED wash, while the zigzag POP fascia adds a sharp, graphic rhythm that shows up in photos from every angle. It makes a standard living room feel taller because the glow sits higher than eye level and the fascia breaks up the ceiling plane. The build is very doable for a DIYer with basic framing skills, but you need patience with straight lines and consistent fascia angles.
Step 1 — Mark and frame the cove. Draw a level line for the main drop 6-8 cm down from the slab, then add a second inner line 10-14 cm from the outer perimeter to create the cove width; frame both levels with GI channels and 2x2 angle supports at 60 cm spacing. Step 2 — Build the zigzag fascia. Use 12 mm POP sheets cut into repeating zigzag segments (for a clean look, keep the zigzag pitch consistent, such as 20 cm repeats) and fix them to a backing strip so the edges land flush against the cove lip. Step 3 — Install LED and finish. Fit an aluminum LED channel in the cove with a diffuser, wire it to a dimmer, then apply primer, 2-3 coats of acrylic putty, and sand until the fascia edges are crisp; paint with matte white for the ceiling and a warm white (2700K-3000K) LED setting.
Editor's noteDry-fit the zigzag pieces on the floor and label them left-to-right before you lift them up. It saves hours and keeps the pattern spacing identical around the room.
Skip thisDon’t mount the fascia directly on loose backing — it will crack at the zigzag corners after a few months.
20. Floating Corner Beacon Drops with Angular Glass-Edge LED
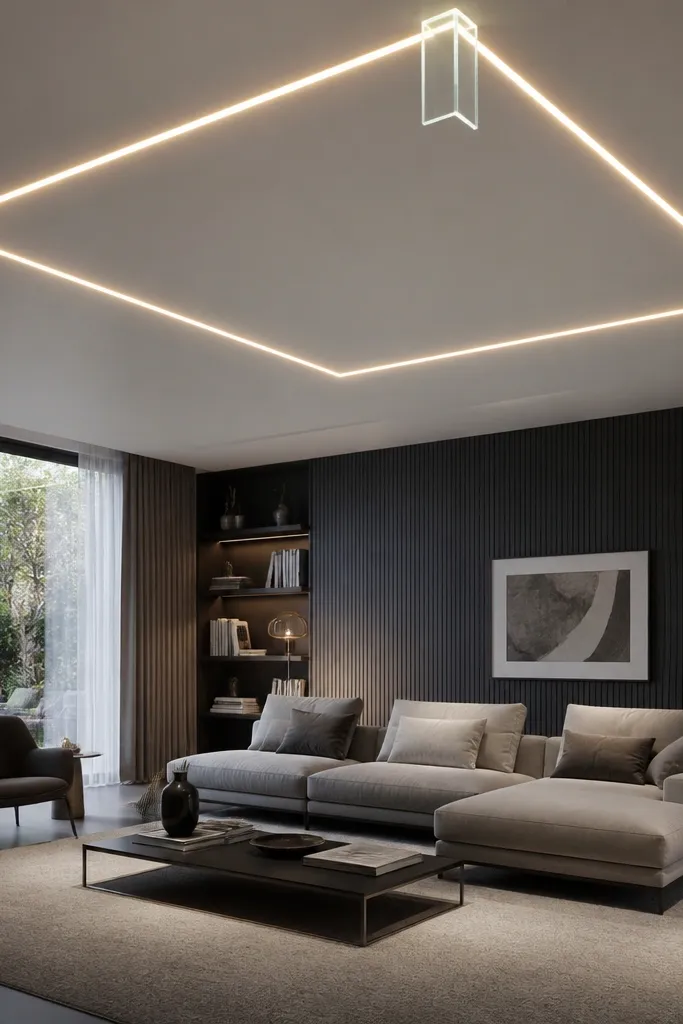
This is for living rooms that need drama but don’t want a full grid or a heavy center medallion. You get two or four angular corner beacon drops that look like they are floating, with an LED line that traces the angles like a clean architectural sketch. The glow makes the room feel more modern because it frames the seating area without taking over the whole ceiling. It suits medium to large living rooms, especially those with a TV wall on one side, because the corner beacons visually balance the space.
Step 1 — Frame corner drops. Choose a corner drop size around 60-75 cm wide per corner and drop it 8-10 cm below the main ceiling level; build a simple boxed frame in GI channels for each chosen corner with hangers at 50-60 cm spacing. Create an angular face by setting one side at a slant (keep the slant consistent, such as 45 degrees) using a diagonal backing strip. Step 2 — Add the LED channel with a thin diffuser edge. Fix an aluminum channel along the slanted face and the adjoining boxed edge, leaving a 6-8 mm gap so the diffuser sits clean and the light line stays sharp; use warm white LED strips and cover with a translucent diffuser to avoid visible dots. Step 3 — POP skin and finishing. Apply POP sheets on the boxed frame and slanted face, seam-fill with mesh tape, then putty-sand until the corners are razor-straight; paint the ceiling matte white and keep the LED brightness moderate so it looks like a line, not a spotlight.
Editor's noteUse a laser level to align all four corner drop angles to the same reference line. Even a 5 mm mismatch shows up instantly in photos.
Skip thisDon’t place LED strips too close to POP seams — heat and uneven sealing will create a shadow line that won’t sand out.



