
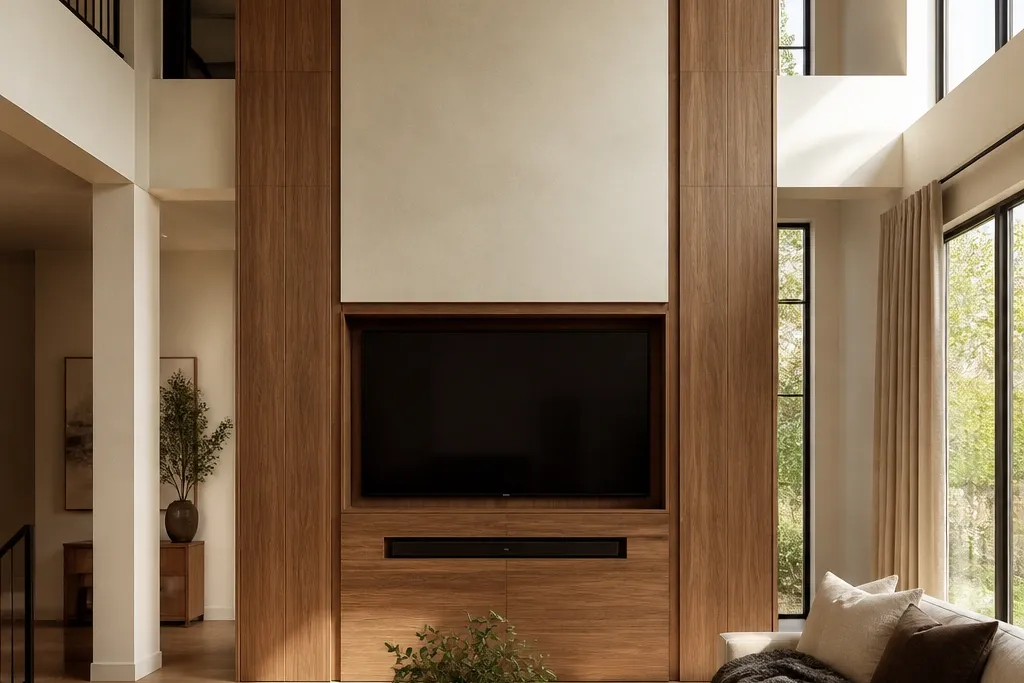

1. Full-height oak slat frame with a centered media niche
This look works because it makes the TV feel like furniture built into the architecture. The full-height oak slats visually “reach” into the double-height space, so the room doesn’t swallow the screen. A centered niche breaks up the plain wall and gives you a place for consoles, books, or a soundbar without clutter. Keep the TV surround matte and warm — oak with a light brown stain and a satin clear coat reads cozy even in bright daylight. Skill level is mid: you’re building a clean grid, so take time with straight lines and consistent spacing.
Start by marking a centered vertical line on the wall and measuring your TV width plus clearance on both sides. Build a simple plywood backer frame first, then attach vertical slat strips (about 1.5-2 inches wide) with consistent spacing (around 0.5-0.75 inch). Cut and frame the media niche so its depth is about 3-4 inches for visual weight, then mount the TV after the slats are installed. Finish by painting the niche back in a warm matte tone or using a matching wood veneer, then add 2700K LED strip light inside the niche with a diffuser cover.
Editor's noteUse a laser level for the slat grid. Small spacing errors show up fast at double-height scale.
Skip thisDon’t use glossy clear coat on the slats; it catches window glare and makes the wall feel colder.
2. Plaster-look panel wall with a warm wood mantel beam
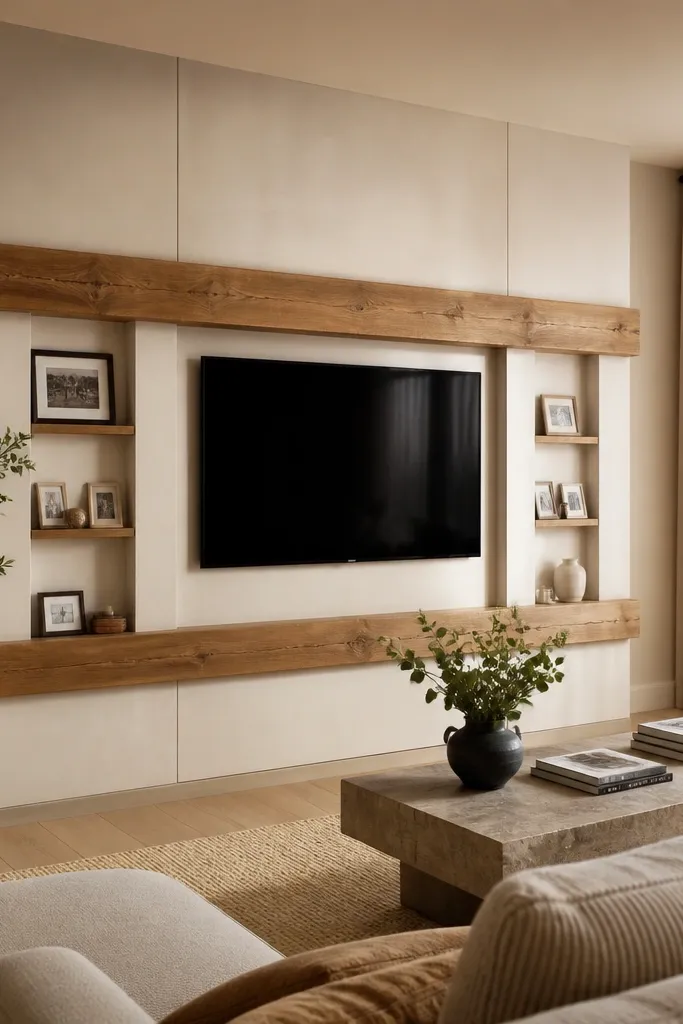
If your room already has big windows and you want the TV wall to feel soft, plaster-look panels are a great choice. The matte finish reduces glare, and the warm wood mantel beam gives you a “cozy anchor” at eye level. This design is also forgiving if your wall isn’t perfectly flat because you can skim/level behind the panel layers. Keep the TV centered and use a mantel-like beam height that visually ties to the second level — the beam should sit high enough that you can see it from the stairs or landing.
Prep the wall by checking flatness with a long straightedge and fixing dips with patch compound. Install a simple panel system using MDF or plywood sheets with a consistent reveal, then apply a plaster-look finish (matte, skim coat style) over the panels. Add a wood mantel beam on top of the TV area using a routed or boxed profile, typically about 7-10 inches tall depending on how wide your TV is. Mount the TV so its center aligns with the mantel’s middle line, then add small recessed spotlights aimed at the plaster for a gentle wash.
Choose a plaster-look finish labeled washable and matte; double-height walls get touched and cleaned more than you think.
Avoid painting the plaster a cool gray; it reads icy next to window light.
3. Two-tone vertical paneling with a dark TV center section
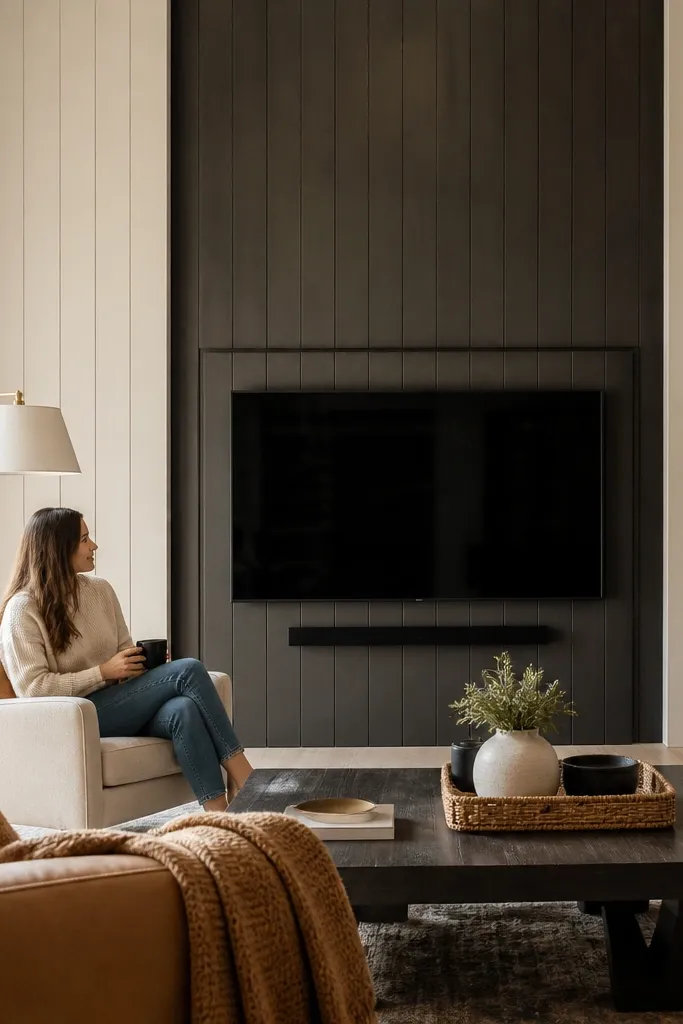
This is the cozy version of modern contrast. The light vertical panels keep the room bright, while the darker center section frames the TV and makes it feel intentional instead of floating. Vertical paneling also helps the wall look taller, which matters in double-height spaces with big windows. Use warm neutrals — think off-white panels and a walnut or espresso center — so the contrast feels warm, not harsh. This build looks sharp even with simple decor because the wall does most of the styling.
Decide your panel grid first: measure the wall width and plan side borders so the TV is centered within the darker section. Install vertical furring strips or a plywood backing so you can attach both the light panels and the dark center section cleanly. Build the darker area as a rectangular surround behind the TV, with a depth of 2-3 inches so it reads as a frame. Finish the light panels with matte paint and the dark section with a wood veneer or a matte charcoal paint, then mount the TV and add two slim vertical LED bars on the inside edges.
Editor's noteUse painter’s tape to map the panel reveals on the wall before you cut any panels. It saves hours later.
Skip thisDon’t make the dark center section too narrow; if it’s thinner than the TV width plus 8-12 inches total, it won’t frame well.
4. Full-height fabric-backed acoustic wall with a slim TV reveal
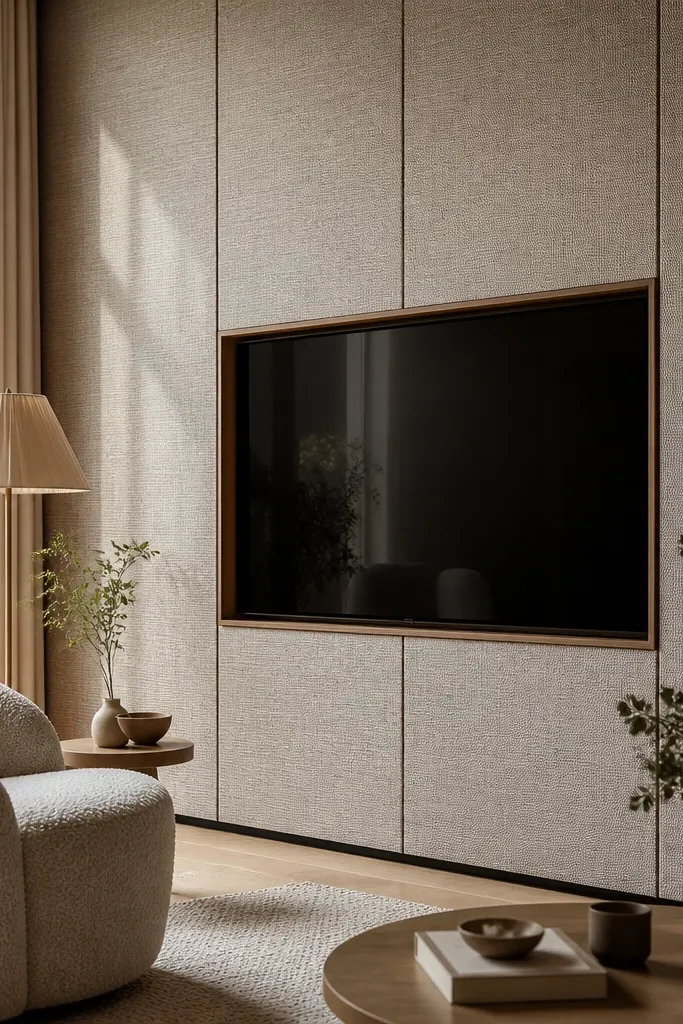
If your double-height living room has echo, this look fixes the sound and makes the TV wall feel cozy. Fabric panels soften the acoustics and also tame bright window light, so the whole wall feels warmer. The TV sits in a slim framed reveal, which keeps the look modern and clean. Choose a neutral woven fabric in oatmeal, stone, or warm gray-brown, then add a wood border around the TV cutout. This is a mid-level project because you’re building a panel backing and keeping fabric tension even.
Build a rectangular grid of frames on the wall using 1x2 wood rails spaced to match your acoustic panel size (often 24x48 inches). Staple or secure acoustic backing material behind each section, then stretch fabric over the frames with tight corners and clean edges. Cut a precise opening for the TV so the bezel sits flush or slightly recessed, leaving a 1-2 inch wood reveal border. Mount the TV after the frame is installed, then run power and cable to a hidden access point behind one panel section.
Buy fabric with a tight weave and matte finish; it looks cleaner and hides small imperfections in the wall.
Don’t pull fabric too tight in one direction; wrinkles show under window light.
5. Charcoal stone-look TV plinth with floating wood sides
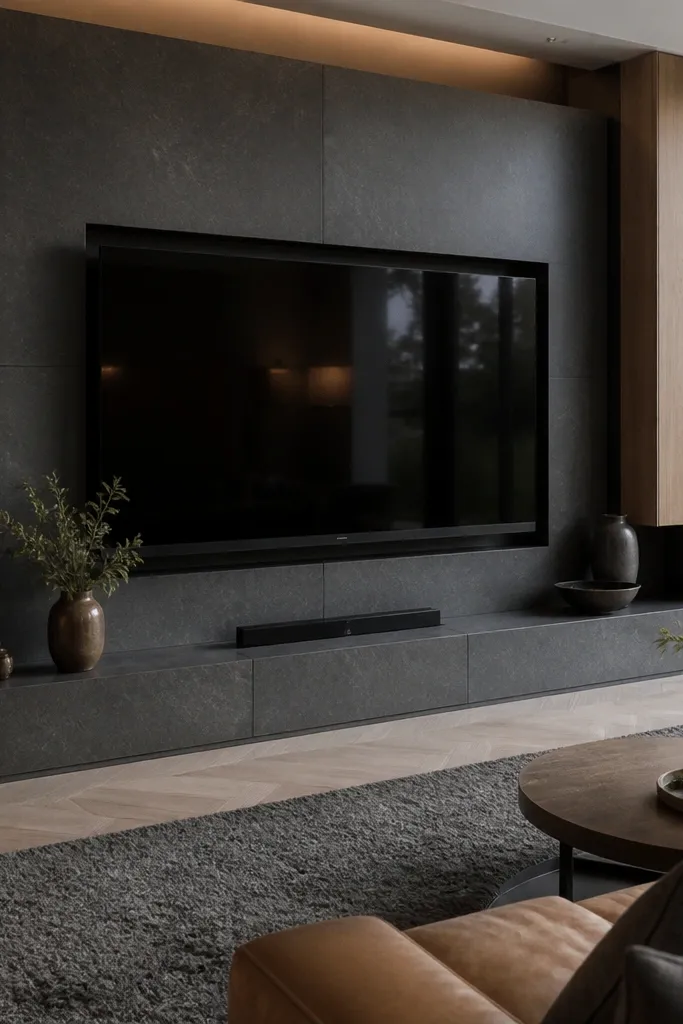
Stone-look finishes make spaces feel grounded, and in a double-height room that grounding effect makes the TV area feel more “designed.” This version uses a charcoal stone-look plinth behind the TV, but keeps the sides lighter with wood panels so the wall doesn’t feel heavy. The plinth shape also creates a cozy visual base that balances big windows. Finish the stone-look surface matte so it doesn’t reflect glare. This is best if you want a modern look with a hint of luxury without going full marble.
Frame the TV area with plywood so you can create a plinth that’s about 3-5 inches deep and spans the TV width plus 12-16 inches. Apply a stone-look panel system or textured skim coat finish on the plinth face, then install floating side boards (oak or walnut tone) that stop above the plinth. Mount the TV on the framed backing, not on the decorative face, and hide cables inside the plinth box. Add small warm LEDs under the plinth edges or in the vertical side reveals for glow without hotspots.
Use matte stone-look paint or a panel finish labeled low-sheen; glossy stone reads harsh next to windows.
Don’t attach the TV directly to decorative surface material; it needs solid backing.
6. Raked ceiling-style slats that follow the room height
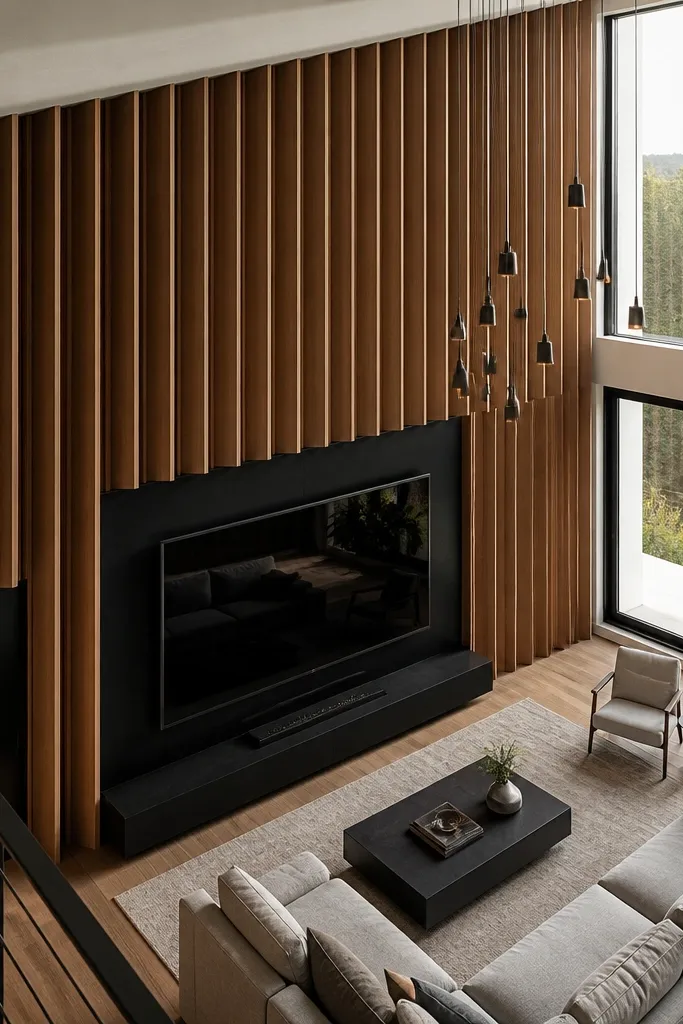
Most TV walls use straight vertical lines. This one feels more architectural by using angled slats that climb upward, which makes the whole wall look taller and more dynamic. In a double-height living room, that motion helps the TV feel integrated instead of pasted onto a flat wall. Keep the slats in a warm mid-tone wood and use a matte finish so the angles don’t create glare. This is a higher-skill build because you’re cutting consistent angle edges, but the payoff is a very photogenic look from multiple viewing angles.
Measure the wall height and decide the slat angle so the top ends land evenly near the second-level line. Build a back frame with two horizontal rails (one at the TV top and one higher up) so you can attach slats consistently. Cut slats with a table saw or miter saw so each one matches the angle; test-fit three before committing. Install the slats, then frame the TV with a simple trim box that sits flush. Wire LEDs behind the slat line with a diffuser strip so light spreads evenly across the wood.
Editor's noteMake a cardboard template for the slat angle and spacing before you cut wood. It keeps every piece consistent.
Skip thisAvoid mixing wood stains across slats; uneven tone shows up instantly with angled light.
7. Built-in TV wall with curved corners and warm oak trim
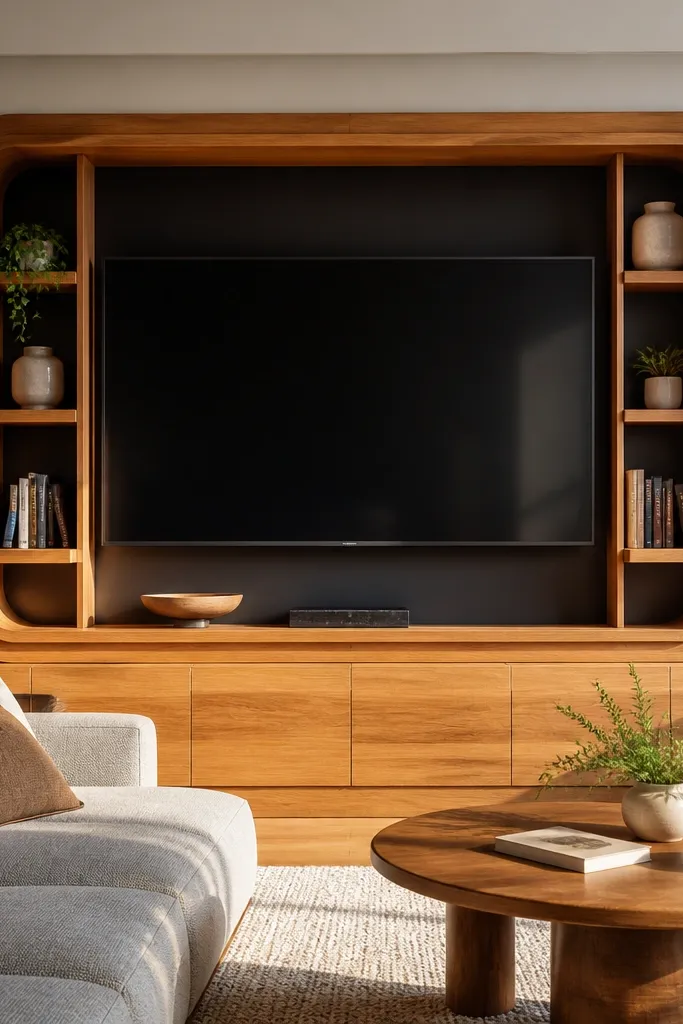
Curved edges soften modern double-height rooms and make the TV wall feel more inviting. This design uses a built-in rectangular surround, but with rounded corners and a warm oak trim that frames the TV like a picture frame. It’s great if you want coziness without adding more clutter. The rounded corners also help hide small construction imperfections because the eye follows the smooth curve. Expect a mid-to-high skill build because you’ll be shaping trim and keeping seams tight.
Build the main surround box using plywood and cut the TV opening to match your TV bezel size with small clearance. For rounded corners, use a flexible MDF trim strip or lamination method to form a radius (a 2.5-4 inch radius looks good for most TVs). Install the trim, then add a back panel in matte plaster-look or a warm painted board behind the TV. Mount the TV on the solid backing, then add two LED channels at the inner edges of the surround for gentle glow.
If you’re using flexible trim, pre-bend it over a form and clamp it dry first. It reduces cracking later.
Don’t rush caulk. Visible seam lines ruin the “soft” look.
8. Vertical ribbed wallpaper TV wall with walnut floating shelf
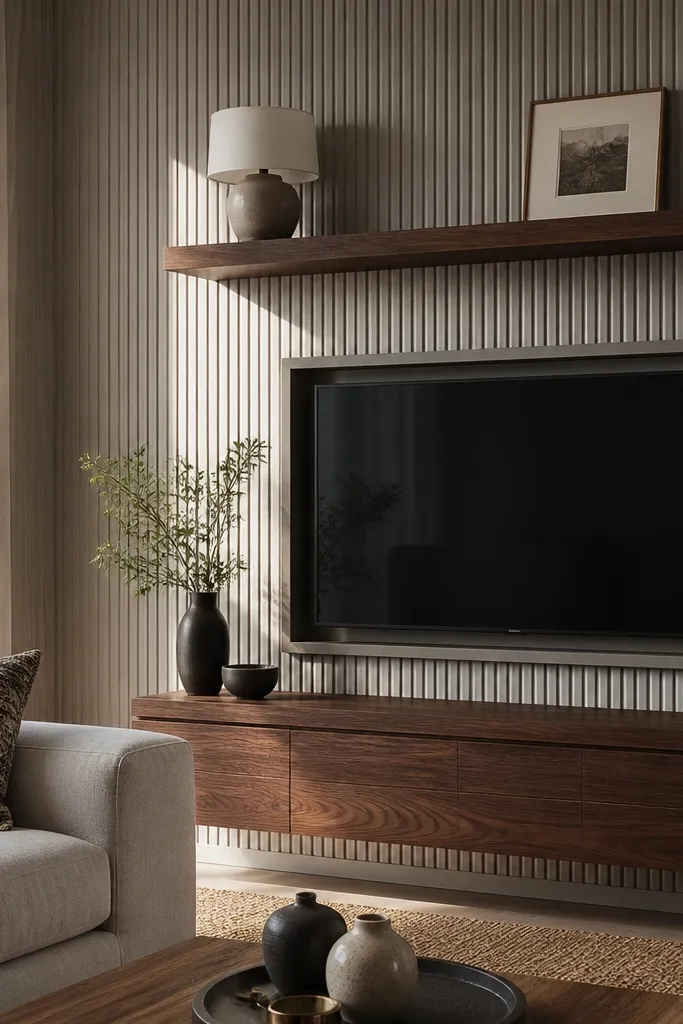
Wallpaper can look surprisingly high-end here because vertical ribs create depth and help the TV wall read as a feature. The ribs also reduce glare compared with smooth paint since they scatter light. Add a walnut floating shelf above the TV to bring in a cozy wood tone and give you a place for a lamp or framed art. Keep the TV centered and use a slim black or warm bronze trim around the TV opening for a clean modern frame. This is a simpler DIY option if you can handle careful measuring and trimming.
Prep the wall by smoothing bumps and applying primer so the pattern aligns cleanly. Hang vertical ribbed wallpaper across the TV area, but plan the TV opening cut so it lands in the middle of ribs for a crisp look. Install a small plywood mounting backer behind the wallpaper at the TV location, then cut the wallpaper opening to expose the backer. Mount the TV, then install the walnut shelf with hidden brackets and add warm accent lighting from under the shelf edge.
Use a sharp utility blade and replace it often. Ribbed wallpaper tears if the blade drags.
Don’t align the pattern after you’ve cut the opening. Finish the hang first, then cut precisely.
9. Windowside TV wall with sheer curtains + LED backlight niche
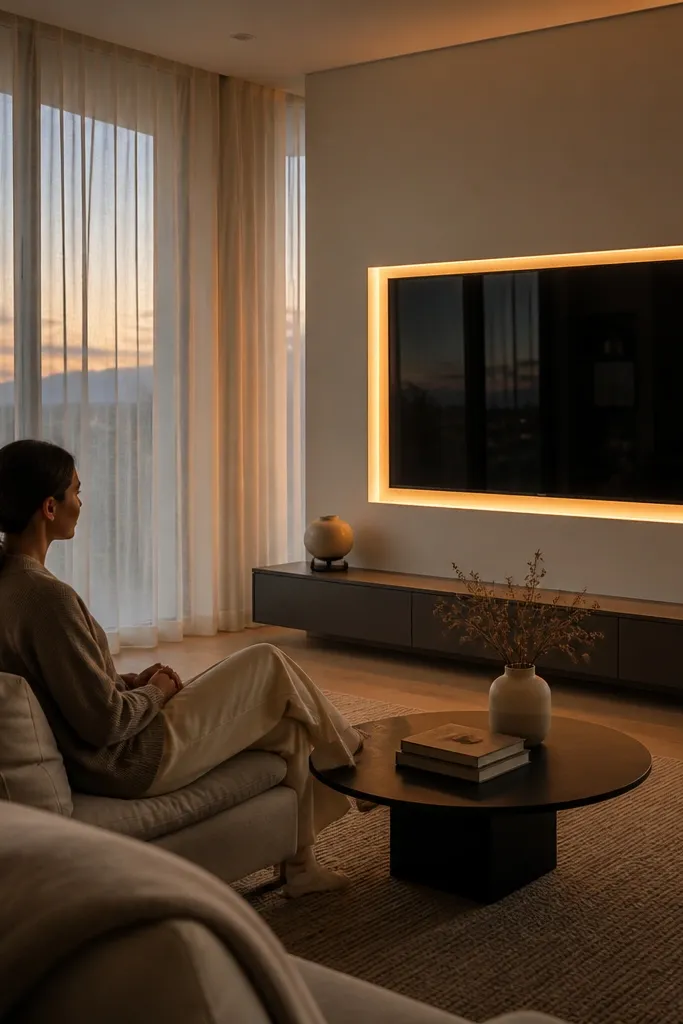
This is for the common problem: big windows cause reflections on the TV screen, and the wall can feel too bright. The fix is to soften the window light while still letting the room feel airy. Place the TV wall so you can hang sheer curtains on either side or directly behind the seating angle, then add a backlit niche behind the TV for warm glow. The niche glow helps the TV area feel cozy even when daylight is strong. The look is modern because the niche is clean and the curtains are light, not heavy.
Hang ceiling track or wall-mounted curtain rods so the sheers can reach floor length and overlap the TV area by a few inches. Build a slim niche surround around the TV with 2-3 inch depth, leaving a gap for the LED strip behind a diffuser. Mount the TV on the solid backing and hide the LED power supply in a removable access panel. Finish the surrounding wall in matte paint and keep your trim color consistent with your curtain rod metal for a unified look.
Editor's noteUse a dimmer for the LED niche so daylight and evening light match without glare.
Skip thisAvoid placing the LED directly behind the TV bezel with no diffuser — it creates a bright halo.
10. Two-story gallery wall with framed acoustic panels and TV center
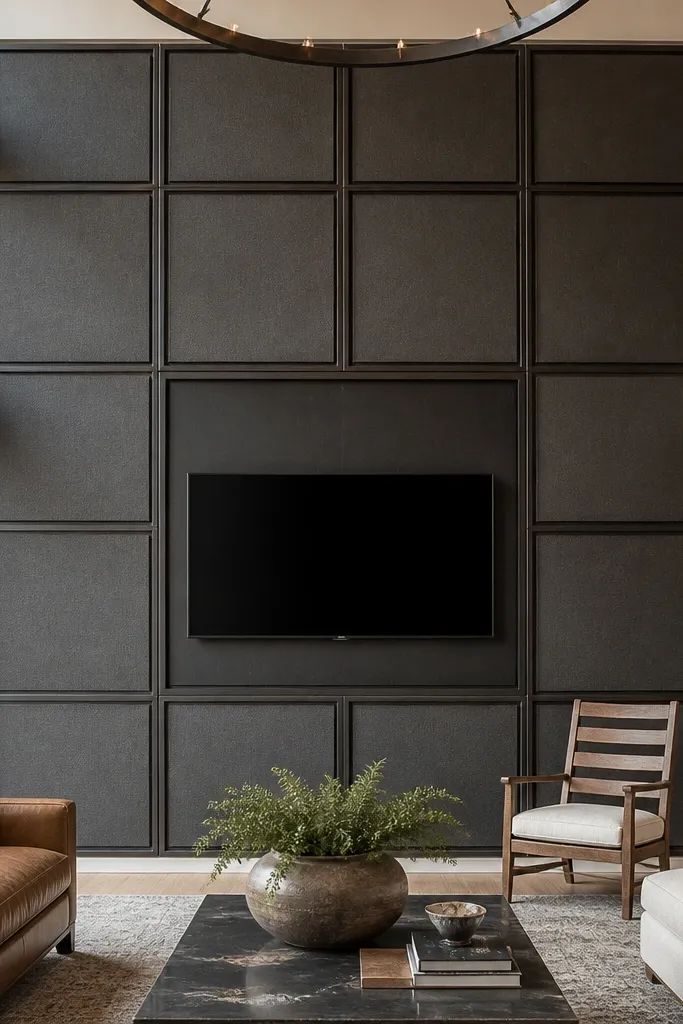
A gallery wall is cozy because it adds warmth, but in a double-height room you need it to be structured or it turns into visual noise. This design uses framed acoustic panels arranged in a tall grid, with the TV centered in a larger frame section. The acoustic backing helps with echo, and the framed look makes the TV feel like part of the art. Choose warm neutrals for frames and a fabric with enough texture to catch light softly. This is mid-level DIY due to the number of panels, but it’s straightforward if you build a repeatable template.
Build a mounting grid on the wall using furring strips spaced to match your frame sizes, then create identical frames from 1x2 or 1x3 lumber. Attach acoustic backing to each panel section and stretch fabric over the frames. For the TV section, install a larger framed opening with solid backing and a recessed mount so the TV sits slightly back. Mount the frames starting from the top, then add LEDs inside the larger TV frame and keep all cords routed to an access point behind the bottom frame row.
Make one perfect sample panel first. Photograph it and match the rest to that reference.
Don’t use too many different frame finishes; it reads messy at double-height scale.
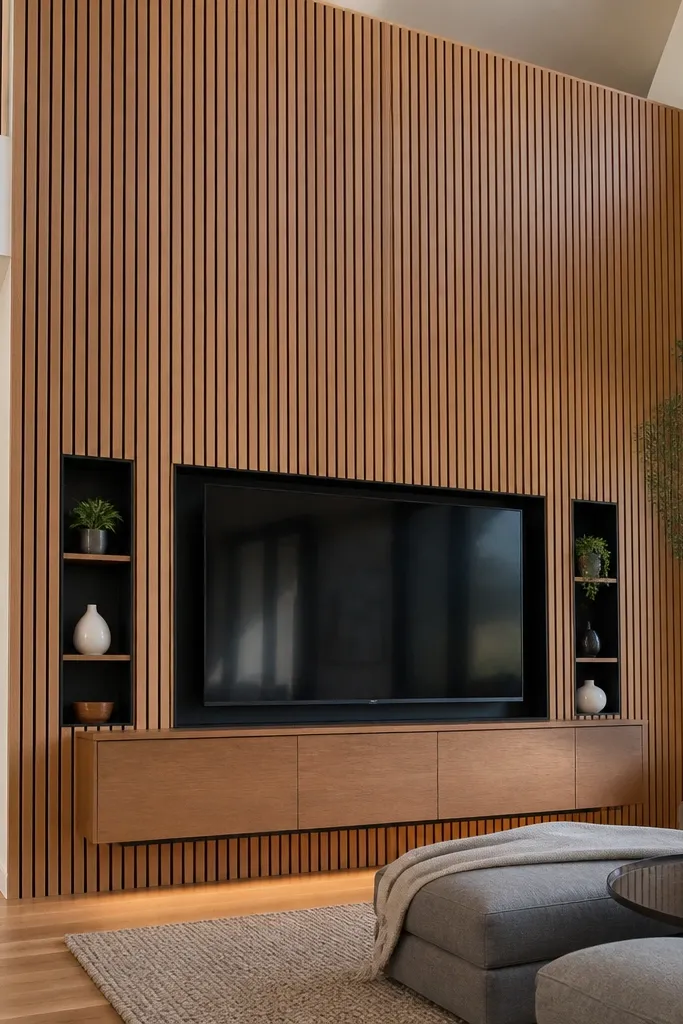
11. Light oak slat wall with integrated floating console and cable chase
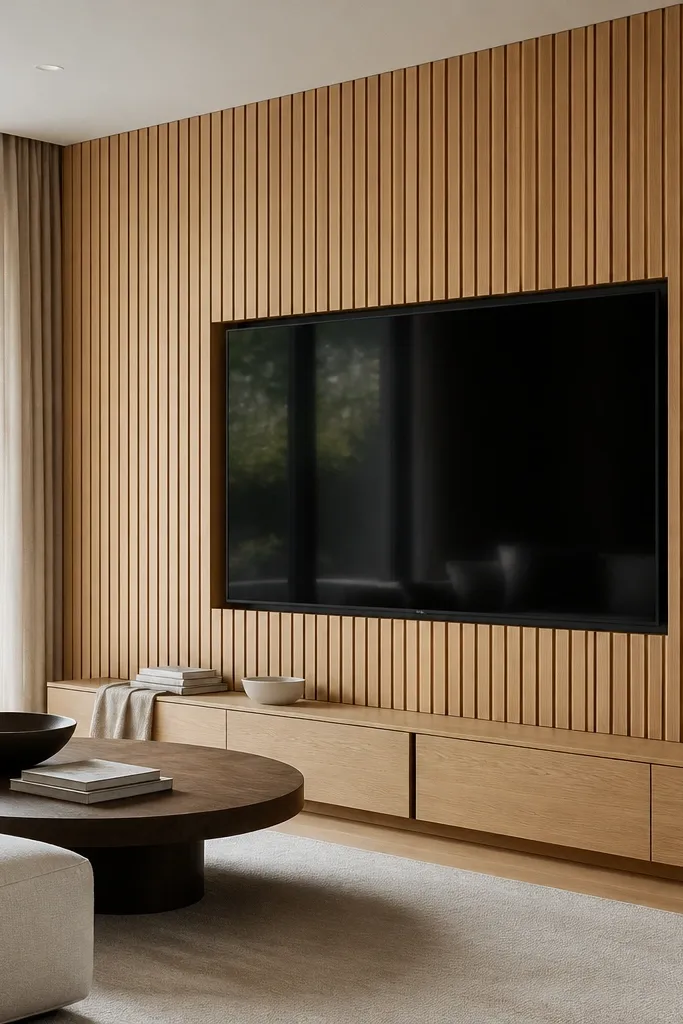
A cozy TV wall needs storage that looks built-in, not a random console that breaks the clean line. This design pairs a light oak slat wall with an integrated floating console below the TV, so the whole area reads as one composition. The slats add texture, and the console adds warmth and practicality. It’s also a smart solution for cable management because you can build a hidden chase behind the lower section. This works well when you want a modern look but still need everyday function.
Install a plywood backer first and mark TV mounting points plus a lower console mounting line. Add vertical slats across the whole wall, but stop them cleanly around the console area so the lower section reads separate. Build a floating console frame from plywood with a face veneer, then mount it to studs using a ledger bracket. Route power and HDMI through the wall cavity into a cable chase behind the console, then mount devices after the console is installed. Finish by adding a warm LED strip under the console edge for a soft glow on the wall.
Editor's noteUse a ledger board to hold the console while you screw it. It keeps the line straight while you work.
Skip thisDon’t mount the console directly to drywall anchors; it needs stud support for weight.
12. Matte black TV frame with warm wood side panels and floor-to-ceiling curtains
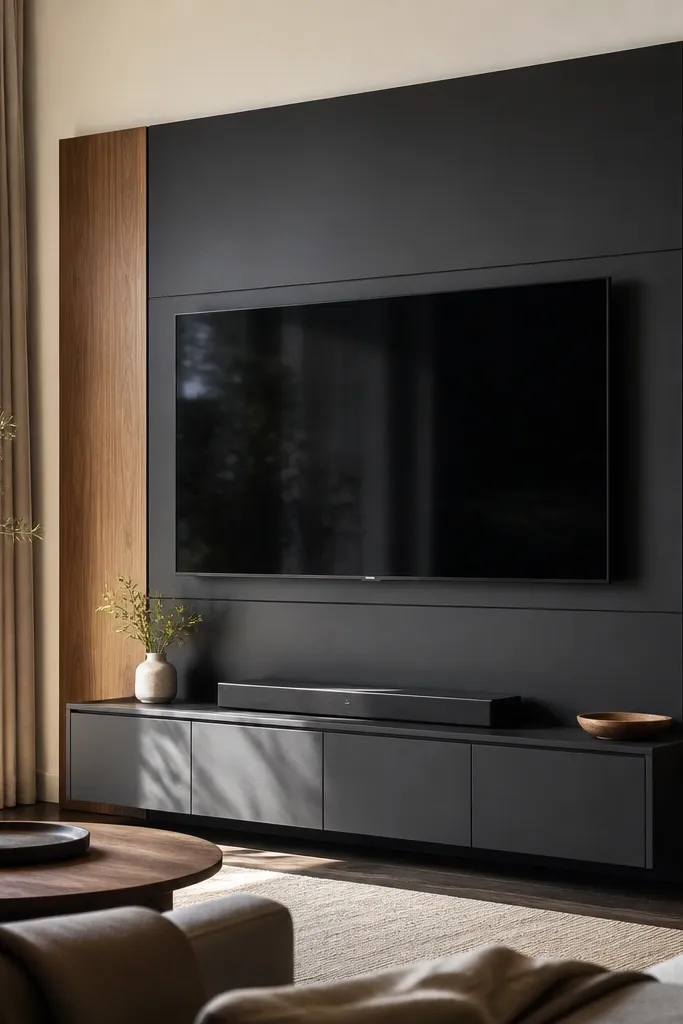
Matte black can look cozy if you balance it with warm wood and soft textiles. This setup uses a matte black TV frame that makes the screen look crisp, then adds warm wood side panels to keep the wall from feeling cold. Floor-to-ceiling curtains around the TV wall soften the room and also reduce window glare depending on where the light hits. The result is a modern, gallery-like TV area that still feels inviting because it’s framed and cushioned by fabric. This is a good DIY if you can build straight trim boxes and handle clean paint lines.
Paint the wall or install a base matte finish first so the black frame sits on a consistent background. Build a TV surround from MDF or plywood trim, using a simple rectangular box and a centered opening sized to your TV bezel. Add warm wood side panels as vertical slabs on the left and right, aligned to the top and bottom of the black frame. Mount the TV on the solid backing, then install curtain rods above the frame height so curtains can drape past the edges by 4-6 inches. Finish with small warm LED uplights aimed at the wood panels for glow.
Use painter’s tape to mask the black frame edges and spray or roll with a foam roller for a smoother matte finish.
Avoid high-sheen black; it reflects window light and looks glossy instead of cozy.
13. White oak and linen media wall with recessed TV and warm step lighting
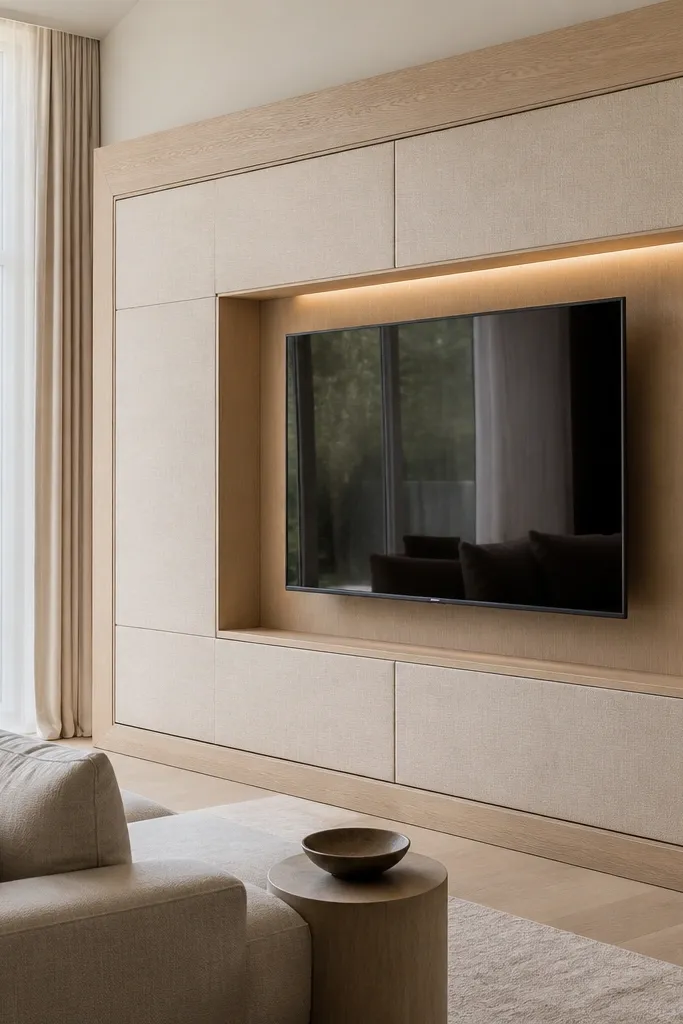
This is the “soft modern” option for a double-height living room. Recessing the TV into a white oak frame creates depth, and linen fabric panels around it add a cozy texture that looks great in daylight. Step lighting inside the recess gives you a warm glow without making the TV area look like a strip-lit gadget. It’s also forgiving because linen hides minor wall imperfections and blends the feature into the room. This is a mid-level project: you’re building a recessed niche and stretching fabric cleanly.
Build a recessed TV opening by framing a box with plywood and setting it back 2-4 inches from the wall surface. Install white oak veneer or solid oak trim around the opening, leaving a clean reveal. Stretch linen fabric on separate framed sections around the TV recess and attach them to the wall grid so they can be removed if you ever change the TV. Add warm LED step lighting inside the recess using a diffuser channel to avoid point glare. Mount the TV last so you can adjust for perfect centering and cable access.
Editor's noteOrder linen fabric with a slight weight (not flimsy). Heavier fabric looks smoother when stretched.
Skip thisDon’t recess the TV too shallow; if it’s less than 2 inches, the depth effect disappears.
14. Warm plaster arch surround with built-in shelves on both sides
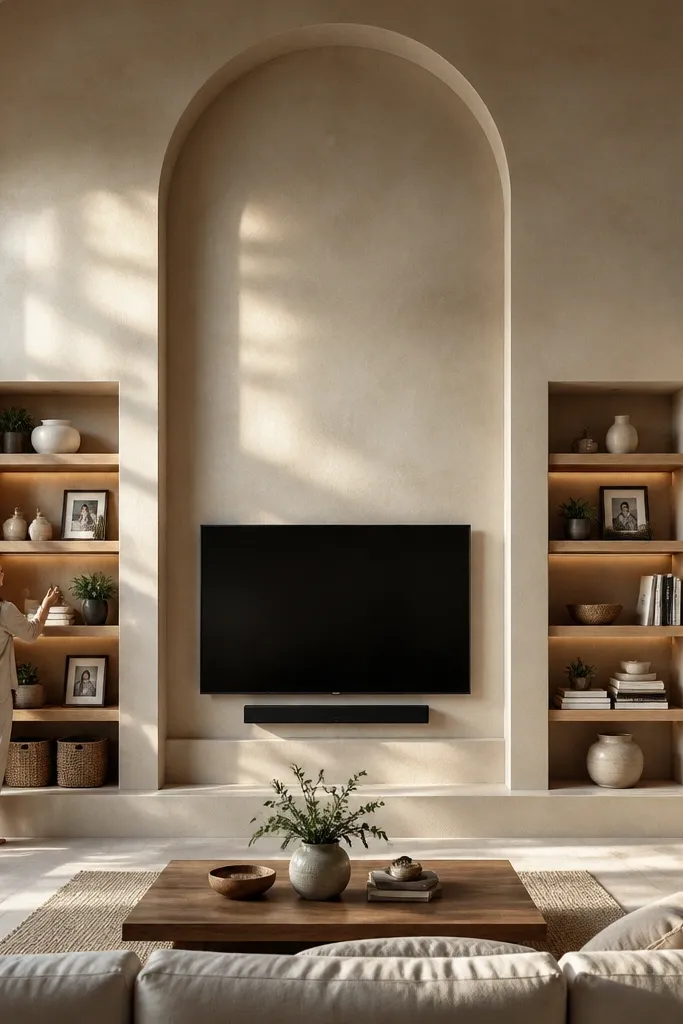
An arch is cozy because it frames the TV like a fireplace without needing an actual chimney. In a double-height room, a plaster arch pulls the eye upward and makes the TV wall feel like a feature wall, not a screen mount. Built-in shelves on each side add function and let you style books, sculptural pieces, or framed photos in a controlled way. Use warm plaster tones like sand, oatmeal, or light taupe — they work with big windows and don’t look gray in shadow. This is best if you want a softer modern look with a little character.
Build the TV backing frame first and decide your arch width so it’s wider than the TV by 20-30% total. Create the arch form from plywood ribs, then skin it with drywall or MDF panels for a smooth curve. Apply a warm plaster-look finish over the arch and surrounding wall surfaces, then build two side shelves with hidden brackets and a matching finish. Mount the TV on the backing frame and keep the TV bottom edge at a comfortable viewing height based on your seating. Finish by adding two discreet warm lights aimed at the inside of the arch for a glow effect.
Editor's noteMake the arch template from MDF and trace it onto your panels. It keeps the curve consistent.
Skip thisDon’t choose a cool white plaster; it can look chalky and harsh with window daylight.
15. Smoked glass TV niche with walnut shelving grid
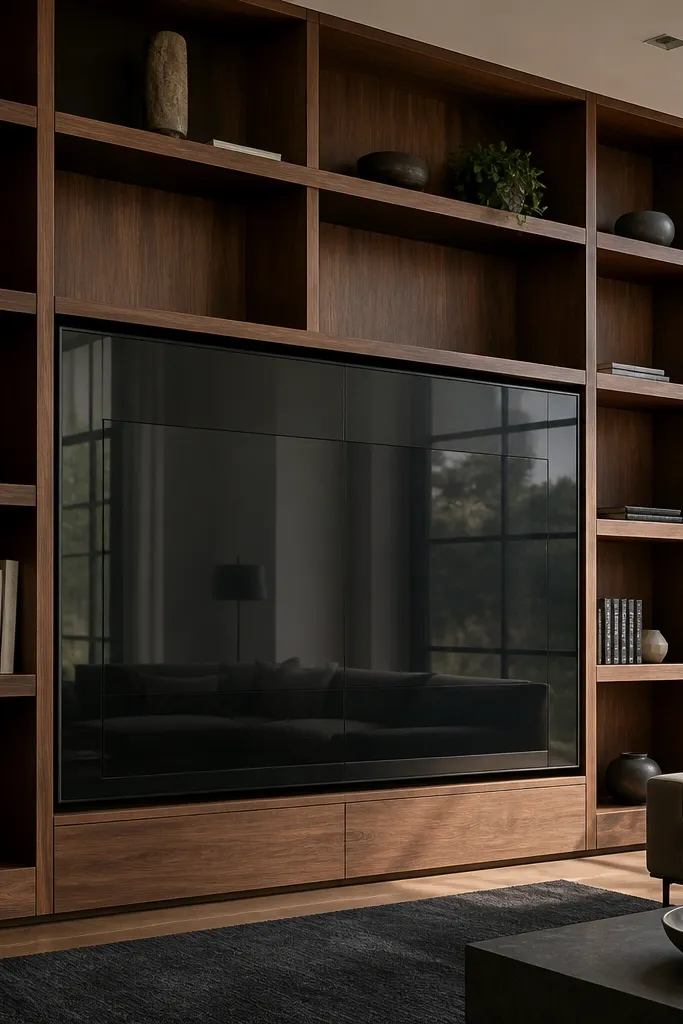
Smoked glass adds drama without clutter. This modern Double Height Living Room TV Wall uses a walnut shelving grid around a TV niche, then adds smoked glass at the niche face for a sleek, cozy look. The walnut keeps it warm, and the glass adds depth and hides the mess of devices behind the screen. It photographs well because reflections are controlled when the glass is smoked and matte, not glossy. This is a higher-skill build because glass fitting needs precision and safety, but you can keep it DIY-friendly by using pre-cut tempered glass panels.
Build a walnut frame grid from plywood with walnut veneer or pre-finished boards, leaving a centered opening for the TV. Install a recessed niche behind the TV so the smoked glass sits slightly forward of the screen plane for depth. Order tempered smoked glass cut to size with polished edges, and mount it using metal standoffs or a gasket system designed for glass panels. Mount the TV on the solid backing and keep ventilation in mind so electronics don’t overheat. Add warm LEDs behind the niche edges with a diffuser so the glow stays soft through the glass.
Editor's noteUse a gasket system, not silicone blobs. Gaskets look cleaner and make removal easier later.
Skip thisAvoid thin acrylic for this; it scratches and looks cloudy over time.
16. Double-height bookmatch wood paneling behind the TV
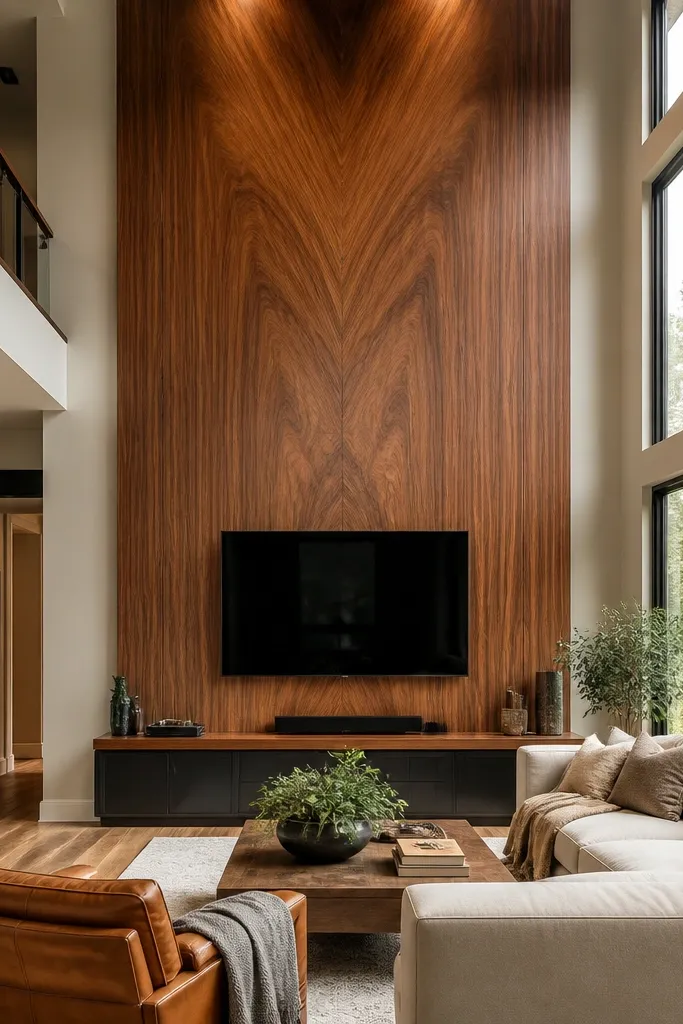
Bookmatched wood paneling looks expensive because the grain lines up symmetrically, and symmetry is exactly what makes a modern Double Height Living Room TV Wall feel designed. This setup keeps the rest of the wall quiet, then uses the wood behind the TV as the hero. In a room with big windows, the grain catches light in a soft, warm way that matte paint can’t replicate. Keep the TV centered and use a simple thin trim border so the wood stays the focus. This is mid-level DIY: the paneling needs careful alignment, but the rest is straightforward.
Choose a veneer sheet set that supports bookmatching and plan the center seam so it lands at the TV centerline. Install a plywood backing and mark the exact TV opening rectangle before you attach veneer. Apply veneer carefully over the backing, then sand lightly and finish with a matte or satin clear coat to control glare. Add a thin wood trim border around the TV opening so you get a crisp edge. Mount the TV on the solid backing, then add two warm LED uplights hidden in the top corners of the surround.
Finish with satin, not gloss. Gloss makes the grain look oily and intensifies window reflections.
Don’t rush the center alignment; an off-center seam is the first thing people notice.
17. Bamboo-woven panel wall with recessed TV and warm floor lamp glow
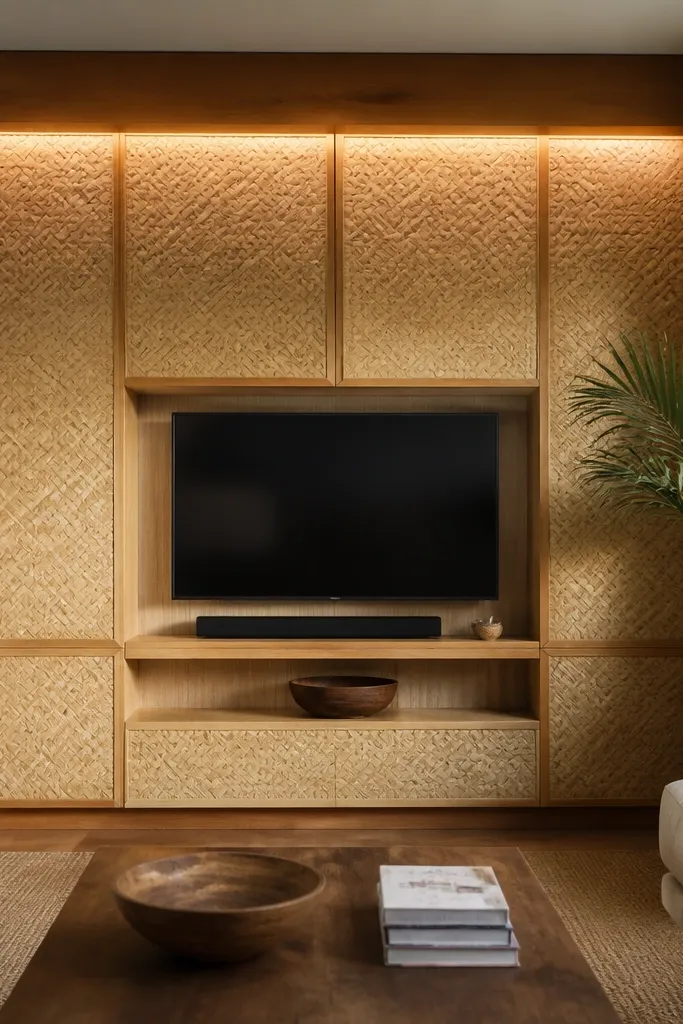
Woven panels add cozy texture instantly, and in a double-height room they soften the hard lines that windows create. A recessed TV keeps the screen from looking glued to the wall, while bamboo or woven cane panels give the wall depth even from far away. This look is photogenic because the texture shows up in sunlight and evening lighting. Keep the colors warm — honey bamboo, light oak trim, and cream matte paint around the edges. This is best for DIY because woven panels can be cut and mounted to a frame more easily than you’d expect.
Build a rectangular frame on the wall with 1x2 rails and add cross supports so the woven panels don’t sag. Create a recessed TV opening by leaving a clear box space in the frame and mounting the TV to the solid backing behind it. Attach the woven panels to the frame using staples or small screws with washers, then trim edges with a light oak border. Add a warm LED strip behind the TV niche with a diffuser, then place a floor lamp near seating to create a second warm light source.
Editor's noteSeal the edges of woven panels with a matte clear coat so fibers don’t fray over time.
Skip thisAvoid overly bright white trim; it can clash with warm woven tones and look stark.
18. Raised picture-frame TV wall with warm LED strip behind the border
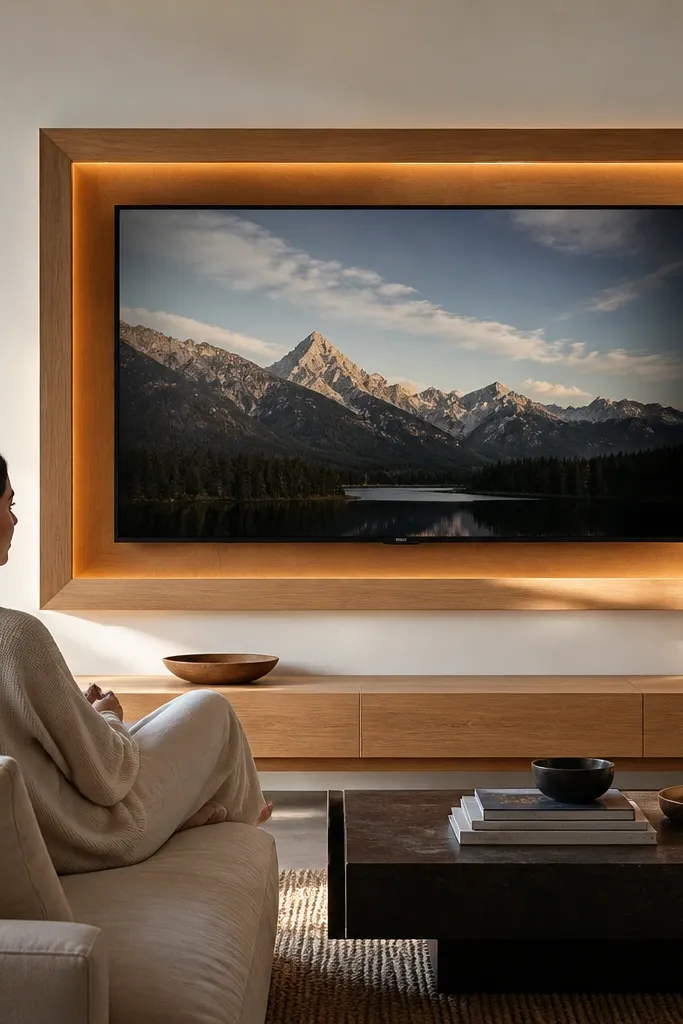
This is the clean, modern option when you want the TV wall to look like built-in art. A raised picture-frame border creates a shadow line that makes the TV feel deeper, and the warm LED strip behind the border adds cozy glow without lighting the entire room. It works well in double-height living rooms because the frame gives the eye a defined shape to read from across the space. Use matte paint for the wall and a warm wood or warm black finish for the frame. It’s a straightforward DIY if you’re comfortable with precise trim cutting.
Measure your TV and design a frame that adds 8-12 inches total width beyond the TV on each side and a similar amount in height. Build the raised frame using MDF trim boxes so you get a consistent 1-2 inch depth and a clean shadow gap. Mount a solid backing panel behind the TV for mounting screws and cable routing. Paint or finish the frame in warm black or walnut tone, then install a diffuser LED strip behind the inner edge of the frame. Mount the TV last and test the glow level at night before you button up any access panels.
Run the LED strip on a dimmer. It lets you match daylight brightness so the frame glow never looks harsh.
Don’t place the LED too close to the TV bezel; it causes a bright line reflection on screen.
19. Floor-to-ceiling curtain returns that frame the TV wall
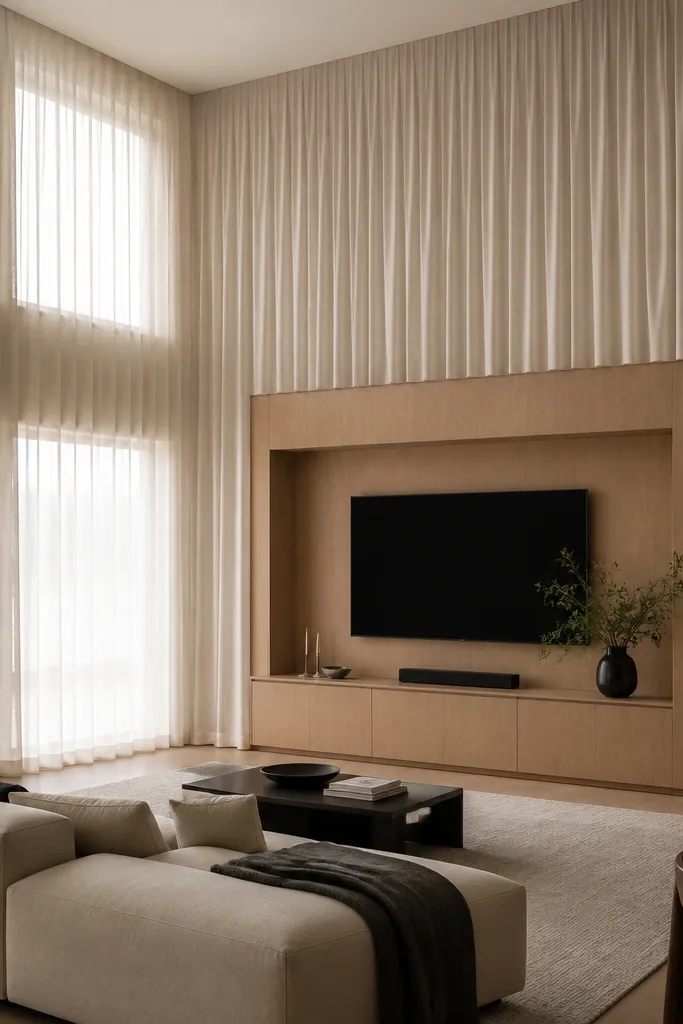
This one is about using the windows to your advantage. Instead of fighting big windows, you create curtain returns that wrap the TV wall like soft architecture. The TV surround can be simple — a slim frame in warm wood or matte paint — because the curtains do the cozy work. In a double-height room, curtain returns also help hide the awkward transition between the TV wall and the rest of the space. Choose thick-but-soft fabric in oatmeal or warm taupe, and use a track system so the fabric hangs smoothly.
Install a ceiling-mounted track or two-rod system so the curtains can reach full height past the second level line. Keep the TV wall surround minimal: a thin wood frame around the TV opening and a matte backing panel to reduce glare. Hang the curtains so each side overlaps the TV surround by 4-6 inches at rest, then add a tieback or magnet so the fabric doesn’t drift forward. Route any cable access to a hidden panel behind the TV frame. Add a warm lamp near seating and avoid overhead-only lighting so the TV wall reads cozy after dark.
Use a fabric with a visible drape weight. Lightweight sheers look pretty but won’t create the cozy “frame” effect.
Avoid curtain rods that sit too low. Double-height rooms need high placement to look intentional.
20. Limestone-look tile wall with soft wood border and recessed TV
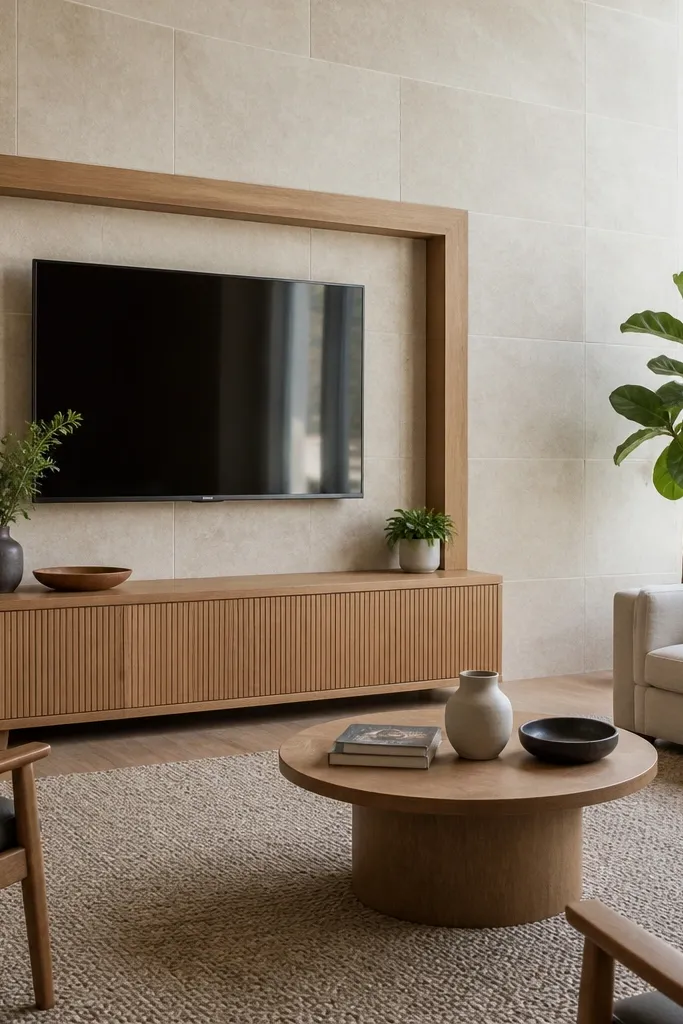
Tile can feel cold, but limestone-look tile plus a warm wood border makes it cozy and modern. Recessing the TV keeps the screen from fighting the tile texture, and the wood border turns the feature into a framed focal point. This is a great choice if you want a durable TV wall that survives daily life without scuffs showing. The tile also photographs well because it has natural-looking variation that reads warm even under daylight. Skill level is mid: cutting tile and keeping grout lines straight takes care.
Choose limestone-look tiles with a matte finish and consistent thickness, then plan your layout so grout lines align around the TV opening. Install cement board or a suitable tile backer, then tile the wall up to the area where the recessed TV surround will sit. Build a wood border frame on top of the tile edges and create a recessed TV opening by mounting a backing box behind the tile layer. Mount the TV to the backing, then add a warm LED strip behind the wood border with a diffuser to avoid glare. Seal grout and finish edges so the wall stays clean and cozy.
Editor's noteDry-lay the tile around the TV opening first. A centered layout makes the whole wall look calm.
Skip thisDon’t use glossy tile; it reflects windows and makes the TV area look slick, not cozy.



