
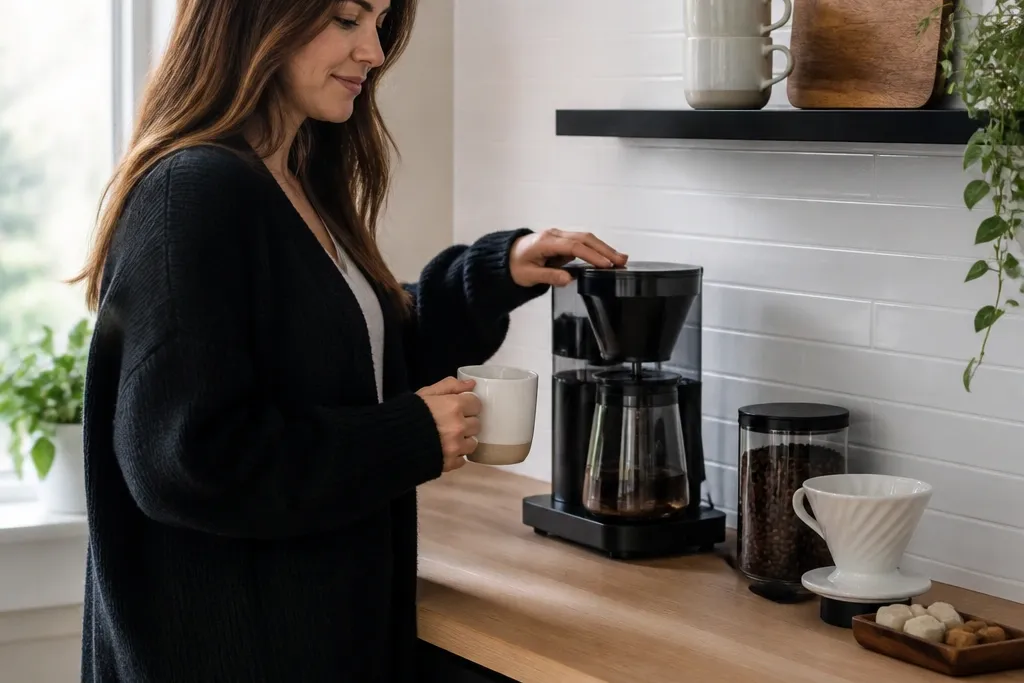
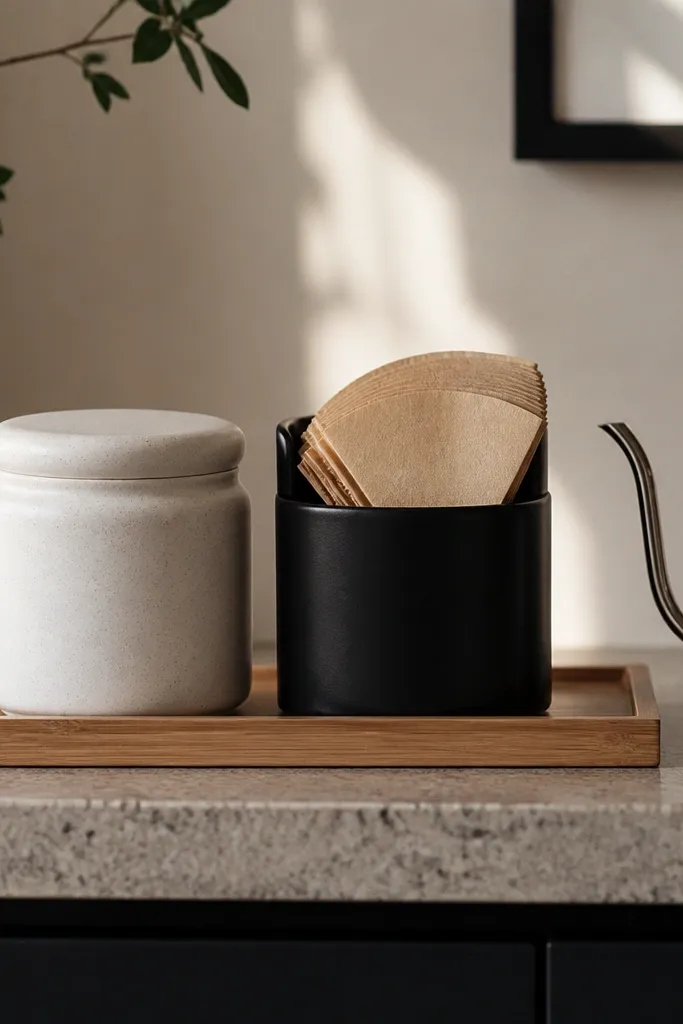
1. Matte Black Wall Shelf Above a Wood Coffee Board
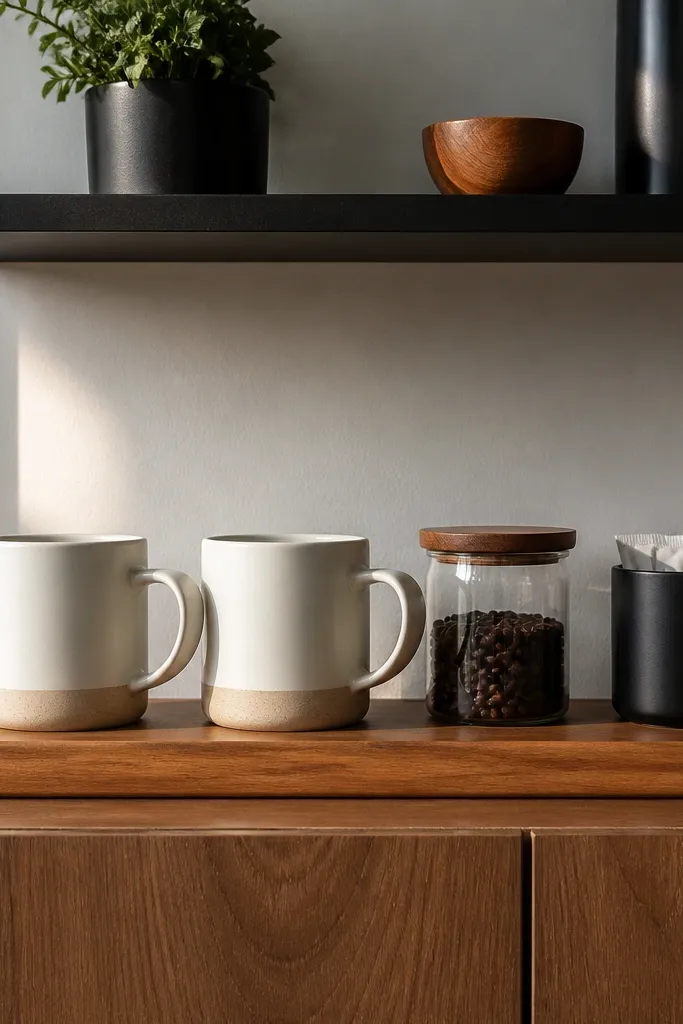
This setup looks modern because the wall shelf creates a crisp top edge and the wood board adds warmth. Keep the shelf matte black and the board one tone of honey or walnut so the station reads intentional. Use it for your “daily” items only — two mugs, one jar for beans, and one small container for sweeteners — so the shelf doesn’t turn into a junk shelf. The wood board also gives you a defined landing spot for a scoop and filter papers, which makes the counter look styled even when you’re mid-routine. It’s a solid weekend project that upgrades the whole corner without needing a full cabinet build.
Editor's noteUse a level and mark stud positions before drilling — a crooked shelf instantly ruins the modern look.
Start by cutting or buying a wood board that’s about 14-18 inches wide and 8-10 inches deep, then sand it and wipe on a thin coat of matte food-safe oil or wax. Mount a single shelf 18-22 inches above the board so mugs clear without crowding; aim for 10-12 inches shelf depth. Place two mugs side-by-side on the board, then anchor your jars at the back edge so they don’t slide when you grab things. Finally, add a small tray under the board area if you want drips contained, then tighten everything and level the shelf before decorating.
Skip thisDon’t load the shelf with every coffee item you own; keep it to the daily rotation.
2. Brass Rail With Peg Hooks and a Clean Mug Row
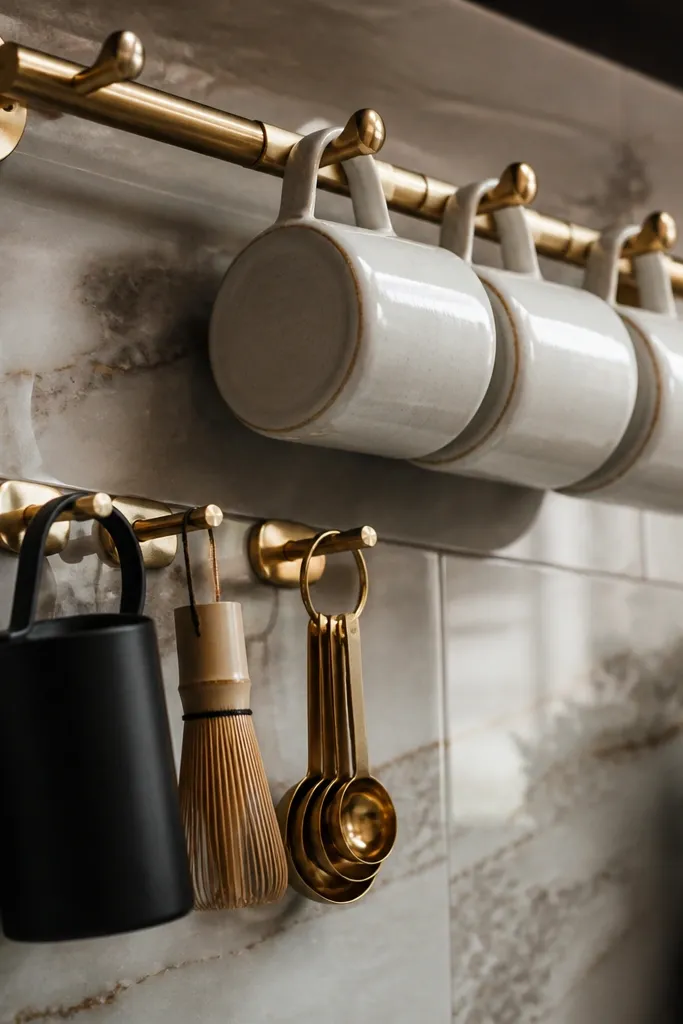
A brass rail turns a coffee station into a functional display. The rail line reads sleek, and peg hooks let you hang tools that usually clutter the counter: measuring spoons, whisk for matcha, and a small milk frother. Keep the mug row consistent — same mug shape and handle direction — so it photographs like a curated set. This idea works best when you’re trying to stop countertop stacking because mugs stay visible and reachable. It’s also rental-friendly if you mount into studs or use a proper adhesive rail kit rated for the weight.
Editor's noteLeave 1-2 inches between mugs so handles don’t touch and get scuffed.
Pick a rail length that matches your mug count; 24-30 inches looks best for a small station. Install the rail at about 50-56 inches from the floor so mugs sit at eye level when you grab them. Hang four to six hooks and place mugs on the hooks or with a simple rail shelf bar, then add a small hanging caddy for measuring spoons and filters. Finish by putting only two things on the counter: a tray for the grinder or pour-over setup and one jar for your main beans.
Skip thisAvoid mixing hook sizes and random tool colors; it turns into hardware-store clutter.
3. Three-Tier Counter Organizer With One Color Liner
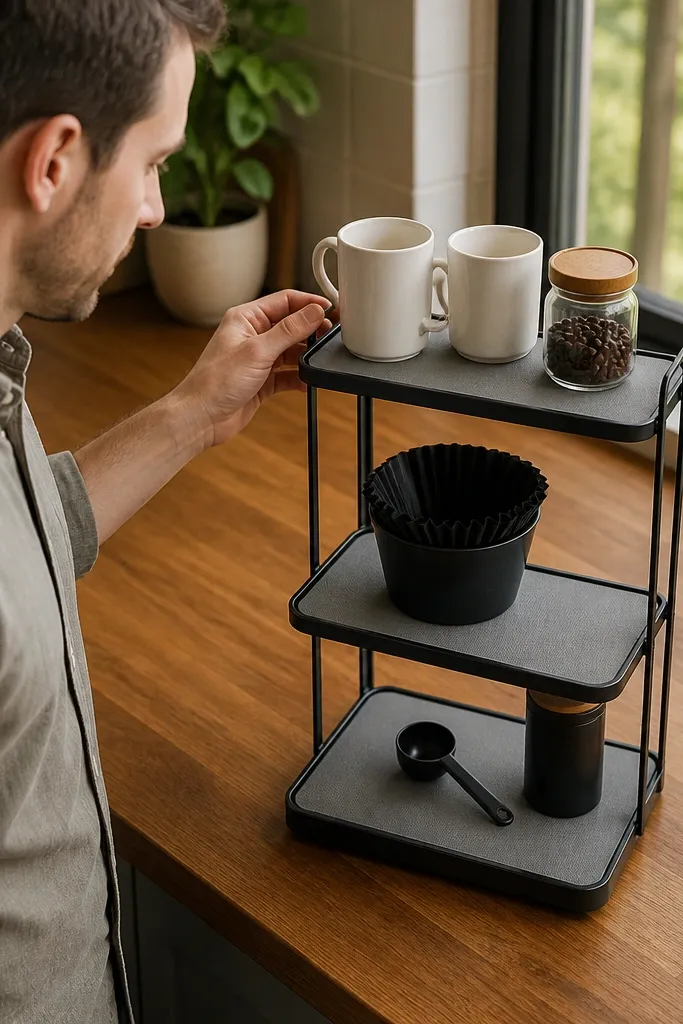
A three-tier organizer makes modern coffee station ideas look tidy because it gives everything a home with visible separation. The key is keeping one liner color across trays — like off-white linen, black felt, or stone-gray silicone mats — so the station doesn’t look patchy. Use the top tier for “display” items (mugs, a small plant, a decorative spoon), the middle tier for beans and filters, and the bottom tier for extra supplies you don’t want on the counter. This is great for small kitchens where you can’t add wall storage but still want a styled, layered look. Expect about 2-3 hours for assembly and styling, depending on whether you’re building from scratch or buying a base organizer.
Editor's noteUse identical jar heights so the tiers look aligned in photos.
Choose a three-tier organizer with flat surfaces; measure your counter depth first so it doesn’t bump into appliances. Cut liner fabric or felt to fit each shelf with a 1-inch overlap so edges don’t curl, then glue or Velcro it in place. Set the middle tier with two jars (one for beans, one for sugar or pods) and add a small basket for paper filters. Place mugs on the top tier only if you have enough clearance; otherwise, keep the top tier for a tray and move mugs to a wall hook.
Skip thisDon’t put tall items on the top tier; it blocks the middle and makes the whole station look top-heavy.
4. Shiplap-Style Backboard With Recessed Shelf Slots
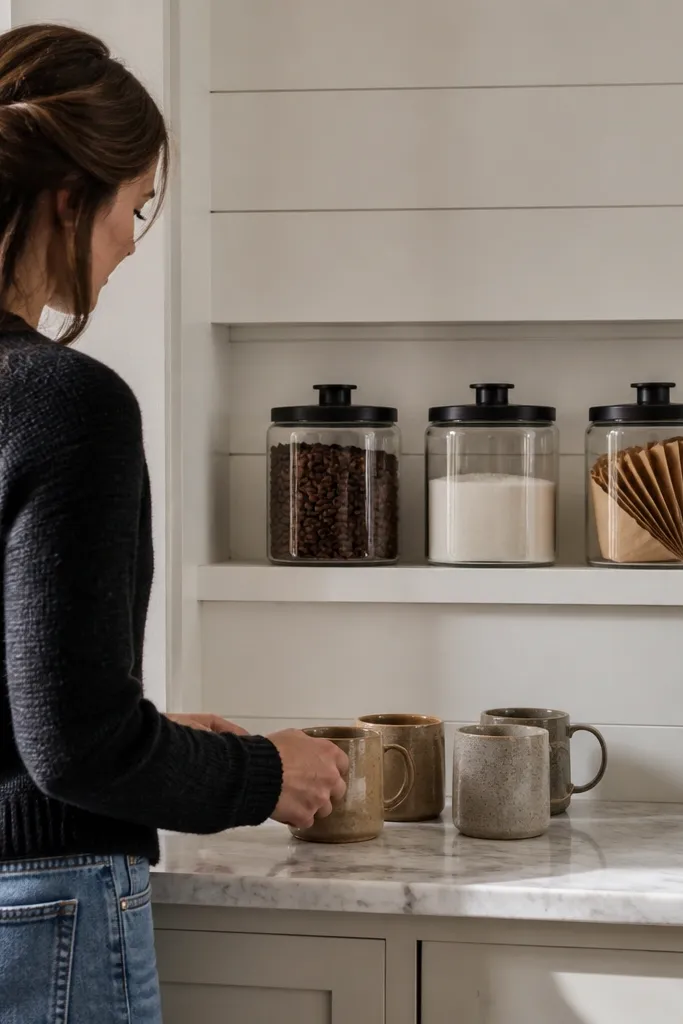
A backboard is the fastest way to make a coffee station look built-in. Even if you only add a small section behind your counter, it creates a clean background so jars and mugs look like part of a designed feature wall. Recessed slots — shallow cutouts where jars sit — keep everything from drifting forward and looking messy. This look works especially well with neutral ceramics and light wood, because the background adds texture without adding clutter. It’s a DIY carpentry job, but it’s straightforward: cut panels, add slots, then mount.
Cut a plywood panel to fit your coffee zone, then attach thin horizontal strips to mimic shiplap spacing (roughly 1/4-1/2 inch gaps). Seal the panel and strips with a clear matte finish so it doesn’t glare under kitchen lights. Mark and cut shallow recesses where jars will sit — keep them just deep enough so the jar base rests flat. Mount the backboard to the wall or to a board behind the counter using screws into studs, then install a small floating shelf above for mugs.
Use a router or oscillating tool for the recesses; it makes jar seating cleaner than sanding by hand.
Skip glossy paint for the backboard — it reflects light and kills the modern, calm look.
5. White Enamel Tray Landing Zone With Black Containers
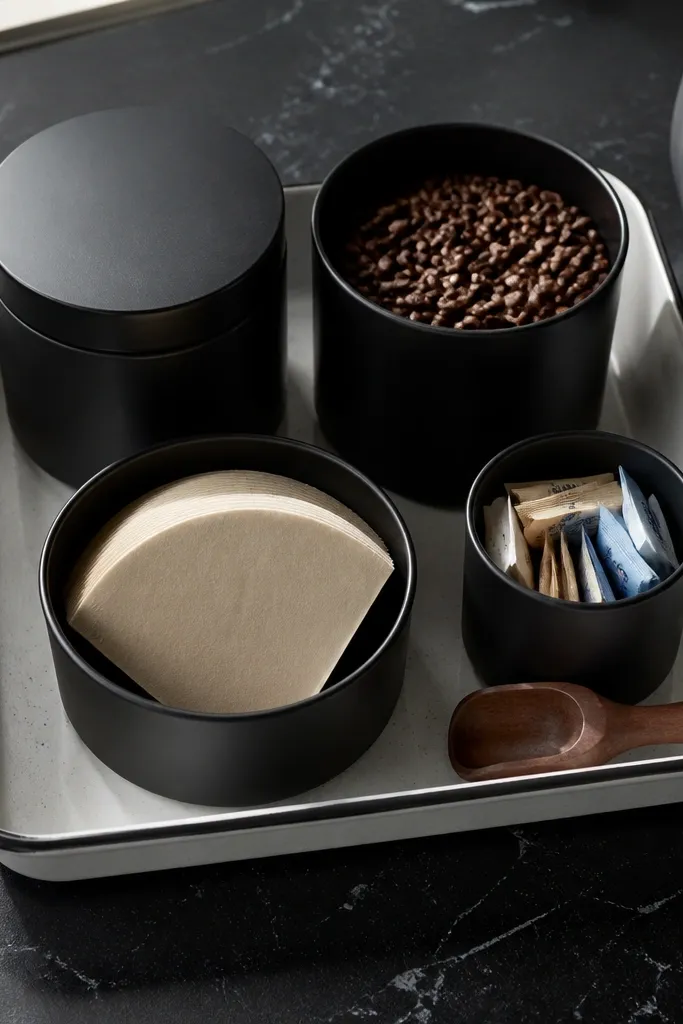
This is a photo-friendly layout because the landing zone is obvious. A white enamel tray gives contrast against dark coffee tools, and it keeps everything contained so your counter doesn’t spread into a mess. Use black containers for beans, filters, and sweeteners so the station reads modern and consistent. Keep the tray sized so it holds your daily routine only: scoop, one jar, one filter stack, and a small creamer pitcher. It’s a low-effort upgrade that makes your coffee corner look designed even with limited storage.
Editor's noteUse a folded cloth napkin under the tray if your counter shows water rings from steam.
Pick a tray that’s roughly 18-24 inches wide and 10-14 inches deep, then wipe it clean and let it dry fully. Choose two to three black containers with lids — one for beans, one for sugar or pods, one for filters — and standardize jar shapes so they line up. Put the pitcher or milk frother to one side of the tray and keep it off the main jar line. Add a small ring or cup for your scoop so it doesn’t wander across the counter.
Skip thisDon’t use mismatched lid styles; the sealed look is part of the modern impression.
6. Concrete-Look Floating Shelf With Minimalist Pour-Over Setup
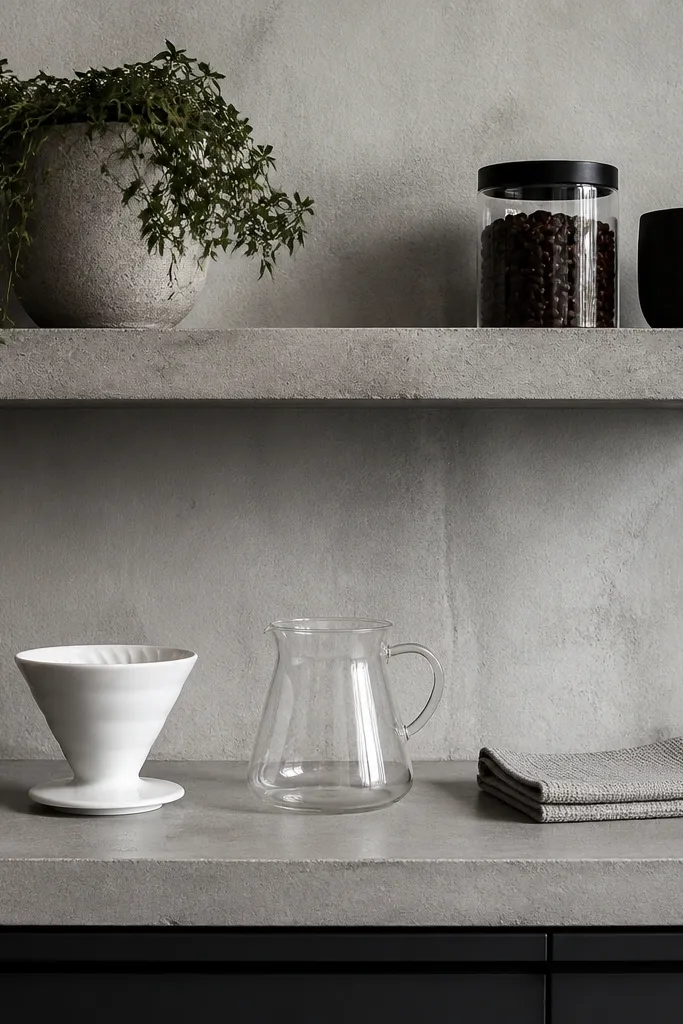
A concrete-look shelf makes modern coffee station ideas feel industrial without being messy. Pair it with a minimalist pour-over setup so the station has one clear purpose and one focal shape: dripper, carafe, and a single jar. Keep the shelf styling strict — one jar, one dripper, one towel — so the concrete background doesn’t get crowded. This works well if you do one brew method regularly because the tools stay in place. The build is simple and the result looks intentional from across the room.
Mount a floating shelf with a concrete-look finish 16-20 inches above your main counter surface. Add a heat-safe base mat if your dripper or carafe will sit directly on the shelf. Place the carafe at the back, dripper in the center, and the coffee jar to one side so the layout forms a triangle. Finally, add a small folded towel in a corner and keep everything else off the shelf.
Use a light-colored towel to catch drips — it reads clean even if you spill a little during brewing.
Avoid stacking paper goods on the shelf; it breaks the minimal look fast.
7. Pegboard Coffee Station With Color-Matched Bins
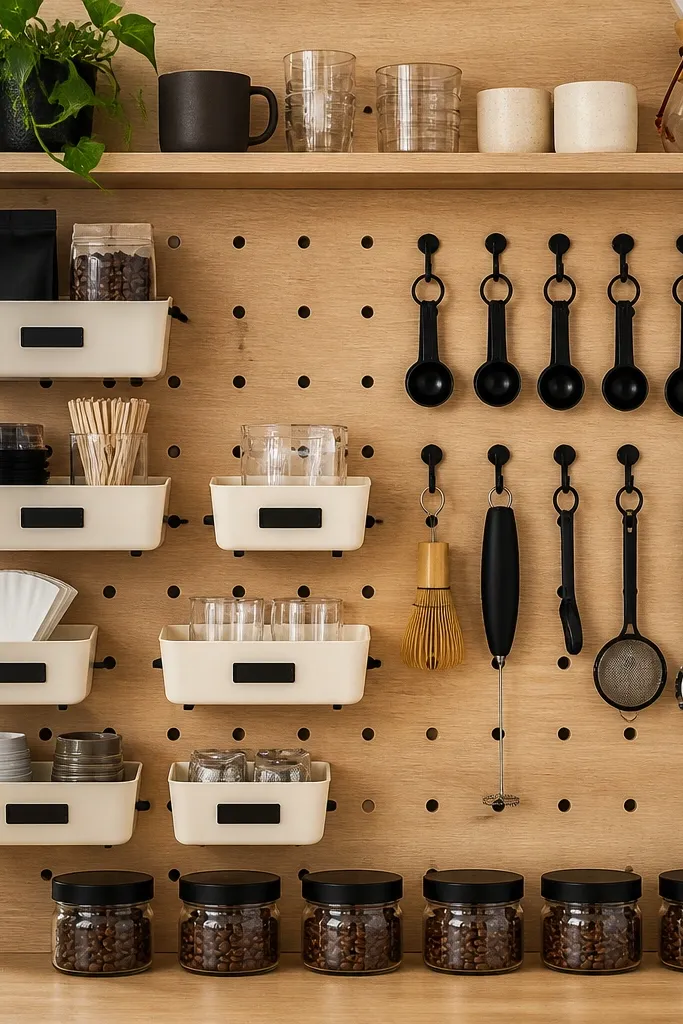
Pegboard is the modern answer to “my counter is always messy.” It gives you a grid where bins and hooks look planned, not random. Use one pegboard color — white or light oak — and match bin colors to your coffee palette. The best part is you can label or color-code without making it look like an office. Put daily tools on hooks (spatula, spoon, frother) and store extra supplies in bins behind them. If you like switching brew methods, pegboard makes it easy to rearrange.
Cut pegboard to fit your wall area and mount it level; measure from the counter so hooks land within arm reach. Install bins for filters, pods, and sweeteners, then hang a small rail or hooks for mugs and tools. Add two jars to the most visible spot — one for beans and one for a backup supply — and keep other items in bins. Finish by adding a simple tray on the counter below pegboard for drips and daily prep.
Pre-plan your layout with painter’s tape on the wall; it prevents drilling the wrong hook spacing.
Don’t use too many peg colors; stick to one bin color family and one metal finish.
8. Slim Cabinet Door Shelf Inserts for Coffee Pods
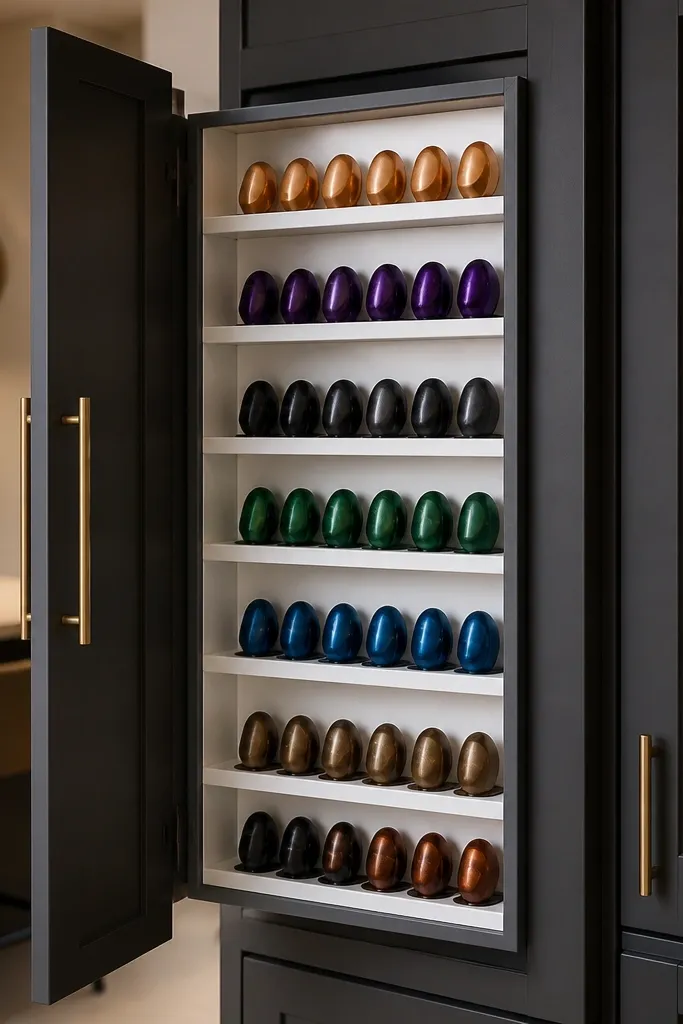
If your pods live in a messy drawer, this idea cleans the whole station. Door-mounted shelves keep pods visible and aligned, which makes modern coffee station ideas look more like a built-in retail display than a home stash. Use slim inserts so the door closes smoothly and the pods don’t spill out. This setup is perfect for small kitchens where you don’t want a wall display but still want everything easy to grab. It also protects your counter from pod packaging clutter.
Editor's noteUse a matte shelf liner so pod packages don’t slide when you open and close the door.
Measure your cabinet door inner width and choose slim shelf inserts that fit with at least 1/2 inch clearance around the edges. Install the shelves at a height where pod tops are visible when you open the door, usually 12-18 inches from the counter line. Place pods in uniform rows so the front edge stays straight. Add a small label strip on the inside of the door for quick selection and keep the counter free for your cup and brewing tools.
Skip thisSkip oversized shelves; if pods sit too deep, you’ll fight the door every day.
9. IKEA-Style Lack Shelf Hack With Oversized Tray Base

This is a clean, modern layout built around one big tray and one wall shelf. The oversized tray acts like a stage: jars, scoop, and a folded towel live on it so the rest of the counter stays clear. The shelf above holds mugs and a small decorative item, but only one layer deep so it doesn’t turn into clutter. This works especially well if your counter is narrow and you need the coffee zone to look cohesive from the side. It’s also a good option if you want a fast refresh without heavy carpentry.
Editor's noteMatch your tray finish to your countertop hardware (matte black pulls or light wood tones).
Mount a single shelf directly above where your tray sits, keeping shelf depth around 8-10 inches for mug clearance. Choose a tray that spans most of the counter width in your coffee zone, typically 20-26 inches wide. Arrange two jars and one small container on the tray, then place mugs on the shelf or on a small secondary tray. Secure all items with non-slip pads and keep everything within the tray border for a crisp look.
Skip thisDon’t add three different tray colors; one neutral base keeps it modern.
10. Marble-Effect Contact Paper Counter Panel With Rounded Corners
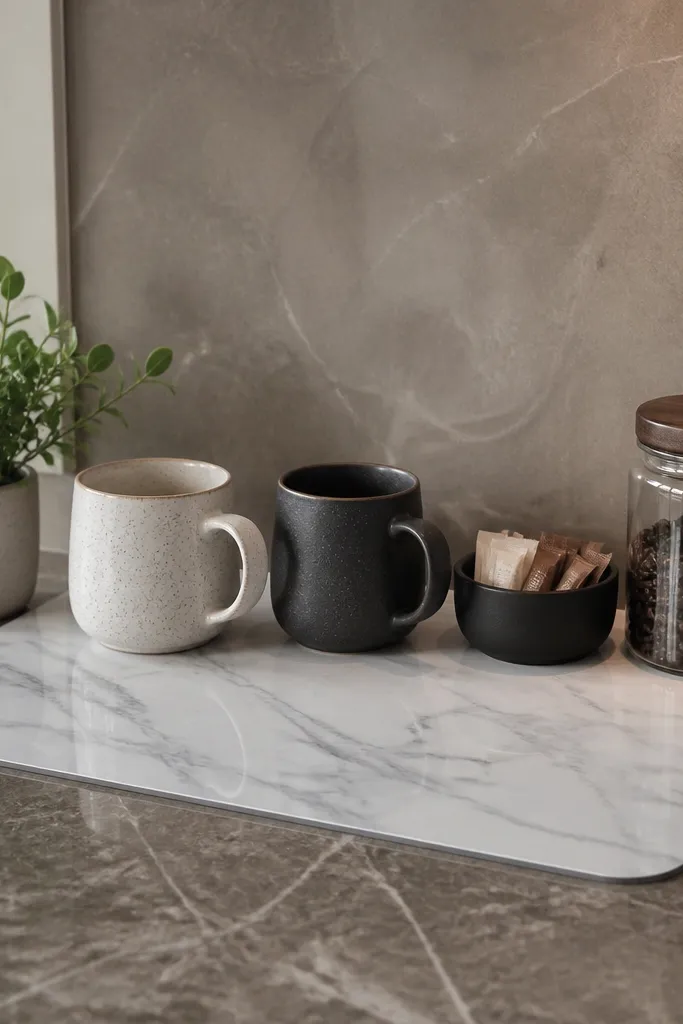
A marble-effect panel makes a coffee station instantly more polished because it creates a uniform surface for your tools. Rounded corners matter — they soften the look and keep it modern instead of craft-store. This is best when you want the station to look like a built-in niche without building cabinetry. Place your pour-over setup and jar cluster on the panel so everything stays in one visual block. It’s also easy to replace if the look changes.
Clean and dry your counter thoroughly, then cut contact paper to the coffee zone size with 1/2 inch extra on each side. Round the corners using a large bowl as a template so the edges don’t lift as easily. Apply slowly from one side, smoothing with a plastic squeegee to avoid bubbles. Seal the edges with a thin clear edge tape or a small amount of clear adhesive so it doesn’t peel near water exposure.
Press edges longer with a warm hair dryer; it helps contact paper bond near corners.
Avoid placing hot carafes directly on the panel — use a heat mat under brewing tools.
11. Stacked Glass Canisters With Tiered Height Layout
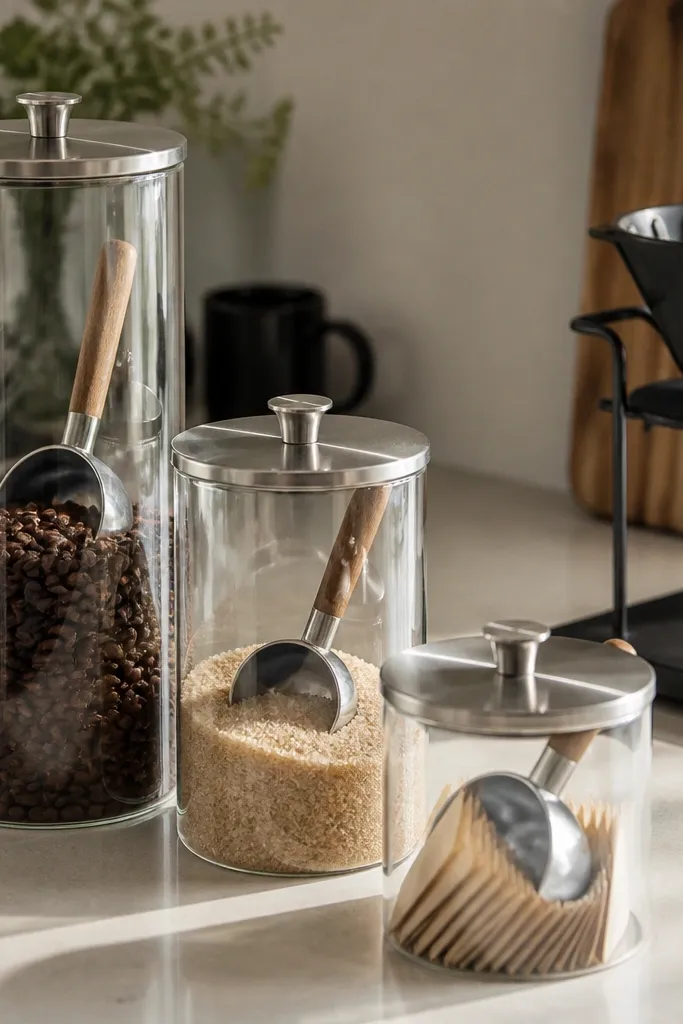
Clear canisters look modern when they’re consistent and intentionally stacked. The trick is tiered height: one taller canister for beans, one medium for sugar, one smaller for filters or pods, so your eye reads a clean gradient. Glass also shows labels and scoops, which makes the station feel curated. This idea works for people who like a visible workflow — you can see what you’re low on without opening cabinets. Build time is short if you already have canisters, and the visual payoff is big.
Choose canisters with the same lid type and finish, ideally matte black or brushed metal. Measure the space and set your tallest canister at the back of the counter or on a tray, not in the front where it blocks everything. Place a medium canister directly in front of it and keep the smallest item on the side or front corner. Add a matching scoop and a small label card so the station looks styled even when you’re not actively brewing.
Wipe canisters daily with a dry microfiber cloth; fingerprints show up on glass fast.
Don’t mix random jar shapes; mismatched lids and widths break the modern line.
12. Open Corner Shelf With Back-Lit LED Strip Under a Tray
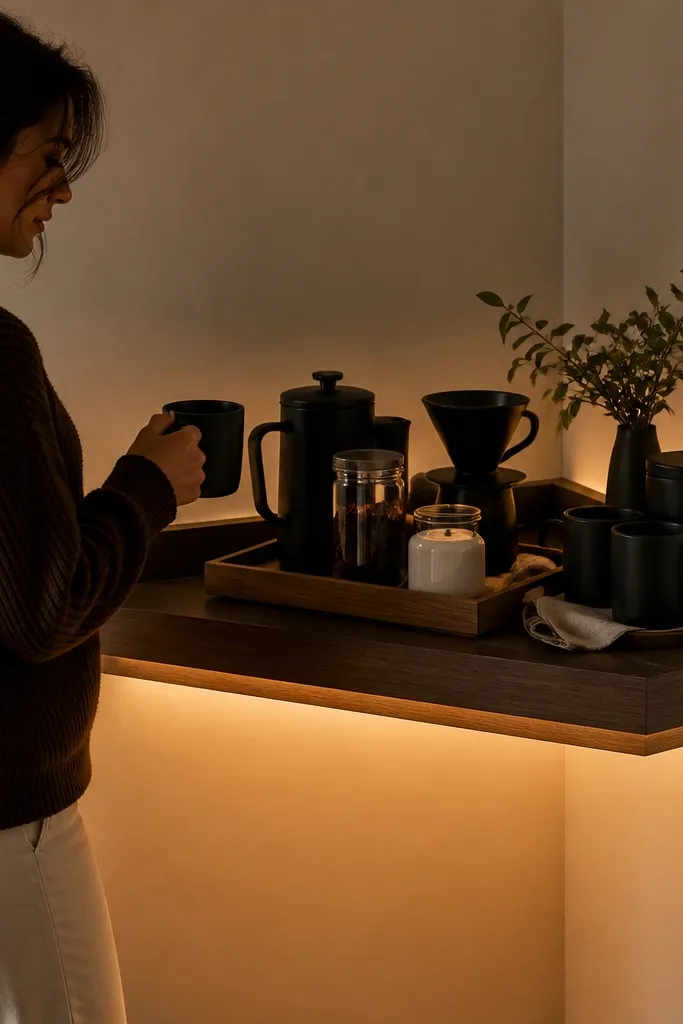
Back lighting adds a modern café feel because it separates your coffee items from the wall. Put a tray on the shelf and run a warm LED strip under the shelf lip so shadows fall nicely under jars and mugs. This works best in corners or along walls where lighting is limited. The station looks styled in the evening too, which matters if you host or drink late. You’re building a small lighting moment, not a full renovation.
Editor's noteUse frosted LED covers so you don’t see bright LED dots in photos.
Mount a small open shelf or corner shelf unit, then attach an LED strip under the shelf edge. Use a warm white LED strip (around 2700K) and a dimmer if you want control. Place a tray on the shelf surface and arrange two jars, one small container, and a mug or two so the light highlights the front edges. Route the cord to an outlet or a plug-in adapter and secure it with cable clips.
Skip thisSkip cool white LEDs; they make wood and ceramics look gray.
13. Slim Sink-Adjacent Coffee Caddy With Drip Tray
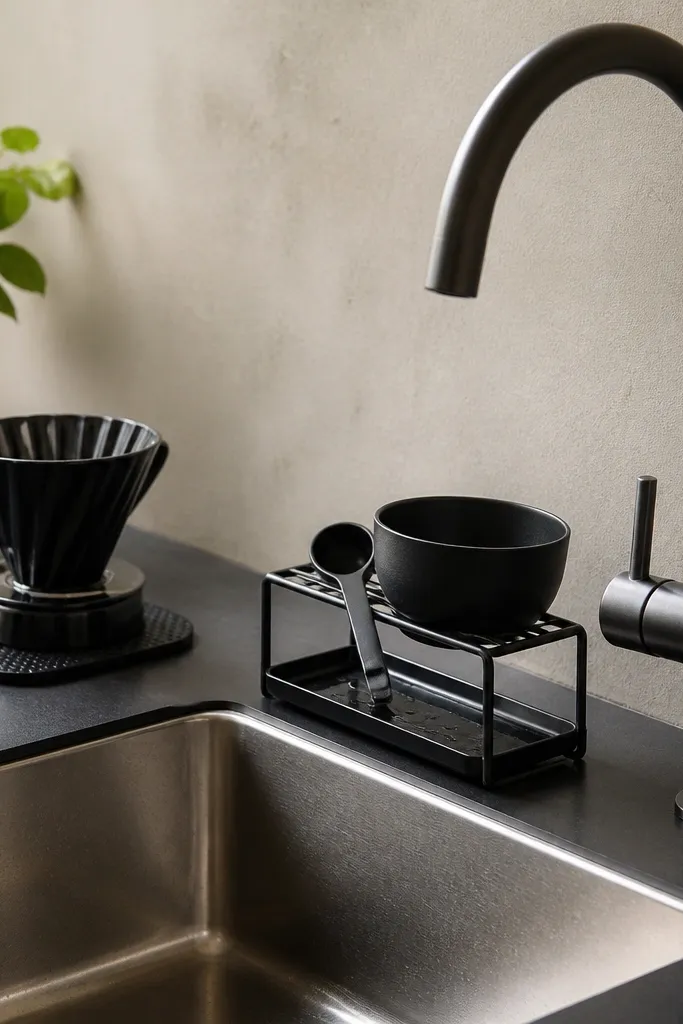
If your coffee station sits near the sink, a slim caddy keeps water and mess contained. This idea works because it gives you a dedicated “wet zone” for rinsing the scoop or dumping grounds, while still looking modern. Choose a caddy with clean lines and a separate drip tray so you’re not wiping the counter constantly. Keep the caddy stocked with only tools you use in the rinse step: scoop, paper filters, and a small towel. Your station stays photogenic because it doesn’t turn into a drying rack.
Editor's noteUse a small stainless or ceramic cup for the scoop; it looks clean and wipes fast.
Pick a slim caddy that fits your space, usually 6-10 inches wide, and place it next to the sink where you prep. Add a drip tray insert or a silicone mat underneath the caddy base to catch water. Set a small jar on the back of the caddy for filters and keep the front for the scoop and a folded towel. If you’re mounting, attach the caddy to studs or use a rated adhesive system and check stability before loading.
Skip thisDon’t store dry beans in a wet zone; keep airtight storage on the main counter or shelf.
14. Matte Stone Tray With Hidden Scoop Holder
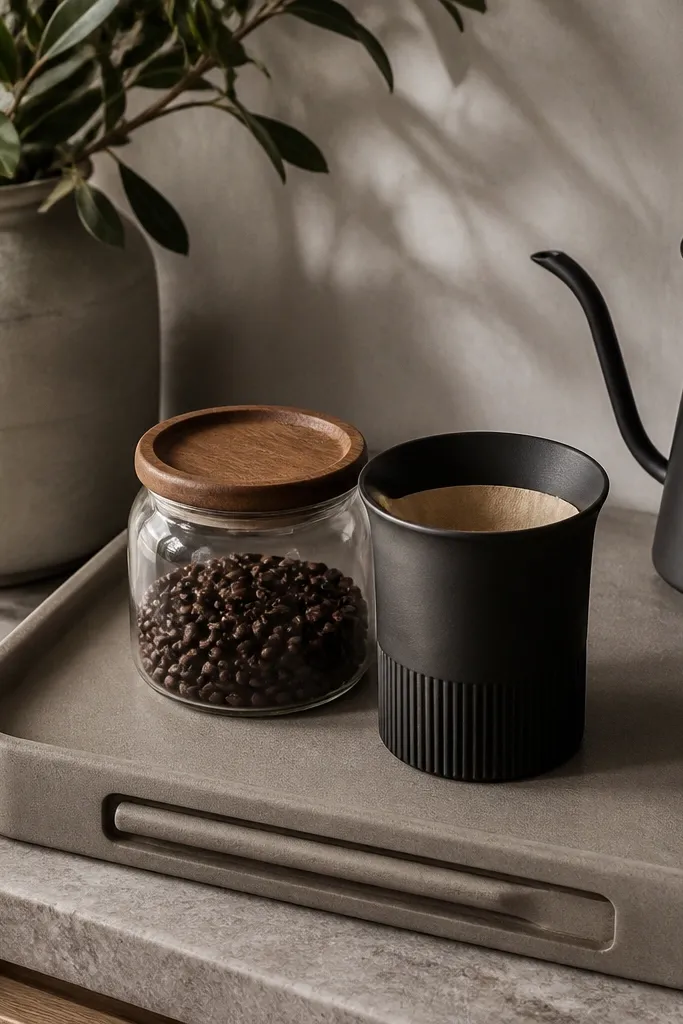
A matte stone tray gives you that modern, spa-like look because it absorbs glare and makes everything look calmer. The hidden scoop holder is what keeps it from looking cluttered — scoops usually look messy when they sit out. Put your scoop where it belongs: in a recessed slot or a small side cup that matches the tray. This setup is great for people who want their coffee station to look styled even right after brewing. It also makes clean-up faster because drips land on one surface.
Editor's noteChoose matte finishes for both tray and containers; gloss shows every fingerprint and water spot.
Buy or build a tray with a flat base, then add a small recessed cup or container for the scoop. If building, use a 1-inch thick wood base, seal it, then glue a small ceramic cup into a shallow cutout. Place the tray on your counter and arrange beans jar at the back, filters to one side, and a small pitcher or milk frother at the other. Finish by adding a liner underneath the tray if your counter is porous or prone to water marks.
Skip thisAvoid leaving the scoop loose; it turns into a visual mess within a week.
15. Coffee Station With Color-Coded Labels and One Jar Size
Modern coffee station ideas look organized when your storage system is repeatable. Using one jar size for everything — beans, sugar, cocoa, pods — makes the station look like a set instead of a collection. Color-coded labels add a clean visual cue without adding clutter, and they help you refill fast because you know what each jar holds at a glance. This is especially useful if you have roommates or family members who grab supplies without asking. The build is low-cost and the visual impact is high.
Editor's noteUse label tape that sticks well to glass or metal; cheap labels peel and look messy fast.
Pick a single jar size and lid finish that fits your shelf or tray depth, then buy duplicates until you have enough for your regular items. Clean and fill each jar to a consistent level so the visual height stays uniform. Print or write labels with a simple color system — for example, black for beans, white-on-dark for sugar, and muted gray for cocoa. Place jars in a straight line on a tray and keep the scoop in a matching small holder so the station looks complete.
Skip thisDon’t mix jar sizes just because you have them; the uneven heights ruin the modern look.
16. Pegboard Shelf Ladder With Hanging Cup Hooks
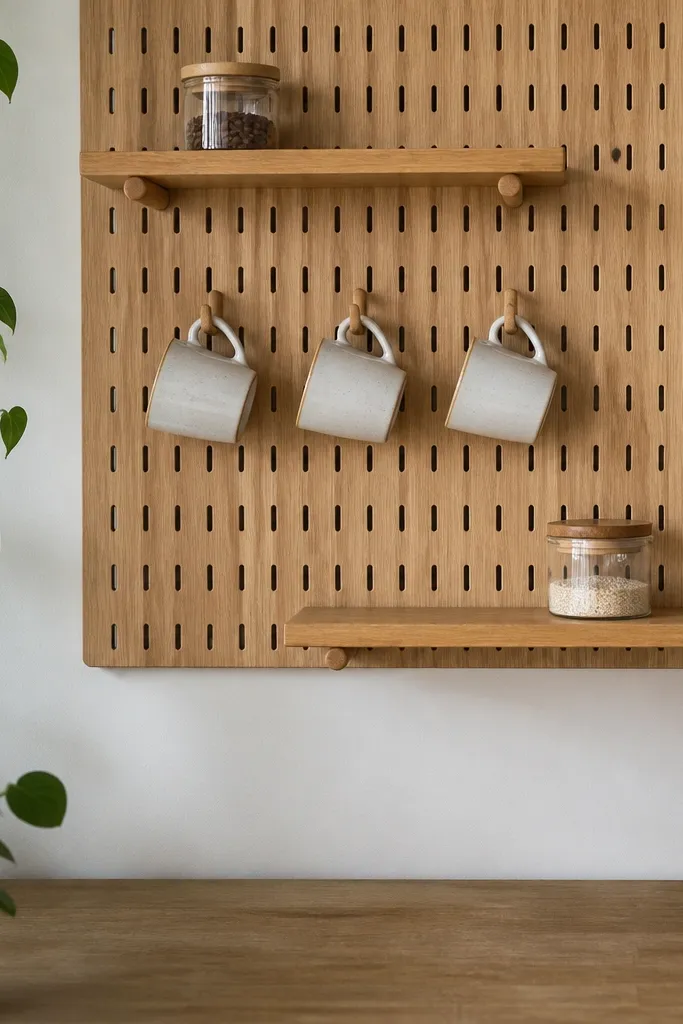
A ladder layout gives you vertical rhythm without building a cabinet. Two small shelves on a pegboard with cup hooks in between looks modern because it creates repeating lines. Use it for mugs on hooks and keep jars on the shelves so nothing sits scattered on the counter. This is a great option if you want a station that looks good from more than one side — the vertical arrangement reads in photos. It’s also easy to adjust if you change your brew method later.
Editor's noteUse the same mug color set; even if you mix brands, matching colors keep it styled.
Mount a pegboard and mark a centerline so shelves are symmetrical. Install two narrow shelves at different heights, leaving enough clearance for mug handles — typically 8-10 inches between shelf surfaces. Hang cup hooks under the pegboard so mugs align vertically and you can grab them quickly. On the counter, keep only your brew tools and a single tray for daily use, letting the pegboard handle storage.
Skip thisDon’t hang mugs too low; they block the shelf view and look cramped.
17. Wall-Mounted Coffee Drawer Pull Station With Small Baskets
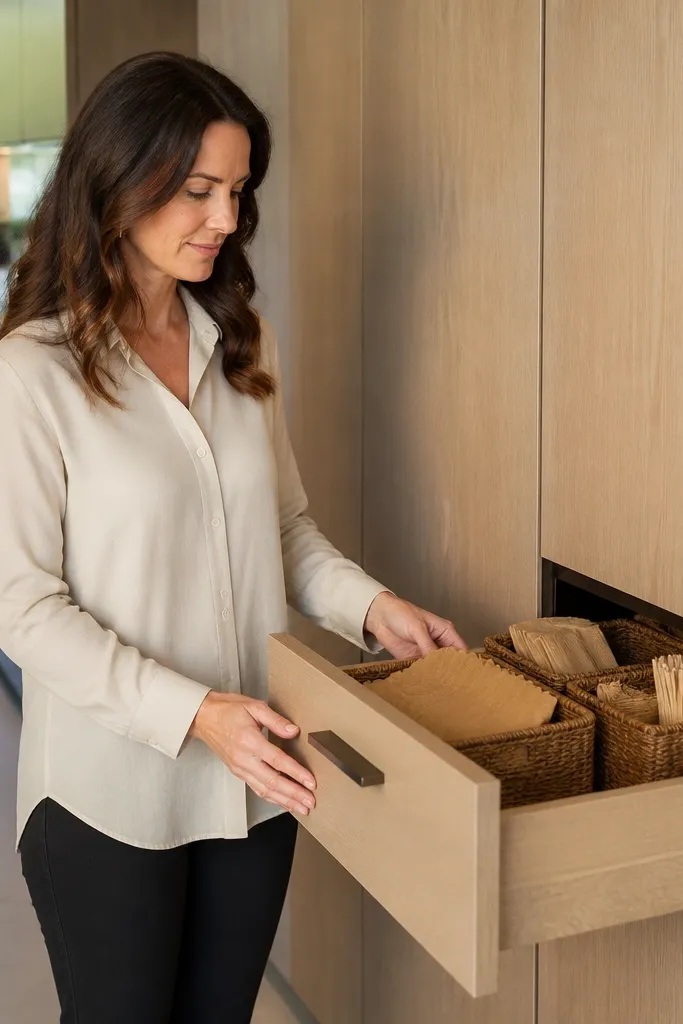
This one looks like a built-in bar because the storage is attached to the wall. A wall-mounted pull panel with small baskets keeps tools visible but contained, and it makes the coffee station feel like furniture instead of a countertop pile. Basket sizes matter: use small baskets for filters and stir sticks, not big ones that swallow clutter. If your station needs a place for both coffee and non-coffee add-ons, baskets are the clean answer because you can separate items by basket. It’s a practical build that also photographs well.
Editor's noteUse basket liners in one neutral color so the inside doesn’t look messy in bright light.
Build or buy a wall-mounted panel with a horizontal frame and install it at about 40-48 inches from the floor. Add two to three small baskets with consistent spacing — keep them about 6-8 inches wide so they don’t look bulky. Mount a small shelf or tray underneath for your daily cup and brewing tool. Arrange baskets by function: filters in one, sweeteners in another, and a small basket for stir sticks or tea bags.
Skip thisAvoid oversized baskets; they make the whole station look like storage, not a styled coffee corner.
18. Countertop Pour-Over Stand With Built-In Heat Mat Tray
Pour-over setups look modern when they’re staged like a workstation, not scattered. A stand with a built-in heat mat tray keeps the brewing area contained and protects your counter from drips and heat marks. Choose a stand in matte wood or powder-coated metal so it matches modern hardware and doesn’t shine under lighting. This idea works if you brew consistently and want your tools to stay in a single arrangement. It also helps you keep the rest of the counter clear, because the stand is doing the job of organizing.
Editor's noteUse a silicone heat mat that matches your stand color family; it looks intentional, not temporary.
Buy a pour-over stand or build one using a stable base board about 10-12 inches wide and 14-18 inches long. Add a heat mat insert on the top or inside a shallow recessed area so the dripper sits securely. Place a single jar to one side and a small towel to the other, keeping the layout symmetrical. Finally, add a simple tray underneath the stand if your dripper drips — it keeps cleanup fast and keeps the look clean.
Skip thisDon’t put multiple brew tools on the stand at once; it reads cluttered.
19. Dark Walnut Cabinet Side Bar With Magnet Knife Strip for Spoons
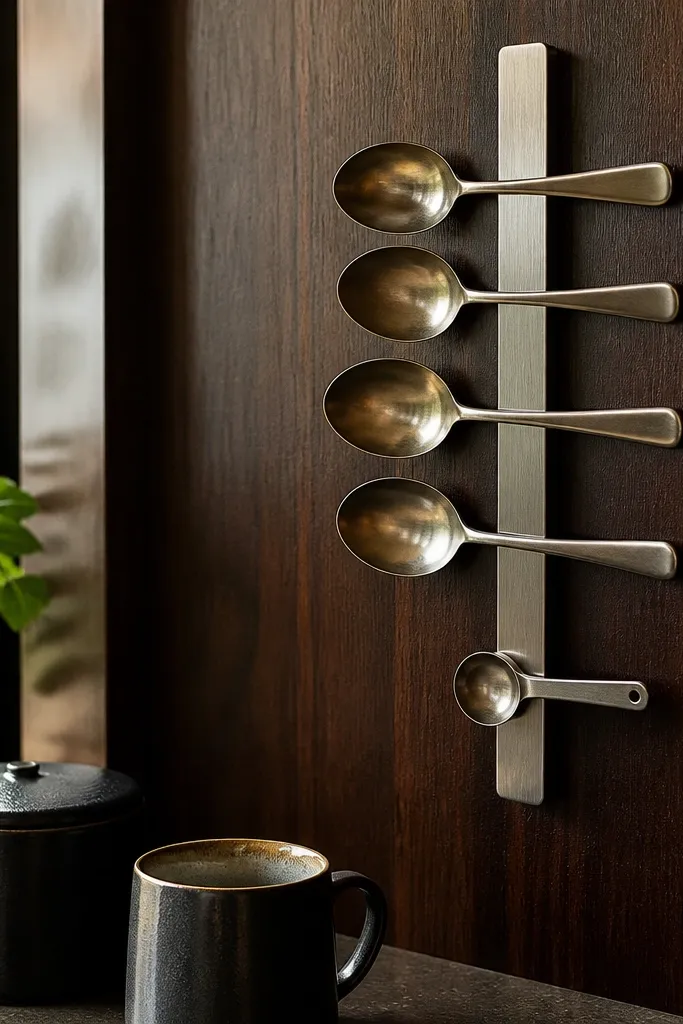
This one makes your coffee station look designer because it hides the mess. You get a clean, vertical landing strip on the cabinet side where spoons, small stir sticks, and even a tiny scoop sit neatly in a straight line. The magnet strip keeps everything aligned so your tools never end up scattered on the counter. It also fixes the “where do I put the spoon?” problem that makes coffee areas look chaotic fast. The look is warm and modern at the same time — dark walnut tone against matte hardware — and it photographs really well because the line stays crisp. This is a beginner-friendly build that takes about 2 hours including drilling and dry-fitting.
Editor's noteUse a scrap piece of painter’s tape to mark your spoon height before you drill anything. It keeps the magnet strip perfectly level so the whole station looks intentional.
Step 1: Cut a walnut veneer-faced board or solid wood strip to 1x6 in (actual) and 18 in long, then sand to 180 grit and wipe with a tack cloth. If you want it extra modern, round just the front corners with a 1/4 in radius round-over bit, then stain to a dark walnut tone and seal with matte poly. Step 2: Mount a stainless magnetic knife strip centered on the strip, 2 in from the top edge, using the strip’s included screws. Hold a spoon against it to confirm the magnet strength — you want spoons to stick firmly without sliding down. Step 3: Pre-drill 1/8 in pilot holes for the wood strip mount on the cabinet side, then screw through with 2.5 in wood screws and add felt pads if the cabinet door ever bumps the strip.
Skip thisDon’t mount the magnet strip too close to the cabinet top — steam and splashes creep up and ruin the finish.
20. Cement-Tile Look Drawer Liner Tray With Brass Lip for Sugar and Filters
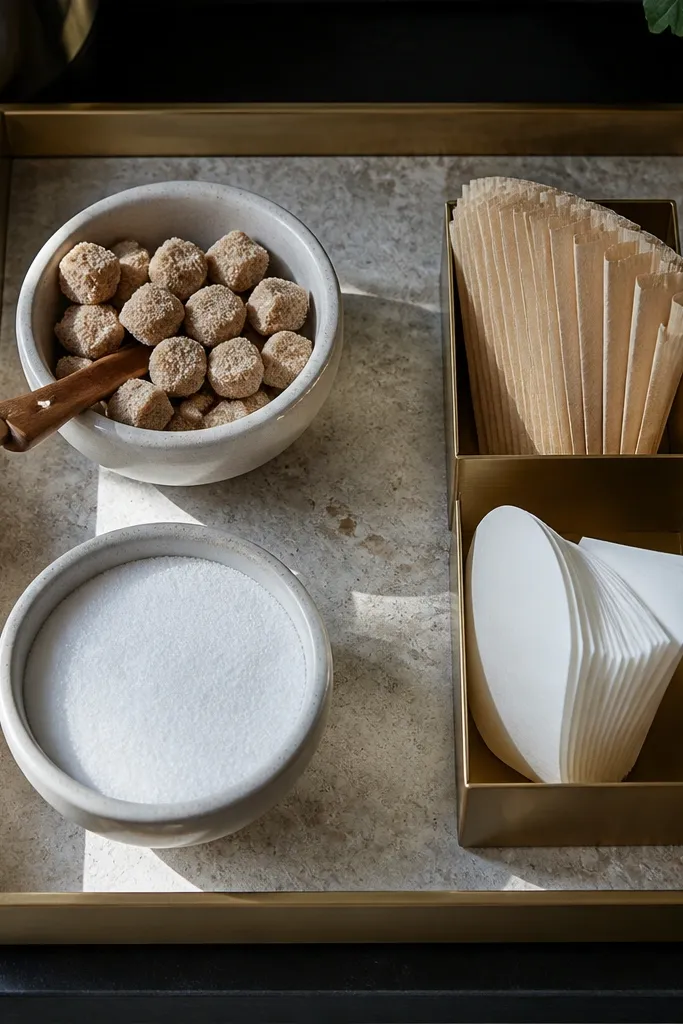
This is a small build that upgrades the whole coffee station because it creates a single, intentional landing zone. Instead of sugar packets and filters living in random containers, you get one tray with a cement-tile look that makes everything look styled. The subtle texture hides scuffs and fingerprints, which matters in real kitchens. Add a thin brass lip and the tray reads modern without trying too hard. It’s also practical — you can drop in a neat stack of filters and a jar for sugar, then keep the rest of the counter clear. This suits apartments, narrow countertops, and any setup where you want a “put things here” area that looks good in photos.
Step 1: Buy adhesive drawer liner vinyl in a cement-tile pattern and a sheet of 1/2 in plywood or MDF for the tray base, cut to 12 in x 7 in. Sand the edges, then test-fit the liner so it wraps cleanly around the sides without bubbles. Step 2: Cut thin brass sheet or a brass angle strip to 12 in x 7 in as a shallow lip, using snips for sheet metal or a metal cutting jig for an angle profile. Glue the lip to the top edge with metal-safe epoxy, then clamp with painter’s tape and scrap wood blocks while it cures. Step 3: Seal the vinyl edges with a thin coat of clear polyurethane or clear contact cement so the liner doesn’t peel from cleaning. Let it cure fully before using it with wet scoops or damp filter packs.
Press the liner down with a plastic credit card, not your fingers. It forces out air and gives you sharp tile edges that look crisp.
Don’t skip sealing the liner edges — that’s where peel starts after the first few wipe-downs.



