
1. Two-Level Hanging Rail with Uniform Hanger Bar
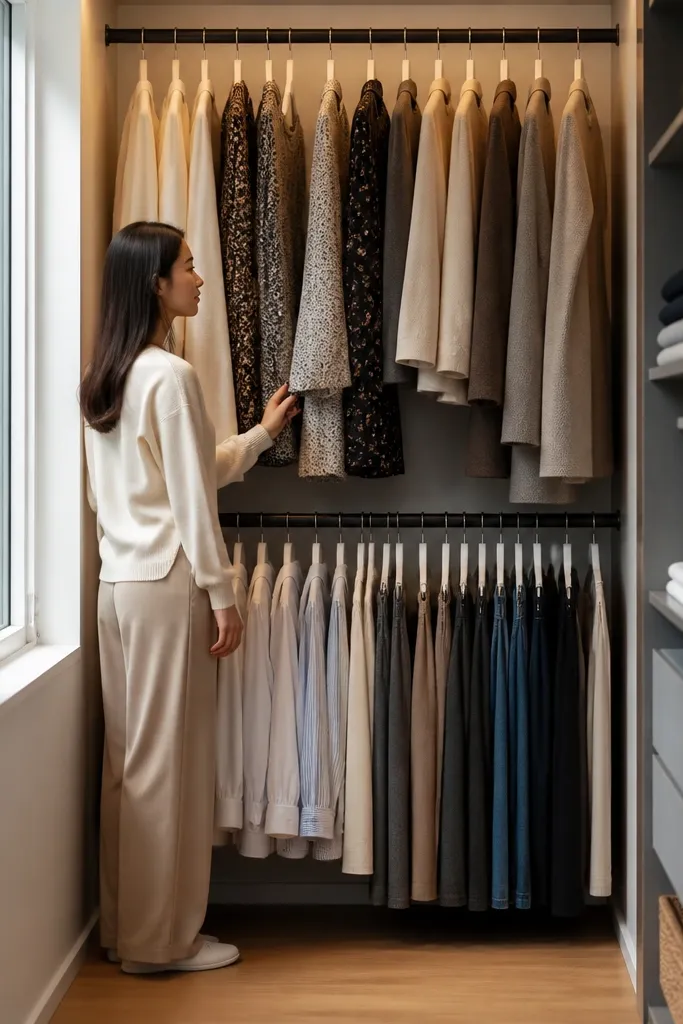
Start by measuring your usable wall width and deciding where the rails will land. Mark two levels using painter’s tape: one around 65-68 inches from the floor to the top bar for everyday clothes, and a second around 40-44 inches for shirts and lighter pieces. Install 1x2 mounting cleats or directly mount brackets to studs (use a stud finder, then pre-drill pilot holes) and level everything with a 4-foot level. Hang the rails, then add a narrow base shelf or a short rod above shoes so the bottom line stays tidy.
This setup fixes the “everything hangs at different heights” look that makes small closets feel chaotic. By splitting hanging into two levels — one higher for dresses and coats, one lower for shirts and pants — you keep items aligned and easy to grab. The visual win is the uniform bar line and the consistent hanger spacing, which makes the closet look styled even when it’s full. Use a simple, solid wall finish behind the rails so the hanging items read as a clean grid instead of scattered shapes. It’s a DIY project that looks expensive because the structure is obvious and the spacing is controlled.
Skip thisDon’t place the lower bar too high; if hangers bump into folded stacks, the whole system stops looking clean.
Editor's noteUse the same hanger type for every category in that section — matching slim hangers make the grid look intentional.
2. Closed Drawer Bank with Skinny Pulls
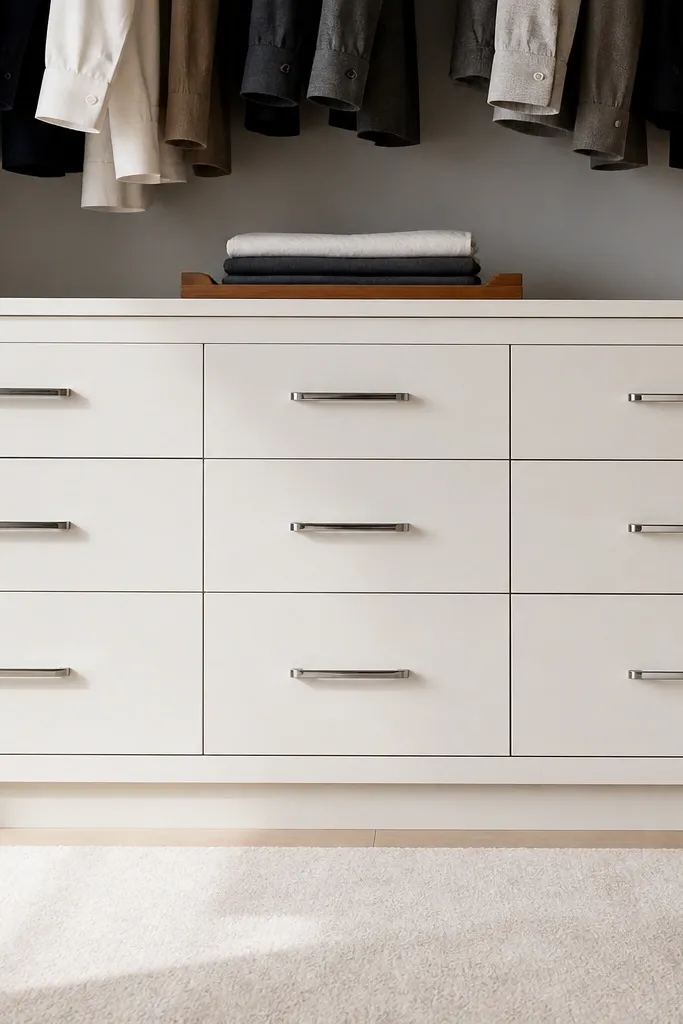
Closed drawers make small closets look calm because they remove visual clutter. A drawer bank also gives you perfect “front-facing order” — you can stack folded items by category and keep the fronts consistent. Skinny metal pulls look crisp and modern compared to chunky knobs, especially in narrow closets where you’ll see the hardware often. This idea works best when you have a wall run that can fit 3-5 drawers and you want your everyday items to live within arm’s reach. It’s a medium DIY build if you’re making custom boxes, but you can also use ready-to-assemble drawer units and mount them flush for a clean look.
Choose a drawer width that fits your space without forcing awkward gaps; 12-inch-wide drawers look tidy in small closets. Install a level ledger board first, then mount the drawer unit frames so the drawer fronts sit flush. Add stops or soft-close hardware if your unit supports it, and test the drawer travel before loading. Finish by adding labels on the inside of the drawer (not the front) so the exterior stays sleek.
If your closet has uneven walls, shim behind the frame at mounting points so the drawer fronts line up perfectly.
Don’t label the drawer fronts with big stickers; it turns the neat look into a craft project.
3. Pegboard Accessory Wall with Matching Baskets
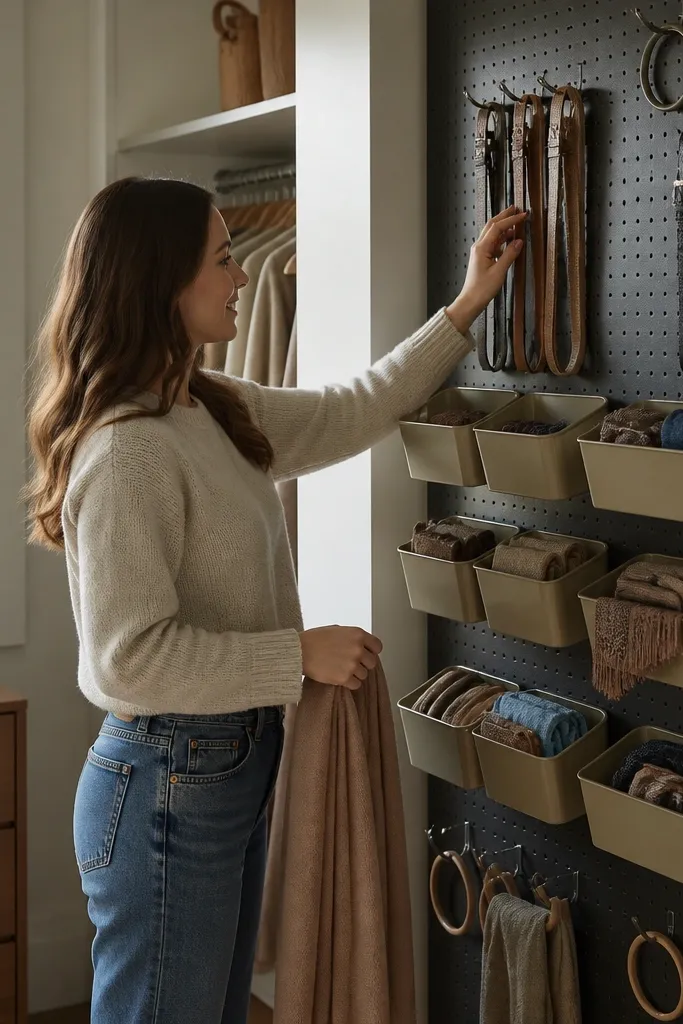
Start by choosing pegboard thickness (3/16-inch is common) and a color that matches your closet — white or matte light wood looks best. Find studs and mark mounting points, then install the pegboard with a level and pilot holes. Add hooks for belts and scarves, then mount small basket brackets so baskets sit at eye level. Finish by filling baskets with folded accessories in uniform stacks so the wall reads structured.
Pegboard is one of the fastest ways to make a small walk-in closet look organized without building a whole wall system. The look is clean because everything has a home and the accessories sit in consistent zones. Matching baskets — same color, same shape — make the pegboard feel modern instead of “workshop.” This is best for belts, scarves, small bags, and jewelry pieces that usually end up in drawers and chaos. It’s also easy to adjust later, which matters when your wardrobe changes season to season.
Skip thisDon’t overload the pegboard with every accessory you own; leave some empty space so it stays visually calm.
Editor's noteKeep basket spacing consistent: one basket per “category,” not random sizes that break the grid.
4. Wire Shelf Upgrade to Board-Back Storage Panels
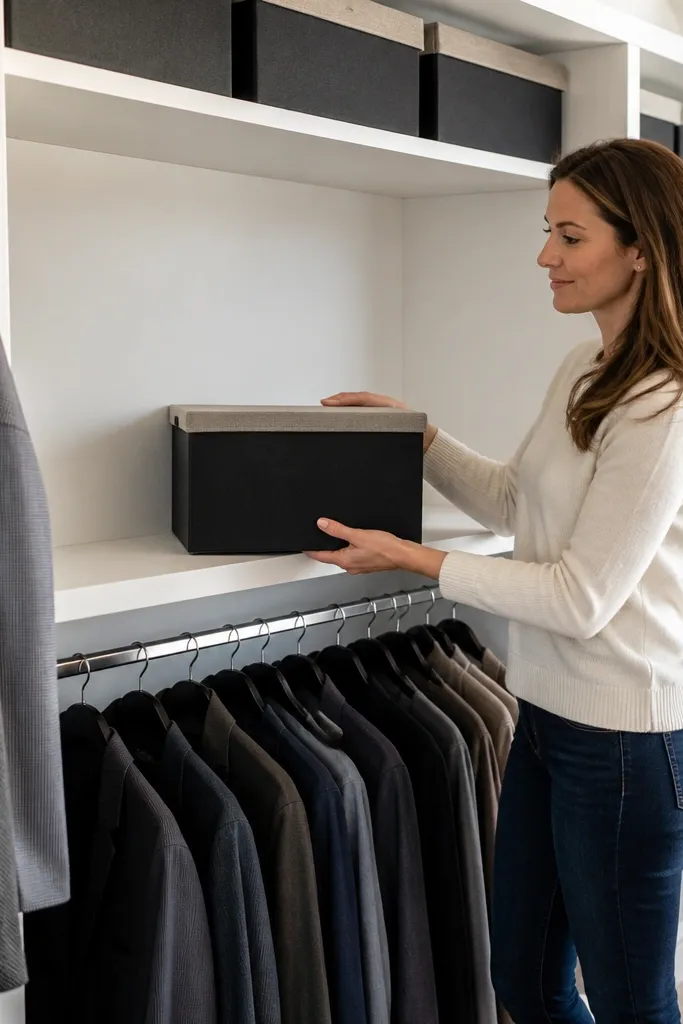
Wire shelves are functional, but they look messy because shadows and gaps make everything feel busy. Replacing them with solid board-back panels (or installing a flat shelf over wire) instantly makes Modern Closet Organization ideas look higher-end. The flat surface also lets you use decorative bins without the contents showing through. This is a smart choice if your closet came with builder-grade shelving and you want a quick aesthetic upgrade. It’s DIY-friendly and takes less time than building a full closet system.
Measure your existing wire shelf footprint and buy shelf panels or cut plywood to match (use 1/2-inch thick boards for a sturdy look). Paint or stain the panels in a finish that matches your closet trim, then attach them using shelf brackets or screws into the wire frame supports. Add a back stop strip so bins don’t slide. Finally, replace loose items with uniform fabric bins or stackable boxes so the flat look stays clean.
Use a semi-matte paint on panels; high gloss shows every smudge and fingerprint.
Don’t keep open wire shelves for small items; they create visual noise even when you’re organized.
5. Shoe Wall with Tilt-Out Trays and Label Slots
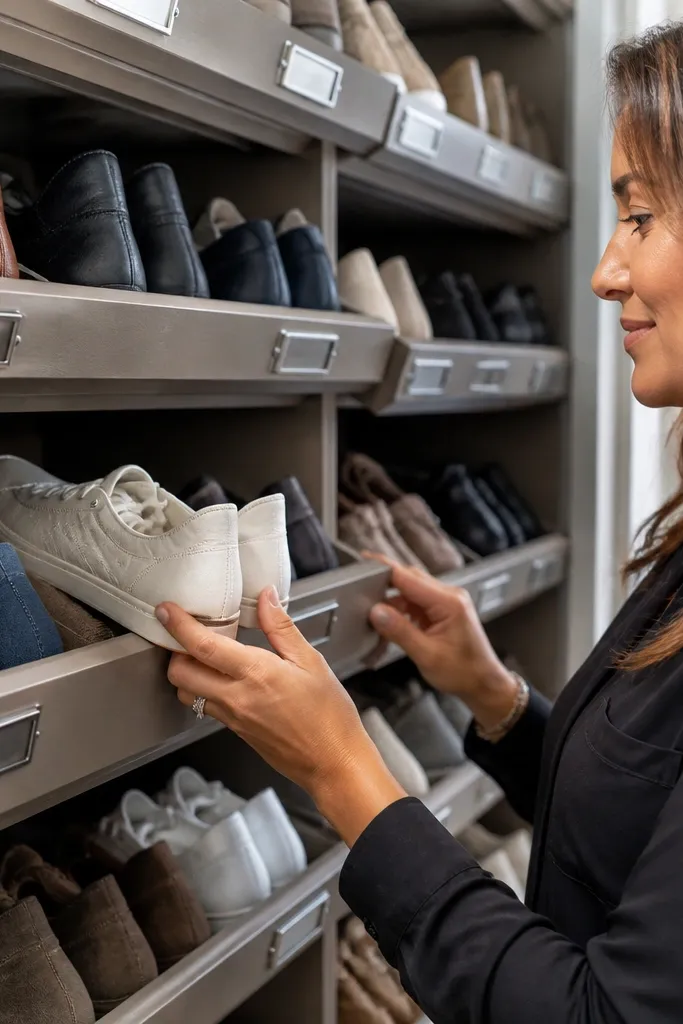
Measure the shoe wall area and decide the tray height so boots don’t fight for space. Install a sturdy base frame or ledger board, then mount the tray rails according to the manufacturer’s bracket spacing. Add a label slot strip on the tray front so you can identify pairs quickly. Load shoes upright and use thin shoe trees or stuffing to keep toe shapes consistent for a cleaner look.
Shoes are the biggest reason small closets look cluttered because they’re bulky and visually uneven. Tilt-out trays hide the mess while still letting you see what you’re grabbing. Label slots keep you from opening everything, which keeps the closet looking tidy between uses. For an aesthetic look, choose trays in a matte finish and keep the label style minimal (small, black text on white). This works great in a narrow walk-in closet because it turns one wall into a clean “shoe zone.”
Skip thisDon’t stack shoes on top of trays; it ruins the clean line and turns the wall back into clutter.
Editor's noteKeep tray compartments uniform — one tray size per shoe type looks better than mixing boots and sneakers in random sections.
6. Folded-Denim Ladder Shelf with Color-Blocked Stacks
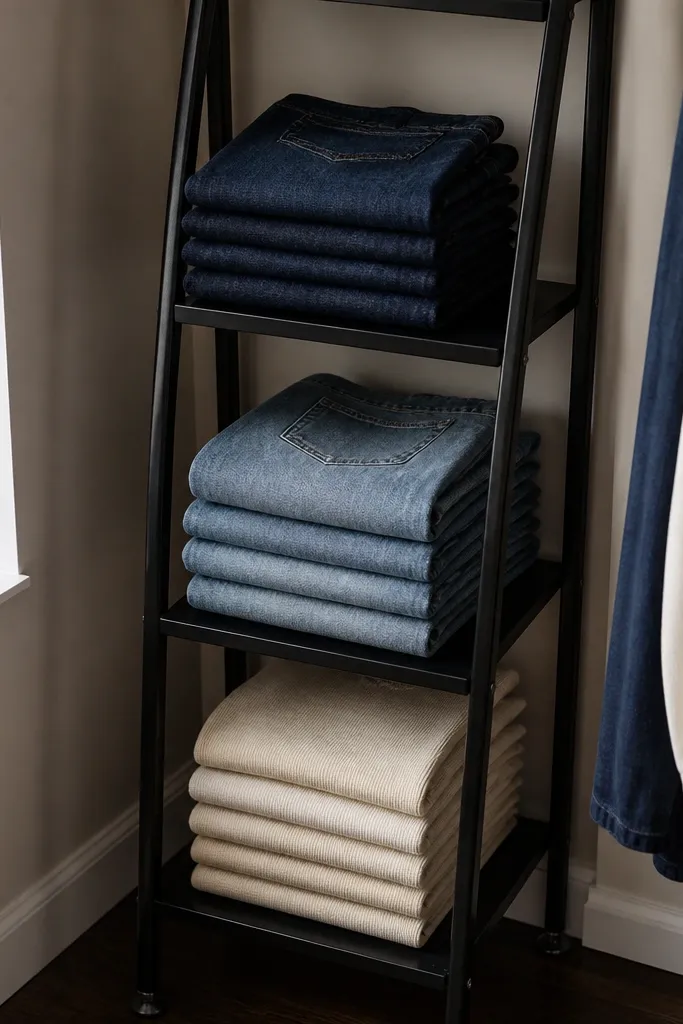
Pick a ladder shelf width that fits your wall run with at least 2-3 inches of clearance from doors or handles. Anchor the top and bottom legs to studs if possible, then mount at a height where you can reach the middle rungs without a step stool. Fold items into uniform rectangles (use a folding board if you struggle with consistency) and stack by color. Add a thin fabric liner on the shelf if you want a softer look under lighter fabrics.
This is a Modern Closet Organization idea that looks styled, not just stored. A narrow ladder shelf gives you vertical display space without eating floor area, and color-blocking folded items turns the shelf into a visual feature. Denim, knits, and neutral tees look best when folded into similar thickness bundles and stacked consistently. It’s perfect for small walk-ins where you want one “show” area — the place you’ll notice when you step in. Skill level is low, and the aesthetic payoff is high.
Skip thisDon’t display items you don’t wear often; the shelf should look intentional, not like an overflow bin.
Editor's noteUse the same fold method across the shelf; mixed fold styles look messy even if the colors match.
7. Ceiling-High Storage with Fabric Lidded Bins
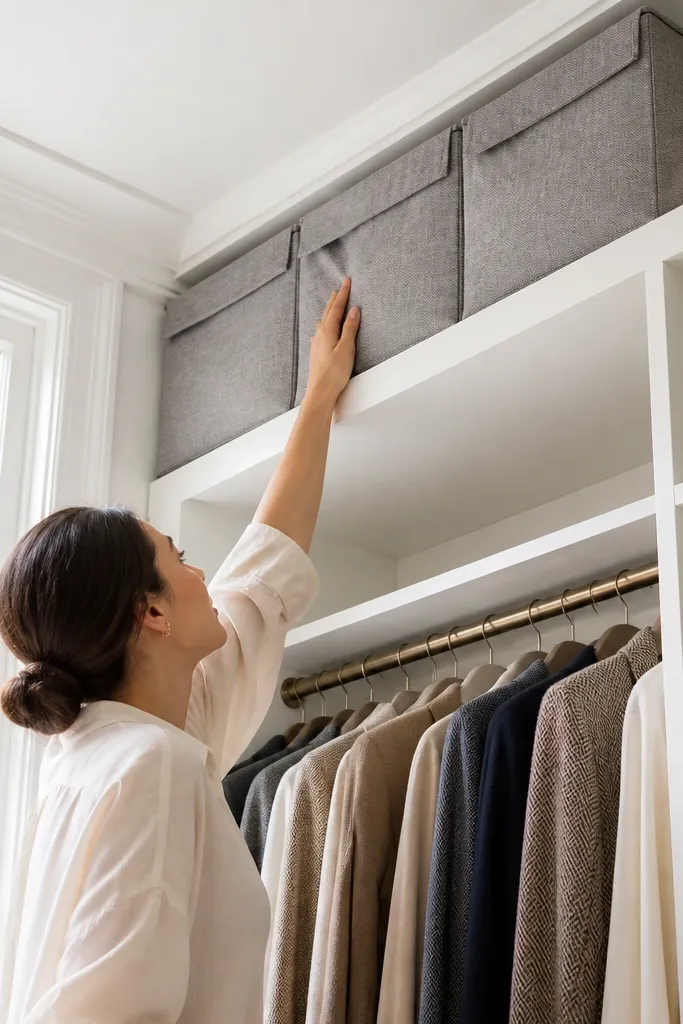
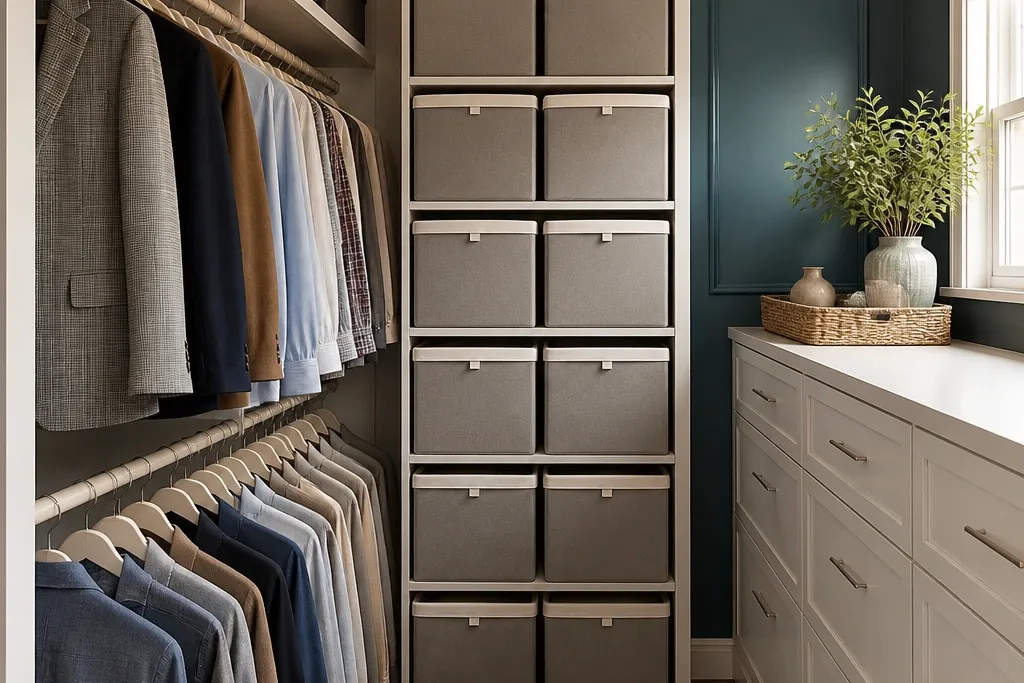
Measure the ceiling height and choose shelf spacing that fits bin height plus clearance for the lid. Install a top shelf with strong brackets into studs, leaving about 10-12 inches of vertical space between shelf lines for easy access. Add a dust barrier strip or a back panel if your closet gets drafts. Use the same bin color across the stack and keep each bin for one category so you can pull items without moving everything.
If your closet feels cramped, it’s usually because you’re using eye-level storage for everything. Ceiling-high bins solve that by moving seasonal items up and out of sight. Fabric-lidded bins look modern because the edges soften the look and hide labels and clutter. This is one of the best ways to make a small walk-in look bigger — not by adding furniture, but by removing visual weight from the middle. You’ll also protect things like winter accessories and extra linens from dust without building a complicated system.
Skip thisDon’t stack multiple lid styles; mismatched lids break the clean, uniform look.
Editor's noteUse a fabric bin color that matches your closet walls, not a bright contrast — it keeps the top storage visually quiet.
8. Backlit Vanity-Style Mirror on Closet Door
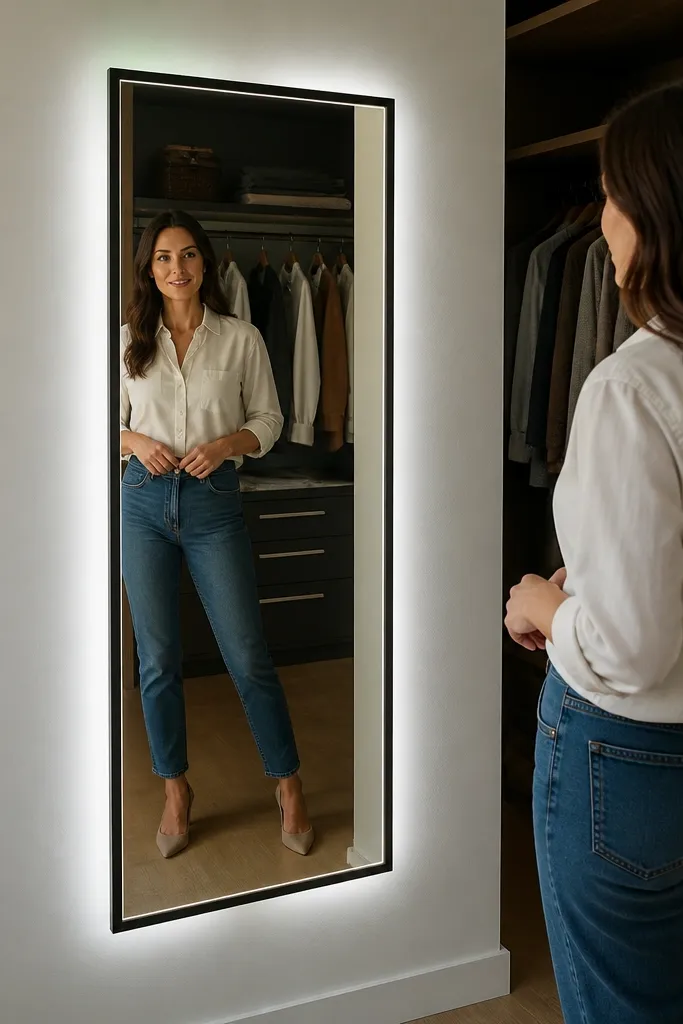
Measure the door or wall area and choose a mirror size that doesn’t block the door swing. Confirm you have electrical access if you’re installing a hardwired backlit model; otherwise, choose a plug-in unit. Mount at about eye level so the reflection is flattering and useful. After installation, adjust closet lighting color temperature if you can (cool-white can look harsh; warm-white feels calmer).
Lighting changes everything in a small closet. A backlit mirror on the door makes the space feel brighter and more intentional, and it also improves how clothes look under light. It’s especially helpful if your closet has harsh overhead lighting that makes colors look off. The mirror also gives you a styling moment — you can check outfit details without stepping into a bathroom. Choose a modern frame finish that matches your hardware so the mirror looks like it belongs.
Skip thisDon’t place the mirror opposite a cluttered shelf; the reflection multiplies mess fast.
Editor's noteKeep the mirror frame finish consistent with your drawer pulls and rod brackets for a cohesive look.
9. Hidden Pull-Out Ironing Board Side Cabinet
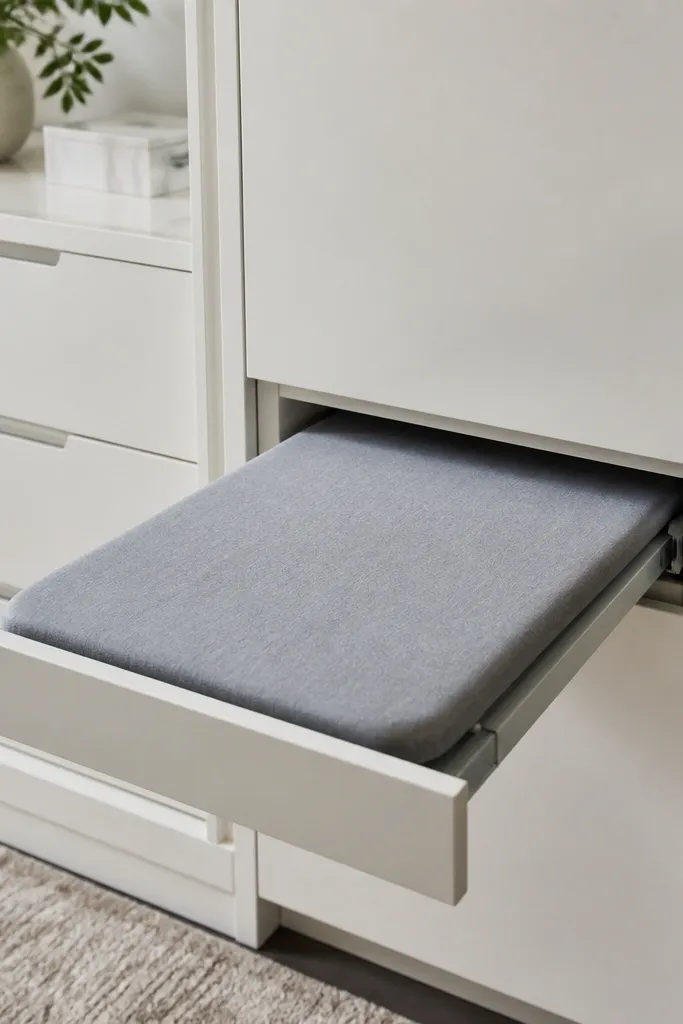
Pick a cabinet width that fits your side wall with clearance for opening; slim cabinets around 12-18 inches wide work well. Install a base frame and mount the pull-out ironing board hardware to the cabinet sides using the included brackets. Add a small top shelf for spray bottles and a hook strip for hangers. Finish by matching cabinet doors and pulls to the rest of the closet so the utility area disappears visually.
A small walk-in looks messy when you store “utility” items in the open. A hidden pull-out ironing board inside a slim side cabinet keeps your closet looking clean while still giving you function. The aesthetic win is that the cabinet face stays smooth and uniform with your other fronts. This is a smart Modern Closet Organization ideas pick if you iron regularly or need a place for garment steamer accessories. It also helps keep wrinkle-handling gear from living in drawers where it steals space.
Skip thisDon’t store wet steam items in the cabinet; let fabrics dry first so you don’t smell damp.
Editor's noteAdd a small felt pad where the board sits to reduce vibration and protect the cabinet face.
10. Matte-Finish Storage Cubes with Fabric Dust Covers
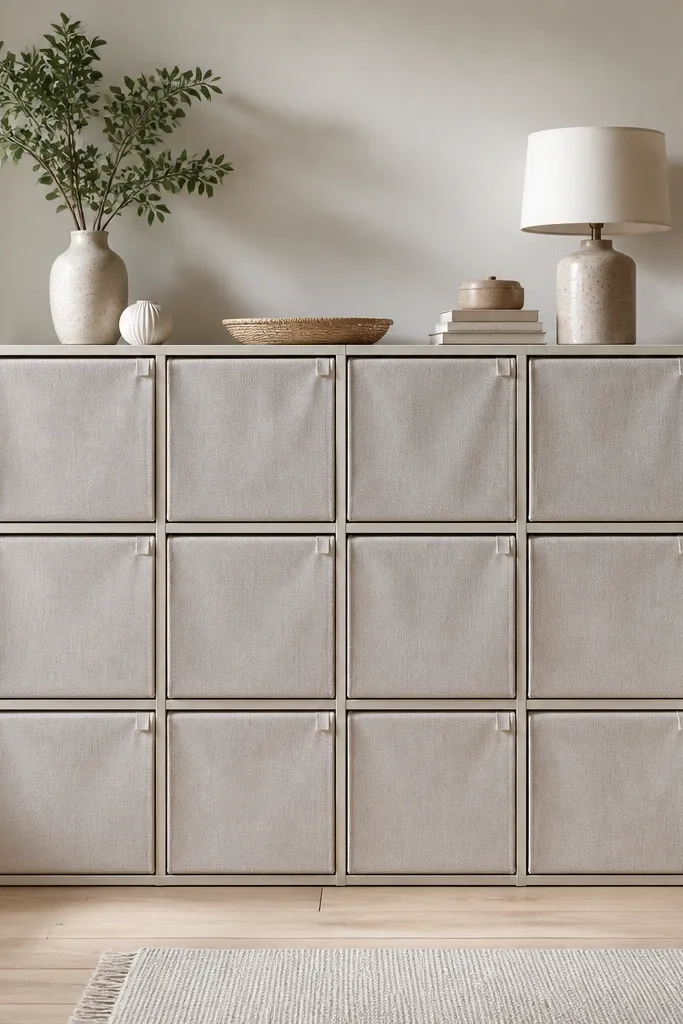
Measure your closet wall run and choose a cube grid that fits without awkward half-cubes. Assemble cubes on a level base and anchor them to studs if the height is above 4 feet. Add fabric dust covers that match the cube finish and keep the covers taut so they don’t sag. Fold items uniformly and leave a small gap at the top of each cube so covers close without forcing items into shape.
Storage cubes can look either cheap or custom. The difference is finish and coverage. Matte cubes with fabric dust covers make the closet feel softer and more modern, and they hide the visual mess that ruins small spaces. This works for folded tees, workout sets, scarves, and seasonal accessories that you want to grab quickly. Choose one cube size and repeat it so your eye reads a clean pattern. It’s an easy DIY upgrade that still looks intentional.
Skip thisDon’t mix cube sizes; uneven grids look messy even if everything is folded.
Editor's noteUse fabric covers with a simple edge trim; it looks cleaner than bulky elastic closures.
11. Bar for Pants with Clip Rails and Bottom Catch Tray
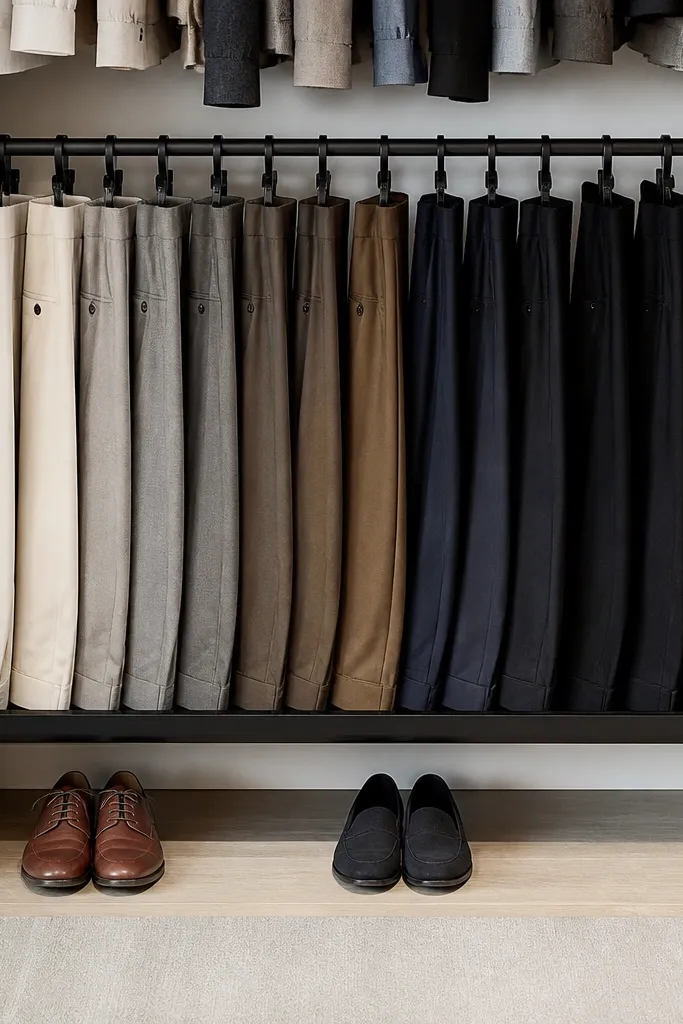
Measure your hanging section and install the clip rail at a height where pants don’t pool on the floor; aim for the bottom hem to land about 1-2 inches above the tray. Mount the rail brackets into studs and use a level to keep the rail straight. Add the bottom catch tray underneath the rail to collect drips and keep the area clean. Hang pants by category (work trousers vs denim) and keep clip spacing consistent so the row looks uniform.
Hanging pants with clips can look sharp — or messy — depending on the system. A clip rail plus a bottom catch tray keeps pant hems from dragging into the shoes zone and keeps everything aligned. For a modern look, choose a rail with matte clips and a tray in a matching finish. This is ideal for small walk-ins where you want your most-used trousers and jeans to be visible but organized. The result looks styled because you’re controlling silhouettes, not just storing clothes.
Skip thisDon’t let pant rows overlap different lengths; it breaks the clean line instantly.
Editor's noteUse a single clip color or finish across the rail; mixed hardware makes the look feel random.
12. Floating Shelf + Curtain-Front Wardrobe for Bulkier Items
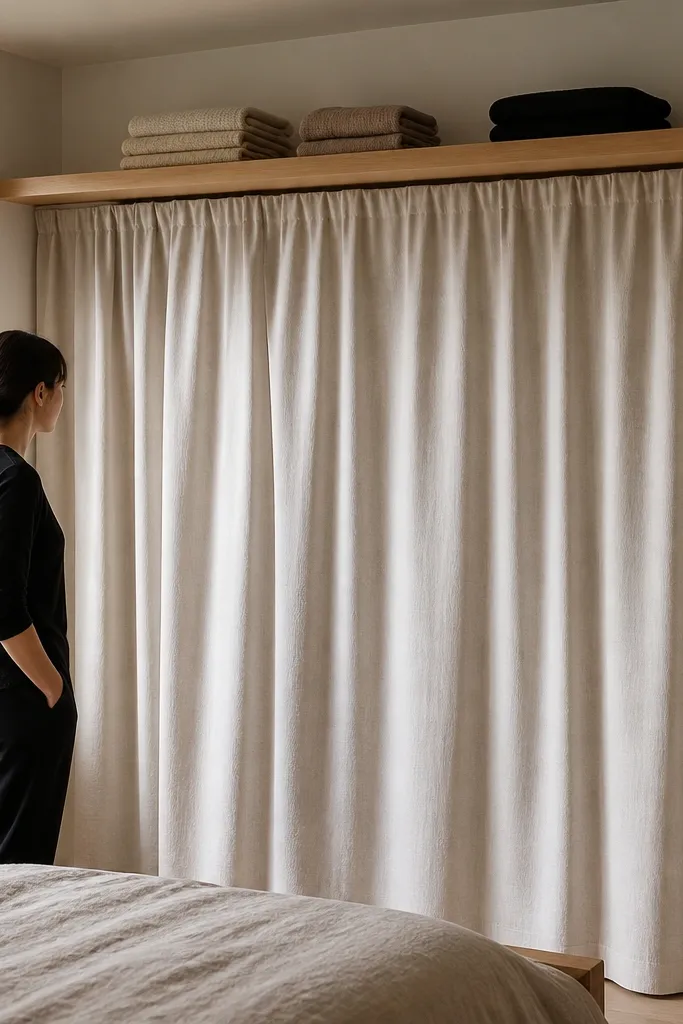
Install a floating shelf using heavy-duty shelf brackets anchored into studs, then leave enough clearance under the shelf for hanging or bins. Mount a ceiling or top-mount curtain rod inside the wardrobe opening so the curtain hangs straight and doesn’t drag. Choose a sturdy curtain fabric like cotton canvas or linen blend for structure. Inside, use labeled bins or folded stacks, then pull the curtain fully closed to keep the look clean.
Sometimes the best-looking storage is storage you can close. A floating shelf above and a curtain-front “wardrobe” below hides bulky items like sweaters, activewear, and extra bedding that look messy when open. The curtain gives you softness and a modern texture, and it also makes the closet feel less boxy in a small footprint. This is a great Modern Closet Organization idea for corners or awkward wall sections where rigid cabinets would look heavy. It’s also quick to refresh — swap curtain color when you want a different vibe.
Skip thisDon’t use thin, transparent fabric; it shows the mess and defeats the aesthetic.
Editor's noteIron or steam the curtain before installing so it falls in smooth vertical lines.
13. Slim Side Cabinet with Clear Door for Bags
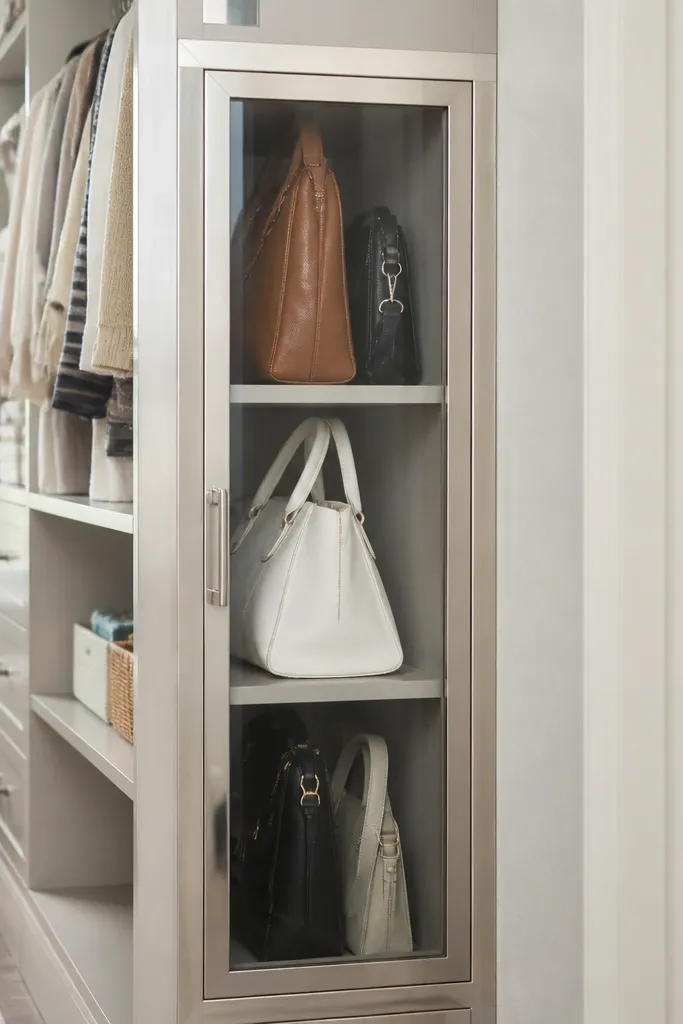
Measure the side wall and choose a slim cabinet width that fits without blocking access; aim for 18-24 inches wide for a strong visual column. Install the cabinet on a level base and anchor into studs. Use bag organizers inside the cabinet so each bag sits upright and doesn’t lean. Wipe cabinet glass and keep the interior free of loose accessories; put small items in matching pouches so the display stays tidy.
Clear-door storage for bags looks stylish when the contents are arranged with intention. It turns your bag collection into a visual column without making the rest of the closet feel crowded. The key is that bags need to be displayed upright and spaced evenly; otherwise, you’ll see every wrinkle and strap mess. This idea works best when your closet has a narrow side wall where you can dedicate a slim cabinet section. It’s a modern look because the cabinet face is clean and the display is controlled.
Skip thisDon’t cram bags; a tight display looks messier than a slightly spaced one.
Editor's noteGroup bags by size, not by color, for a more uniform silhouette from the doorway.
14. Color-Matched Hanging Rail Backing Panels
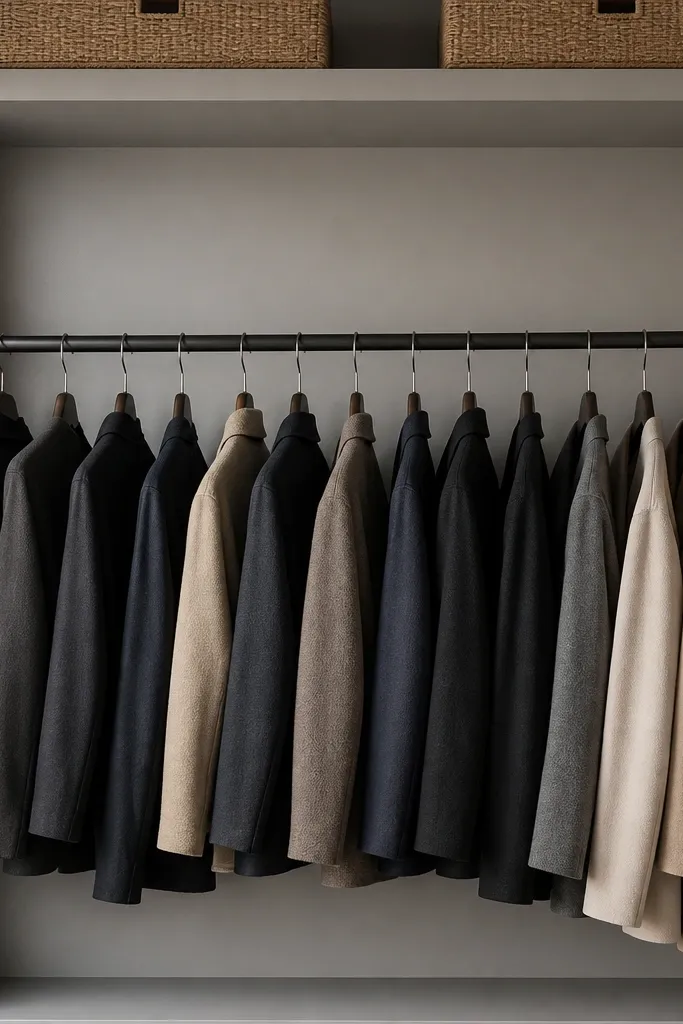
Clean and prep the wall first; wipe with degreaser and let it dry completely. Paint the area behind the rails with a durable interior enamel or install a peel-and-stick panel cut to the rail width. Mark rail bracket positions on the panel so you can mount cleanly into studs. After panels are secure, install rails and test hanger alignment so the bars sit centered in the backing area.
A lot of closets look unfinished because the back wall behind hangers is bare, scuffed, or mismatched. Adding a color-matched backing panel behind the rails makes the hanging area look designed and hides wall imperfections. For Modern Closet Organization ideas, this is a low-effort upgrade with a high payoff because your eye focuses on the structured grid of hangers and the clean backdrop. Choose matte paint or a peel-and-stick panel in a soft neutral to keep the closet calm. This also helps accessories look more cohesive because the background doesn’t clash.
Skip thisDon’t paint over dust or loose drywall compound; peeling behind hangers is a pain to fix.
Editor's noteUse a matte finish for the backing; it hides smudges better than semi-gloss in close quarters.
15. Drawer-Top Tray System for Jewelry and Small Accessories
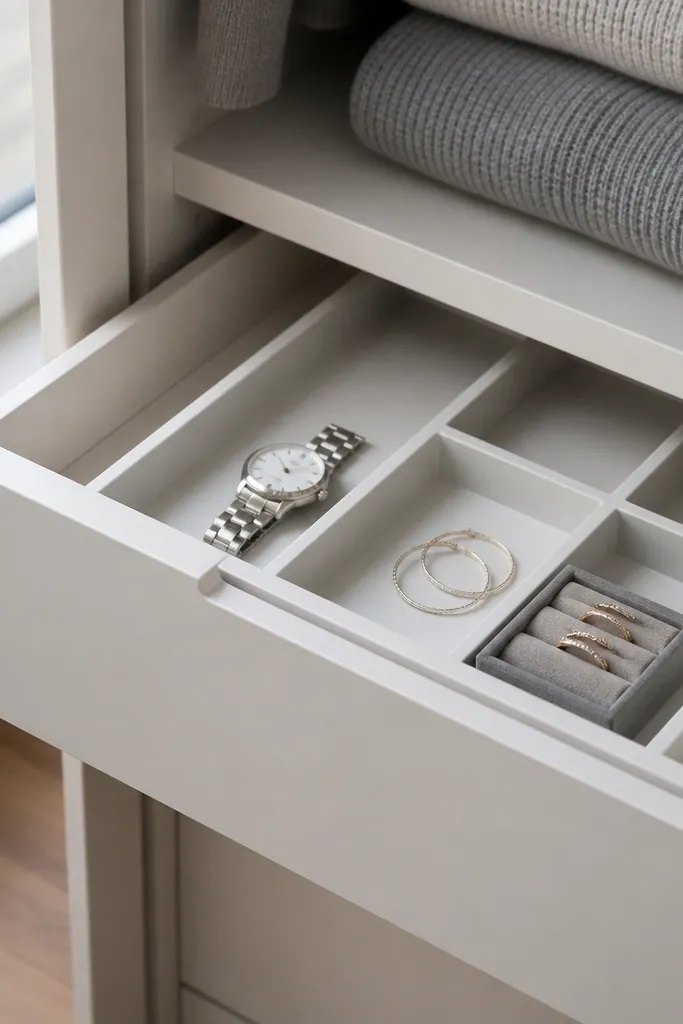
Measure your drawer interior width and choose tray sizes that fit without gaps bigger than 1 inch. Install a drawer liner in a neutral color, then place trays and mark their positions. Use adhesive or removable tray anchors depending on your drawer type. Add one long compartment for watches or bracelets, and smaller compartments for rings and earrings. Keep one tray for daily items and reserve the rest for seasonal pieces.
Small closets usually have small accessory mess. A drawer-top tray system makes that mess look intentional by giving every item a defined spot and keeping surfaces uniform. The look is modern because you’re not stacking jewelry in random piles; you’re arranging it in flat trays and slim compartments. This works especially well when you have a drawer near the hanging area so you can do outfit finishing quickly. It’s also one of the easiest projects to keep up with because trays make it hard to “dump” items back in the drawer.
Skip thisDon’t mix tray heights randomly; uneven levels create a cluttered look.
Editor's noteUse a black or charcoal tray base; it hides tiny scratches and keeps metal jewelry from looking too cluttered.
16. Linen Closet-Style Shelf with Front Lip and Matching Baskets
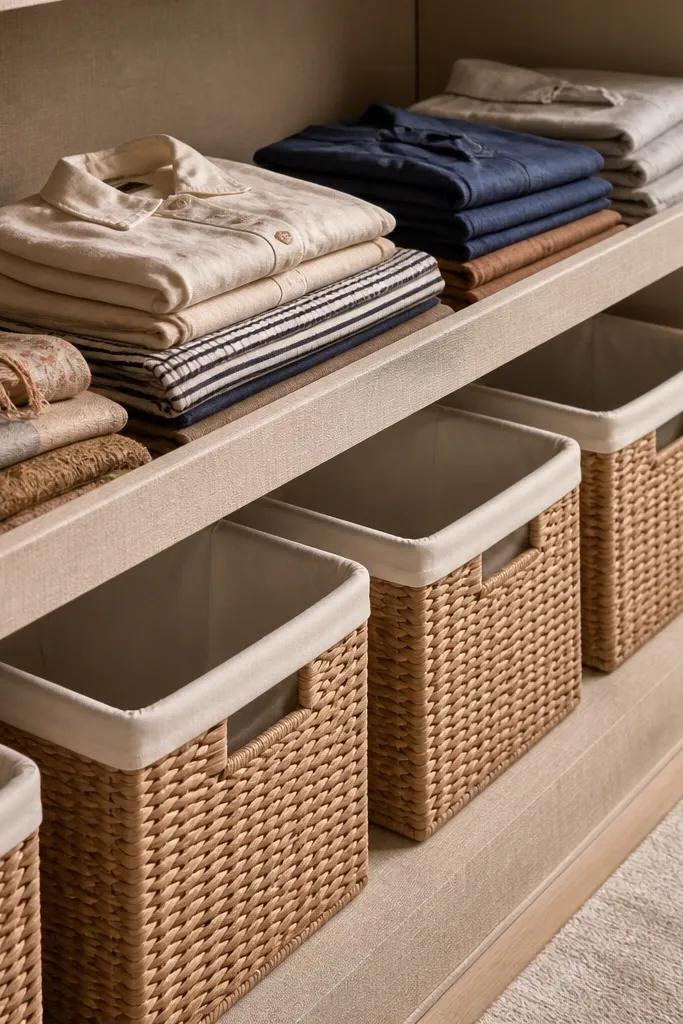
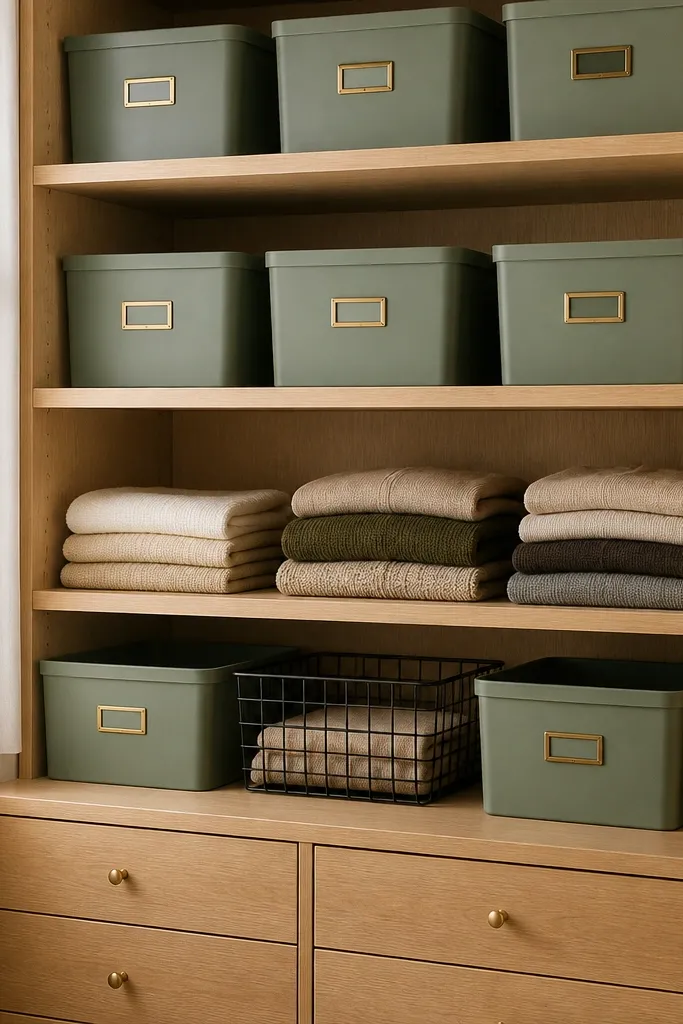
Measure shelf depth so you can fit baskets with at least 1 inch clearance behind them. Install a front lip strip (wood or metal) along the front edge of each shelf to prevent sliding. Add matching baskets that fit the shelf footprint and keep basket height consistent across rows. Fold items into rectangles and place them so basket contents sit just below the top edge for a neat line.
This is the shelf style that makes folded clothes look like a store display. A front lip keeps bins from sliding forward, which means your stacks stay aligned and level. Pair that with matching baskets (same color, same weave) and you get a Modern Closet Organization look that reads clean even when you’re moving quickly. It’s ideal for small walk-in closets where you want folded sweaters, tees, and linens stored in a visible, aesthetic way. The front lip also makes the shelf feel more built-in.
Skip thisDon’t use open baskets with irregular contents; the shelf will look like a jumble.
Editor's noteChoose baskets with stiff sides; soft baskets collapse and make stacks look messy.
17. Mirrored Accent Panel on the Shelf Side
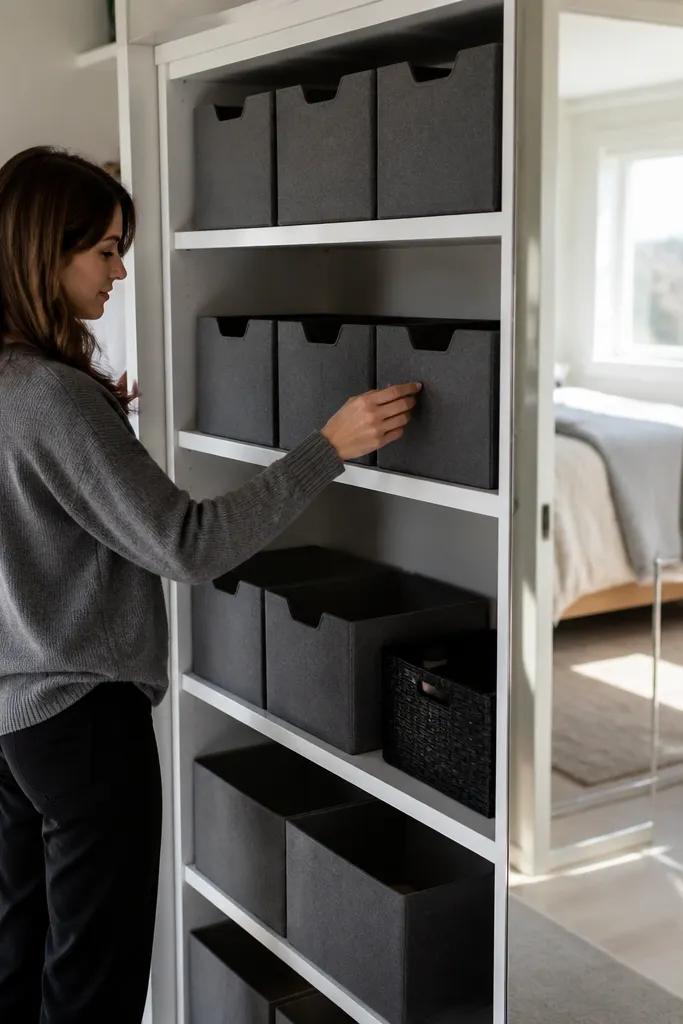
Mirrors aren’t just for checking your outfit. A mirrored accent panel on the side of shelves makes a small closet feel deeper because it reflects the organized rows. This idea works best with a controlled display: uniform bins, consistent shelf spacing, and minimal loose items. The look is modern because the mirror is a clean surface, not a crowded wall of decor. If your closet feels narrow, this is one of the simplest ways to fake extra width without changing your layout.
Pick a mirror panel size that fits the side area without hitting shelves or doors; keep it vertical for a clean look. Use a lightweight backing mirror or acrylic mirror for easier mounting and safer handling. Prep the surface, then mount with mirror-safe adhesive or mechanical standoffs. After installing, arrange shelves so the reflection shows your best zone — usually the hanging rail or neatly stacked bins.
Angle the mirror slightly toward the center so it reflects multiple shelves, not just one corner.
Don’t place the mirror where it reflects a messy floor area or scattered hangers.
18. Slim Pull-Out Trash + Lint Bin Inside a Drawer
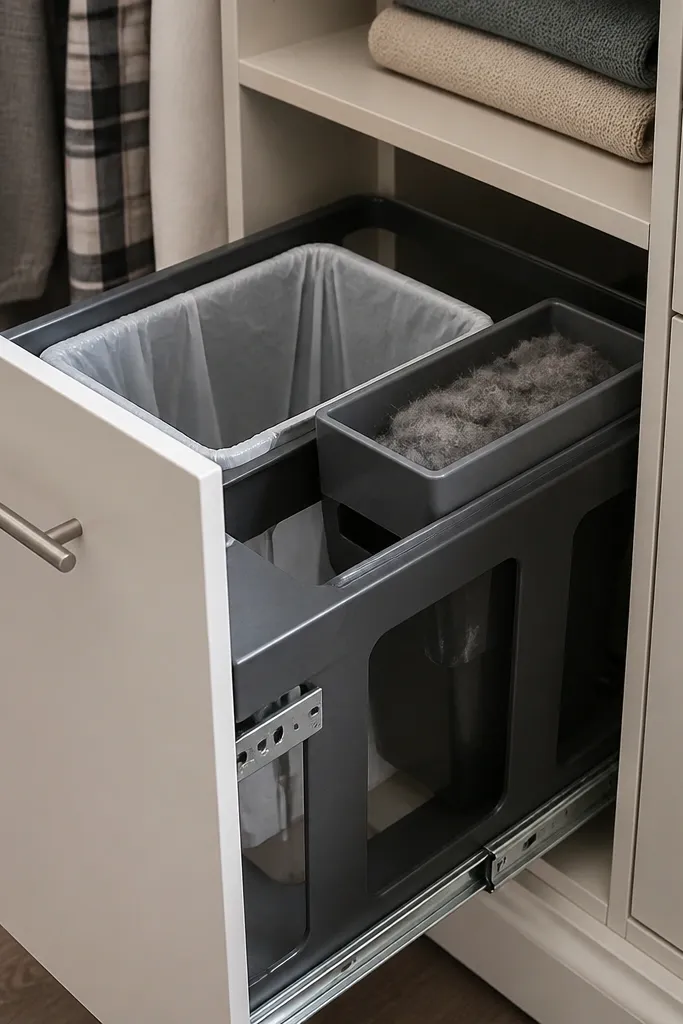
This one is about keeping the closet looking good between cleanups. A pull-out trash and lint bin in a drawer stops the usual mess: receipts, tags, lint balls, and random packaging that ends up on shelves. It’s not glamorous, but it changes how your closet stays styled because you remove clutter instantly. Choose a slim insert that slides cleanly and sits under folded storage or beside accessory drawers. The modern look comes from the fact that the drawer face stays clean and the mess stays contained.
Measure the drawer interior and choose an insert that fits with at least 1/4-inch clearance on each side. Install drawer slides if needed, then mount the bin insert to the slide platform. Add a small hook or tray for lint rollers so it doesn’t roll around. Test pull-out clearance with the drawer fully open and close, then load the bin with a small trash bag and a lint container.
Use a rigid container for lint so it doesn’t collapse and spill.
Don’t put a loose bag inside without a rim; it shifts and looks messy through the drawer opening.
19. Garment Bag Zone with Clear-Window Dust Covers
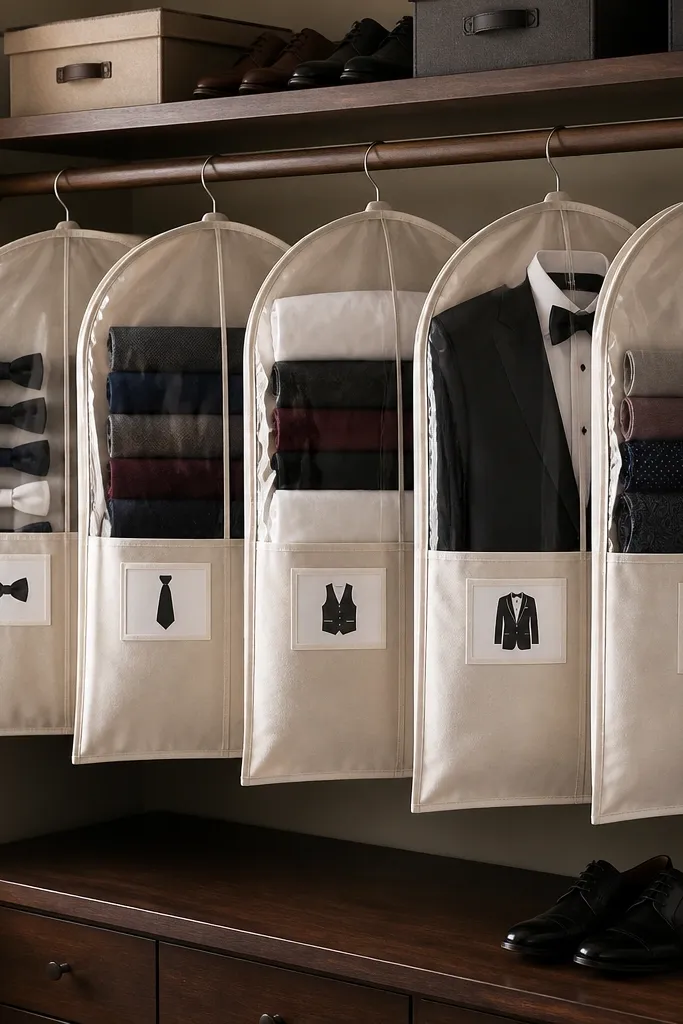
Choose garment bags with clear windows and matching hangers, then decide how many you can fit on one rail without crowding. Install the rail at a height where bags won’t bump adjacent shelves. Hang bags in a single row with labels facing outward, and keep the same bag size for a clean visual line. Add a small shelf or basket under the rail for garment accessories like hang tags and garment steamers.
Garment bags are underrated for small walk-in closets because they protect items and keep the closet looking intentional. Clear-window dust covers let you identify what’s inside without opening everything, and labeled fronts keep the zone organized. This is the Modern Closet Organization ideas pick for formalwear, coats you don’t wear often, and special dresses that you want to store without wrinkles. The aesthetic works when the bags are uniform and hung on the same rail line. It also makes the closet feel “curated” because you’re displaying storage, not random plastic.
Skip thisDon’t mix garment bag sizes; uneven shapes make the whole hanging row look cluttered.
Editor's noteUse labels on the window area with a simple font and consistent wording — it keeps the zone neat even from across the room.
20. Corner Wraparound Shelves with Rounded Bins
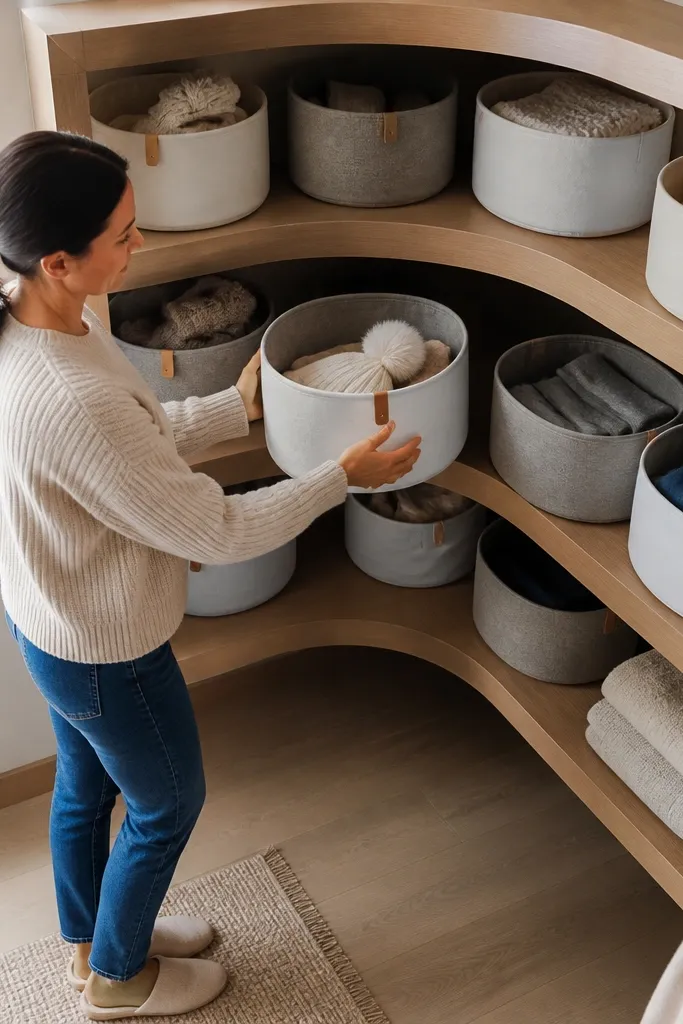
Measure the corner opening and choose corner shelf depth so bins sit without sticking into walk paths. Build or buy corner shelf brackets and anchor them into studs. Install shelves with a consistent height line so bins stack evenly. Place rounded bins that match your closet style, then fold items into uniform rectangles so they fit without gaps. Keep the corner for items you grab less frequently to reduce daily rummaging.
Corners are dead space in small walk-ins, and ignoring them makes the rest look more cramped. Wraparound corner shelves use the geometry of the room and give you a dedicated place for folded accessories and small seasonal items. Rounded bins look softer in corners than square boxes, and they prevent the “hard edges” feeling that makes tight closets feel harsher. This idea is visually attractive because the corner becomes a designed nook instead of an awkward gap. It also helps you keep overflow from migrating onto your main shelves.
Skip thisDon’t put bulky shoes in corner bins; irregular shapes make the bins look messy fast.
Editor's noteUse bins in one color family so the corner doesn’t look like a separate storage junk area.



