
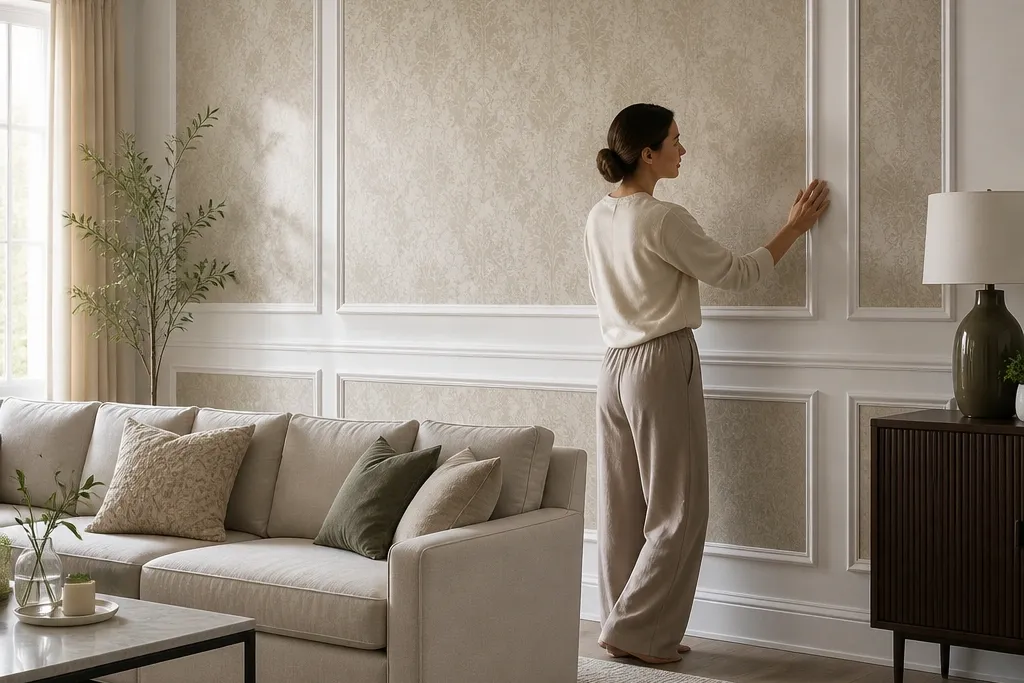
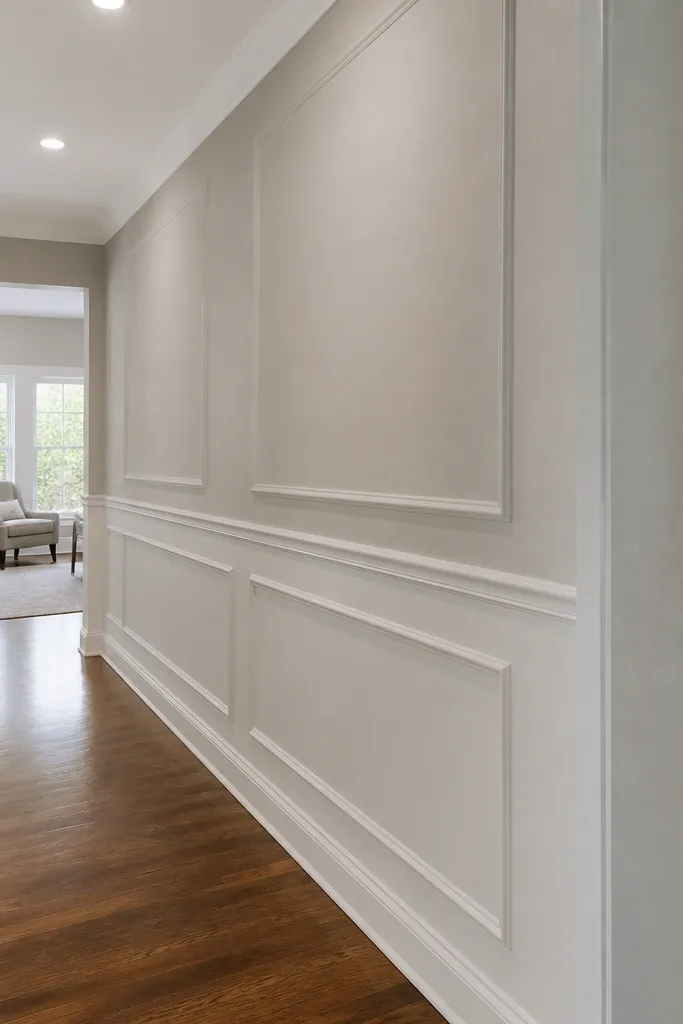
1. Picture Frame Border Around a Wallpaper Feature
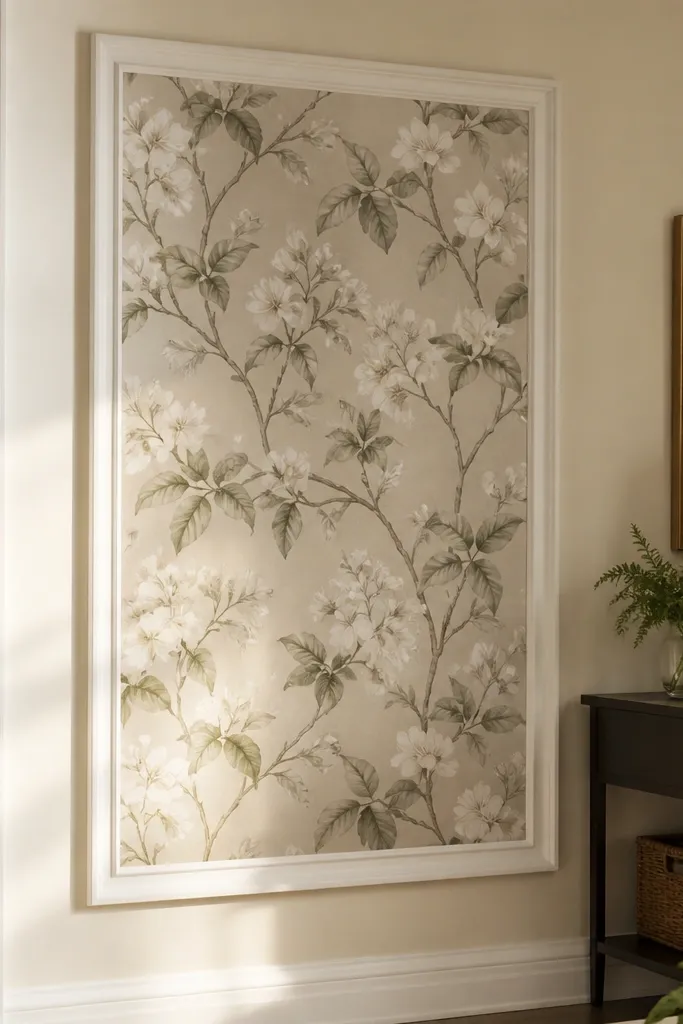
This is the easiest way to make wallpaper look “finished” without turning the whole room into a craft project. A simple rectangular border gives you a clear focal area, and the moulding hides the messy wallpaper edges where you cut around seams. Use a medium profile trim so it reads as intentional in daylight and doesn’t look like tape. Paint the moulding white or warm cream and keep the wallpaper as the color anchor. It works in hallways, dining rooms, and bedrooms because it frames the wall without shrinking the space.
Measure the wallpaper feature area and decide the border thickness, then mark a level line with a laser or long straightedge. Cut four trim pieces for the rectangle, miter corners at 45 degrees, and dry-fit them to confirm the pattern lines up. Apply construction adhesive to the back of the trim (avoid the very edge), press into place, and run a thin bead of paintable caulk at the seam. Prime and paint the moulding after it’s fully set, then wipe any caulk haze while it’s still soft.
Use painter’s tape as a spacer guide for the border width while the adhesive grabs.
Don’t glue over high-texture wallpaper ridges — the trim will wobble and you’ll see gaps.
2. Chair Rail Line With a Wallpaper Panel Below
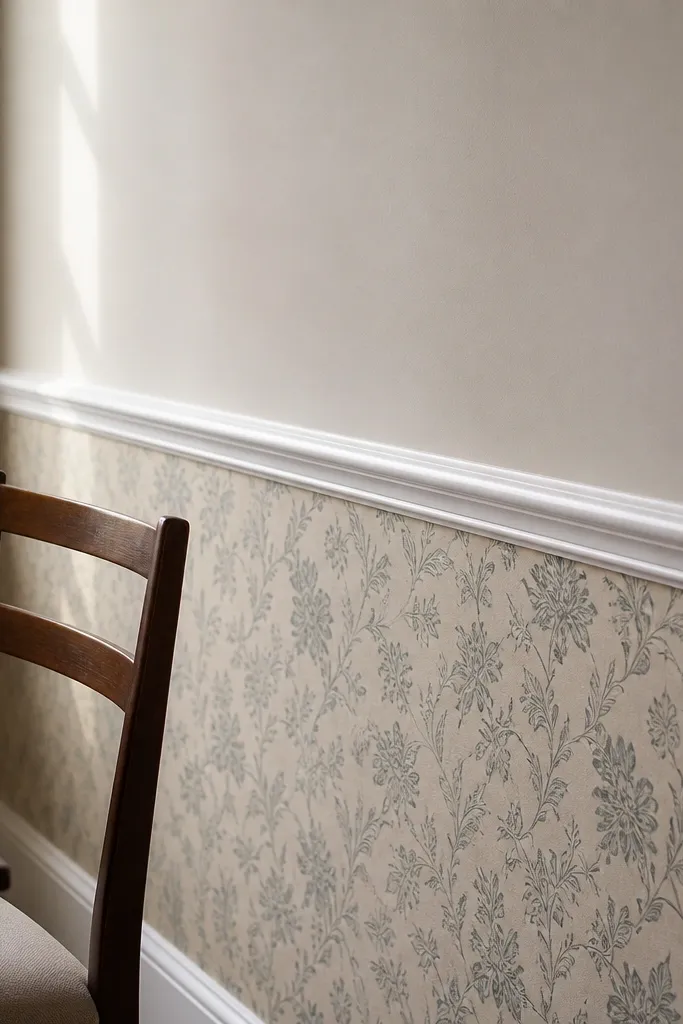
Pick your chair rail height — a common starting point is about 36 inches from the floor, then adjust to your window and artwork placement. Apply wallpaper only for the lower band, then install the chair rail on top of the wallpaper edge line so it covers the cut. Cut the rail ends with 45-degree miters and use caulk at every joint. Paint the chair rail after installation so it looks continuous and the caulk blends in.
A chair rail setup gives you the “classic built-in” look while keeping maintenance simple. The chair rail acts like a visual stop line, so the wallpaper only has to be perfect within a defined band. You get a clean break between painted upper wall and patterned lower section, which also helps hide minor scuffs near chair height. For low maintenance, keep the upper wall washable paint and treat the moulding like trim: wipeable and paintable. This layout looks crisp in living rooms and entryways where people bump the lower half of walls.
Skip thisDon’t place the rail too high; it visually compresses the room and makes the wallpaper band feel cramped.
Editor's noteBefore wallpapering, mark the top edge line with a pencil and a level — it prevents the whole band from drifting.
3. Wainscot Panels With Wallpaper in the Squares
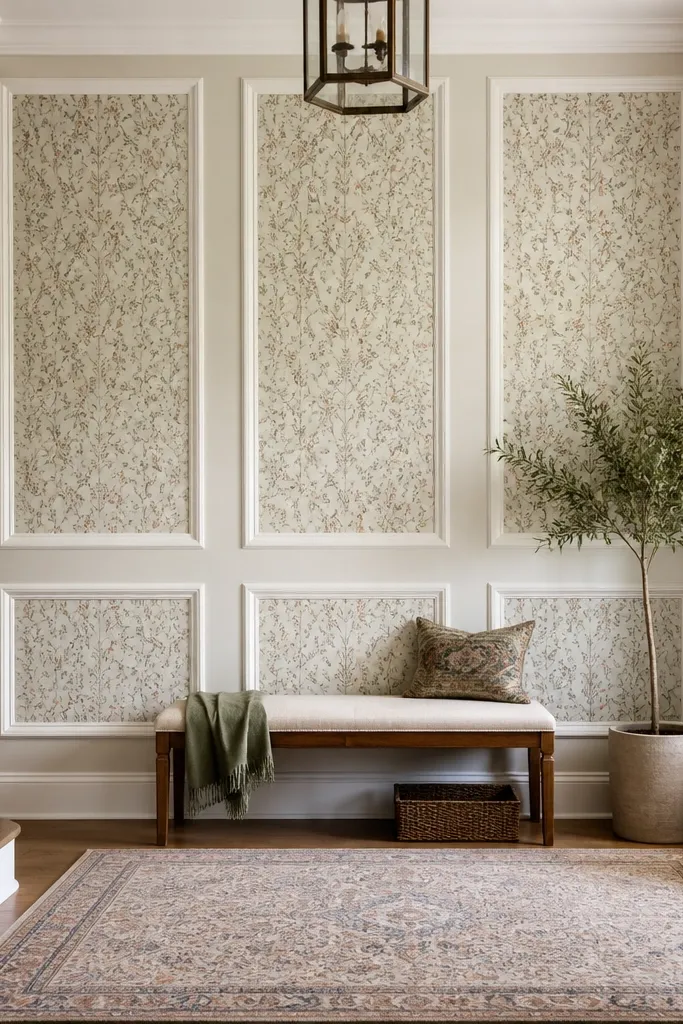
Decide on panel sizes first: a clean starting range is 12 to 18 inches per square depending on wall width. Mark a perimeter frame, then snap horizontal and vertical guide lines using a chalk line or laser. Cut rails and stiles from primed MDF or PVC, miter where needed, and dry-fit each square frame. Install outer frame, then glue the inner grid pieces, and finally caulk all edges so the moulding looks sealed and crisp.
This one reads like true wainscot, but the inside “panels” are wallpaper, which is where the look gets interesting. The moulding grid creates structure and hides wallpaper seams, so you’re not relying on perfect paper alignment across an entire wall. For low maintenance, you can repaint the moulding and touch up caulk lines without disturbing the paper pattern. Choose a wallpaper with a repeat that looks good when framed, like stripes angled slightly or a soft botanical. This suits stair landings, dining rooms, and bedrooms where you want texture and depth.
Skip thisSkip skipping the caulk — dry gaps around wallpaper edges make the whole grid look DIY.
Editor's noteUse a spacer block the same thickness as your moulding so every panel width stays consistent.
4. Vertical Strip Moulding With Patterned Wallpaper Columns
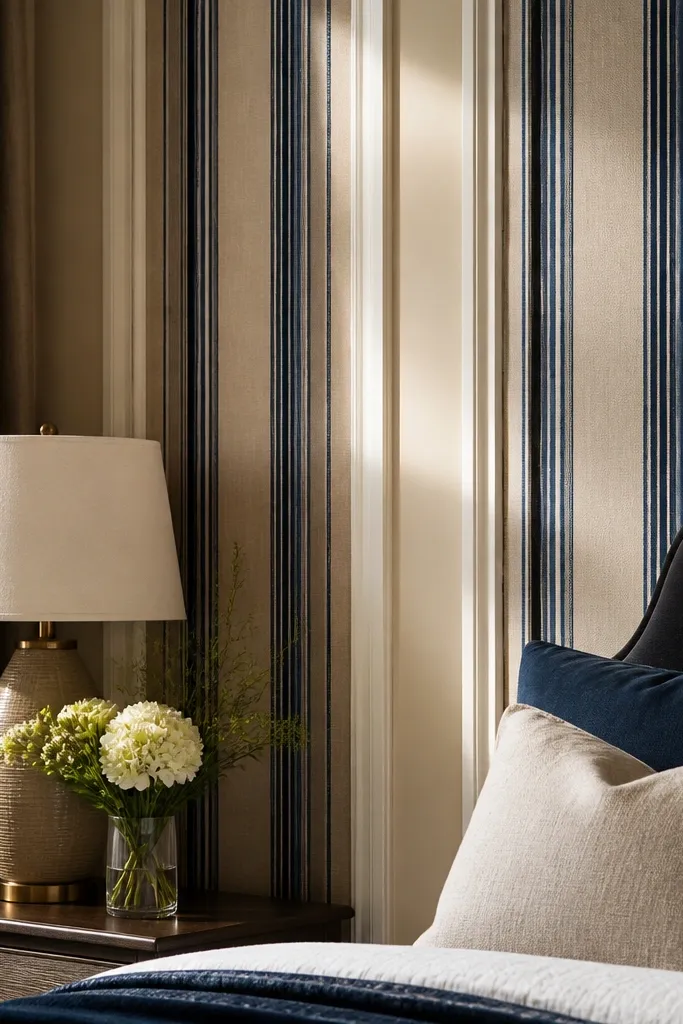
Vertical strips make walls feel taller, and the wallpaper columns give you the color without covering everything with heavy trim. This layout looks clean in photos because each column has a defined edge, and shadows catch the moulding depth. Use a simple strip profile with a flat face so it doesn’t compete with the wallpaper. Keep the wallpaper repeat aligned so columns look like a designed system, not random patches. It works great in narrow rooms and hallways where you want more height.
Measure wall width and divide it into even column widths, leaving equal margins at both ends. Install vertical moulding strips over wallpaper or on bare wall before wallpaper, but for low maintenance choose top-mounted over wallpaper so you can swap paper later. Mark each strip centerline, cut pieces to height, and glue with construction adhesive at the back. Caulk around the edges, then paint moulding and any exposed wallpaper border line if needed.
Use a level app or laser to keep all strip lines straight — vertical drift shows up immediately.
Don’t use too many thin strips; it turns into a busy barcode effect with patterned wallpaper.
5. Horizontal Panel Bands Running Across the Wall
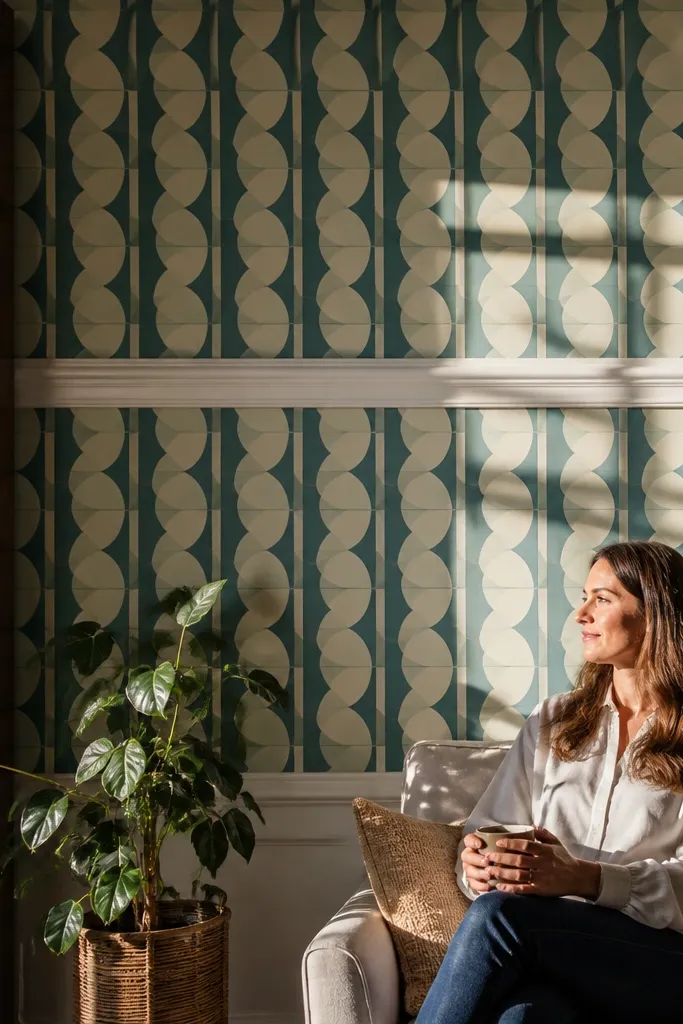
Choose band count based on wall height: 2 to 4 bands looks best. Mark the band lines using a laser, then install a perimeter strip for each band as a base. Cut additional horizontal pieces to form simple “panel” rectangles, or keep it as a single strip with a top and bottom line. Glue, caulk, and paint the moulding in one pass so the lines look sharp under raking light.
Horizontal bands are a smart way to add moulding drama without building a full grid. They also break up large wallpaper fields, so the wall looks styled even when the wallpaper pattern is large. The moulding shadow line makes the wallpaper edges look intentional, which is what keeps this from looking like “two materials stuck together.” Keep the bands consistent and slightly spaced so the wall feels designed rather than chopped. Best for living rooms and offices where you want structure but not heavy trim coverage.
Skip thisAvoid uneven spacing; measure from the same reference point every time.
Editor's noteIf your wallpaper has a directional motif, align the motif with the top band so the pattern feels anchored.
6. Layered Border Trim Over a Wallpaper Seam
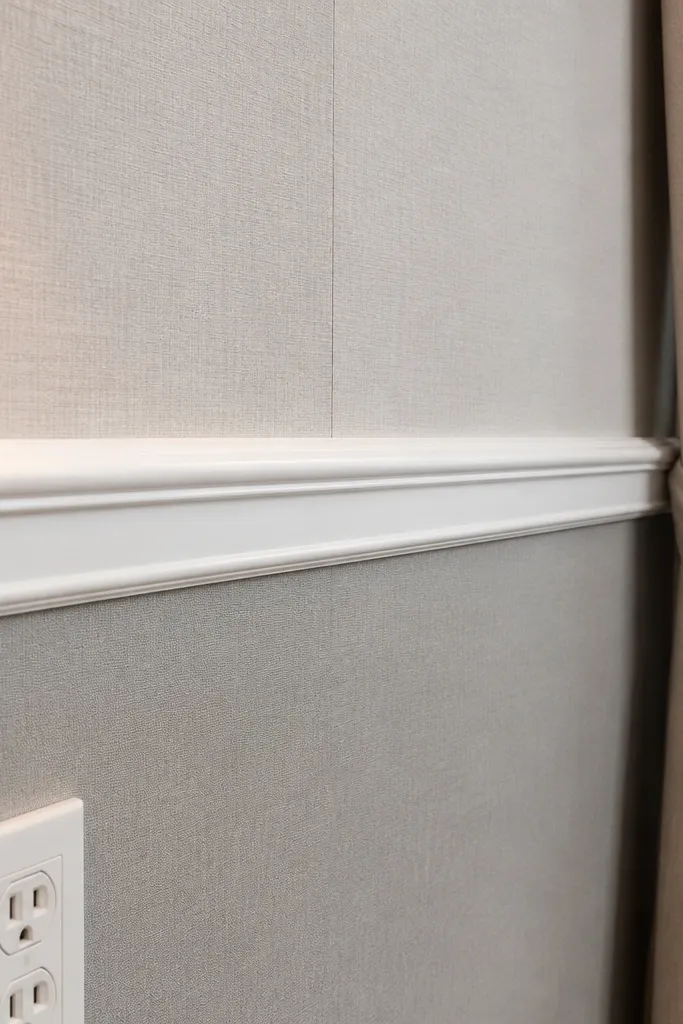
Find the seam line and dry-fit the layered trim so it covers the joint by at least 1/4 inch on each side. Cut border pieces to length and miter corners if you’re wrapping around an edge. Apply adhesive to the trim back, press onto the seam area, and use painter’s tape for alignment while it sets. Caulk the perimeter and paint after installation so the border edges look sealed and clean.
Wallpaper seams are where “low effort” projects usually show. Put a layered border trim over the seam and you get a built-in look that hides the joint and makes the wallpaper feel like part of the architecture. This works especially well with striped, damask, or large botanical prints where seams are visible in certain light. Keep the border profile medium and paint it the same color as your base trim for a unified room. It’s a great choice for renters too because the border can stay while you swap the paper later.
Skip thisDon’t rely on the wallpaper seam being perfectly straight; cover it generously so it disappears.
Editor's noteUse a fine-tooth saw blade or a miter saw with a clean fence to avoid jagged trim edges at corners.
7. Crossbuck Style Square Frames With Wallpaper Inside
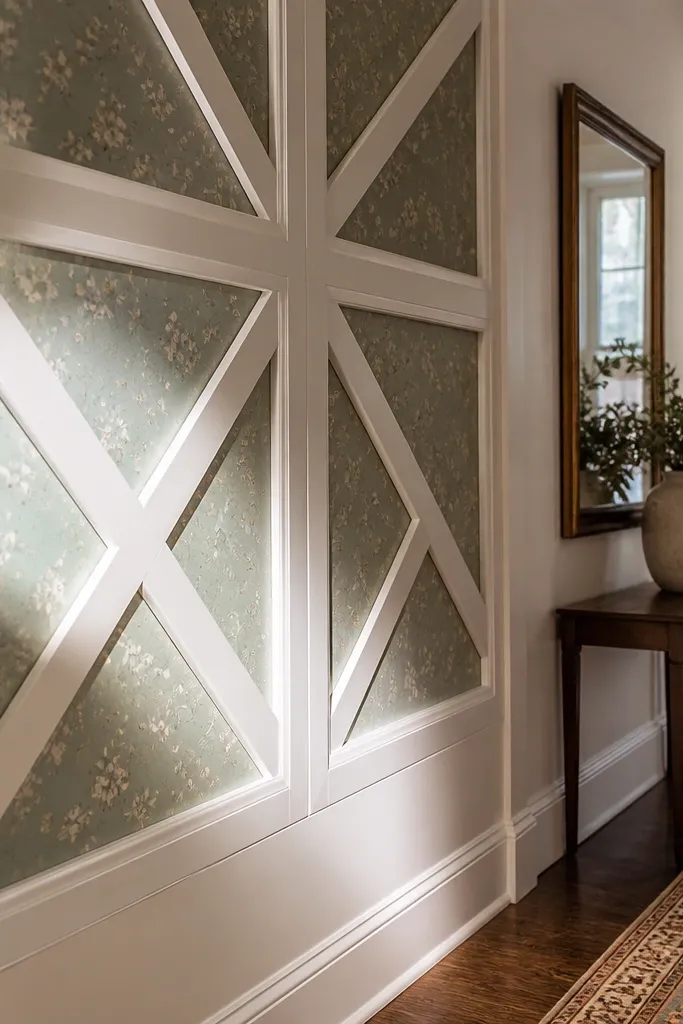
Start with one repeating square size, then mark a grid on the wall using a laser. Install the square perimeter pieces first, then add diagonal cross pieces cut to fit inside the square. Use MDF or PVC for clean edges, and glue each piece in place with construction adhesive. Caulk every frame edge, then paint the frames with a satin finish for easy cleaning.
Crossbuck-style frames give you that cottage-meets-modern look, and the wallpaper inside keeps it from feeling heavy. The diagonal cross detail creates strong shadows, so it photographs well even when the wall is lit from one side. For low maintenance, the frames are paintable and easy to wipe, while the wallpaper is the only part you’d ever replace. Pick wallpaper with a calm color story so the cross pattern doesn’t fight it. This is a strong option for entry nooks, breakfast rooms, and reading corners.
Skip thisSkip cheap foam trim — it warps and the diagonal lines won’t look crisp.
Editor's noteDry-fit diagonals without adhesive first; tiny length differences show up as wonky crosses.
8. Arched Panel Outline Moulding Over a Wallpaper Field

Choose your arch width and height based on wall size — a starting point is 18 to 24 inches wide with 10 to 14 inches from spring point to base. Create a cardboard template for the arch so every curve matches. Install the arch outlines on top of the wallpaper using adhesive on the back and light pressure until set. Caulk along the edges and paint with satin enamel so it wipes clean.
Arched outlines add a softer, more architectural feel than straight rectangles, and they look great on wallpaper because they give the eye a shape to follow. You’re basically drawing a set of arches that frame the print without covering the whole wall in dense trim. Use a flexible PVC strip for the arch curve or pre-made MDF arch templates for consistent radii. Keep arches spaced so the wall doesn’t feel crowded. This works well in powder rooms, bedrooms, and above consoles where you want a focal wall.
Skip thisDon’t eyeball the arch radius; one arch that’s off by even an inch looks wrong next to the others.
Editor's noteUse a flexible measuring tape to mark the arch curve accurately — straight measuring sticks lie on curves.
9. Modern Flat Slab Moulding With Wallpaper Backing
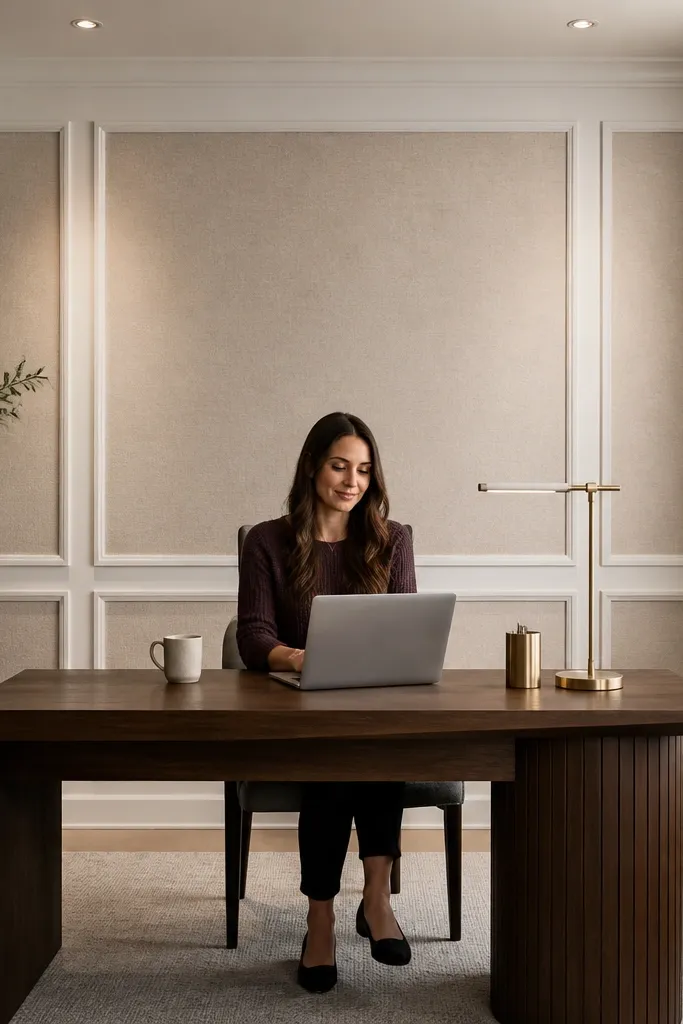
Use 1/2-inch MDF or PVC flat strip for a clean slab look. Mark a grid with a consistent panel size, then install outer rectangles and inner lines so the wallpaper is visible inside. Cut lengths with a fine blade for tight miters, glue with construction adhesive, and press in place. Caulk only at the trim-to-wall seams, then paint the moulding and let it cure fully before touching the wallpaper edge areas.
If you hate ornate moulding, flat slab panels look sharp and still feel “custom.” The wallpaper backing adds color and texture, while the flat trim reads modern because it has minimal grooves. This is a great low-maintenance choice because the surfaces are simple to wipe and the edges are easy to caulk without lots of corners. Pick a matte wallpaper so the moulding shadow line stays the star. Best for kitchens, home offices, and modern living rooms.
Skip thisDon’t choose a moulding with deep grooves — dust catches and makes “low-maintenance” a lie.
Editor's noteUse painters caulk with a smooth finish and tool it with a damp finger for a thin, even line.
10. Beaded Border Trim Framing a Wallpaper Corner
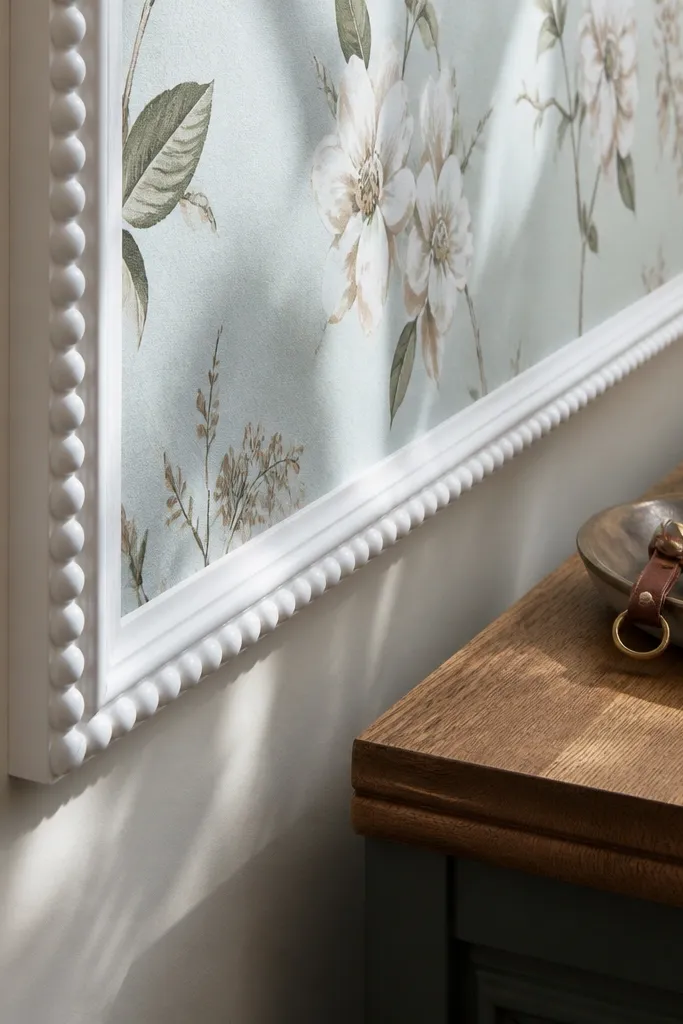
Pick a beaded trim profile that matches your baseboard thickness so the corner doesn’t look chunky. Install it on top of the wallpaper edge by gluing along the back and aligning the bead face to your reference line. Cut miters at inside corners or use a scarf joint depending on the trim profile — dry-fit first. Caulk the perimeter, then paint after installation so the bead highlights look clean.
Corners are where wallpaper projects usually look unfinished. A beaded border trim along the corner creates a crisp “jewel box” effect and makes the wallpaper edge look like it was designed into the space. Small bead profiles look sweet without overwhelming the room, especially with soft floral or subtle geometric wallpaper. Paint the trim the same color as your baseboards so the corner reads intentional. This is ideal for small spaces like entry foyers, reading nooks, and bathrooms where you want charm with minimal effort.
Skip thisDon’t paint before caulking — the caulk line will show as a different sheen.
Editor's noteUse a small foam roller to paint the bead face evenly so it doesn’t look streaky.
11. Double-Line Border Like a Gallery Frame
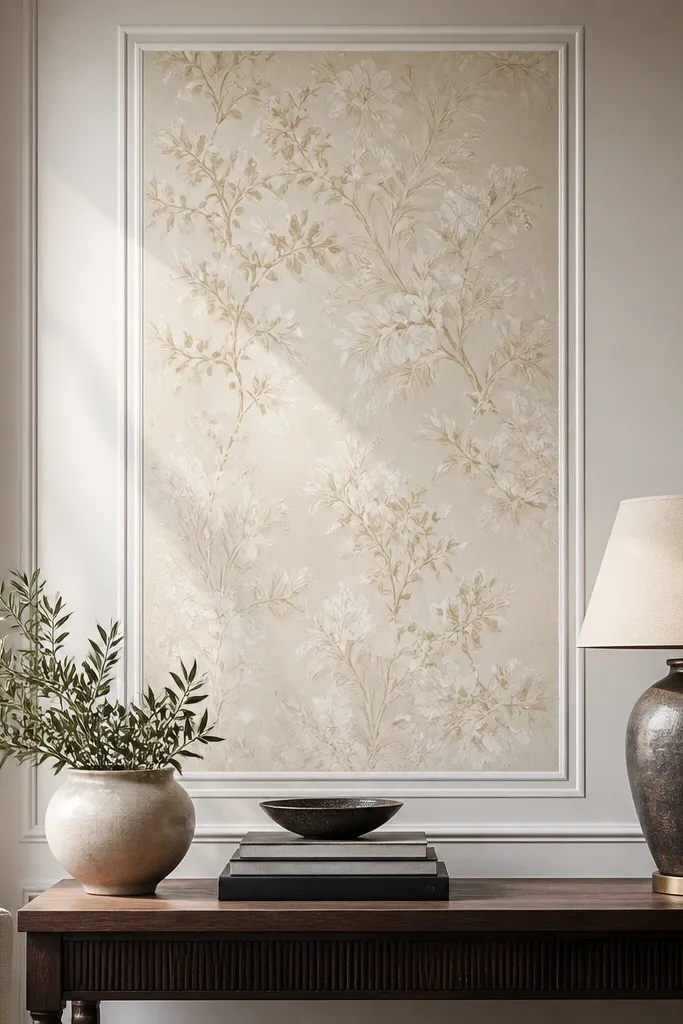
Choose two trim strips with slightly different widths, for example 1/4-inch and 1/2-inch, so the double line reads clearly. Mark a rectangle or wall band, then install the outer strip first using adhesive and brad nails if needed for alignment. Add the inner strip so it sits parallel with a consistent gap, then caulk between both strips and the wall. Paint the full border in one coat to keep the sheen consistent.
A double-line border gives you a gallery look with less trim bulk. It frames wallpaper like a print, so you get a polished effect without heavy 3D moulding. This works best with wallpaper that has a clear center motif or a strong repeat, because the border makes the pattern feel curated. The two lines also hide slight unevenness in wallpaper trimming — you get a buffer. Put this behind a console table, in a hallway, or on a feature wall where you want it to feel styled.
Skip thisSkip thick gaps — if the double lines don’t look tight, it reads sloppy instead of gallery.
Editor's noteUse a scrap spacer to keep the gap between the two lines uniform.
12. Corner Triangle Panel Details With Wallpaper Infill

Decide on triangle size, then mark a grid at the corner area so triangles are consistent. Cut right triangles from MDF or PVC for the moulding pieces and create a small perimeter frame around each triangle if you want extra depth. Glue triangles onto the wall over wallpaper, then caulk around edges. Paint the moulding so it matches other trim, and let the paint cure before you touch the wallpaper surface.
Triangle panel details add geometry without covering the entire wall in trim. You get a crisp, photo-friendly pattern that looks intentional even if you keep the rest of the wall simple. The wallpaper infill keeps the triangles from looking flat or too architectural for a softer room. This works especially well with wallpaper that has a repeating grid or diagonal elements, because the triangles echo the direction. Place this near doors, alcoves, or above bedheads where the geometry catches light.
Skip thisDon’t place triangles too close to trim lines like windowsills — you’ll fight clearance and the corners look cramped.
Editor's noteIf you can, use pre-primed MDF and sand the edges lightly before painting for a smoother look.
13. Square Panel Grid With Wallpaper Strips Instead of Full Wallpaper
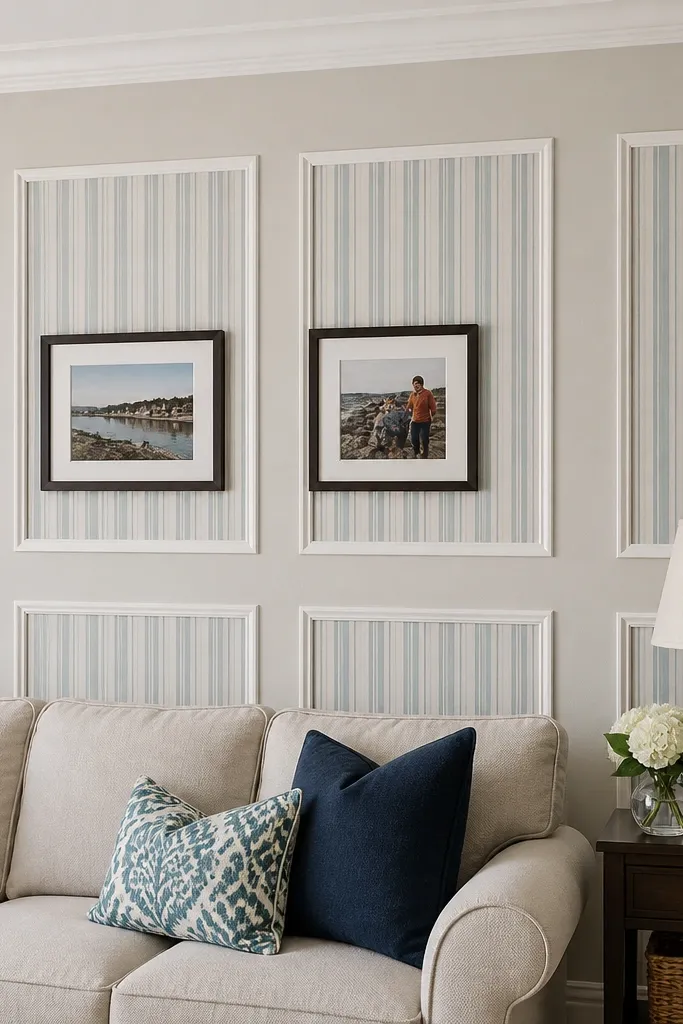
Mark and install the moulding grid first on a painted wall or directly on drywall. Plan each panel opening size, then cut wallpaper strips to fit inside with a small overlap that you trim flush after the glue sets. Apply a thin layer of wallpaper paste or adhesive to the back of the strip, press into each panel, and smooth with a plastic tool. Seal the edges with a tiny bead of clear or paintable caulk where the strip meets the trim, then paint the moulding.
This is a clever compromise when you don’t want to cover a full wall with wallpaper. Put wallpaper strips inside a moulding grid so you get pattern and color in controlled sections, while the rest of the wall stays paintable and easy to maintain. It’s also a budget-friendly way to use partial wallpaper rolls without wasting. The moulding edges hide cut lines, so the strips look neat. Best for rooms where you want the “panel look” but also want the flexibility to repaint around the strips.
Skip thisAvoid wrinkled strips — if the wallpaper relaxes after pressing, the moulding edge will show unevenness.
Editor's noteCut wallpaper strips slightly long, then trim with a fresh blade once the adhesive grabs.
14. Moulding Frame Around a Wallpapered Alcove
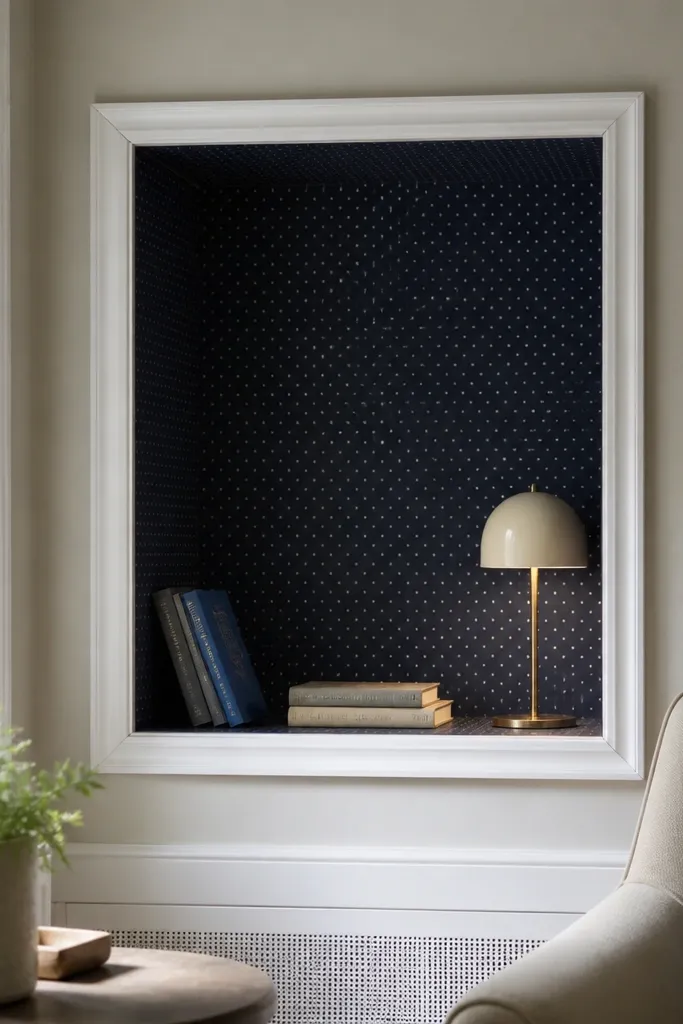
Alcoves look instantly more expensive when you frame them, and wallpaper is the easiest way to add depth inside. The moulding border makes the alcove feel like a custom feature rather than a recess with unfinished edges. Low maintenance comes from keeping the frame paintable and wiping-friendly while the wallpaper stays protected inside the recess. Choose a wallpaper with a medium contrast so it reads from across the room. This layout works in living rooms, bedrooms, and kitchens where you have built-in niches or shelves you don’t want to leave blank.
Measure the alcove opening and cut an outer trim frame to match the perimeter. Test the miters or butt joints on a scrap first so the corners fit cleanly. Glue the frame onto the drywall edges around the alcove, then install the wallpaper inside with careful trimming along the inner edge. Caulk the inside perimeter where wallpaper meets trim so dust and moisture don’t get behind.
Use a utility knife with a new blade every few cuts — alcove edges show every jagged line.
Don’t wallpaper the alcove before the frame is dry-fit; you’ll lose time fixing alignment.
15. Half-Height Wallpaper With Full Wall Moulding Overspray Protection
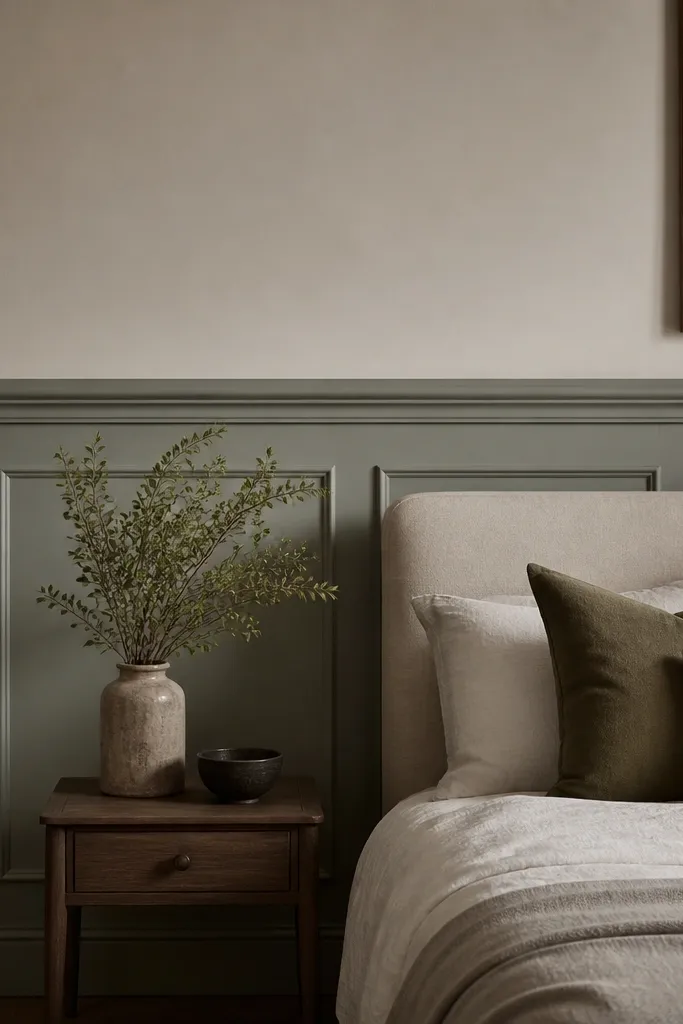
Decide your wallpaper height band, then mark a level line across the wall. Install a perimeter moulding strip at the top edge of the wallpaper so it covers the cut and creates a crisp boundary. Add a second strip below it if you want extra depth, like a mini picture-frame effect. Glue and caulk the moulding, then paint it after the caulk cures so the edge line is tight.
If you want low-maintenance wall moulding ideas that also make future paint jobs easier, this layout gives you a hard line to work against. Wallpaper only covers the lower half, and the moulding system wraps the edge so the paper line stays protected. It looks classic and gives you structure even if the wallpaper pattern is bold. The moulding is paintable, so you can refresh the room without touching the wallpaper again. Ideal for dining rooms and hallways where you want a tidy, built-in feel.
Skip thisAvoid painting over un-cured caulk; it can crack and pull away from the trim edge.
Editor's noteMask the wallpaper edge with a thin strip of tape before painting to prevent paint mist on the paper.
16. Tall Vertical Moulding With Wallpaper Underlay at the Center
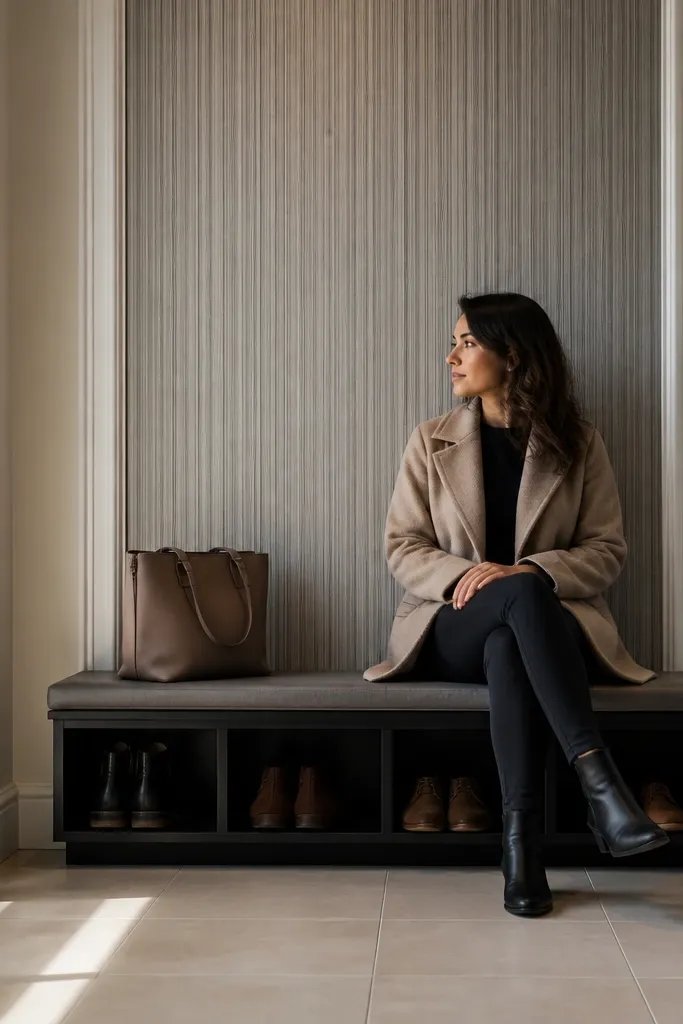
Pick a centered wallpaper panel width, then install two vertical moulding strips on both sides with a consistent gap. Dry-fit the wallpaper panel inside the moulding boundaries first to confirm you can trim it cleanly. Glue the panel edges to the wall, then caulk where it meets the trim so you don’t see raw paper. Paint the moulding after installation, and keep the panel interior unpainted so the wallpaper stays crisp.
This is a clean “modern accent column” look. You place tall vertical moulding strips on either side of a wallpaper panel, so the wall reads structured without needing a full grid. The wallpaper stays contained in a narrow area, which makes it easier to match patterns and touch up later. It also reduces the number of wallpaper seams you have to manage. This works great for large living room walls where you want something architectural but not busy.
Skip thisDon’t make the wallpaper panel too narrow; it looks like a patch instead of a column.
Editor's noteUse a thin foam roller to press wallpaper into the corners without pushing it out of line.
17. Ombré-Like Wallpaper Panel With a Thick Crown Border
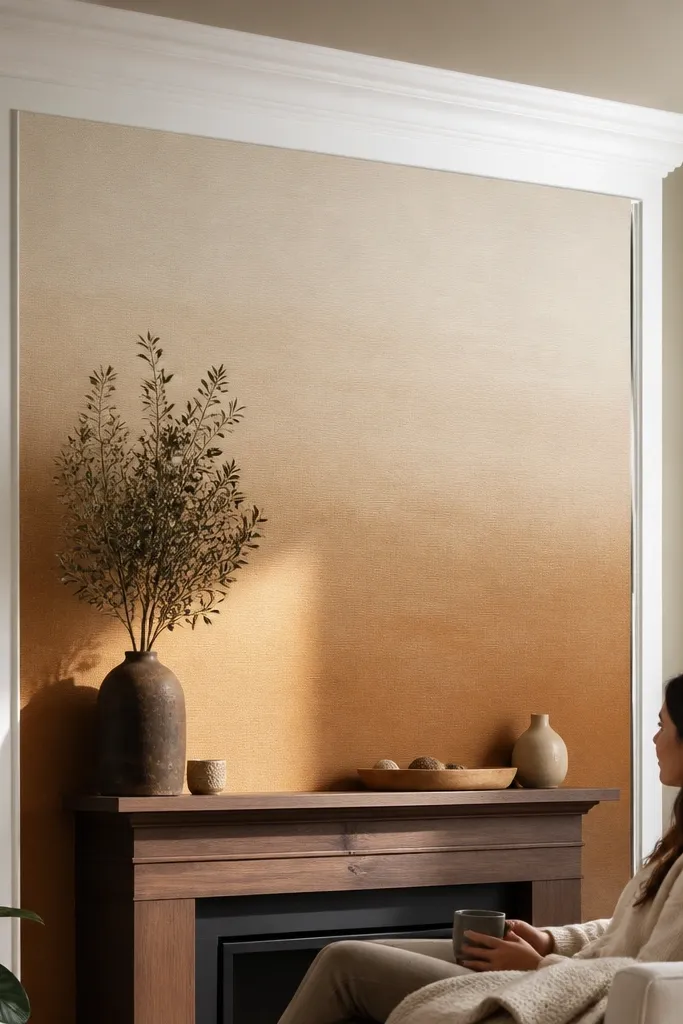
Install the wallpaper first, then mark where the thick border will sit so it covers the top edge cut. Cut the border pieces to length, miter corners, and glue them to the wall directly on top of the wallpaper edge. Use caulk at the underside and ends so no paper fibers show through. Paint the border once it’s fully set, and touch up any tiny gaps with a small angled brush.
A thick top border makes wallpaper feel elevated, and it’s low maintenance because the moulding hides the hardest-to-trim edge — the top cut line. If your wallpaper has a gradient, ombré, or large-scale motif, the thick border gives it a premium finish. Keep the border profile bold enough to create a strong shadow line, then paint it in a satin white for easy cleaning. This layout is great above a bed, behind a desk, or on a feature wall where you want one strong horizontal anchor.
Skip thisDon’t pick a border so thick that it blocks outlets or light switches — plan clearance before wallpapering.
Editor's noteIf the border is heavy, use brad nails in addition to adhesive to stop it sliding before the glue cures.
18. Small-Scale Panel Squares With Wallpaper on a Single Wall
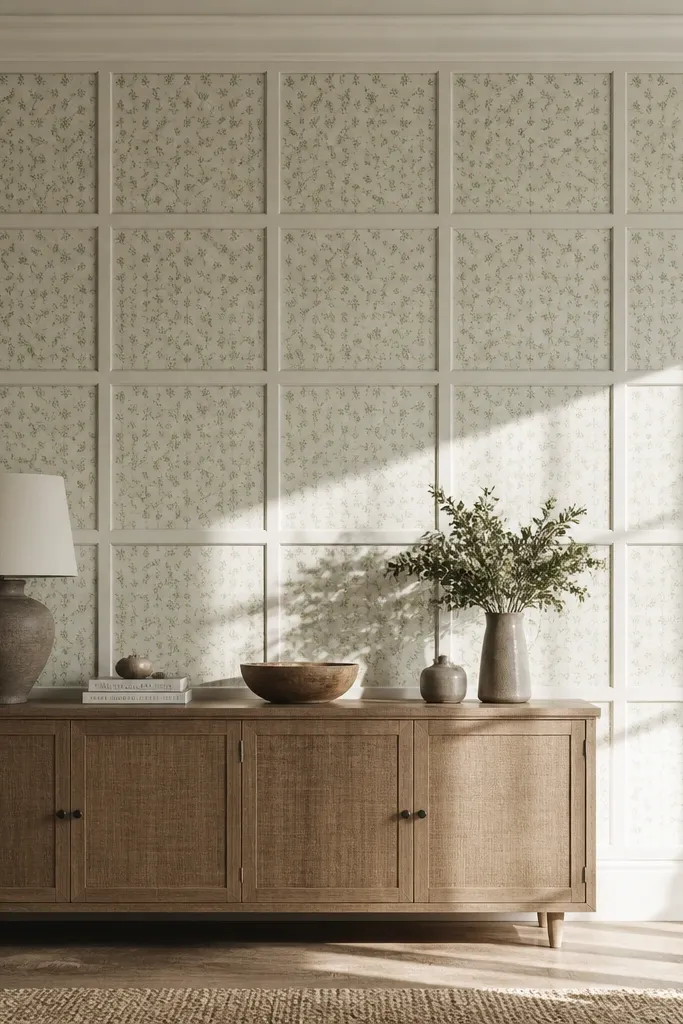
Small panel squares create a busy, tailored look without needing huge moulding pieces. It works well when the wallpaper print is medium or small-scale, because the trim frames keep the pattern from feeling overwhelming. For low maintenance, you can wipe down the moulding and repaint it, while the wallpaper inside the small squares is protected from scuffs. This is a strong choice for a single accent wall behind a sofa or bed where you want texture and structure. Keep your palette limited so the squares don’t look chaotic.
Pick a panel size around 8 to 12 inches wide for a tight, tailored look. Mark a perimeter frame, then add inner vertical and horizontal pieces to form the squares. Cut stiles and rails from primed MDF or PVC, dry-fit, then glue in place starting with the outer perimeter. Caulk all seams, then paint in satin so the finish wipes clean.
Use a jig block to keep spacing exact between rails — it saves hours of measuring.
Avoid large gaps between squares; inconsistent panel sizes make the wall look uneven in photos.
19. Tall Border Columns With Wallpaper Between Vertical Rails
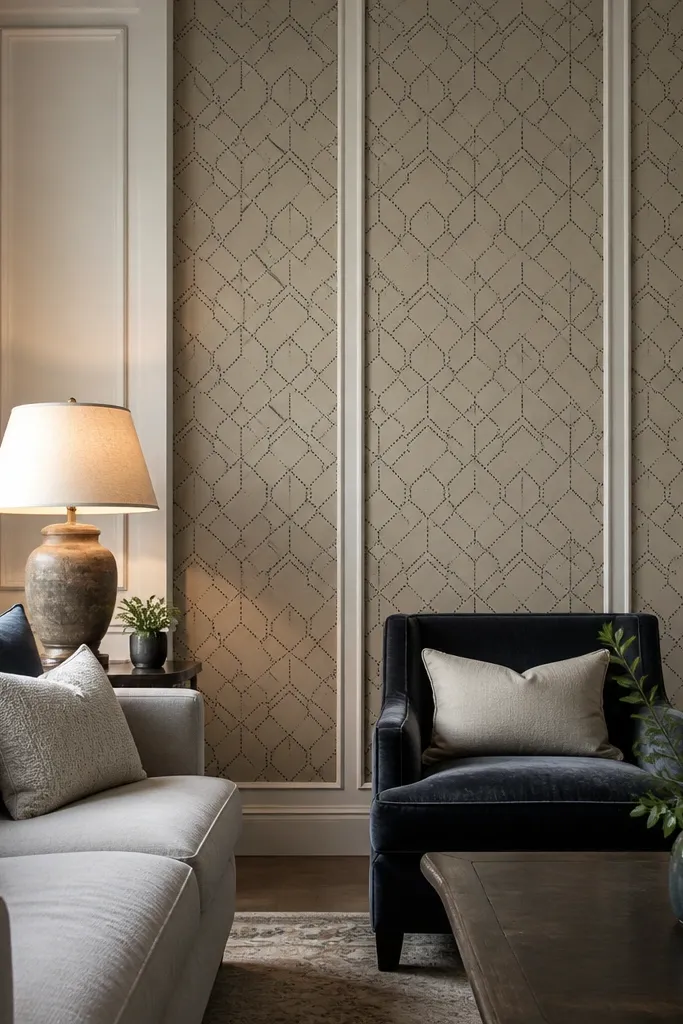
Decide the number of columns based on wall width, then mark each column centerline. Install vertical rails first, then attach the inner rail edges or simply frame the wallpaper with the two rails. Cut wallpaper to fit between rails, press it into place, and trim flush along the inner edges. Caulk at both sides, then paint the rails while keeping the wallpaper untouched.
This is like a simplified version of a full wall grid, but it still looks architectural. Two vertical rails create a frame, and the wallpaper sits between them like a framed panel. The look is photogenic because the rails cast narrow shadows that outline the wallpaper. Choose rails with a slight bevel or a flat face that catches light cleanly. This suits bedrooms, staircases, and living rooms where you want structure that doesn’t swallow the wall.
Skip thisDon’t skip testing wallpaper placement before installing rails — once rails are up, you can’t easily shift the panel.
Editor's noteUse a sharp blade and a metal straightedge to trim wallpaper edges for a clean line inside the rails.
20. Corner-to-Center Border With Symmetry Over Wallpaper
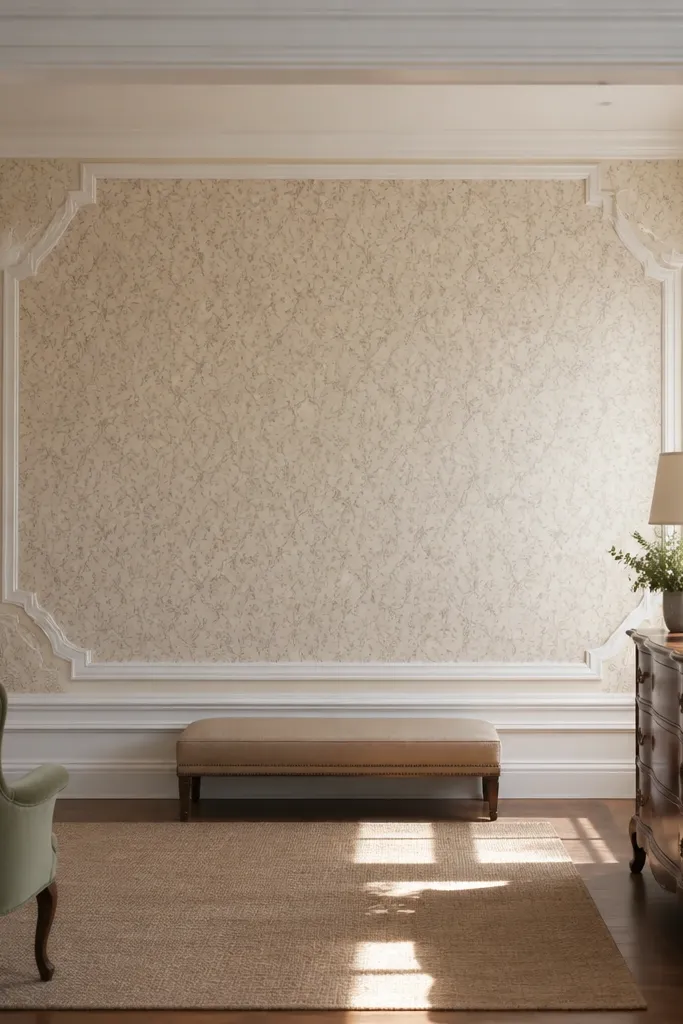
Choose a central wallpaper panel area and measure margins from both corners to keep symmetry. Install corner-to-center border strips by marking guide lines, then cutting trim pieces to match lengths and angles. Glue and caulk each strip, then paint the moulding in one consistent finish. Finally, tidy wallpaper edges where they meet the border using a fresh blade for a crisp seam.
Symmetry makes moulding + wallpaper look intentional fast. This layout uses borders that run from corners toward the center, framing the wallpaper area in a way that reads balanced from doorways. When you keep the border thickness consistent, the wall photographs cleanly and looks like it was designed, not pieced together. It’s low maintenance because most of the work is straight lines and flat trim sections. Great for living rooms and entryways where you view the wall from multiple angles.
Skip thisDon’t use different moulding profiles on the same wall; mixed profiles fight the symmetry.
Editor's noteMark both sides with the same measurement method — swapping “left then right” eyeballing is where asymmetry starts.
21. Wallpaper Stripes Inside a Tall Vertical Frame With a Base Trim
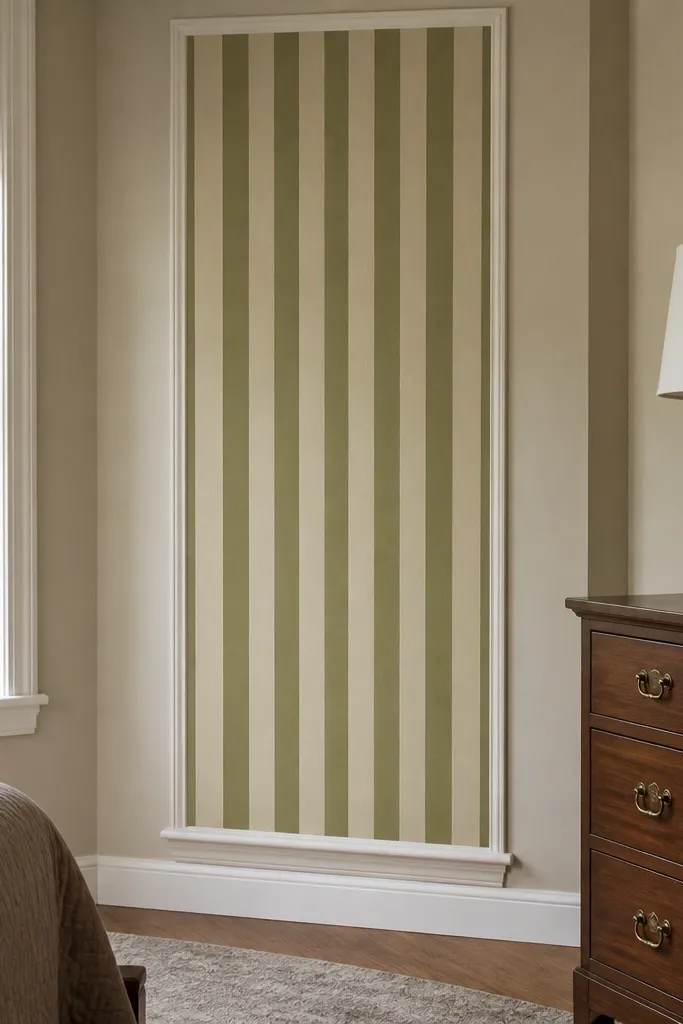
Install a vertical frame using two side moulding rails and a top trim, then add a bottom base trim for visual weight. Cut wallpaper to fit inside the frame opening, keeping stripes aligned with the center line. Glue the wallpaper down, press edges into the frame, and trim flush once it’s set. Caulk around the wallpaper edges where they meet the trim, then paint the moulding.
This idea is about controlled pattern. You create a tall vertical frame with moulding, then fill it with wallpaper stripes so the pattern looks designed and not scattered. The base trim at the bottom makes the panel feel grounded, and it hides the cut edge where the wallpaper stops. The moulding stays wipeable and paintable, so you can refresh the room later by changing only the wallpaper inside the frame. Great behind a sofa, in a bedroom corner, or along a hallway stretch.
Skip thisDon’t stretch wallpaper to fit; it will distort stripe spacing and ruin the framed look.
Editor's noteAlign stripe centers with the room’s main axis, like the center of the doorway or the bed — it makes the whole wall look composed.
22. Thin Crown and Base Border Pair Over Wallpaper Panels
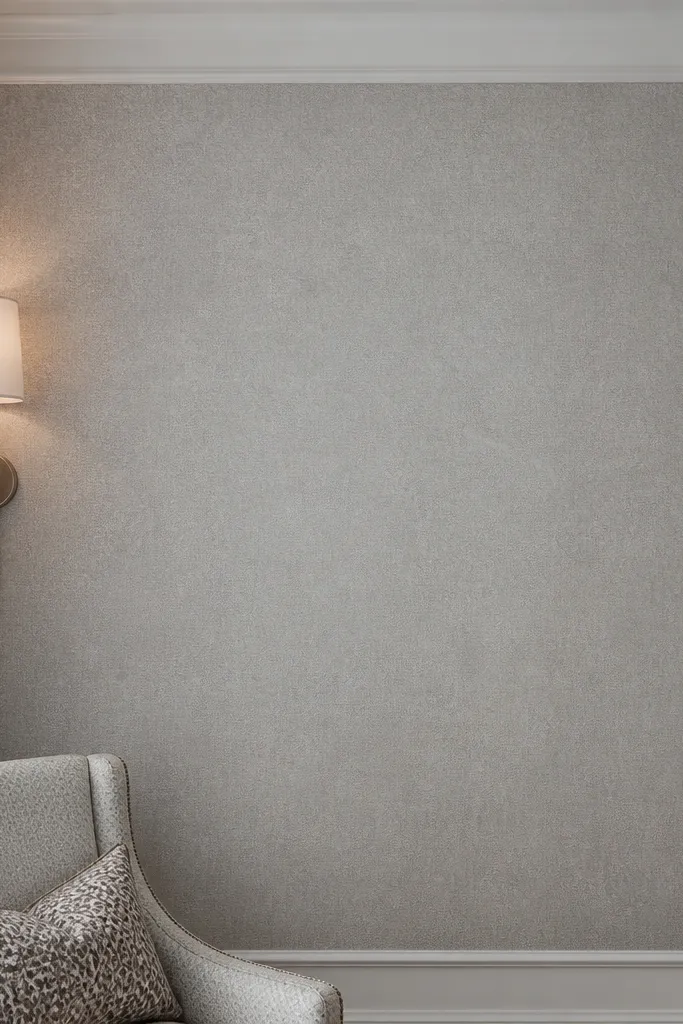
A top-and-bottom border pair gives wallpaper a built-in “shelf” feel without needing lots of extra trim pieces. It’s low maintenance because you’re working with straight, thin profiles that are easy to wipe and touch up. The wallpaper sits between the borders and looks clean even if the wall has minor imperfections. Choose a wallpaper with enough contrast to read between the thin lines — think solid floral, subtle texture, or modern geometrics. This works well in bedrooms, kitchens, and offices where you want a tidy, architectural finish.
Measure wall height and decide your border thickness — thin trim around 1 to 2 inches is a good start. Install the bottom border first so you have a straight reference, then install the top border at the correct height with a laser. Cut and install any side returns if needed, then glue the wallpaper panel between the borders with clean edge trimming. Caulk the wallpaper edge lines under the trim so they look sealed.
Paint borders before installing wallpaper so you don’t risk paint getting onto the paper.
Don’t place borders at random heights; use measurements from the floor and keep them level.
23. Moulding Frame With a Textured Wallpaper Inset and Smooth Paint Around
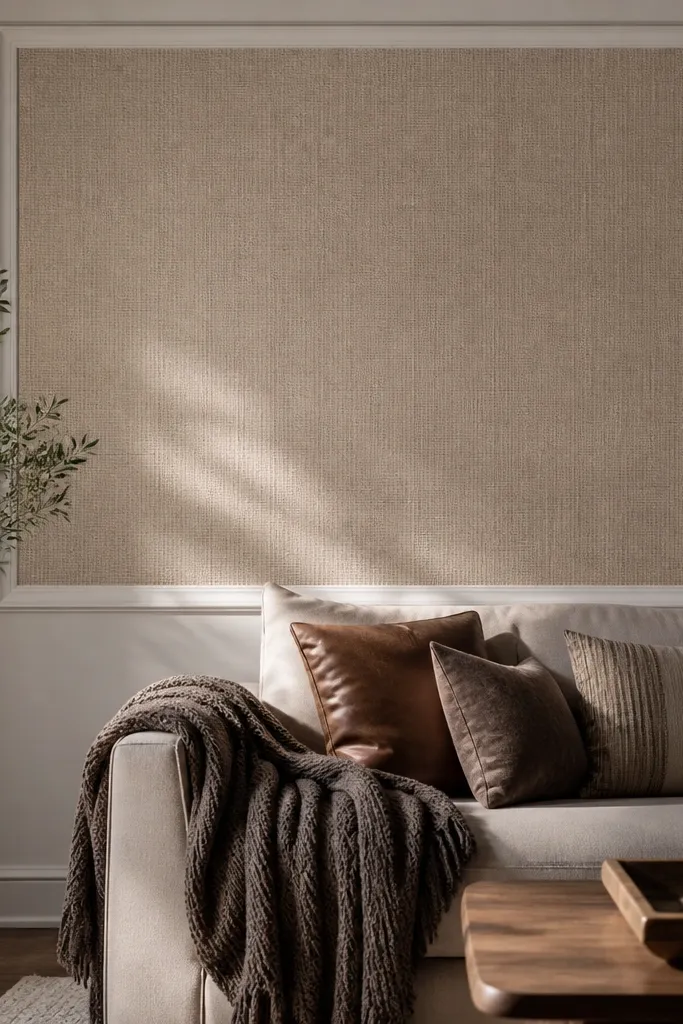
Paint the wall base first in a washable finish like satin. Install a flat moulding frame on top of the painted wall, then cut wallpaper to fit inside the opening with a small margin. Glue the wallpaper inset, press it flat, and trim the edges so they meet the inside of the frame cleanly. Caulk lightly at the perimeter and let it cure, then touch up frame paint if caulk discolored the surface.
Textured wallpaper inside a moulding frame looks expensive because the trim creates a clean boundary around the texture. The smooth painted wall around it stays easy to clean, while the wallpaper is protected from direct scuffs inside the frame. This is a smart low-maintenance compromise when you like tactile wallpaper but don’t want to wipe the whole wall. Use a moulding profile with a flat face so it doesn’t collect dust in grooves. Great for living rooms and hallways where you want one tactile feature without turning the entire wall into a maintenance chore.
Skip thisAvoid deep-groove moulding around textured wallpaper; dust gathers where texture meets trim.
Editor's noteUse a wallpaper smoothing tool with felt — it reduces bubbles on textured prints.
24. Diagonal Wallpaper Panels With Matching Trim Borders

Diagonal panels look bold and modern, and the moulding border makes them feel like a designed system instead of a wallpaper cutout. The diagonal edge also hides small alignment issues because the shadow line from the moulding reads as intentional. For low maintenance, keep the moulding wipeable and use caulk so the diagonal wallpaper edge stays sealed. Pick a wallpaper that looks good when rotated, like small geometrics or subtle gradients. This is a standout choice for a feature wall behind a desk or dresser.
Mark a diagonal line across the wall and decide the panel boundaries with two trim rectangles that mirror the diagonal. Install trim borders along the diagonal using careful miter cuts at the top and bottom corners. Cut wallpaper panels following the diagonal shape, glue them down, and trim flush along the moulding inside edge. Caulk the trim-to-wall seams and the wallpaper edge where it meets the border.
Use a flexible straightedge or string line to mark the diagonal accurately before cutting wallpaper.
Don’t rush miter angles; a tiny diagonal border mismatch looks obvious in photos.
25. Wallpaper Behind a Single Oversized Moulding Rectangle
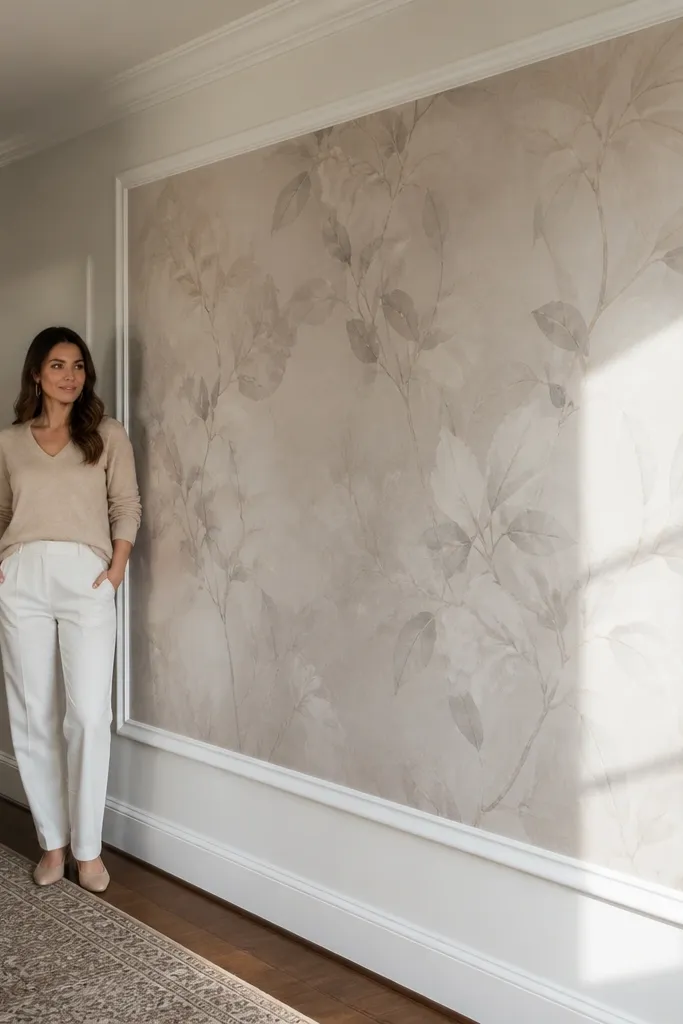
Choose the rectangle size based on wall proportions, then mark its outer edges with a level and measuring tape. Cut the moulding pieces for the four sides, miter corners, and dry-fit to confirm the rectangle is square. Glue the frame onto the wall over the wallpaper area, then trim the wallpaper edges so they stop under the inside edge of the frame. Caulk the inside perimeter and paint the moulding after installation.
Sometimes the best low-maintenance look is one big frame, not a grid. A single oversized rectangle gives you a dramatic focal area while keeping the number of joints low, which means fewer caulk lines and fewer chances for gaps. It’s great when your wallpaper has a strong motif or gradient, because the frame makes it feel like art. Use a medium or wide moulding so it reads from across the room. This suits living rooms, bedrooms, and hallways where you want one clean design moment.
Skip thisAvoid thin trim for large rectangles; it can look flimsy and the shadow line disappears.
Editor's noteCheck the rectangle’s diagonals — measure corner to corner both ways to confirm it’s square before gluing.



