
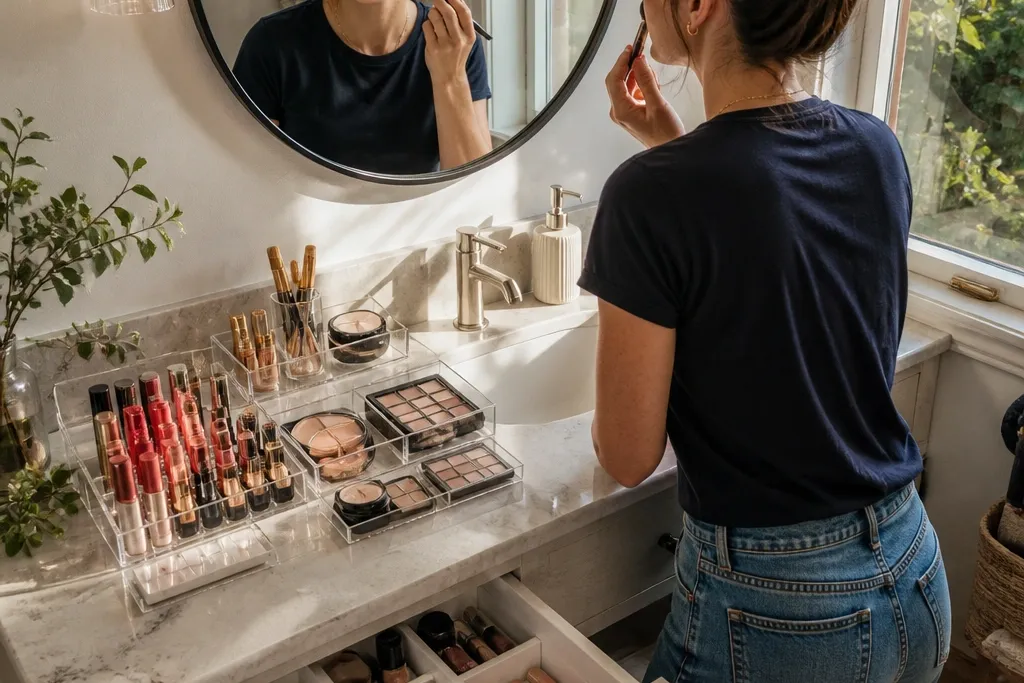
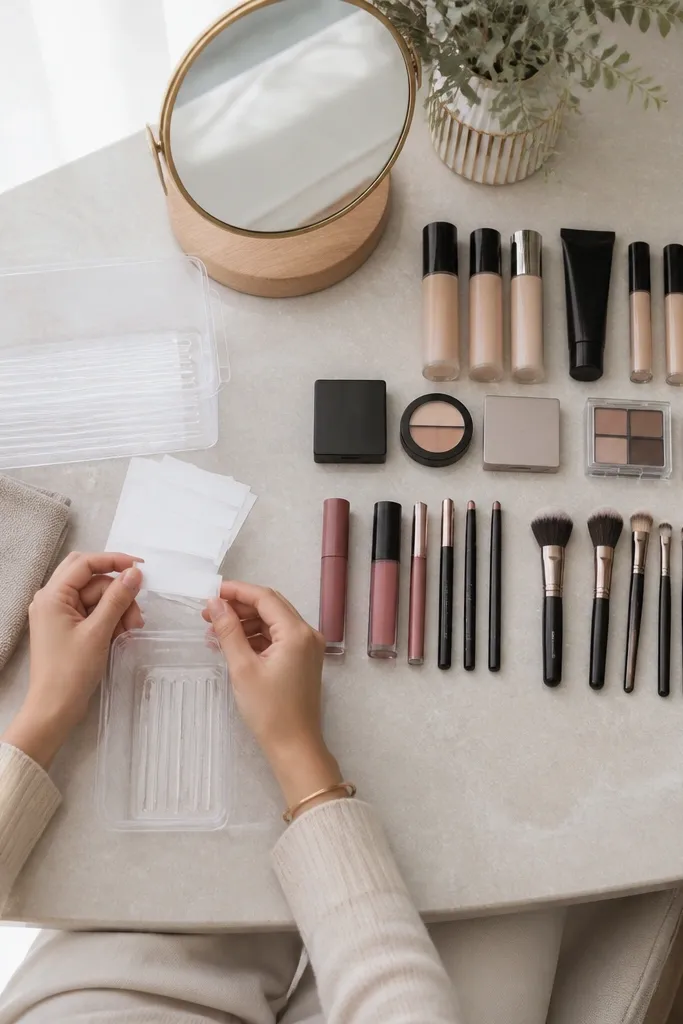
1. Clear Acrylic 3-Row Vanity Tray for Daily Products
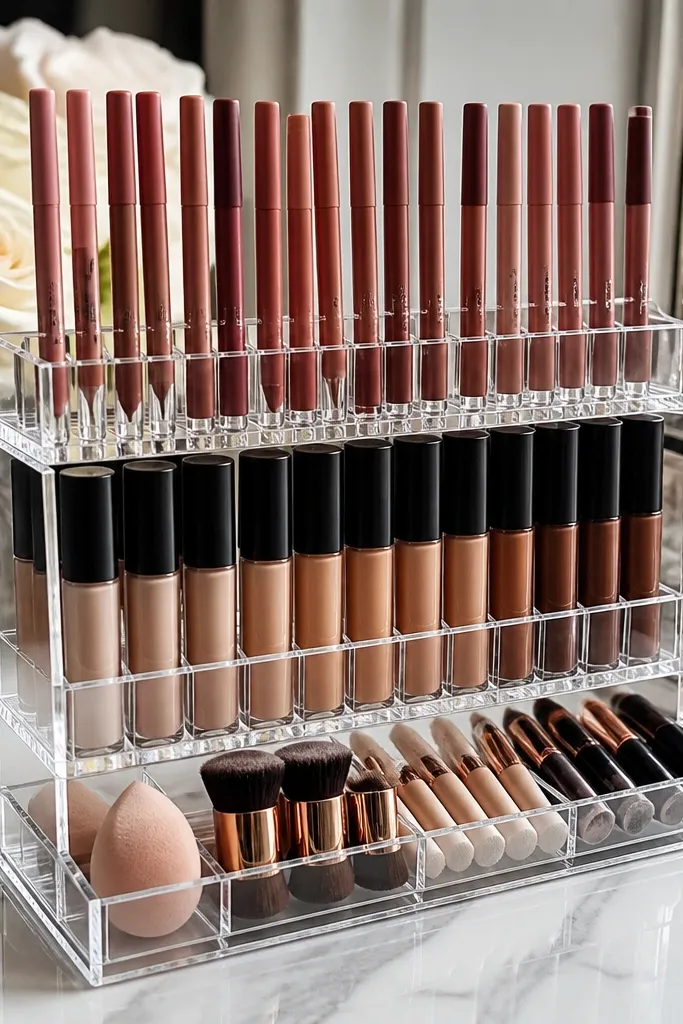
A clear acrylic tray makes your daily makeup look intentional because it turns loose items into clean rows. You can separate by category — lips in one row, base in another, small tools in the third — and everything stays visible from your seat. Acrylic also wipes clean fast when a cap gets sticky or a powder puff leaves a dusting. This is low-maintenance because you’re not re-folding, re-stacking, or re-sorting each time; you just slide items into the right row. It fits best on a vanity surface, bathroom shelf, or inside a cabinet door where you want it to look styled.
Get a clear acrylic tray with three horizontal tiers (about 10-14 inches wide for a typical vanity). Place it on a clean, dry counter and test spacing by setting your most-used items in a rough row order first. Then add dividers only if the tray is too open — use thin acrylic sheet strips or adjustable compartment inserts so bottles don’t roll. Finally, line the base with a thin non-slip mat or a strip of clear drawer liner so the tray doesn’t slide and items don’t drift.
Use a non-slip mat under the tray so you can move it slightly without items shifting.
Don’t overload it with tall bottles — if they reach the top edge, lids snag and the whole system falls apart.
2. Pegboard Makeup Wall with Spray-Black Tool Hooks
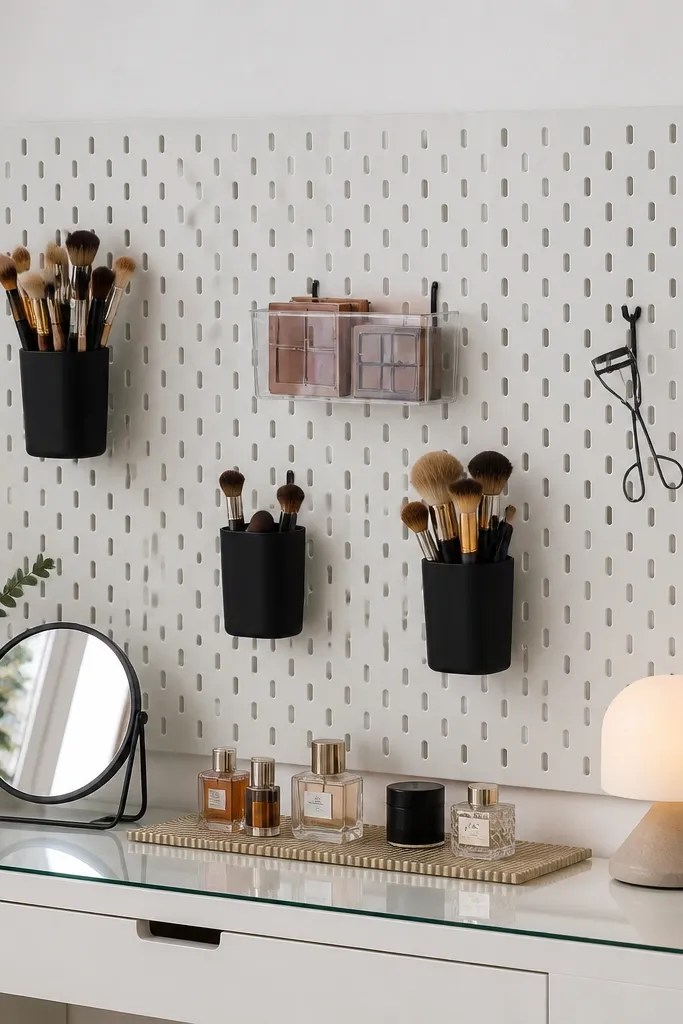
Pegboard is the fastest way to get that “studio” look on a budget. The board gives you a visible grid, so your brush cups, small bins, and hook-hung items all line up. Spray-black hooks look clean and modern next to white pegboard, and they hide the chaos of random brush cups and tangled cords. This setup stays low-maintenance because you can hang and rehang tools without digging through drawers. It’s best for a vanity wall, inside a closet door, or behind a makeup station where you want everything upright and easy to grab.
Buy a pegboard sheet sized to your space and mount it using screws into studs or strong wall anchors. Spray paint only metal hooks (not the pegboard) in a matte black finish and let them cure fully. Install brush holders or small clear containers on the hooks so brushes face upward and don’t sit in puddles. Then add a few “grab zones” — one cluster for eye tools, one for face tools — and keep the heaviest items on lower hooks so the board stays balanced.
Editor's noteLabel the back of each hook with a tiny strip of painter’s tape — you’ll remember placement without adding clutter.
Skip thisSkip shiny chrome hooks; they show smudges and fingerprints more than matte finishes.
3. Drawer Divider Inserts in a Single Palette Grid
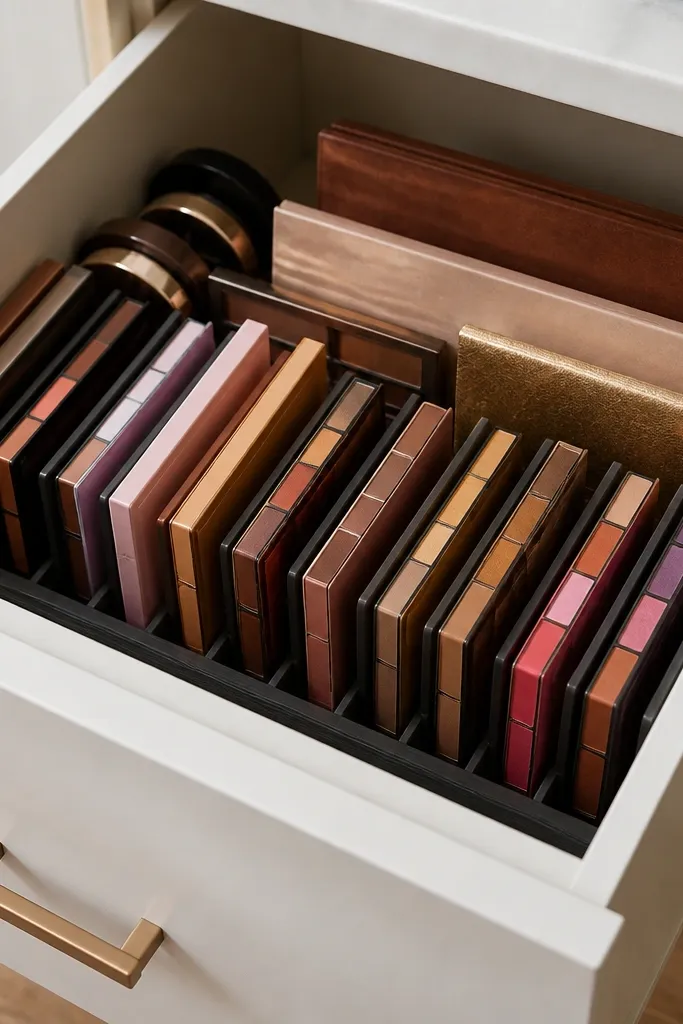
If your palettes and larger products live loose in a drawer, they look messy fast. A divider grid makes them stand upright and prevents the “stack collapse” that happens when you pull one item out. You also get a clean, photogenic look because the drawer becomes a neat wall of colors instead of a jumble. This is low-maintenance because you only need to follow the grid once; after that, returning items is automatic. It works best in a vanity drawer where you want closed storage but still like seeing your collection.
Measure your drawer width and depth, then buy adjustable drawer divider inserts or cut-to-fit acrylic dividers. Build a grid that matches your biggest palette footprint first, leaving at least 1/4 inch of clearance so lids open without scraping. Place face palettes in one section and eye palettes in another, then add a narrow divider for blush/bronzer compacts. Finish by adding a non-slip liner so dividers don’t shift when you pull something heavy.
Editor's noteUse a cardboard template to map each palette size before you lock in the divider spacing.
Skip thisDon’t mix tall and flat items in the same compartment — tall ones tip over flat ones and mess up the whole grid.
4. Stackable Cup System for Brushes and Sponges
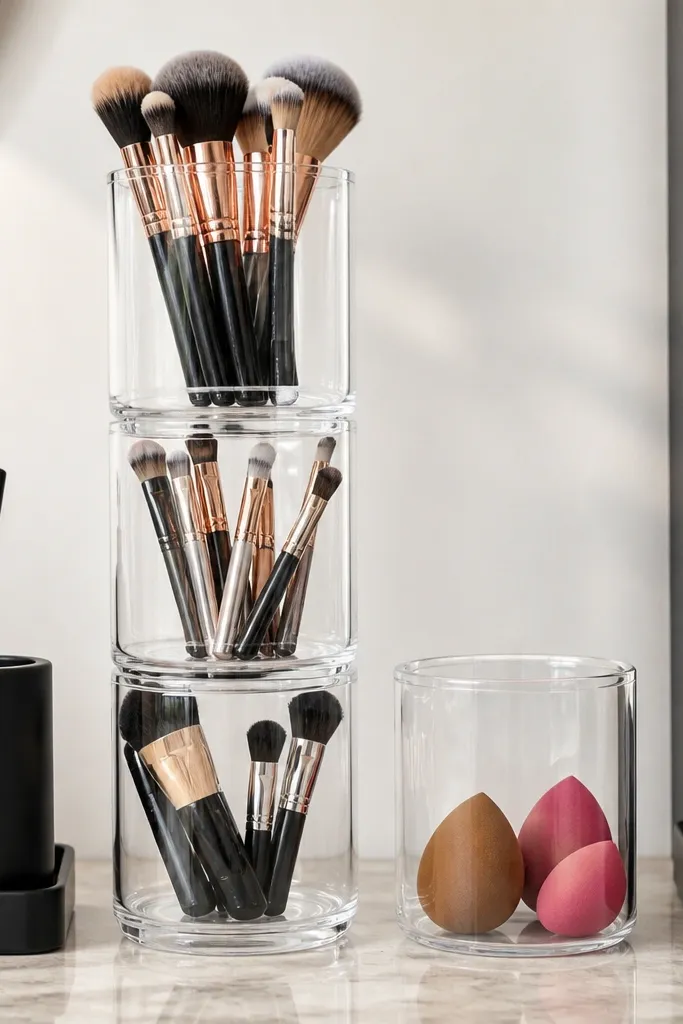
Brush and sponge storage is where low-maintenance setups either work or fall apart. Stackable cups keep handles upright so you can grab without bending bristles, and a separate cup for sponges prevents gunk from transferring to clean tools. The look is clean because cups create vertical lines and consistent spacing. This setup is also easy to maintain: wipe the cup rims and toss sponge covers into the wash cycle. Place it on the counter or inside a drawer, but keep it within arm reach so you’re not tempted to toss brushes back into a random bag.
Buy stackable acrylic or ceramic cups with a diameter that fits your biggest brush handle. Add one cup for face brushes, one for eye brushes, and one smaller cup for sponges or sponge backups. If cups don’t stack neatly, use a shallow organizer tray as the base so everything stays aligned. Then add a removable liner inside the sponge cup (silicone or a washable fabric insert) so you can clean it without scrubbing the whole cup.
Keep sponge backups in a sealed container next to the cups so you don’t leave them out and ruin the aesthetic.
Avoid one mixed cup for everything — it makes bristles splay and you end up rummaging.
5. Fabric-Covered Pencil Case for Lip Liners and Minis

A pencil case looks cute on a vanity and solves the “lip liners roll around” problem. Fabric softens the look, and the zip keeps caps from collecting dust. It’s low-maintenance because you can store it in a drawer or on a counter tray, and you only open it when you’re using lips. The organization stays photogenic because the case keeps everything contained and evenly sized. This is ideal for lip liners, mini glosses, and travel-size products that don’t fit neatly in larger organizers.
Choose a pencil case with a sturdy zipper and a flat base so it doesn’t collapse when you set it down. Sort your lip liners by thickness and place them in the case upright, using a small elastic band or a folded card insert to keep them from tipping. If minis slide, add a thin foam strip at the bottom to create friction. Finally, keep the case on a matching tray or inside a drawer compartment so it doesn’t drift across the counter.
Editor's noteWipe the case with a damp cloth and let it dry fully before refilling so sticky caps don’t stain fabric.
Skip thisSkip stretchy, floppy cases — they bulge and turn into a lumpy mess when you add more than a few items.
6. Lidded Counter Tray with Separate Sections for Powders
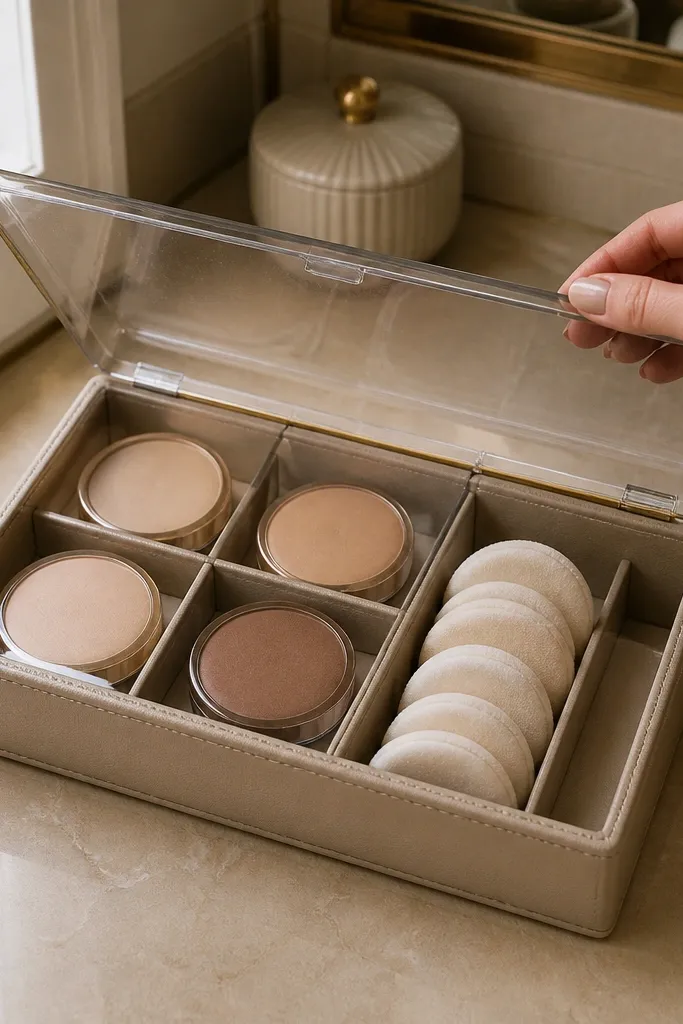
Loose powders look messy because they scatter and catch fingerprints. A lidded tray keeps them controlled and makes your vanity look styled even when you’re mid-routine. Separate sections stop compacts from sliding into each other, and the lid reduces dust and powder fallout. It’s low-maintenance because you close it when you’re done and you don’t have to keep wiping the same counter edge. Use this for setting powder, pressed powder, bronzer compacts, and anything that leaves residue.
Find a lidded tray with at least 2-3 compartments or a tray with a removable insert. Place a non-slip liner inside each section so compacts don’t drift. Set heavy powder jars on the bottom layer and keep smaller compacts in upper sections for easy access. When you’re done, close the lid and store the tray on the same spot each day.
Editor's noteUse a thin plastic wrap barrier under loose powder jars if you spill often — it protects the tray and is easy to replace.
Skip thisDon’t use an open tray for loose powders — powder dust spreads and kills the clean look.
7. Magnetic Spice Rack Mounted Inside Cabinet Door

A door-mounted rack is a smart way to free counter space without hiding everything. Magnetic racks hold small bottles upright and keep labels visible, which makes daily returns quick. The look is tidy because the items line up vertically in a narrow grid. Low-maintenance comes from access: you open the cabinet door and everything is already sorted. This setup works best for nail polish, face mists, setting sprays, and small serums you use near your makeup station.
Measure the inside of your vanity cabinet door for clearance and choose a slim magnetic rack that fits without rubbing hinges. Mount it with screws or strong adhesive pads rated for the surface material. Place metal-capped bottles on the rack and test how they sit when the door opens and closes. Add a small clear bin at the bottom for items that don’t magnetize, like palettes or non-metal caps.
Editor's noteUse a tiny strip of felt on the rack edge where bottles touch so caps don’t scratch and scuff.
Skip thisSkip super-light racks that flex — wobble makes bottles slide and you’ll stop using the system.
8. Clear Label Tabs for Drawer Sections (No Paper Chaos)
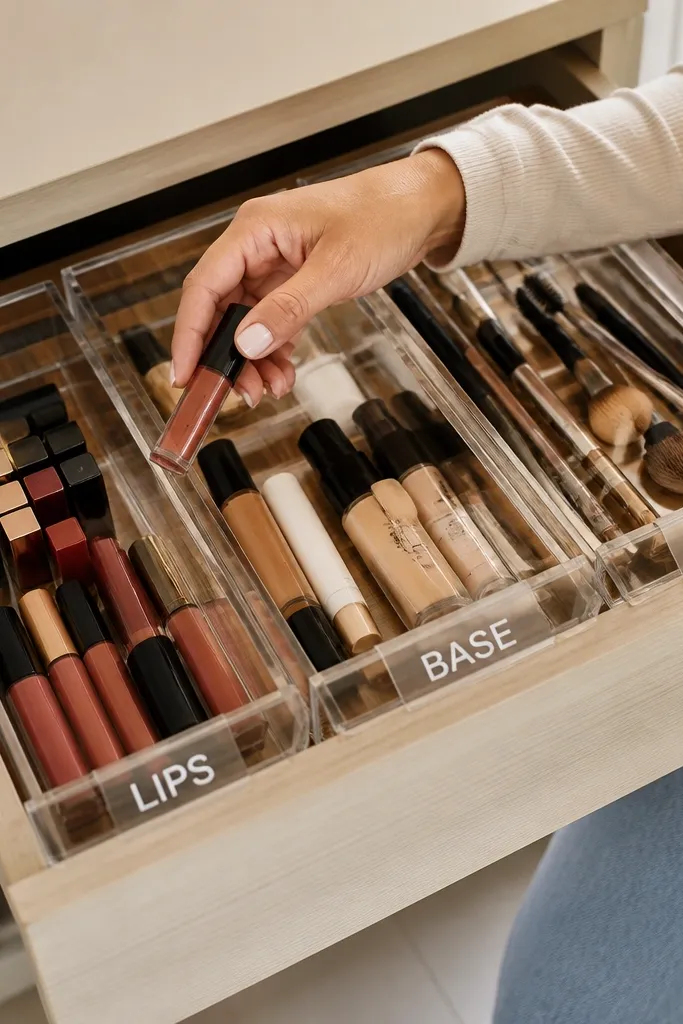
Labels don’t have to look messy to be useful. Clear label tabs give you quick category recall while keeping the drawer aesthetic clean. You’re not putting piles of paper in the drawer; you’re adding small tags to the divider edges. This is low-maintenance because you can put items back exactly where they belong without thinking. It looks photogenic too because the drawer looks designed, not improvised. Use it for any drawer organizer grid you build with dividers.
Pick clear label tabs that stick flat to divider surfaces and won’t peel when you wipe. Write category names in a consistent font — keep it short like “Lips,” “Face,” “Eyes,” “Tools.” Attach the tabs to the divider edges you touch most so they’re easy to read. After labeling, do one test: close the drawer, open it, and see if you can return three items to the correct section without guessing.
Editor's noteUse a label color system: black for face, rose for lips, gray for tools so you can scan even when you’re tired.
Skip thisDon’t label the whole drawer with long sentences — it looks cluttered and slows you down.
9. Tote-Style Vanity Caddy for Travel Makeup Rotation
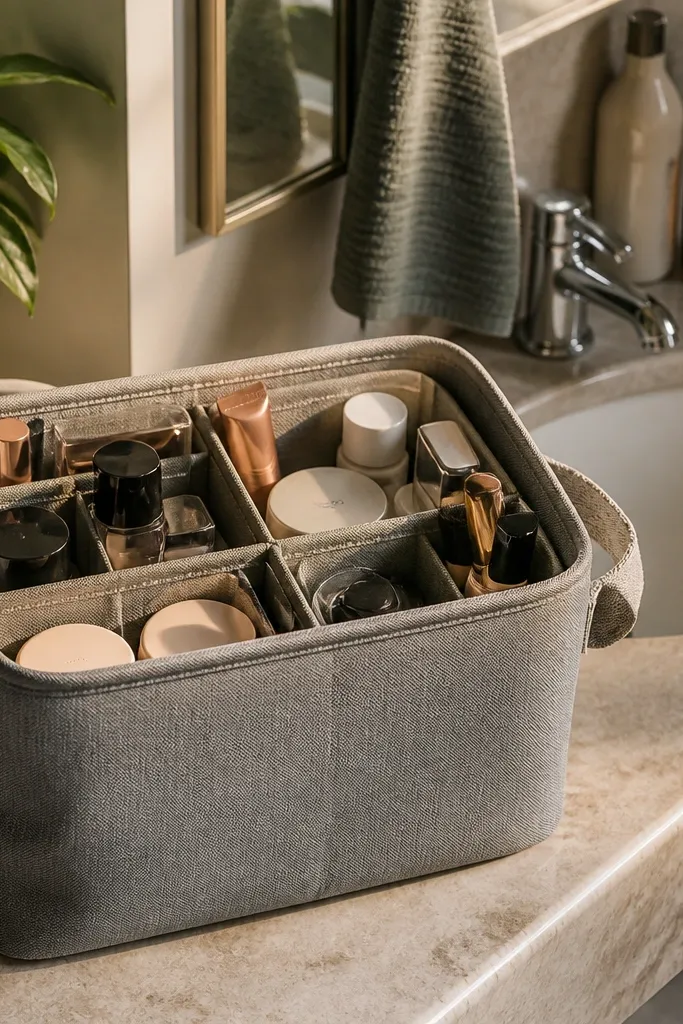
A caddy that looks like a small tote keeps your vanity from turning into a storage dump. It’s low-maintenance because you can rotate your “current week” products without reorganizing the whole cabinet. The compartments make it easy to keep the same items in the same spots, and the fabric exterior gives a warmer, more styled look than plain plastic bins. This works well when you have more makeup than one vanity can handle and you need a controlled surface to work on.
Choose a structured caddy with rigid base and at least 6-8 compartments. Put brushes and tools in the larger compartments, and reserve the smaller ones for lip liners, travel-size foundations, and mini skincare. Keep one compartment for “in use” items and one for “backup” items so you’re not constantly hunting. Then set the caddy on a tray or inside a drawer so it looks intentional, not like a random bag.
Add a thin clear pouch inside for cotton pads or blotting papers so small items don’t float around.
Avoid soft, floppy totes — they sag and everything ends up at the bottom.
10. Wall-Mounted Clear Shelf for Palettes and Eyeliner

A wall-mounted shelf turns your vanity into something you can style instead of just store. Clear shelves keep the look light and airy, and they make palettes look like decor when they’re standing upright. This is low-maintenance because you can keep eyeliner, mascara, and brow products in a single line where you grab them without digging. It also protects the counter from clutter since you’re moving the “pretty but frequent” items off the surface. Use it above or beside your mirror so it’s within reach.
Pick a small clear acrylic shelf with a lip so palettes don’t slide forward. Mount brackets to studs or use strong anchors, then attach the shelf level. Arrange palettes upright on the back edge and line eyeliners and mascaras in front so you can see caps. Add a small non-slip pad under the shelf surface so products don’t drift when you touch them.
Keep one shelf only for daily eye products; don’t mix in powders or you’ll get dust and fingerprints quickly.
Don’t mount it too high — if you have to reach, you’ll start setting items down instead of returning them.
11. Acrylic Brush Cup with Removable Divider Insert
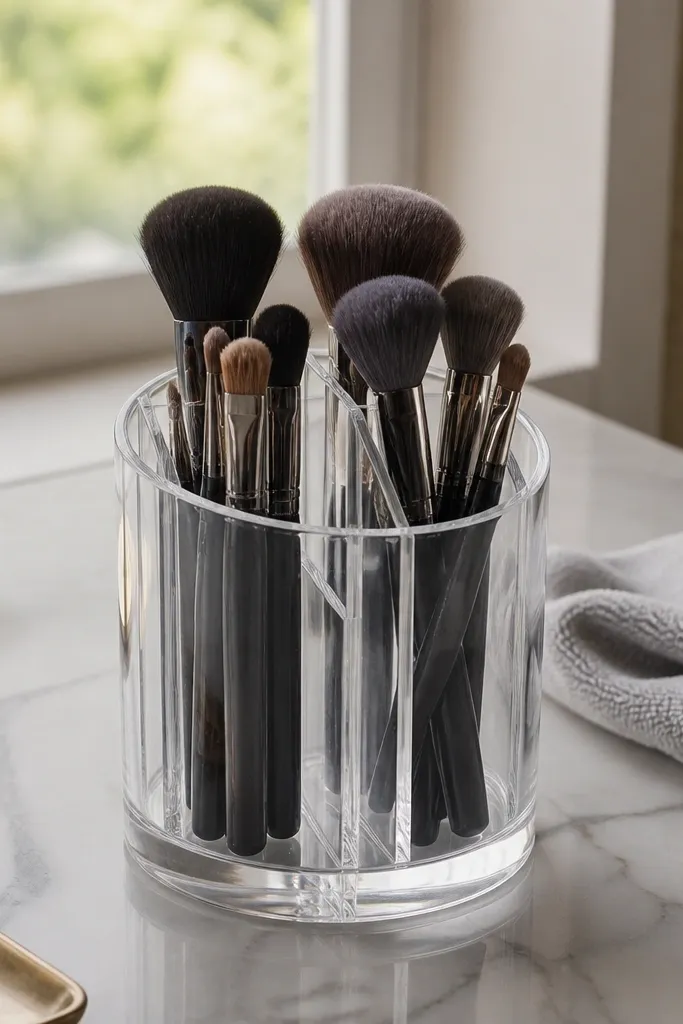
A single brush cup can look clean, but only if it has a divider. With a removable insert, you get the same visibility and grab speed as multiple cups, without the visual clutter of stacked containers. It’s low-maintenance because you can lift the insert out for wiping and sanitize the cup quickly. The look is minimal — straight brush handles, consistent spacing, no tangled bristles. This is best for one-cup systems when your vanity surface is small.
Buy an acrylic cup with a diameter wide enough for your largest brush handle. Create a removable divider insert from thin acrylic or washable silicone by cutting it to fit snugly inside the cup. Place face brushes on one side and eye brushes on the other, then add a small base mat so the divider doesn’t slide. Wipe the cup and divider with a makeup-safe cleaner and let it dry before reassembling.
Editor's noteChoose a divider that’s slightly shorter than the cup rim so it never catches on brush handles.
Skip thisDon’t store wet brushes upright — they can drip and stain the cup.
12. Stacked Clear Storage Boxes for "In Use" vs "Backups"
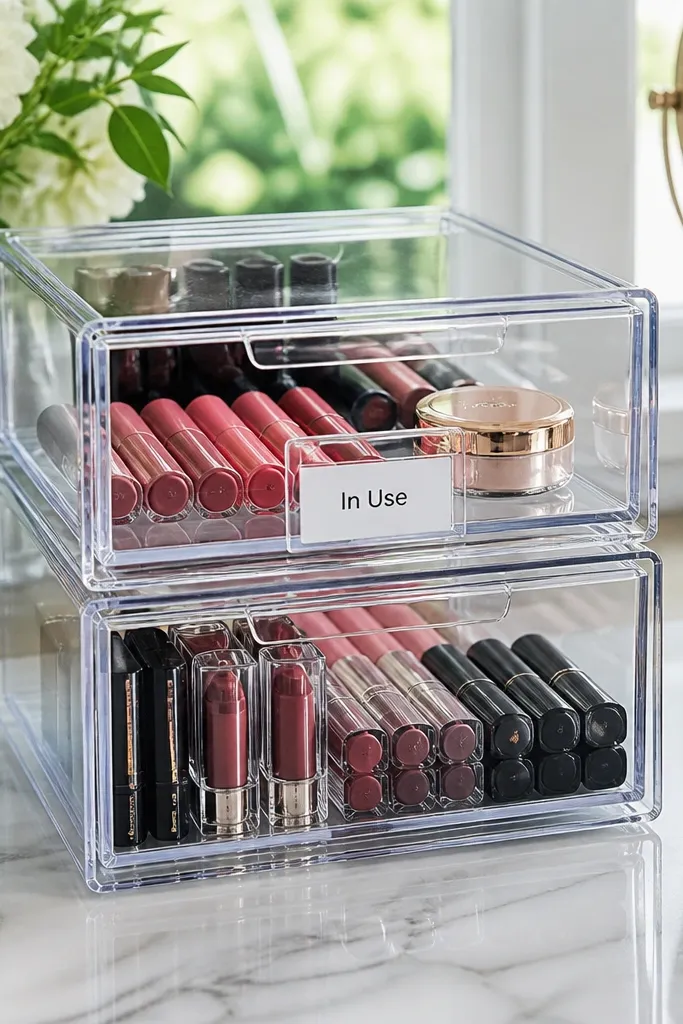
Stacked clear boxes make your vanity look like a tidy display instead of a storage area. By splitting in-use items from backups, you reduce decision fatigue and keep the counter from filling up. Clear boxes also let you match colors and see what’s running low without opening everything. This is low-maintenance because the system is binary: items either live on top as in-use or in the stack as backups. It’s best for foundations, primers, concealers, and any product you rotate.
Buy two clear storage boxes with lids that stack cleanly and fit your drawer or shelf depth. Place in-use items in the top box and store backups in the lower box. Use a small label maker or clear label tabs on the box lids so you can see the category without opening. If boxes are too deep, add a small divider tray so items stand upright rather than sinking to the bottom.
Keep backups grouped by shade family — it speeds up restocking and keeps the look orderly.
Avoid mixing too many categories in one box — it turns into a rummage pile.
13. Magnetic Strip for Metal Tools on the Side of Vanity
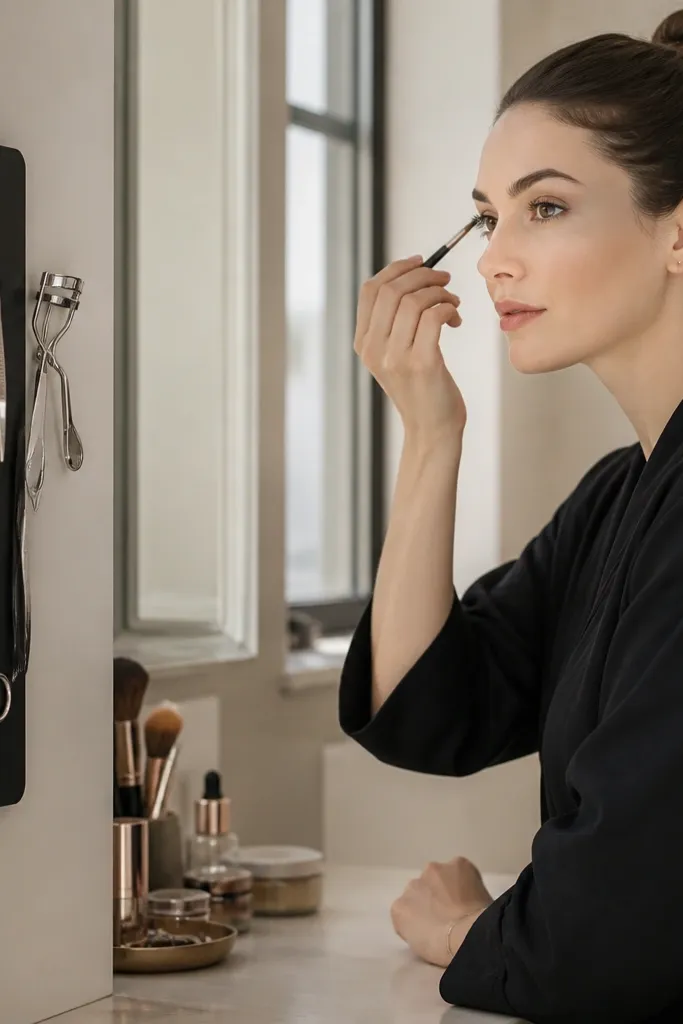
A magnetic strip looks sleek and keeps small metal tools from disappearing into drawers. Tweezers, eyelash curlers, and small scissors stay visible and ready, which reduces the “where is it?” scramble that ruins a low-maintenance routine. The visual is clean because tools hang in a straight line instead of scattered. This setup is especially good for bathrooms where drawers get cluttered fast. Mount it on the side of a vanity, inside a cabinet door, or along a wall panel next to your mirror.
Choose a magnetic strip with a finish that matches your hardware — matte black or brushed steel. Mount it using screws into studs when possible, or use heavy-duty anchors rated for the strip weight. Place metal tools on the strip and test spacing so they don’t knock into each other when you reach. For non-metal items, use a small tray next to the strip so everything still looks coordinated.
Editor's noteAdd small felt pads to tool contact points if your tools scratch or squeak.
Skip thisSkip a weak strip — if tools slide, you’ll stop returning them.
14. Wood-Tone Tray with Silicone Cup Inserts for Face Tools
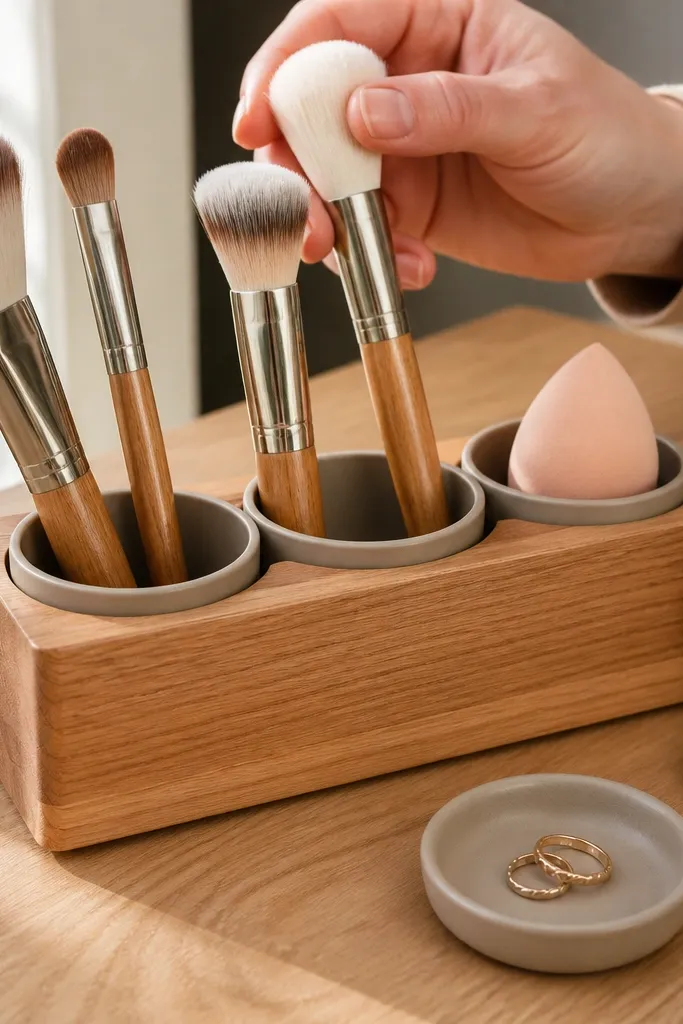
A wood-tone tray makes makeup organization look warmer and more styled than plain plastic. Silicone cup inserts keep face tools upright and reduce mess when you’re switching brushes during your routine. The tray creates a boundary, so spills don’t spread across the counter. This is low-maintenance because you can lift the silicone inserts out, wipe, and put them back in seconds. It’s perfect for a vanity with a wood finish or a bathroom that feels more natural than modern-minimal.
Pick a shallow wood-tone tray with raised edges to catch drips. Buy silicone cup inserts (or a silicone organizer tray with removable wells) sized for your brushes and sponge. Set cups into the tray so handles face the same direction and sponge sits in its own cup. Then add a wipeable mat under the tray if your surface scratches easily.
Editor's noteUse a small spray bottle of 70% isopropyl alcohol for quick wipe-downs on silicone — it evaporates fast and doesn’t leave a greasy film.
Skip thisDon’t choose a tray with porous raw wood — it stains from pigment and oils.
15. Clear Flip-Top Organizer for Cotton Pads and Wipes
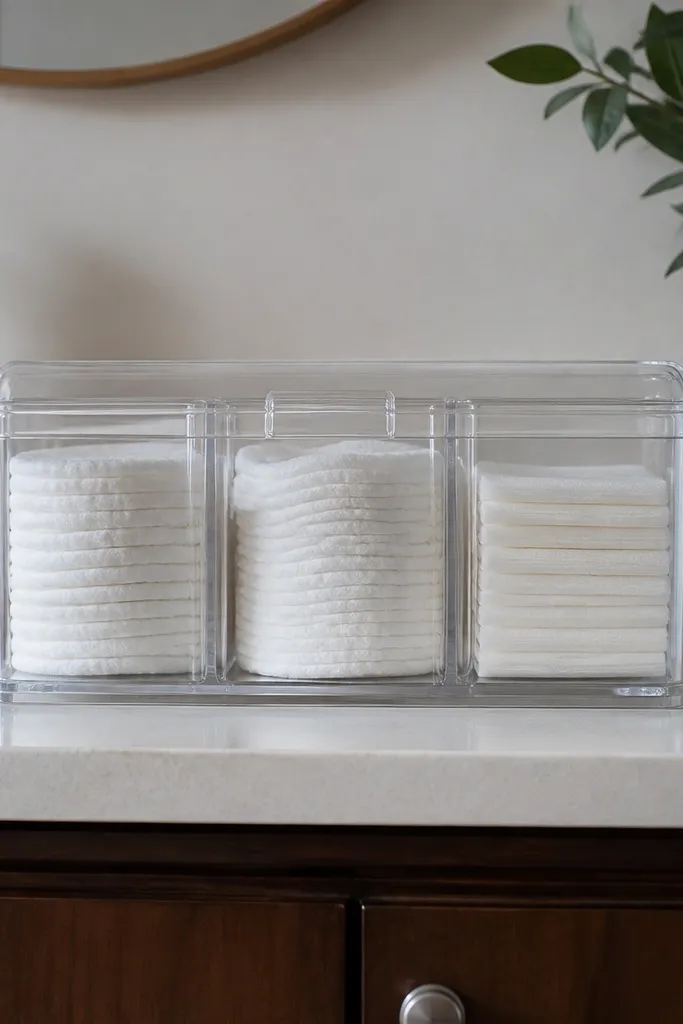
Cotton pads and wipes are functional, but they look messy when they’re stacked in a random pile. A clear flip-top container turns them into a clean, countertop-friendly station. The flip lid keeps dust off and prevents the “open bag” look. This is low-maintenance because you can grab what you need without opening multiple drawers or rifling through a bin. It also makes your vanity look finished because these are the items that show up in photos and in daily use.
Buy a clear organizer with a flip lid and internal compartments sized for cotton pads or rounds. Place cotton pads in the main chamber and wipes in the side compartment or smaller tray insert. Keep it near your mirror so you can wipe mistakes quickly. Wipe the container exterior weekly and check for residue around the hinge so it stays clear.
If your wipes dry out, store the organizer in a lower-humidity spot and close it fully after each use.
Avoid tinted containers — they hide how much you have and you’ll end up overbuying or leaving piles.
16. Under-Sink Stackable Bins for Backup Bottles (Label the Front)
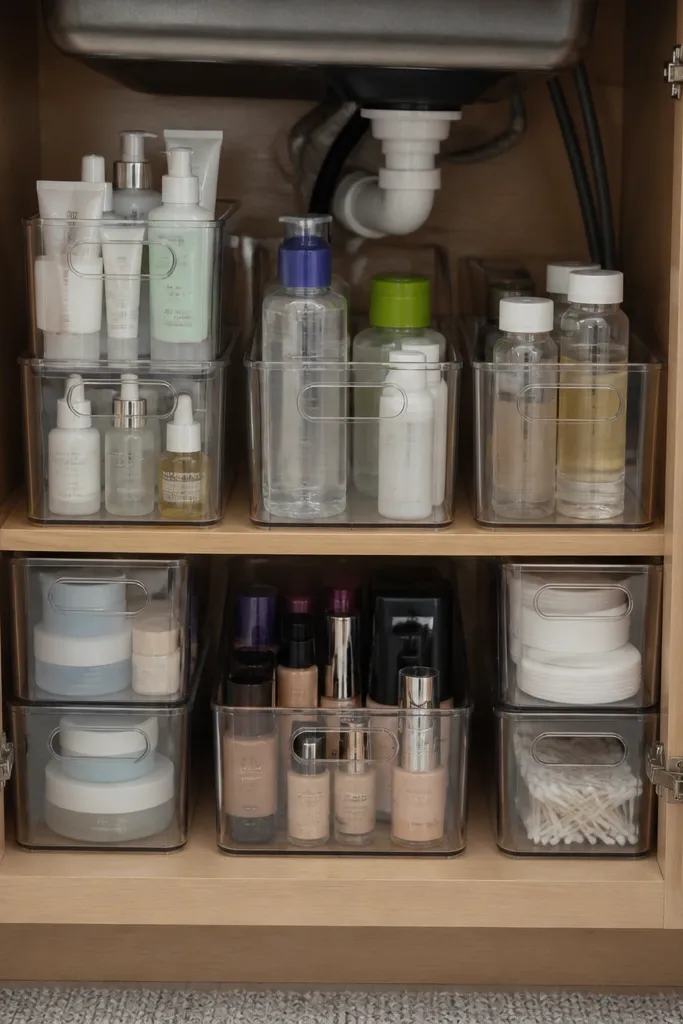
If your backups live on the floor of the cabinet, your vanity will always look chaotic. Stackable bins keep everything upright, and labeling the front means you don’t open and close multiple containers during restocks. This is low-maintenance because it’s a closed system: you pull one bin, grab one item, put the bin back. The look is clean when you crack the door because you see neat lines, not random bottles. Put this under a vanity sink or in a lower cabinet where you store extra base products and skincare you use with makeup.
Choose stackable clear bins that fit the cabinet depth and have front labels or label sleeves. Sort backups by type — foundation, concealer, primer, setting spray — and keep each type in one bin. Use a small divider in each bin so bottles don’t tumble when you pull it out. Label with short category names and a shade range if you have multiple tones.
Add a moisture-absorbing sachet inside the cabinet to reduce foggy labels and sticky lids.
Don’t stack too high — bins that are hard to reach get ignored and turn into the same messy pile.
17. Back-of-Mirror Organizer Pocket for Daily Receipts of Makeup

A back-of-mirror pocket is one of the simplest ways to keep “in the middle of your routine” items from landing on the counter. It holds small tools like mascara, brow gel, setting brushes, and cotton pads so you don’t keep placing them down and forgetting them. The look is tidy because the pocket hides clutter while still keeping items visible at a glance. It’s low-maintenance because you can grab and return without opening drawers. This works best for small spaces where your counter is constantly getting used for skincare too.
Pick a pocket organizer with multiple compartments and sturdy attachment straps or hooks. Hang it behind the mirror so it sits at the height of your working hand. Place items in the order you use them — brows, eyes, then touch-ups — and keep each item upright with a quick insert of tissue or a small divider card if needed. Check that the pocket doesn’t sag and that lids and caps don’t get caught when you remove products.
Use a washable liner inside the pocket if your tools leak; it saves you from scrubbing fabric.
Avoid pockets with one big compartment — it turns into a grab-bag fast.
18. Tiered Counter Stand for Lipsticks with Removable Liners
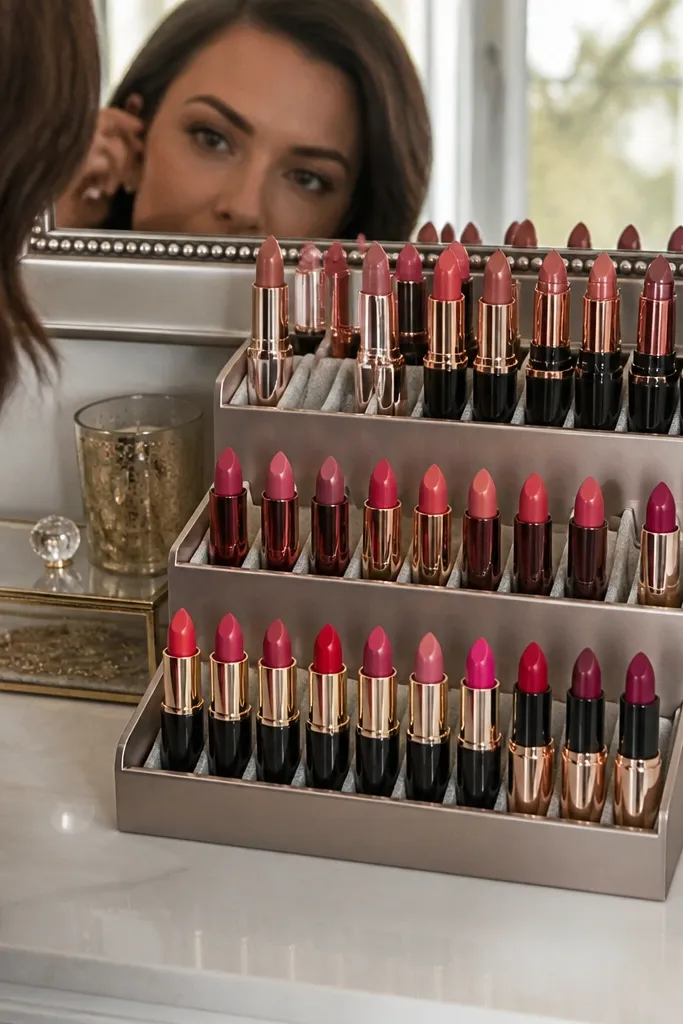
Lipsticks look best when they’re displayed upright in rows, and a tiered stand gives you that showroom look without taking over the whole counter. The tiers create height variety, so your vanity looks styled even with a small collection. Removable liners help you keep the stand clean when caps get smudgy or a tube sweats. This is low-maintenance because you can grab one lipstick and return it to the exact slot without searching. Use it for lipsticks, glosses, and lip liners that fit upright in the openings.
Choose a tiered stand with openings sized for your lipstick tubes (check diameter, not just “lipstick”). Add removable liners made from drawer paper or silicone so tubes don’t slide. Arrange by finish first — matte together, gloss together — and keep brands mixed only if the tubes have similar shapes. Finally, wipe the stand between weeks and replace liners when they start to look stained.
Keep a small microfiber cloth folded near your vanity — quick wipe after a cap touch keeps the display crisp.
Don’t over-pack the tiers — if tubes press too tightly, you’ll smudge finishes when you pull them.
19. Small Clear Cup Bar for Makeup Sponges and Blender Eggs
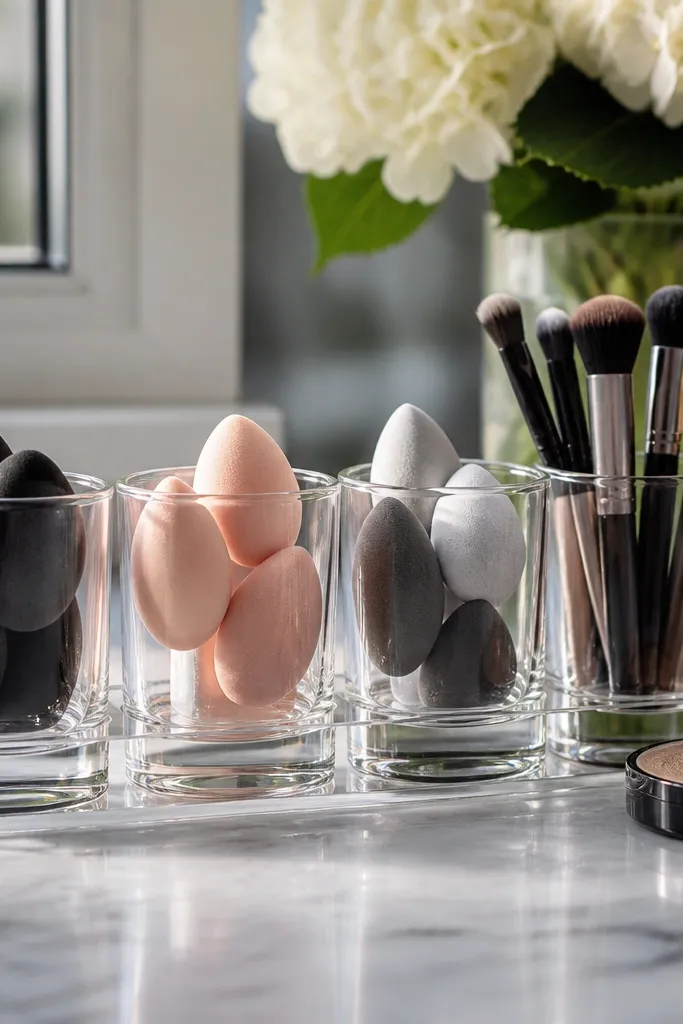
Sponges and blender tools are the fastest way to ruin a pretty vanity — they look messy when they’re piled in a container. A row of small clear cups keeps each tool visible and upright, and it makes the setup look like a clean station. Clear cups also show you which sponge is dry and ready, which reduces the temptation to grab a damp one. This is low-maintenance because each cup is a single home, and cleaning is simple: rinse cups, wipe rims, and reset. It’s perfect for a vanity where you do foundation regularly and want your tools to look neat.
Use a small bar organizer or make one by mounting a row of clear cups on a tray base. Ensure cup mouths are wide enough for your blender tools and short enough that they don’t tip. Keep one cup for “clean and dry” tools and one cup for “in use” or backup. Place a thin drainage mat or paper liner inside each cup so residue doesn’t pool and stain the base.
Editor's noteRotate sponge tools by type: one for cream products and one for powders, so the cups visually guide your routine.
Skip thisSkip covered sponge containers if you sweat a lot — trapped moisture makes the whole look and smell worse.
20. Hanging Organizers for Hair Tools and Brushes on a Side Rail
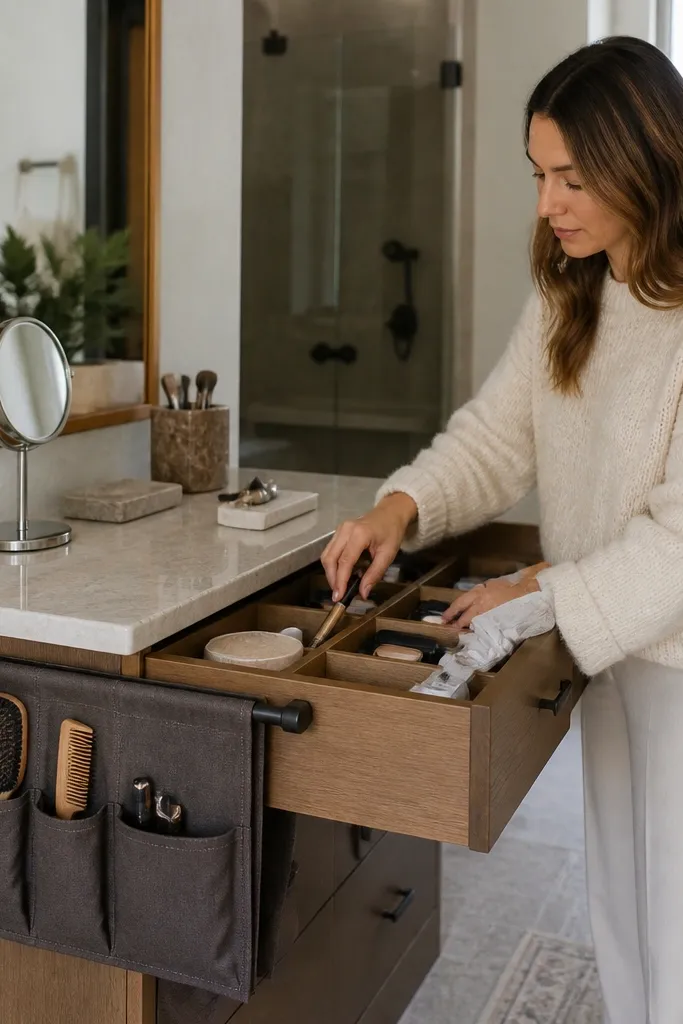
A vanity can get crowded fast because hair tools end up on the same surface as makeup. Hanging organizers on a side rail keep hair brushes, mini combs, and tool accessories from mixing with powder and lipstick. The look stays clean because pouches create consistent shapes and clear compartments. This is low-maintenance because you don’t have to move items around every time you do makeup; your hair stuff lives in its own vertical zone. It’s best if your vanity is also where you store blow-dry accessories or daily hair tools.
Install a small side rail or hooks next to your vanity mirror or inside a closet wall. Hang clear pouches with multiple compartments so brushes don’t get crushed. Put combs and small accessories in the smallest pockets, and keep larger brushes in the wider sections. Add one pouch specifically for cleaning items like hair clips or spare elastics so they don’t drift onto the makeup side.
Editor's noteStick to clear pouches so you can scan what’s where without opening them mid-routine.
Skip thisDon’t put heavy hot tools in pouches — they warp and melt plastic.



