
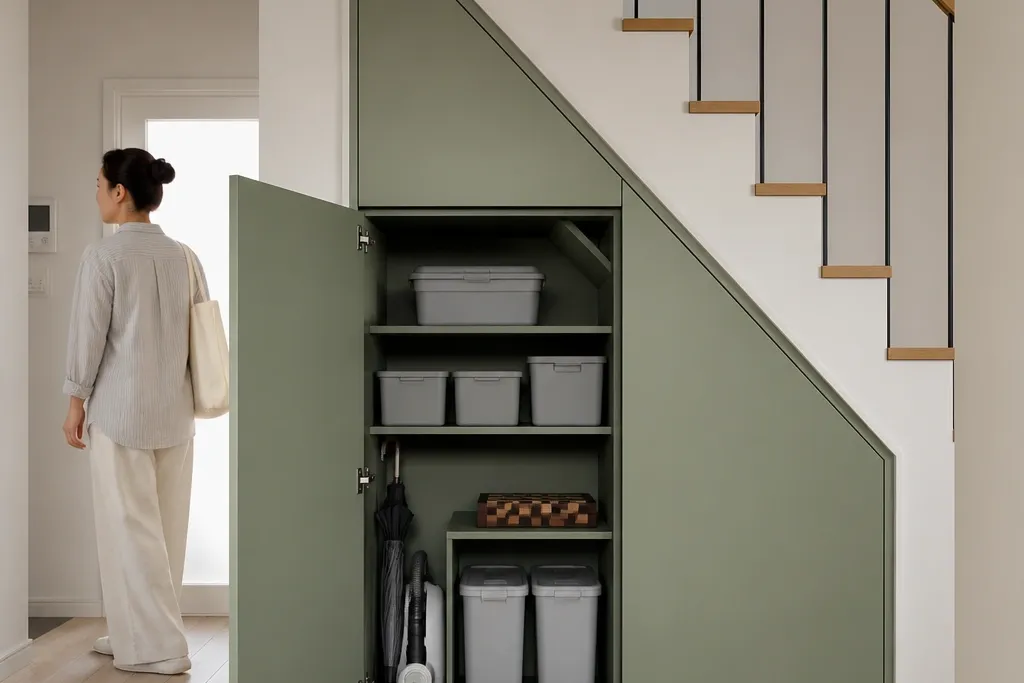
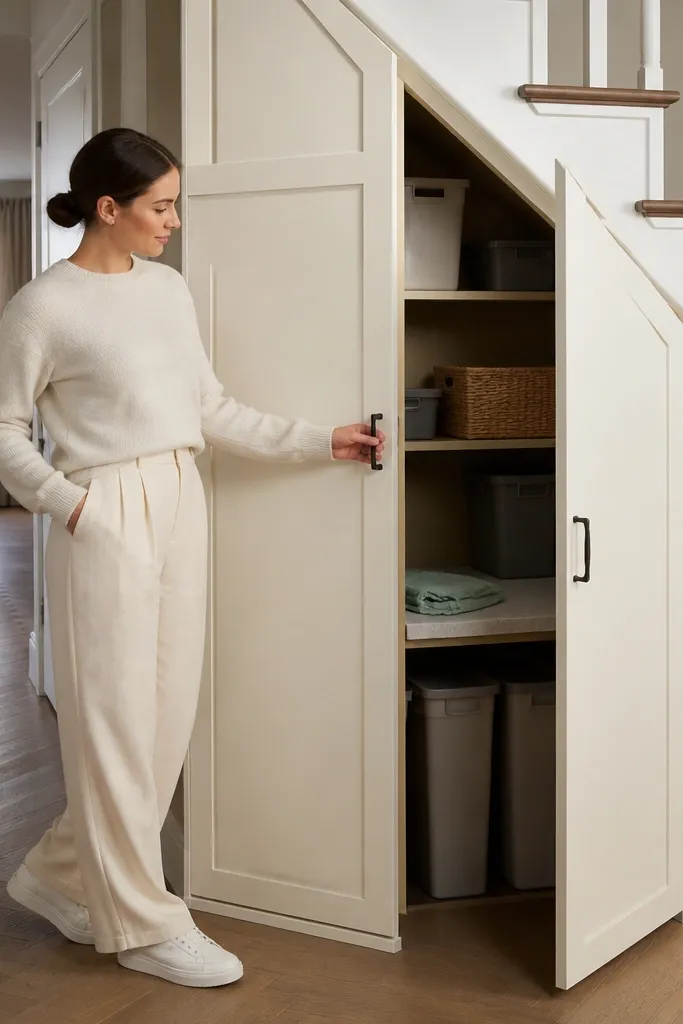
1. Shallow Shoe Cabinet with Slatted Lift Doors
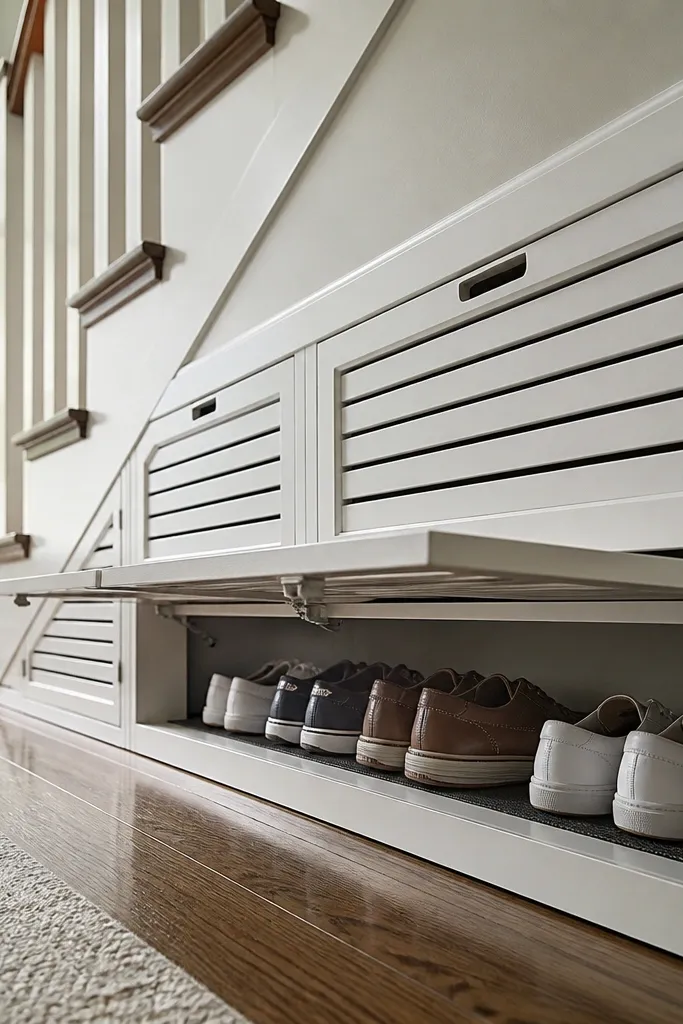
This is the cleanest way to store shoes under stairs without turning the space into a dusty open cubby. The slatted lift doors hide the mess, but the gaps still let air move so shoes don’t sit sealed and damp. Use it when the under-stairs area is shallow and you want a uniform, built-in look. Finished in a matte paint or vinyl wrap, it wipes down easily and looks intentional even in a small hallway. The build is beginner-friendly because you’re making a simple box and adding a door frame.
Measure the usable width and the shallowest depth you have, then build a cabinet box from 18mm laminated MDF with sealed edges. Install a fixed shelf platform at a height that fits shoes flat (aim for about 80-110mm between the shelf and the door line). Mount a slatted lift door set using a door frame and two lift hinges so the door rises smoothly and clears the opening. Finish by adding black bar pulls and a magnetic catch to keep the door closed.
Pre-paint or wrap the inside faces too. It makes scuffs less obvious and keeps wipe-downs consistent.
Don’t use fully solid doors with no airflow if you store damp shoes.
2. Tall Pantry Column with Rolling Wire Baskets
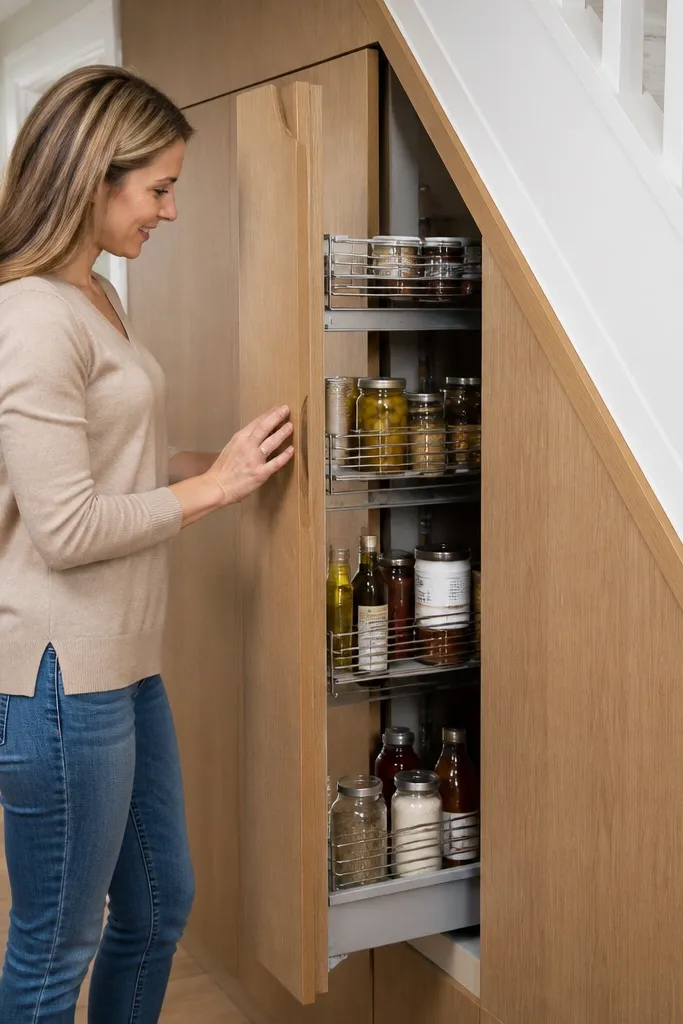
If your under-stairs void is tall but narrow, a pantry column looks sharp and keeps daily items easy to grab. Rolling wire baskets reduce maintenance because you can pull everything out to clean the base in one go. The door hides the clutter instantly, so the hallway stays neat even when you’re busy. This setup works well for snacks, extra toiletries, or pet treats. Visually, it’s photogenic because the baskets line up neatly and the front door makes the whole area look like furniture.
Build a tall cabinet frame from 18mm MDF and leave a clear internal width that matches your basket size. Screw in a pair of heavy-duty side rails at two heights so each wire basket rolls straight without wobbling. Add one or two internal stops so baskets don’t slam at the back. Fit a simple hinged door with a recessed handle and install a soft-close hinge if you want quieter daily use.
Choose baskets with a powder-coated finish and rounded corners; they wipe clean and don’t snag labels.
Skip cheap side rails that flex. Wobbly rails make baskets scrape and get annoying fast.
3. Drawer Bank Under the Wedge with Finger Pulls
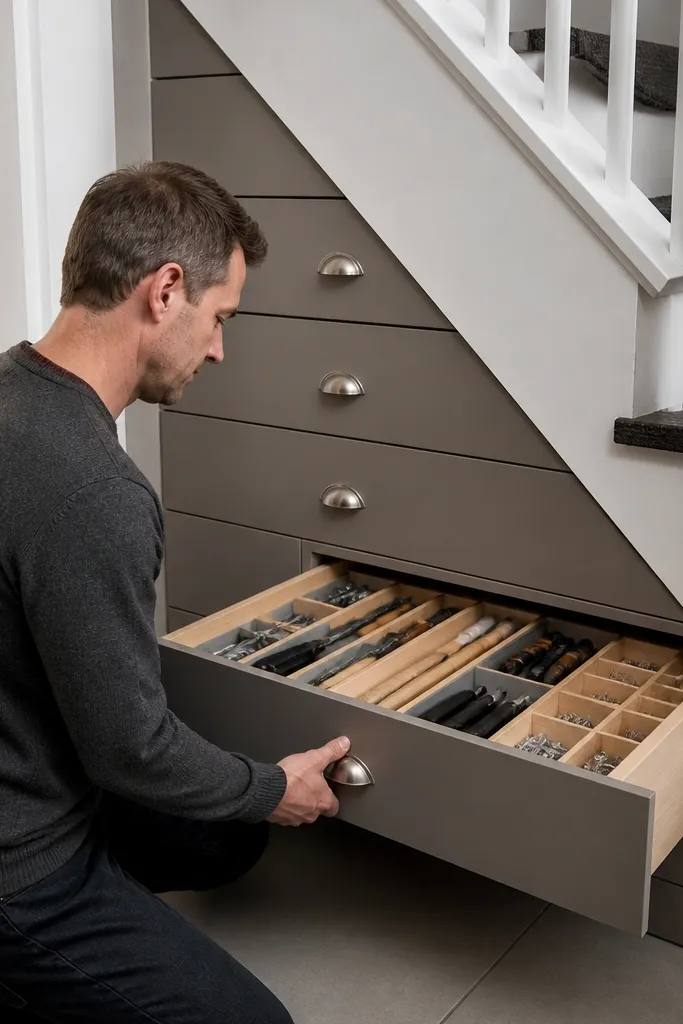
A drawer bank is the most low-maintenance option because drawers close fully and you can organize by category. Under stairs, the wedge shape usually ruins “one-size” shelves, but drawers let you control layout per section. Use this when you want the void to disappear visually while giving you quick access to small tools, chargers, wrapping supplies, or kids' odds and ends. Finger pulls look sleek and eliminate the need for protruding handles that catch backpacks. Finished in a flat paint, it stays easy to wipe and looks built-in.
Cut the cabinet side panels to follow the stair wedge profile and keep each internal run square where the drawers slide. Build three to five drawer boxes from 12mm plywood or MDF with sealed edges, sized so you get a consistent 3mm reveal around each front. Install full-extension drawer runners at the same height across the bank so drawers don’t drift. Finally, attach finger pull grooves on the drawer fronts and add a magnetic catch or latch if needed for alignment.
Editor's noteUse a single spacer template for drawer spacing. It keeps reveals even and the finished look clean.
Skip thisDon’t mount drawer fronts before you confirm runner alignment. Fixing it later is painful.
4. Flip-Top Console Storage with Hidden Lids
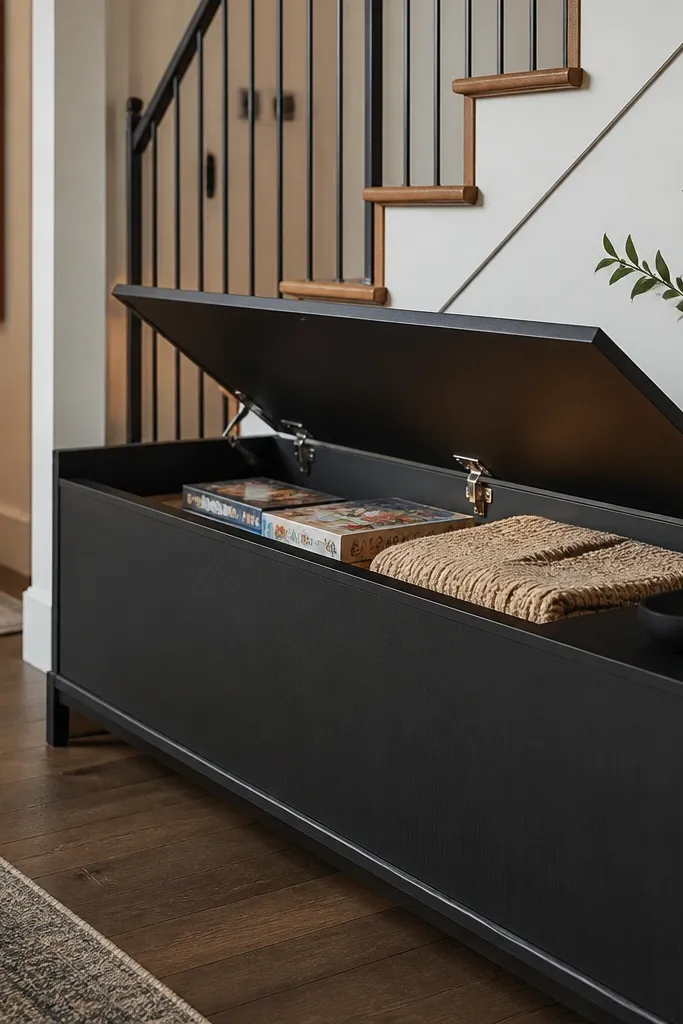
This one looks like furniture, not storage. A flip-top console with hidden lids lets you store bulky items like board games, extra blankets, or seasonal décor while keeping the top surface calm and clutter-free. The lid protects items from dust better than open shelves, which matters in hallways. It also gives you a place to drop mail or keys without building a separate table. Choose a durable top finish like laminate or solid surface so it’s easy to wipe.
Build a base cabinet with 18mm MDF and a solid top panel sized to cover the opening with a consistent overhang (about 10-15mm). Cut the internal compartment so it’s deep enough for the items you actually store. Attach flip-top lids using heavy-duty lift hinges and gas struts if the lid is wide, then add a magnetic latch to keep it shut. Finish the top with laminate or a sealed paint system, then fit a trim strip for a crisp edge.
Editor's noteAdd a thin felt or rubber bumper on the cabinet edge. It prevents lid chatter and scuffs.
Skip thisAvoid cheap lift hinges. They sag and make the lid drift over time.
5. Closed Cubbies with Removable Drawer Liners
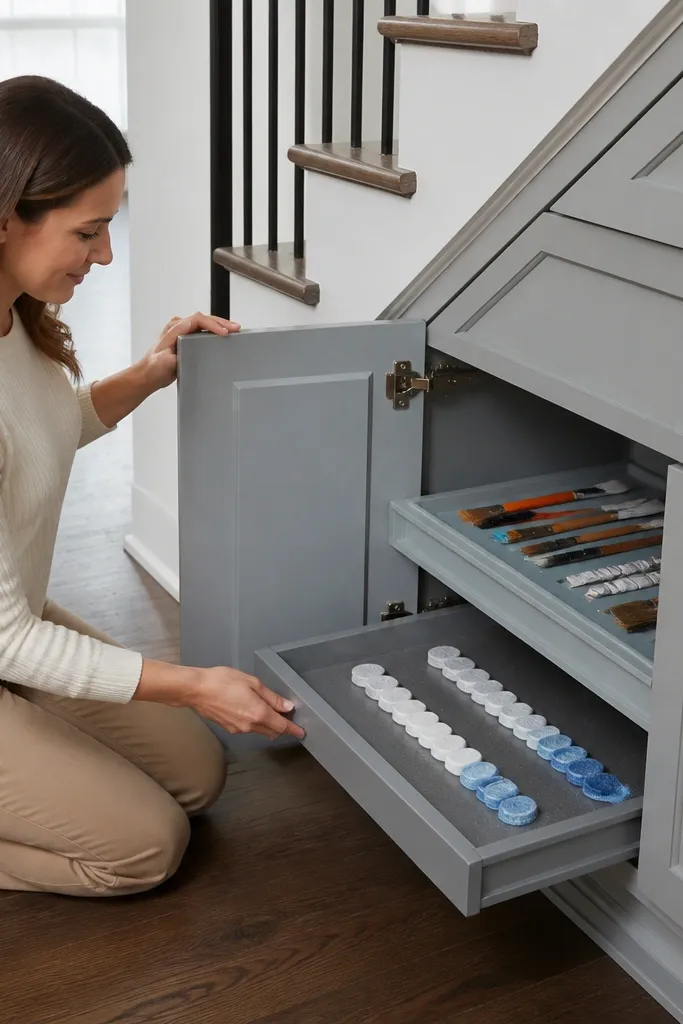
Cubbies can look great if you close them and make the inside easy to clean. These are small compartments with doors, but you keep maintenance low by using removable liners so spills and dust don’t become stains. This setup is perfect for art supplies, cleaning tablets, or kids' craft kits. The clean front doors keep the hallway tidy, while liners let you swap sections without rebuilding anything. It’s also photogenic because the door grid reads like built-in cabinetry.
Frame the under-stairs grid using 18mm MDF and build uniform openings, leaving a 2-3mm gap between doors. Add removable liners using waterproof contact laminate or thin plastic trays that fit each compartment snugly. Install small hinges on each door and align with shims so doors sit flush. Add magnetic catches for quick closure and finish with matching knobs or bar pulls.
Editor's noteLabel the liners, not the doors. Labels stay protected and look tidy when you swap contents.
Skip thisSkip open cubbies if you’re serious about low maintenance. Dust collects fast.
6. Broom and Vacuum Boot Cupboard with Bottom Vent
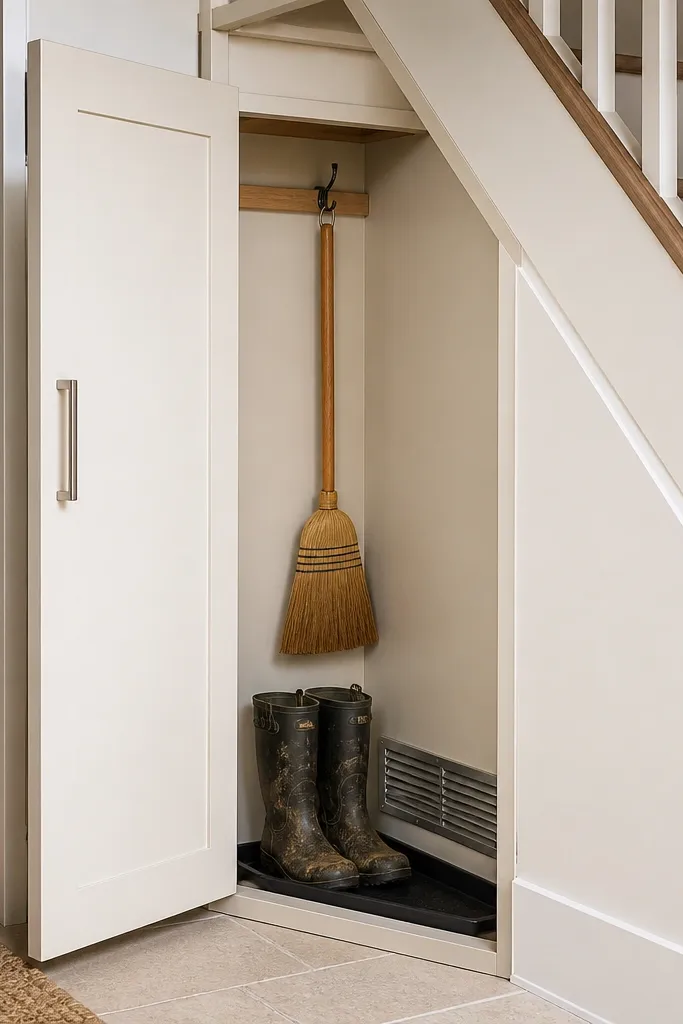
Long tools get messy — bristles, wet heads, and muddy boots. A broom and vacuum boot cupboard keeps all that tucked away with an easy wipe interior and a bottom vent that helps dry air out. The look is clean because the door hides the clutter, and the interior stays organized by hanging points and a boot tray. This works in entryways where mud and snow are real problems. Choose a hard-wearing interior like sealed plywood or a waterproof board so it survives damp items.
Build a tall cabinet with 18mm waterproof board or sealed plywood and create a bottom sump tray area using a removable plastic tray or tiled base panel. Install a vertical rail inside with hooks for brooms and a separate bracket for the vacuum wand so it doesn’t tip. Cut two vent slots low on the side or back and cover them with a grille to reduce moisture buildup. Fit a hinged door with a magnetic latch and add a threshold strip so water doesn’t creep inside.
Mount hooks on a removable back panel. If you change tools later, you swap panels instead of patching holes.
Don’t store wet mop heads in sealed cabinets with no airflow.
7. Sliding Door Under-Stairs Cabinet with Matte Black Rails
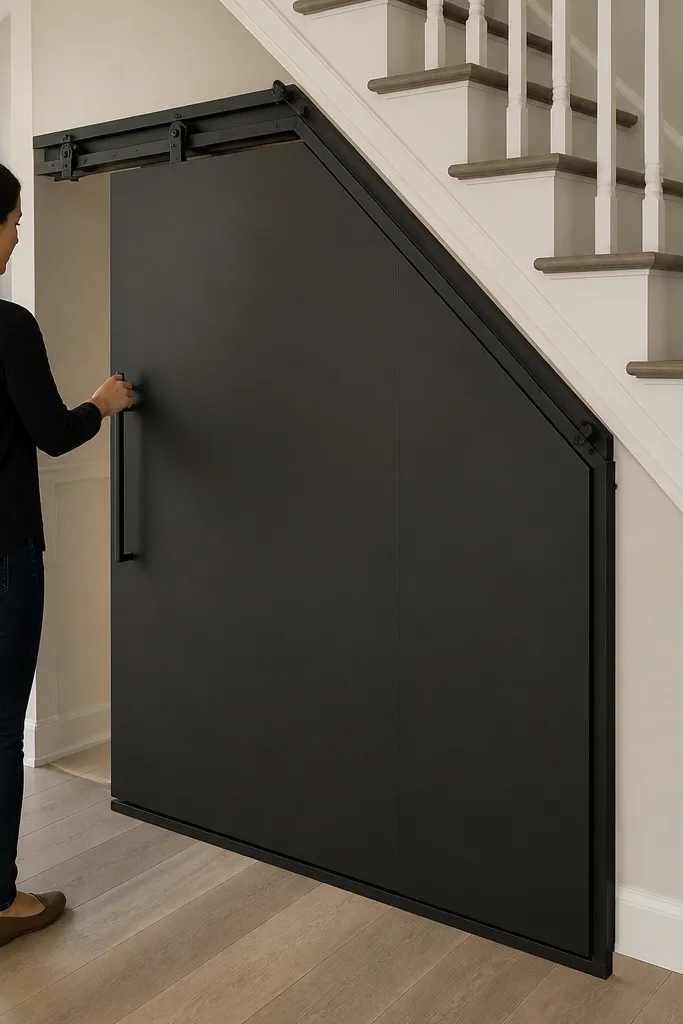
Sliding doors look sleek in tight homes because they don’t require swing clearance. For under-stairs storage, that matters when you have a hallway with limited space. Matte black rails and matching bar pulls make the unit feel custom and tidy. Maintenance stays low because the door seals the contents from dust. This is a great choice for bulk items like spare linens, vacuum bags, or storage bins you don’t want on display. Use the same finish on the entire front so it reads as one piece of furniture.
Build a cabinet box from 18mm MDF and install a single wide internal shelf or two shelf levels based on your bin sizes. Mount the sliding track at the top and hang the door panel with a floor guide to keep it from rubbing. Use a door panel thickness that won’t warp (18-20mm) and add a soft-close damper if the track supports it. Finish the door edges with sealed edging tape and wipe-test the surface with a damp cloth before you commit to painting.
Editor's noteVacuum the track once a month. It keeps sliding smooth and prevents gritty noise.
Skip thisDon’t mount the track before you test the door clearance at the narrow end of the wedge.
8. Corner-Style Pull-Out Pantry Shelf with Stops
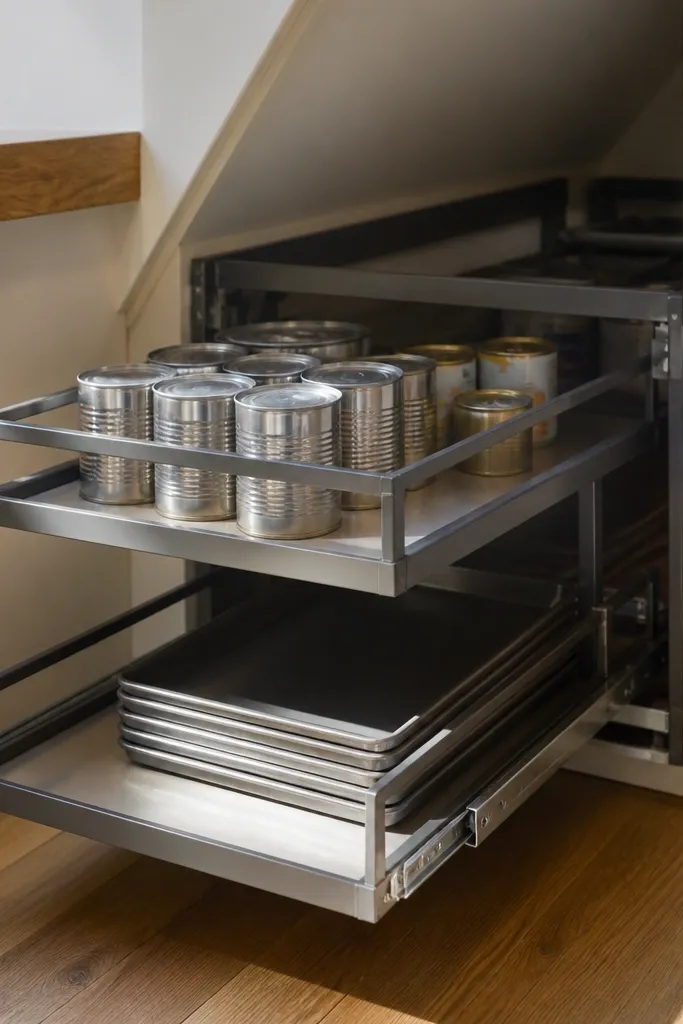
When the space is too awkward for cabinets, a pull-out shelf gives you clean access without open clutter. The shelf slides out, then stops at a fixed point so you can grab items without digging. It’s ideal for canned goods, cleaning spray, or baking trays that fit flat. Visually, it looks crisp because you can keep the front face simple and the shelf edge trimmed in matching color. Low maintenance comes from the fact that everything is closed and contained when slid in.
Cut a shelf panel to fit the wedge opening and add a 10-15mm front trim strip for a finished edge. Install drawer slides rated for the shelf weight, using one slide per side if the shelf is wide enough. Add a stop block so the shelf doesn’t overextend and scrape the back panel. Fit a simple face board front so the shelf looks like it belongs to the under-stairs cabinet system.
Use rubber shelf bumpers at the stop point to prevent clacking and scuffs.
Don’t skip the stop block. Overextension destroys alignment fast.
9. Under-Stairs Utility Cabinet with Tiled Splash Back
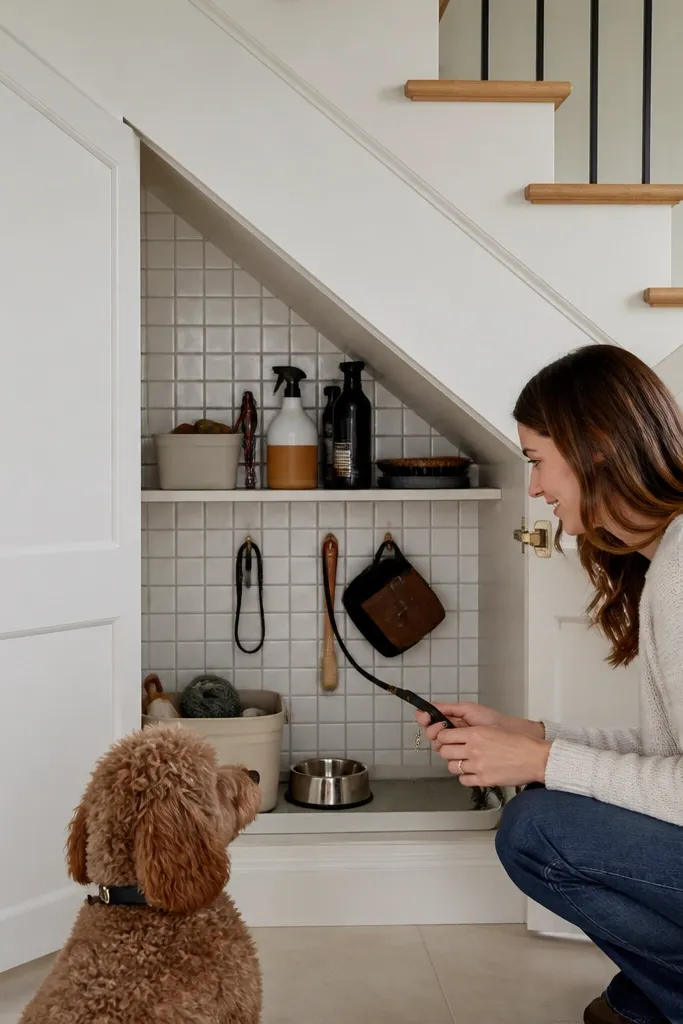
If your under-stairs storage touches messy jobs — laundry add-ins, shoe spray, pet gear — a tiled splash back makes a noticeable difference. Tile is wipeable, resists staining, and looks clean even when you store practical items. Pair it with closed cabinet doors so the hallway still looks neat. This idea is great for small utility zones where you don’t have space for a full laundry room. The front can match your hallway cabinetry, while the tiled interior stays practical.
Build the cabinet shell and line the back wall with a waterproof backing board before tiling. Install the tile with thinset or a tile adhesive made for your substrate, then grout and seal once cured. Add fixed shelves and a removable caddy for small bottles so you can clean the back panel easily. Finish the door fronts with a durable paint or laminate and add a magnetic latch.
Use light grout and seal it well. It makes future wipe-downs simpler and prevents dark staining.
Don’t tile onto bare MDF. It swells and cracks.
10. Fabric-Covered Drawer Fronts with Washable Liners
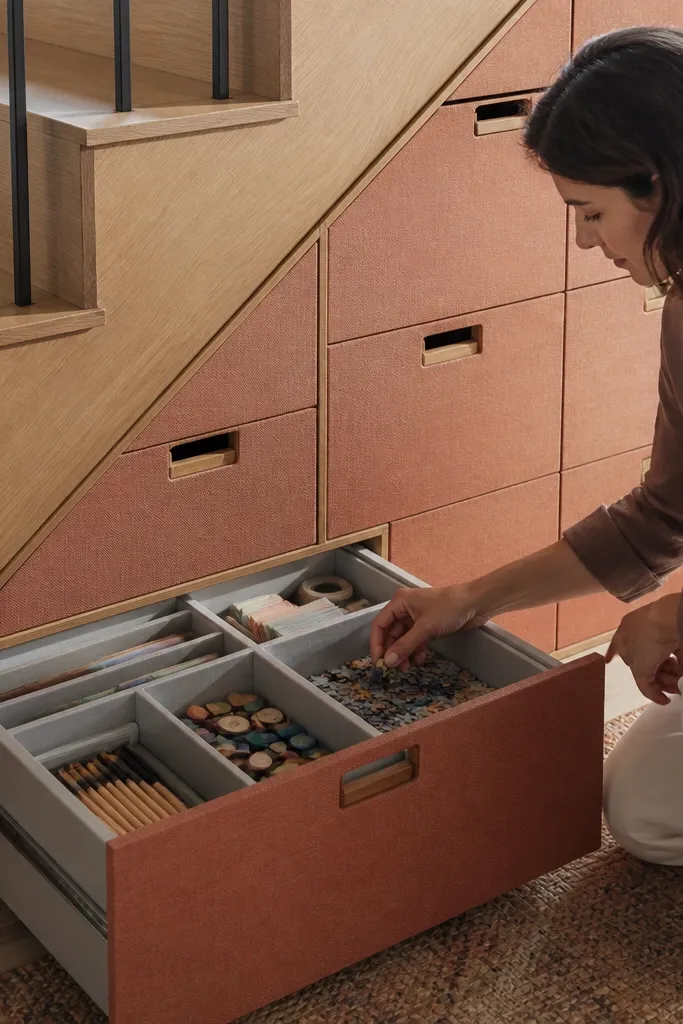
This is the aesthetic play for low-maintenance storage. Fabric-covered drawer fronts look warm and designer, but the maintenance stays manageable if you keep the interior wipeable and use removable liners. It works best for kids' items, board games, or craft supplies where you want it pretty but still practical. Keep the fabric on the front only, not on the inside, so spills don’t soak in. The result reads like built-in furniture with a softer texture.
Build a drawer bank with MDF fronts and apply a fabric wrap on the exterior only, stretching tightly and stapling to the back of the MDF. Use a washable fabric that can handle light damp wiping, then seal the edges with a clear coat or fabric sealant made for textiles. Line each drawer with a removable vinyl or wipeable plastic insert. Install drawer runners and add consistent pulls, then test drawer opening with the fabric thickness included.
Use a fabric with a tight weave. Loose weaves trap dust and look dull sooner.
Don’t wrap the inside faces. Keep the interior waterproof.
11. Glass-Front Upper Cabinet with Closed Lower Storage
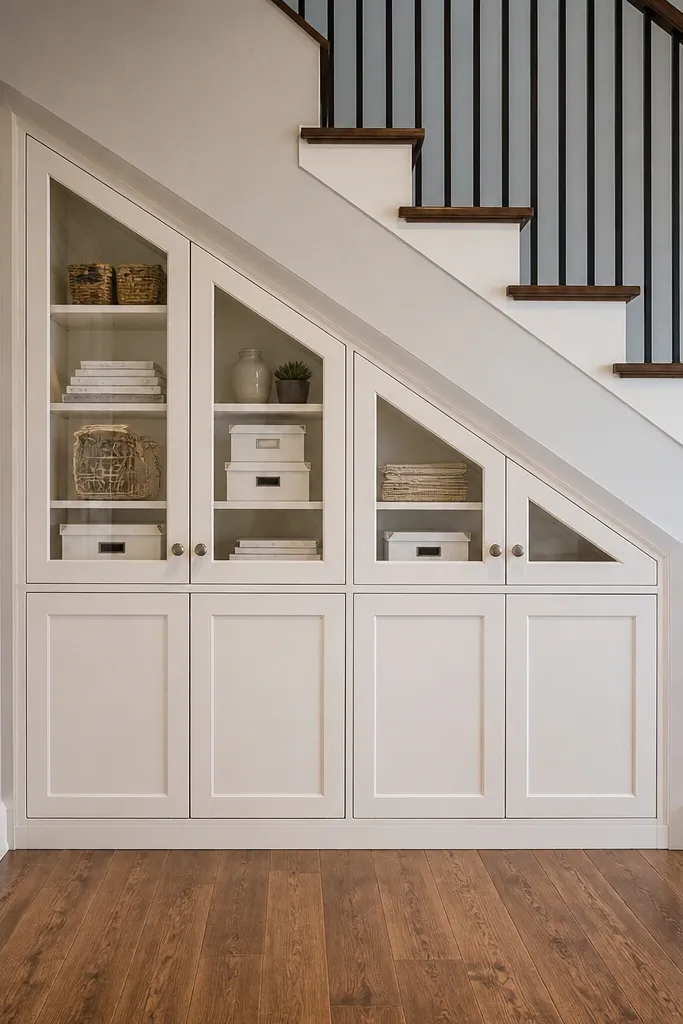
This one is for people who want under-stairs storage to look airy instead of heavy. Put glass on the top section only so you can see decorative items or neatly stacked boxes, then keep the bottom section closed for real mess. The glass is low maintenance because you can wipe it fast, and closed doors protect most contents from dust. Visually, it creates a layered look that photographs well in hallways with natural light. Use it when the void is narrow but you want it to feel intentional.
Build a cabinet with two vertical zones: an upper compartment for glass doors and a lower compartment for solid doors. Use thin clear acrylic or real glass fitted into a frame with glazing beads. Install shelves so items sit evenly and don’t tip forward. Mount solid doors with soft-close hinges and add magnetic catches so the lower zone stays dust-free.
Editor's noteUse shelf clips so shelves can be removed for deeper cleaning without disassembly.
Skip thisDon’t put glass on the whole unit if you store daily clutter. Dust shows fast.
12. Pegboard Back Panel with Matching Door Fronts
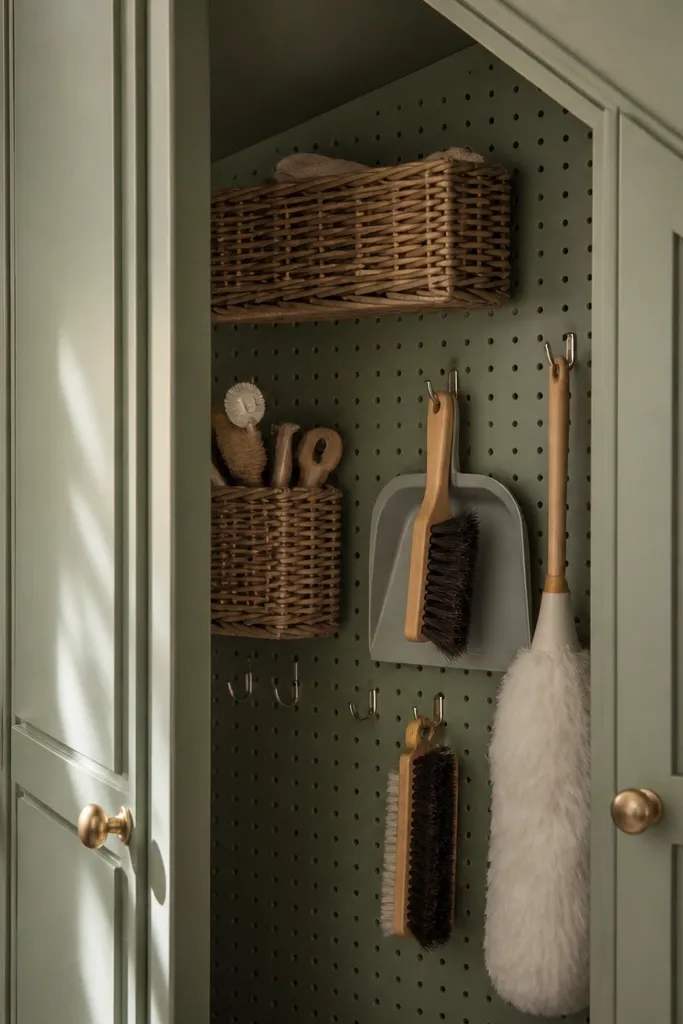
Pegboard inside a closed cabinet is one of the best low-maintenance compromises: you get flexible organization without leaving tools exposed. The door keeps dust off, but the pegboard lets you move hooks and baskets when your needs change. This looks especially good if you paint the pegboard and frame the same color as the hallway built-ins. Store small tools, charging cables, craft scissors, or pet accessories on hooks. It’s also satisfying to look at because everything hangs in neat rows.
Build a cabinet shell with 18mm MDF and mount a pegboard panel on the back using spacers so it doesn’t sit flush against the door. Paint the pegboard and seal it so cleanup is easy. Install hooks and small wire baskets, then add a solid door front with hinges aligned to the cabinet opening. Add a magnetic latch and consider a soft-close hinge so the door doesn’t slam.
Editor's noteUse uniform hook types. Mixed hooks look messy and make the system feel random.
Skip thisDon’t leave the pegboard exposed without a door. That defeats low-maintenance storage.
13. Built-In Bin Wall with Hinged Lids and Label Slots
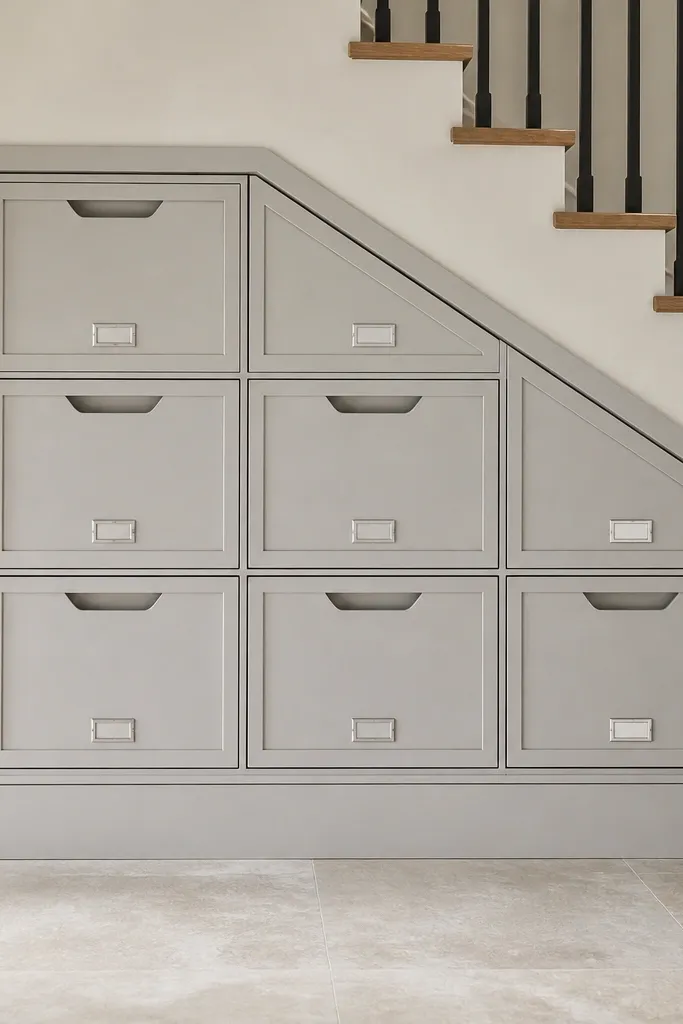
This is a great option for tight homes because it keeps small items contained and visually organized. Hinged lids hide the bins, while label slots make it easy to reset the system when you reorganize. The bin wall also photographs well because the front faces align and the label area creates a neat grid. It’s ideal for craft supplies, spare chargers, cleaning sponges, or kids' school extras. Maintenance stays low because you’re not dusting open cubbies.
Plan the grid sizes around standardized bins so you don’t fight irregular shapes. Build the wall frame from 18mm MDF and install bin supports with screws so they’re solid. Add a set of hinged lid panels on the front using small hinges, and cut label slots into the lid face board. Finish the front in a durable paint and install magnetic catches to keep lids shut.
Editor's noteUse bins with smooth sides. They wipe faster and look cleaner than textured plastics.
Skip thisDon’t choose bins with lids that don’t sit flat. You’ll get gaps that collect dust.
14. Under-Stairs Storage Bench with Removable Fabric Basket Drawer

A storage bench under stairs is one of the best ways to make the space useful without adding clutter. The seat top looks like furniture, and the hidden compartment keeps the hallway tidy. Pair it with a removable basket drawer for frequently used items so you can lift the whole thing out for cleaning. Choose a stain-resistant fabric or a wipeable top finish so maintenance stays low. It’s especially good in narrow entries where you need seating and storage at the same time.
Build a bench base from 18mm MDF with a hinged seat panel attached to reinforced hinges. Create an internal compartment sized for a removable basket drawer and add a simple wooden or metal rail so the basket slides out. Install a gas strut or lift hinges to keep the seat open smoothly. Finish the seat top with laminate or a fabric cover over a sealed base, then add corner protectors to prevent scuffs.
Use a removable tray under the basket drawer. It catches dust and crumbs without you scraping the bottom.
Don’t hinge a thin seat panel. It warps and makes the bench look sloppy.
15. Slim Under-Stairs Cabinet with Full-Height Soft-Close Door
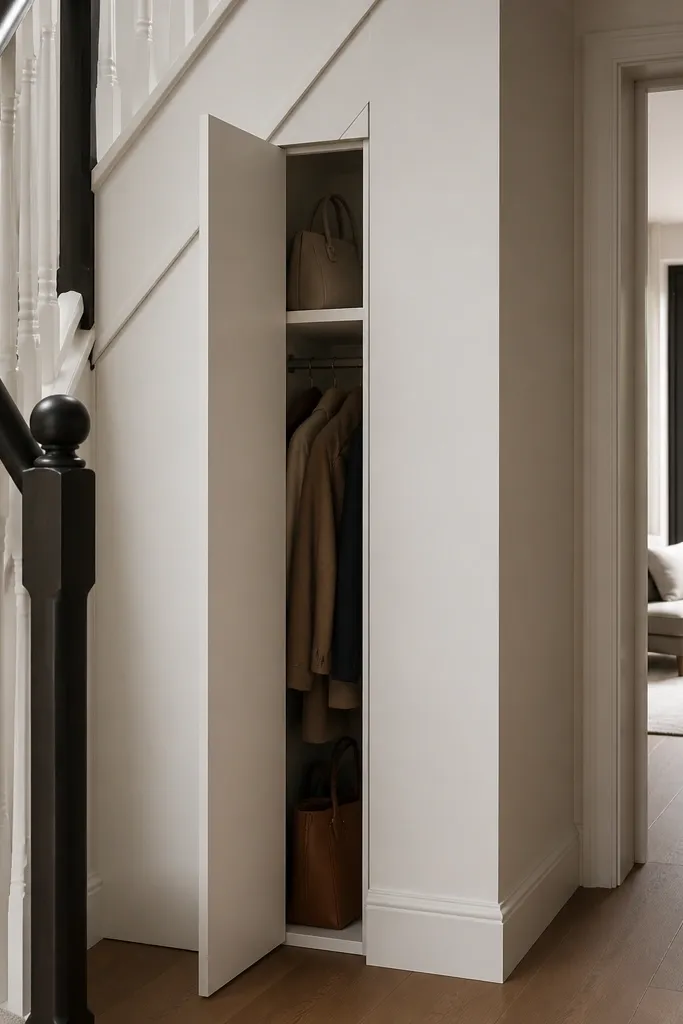
If your under-stairs void is narrow and tall, a single full-height cabinet door looks clean and reduces the number of moving parts. One door means fewer misalignments, fewer catches, and less maintenance than lots of tiny panels. Inside, you can add a single deep shelf or a hanging rail for bags and coats. The front is the aesthetic — smooth door, consistent handle, and a crisp reveal. This is also a good choice if you want a calm, minimal look.
Build the cabinet frame to the wedge shape and keep the door opening square at the front face. Use 18-20mm MDF for the door and apply a durable finish that wipes well. Install one set of soft-close hinges rated for the door size and add an adjustable strike plate for perfect alignment. Add one interior shelf at a height that matches your bins or hanging items, then seal all edges.
Editor's noteUse an adjustable hinge plate. It makes alignment fixes quick without redoing the door.
Skip thisDon’t use cheap hinges. A heavy door with weak hinges will sag.
16. Under-Stairs Drawer with Cutlery-Style Inserts for Small Tools
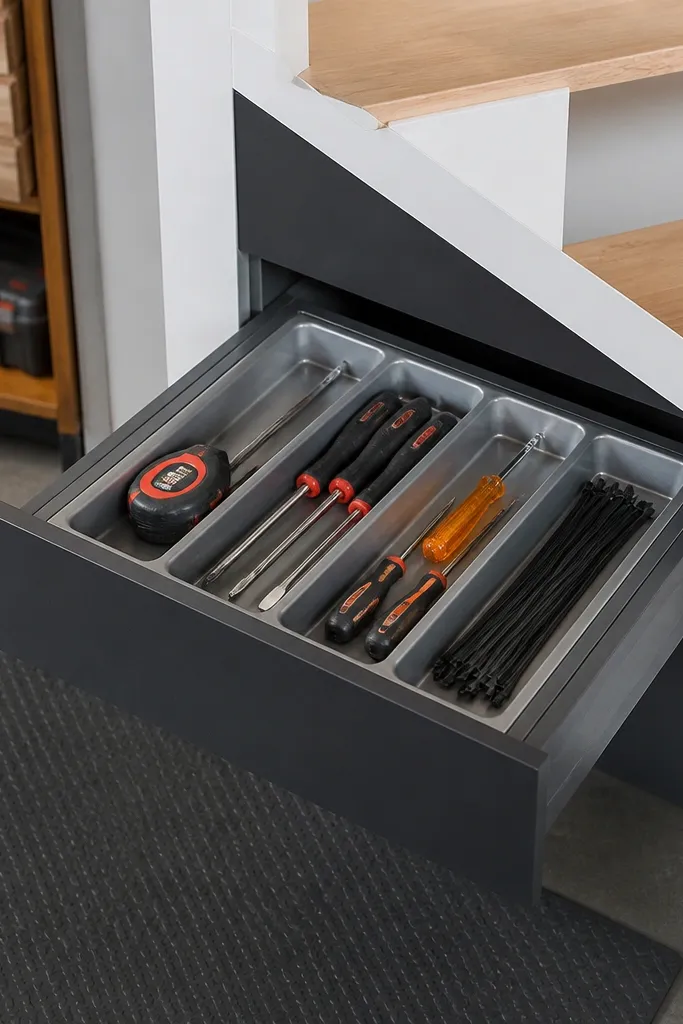
This is a small-storage idea that still looks premium. Instead of random piles, use drawer inserts like cutlery organizers so screwdrivers, tape measures, and cables have a home. Low maintenance comes from the fact that everything has a defined spot, so the drawer stays neat and easy to wipe. It’s perfect for entryway “life admin” items like charging bricks, keys organizers, and light household tools. The aesthetic is crisp if you keep the insert color consistent and the drawer front clean.
Build a shallow drawer sized to the under-stairs void and add sealed sides so it wipes easily. Install modular plastic or wood inserts with adjustable compartments, leaving at least 5mm clearance from the drawer edges. Add a non-slip liner on the drawer bottom so inserts don’t slide. Finish with a simple pull and a magnetic latch if the drawer is hard to reach.
Editor's noteMeasure one insert module against your most-used items first. Build around the tools you grab daily.
Skip thisSkip foam inserts. They trap dust and look messy after a few months.
17. Under-Stairs Cabinet with Flip-Down Tray for Wrapping Paper
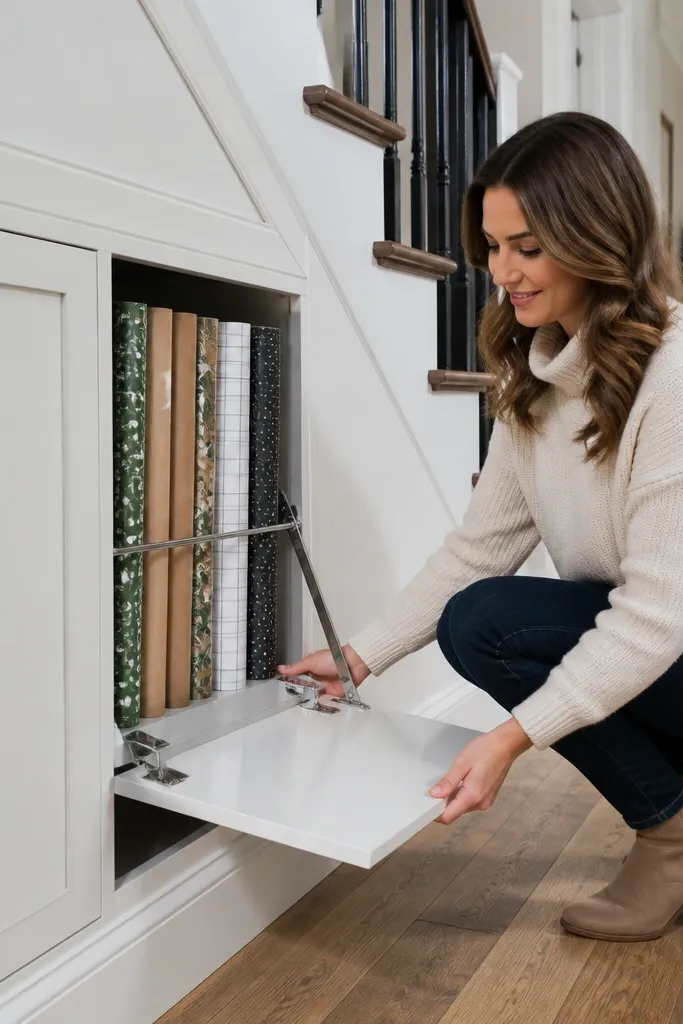
Wrapping paper storage is where under-stairs ideas usually fail, because paper unrolls and creates a mess. A flip-down tray solves that by storing rolls upright or flat behind a closed door, then flipping down to give you access. The look is tidy because the tray stays hidden most of the time. You also get a clean surface for quick cutting. This is low-maintenance because you don’t fight tangled rolls or dust-covered paper stacks in open cubbies.
Build a cabinet with an internal compartment sized for wrapping paper rolls, then add a flip-down shelf panel supported by a hinge and a locking prop. Install two side guides so rolls sit straight and don’t tip when you open the tray. Fit a hinged door in front to keep dust out. Add a removable cutting mat on the flip-down tray so you can wipe it quickly after use.
Editor's noteStore rolls with rubber bands removed. Bands dry out and leave sticky spots on the paper.
Skip thisDon’t store rolls loose with no guides. They slide and get crushed.
18. Hidden Under-Stairs Larder with Removable Shelf Panel
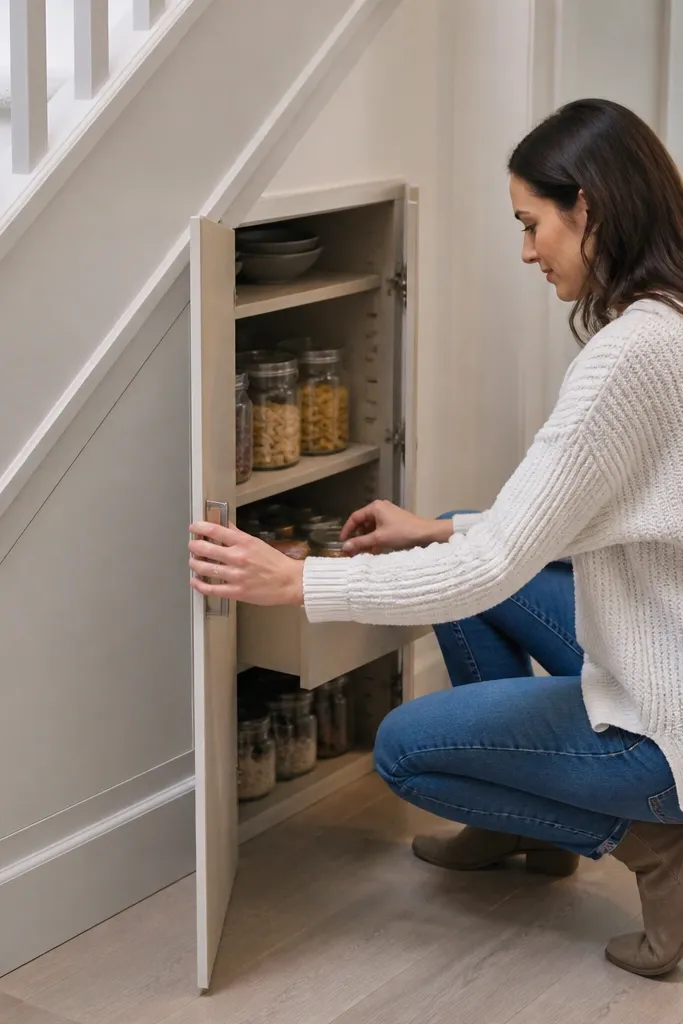
This idea hides a storage zone behind a small door so the outside stays clean, but the inside is still flexible. A removable shelf panel lets you reconfigure spacing without rebuilding the cabinet. It’s a good fit for tight homes where the under-stairs area is visible from the hallway and you want it to look quiet. Use it for pantry backups, cleaning refills, or kids' snack boxes. The low-maintenance part is simple: the door keeps dust off, and the shelf panel removes for faster cleaning.
Build a cabinet shell with a single door and two fixed side frames. Install one fixed shelf and leave the second shelf as a removable panel on shelf pins or a simple rail system. Cut a door opening with a consistent reveal and add a magnetic latch. Finish the door front in the same material as the hallway cabinetry so it reads like built-in storage.
Use shelf pins with a locking lip so the removable panel doesn’t creep over time.
Don’t use thin boards for removable shelves. They flex and the panel starts to wobble.
19. Under-Stairs Bin Drawer with Clear Front Labels and Matching Doors
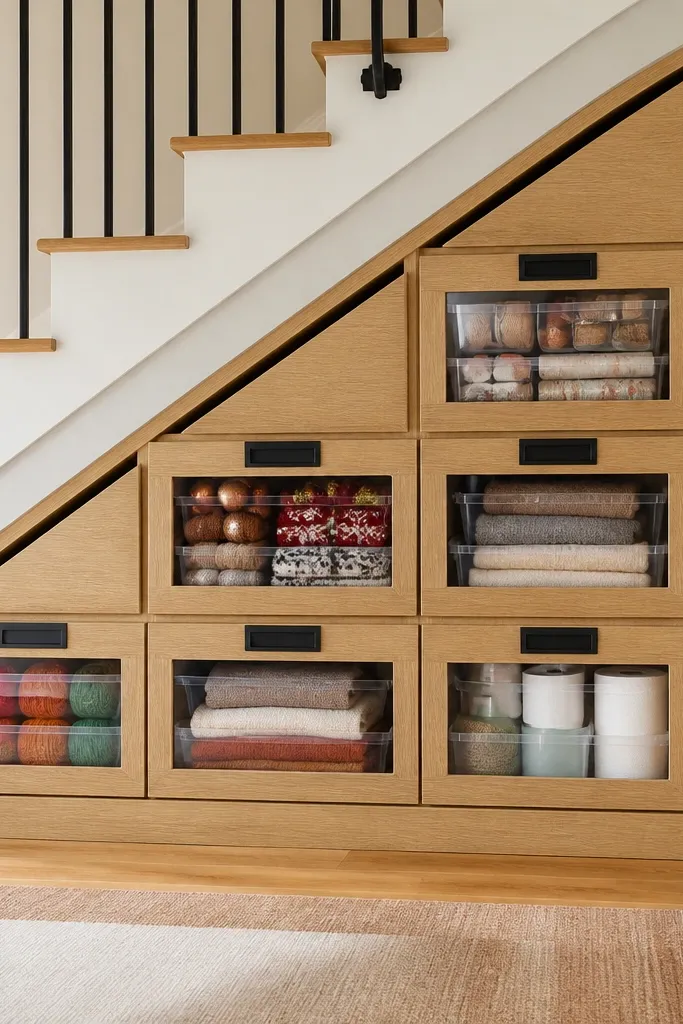
Label windows make this storage system look organized even when the bins are full. The aesthetic is clean because the fronts align and the label area creates a neat rhythm across the void. Maintenance stays low because you can identify items quickly and put them back without rummaging. Use it for seasonal items, spare linens, or holiday décor that you don’t want to dig for. Choose clear label windows that wipe clean without scratching.
Build a drawer or cabinet base with bin-sized compartments and use bins with a flat front. Install a clear label window panel over each bin front with a simple frame so labels stay protected. Add matching door fronts or a drawer face so the bins are hidden from view when closed. Use soft-close hinges or gentle drawer runners to keep everything quiet and smooth.
Editor's notePrint labels on waterproof label paper and laminate them. Wipe-downs won’t smear ink.
Skip thisSkip marker labels on the bins. They smear and look messy fast.
20. Under-Stairs Storage with Built-In Curtain Door for Shallow Voids
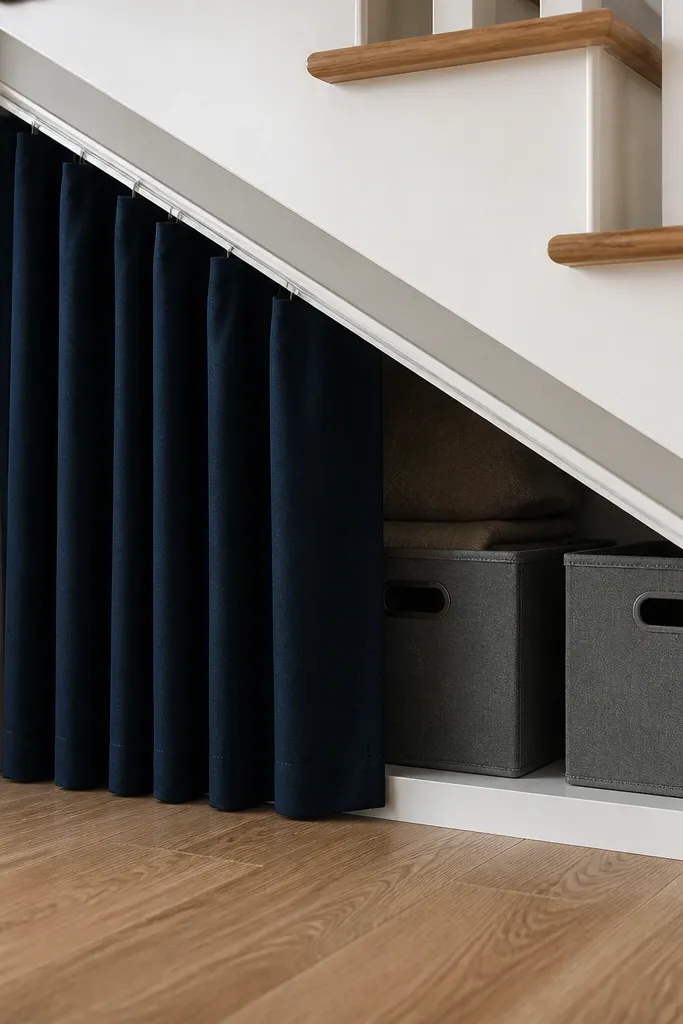
When the under-stairs space is too shallow for rigid doors, a curtain door looks surprisingly good and keeps dust down. It’s still low maintenance because the curtain can be removed and washed, and the storage stays covered. Pick a structured curtain fabric with a tight weave so it doesn’t look droopy. This works for linen backups, board games, or pet supplies when you want the front to feel soft and stylish. The look is clean if you keep the curtain rod and brackets minimal and centered.
Build a shallow cabinet frame and stop the interior at a consistent height so the curtain hangs evenly. Install a curtain rod or track at the top with side brackets that keep the fabric from blowing out. Use a curtain with a weighted hem or add a thin magnetic strip at the bottom edge for closure. Add a small inner shelf and a removable bin so items stay organized and easy to pull out for cleaning.
Use a dark neutral curtain and a lighter liner behind it. It hides contents without making the void feel heavy.
Don’t use flimsy thin fabric. It bunches and looks untidy.



