
1. Matte charcoal penetrating sealer on stacked limestone
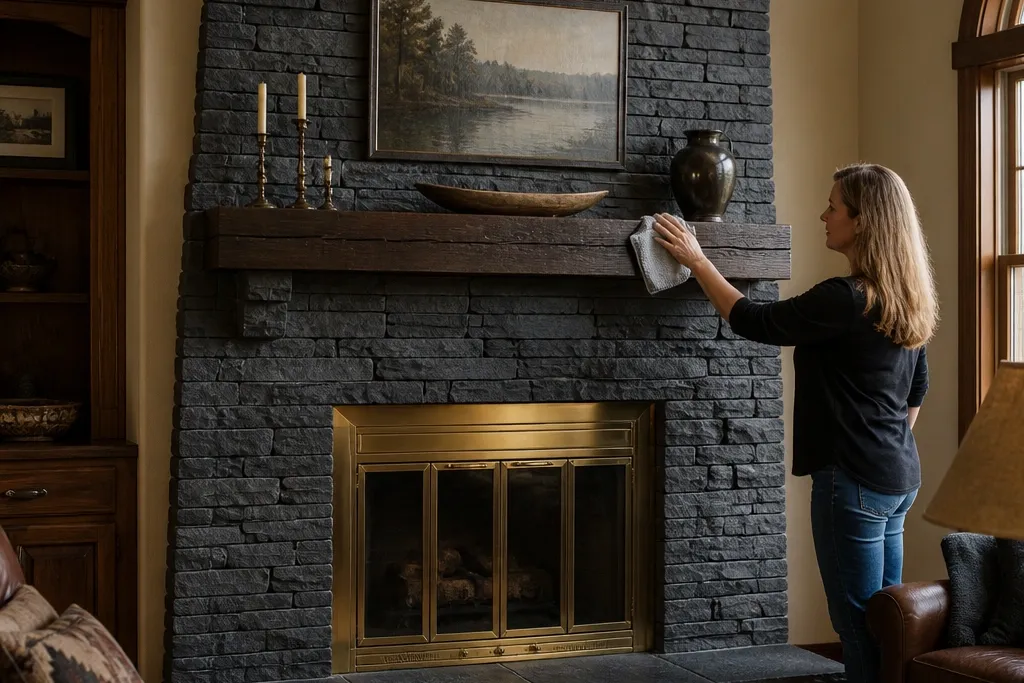
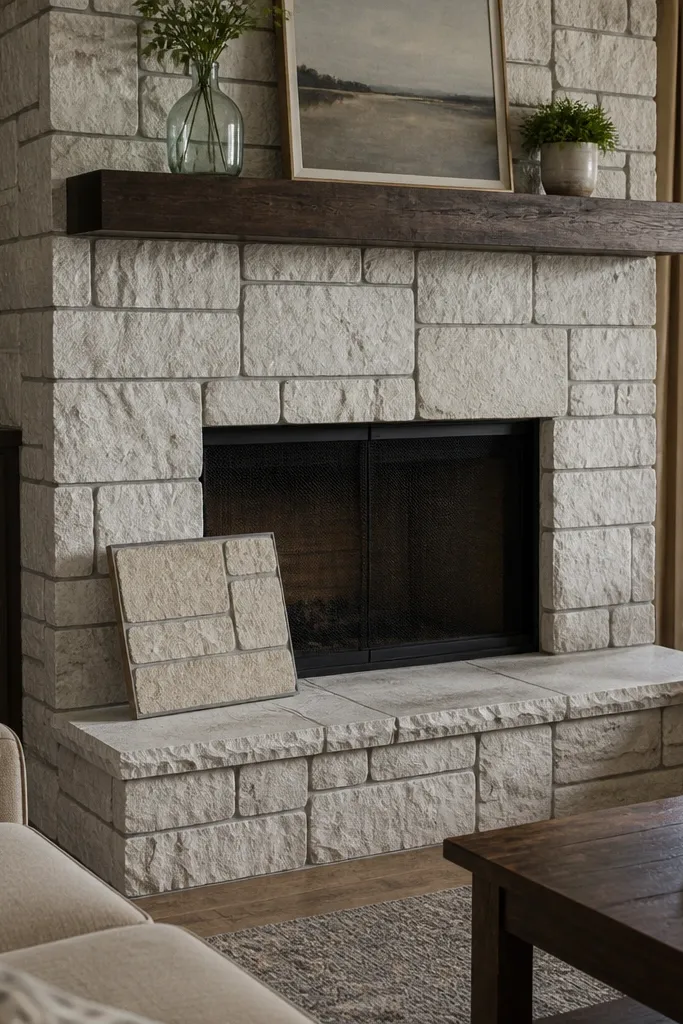
Stacked limestone looks sharp when the surface stays dry-looking and color stays even. A matte penetrating sealer keeps that limestone texture from turning shiny while still reducing staining from soot and cooking smoke. Charcoal-leaning tones also hide the gray “halo” that shows up around the firebox over time. This is a great option if you want the stone to read natural but still be wipe-friendly with minimal effort.
Start by cleaning the stone with a stone-safe degreaser, then let it fully dry. Apply a penetrating sealer made for limestone in thin, even coats, working one vertical section at a time so you don’t miss edges around the opening. After the first coat cures, apply a second coat only if the stone still looks thirsty (drier patches). Finish by checking a small test area under warm light to confirm the sheen stays matte.
Editor's noteDo a 24-hour test patch and check it under daylight and at night; sheen changes show up fast with limestone.
Skip thisSkip spraying a heavy coat over dusty mortar joints — it creates uneven dark spots.
2. Satin whitewash over light fieldstone with sealed grout
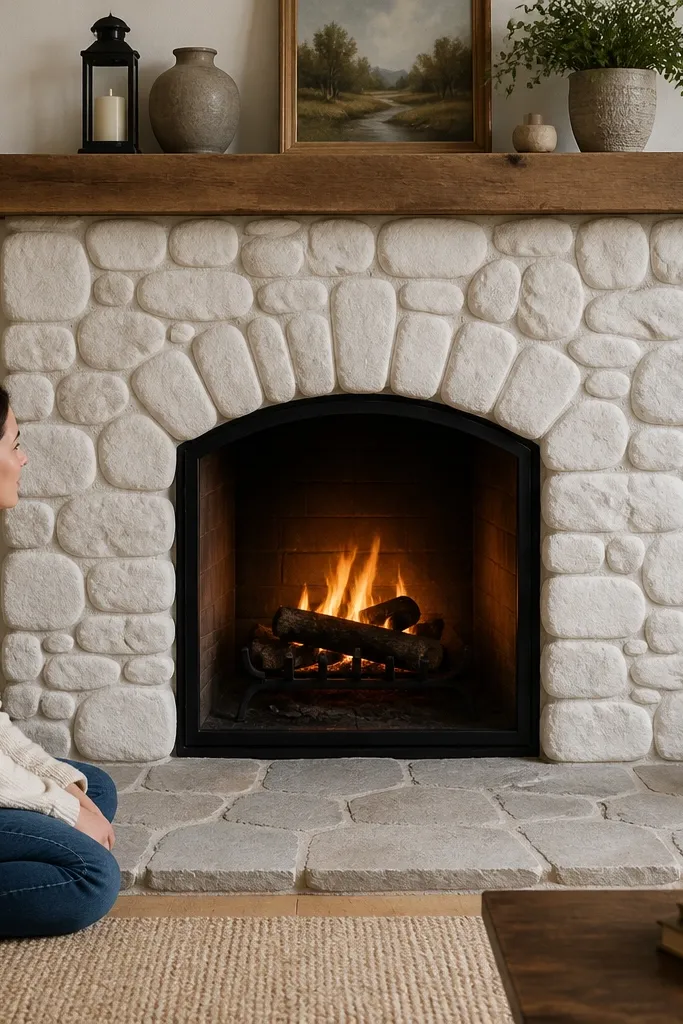
Whitewash turns fieldstone into a bright focal point without needing full paint coverage on every pebble. The trick for low maintenance is sealing the grout and the stone so soot doesn’t sink into the lighter pores. Satin whitewash looks soft and layered in photos, and it makes the fireplace feel taller because highlights catch along the stone edges. If your room gets harsh overhead light, satin is forgiving compared with glossy finishes.
Clean and dry the stone thoroughly, then tape off the hearth and any trim. Brush on a whitewash mixture (thin enough to let texture show) in controlled passes, then wipe back to keep the high points light. Let it cure and then apply a breathable sealer designed for painted or lime-based finishes, focusing extra attention on grout lines. After cure, do a gentle water test; if water beads, you’re set.
Use a foam brush for whitewash so you don’t flood mortar valleys.
Don’t whitewash over unsealed grout; that’s where soot stains start.
3. Warm greige limewash look with clear heat-safe topcoat
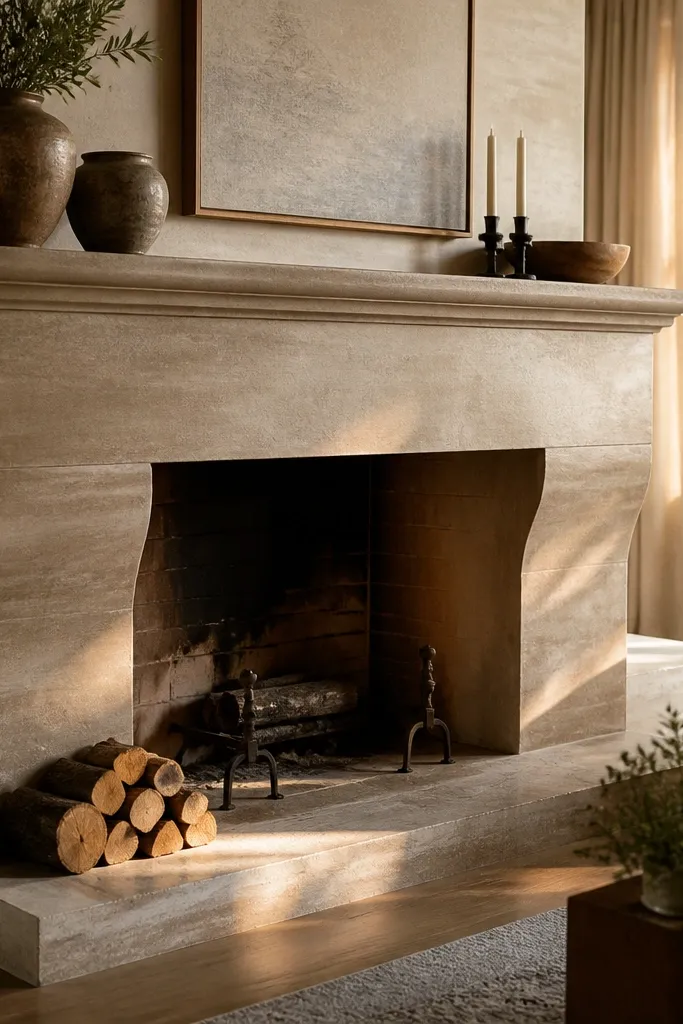
A warm greige limewash look gives you the aged, organic vibe without the constant maintenance of truly unsealed lime. The finish reads airy but still hides grime better than pure white, especially on natural stone with mixed tones. Add a clear heat-safe topcoat over the surround area so soot wipes off instead of absorbing. This is a great fit if you want “soft stone wall” energy but still need practical cleaning.
Apply limewash in thin coats so it doesn’t fill the texture, then let each coat dry before the next. Use a small brush to work into joints so you don’t leave bare mortar spots. Once the color cures, apply a clear topcoat formulated for masonry and heat exposure near the firebox. Keep the first coat light and check coverage around the opening before adding a second coat.
Editor's noteWork from bottom up so drips don’t create darker streaks that show after curing.
Skip thisSkip heavy limewash coats; thick layers peel and trap soot.
4. Matte black stone surround with breathable sealer
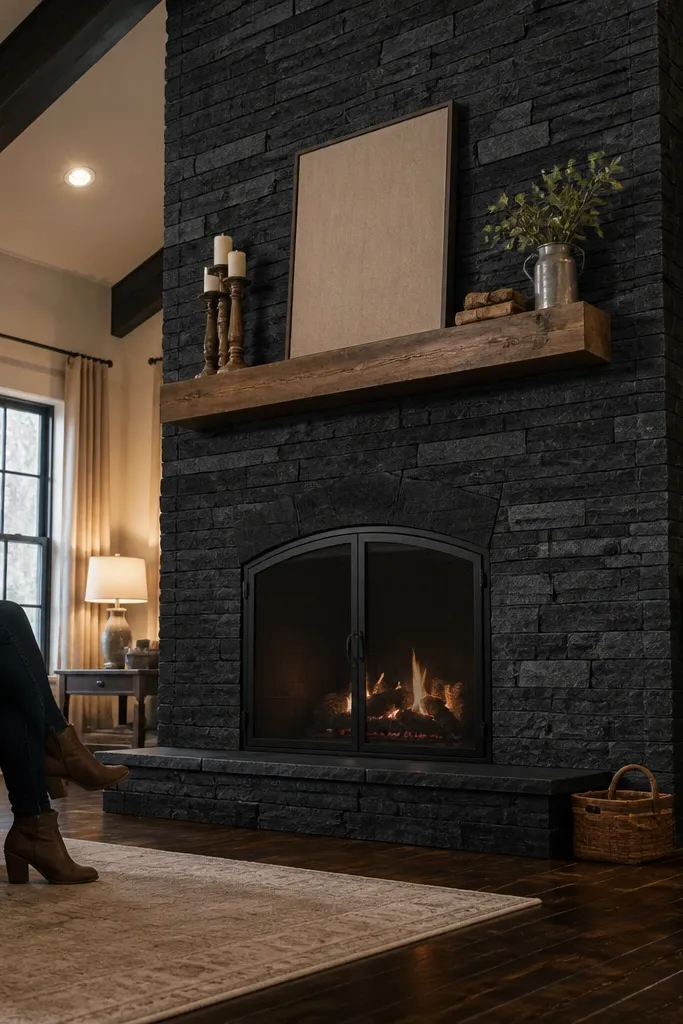
Black stone finishes look bold and clean, especially when the fireplace is tall. Matte black helps hide small discolorations and soot dusting that happens around the opening. Use a breathable sealer so you don’t trap moisture in the stone, which can create long-term blotching. The look is dramatic in photos but still practical because matte surfaces don’t show glare.
Start with a stain-blocking prep if your stone has visible mineral leaching, then clean and dry completely. Apply a masonry stain or tinted sealer designed for stone, keeping coats even across faces and edges. After color sets, apply a breathable matte sealer that’s rated for masonry. Let the whole surround cure with airflow and avoid cleaning for the recommended cure window on the product label.
Use a consistent brush direction for the first coat so the texture reads uniform.
Don’t use a glossy topcoat; black gloss shows fingerprints and soot haze.
5. White paint over stone with scuff-resistant satin enamel
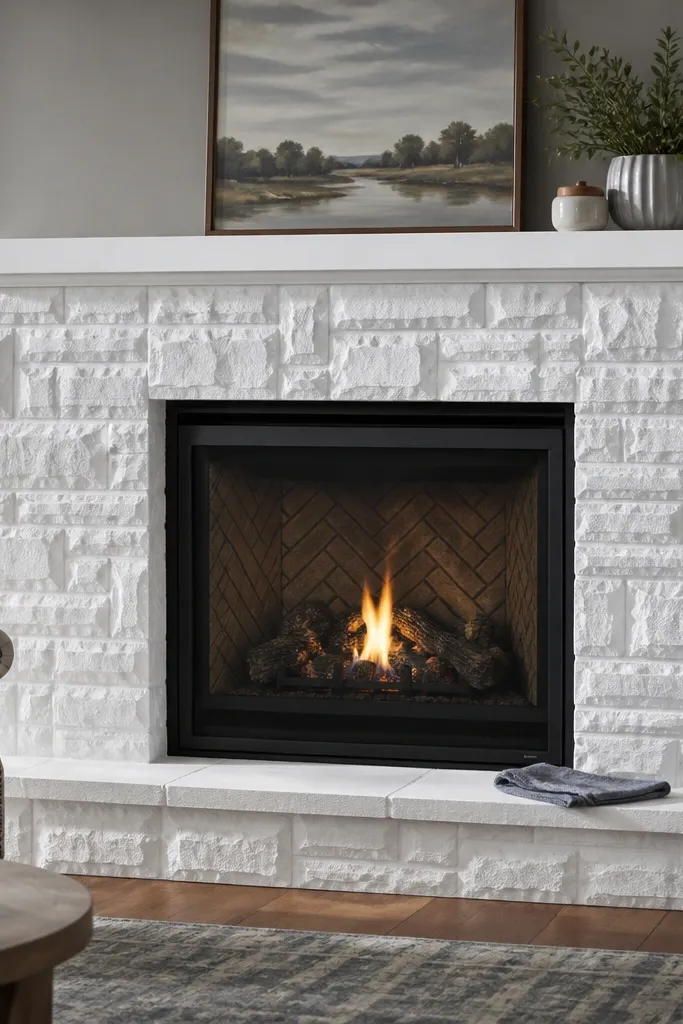
Painting stone can be the lowest-maintenance choice because you control the surface finish and make soot removal predictable. The best look is satin enamel on top of the right bonding primer so the finish doesn’t chalk or peel at edges. White also makes the fireplace feel crisp and tall, and satin hides minor wall scuffs better than flat paint. This is ideal if your home needs a clean, modern look and you don’t want to deal with uneven sealer absorption.
Clean the stone aggressively to remove soot residue and dust, then let it dry. Prime with a high-bond masonry primer, paying attention to mortar joints and any glossy stone faces. Apply two coats of satin enamel with a small roller for flat areas and a brush for corners, keeping a wet edge to avoid lap marks. After cure, inspect edges around the firebox and touch up thin spots with a brush.
Lightly sand between coats using 220-grit to reduce brush texture on visible areas.
Don’t use flat wall paint — it scuffs and shows soot smears.
6. Soft off-white mortar-focused finish with darker grout lines
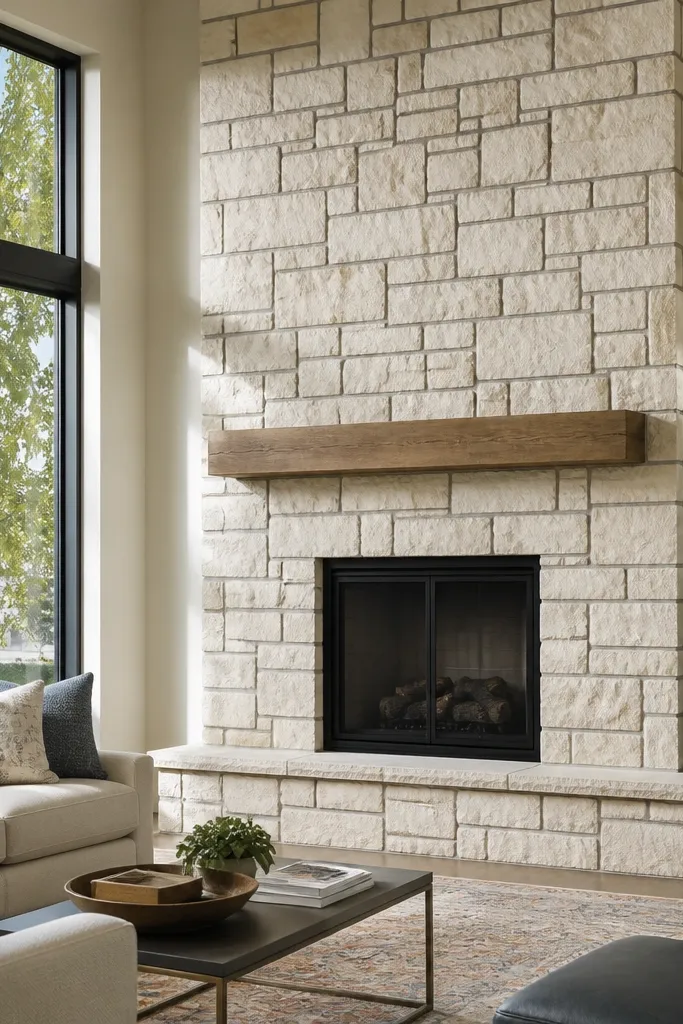
When you emphasize grout lines with a darker tone, the fireplace reads more architectural and intentional from floor to ceiling. Keep the stone a soft off-white and the joints deeper for a crisp grid effect that photographs well. Seal both stone and grout so the darker lines don’t become stain traps. This approach also hides minor unevenness in stone spacing because the contrast draws the eye to the structure.
Clean and dry the stone, then apply an off-white masonry stain or wash on the stone faces only. Use a grout stain or tinted joint sealer to deepen the lines without turning the whole area dark. Seal the entire surround with a compatible sealer so soot wipes clean and doesn’t soak into joints. Let everything cure fully before lighting a fire; early heat can cause uneven color changes.
Editor's noteMask the grout lines only if you’re confident; otherwise, stain the stone faces first and then do a controlled grout pass.
Skip thisDon’t rely on paint to “fix” dirty grout — clean first or the contrast will look messy.
7. Natural stone with clear matte sealer and brass fireplace trim
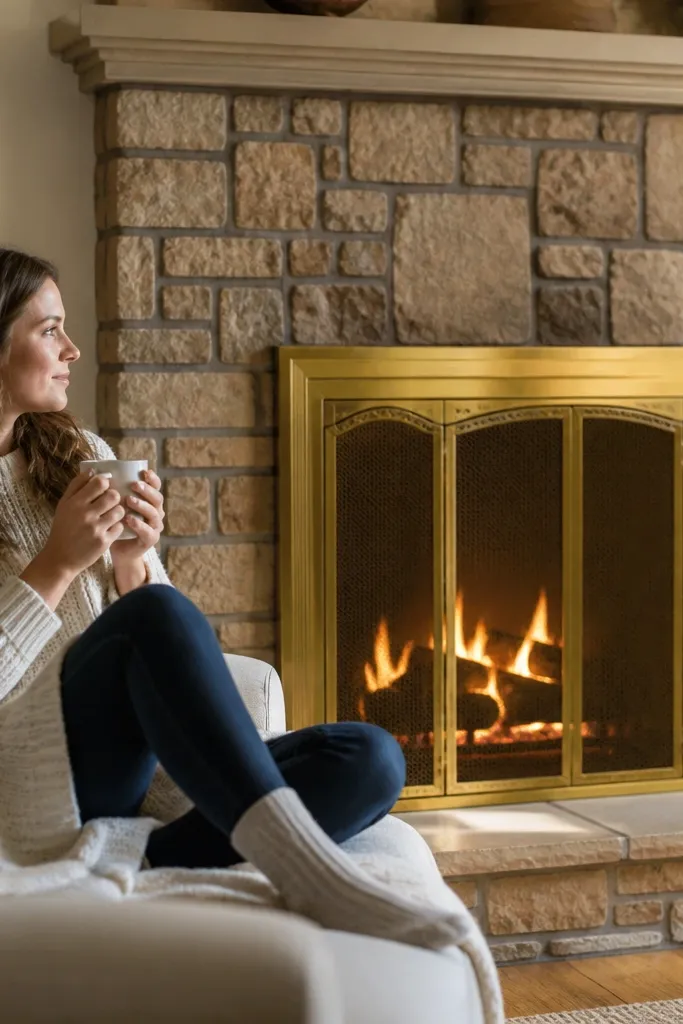
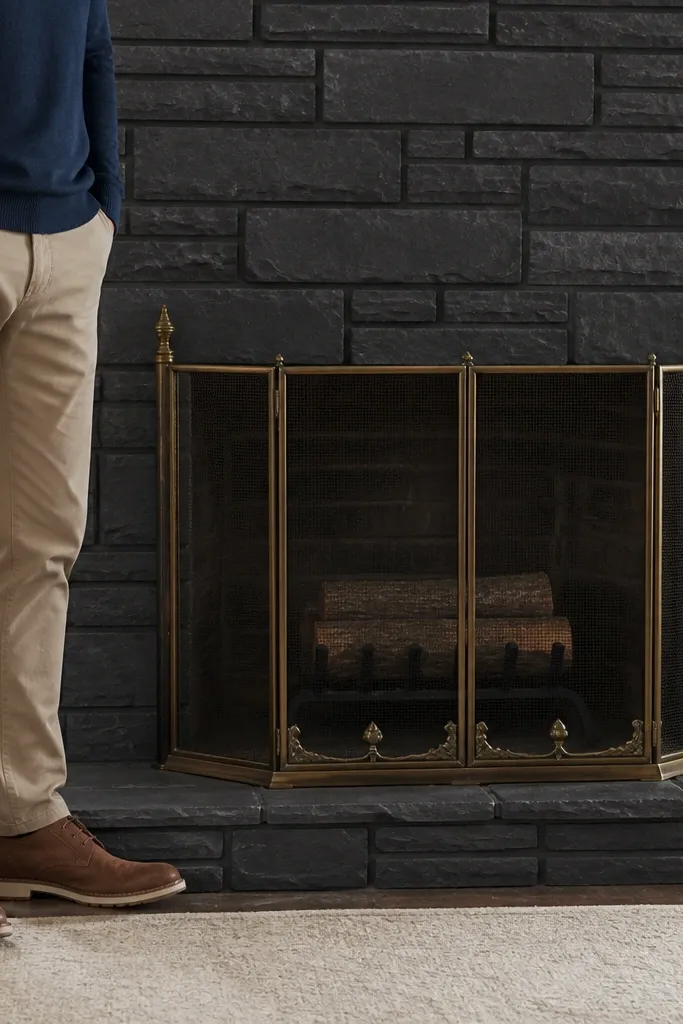
If you like your stone’s real color, don’t cover it. A clear matte sealer keeps the surface looking honest while reducing staining so soot doesn’t become permanent. Pair it with brass trim and a matching screen to add warmth and make the fireplace pop in photos without heavy color changes. This is one of the cleanest low-maintenance setups because you’re sealing once and touching up rarely.
Clean the stone with a masonry cleaner that removes soot and film, then rinse and dry. Apply a clear matte sealer in two coats, keeping coverage consistent on the vertical faces and around ledges. Install or mock up brass trim before the final coat so you can seal edges cleanly. After curing, wipe a small test area with a damp cloth to confirm easy cleanup.
Use painter’s tape to protect brass while sealing so you don’t leave haze on metal.
Skip using a penetrating sealer that isn’t rated for your stone type; limestone and granite need different chemistry.
8. Beige travertine look with honed finish + stain-blocking sealer
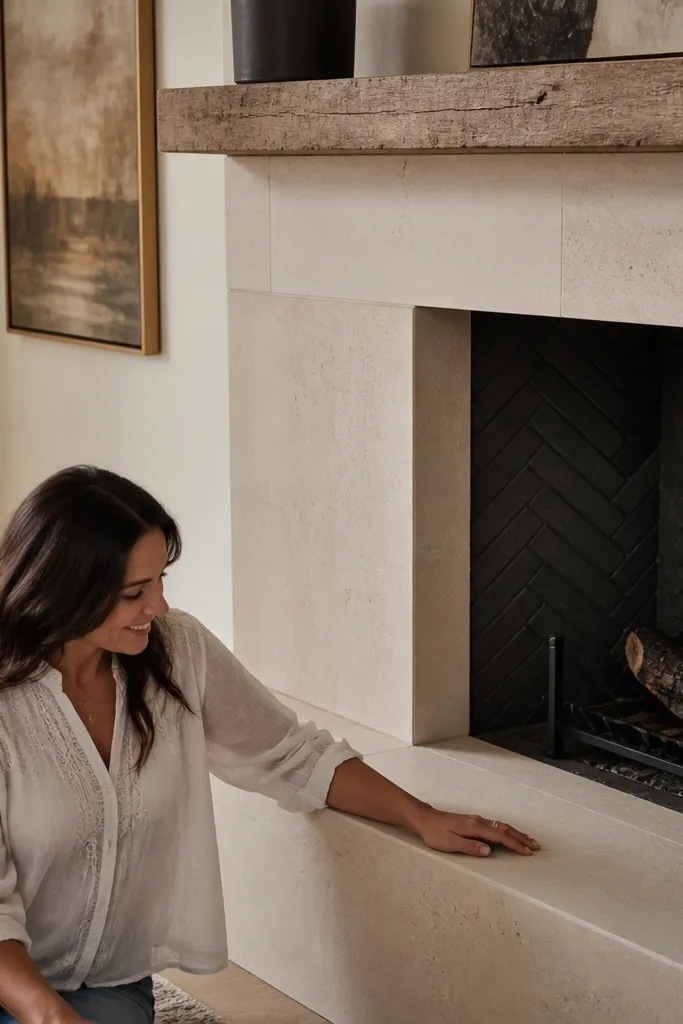
Travertine looks luxurious, but its pores can grab onto soot if you leave it unprotected. A honed look with a stain-blocking sealer keeps the surface matte and clean while still feeling upscale. Beige tones hide dust and small scuffs, which is what you want on a floor-to-ceiling feature. If you’re building or renovating, this finish direction is photogenic because it has subtle color variation without looking dirty.
If you’re using actual travertine, ensure it’s honed or lightly brushed rather than polished for lower glare. Clean and let it dry completely, then apply a pore-filling stain-blocking sealer made for travertine and similar porous stone. Add a second coat only after the first one soaks in evenly. Let cure for the full recommended time before using the fireplace near the opening.
Check the finish in late afternoon light; travertine sealer can look lighter when it’s fresh.
Don’t use a general-purpose concrete sealer — porous stone needs the right penetration profile.
9. Two-tone surround with painted mantel shelf and sealed stone body
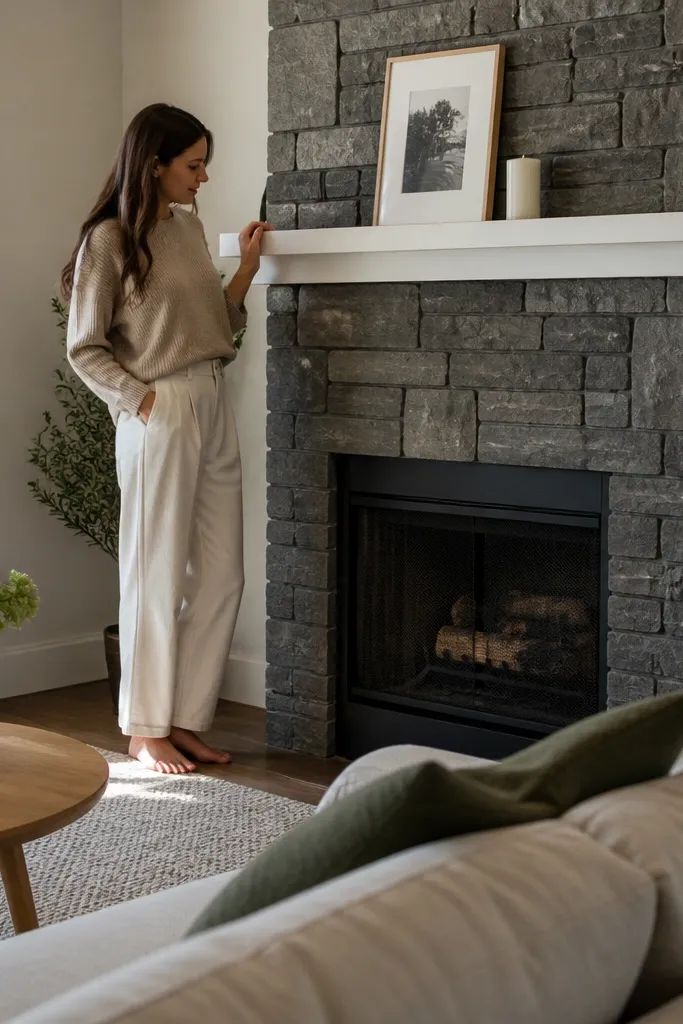
Two-tone looks more custom without adding maintenance complexity. Keep the stone body sealed with a matte penetrating finish so soot cleanup is easy, then paint the mantel shelf with a tougher enamel so fingerprints and dust wipe off. This makes the fireplace feel designed because the mantel reads crisp and the stone stays natural. It also helps you mask any uneven stone edges because the painted shelf creates a clean visual line.
Seal the stone first with a matte penetrating sealer in two coats, then let it cure. Build or prep your mantel shelf, then sand, prime with a bonding primer, and paint with satin enamel. Use caulk at the shelf-to-stone seam so soot can’t creep into a gap. Touch up any paint edge chips with a small brush after full cure.
Use painter’s tape only after the stone is fully cured so sealer doesn’t lift.
Don’t paint the stone body and mantel in the same sheen — mismatched sheen highlights unevenness.
10. Textured white plaster finish over stone with clear coat
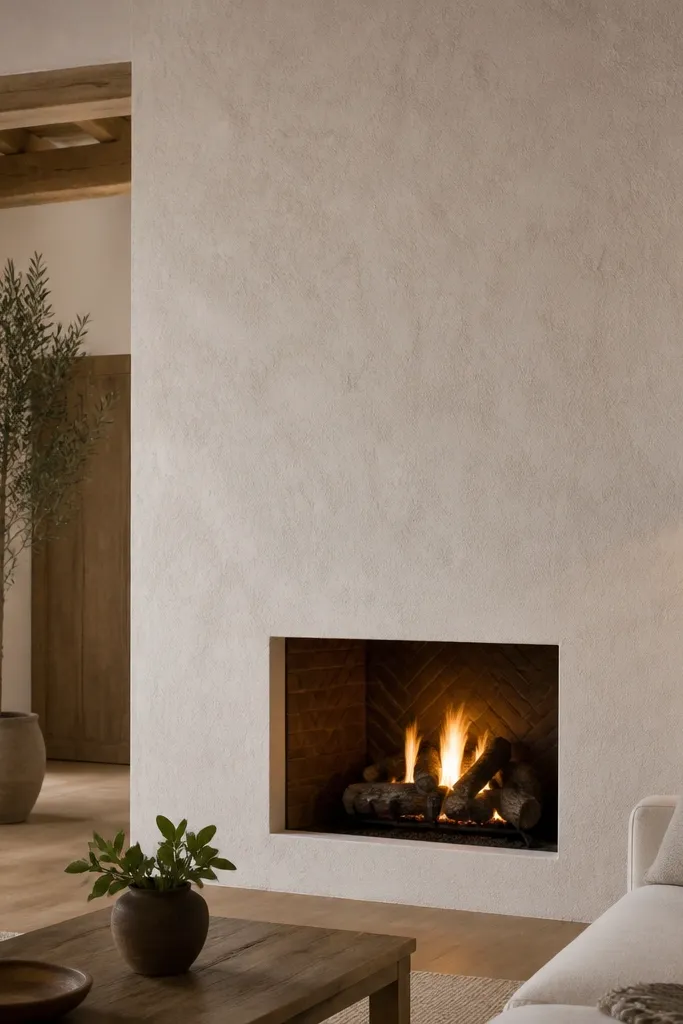
A textured plaster layer makes stone feel like a continuous wall, which looks great when the fireplace runs floor to ceiling. The low-maintenance part is the clear coat over the plaster so soot doesn’t soak into the texture. Choose a fine, tight texture so it photographs smooth and doesn’t look like patchwork. This works best in rooms with softer lighting because the texture creates gentle shadow lines instead of harsh glare.
Clean and dry the stone, then apply a cementitious base coat or plaster bonding layer designed for masonry. Skim coat with a thin plaster layer using a trowel and keep the texture consistent top to bottom. After cure, apply a clear masonry topcoat rated for interior heat exposure near the opening area. Do one more spot test for wipeability on the most-used height around the firebox.
Keep texture direction consistent — vertical trowel strokes help the fireplace read taller.
Don’t skip the bonding layer; plaster over dusty stone cracks fast.
11. Dark smoke-gray wash on stacked stone with sealed top layer
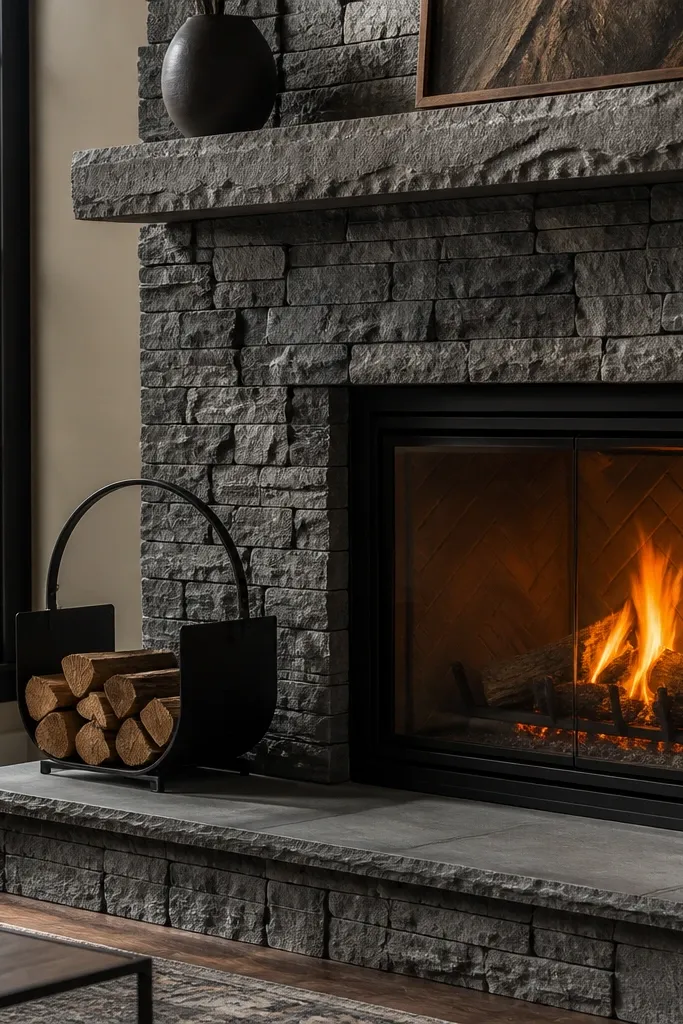
A smoke-gray wash gives stacked stone depth without turning it into flat paint. The wash settles into low areas, so you get shadows that look natural even after years of cleaning. Seal it with a matte topcoat so soot doesn’t turn the gray muddy. This look is especially good if your stone is already slightly warm-toned and you want a cooler, modern fireplace.
Clean the stone thoroughly, then apply a diluted gray masonry wash with a brush, working into the texture. Wipe back the high points so the wash stays in recesses rather than building a thick film. Let it cure, then apply a matte sealer in two coats, focusing on the area around the opening where soot lands. After cure, wipe with a damp cloth to confirm the finish is stain-resistant.
Editor's noteUse a second coat only after the first coat is fully dry; early layering traps solvent and can streak.
Skip thisDon’t leave unsealed wash — that’s how gray turns patchy.
12. Warm white paint with a subtle stone-edge dry brush
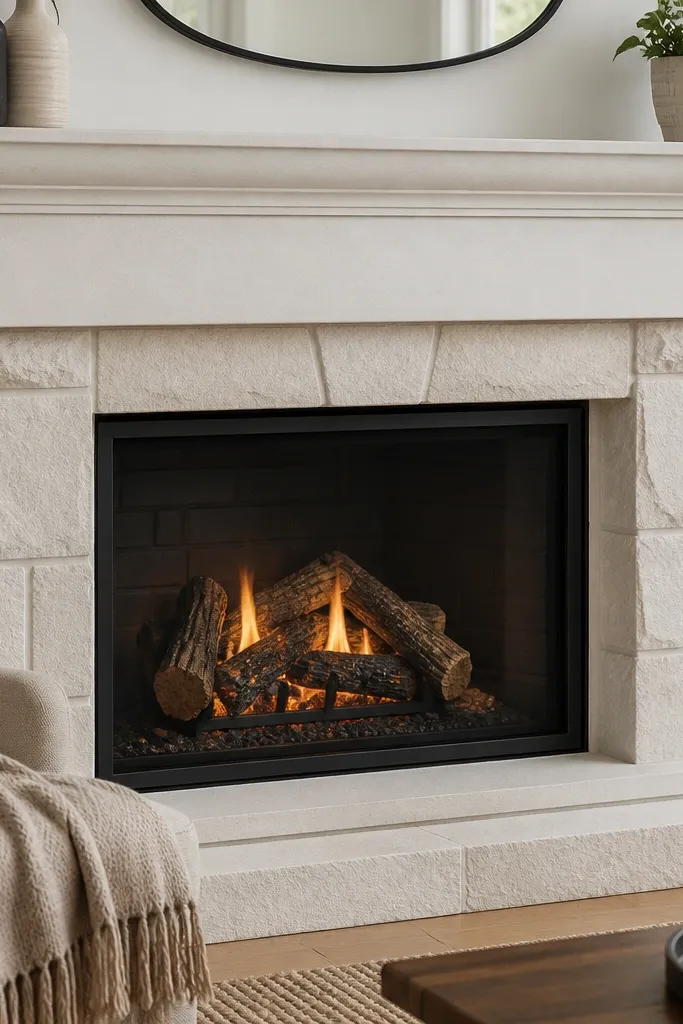
This finish keeps a clean, bright fireplace but still shows the stone shape. You paint the main field warm white, then dry-brush a slightly darker tone along stone edges so the texture reads without needing full color complexity. The low-maintenance win is that the base is paint — soot wipes off like a wall finish when you use satin enamel. It also hides small chips and uneven stone gaps because the edge shading makes them look intentional.
Prime the stone with a high-bond primer and let it cure. Paint the entire surround with warm white satin enamel using a roller for speed and a brush for corners. After the base coat dries, use a nearly dry brush with a darker warm gray paint to lightly trace edges; keep it subtle and consistent. Seal with a compatible clear topcoat if your product system allows it, especially in the firebox-adjacent zone.
Practice on a cardboard test board — dry brushing is all about paint load.
Don’t over-darken the edges; heavy dry brushing reads like sloppy touch-up.
13. Monochrome taupe stain on ledgestone with matte sealer
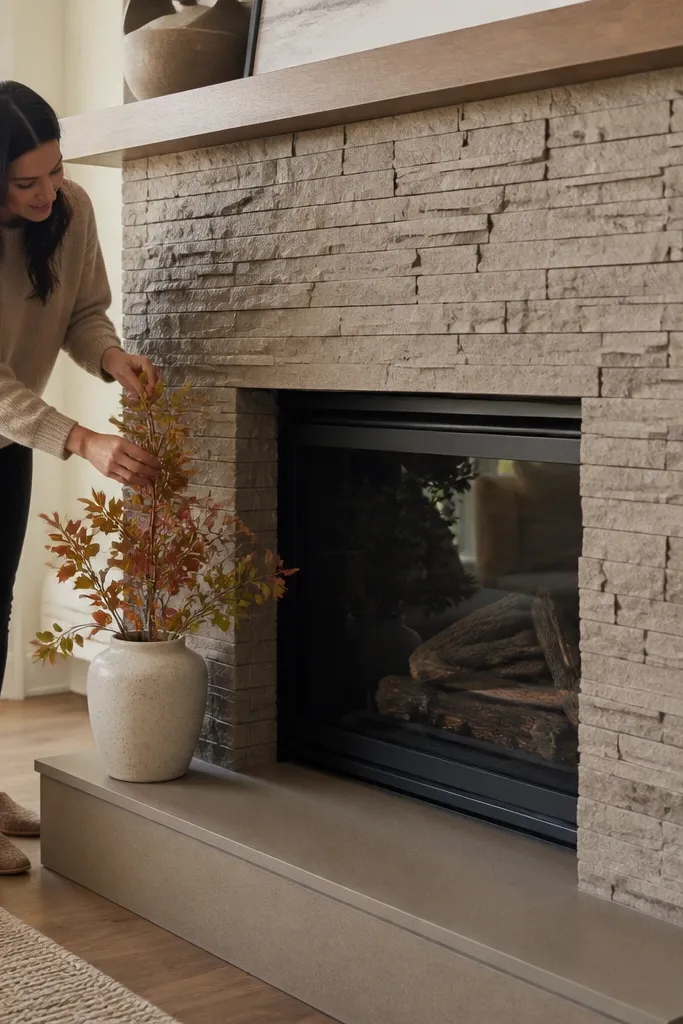
Ledgestone can look uneven when each piece absorbs color differently, but taupe staining plus a matte sealer evens it out. Monochrome tones make the fireplace look clean and expensive, and matte keeps glare down near windows. This is a strong choice for low maintenance because the sealer reduces staining and the stain reduces the “white dusty” look that can appear on porous surfaces. The final effect is modern and calm, not flat.
Clean the ledgestone and let it dry completely, then test the taupe stain on a hidden edge first. Apply stain evenly with a brush or sponge, keeping the same dwell time across the whole surround. Let it cure, then apply a matte sealer in two coats, working carefully along the ledge lips where soot collects. Touch up any lighter strips after the first sealer coat so everything stays consistent.
Stain with the same brush pressure across all rows — it prevents patchiness.
Don’t skip the stain test; ledgestone can swing several shades after sealing.
14. Stone veneer with white mortar wash and clear matte protector
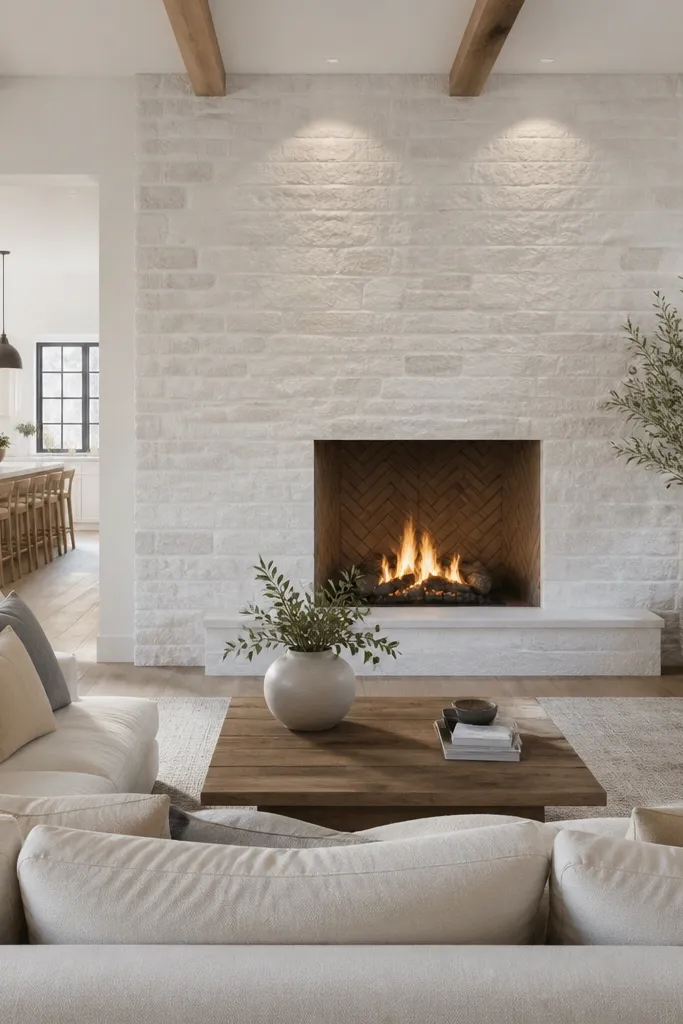
A white mortar wash makes stone veneer look like it’s part of a continuous plaster wall, which reads clean from far away. The key for low maintenance is sealing the mortar wash with a clear matte protector so soot doesn’t soak into the joints. This finish is great for open-plan rooms because it brightens the whole fireplace wall without the high-contrast look of pure white paint. It also hides minor mortar inconsistencies because the wash blends them.
Clean and remove dust from the veneer and joints. Apply a white mortar wash with a sponge brush, then wipe away excess from the stone faces so it stays in joints. Let it cure, then apply a clear matte protector designed for masonry and interior soot exposure. Recoat only after the first coat dries fully so you don’t trap moisture under the finish.
Editor's noteUse a damp rag to control mortar wash on the stone faces — it keeps edges crisp.
Skip thisDon’t over-wet the joints; water can carry dirt deeper and cause blotches.
15. Honed marble-style surround with clear satin sealer
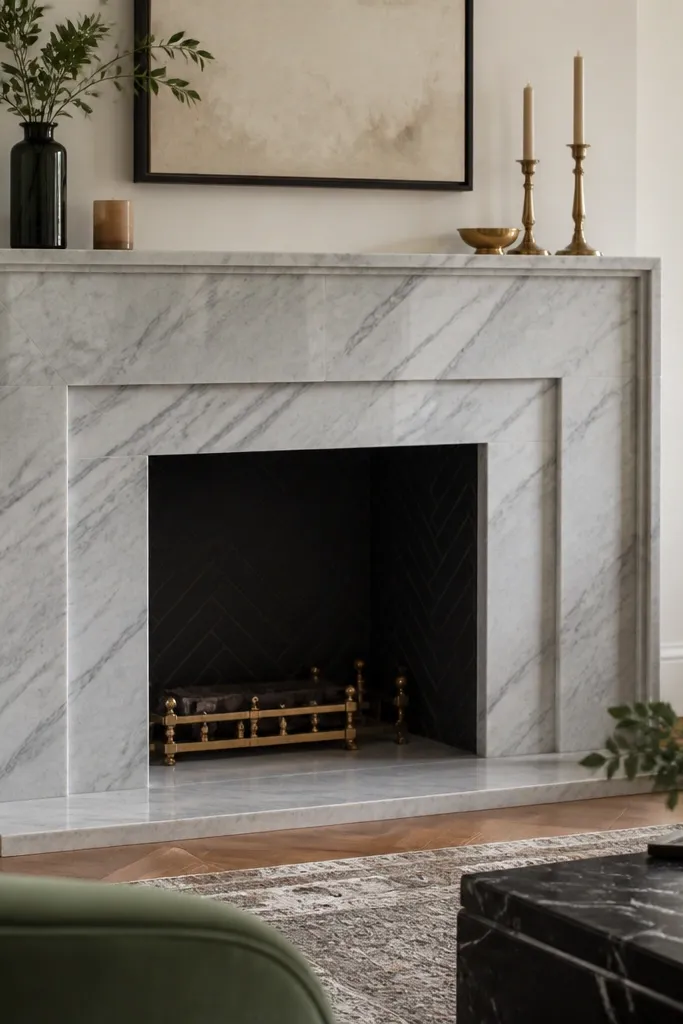
A honed marble-style look is photogenic because it has soft movement and low glare. Choose a clear satin sealer if you want the surface to look slightly richer without going glossy. Satin makes wiping easier than matte while still hiding minor scuffs better than gloss. This finish works well when your stone has natural veining or when you’re using a stone-look veneer meant to imitate it.
Clean the stone-look surface and check for dust in seams. Apply a clear satin sealer in two coats, keeping coats thin and evenly spread so you don’t create shiny patches. Allow full cure before using the fireplace, especially near the opening where heat is strongest. After cure, wipe with a damp cloth and confirm no dulling spots appear.
If the stone-look veneer has grout, seal grout first so it doesn’t steal the finish.
Don’t use a glossy sealer on marble-style finishes — veining turns into glare streaks.
16. Painted brick-style look using masonry paint on stone
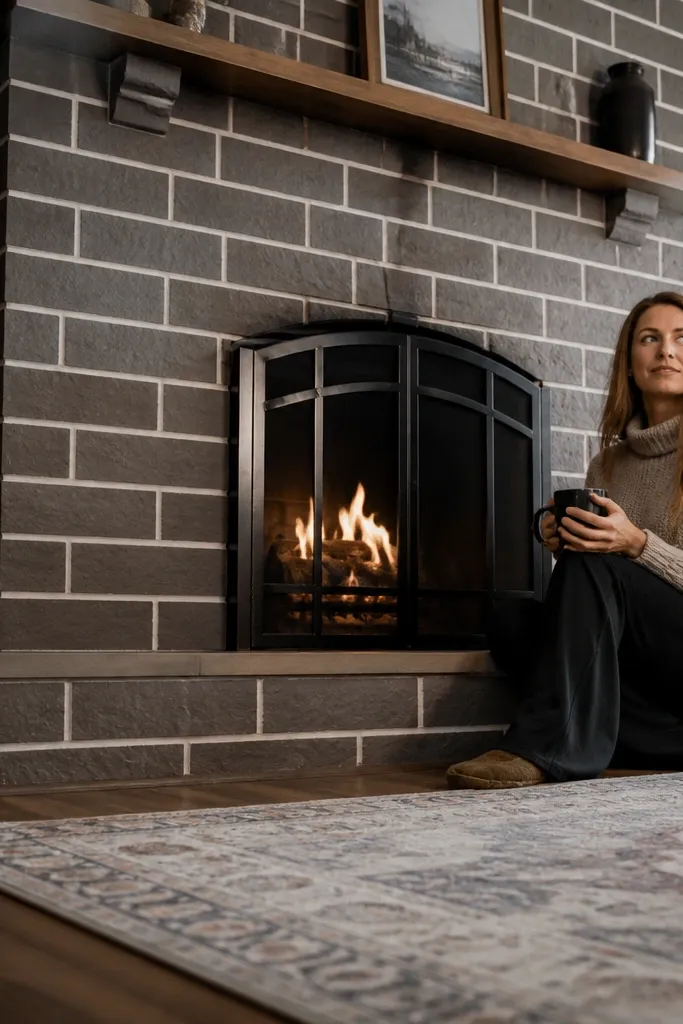
You can fake a brick-style grid on stone by painting the face and defining “mortar lines,” but you need a finish that cleans like paint, not like untreated stone. This is photogenic because it creates strong horizontal and vertical rhythm across a tall surround. Use a matte or satin masonry paint plus a clear heat-safe topcoat near the firebox so soot doesn’t stain the “mortar lines.” It’s a smart low-maintenance approach when your room wants a traditional pattern without messy real brick upkeep.
Prime the stone with a high-bond masonry primer so the paint grips. Paint the field with masonry paint in two coats, letting each coat dry fully. Then tape and brush in mortar-line rectangles using a slightly darker tone, keeping line widths consistent. Seal the finished surface with a heat-safe clear topcoat in the opening-adjacent zone.
Editor's noteUse painter’s tape for lines, then peel while the paint is still slightly tacky to avoid ridges.
Skip thisSkip thick clear coats; they can pool and catch soot.
17. Terracotta clay wash with sealed matte protector
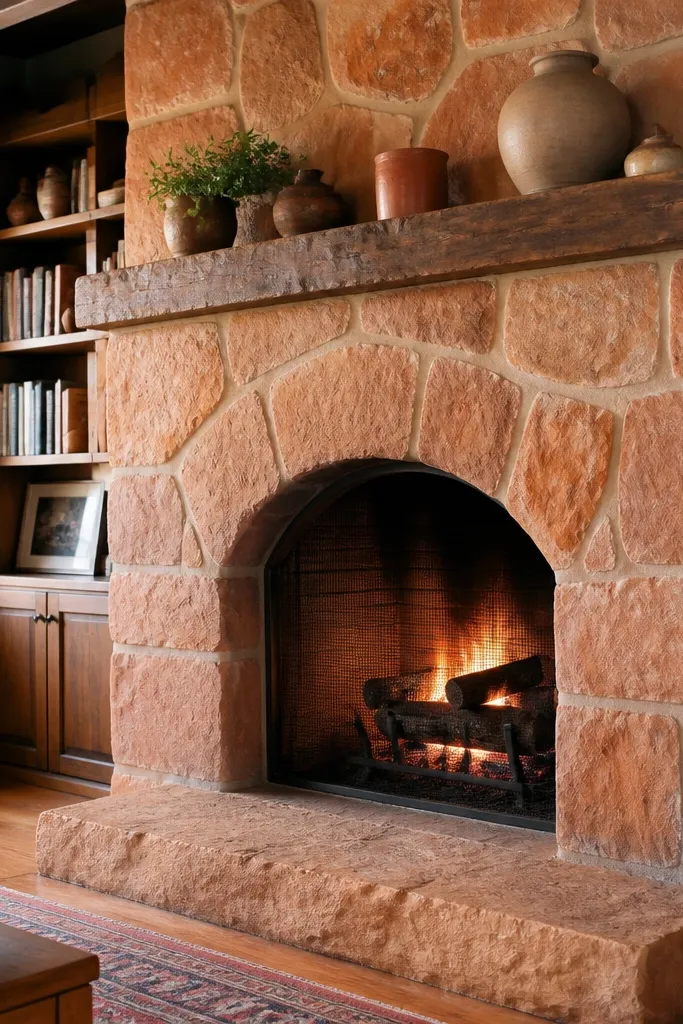
Terracotta clay wash looks warm and handmade, and it flatters older homes and modern spaces alike. It also hides the gray cast that can show up when soot mixes with lighter stone. To keep it low maintenance, you seal the clay wash so it stays wipeable instead of porous and stain-prone. Matte finish keeps the color soft and prevents glare that can make terracotta look oily.
Clean and dry the stone completely, then test your terracotta wash on a small area. Brush the wash on thin and let it soak in so it stays in texture valleys. After cure, apply a matte sealer in two coats, focusing on the vertical sides of the opening and the hearth edge area. Let it cure fully and do a water spot test to confirm it resists staining.
Editor's noteMix the wash slightly warmer than you think; sealer can cool the tone a touch.
Skip thisDon’t seal too soon — trapping moisture can cause uneven darkening.
18. Two-coat stone paint system in warm white with satin finish
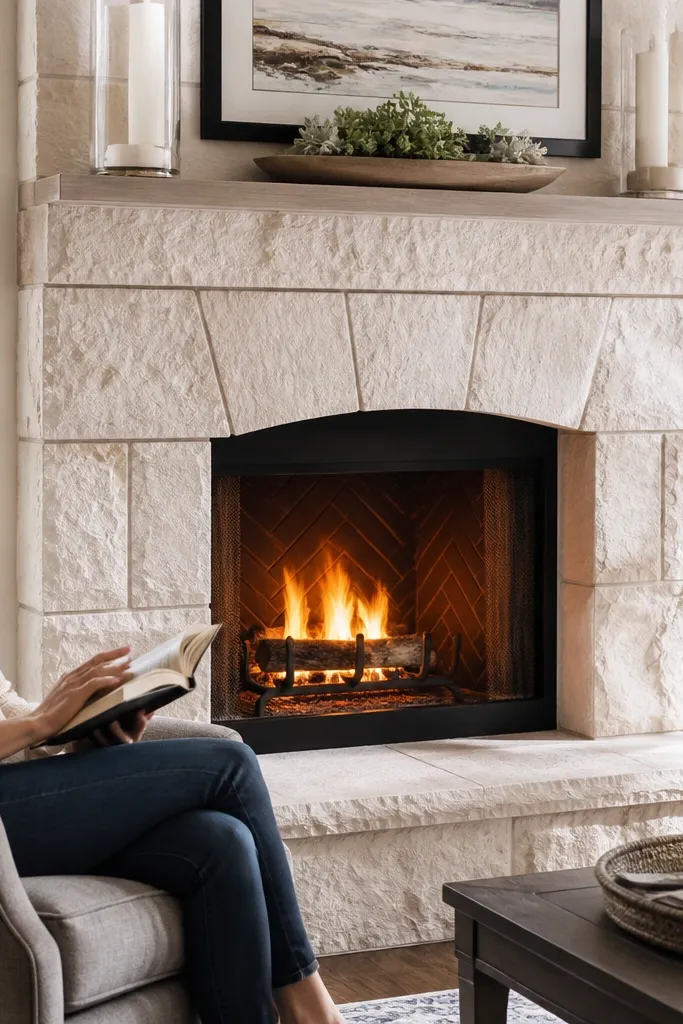
If you want the most predictable cleanup, paint the stone with a system built for masonry, then keep the sheen satin. Warm white makes the fireplace feel inviting and helps the room look brighter, especially in winter. Satin resists scuffs better than flat paint, which matters because the area near the hearth gets touched and cleaned more. This is a low-maintenance finish direction because it turns the stone surface into a stable, wipeable wall finish.
Strip off any loose coatings, clean soot residue, then dry thoroughly. Prime with a masonry bonding primer, then apply the warm white paint in two full coats, using a roller plus angled brush for edges. Keep coats even to avoid lap marks — tall fireplaces show them. After the paint cures, apply a compatible satin protective topcoat if the paint system calls for it, especially near the firebox.
Use a light gray primer if your stone is darker; it cuts the number of paint coats needed.
Don’t paint over damp stone; it causes bubbling that you can’t sand out.
19. Charcoal limewash over stone with protective matte sealant
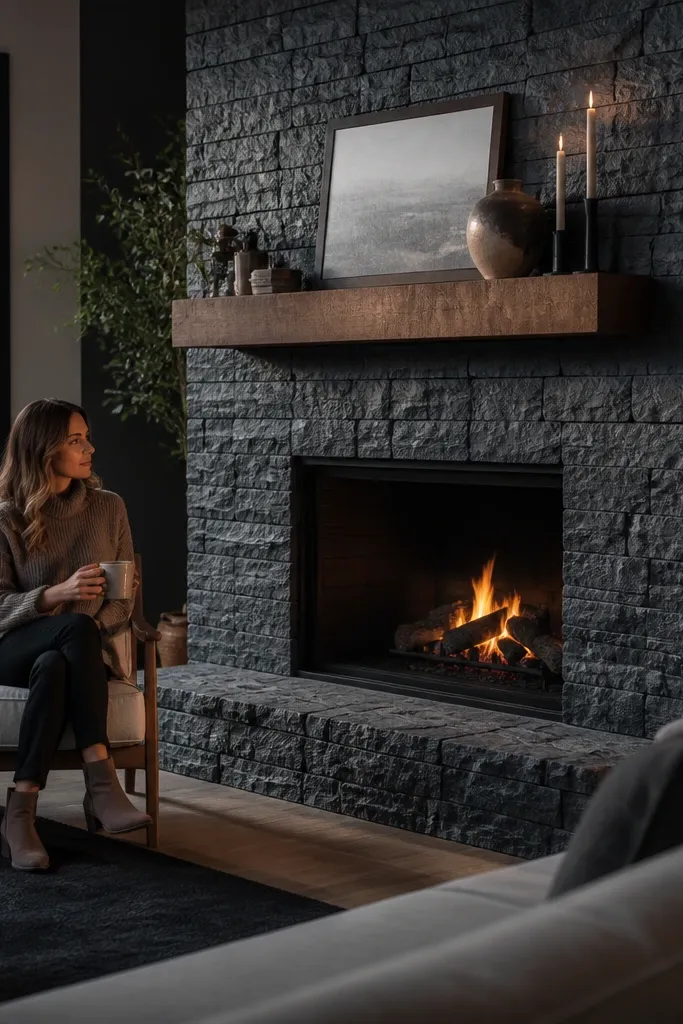
Charcoal limewash gives you depth and shadow without looking like heavy paint. The color reads sophisticated in both daylight and warm lamp light, and it hides minor discoloration better than white. For low maintenance, protect the limewash with a matte sealant so soot can be wiped rather than absorbed. This look is especially good when your fireplace has a lot of vertical height and you want a calm, uniform tone.
Clean and dry the stone, then apply charcoal limewash in thin layers so texture stays visible. Keep your strokes consistent across the surround and avoid overworking wet spots. Let it cure fully before sealing. Apply a matte sealant made for lime or masonry surfaces in two coats, and check the area around the opening for full coverage.
Editor's noteMist the surface lightly between coats only if the product directions allow it; too much water causes uneven absorption.
Skip thisDon’t use a high-gloss clear coat; charcoal gloss looks streaky around the opening.
20. Natural stone with micro-beaded matte seal for anti-wicking
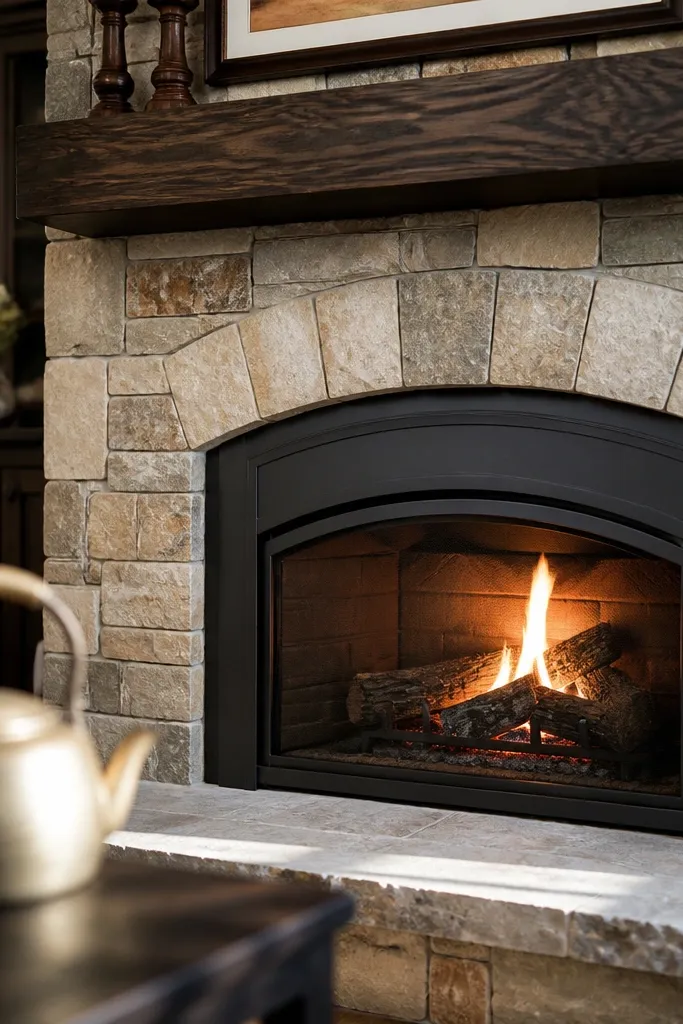
Some stones stain because they wick soot and grease into pores. A matte sealer designed for anti-wicking helps keep residue on the surface so it wipes with less effort. You keep the natural color and texture, but you reduce the long-term “dirty ring” effect around the opening. This is a smart move for people who want real stone but hate repeat deep cleaning.
Clean the stone and remove any previous coatings if they interfere with bonding. Apply the anti-wicking matte sealer evenly, keeping a wet edge and covering corners and ledges. Let it cure fully, then apply a second coat if the first coat doesn’t bead water uniformly. Do a small wipe test with a damp rag and check for dark smears.
Editor's noteUse a small foam applicator for corners so the sealer doesn’t pool and leave shiny spots.
Skip thisDon’t stop after one coat on porous stone — it usually needs two for consistent wipe behavior.
21. Warm gray painted stone with brushed-on satin texture coat
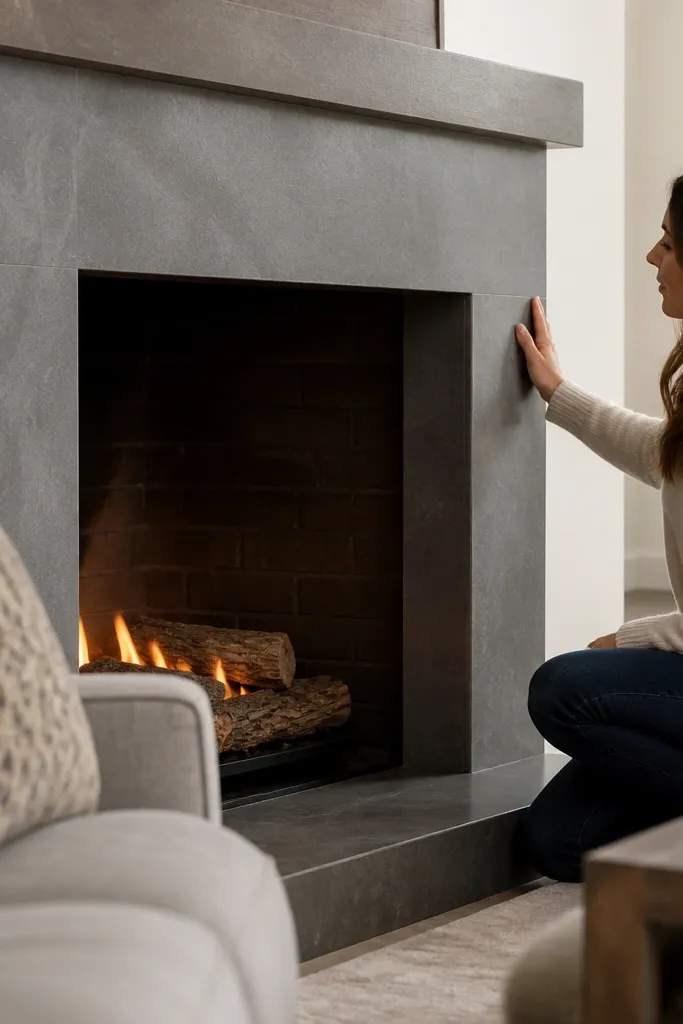
A brushed-on satin texture coat turns stone into a soft, architectural surface while still letting the stone geometry show through lightly. Warm gray is forgiving and hides tiny scuffs, which matters in a fireplace surround that gets cleaned frequently. The satin texture also breaks up reflections so the fireplace looks good in photos without glare. This finish is for people who want a more modern, controlled look than plain limewash or flat paint.
Prime the stone with a high-bond masonry primer, then apply a warm gray base coat. After it cures, apply a satin texture coat with a brush in one consistent direction, keeping the strokes light so you don’t create thick ridges. Let cure fully, then add a clear heat-safe topcoat near the firebox if your product system recommends it. Inspect for missed spots and touch up with a small brush before final cure.
Editor's noteBrush strokes should be longer than the stone pieces; short strokes look patchy on tall walls.
Skip thisAvoid overloading the brush — thick texture traps soot and makes cleaning harder.
22. Light oak mantel + sealed stone surround in soft ivory matte
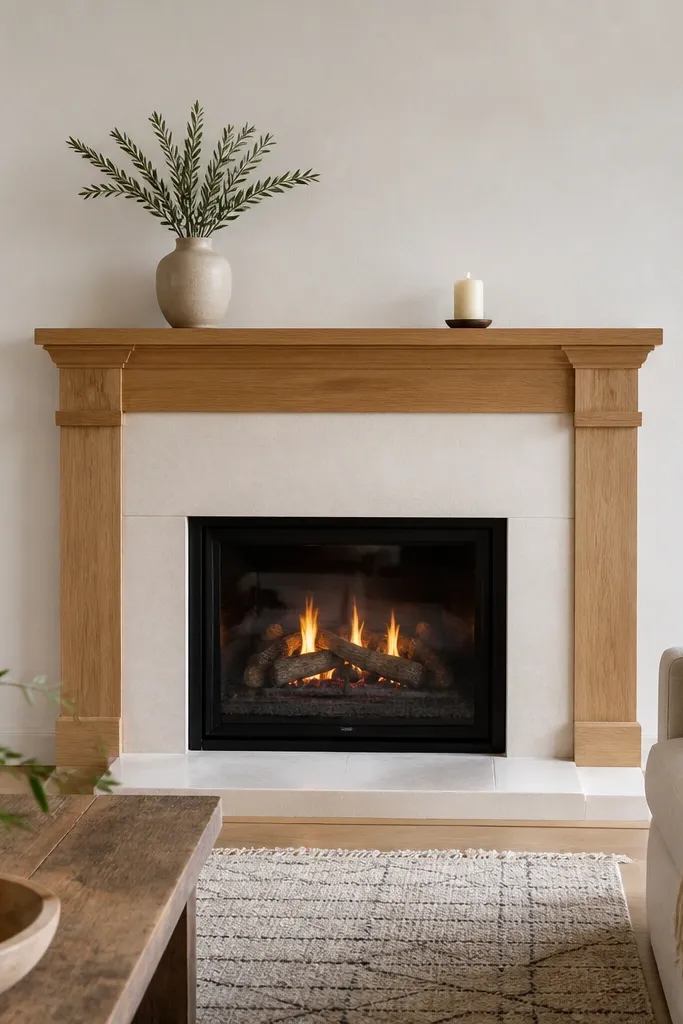
This combo looks expensive because the mantel brings warmth while the stone stays clean and matte. Seal the stone in soft ivory so it doesn’t go chalky or stain dark, and keep the mantel protected so it wipes easily. It’s low maintenance because the stone is sealed once and the wood top gets a durable finish you can clean with mild soap. The floor-to-ceiling effect stays cohesive because the stone reads light and the mantel reads structured.
Seal the stone surround with a matte sealer in two coats, focusing on ledges and the sides of the opening. Let it cure fully. Sand and refinish the mantel if needed, then apply a durable clear finish compatible with warm oak (a wipe-on polyurethane or similar). Install the mantel after stone sealing so you can clean edges cleanly and avoid staining the wood.
Leave a small shadow gap between mantel and stone if you can; it hides minor seam imperfections.
Don’t seal wood and stone with the same schedule; different cure times can cause seam haze.
23. Moody navy wash on stone with satin sealer for easy wipe-down
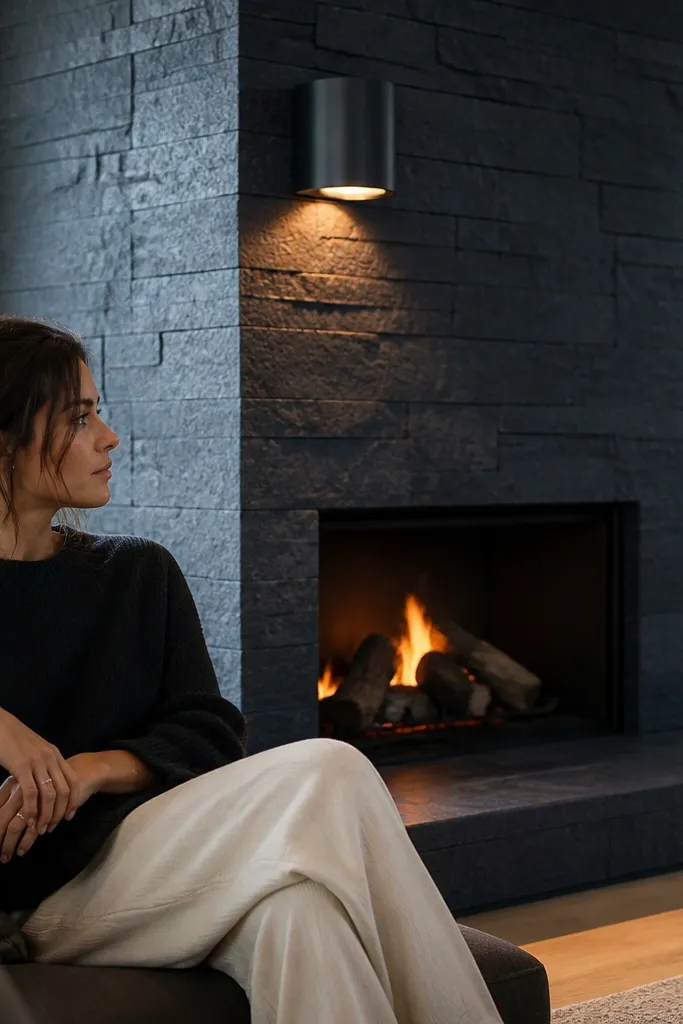
Navy wash looks dramatic and clean, and it hides soot dusting better than light colors. A satin sealer beats matte here because navy can look flat without a bit of surface protection — satin gives a controlled sheen that makes the texture pop. This is a strong choice for modern living rooms where you want the fireplace to read like a piece of furniture. The low-maintenance angle is real: soot wipes off without turning the surface patchy.
Clean the stone and test the navy wash in a small area. Apply wash in thin layers, wiping high points so the color sits in texture valleys. After cure, apply satin sealer in two coats, making sure you cover the areas that get direct soot deposition from the opening. Let the finish cure fully before using the fireplace.
Keep navy coats consistent in thickness; thin spots lighten and show through after sealing.
Don’t use matte sealer with deep navy — it can look chalky after a few cleanings.
24. Stone surround with lime-based white mortar plaster and matte protection
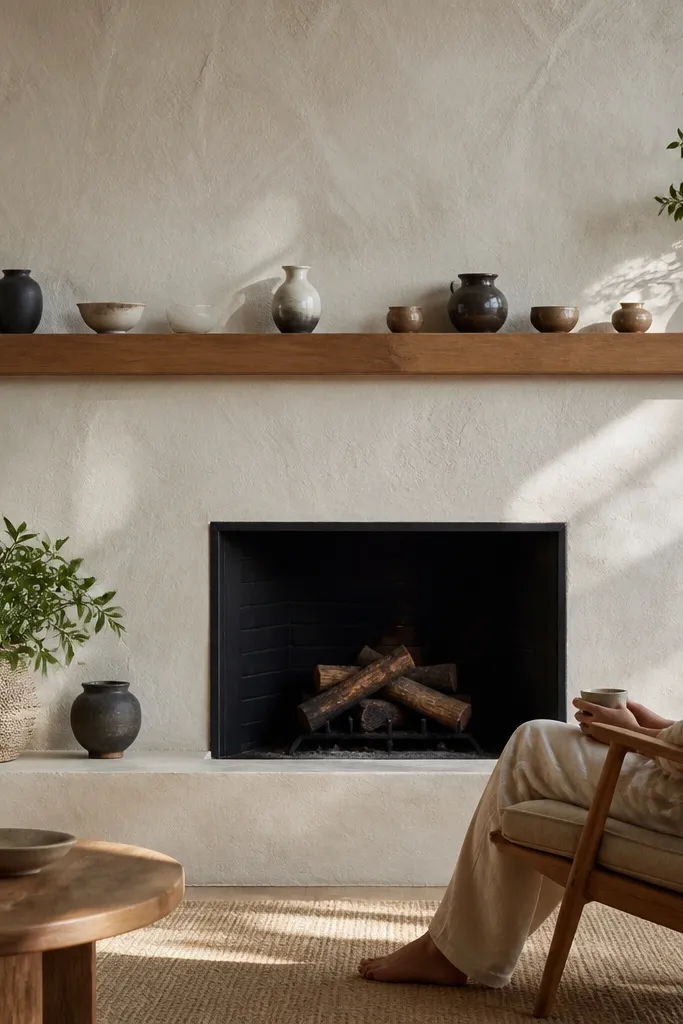
This finish makes the fireplace wall look unified, like it was always meant to be plaster, not stone veneer. Lime-based mortar plaster gives a soft, breathable look while matte protection keeps soot from absorbing into the surface. You get a clean, photogenic backdrop for the firebox and any mantel decor. It’s low maintenance because the surface stays wipeable when sealed properly, and matte reduces the glare that shows up on glossy coatings.
Prep the stone with a bonding base coat, then apply the lime-based plaster in thin passes. Use a trowel to smooth enough that it looks intentional, but don’t fully erase texture — you need slight variation for depth. After cure, apply a matte sealer compatible with lime surfaces. Keep a close eye on corners and the top edge where dust collects; those need full coverage.
Editor's noteMask the opening edges and tool them clean — the crisp edge sells the whole look.
Skip thisDon’t seal before full cure; lime-based materials need time to stabilize.
25. Salt-wash lime finish on stacked stone with clear heat-safe topcoat
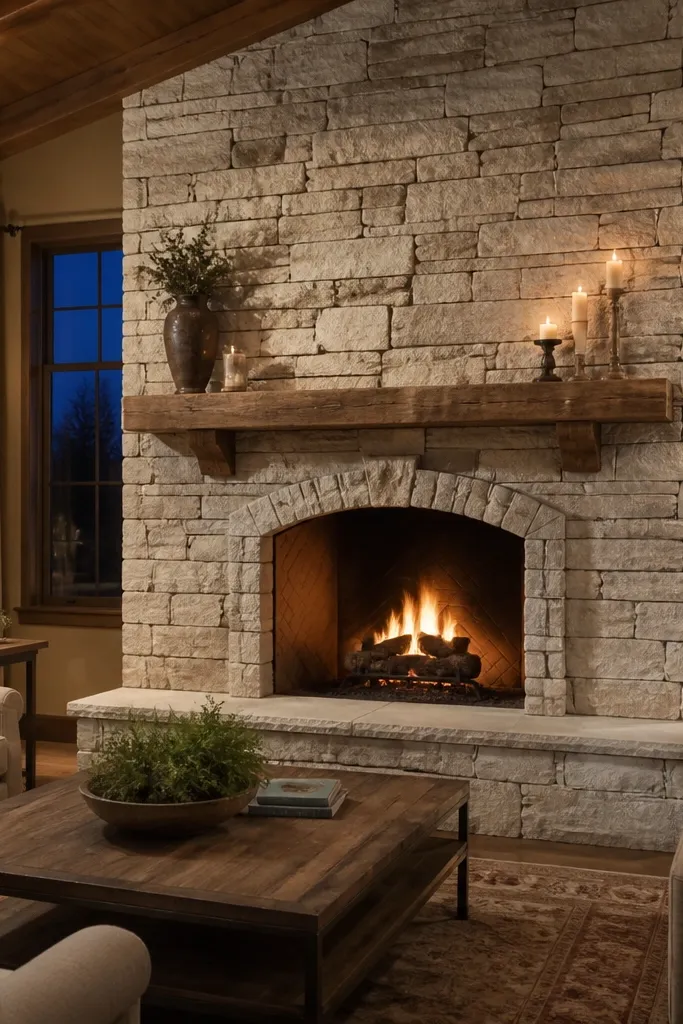
This is a stone finish that looks weathered on purpose, not “painted.” The salt-wash lime pulls white pigment into the high spots and leaves darker pockets in the mortar lines, so your fireplace reads crisp from across the room. The trick is using a lime-based wash meant for masonry, then sealing it with a heat-safe, breathable clear so the look stays clean even near the firebox. It’s a strong choice for low-maintenance because the clear topcoat reduces staining and makes dust wipe off without scrubbing. Skill level is medium — you’re doing a controlled, repeatable staining pattern, not freehand art. Plan on one full weekend for prep and dry time, plus a second day if you need a second clear coat.
Clean the stone first with a stiff nylon brush and a masonry cleaner if you see any chalky residue, then let it dry 24 hours. Mix a lime-wash (hydraulic lime or lime putty-based masonry wash) about the consistency of whole milk, and brush it on in thin coats — work one section at a time so edges stay soft. While the wash is still damp, sprinkle coarse salt crystals lightly over the face stones, focusing on the areas you want lighter; after 5-15 minutes, mist the surface with water to activate the wash, then brush off salt residue once it dries. Let the lime cure fully (follow the product label, but don’t rush), then apply a clear heat-safe masonry sealer rated for interior fireplaces in two thin coats, keeping the first coat from pooling in mortar grooves. The final look should have soft gray shadows in joints and lighter stone faces, with a matte or satin sheen that doesn’t look plastic.
Editor's noteUse painter’s tape to mask the mantel edge and any metal trim, then pull tape while the last clear coat is still slightly wet so you get a clean line with no ridge.
Skip thisSkipping the lime curing time before sealing traps moisture and can cause hazing or uneven sheen.



