
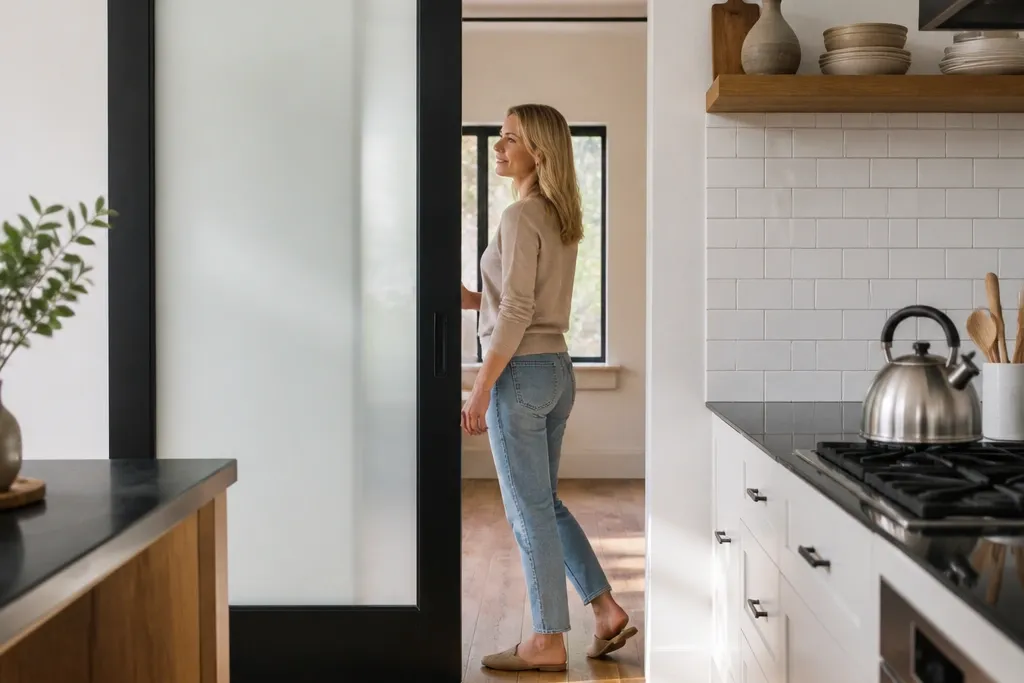
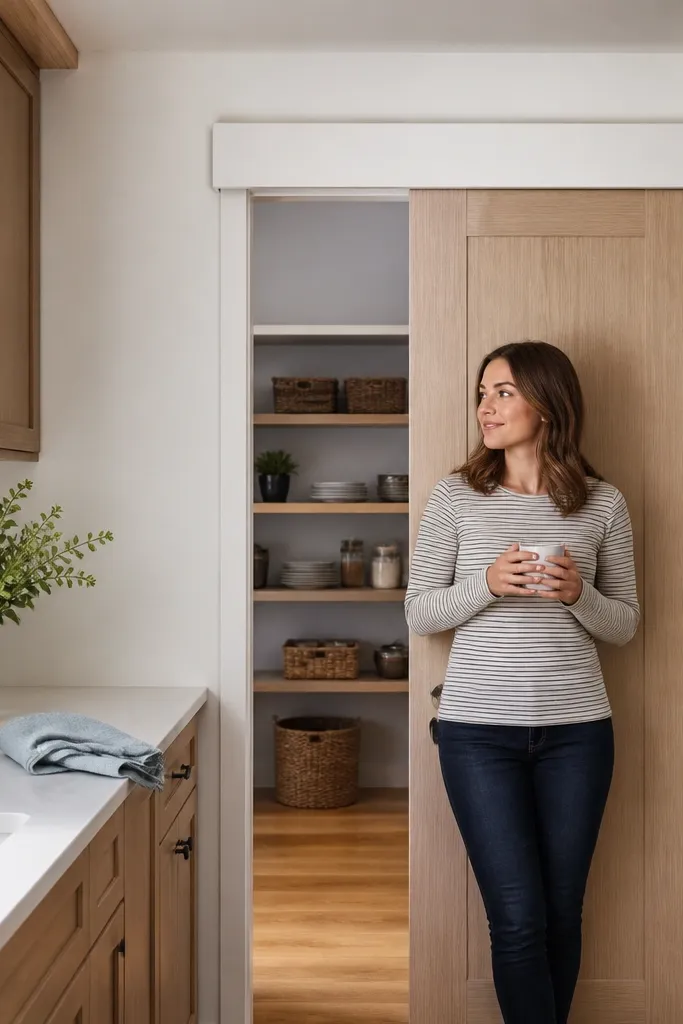
1. Matte Black Glass Panel with a Sealed Track Cover
This is the cleanest-looking low-maintenance sliding door option for kitchens because the glass surface wipes down fast and the sealed top track cover hides the grime zone. The matte black frame gives you a modern edge without showing every fingerprint like chrome. Tinted or lightly frosted glass also makes the inside feel tidy even when you’re not perfectly organized. Skill level is moderate because you’re installing a proper track and aligning rollers, but the payoff is that you don’t end up scraping a dirty rail every week. It suits kitchens that need visual light while still separating mess, like between dining and prep areas.
Start by selecting a sliding hardware kit with a track cover that snaps or screws shut over the rail. Mount the top track level using a laser or long level, then hang the door panel and adjust roller height so there’s a consistent gap along the bottom. Finally, add soft-close if your kit supports it, then test the door at full open and full closed to confirm it doesn’t drift. Clean the glass with a streak-free cleaner and wipe the frame with a microfiber cloth after installation so you don’t lock in construction dust.
Editor's noteUse two foam shims behind the track mounts to prevent tiny gaps where grease dust sneaks in later.
Skip thisSkip open-channel tracks without a cover — they look fine at first and turn into a crumb magnet.
2. White Painted MDF Flush Door with Hidden Roller Hardware
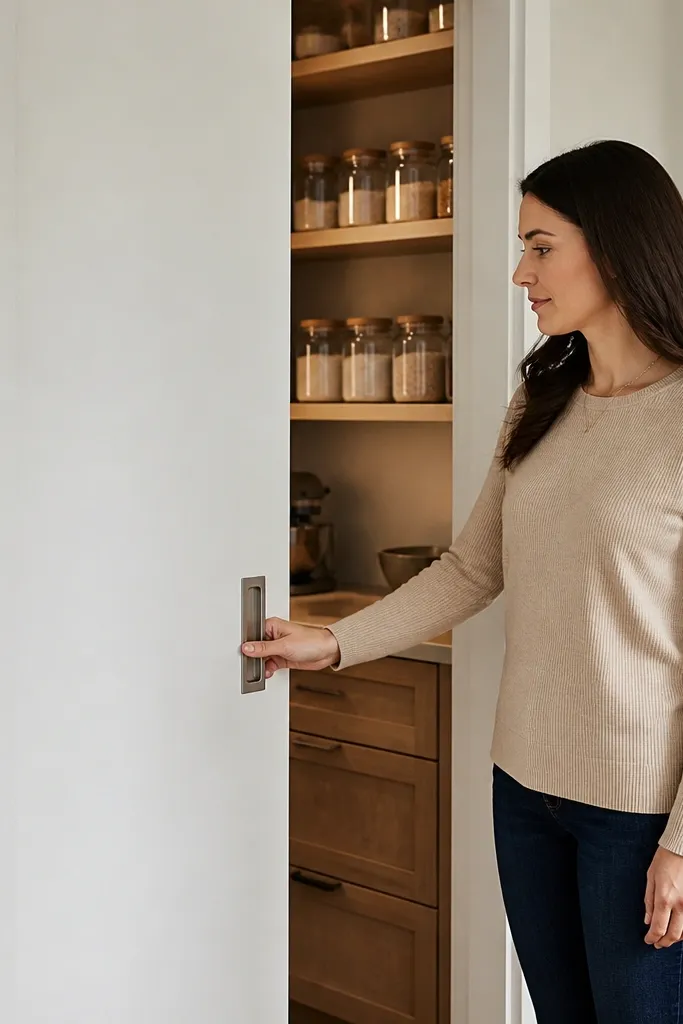
A flush MDF door reads built-in and makes maintenance feel simpler because you don’t have lots of decorative grooves to scrub. White painted MDF is also forgiving: you can repaint scuffs instead of replacing the whole door panel. Hidden roller hardware reduces the number of exposed parts that collect kitchen dust. If you keep the door edges sealed, it wipes clean with a damp cloth and doesn’t swell near steam. This is a good choice when your kitchen already has flat cabinets or slab-style fronts and you want the sliding door to match that look.
Start by ordering or building a flush MDF panel and seal all edges with primer plus a hard topcoat (use a cabinet-grade paint system). Install a track with a concealed carriage so the roller assembly sits behind the door face. Hang the door, then set the bottom guide so the door stays straight without rubbing. Finish by adding magnetic stops or a bumper kit so the door closes consistently without chipping the paint.
Sand between coats with 220 grit and vacuum the MDF dust before the final coat to keep the finish smooth.
Don’t leave MDF edges unsealed — they drink moisture and look rough fast.
3. Oak Veneer Sliding Door with Clear Hardwax Finish
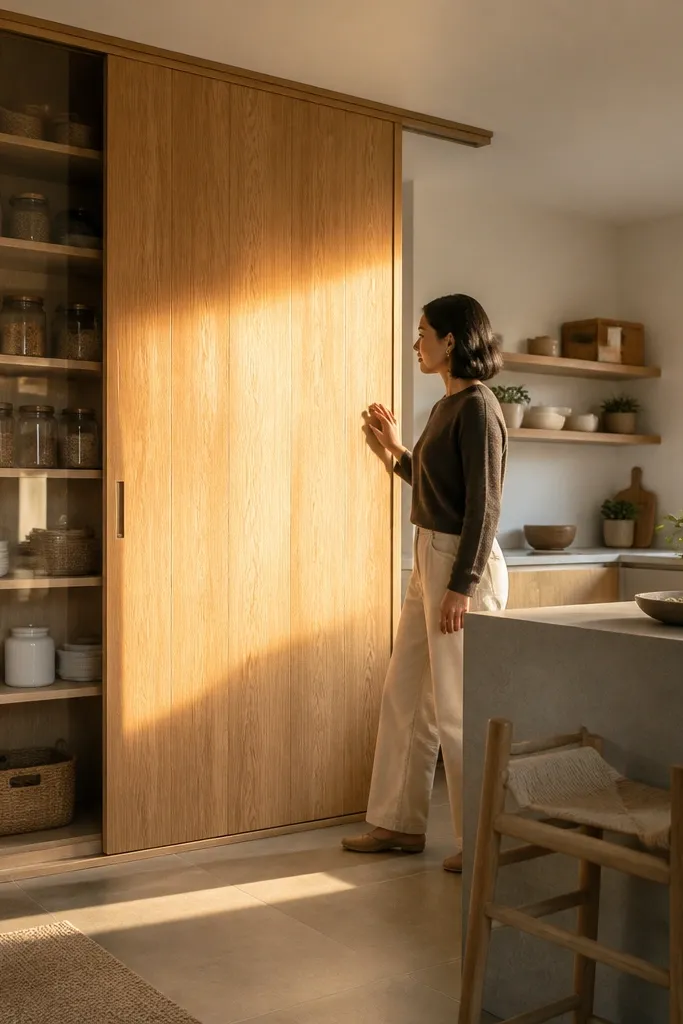
If you want warmth but still want low-maintenance, oak veneer with a hardwax or tough clear finish is a strong middle ground. Veneer looks like real wood while staying more stable than solid boards in kitchen humidity swings. The clear finish makes wipe-down easier and keeps fingerprints from soaking in as deeply as raw wood. Pair it with a covered track and you’ll avoid the common kitchen problem where the door looks great but the mechanism turns dirty and noisy. This suits kitchens with warm undertones, like brass lighting or honey-colored countertops.
Start by cutting your veneer panels to size and backing them with stable substrate like MDF or plywood for flatness. Apply a clear hardwax or cabinet-grade clear coat in thin coats, sanding lightly between coats for adhesion. Install rollers with adjustable height, then mount the covered track and set the door so it sits parallel to the floor. Seal the bottom edge last and add a bottom guide to prevent the door from drifting into the frame.
Wipe the finish with a dry microfiber first — it removes dust that would otherwise scratch when you apply cleaner.
Skip oil-only finishes near stovetops; they get sticky and collect cooking residue.
4. Black-and-White Checker Laminate Door Panels
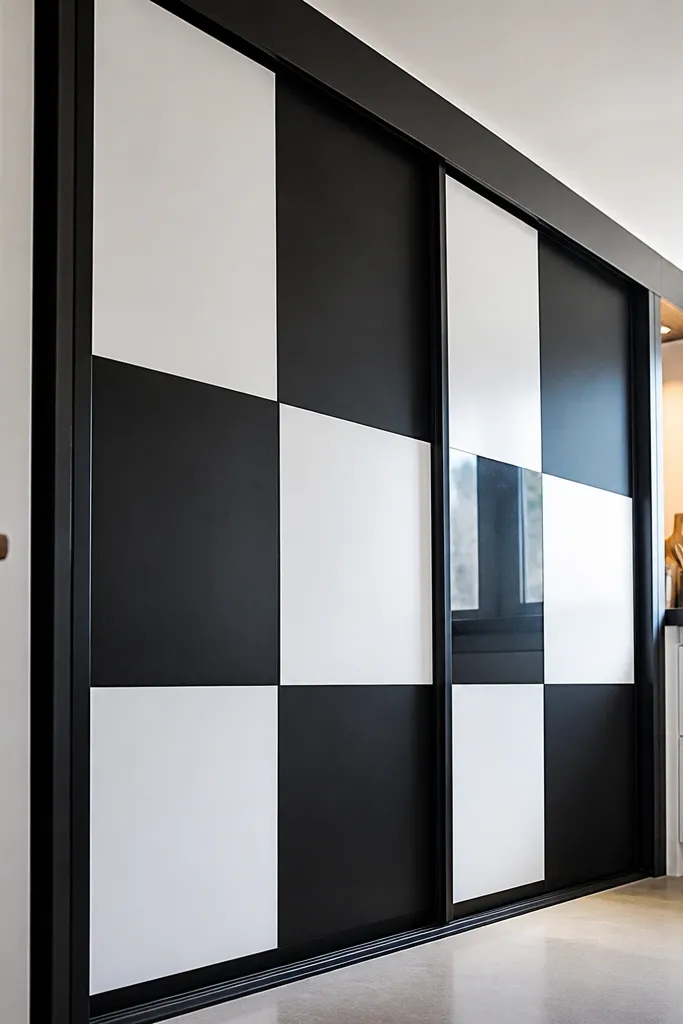
This one is visually bold and still practical. Checker laminate is hard, wipe-clean, and hides small scuffs better than solid color paint. The pattern also disguises fingerprints, which matters in kitchens where the door gets touched while grabbing dishes. Use a simple matte frame and keep the track covered so maintenance stays minimal. It’s best for kitchens that want a statement without needing extra decor — the door does the work. Plan for a snug fit so the pattern lines stay sharp and aligned when the door is closed.
Start with a laminate panel system or rigid laminate sheet cut to your door size, then mount it to a solid core like plywood. Seal the cut edges with edge banding or matching sealant so moisture can’t creep in. Install a covered track and hang the door using rollers rated for the panel thickness. Add a magnetic or rubber bumper stop so the door closes without tapping and chipping the laminate edges.
Editor's noteDry-fit the door with painter’s tape marks for the panel seam alignment before you remove the protective film.
Skip thisDon’t use thin pressboard for the core — it chips laminate edges when the door bumps.
5. Textured White Microcement Look Door with Easy Wipe Finish
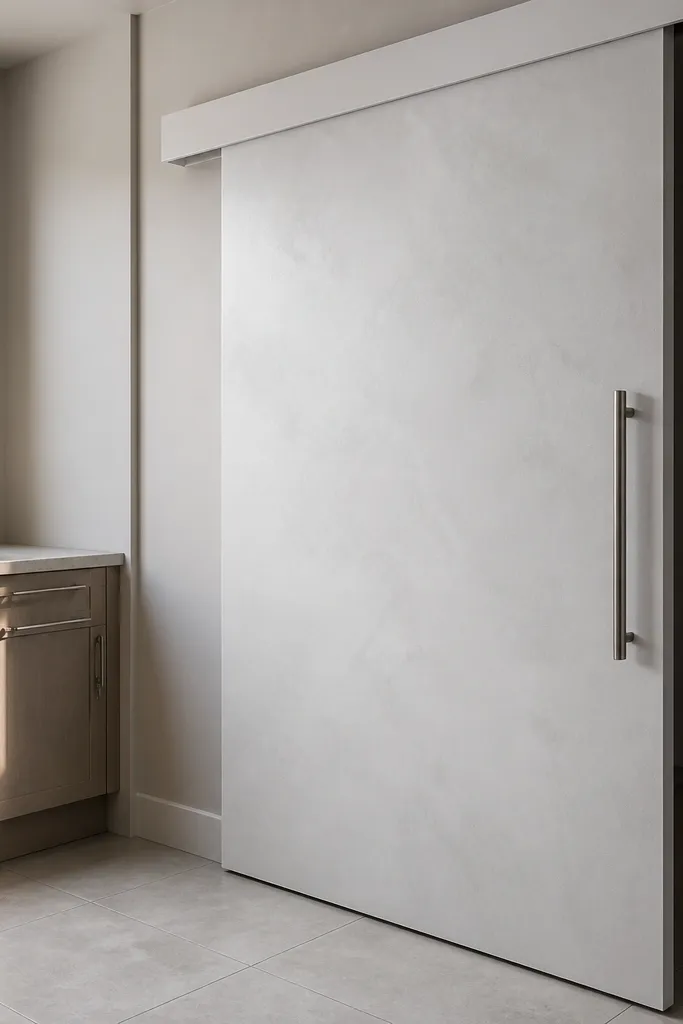
Microcement-style texture looks high-end and hides minor marks, but only if you seal it correctly. Use a microcement-look coating or cement-texture laminate, then top it with a wipe-clean sealer designed for stains. This gives you that tactile, architectural look without the maintenance headache of porous surfaces. The sealed texture also helps the door stand out against smooth cabinet fronts. This idea is great for kitchens with monochrome tones where you want texture without clutter.
Start by choosing a microcement-look panel system or a textured board with a built-in sealable surface. Apply the manufacturer-approved sealer/topcoat and let it cure fully before install. Mount the track with a cover and hang the door on adjustable rollers, setting the door height so it doesn’t scrape the floor. Add a bottom guide and test for smooth travel across the full range.
Use a pH-neutral cleaner only — harsh cleaners dull sealers over time.
Don’t skip the topcoat sealer; textured cement looks amazing until it stains permanently.
6. Stainless Frame with Frosted Glass Inserts
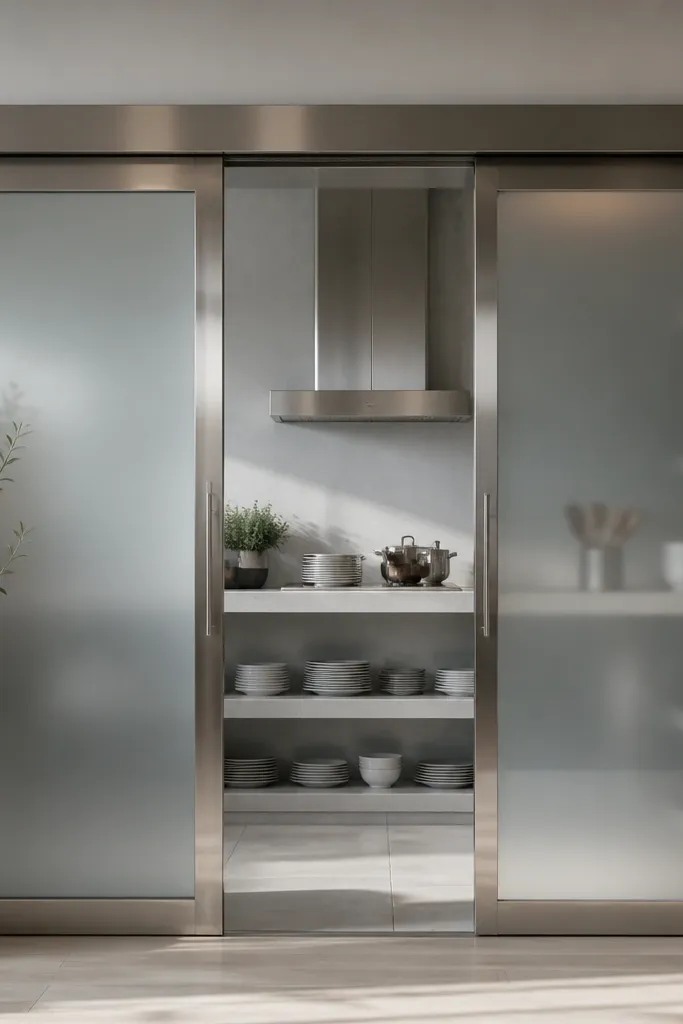
Stainless framing gives you a professional kitchen vibe and it wipes down easily. Fro frosted glass inserts keep the interior area from looking cluttered while still letting light through. The low-maintenance part is the combination: metal that resists spotting and glass that doesn’t hold grease. A covered track keeps the mechanism out of sight and out of trouble. This fits modern kitchens with stainless appliances and clean, linear cabinetry.
Start by building or buying a stainless frame kit sized to your opening, then fit frosted glass with glazing gaskets. Install a top track with a cover and mount the roller carriage so it supports the door’s weight evenly. Hang the door, adjust roller height, and set a bottom guide to keep the glass from tapping the sides. Finish by sealing any gasket edges and confirming that the door closes flush without metal-on-metal clatter.
Editor's noteUse silicone-free glazing if your frame kit specifies it — it keeps glass stable without residue.
Skip thisAvoid leaving glass edges exposed — chips and cracks start at the first impact point.
7. Walnut Slat Door with Dust-Reducing Bottom Sweep
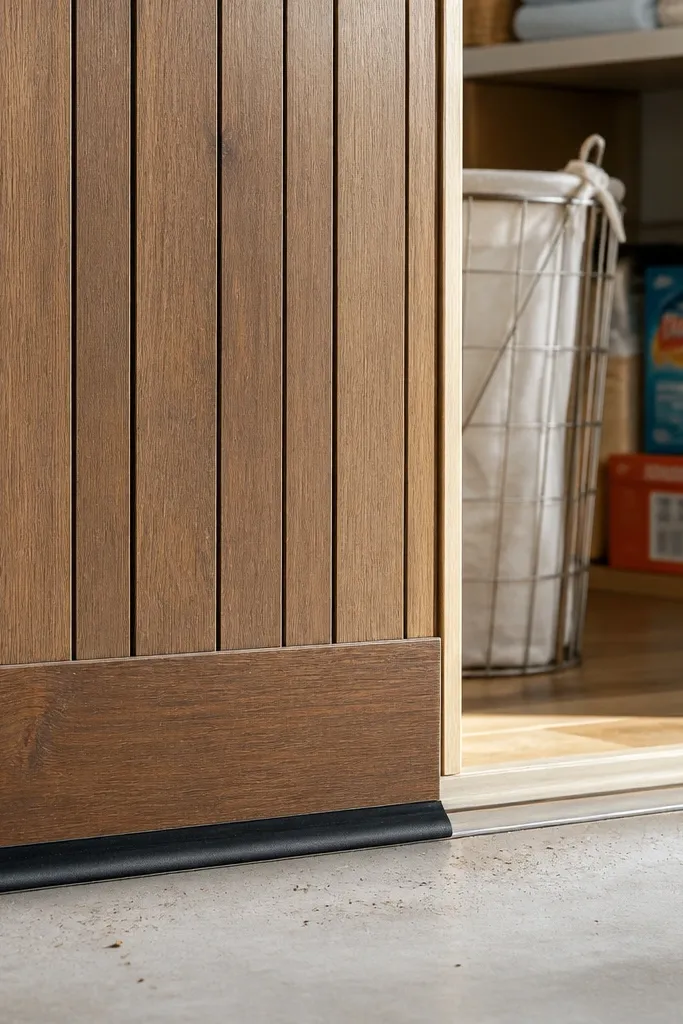
A slat door looks architectural and keeps airflow moving, which is helpful when you’re separating a kitchen pantry or laundry nook. Walnut slats add warmth and hide fingerprints better than glossy paint. The low-maintenance angle comes from adding a bottom sweep and using a sealed track cover so dust doesn’t settle into the gaps. You still get a photogenic look when the door is open because the slats catch light in a neat pattern. This works best when you want separation but not full visual blocking.
Start by building a slat door frame from stable plywood or hardwood, then mount walnut slats with consistent spacing (use spacers so the gaps match). Finish the wood with a wipe-clean topcoat and seal the underside. Install a covered track with a smooth roller set and add a bottom sweep strip sized to your door width. Adjust the bottom guide so the sweep lightly brushes without dragging.
Sand slat edges with 180 then 220 grit before topcoat — rough edges grab grime.
Don’t use open tracks without a cover; slat doors make dust look worse because you can see it.
8. Black Framed Door with Clear Acrylic Panel

Clear acrylic looks sharp and modern, and it’s easy to wipe clean — the surface doesn’t absorb grease like unsealed wood. The black frame adds contrast and keeps the door from looking flimsy. This is a good low-maintenance sliding door idea when you want to show off something tidy inside, like a wine cabinet or a neat spice wall. It also makes the space feel bigger because the panel stays transparent. The key is using a track system with a cover so the door hardware stays hidden and clean.
Start by cutting an acrylic panel to size and smoothing edges with a proper edge finishing method (don’t let it sit with rough edges exposed). Build a black frame with gasket strips to prevent rubbing and reduce noise. Install a covered track and hang the door with roller wheels designed for lighter panels. Add a soft-close option if available and test for any contact between acrylic and frame at full open.
Editor's noteUse a microfiber cloth and acrylic-safe cleaner; paper towels create micro-scratches.
Skip thisAvoid using abrasive cleaners — acrylic hazes quickly.
9. Beige Linen-Look Fabric Door with Removable Cover Panel
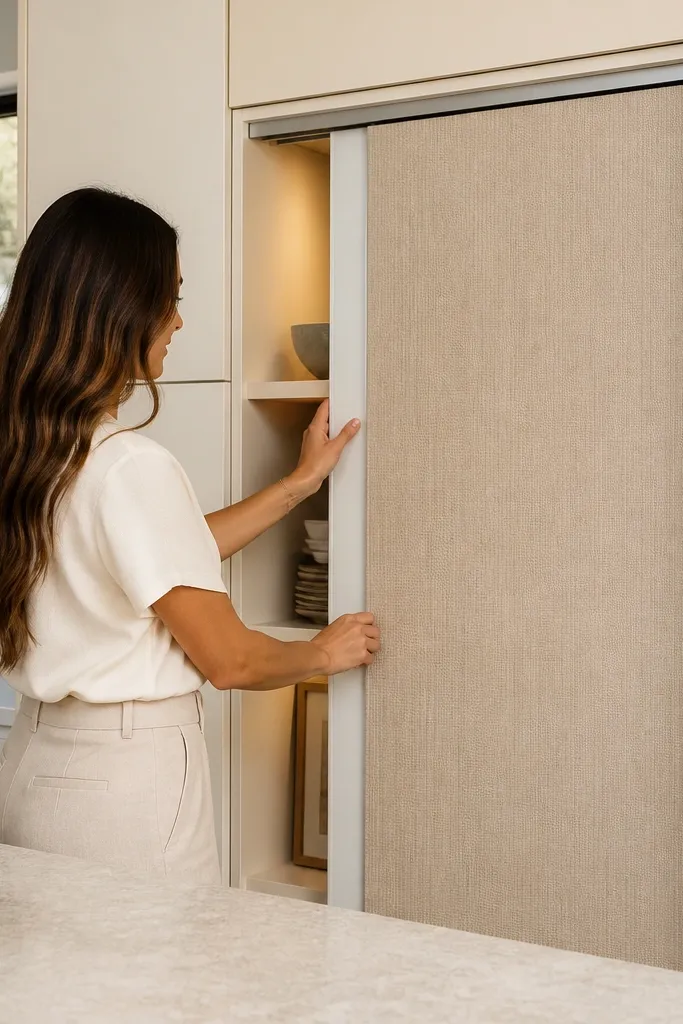
Fabric sounds high-maintenance, but you can make it low-maintenance by designing a removable cover. A linen-look door panel in a framed system lets you remove the fabric for spot cleaning or quick swap, so the door stays photogenic without constant scrubbing. Keep the track covered and the frame smooth so crumbs don’t get stuck in seams. This is best when you’re separating a kitchen office corner or pantry area and you want the door to soften the room. Choose a color close to your wall so it reads calm, not busy.
Start with a framed door panel and attach a removable fabric cover using clips or a zipper track so you can take it off. Use a wipe-clean backing material behind the fabric and keep the fabric from touching the floor. Install a covered track and hang the door with rollers that don’t pinch the frame. Add a bottom stop and guide so the door closes without fabric rubbing the frame edges.
Editor's noteBuy two covers at the start — one in use and one ready to swap after a spill.
Skip thisSkip fabric that’s glued directly to the board; you can’t clean or replace it cleanly.
10. Cream Shaker Panel Door with Fingerprint-Resistant Paint
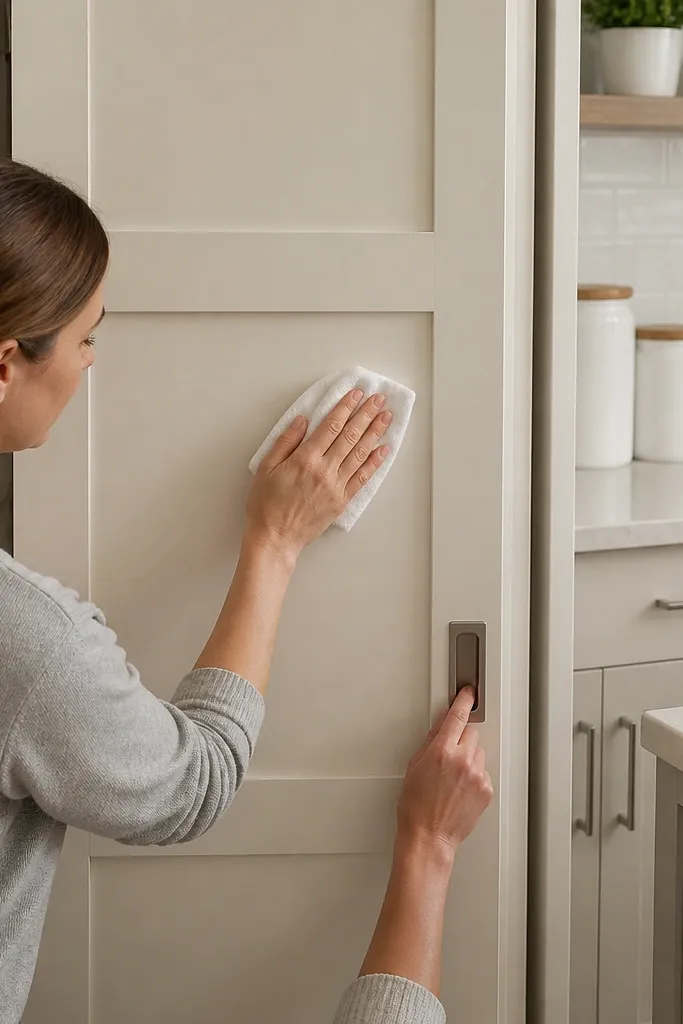
Shaker style looks classic and kitchen-friendly, and you can still keep it low-maintenance with the right paint. Fingerprint-resistant cabinet paint or a hard enamel topcoat reduces visible smears around handles and edges. The panel recesses hide minor wear, but you’ll want the paint finish to be smooth so grease wipes off without scrubbing. Install on a covered track so the recesses don’t extend to the messy mechanism area. This works for farmhouse-modern kitchens where you want the door to match cabinet doors and trim.
Start by building a shaker frame panel with recessed rails and stiles, then apply primer and a hard enamel finish in multiple thin coats. Sand between coats until the surface feels glassy, not gritty. Install a covered top track and hang the door on rollers sized for the panel weight. Add a bottom guide and stops so the door closes square and doesn’t chip the paint at corners.
Prime all edges separately — the edges are where grime and moisture show first.
Don’t choose satin finish near the stove; it shows wipe marks more than semi-gloss.
11. Green Enamel Door with Brass Track Detail
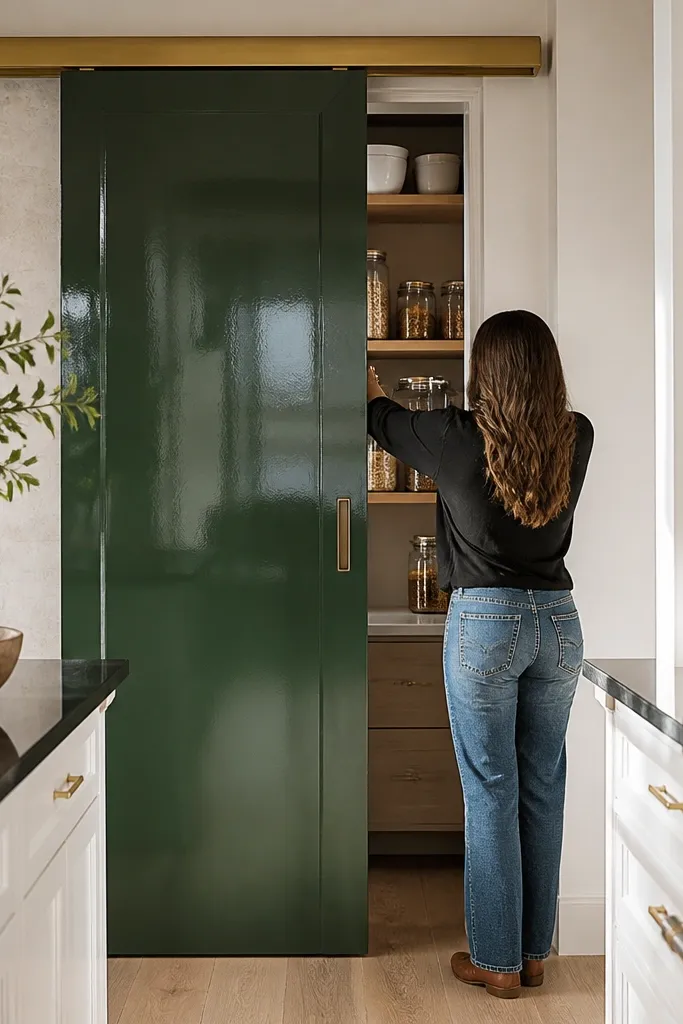
Deep green enamel looks rich without needing extra decor, and enamel is one of the easiest finishes to wipe clean. Brass track details add warmth and make the door look intentional even when the room is simple. Keep the track covered to prevent grease dust from dulling the brass over time. This idea is great if you have warm wood floors or brass hardware elsewhere, like cabinet pulls. The door becomes the focal point while still being low-maintenance because the surface resists staining.
Start by painting the door panel with a cabinet-grade enamel and cure it fully before install. Use a hardware kit that includes brass-toned track components and a cover over the rail. Mount the track level, hang the door, and adjust roller height so the door runs smoothly without scraping. Finish by installing brass end caps and adding a soft-close bumper if included in the kit.
Editor's noteWipe brass with a dry cloth after cooking splatters so you don’t leave oily residue.
Skip thisAvoid high-porosity finishes like chalk paint near cooking — they stain and need rework.
12. Two-Tone Door with Contrasting Frame and Center Panel
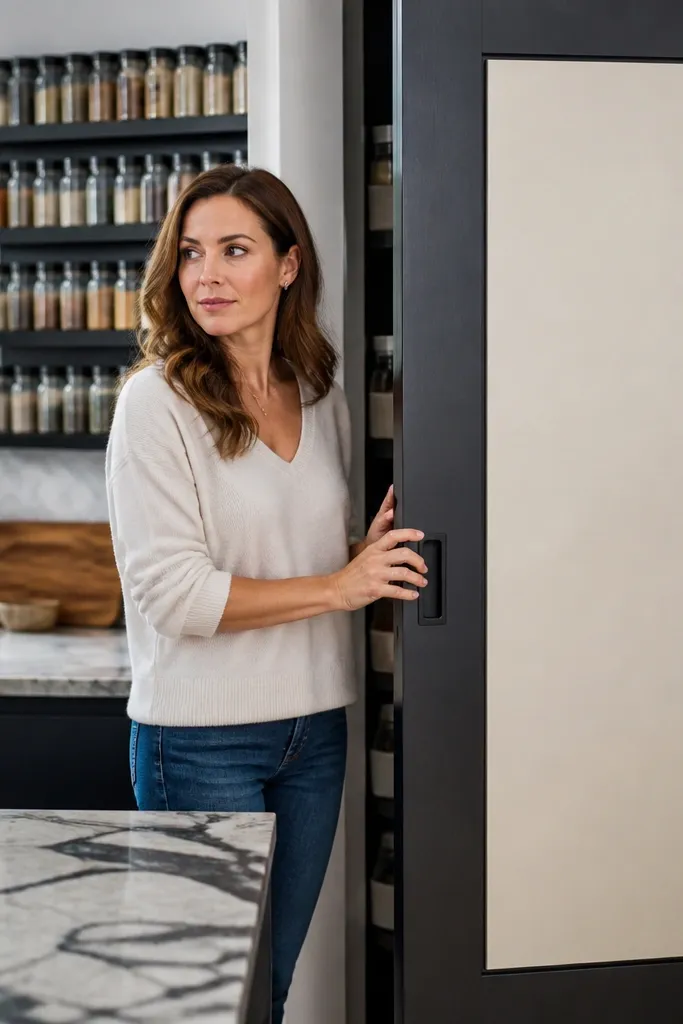
Two-tone doors look custom and help you hide maintenance visually. Use a darker frame and a lighter center panel so scuffs on the frame don’t stand out, while the center stays bright and clean-looking. The low-maintenance part is material choice: painted MDF or sealed veneer lets you wipe grease without soaking in. The contrasting colors also make the door read crisp in photos because the edges define the shape. This is a strong option for kitchens where you want the sliding door to match cabinetry while still adding personality.
Start by building a framed door where the center panel is a single flat piece (MDF panel or sealed veneer). Paint the frame one color and the center panel another, using a hard topcoat on both. Install a covered track and hang the door with rollers aligned so the door face stays flush at the edges. Add a bottom guide and adjust the stop so the door lands consistently without rubbing the frame.
Editor's noteMask the panel edges with fine painter’s tape and remove tape while paint is still slightly tacky for sharp lines.
Skip thisDon’t mix finishes with different sheen levels; you’ll see every wipe mark in the light.
13. Rattan-Inspired Door with Removable Slat Inserts
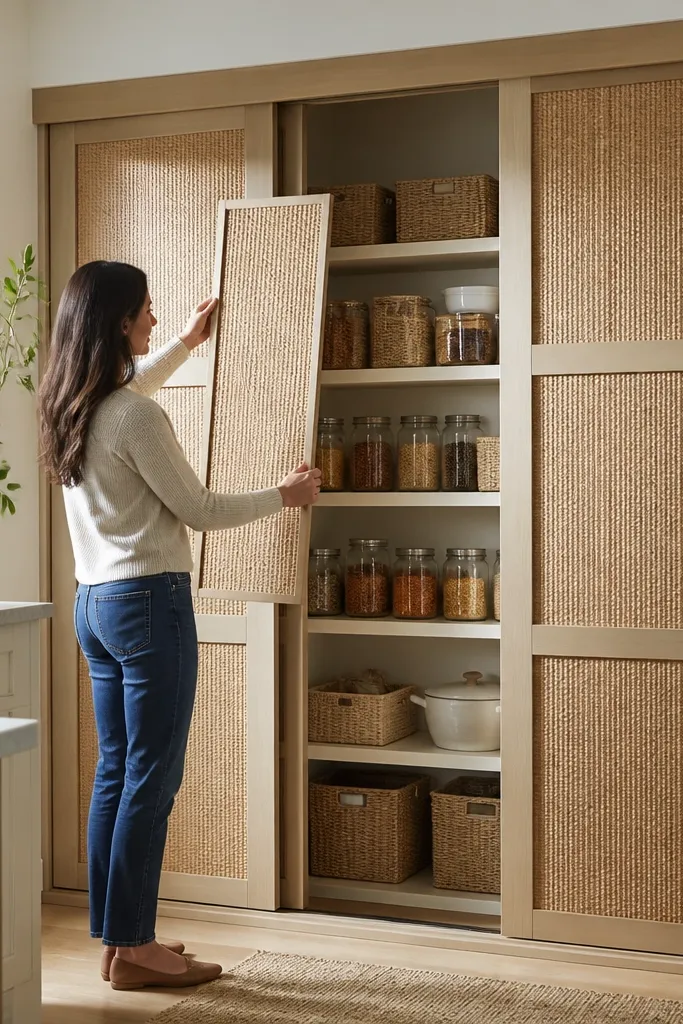
Rattan-inspired doors look warm and airy, and you can make them low-maintenance by designing removable inserts. If a section gets dusty or stained, you swap that insert instead of cleaning tiny fibers forever. Choose a sealed rattan-look material or a coated panel that wipes clean, then add a covered track so dirt doesn’t settle in the mechanism. This is a great door for kitchens that want texture without heavy visual clutter. It looks best when the surrounding cabinetry is simple and light-colored.
Start by building a rigid frame and installing rattan-look inserts using screws or magnetic tabs so they detach. Coat or seal the inserts with a clear wipe-clean finish, then seal the frame. Install a covered track and hang the door so the inserts don’t scrape the floor by adding a small gap. Add a bottom guide and test for smooth movement, especially around curves and stops.
Keep inserts in a labeled set so replacement matches the exact sheen and color.
Skip real untreated rattan in a kitchen; it absorbs grease and stains permanently.
14. Charcoal Metal Mesh Door with Grease-Resistant Coating
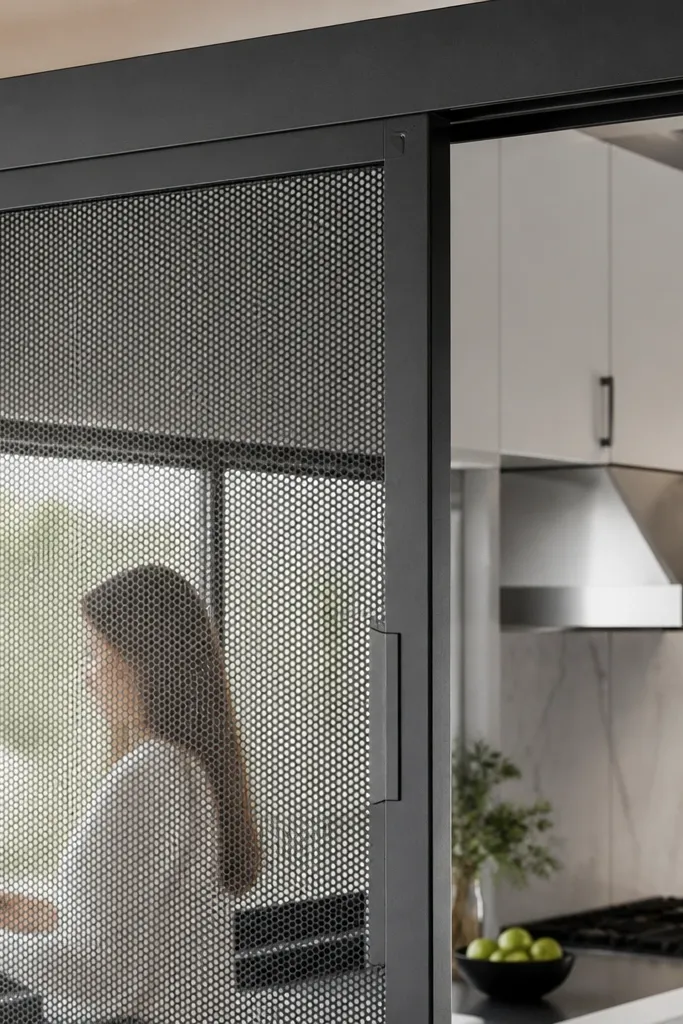
Metal mesh looks industrial and photogenic, but the trick is using a coating that resists grease so it stays dark and clean-looking. The mesh lets light through and keeps the space feeling open, while the charcoal finish hides minor dust better than bright colors. For low-maintenance, you need a covered track so grease doesn’t collect in the rail. This door suits kitchens with black hardware, concrete counters, or open shelving. It also works well when you want separation without blocking air flow.
Start by selecting or building a metal mesh door panel with a rigid frame so it doesn’t sag. Use a grease-resistant powder coat or a durable paint system meant for metal, then cure it fully. Install a covered top track and hang the door on rollers rated for the panel weight. Add a bottom guide and stops so the door closes straight and doesn’t twist the frame.
Editor's noteUse a soft brush vacuum attachment for mesh — it removes dust without smearing grease across the pattern.
Skip thisAvoid bare metal — it will spot and rust near cooking humidity.
15. White Marble-Look Laminate Door with Matte Finish
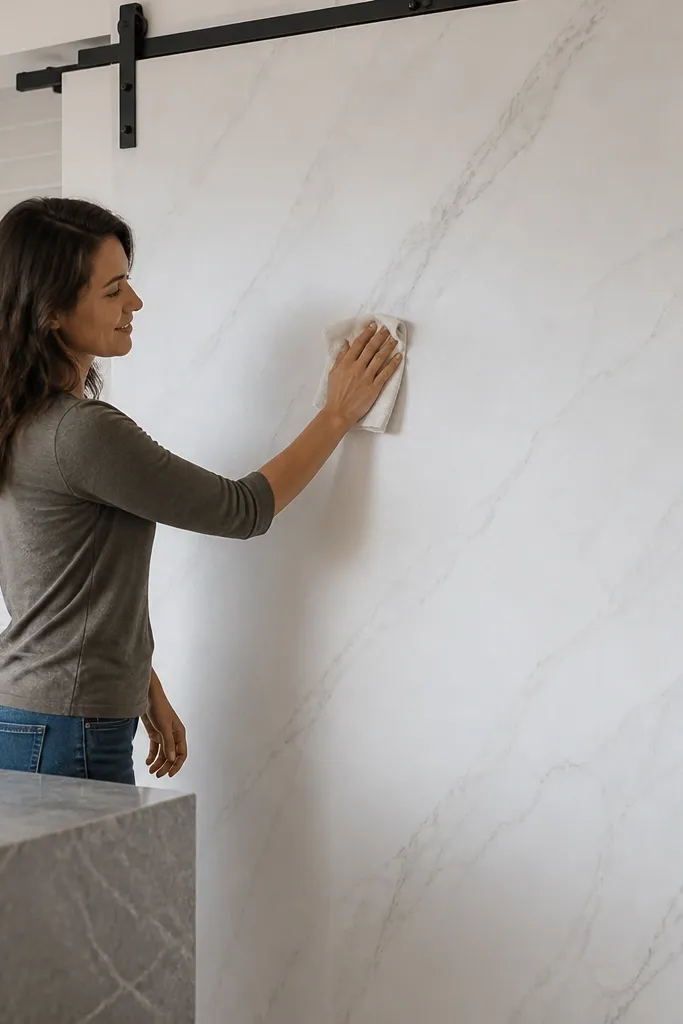
Marble-look doors photograph beautifully, and laminate makes the maintenance simple. Choose a matte marble-look laminate so fingerprints don’t show and grease wipes off without streaking. The pattern also hides small scratches better than flat white paint. Pair this door with matte black or brushed nickel hardware so the look stays clean, not busy. This is a great choice for kitchens with white counters and light gray floors where you want the door to add pattern without adding clutter.
Start by mounting the laminate to a stable core like plywood, then seal all edges with matching edge banding or countertop-style edging. Install a covered track and hang the door on rollers that match the door weight. Set the door so there’s a consistent bottom clearance and add a bottom guide to prevent rubbing. Finish by cleaning off any laminate dust and checking the door alignment at both ends of travel.
Editor's noteUse a laminate-safe cleaner and avoid ammonia-based products that can dull the matte surface.
Skip thisDon’t use glossy laminate; it shows smudges and wipes look obvious.
16. Pale Wood Slab Door with Clear Poly Topcoat
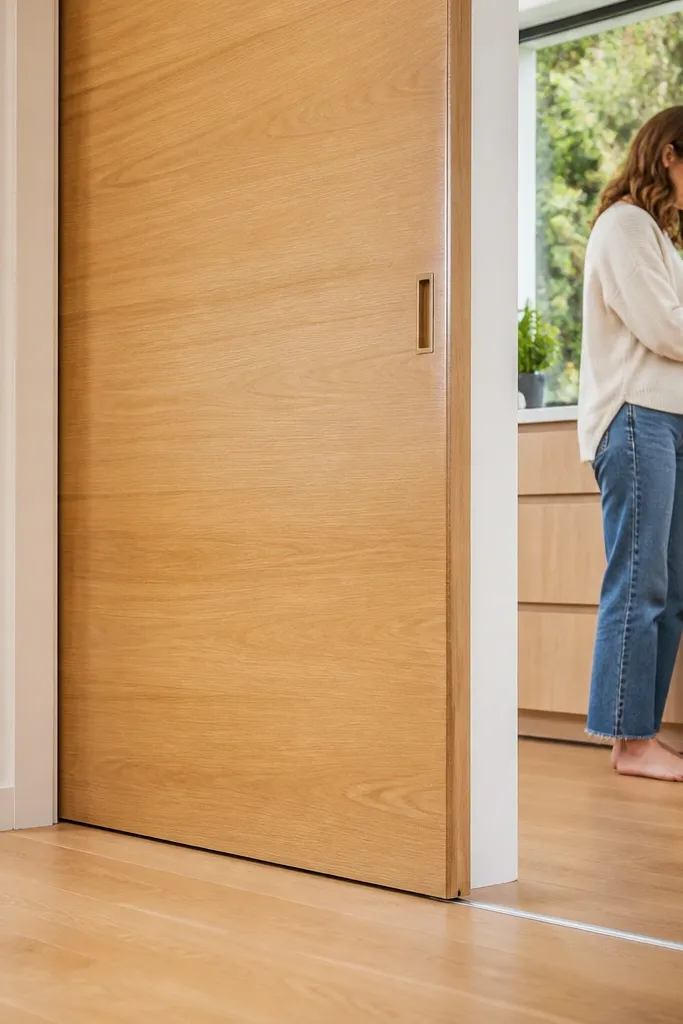
A slab door with a clear poly topcoat keeps the wood look while making cleaning straightforward. The poly layer stops grease from sinking in, so you wipe rather than scrub. Keep the finish on the edges too, because kitchen grime attacks the edge grain first. This style looks great in bright kitchens with light walls and simple cabinet hardware. It’s also forgiving if your opening isn’t perfectly square, because the slab reads solid and intentional.
Start by building a slab panel from stable boards or using a pre-made slab door, then sand to a smooth surface. Apply a clear poly topcoat in thin coats, sanding lightly between coats for adhesion. Install a covered track and hang the door with adjustable rollers, then set a bottom guide to keep it from drifting. Add a soft close or bumper so the slab doesn’t slam and chip the clear coat at the corners.
Let the poly cure fully before installing handles so you don’t trap dust in tacky spots.
Skip edge sealing — that’s where the first rough spots and discoloration show.
17. Two Sliding Panels in One Track with Center Pocket Stop
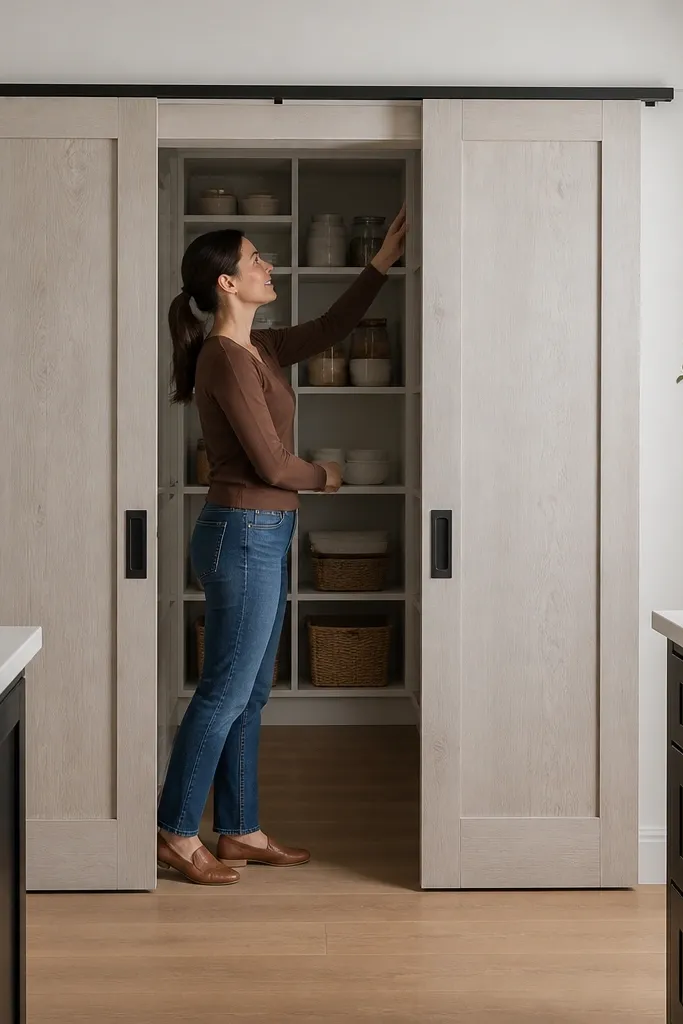
If you want the look of a single wide door but with easier maintenance, split it into two panels on one track and use a center pocket stop. Smaller panels mean fewer heavy parts to handle and less chance of the door dragging into the track. The pocket stop keeps the door aligned so it doesn’t grind dust and debris into the rail. Visually, it looks custom because you get strong panel lines and the door reads architectural. This suits kitchens that need frequent access, like pantry zones next to the fridge.
Start by choosing a multi-panel sliding hardware kit that supports two panels and includes a center stop system. Install the covered track at a level line, then hang each panel and adjust roller height so both panels sit parallel. Add bottom guides for each panel and set the center pocket stop so the panels land the same way every time. Finish by tightening all fasteners and checking that the panels don’t contact each other during travel.
Use a felt or rubber bumper on the pocket stop so the finish doesn’t chip at contact.
Don’t rely on friction alone for stops; without a proper pocket stop, panels drift and the track gets dirty fast.
18. Framed Ceramic Tile Insert Door with Grout-Sealed Surface
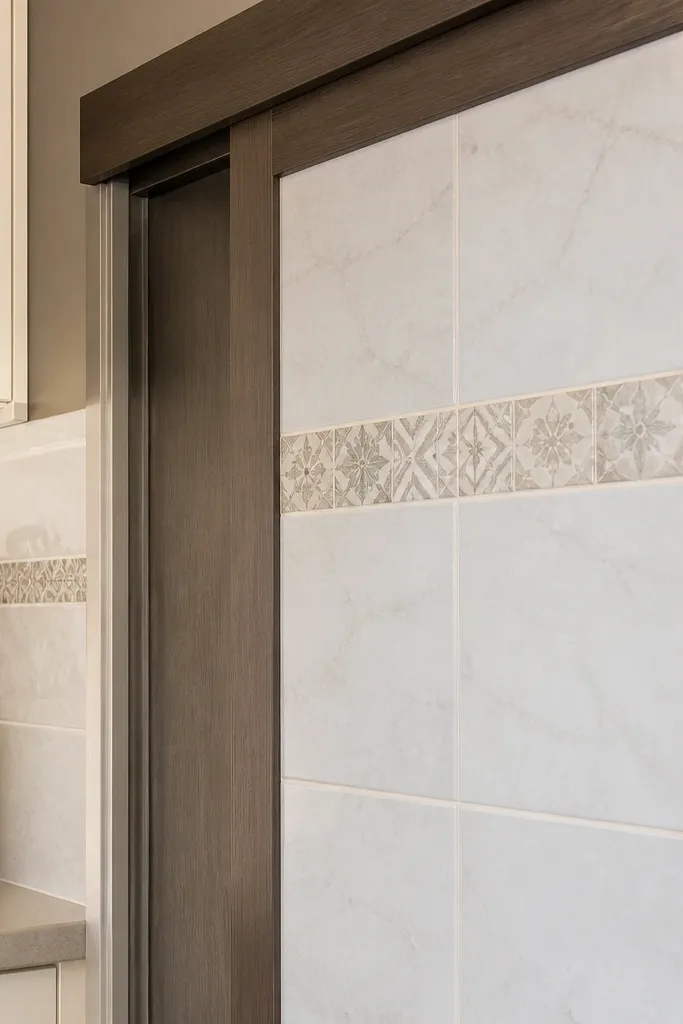
Ceramic tile inserts look like designer backsplash detail, and they’re easy to wipe when the grout is sealed. This is a low-maintenance sliding door idea because the tile surface resists grease and water better than many painted finishes. You get a photogenic pattern that matches your kitchen tile, while the sealed track cover keeps the mechanism clean. It suits kitchens where you already have tile backsplashes and want continuity. The one catch is weight — tile is heavier — so you need hardware rated for the load.
Start by building a rigid frame and setting ceramic tile on a cement board or tile-ready substrate, then grout the joints. Seal the grout with a penetrating sealer and let it cure fully before installing the door. Install a covered top track and use rollers and hangers rated for the door’s tile weight. Hang the door, adjust roller height, then add bottom guides so the tile doesn’t hit the frame or floor at any point.
Choose larger tile pieces (like 4x4 or 2x2) to reduce grout lines you have to keep looking clean.
Avoid unsealed grout — it stains quickly near cooking splatters.
19. Matte Terracotta Door with Linen-Textured Topcoat
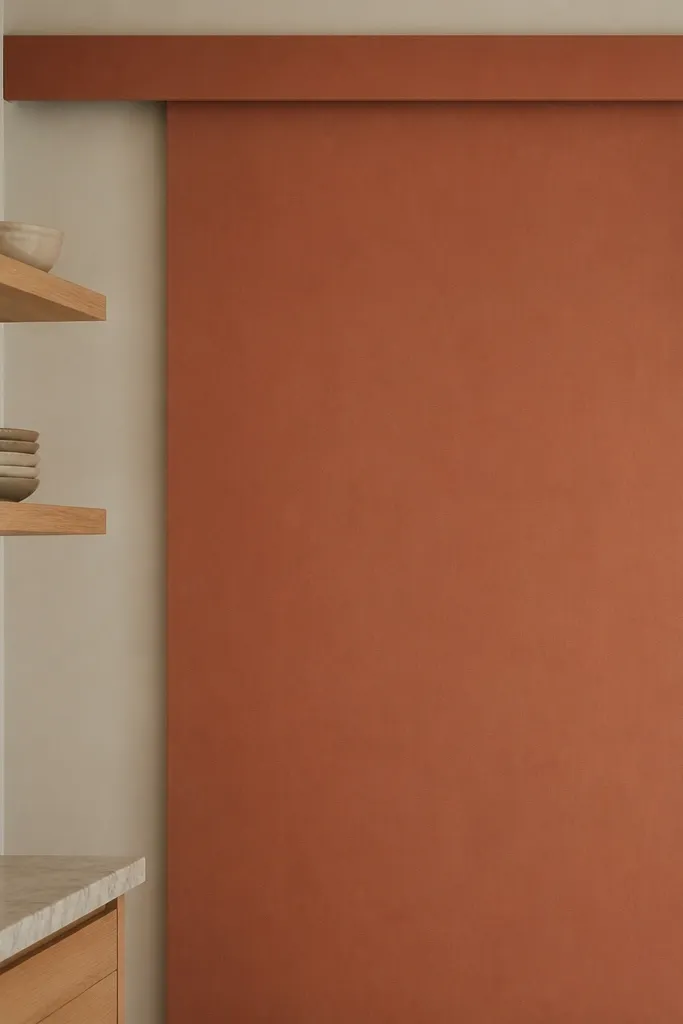
Terracotta looks warm and handmade, and a linen-textured topcoat keeps it from looking too glossy in kitchen light. The surface texture hides small smudges, and the matte finish makes the door photograph like a ceramic piece. Low-maintenance comes from using a sealed, wipe-clean topcoat rather than letting texture stay porous. Pair it with a covered track and simple black hardware so the look stays grounded. This suits earthy kitchens with warm stone countertops and light wood floors.
Start by painting or coating your door panel with a textured topcoat that’s rated for wipe-clean use, then apply a clear protective layer if required. Sand lightly after curing if the texture feels too rough, so dirt doesn’t lodge in high spots. Install a covered track and hang the door on smooth rollers, then add a bottom guide to keep consistent clearance. Test the door travel and install soft-close or bumpers to prevent chipping on impact.
Editor's noteUse a damp microfiber, then a dry wipe right after. Matte textured finishes look best when you don’t leave water sitting.
Skip thisSkip unsealed textured coatings — they stain from cooking oils.
20. Stained Alder Door with Polyurethane and Clear Edge Banding
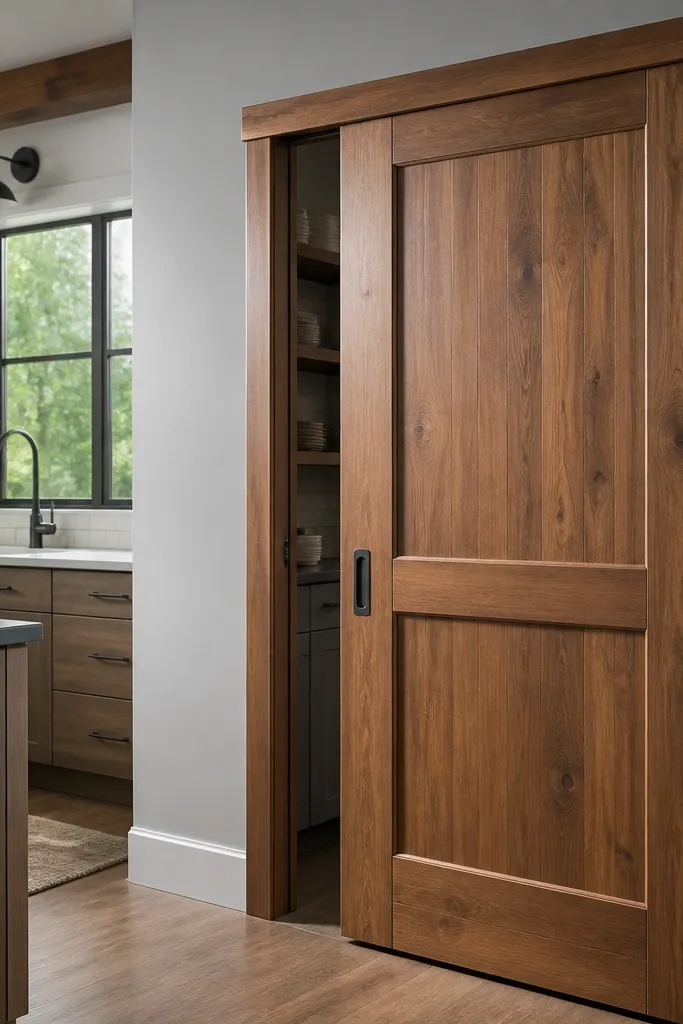
Stained alder gives you a natural look without the maintenance mess of raw wood. The key is polyurethane over the stain and clear edge banding so the door edges don’t absorb moisture. You still get that warm grain in photos, but you can wipe grease without the stain lifting. Pair with a covered track so the hardware stays out of the splash zone. This works in kitchens that already have wood accents and want the sliding door to match them.
Start by sanding alder to 180 grit, then apply a wood stain in even coats and wipe off excess. Let it dry fully, then apply multiple thin polyurethane coats, sanding lightly between coats. Seal the edges with clear edge banding or a thin coat of polyurethane plus sanding for smoothness. Install a covered track, hang the door with adjustable rollers, and set the bottom guide so the door doesn’t drag.
Editor's noteIf you see streaking after staining, sand back lightly and restain only the affected areas before the first poly coat.
Skip thisDon’t skip edge banding or extra sealing on the door’s end grain.
21. Blackboard-Style Door Panel for Notes, with Wipe-Clean Sealer
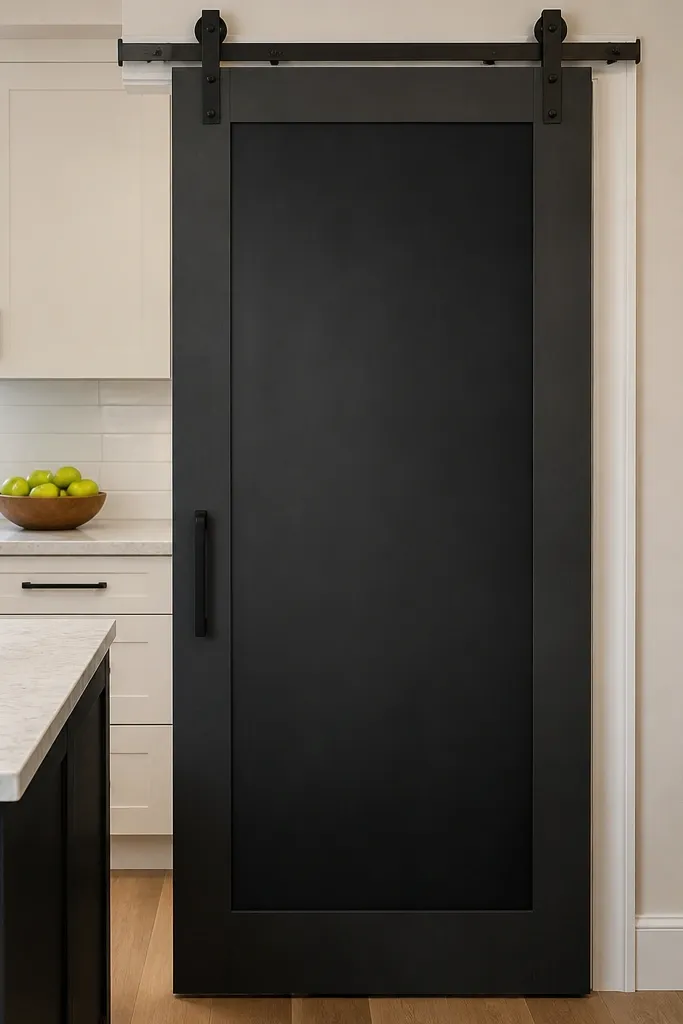
A chalkboard-style panel on a sliding door is practical in a kitchen because you can write reminders and wipe them clean. The low-maintenance part depends on the coating: use a chalkboard paint system that includes a wipe-clean clear sealer after the cure, so grease doesn’t soak in. The matte surface hides minor scuffs, and the door looks fun without requiring extra decor. Use a covered track so the mechanism stays tidy, and keep the door frame simple to avoid scrubbing. This fits kitchens where you want organization that looks intentional.
Start by applying chalkboard paint to a flat panel and cure it fully per the paint directions. After curing, seal it with the recommended clear topcoat for chalkboard use, then cure again before install. Mount the panel into a frame and install a covered track with rollers suited for the door weight. Add a bottom guide and stops so the door lands gently and doesn’t chip corners.
Use chalkboard cleaner instead of kitchen degreaser — degreaser can leave a permanent haze.
Avoid using regular wall paint as a chalk surface; it smears and won’t wipe clean.
22. Bright White Micro-Panel Door with PVC Edge Protection
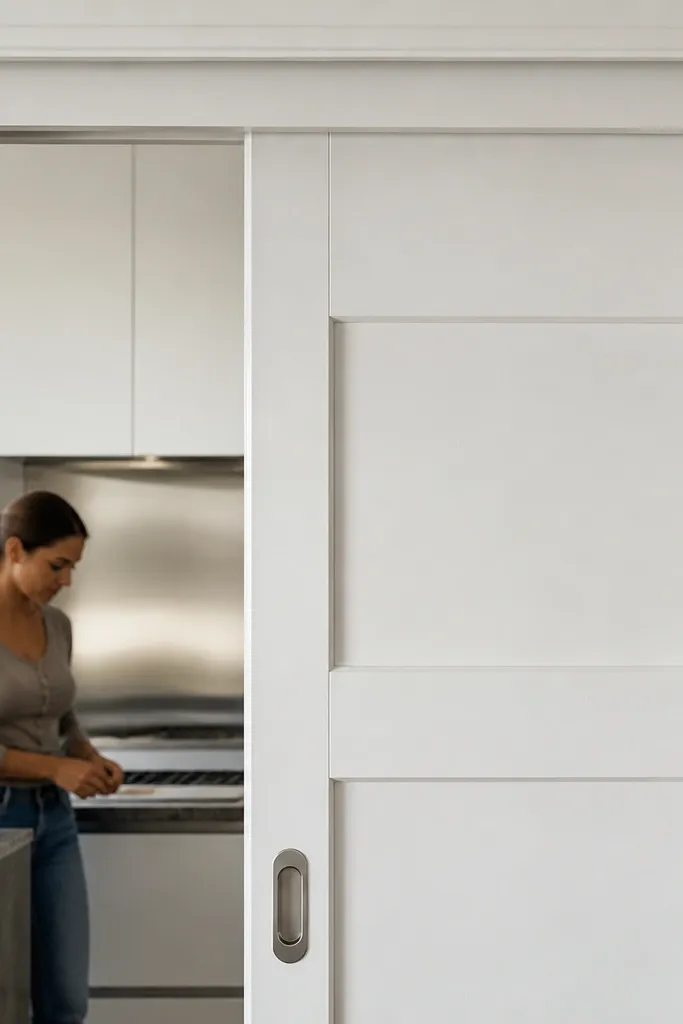
Micro-panel doors look modern because the small recessed sections catch light and make the door look detailed without being busy. Bright white keeps kitchens looking crisp, and PVC edge protection blocks moisture at the points that usually fail first. For low-maintenance, the finish should be smooth and wipeable, like a cabinet-grade paint or sealed panel system. A covered track keeps dust and grease from getting into the rail and ruining the clean look. This is ideal when your kitchen is mostly white cabinets and you want the sliding door to match the same style language.
Start by using a micro-panel door slab or building panels on a stable core, then apply primer and a hard white topcoat. Add PVC edge protection or edge banding to all sides, especially the bottom edge. Install a covered top track and hang the door on rollers set for smooth travel, then install a bottom guide. Test close speed and add bumpers or soft-close so the door doesn’t slam and chip the white finish.
Editor's noteReapply touch-up paint to any exposed edges immediately — white edge failures show fast.
Skip thisDon’t leave raw cutouts or exposed core around the panels; they swell and turn yellow.
23. Clear Acrylic + White Backing Door for a Light, Clean Look
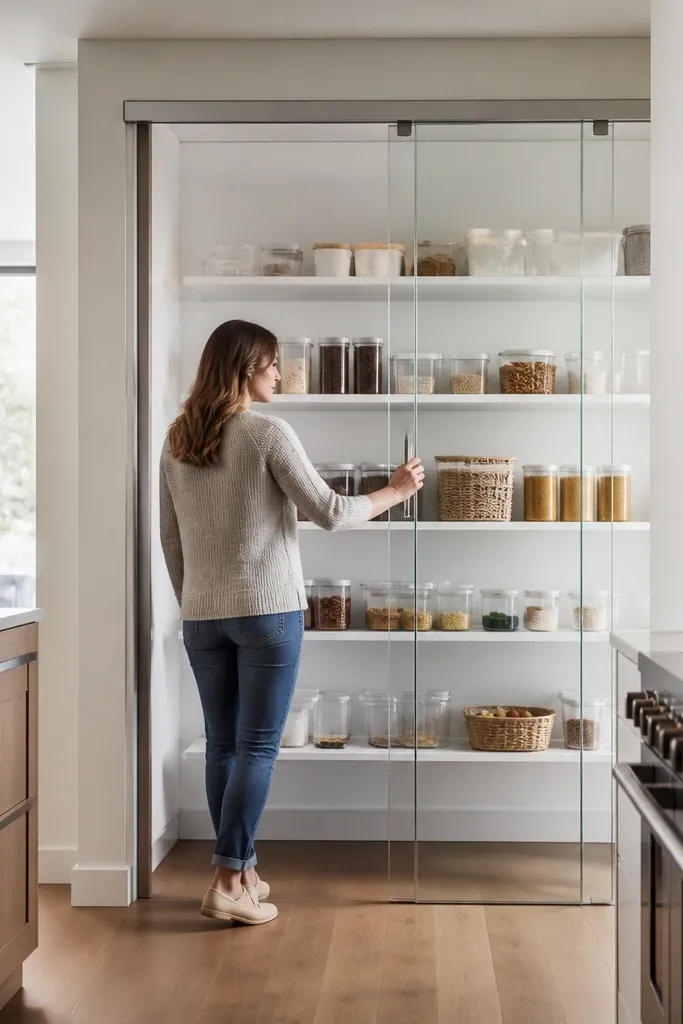
This idea makes the door feel lighter than it is because you get a floating, glass-like look. The white backing keeps the interior area from looking messy and gives you a crisp, bright appearance. Acrylic is easy to wipe, but keep it protected with proper hardware so it doesn’t scratch from metal contact. Use a covered track to keep kitchen grease away from the rollers, which is where low-maintenance really wins. Great for kitchens that need a visual divider without making the space feel closed in.
Start by building a door frame with a white backing panel, then mount clear acrylic with spacer gaskets. Install a covered track and hang the door on rollers designed to avoid metal rubbing on acrylic. Adjust roller height until the acrylic panel stays centered and doesn’t contact the frame during travel. Add bottom guides and check clearance at both ends, then clean with acrylic-safe supplies after installation.
Editor's noteAdd a thin felt gasket strip where acrylic meets the frame to prevent micro-scratches.
Skip thisAvoid tight metal contact points — acrylic scratches are permanent and show instantly.
24. Olive Green Slab Door with Track-Mounted Dust Guard
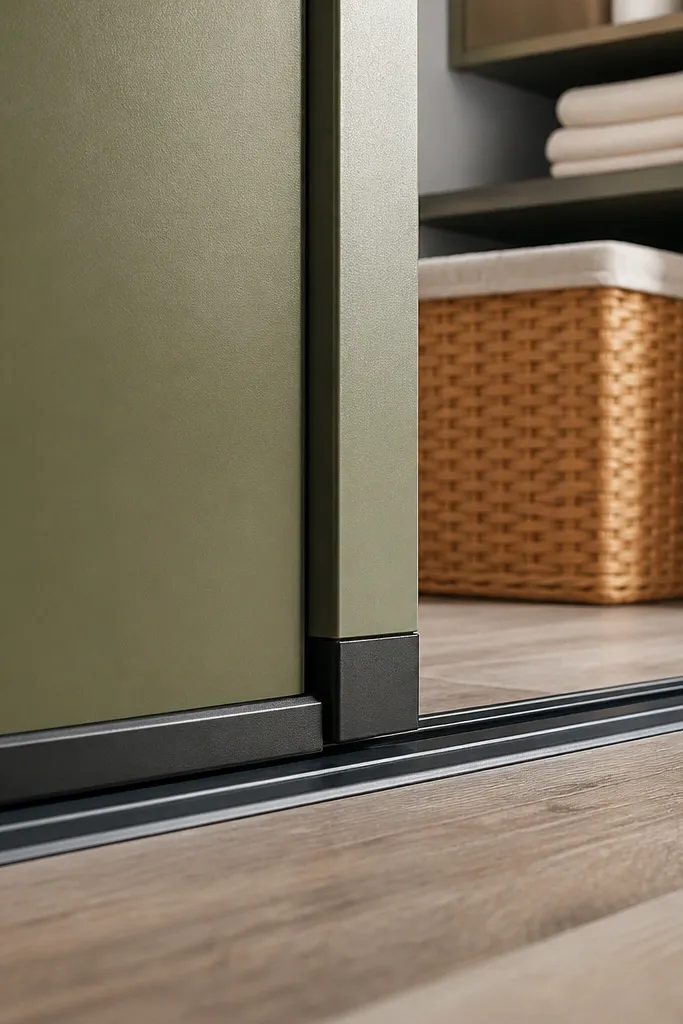
Olive green slab doors look calm and grounded, and they hide small imperfections better than bright white. The low-maintenance win here is the track-mounted dust guard, which blocks crumbs and grease splatter from getting into the rail. With a sealed slab finish, you wipe the surface quickly and keep the mechanism quiet. This is a smart choice for kitchens where you cook often and you want fewer cleaning sessions. Pair with warm metals like bronze or matte black so the door looks intentional, not random.
Start by finishing your slab door with a wipe-clean topcoat, sealing all edges thoroughly. Install a track system that includes (or supports) a dust guard panel over the rail opening. Mount the track level, hang the door, and set the bottom guide so it doesn’t rub. Adjust roller height and confirm the dust guard stays aligned during travel, then install end stops to prevent door bounce.
Editor's noteWipe the dust guard with a dry microfiber weekly — it prevents buildup from turning into sticky grime.
Skip thisDon’t install a dust guard on an out-of-level track; it will scrape and create new debris.
25. Patterned Enamel Door with Color-Matched Rubber Bumpers
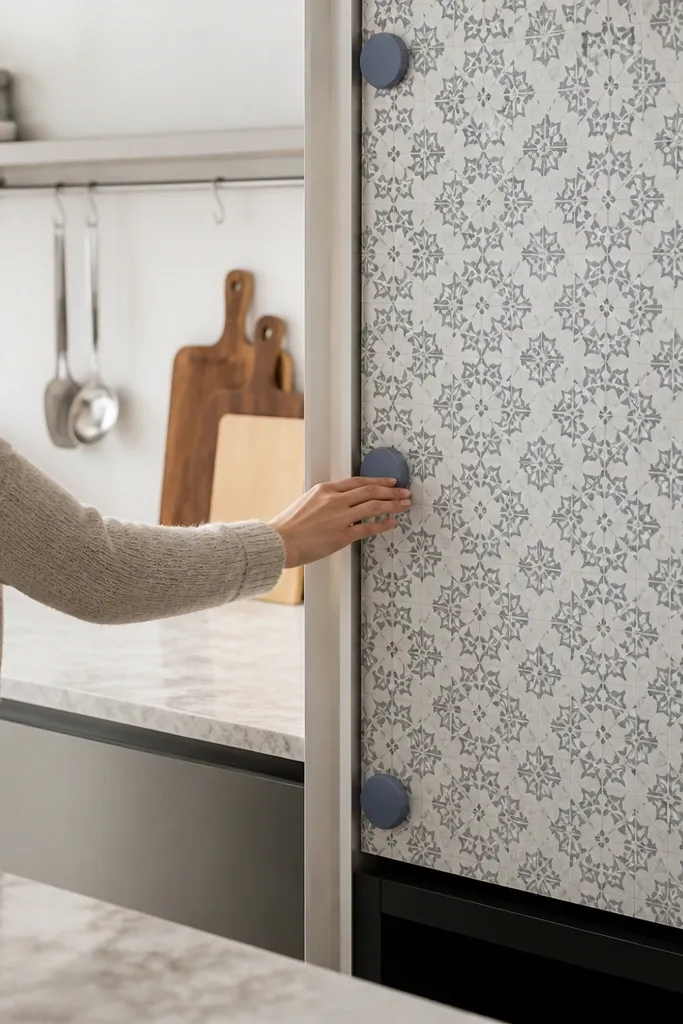
A patterned enamel door looks custom and stays low-maintenance because enamel is hard and wipeable. The pattern adds visual interest while the smooth finish prevents grease from soaking in. The color-matched rubber bumpers matter because they stop metal-on-metal impact that chips paint over time. Pair this with a covered track so the mechanism stays clean and the door keeps gliding quietly. This works best when you want the door to be a focal point, like in a kitchen with plain cabinetry and a single statement color.
Start with a door panel finished in enamel with a durable topcoat, then ensure the pattern is sealed and not just printed. Install a covered track and hang the door using rollers sized for the door’s weight. Set the bottom guide and install rubber bumpers at the stop points so the door lands softly every time. After install, test close speed and adjust stops until there’s no bounce or scraping.
Editor's noteUse a soft cloth and mild soap on enamel; avoid strong degreasers that can dull the finish.
Skip thisAvoid metal bumpers directly on painted surfaces — chips appear at the contact point fast.



