
1. Drop-Front Bench Shoe Cabinet with Toe-Lip Dividers
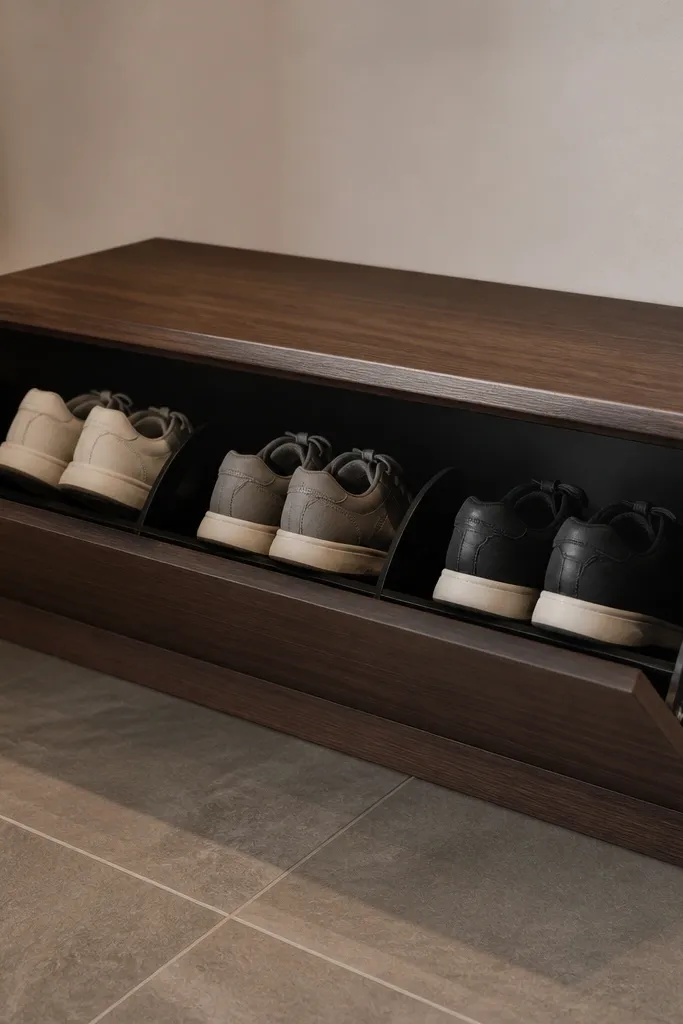
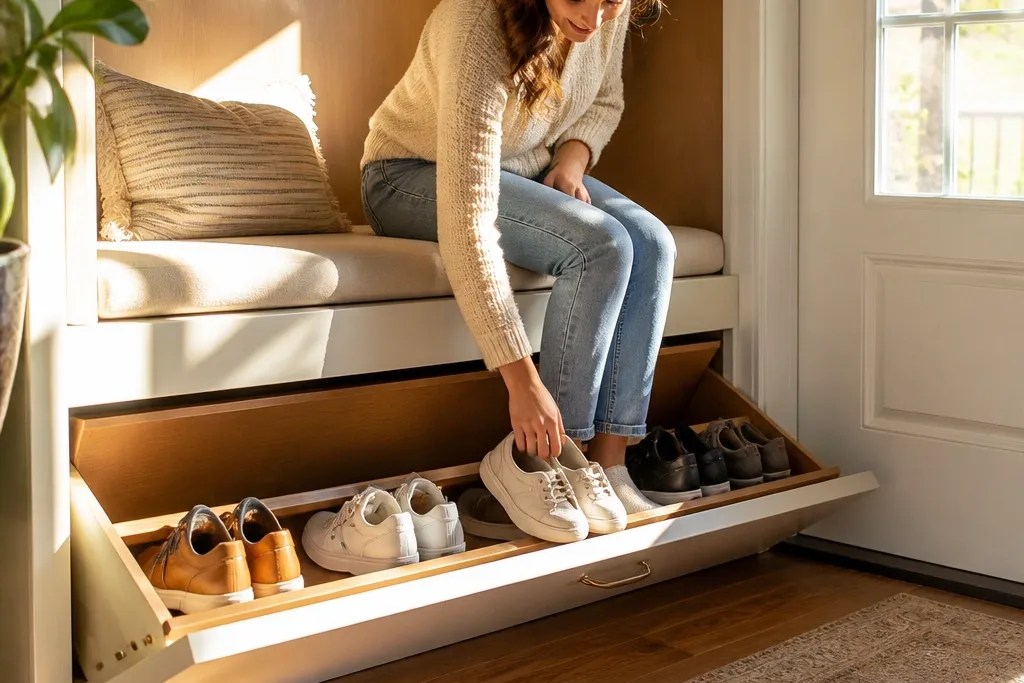
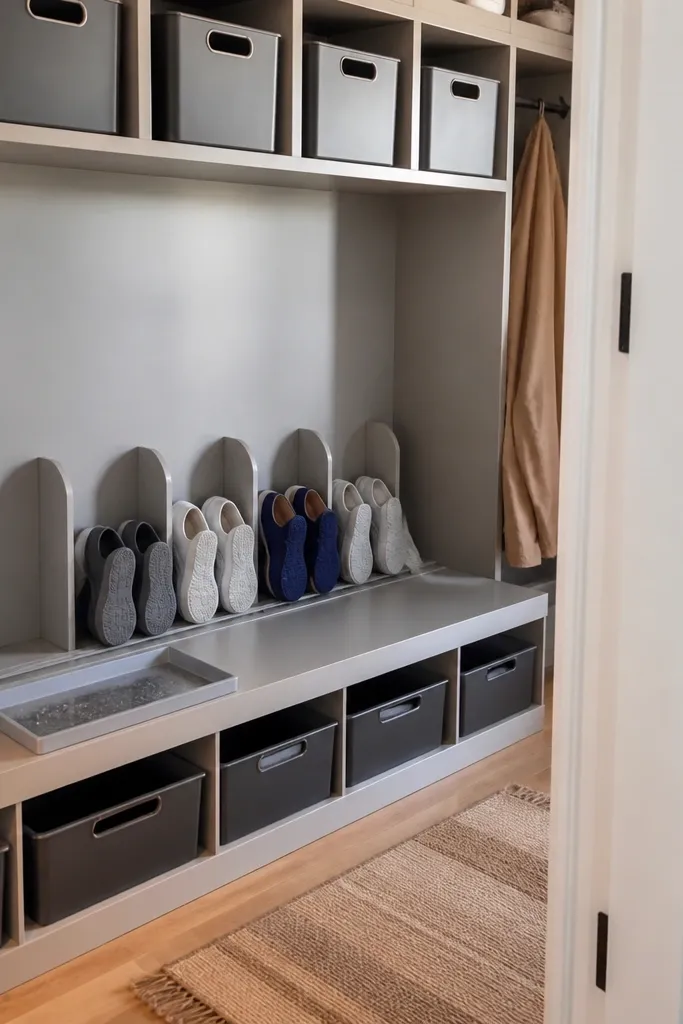
Start by building a rectangular cabinet frame from 3/4-inch plywood, sizing it for your bench footprint and the number of pairs you want (for example, 36 inches wide for 6 compartments at 6 inches each). Add a fixed back panel and install toe-lip dividers: rip strips about 3/4-inch tall and glue/screw them across the front of each cubby. Mount a drop-front panel with hinges and a magnetic catch so it closes quietly. Finish with a sealed top coat on the bench top and add a thin, wipeable liner on the cubby floor.
This is one of the cleanest low-maintenance shoe storage ideas because the door hides everything and the toe-lip dividers prevent pairs from sliding forward. The look is intentional: a bench top reads like furniture, not a shoe bin. Inside, each compartment is sized so your sneakers sit flat against the back wall with their toes stopped by a raised lip. That stops the “one shoe always ends up loose” problem. It fits entryways, mudrooms, and hall closets where you want shoes out of sight but still easy to grab.
Skip thisDon’t make compartments deeper than you need — extra depth lets shoes drift and look messy.
Editor's noteUse a magnetic catch plus a soft-close hinge for the front panel so it doesn’t slam and shift shoes.
2. Wall-Mounted Floating Cubbies with Angled Steel Wire Stops
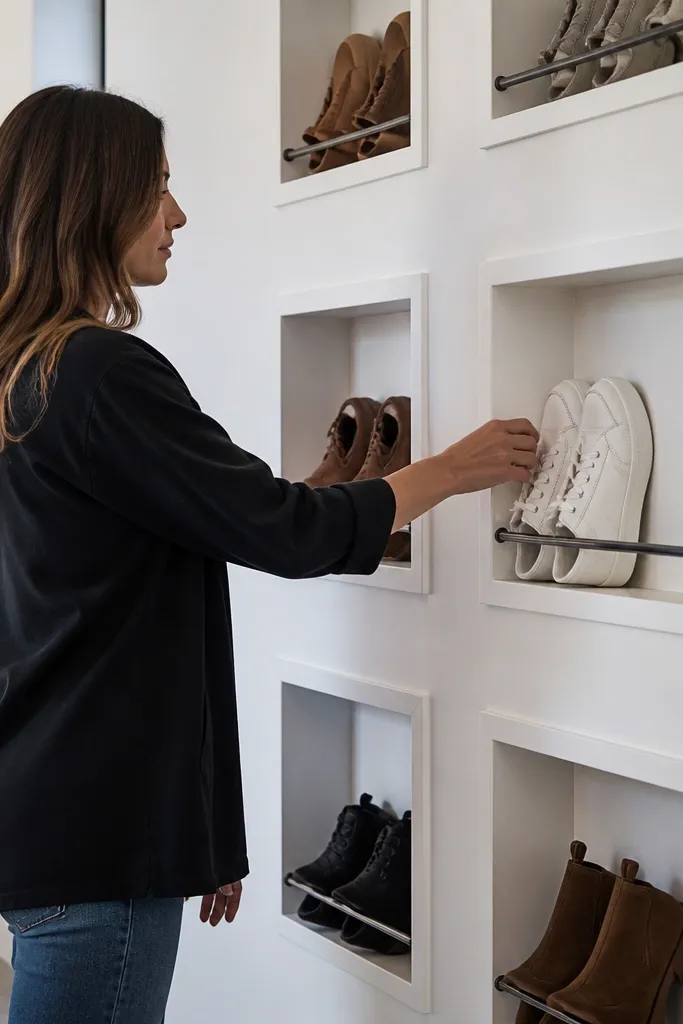
Floating cubbies look sharp because the lines are clean and the wall stays open. The trick for low-maintenance shoe storage ideas is the angled steel wire stop at the front of each cubby. Shoes rest against the back and the wire bar catches the toe so pairs don’t slide down over time. You get a gallery-like look while still keeping access fast. This works best for flats, low-top sneakers, and sandals in a hallway or laundry room where you want shoes visible but controlled.
Mark and level a mounting rail on the wall, then build cubby boxes from 3/2-inch plywood with open backs or solid backs depending on your wall space. Install angled steel wire stops by screwing small brackets to the inside front edge of each cubby; set the wire at a slight downward angle so it touches the toe area. Mount the cubbies on the rail using lag screws into studs. Seal the wood with satin polyurethane, then add a thin cork or rubber mat in each cubby for grip.
Keep cubby height around 5-6 inches for flats and 7-8 inches for low sneakers so shoes don’t tip forward.
Skip flimsy brackets — if the wire stop flexes, shoes will creep and the neat look disappears.
3. Recessed Closet Door Shoe Rack with Flip-Down Shelves
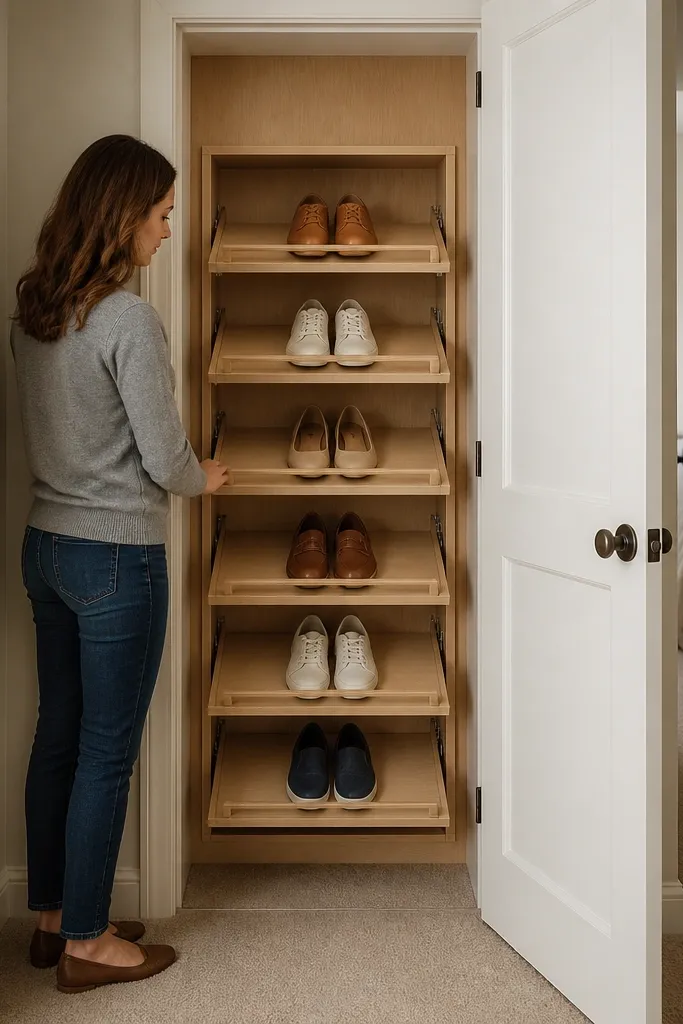
Measure your door thickness and build a frame insert that sits flush in the recessed area, using 1/2-inch plywood for the shelf panels. Cut shelves to a width that matches your shoe size range, leaving 1 inch of clearance between compartments. Install flip-down hinges rated for weight and add a door-mounted latch to keep the shelves up when closed. Line each shelf with a grippy felt or anti-slip drawer liner so shoes don’t slide when you flip it down.
If you want a low-maintenance setup that hides the clutter instantly, a recessed closet-door rack is the move. Flip-down shelves keep shoes upright and give you a clean, front-facing look when the door is open. Because the shelves are hinged, you don’t have to reach deep into a closet and disturb other pairs. The shelves also create a consistent plane so shoes look aligned instead of haphazard. This suits bedrooms and linen-closet-size spaces where you already have a door you can modify.
Skip thisDon’t mount shelves too close to the top edge of the door or you’ll lose clearance for taller shoes.
Editor's noteUse a latch that holds the shelves closed tight — loose doors cause shelf sag and uneven alignment.
4. DIY Pegboard Shoe Wall with Numbered Slide Trays
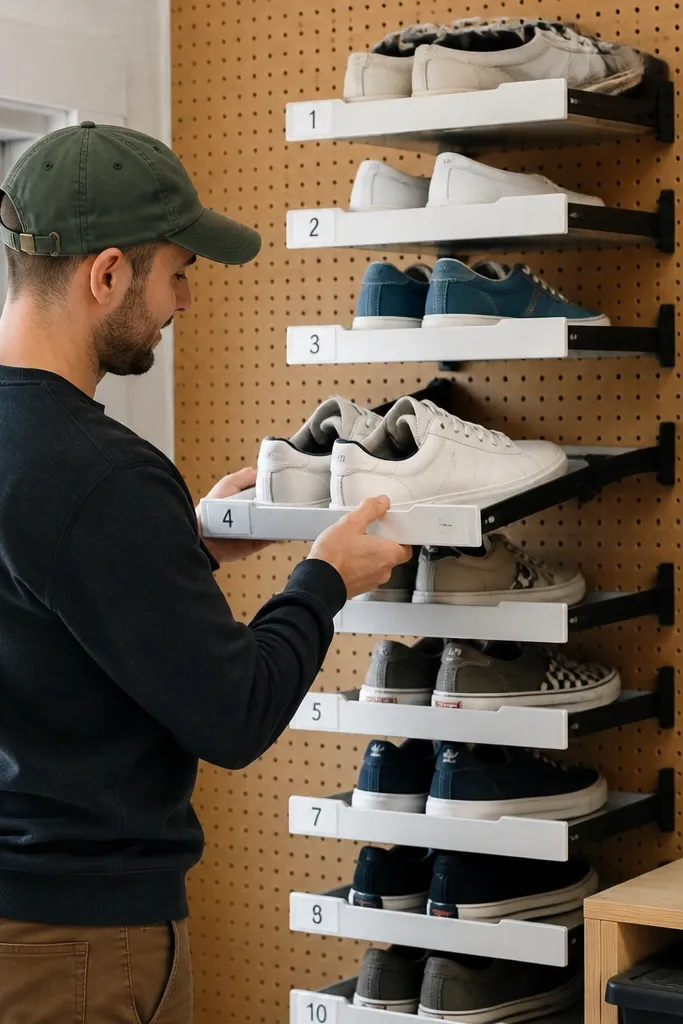
Pegboard gets a bad reputation for being “messy,” but the secret is slide trays and numbering. Each pair goes into a tray that glides out, so you’re not hunting around behind other shoes. The tray holds the shoe shape and keeps everything aligned, which makes the whole wall look curated instead of chaotic. This is a great option for small spaces because the footprint stays thin while the look stays graphic. Use it in a garage entry corner, basement stair landing, or a narrow closet.
Mount 1/4-inch pegboard to studs with a solid backing strip behind it for strength. Build trays from 1/2-inch plywood with shallow sides so shoes sit flat, and attach drawer slides underneath each tray. Cut a grid layout and label the tray positions with removable vinyl numbers or engraved tags. Finish the pegboard with a paint color you like, then add a washable liner inside each tray and a small ventilation slot in the bottom.
Pre-drill slide holes and test one tray first so you don’t end up with crooked slides across the whole wall.
Avoid open peg hooks — shoes slip off and the wall quickly looks unplanned.
5. Vertical Boot Tower with Adjustable Strap Rails
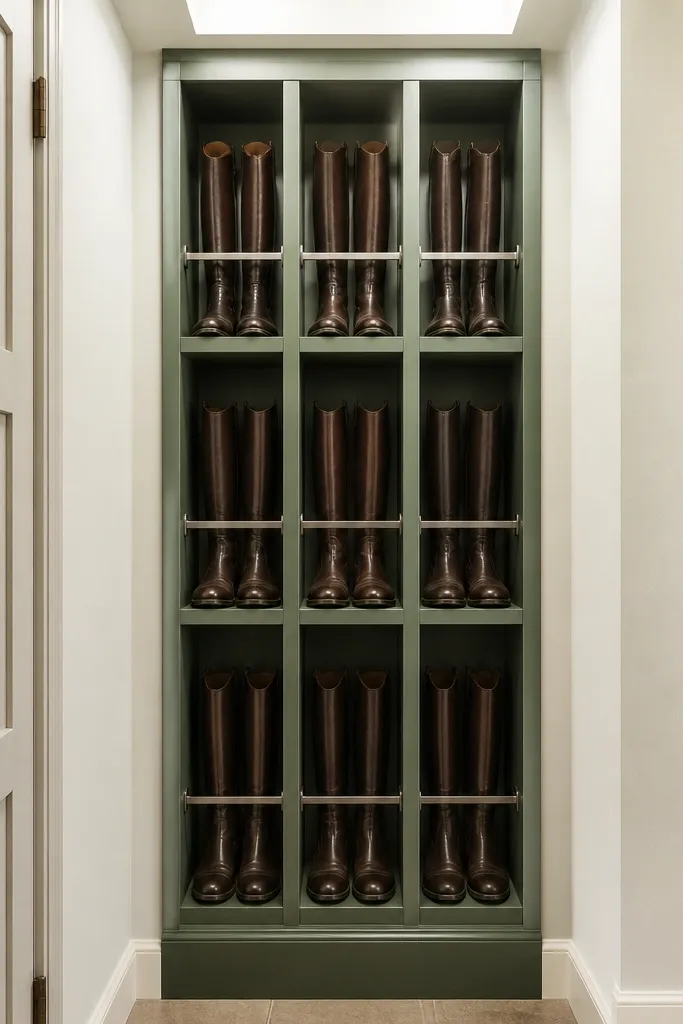
Build a tall cabinet from 3/4-inch plywood with multiple vertical compartments, leaving 10-12 inches of depth for boot footprint depending on your boots. Install two horizontal rails per compartment using metal slotted strips so you can reposition strap points. Add adjustable webbing straps that attach to the rails via snap hooks, then secure the bottom with a ventilated base panel made from slats. Seal the wood and add a removable perforated liner sheet so you can wipe or swap it.
Boot storage usually fails because shafts flop and boots lean until they look messy. A vertical boot tower fixes that by holding each boot by its shaft with adjustable strap rails. The look is neat because each compartment is the same height and boots sit upright, not sprawled. It’s low-maintenance because you don’t have to stuff extra inserts to keep shape. This is ideal for people with ankle boots, mid-calf boots, and rain boots that you rotate seasonally.
Skip thisDon’t store boots flat on the bottom panel — the shaft loses shape and the tower looks sloppy.
Editor's noteSet rail height so the strap touches the boot shaft around mid-calf, not near the ankle — it keeps the boot straight.
6. Clear-Front Shoe Cubby with Labeled Fabric Curtain Bottom
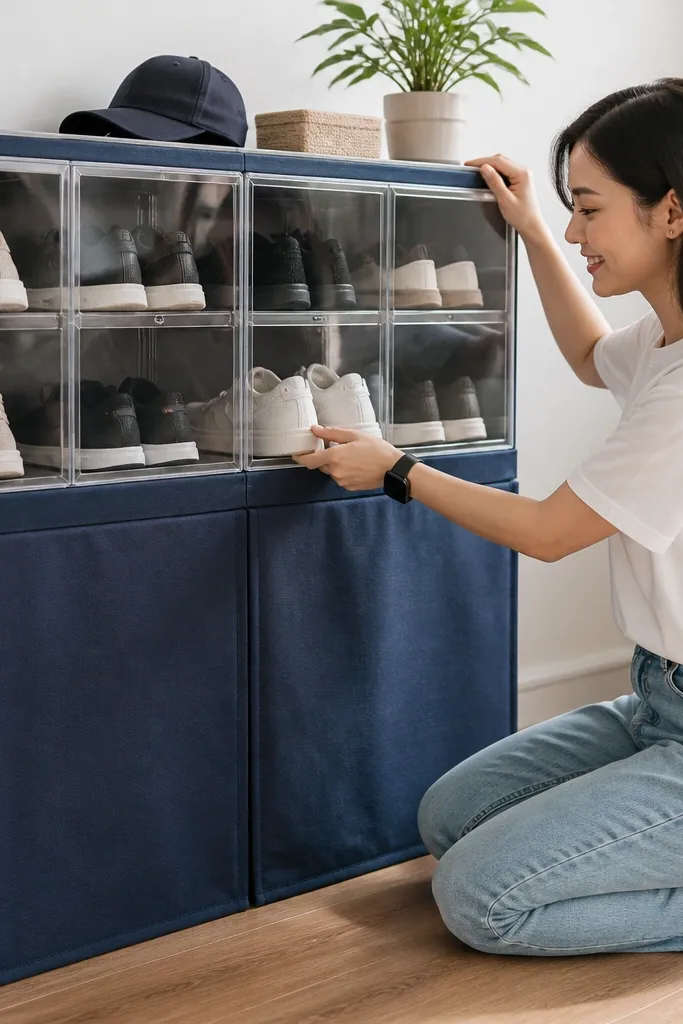
Build a cabinet shell from plywood and add clear acrylic or polycarbonate panels to the front openings. Cut fabric curtains from sturdy cotton canvas or polyester blends and sew small grommet tabs for mounting to a simple track or tension rods. Label each compartment with removable labels that stick to the acrylic frame. Add a thin ventilated insert on the bottom of each cubby, then seal all wood edges with a wipeable finish.
This gives you the “photo-ready” look of seeing shoes without letting them become a visual mess. Clear front panels show the arrangement, while a fabric curtain at the bottom catches dust and hides the worst of the inside clutter. For low-maintenance shoe storage ideas, the curtain is the secret: it’s washable and you don’t need to deep-clean the whole unit. Labeled sections make it feel organized even when you’re rushing. Great for entry closets where you want a clean, modern look and quick grab access.
Skip thisDon’t use full-length curtains inside sealed cubbies — trapped moisture turns into smell.
Editor's noteUse polycarbonate over acrylic if you have kids or a busy entry — it’s more impact-resistant.
7. Under-Stair Pull-Out Shoe Drawers with Soft-Close Slides
Measure the stair stringer area and plan drawer widths that match your shoe types (for example, 8-inch wide drawers for sneakers). Build drawer boxes from 1/2-inch plywood and mount them on full-extension drawer slides. Install a fixed back panel in the under-stair cavity and add a toe-kick trim so the drawers don’t look unfinished. Line each drawer with a grippy mat and add a few ventilation holes in the drawer base.
Under-stair space is perfect when you turn it into drawers instead of open shelves. Pull-out shoe drawers keep pairs aligned and stop the “everything falls forward” issue. Soft-close slides make it feel furniture-grade, which is the difference between tidy and chaotic. The look is clean because you see flat drawer fronts, not a wall of shoes. This is best for narrow layouts and hallways where you want a smooth, minimal front.
Skip thisSkip partial slides — you’ll end up reaching in and shifting shoes every time.
Editor's noteIf the space is tight, use a drawer front that overlaps by 1 inch so you can grab the drawer easily without pulling the shoe out first.
8. Lidded Wicker-Style Shoe Bins with Hidden Vent Grilles
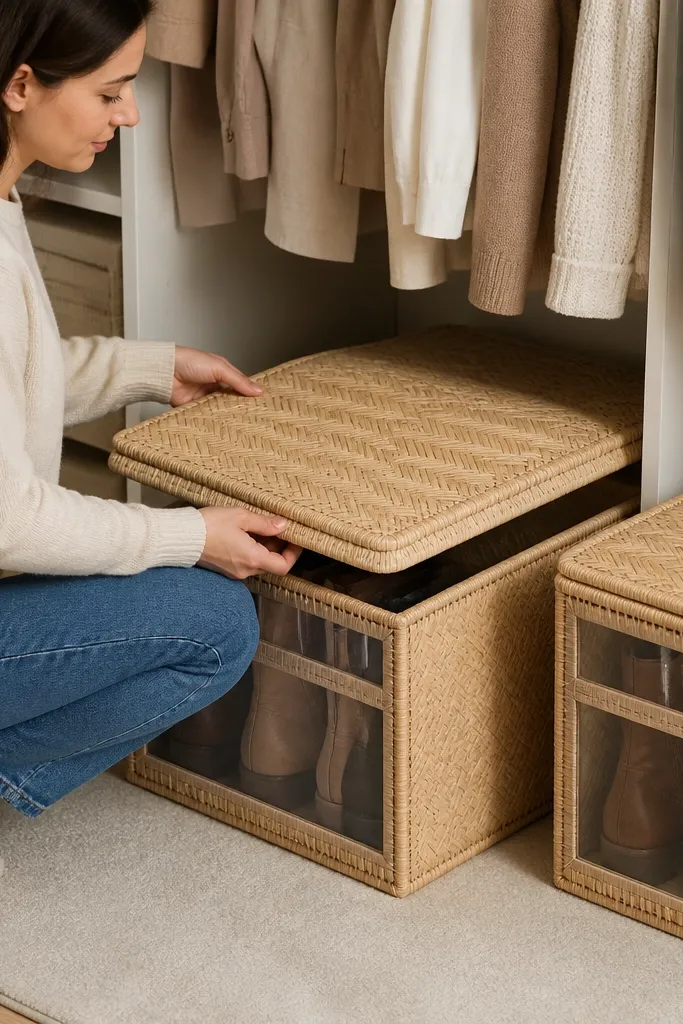
Wicker-style bins look warm and aesthetic, but plain bins trap moisture. The fix is hidden vent grilles under the lid so air circulates while the shoes stay out of sight. Add dividers inside and the bins look neat even when you’re not. This is a good low-maintenance choice for closets where you want a softer look than wood cubbies. It also works well for seasonal shoes you don’t touch daily.
Build bin frames from thin plywood strips so you can attach lids and dividers, then wrap with woven material or use a woven-look panel. Make lids with a removable insert panel and cut vent grilles in that insert. Add internal dividers from plywood strips so each pair has its own section. Line the inside with washable fabric and seal the wood frame edges to handle occasional dampness.
Use a removable vent insert so you can clean dust without taking the whole bin apart.
Don’t store wet shoes directly in sealed bins without ventilation — that’s where smell starts.
9. Stackable Shoe Ledges with Interlocking Front Panels
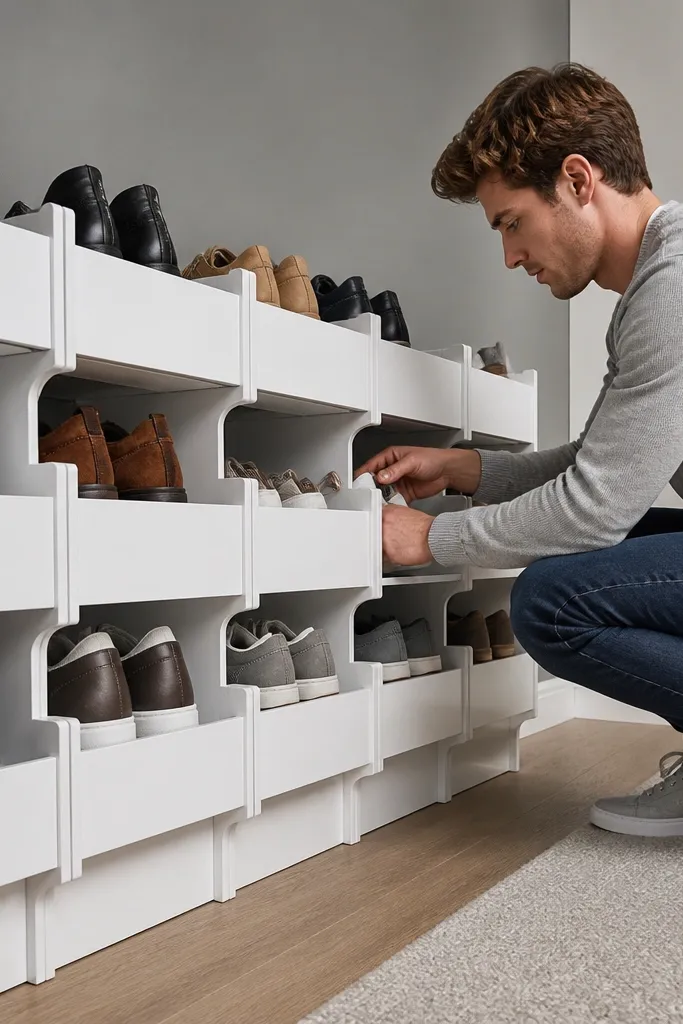
Cut modules from plywood: each ledge should be about 6-7 inches deep for low shoes and 7-8 inches for sneakers. Build a front interlocking panel system using a simple tongue-and-groove profile so modules lock without wobble. Add 1/2-inch dividers for each pair width. Finish with a durable clear coat and add felt pads on the bottom to prevent scuffs.
Stackable ledges make shoe storage look like design, not clutter. The interlocking front panels create a clean grid and stop shoes from tipping when you add another layer. This is low-maintenance because you can rearrange stacks without rebuilding — you just move modules. The look stays consistent since every module has the same front geometry. Great for entry corners, laundry rooms, and dorm setups where you want quick visual order.
Skip thisDon’t skip interlocks — stacked ledges without a lock shift and ruin the neat lines.
Editor's noteKeep stack height to 2-3 modules for stability and easier access.
10. Slim Shoe Tower with Side-Mounted Pull Handle and Mesh Door
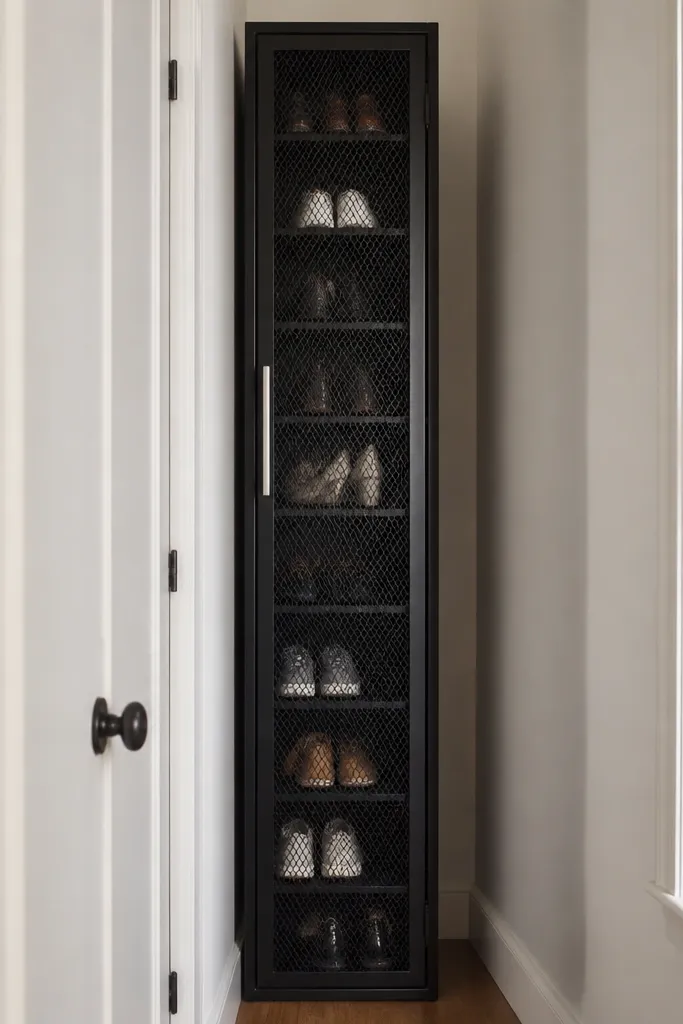
A slim tower fits tight spaces and still looks neat because the compartments are hidden behind a mesh door. Mesh keeps airflow moving, which matters for sweaty sneakers and wet rain boots. The side-mounted pull handle makes it easy to open without bending, so you’re more likely to put shoes away correctly. It’s also photogenic: clean vertical lines and a tidy grid inside. Ideal for narrow hallways, apartments, and spaces beside the fridge or washing machine.
Build a tall, narrow cabinet from 3/4-inch plywood and divide it into equal-height compartments. Install a mesh door on hinges with a soft-close damper or spring so it closes gently. Add a front lip inside each compartment so shoes sit in the same spot. Use a wipeable liner on the compartment floor and drill small drainage holes at the bottom with a removable tray underneath for moisture.
Use a removable base tray — it turns a damp issue into a quick wipe instead of a whole reset.
Avoid solid doors without airflow — the tower will smell even if it looks clean.
11. Painted Pegboard + Shelf Ledge Combo for Sneakers and Slides
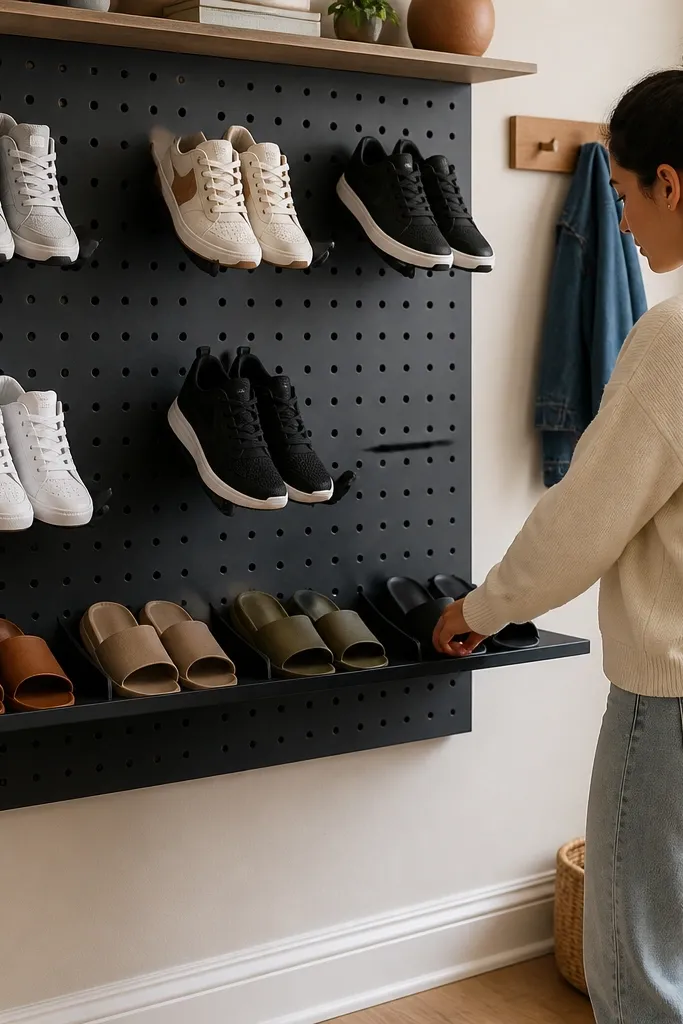
This hybrid keeps the look clean and the storage low-maintenance. The bottom shelf holds slides and sandals in a neat line, while the pegboard above gives you a tidy display of pairs that need quick access. Use dividers on the shelf so shoes don’t slide into each other. The pegboard stays looking organized because you hang only structured items like belts or shoe stretchers, not random clutter. It’s a good choice for a small closet corner where you want a “styled” look without daily maintenance.
Mount pegboard to a wall with a backing strip into studs. Install a bottom shelf from 3/4-inch plywood anchored to the same studs, then add 2-3 shallow dividers cut from 1/2-inch plywood. Paint pegboard and shelf in a matte color, then seal the shelf top with a satin clear coat. Add small hooks for stretchers and a few labeled baskets for accessories like laces.
Line the shelf dividers with non-slip shelf liner so shoes don’t drift when doors bump them.
Don’t hang shoes directly on hooks — they warp and the wall looks messy fast.
12. Bifold Door Shoe Closet with Hidden Spring Latch
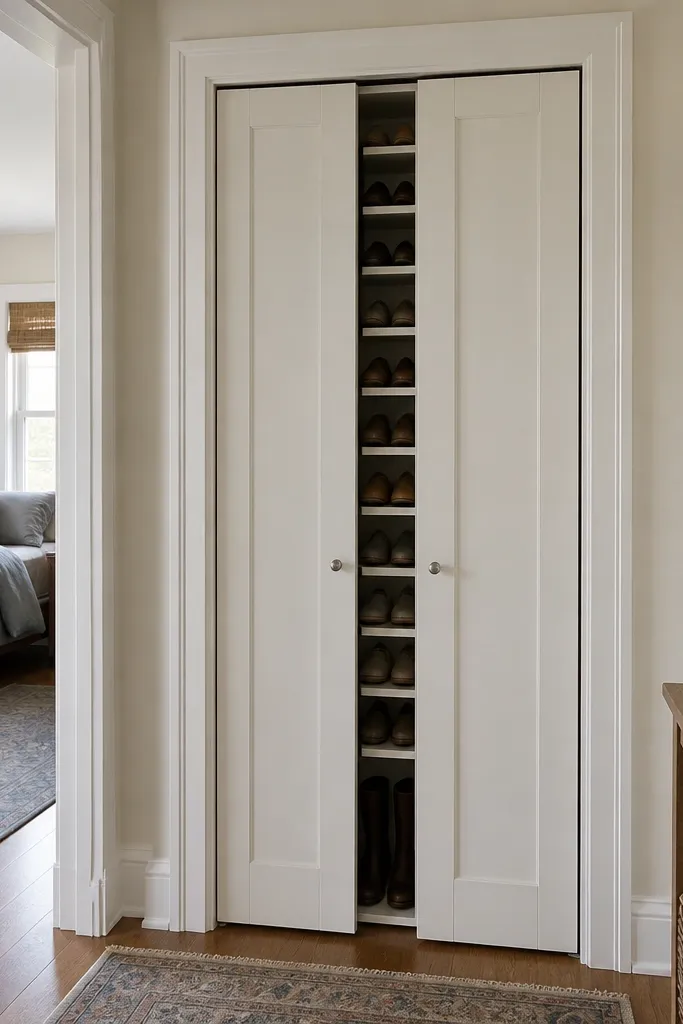
Build a cabinet frame from plywood and divide the interior into cubbies using a consistent module width. Install bifold door hardware sized for your cabinet opening and add a spring latch to pull the doors closed. Add a thin toe guard panel at the bottom of each cubby to keep shoes from sliding. Finish with a paint-ready primer and topcoat, then add a removable mat liner inside each compartment.
Bifold doors make shoe storage look like a real closet feature, not a DIY afterthought. The spring latch keeps doors shut so shoes stay hidden and aligned behind the panels. Inside, you can use fixed cubbies with consistent spacing, which keeps everything visually even. This is low-maintenance because opening is quick and closing is automatic with the latch. It’s perfect for entryways where you want a smooth front and don’t want a full swinging door taking space.
Skip thisDon’t oversize cubbies — empty space makes shoes lean and look uneven.
Editor's noteUse soft-close bifold hardware if you want the doors to close without slamming and shifting shoes.
13. Stair Nook Shoe Shelf with Cutout Vent Slots and Removable Liners
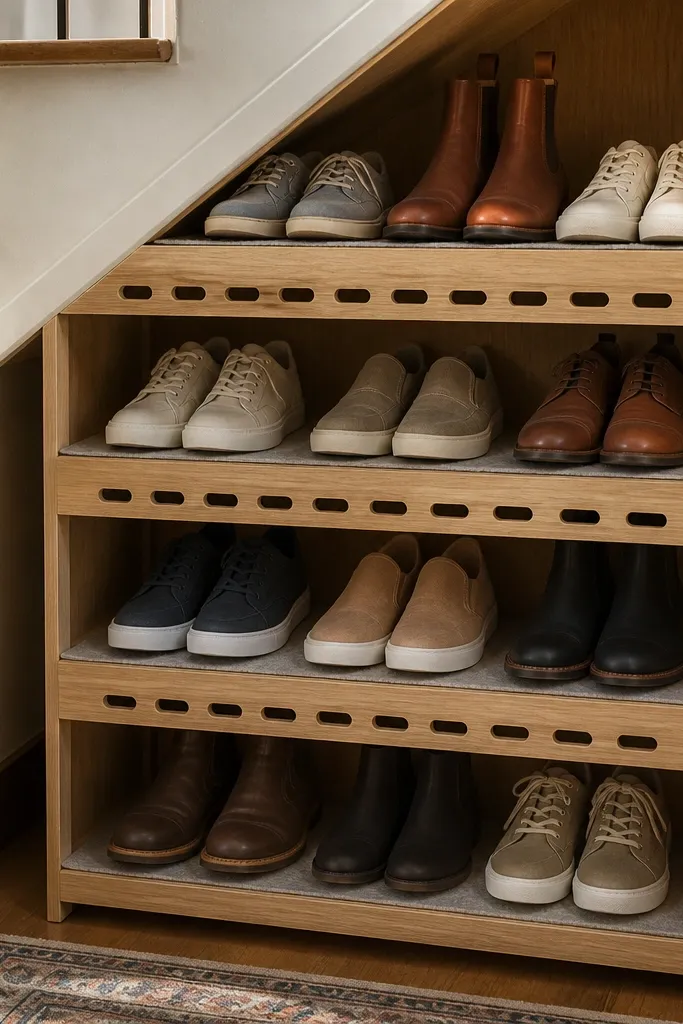
Build a wall-fixed shelf using 3/4-inch plywood with a shallow depth of 6-7 inches. Cut vent slots in the underside or back panel using a jigsaw so air can move out. Add removable liners by sewing fabric pockets or using hook-and-loop fabric strips attached to the shelf base. Seal the wood, then add a top coat only on the visible surfaces so liners do the cleaning work.
This is a small-space project that still delivers a neat look. Vent slots under each shelf keep moisture from pooling, while removable liners mean you can swap dirty fabric instead of scrubbing wood. The shelf edges create a clean visual line, and the vent pattern looks intentional instead of “random holes.” It’s low-maintenance because the liners handle grime and the ventilation handles smell. Great for tight stair landings or alcoves where you want shoes to sit in an orderly row.
Skip thisSkip ventilation — solid shelves in damp areas turn into odor traps.
Editor's noteCut liners with a slight overlap at the front edge so shoes don’t snag fabric when you slide them in.
14. Modular Shoe Drawer Inserts for Existing Dresser Space
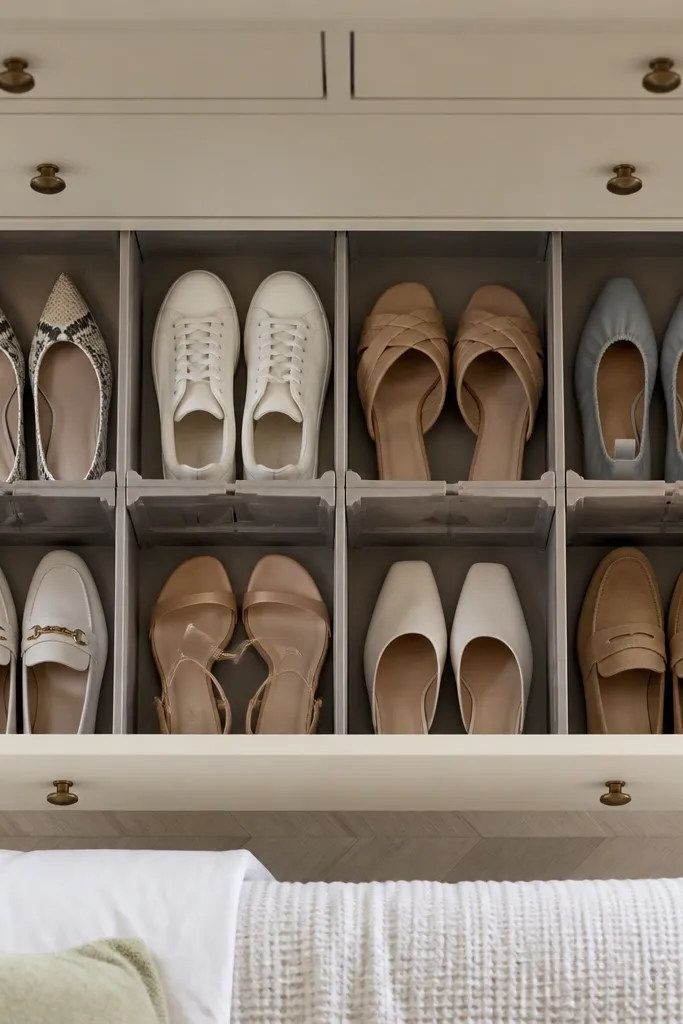
Measure your drawer internal width and height, then cut dividers from 1/2-inch plywood or plastic-coated board. Build a grid where each compartment is big enough for your largest flats but tight enough to stop side-to-side movement. Add anti-slip shelf liner to the bottom and glue felt pads on divider feet. Seal or paint the dividers to match your drawer, then add labels on the side wall.
If you already have a dresser or cabinet drawer, you can turn it into low-maintenance shoe storage without building furniture from scratch. Modular inserts create separate sections so shoes don’t collapse into each other. The look stays neat because each compartment is uniform, and you can label them. This is especially good for flats, loafers, and sneakers that store flat. It’s also one of the fastest projects on the list — you’ll feel organized the same day because you’re using existing space.
Skip thisDon’t use tall dividers for flats — they waste vertical space and look messy when the drawer is half-full.
Editor's noteMake one compartment slightly wider for slip-on shoes so you don’t force pairs into the wrong slot.
15. Rolling Shoe Rack Cart with Locking Casters and Fabric Shelf Covers
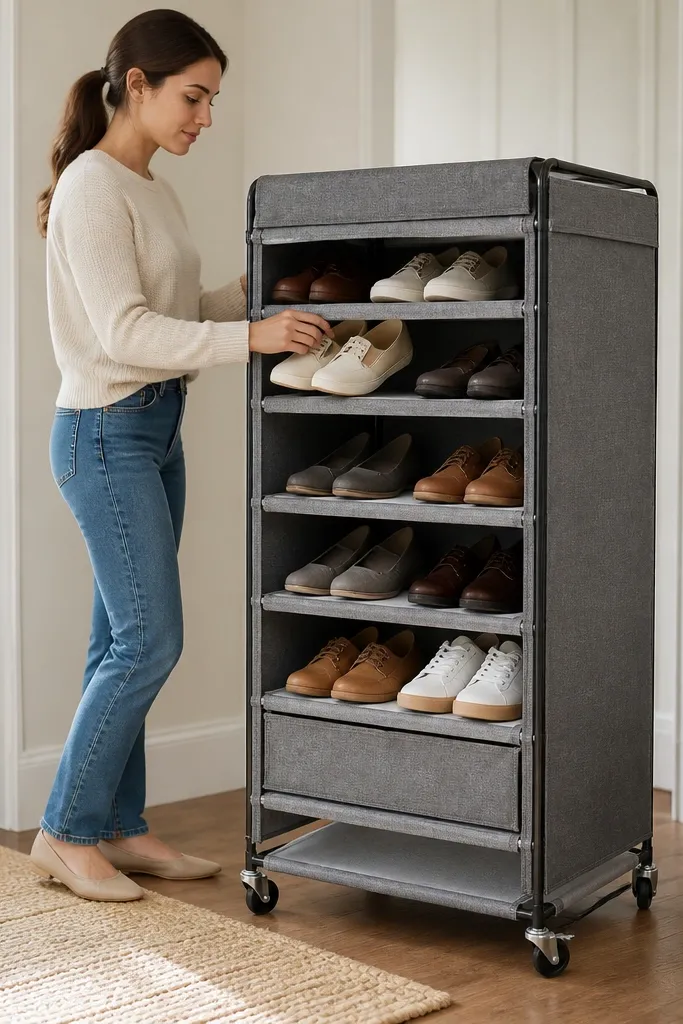
Build or buy a simple metal cart frame, then add wooden shelves cut to fit the frame spacing. Attach locking casters rated for the cart weight and add a handle for pulling. Cut fabric shelf covers from canvas or heavy polyester and wrap them over thin foam or batting to create a neat, padded look. Add grippy liners inside each shelf so shoes stay in place when you roll the cart.
A rolling cart looks stylish because it’s tidy and movable, but the low-maintenance part comes from locking casters and shelf covers. Lock the wheels when it’s in place so the cart doesn’t drift and cause shoes to tip. Fabric shelf covers make the cart look soft and uniform, and they hide scuffs and dust. This setup works well in rentals where you can’t build permanent storage. It’s also great for seasonal rotations because you can wheel it to the closet when needed.
Skip thisAvoid loose fabric covers that bunch — shoes catch on wrinkles and the cart looks messy.
Editor's noteChoose casters with a soft tread so they don’t mark floors and so the cart doesn’t roll when you bump it.
16. Shoe Storage Ladder with Removable Step Trays
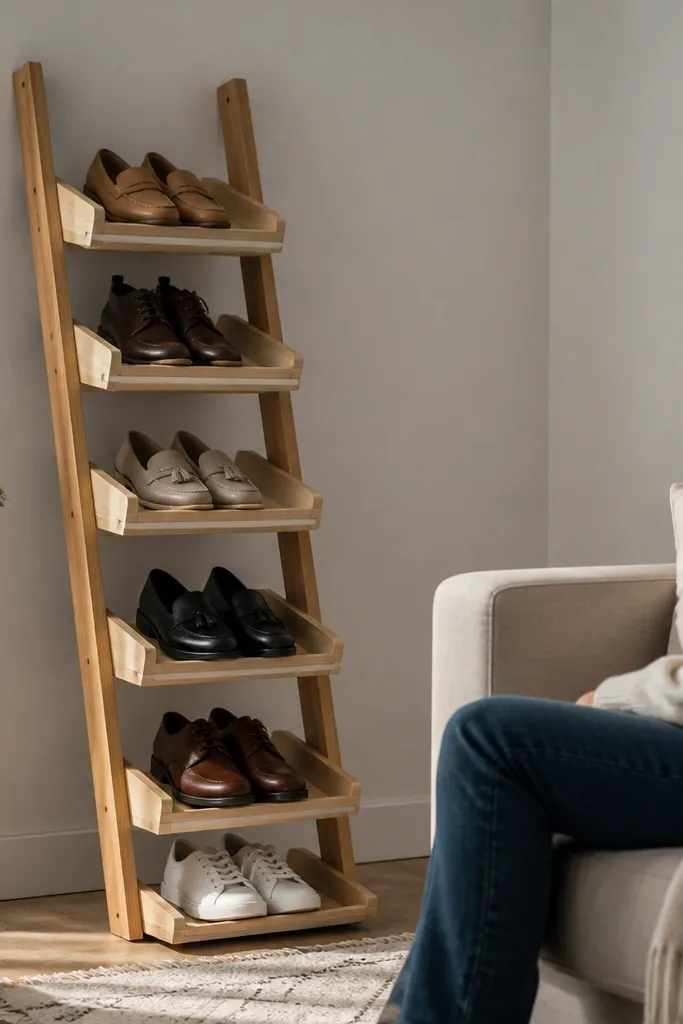
A ladder-style rack is photogenic because it has a clear vertical rhythm. To keep it low-maintenance, you don’t just place shoes on rungs — you use removable step trays so shoes sit flat and don’t slide. The trays keep the look uniform even if you rotate pairs. This works in entryways and living rooms where you want shoes stored but still visually neat. It’s also good for people who need quick access to everyday sneakers without opening doors.
Build a ladder frame from 1x2 or 2x2 pine or hardwood and space the rungs for your shoe heights (for example, 7 inches apart for low sneakers). Add removable trays by attaching small cleats on each rung and using plywood tray panels that sit on the cleats. Stain or paint the ladder, then seal with a clear coat. Line each tray with anti-slip rubber or cork so shoes don’t shift and fall off when you grab them.
Make trays slightly wider than the rung spacing so shoes have full support at the heel.
Don’t skip trays — bare rungs create toe-drag chaos and the rack looks untidy.
17. Corner Shoe Cabinet with Rotating Carousel Shelves
Build a corner cabinet frame from plywood and install a rotating carousel mechanism in the center. Use carousel shelves sized for shoe widths; for most sneakers, shelves around 10-12 inches in diameter work well. Add small dividers or a central stop so shoes sit in consistent positions on each shelf. Seal the cabinet interior and add a wipeable liner on each shelf surface.
Corners waste space, and open corner shelving gets messy fast. A rotating carousel shelf fixes that by keeping every pair in its own slot and bringing it to you without disturbing the rest. The visual payoff is a neat circular arrangement, easy to photograph and easy to maintain. For low-maintenance shoe storage ideas, the carousel matters because you don’t rummage — you rotate. This suits entry corners, walk-in closet corners, and small hallways where you need maximum storage in a tight footprint.
Skip thisDon’t overload each shelf — crowded shelves make shoes lean and the carousel looks messy.
Editor's notePosition the carousel so the most-used pairs sit at eye height or waist height for faster grab-and-go.
18. Wall Shelf + Drawer Combo with Shoe-Specific Slot Depths
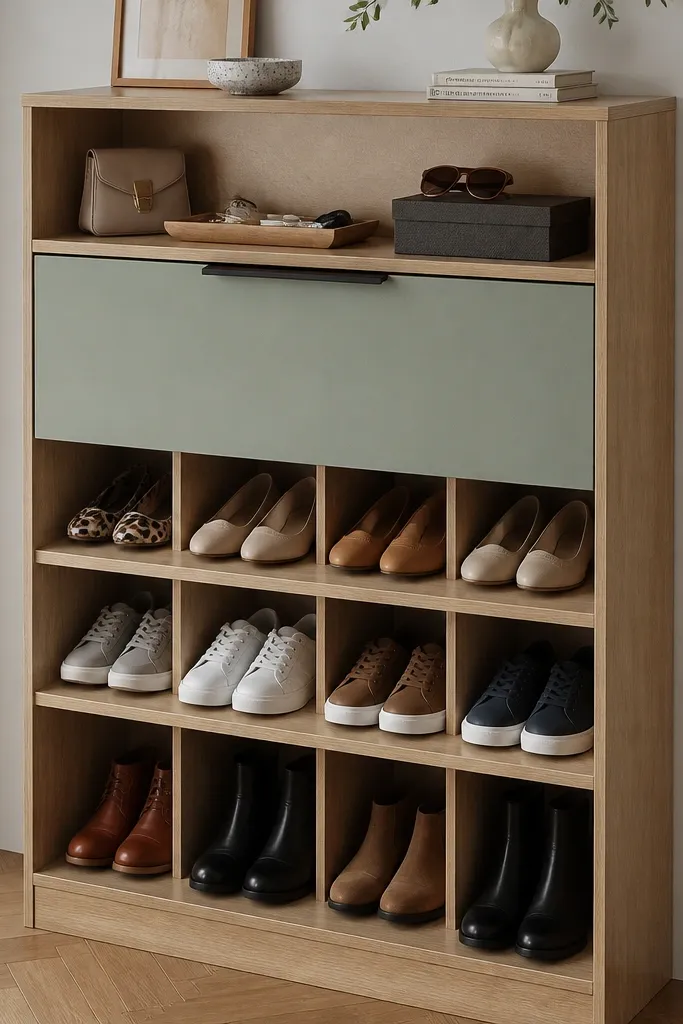
Build a wall-mounted unit from plywood with two sections: a shallow display shelf and a lower shoe-slot section. Cut slot dividers to create individual compartments, aiming for about 6 inches depth for flats and 7-8 inches for sneakers. Add a drawer under the shoe area using full-extension slides, and line it with felt for small items. Finish the visible wood with paint or stain, then add anti-slip mats inside the slots.
This combo gives you two looks in one: a clean top shelf for display and a drawer for accessories, while shoes sit in neat slots below. The key is slot depth. If slots are too deep, shoes slide forward; too shallow and they tip. Slot dividers also keep pairs aligned, so the whole unit stays photo-ready. It’s low-maintenance because accessories live in the drawer, leaving the shoe area uncluttered. Great for entryways where you keep keys, lace bags, and shoe care items.
Skip thisDon’t make one-size slots for everything — mixed shoe types need different depths to stay neat.
Editor's noteUse a removable drawer liner so spilled polish or dirty laces don’t stain the wood.
19. Magnetic Boot Cuff Holder Inside Tall Cabinet
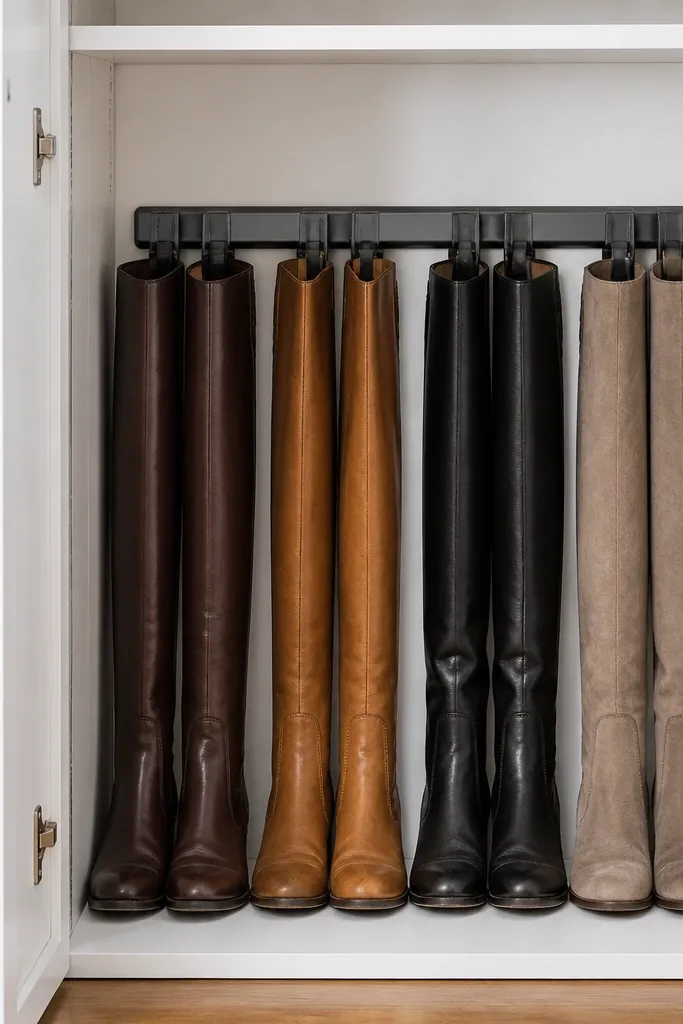
Build a tall cabinet with vertical compartments and a ventilated base made from slats. Install magnetic strips on two interior side panels per compartment at the height where the cuff naturally rests. Add a small stop block at the bottom so the boot toe stays aligned. Line the compartment with a removable fabric sheet and seal the wood surfaces with a wipeable finish.
Boot cuffs flop because there’s nothing holding them upright. A magnetic cuff holder inside a tall cabinet fixes that while keeping the cabinet exterior clean. The look inside stays orderly because each boot has a defined position, and you don’t need bulky inserts. Low-maintenance is the goal here: magnets are fast, and you can wipe the interior without removing everything. This works best for boots you store vertically and rotate a few times a week.
Skip thisAvoid strong magnets without a stop block — boots can yank sideways and lose alignment.
Editor's noteUse thin magnets and test with one boot first so the cuff pulls into place without bending the leather.
20. Under-Bed Shoe Storage with Rigid Slat Cradles and Fabric Front
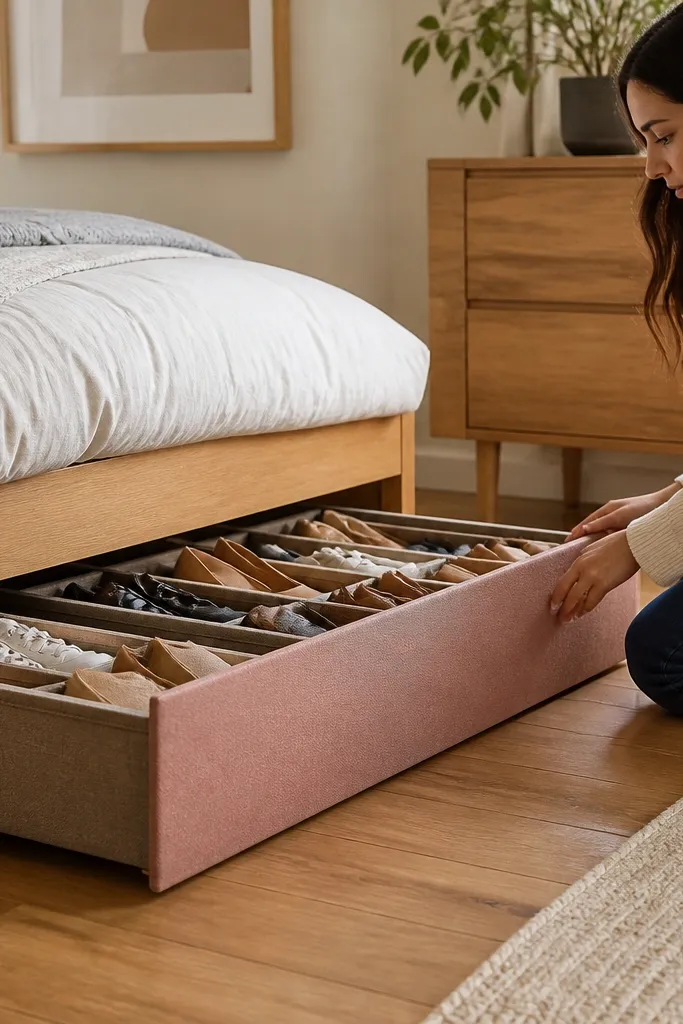
Build a low bin frame from plywood and attach a fabric front panel with Velcro or snaps for easy removal. Make rigid cradles from slats spaced to support the shoe sole without letting the toe sag. Fit cradles so each pair sits flat and does not touch adjacent pairs. Add ventilation by drilling small holes in the bin base and include a removable base tray for dust and moisture.
Under-bed storage can look awful if shoes slump into a pile. Rigid slat cradles solve that by holding each pair in a consistent shape, so the storage looks neat whenever you pull it out. The fabric front hides the mess and gives a uniform, styled look. For low-maintenance shoe storage ideas, rigid cradles mean you don’t have to re-stack shoes every time. This is ideal for seasonal shoes, extra pairs, and travel footwear in bedrooms.
Skip thisDon’t use soft sagging cardboard as a cradle — it collapses and turns into a shoe pile.
Editor's noteLabel the bin by shoe type on the fabric front so you don’t open it just to guess.
21. Two-Tier Shoe Shelf with Flip-Top Lid and Perforated Back Panel
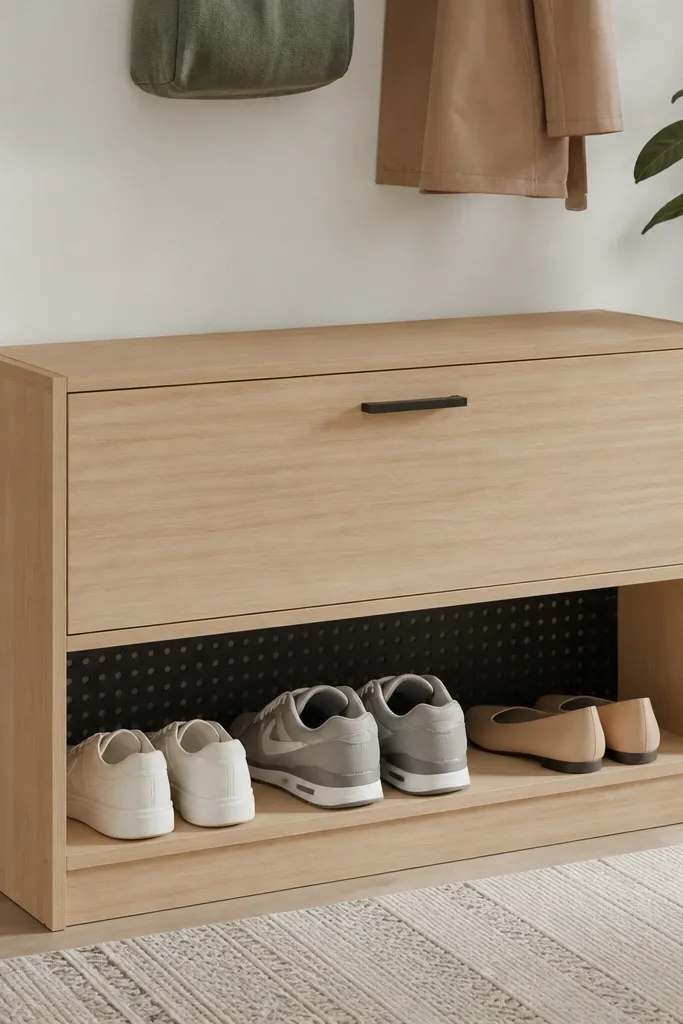
Build a rectangular shelf box from plywood with two levels spaced for your shoes, then add a flip-top lid using a piano hinge. Cut a perforated back panel from thin plywood or metal sheet and attach it to create airflow behind the shoes. Add a front lip inside each tier so pairs don’t slide forward. Seal the unit and add a removable, washable liner on the shelf surface.
A two-tier shelf with a flip-top lid gives you the “closed storage” look without needing a full cabinet. The perforated back panel keeps air moving so shoes dry out instead of sitting in trapped humidity. The lid hides clutter and makes the unit look clean on sightlines from the hallway. It’s low-maintenance because opening is quick and you don’t have to rearrange shoes behind doors. Best for entryways and mudrooms where you want a compact, furniture-like shoe station.
Skip thisDon’t skip the back ventilation — a closed shelf without airflow becomes smelly fast.
Editor's noteUse a lid stay or magnetic hold so the lid opens to a consistent angle and doesn’t flop onto shoes.
22. Painted Metal Locker-Style Shoe Cubes with Numbered Tags
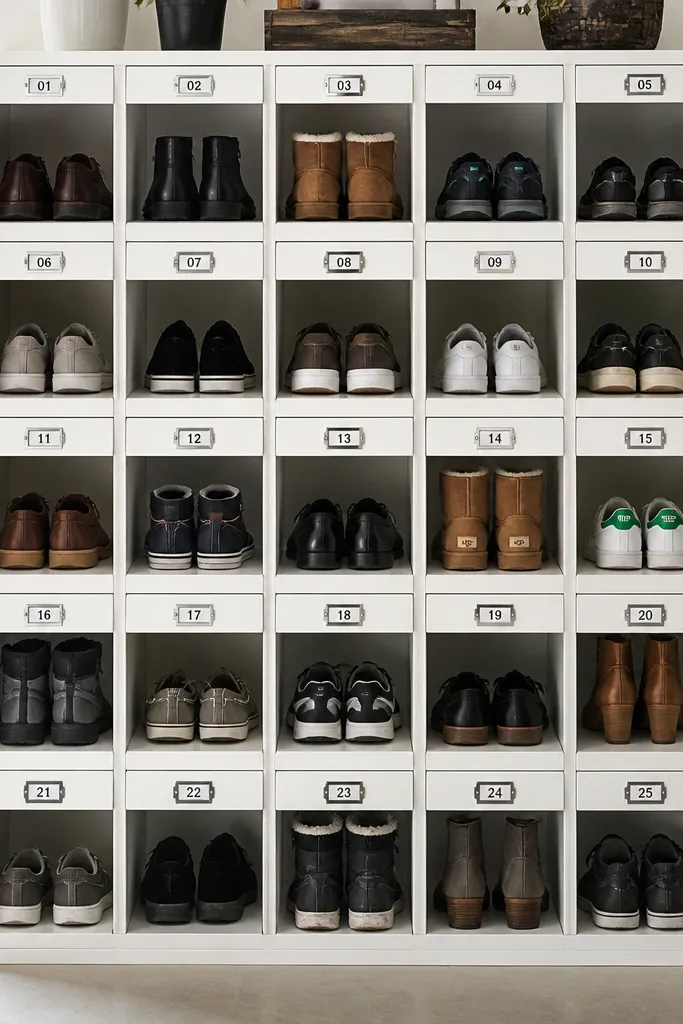
Locker-style cubes look crisp and intentional, which is why they work for low-maintenance shoe storage ideas. The neat part comes from numbered tags and fixed cubby sizes, so each pair has a home and you don’t shuffle shoes around. Painted metal cubes also wipe clean, which matters when you have muddy soles. This setup looks great in a garage entry, basement, or shared hallway where multiple people store shoes. It’s also easy to keep consistent because the cubes are uniform.
Build cube frames from 1/2-inch plywood with metal sheet or thin panel fronts, then paint everything with a durable enamel. Create cubby dividers inside using plywood strips so each cube holds one pair. Add numbered tags on a label strip across the front so you can quickly match shoes to their slot. Install small ventilation holes on the sides or back and add a grippy mat inside each cube.
Use enamel paint and a clear topcoat so scuffs don’t turn into permanent gray marks.
Avoid open cubes without dividers — shoes lean and the grid stops looking neat.
23. Acrylic Shoe Display Boxes with Sliding Side Vents
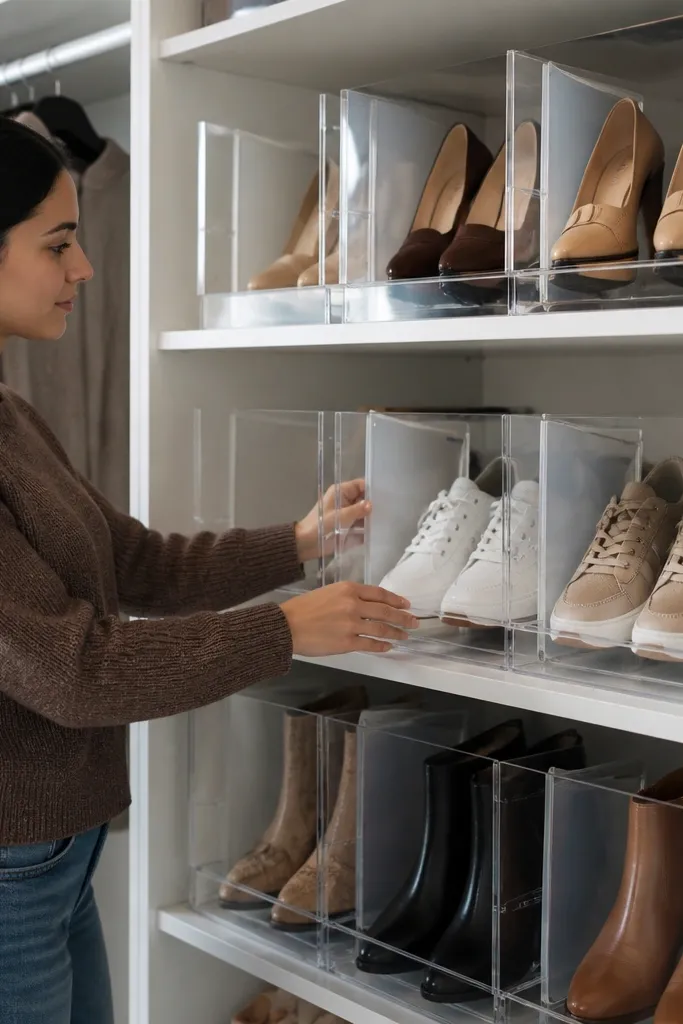
Build or buy acrylic box frames and add internal dividers using thin plastic or sealed wood strips. Cut a sliding vent panel that covers vent openings on the box sides; use small tracks or tabs to keep it moving smoothly. Add a grippy base liner and make sure the shoe position has a physical stop at the toe. Clean edges and attach handles so you can open without smudging the front.
These look like boutique display cases, but they’re built for daily use. Transparent acrylic fronts show shoes arranged neatly, and sliding side vents control airflow so you’re not trapping moisture. Each box has internal dividers that hold shoes upright at a consistent angle. The result is a photogenic, clean look even in a closet because the shoes don’t slump into each other. This works best for clean, everyday pairs like sneakers, loafers, and sandals where you want them visible and styled.
Skip thisDon’t seal the box completely — closed acrylic storage is a smell trap.
Editor's noteUse matte labels on the side, not on the front — it keeps the display look clean and less cluttered.
24. Shoe Storage Bench with Removable Slat Drawer for Wet Gear
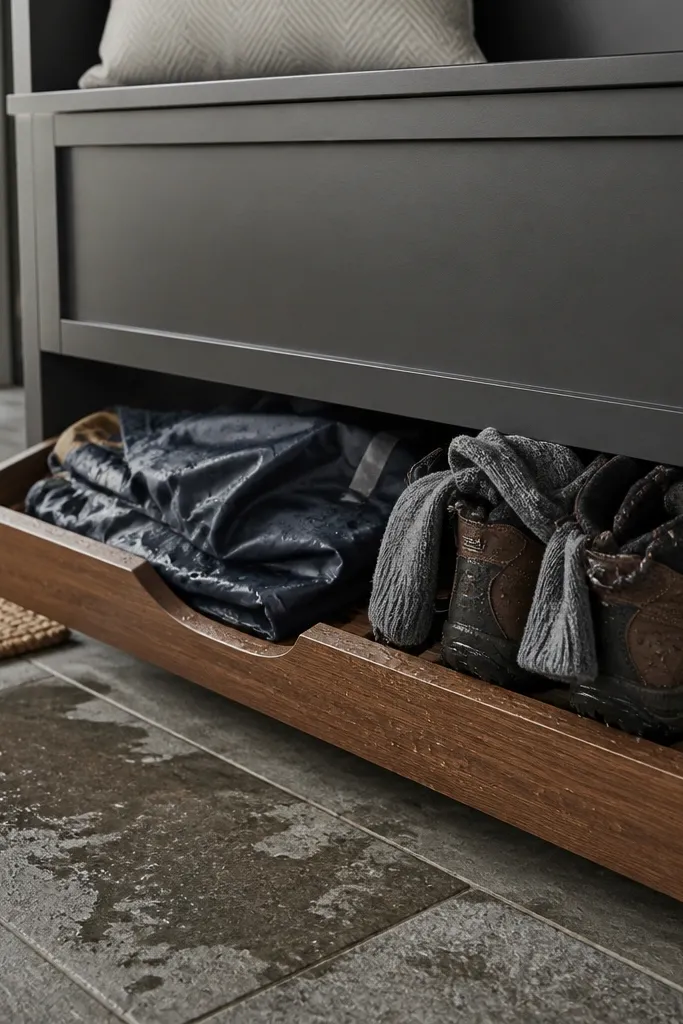
Build a bench cabinet from plywood with a top lid and a separate drawer compartment below. Make the drawer bottom from slats with gaps so airflow and drainage happen; add a removable drip tray underneath. Install dividers in the main cabinet for dry shoes while keeping the slat drawer dedicated for wet items. Finish the bench top with a sealed coat that wipes clean and add weather-resistant hardware for the drawer.
This is a practical aesthetic move: you keep the main storage clean while wet gear goes into a dedicated removable slat drawer. The slats let water and dampness drop through and dry faster, so the bench stays looking tidy. Low-maintenance comes from the removable drawer — you pull it out, rinse if needed, and put it back. The exterior looks like furniture, so you don’t see the wet-shoe reality. Great for rainy climates, mudrooms, and families who come in with wet boots.
Skip thisAvoid solid drawer bottoms for wet gear — trapped moisture turns the whole unit into a smell source.
Editor's noteChoose slat spacing that matches your shoe sole thickness so the drawer supports weight without sagging.
25. DIY Clear-Lid Shoe Trays for Back-of-Closet Rotation
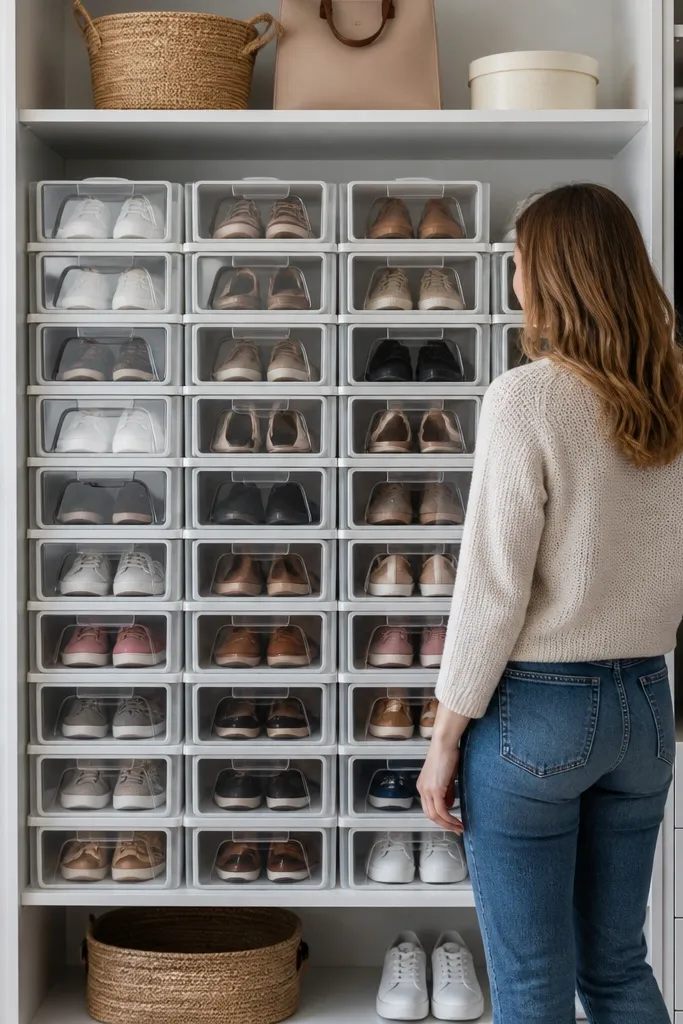
Build tray frames from lightweight plywood or use thin plastic bins and reinforce the edges with corner braces. Add internal dividers from sealed wood strips sized for your shoe types. Use a clear lid panel that clips or screws on so you can remove it for cleaning. Stack trays by adding alignment notches on the sides and include small ventilation holes in the tray sides.
For the back of your closet, low-maintenance shoe storage ideas need visibility and structure. Clear-lid trays let you see what’s inside without opening every container, and dividers keep pairs from becoming a tangled mess. The lid keeps dust off and makes the trays stackable, which keeps the closet looking neat. This is ideal for shoes you don’t wear weekly, like dress shoes, seasonal boots, and travel flats. It also keeps the look consistent because each tray has the same grid layout.
Skip thisDon’t store shoes in random depth trays — inconsistent sizing makes the stack look messy and uneven.
Editor's notePut labels on the tray lid edge, not on the top center — it keeps stacking lines clean.



