


1. Split-Top Desk With Two Pen-Lip Channels

This setup looks clean because each person gets a dedicated front edge for the small stuff that usually spreads — pens, highlighters, and sticky flags. The pen-lip channels create a visible boundary without adding bulky partitions, so the desk stays photogenic even when it’s mid-task. Use a light, sealed wood top so smudges wipe without leaving dark marks. Skill level is beginner-friendly if you’re comfortable with basic measuring and screwing on trim, and the time is about a weekend for build plus drying.
Measure your tabletop so each person gets roughly 20-24 inches of usable width, with a 2-3 inch shared gap in the middle for paper. Build two shallow channels along the front edge using 1x2 lumber cut into 2-foot sections, then cap them with a thin strip so items can’t roll off. Add a shared tray centered behind the channels for papers and notebooks. Finish by sealing the top (polyurethane or hardwax oil) and then screw the channel trim so it won’t lift when you clean.
Editor's notePut felt pads under the pen holders so they slide less and don’t scratch the seal.
Skip thisDon’t make the channels too deep — deep channels hide mess instead of keeping it contained.
2. Floating Shelf Desk With Hidden Cable Tray
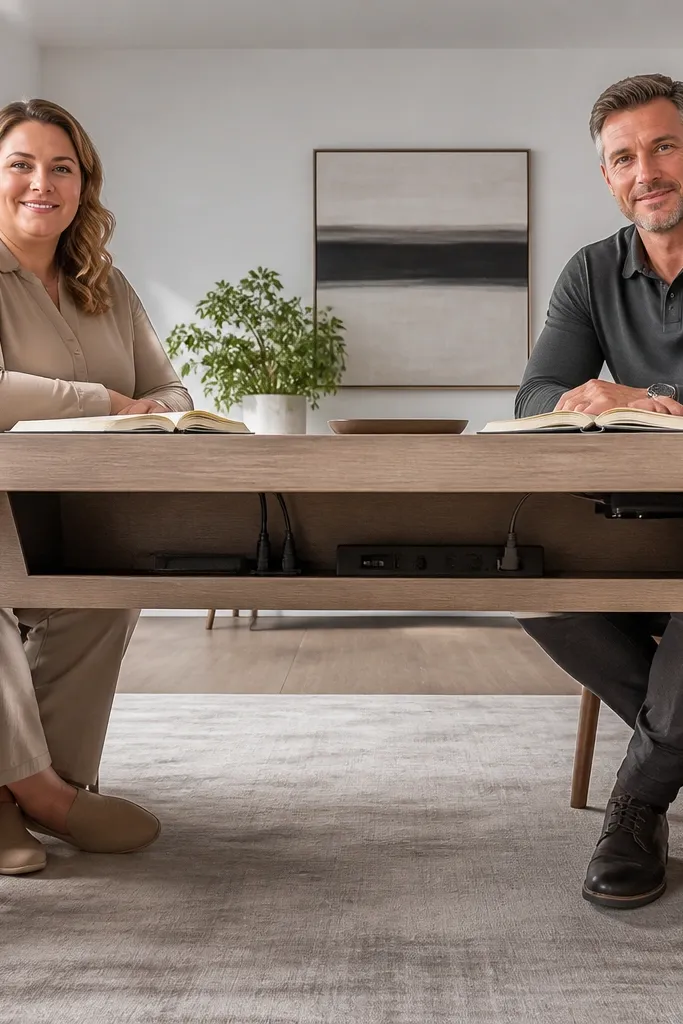
If you want shared study table vibes that look uncluttered, a floating shelf desk is hard to beat. There’s no bulky cabinet base, so the photo reads clean and airy, while the underside can hide the ugly part — power strips and loose cords. It’s low-maintenance because there’s less furniture to dust, and the cable tray prevents the daily cord scramble. This works best in small rooms where floor space matters and where you want the desk to visually “disappear.”
Choose a shelf depth of 12-14 inches so both people can work comfortably without leaning into each other. Mount two heavy-duty brackets into studs, then attach a back panel lip (about 1 inch tall) to block cord visibility. Install a cable tray under the back edge using screws and small mounting clips, then route cords through a simple slit or rear opening. Add two small wall-mounted bins or a shared paper ledge above the desk so supplies have a place.
Use white cable clips on the underside if your shelf is light — they blend and reduce the visual “cord mess” effect.
Avoid mounting into drywall only; floating desks that loosen create wobble that makes shared work annoying.
3. L-Shaped Shared Table With a Central Paper Landing

An L-shaped layout gives you separation without a wall, and it looks intentional in photos because the lines guide the eye. The central paper landing keeps shared materials in one spot, so both people reach in the same direction instead of crossing arms. For low-maintenance, you want surfaces that wipe fast and edges that stop items sliding — that’s why a small raised lip on the paper landing matters. This is best for rooms where you want two people to work side-by-side but with clear personal space.
Build or buy two straight desktop sections that form an L with a corner gap of about 2 inches where the paper landing sits. Add a third small shelf board in the corner area with a 3/4-1 inch lip so notebooks don’t slide off. Attach cable management under both arms using a single shared power strip mounted to the inside of the corner frame. Finish by sealing the desktop surfaces and adding two matching desk trays near each seat.
Keep the paper landing width around 10-12 inches so it holds letter-size stacks without turning into a catching-shelves mess.
Don’t place the power strip on the top — cords will always end up visible.
4. Book-Nook Desk With Vertical Dividers

This one looks cozy and organized because the storage is vertical, not scattered across the tabletop. Vertical dividers keep books, notebooks, and folder sets from collapsing into a shared pile. It’s low-maintenance because you’re not relying on daily folding or tidying — the structure forces items into the right place. The look is especially good with matching box sizes and a consistent color palette for bins.
Use a desk base with a built-in side shelf or add a freestanding bookshelf next to the desk top. Install vertical dividers that are just slightly wider than your most common notebooks, usually 9-10 inches for standard A4/letter hybrids. Add two small “current work” slots at the desk height and keep everything else above. Seal the tabletop and add two matching tray inserts so both people can drop items into their zones.
Label dividers with simple tape bands on the inside edge so the front stays clean in photos.
Avoid open piles on the tabletop — vertical storage only works if you stop the horizontal spill.
5. Rolling Supply Carts Under Each Seat
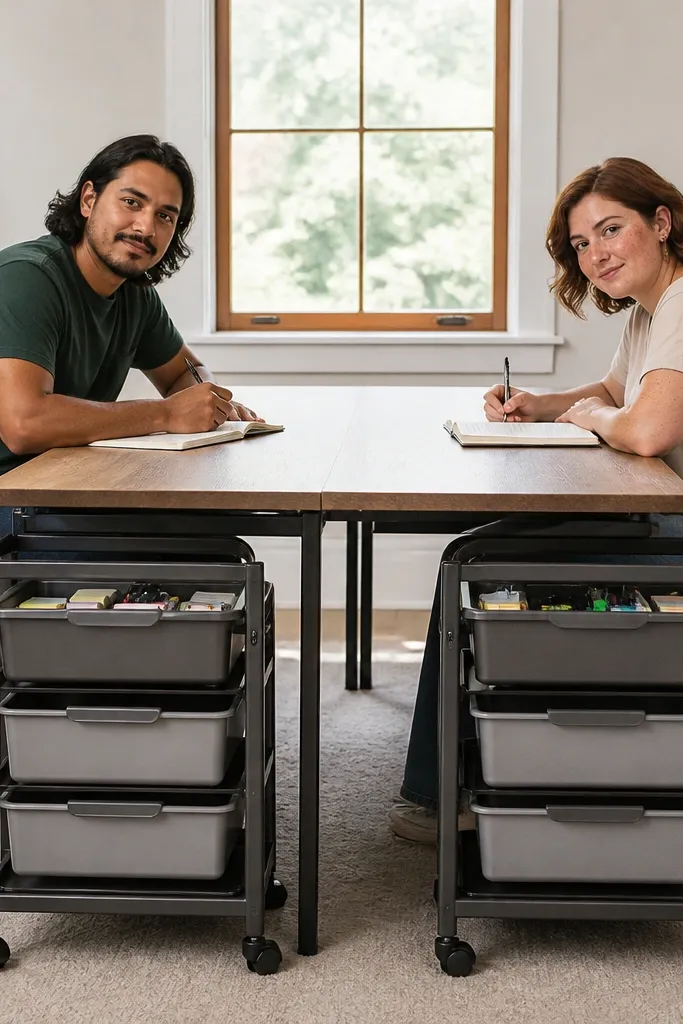
When you want shared study table ideas that stay neat even with daily use, carts beat baskets. Each person gets a rolling cart under their side of the desk, so supplies move with them and don’t roam across the shared surface. The visual payoff is big: the tabletop stays mostly clear, and you can pull the cart out when you need it. This setup is low-maintenance because cleaning is faster — you wipe the top and the rest is stored in bins with lids.
Pick carts with a total width that fits under your desk without scraping, usually 12-16 inches wide depending on your leg clearance. Add two to four bins per cart: one for pens, one for papers, one for chargers, and one for small tools like erasers. Label bins with color tape and keep the cart handles facing the aisle so both people can grab them quickly. Finish by adding a small desk lip or tray to catch paper stacks when carts are out.
Use caster wheels with a rubber tread if your floor is wood — they roll quietly and don’t snag.
Don’t use one big open bin — open bins turn into mixed piles in a week.
6. Shared Desk With Two Desktop Drawer Trays

This looks sharp because it gives you clean lines and hidden storage right where people grab items. Two shallow drawer trays mean each person has a “grab and go” space for the stuff that always floats around — pens, sticky notes, and small stationery. It’s low-maintenance because you can close the drawers in 10 seconds and the desk instantly looks reset. This is a strong choice if your room has limited storage elsewhere.
Build the desk front with a 2.5-3 inch tall drawer opening per person, separated by a 2-inch center gap. Use full-extension slides if you want smooth access, and keep drawer depth around 10-12 inches so items don’t jam. Add a drawer tray insert using thin plywood or a plastic organizer so pens don’t rattle. Seal the drawers and front trim, then add a shared top tray for papers behind the drawer line.
Editor's noteCut the drawer fronts to match the desk finish, then add a clear coat so the edges wipe clean.
Skip thisSkip cheap slides; wobbly drawers make shared use feel messy fast.
7. Pegboard Back Wall With Two Tool Zones

A pegboard behind the desk turns the back wall into an easy visual system. You get a clean look because hanging tools are arranged in a grid, and you can keep cables and chargers off the tabletop. Two tool zones mean each person has their own hook layout, so the desk stays balanced instead of one side taking over. It’s low-maintenance because you’re not hunting — everything has a hook and a spot.
Mount a pegboard panel behind the desk using wall anchors into studs if possible. Create two zones by marking a vertical line and placing each person’s items at eye level — pens in one row, chargers in another. Add a cable management hook system: cord clips and a small tray where power bricks sit. Finish by adding a shared clamp-on paper holder at the center so both people can flip through assignments without touching each other’s space.
Use color-coded hooks for each person so you don’t need labels once the layout is set.
Don’t hang heavy items on flimsy hooks; the pegboard will sag and look messy.
8. Two-Lamp Study Desk With a Shared Task Rail

Lighting is where shared desks either look polished or look chaotic. Two lamps keep each person’s workspace bright without glare wars, and a shared task rail along the back edge holds the things that create mess — like a phone stand, a coaster tray for water bottles, and a small paper clamp. This is low-maintenance because you reduce the need to move items around to see what you’re doing. The look is also photogenic because the rail creates a crisp, intentional line.
Mount a metal rail or wooden picture rail along the back of the desk, about 2-3 inches below the top surface. Attach adjustable gooseneck lamps to two positions that align with each person’s work area, aiming light down and slightly inward. Add two clip-on trays that match the rail spacing, then put a shared clamp folder holder centered between the lamps. Finish by tightening all hardware and using cord sleeves so both lamps' cords run along the underside.
Editor's noteAim each lamp so the light lands on the work surface, not the page edge — it reduces glare and smudges.
Skip thisAvoid overhead lighting only; shared desks need independent task lighting to stay tidy and functional.
9. Drawer-Front Storage Bench With Lift-Top

A lift-top bench desk looks intentional and stays clean because you can close everything away when you’re done. The drawer fronts add quick storage for daily supplies, while the lift compartment holds bulk items like textbooks, reference manuals, and extra stationery. It’s low-maintenance because you’re not maintaining a “perfectly clear” tabletop — you can hide the clutter in seconds. This works well in shared rooms where the desk also needs to function as a seating area.
Build a bench frame with a top panel sized for two people, then add a hinge system for the lift lid. Use two drawer sections at the front, each about 14-16 inches wide, so each person has their own daily grab space. Install a soft-close hinge and add a lid support stay so the lid doesn’t slam. Finish with a sealed top surface and add a shared tray on the lid so paper stays flat while you work.
Add a magnetic latch with a strong hold so the lid closes firmly and doesn’t drift open.
Don’t use flimsy hinges; a wobbly lift-top makes shared use feel sloppy.
10. Cable-Managed Standing Desk Conversion Slab
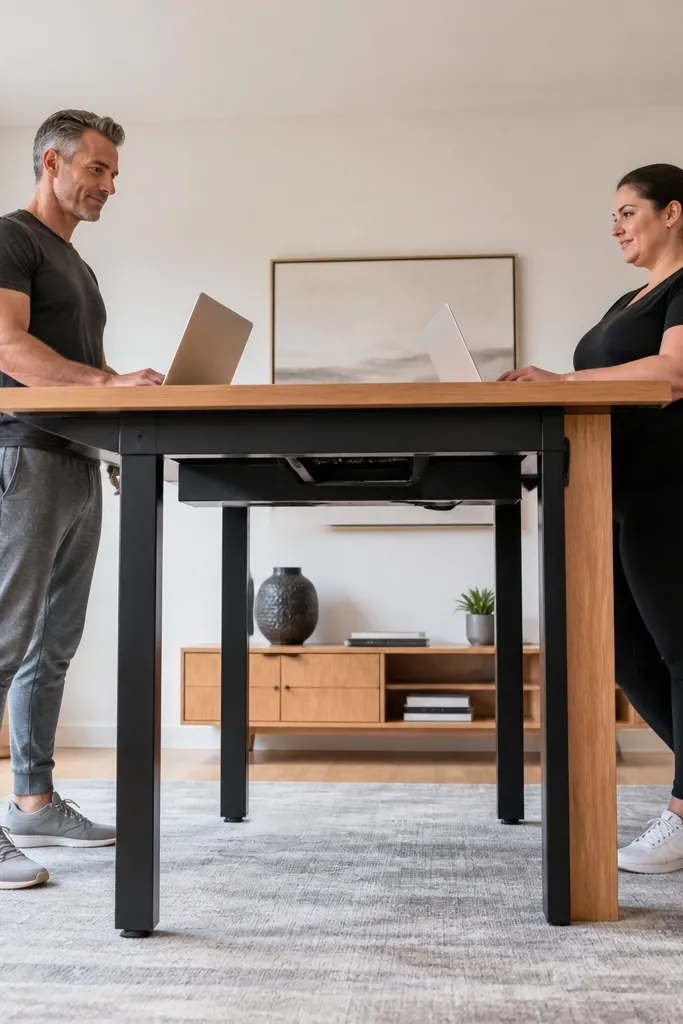
If you’re building shared study table ideas for a home office vibe, a standing desk conversion slab can look sleek while staying low-maintenance. The key is cable management: cords run in a tray under the slab and disappear from view. For two people, you get clean side stations for each workstation without extra clutter. It’s practical because you can adjust height for comfort, and the flat top wipes fast when mess happens.
Choose a slab top at least 48 inches long so both people have enough width, then mount it securely to a stable standing frame. Install a cable tray under the slab that spans the center, then mount a power strip inside the tray area. Add two side organizers: one under each person’s side using wall clips or a small lip tray. Seal the slab with a wipe-friendly finish and add two cup holders that sit at the front edge.
Use a cable sleeve from the power strip to each device — it keeps cords aligned and reduces tangles.
Avoid loose power strips hanging under the desk; they become the first visible mess.
11. Sculpted Divided Tray Topper for Shared Laptops

This is a low-maintenance trick that changes how the desk looks without building a new table. A sculpted divided tray topper creates boundaries for two people’s daily workflow: laptop zone, notebook zone, and small-device zone. When the tray is in place, you can keep the tabletop surface clear and still have everything within reach. It’s great for shared setups where both people use laptops but don’t want the table to look like a charging station.
Buy or build a tray topper sized to cover the middle of the desk and prevent sliding by adding non-slip feet. Divide it into two mirrored sections using a divider wall that’s about 1.5 inches tall so items can’t slide into each other’s space. Add a shallow channel for cables and a small compartment for chargers, then cover the tray with a wipeable finish or liner. Place two small notebook rests at the front corners so papers don’t curl.
Use a dark tray color if your desk is light — scuffs show less and the photo reads cleaner.
Don’t make the compartments too small; crammed compartments force people to shove items on top.
12. Two-Seat Desk With Side Wall Pegboard + Shelf-Lid
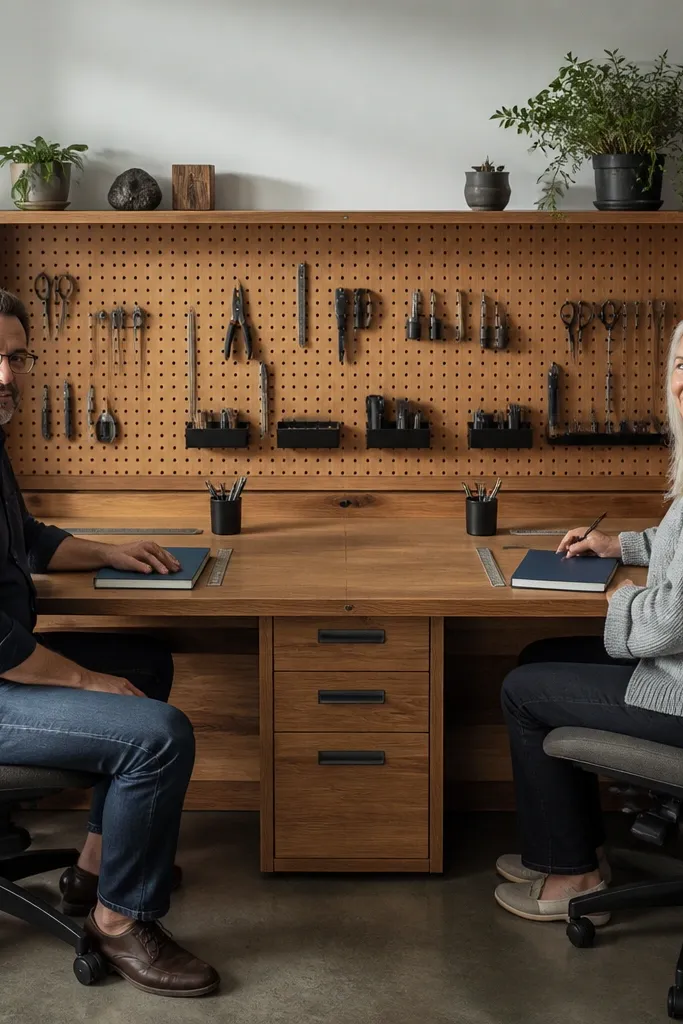
When you want a shared study table that looks styled, not lived-in, combine a side pegboard with a shelf lid. The pegboard holds daily tools neatly, while the shelf lid covers the “in-between” mess like sticky notes, loose papers, and a half-used notebook. This is low-maintenance because the lid hides clutter instantly, and the pegboard keeps daily items from drifting onto the tabletop. It also looks good because the side wall becomes part of the design.
Mount a pegboard on the side wall next to the desk and create two vertical rows of hooks at each person’s height. Build a narrow shelf lid that sits above the desk surface on two brackets, with a lip that prevents paper from falling in front. Add a small tray inside the lid area for loose stationery. Use a cable sleeve and clips to route chargers to a hook-mounted charging station.
Keep the lid lip height around 1 inch so paper edges don’t slip off during opening.
Avoid hanging tiny items with no plan; tiny chaos looks worse than a full table.
13. Round-Edge Shared Table With Two Lap Trays

Round edges make shared desks feel calmer and safer, and the look is softer in photos. Add two lap-style trays so each person can position papers and books without spreading items across the whole surface. This setup stays low-maintenance because when the day gets messy, you can lift the trays and wipe the table quickly. It’s best for shared desks used for reading, sketching, or laptop work where people like to rearrange their space often.
Use a tabletop with rounded corners or add a rounded edge trim so items don’t catch. Place two lap trays on each person’s side — aim for trays that fit within a 22-24 inch working width. Install non-slip pads under the trays so they don’t slide when someone bumps the desk. Add a shared paper stack holder in the center and route cables to a single corner outlet with a cord length that reaches each tray without slack piles.
Choose trays with a wipeable surface like laminate or sealed wood rather than fabric — fabric stains fast with daily use.
Don’t rely on the table edge to stop sliding; flat trays still drift without non-slip pads.
14. Modular Side Shelves With Flip-Down Paper Rail

This idea looks clean because the paper rail creates a dedicated place for stacks, and side shelves keep books vertical. The flip-down rail is low-maintenance because you don’t need to manage loose papers on the tabletop — it’s either up and open for working or down when you want the desk to look tidy. Two people get separate book storage while sharing the rail area. This works best for study-heavy households where papers multiply fast.
Build two matching side shelf units attached to the desk frame, each with one open compartment at desk height and closed storage above. Install a flip-down paper rail across the center using a hinge and a small stop so it locks in place. Add a shallow lip to the rail so paper doesn’t slide off when you flip it down. Seal the shelf surfaces and add small bin inserts for pens and sticky notes so they don’t spill.
Use a hinge with a friction adjustment so the rail stays where you put it, not flopping down mid-study.
Avoid a rail with no stop — a drifting rail makes the desk look messy even when it’s closed.
15. Pegboard Cable Curtain With Two Charging Nooks

This is the most “designed” way to hide cords while keeping shared desks functional. A pegboard cable curtain blocks the view of power bricks and messy wiring, so the desk looks tidy in photos and in real life. Two charging nooks mean each person has their own device spot, which reduces the constant “whose charger is this?” drama. It stays low-maintenance because you’re not untangling daily — you’re plugging in and moving on.
Mount a pegboard panel behind the desk and add two charging nooks using a small shelf board and two hook sets. Install a cable curtain using a simple fabric panel or thin acrylic sheet mounted to the pegboard so it covers the charging area. Route cords through clips on the pegboard, then attach the charger bricks to the nooks so they sit above the curtain line. Add two small desk trays in front for quick drop of pens and paper clips.
Editor's noteUse a light-colored cable curtain so it doesn’t look heavy, especially in smaller rooms.
Skip thisDon’t put charging bricks on the tabletop — cables will always end up tangling across both work zones.



