
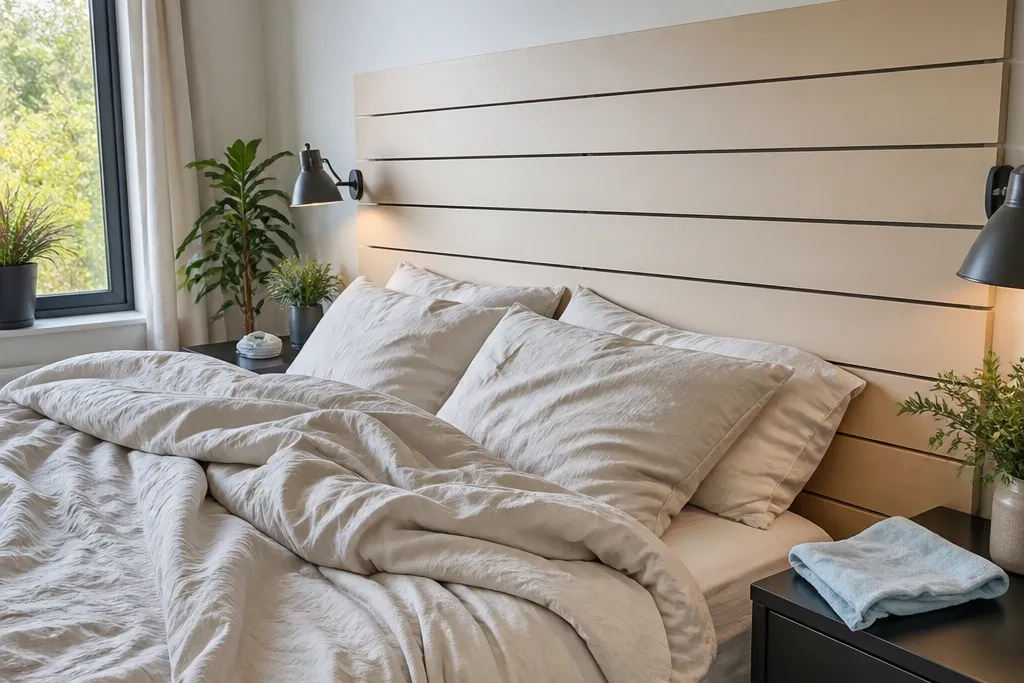
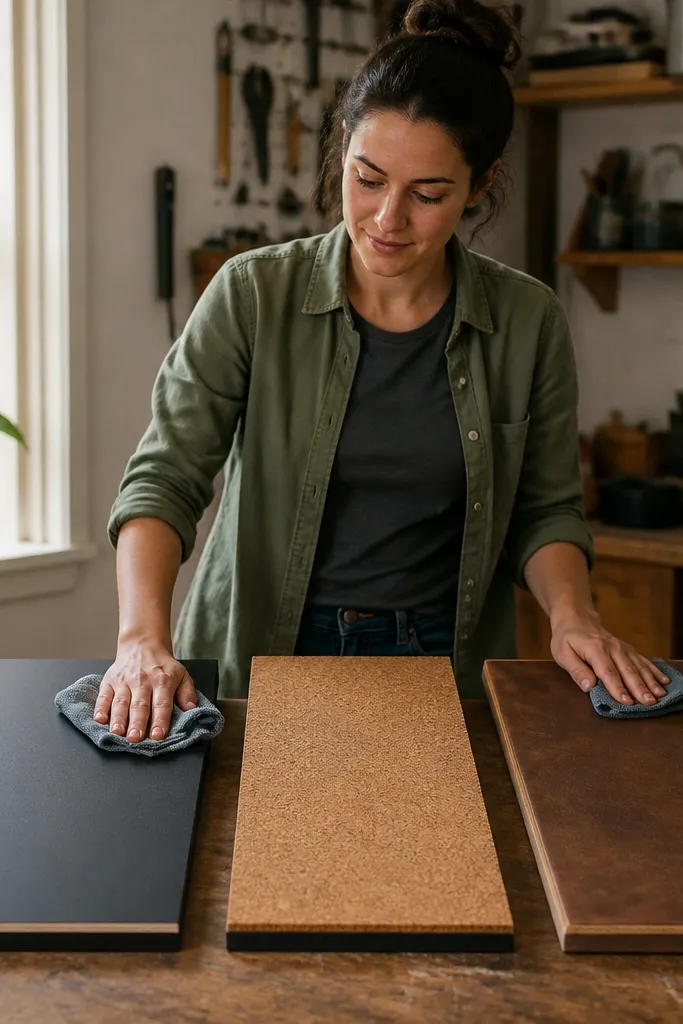
1. Satin-painted plywood slat headboard with shadow gaps
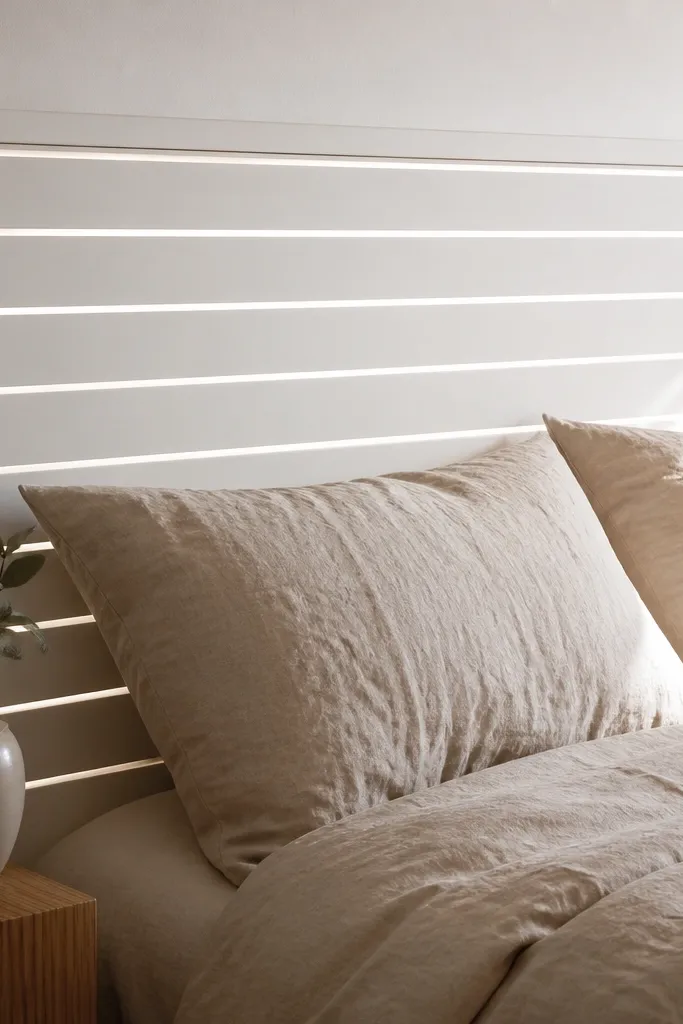
This is the cleanest-looking “modern DIY” headboard that still feels warm. The trick is the shadow gap: you leave a small, even space between slats so light catches the lines, not dust. Plywood takes paint beautifully when you seal it first, and satin sheen hides minor scuffs better than flat paint. It’s low-maintenance because the surface is smooth and there are no fabric crevices to trap grime. It also photographs like a built-in piece because the lines look intentional from every angle.
Editor's noteUse a 1/8-inch spacer strip for every slat — it keeps the gaps uniform so it looks expensive in photos.
Cut a plywood backer to your bed width and height (typical is 48-54 inches wide and 24-30 inches tall). Rip slats from 1x2 hardwood or 1/2-inch plywood strips, then space them with 1/8-inch spacers while you screw them into the backer. Sand the whole face, then prime with a bonding primer and finish with two coats of satin enamel or cabinet paint. Add cleat-style wall mounting or a back frame with two French cleats so it sits flush and stays aligned.
Skip thisDon’t paint over raw plywood edges without sealing — they drink paint and look blotchy.
2. Wall-mounted cork panel headboard with sealed edges
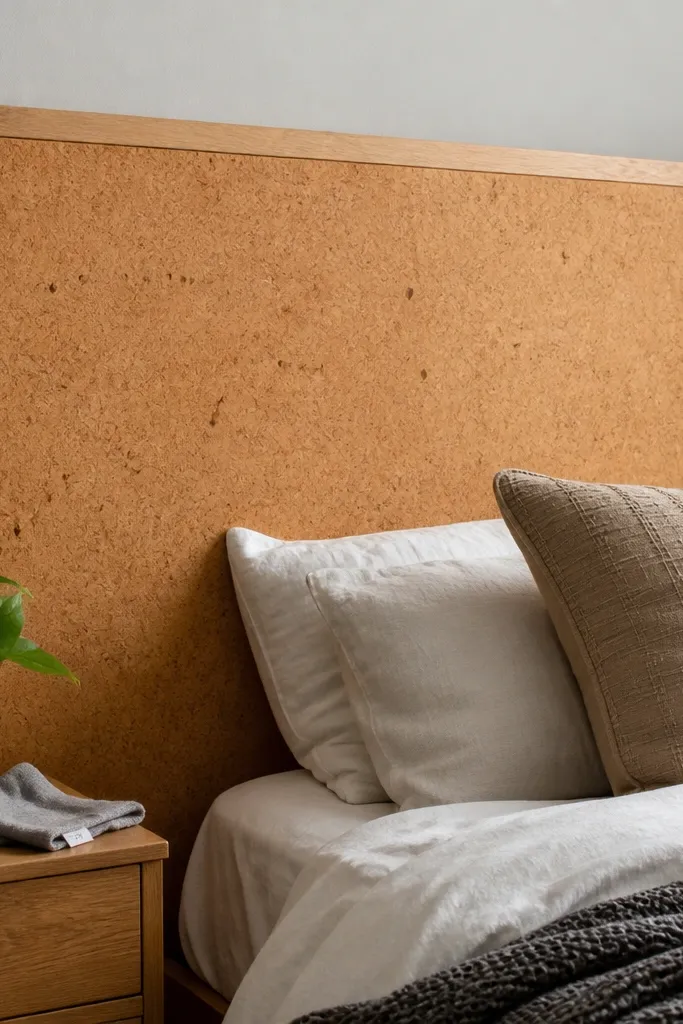
Cork gives you that cozy, textured look without the messy upkeep of loose fabric. When it’s sealed, it wipes clean and resists the “fuzzy dust” that some porous materials catch. The best version is a cork panel backed by plywood and framed with a slim border so the edges look crisp. You get a warm, natural tone that looks great with wood floors, light bedding, and neutral rooms. It’s also forgiving if your wall isn’t perfectly flat because the frame covers small gaps.
Editor's noteSeal twice and scuff-sand lightly between coats for a smoother wipeable surface.
Buy cork sheet material and back it with 1/4-inch plywood cut to size, using contact adhesive or spray adhesive. Frame it with 1x2 trim cut to your perimeter, pre-drill and screw into the plywood frame, not into the cork. Seal the cork with a clear water-based sealant made for cork or a polyurethane-compatible sealer, then let it cure fully before using. Mount with two wall cleats or a French cleat system so it hangs straight and you can still clean the floor area.
Skip thisSkip unsealed cork — it marks easily and picks up stains from bedding contact.
3. Reclaimed wood picture-frame headboard with glass-smooth finish
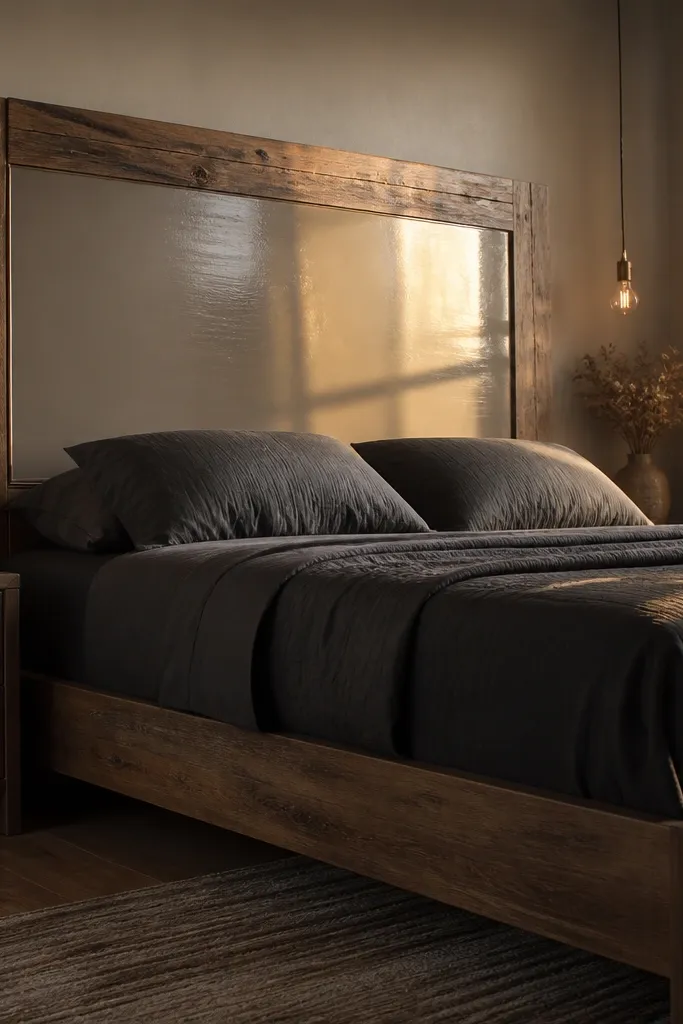
This one looks like a custom art piece behind your bed. The idea is a reclaimed wood frame around a smooth center panel so the texture stays on the borders, not everywhere you touch or clean. Seal the center with a clear topcoat or paint it in a solid color so it stays wipeable. It’s low-maintenance because the surface you clean is flat, and the frame parts are sealed wood with no fabric to trap dust. In photos, the frame gives depth and the sealed center reads clean and modern.
Editor's noteUse a random-length reclaimed frame but keep the face width consistent so the grain looks deliberate, not chaotic.
Build a rectangular frame from reclaimed boards cut to match your bed width, then add corner blocks so it stays square. For the center, use 1/2-inch MDF or plywood and either paint it with satin paint or seal it with a clear coat for a smooth look. Sand everything to uniform grit, then apply primer (if painted) and two coats of topcoat. Mount using a French cleat attached to the back frame at the correct height so the headboard sits centered.
Skip thisDon’t leave rough nail holes or unsealed knots in the center — they collect grime and look messy up close.
4. Oversized leather-look vinyl panels with hidden zippers
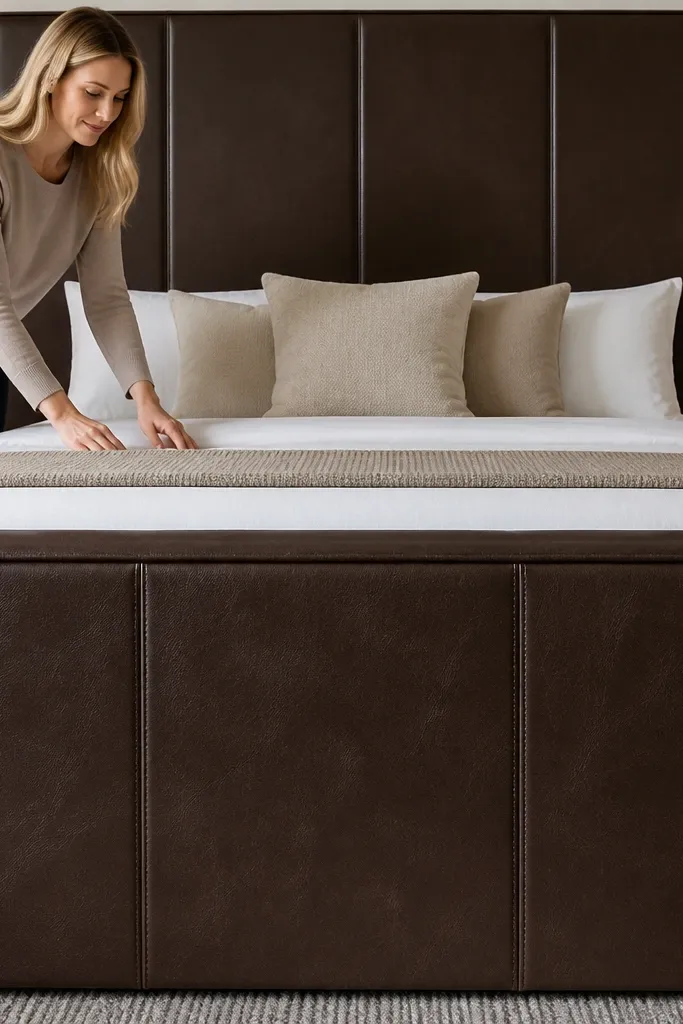
If you want the “upholstered” look without the fabric maintenance, go leather-look vinyl with removable top covers. The look is bold and clean because the surface is smooth and reflective, and the seams are controlled. Hidden zippers let you remove covers for wiping or replacement, so you’re not stuck with the whole headboard when something happens. It also handles daily life better than linen or velvet — no lint, no snagging. This is a strong choice for kids, pets, or anyone who eats in bed.
Editor's noteChoose vinyl with a matte finish, not glossy — glossy shows every fingerprint and bedding wrinkle.
Make a plywood backing sized to your headboard footprint, then attach foam only where you want padding (thin foam is enough for shape). Stretch leather-look vinyl over the foam and staple to the back, leaving zipper tracks accessible on the back side. Install two zipper seams across the back so the front cover lifts off cleanly. Finish by sealing edges and attaching the whole assembly to a wall cleat for a stable hang.
Skip thisDon’t use thick foam under vinyl — it makes waves that look sloppy and hard to keep straight.
5. Powder-coated metal grid headboard with removable dust screen
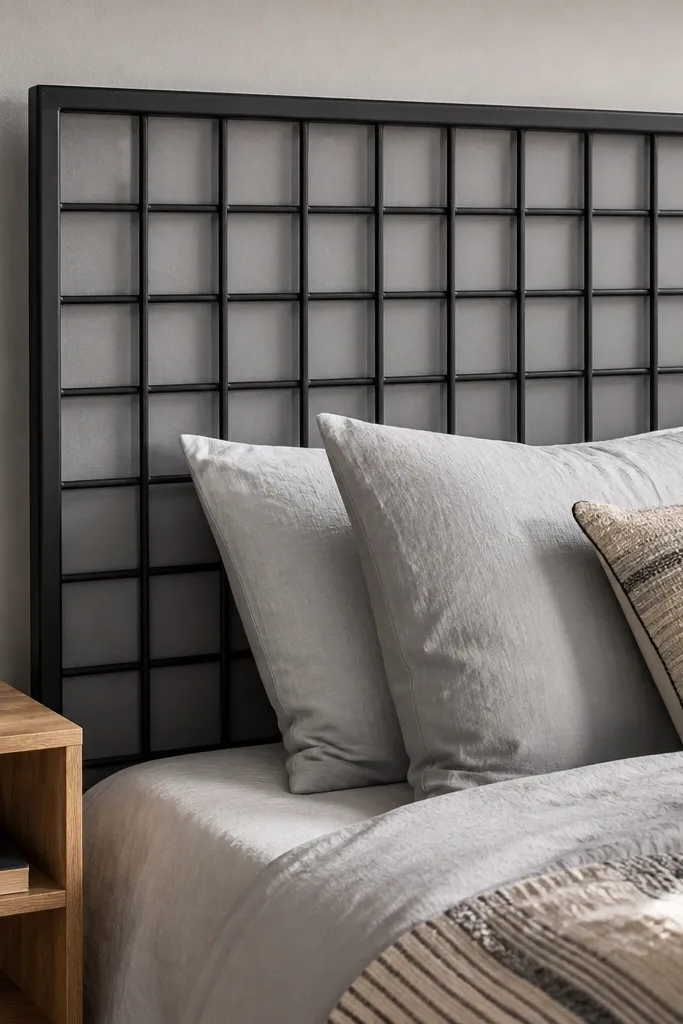
A metal grid looks industrial and graphic, but the low-maintenance part depends on the dust control. This design uses a front grid for the look and a smooth, removable backing screen so dust doesn’t collect in deep pockets. Powder-coated metal wipes easily and resists rust, which matters near humid bathrooms or laundry rooms. It’s photogenic because the grid creates a pattern of light and shadow behind your pillows. If you keep the backing panel removable, cleaning takes seconds.
Build a rectangular frame from metal tubing or wood backing with mounted grid attachment points. Attach the grid front using machine screws so you can disassemble later. Add a second smooth panel behind the grid (thin sheet metal or sealed plywood) that slides out on two rails. Finish the metal with powder-coat or use pre-finished powder-coated components, then mount the frame to studs using lag screws through the mounting rails.
Paint or coat the backing panel the same color as the grid so the inside doesn’t show when you slide the screen out.
Don’t use bare steel — it will spot and look dirty fast.
6. Monochrome slatted board headboard with stain-matched edge banding
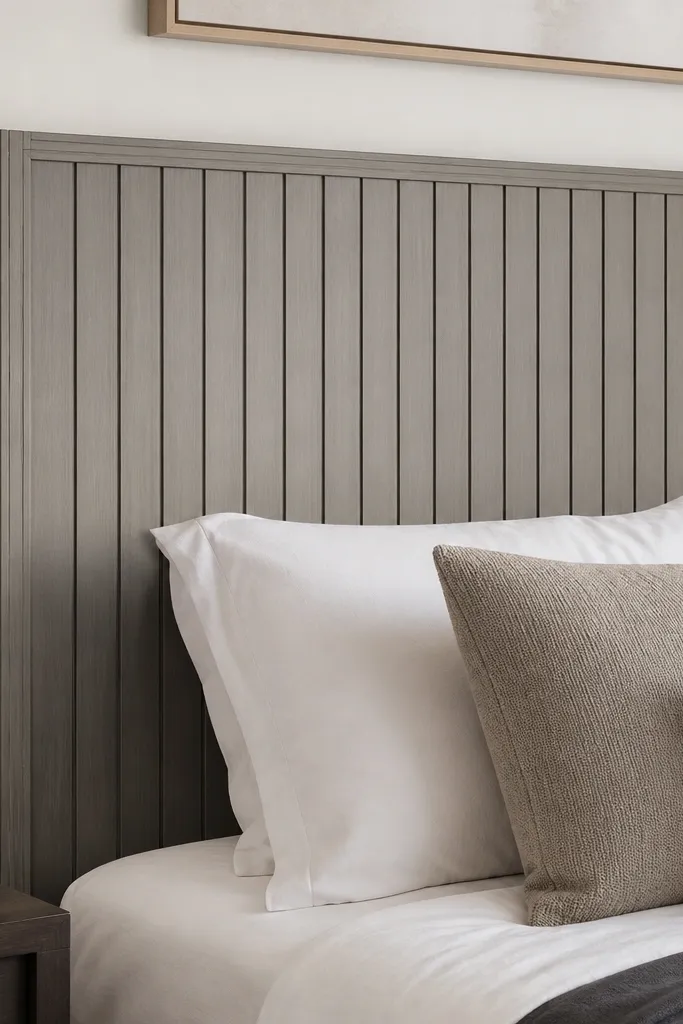
This is for people who want wood texture but hate maintenance that comes with rough grain and uneven edges. The look is consistent slats, a clean perimeter, and edge banding that makes the whole thing look built-in. Staining sealed wood gives you a finish you can wipe, not a porous surface that grabs bedding oils. It’s low-maintenance because the finish is uniform and the slats are sized so dust doesn’t hide in gaps. It photographs well because the tone stays even across the whole panel.
Editor's noteUse foam sanding blocks while sealing so you don’t round edges and lose that sharp, modern look.
Rip slats from 1x3 or 1x2 boards to a consistent width, then cut a backer from 3/4-inch plywood to the full headboard size. Stain the slats first, then apply edge banding to the frame perimeter so raw edges don’t show. Assemble with wood glue plus screws driven from the back to avoid visible hardware. Seal with a wipe-on polyurethane in a satin sheen and let it cure 48 hours before mounting.
Skip thisAvoid mixing stain colors across slats — mismatched tones look like a “DIY mistake” in close photos.
7. Fabric-free tufted look using buttonless channel panels
Tufted headboards look plush, but they’re maintenance nightmares when the fabric is loose or the buttons collect grime. This version gives the tufted vibe using channels in a rigid panel and a smooth top finish. You get the same raised pattern — just cleaner and wipeable. It’s a great choice if you want a “soft” look without actual upholstery upkeep. The channels also add depth in photos, especially with side lighting.
Editor's noteUse a contrasting paint color only in the grooves to make the pattern read clearly even at night.
Start with a 1/2-inch MDF or plywood panel cut to size. Mark vertical channel lines and route shallow grooves (about 1/4-inch deep) spaced evenly. Fill grooves with thin strips of matching material or paint over them with a contrasting color to define the channels sharply. Seal the surface with a satin topcoat, then mount with a back cleat system so it sits flat and doesn’t sag.
Skip thisSkip deep grooves — they look great up close but trap dust and wear faster.
8. Outdoor canvas headboard with taut stretch and removable top cover
Outdoor canvas gives you the look of fabric without the fragile upkeep of indoor textiles. It’s tightly woven, so it doesn’t fuzz, and it wipes clean with mild soap. The removable top cover is the part that makes it truly low-maintenance — spills and pet marks go straight to the wash instead of soaking into the frame. You still get a warm, relaxed aesthetic that works with rustic, coastal, and modern rooms. In photos, tight fabric tension makes the headboard look tailored, not baggy.
Editor's noteChoose canvas with a higher thread count and a matte finish so it doesn’t show every wrinkle under flash.
Wrap outdoor canvas around a rigid frame made from 1x2 lumber (build a rectangle the exact size of your headboard face). Pull canvas tight with a staple gun, then trim cleanly and add a second layer on the back for a smooth surface. Sew or fit a removable top cover that snaps or uses hidden magnets at the back edge. Finish by sealing the wood frame edges and mounting using corner brackets into studs.
Skip thisDon’t stretch loose canvas — sagging makes the whole bed look unmade even when it’s clean.
9. Shaker-style panel headboard with painted center and wood frame
Shaker-style design looks calm and expensive because it uses proportion, not decoration. You paint the center panel for easy wipe-cleaning, while the wood frame gives warmth. The low-maintenance part is the sealed painted panel in the middle, where most contact happens from bedding and pillows. It also hides minor wall imperfections because the frame covers edges and creates a clear boundary line. This is a great option for renters because it mounts cleanly without heavy upholstery.
Build a rectangular frame from 1x3 boards and add inner rails to create a recessed center panel. Use MDF for the center, sand smooth, prime, then paint with satin cabinet paint. Assemble with wood glue and brad nails, then add corner blocks for rigidity. Mount to studs using two sturdy brackets or a French cleat, and keep the headboard 1-2 inches from the wall so you can dust behind it.
Paint the center panel before assembly so you get clean edges and no brush marks on corners.
Don’t skip primer on MDF — unprimed panels look chalky and stain-prone.
10. Folded-crease faux leather headboard with magnetic flaps
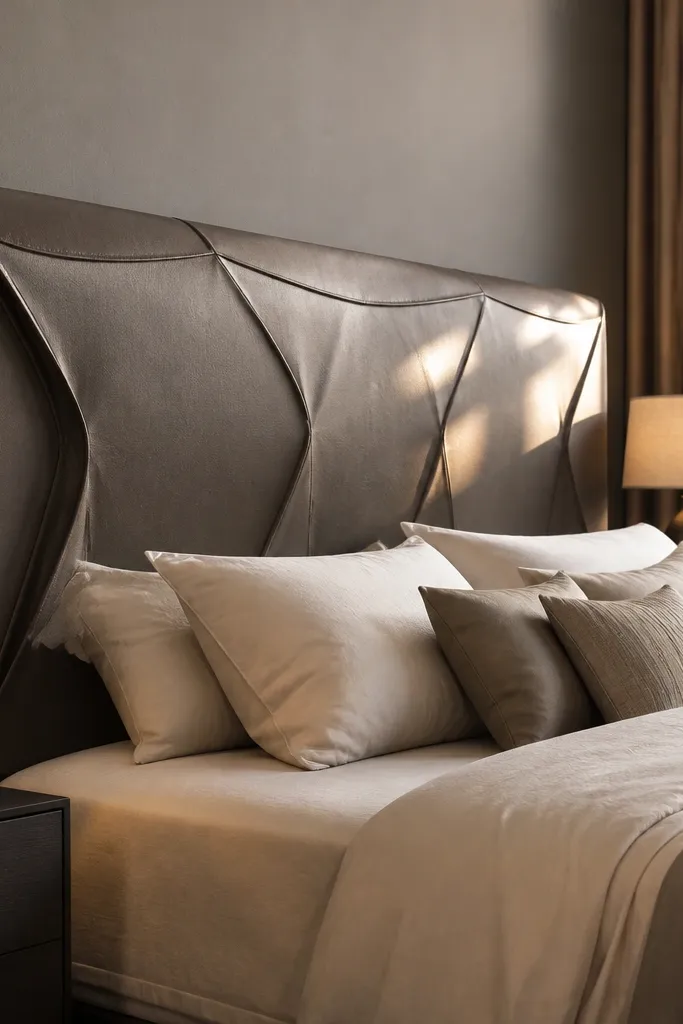
This one gives you that sculptural, boutique look without complicated upholstery labor. The folded crease effect is created by pre-creasing vinyl panels and securing them with magnets so the surface stays tight. It’s low-maintenance because the front is smooth and wipeable, and you can remove the top layer for cleaning or replacing. The crease lines create strong shadows in daylight, which makes the headboard look designed, not flat. It also works well in small rooms because it adds visual texture without adding bulky height.
Editor's noteTest magnet spacing on a scrap piece so the vinyl doesn’t lift at the corners.
Create a backing panel from plywood and attach thin foam only along the fold lines so the creases hold shape. Cut vinyl panels and pre-crease them with a straight edge (use gentle heat from a hair dryer if the vinyl allows). Secure the panel edges to the backing with hidden magnets spaced every 8-10 inches so the top layer stays aligned. Seal all vinyl edges with a matching trim and mount the whole assembly to studs using a back cleat.
Skip thisDon’t use too much foam — creases puff and look uneven.
11. Large-format peel-and-stick wall panels turned headboard
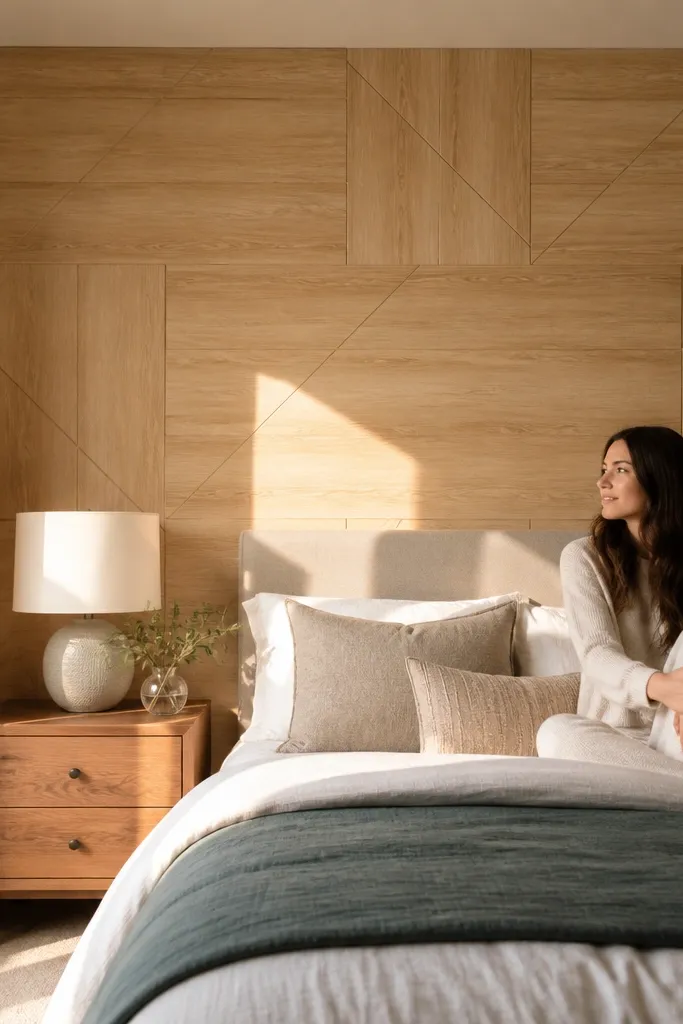
This is the fast, photogenic route that still counts as low-maintenance. Large-format peel-and-stick panels are already finished, wipeable, and designed to live on walls, so you’re borrowing that durability for your bed. The look depends on the panel pattern — think geometric, faux tile, or wood plank styles that read clean in photos. It requires less build time than wood framing, and repairs are easy because you can replace one section. The surface is flat and smooth, so cleaning is just a wipe-down.
Pick panels with a matte finish and a thickness that won’t flex, and measure your headboard size including a 1-inch border. Mount a plywood or MDF backing to the wall first, then apply panels directly to the backing following the manufacturer’s alignment method. Trim edges with a sharp utility knife and sand lightly at any seams. Finish by sealing any cut edges with clear edge sealer and mount using screws through the backing into studs.
Use a level and mark your first reference line — peel-and-stick alignment mistakes are hard to fix after it sticks.
Avoid glossy panels — they show smudges from pillows and look messy under light.
12. Cement board headboard with limewash topcoat
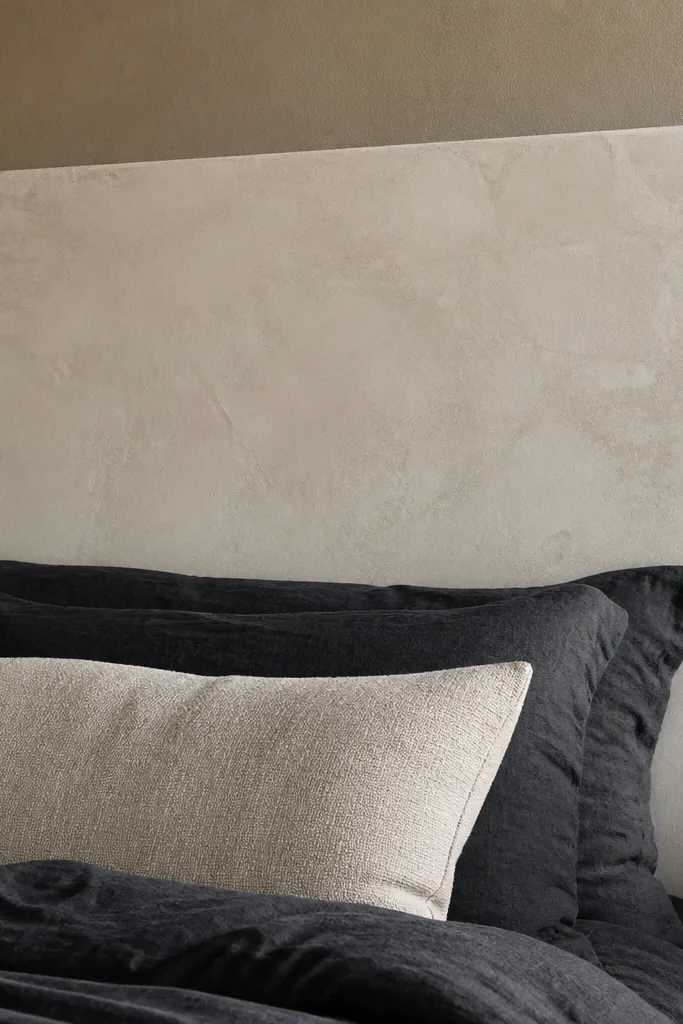
Concrete-look headboards are trendy, but most are rough and messy. Cement board with a proper sealed limewash gives you the look of mineral texture while staying wipeable. You get a cool, modern surface that hides fingerprints better than smooth painted walls because the texture breaks up marks. It also photographs beautifully with warm lighting and natural wood furniture. This is a true low-maintenance option because the finish is designed for walls and resists everyday scuffs when sealed correctly.
Cut cement board to your headboard size and seal all edges with cement board sealer or a compatible primer. Apply a limewash topcoat in thin layers, letting each layer dry before the next so it doesn’t streak. Seal the final coat with a clear, breathable sealer that’s intended for mineral surfaces. Mount using corrosion-resistant screws into studs, and keep a small air gap from the wall so it doesn’t hold moisture.
Do a test patch first — limewash tone shifts as it dries.
Don’t skip edge sealing — cement board edges drink moisture and can look darker over time.
13. Monolithic foam core headboard with heat-bent vinyl skin
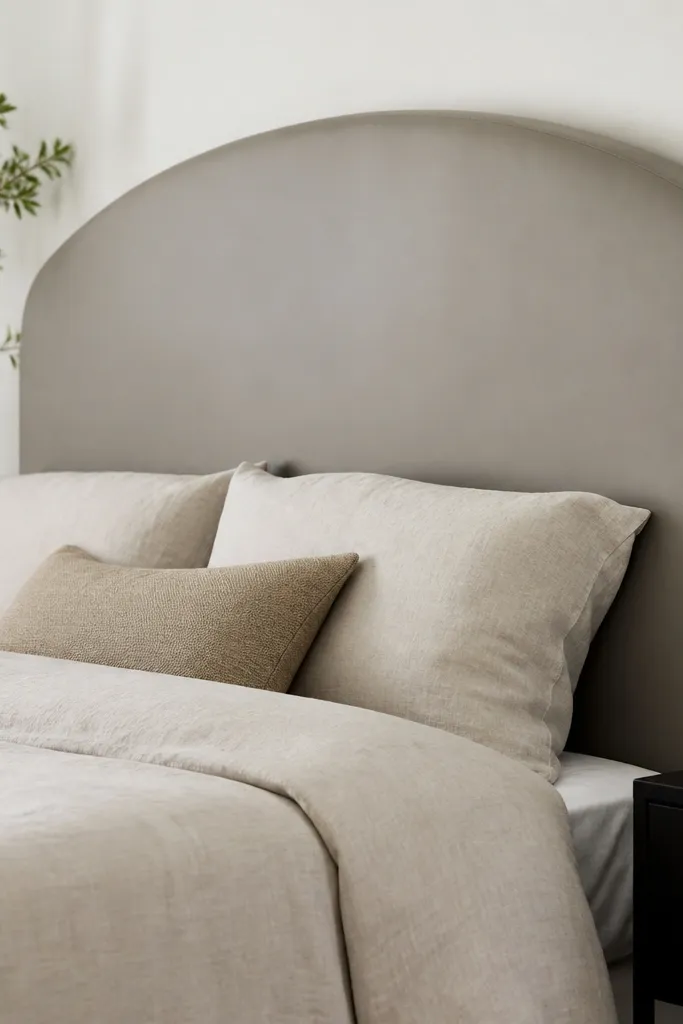
This looks custom and soft, but it’s mostly a smooth vinyl skin over a rigid foam core. The curved top gives you that high-end designer vibe, and the vinyl surface is wipeable like a vinyl couch. Low maintenance comes from avoiding fabric and using a skin that doesn’t trap dust. It’s great for modern rooms that want softness without tufting or button hardware. In photos, the curved edge creates a clean silhouette that stands out from flat wall art.
Build a foam core panel from high-density foam sheets and laminate them to your desired thickness. Heat-bend vinyl to shape (use a hair dryer or heat gun carefully) and stretch it tight over the foam, then wrap and staple to the back. Trim the base edge cleanly and add a thin backing board so it mounts flat. Mount with a concealed cleat or two brackets so the headboard doesn’t rock.
Wrap the vinyl in a test strip and practice your heat setting so you don’t warp the final piece.
Avoid cheap vinyl — it creases and cracks around the curve.
14. Picture ledge headboard hybrid with wipeable slats

This is for people who want function without adding maintenance. The top ledge gives you a place for a lamp or books, and the lower section uses sealed horizontal slats that you can wipe quickly. It looks layered and intentional in photos because you see the shelf line plus the slat band. The low-maintenance angle is that the slats are sealed and spaced so dust doesn’t hide in deep pockets. It also helps keep bedding styling neat because you’re not cluttering bedside surfaces.
Cut two side rails and a back panel from plywood, then install a top shelf board (about 1-2 inches wide) with a front lip. For the slat section, use 1x2 slats spaced about 1/8-1/4 inch apart, then seal with satin paint or clear coat. Add a back cleat for mounting and a level spacer so the shelf stays straight. Finish with corner sanding and a wipeable topcoat over any exposed edges.
Use satin, not semi-gloss, on the shelf so it doesn’t glare in daylight photos.
Don’t pack slats tightly — the gap helps with cleaning and keeps the look airy.
15. Tall woven jute-look panel with sealed topcoat and removable face
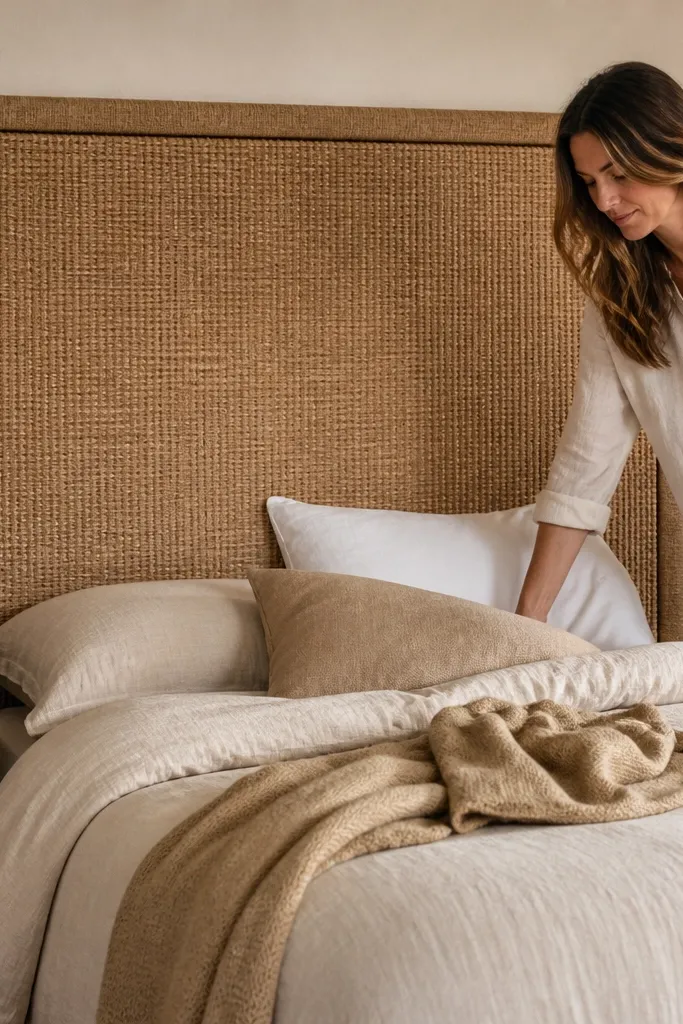
Woven textures can be maintenance traps if they stay porous and fuzzy. This approach uses a jute-look material stretched over a frame and sealed so the surface wipes like a coated fabric. You get the natural, cozy look without the dust-grabbing fibers. The removable face panel matters because if it stains, you replace one panel instead of rebuilding the whole headboard. It’s especially good in bedrooms where you want warmth and pattern but still need easy cleaning.
Editor's noteChoose a coated fabric with a tight weave so the sealant doesn’t soak in and darken the pattern.
Stretch jute-look coated fabric over a rigid frame (thin plywood) and staple on the back, pulling tight to remove wrinkles. Apply a clear sealant compatible with coated textiles, then let it cure fully before mounting. Build the headboard as a two-part system: a fixed back frame and a removable front panel that attaches with magnets or screws from the back. Mount the back frame to studs and keep the front panel removable for washing or replacement.
Skip thisSkip untreated woven textures — they stain and feel rough when you wipe them.
16. Slim acoustic foam panels with washable fabric skin
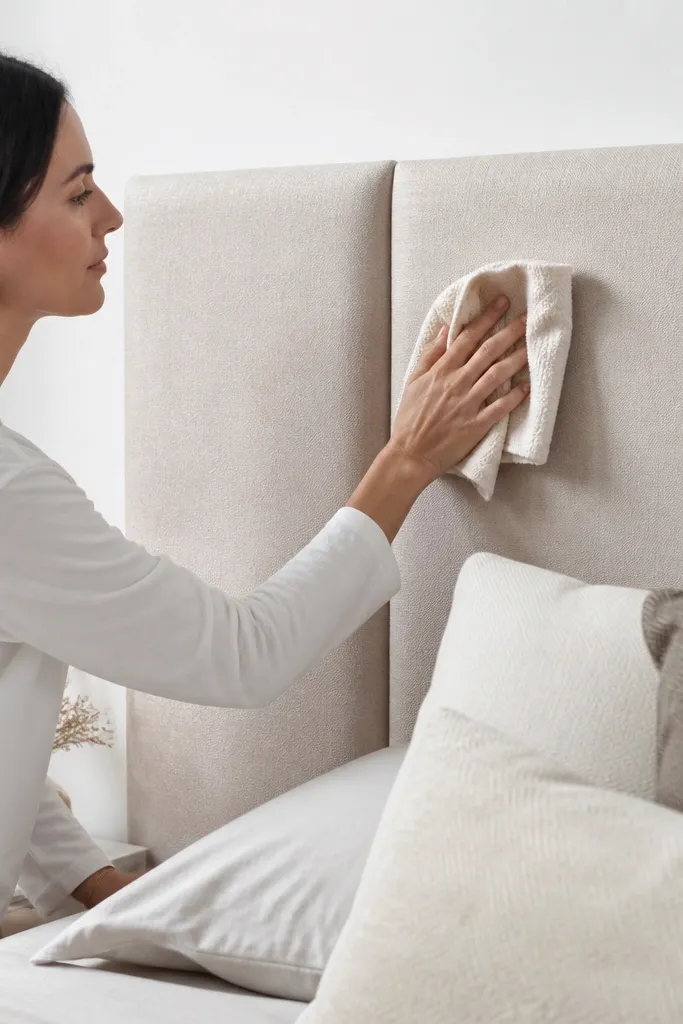
Acoustic-style panels can look sleek when the fabric is smooth and removable. This headboard uses thin foam for a cushioned look but wraps it in a washable, tightly woven cover so it stays low-maintenance. The visual payoff is a clean, slightly padded surface that looks tailored and reduces the harsh “blank wall” effect behind pillows. It’s photogenic because it reads as one smooth plane with subtle panel seams. If you want a cozy feel without the constant fabric care, this is the smarter route.
Editor's noteUse a removable cover fabric with a tight weave that doesn’t pill — it keeps the surface looking clean longer.
Cut thin foam sheets to panel size and wrap each in a washable cover fabric, then secure with a zipper or Velcro at the back edge. Mount the foam panels to a backing board using adhesive or standoffs so air can move behind them. Use a simple back frame to mount to studs with a cleat system. Finish by aligning seams evenly and adding edge trim so the cover looks crisp.
Skip thisDon’t use thick foam — it bulges and makes the cover look stretched.
17. Tile-look headboard on sealed hardboard with grout-free finish
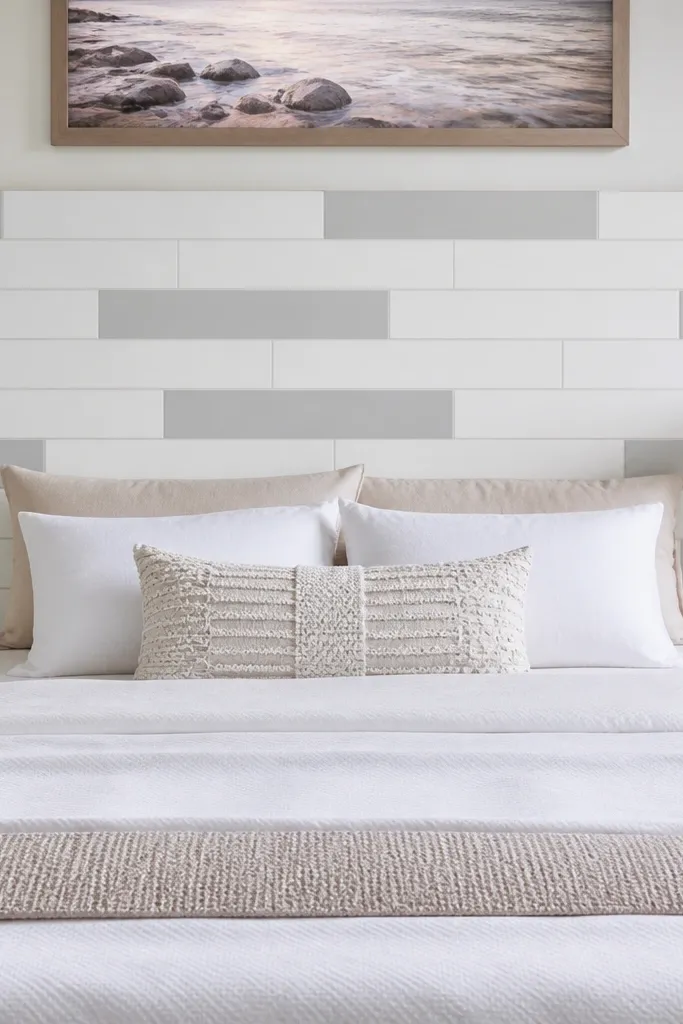
Tile-look headboards look spotless in photos because the pattern reads like a wall feature. The low-maintenance version avoids real grout entirely, using a grout-free tile-look panel on a sealed backing. That means you can wipe it clean without scrubbing between lines. It’s also resistant to scuffs compared with paint-only surfaces, and it works in rooms with higher humidity. Choose a pattern that looks crisp from a distance — small tile reads cluttered behind pillows.
Editor's notePick large tile patterns (like 4x4 or 6x6) so the design still looks intentional when your pillows cover part of it.
Use tile-look peel-and-stick or printed rigid panels designed for backsplash use, and mount them over sealed hardboard. Cut the backing to size, seal the edges, then apply the panel with careful alignment from a reference line. Trim edges cleanly and add a slim wood or metal trim border to hide the cut. Mount to studs with cleats and keep the headboard slightly off the wall for dusting behind it.
Skip thisAvoid tiny tile patterns — they make the bed look busy and show dust lines.
18. Rattan cane headboard with clear-coat and tight spacing

Rattan cane looks airy and expensive, but it can turn into a dust collector if it’s loose or unsealed. This version uses a cane sheet stretched tight over a rigid frame and then sealed with a clear protective coat. The look stays light and photogenic, especially with warm lighting and linen bedding. Low maintenance comes from the sealed surface and the tight weave that doesn’t create deep pockets. It also adds texture without fabric that gets crushed or snagged.
Stretch rattan cane or cane-style webbing over a rectangular frame made from wood, pulling tight and stapling on the back. Trim excess and seal the cane with multiple thin coats of clear protective finish designed for wicker or natural fibers. Add a slim perimeter border so the frame edges look clean and the seal stays uniform. Mount with corner brackets into studs or a French cleat on the back frame.
Seal in thin coats and rotate the piece so you don’t get drips on the front pattern.
Don’t leave cane unsealed — it picks up stains and looks darker around contact points.
19. Matte laminate headboard with routed bevel edges
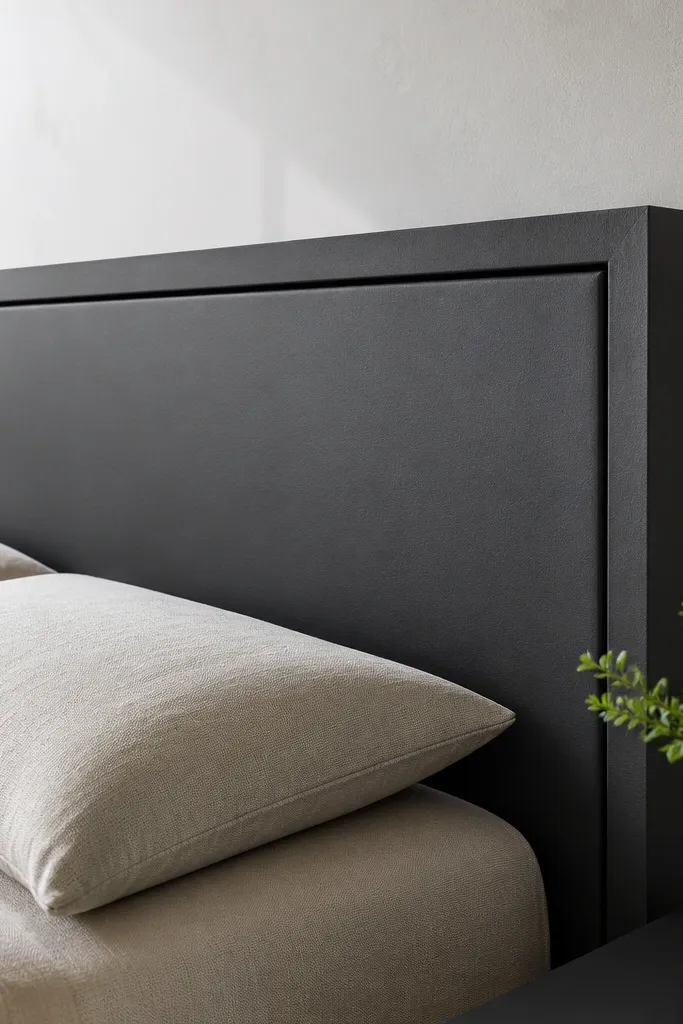
Laminate headboards look crisp and modern, and the maintenance is straightforward because the finish is already engineered to resist stains. The routed bevel edges create a premium look without adding complex details that collect dust. Choose matte laminate in charcoal, warm gray, or soft sage so it doesn’t show scratches as easily as glossy surfaces. This is a smart fit for bedrooms that get heavy use because laminate doesn’t scuff like painted MDF. In photos, the beveled edges catch light and make the headboard stand out.
Editor's noteUse a sharp laminate trimming bit and take shallow passes — you avoid chipping along the edge.
Cut a plywood core to size and apply laminate using contact adhesive or pressure-sensitive laminate adhesive, then trim flush. Rout a shallow bevel around the perimeter (about 1/8-inch) so the edge reads clean and dimensional. Sand lightly at the edge and apply an edge band if needed for a sealed perimeter. Mount using a back cleat attached to the core so it hangs straight and stays stable.
Skip thisDon’t skip edge sealing — raw edges swell and look messy fast.
20. Vintage window frame headboard with sealed back panel
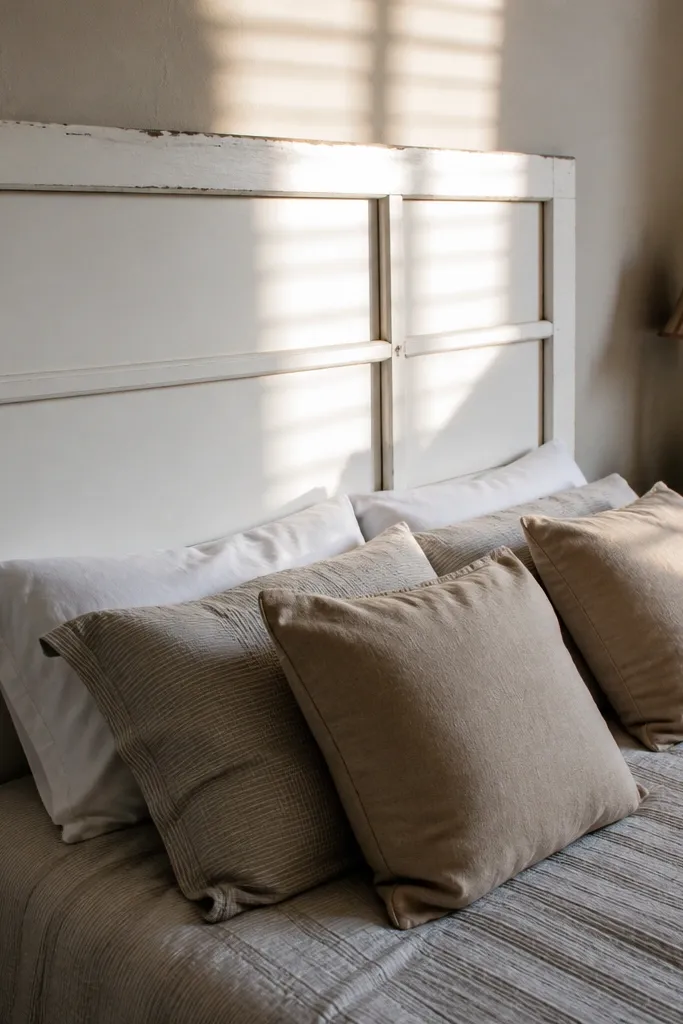
A window frame headboard looks instantly styled, like it belongs in a magazine. The key for low maintenance is the center panel: use a sealed, smooth surface inside the frame so dust isn’t trapped in old glass channels or rough wood. Paint or refinish the frame, then seal it so it wipes clean even if you touch it while styling bedding. This works in rooms with cottage, farmhouse, and transitional decor, but you can make it modern by painting the frame a solid matte color. Photos love it because the frame creates a strong border line behind pillows.
Editor's noteAdd a thin foam spacer between the center panel and frame so the panel doesn’t rattle.
Source a window frame with intact rails, then remove any loose hardware. Paint the frame with a cabinet-grade matte or satin enamel and let it cure. Cut a smooth center panel from plywood or MDF, seal it, and attach it behind the frame so the front stays clean. Mount the whole piece to studs using two strong brackets or a French cleat on the back.
Skip thisDon’t use old, unsealed glass channels — they collect dust and look dirty in close photos.
21. Stacked book spine headboard with sealed covers and clear topcoat

This looks clever and artsy, but it only stays low-maintenance if the spines are sealed and the surface is protected. The build keeps the “book” look while making it wipeable with a clear topcoat. It’s also easy to swap out later if you want a different theme — you can change the spine covers without changing the frame. In photos, the grid pattern looks intentional and gives vertical rhythm behind your pillows. Choose a color palette that matches your bedding so the headboard reads cohesive, not chaotic.
Build a plywood backing frame and attach vertical strips where book spines will sit, spacing them evenly (measure the spine widths and add 1/8-inch gaps). Create spine covers from printed paper or real book spine labels on cardstock, then seal each cover with clear matte medium. Attach the spine pieces to the frame, then apply a final clear topcoat over the whole front so it wipes clean. Mount with a cleat system and add a border trim so edges look finished.
Use matte clear topcoat — it reduces glare from bedside lamps and cameras.
Avoid glossy finishes — they show every fingerprint and look messy under flash.
22. Oversized rope-and-wood knot lattice headboard
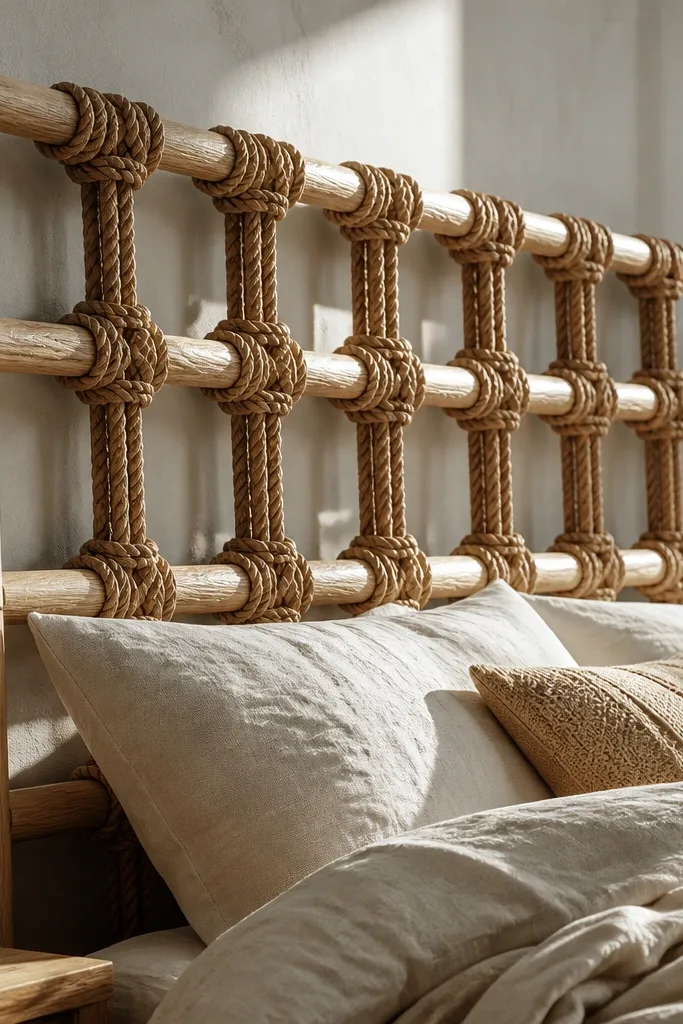
This headboard gives you a bold, sculptural look without upholstery. The rope reads warm and handmade in photos, but it stays low-maintenance because it is sealed and easy to spot-clean. You get the height and structure of a traditional headboard, plus a texture that hides minor wall flaws. It suits bedrooms that need character — boho, coastal, farmhouse, even modern with warm tones. Skill level is beginner-friendly if you can use a drill and cut rope cleanly. Plan on a single weekend for building and sealing.
Build a rectangle frame from 1x3 pine or poplar. Cut two side rails at your target height (typically 56-60 inches tall) and two top/bottom rails so the finished size matches your bed width. Add 1/2-inch cleats inside the frame edges to support the rope tension and keep knots from sagging.,Mark a grid on the face: for example, 6-inch spacing for a queen-size look. Drill small pilot holes at each grid intersection, use the rope to weave in a simple over-under pattern, then tie a tight double overhand knot at each hole. Pull rope taut as you go, and keep knot height consistent so the surface looks even from across the room.,Seal the finished rope lattice with two coats of clear matte polyurethane or marine spar varnish. Let each coat dry fully, then mount the headboard to the wall using a French cleat or 2-3 heavy-duty brackets. Finish by trimming stray rope ends and using heat to fuse the fiber tips if your rope is synthetic.,Safety and durability check: keep knots away from sharp screws and avoid soaking the rope — thin coats prevent tackiness.
Use a rope with a consistent diameter (about 1 inch) so knot bulk looks intentional instead of lumpy.
Don’t skip tensioning while you weave — loose rope makes the lattice look messy fast.
23. Magnetic felt panel headboard with metal pin grid
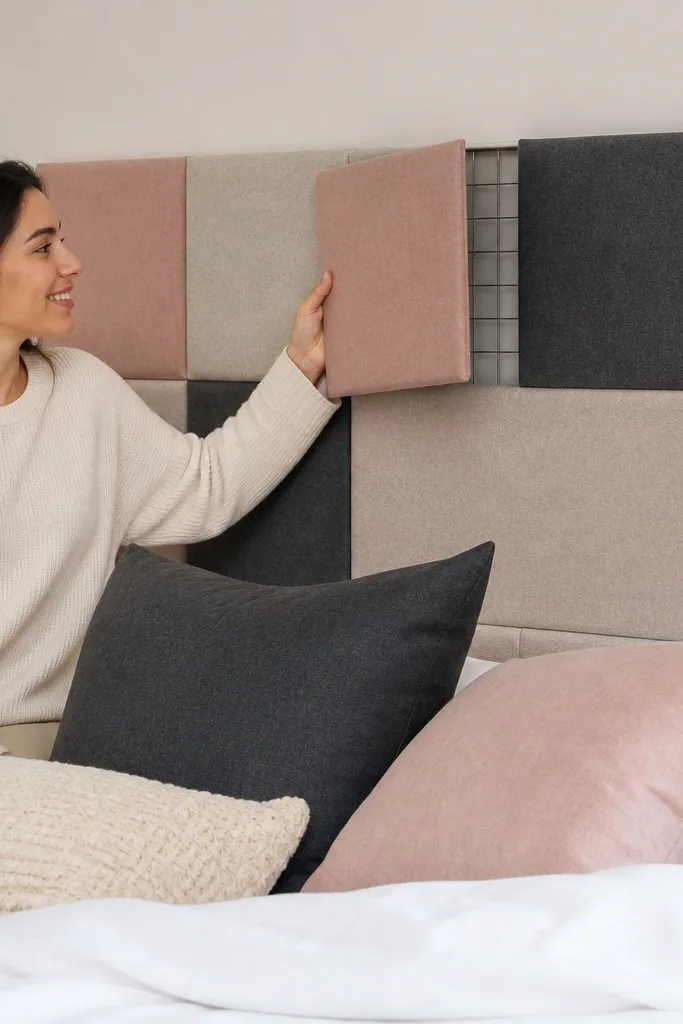
This one is built for low-maintenance because the surface is replaceable. You mount a hidden pin grid to the wall, then press magnetic felt tiles onto it. If a tile gets stained, you remove just that piece — no reupholstering, no patching. The look is clean and soft in photos, with subtle color blocking that makes your bed feel styled. It works in apartments and rental homes because you can attach the base hardware without damaging the wall much. Time is about 3-5 hours for the base and tiles, plus drying time for any mounting primer if you need it.
Install a 1/4-inch plywood backer to the wall or to a bedframe cleat. Size it to your bed width (for a queen, start around 60 inches wide) and about 30-36 inches tall for a modern half-headboard look, or taller if you want full coverage. Spray paint or prime the backer so any hardware shows cleanly through gaps.,Add a metal pin grid: screw a series of small threaded studs or nail-like pins in straight rows with 4-6 inch spacing. Use a level and measure from the center so the grid lines up with the bed. Screw in 1/2-inch deep pins so magnets have enough clearance to sit flat.,Cut felt tiles from 1/2-inch thick craft felt or upholstery felt. Glue a thin sheet of neodymium magnets to the back of each tile in a grid pattern that matches your pins. Press each tile onto the pins and adjust for tight seams so the overall surface looks uniform.,Finish by adding a thin fabric edge trim around the perimeter using fabric glue or a staple edge on the backer.
Use neodymium button magnets inside the felt so the tile stays flush and doesn’t bulge at the edges.
Don’t use flimsy craft felt — it pills and dents, and it reads cheap under direct light.
24. Cedar slat headboard with hinged flip-down cleaning tray
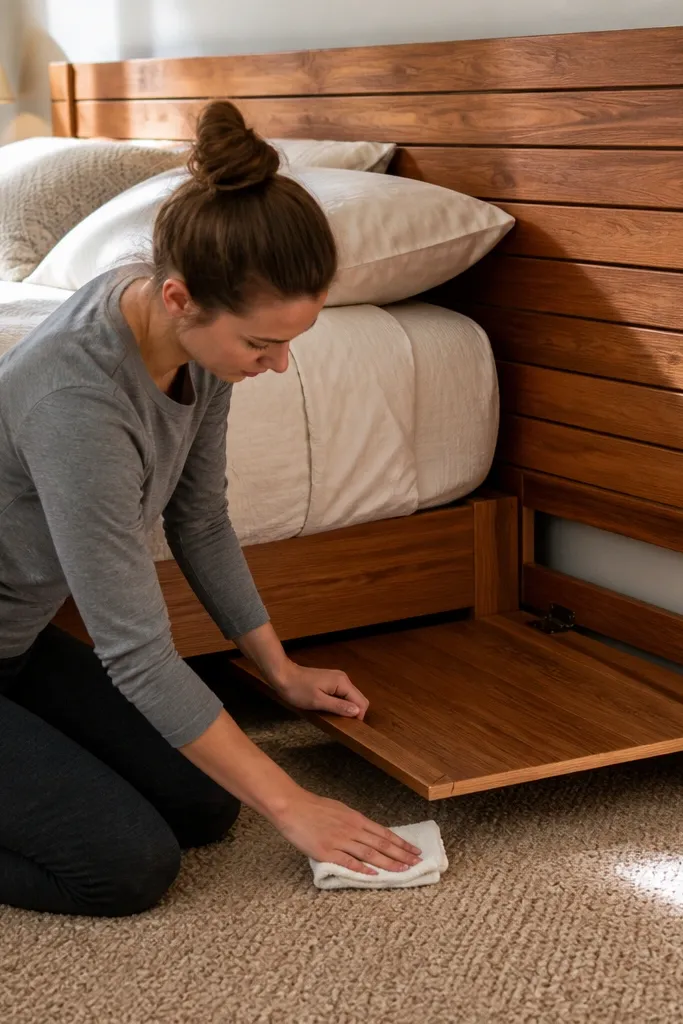
This headboard solves the annoying part of headboard ownership — cleaning behind it and dust buildup. The cedar slats look warm and high-end, but the smart feature is a hinged flip-down tray that gives you access to the wall gap. You still get that photogenic wood grain and shadow lines, and the slats are easy to wipe with a dry cloth. It works in bedrooms where the bed sits close to the wall, especially in small rooms. Skill level is intermediate only because of the hinge and alignment, not because the carpentry is hard. Budget time is 1 day for build and a few hours to finish and mount.
Editor's notePre-drill hinge holes and countersink so cedar doesn’t split — it keeps the finish looking straight.
Cut cedar boards for slats: use 1x3 cedar for most looks, with 1/2-inch spacing between slats. Build a back frame from 2x2 or 1x4 stock so the headboard has a solid mounting edge. Make the headboard height around 54-60 inches and ensure the slat top sits 1 inch below the frame top for a clean border.,Add the hinged tray to the bottom section: cut a plywood or thin cedar panel the width of the headboard minus 1/2 inch. Install 2 heavy-duty hinges on the back of the tray and mount matching hinge plates to the frame. Add a small magnetic catch or latch so the tray stays upright when you lean against the headboard.,Mount the headboard to the wall with two French cleats or lag screws into studs. Apply a clear cedar finish that dries hard — two coats of matte exterior spar varnish or a clear water-based wood finish, sanding lightly between coats. Seal the back edges too, so the tray doesn’t absorb dust and smell.,Test the hinge swing with the bed pushed into place so the tray clears pillows and doesn’t scrape the mattress.
Skip thisDon’t leave the slat ends raw — unsealed ends drink moisture and the headboard looks uneven after a season.
25. Rope-wrapped ladder rail headboard with removable fabric cover
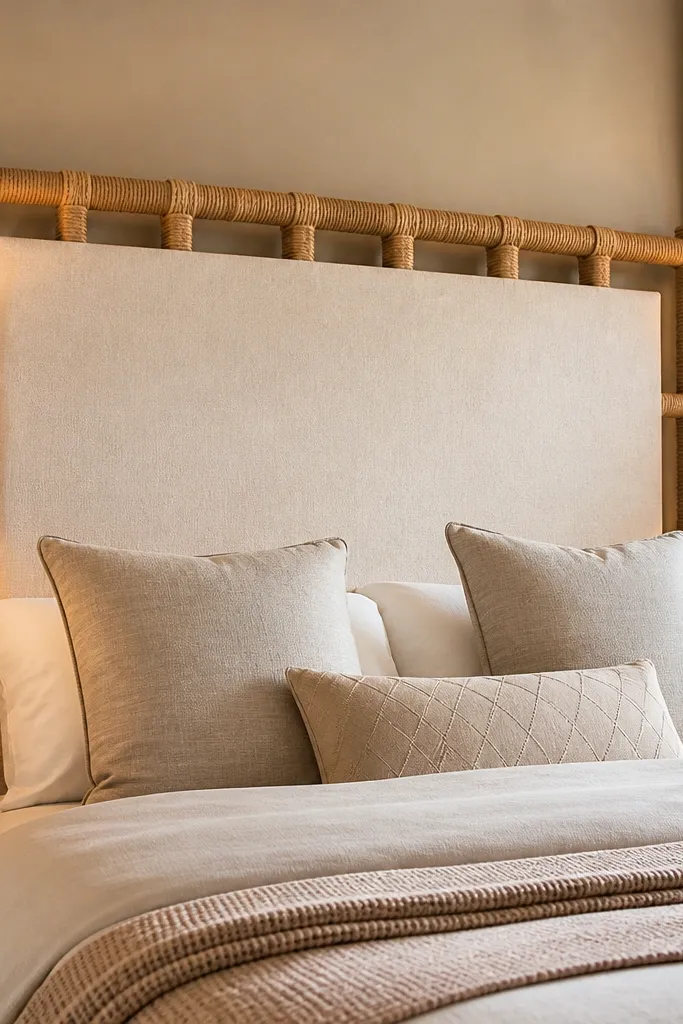
This headboard looks like a designer prop because it has height, negative space, and a graphic rope wrap. The removable fabric cover is the low-maintenance part: you can take it down and wash or swap it when you change seasons. The rope rails stay clean with a quick wipe, and the fabric hides wall scuffs behind the bed. It suits kids' rooms, guest rooms, and rental setups where you want style that doesn’t turn into a chore. Skill level is beginner to intermediate; the build is basically a frame with wrap and a simple cover. Plan 4-6 hours for the first version, plus drying time if you seal the wood.
Build two vertical ladder rails from 2x2 stock or 1x3 boards stacked for thickness. Cut rails to 60-66 inches tall and add 2-3 horizontal rungs at 10-14 inches apart for a ladder rhythm. Sand everything smooth and round edges slightly so rope wrap looks tight instead of catching.,Wrap the rails and rungs with thick cotton or jute rope. Use a heavy-duty fabric glue or contact cement at anchor points, then spiral wrap with even spacing. Secure the rope ends on the back of the rails so the front stays clean.,Make the removable cover: cut a piece of tightly woven canvas or duck fabric to the inner opening size (for example, 56 inches wide by 24-30 inches tall, depending on your layout). Sew a simple top sleeve for a rod or use Velcro strips along the back of the frame so it comes off without tools. Attach the cover so it sits flat against the rails with no wrinkles in photos.,Seal the rope lightly with a clear matte sealant made for natural fibers if you want easier wipe-downs. Let it cure fully before mounting.
Use a rod-and-sleeve top attachment so the fabric hangs straight; Velcro-only installs tend to skew after a few removals.
Don’t wrap rope too loosely — it creates gaps that look sloppy once the light hits.



