
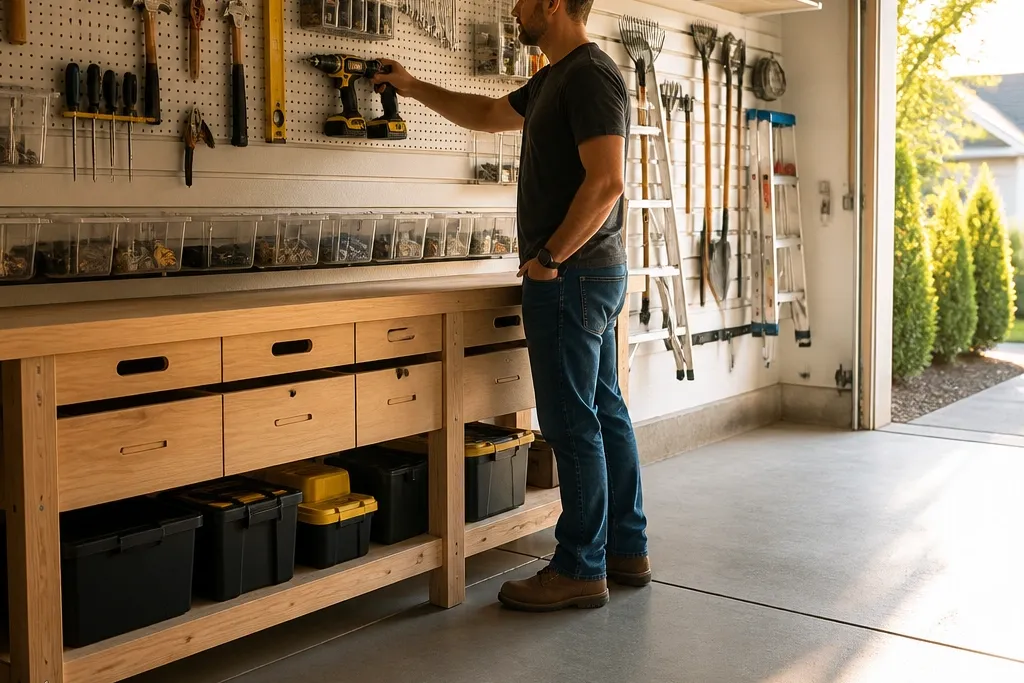
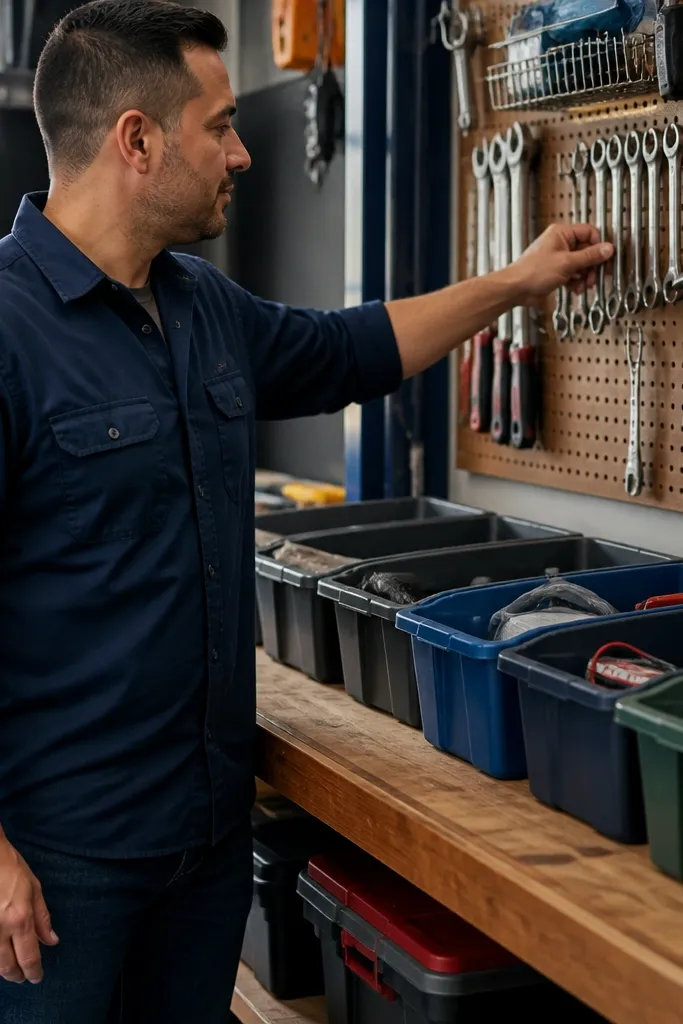
1. Grid Pegboard With Color-Coded Tool Shadows
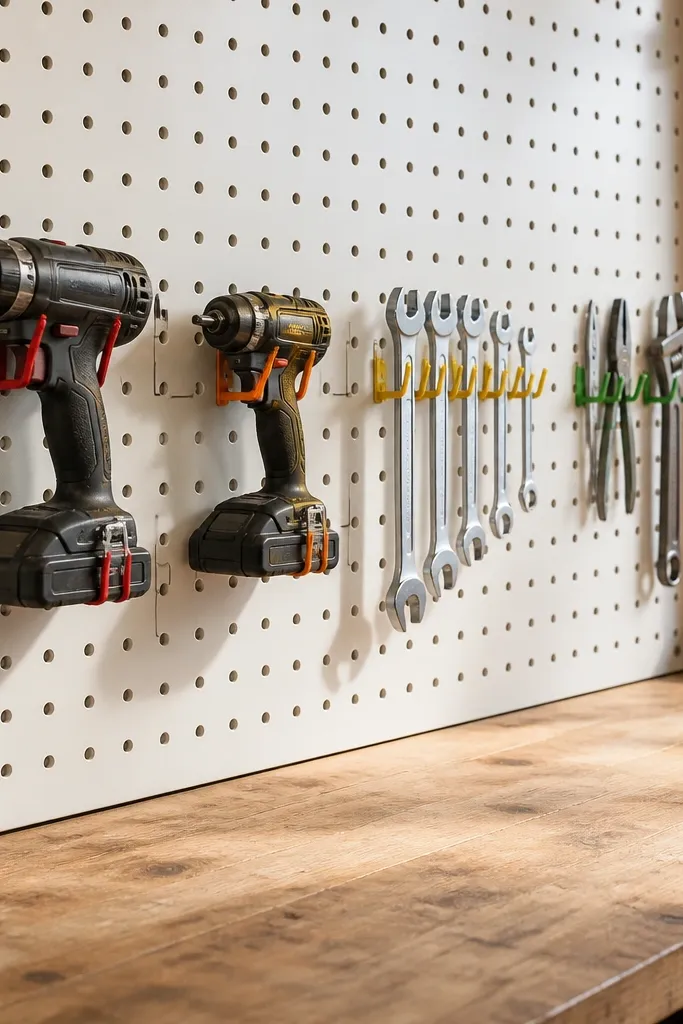
A grid pegboard with shadow outlines makes your garage look intentional and keeps tools from drifting onto benches. The visual guide is what makes it low-maintenance: you can glance and instantly see what’s missing or misplaced. Use a light board color like white or off-white so the hooks and tools pop, and grime shows less than on dark boards. This setup works best for hand tools and frequently used power-tool accessories since they get handled every week.
Start by mounting pegboard on wall studs using a level and long screws. Lay out a consistent grid spacing (for example, 2-inch squares) and install hooks that match your tool handles. Then add adhesive outline labels or printed shadow templates behind the hooks so every tool lands in the same spot. Finish by grouping by color (drill bits in one color, wrenches in another) and wipe the board with a damp cloth before you load tools.
Editor's noteBuy hooks with the same brand/model so the spacing looks uniform across the whole wall.
Skip thisDon’t hang random hook sizes — mismatched spacing makes the whole wall look messy fast.
2. Slatwall Tool Rail for Exact Drill Placement
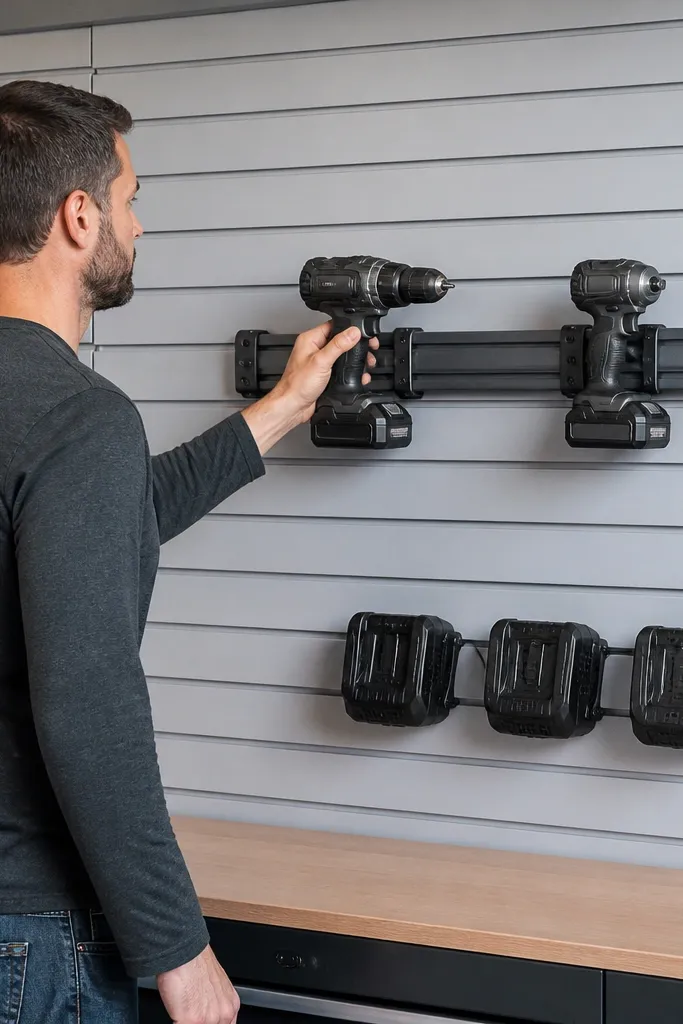
A slatwall tool rail gives you a permanent landing spot for a drill, impact driver, and chargers without hunting around. The look is clean because slatwall creates a repeating pattern, and the rail keeps tools aligned at the same height. It’s low-maintenance because you’re not rethinking where things go — you just return them to the rail. This suits garages where you work at a bench and want your power tools visible but contained.
Start by installing slatwall level across studs, leaving at least 2 inches of clearance above your workbench. Choose a drill-specific rail or universal tool cradle, then attach it with the manufacturer’s hardware for the correct load rating. Add a small shelf or bin below the rail for chargers and batteries so they don’t clutter the floor. Finally, run a short cable management strip so cords don’t hang loose.
Editor's noteMount the rail so the drill sits with the chuck facing outward; it looks better and is quicker to grab.
Skip thisSkip flimsy screw-in anchors for slatwall — use studs so heavy tools don’t shift over time.
3. Clear-Lid Bin Wall for "Task Kits"
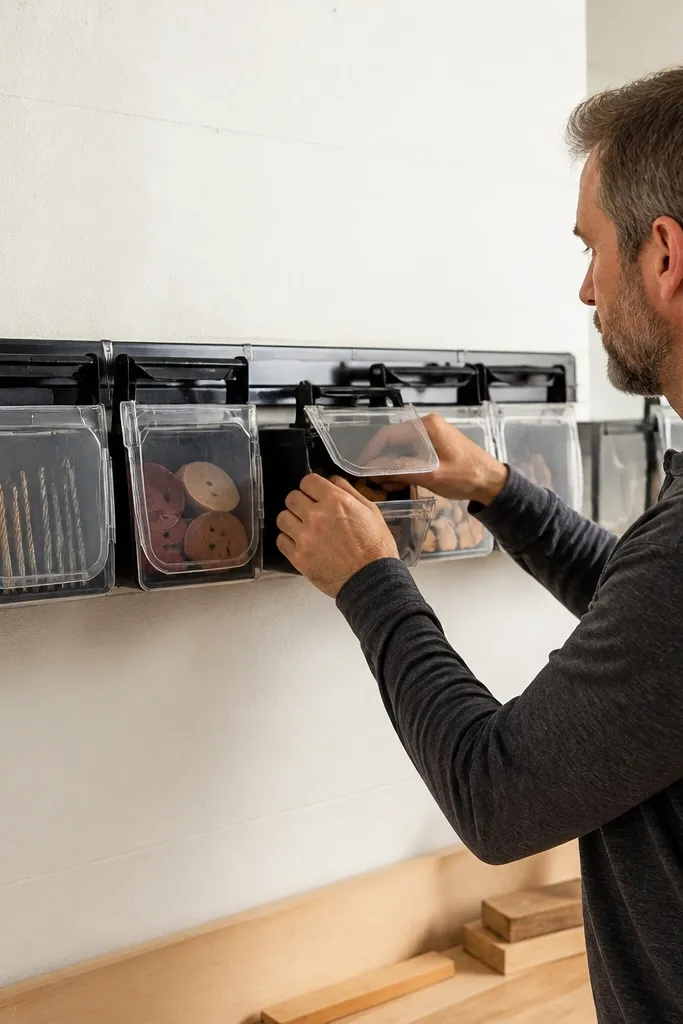
Task kit bins keep your garage tidy because you’re organizing by project, not by loose categories. A wall-mounted line of clear-lid bins looks crisp, and you can see what’s inside without opening everything. This is low-maintenance because you refill one bin after a job instead of rebuilding a pile. It works great for things like deck hardware, electrical basics, automotive fluids accessories, or small consumables you grab mid-project.
Start by selecting uniform bins with smooth sides and snap-on lids so they wipe clean. Mount them on a rail system or directly to a board using evenly spaced brackets, keeping the bin fronts aligned. Label each bin by task using a label maker and a consistent format like “Deck — Fasteners” or “Electrical — Switches.” Then fill each bin with a controlled set of items and add one small paper checklist inside the lid for quick inventory.
Editor's noteUse bins with a slightly smoked tint so glare doesn’t wash out labels.
Skip thisDon’t overfill — if bins bulge, you’ll stop refilling them correctly and everything spills back into clutter.
4. Sealed Plywood Tool Bench Front Drawers

Front drawers on a workshop bench are the quickest upgrade for low-maintenance because you stop storing tools in piles. Sealed plywood drawers look warm and clean, and they hide greasy parts so the bench surface stays photo-ready. The win is simple: you can close everything instantly when company visits or when you need floor space. This suits anyone who keeps wrenches, bits, and small parts on the bench top.
Start by building or buying a bench base that can accept drawer slides rated for the weight you store. Seal plywood with two coats of polyurethane, sanding lightly between coats so the surface wipes clean. Install box-style drawers with dividers, then mount drawer pulls centered for a uniform look. Load tools by size and weight, keeping the heaviest items in the bottom drawer and smaller items in the top two.
Editor's noteAdd a thin strip of felt or foam liner inside each drawer to prevent metal-on-metal clatter.
Skip thisDon’t skip sealing — raw plywood turns into a wipe-stain mess after a few months.
5. Magnetic Strip for Bits and Small Metal Parts
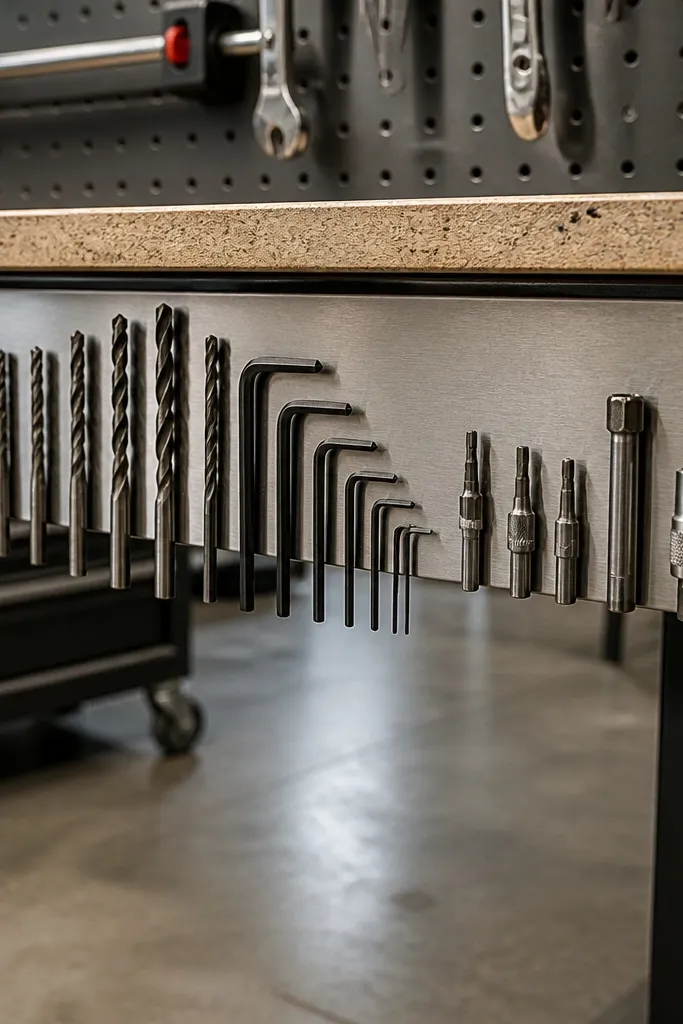
A magnetic strip is low-maintenance because it keeps small metal parts visible and stops them from disappearing into bins. It’s also visually satisfying — the bits line up cleanly, and the strip looks like a tidy tool gallery. Use it for drill bits, small hex keys, and other metal accessories you grab often. The look stays clean because everything sticks to the strip in a controlled layout.
Start by mounting a powder-coated or stainless magnetic strip to a sealed board or directly to wall studs. Measure and mark the placement so the strip is level, then secure it with appropriate screws. Arrange bits by length and diameter, leaving a small gap so you can pull one out without snagging neighbors. Add a small tray below the strip for items you don’t want stuck to magnets, like tape measures.
Editor's noteStick a small label under each row (e.g., “1/4 hex” or “HSS drill”) so you don’t have to search when you’re tired.
Skip thisDon’t mount it on drywall without studs — the strip will loosen and the whole layout will sag.
6. Fold-Down Wall Shelf for Paint, Solvents, and Rags
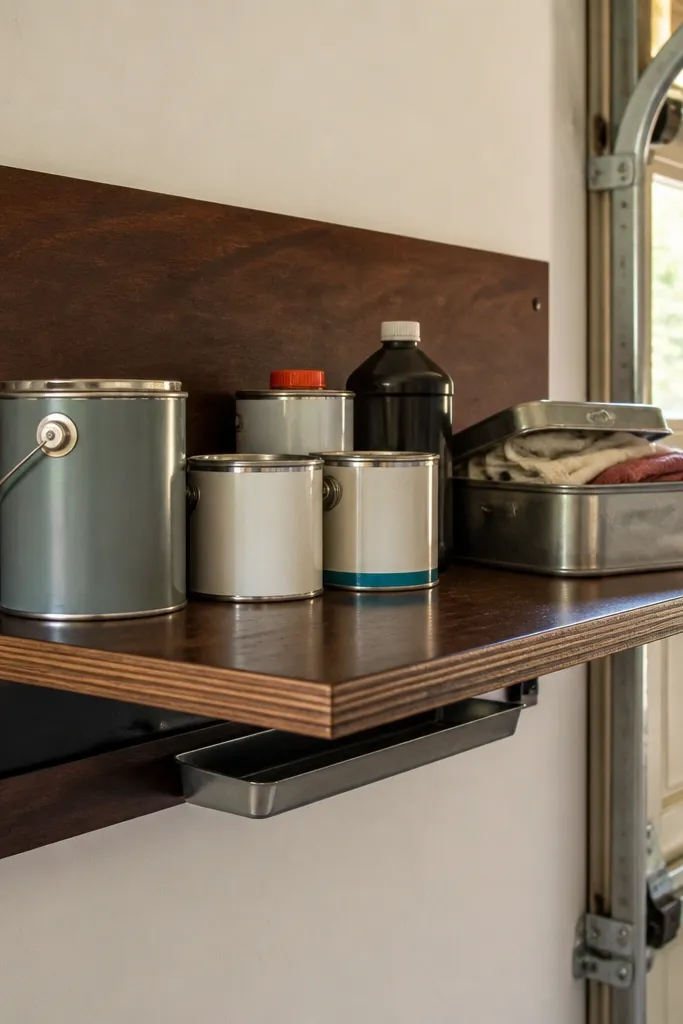
A fold-down shelf keeps messy liquids off benches and makes the garage look controlled instead of improvised. When it’s up, it reads like tidy wall decor; when you need it, it drops down and you work with everything at hand. Choose a sealed surface and use drip trays so spills don’t become stains. This is low-maintenance because the shelf is a single staging spot — no more bottles scattered around during projects.
Start by installing a heavy-duty wall bracket into studs and test the swing with a weight similar to your heaviest bottle. Use a sealed shelf board (polyurethane or marine-grade finish) and add a shallow drip tray underneath the shelf edge. Mount a small labeled rack for bottles and a sealed container for rags. Then set up a simple rule: anything liquid-based lives on the shelf only, and you return it the same day.
Use clear bottle labels with a date field so you can quickly rotate older products.
Don’t store solvent containers directly on bare wood — stains and odors soak in.
7. Airtight Latching Storage for Seasonal Extension Cords
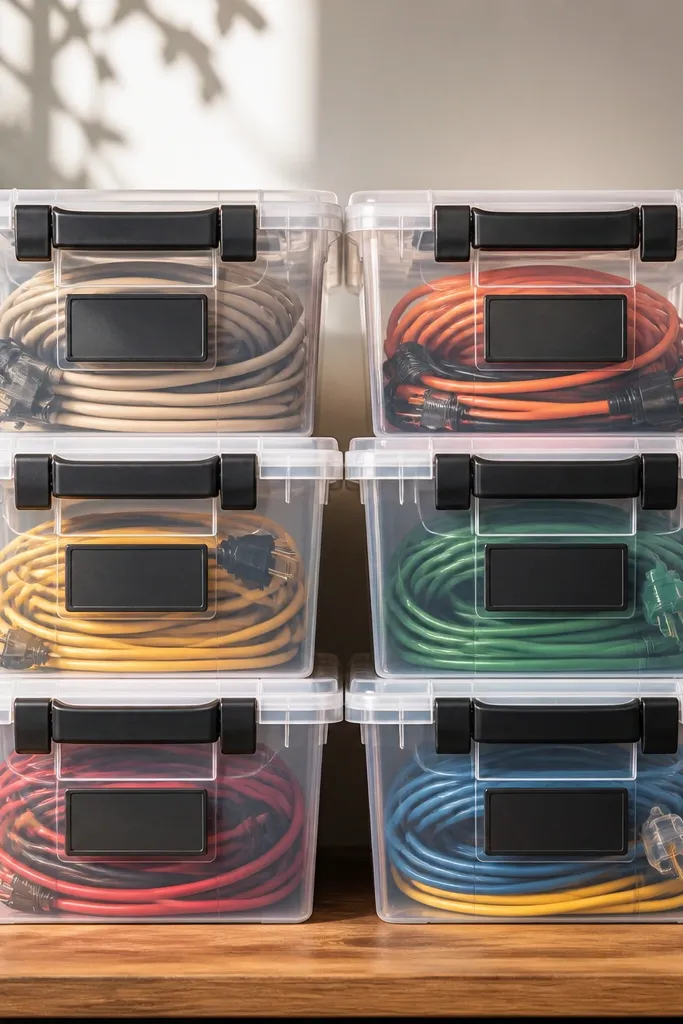
Extension cords are the classic garage clutter because they tangle and get shoved into whatever bin is closest. Airtight latching bins keep them neat and protect the cord ends from dust and grime. The look is clean because the bins stack with consistent fronts and labels. This is low-maintenance for cords you don’t use daily — you set them up, close the lids, and forget about the mess until the season returns.
Start by selecting latching bins with smooth sides and a size that fits a coiled cord without bending the plug. Coil cords neatly using a simple figure-eight method, then strap with Velcro ties. Label each bin with gauge and length like “12/3 — 50 ft.” Store bins on a shelf at a reachable height and keep the cords grouped by gauge so you don’t open the wrong one.
Editor's noteWrap a small piece of painter’s tape on the plug end with the cord length to speed up grabbing.
Skip thisDon’t coil too tight — thin cords can kink and fail faster.
8. Pegboard Cable Clips for Charger Wires
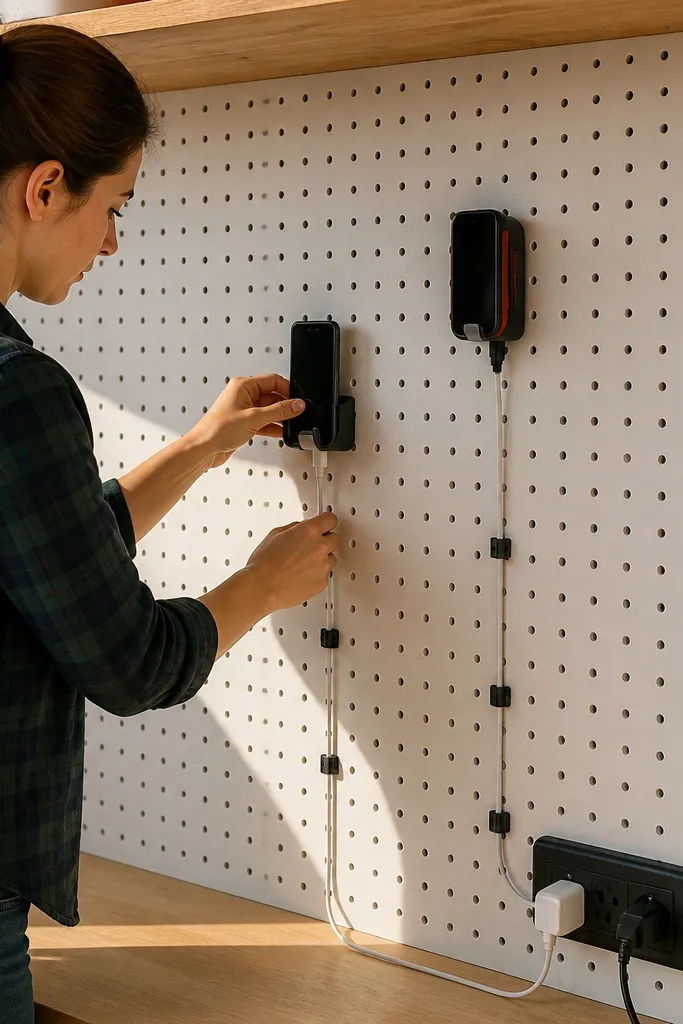
Chargers create chaos because cords coil into loops and then disappear behind tools. Cable clips mounted on pegboard keep wires in a neat line and make the garage look tidy even when you’re mid-project. It’s low-maintenance because you can put the charger back in one motion and the wire falls into place. This suits garages with lots of battery tools and phone/lighting chargers you rotate through.
Start by mounting pegboard or a small sealed board near your tool rail. Install small adhesive-backed cable clips or screw-in cable guides in a vertical row, then label each clip run with a simple tag (e.g., “Impact driver charger”). Coil each cord loosely, then tuck the plug end into a small hook while the wire rests on the clip line. Finally, keep a single small bin for spare charging bricks so they don’t wander.
Editor's noteUse consistent cord length sections by trimming excess tie points so every coil looks similar.
Skip thisSkip loose zip ties — they tighten over time and make cords harder to remove cleanly.
9. Wall-Mounted Bin for Screws, Bolts, and Washers
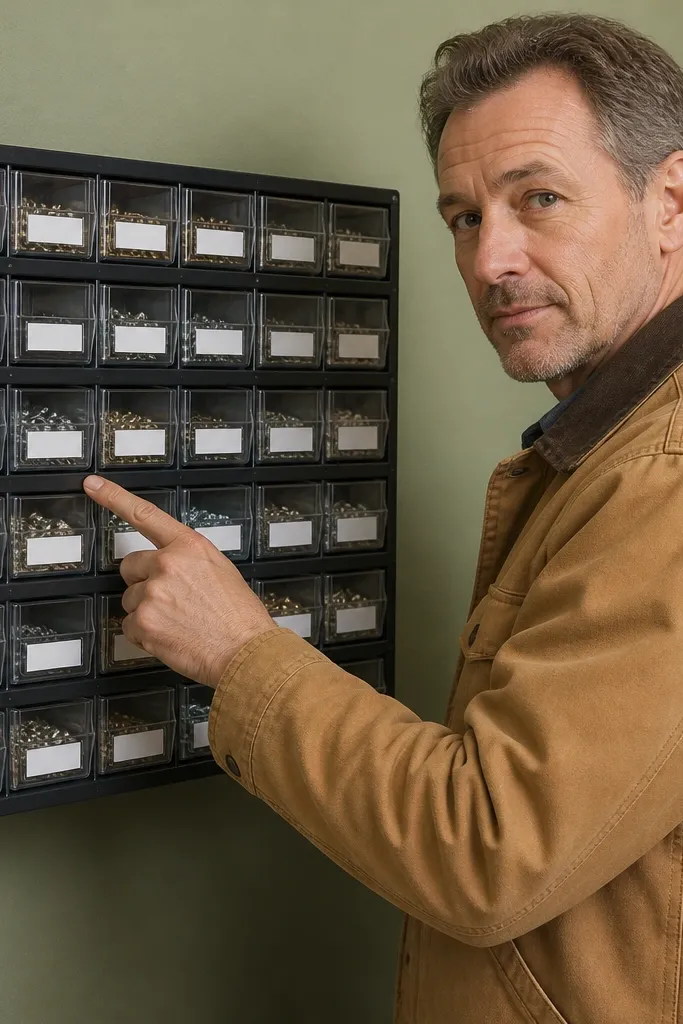
A dedicated screw and bolt wall organizer keeps small hardware from spreading across benches. The look stays clean when you use uniform bin fronts and clear labels, and the system stays low-maintenance because you don’t have to hunt through mixed containers. Go for bins with individual compartments or separate trays, so washers and screws don’t mix. This is ideal for people who do regular home repairs or build furniture projects in the garage.
Start by choosing bins with tight lids or drawer fronts so dust stays out. Mount them on a plywood backer or slatwall section at eye level, spacing them so each label is readable. Sort hardware by type first (screws vs bolts vs washers) and then by size using label codes like “M6 — Washers.” Fill each bin, then add a small “last refill date” sticker to the front to keep quantities predictable.
Editor's noteUse a label code system you can read in one glance, not a long description.
Skip thisDon’t combine mixed sizes in one bin — the mess comes back the first time you need one specific piece.
10. Paint-Stain Resistant Shelf Liner and Tool Layout

Shelf liner seems boring until you watch it save your whole garage look. A wipe-clean liner keeps drips and oils from turning shelves into sticky grime, and it makes everything look more finished. Pair it with a strict layout — same tool orientation, same spacing — and the shelf reads like a designed storage wall, not a dumping zone. This is low-maintenance because cleanup is a quick wipe, not a full scrub.
Start by cutting shelf liner to fit with a clean edge and no gaps where dust collects. Place it on metal or sealed wood shelves, then mark a simple grid with painter’s tape so bins and tools go back in the same spots. Use uniform containers so the visual rhythm stays consistent across the shelf. Finally, store oily rags and brushes in lidded containers so the liner stays clean longer.
Editor's noteUse a liner color close to your bins, like medium gray, to hide scuffs.
Skip thisSkip textured liners — they trap grit and become harder to clean than smooth surfaces.
11. Stackable Clear Bin Tower for Auto Fluids Accessories
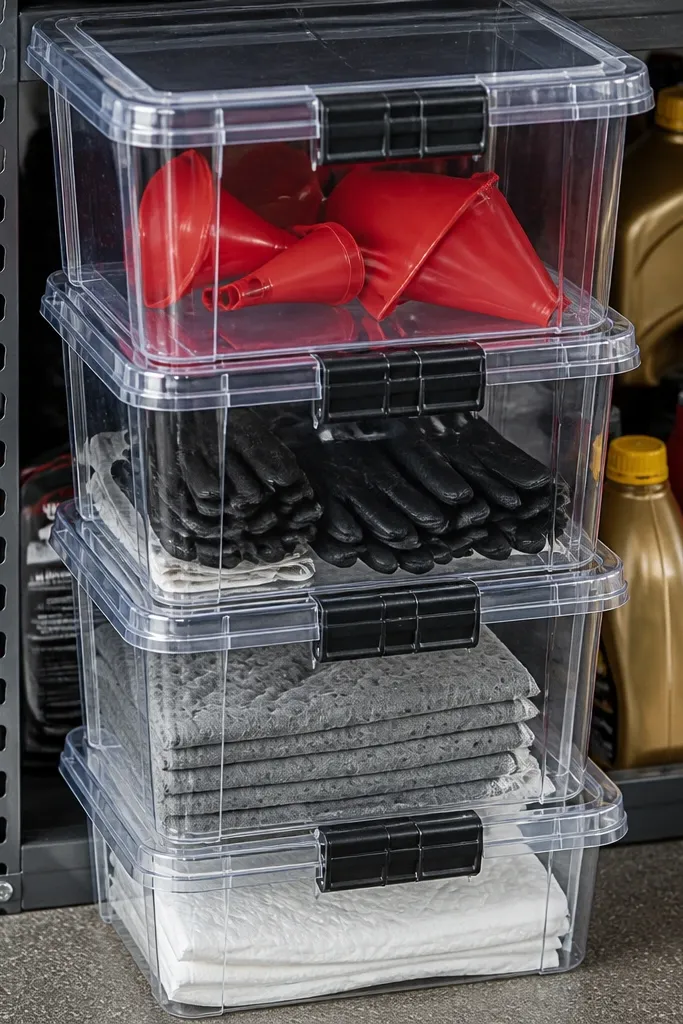
A stackable clear bin tower keeps automotive accessories from turning into a scattered pile of funnels, gloves, and spill pads. The tower looks sleek because the fronts align, and you can see what you have without opening lids. It’s low-maintenance because you pull one tower section for a job and put it back at the end. This works best for garages where you do occasional car maintenance and want the area to look tidy between projects.
Start by choosing bins that stack securely and have clear fronts and lids that close tight. Label bins by function, like “Funnel & Gloves,” “Spill Pads,” and “Filters/Adapters.” Build a stable tower on a shelf or in a corner using a base tray to catch drips. Keep the heaviest items on the bottom bin and lighter accessories above, then store the tower in a consistent spot so it doesn’t get moved around.
Editor's noteAdd a small drip tray under the bottom bin if you store anything that can leak.
Skip thisDon’t mix liquids and dry accessories in the same bin — you’ll end up wiping everything.
12. Tool Drawer Inserts With Labeled Foam Trays
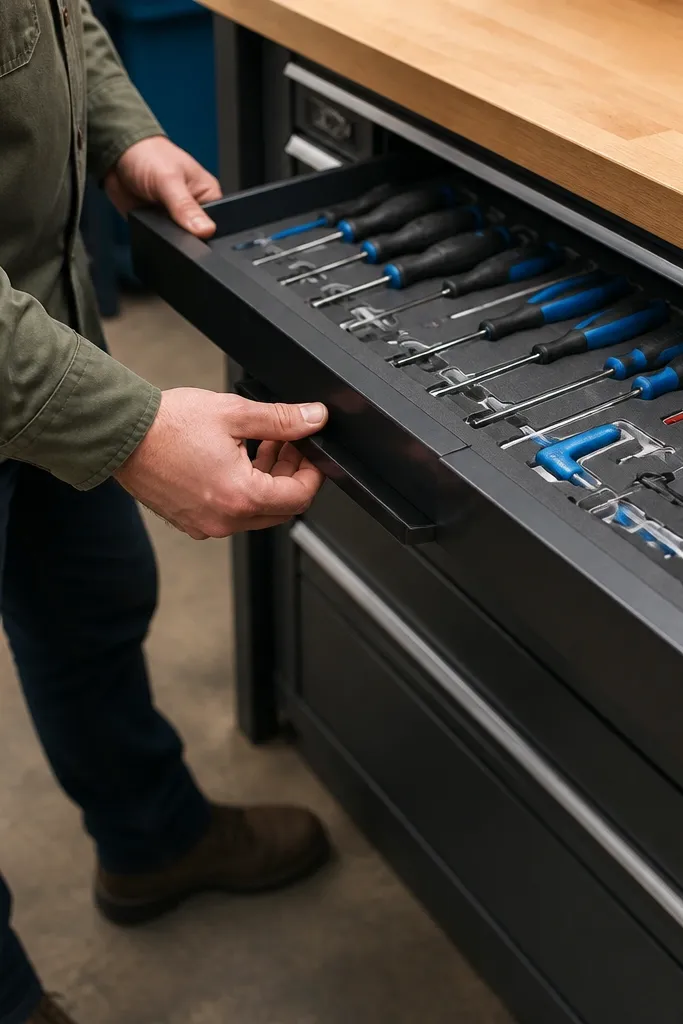
Foam trays in drawers are one of the best “low-maintenance” methods because they stop tools from sliding around and they make missing items obvious. The look is clean because every tool sits in a shaped pocket, and the label tells you where it returns. This is especially good for screwdrivers, small hand tools, and measuring tools you don’t want loosely rolling. It also reduces noise and keeps the drawer from turning into a metal junk drawer.
Start by measuring your drawer interior and cutting foam inserts to fit snugly without gaps. Choose closed-cell foam so it wipes clean and doesn’t absorb oil. Mark tool outlines on the foam, then carve pockets using a sharp utility knife. Label each section with a label maker, then insert tools in the same orientation every time and test the fit by lifting one tool at a time.
Editor's noteCarve pockets slightly tighter than you think you need; loose foam turns into a clutter magnet.
Skip thisDon’t use soft, open-cell foam — it tears and holds stains.
13. Wall-Mounted Long-Handle Organizer With End Caps
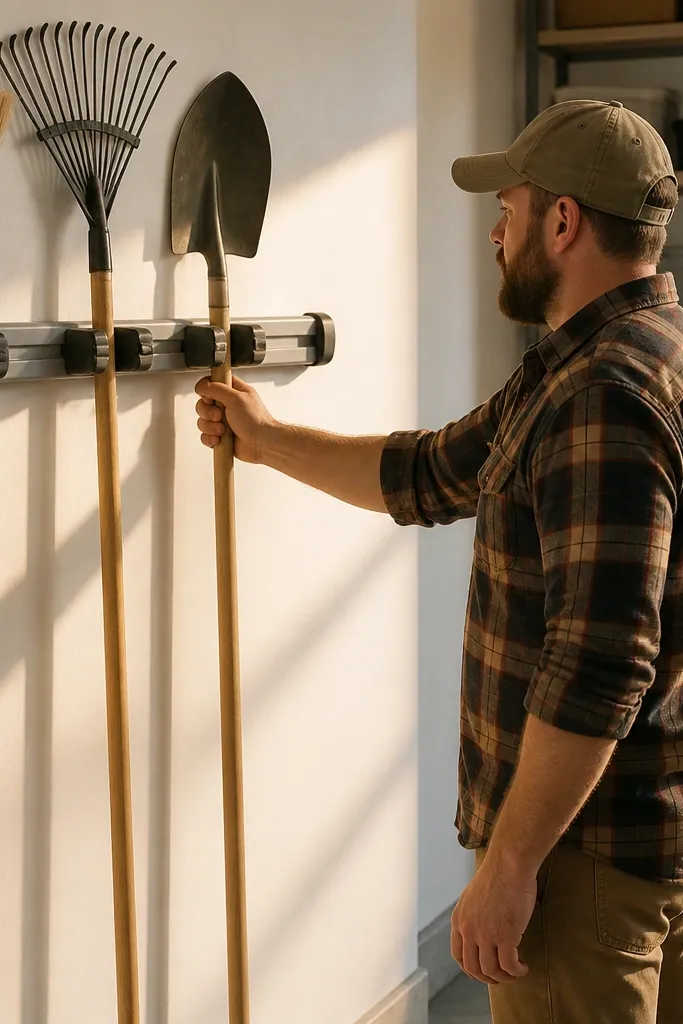
Long-handled tools look chaotic when they lean against walls or pile in corners. A wall rack with end caps keeps them upright, separated, and aligned — the whole garage instantly looks more designed. It’s low-maintenance because you return tools by placing the handle into the same slot each time. This suits brooms, rakes, shovels, and yard tools stored in the garage, especially if you want that clean wall look.
Start by measuring the longest handle and choosing a wall rack with adjustable or fixed spacing. Mount the rack into studs and keep the top bar high enough that bristles don’t drag on the floor. Add end caps or soft separators between handles so metal doesn’t scuff and so tools don’t slide. Finally, group by use: yard cleaning tools in one section, snow or seasonal tools in another.
Use a rack with a slight upward angle so tools settle back into place instead of creeping out.
Don’t mount on a single anchor point — long handles create leverage that pulls racks loose.
14. Under-Bench Bin Storage With Pull-Out Rails
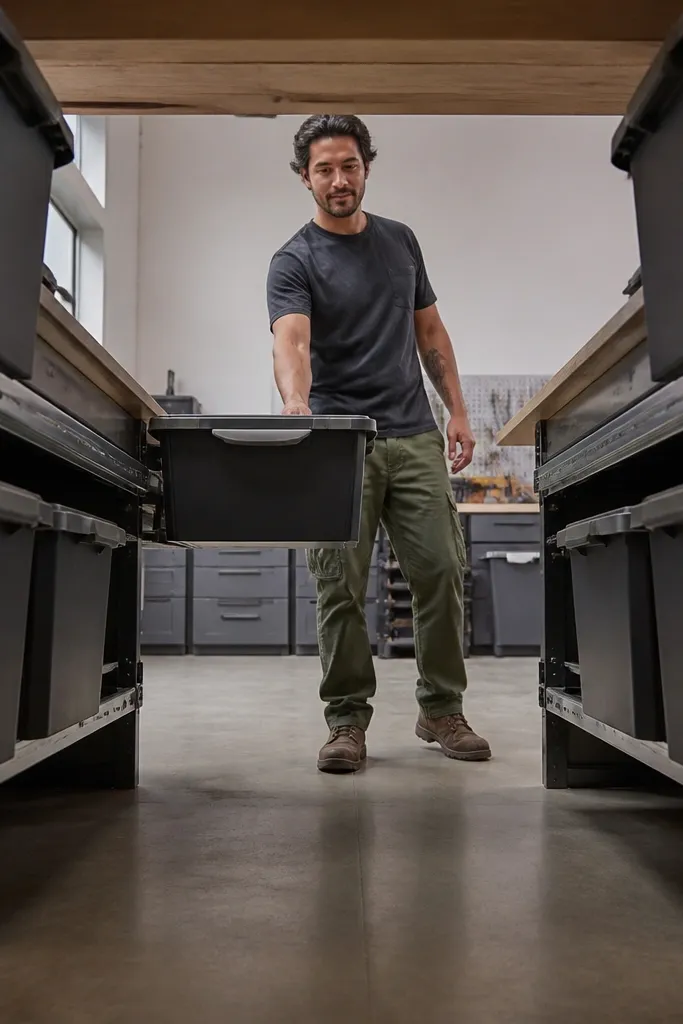
Under-bench storage is low-maintenance when it pulls out cleanly. Bins on pull-out rails keep the area usable and stop the classic problem of reaching into a dark gap and dumping everything back. The look stays neat because bin fronts stay visible and aligned, not hidden behind piles. This works for workshop consumables like sandpaper, shop towels, spare fasteners, and small replacement parts.
Start by installing drawer slides or heavy-duty pull-out rails under the bench frame. Use bins with flat sides that fit the slide width, and make sure there is at least 1/2 inch clearance for smooth movement. Label the bin fronts and keep items grouped by how frequently you grab them. Then add a simple rule: only consumables go under the bench, and anything greasy gets a lidded container.
Use bins with finger pulls so you can open them without grabbing the plastic edges.
Skip oversized bins — they tip and force you to shove items in.
15. Corner Workbench Clamp Station With Locking Hooks
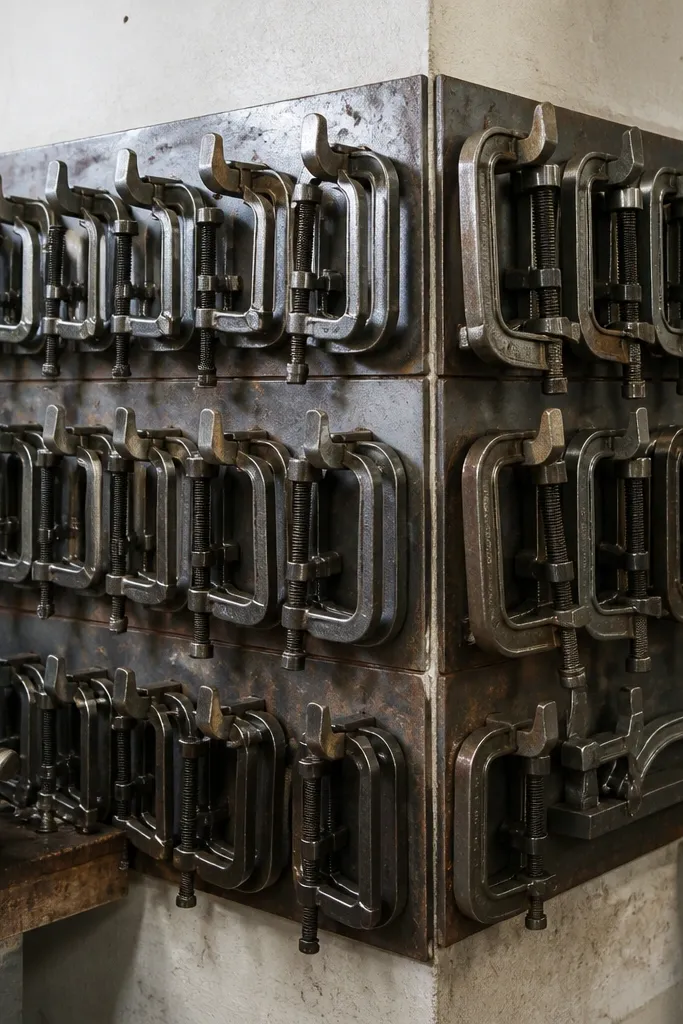
Clamps are always in the wrong place because they’re bulky and awkward. A corner clamp station with locking hooks keeps them aligned and visible, and it looks sharp because clamps hang in a repeating pattern. It’s low-maintenance because you don’t stack them on the bench where they slide and create a mess. This setup is good for woodworking clamps, metal clamps, and any garage project where you need multiple clamp sizes.
Start by mounting a corner board into studs so it can handle the clamp weight. Install locking hooks spaced by clamp width so each clamp hangs without overlapping. Add a narrow shelf at the top for clamp pads or spare screws, then label hook positions by clamp size. Load clamps and test the spacing by removing one at a time; if they bump, adjust the hook spacing before you commit.
Add small foam sleeves to clamp jaws so they don’t scratch the board and the station stays clean.
Don’t hang clamps by the jaw alone — they can twist and look messy in minutes.
16. Ceiling-Mounted Storage for Ladders and Long Boards
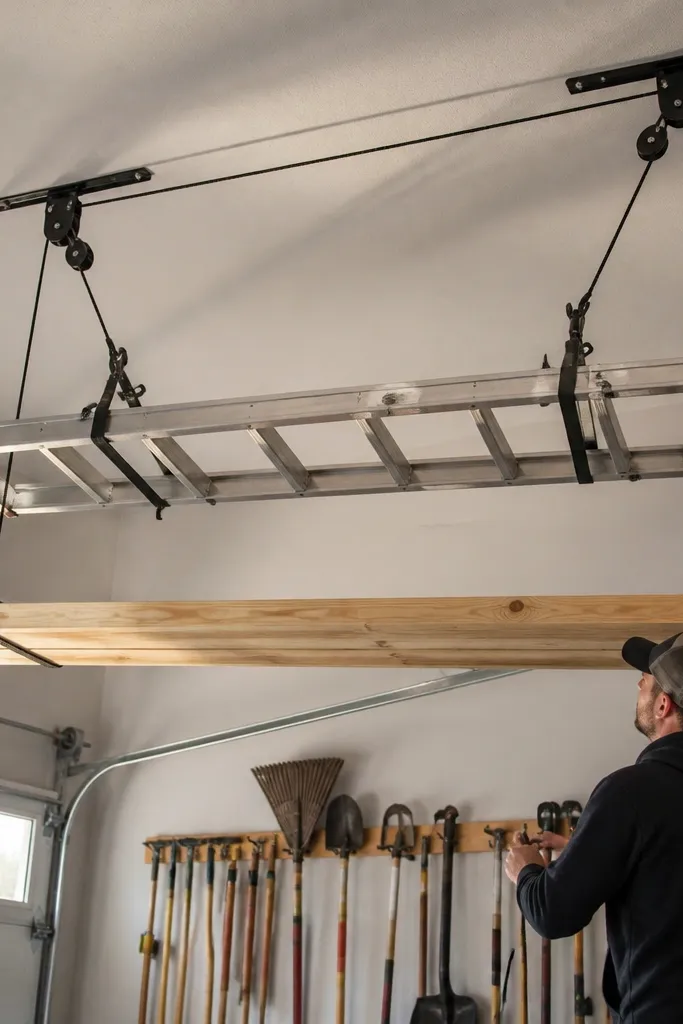
Ceiling storage cleans up the garage floor instantly and keeps long items from leaning everywhere. It looks tidy because you remove the visual clutter and keep the walls for tool organization. The low-maintenance part is that you lift and lower with controlled straps instead of dragging heavy items around. This suits ladders, extension poles, and long boards when you want the floor to stay open.
Start by installing a ceiling track or hoist system rated for your item weight. Use straps with protective sleeves so the ladder rails don’t scrape the surface. Measure clearance above the floor so you can store items without catching on garage door tracks. Finally, add a simple label system on the hoist controls so you know which strap set lifts which item.
Editor's noteStore the ladder with its feet facing the same direction every time — it reduces fiddling and keeps the setup consistent.
Skip thisSkip DIY ceiling anchors — use the rated hardware and mount into joists.
17. Magnetic Label Strips for Reconfigurable Storage

Magnetic label strips keep your garage organization from going stale. When you finish one project and start another, you can swap labels without peeling tape off bins or repainting cards. The look is neat because labels align in a consistent place, and the strips read like part of the system. This is low-maintenance because it removes the “relabeling pain” that turns bins into mystery boxes.
Start by attaching metal label plates to bin fronts using screws or strong adhesive designed for plastic. Install magnetic label strips that can slide on and off, then write labels on durable cardstock protected with clear laminate. Keep label text short and consistent, using a format like “Fasteners — 1/4” or “Tools — Wrenches.” Finally, store a small label maker with spare laminated cards so you can update the system right after a project ends.
Editor's noteUse a label font size that stays readable from 6 feet away.
Skip thisDon’t put labels on curved plastic — they peel and look sloppy quickly.
18. Wall Trash and Recycling Station With Closed Front Bins
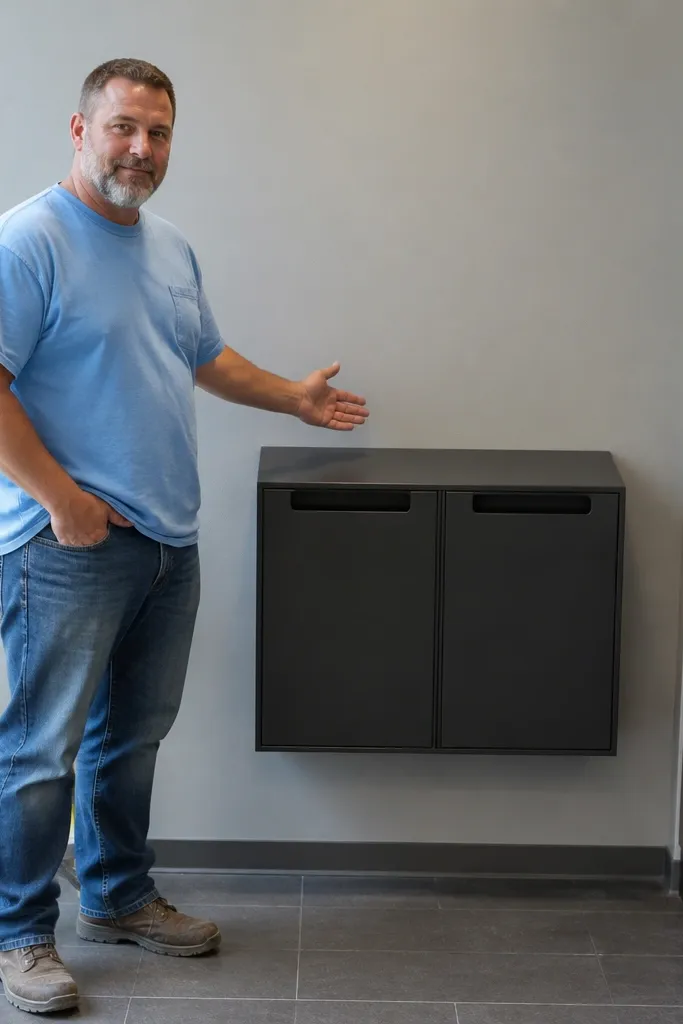
A clean garage is easier to maintain when trash doesn’t pile up on the floor. Closed-front wall bins keep wrappers, packaging, and scrap out of sight, and the labeled doors make the station look intentional. It’s low-maintenance because you always know where waste goes during a project. This setup also helps your workshop look photogenic since the floor stays clear and the wall looks organized.
Start by mounting a small wall frame to studs, then install two closed bins with swing doors or lids. Add a simple label panel above each bin with clear icons or text like “Cardboard” and “Trash.” Place a small catch tray under the opening to prevent drips and keep the base clean. Then set a rule: scraps go into the bins immediately, and the station gets wiped once a week with a damp cloth.
Choose bins with smooth plastic doors so they wipe clean without grime buildup.
Skip open bins — they look messy fast when you’re working.
19. Wipe-Clean Floor Tool Mat for Benches and Work Zones
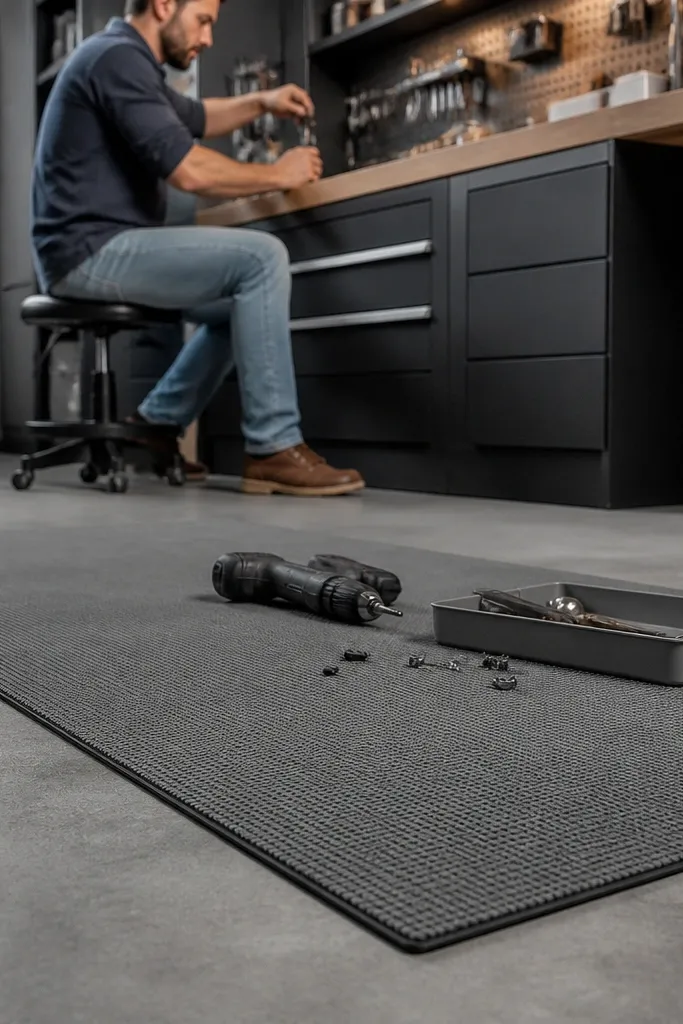
A floor mat for your work zone keeps the garage from looking dirty even when you’re mid-project. The mat gives you a clean boundary for tools and parts so you don’t scatter items across concrete. It’s low-maintenance because you sweep and wipe the mat instead of scrubbing the whole floor every time. This suits garages where you do messy tasks like sanding, cutting, or quick mechanical work and need the space to look tidy.
Start by choosing a thick, wipe-clean mat with a textured surface that won’t become slippery. Cut it to fit the work area and place it in front of your bench or tool station. Add small painter’s tape lines or a printed label strip on the mat to mark tool staging zones like “Tools,” “Parts,” and “Trash.” Finally, commit to the boundary: everything you set down goes on the mat, and everything leaves with you.
Use a mat color close to your bin color palette so the zone looks designed, not temporary.
Don’t use thin foam mats — they tear and trap grit.
20. Uniform Hook System for Hammers, Levels, and Hand Saws
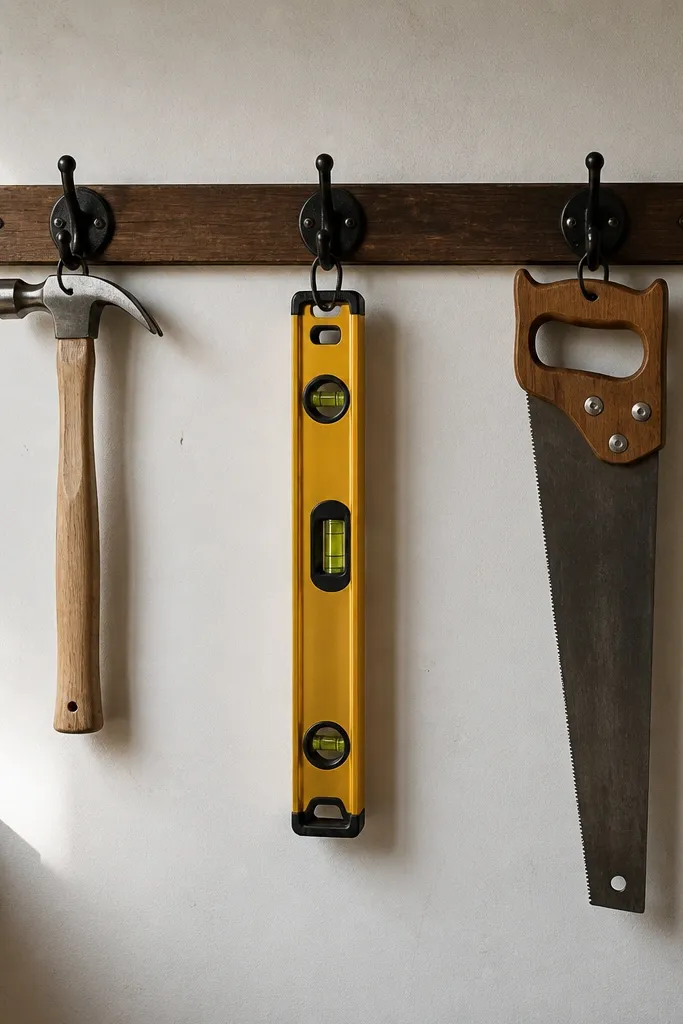
A uniform hook system makes the garage wall look like a real workshop. When every tool hangs from the same style of hook and in the same orientation, the whole area reads clean. It’s low-maintenance because you don’t have to decide where each tool belongs — the hook positions are fixed. This is ideal for long hand tools like levels, hand saws, hammers, and pry bars that are too awkward for drawers.
Start by installing a mounting board or slatwall on studs, then choose one hook style and stick to it. Mark hook locations at consistent heights so tools don’t overlap visually. Hang tools by handle type first, then adjust hook height so the tool head clears the floor and doesn’t touch other tools. Finish by adding a small label strip at the top listing tool groups like “Measure,” “Strike,” and “Cut.”
Hang levels with the long edge parallel to the board; it keeps them straight and easy to grab.
Don’t mix hook styles — different hooks create a messy, inconsistent look.
21. Sealed Storage Cabinet for Oily Parts and Grease Rags
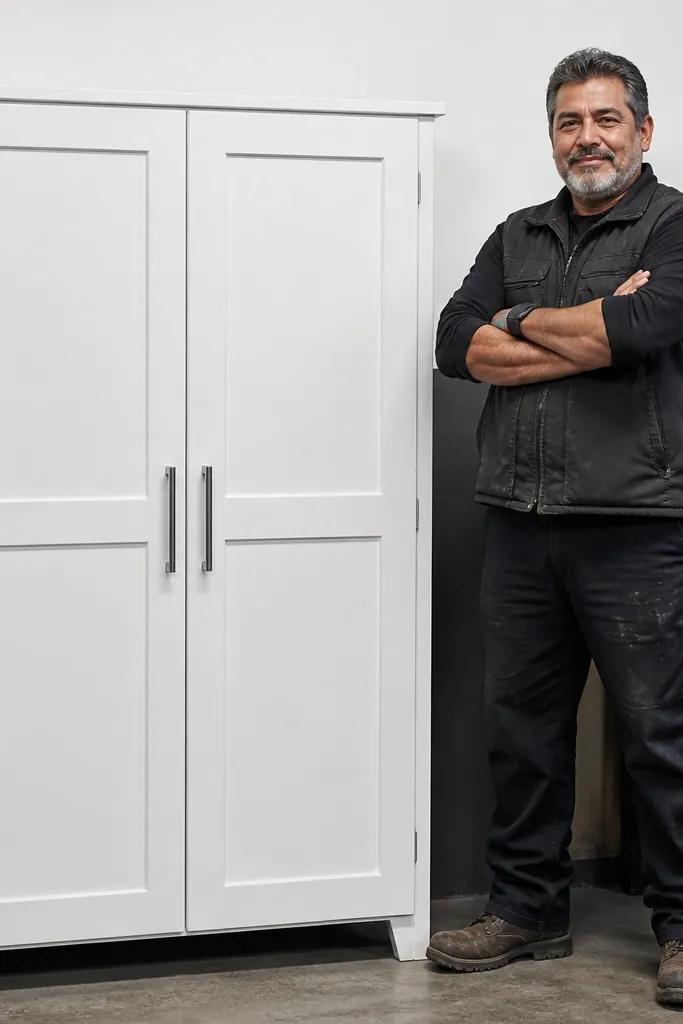
A sealed storage cabinet is the low-maintenance answer for the stuff that makes garages look grimy: greasy rags, oily parts, and spill pads. Closed doors hide the mess and protect surfaces from dust, so you’re not cleaning constantly. The look stays sharp because the cabinet fronts create a clean block on the wall. This setup works best when you have a bench area that tends to collect oily leftovers after maintenance jobs.
Start by using a metal cabinet or a sealed wood cabinet with a wipeable finish. Install it on studs at a height that lets you access items without reaching across tools. Add labeled bins inside the cabinet and include a small lidded container for used rags. Place spill pads or absorbent material in a front bin so you can grab it immediately when needed. Seal the cabinet shelves with an additional coat if you used wood so oil doesn’t soak in.
Editor's noteUse a liner on the bottom shelf so leaks don’t permanently stain the cabinet.
Skip thisDon’t store greasy items on open shelves — they stain and the whole space looks off.
22. Corner Shelf With Pull-Out Tray for Paint Brushes
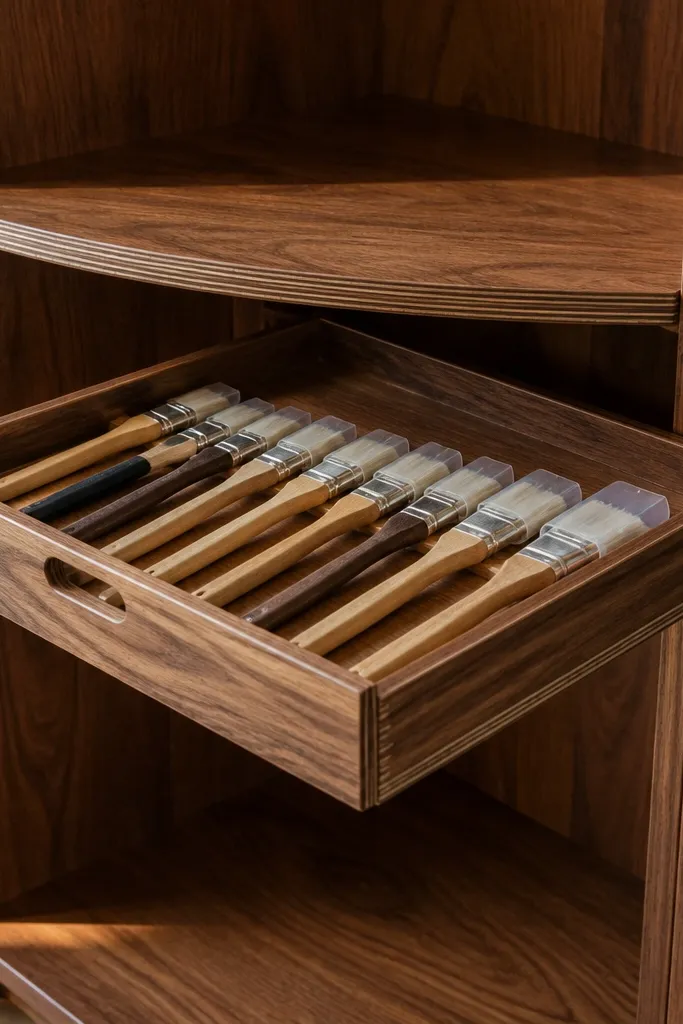
Paint brushes and small finishing tools make garages look messy because they end up in cups, on shelves, and near the floor. A corner shelf with a pull-out tray keeps them contained and makes the area look tidy when you glance across the garage. The pull-out style is low-maintenance because you can access everything without dumping the tray onto your bench. This suits touch-up kits, brush sets, and small finishing supplies.
Start by building a corner shelf with a sealed surface and a pull-out tray mounted on slides. Install the shelf into studs and keep the tray width wide enough for brush handles without forcing them to bend. Add small slots or cup holders on the tray for brush sizes and a sealed jar holder for solvent-free storage. Label the front edge of the tray by brush type and keep leftover paint in closed containers stored beside the shelf.
Use a removable tray liner so dried paint drips don’t become a permanent mess.
Don’t store brushes loose in open cups — they dry out and the garage gets sticky.
23. Workbench Pegboard Backer With Tool Line Near the Vise
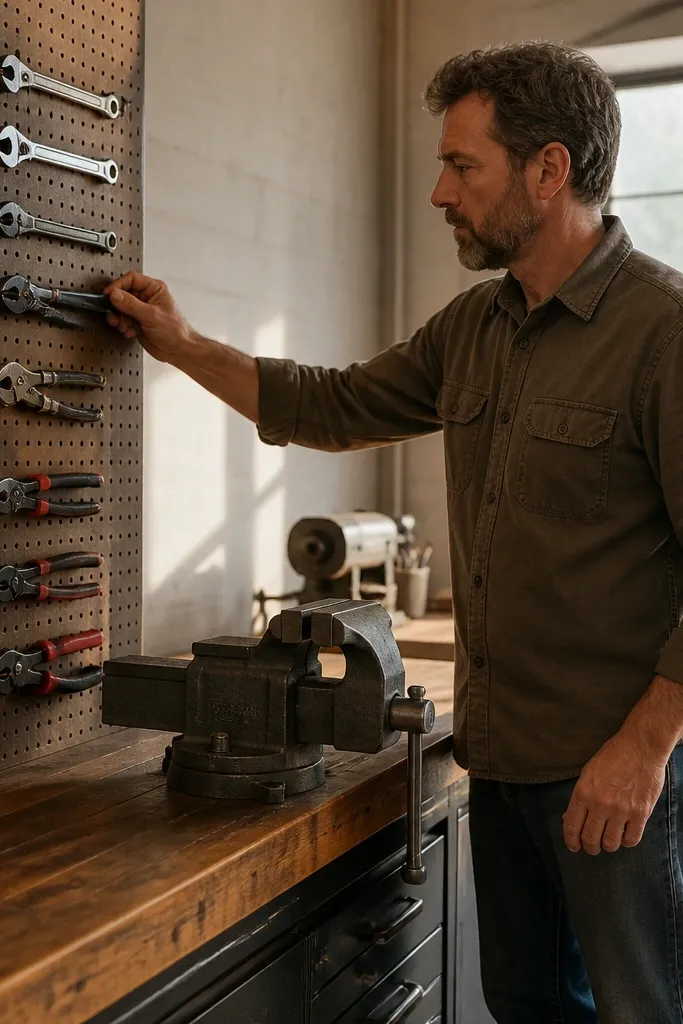
A pegboard backer behind the workbench makes tool placement automatic because the tools you use at the vise are always in one vertical line. It looks clean because you’re organizing the exact area you work in, not random walls farther away. The low-maintenance win is that you stop walking back and forth for tools, and you stop leaving tools on the bench. This suits garages with a vise, a drill press area, or a main bench where projects start.
Start by mounting pegboard behind or next to the bench so the tool reach is short. Install hooks at a height where tools hang just above the bench line, and keep the spacing consistent. Add a small shelf on top for frequently used consumables and a bin for frequently used bits. Finally, set up a “return rule” for the vise zone: when you’re done, every tool goes back to its hook before you move to the next step.
Put the most-used tools in the center strip so your arm movement stays consistent.
Skip random hook placement — if the layout isn’t repeatable, it turns back into clutter.
24. Cable-Managed Power Strip Station in a Box
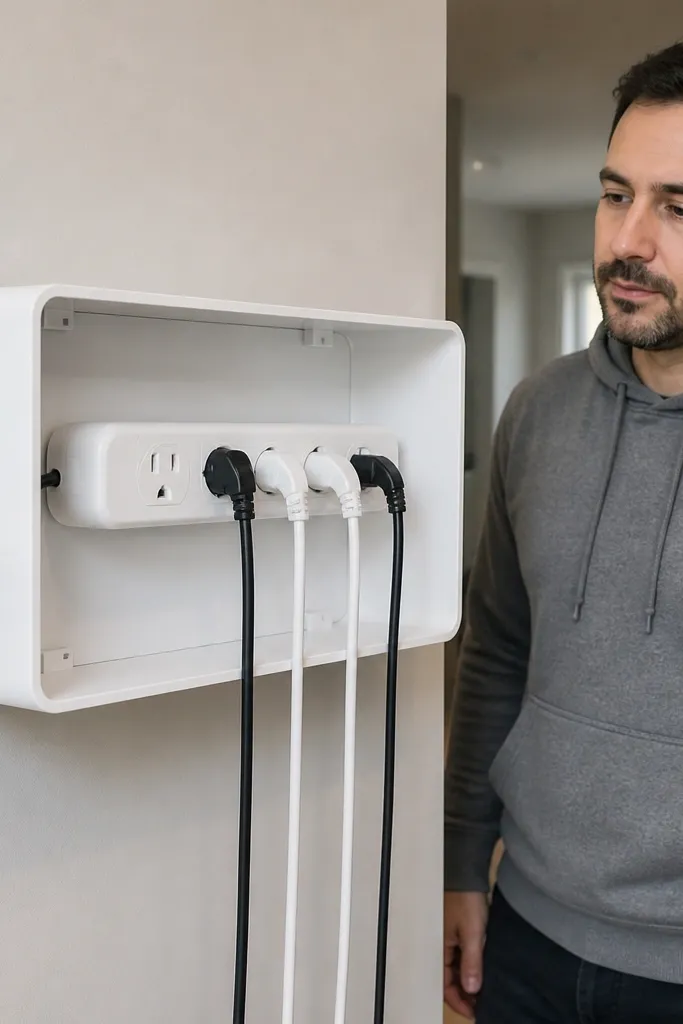
A power strip station inside a wall box is low-maintenance because it stops cords from becoming a tangled mess across the floor. You get a clean look because the outlet faces are contained and the cords route neatly into the box. It also improves safety by keeping connections off dusty surfaces and reducing trip hazards. This is ideal for garages where you run chargers, lights, and small shop tools near the bench.
Start by installing an electrical box or a ventilated power strip enclosure into a safe wall location with proper mounting. Mount a power strip inside and secure it with a cable clamp so the strip doesn’t swing. Route cords through strain relief grommets so the cables don’t rub against edges. Label each outlet if you have multiple devices, then add a short cord hang point so you coil and store slack neatly after use.
Use velcro cable ties, not tight wraps — they keep the cords looking neat and are easier to remove.
Don’t run cords under rugs or mats — keep them visible and protected.
25. Flip-Top Tool Totes With Drop-Lock Lids
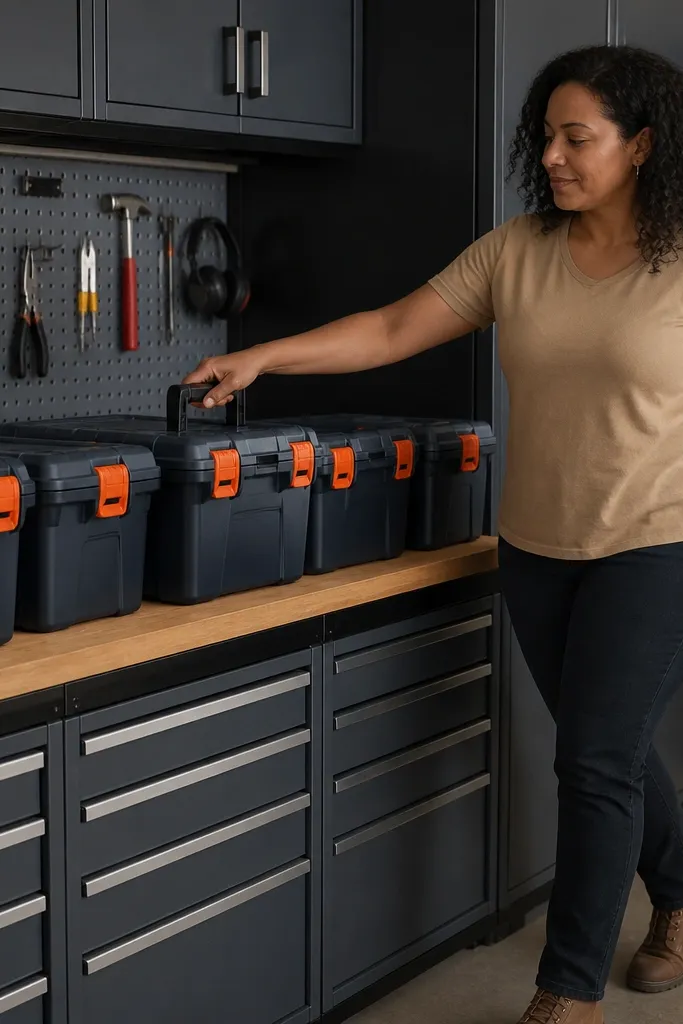
This is low-maintenance Garage Organization for people who hate digging through bins. Each tote holds one job set — like auto fasteners, sanding supplies, or electrical basics — and the lid locks shut so nothing spills when you grab it one-handed. The flip-top style also makes the tote look tidy from across the garage because the lid stays aligned and flat, not flopping open. Build it once, mount a row on the wall, and you get a clean “grab and go” system that still reads visual and intentional. It fits best in a workshop garage where you do frequent small projects and want the tool area to stay calm even on busy weekends.
Cut two tote bodies from 3/8-in plywood or 1/2-in exterior-grade plywood, sized 14 in wide x 10 in deep x 6 in tall. Use a 3/4-in thick hinge-side strip and attach a flip-top lid cut from 1/2-in plywood, then add a small front lip so the lid sits flush when closed. Install a simple drop-lock using a spring-loaded hasp on the inside edge of the lid and a matching strike plate on the tote front; keep the lock centered so lids look uniform. Mount a continuous 1x4 rail to studs at 48 in above the floor, then screw the tote backs to the rail using two 1/4-in hanger bolts per tote so they hang tight without wobble. Finish the wood with two coats of wipe-on polyurethane, then add vinyl label plates on the front so job sets stay obvious in seconds.
Use rubber bumpers on the underside of the lid so it closes softly and stays quiet when you lock it.
Avoid using thin hinges or skipping the lock — a flimsy lid gets stuck open and the whole system turns into clutter fast.



