
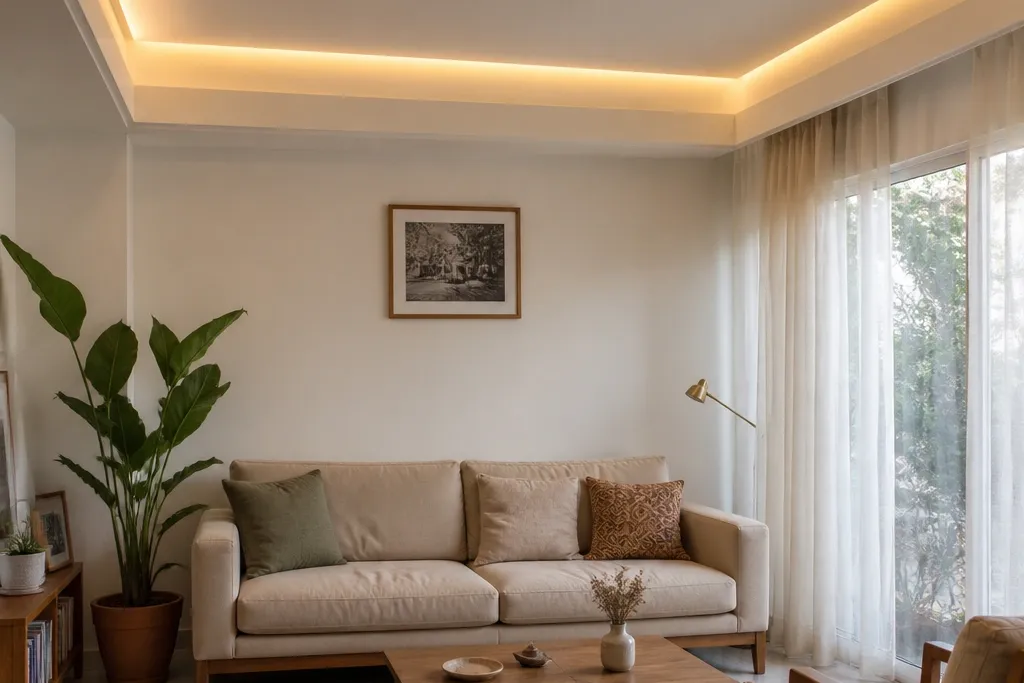
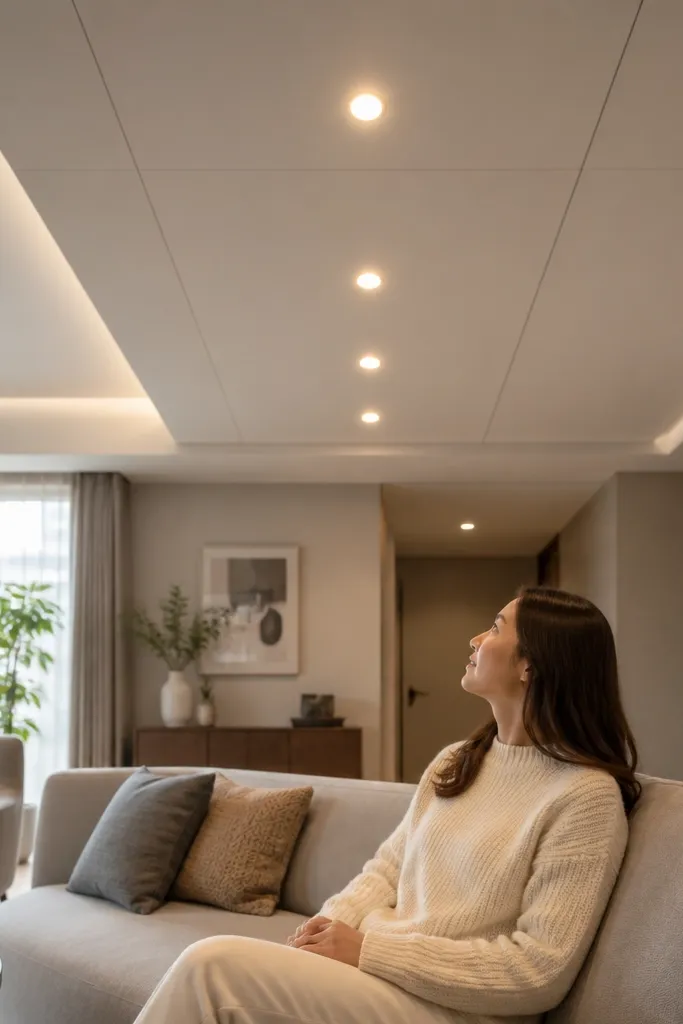
1. Center Tray Ceiling with Soft LED Cove
This is the clean, modern option for a small living room because it frames the center without dropping the whole ceiling. The tray creates a clear focal point, and the concealed LED cove makes the edges look crisp instead of like a patchwork border. Go with a matte white or warm off-white so the glow looks smooth, not shiny. It stays low-maintenance because you’re painting fewer surfaces and keeping the lighting indirect, so dust doesn’t show as much as it does on glossy finishes.
Start by marking the room center and snapping a grid line on the ceiling where the tray edges will land. Build a rectangular frame for the tray using metal channels, then add a second inner level to form the step — keep the LED channel depth around 25-35 mm so the strip doesn’t glare. After board installation, tape and joint all seams, then apply two coats of ceiling primer and a final matte white paint. Finish by installing a concealed LED strip in the cove with a diffuser cover, and test the glow before final paint touch-ups.
Use a diffuser channel for the LED; the glow should look like a soft band, not a visible line.
Don’t skip a second joint-compound pass — hairline ridges show under side lighting.
2. TV Wall Drop with Hidden LED Strip Line
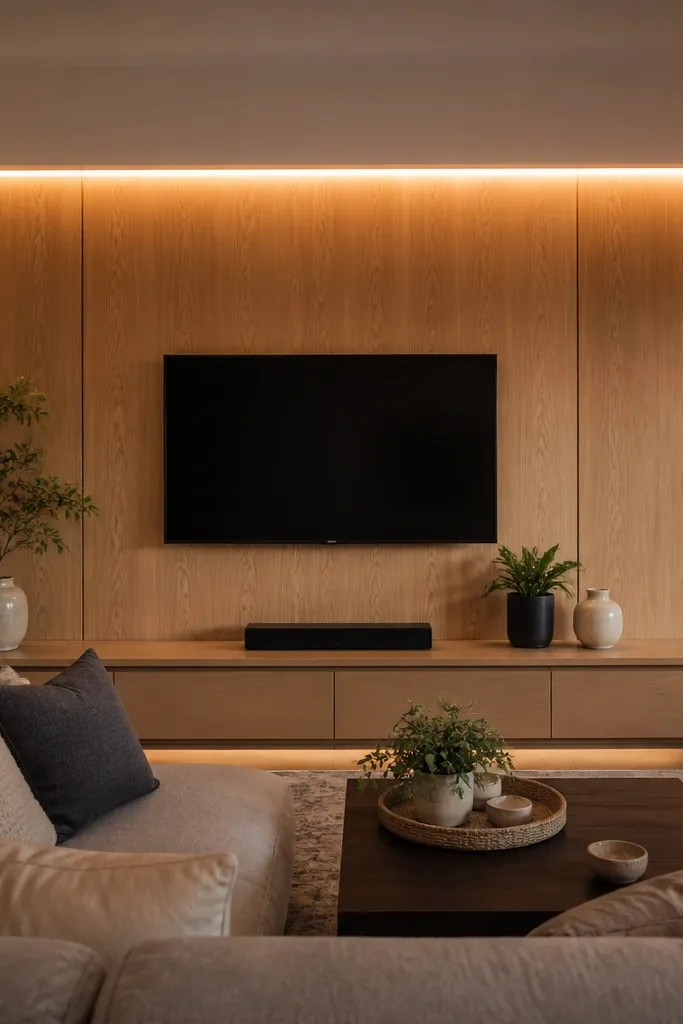
If your living room is small, the TV wall is where you want the ceiling to do the heavy lifting. A narrow drop above the TV creates depth, and a hidden LED strip gives that modern “floating” look without a big ceiling change. This design is low-maintenance because the lighting is controlled to one line, so you’re not dealing with multiple cutouts that collect dust. It also hides wiring runs cleanly, which matters when your TV mount, set-top box, and router sit along the same wall.
Editor's noteKeep the LED strip about 15-20 mm back from the front edge of the channel to reduce glare.
Measure the TV wall width and decide on a drop width that’s about 10-15 cm wider than the TV span. Build a perimeter frame across that section, then board the drop with 9.5 mm or 12.5 mm gypsum for a straight face. Route the LED strip in a concealed channel so the light hits the wall and ceiling surface gently. Joint, sand, prime, and paint the drop and ceiling in one consistent schedule, then install the LED strip and controller after the paint cures.
Skip thisDon’t place the LED too close to the board edge — you’ll see bright dots and uneven brightness.
3. Two-Tier Perimeter Frame with Corner Glow
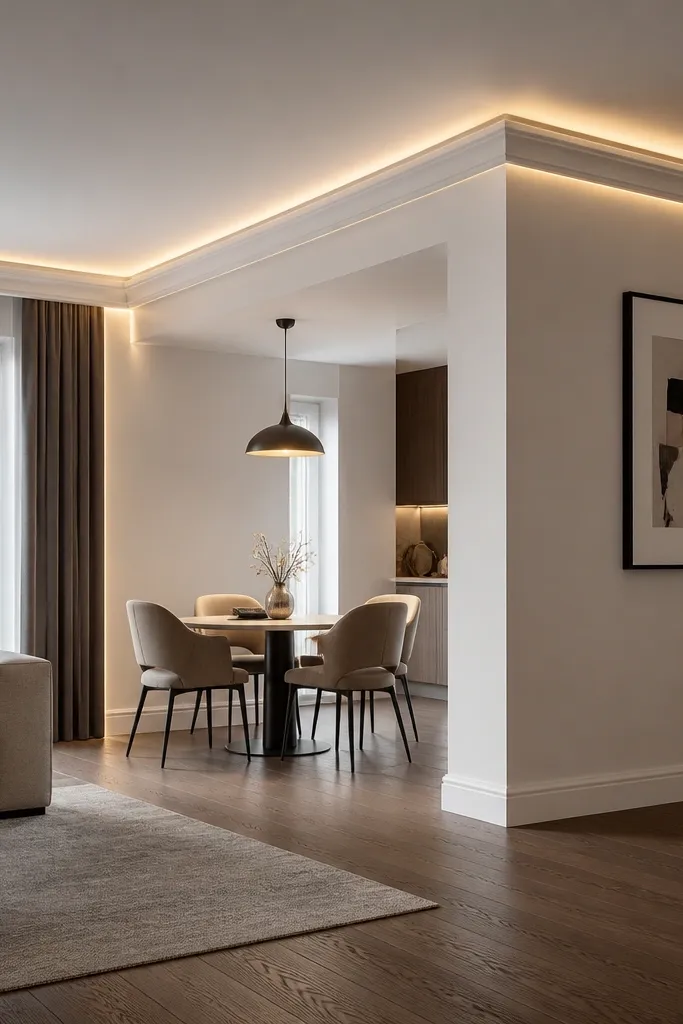
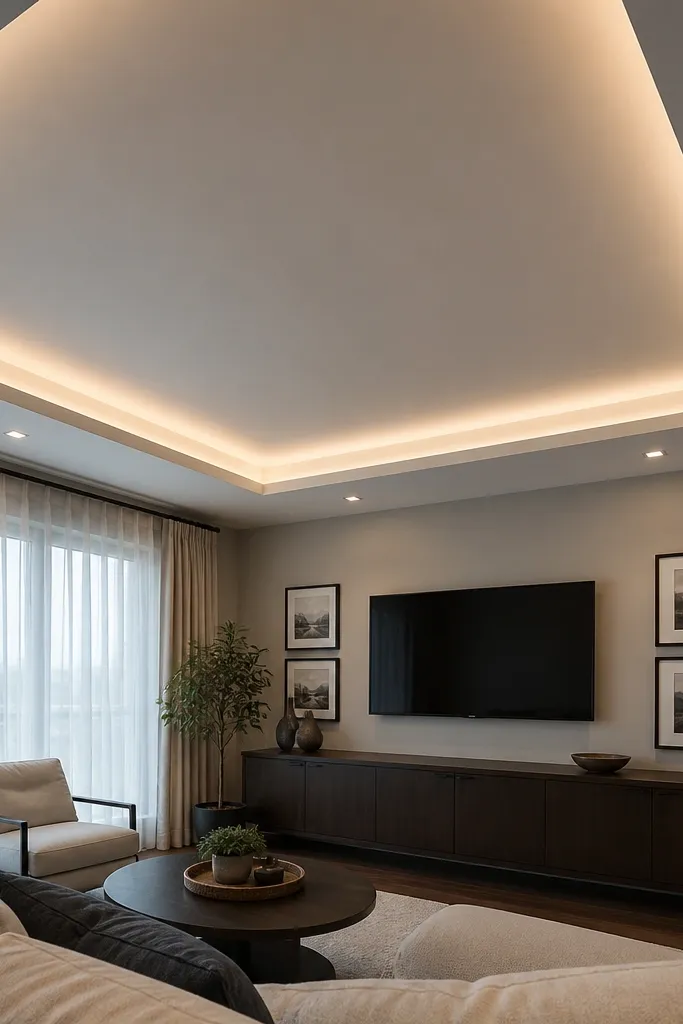
This perimeter style makes a small room feel taller because it adds depth at the edges, not a giant drop in the center. The second tier gives a sharp, architectural border, and the corner glow adds that modern finish that photographs well. It’s low-maintenance because the design uses long, continuous lines that hide dust better than lots of small geometric cutouts. Keep the tones consistent — one matte white and one light gray accent looks cleaner than bold color blocks on small ceilings.
Mark a perimeter outline 6-8 cm down from the main ceiling for the first tier, then set the second tier another 4-6 cm lower. Install the metal main runners first, then add cross tees to keep the board edges supported — spacing around 400-450 mm is a safe target for most DIY frames. Fit boards on both tiers, then use corner bead for crisp outer edges. Joint, sand, and prime all tiers, then paint. Install a concealed LED strip in the corner channel, using a diffuser so the glow spreads evenly.
Corner glow looks best with 2700K-3000K LEDs and a diffuser cover — it should read as warm ambient, not decorative lighting.
Don’t skip corner bead; without it, corners round off and the whole look turns soft.
4. Geometric Grid Ceiling with Recessed Square Coves
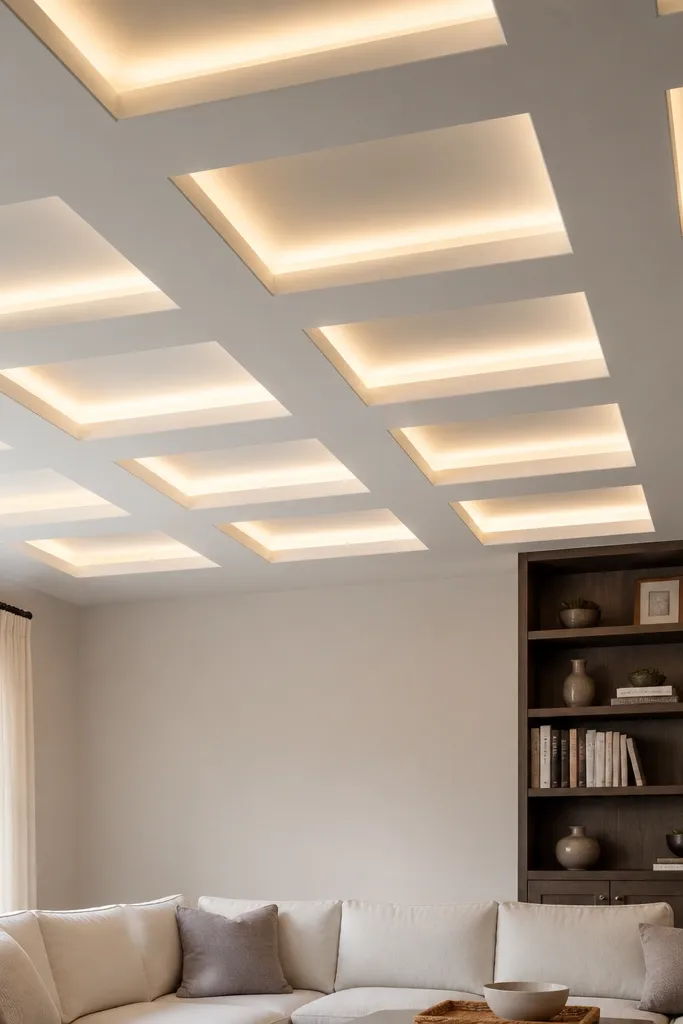
A geometric grid is visually interesting even in a small room because it adds rhythm across the ceiling plane. Recessed square pockets with hidden LED strips make it modern without looking busy. For low-maintenance, keep the number of pocket sizes consistent and avoid deep, narrow pockets that are hard to clean and show shadows if the ceiling isn’t perfectly flat. This design also works well if your room has a simple wall layout, because the ceiling becomes the main focal point.
Editor's noteUse the same pocket depth everywhere; inconsistent depths create uneven shadows that stand out in photos.
Pick a grid size that fits your room scale — aim for 45-60 cm spacing so pockets don’t feel cramped. Build a primary frame for the ceiling, then install secondary channels to create a shallow recess for each pocket. Board the top plane first, then add pocket boards and a frame for the LED channel. After installation, tape seams, apply joint compound in thin layers, and sand until the surface is uniform. Paint matte, then cut LED channel openings and install LED strips with a diffuser to reduce hotspots.
Skip thisDon’t use glossy paint — it amplifies every joint line and makes the grid look messy.
5. Single Central Round Drop with LED Ring
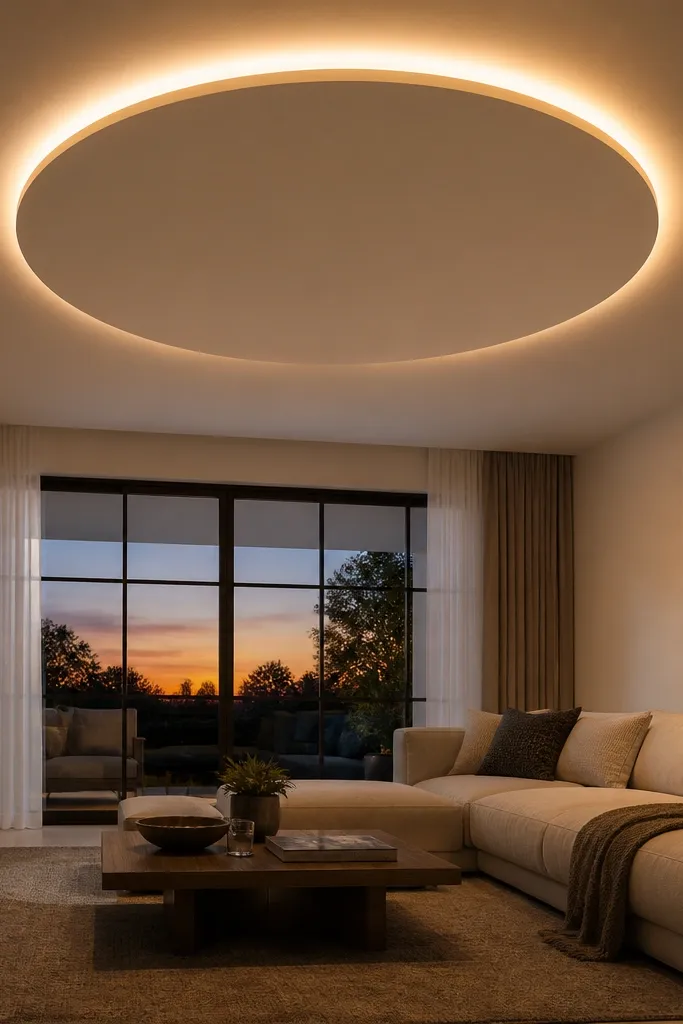
A round medallion softens a small living room, especially if your furniture lines are mostly straight. The round drop feels intentional, and the LED ring gives a neat halo effect that reads upscale without needing complex patterns. This is low-maintenance because it’s one main feature — fewer edges to joint than multi-panel designs. It also hides the wiring for a hanging light or ceiling fan if you’re planning to replace fixtures.
Use a string-and-pencil method or a template to mark a perfect circle on the ceiling. Build the frame for the round drop using curved metal channels or carefully bent runners, and keep the drop depth around 7-9 cm. Board the drop, then create a shallow ledge for the LED ring so the strip sits behind a diffuser. Joint and sand the drop edges, prime, and paint matte white. Finally, install the LED ring strip and test the halo glow before you fully finish touch-ups.
Plan the circle size to be about 35-45% of the room width so it doesn’t dominate the space.
Avoid very small circles — the LED ring ends up too bright and makes the center look cramped.
6. L-Shaped Corner Frame with Hidden Channel Glow
This layout is smart for small rooms where one corner is dominated by a seating arrangement or a study nook. An L-shaped frame adds structure without lowering the entire ceiling, so the room stays airy. The hidden channel glow along the edges looks clean and modern, and because the glow line is continuous, it hides minor surface imperfections. It’s low-maintenance because you’re painting a limited number of faces and the glow line doesn’t require frequent cleaning like exposed fixtures.
Editor's noteUse a backer strip behind the LED channel so the diffuser sits flat and doesn’t sag over time.
Decide which corner you’re emphasizing, then measure along both walls to set the frame lengths so they align with your sofa or work desk. Install metal runners along the two directions, keeping the drop height around 6-7 cm. Board the frame faces, then add a recessed channel strip where the LED will sit — keep the channel 25-35 mm deep. Tape and joint all seams, sand smooth, and paint matte. Install the LED strip with a diffuser, then cover the channel opening with a trim strip for a neat edge.
Skip thisDon’t let the frame edges wander — measure diagonals to keep the L shape true.
7. Thin Border Ceiling with Micro-LED Line
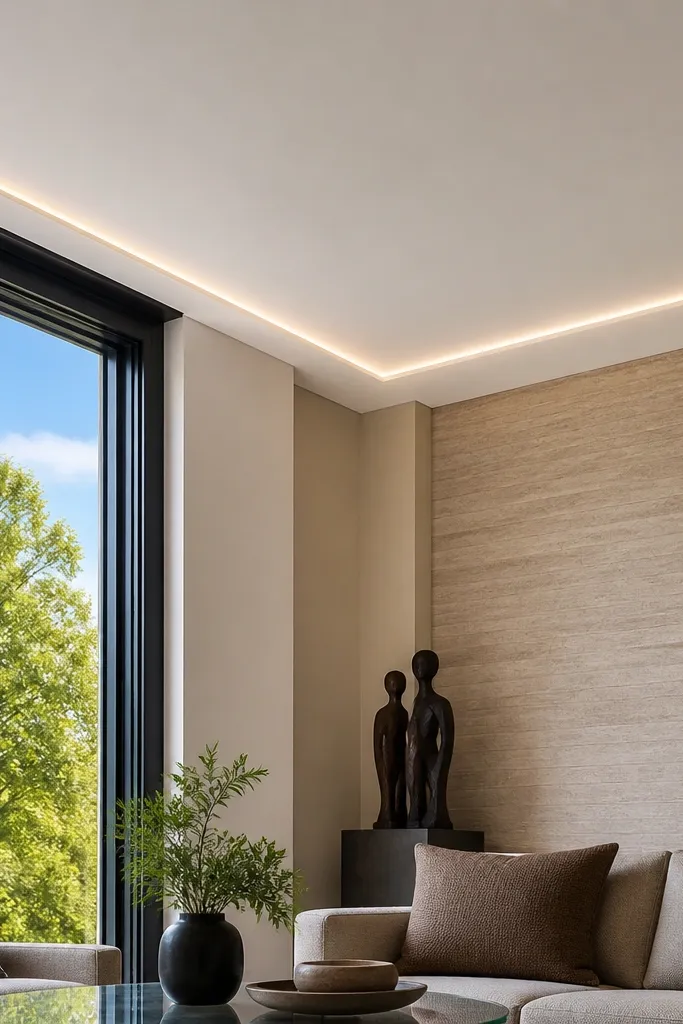
If your goal is low-maintenance False Ceiling Living Room aesthetics with almost no visual clutter, a thin border wins. The ceiling drops only slightly at the perimeter, and a micro-LED line creates a polished glow effect. This design is ideal when your living room has strong wall features — big windows, a textured accent wall, or bold curtains — because the ceiling stays quiet. It also stays clean because there are fewer corners and recessed areas where dust collects.
Mark a perimeter line 4-6 cm down from the existing ceiling. Install a lightweight metal frame around the room and add cross members at about 400-450 mm spacing. Board the drop, then create a shallow recess for the micro LED strip — keep the recess narrow and straight so the line looks continuous. Joint the perimeter edges, sand smooth, prime, and paint matte. Install the LED strip in the recess using a diffuser cover, then hide the cable feed behind the frame.
Choose an LED strip with a uniform beam angle and use a diffuser — thin lines reveal uneven brightness fast.
Avoid exposed LED without diffusion; it looks harsh and shows strip imperfections.
8. Ceiling Coffered Squares with Recessed Lighting
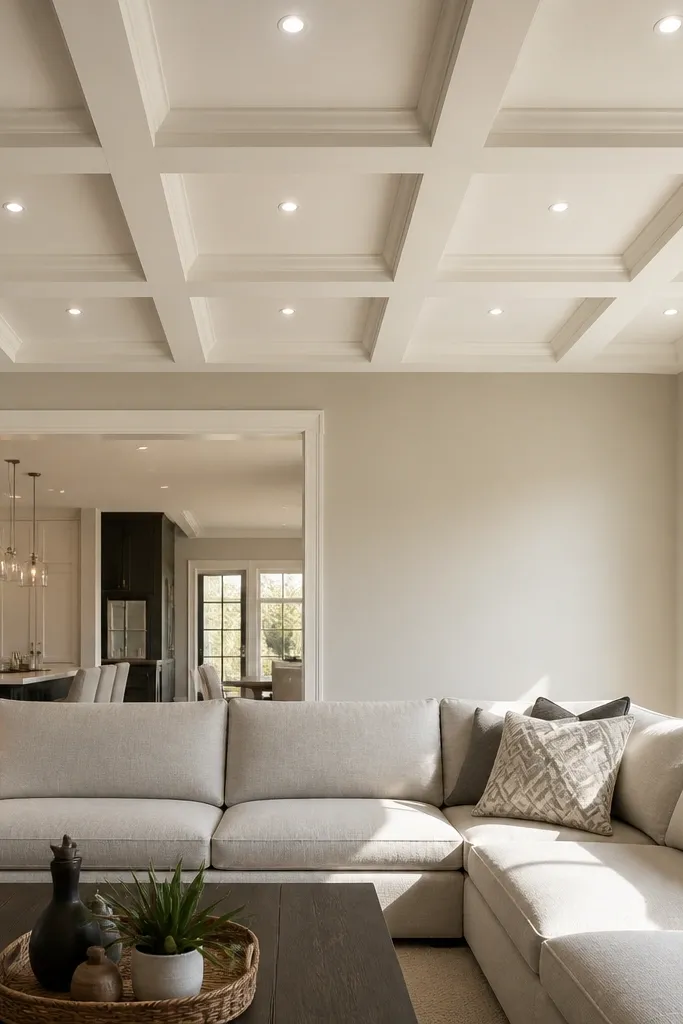
Coffered squares bring a classic feel, but when you keep the spacing modern and pair it with concealed downlights, it looks current. In small rooms, this style works because the pattern is controlled and the downlights reduce the need for extra fixtures. For low maintenance, use fewer cutouts and keep the panel edges shallow so you don’t get deep seams that collect dust. The result is photogenic and structured without looking heavy.
Pick a panel grid that fits your ceiling width — aim for 50-70 cm squares depending on room size. Build a main frame, then install secondary channels to create recessed panel areas with consistent depth around 5-7 cm. Board the recessed areas and the top plane, then tape and joint all seams carefully. Prime and paint matte white. Mark downlight cutouts, install recessed fixtures, and wire them through access points before final painting.
Use warm 2700K-3000K bulbs so the coffer shadows look soft instead of gray.
Don’t make panel depths too deep — small ceilings start to look lower and more cluttered.
9. Mirror-Like Gloss Accent Panel with Matte Rest
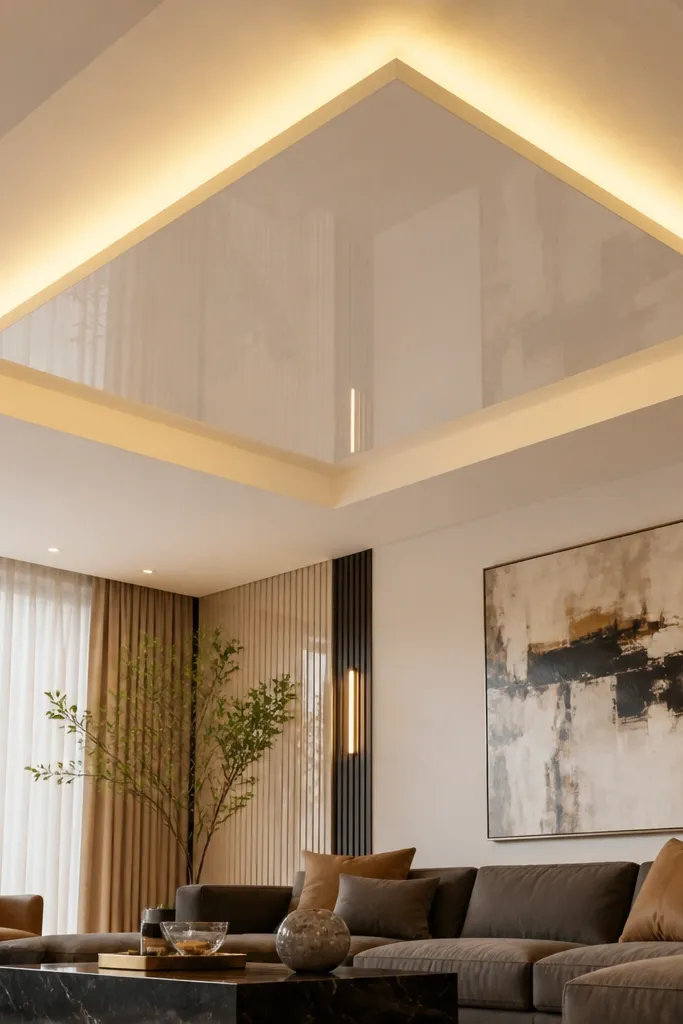
This is a trick that looks expensive without covering the whole ceiling in glossy paint. Keep the main ceiling matte for low-maintenance cleaning, then add one glossy accent panel in the center with a warm LED glow behind it. The contrast makes the ceiling look designed, and it photographs well because the glossy panel catches light cleanly. If you’re careful with edges and joint finishing, it stays tidy because you only have one glossy surface to manage.
Editor's noteSand the glossy panel area until it feels glass-smooth by touch; texture shows under gloss paint.
Frame the ceiling for a single central panel — keep it about 40-55% of room width so it reads balanced. Board the panel and the surrounding ceiling, then finish joints on the entire ceiling but focus extra sanding around the glossy panel edge. Prime everything, then use matte paint on the main ceiling and a gloss or semi-gloss finish on the accent panel. Install a concealed LED behind the panel edge so light hits the panel and perimeter evenly. Let the paint cure fully before you install LED covers and trim.
Skip thisDon’t use gloss on every surface; it highlights joint flaws and fingerprints.
10. Staggered Step Ceiling with Side Glow
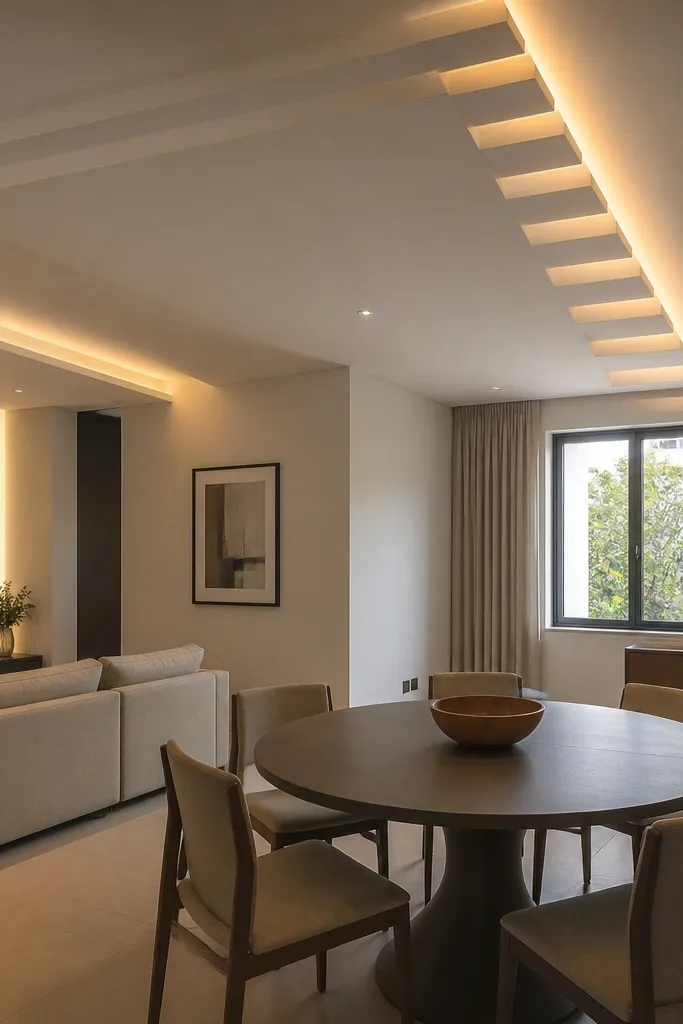
Staggered steps create a modern look that doesn’t require heavy geometric cutouts. Instead of a full perimeter border, the steps stack along one side, which works especially well for rooms with a dining zone on one half and seating on the other. Side glow makes the ceiling feel layered and hides unevenness because the light is directional. It’s low-maintenance because it uses long, clean edges and one main lighting channel.
Editor's noteUse a straight laser line for step edges; staggered ceilings show wobble fast.
Choose a side of the room to anchor the steps, usually above the sofa or along the TV wall. Mark step lines and keep the first drop about 6-7 cm, with the second step 4-5 cm lower. Build the frame in layers, then board each level with consistent support spacing. Add a recessed LED channel along the upward face of the step so the light washes across the ceiling surface. Joint, sand, prime, and paint matte. Install the LED strip after paint and attach the diffuser cover for smooth glow.
Skip thisAvoid random step heights — keep two levels only so the look stays clean.
11. Wave Border Ceiling with Concealed LED Trench
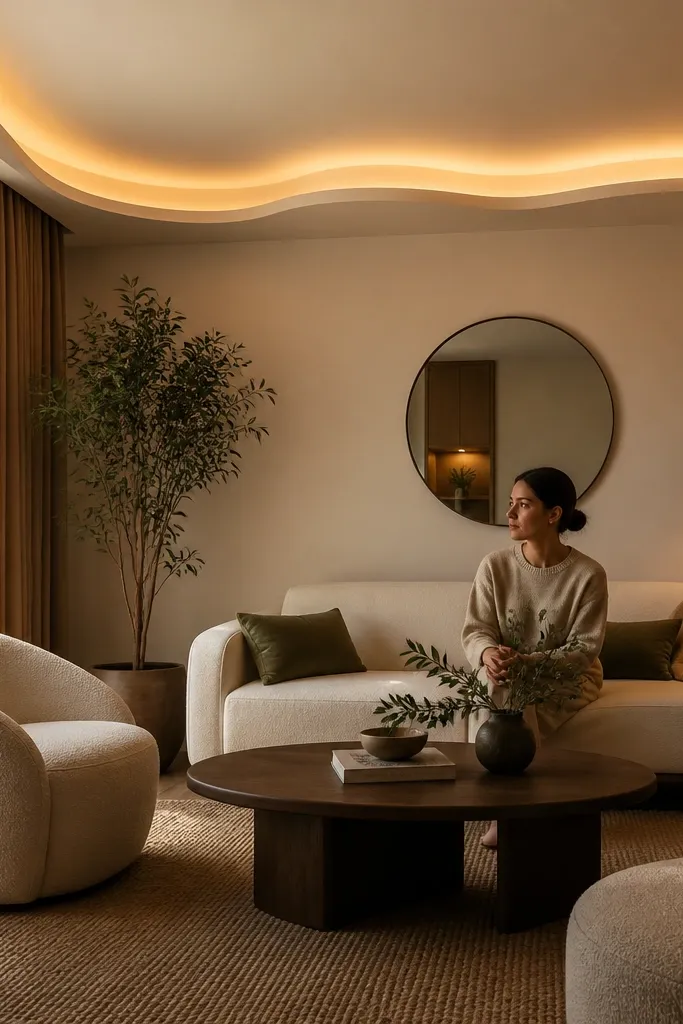
Waves soften the angular feel of a small living room, especially when your furniture has rounded corners or curved decor. A wave border around the perimeter gives movement, but you can keep it low-maintenance by limiting the wave to one border ring and not turning the whole ceiling into a maze. The concealed LED trench makes the waves look smooth and continuous. It’s a good choice when you want modern aesthetics without adding many cutouts that create dust traps.
Editor's noteTest the LED glow by powering it on before final trim — you’ll see unevenness immediately.
Sketch a wave pattern that fits your perimeter — use a consistent wave width so it looks balanced across corners. Build the perimeter frame following the wave curve, using metal members that can be bent gradually. Board the wave border and create a trench for the LED strip — keep the trench depth consistent so the glow is even. Joint seams carefully, especially along the wave transitions, then sand smooth. Prime and paint matte white, then install LED with a diffuser to prevent visible hotspots.
Skip thisDon’t make wave edges too sharp; sharp corners chip and show joint lines.
12. Asymmetric Drop with Center Light Well
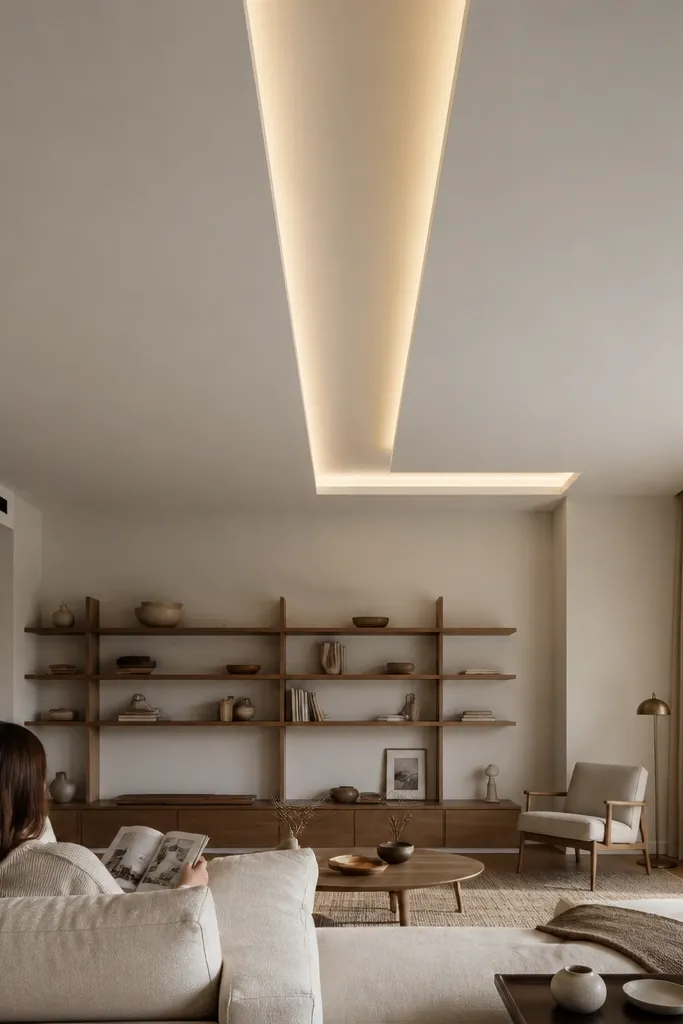
Asymmetry looks modern and intentional, and it’s great for small living rooms where symmetry feels forced. The trick is to keep the asymmetry simple: one main drop line plus a centered light well. Concealed LED inside the well makes the ceiling look like it has depth, not just a box. Low maintenance comes from using one lighting cavity and keeping seams to a minimum.
Editor's noteKeep the light well border width consistent — uneven borders are the fastest way to make asymmetry look messy.
Measure the room and decide where the TV or main seating line sits. Build a single main drop that’s slightly offset by 10-20 cm from the center, then add a rectangular light well in the middle of the lowered area. Frame the light well with consistent dimensions and install boards so the well edges are straight. Joint, sand, prime, and paint matte white. Install a concealed LED strip inside the well with a diffuser, then add trim to hide the channel edges.
Skip thisAvoid multiple asymmetrical features; two is enough to look designed.
13. Suspended Look Ceiling with Hidden Main Grid
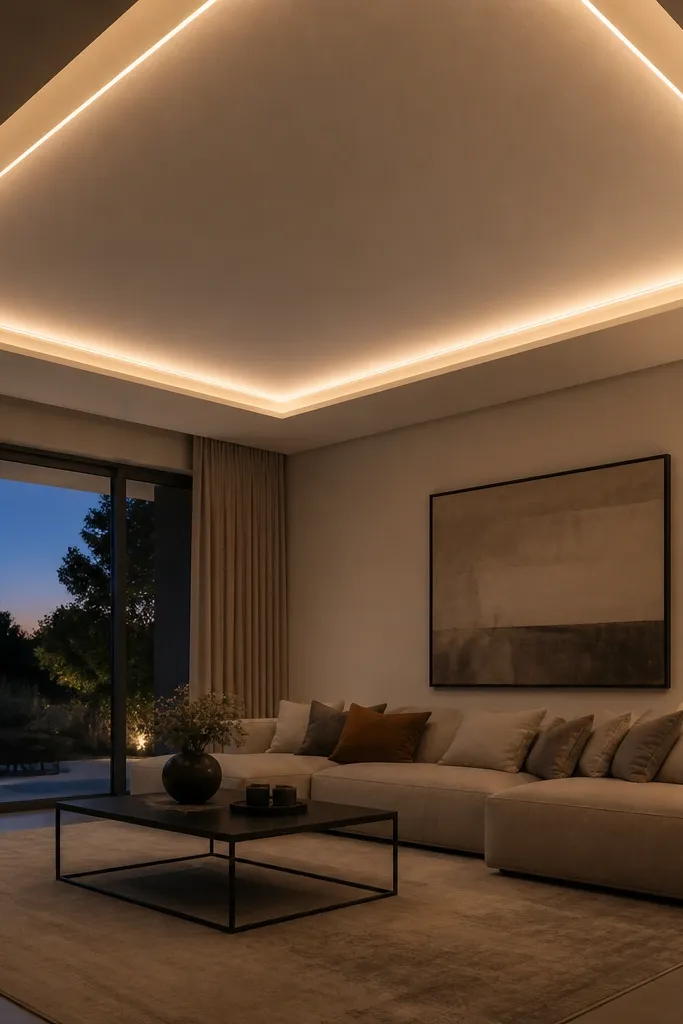
This design gives a 'floating' ceiling feel without actually hanging complicated fixtures. You build a slightly recessed center panel that looks suspended because the perimeter has a concealed glow. In a small living room, it creates depth and keeps the look modern. It’s low-maintenance because the center panel is a single flat surface, and the glow hides minor joint lines around the perimeter.
Frame a recessed center area so it sits about 4-6 cm lower than the main ceiling plane. Leave a perimeter band for LED — typically 8-12 cm wide — and build it as a consistent border. Board the center panel and perimeter band, then tape and joint all seams with extra attention on the panel edge line. Prime and paint matte, then install LED strips in the perimeter band with a diffuser. Finish with trim that covers the LED opening for a clean shadow line.
Use a wider perimeter band if your ceiling is slightly uneven; the glow line makes minor dips harder to see.
Don’t use narrow perimeter bands; they reveal unevenness and create harsh light shadows.
14. Slim Edge Frame with Recessed Fan/Light Access
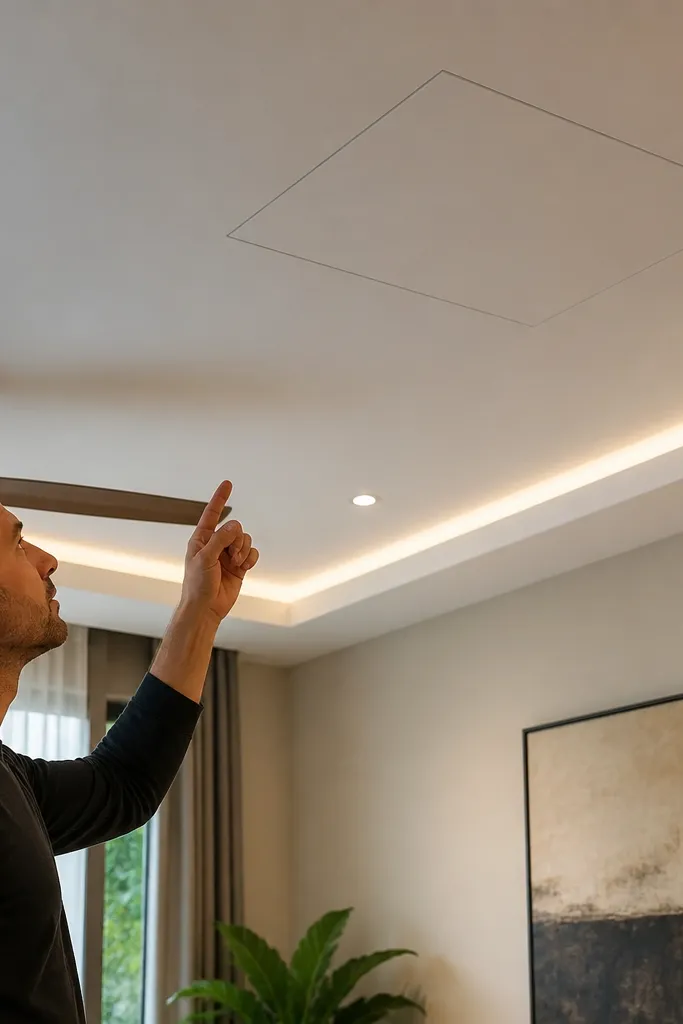
This is a practical aesthetic for low-maintenance living rooms where you know you’ll need access later. The design uses a slim edge frame for style, and it includes an access panel layout so wiring, fan servicing, or future LED swaps don’t mean breaking the ceiling. It still looks modern because the border is minimal and the glow is controlled. If you hate maintenance surprises, this structure is the smartest way to get a clean ceiling that stays clean.
Build a perimeter border drop around 5-6 cm and keep the face simple — no extra recesses. Plan an access hatch near the fan mount or main junction box location before you board. Install a reinforced board section for the hatch and keep its edges aligned with the border trim. Joint, sand, prime, and paint matte over everything, then install a hinged access panel cover with a matching paint finish. Add a concealed LED strip in the perimeter notch if you want a glow line.
Label the wiring runs before closing the ceiling so future troubleshooting is a 10-minute job, not a ceiling demolition.
Don’t place the access hatch off-center; it will show as a mismatch in the border line.
15. Wood-Look Accent Slats in Ceiling Border
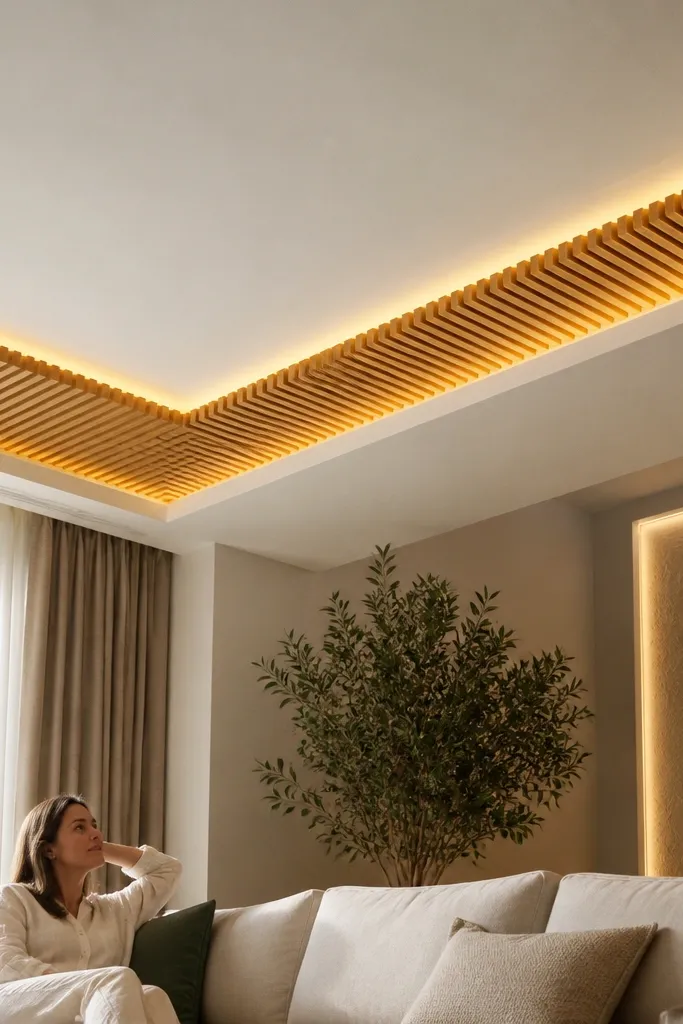
Wood-look accents make a false ceiling feel warm and modern without turning the project into a full carpentry job. Use slats only in a border band so the ceiling stays low-maintenance and easy to wipe. The warm LED behind the slats makes the grain read soft instead of flat, and it photographs beautifully next to a light-colored wall. Keep the base ceiling matte white, then paint or finish the slats so they resist scuffs.
Editor's noteSeal the slat edges with two thin coats; edge sealing prevents uneven darkening from dust and light.
Build the base perimeter border with metal framing and board it smooth. Leave a recess behind where the slats will sit, around 20-30 mm deep, and install a concealed LED strip there with a diffuser. Fix slats on top of a mounting track or directly onto a rigid backing strip — keep spacing consistent, like 20-25 mm gaps. Prime and paint the slats if they’re MDF strips, or use pre-finished veneer strips and seal the edges. Joint and paint the main ceiling matte white, then attach the slats after the paint cures.
Skip thisAvoid thin, bendy slats — they warp and the border line loses the crisp look.
16. Color Blocking Ceiling with Two Tone Matte Paint
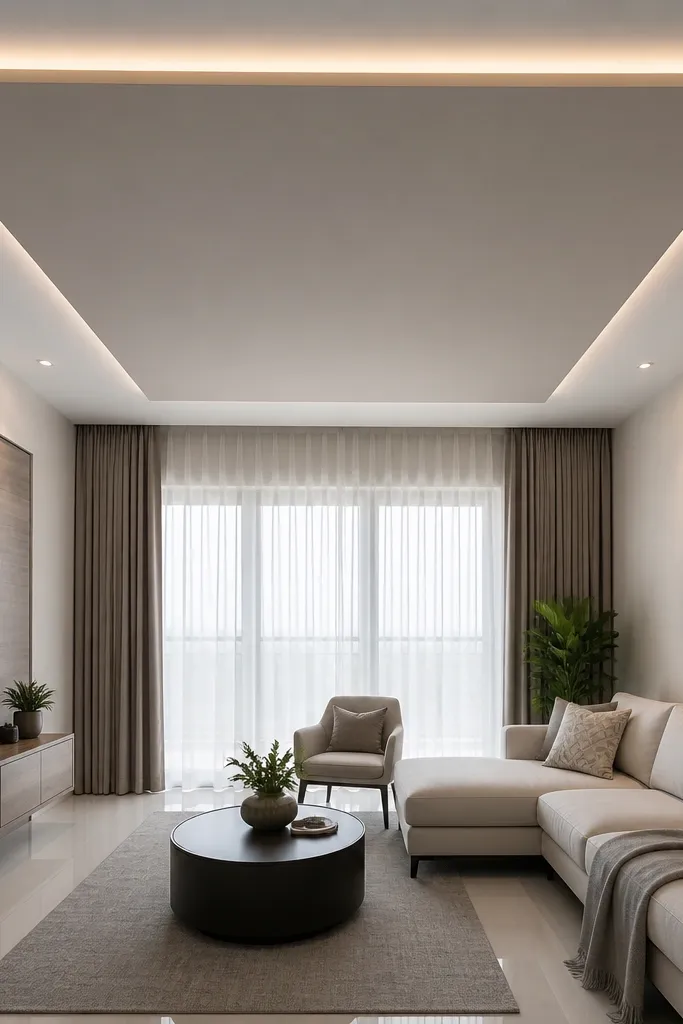
Two-tone paint is one of the lowest-effort ways to make a false ceiling look modern and deliberate. Keep the base matte white, then paint a centered rectangle or stepped shape in a light warm gray. Add a concealed LED edge so the darker shape looks like it’s floating. This stays low-maintenance because matte finishes hide minor imperfections better than glossy paint, and you’re not relying on lots of cutouts.
Editor's noteUse the same sheen for both colors — matte-matte looks cleaner than mixing matte and eggshell.
Frame a simple drop or tray so you have a clean boundary line for the color block — keep the drop depth around 6-8 cm. Board and joint the ceiling fully, then prime everything. Apply matte white on the main ceiling and tape off the color-block area with painter’s tape for a sharp edge. Paint the accent shape in a light warm gray and remove tape while paint is slightly tacky for cleaner lines. Install a concealed LED strip along the accent edge in a shallow channel, then test glow before final touch-ups.
Skip thisDon’t freehand the boundary; uneven edges make the whole ceiling look DIY in a bad way.
17. Mini Drop Around Windows and Seating
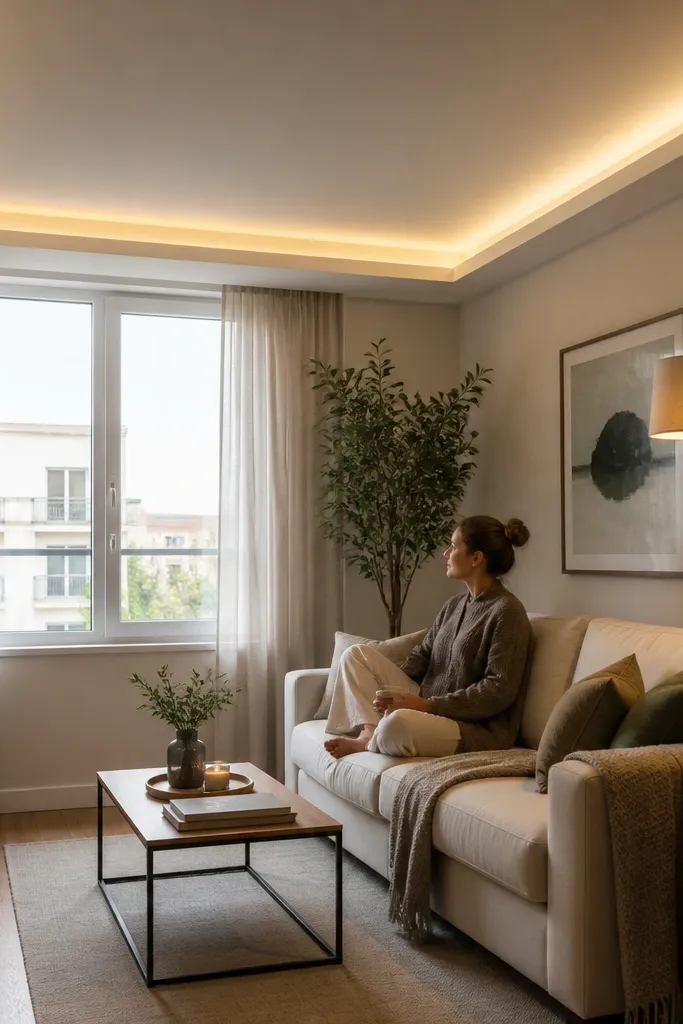
In many small living rooms, the ceiling problem is uneven light or awkward wiring near the window side. A mini drop around the seating zone keeps the room open while still giving you a modern ceiling feature where you care most. Concealed LED in that zone adds warmth and makes the seating area feel styled. It’s low-maintenance because it’s a partial ceiling change — fewer joints, fewer surfaces, and less time spent sanding.
Editor's noteBlend the paint edges by rolling in the same direction and keeping a wet edge; it prevents visible patch lines.
Measure the seating area footprint and mark a rectangle or U-shape drop zone that matches your sofa and rug edges. Keep the drop height around 6-7 cm so it doesn’t swallow the room. Build the metal frame only for that zone and board it, leaving the rest of the ceiling level. Add a recessed LED channel along the inner edge facing the seating. Joint, sand, prime, and paint matte white on the drop and blend the edges with the main ceiling. Install LED strip with diffuser and attach a simple trim cover to hide the channel opening.
Skip thisDon’t make the drop too close to the window — it blocks light and makes the room feel smaller.
18. Rounded Rectangle Tray with Diffused LED Channel
This design is modern because it uses softened corners. Rounded rectangles look smoother than sharp-edged trays, and the diffused LED makes the border glow feel even. It’s great for small rooms because it reads clean from every angle and doesn’t create harsh shadows. Low-maintenance comes from having one main tray and one continuous LED channel, so you’re not managing many seams or small cutouts.
Lay out a rounded rectangle using a template or arc method so corners are consistent. Build the tray frame with metal channels and keep the tray depth around 7-9 cm. Board the tray top and sides, then add a recessed LED channel around the inside edge with a diffuser. Joint and sand the tray edges until the curve is smooth to the touch. Prime and paint matte white, then install LED and diffuser covers. Test glow and adjust diffuser position if you see hotspots.
Use a flexible straightedge or a string line to keep the rounded edges fair — wobbly curves ruin the whole look.
Don’t skip sanding on the curve; tiny ridges show under diffused lighting.
19. Corner Recess Panels with Backlit Edge
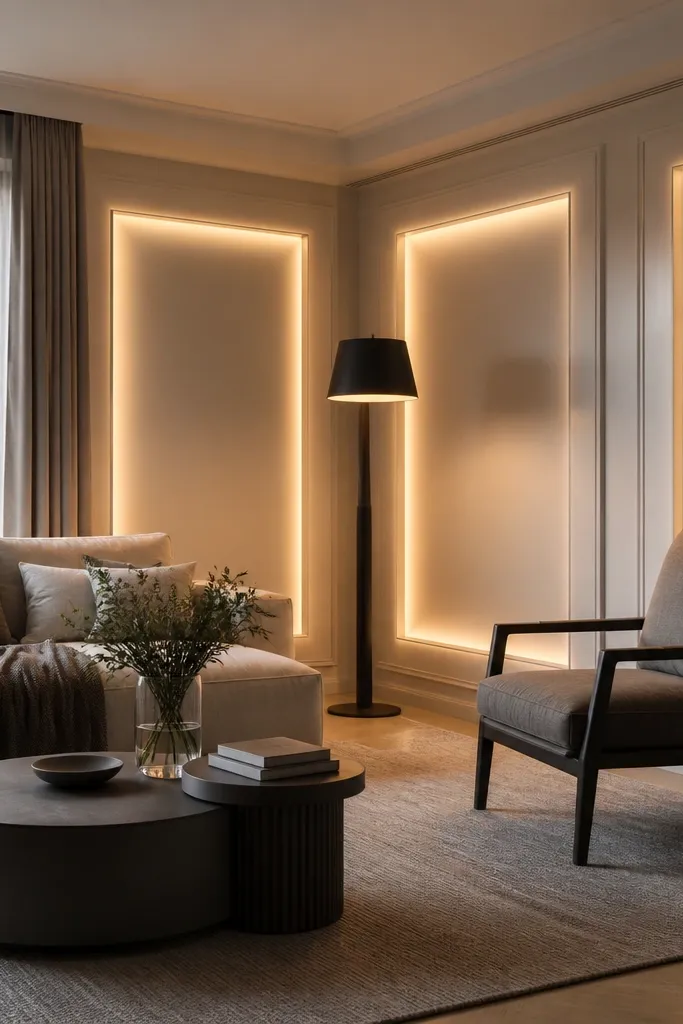
Corner recess panels give you a modern look with minimal ceiling work. They create a styled frame around the room without dropping the center, which helps small living rooms feel bigger. The backlit edge makes the corners glow and visually ties together the ceiling and wall lighting. It stays low-maintenance because the recesses are simple rectangles and the lighting is hidden, so you don’t get exposed fixtures collecting dust.
Choose two opposite corners or corners aligned with the TV and seating. Build small recess frames in those corners, keeping the recess depth around 4-6 cm so it doesn’t feel heavy. Board the recess faces and create a narrow channel for the LED strip behind a diffuser. Joint and sand the ceiling and recess edges, then paint matte. Install LED strips and make sure the diffuser sits flush so the glow line looks continuous. Hide wire feeds behind the main frame and secure them before board finishing.
Keep the recess opening sizes equal; mismatched corners look accidental even when the rest is perfect.
Avoid too-deep recesses — they throw hard shadows in small rooms.
20. Ceiling Border with Recessed Cigarette Lights
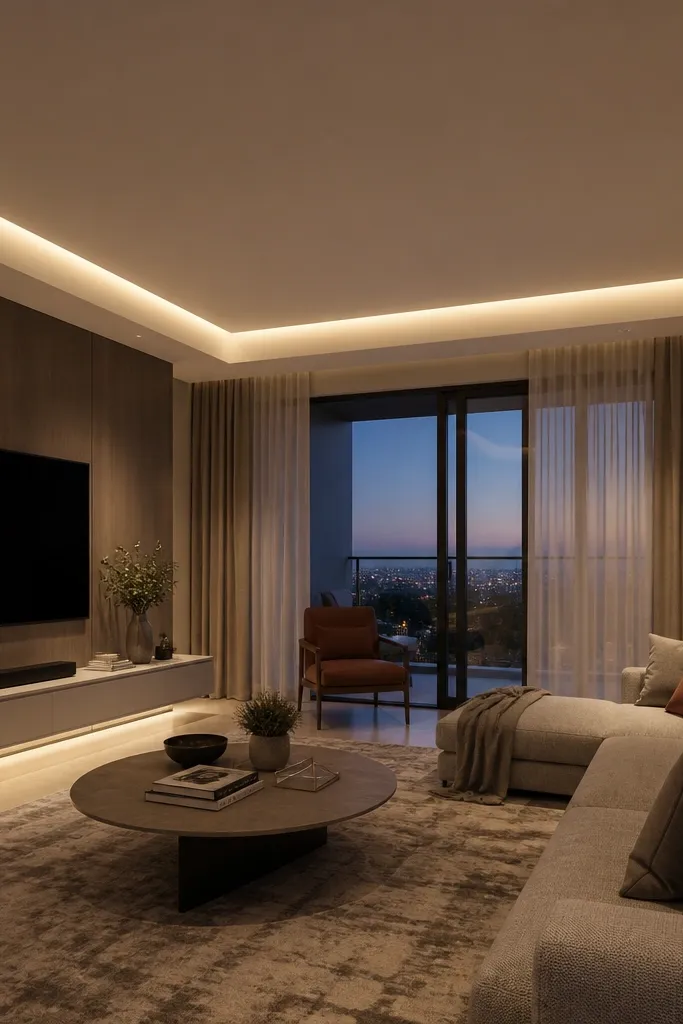
Slot lights inside a border look sleek and modern, and they’re surprisingly good for low-maintenance living rooms. Instead of many separate downlights, you get one long glow line that reads clean in photos and reduces dust-prone fixtures. The border frame contains the wiring and makes the whole ceiling feel intentional. Keep the glow warm and diffused so it doesn’t glare and show small surface imperfections.
Editor's noteUse a diffuser that matches the slot width — a mismatch creates uneven brightness that’s hard to hide later.
Build a perimeter border drop around 7 cm wide with a concealed channel cavity. Plan the slot light positions as one continuous strip or two long segments aligned with the room’s long axis. Install LED strip or linear LED modules inside the channel with a diffuser cover. Board and finish the channel opening so the slot edge is straight and smooth. Prime and paint matte white, then install the LED module and diffuser cover after paint cures. Test for even brightness and adjust diffuser seating if you see bright bands.
Skip thisDon’t paint over the diffuser surface; it can dull the light and create patchy glow.
21. Slim Coffered Border with Hidden Spotlights
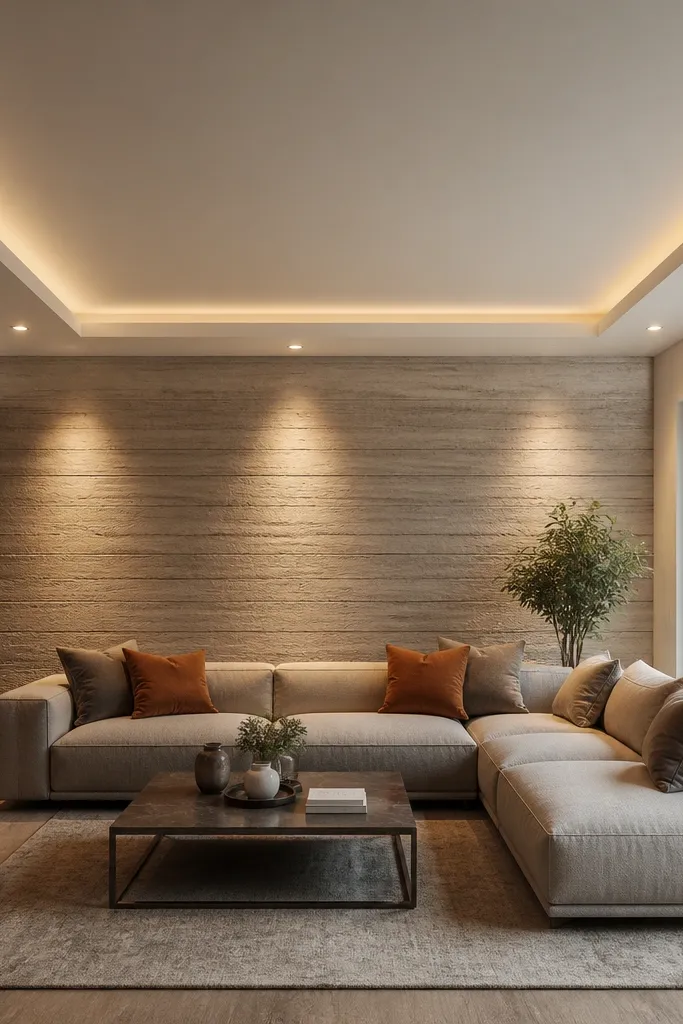
This is a good compromise when you want a modern ceiling texture but you don’t want to commit to full coffer panels across the whole room. A slim coffered border adds detail, while hidden spots give you layered lighting without visible fixtures. For low-maintenance, keep the border limited and use fewer downlights — the ceiling stays easier to keep clean and less likely to show dust around many cutouts. It looks great above a sofa set or dining table area.
Frame a perimeter border drop with a coffer pattern built only within the border width, about 35-50 cm. Install secondary channels to create shallow recessed squares within the border — keep depth around 3-5 cm so the ceiling doesn’t feel too low. Board, joint, and sand the recessed edges carefully, then paint matte. Mark and cut recessed spotlight openings within the border faces, then wire and install fixtures before final paint touch-ups. Finish trim around the border to hide the spotlight housing gaps.
Use spotlights with adjustable tilt so you can aim light away from ceiling joints and toward walls or artwork.
Don’t crowd the border with too many spots; it creates a busy look and more dust around housings.
22. Minimal Center Square with Corner LED Stairs
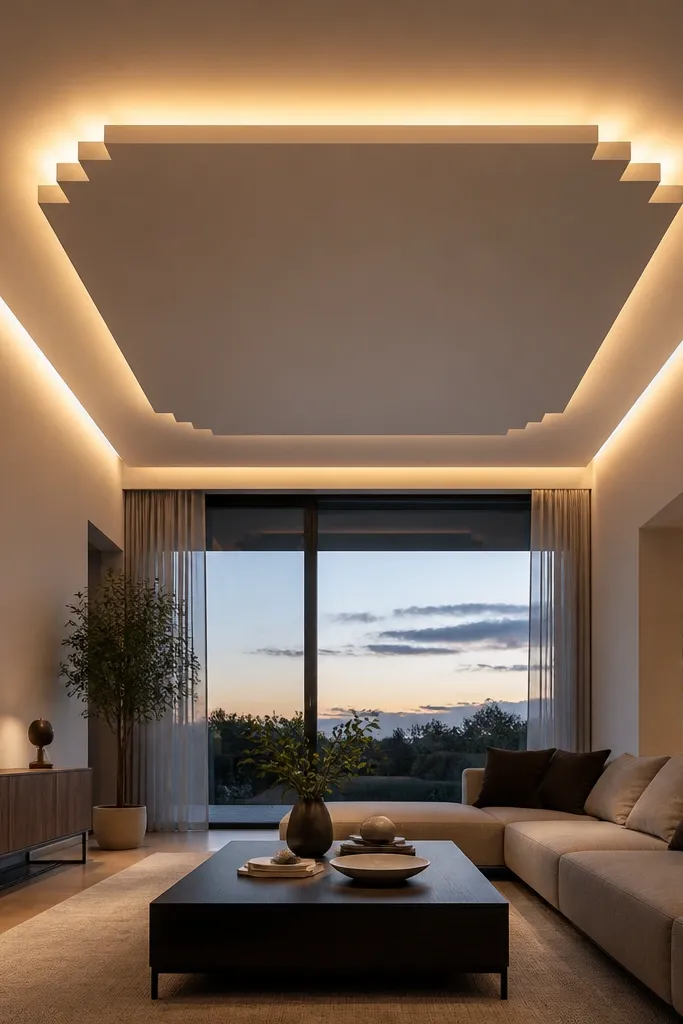
If your living room has clean, modern furniture but you still need a ceiling feature, this design is a smart fit. The center square panel is simple and low-maintenance, while corner LED stairs add depth and glow without clutter. It photographs well because the lighting emphasizes the ceiling plane, not the seams. Keep the color palette tight — matte white with one light gray accent square — so it stays calm in a small room.
Editor's noteAim for equal corner glow intensity by using one LED driver and consistent strip lengths for each corner.
Frame a central square tray that sits about 4-6 cm lower than the main ceiling. Build small stepped LED recesses in each corner — each step should be shallow and consistent, around 3-4 cm deep. Board the tray and corners, then joint and sand all seams until flat. Prime and paint matte, using light gray only for the center square if you want the accent. Install LED strips in each corner recess with diffusers, then test glow coverage so corners don’t look dim compared to the center.
Skip thisAvoid mixing strip lengths randomly; uneven corner brightness looks sloppy fast.
23. Ceiling Fan Hub with Decorative LED Halo
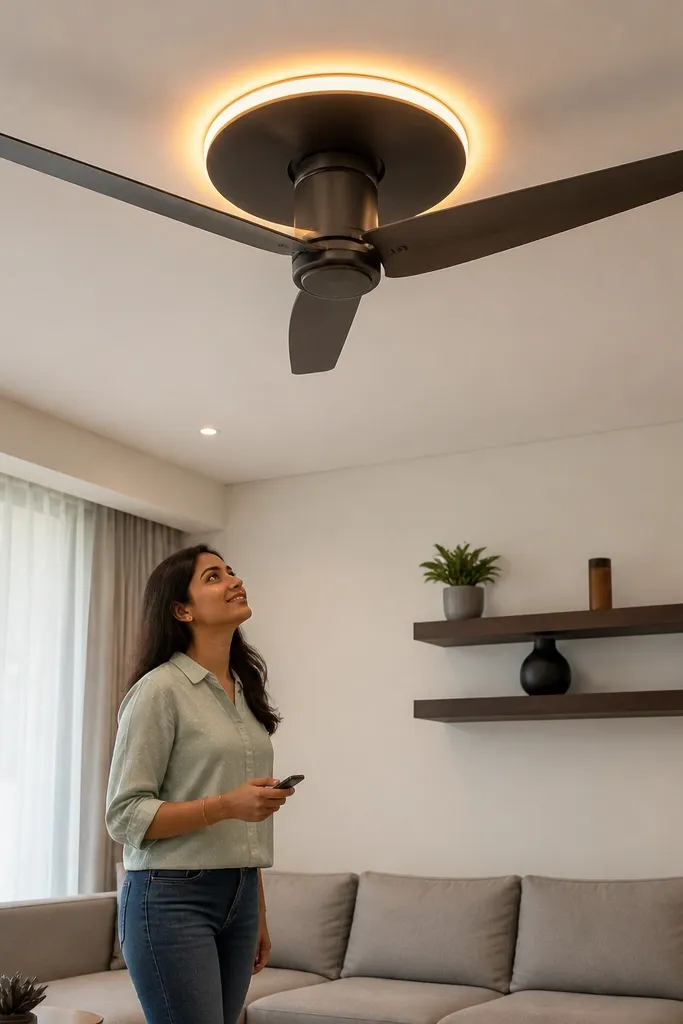
You can make a ceiling fan area look intentional instead of like a hole in the middle. This design adds a decorative LED halo around the fan hub while keeping the rest of the ceiling clean and matte. It’s low-maintenance because you’re not adding many extra fixtures, and the halo uses a diffuser so it doesn’t show strip glare. Great for small living rooms where airflow is needed and you still want the ceiling to look modern.
Editor's noteUse a diffuser ring that matches the ring diameter so the halo looks even all the way around.
Plan your fan location first and build the metal frame around the fan mount point, leaving clearance for the fan base. Create a shallow circular or hexagonal decorative ring around the fan hub with a recess for LED — keep the ring depth around 4-6 cm. Board the ceiling and ring, then joint and sand smoothly around the ring edge. Prime and paint matte white, then install LED strip in the ring recess with a diffuser cover. Wire the LED to a dimmer or separate switch, and test before final trim placement.
Skip thisDon’t run LED wiring through the fan housing; keep wiring access separate and safe.
24. Wall-to-Wall Border with Recessed Channel for Air Vent
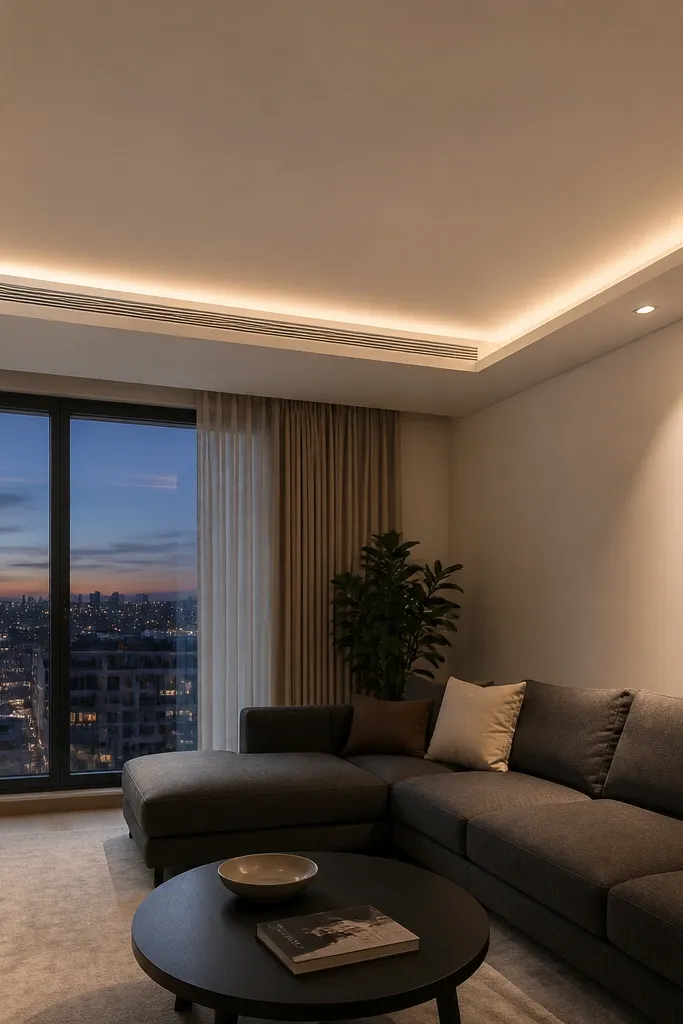
If your living room has a visible air vent or returns, hiding it cleanly makes the whole space look higher-end. A wall-to-wall border with a recessed channel lets you integrate the vent line and keep the ceiling design consistent. Add a concealed LED strip so the border reads modern rather than utilitarian. It’s low-maintenance because the vent is accessible through a proper grille, and the ceiling around it stays smooth and paintable.
Editor's noteUse a removable grille with screws so you can clean filters without touching the ceiling finish.
Measure the vent size and decide where the grille will sit — align it with the border line for a clean look. Build a perimeter border drop around 6-8 cm wide and install a recessed channel where the vent duct opening will connect. Board the ceiling and leave the vent opening framed for the grille — reinforce the opening edges so the grille sits flush. Joint and paint matte around the vent area. Install the vent grille after paint, then add a concealed LED strip in the border notch with a diffuser. Test airflow after installation to confirm the duct connection isn’t blocked.
Skip thisDon’t seal the vent duct with random filler; you need access and proper airflow clearance.
25. Modern Ceiling Slab with Hidden LED and Thin Shadow Gap
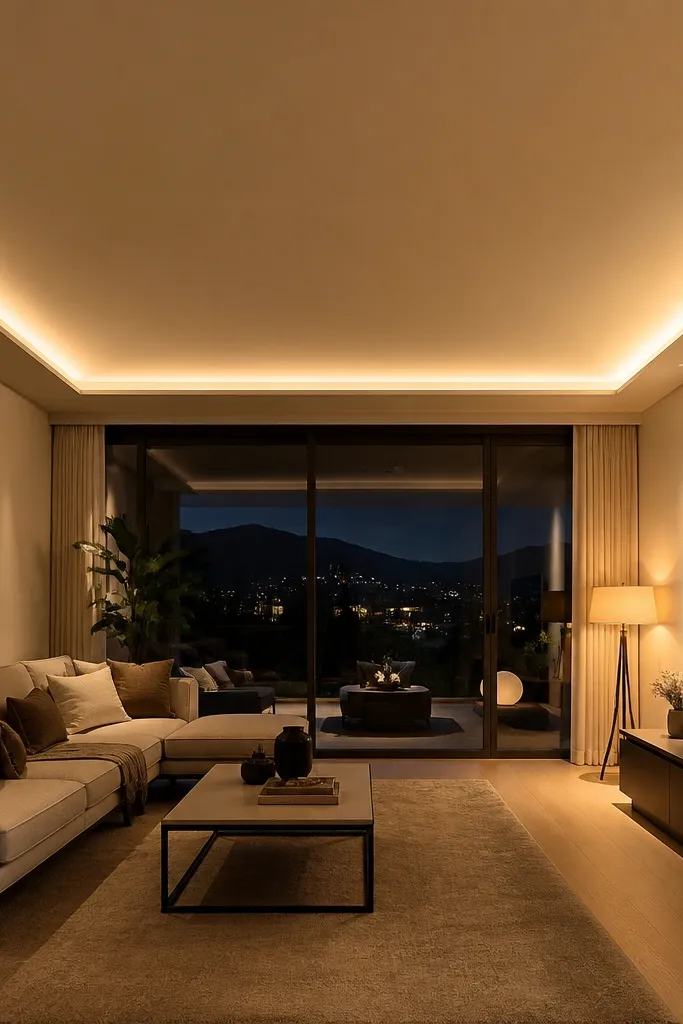
This is the cleanest look for a low-maintenance False Ceiling Living Room when you want “modern” without visible patterns. The ceiling stays mostly flat, and the perimeter has a thin shadow gap that makes it look floating. A concealed LED strip behind the gap adds a warm wash that’s forgiving on small-room ceilings. It’s low-maintenance because there are no lots of cutouts, and the surfaces are easy to wipe.
Editor's noteA consistent shadow gap is everything; adjust the ledge frame before boarding if you see any corner mismatch.
Keep the false ceiling drop minimal — 4-6 cm is enough for framing and wiring. Build a perimeter frame with a ledge that creates a shadow gap of 8-12 mm. Board the ceiling and finish the ledge edges cleanly with joint compound, sanding until the ledge line is crisp. Prime and paint matte white. Install the LED strip behind the shadow gap with a diffuser, then add trim that hides the LED housing while leaving the gap visible. Verify the gap width around all corners by measuring with a small ruler or tape.
Skip thisAvoid thick trim that blocks the gap — the floating look disappears.



