
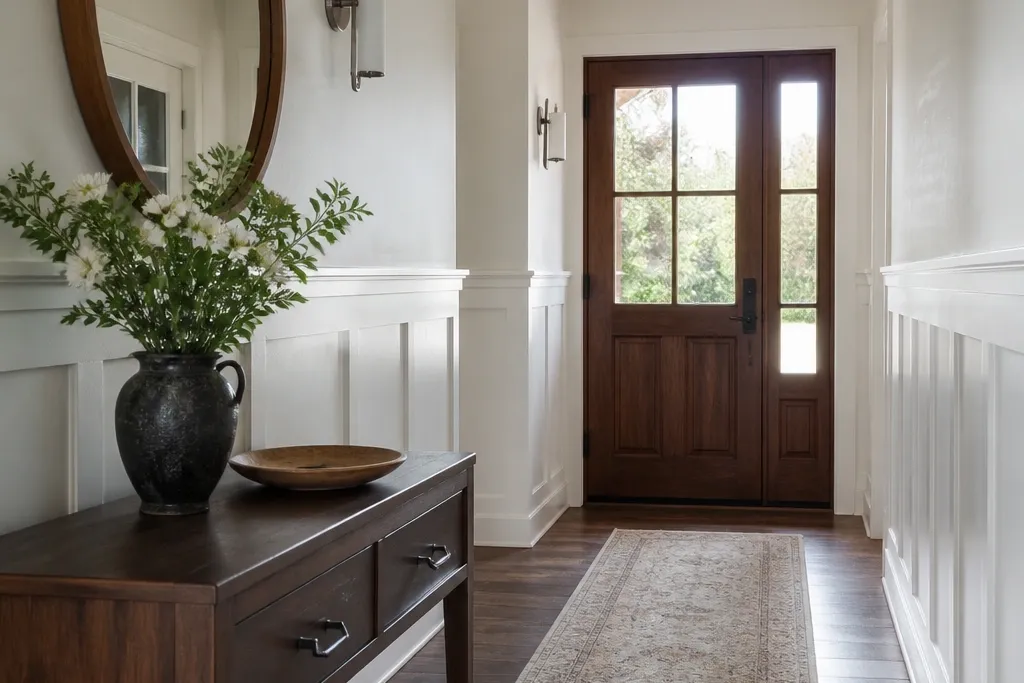

1. Classic chair-rail paneling with beadboard base
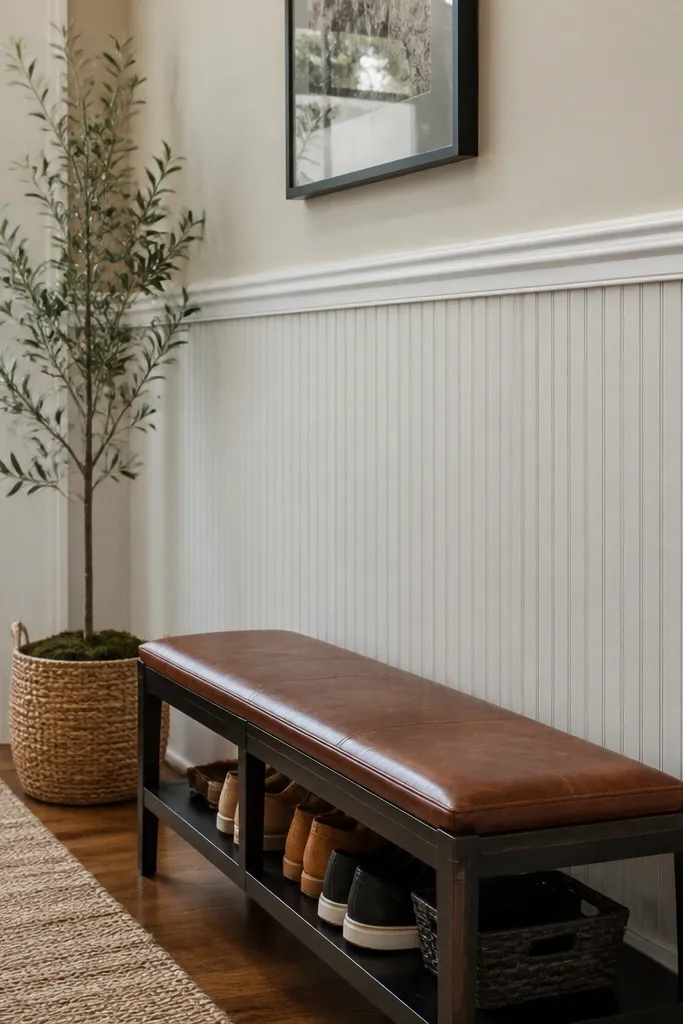
This is the entryway version of a tailored suit: one clean chair rail line, then beadboard below for texture that still wipes down easily. The beadboard hides small wall imperfections because the grooves break up shadows, so you don’t have to chase every bump in the drywall. Paint it in a crisp white with the same satin sheen as your trim and the whole entry looks “finished” even in flat daylight. Skill level is beginner-friendly because you’re repeating a simple width and you can buy pre-primed beadboard sections. It’s also low-maintenance because the surface is smooth after paint and the seams you seal with caulk stay tidy.
Start by marking the top of your wainscot band at 36-42 inches from the floor, then snap a level line around the entry. Install the chair rail first using a stud-finder, 16-gauge brad nails, and construction adhesive on the back of the rail. Then cut and fit beadboard panels below, staggering seams if your panels are modular, and nail into studs or the wall backing wherever possible. Caulk every joint, fill nail holes with paintable filler, and sand lightly once dry before painting the entire wainscot and rail in one go.
Use a 2-inch foam roller for the flat areas and a small angled brush only for edges so the finish stays uniform.
Don’t leave beadboard seams uncaulked — that’s where grime collects and the lines look messy.
2. Two-rail wainscoting with flat-panel squares

If your entry feels plain, flat-panel squares give you “custom built” energy without adding fragile detail. The flat panels reflect light smoothly, which makes the entry look brighter and more expensive than beadboard in photos. You keep maintenance simple because painted flat surfaces wipe clean, and you only have a few rail lines to manage. This design is best when your entryway has a straight run of wall and you can keep panel widths consistent. It also works well with narrow hallways because the square rhythm makes the space feel planned rather than cramped.
Editor's noteDry-fit one full bay on the wall using painter’s tape to confirm the panel proportions look right before you cut everything.
Measure the wall width and divide it by the panel width you want, aiming for panel bays around 10-16 inches wide so you don’t end up with tiny cuts. Mark two horizontal rails: one at your chosen band top (36-42 inches) and the second about 10-16 inches below it, both perfectly level. Frame the panel bays with thin MDF trim strips, then add flat panel inserts cut to fit the openings. Nail or glue the trim to studs and caulk the seams before sanding and painting.
Skip thisSkip “perfectly centered” layout on the first wall and then changing it on the next — inconsistent bay widths look off in hall photos.
3. Tall wainscoting to doorway height
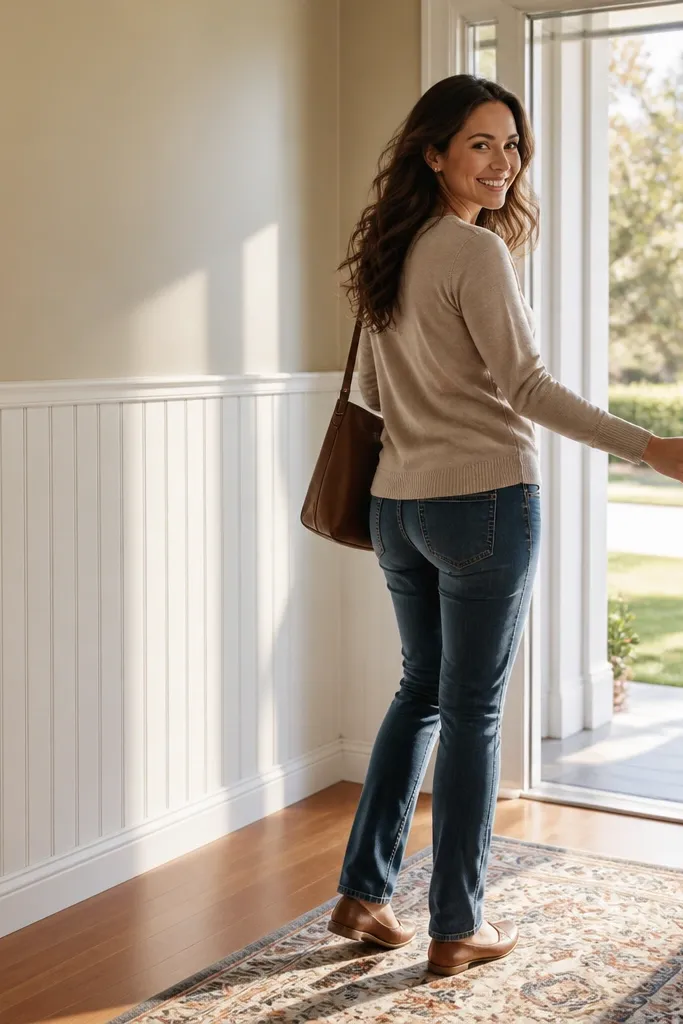
Tall wainscoting makes a grand welcome because it frames the doorway area instead of stopping halfway down the wall. It’s one of the best low-maintenance wainscoting ideas for entryways with scuffs, because more painted surface means you can keep the wall looking fresh longer. Choose a simple top rail and either beadboard or flat panels so you don’t add busy trim. This look is especially flattering in entries with higher ceilings, but it still works in standard heights if you stop at a clean visual point like the bottom of the door casing. The maintenance stays easy because you’re painting a larger area with sealed seams.
Decide your height first: aim to end the top rail just below the door casing or at about 60-66 inches from the floor for standard entries. Snap a level line for the top rail and install it into studs with adhesive plus brad nails. Build the lower section using beadboard sheets or framed flat panels, then cut around outlets and door trim cleanly. Caulk the perimeter, fill nail holes, sand, and paint with satin for wipeable durability.
Plan outlet locations before you cut the beadboard or panels so you don’t end up with awkward patches around switch boxes.
Don’t run the wainscot over crooked trim lines — correct the layout on the rail, not the drywall.
4. Removable chair-rail panels with a clean skirt
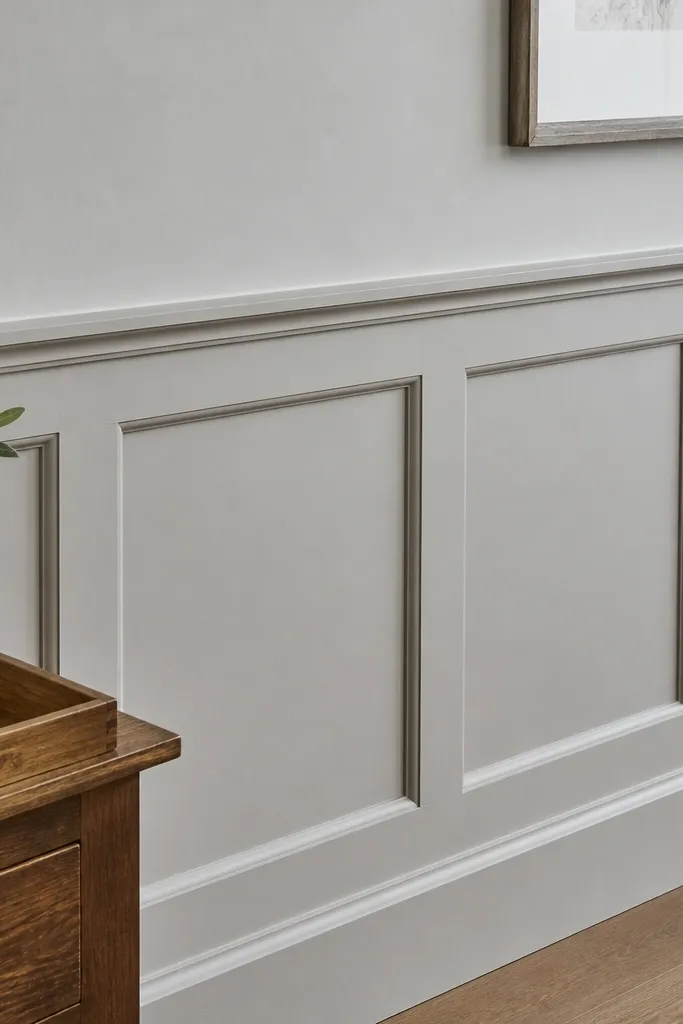
This approach looks built-in but stays low-maintenance because the panel sections are sized for easy replacement if you ever ding them. The visual trick is a clean skirt line below the chair rail so your eye reads a continuous “foundation,” not a patchwork. You get a smooth painted surface that wipes well, and the trim lines are simple enough to keep crisp. This is a smart pick for homes with kids, pets, or heavy shoe traffic where entry walls take hits. It’s more work than basic board-and-batten, but the payoff is repairability.
Frame the wainscot perimeter with thin MDF rails and a bottom skirt, using a level chalk line to keep everything straight. Cut your panel inserts as separate rectangles that fit snugly between the rails, leaving a tiny expansion gap for paint and movement. Attach panels using construction adhesive plus brad nails only into the trim frames so you can remove them later with minimal damage. Caulk edges, paint, and keep a matching leftover piece for quick future swaps.
Use a consistent panel size grid so replacement is as simple as popping out one section and sliding in a new one.
Don’t glue panels directly to drywall — repairs turn into demolition when you need access.
5. Board-and-batten wainscoting with wider battens
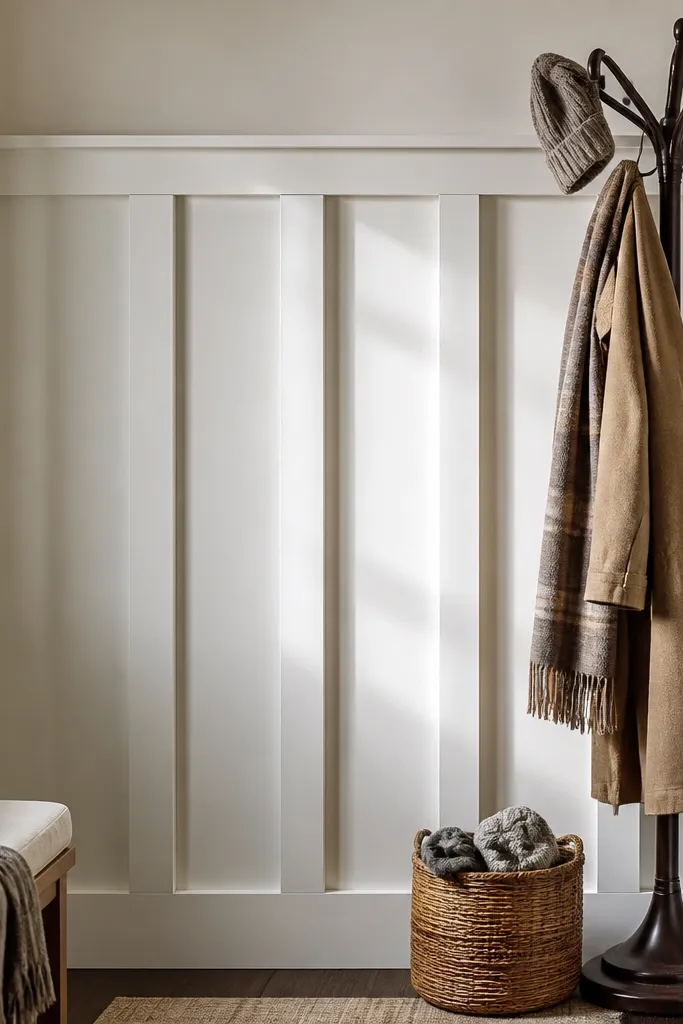
Board-and-batten reads bold and architectural, and it’s still low-maintenance when you keep the battens wide and the spacing consistent. Wider battens create cleaner shadows and reduce the “busy” look that thin battens can produce in entry photos. Paint everything satin so fingerprints and scuffs wipe off without the shine looking greasy. This works best when your entry has a strong vertical element like a tall door or side window, because the vertical lines elongate the space. It’s also a practical choice if you want fewer horizontal seams to caulk.
Mark your top rail height at 36-42 inches, then install the rail level. Lay horizontal base boards at your chosen bottom line, nailing into studs and adding adhesive along the back edges. Install vertical battens spaced evenly across the wall, using a scrap spacer to keep the gaps consistent. Fill nail holes, caulk the batten edges, sand smooth, and paint in one continuous finish coat.
Pre-prime and lightly sand battens before final paint so the edges don’t drink primer and look uneven.
Don’t use random batten spacing — uneven gaps show up instantly in bright entry lighting.
6. Herringbone wainscoting band with a simple border
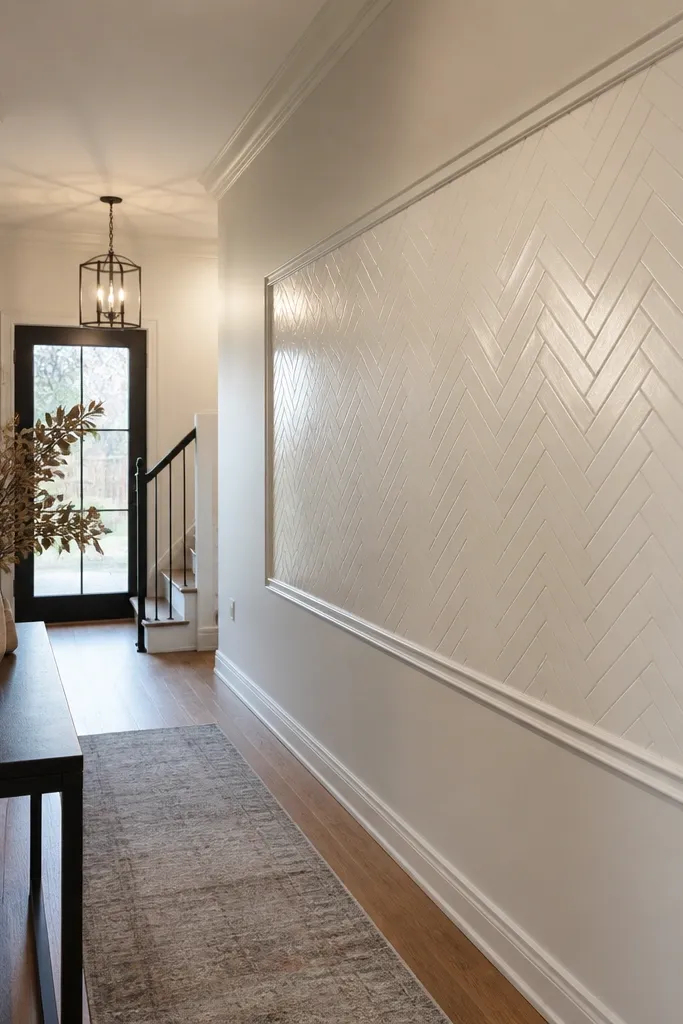
A herringbone band looks high-end because the pattern catches light and adds motion without covering the entire wall with heavy texture. Keep it contained to one band and you get the grand welcome effect without turning the whole entry into a dust trap. This is a better choice for low-maintenance wainscoting ideas than full-floor-to-ceiling patterned walls because you’re sealing and painting a controlled area. Use paint over wood strips or MDF strips so the finish is wipeable. It’s also a strong option when you want something different from the standard chair rail + beadboard combo.
Build a rectangle frame with MDF border rails at your chosen height, like top rail at 40 inches and bottom at 28 inches, then secure it into studs. Cut narrow strips (about 1-1/2 inches wide) and set them in a herringbone pattern, using a chalk guide line to keep the angle consistent. Glue strips to a backing board or directly to the framed area, then nail only into the frame edges to avoid splitting. Caulk all pattern junctions, fill nail holes, sand, and paint satin for easy wipe-down.
Make a paper template for one herringbone unit and test it against your wall width before cutting all strips.
Don’t wing the angle — if the chevrons drift, the pattern looks sloppy fast.
7. Crisp picture-frame wainscoting with mitered corners
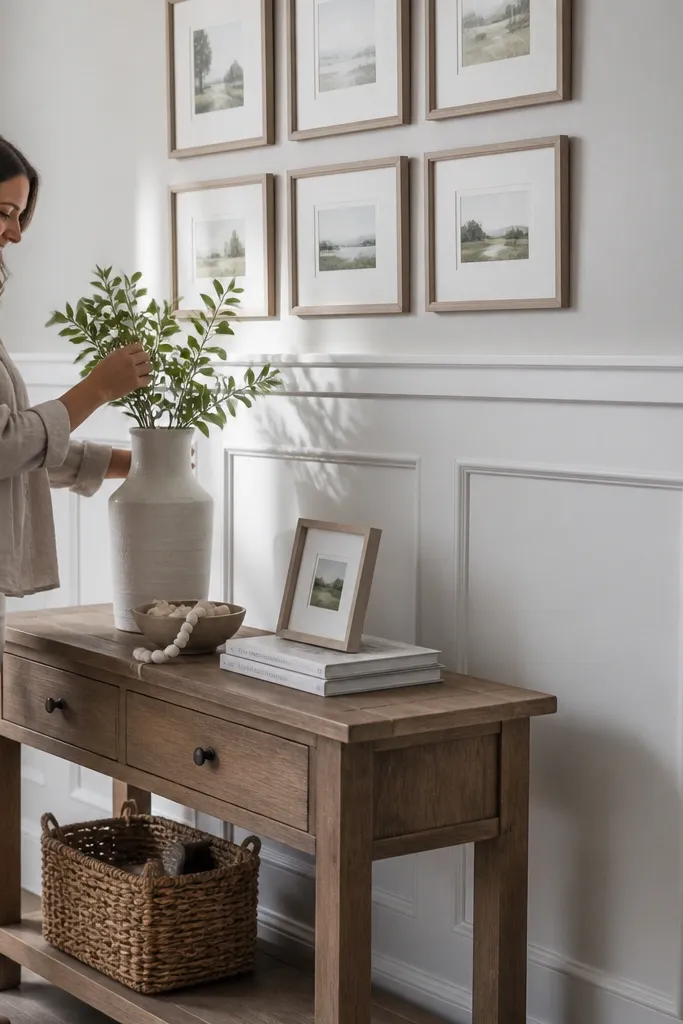
Picture-frame wainscoting looks like custom millwork because the trim creates framed “art” panels on the wall. For low-maintenance wainscoting ideas, choose flat MDF frames with mitered corners so the lines are clean and there’s less surface texture to trap dirt. This look is photogenic because it creates strong shadow lines around each frame, especially with satin paint and bright overhead lighting. It’s best on entry walls that have a single focal point like a console table or a wall mirror. The skill level is mid-range because mitering needs attention, but the result looks intentional.
Mark the wainscot band height and snap a level line for the top and bottom rails. Build the outer border frame first with mitered corners, nailing into studs and using adhesive on the back. Create inner frames by installing cross members to form equal openings, then add the inner trim with mitered returns. Caulk at every seam, sand flush, and paint with satin so the framed edges stay crisp.
Use a miter saw stop block to repeat frame widths without measuring every piece.
Don’t skip test-fitting one corner — if your miters don’t close tight, the whole wall will look off.
8. Beadboard wainscoting with a decorative crown cap
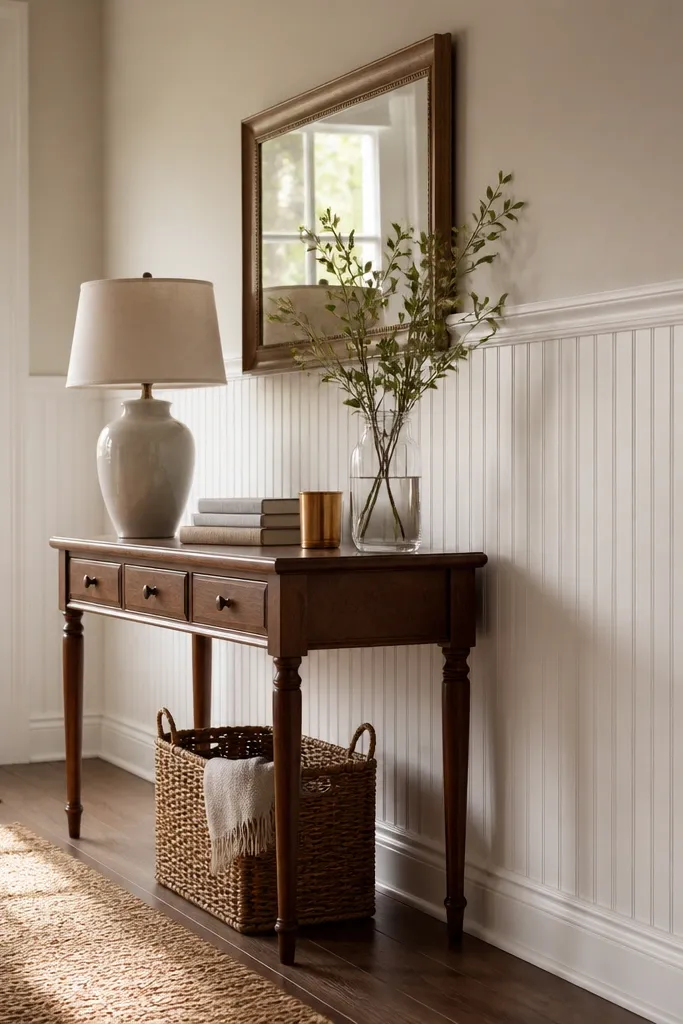
Add a simple crown cap and beadboard suddenly looks like it belongs in a traditional entry with real architecture. This is one of the few low-maintenance wainscoting ideas that feels fancy without turning into complicated trim work. The beadboard grooves still hide drywall imperfections, while the cap creates a strong top line that frames your mirror or light fixture. Keep the crown profile small so it doesn’t collect grime in deep crevices. The finish is still paintable and wipeable once sealed, so you’re not trading looks for daily upkeep.
Set your top line for the crown cap at your chosen band height, then install the cap using adhesive plus nails, keeping it dead level. Install beadboard below the cap, cutting around outlets and leaving expansion gaps at the ends. Add a bottom rail or skirt trim to give the beadboard a clean stop point and make the lower edge look intentional. Caulk all crown joints and beadboard seams, fill nail holes, sand, and paint satin in two coats.
Seal the crown cap with a smooth caulk bead, then lightly sand after it cures so the paint doesn’t show ridges.
Don’t pick a crown with deep, sharp pockets — those catch dust and look dull over time.
9. Shiplap wainscoting band with horizontal seams sealed
Shiplap gives you the warm, cottage-adjacent look but keeps maintenance straightforward if you seal the seams and paint it properly. The horizontal line pattern adds depth and makes the entry feel taller, especially when paired with a simple vertical door and trim. For low-maintenance wainscoting ideas, the key is to use primed boards and caulk the seam joints so dirt can’t collect in the grooves. Once painted satin, shiplap is easy to wipe like any other painted wall section. This works well in entries that get natural light because the texture catches it without looking chaotic.
Pick your band height and snap a level line for the top edge. Install a starter board, then fit shiplap boards horizontally using a small spacer so the seams stay consistent. Nail into studs, and glue where needed so boards don’t shift. Caulk every seam, fill nail holes, sand smooth, and paint with satin paint in two coats.
Use a caulk gun with a thin bead and wipe excess immediately with a damp rag so the grooves stay crisp, not smeared.
Don’t leave shiplap seams uncaulked — the gaps collect shoe dust and look gray after a few months.
10. French-country wainscoting with arched panel accents

Arched accents make an entry feel welcoming and slightly romantic, and they look great in front of a mirror or art. The trick for low-maintenance wainscoting ideas is to keep the arch details limited to the panel tops while the rest stays flat and wipeable. This design reads “grand” because it creates shape at eye level, not just flat rails. Use MDF for the arches so the curves are consistent, then paint satin for easy cleaning. It’s a mid-skill project because you’re cutting repeated arches, but it’s manageable with a template.
Choose a panel band height and decide how many arched openings fit your wall width, aiming for repeatable spacing. Build the outer rails and bottom skirt, then mark arch templates on the panel pieces. Cut arch tops with a jigsaw or router template, attach panels into the framed openings, and nail into the trim. Caulk seams, fill holes, sand, and paint in two coats so the arch edges look sharp, not fuzzy.
Cut one arch template from scrap MDF and trace it for every opening to keep the curves identical.
Don’t make arch openings uneven — mismatched curves make the entry look homemade instead of built.
11. Modern vertical panel wainscoting with hidden fasteners
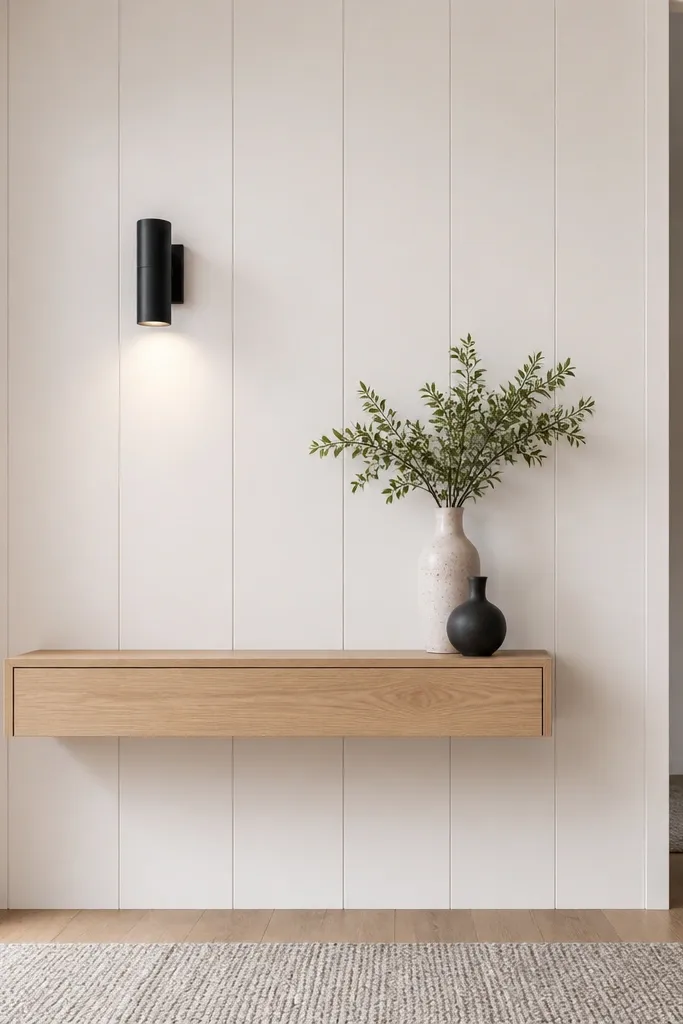
This is for entries that need a clean, modern look without a lot of decorative trim. Vertical panels add height, and the smoother surface makes it feel low-fuss to maintain. Hidden or minimal visible fasteners keep the finish looking crisp, which matters in a bright entry where nail heads can show through paint. The design is best with narrow, consistent panel widths so the wall reads straight and intentional. It’s a good choice if you’re tired of chair rails and want something that still looks grand.
Mark your band height and install a top and bottom rail, then add vertical studs or backing blocks where panels will land. Cut panel pieces from primed MDF and fit them into the rail grid with a consistent gap for paint. Use construction adhesive and a nailer where the fasteners land inside the trim line, then caulk the seams so they vanish. Fill any tiny imperfections, sand, and paint satin for a wipeable finish.
Keep panel gaps consistent with thin plastic shims so the seams look intentional, not accidental.
Don’t rely on caulk to hide big gaps — fix the fit first or the seams will look thick.
12. Wainscoting with a built-in bench back panel look
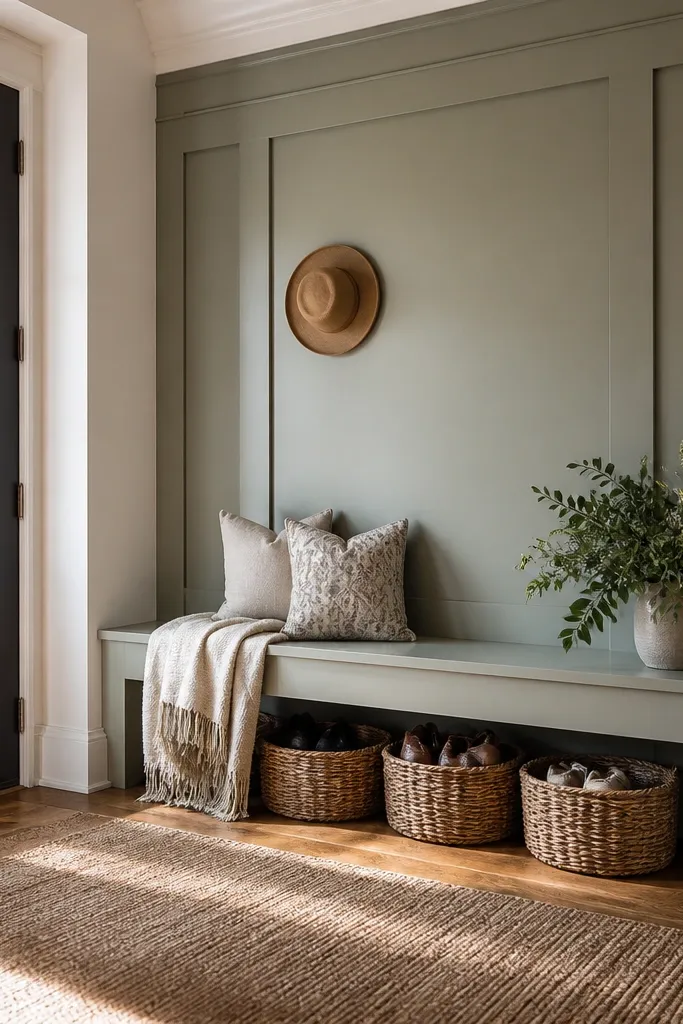
If you have a bench, shoe storage, or even just a console table, framing the area with wainscoting makes the whole entry feel designed. This look uses a larger central panel section with a top rail and side rails, so it reads like a built-in back panel even when you’re not installing a bench. It’s low-maintenance because the surfaces are flat and sealed, and you’re not adding high-texture detail. This is also a smart visual strategy if your entry has awkward wall features like a thermostat or a slightly off-centered mirror. The project is straightforward because you’re building one main panel rectangle and repeating the frame shape.
Measure the space behind your bench/console and decide the central framed panel size, keeping it centered on the doorway or main light. Install outer wainscot rails at your chosen band height, then build the central rectangle frame using thin MDF strips. Fit flat panel inserts inside the frame, then cap the top rail with a simple profile trim for a finished look. Caulk seams, sand, and paint satin so the framed area reads smooth from across the room.
Use painter’s tape to mask a clean line for the central frame before you cut — it helps you visualize symmetry while you work.
Avoid centering the wainscot on the bench if your mirror is off-center — choose one anchor and align everything to it.
13. Beadboard with a double-stacked rail for extra height
A double-stacked rail adds a built-up, designer feel without adding lots of small pieces. On entry walls, this reads as more “structure,” which makes the space feel taller and more formal. Keep the beadboard below and you still get the low-maintenance wainscoting benefit of grooves that hide minor drywall flaws. The double rails also create a thicker shadow line that looks great in photos with flash or window light. This works best when your entry has a mirror or artwork at eye level, because the rails frame that focal point.
Pick a top rail height around 40 inches and add a second rail about 4-6 inches below it, both level. Install the lower rail first so the spacing is easy to control, then add the upper rail on top. Mount beadboard below the lower rail, cutting around outlets and leaving small clearance at corners. Caulk every seam, fill nail holes, sand, and paint satin in two coats for crisp, wipeable edges.
Use a laser level if you have one — two rails magnify any slight slope and it becomes obvious in photos.
Don’t make the rails different depths unless you’re comfortable with trim-matching — mismatched profiles look accidental.
14. Shadow-gap wainscoting with flat panels
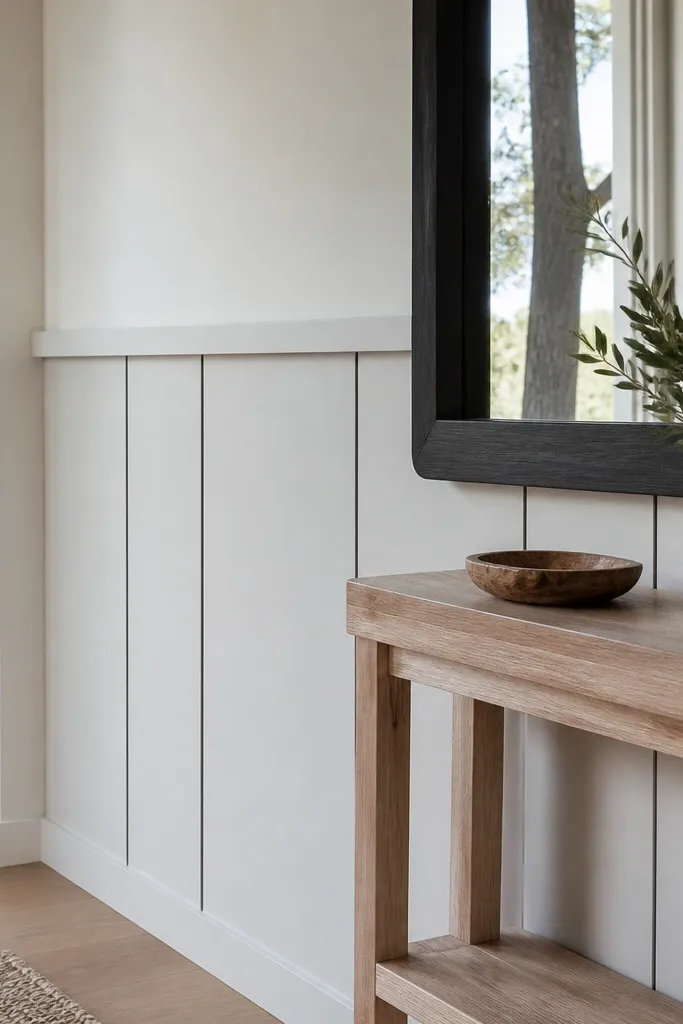
Shadow-gap wainscoting looks modern and expensive because it creates a thin dark line that defines each panel edge. The maintenance stays reasonable because everything is paintable and smooth, and the shadow gap hides tiny imperfections at the seam. This is a high-impact option when your entry has bright walls and you want strong definition without heavy ornament. You do need to use the right trim pieces (or build a consistent gap with spacers and careful measuring), but once it’s painted, it’s easy to wipe. It’s also forgiving — the shadow line makes slight unevenness less noticeable.
Choose a panel band height (around 38-42 inches) and install a top and bottom rail. Use trim boards designed for shadow gaps or create the gap using a spacer strip so there’s a consistent thin line between the panel and the frame. Build the panel grid with flat MDF inserts, then attach the trim so the gap stays open and uniform. Caulk only where you want a sealed finish, fill nail holes, sand lightly, and paint satin to keep the shadow line crisp.
Test your gap width on scrap before you cut the wall pieces — even a 1/16-inch change affects how sharp the line looks.
Don’t paint over a gap you need to stay dark — mask the edges so the shadow line remains visible.
15. Wainscoting with vertical beadboard corners and flat center
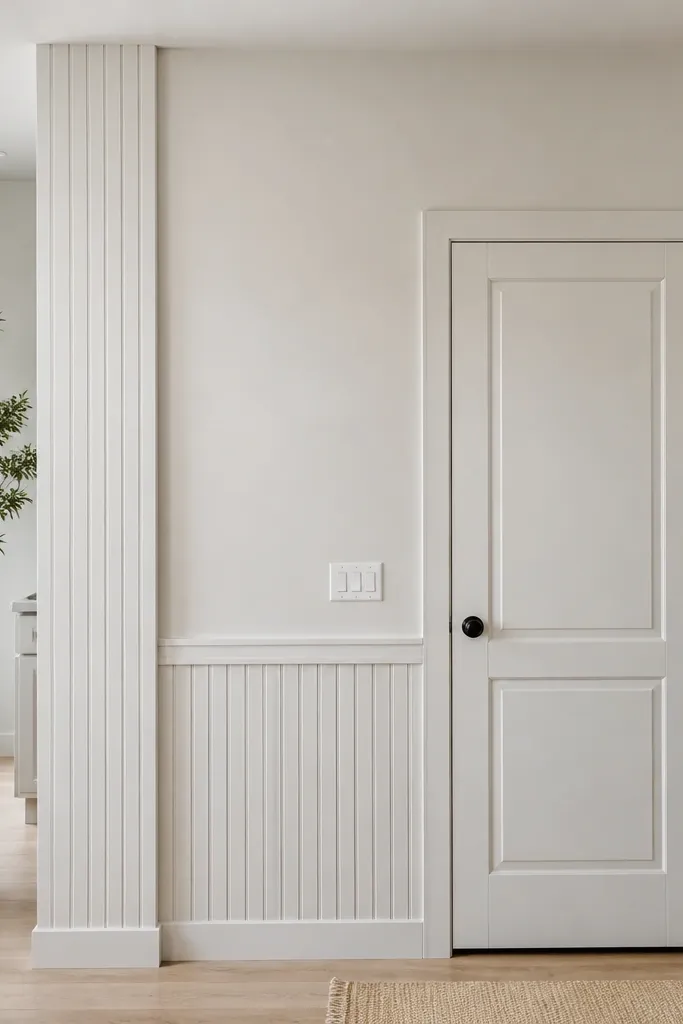
This is a smart design trick: you get the charm of beadboard, but only where it adds depth and frames the room. Vertical beadboard corners make the entry look taller and more finished, while the flat center keeps the wall easy to wipe and helps the layout look clean. It’s one of the best low-maintenance wainscoting ideas when you want “interest” without committing to beadboard across the entire run. In photos, the corner texture catches light and makes the whole band look custom. It’s also practical in entries with frequent scuffs because the center panels stay smooth.
Editor's noteKeep corner beadboard widths consistent on both sides so the entry doesn’t look asymmetrical in mirror reflections.
Mark your wainscot band height and install the top rail level. Add vertical beadboard trim only at the corners by building small corner sections that run from the bottom line to the rail. Fill the middle sections with flat panel frames or flat MDF inserts, keeping panel widths consistent across the wall. Caulk all seams, fill nail holes, sand, and paint satin for a uniform wipeable finish.
Skip thisDon’t let the beadboard corners start at slightly different heights — the eye catches that immediately.
16. Painted panel molding with a single continuous bottom rail
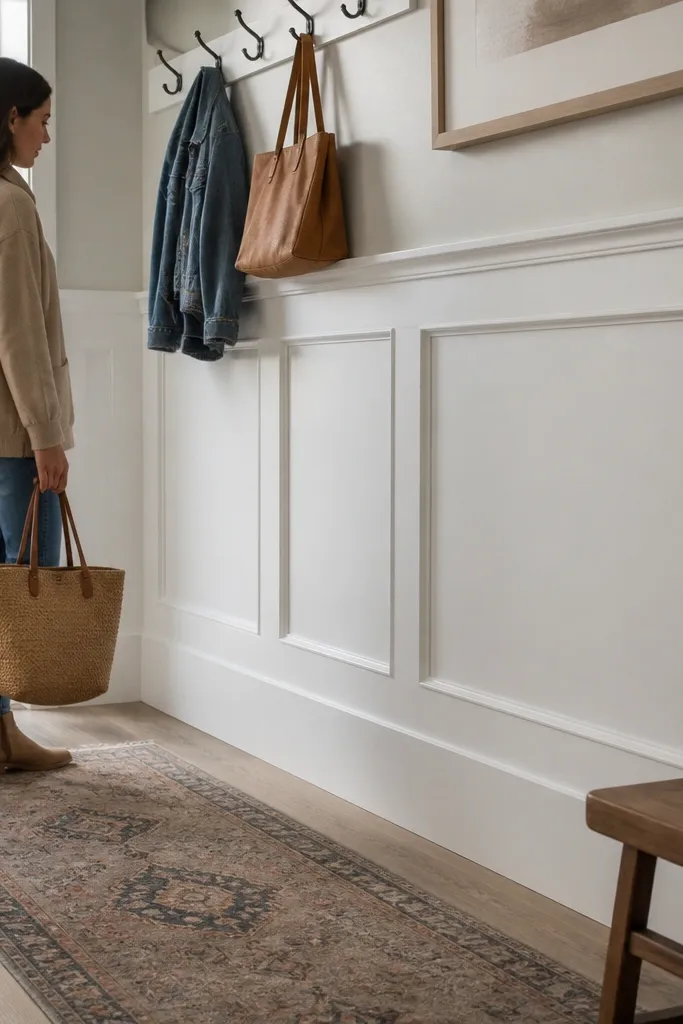
This look is understated but it reads grand because the lines are continuous and the panels are framed cleanly. A single continuous bottom rail keeps the lower edge crisp and protects the wall from scuffs where shoes and bags bump around. For low-maintenance wainscoting ideas, this is a good pick because you’re not building lots of small decorative elements that create ledges. The panel molding adds visual structure while staying easy to clean because the face is flat and sealed. It’s best for entryways where you want a polished finish that doesn’t compete with bold wallpaper or a statement light fixture.
Decide your band height and snap a level line for the bottom rail first, then install the bottom rail into studs with adhesive and brad nails. Add vertical panel molding strips to create equal openings, then install a top rail or cap strip depending on your preferred look. Fit flat panel inserts behind or between the molding strips, then caulk each perimeter seam. Fill nail holes, sand flush, and paint satin in two coats for durability.
If your wall has an outlet on the wainscot band, build the panel grid around it so molding lines don’t stop awkwardly at the box.
Avoid mixing trim profiles — keep one molding profile for the whole band or the finish looks patchy.
17. Hollow-core door slab style wainscoting panels
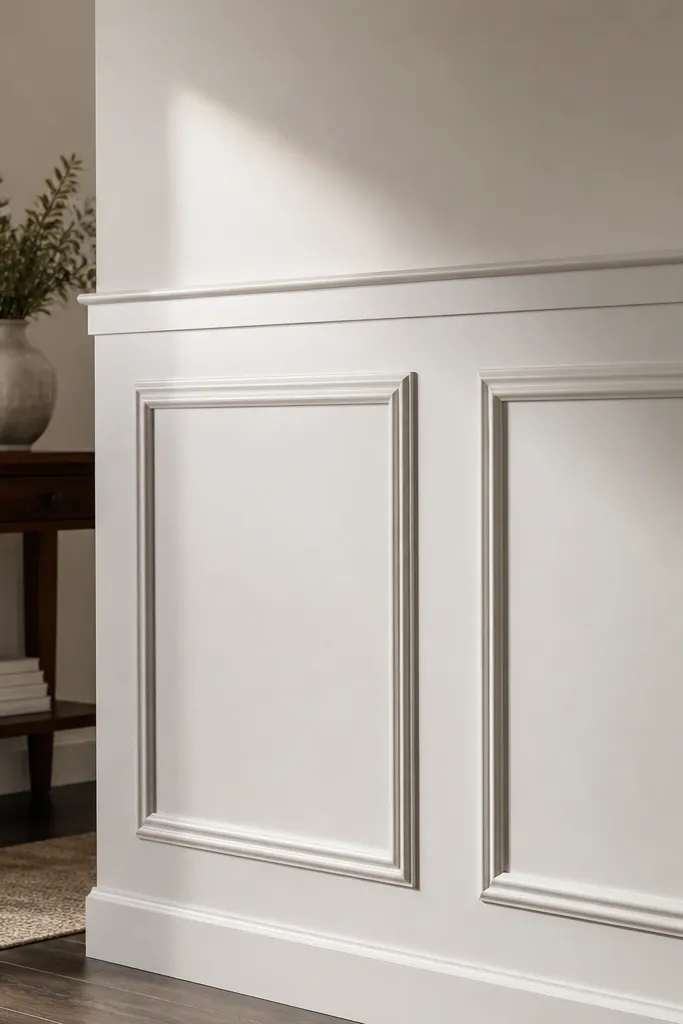
This one looks custom because it mimics the raised-panel look you’d see on a quality door, but you can build it with flat MDF and simple trim shapes. The raised effect adds depth and shadow without needing real wood carving. It’s low-maintenance because once it’s painted and sealed, the surface wipes like any other painted wall — no deep grooves to trap dust. Use it when your entry has modern hardware or clean-lined furniture and you want a more traditional wall texture. The build is a bit more trim work, but the result photographs beautifully.
Editor's noteUse the same MDF thickness for both the slab and border trim so the raised look stays consistent across the wall.
Build a rectangular rail grid at your chosen band height, then cut raised “slab” sections from MDF sized to fit inside each opening. Add thin trim strips to create the raised border effect around each slab, using a consistent width so the pattern looks intentional. Secure the slabs to the rail grid with construction adhesive and nails hidden behind the border trim. Caulk seams carefully, fill nail holes, sand smooth, and paint satin in two coats.
Skip thisDon’t make the raised border widths different — it kills the door-panel illusion.
18. Marble-look tile wainscoting with a thin chair-rail top
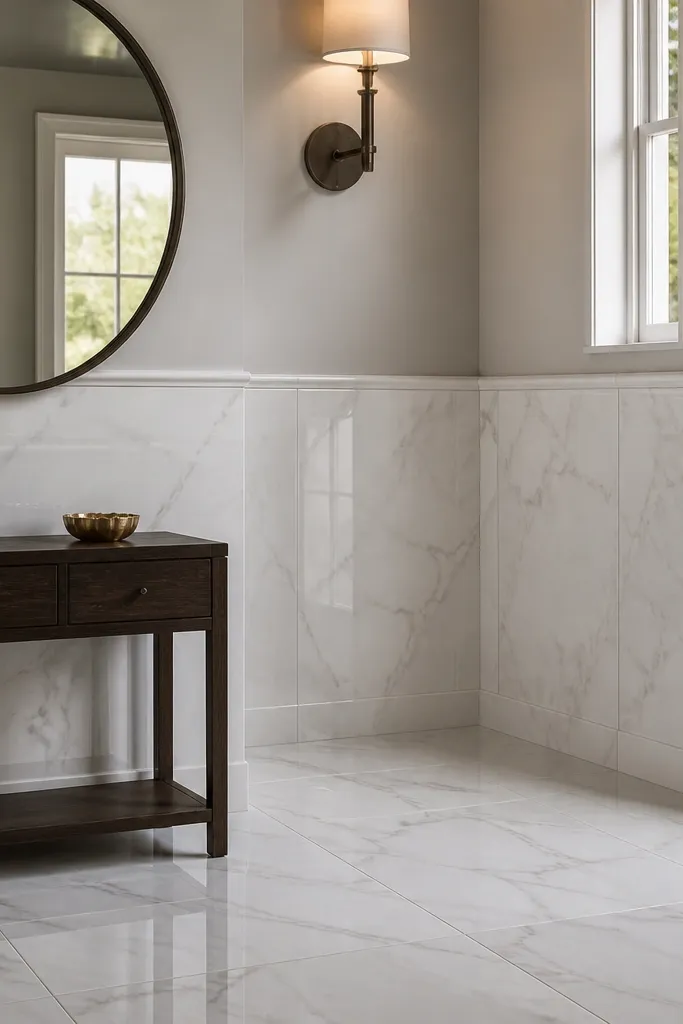
This is the cleanest way to get high-end entryway vibes without babying the wall. You cover the wainscoting zone with marble-look porcelain tiles so scuffs, shoe marks, and mop water wipe off fast. Keep the chair rail thin and crisp so the tile stays the star, not the trim. It looks grand because the tiles read like stone slabs and the grout lines stay tight and uniform. The build is mid-skill: tiling is the only part that takes attention, but you can finish in a weekend if the entryway is small. Best for entryways, mudrooms, and homes with kids or pets where walls take a beating.
Editor's noteUse a laser level to keep the ledger line dead straight; crooked tile lines make the whole entry look off even if the trim is perfect.
Mark a level line for the top of the tile panel first, then decide your wainscoting height — 34-36 inches from the floor is a good entryway target. Install a 1x4 ledger board on that line using screws into studs, then spread thinset with a 1/4-inch notched trowel and set marble-look porcelain tiles with spacers to keep grout consistent. After the thinset cures, pull the ledger board off, fill the top gaps, and grout with an unsanded grout if your grout joints are under 1/8 inch. Seal the grout with a penetrating sealer, then add a slim chair rail (1x2 or 1x3) over the tile using construction adhesive plus brad nails. Caulk the top and corners, then paint the chair rail in a semi-gloss trim paint so it wipes clean.
Skip thisDon’t tile directly over glossy paint or dusty drywall — it will release and you’ll get hollow spots.
19. Raised panel wainscoting with 3-inch beaded cap strips
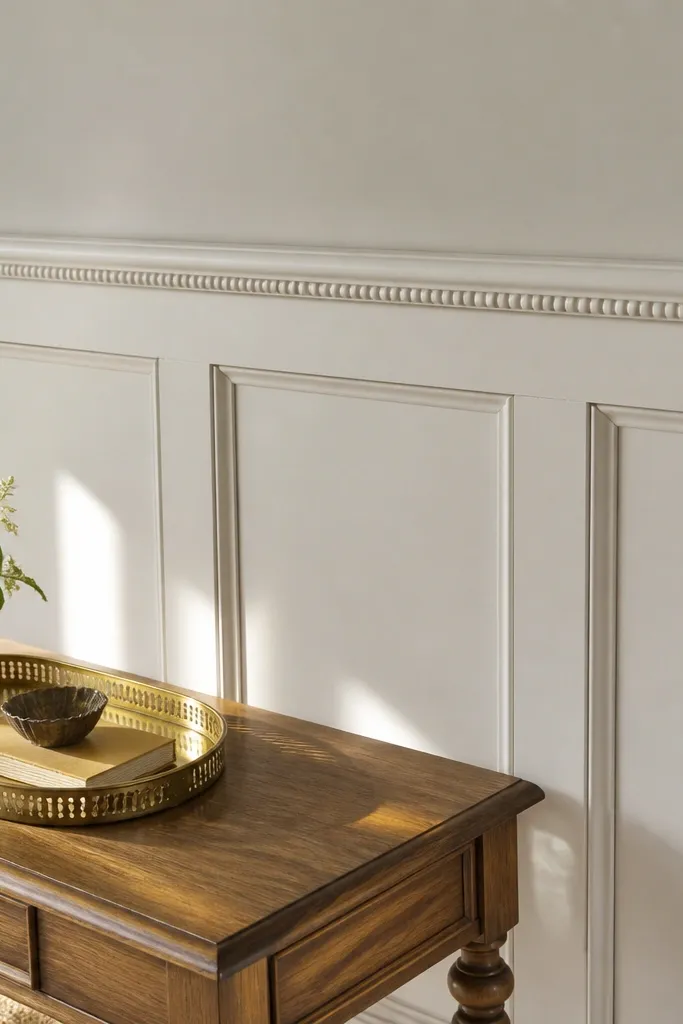
This style gives you that old-house, built-in look, but it’s still practical for daily life. The raised panels create depth in photos, while the beaded cap strip makes the whole run feel intentional and finished. It’s low maintenance because the surfaces are painted wood and the grooves are shallow enough to dust with a microfiber cloth. You get a grand welcome because the cap strip catches light and creates a clear visual band at eye level. Skill is basic carpentry: you’re cutting panel frames and nailing trim, not doing fine joinery. It fits entryways with standard ceiling heights and hallways that need a strong horizontal anchor.
Choose a wainscoting height around 40-42 inches, then install a bottom rail first using a straight level line and screws into studs. Build the panel frames from 1x3 or 1x4 primed MDF trim, using a simple raised center panel insert (MDF panel or thin plywood) that sits flush inside the frame. Add the beaded cap strip on top — a 3-inch-wide pre-profiled bead-and-casing strip — and keep it aligned with your top rail line for a crisp edge. Prime everything with a bonding primer, then paint two coats of semi-gloss trim paint, letting each coat dry fully before touching up. Seal the panel edges with paintable caulk at corners so dirt doesn’t collect in tiny gaps.
Pre-paint the panel inserts before assembly; it makes the grooves look even and cuts touch-up time.
Skip the temptation to use random scrap trim widths — mismatched widths make the panels look crooked even when the level is correct.
20. Board-and-batten wainscoting with a recessed picture ledge shelf
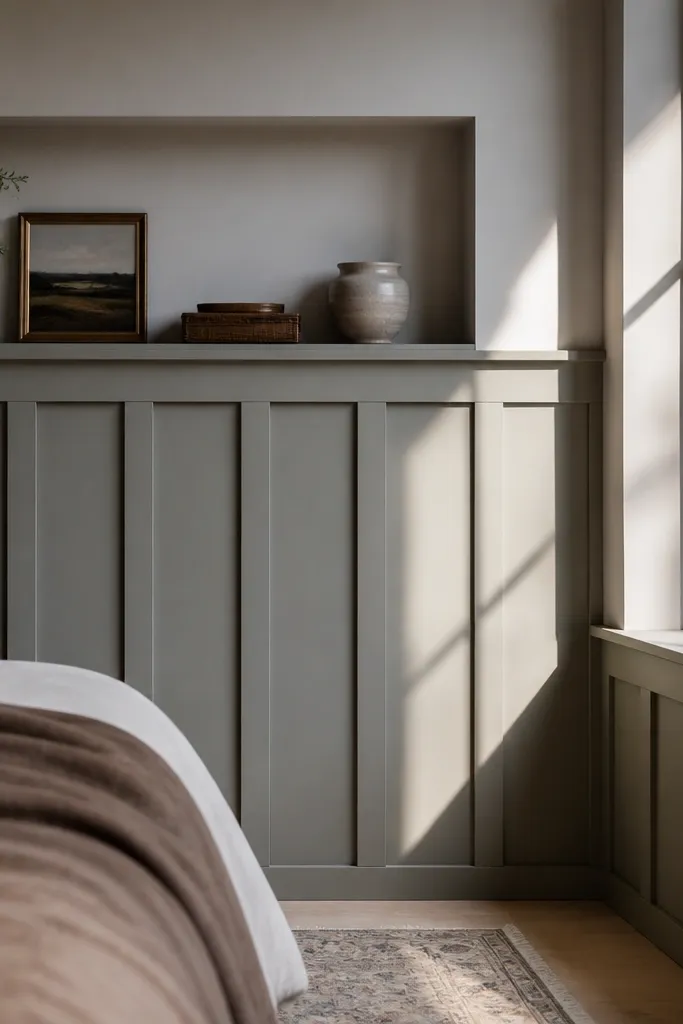
If you want “grand welcome” in a way that also helps you live in the space, this one nails it. The board-and-batten look gives texture, and the recessed picture ledge shelf adds a practical spot for seasonal decor, keys trays, or a low plant. It still reads as wainscoting because the shelf is inside the trim line, not a separate floating object. The recessed top surface stays cleaner because items sit back and dust doesn’t land on edges as easily. This build is beginner-friendly carpentry with a bit of measuring — no complex router work. It’s great for entryways that need storage and visual structure without turning into clutter.
Editor's noteDry-fit the shelf face pieces with painter’s tape before nailing; a 1/16-inch shift shows up instantly on a long entry wall.
Set your overall wainscoting height at 48 inches, then mark the shelf opening line about 6 inches below the top. Frame the recessed ledge using 1x3 rails and 1x2 face pieces, leaving a 3/4-inch deep recess so decor sits securely without falling forward. Install vertical battens (1x2) centered between the horizontal rails, spacing them evenly — 8 to 10 inches on center looks balanced in most entryways. Cap the top with a thin chair rail style trim piece that hides the recess edges, then fill nail holes and caulk all seams. Paint the whole run semi-gloss, then add a clear coat only on the shelf surface if you plan to set items there often.
Skip thisDon’t make the recess too shallow — under 1/2 inch invites items to slide forward and chip the trim.



