
1. White painted square balusters with satin topcoat
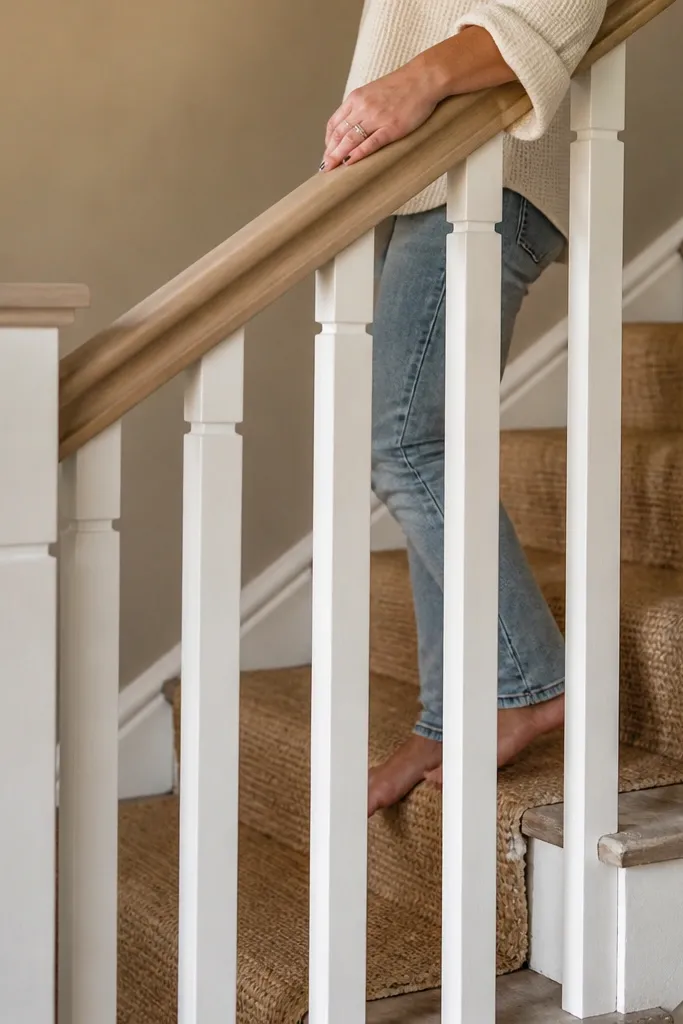
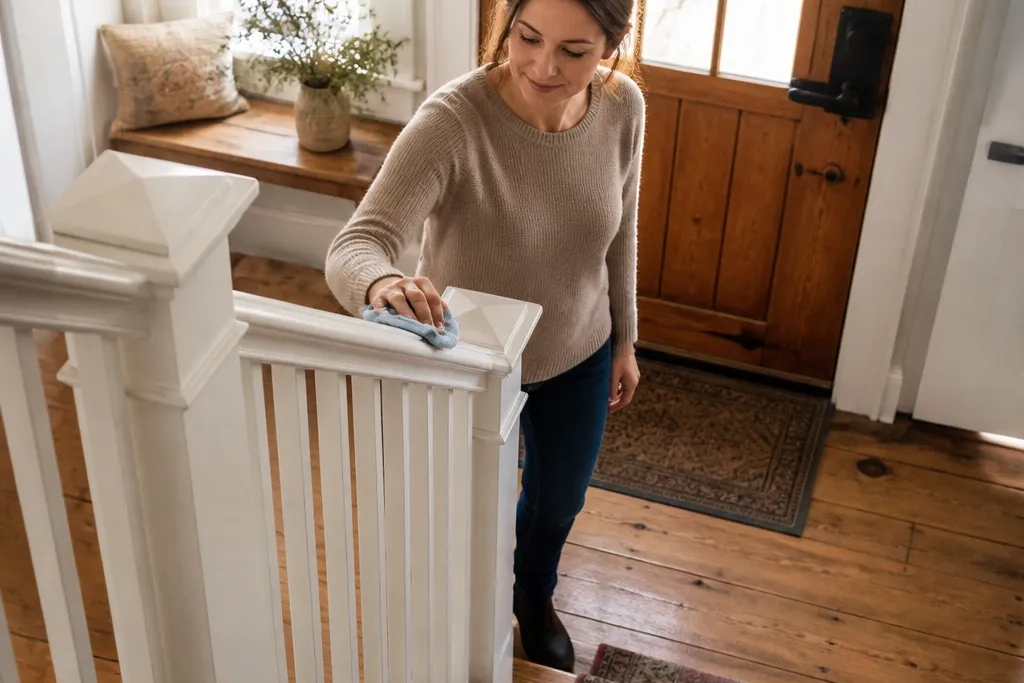
This is the farmhouse look that stays neat even when the rest of the house is chaos. Square balusters give you clean lines, and painting lets you control color and hide minor wood imperfections. The satin topcoat matters because it wipes clean without the glassy stickiness of gloss. Pair it with a simple handrail profile — rounded on top, flat underneath — so fingers don’t snag and grime doesn’t collect. It fits entry stairs, hallway stairs, and any space where you want bright, airy contrast against darker floors or trim.
Start by sanding the baluster wood to 150-180 grit, then prime all sides including the ends with a bonding primer. Paint with a cabinet-grade enamel, let it cure fully, then topcoat with satin for wipe-clean durability. Install balusters at consistent spacing, using a spacing jig or a scrap block cut to your gap, and fasten through top and bottom rails so nothing loosens over time.
Seal the baluster end grain with primer twice; it’s the first place paint lifts later.
Skip glossy poly on painted railings — it shows fingerprints and scuffs more.
2. Natural oak handrail with clear conversion varnish
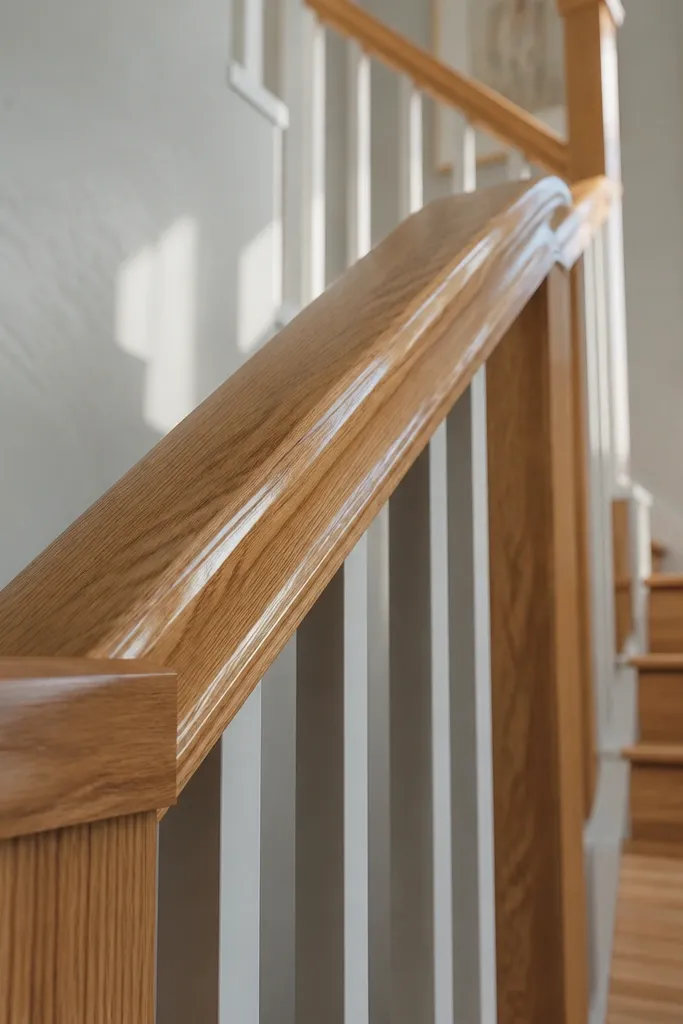
If you want farmhouse warmth without painting, stained and sealed oak is a great route. A clear conversion varnish system hardens into a tough film, so you can wipe off smudges without the sticky feel that cheap “clear coats” get. Keep the rest of the railing simpler — either white square balusters or light wood with minimal detailing — so the handrail remains the hero. This look works especially well with white walls, oak floors, and black metal light fixtures. It’s also a good choice when you want a railing that looks richer over time rather than chipping at edges.
Sand the oak handrail to 120 then 180 grit, wipe with mineral spirits, and apply a wood conditioner if your boards are blotchy. Stain evenly, then let it dry until tack-free before you start the clear coat. Apply conversion varnish in thin coats, lightly scuff-sand between coats with 320 grit, and finish with a final coat. Install the handrail only after the last coat cures so you don’t trap uncured finish under brackets.
Editor's noteUse a foam brush or lint-free cloth for stain, and keep a wet edge so you don’t get lap marks.
Skip thisDon’t rush the cure time; installing too soon can cause finish imprinting.
3. Black metal pickets with white wood handrail
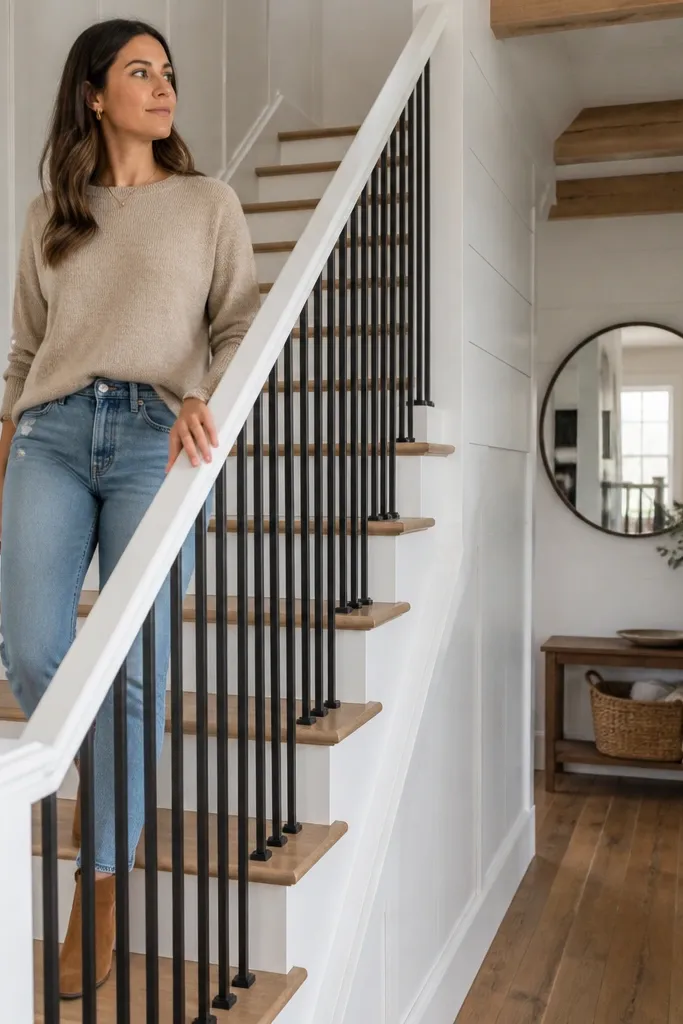
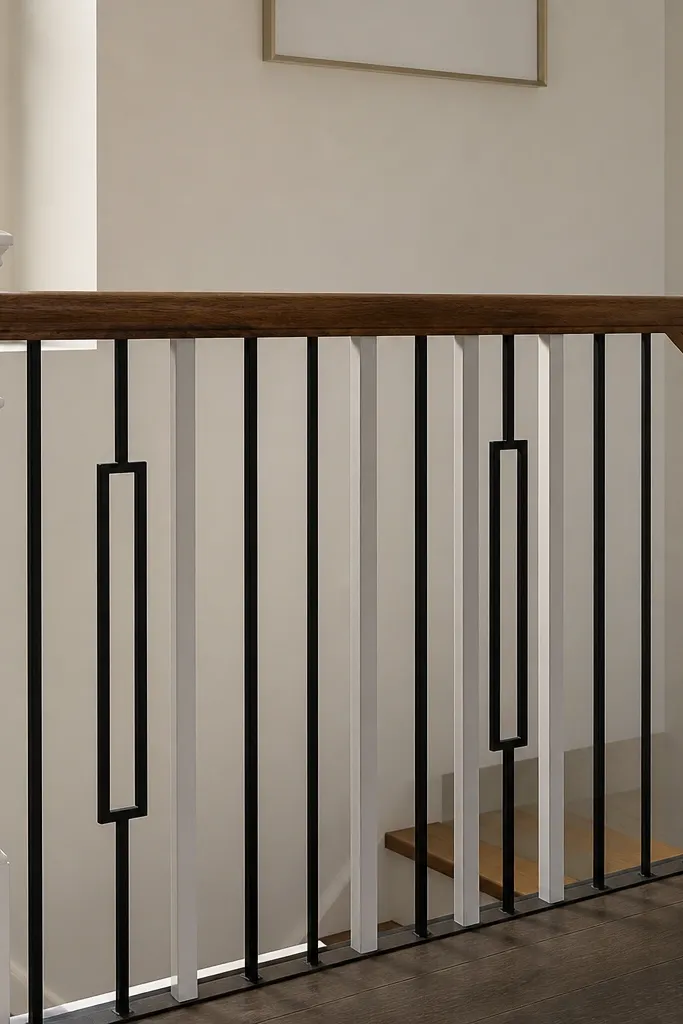
This combo reads farmhouse because it blends clean industrial lines with a soft, painted handrail. Black metal pickets resist dents and are easier to clean than carved wood. The white wood handrail gives you that classic farmhouse contrast and feels good to touch. If you choose powder-coated metal, you avoid rust worries and keep the look crisp for years. It’s perfect for open staircases where you want the railing to look light, not bulky, while still feeling sturdy.
Choose powder-coated pickets with consistent width so spacing stays uniform. Mount posts to the stair stringers or landing framing, then attach a top and bottom rail that aligns with your handrail height. Install pickets with threaded inserts or proper brackets, keeping each one square so the powder coating doesn’t get scraped. Finish by painting or topcoating the handrail with cabinet enamel and satin topcoat, then secure the handrail with brackets that hide fasteners.
Editor's noteUse a laser level or a long straightedge to keep the top rail perfectly level across the run.
Skip thisDon’t mix metal finishes; mismatched sheen makes the whole railing look “off” in daylight.
4. Reclaimed-looking whitewashed balusters with sealed topcoat
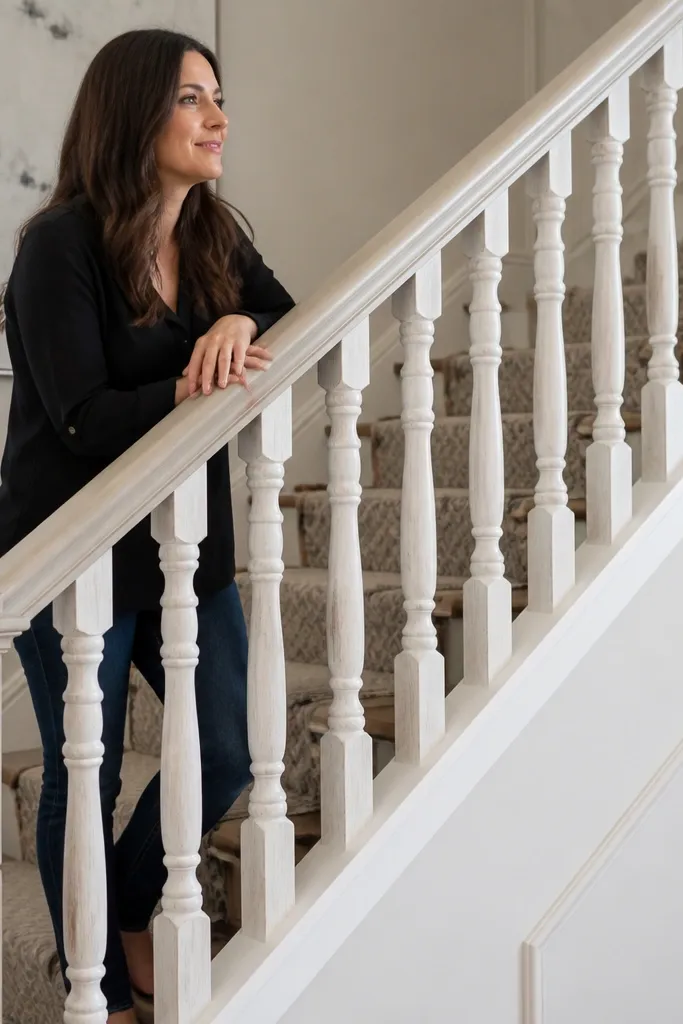
Whitewash gives you that farmhouse “lived-in” texture while staying cleanable when you seal it right. The key is not the whitewash itself — it’s the topcoat you put over it. A sealed satin finish keeps the grain visible but prevents the rough surface that traps dust. Pair this with a smooth, painted handrail so the look stays cohesive. This is a strong fit for traditional farmhouse interiors and for people who want character without constant maintenance.
Lightly sand balusters, then apply a thin whitewash stain or watered-down paint wash so the grain still shows. Let it dry, then seal with a satin clear topcoat designed for wood floors or trim durability. Install with consistent spacing and use a guide block to avoid widening gaps near the corners. If the balusters have heavy texture, sand the high spots smooth before sealing so wiping is actually easy.
Editor's noteDo a test piece: whitewash can turn yellow on some woods unless you pick the right base coat.
Skip thisSkip skipping the clear topcoat — whitewash alone stays chalky and collects dirt.
5. Two-tone railing with warm wood handrail and painted posts
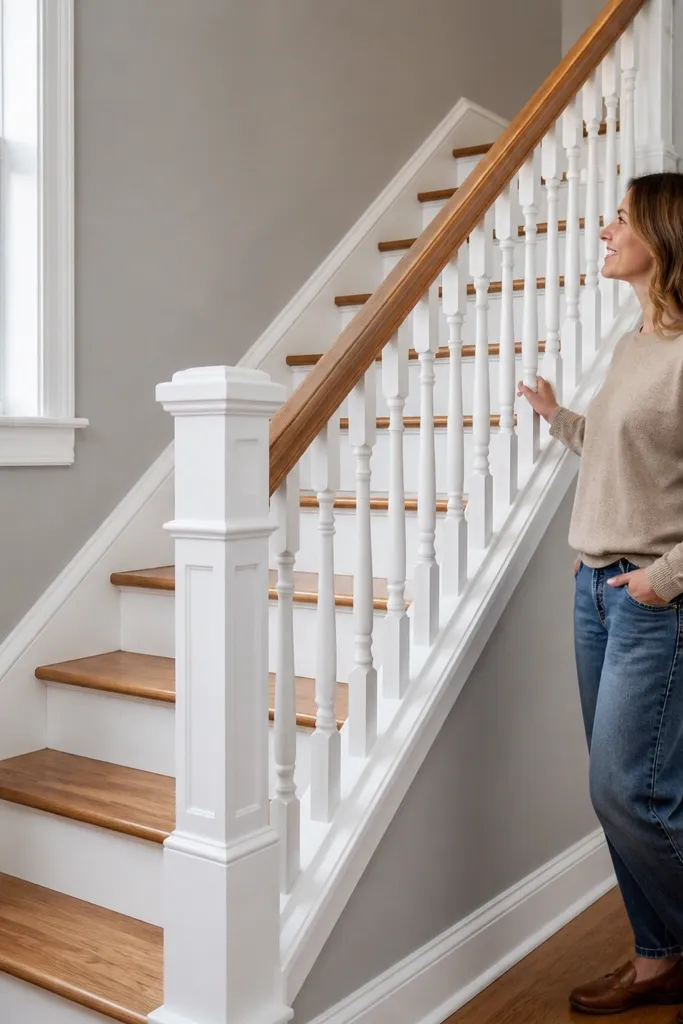
Two-tone railings look more custom than all-white or all-stain, and they hide wear where people touch most. Paint the posts and base rails for crisp farmhouse contrast, then use warm wood for the handrail so it feels inviting. The maintenance advantage is smart: you can scuff-touch up the painted parts with minimal sanding, while the handrail gets a tough topcoat that wipes clean. This style works great on stairs that open into a landing, because the posts frame the space nicely. Keep the balusters plain — round or square — so the two-tone effect stays clean.
Prime and paint posts and base rails with a bonding primer, then topcoat with satin enamel. Build or select a handrail from solid wood, sand to 180 grit, stain, and seal with a durable clear coat. Install posts first, then attach the base rail, then place balusters with a spacing jig. Finish by mounting the handrail with brackets and caulking only the paint-to-wood seams for a tight look.
Editor's noteUse painter’s caulk that matches your paint line; it stays flexible and prevents cracking at seams.
Skip thisDon’t stain the handrail before painting posts; drips and overspray are a pain to clean.
6. Horizontal shiplap-style rail panels with powder-coated uprights
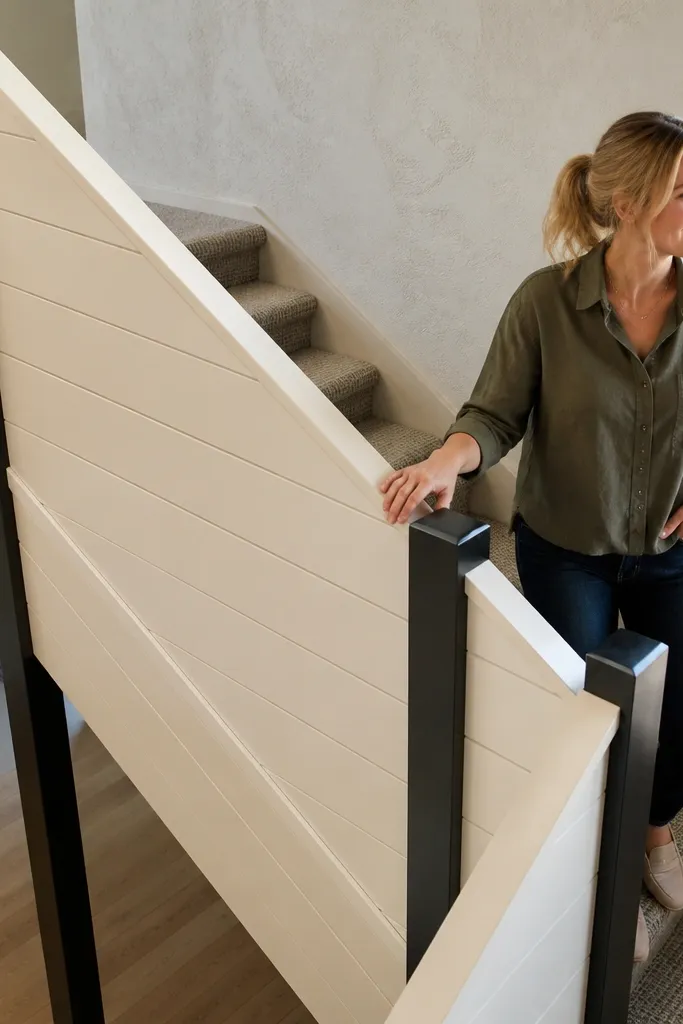
Horizontal paneling reads farmhouse in a way that’s cleaner than carved balusters, and it reduces the dust traps you get with lots of individual spindles. Powder-coated uprights keep the metal look crisp and easy to wipe. The panels can be painted white or a soft cream, and the smooth face wipes down in seconds. This look is especially good for staircases where you want a more solid visual barrier. It’s also a good option if you’re trying to make a railing look “custom built” without complicated curves.
Install uprights at your chosen spacing, then build a panel frame that fits between them. Use thin boards cut to create the shiplap-like lines, leave a consistent reveal, and fasten from the back. Prime everything, paint with cabinet-grade enamel, and topcoat with satin for durability. Add a handrail on top with a smooth profile so fingers don’t catch on panel edges.
If you use wood panels, seal the back side too; it prevents warping that shows as uneven gaps.
Don’t skip the reveal spacing; panels that touch will expand and crack the paint later.
7. Vertical board railing with beadboard lower section
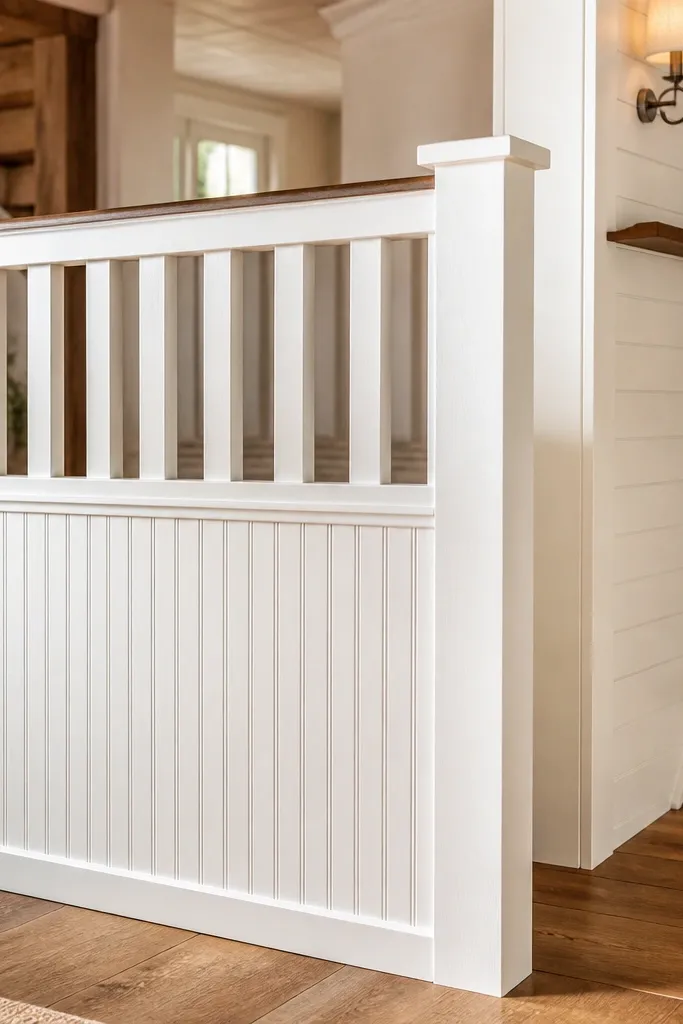
This is farmhouse with structure: vertical boards keep the upper section clean, while beadboard in the lower panel adds that cottage texture without the deep carve of ornate wood. The maintenance win comes from using a smooth, sealed finish on the beadboard face. You still get plenty of visual interest, but wiping is manageable because the face is flat and protected by topcoat. This style works well on stairs that need a more enclosed feel, like basements stairs or homes with high foot traffic. Choose a simple, rounded handrail to keep it comfortable.
Frame the vertical board section first, then cut beadboard panels to fit the lower area between rails. Prime all surfaces, then paint with an enamel formulated for trim, followed by satin topcoat. Install the panel assembly to your posts and base rails using screws hidden behind trim pieces. Finally, install the handrail at the right height and keep the handrail profile smooth — round or gently contoured on top.
Editor's noteUse foam sanding blocks on beadboard before priming to flatten raised edges.
Skip thisAvoid heavy gloss on beadboard; it shows every scuff and finger mark.
8. Rounded white balusters with clear sealed base rail
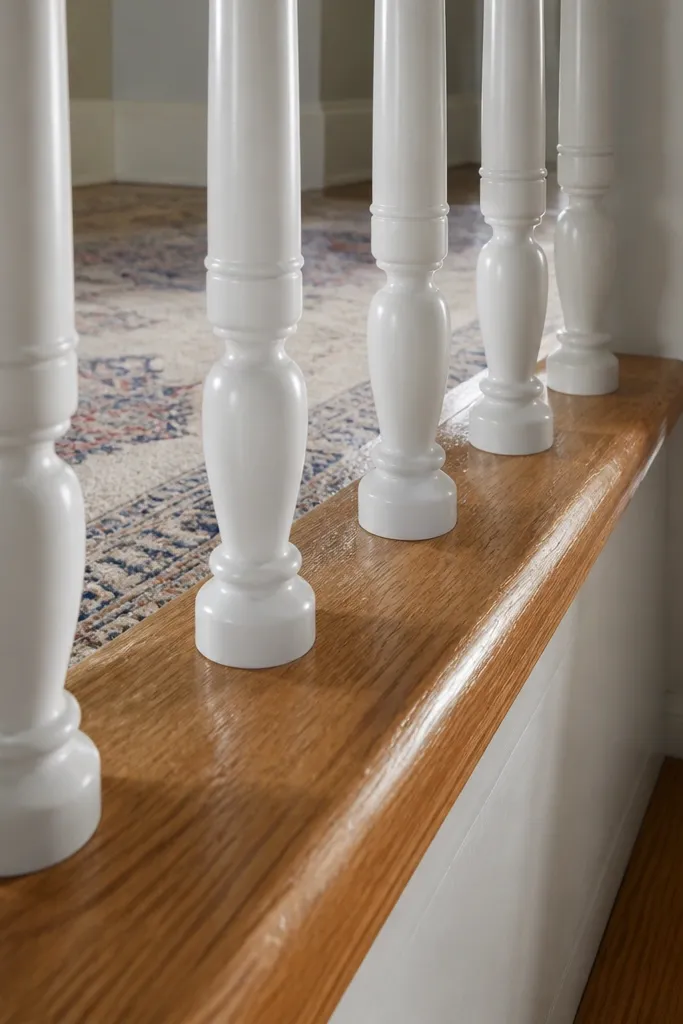
Rounded balusters soften the whole staircase and make the railing look more farmhouse and less “builder grade.” The trick is mixing finishes without creating maintenance headaches: keep the balusters painted for easy touch-up, but choose a clear sealed base rail in a matching wood tone. That gives you warmth at the bottom where kicks and shoe scuffs happen, and it wipes clean without paint chipping. This look is great when your walls are white and you want the wood to show through. It also photographs well because the rounded shapes catch light smoothly.
Paint balusters with bonding primer and satin enamel, then seal the base rail with a durable clear coat. Install base rail first, then set balusters using a template to keep the spacing consistent. Add the handrail over the top with brackets and caulk only the seam lines so water doesn’t creep into gaps. Finish with a final topcoat touch on any screw heads.
If your base rail gets scuffed, use a harder topcoat than you would on the wall trim.
Don’t clear-coat over unsealed wood edges; end grain will drink moisture and dull the finish.
9. Shaker-style railing with painted rails and square posts
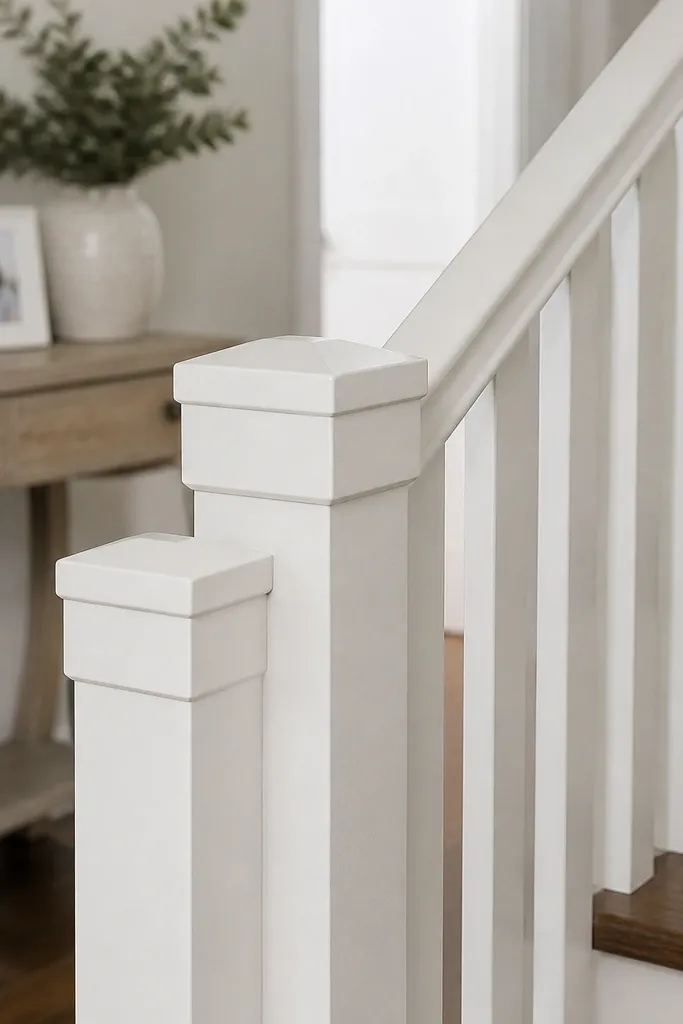
Shaker style works because it looks intentional and clean, not fussy. Painted square posts and rails create crisp geometry, while simple balusters keep it low maintenance. The look reads farmhouse without needing heavy distressing. If you use satin enamel over primer, the railing wipes clean and resists everyday scuffs. This is a strong choice for rental-friendly upgrades because you can update the look fast without structural changes. It also works with both modern and traditional farmhouse interiors.
Cut or buy square posts and rails, then sand, prime, and paint in thin coats for an even finish. Use a straight spacing guide for the balusters so the grid stays consistent from bottom step to landing. Attach everything with proper screws and angle brackets where needed so the railing doesn’t loosen. Finish with a handrail that has a smooth top — avoid sharp corners that catch grime and fingers.
Use painter’s tape to protect the handrail edge while you paint the rails, then peel it while the paint is still slightly soft.
Skip “one thick coat” painting; it leads to drips and a rough surface you’ll hate cleaning.
10. Stained handrail with white metal rod balusters
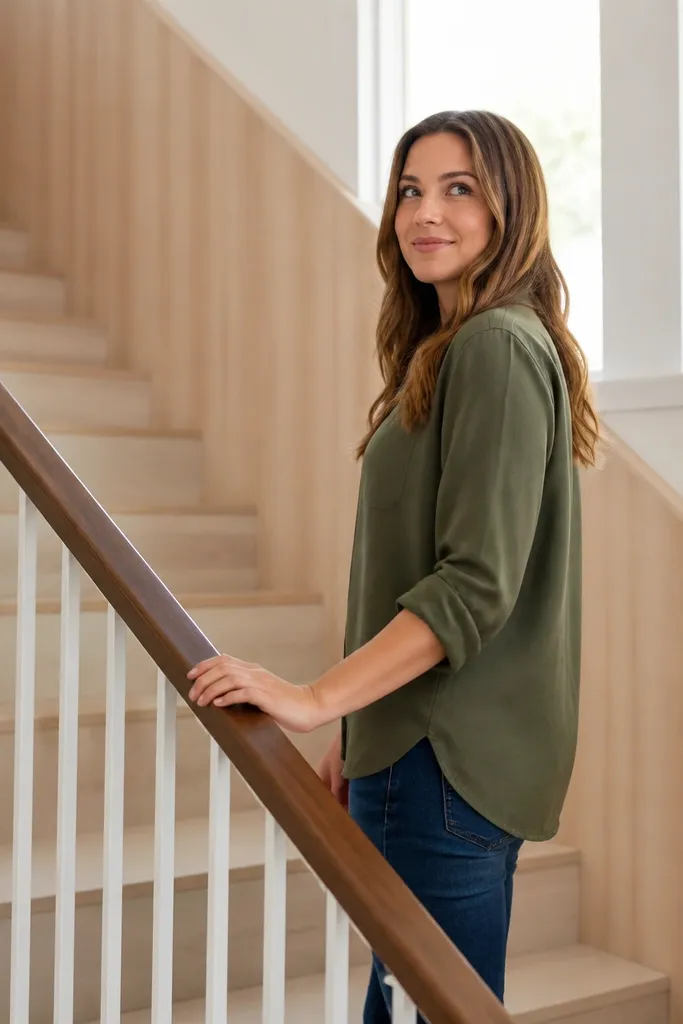
Metal rod balusters create a clean, airy look and are easier to wipe than wood spindles with grooves. Stain the handrail to bring warmth back into the farmhouse feel. White rods keep the visual line light, especially on narrow stairs. This combination is good when you want the railing to look modern farmhouse instead of rustic. It also helps reduce dust build-up because rods have fewer edges than turned wood.
Install new posts or reuse existing ones, then mount top and bottom mounting plates for the rods. Choose rods with a smooth finish and consistent diameter. Measure the stair run, calculate baluster lengths, and cut rods or select pre-cut sections so spacing stays even. Stain and seal the handrail, then mount it so the rods align with the underside and don’t leave awkward gaps.
Mark rod holes with a template board so you don’t drill slightly off and create a crooked line.
Avoid textured rods; they trap dust and look dirty faster.
11. Distressed paint look with sealed edges
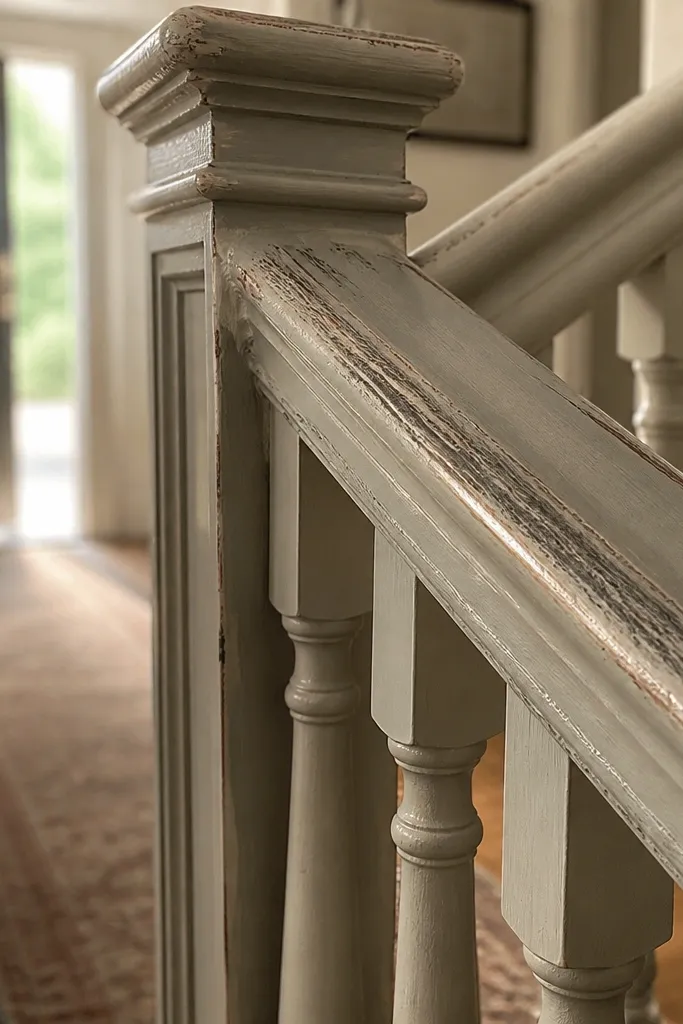
Distressing can look amazing on farmhouse railings, but it’s only low maintenance when the distressing is sealed. You want controlled wear — scuffed corners, light rub-through — then a clear satin topcoat that locks everything in. This keeps the railing from turning chalky and collecting grime in the worn spots. The farmhouse vibe is strong, but cleaning stays simple because you’re sealing the surface, not leaving it porous. Use this when you want the railing to look “old” without losing the wipe-clean ability.
Prime the railing parts, then paint a base color and a top color. Apply distressing with sanding blocks on edges and corners, focusing on areas hands would naturally touch. Wipe dust off thoroughly, then seal with a satin clear topcoat made for painted trim. Recoat any areas where distressing exposes raw wood so the surface stays uniform.
Distress with a light touch and stop early; you can always add more wear after sealing tests.
Don’t leave distressing unsealed; it will grab dirt and look dirty fast.
12. Wood slat railing with wide spacing and sealed stain
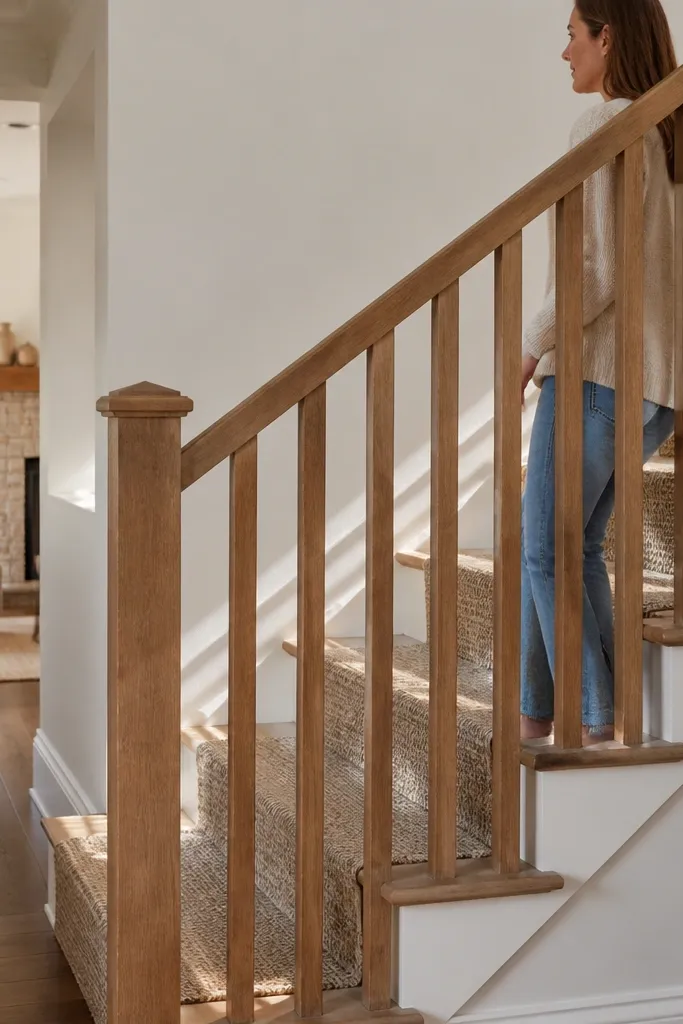
Wood slats look farmhouse and modern at the same time, and wide spacing reduces how much surface you’re cleaning. The aesthetic is clean: slats create a gentle pattern, while the gaps keep the railing from feeling heavy. To make it low maintenance, stain and seal with a finish that resists water and fingerprints. This works well on stairs with decent lighting because the slats catch light without deep carvings. If your current railing feels too busy, slats calm it down.
Build a slat frame with top and bottom rails, then cut slats to the same width and length. Sand to 180 grit, stain evenly, then seal with a durable clear coat in thin layers. Install slats using spacers or a jig so the gap stays consistent across the run. Finish the handrail with a smoother top profile than the slats so it feels good and wipes easily.
Editor's noteUse a spacer block that matches your desired gap; measuring each slat wastes time and causes drift.
Skip thisDon’t use a low-sheen outdoor oil finish inside; it can feel tacky and collects dust.
13. Black pipe railing with wood handrail and simple fittings
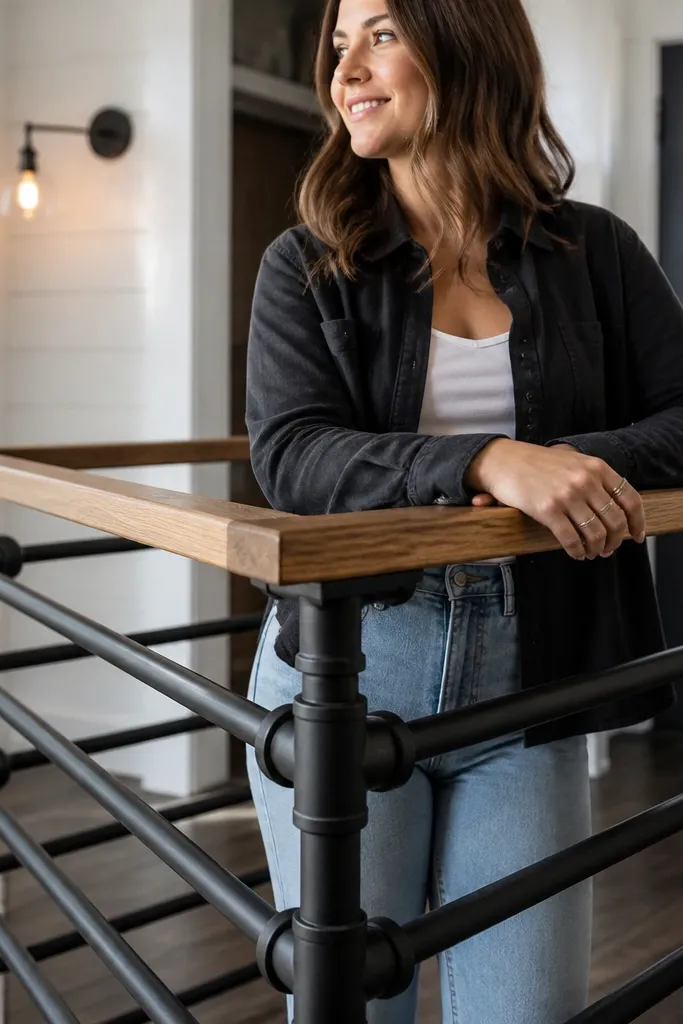
Pipe railings read farmhouse-industrial, and they’re genuinely low maintenance because metal is easy to wipe. The wood handrail adds comfort and keeps the look warm. Choose matte black pipe or, better, powder-coated black fittings so scuffs don’t turn into shiny scratches. This style looks great in entryways with exposed beams, black hardware, and warm wood tones. It also works well for open staircases where you want the railing to look sturdy without being visually heavy.
Mount posts securely first, then plan pipe runs so elbows and tees land cleanly at consistent heights. Cut pipe to length, dry-fit everything, then assemble with proper threaded fittings. For the wood handrail, sand to 180 grit, stain, and seal with a tough satin topcoat. Install the handrail brackets so they don’t pinch the metal and create wobble.
Use felt pads or thin rubber isolation where metal meets wood to prevent squeaks and paint wear.
Skip “rough” fittings; they snag gloves and collect grime in threads.
14. White vertical spindles with a chunky handrail
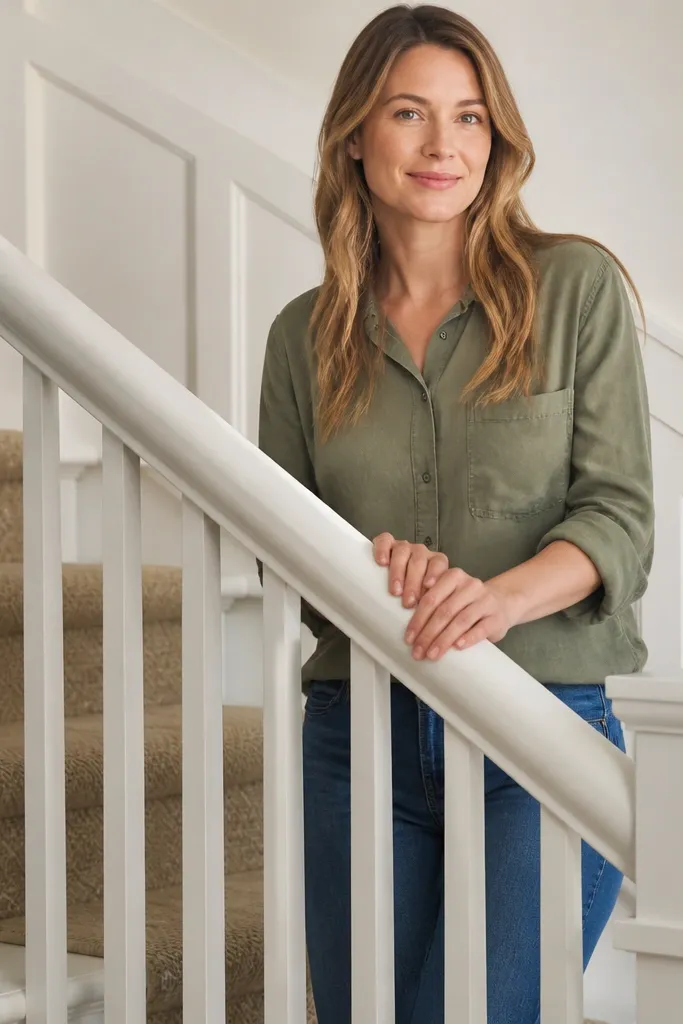
Chunky handrails make the whole farmhouse railing feel built-in and expensive. Vertical spindles keep the look traditional while staying easy to clean because the spindles are straight and smooth. The maintenance angle is simple: satin enamel on the handrail and spindles wipes clean without the glare that shows every fingerprint. This is a great choice for narrow stairs because the thick top line visually anchors the staircase. Pair with black or dark bronze lighting for a strong farmhouse contrast.
Build a handrail using a thicker board profile, sand smooth, then prime and paint with satin enamel. Install vertical spindles at consistent spacing using a drill guide or spacer block. Attach spindles to top and bottom rails so the structure doesn’t loosen. Finish by sealing any gaps between rail pieces with paintable caulk, then touch up with a small brush.
Round the underside edges of the handrail slightly; it makes wiping easier and feels better to grip.
Don’t leave sharp corners on the handrail edge — they collect scuffs and paint flakes.
15. Walnut handrail with painted baluster grid
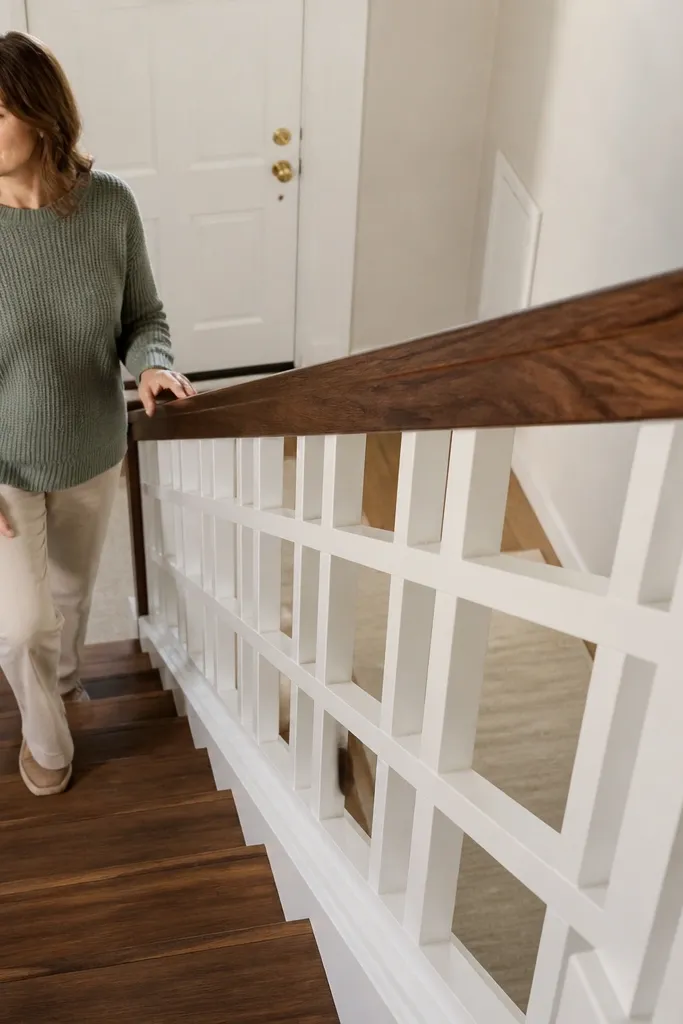
Walnut brings farmhouse richness, and the painted baluster grid keeps it clean and low maintenance. The contrast is what makes it pop: warm dark handrail against a crisp light grid. Walnut also hides minor scratches better than pale woods, as long as you seal it with a durable clear coat. This style looks especially good on stairs with white walls and light floors. It’s a smart pick if you want “high-end” look without complex carving.
Sand walnut handrail to 180 grit, stain to your preferred depth, and seal with a durable satin clear topcoat. Paint balusters or a baluster frame with bonding primer and satin enamel, then set them into a grid using a consistent spacing template. Install posts and rails first, then lock the grid in place with screws from the backside. Finish by tightening all bracket screws and touching up paint at screw heads.
Seal the bottom edge of the handrail too; it gets the most shoe-contact scuffs and water drips.
Avoid semi-gloss on the grid; it shows every fingerprint and smudge.
16. Green painted railing with white trim line
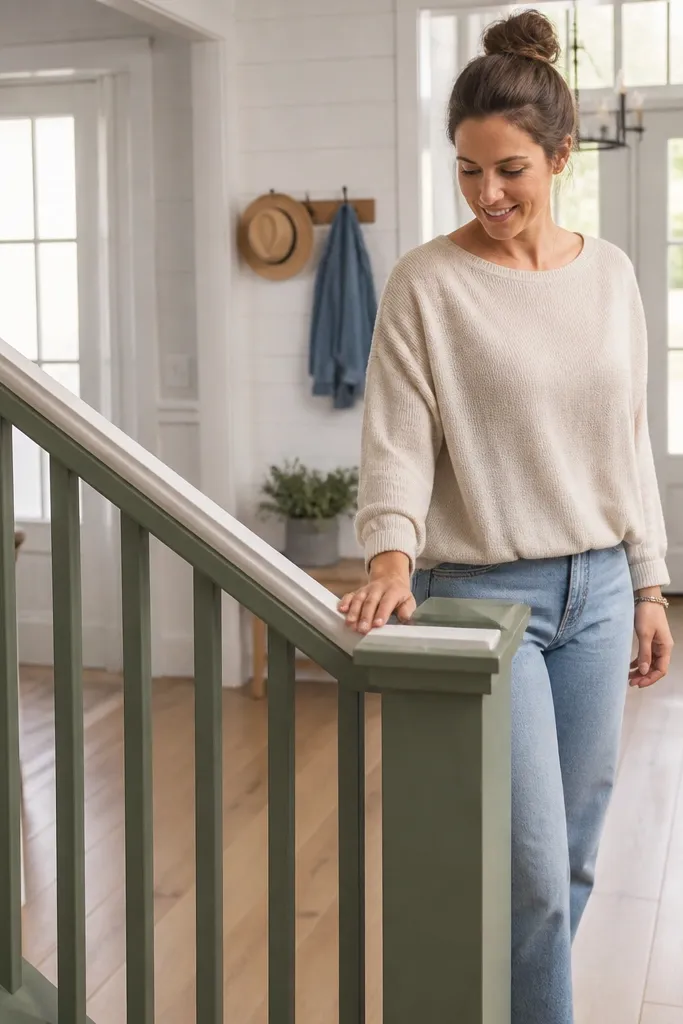
Farmhouse green railings look incredible in daylight and hide dirt better than pure white. Keep the design simple: green posts and rails, white trim line along the handrail edge, and straightforward balusters. The win for low maintenance easy care stair railing is the finish system — use satin enamel, not chalk paint, and topcoat so it wipes clean. This works beautifully with white walls, light wood, and black iron accents. It also makes the staircase feel like a deliberate feature rather than a functional afterthought.
Prime the railing with a bonding primer, then paint green enamel in thin coats. Add a white trim line by taping a straight edge and painting the trim after the green base cures. Topcoat everything with satin for wipe-clean durability. Install balusters with a jig, then caulk only the trim seams so you get a crisp line without messy squeeze-out.
Editor's noteUse a fine bristle brush for the trim line; foam rollers leave a texture that shows under light.
Skip thisDon’t skip primer — green pigments can bleed or look uneven without it.
17. Cream painted railing with rounded spindles and dark bronze brackets
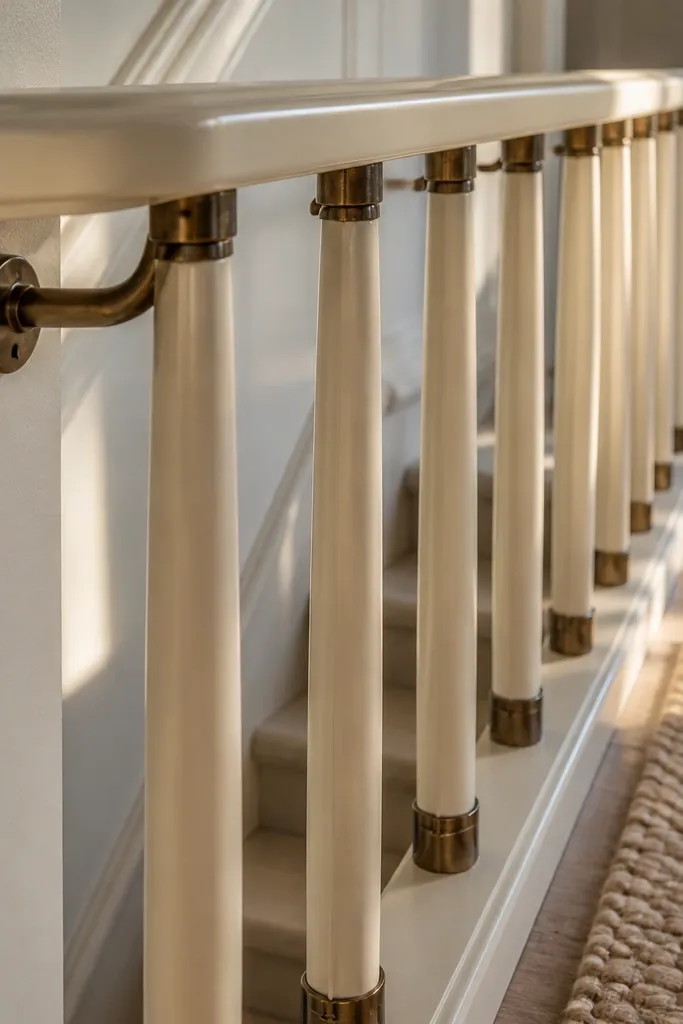
Cream paint softens farmhouse railings and makes them look cozy instead of stark. Rounded spindles read friendly and reduce sharp edges that trap grime. Dark bronze brackets add a classy accent without going full modern — it still looks farmhouse because the overall lines stay simple. The low maintenance angle is the satin enamel topcoat, which wipes clean and doesn’t glare. This is a great look for stairs near living rooms where you want the railing to blend in but still look intentional.
Prime the railing parts, paint with cream satin enamel, and topcoat with a durable satin finish. Install rounded spindles using consistent spacers and fasten with brackets so the load transfers cleanly. Use pre-drilled mounting points for the handrail brackets and keep them aligned so the bronze hardware sits straight. Finish with caulk at seams and touch up paint at every screw head.
Editor's noteCheck bracket alignment by dry-fitting the handrail first; it prevents crooked hardware later.
Skip thisAvoid painting over oily hardware — wipe metal with degreaser before priming or it won’t hold.
18. Two-level handrail with simple farmhouse posts
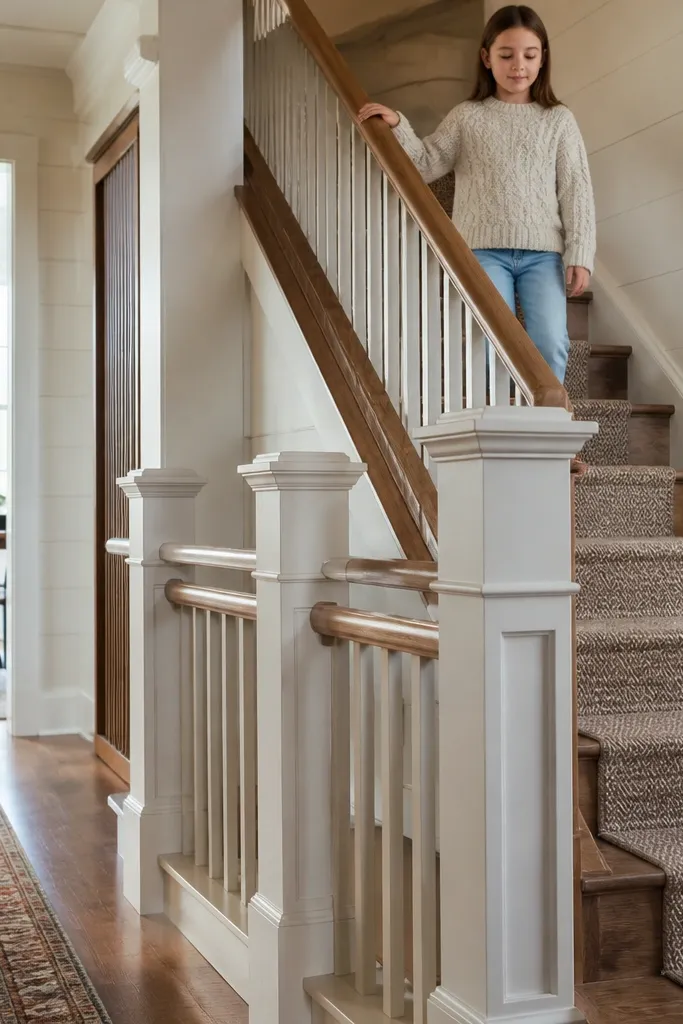
A two-level handrail profile looks custom and gives you a comfortable grip surface that stays clean. The upper rail is where hands land; the lower rail adds visual weight and hides minor imperfections in transitions. For low maintenance easy care stair railing, the build should keep surfaces smooth and avoid layered edges that collect dust. Use this style when your staircase has a dramatic run or when you want the railing to look like it belongs to a built-in staircase. It also works well with white painted posts and simple balusters.
Select a handrail profile that has a clear upper and lower edge, then sand and finish it with satin enamel or a durable clear coat. Install posts and base rails first, then build the two-level handrail using brackets that support both layers. Add balusters at consistent spacing so the visual rhythm stays even. Caulk seams between handrail and brackets, then touch up with matching paint so the profile looks continuous.
Editor's noteUse a template to keep the two-level spacing consistent across the whole run — small differences show fast.
Skip thisDon’t stack two rails with gaps; dust will collect in the seam and you’ll see it every time.
19. Sculpted farmhouse wood posts with simple flat balusters

Sculpted posts bring farmhouse drama while flat balusters keep cleaning realistic. The trick is to keep the carved area limited to the posts and leave the balusters smooth. That gives you visual interest where it’s easiest to keep clean, and reduces the number of edges that trap dust. Seal the carved areas with a durable topcoat so the grooves don’t become dirt collectors. This look works on stairways with strong lighting because the post shapes cast nice shadows. It’s a solid choice when you want a “statement” railing without turning maintenance into a second job.
Start with posts that have controlled carving depth; sand them smooth where hands might touch. Install posts and rails, then attach flat balusters with a jig for consistent spacing. Prime and paint the balusters and rails with satin enamel, and seal carved posts with a topcoat rated for trim. Finish by mounting the handrail and checking that the handrail overhang doesn’t create a ledge that catches dust.
Editor's noteUse a soft-bristle brush to clean carved post grooves during final dry time; dust trapped in carvings shows after paint cures.
Skip thisAvoid deeply carved balusters; the grooves are the first place the railing looks dirty.
20. Clear glass panel with wood handrail and black frame
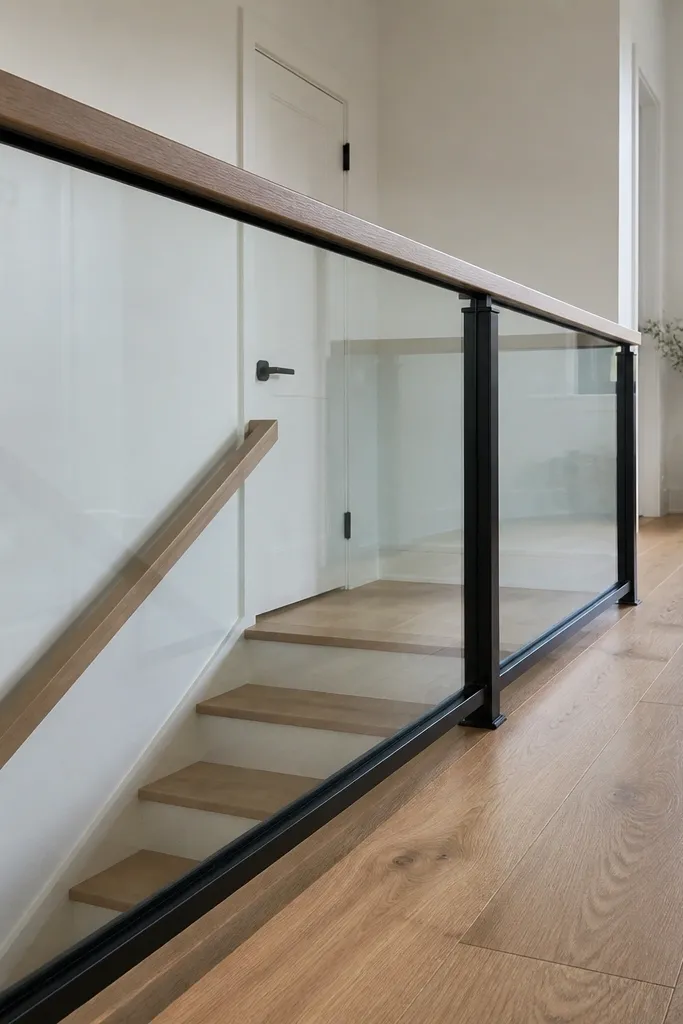
This is farmhouse-modern: clear glass keeps the view open, while a wood handrail keeps it warm. The black frame ties it back to farmhouse hardware styles, and the glass is easy to wipe because it has a smooth surface. For low maintenance easy care stair railing, glass wins — you’re mostly cleaning hand smudges, not porous wood details. It’s best for staircases where you want the railing to disappear visually but still look polished. Make sure you choose tempered, properly mounted panels so it feels solid.
Install black metal or painted frames to posts with the right anchors for your stair material. Mount the glass panels using manufacturer hardware and keep the edges protected with gaskets. Add a wood handrail on top with a smooth satin topcoat for wipe-clean grip. Seal any frame-to-wood seams with paintable caulk and check that panels don’t rattle before final tightening.
Editor's noteUse a microfiber cloth and a streak-free cleaner; glass looks great longer than you’d expect with the right product.
Skip thisDon’t choose decorative glass with heavy texture; it looks dusty even when it’s clean.
21. Matte white railing with micro-bevel handrail edge
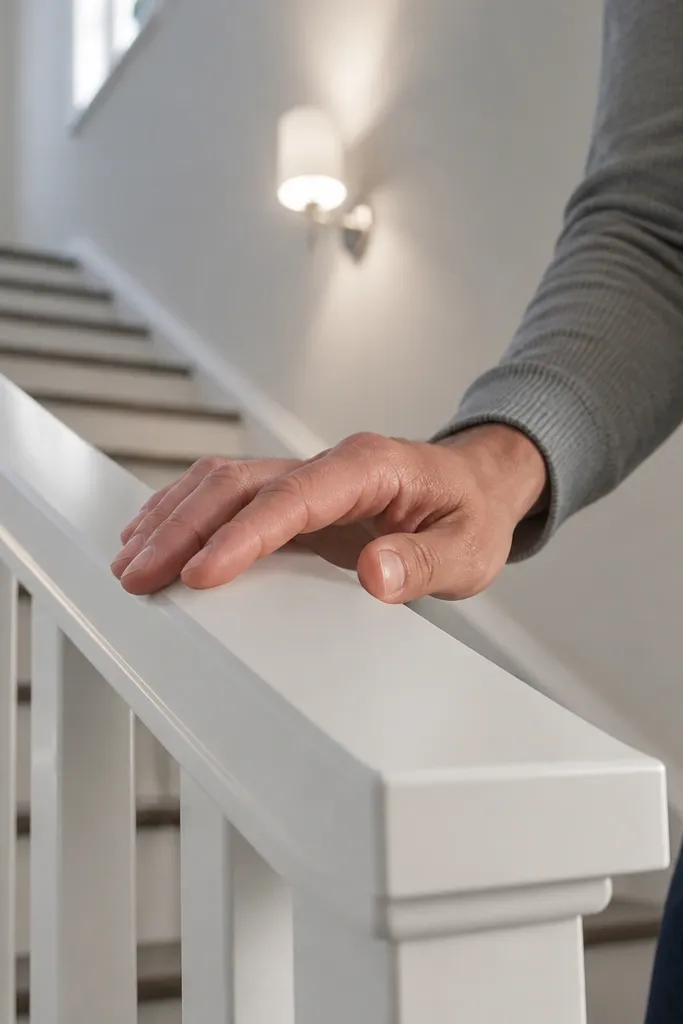
Matte white can look gorgeous on farmhouse railings because it hides fingerprints better than satin or gloss. The secret is the handrail edge: a micro-bevel keeps the top comfortable and reduces sharp contact points that get scuffed. This style is great for families because matte finishes don’t show every touch mark, and cleaning is still easy when you use a topcoat rated for interior trim. Pair it with light wood stairs or dark floors for contrast. Keep balusters simple so the railing doesn’t become a dust collector.
Sand and prime all parts, then paint with a trim enamel in matte. Before painting, add a micro-bevel to the handrail edges using sandpaper wrapped around a block or a small router jig if you’re comfortable. Apply a hard topcoat made for painted trim if your enamel requires it for durability. Install balusters with consistent spacing and seal seams with paintable caulk.
Editor's noteTest matte on scrap — some mattes look flat and chalky unless you use the right enamel system.
Skip thisDon’t use chalk paint — it marks and wipes poorly.
22. Walnut base rail with white vertical balusters
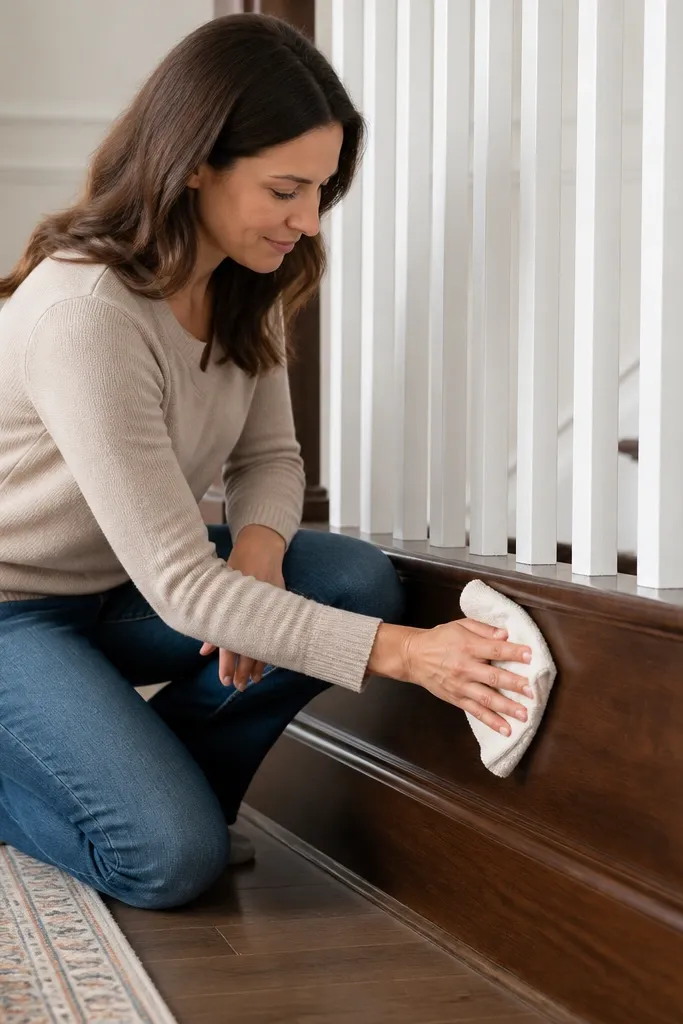
This look is farmhouse and practical because it puts the most durable finish where contact happens — the lower rail. White vertical balusters keep the style bright, while walnut base rail hides scuffs and looks warm. The maintenance win comes from sealing the walnut with a satin topcoat that resists water spots and finger oils. You get a clean, layered look without a million tiny details. It’s especially good when your stairs are near a front door and the railing gets bumped by bags and coats.
Paint balusters and posts with bonding primer and satin enamel, then topcoat for wipe-clean durability. Sand walnut base rail to 180 grit, stain evenly, and seal with a durable satin clear coat. Install the walnut base rail first, then place vertical balusters with a spacing guide. Mount handrail last and caulk only the top seam so you keep the railing easy to clean.
Use a slightly darker walnut stain than you think; the topcoat lightens it a bit after cure.
Don’t leave the bottom edge unsealed; that’s where moisture and scuffs attack first.
23. Farmhouse arch-top baluster frame with painted finish
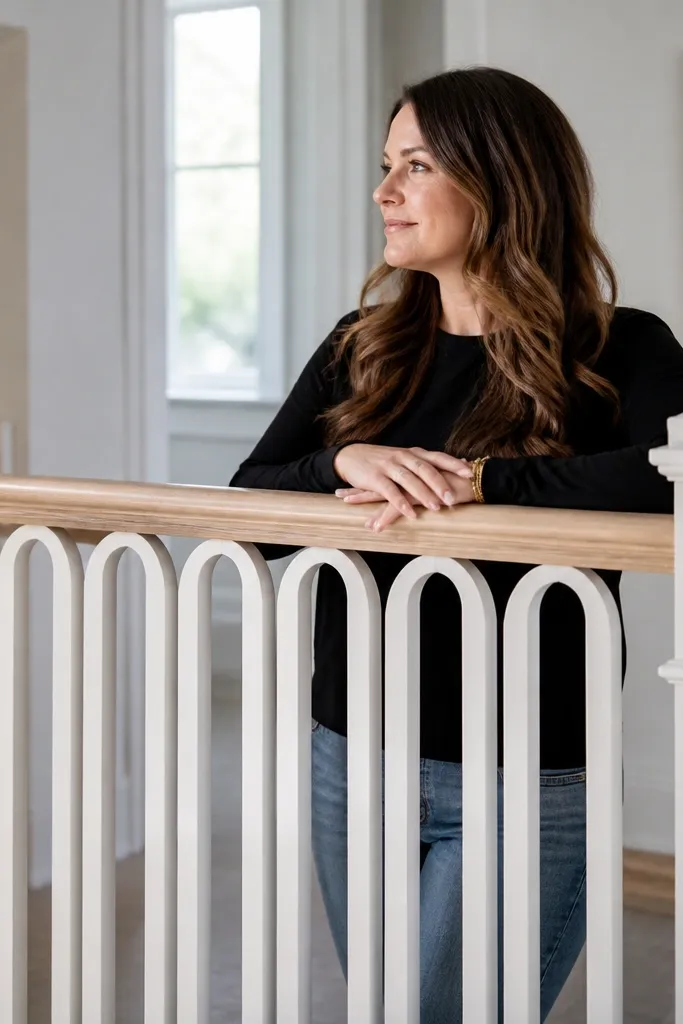
Arched baluster tops add a farmhouse-soft touch without turning the railing into ornate carving. The arches create a visual rhythm that looks great in photos, while the rest of the baluster stays mostly smooth for easy cleaning. Paint does the heavy lifting: it hides small imperfections and lets you pick a color that matches your trim. Keep the handrail simple and rounded so it’s comfortable and wipes fast. This works well on staircases with traditional wall trim or classic farmhouse doors nearby.
Choose balusters with arched tops that are smooth on the face, not deeply carved. Prime and paint with bonding primer and satin enamel, then topcoat for durability. Install a straight top and bottom rail frame so the arches line up consistently. Mount the handrail with brackets that keep the top edge smooth and avoid a ledge that collects dust under the rail.
Editor's noteUse a single arched baluster as your spacing reference; align every other one to it so the arches stay even.
Skip thisAvoid mixing different arched baluster profiles; it creates a lopsided look fast.
24. White painted railing with wire-brushed texture on posts (sealed)
Textured posts bring rustic farmhouse character without adding tons of cleaning work. Wire-brushing creates subtle grain texture, but you only want it on the posts — keep balusters smooth. Paint over the texture and seal with a durable topcoat so the surface doesn’t stay rough and dirt-grabbing. This look photographs beautifully because the texture catches light while the rest stays crisp and clean. It’s a great choice when you want “farmhouse” in the details but still need a low maintenance easy care stair railing.
Wire-brush the post wood lightly to raise grain, then sand to knock off loose fibers. Prime the posts, paint with satin enamel, and topcoat after the paint cures so the texture is locked down. Install posts and rails, then add smooth balusters using a spacing jig. Finish by mounting the handrail and caulking only the seams that you want to keep dust-free.
Editor's noteVacuum and wipe posts thoroughly after wire-brushing; leftover fibers cause pinholes under paint.
Skip thisDon’t texture the handrail; textured grip surfaces feel gross and wipe slower.
25. Black metal scroll-free railing with straight bars and wood cap
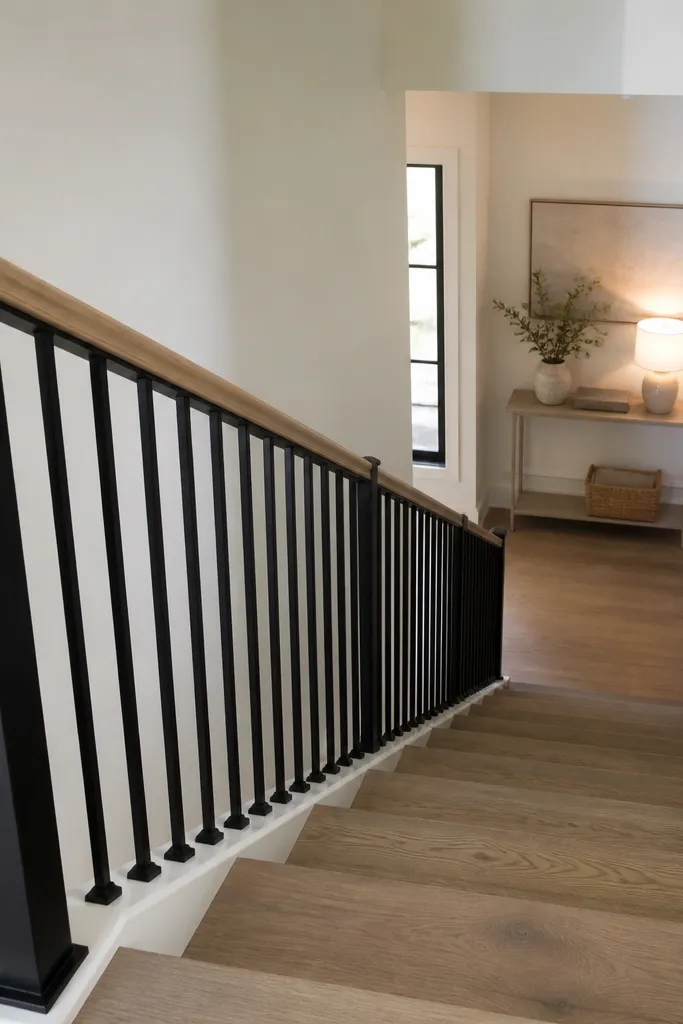
Scroll-free metal railings look cleaner than decorative scrollwork, and they’re easier to maintain. Straight bars keep dirt from hiding in twists, and a wood handrail cap gives you that farmhouse warmth. Black metal also resists daily scuffs better than most painted wood if you use powder-coated finishes. This style is a smart pick for people who want farmhouse but don’t want the railing to look overly traditional. It also pairs well with both white walls and warm wood trim.
Select powder-coated straight bars and plan your bar layout so the spacing is consistent from start to end. Install posts and top/bottom mounting rails, then attach bars with proper brackets or welded connections. Sand and seal the wood handrail cap, then mount it so it covers the top edges of the metal. Caulk the wood-to-metal seam lightly to stop dust accumulation and wipe down after curing.
Editor's noteIf your stair has a tight turn, pre-build the straight-bar section on the floor to check alignment before installing.
Skip thisSkip decorative scroll elements — they create dust pockets that look dirty quickly.



