
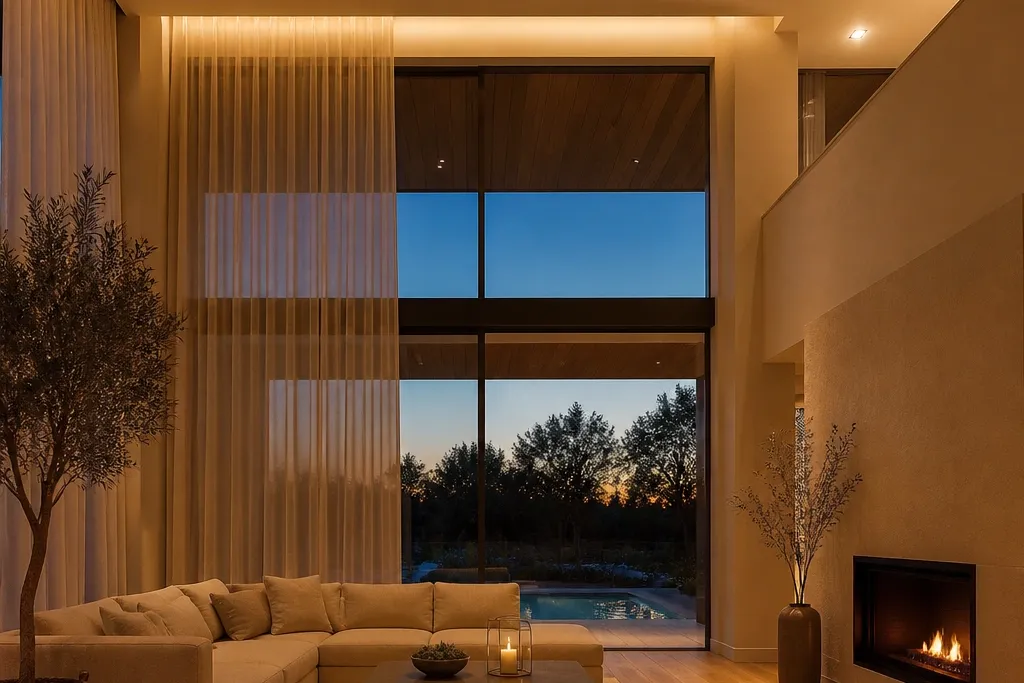

1. Cove wash + fabric drum pendants over the seating
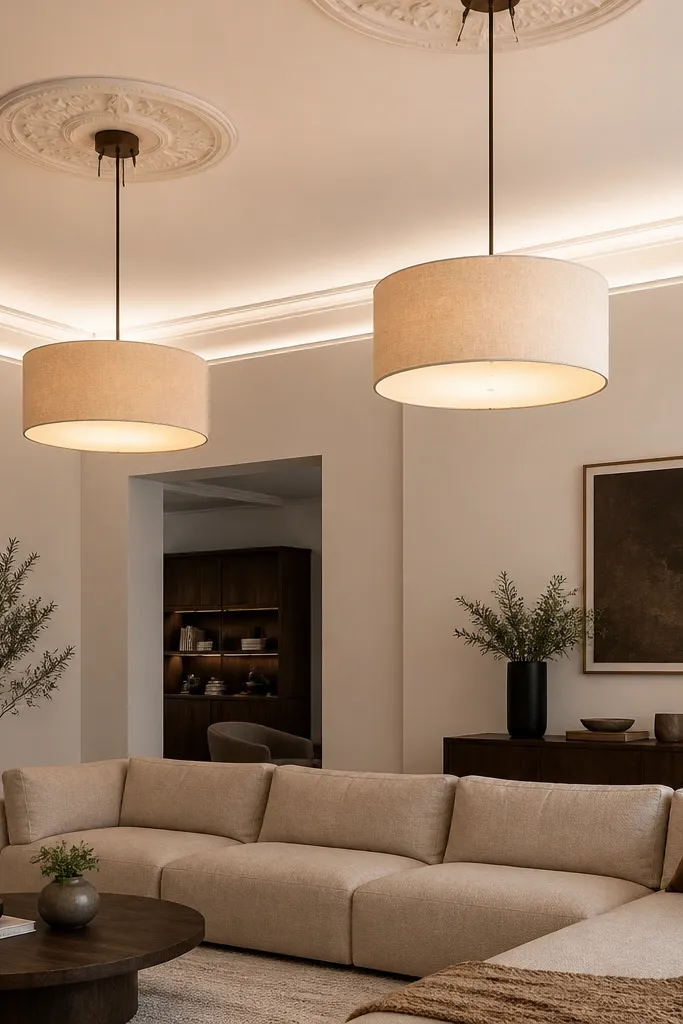
This setup makes the double height feel “filled” without blasting the room. The cove wash paints the upper walls evenly, so the tall volume doesn’t look shadowy. Above the seating, fabric drum pendants soften the light with a warm glow and hide the LED glare behind a diffuser. It looks tailored because the cove gives a continuous line while the pendants anchor the conversation zone. Skill level is beginner to intermediate: you’re mainly working with electrical placement and clean finishing, not complex fabrication.
Step 1: Mark a cove line 8-10 inches below the ceiling edge and plan a continuous LED channel along the perimeter. Use 12-24V LED strips with an aluminum channel and a frosted diffuser; keep the channel length continuous for even output. Step 2: Hang two matching pendants centered over the sofa — aim for the bottom of the shade about 28-34 inches above the seating surface. Step 3: Install dimmers for the cove and pendants separately so you can tune the mood without changing bulbs.
Use a frosted diffuser on the cove channel; it prevents “strip dots” from showing on the wall texture.
Don’t aim the cove light too steep — a sharp angle makes hot spots and kills the soft, architectural look.
2. Stone-clad wall grazing with a low-profile linear up-light
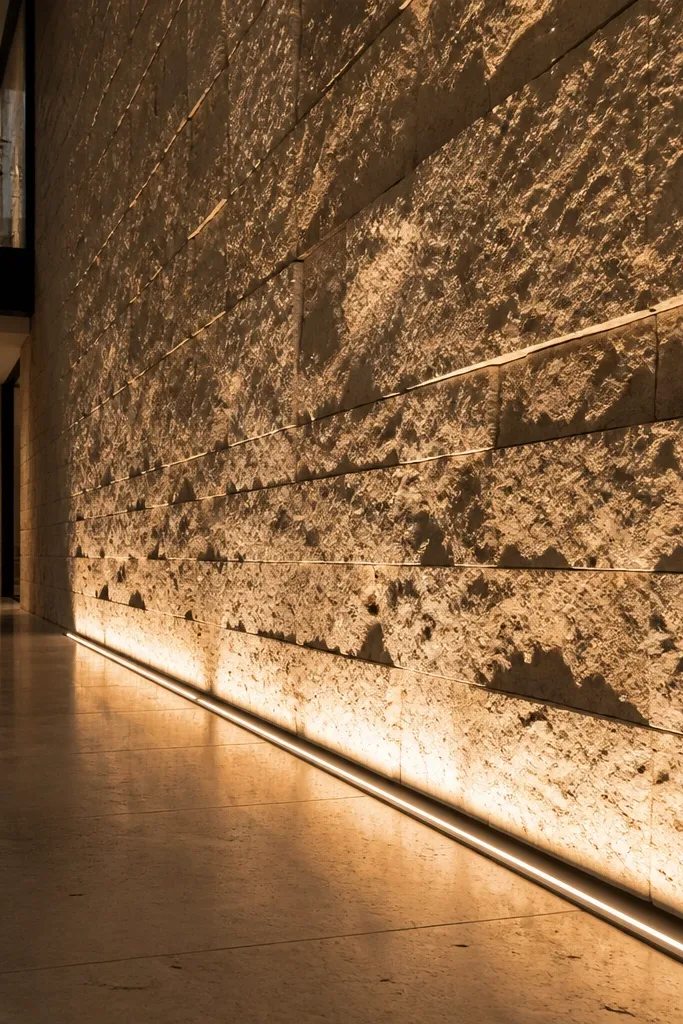
If you have stone, brick, or textured cladding, grazing is the most photogenic way to make it look expensive in a double-height space. A linear up-light placed near the base throws light upward across the wall, showing grains and relief without needing many fixtures. Keep the ceiling lighting minimal because the wall becomes your “main character.” This is low-maintenance because you’re using a small number of robust fixtures with sealed optics, and the light direction is fixed. It suits Indian homes with feature walls behind the sofa or TV wall where the texture already exists.
Step 1: Choose a linear up-light with a narrow beam control or a wall-wash optic and place it 6-10 inches away from the wall surface. Aim the beam to hit the wall at about 20-30 degrees from horizontal so it travels upward smoothly. Step 2: Set the fixture height so the beam starts around 12-18 inches above the floor and reaches the mid-upper wall. Step 3: Use 2700K-3000K LEDs and wire it to a dimmer; finish with a clean wall base cover or false wall trim so dust doesn’t collect at the fixture edge.
Editor's noteTest the beam on a cardboard mock-up before final mounting — you want the texture to glow, not the wall edge to glare.
Skip thisAvoid placing the light too close to the wall — it creates a bright stripe and leaves the upper section flat.
3. Chandelier with frosted glass + hidden LED perimeter lines
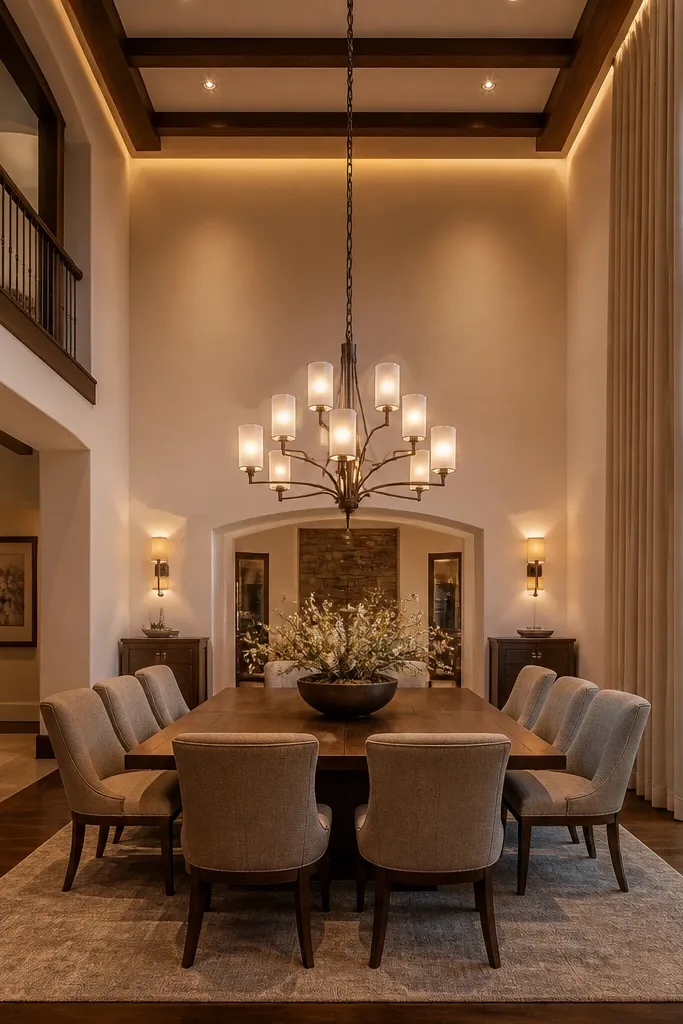
A chandelier can look perfect in a double-height room, but bare bulbs fight glare and cleaning. Frosted glass shades spread the light into a soft halo, so faces look good and photos don’t blow out. The hidden LED perimeter lines handle the background brightness so the chandelier doesn’t have to do everything. This design looks high-end because you get both a statement piece and architectural lighting. Maintenance stays low since you can clean frosted glass panels without fiddly bulbs and your LEDs run for years.
Step 1: Mount the chandelier so its bottom sits roughly 7-9 ft from the floor (adjust for your room height, aiming for it to frame the seating). Use frosted or opal glass shades and choose a chandelier wattage that matches your room size instead of going oversized. Step 2: Install a concealed LED strip in the ceiling cornice or beam recess, set to wash the upper perimeter. Step 3: Wire chandelier and perimeter LEDs to separate dimmers so you can keep the chandelier bright for evenings and lower it for daytime ambiance.
Pick a chandelier with removable glass diffusers so you can wipe them clean in under 10 minutes.
Don’t rely on one chandelier circuit — without perimeter wash, the walls go dark and the height looks heavy.
4. Tall floor uplights behind the seating + slim downlights
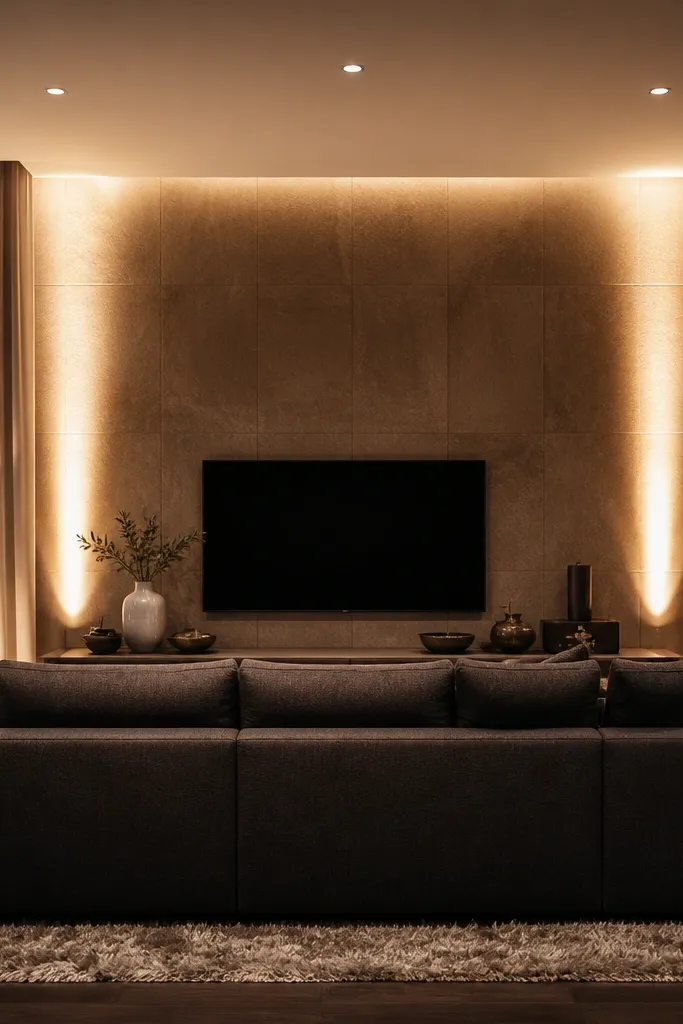
This is the “low-effort, big impact” plan for double heights because the uplights build vertical glow without touching the ceiling. Place tall uplights behind and slightly to the sides of your sofa so light climbs upward along curtains, textured wall panels, or the back wall. Add a few slim recessed downlights for general brightness at eye level. The result is flattering and realistic in photos because the light starts near the seating and travels upward. It suits rooms where you don’t want to add ceiling cove work or where electrical drilling is limited to a few points.
Step 1: Pick two to four tall uplights (or LED floor lights) with an adjustable head and warm LEDs around 3000K. Position them behind the seating, aiming the beam toward the wall at about 30-45 degrees upward. Step 2: Install 4-6 slim recessed downlights spaced evenly across the living zone, keeping spacing consistent so brightness doesn’t patch. Step 3: Use separate dimmers for recessed lights and floor uplights; start with recessed at 30-40% and uplights at 50-70% for a warm layered look.
Use uplights with glare control (frosted lens or louver) so the beam doesn’t show as a bright dot in photos.
Avoid aiming uplights straight up — it washes the ceiling instead of building the vertical wall glow.
5. Mirror-back TV wall with linear LEDs and ceiling wash
A double-height living room often has a TV wall that’s visually heavy. A mirror-backed or glossy TV wall plus linear LEDs makes that wall look brighter and cleaner without adding more fixtures overhead. Add ceiling wash so the mirror reflection doesn’t look harsh. This combo is photogenic because it creates depth — light reflects upward and makes the room feel taller. It also stays low-maintenance because linear strips are easy to clean and you’re not dealing with many bulbs across the ceiling.
Step 1: Install a mirror-backed cladding panel behind the TV with a clear service gap for wiring. Run two vertical or horizontal linear LED strips with a diffuser, keeping them even on both sides of the TV area. Step 2: Add ceiling wash using a concealed LED channel in the ceiling beam line — aim the wash toward the mirror wall. Step 3: Use a dimmer with a warm 2700K-3000K LED strip and set the mirror-side brightness lower than the room ambient so reflections don’t glare.
Use diffused strips, not bare LED bars, or the mirror will show pixel-like dots.
Don’t place the strip too close to the mirror edge — it creates a bright halo that looks messy on camera.
6. Wood slat feature wall with hidden spot grid and warm track lights
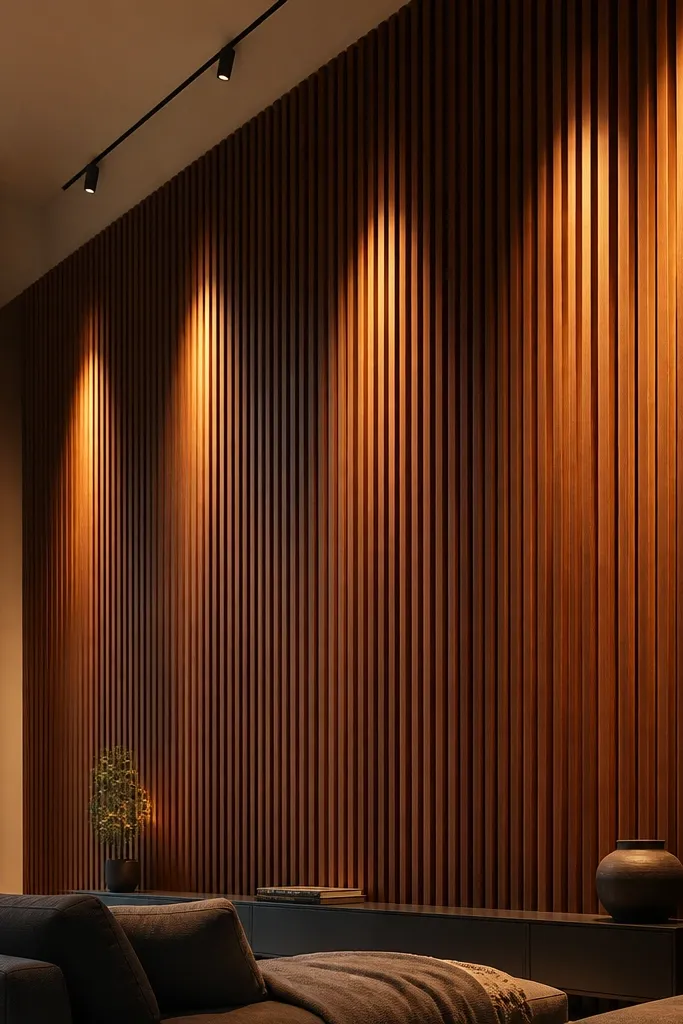
Wood slats look amazing in double-height rooms, but they need controlled light to show the grain. A hidden spot grid (or concealed beam pockets) lights the slats from the side, so the shadow lines between slats become crisp. Track lights add flexibility for future art changes without rewiring. You get a gallery look that still feels warm, not clinical. This is low-maintenance because track heads can be adjusted without opening ceiling panels, and you’re using a small number of high-output spots.
Step 1: Mark a side-lighting pattern so each spot hits a line of slats, not the floor. Use track lights with adjustable heads and install the track parallel to the slat wall at about 12-18 inches away from the wall line. Step 2: Add 4-8 concealed spots in a ceiling beam pocket if your design has one; set aiming angles so beams graze the slats at 15-25 degrees. Step 3: Use 3000K LEDs with CRI 90+ and group them into zones for dimming — slat lighting should be slightly brighter than ambient.
If you use track lights, choose models with interchangeable lenses so you can widen or narrow the beam later.
Avoid lighting straight-on — it flattens the slat texture and makes the wall look like a photo backdrop.
7. Stair void double-height glow with step lights and wall wash
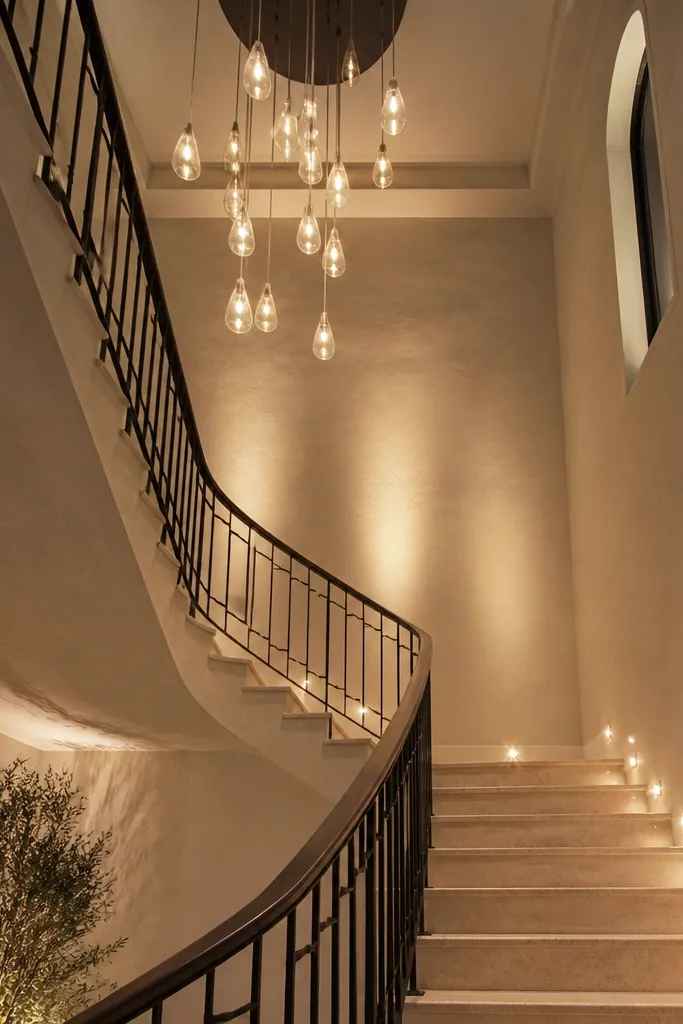
In many Indian homes, the double height sits above a stair void. Step lights and wall wash make that vertical space look intentional instead of dark. The step lighting guides movement and adds a soft rhythm that reads beautifully in photos. Wall wash fills the void behind the stairs so the top half doesn’t look like empty air. This plan is low-maintenance because LEDs are built into sealed housings and you avoid changing high ceiling bulbs frequently.
Step 1: Install low-glare step lights in recessed channels along the stair treads, using warm LEDs around 2700K. Keep spacing consistent and wire them to a single driver per stair run. Step 2: Add a wall wash fixture near the stair landing aimed upward across the void wall. Step 3: Use a dimmer or scene controller so step lights stay low for daytime and rise for evenings.
Set step lights slightly dimmer than you think — brighter steps look harsh and dirty in the dark.
Don’t use high-beam spotlights in the void — they cause glare on railings and make the stairs look unsafe.
8. Ceiling beam downlights with a warm perimeter halo
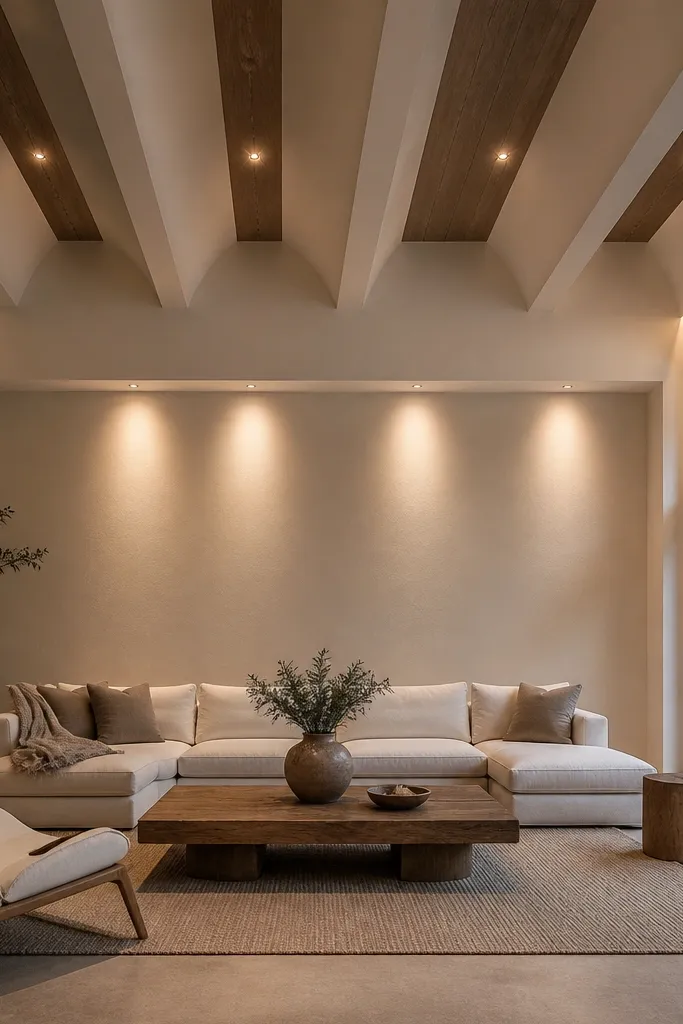
If your double-height ceiling already has beams or a false beam plan, use it. Downlights inside the beams give controlled brightness at eye level, while a perimeter halo keeps the room from looking flat. This design is clean and modern-looking without needing a chandelier. It also stays low-maintenance because you’re using sealed downlight modules and a single perimeter LED channel. The look is photogenic because the halo draws the eye toward the room edges and makes the height feel intentional.
Step 1: Plan downlight placement inside each beam bay with consistent spacing so the beam pattern looks balanced from the seating. Use recessed downlights with diffused lenses and warm 3000K light. Step 2: Install perimeter LED halo in the ceiling soffit or beam recess; use an aluminum channel with diffuser for smooth output. Step 3: Wire downlights and halo separately, then set dimming so halo stays around 20-35% while downlights run at 40-70% depending on time.
Choose downlights with a narrow trim ring; thick trims collect dust and look messy over time.
Avoid mixing too many cutouts and angles — random beam spacing makes the double height look uneven.
9. Two-story pendant line with glass shades and dimmer scenes
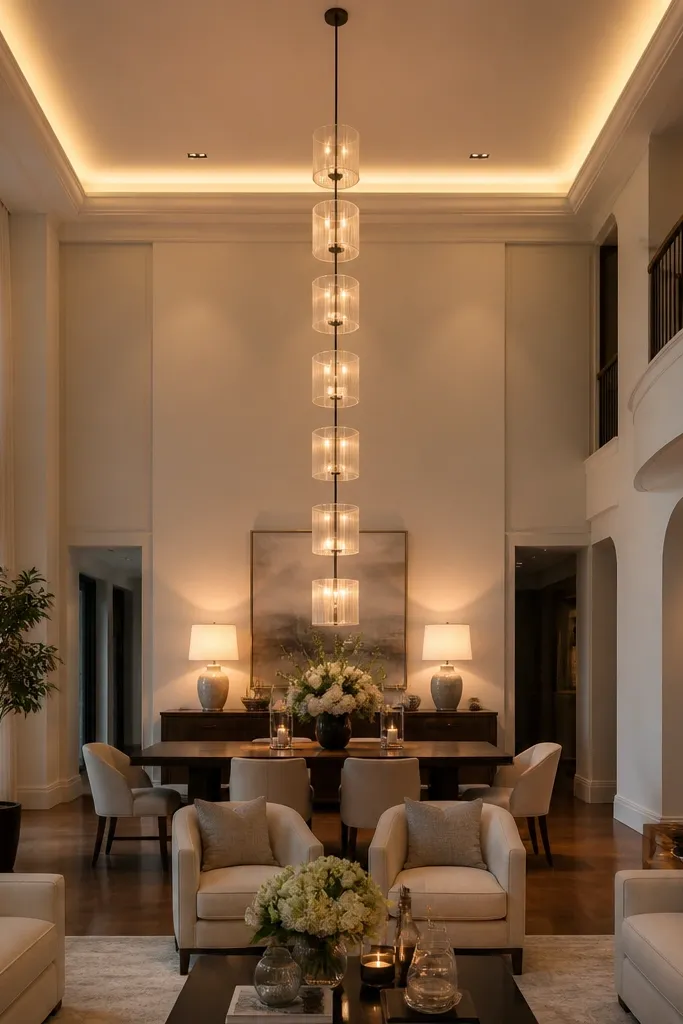
A vertical pendant line is a smart way to turn double height into a design feature. Use glass shades that diffuse light downward, not bare open cages that throw glare. The key is symmetry: align pendants so they visually “stack” and the light column feels deliberate. Add dimmer scenes so you can keep the room bright for daily life and softer for evenings. It’s low-maintenance because you’re changing fewer bulbs and the glass is easy to wipe.
Step 1: Decide the centerline of your seating or dining axis and hang pendants along it. Keep the bottom of the lowest pendant about 30-34 inches above seating, and use consistent spacing between pendants (about 24-36 inches depending on ceiling height). Step 2: Use warm LED bulbs inside each glass shade and wire them to a dimmer group so brightness changes are uniform. Step 3: Add subtle ambient lighting (like wall wash or perimeter halo) so the pendants don’t leave corners dark.
Editor's noteUse frosted or lightly opal glass so the pendant line looks smooth instead of dotted with hotspots.
Skip thisDon’t hang different pendant heights randomly — the double-height column will look accidental.
10. Textured wall cove + floor-standing arc lights for soft faces
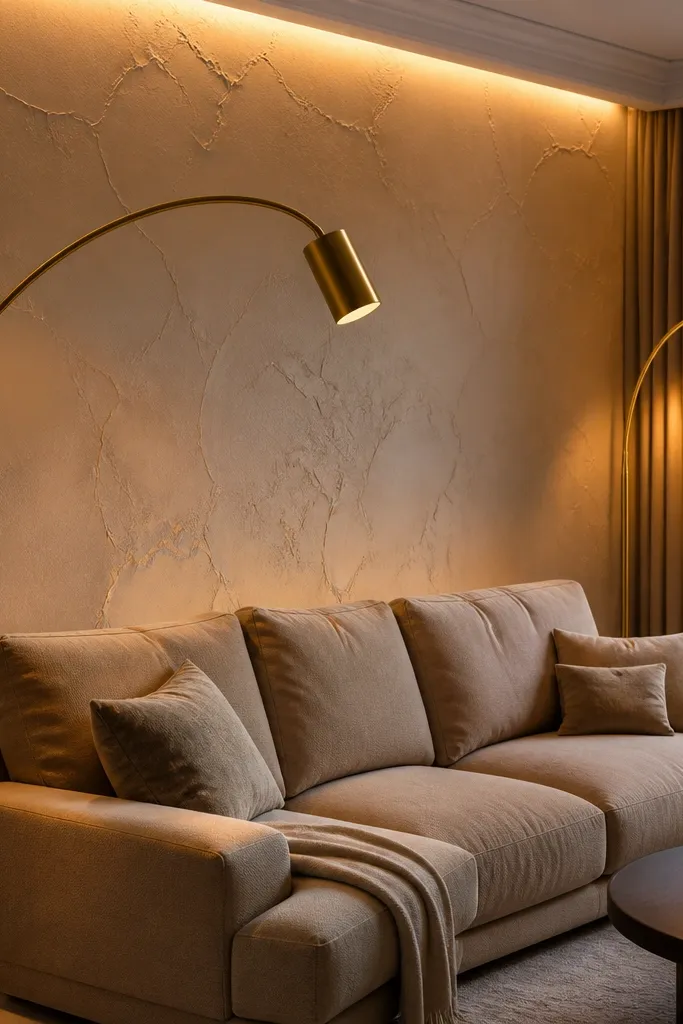
Arc floor lights are underrated in double-height rooms because they put light at face level without ceiling work. Pair them with a cove wash on the textured wall so you get both softness and architectural glow. Arc lights create flattering highlights on curtains and walls, while the cove keeps the upper portion bright enough to photograph well. This combo is low-maintenance because arc lamps are easy to clean and you can replace bulbs without touching ceilings. It suits living rooms where you want a cozy, layered mood rather than a bright showroom look.
Step 1: Install a wall cove or ceiling soffit aimed at the textured surface. Use 12-24V LED strip with frosted diffuser and set it to 2700K-3000K. Step 2: Place two arc floor lamps behind or to the side of the sofa, with the lamp head 5-7 ft above floor so the beam lands near seating face height. Step 3: Use dimmers for arc lamps and cove separately; start with arc at higher brightness for evening comfort.
Choose arc lamps with a wide shade opening so the light doesn’t look like a thin beam.
Avoid placing arc lamps directly behind people — it backlights faces and makes them look darker.
11. Minimal ceiling + decorative wall sconces at eye-height grid
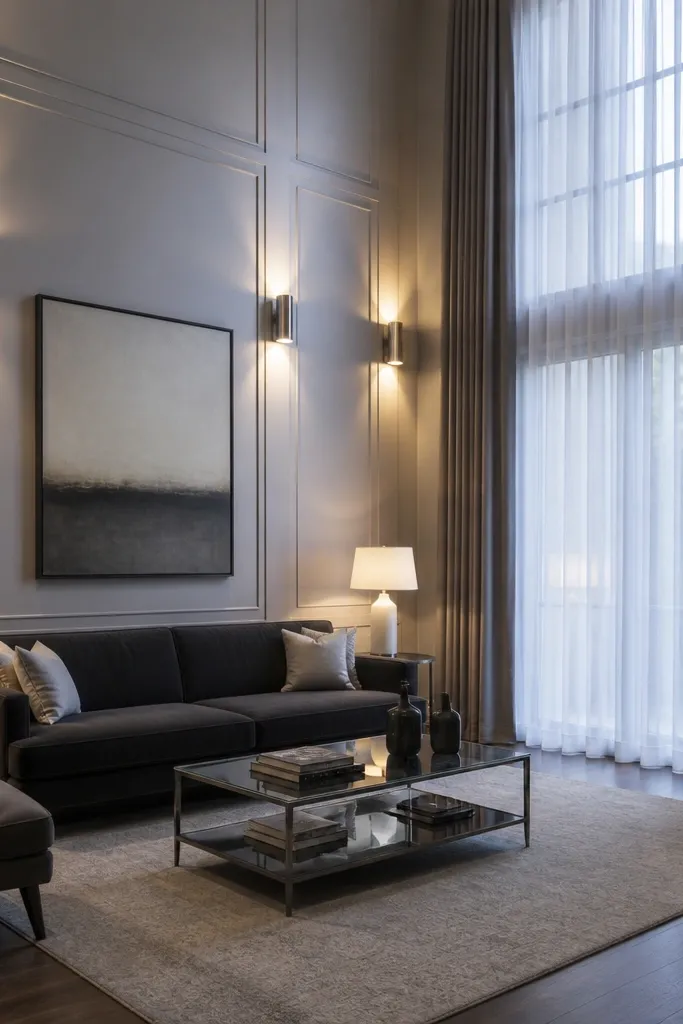
For low-maintenance Double Height Living Room Lighting, you don’t need a lot of ceiling fixtures if you control light placement. Wall sconces placed in an eye-height grid keep the seating area bright and make the room feel grounded. The double-height ceiling stays calmer because the sconces draw attention horizontally, which is what you want for everyday use. This design looks neat and intentional because sconces frame the wall and reduce the “blank upper wall” problem. Maintenance is easy since sconces are accessible and you can clean them without ladders.
Step 1: Choose 4 wall sconces (2 per side) and mount them so the center of the light is around 60-66 inches from the floor. Aim the sconces slightly upward at 10-20 degrees to lift the wall glow without glare. Step 2: Keep ceiling lighting minimal — use only a few recessed lights for overall safety and brightness in corners. Step 3: Use warm 2700K LEDs and a single dimmer for sconces so the whole wall lighting changes together.
Editor's notePick sconces with diffusers or linen shades; they hide LED points and reduce glare on glossy surfaces.
Skip thisDon’t mount sconces too low — the double height will exaggerate shadows at head level.
12. Black linear pendant over dining + white cove wash for contrast
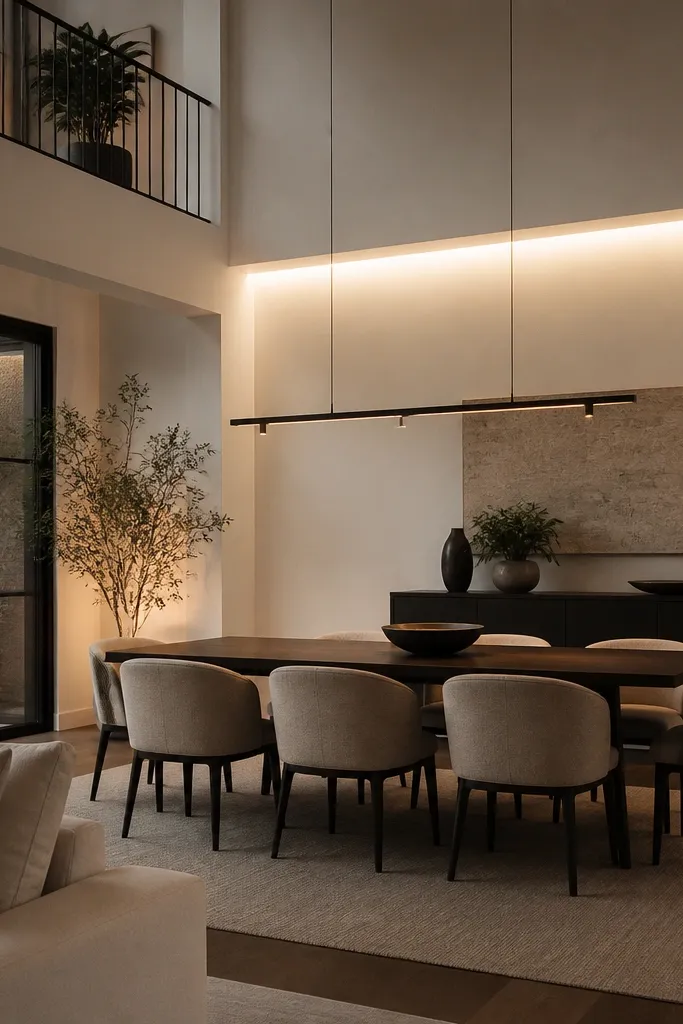
Contrast looks great in Indian double-height living rooms: a black linear pendant gives a crisp modern line, while a white cove wash keeps the room warm and bright. The pendant focuses light where you sit, and the cove fills the upper wall area so the room doesn’t feel top-heavy. This design is photogenic because lines stack — pendant line down, cove line around the ceiling. It stays low-maintenance because linear LEDs are housed and the pendant usually uses fewer components than a multi-lamp chandelier.
Step 1: Hang a black linear pendant centered over the dining or main seating line. Keep the bottom of the fixture about 30-36 inches above the table or seat, and keep the pendant length about 60-75% of the table width. Step 2: Install a perimeter LED cove wash in a white ceiling soffit, using frosted diffuser to avoid strip dots. Step 3: Wire pendant and cove to separate dimmers, and set the pendant slightly brighter than the cove for depth.
Use a matte black finish instead of gloss so dust doesn’t show as easily on the pendant surface.
Avoid a pendant that’s too thin — in a tall room it looks lost unless the ceiling height is matched.
13. Railing-side LED strips for double-height vertical rhythm
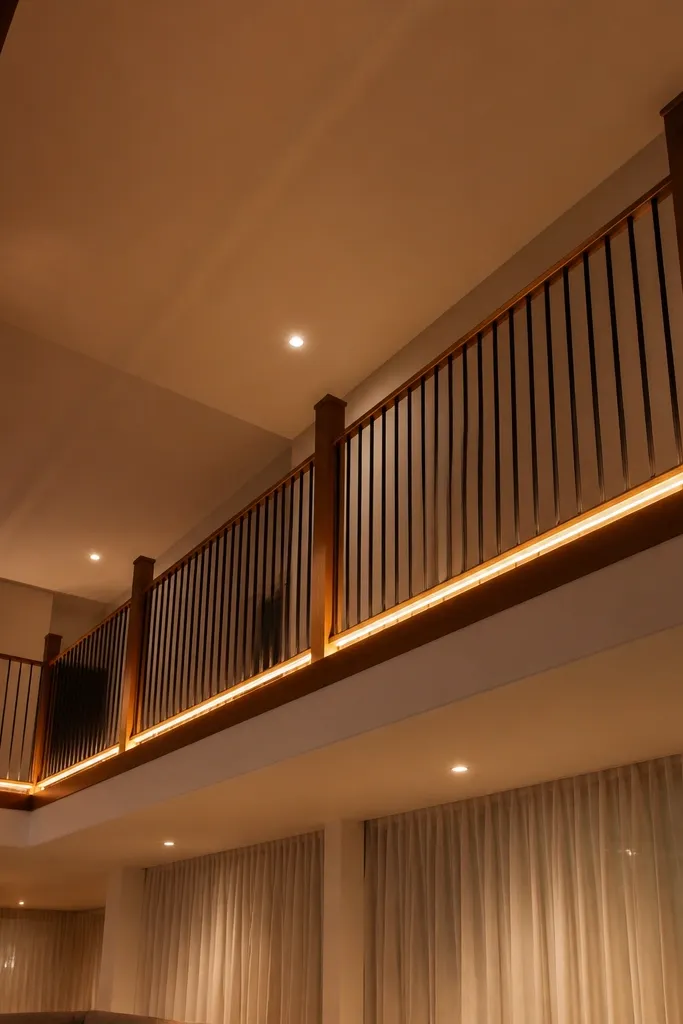
If your double height has a balcony or mezzanine, lighting the railing edge gives a clean vertical rhythm that looks designed in every photo angle. Warm LED strips along the railing underside or side channel create a soft glow that outlines the architecture. Pair it with a small number of ceiling downlights so the main seating stays comfortable. This is low-maintenance because the strips are accessible from the balcony side for cleaning and bulb replacement is rare with proper drivers. It’s also one of the easiest ways to make the second level feel connected to the living room.
Step 1: Choose an aluminum channel for LED strips that mounts to the railing underside with a diffuser cover. Use 2700K-3000K LEDs and keep the strip brightness moderate so it outlines rather than blinds. Step 2: Install a few recessed downlights in the living area for general brightness, spaced evenly across the seating zone. Step 3: Connect railing lighting to a dedicated driver and dimmer; test brightness from both floors to confirm it doesn’t glare toward eyes.
Editor's noteUse a diffuser channel rated for side lighting — it prevents the strip from looking like a bright line.
14. Ceiling fan with integrated downlight + wall grazing for drama
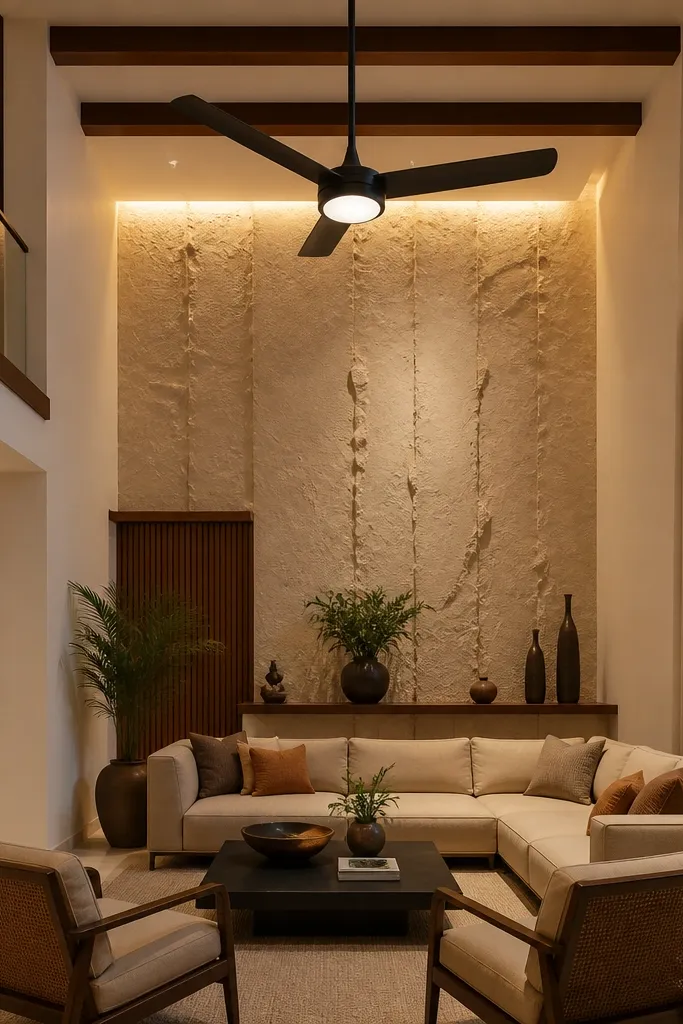
This is a practical Indian solution because you get comfort and lighting in one install. A ceiling fan with an integrated downlight reduces extra fixtures and keeps the ceiling visually clean. For drama and texture, add wall grazing on the feature wall so the double height still has depth. The fan light is low-maintenance because it’s part of one unit, and wall grazing is easy to maintain since it’s mounted at accessible heights. This design works best when your seating is near a textured wall and you want a warm, cozy atmosphere without over-lighting the ceiling.
Step 1: Install a ceiling fan with an integrated downlight in the center of the living zone, keeping blade clearance as per the fan manual and ensuring the light faces downward. Choose 2700K-3000K bulbs with good CRI if the fan light accepts replaceable lamps. Step 2: Mount one or two wall grazing fixtures at the right distance from the feature wall (usually 6-10 inches) and aim them upward across texture. Step 3: Add a dimmer for the fan light and a separate dimmer for the wall grazing so you can control mood independently.
If your fan light is too dim, don’t swap to a harsh white — adjust brightness with dimmer range and add grazing for lift.
Avoid using wall grazing on a plain painted wall — it will look like a spotlight, not a glow.
15. Plaster cove column wraps with concealed LED and warm spot accents
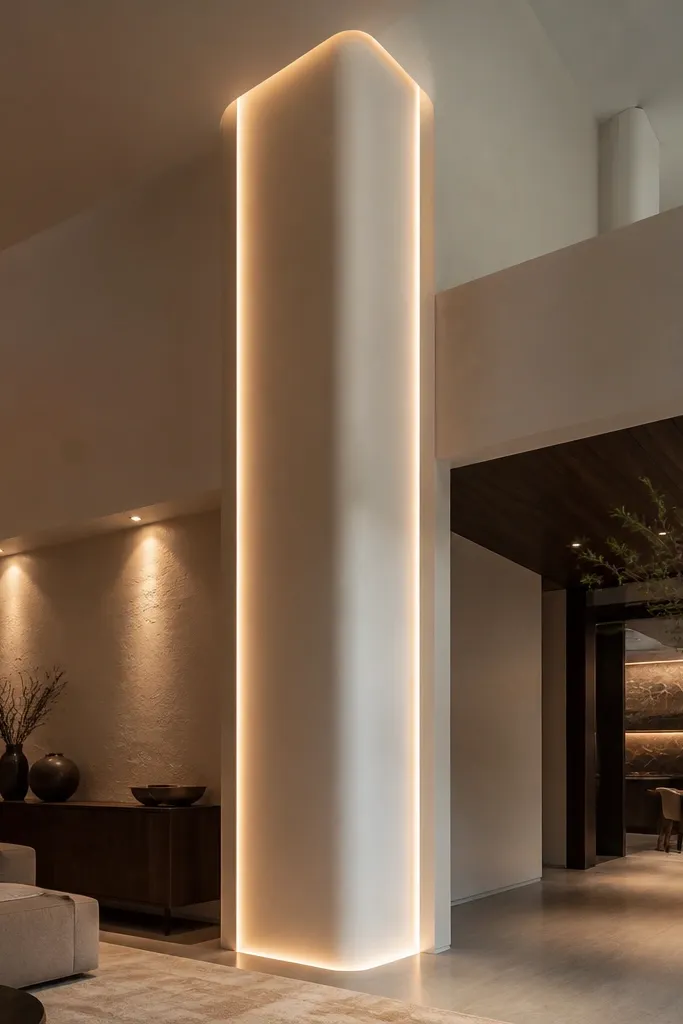
Column lighting is one of the most overlooked ways to make double-height rooms look intentional. Wrap a column with a concealed LED cove and add small warm spot accents on the surrounding wall, and suddenly the height feels framed instead of empty. The cove makes the column glow softly, while the spots add detail so textures and art look crisp. This design is low-maintenance because the LED is hidden behind plaster work and the spots are few and accessible. It suits Indian homes with prominent columns, arches, or structural beams in the living zone.
Step 1: Build a plaster cove wrap around the column with a consistent gap for LED installation, usually 2-3 inches deep with a frosted diffuser. Run a continuous LED strip inside an aluminum channel so output stays even around the column. Step 2: Install 2-4 small recessed or track spot accents aimed at the adjacent wall or art height range. Step 3: Use warm 2700K-3000K LEDs and set dimmers so the column stays steady while the wall spots can be turned down when you want a softer look.
Use plaster with a smooth finish where the diffuser line sits; rough plaster shows uneven glow.
Don’t put the LED too close to the diffuser edge — it creates a bright line along the cove.



