
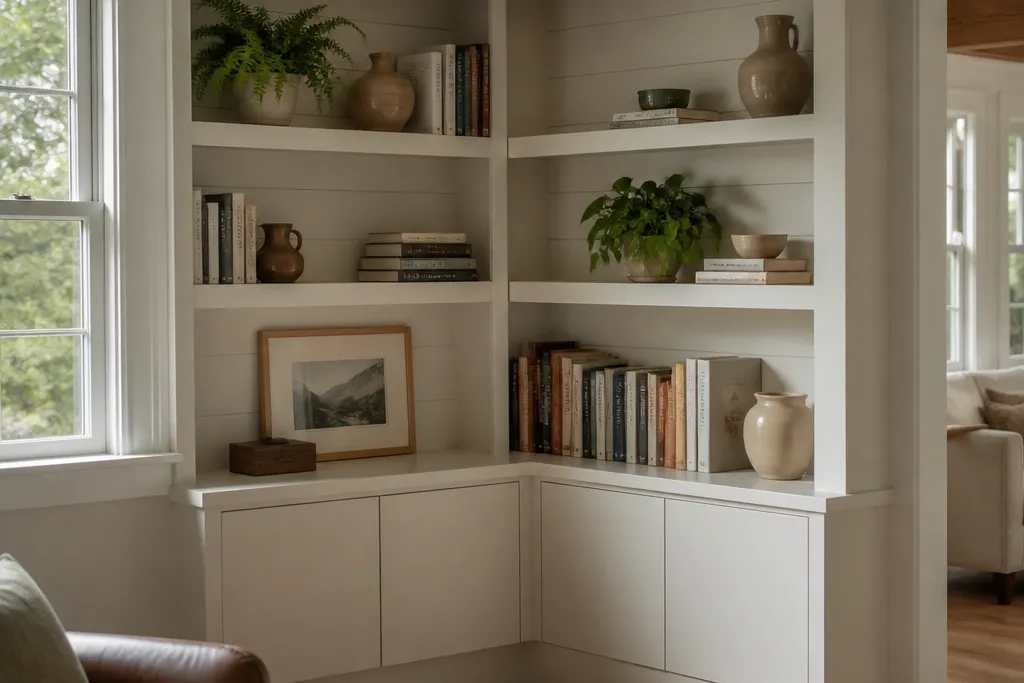
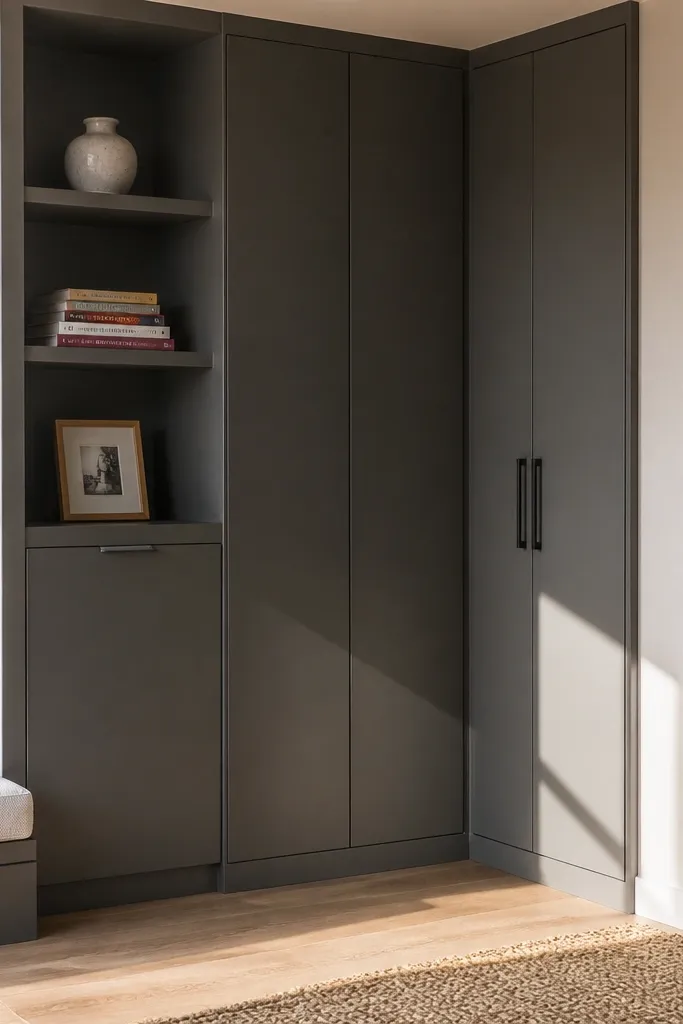
1. Shiplap-backed corner shelves with cabinet doors
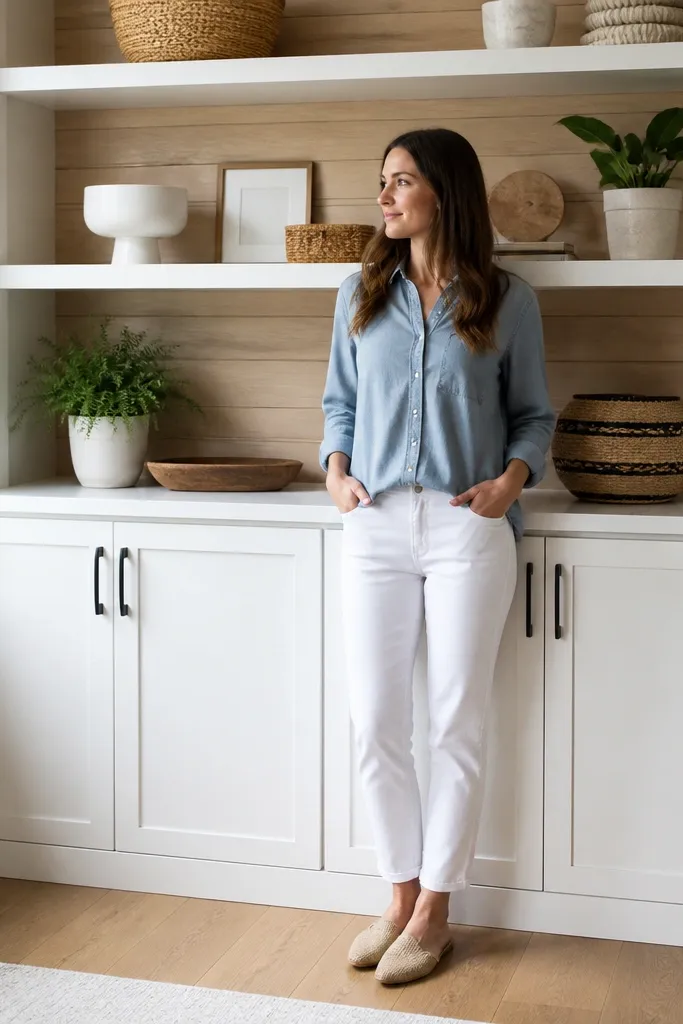
This is a corner built-in that stays tidy because the mess is behind doors, not on open shelves. The shiplap back adds texture that reads warm in daylight, while the closed lower cabinets stop clutter from spilling into the corner. Keep the shelf faces painted smooth so you can wipe them without snagging dust in grain. This look fits entryways, laundry hall corners, and any spot where you store everyday items you do not want on display. Build it with a consistent reveal line at the corner so the whole run looks intentional rather than “two shelves taped together.”
Start by framing a corner carcass with 3/4 in plywood side panels and a backer that covers the corner gap. Install vertical studs or cleats so you can screw the shelves and door rails solidly, then shim to make the face lines straight. Next, add shiplap sheets to the back only (not on shelf faces), prime, and paint the shiplap before installing shelves. Finish by building or mounting simple slab doors on soft-close hinges and aligning them so the reveals stay even at both walls.
Use 1/8 in reveal spacers when you dry-fit doors so the gap stays consistent across the whole corner.
Avoid shiplap on the shelf faces; the texture makes cleaning slower and catches grime.
2. Matte charcoal floating shelves with a warm wood L-back
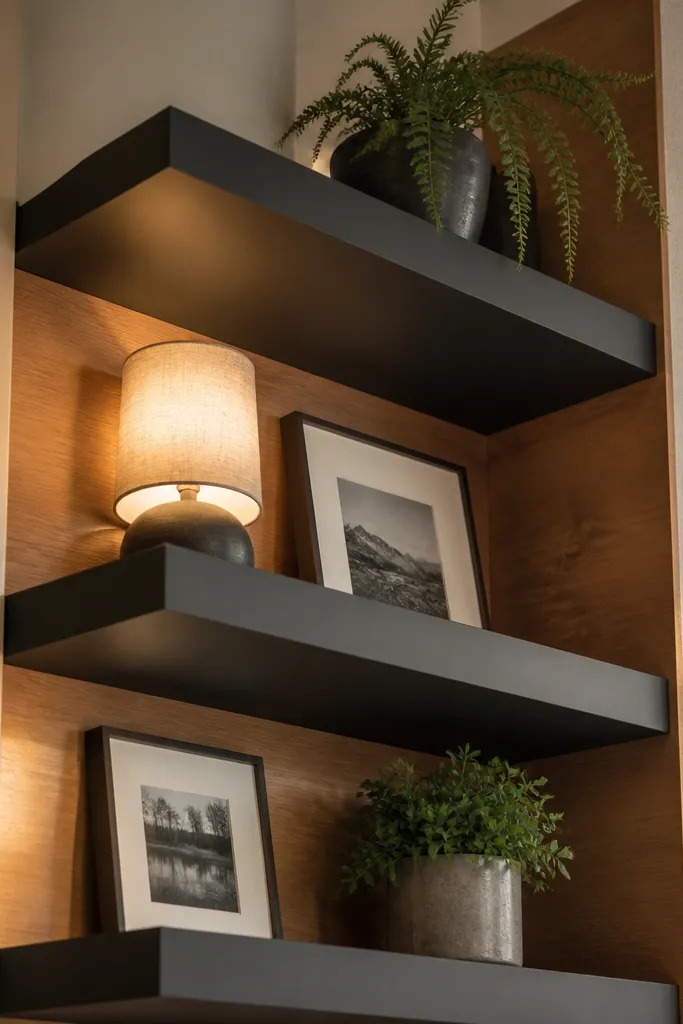
If you want photogenic minimalism, this corner look uses color contrast instead of clutter. Matte charcoal shelf faces hide fingerprints better than glossy finishes, and the warm wood back keeps it from looking cold. The open cubbies give you a place for framed photos, books, or a small lamp, and the wood back makes the corner feel finished. This is a strong choice for living rooms and home offices where you want the corner to look styled without extra storage. Keep the shelf spacing predictable so you can set decor quickly and it still looks “designed.”
Mark a level line on both walls, then install a hidden ledger made from straight 2x2 or a metal rail at the correct height. Cut side supports from 3/4 in plywood and attach them to the ledger and wall studs with construction screws. Add a continuous L-shaped back panel from 1/2 in plywood finished in warm wood stain or veneer, then mount shelf planks on top with concealed brackets. Sand everything smooth, prime, and spray or brush a matte cabinet paint on the charcoal faces; seal the wood back with a clear wipeable topcoat.
Editor's notePre-drill and counterbore the bracket screws so the shelf faces stay flat and do not chip.
Skip thisAvoid uneven shelf heights; even a 1/2 in difference makes the corner look DIY instead of built-in.
3. Tall pantry-style corner with pull-out bin shelves
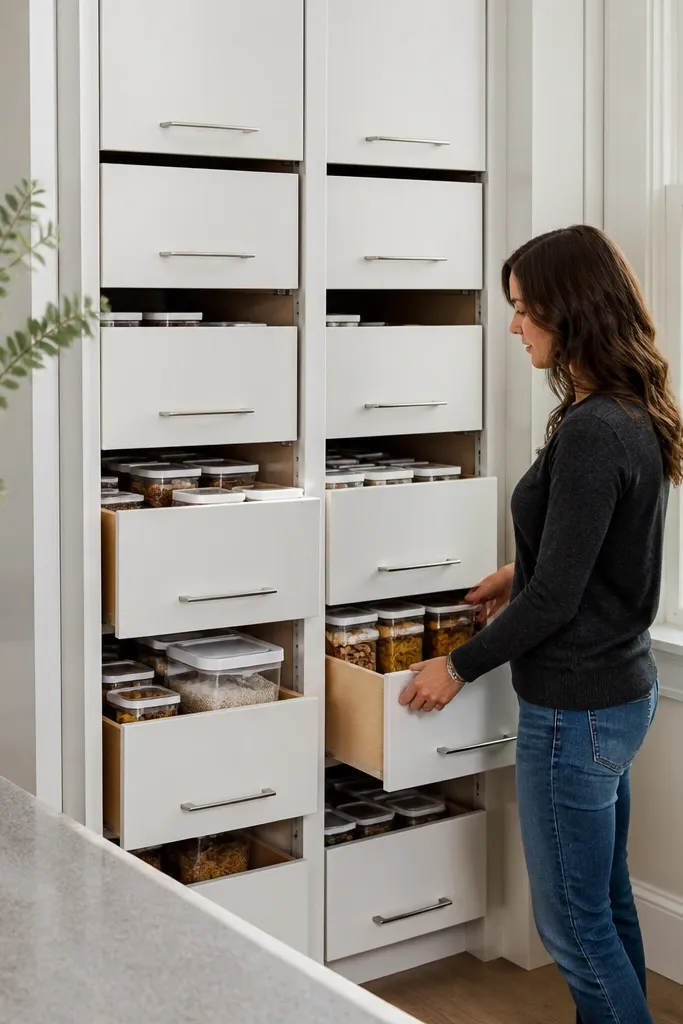
This one is about low-maintenance because you stop hunting and stop leaving bags and boxes on the floor. A tall corner unit with pull-out bins keeps small items contained, and you can wipe the bin fronts easily. The look is clean because everything is aligned vertically, with consistent shelf heights behind the bins. It works in kitchens, utility rooms, and near the garage entry where you store cleaning supplies, snacks, or seasonal extras. The photogenic part is the straight lines and the flush bin fronts that look built rather than added later.
Frame the tall corner carcass using 3/4 in plywood and build a base platform strong enough for slide hardware. Install interior rails for the pull-out slides at the exact height you want each bin; measure from the finished floor so the bins line up. Cut and assemble bin frames from plywood or use store-bought wire bins with matching fronts, then attach them to the slides. Finally, add painted face trim around the opening and install a simple door or open “display” shelf section above the bins.
Use full-extension slides so the bin pulls all the way out and you can clean behind it without moving everything.
Avoid flimsy bin frames; weak racking makes doors rub and creates uneven reveals.
4. Corner window-seat built-in with cubbies underneath
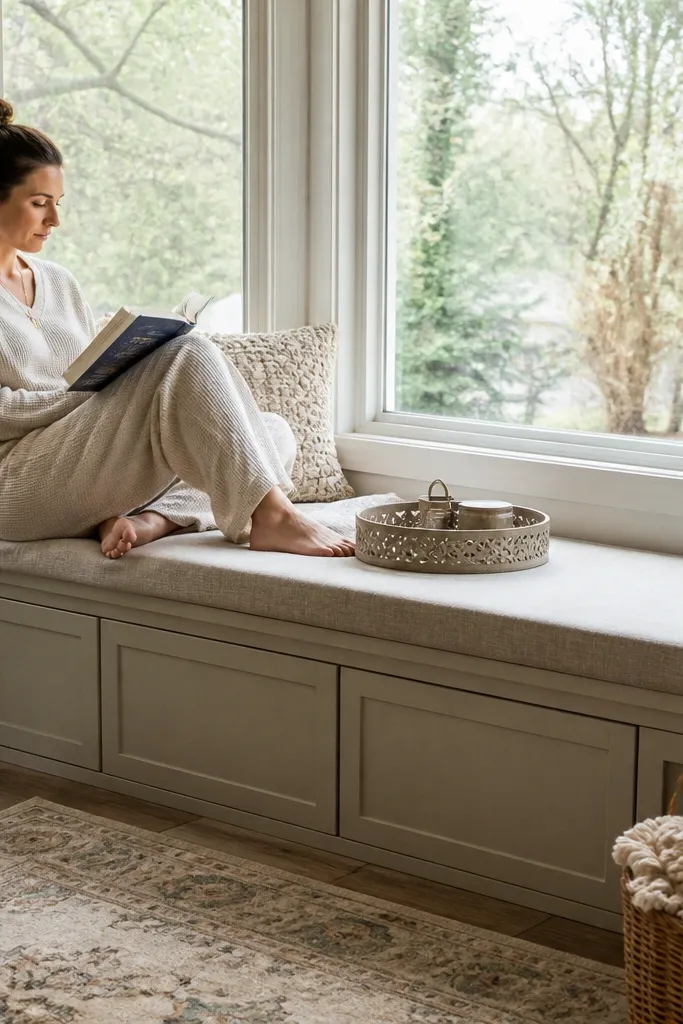
A window-seat corner build looks expensive, but it stays low-maintenance because it hides storage under the bench. The cubbies underneath are perfect for throws, board games, or seasonal items you do not want visible all the time. The bench top gives you a clean styling surface, and you can wipe fabric cushions with covers that zip off. This is ideal for reading corners and any space where you want comfort plus order. Keep the trim crisp and paint it the same color as the wall so it reads built-in rather than “wood furniture placed against a wall.”
Build the window-seat carcass first with 3/4 in plywood and support legs or a continuous cleat anchored into studs. Frame the cubbies as square boxes with 3/4 in partitions so the dividers do not bow. Add a solid plywood seat top, then finish it with durable paint or a topcoat made for furniture surfaces. Install a back panel or paneling behind the seat to close gaps, and add a hinged lift-top cushion or a removable cushion system depending on your comfort needs.
Use 1/2 in thick shelf liners or smooth vinyl on the cubby floors to protect paint from scuffs.
Avoid leaving cubby bottoms bare; paint chips fast under bags and baskets.
5. Two-tone corner shelves with white face and walnut interior
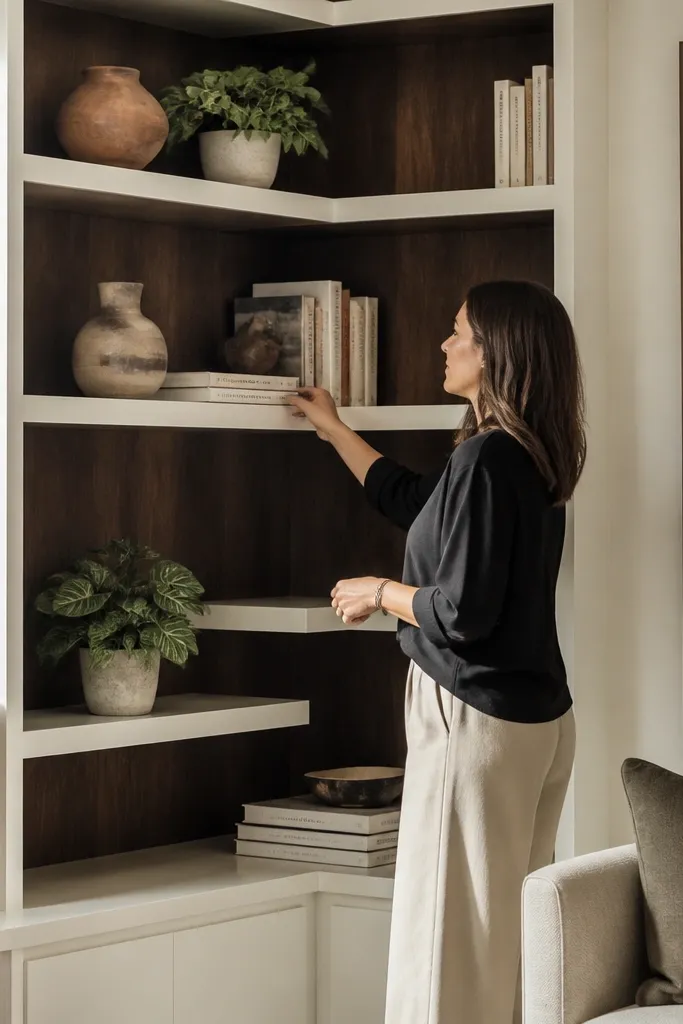
Two-tone built-ins look high-end because the eye reads depth. The white exterior face stays clean against walls, and the walnut interior makes the shelves look warm without adding visual clutter. This is great for corners where you want decor to look intentional: books, vases, and framed art pop against the darker interior. Low-maintenance comes from smooth, sealed surfaces — you can wipe the white face and the walnut-stained back without worrying about rough grain. Keep the shelf edges sharp and consistent so the corner reads like a single built unit.
Cut your carcass from 3/4 in plywood and plan separate finish zones: white for the outer face and walnut for the interior back and inner panels. Prime everything, then apply a cabinet-grade white enamel on the outer face panels. Stain the inner backer and interior side panels with a walnut tone, then seal with a water-resistant topcoat. Mount the shelves with hidden brackets so the underside stays clean, and install decorative trim only after the finishes cure.
Editor's noteMask the finish line with painter’s tape pressed tight along a straight edge to get a crisp two-tone border.
Skip thisAvoid staining over unsealed MDF; it blotches and looks uneven once installed.
6. Open corner shelves with a continuous tile back for wipe-clean storage
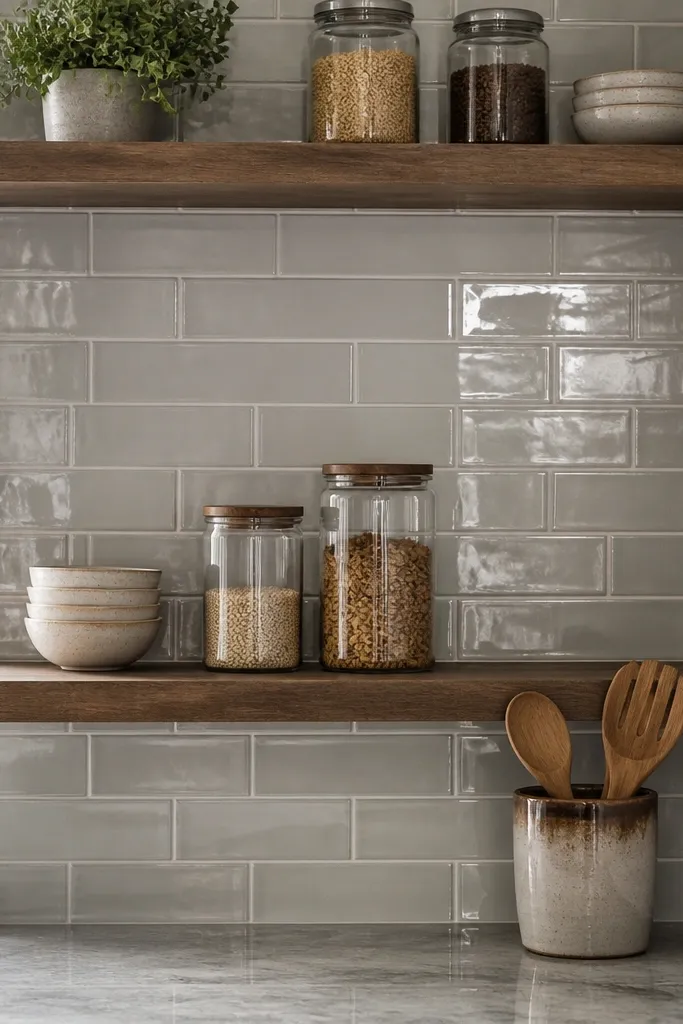
Tile backs are the best low-maintenance upgrade you can add to open shelves because they resist fingerprints, splashes, and everyday grime. This corner build keeps the shelves open for display, but the tile behind them makes cleaning quick and makes the corner look finished even when shelves are styled casually. Use small-format tile or a subway tile laid in a consistent direction so the corner stays photogenic instead of busy. This works well in kitchens, coffee stations, or mudroom corners where you deal with water marks and handprints. The look is clean and graphic, and the tile line makes the corner feel architectural.
Frame the corner carcass with 3/4 in plywood shelves and a flat backer panel that you can tile over, like 1/2 in cement board or a tile-ready plywood system. Install the backer first, then apply thinset and set tile in your chosen pattern. After the grout cures, grout seal it, then mount the shelves on brackets attached to the side panels. Paint or finish the shelf faces in a wipeable enamel; seal the edges so dust does not collect in tiny gaps.
Dry-fit tile around the corner first and plan the cuts so the visible edges are straight, not tiny slivers.
Avoid grout on raw wood backing; it cracks and makes a messy corner.
7. Beaded board corner shelves with glass-front upper cabinets
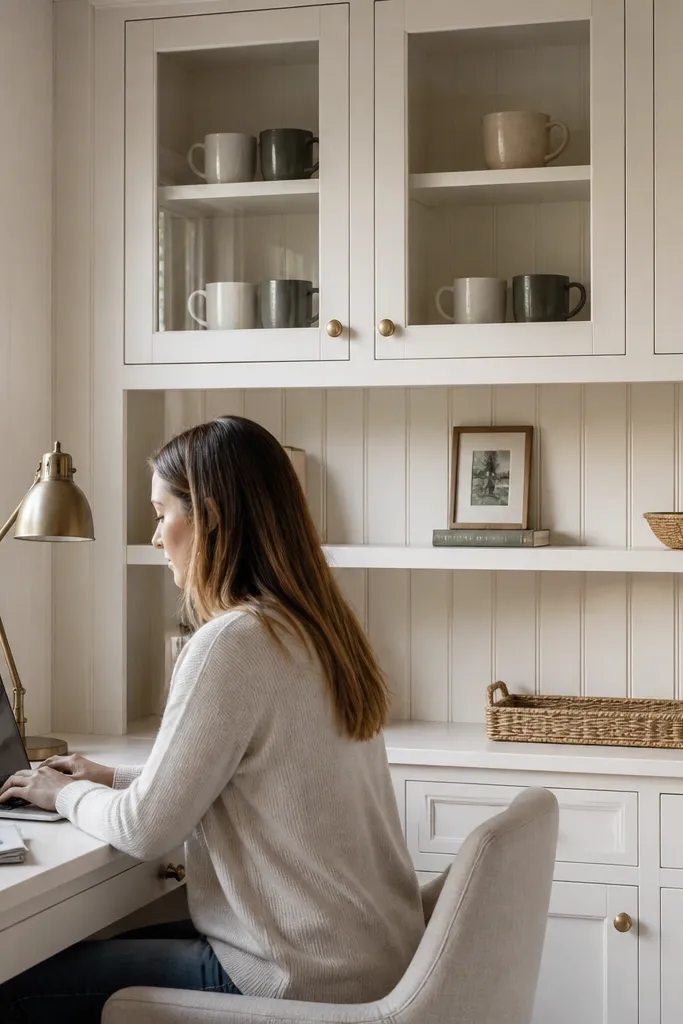
This is the corner look that stays tidy because the upper glass-front cabinets hide the “stuff you like but do not want dusty.” The beaded board adds a classic texture that photographs well, and glass keeps the corner from feeling heavy. The lower shelves or drawers can stay open for baskets and everyday items you access daily. This setup is great for dining rooms, kitchens, and craft corners where you rotate decor or seasonal items. Choose clear glass or lightly tinted glass so the contents look crisp but not messy.
Build a corner cabinet carcass with 3/4 in plywood and add beaded board only to the back panel area behind the shelves. Install an internal frame for glass doors using 1/2 in trim rails and weatherstrip so the doors close cleanly. Mount the shelf supports at two or three fixed heights so you can style the same way each time. Finish with paint on the beaded board, then install glass doors with magnetic catches or soft-close hinges for smooth daily use.
Editor's noteAdd a removable shelf liner behind the glass so you can wipe dust quickly without taking the whole unit apart.
Skip thisAvoid using cheap thin glass; it warps visually and makes the doors look uneven.
8. L-shaped corner shelves with hidden cable channel
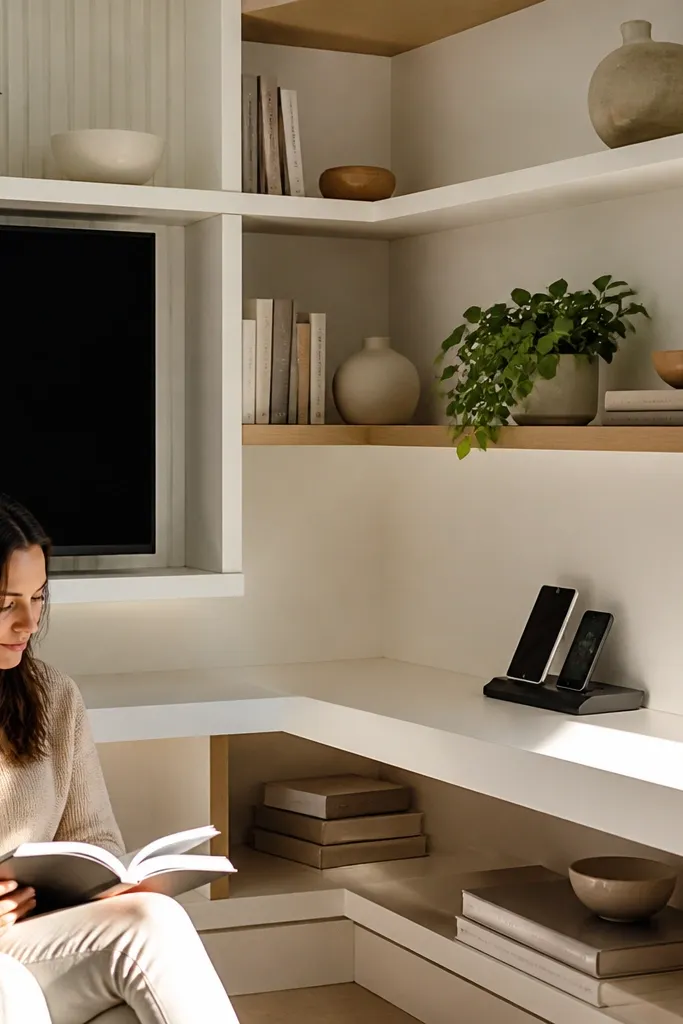
If your corner has a router, charging station, or small electronics, this is the low-maintenance build that keeps cables from turning into a permanent eyesore. The hidden cable channel is behind a removable trim strip, so you can plug things in without opening the whole cabinet. The shelves stay clean because the cable mess is contained, and the corner reads as one designed unit. This is ideal for home offices and living rooms where you want a neat tech zone. The look is simple, but the cable control is what makes it feel truly low-maintenance.
Plan your shelf run as an L shape and frame it with 3/4 in plywood side panels and a closed back. Before you close the back, install a cable channel made from a metal or plastic raceway mounted along the inside wall. Add a small access opening covered by a removable face trim strip so you can reach the channel. Mount shelves on brackets, then finish the face trim and shelf surfaces with wipeable paint or laminate.
Route power and low-voltage cables in separate channels so you do not get interference and so the system stays organized.
Avoid stapling cables directly to the back; it makes later rework painful and creates uneven bulges.
9. Corner shelving with integrated peg rail and closed lower baskets
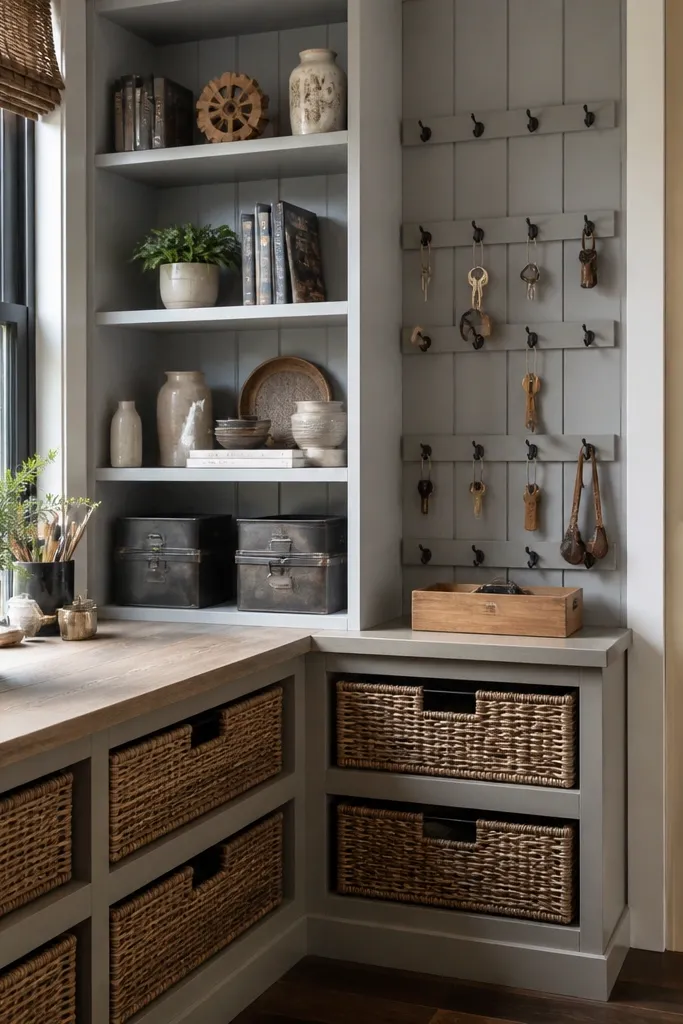
This is a practical corner built-in that still looks designed. The peg rail keeps tools, small hooks, or keys organized in a visible grid, while the closed lower baskets hide the “daily chaos.” You get photogenic structure from the consistent hole spacing and clean shelf lines. Finish the shelves in a matte paint and use matching metal hooks so everything looks intentional. This works well in mudrooms, garages, and laundry rooms where you need quick access but hate clutter. The low-maintenance part is that you can wipe the shelf faces and baskets without sorting through loose items.
Frame the corner unit with 3/4 in plywood carcass panels and install two shelf tiers above the basket area. Mount a peg rail backing panel on the inside wall section and attach a pre-drilled pegboard or slotted rail to it with screws. Build a basket section below using fixed shelf supports and add removable basket slides or simple stops. Finish by painting everything, then add hooks and a small trim shelf at the top for frequently used items.
Editor's noteUse a metal peg rail instead of thin wood if you want a sharper look and less sag over time.
Skip thisAvoid mixing random hook sizes; use a single hook style so the grid looks neat.
10. Slim corner shelves with a recessed niche for a small plant wall
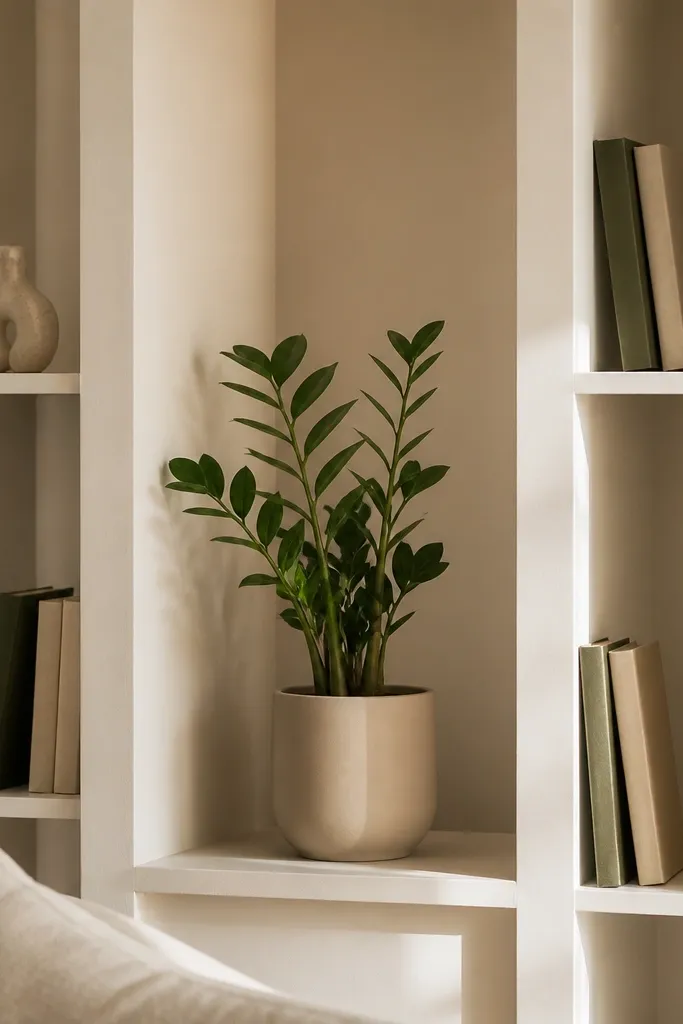
This corner build is for people who want the corner to look fresh without constant decor changes. A small recessed niche makes a plant display look intentional, and the surrounding shelves hold books or a single sculptural object. Low-maintenance comes from limiting the “busy” area to one niche and keeping the rest simple and wipeable. The niche also helps you control water — you can add a waterproof liner and a drip tray so spills do not reach the shelves. This is perfect for living rooms, bathrooms with enough light, and reading corners. It photographs well because the niche creates a focal point instead of scattered items.
Build a slim corner carcass with 1/2 in or 3/4 in plywood depending on your span, keeping shelf depth around 8-10 in for a sleek look. Frame a recessed niche inside one wall section using 1x2 or plywood strips so the opening has crisp edges. Line the niche with a waterproof liner and add a tray that sits under the plant pot. Mount the shelves on concealed brackets, then finish shelf faces with cabinet paint and seal the niche liner area.
Make the niche at least 10 in deep so the pot sits fully inside and water never reaches the shelf edge.
Avoid open plant watering directly above shelves; always use a tray or liner.
11. Corner shelves with a continuous countertop-style top and hidden storage
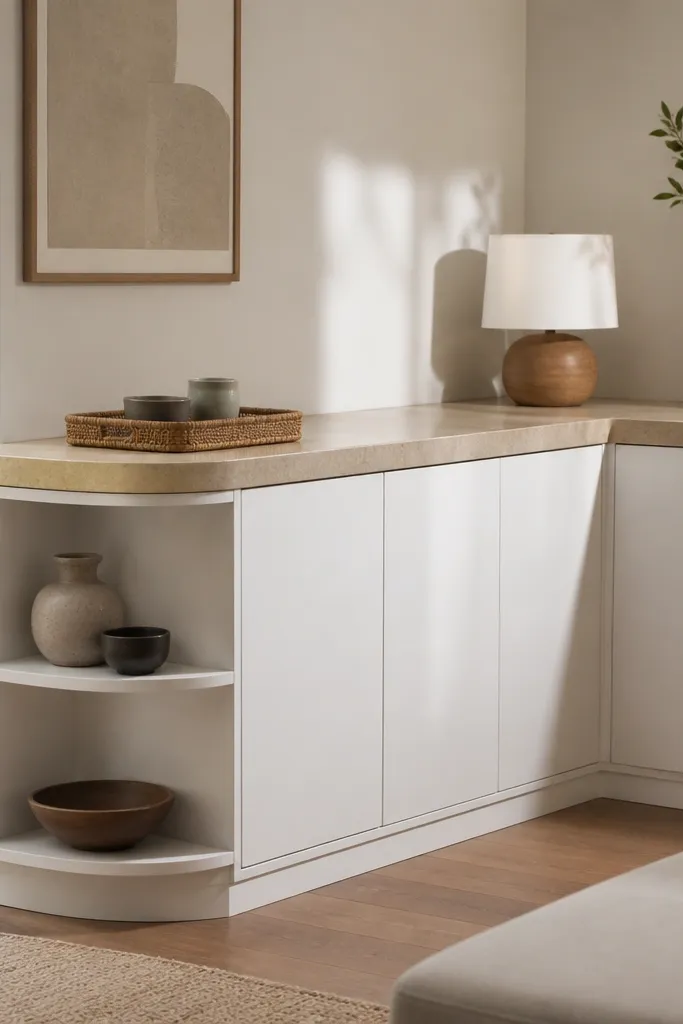
A thick, countertop-style top makes corner shelves look built-in and furniture-like. The top gives you a clean place to set a tray, lamp, or coffee items, while hidden storage behind doors keeps the corner from turning into a catch-all. This is low-maintenance because daily clutter stays behind closed fronts, and the top surface is wipeable. It works in entryways and kitchens where you want a landing spot but do not want open shelves full of random items. The aesthetic is bold because the top thickness creates a shadow line that reads great in photos.
Frame the corner unit with a strong top support layer, using 3/4 in plywood and blocking so the thick top does not flex. Cut a countertop-style top from 3/4 in plywood with a layered edge (or use butcher block sealed with a hard finish) and install it after the carcass is square. Add shelves inside with fixed heights, then install door fronts on soft-close hinges to hide storage. Finish the top and shelf faces with a durable wipeable finish; add a simple toe-kick if you want the unit to look grounded.
If you use butcher block, seal it with a water-resistant topcoat and re-coat on a schedule; it stays clean and resists stains.
Avoid thin top panels; they flex and make the whole corner look cheap.
12. Offset corner shelves with vertical slats and backlit LED strip
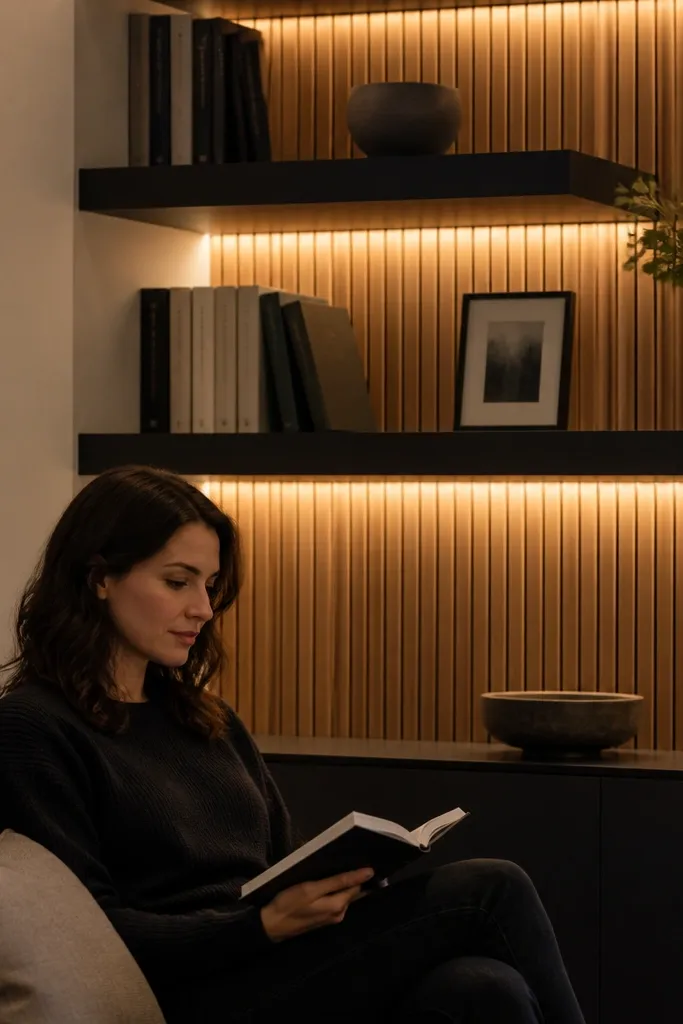
This corner design looks expensive because it has controlled lighting and a textured back. Vertical slats create a clean rhythm, and a concealed LED strip adds a soft glow that makes shelves look styled even when the room is dim. Low-maintenance is about reducing dust visibility: when lighting is even and surfaces are smooth, you notice less grime and smudges. This is best for living rooms and bedrooms where you want a mood feature, not a storage dump. Use warm LED color temperature so the wood and painted surfaces look flattering instead of harsh.
Build the corner carcass and mount a slat panel to the back, leaving a channel space behind it for the LED strip. Install a diffuser strip or aluminum channel so the LED light does not show bright dots. Route power to a hidden junction box and include a switch or smart plug control. Mount shelves on brackets so the shelf line stays consistent, then finish the shelf faces with a smooth paint and seal the slats with a clear coat.
Use 2700K LEDs for warm glow; 4000K looks clinical and makes imperfections stand out.
Avoid exposing the LED strip; visible diodes look messy and ruin the clean look.
13. Corner shelves with an arch-top display niche and lower drawers
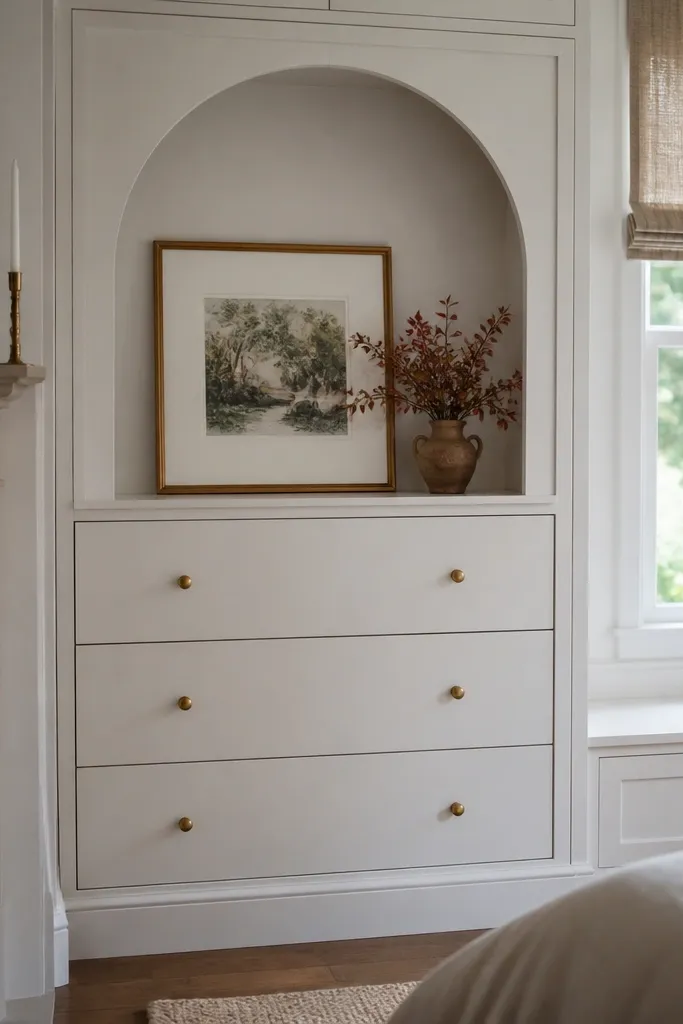
An arch-top niche adds character without making the whole corner complicated. It gives you one clear place for a framed print, small art object, or a seasonal vase, and the shape makes the corner more photogenic than straight rectangles. Lower drawers keep everyday items hidden, so the corner stays clean even when you are not styling it. This is a great choice for dining rooms, entry halls, and spaces where you want both storage and a decorative focal point. Keep the drawer pulls simple and aligned for a crisp built-in look.
Frame the corner carcass using 3/4 in plywood and set the niche opening height so the arch sits centered. Cut the arch form from plywood template pieces, then skin it with thin plywood or hardboard to keep the curve smooth. Build drawer boxes from 1/2 in plywood and mount full-extension slides at the correct height so drawers align with the niche. Finish by painting the entire unit, then install a drawer front and niche trim to hide any construction seams.
Editor's noteMake a cardboard arch template and check it against the wall height before you cut wood.
Skip thisAvoid cutting the arch freehand; uneven curves look obvious in photos.
14. Corner shelves with rattan-front doors and open upper ledge
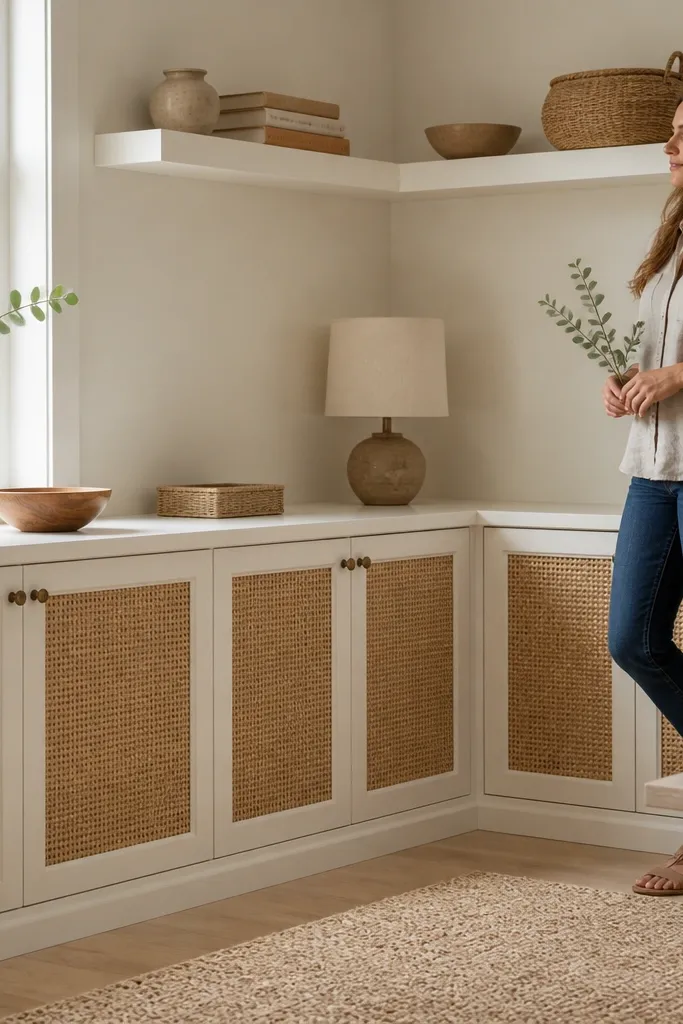
Rattan-front doors let you add texture without showing clutter. The lower cabinets hide items, and the open upper ledge gives you a place for a small lamp or a book stack. This is low-maintenance because you can wipe the painted frame and the rattan is easier to dust than a bunch of open shelves. The corner looks warm and airy, especially when the shelves are a clean white or soft cream. It works in living rooms and bedrooms where you want a relaxed aesthetic but still need order. Keep the rattan enclosed behind a frame so it does not snag or warp.
Build the corner carcass with 3/4 in plywood and install a divider shelf for the open ledge section. Frame door openings with 1x2 or 3/4 in trim so rattan panels have a consistent depth and edge support. Cut rattan panels to size, then tack and glue them into the door frames with a stable backing. Paint the frame, seal the shelf faces, and install doors using hinges that keep reveals even at both walls.
Use a satin topcoat on the painted frame so fingerprints wipe clean without looking glossy.
Avoid oversized rattan panels without a rigid frame; they sag and look uneven.
15. Monochrome corner shelves with textured cement board back
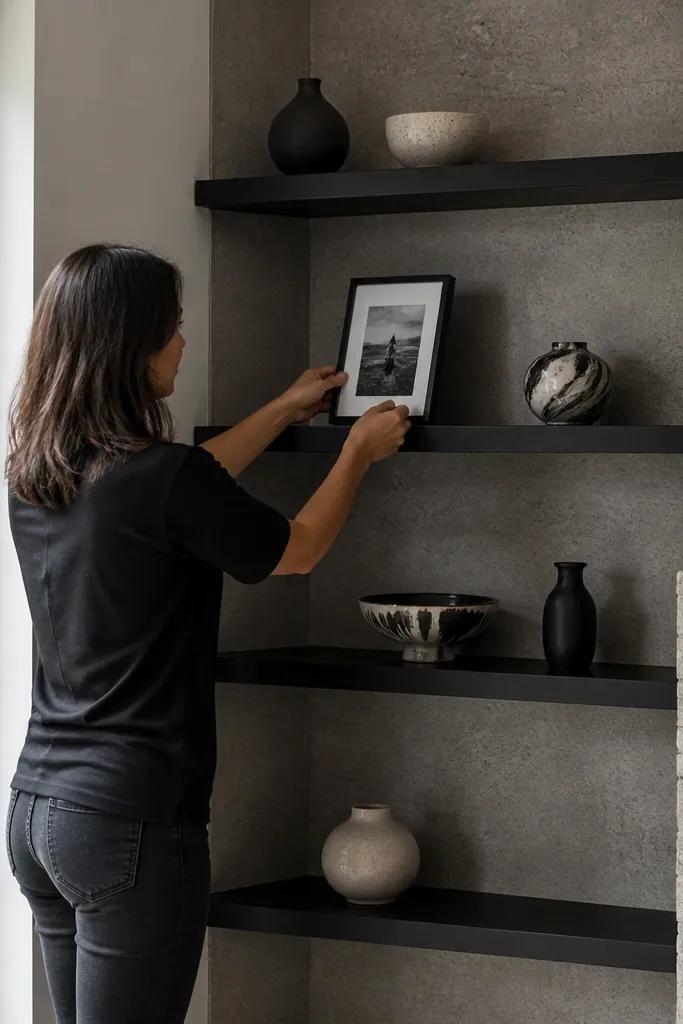
A textured cement board back makes corner shelves look architectural while keeping the shelf storage simple. Monochrome color keeps it calm, and the texture adds depth that photographs well from multiple angles. Low-maintenance comes from sealing the textured surface so you can wipe dust, and keeping shelf faces smooth. This build is great for modern living rooms, studios, and home offices where you want a “feature wall” feel without wallpaper. Pair it with a simple shelf layout and a few deliberate decor pieces, because the back texture already does the heavy lifting visually.
Frame a corner carcass with 3/4 in plywood and create a solid back area that can take cement board. Install cement board sheets and tape seams, then texture lightly if you want a subtle finish. Seal the cement board with a clear masonry sealer rated for wipe-clean surfaces, then paint the shelf faces in the monochrome color. Mount shelves with hidden brackets and add a thin trim line around the back so the edge looks clean.
Seal twice: one coat for penetration, second coat for a smoother wipe-clean layer.
Avoid unsealed cement board; it sheds dust and makes the corner look dirty fast.
16. Corner shelves with vertical metal edge trim for a sharp modern line
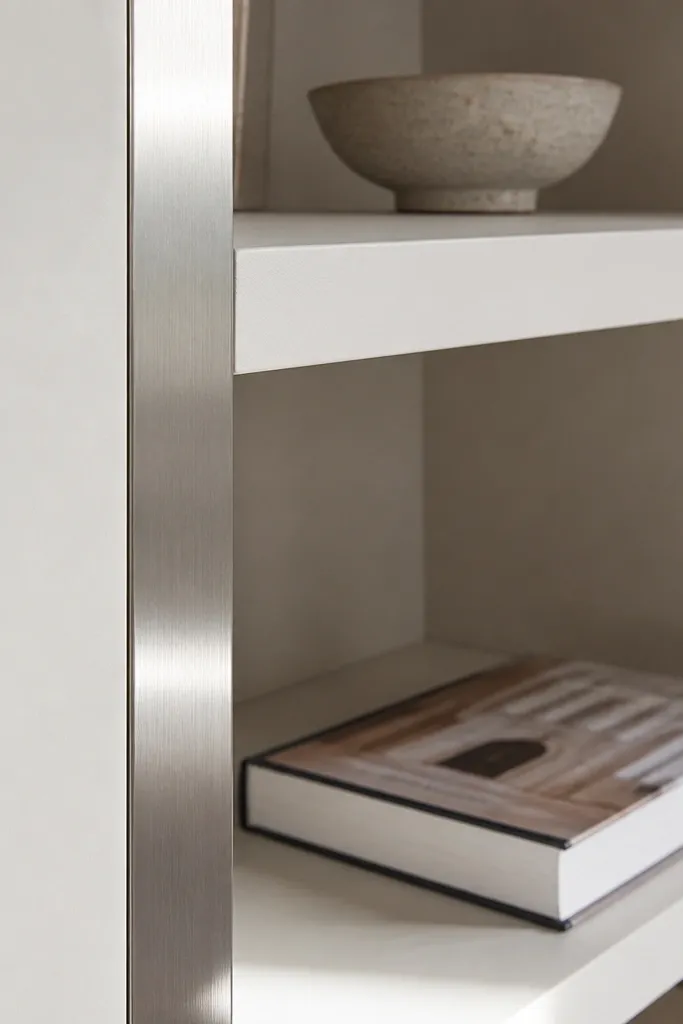
Metal edge trim is a small detail that makes corner built-ins look engineered. It creates a crisp line where the two walls meet, so the corner reveal reads intentional instead of “filled with caulk.” Keep the shelf faces matte and smooth so it stays low-maintenance and easy to wipe. This is a strong pick for modern kitchens, offices, and hallways where you want clean geometry. The metal also hides minor gaps between panels, which helps when your walls are not perfectly square.
Build the carcass with 3/4 in plywood and leave a planned gap for the metal edge trim at the corner. Install shelf supports and mount shelves with concealed brackets for a clean underside. Cut and install metal L-channel or edge trim along the vertical corner seam, anchoring it to studs or plywood with small screws. Finish by caulking only the edges that will not be visible, then prime and paint shelf faces with cabinet paint.
Buy trim in the exact thickness that matches your panel thickness so it sits flush without a bulky look.
Avoid painting over metal trim without sanding and bonding primer; the paint chips at the edges.
17. Corner shelves with removable front panels for seasonal styling
Removable front panels keep the corner low-maintenance while still letting you change the look. You can store items behind the panels and swap in a different panel finish or decor insert when seasons change, without rebuilding anything. The shelves look open and airy, but the front panel system lets you hide clutter quickly. This works well for living rooms and dining rooms where you like seasonal styling but hate constant reorganization. The photogenic part is the consistent front panel rhythm and the clean shelf alignment.
Frame the corner carcass and install shelves with fixed supports so the spacing stays consistent. Build removable front panels using 1/4 in plywood or thin MDF panels attached to a rail system with magnets or concealed clips. Add a closed back so dust does not collect in the gap behind the shelves. Finish the panel faces in a wipeable paint or laminate, then test the panel removal so it slides out without snagging on trim.
Use strong magnets and a metal backing strip so the panels seat tight and do not rattle.
Avoid relying on friction-fit panels; they loosen and leave uneven gaps.
18. Corner shelves with floor-to-ceiling vertical storage and a lift-top cabinet
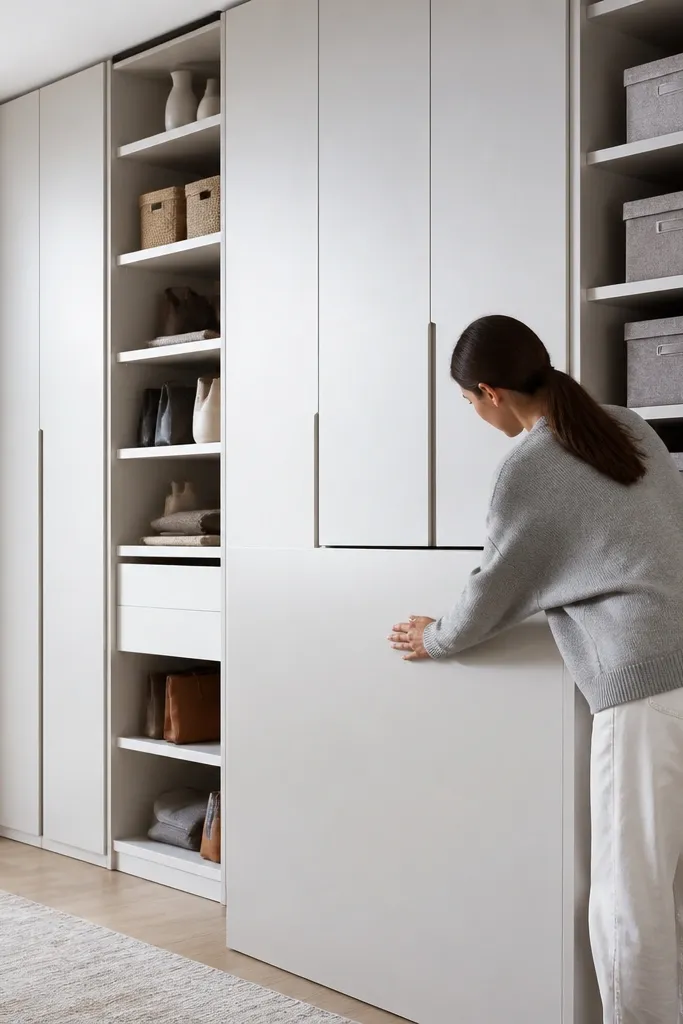
This build is for corners that need serious storage but still need to look clean. Tall vertical columns keep items organized, and a lift-top cabinet hides larger clutter that would otherwise sit on open shelves. The corner looks built-in because the columns run continuous from floor to ceiling and the shelves align into a single visual grid. Low-maintenance comes from fewer open surfaces: you dust less, and you close it when life gets messy. This is a great fit for utility corners, craft rooms, and any space where you store supplies you do not want visible.
Frame a floor-to-ceiling corner carcass with 3/4 in plywood and add intermediate blocking so the lift-top has solid support. Build the lift-top cabinet box with a hinged lid and gas struts or a spring hinge sized for the lid weight. Add vertical storage shelves inside the columns with fixed heights for bins or books, then install a face trim grid around the openings. Finish shelf faces with cabinet-grade paint and seal all edges so the unit wipes clean.
Editor's noteUse a soft-close lift mechanism rated for your lid thickness so it closes gently and stays aligned.
Skip thisAvoid undersized hinges; a heavy lid drops and misaligns the face panel over time.
19. Corner shelves with built-in bar tray ledge and glass storage

A bar-style corner built-in looks great and stays low-maintenance because everything has a home. The tray ledge gives you a clean staging spot for bottles and a tidy way to set a glass without leaving rings on nearby surfaces. Angled glass storage keeps stemware secure and reduces the “pile of glasses” mess. This works in dining rooms, game rooms, and kitchens where you want a small entertaining zone. Choose smooth, sealed finishes so you can wipe condensation and smudges without staining the wood.
Build the corner carcass using 3/4 in plywood and add a ledge shelf at the height you want for a tray. Install angled glass racks using pre-made rack rails or build a simple angled support frame from wood blocks. Add a back stop panel so glasses do not slide forward, then mount standard shelves for bottles and small bar items. Finish with a durable clear topcoat on wood surfaces or use laminate on shelf faces for maximum wipeability.
Add a thin rubber mat on the tray ledge to prevent glass from slipping and to protect the finish.
Avoid open glass storage without a back stop; one bump turns it into a mess.
20. Corner shelves with paneled side returns and hidden base kick
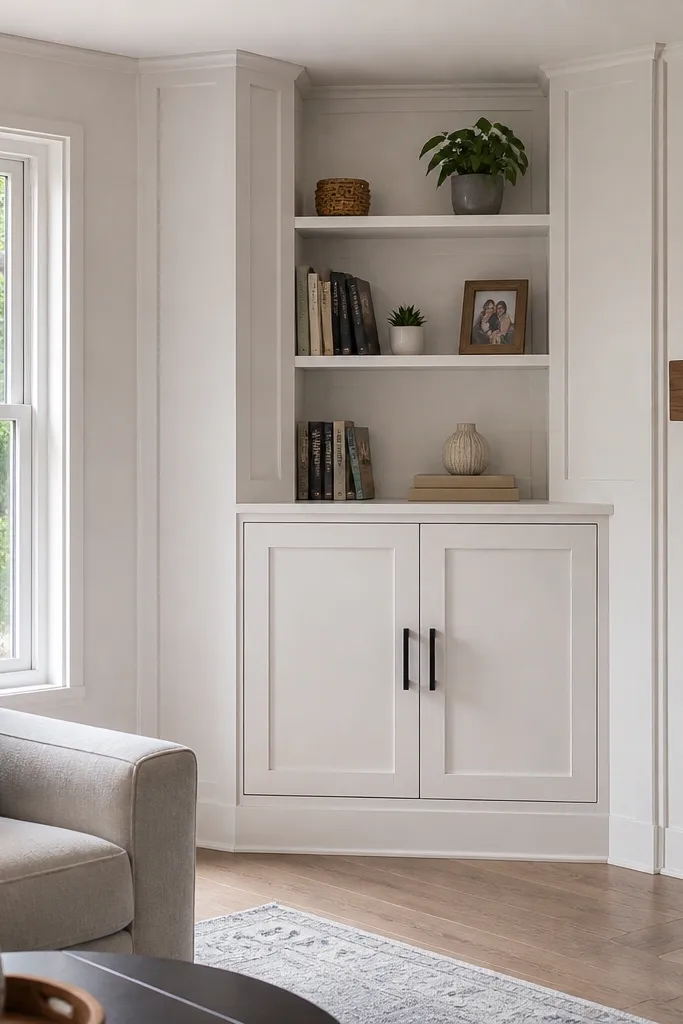
Paneled side returns make corner shelves look like they were always part of the room. The side returns cover the messy wall-to-cabinet transition, and a hidden kick base keeps the bottom line clean. This is low-maintenance because you reduce the visible dirt line at the floor and you can wipe the base area easily. It works in hallways and living rooms where dust collects at the bottom edge of furniture. Keep the finish smooth and consistent across shelves, returns, and trim so the whole corner reads as one object.
Frame the main corner unit first and keep the face square using shims at the wall studs. Install side return panels that wrap slightly onto each wall so gaps are covered by solid wood, not caulk. Add a toe-kick or kick base behind a thin face panel so you get a clean bottom line without exposing unfinished framing. Prime and paint the entire unit, then install shelf boards and any decorative trim last.
Plan your kick height to match nearby built-ins or cabinets so the corner does not look “off” at floor level.
Avoid leaving the bottom edge raw; it collects dust and looks unfinished fast.



