
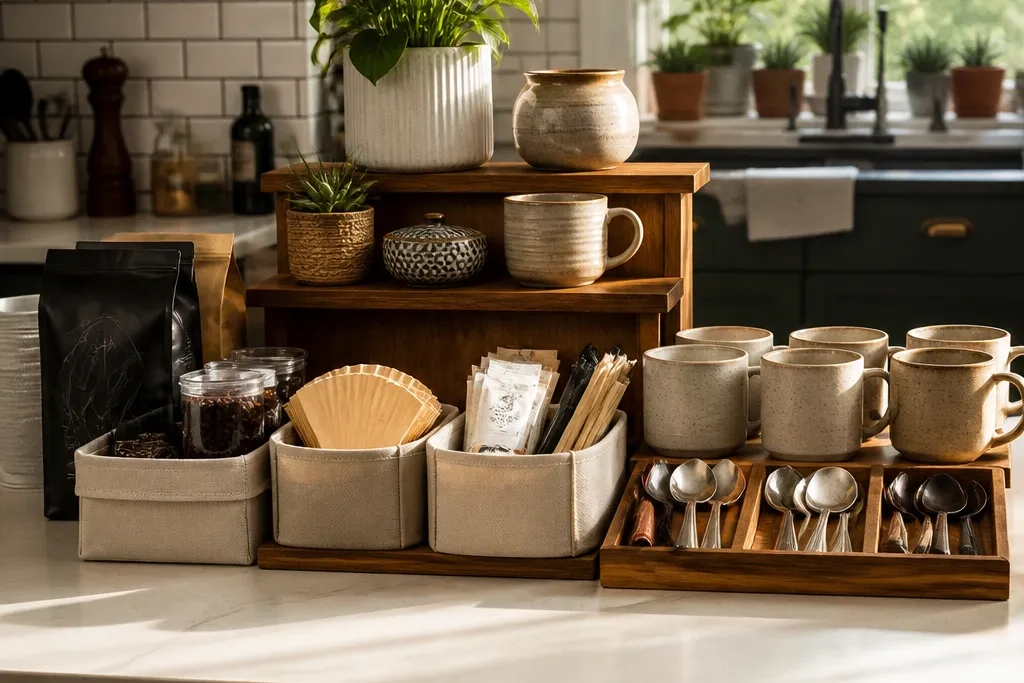
1. Tiered tray with a sealed wood base and labeled bins
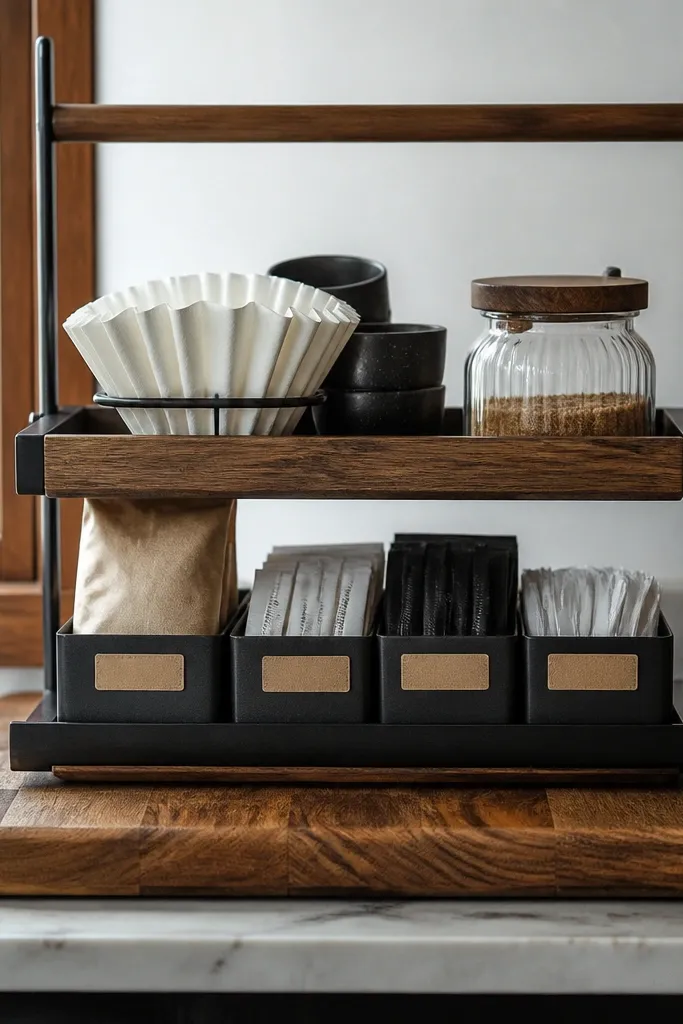
Start with a tray that has a solid base at least 12 inches wide, then add two shallow, lidded bins that fit the tiers. Use a light sanding and wipe-clean sealant on any raw wood tray so coffee dust doesn’t soak into the pores. Label each bin with a small adhesive label on the front edge so you can read it without digging. Place daily items like stir sticks and sweetener packets on the top tier, and keep filters or backup pods in the lower bin. Finish by tightening the arrangement so all container fronts line up on the same plane.
This setup looks styled because it turns “random supplies” into a small display. The sealed wood base gives you the warm, photogenic look, and the tiered layout forces a clear hierarchy: daily items on top, backups underneath. Labeled bins keep you from refilling the wrong thing and reduce the messy pile that happens when you’re half awake. It’s low-maintenance because everything wipes down and nothing needs constant rearranging to stay neat. It works best on a coffee bar cart or a flat section of counter where you can keep the station centered.
Skip thisAvoid open bins without dividers — they look fine for five minutes, then everything turns into a jumble.
Editor's noteUse waterproof label stock or laminate so sugar spills don’t ruin the text.
2. Wall-mounted peg rail with a mug row and spoon hooks
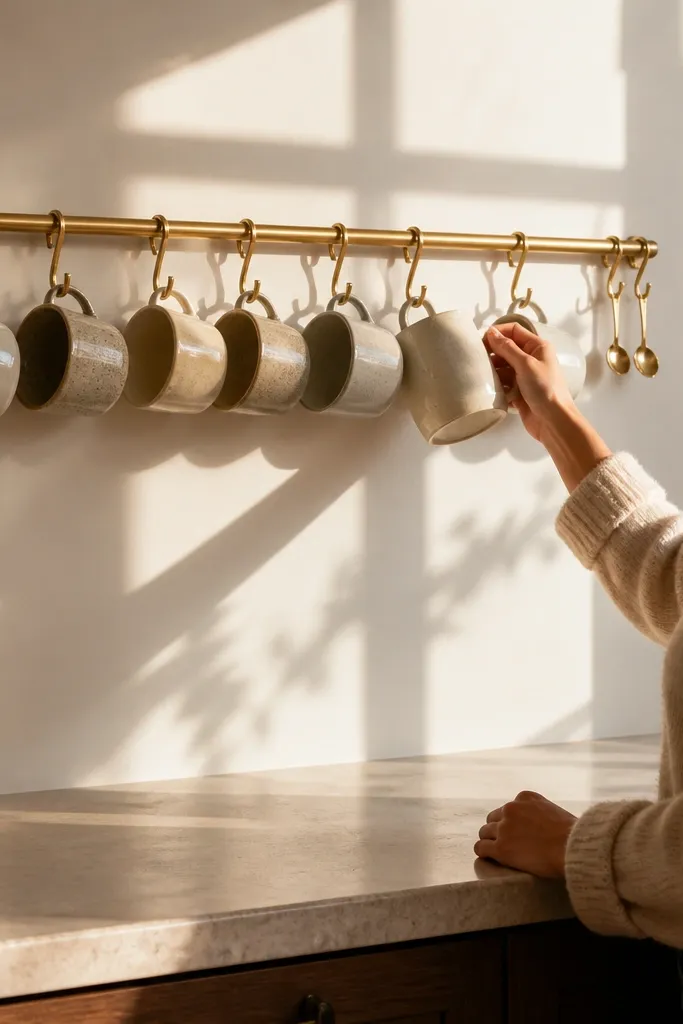
Find a rail length that fits your space — 24 to 36 inches is plenty for a small coffee station. Install the rail into studs if possible, or use proper anchors rated for the weight of mugs plus tools. Hang mug hooks spaced about 3 inches apart so handles don’t clack and scrape. Add two spoon hooks and one hook for a small scoop, then keep the rest of the counter for a tray base. Wipe the hooks weekly with a dry cloth so coffee dust doesn’t build up on metal.
If your counter is always crowded, this is the cleanest visual fix. A peg rail pulls mugs and tools off the surface, so you instantly reduce clutter while keeping everything within arm’s reach. The mug row looks intentional and adds warmth, especially when you hang matching hooks and use a consistent metal finish. It’s also low-maintenance because you’re not dealing with shifting stacks; items hang where they belong. This works best if you have a backsplash or wall area next to your machine or kettle.
Skip thisDon’t mount too high; if mugs are above eye level, you’ll stop using the station and clutter returns.
Editor's noteMount the rail so the mugs sit just above counter height — you’ll grab without lifting your arm high.
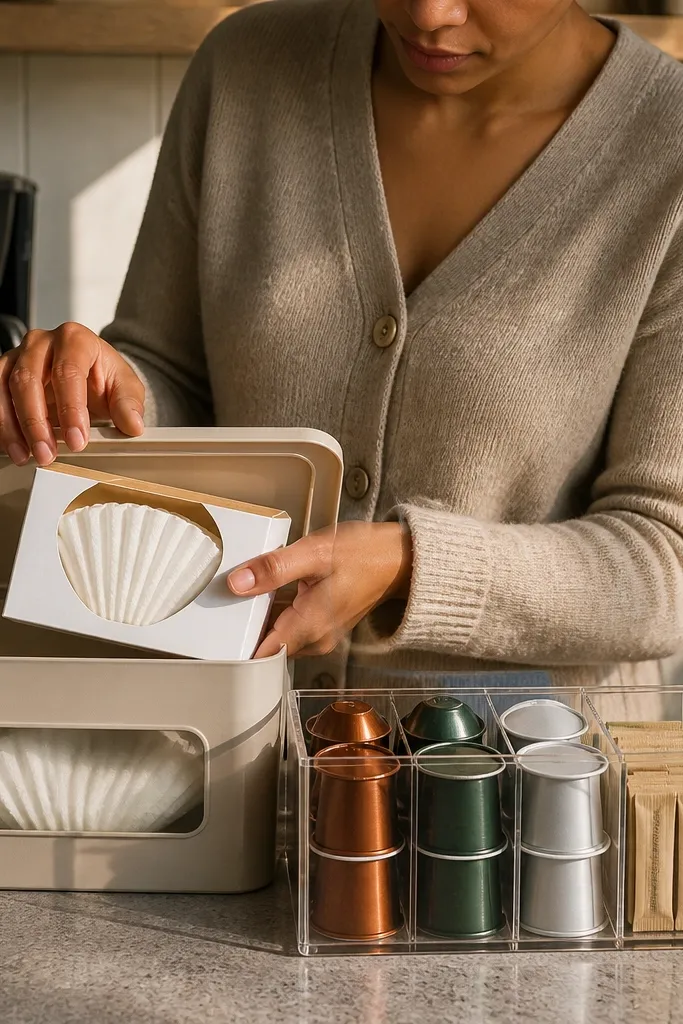
3. Clear acrylic drawer organizer for pods and sweeteners
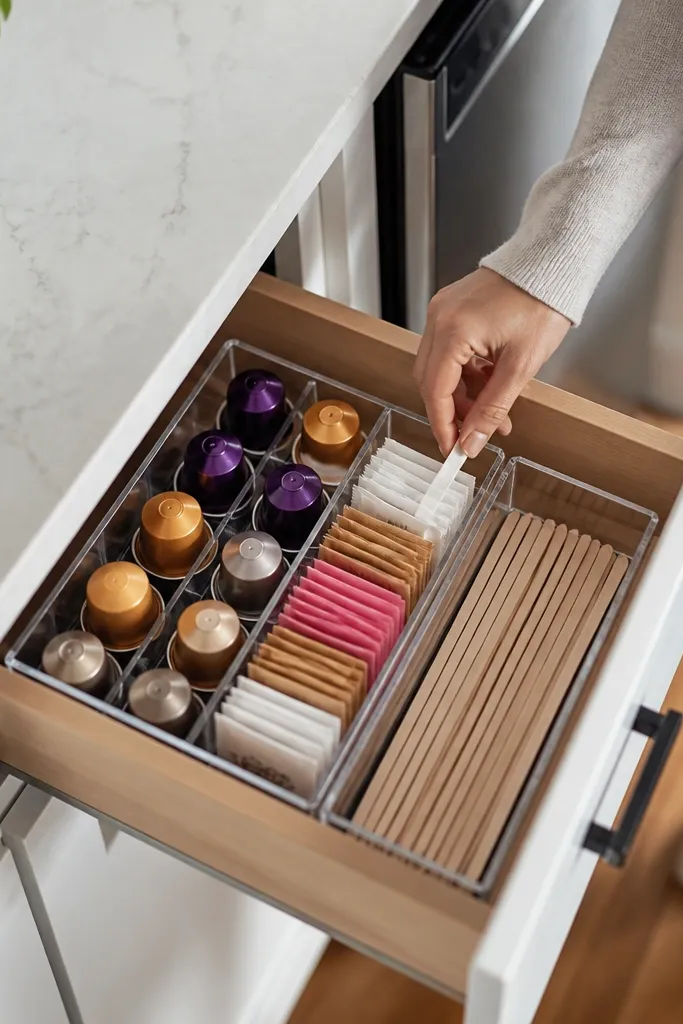
Measure your counter surface and choose an organizer that fits with at least 1 inch of clearance on each side. Use one organizer section for pods and another for single-serve items like sweetener packets and stir sticks. Add a small strip label at the front of each compartment so you refill correctly. Place the organizer on a tray mat or sealed board so minor spills don’t stain the counter. Keep the heaviest items in the bottom compartment to prevent wobble.
Clear acrylic makes the station look tidy because you can see what’s inside, and that reduces the “grab whatever is closest” habit. Compartment organizers keep pods from spilling into a big mixed pile, which is what kills the look in the first place. Sweeteners and stir sticks get separated, so the station stays photogenic even when you’re moving fast. This is low-maintenance because acrylic wipes clean and you can rearrange without tools. It suits countertop setups where you want a crisp, modern look and you don’t want to build anything heavy.
Skip thisAvoid organizers with deep, single compartments — you’ll end up digging and knocking items over.
Editor's notePut a non-slip mat under acrylic so it doesn’t slide when you yank a pod.
4. Powder-coated metal caddy with a mesh scoop holder
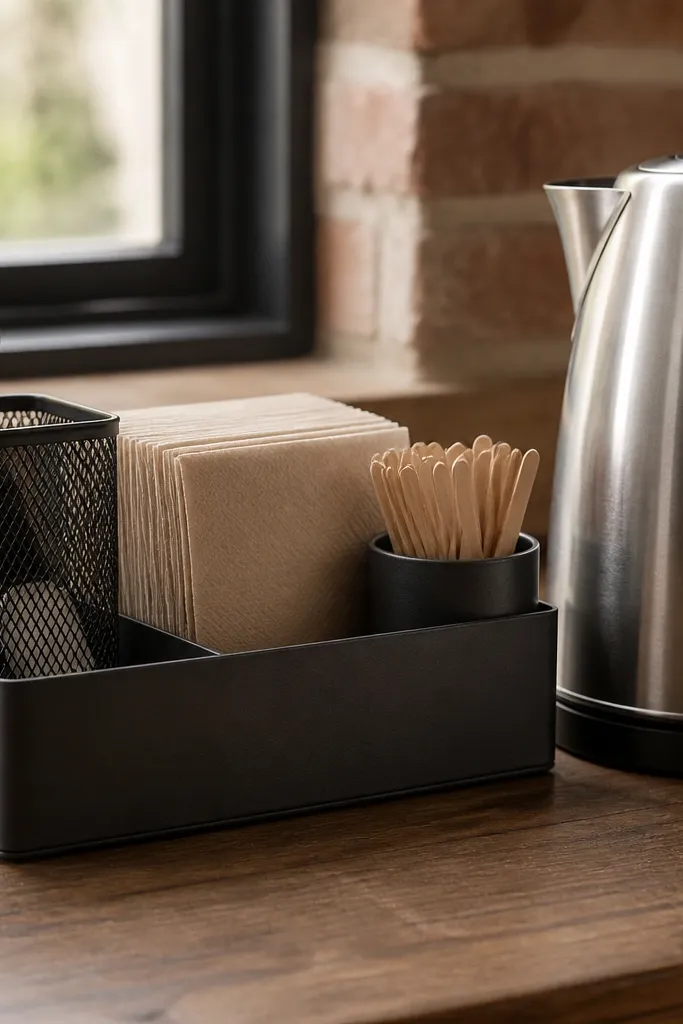
This is the “industrial tidy” look that still feels warm. Powder-coated metal resists coffee stains and wipes down in seconds, and the mesh scoop holder keeps the scoop visible without taking up drawer space. The caddy shape creates a defined footprint, so your station doesn’t sprawl. You get a clean, structured look with minimal effort, which is exactly what low-maintenance coffee station ideas should deliver. It’s a great pick if you use a scoop or grinder daily and want everything in one grab.
Buy or build a small caddy that’s about 10 to 12 inches wide with at least two internal sections. Add a mesh scoop cup holder to one side so the scoop rests upright. Use small, removable bins for filters or stir sticks so you can pull them out to refill. Anchor the caddy onto a tray base so it doesn’t slide when you’re scooping. Wipe the metal weekly and spot-clean any drips with a damp cloth.
Choose a matte powder coat over glossy — coffee dust shows less on matte surfaces.
Avoid rust-prone metal or uncoated wire — the look degrades fast around wet scoops.
5. Coffee station tray mat with three refill jars
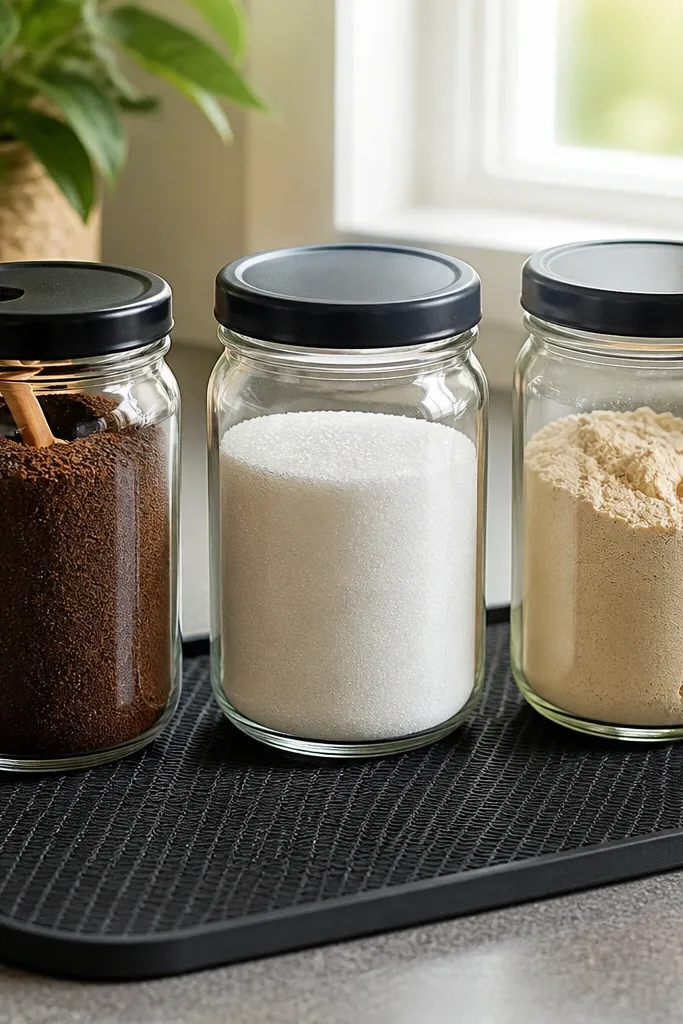
A tray mat is low-maintenance because it creates a boundary. When spills happen, they land on the mat, not your counter, and that keeps the station looking clean. Three matching jars make the setup look designed instead of cluttered: coffee in one, sugar in another, creamer in the third. Glass jars also photograph well because you can see levels and quickly spot when you need to refill. This works best for stations that serve multiple drink types and want quick grab options.
Pick a tray about the width of your daily workflow, then add a silicone or cork tray mat on top. Choose three jars with matching lids — wide-mouth jars are easiest to refill without mess. Label the lids' fronts with a simple vinyl label so you can read it quickly. Place the jars in a triangle layout on the tray to keep the station balanced. Add a small scoop or measuring spoon on a hook or in a tiny dish so it doesn’t wander.
Use one jar for “daily sugar” and keep bulk sugar in a cabinet to prevent the jar from looking half empty.
Avoid mismatched jar heights — it makes the whole station look like it’s falling over visually.
6. Slim cabinet-side pull-out caddy for filters and stir sticks
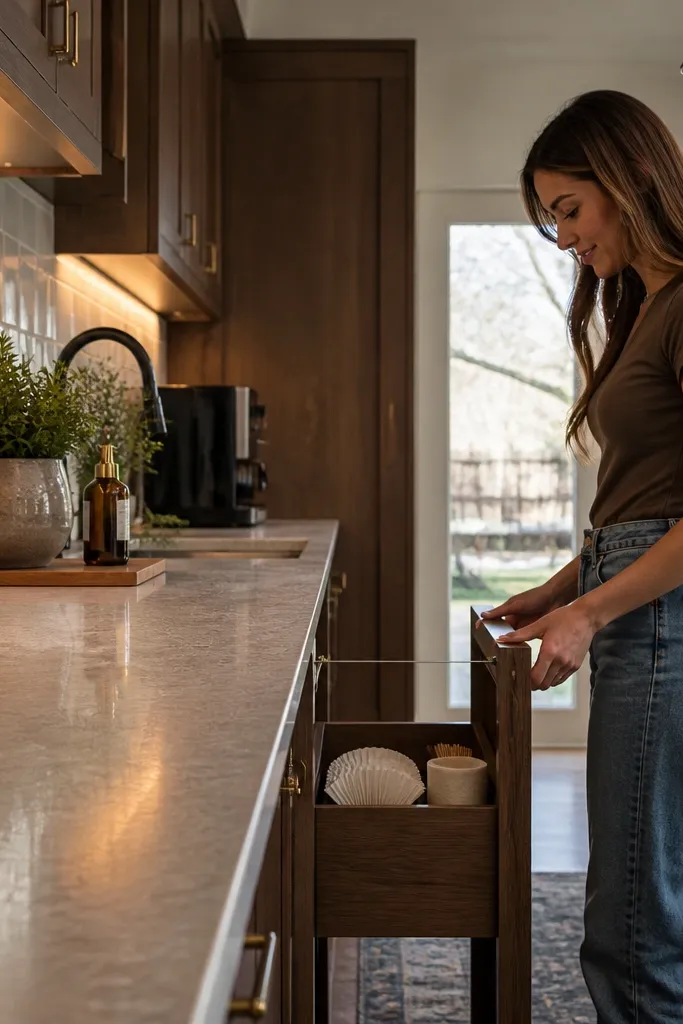
Measure the side space of your cabinet and look for a slim pull-out organizer that fits with about 1/2 inch clearance. Install it with the included brackets and screws, keeping the slide level so it doesn’t bind. Load it with shallow bins for filters and a small compartment for stir sticks. Add a lidded bin for napkins so coffee dust doesn’t collect. When installing, keep the caddy handle aligned with your standing position so you can pull it without bumping the counter.
If your coffee station clutter happens because supplies live in the back of cabinets, a pull-out caddy fixes it. It keeps filters, stir sticks, and napkins out of sight until you need them, then disappears when you’re done. The look stays clean because the counter stays clear, but the function stays fast. This is low-maintenance because you’re not re-stacking items — you’re just pulling one drawer out. It’s ideal for narrow kitchens where counter space is precious.
Skip thisDon’t overload the caddy — cramped bins make you dump items back onto the counter.
Editor's noteUse bins with smooth, flat fronts so you can wipe them without scrubbing corners.
7. Magnetic spice strip labels for coffee, decaf, and sweeteners
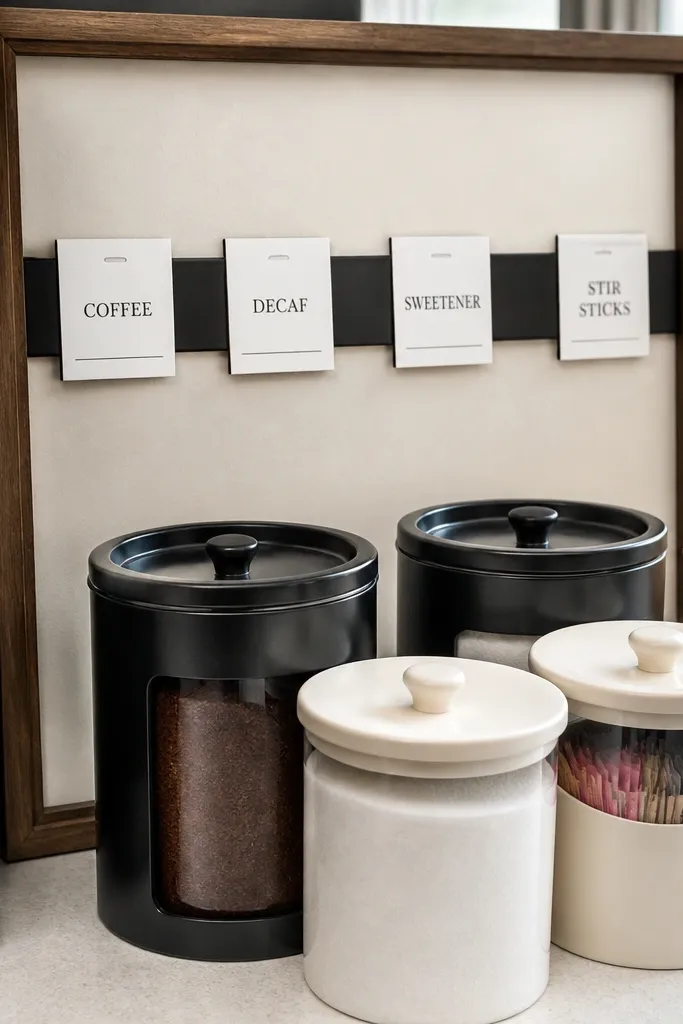
Start with a small metal strip board or magnetic sheet mounted on the wall or inside a cabinet door. Add magnetic label cards for coffee, decaf, sugar, and creamer — keep them in consistent font size and color. Place matching containers on a tray or counter base directly under the labels. When you refill, use the same container type so the label always matches the contents. Wipe the metal strip with a damp cloth and dry it so magnets stick cleanly.
This one is for people who hate messy handwriting and messy refills. A magnetic strip system gives you clean labels that match and look intentional, plus it makes it easy to swap labels when you run out. You attach the strip to a board or small wall section behind your coffee machine, then keep containers nearby. The station looks organized even when you’re mid-refill because the labels stay aligned. It’s low-maintenance because magnets let you update without replacing anything.
Skip thisAvoid labels that sit too low or too small — you’ll squint and end up grabbing wrong items.
Editor's noteColor-code one category with a single colored dot label so the whole station reads faster in the morning.
8. Corner coffee caddy with a vertical riser and hanging towel ring
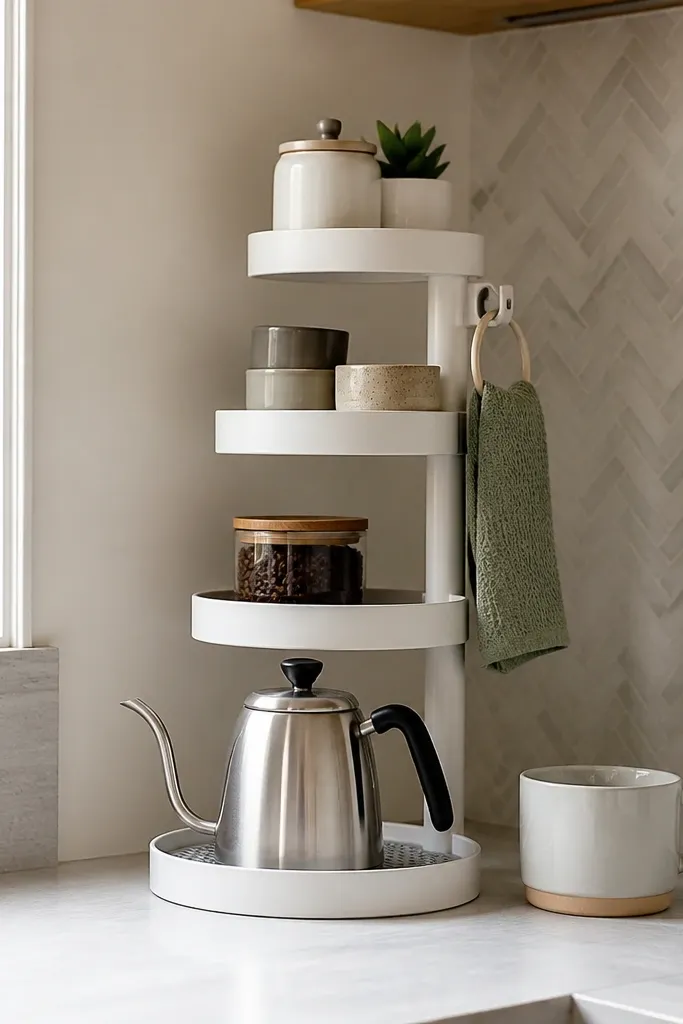
Use a vertical riser stand at least 18 inches tall with a stable base that fits in the corner footprint. Add two small bins on the riser for filters and stir sticks, and keep a larger bin at the bottom for pods or creamer. Install a towel ring on the side of the riser at handle height. Place a sealed tray under the riser to protect the corner counter surface. Add a small cloth and a spare wipe packet, then keep the riser loaded so morning setup is automatic.
Corners are where clutter hides and grows, but a vertical riser turns that dead space into a neat station. Add a towel ring so you keep a small wipe cloth exactly where drips happen, and you stop leaving sticky messes on the counter. The vertical design also keeps items from stacking unevenly, which is what makes stations look messy in photos. It’s low-maintenance because you’re not constantly moving things around; tools hang and bins stay in place. Perfect for apartments or small kitchens where you can’t spare extra counter length.
Skip thisAvoid fabric storage on corners — drips collect and the station starts to look stained.
Editor's noteChoose a towel ring with a smooth finish so sticky sugar wipes off easily.
9. Lidded countertop bin set for sugar, creamer, and stir sticks
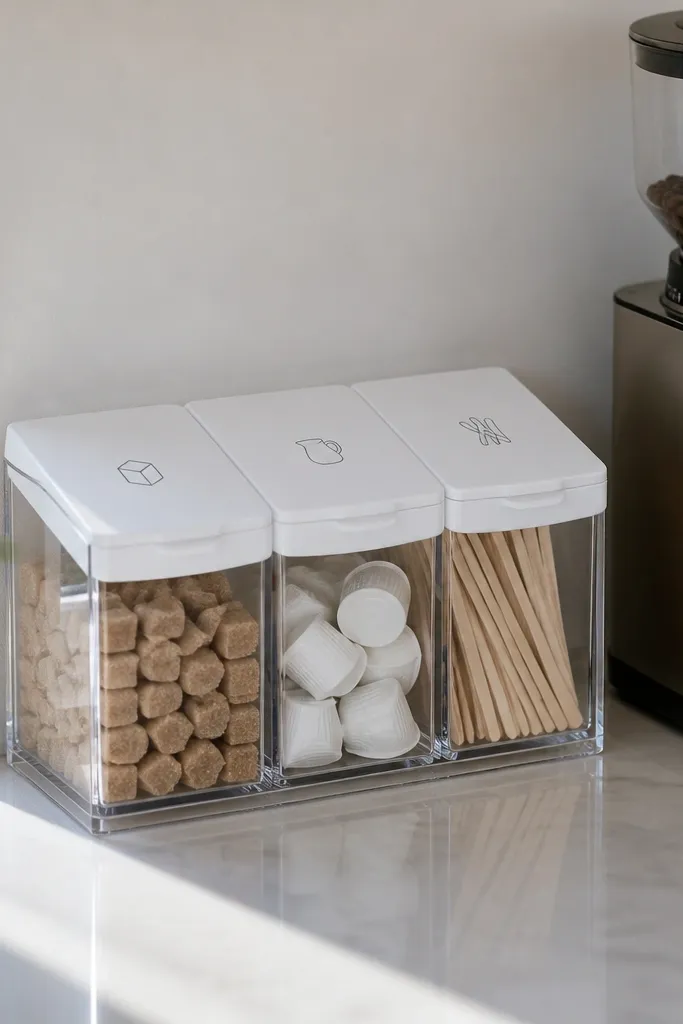
Choose three matching bins with tight-fitting lids, ideally in a matte neutral like black, cream, or clear. Pick sizes that hold a day or two of supplies so you can refill without rushing. Arrange them in a straight line on a tray or shelf so edges align. Label the lids' fronts with function labels and color-code only one category if you need speed. Keep stir sticks in a narrow bin so they don’t get lost in larger add-in containers.
Lidded bins are the most underrated way to keep a coffee station looking clean. Open containers invite dust, and they look messy when you add one more scoop or packet. With lids, you can toss things in during refills and still keep the station visually calm. The bin set is low-maintenance because it reduces daily tidying — you just close lids. It also looks good because the lids create consistent shapes and lines.
Skip thisDon’t go for tiny bins — constant refilling makes you leave lids open, and the mess shows.
Editor's noteUse bins with removable lids so you can wash them without soaking the base.
10. Sealed butcher block coffee shelf with a built-in drip tray lip
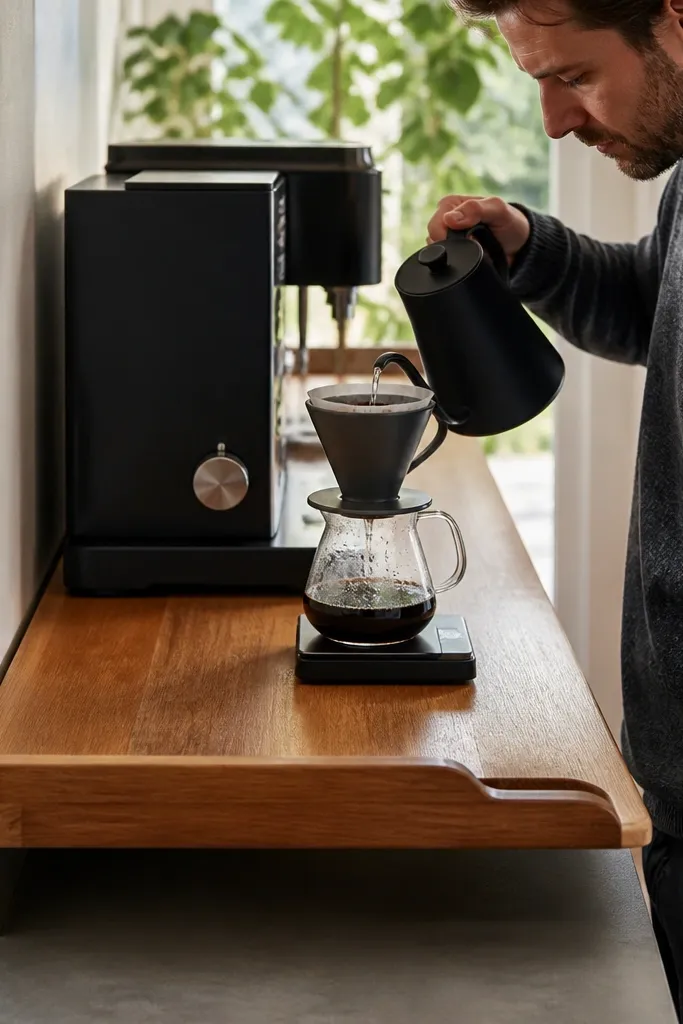
This is for people who want a warm, high-end look without complicated maintenance. A sealed butcher block shelf looks gorgeous in photos, and the built-in drip tray lip keeps drips from spreading under your machine. It also gives you a dedicated “work surface” so you don’t set wet cups directly on the counter. The low-maintenance part comes from sealing — wipe, dry, done. It suits coffee stations where you have a machine that occasionally drips or you pour from a kettle daily.
Cut or buy a shelf board sized to your machine footprint, then seal it with a food-safe finish meant for cutting boards. Add a shallow metal drip tray under the lip so you can remove and clean it fast. Install the shelf with brackets into studs, then test the shelf stability with gentle pressure. Place a small tray mat on top for overflow items like filters and paper towels. Seal the bottom edge too so moisture doesn’t creep into the wood grain.
Re-seal twice a year with the same finish so the wipe-clean surface stays consistent.
Avoid leaving the end grain unsealed — it soaks first and ruins the look fastest.
11. Tempered glass shelf with stainless rails for mugs and cups
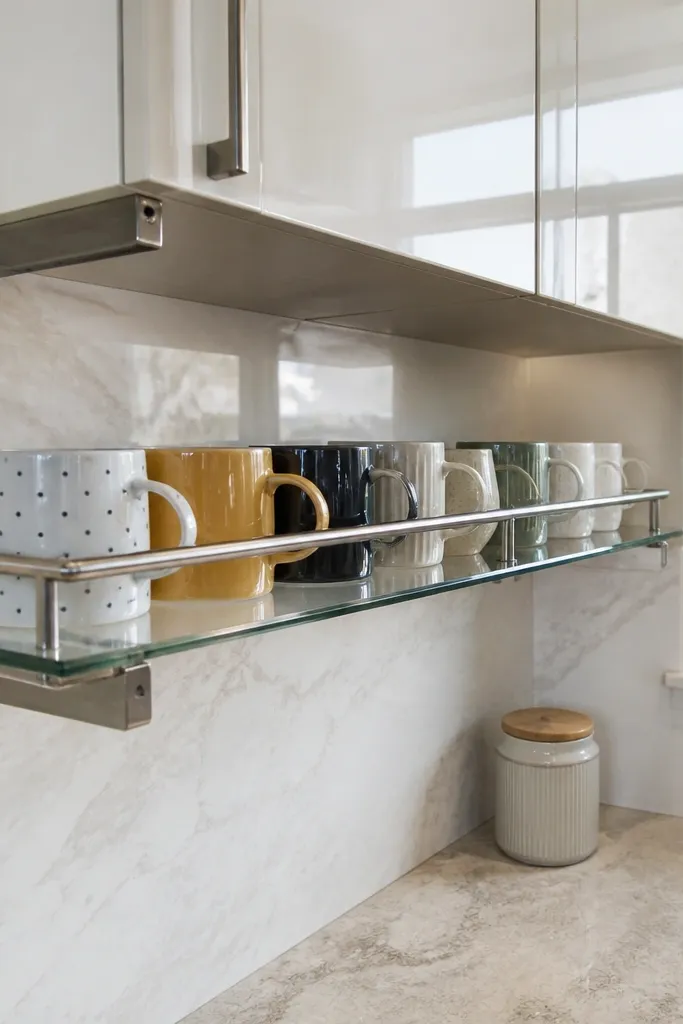
A glass shelf makes the station feel lighter and more modern, which helps it look good even in small kitchens. Stainless rails keep cups from sliding and create a clean boundary, so your setup stays aligned instead of becoming a leaning tower. It’s low-maintenance because glass wipes instantly and rails keep your cups in one place. This works best if you already have a modern kitchen and want the coffee station to match the vibe rather than stand out. Great for stations that use multiple cup sizes.
Mount tempered glass shelving with rated brackets and ensure level installation. Add stainless rails or rail brackets along the back edge to stop mugs from shifting. Use a small tray under the shelf to catch drips and keep the counter protected. Place cups in a neat stack, then store add-ons in a small bin on the lower counter. Clean with a glass-safe cleaner, then dry to prevent water spots.
Use felt pads on the rail contact points so ceramic doesn’t scratch and chip.
Avoid storing heavy ceramic mugs directly on glass without rails — one bump and you’ll have chips.
12. Drawer insert for coffee tools with a magnetic strip for the scoop
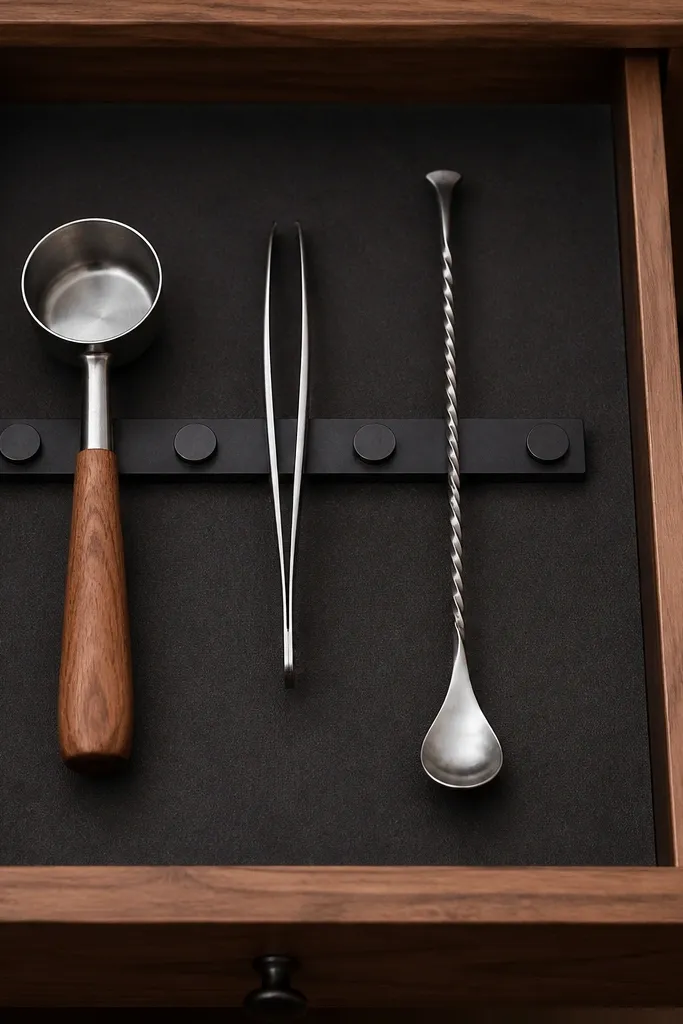
Measure the drawer interior and cut or buy a foam or molded insert with compartments for your exact tools. Install a small magnetic strip on the side wall so the scoop hangs flat and doesn’t fall. Place a small tray or mat on top of the drawer for daily items like a tiny spoon rest. Keep filters and packets in a separate lidded container, not loose in the drawer. Wipe the insert with a damp cloth and let it dry fully so coffee dust doesn’t embed.
This one cuts clutter by fixing the tool mess. If your scoop, tweezers, and stir spoon end up loose in drawers, they spill out onto the counter when you need them fast. A drawer insert keeps tools in place, and the magnetic strip makes the scoop always land in the same spot. The station stays minimal because you only bring the tools out when needed. It’s low-maintenance because you’re not constantly re-stacking; the drawer organizes the chaos. Best for kitchens with enough drawer space next to the coffee area.
Skip thisAvoid mixing oversized items with tiny tools — one refill day and the compartments become useless.
Editor's notePut frequently used items closest to the front edge of the insert so you grab without digging.
13. Stackable canisters with matching chalk labels on a narrow shelf
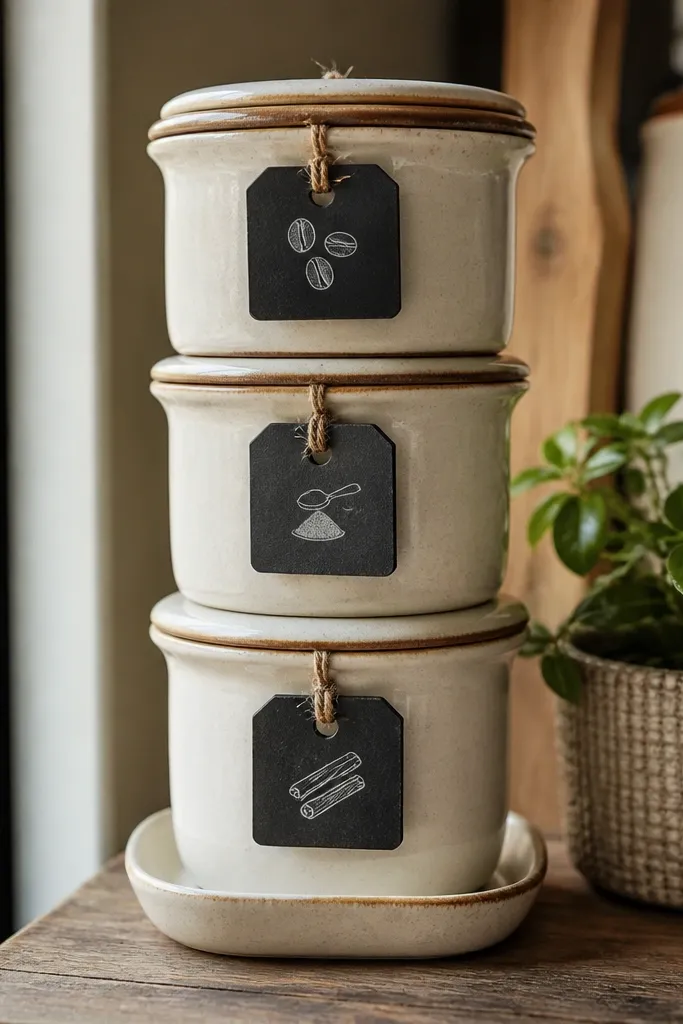
Stackable canisters look clean and intentional because they create a repeating shape. Chalk labels add a handmade feel, but you keep it neat by using the same label size and placement on each canister. A narrow shelf keeps the footprint small, so your countertop stays clear while the station still looks styled. It’s low-maintenance because you just wipe the canisters and re-chalk when needed. This suits stations where you use multiple coffee types and want a visible “menu” on the shelf.
Choose canisters with matching lids and a footprint that fits your shelf width, ideally 4 to 6 inches wide each. Mount a narrow shelf above or beside the machine with solid brackets. Apply chalkboard labels or chalk paint squares to the canister fronts and use consistent handwriting style and size. Store one canister for daily coffee, one for decaf, and one for sugar or creamer. Set up a small scoop rest on the shelf edge so the scoop always stays with the canisters.
Use a damp cloth to clean chalkboard labels before re-writing so the text stays crisp.
Avoid glossy chalkboard surfaces — the chalk smudges and the labels look messy fast.
14. Magnetic under-cabinet cup hooks with a slim tray
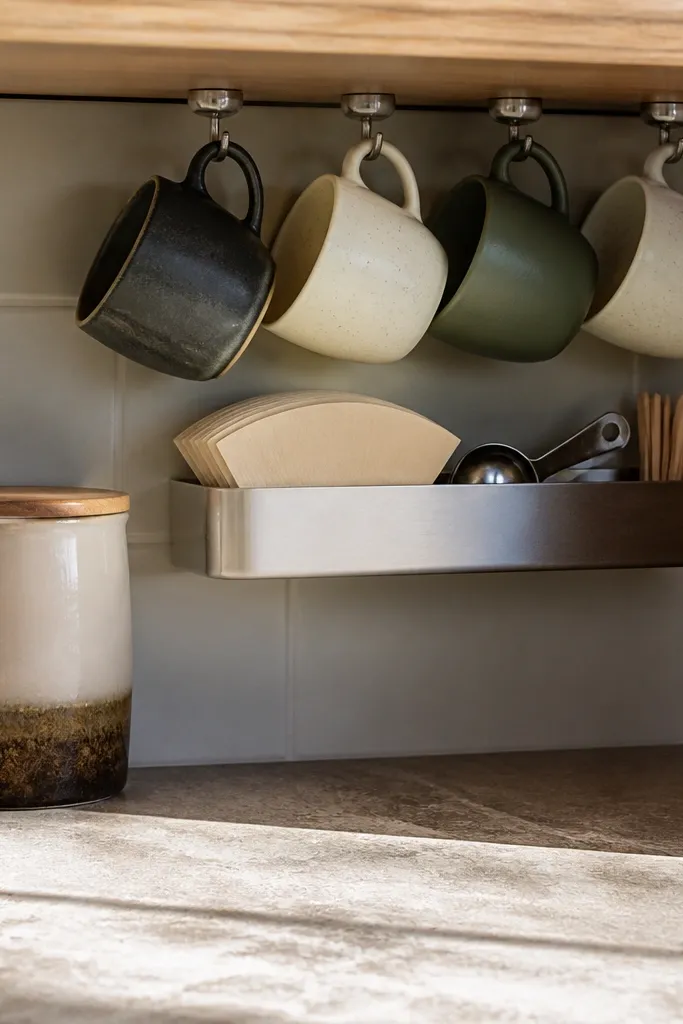
Select heavy-duty under-cabinet hooks with strong magnets or plan to screw into cabinet bottoms if magnets don’t hold. Position the hooks so mug handles face outward and don’t bump the backsplash. Add a slim tray that fits under the hooks so you can set items down during prep. Place a small bin on the tray for filters and keep a single scoop rest in the tray corner. Test the setup with a full mug and shake gently to ensure it stays secure.
This is a smart way to clear counter space without drilling a bunch of holes. Under-cabinet hooks keep mugs in the “grab zone” while the counter stays mostly empty. Add a slim tray beneath for daily items like filters, a scoop, and stir sticks, and you get a tight, organized footprint. It’s low-maintenance because hooks are easy to wipe and cups hang instead of stacking crooked. This works great for renters or anyone who wants a clean look fast without major construction.
Skip thisAvoid weak magnets on thick cabinet doors — if hooks shift once, mugs will start living on the counter.
Editor's notePut the tray slightly forward so you can reach it without twisting your body.
15. Fold-flat paper towel holder built into a coffee shelf
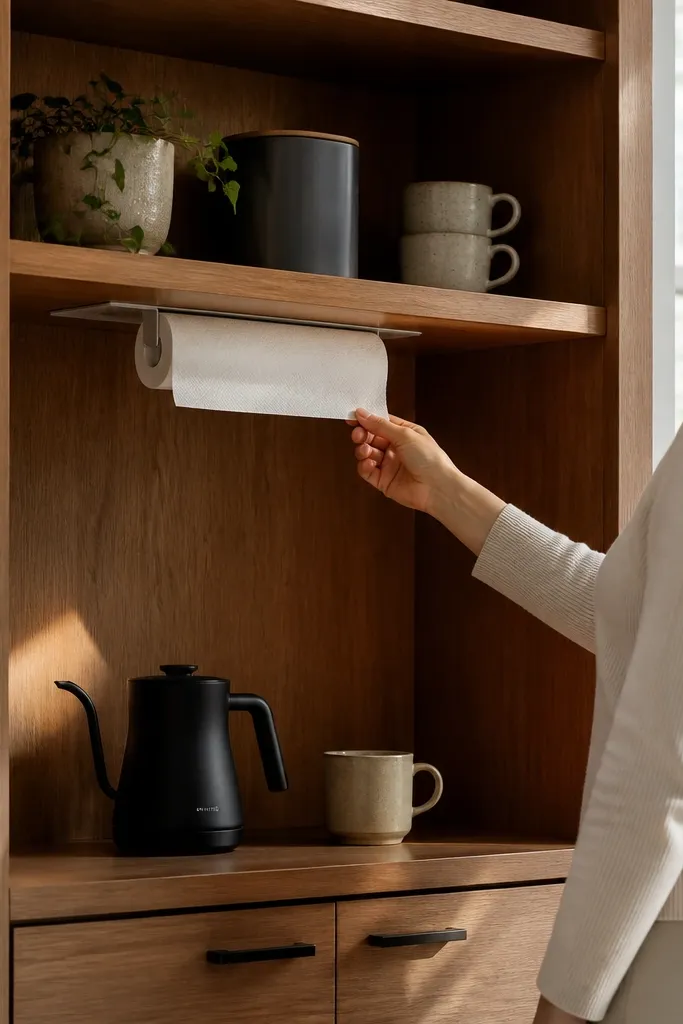
Paper towels are part of coffee station clutter because they end up stacked, folded, or shoved under random items. A fold-flat holder keeps them neat and reachable, so you wipe spills immediately and the station stays clean. The aesthetic is simple: one consistent holder, one clean work area, no leaning stacks. It’s low-maintenance because you replace the roll and keep moving — no re-folding or hunting for wipes. This suits stations where you pour milk, stir, or use drippy methods like pour-over.
Build or buy a small holder that keeps the roll vertical but includes a fold-flat cutting edge or holder lip. Mount it on the side of your coffee shelf or on a vertical board next to the station so it doesn’t block the counter. Add a sealed tray base for filters and add-ins so the paper towels don’t sit directly on unprotected wood. Keep a small container for used wipes so you don’t toss them on the tray. Install the holder so the pull-down towel hangs straight and doesn’t snag on mugs.
Use a sealed wood backer behind the holder so drips don’t discolor the wall.
Avoid storing paper towels loose in a bin — they crush and look sloppy fast.
16. Countertop coffee bar cart with two-tier pull-out trays
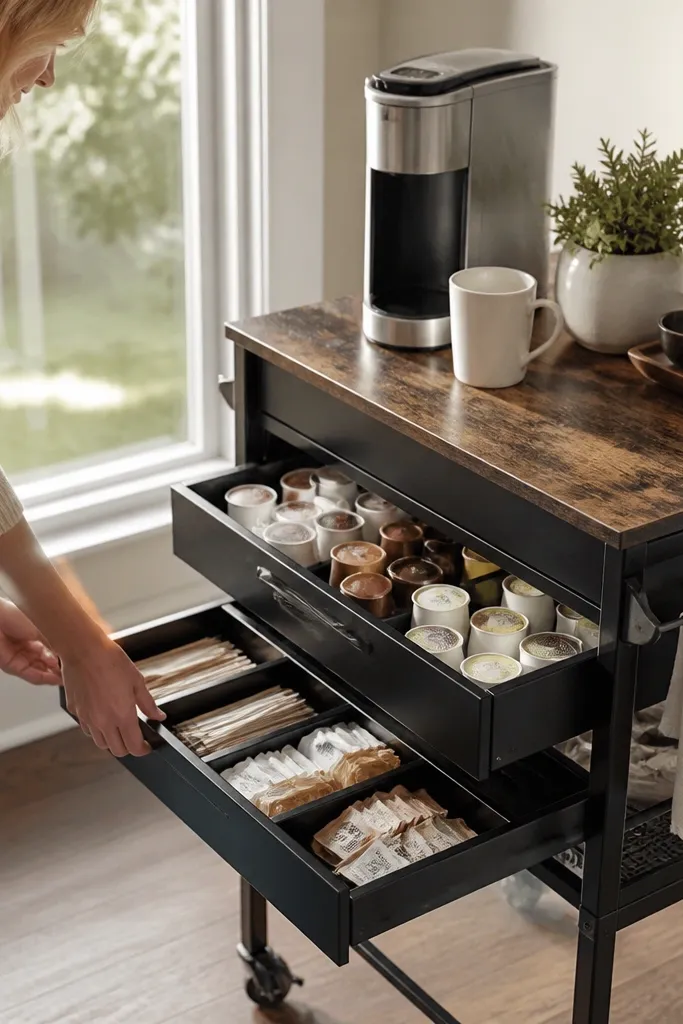
Pick a cart size that fits your counter clearance — aim for a cart footprint under 20 inches wide. Ensure the trays slide smoothly and don’t wobble when loaded. Add matching lidded bins for filters and sweeteners, and place mugs on a side rack or top shelf. Use a pull-out for daily items and keep backup items in the lower pull-out bin. Secure all containers so they don’t tip when you move the cart, then wipe the top and wheels regularly.
A cart is the cleanest way to keep a station organized because you can move it when you clean and keep everything contained. Two-tier pull-out trays make the setup look tidy from every angle, and they stop your supplies from spilling onto the surrounding counter. Choose a cart with a wipe-clean top and rails, then use matching bins to keep the look consistent. This is low-maintenance because you can pull the trays out, restock, and push everything back into a defined space. Perfect for kitchens where the coffee area changes depending on the day.
Skip thisAvoid open carts without side rails — mugs and bottles slide and the station looks messy instantly.
Editor's noteUse caster locks so the cart doesn’t drift while you’re pouring.
17. Satin-finish utensil rail with small labeled condiment cups
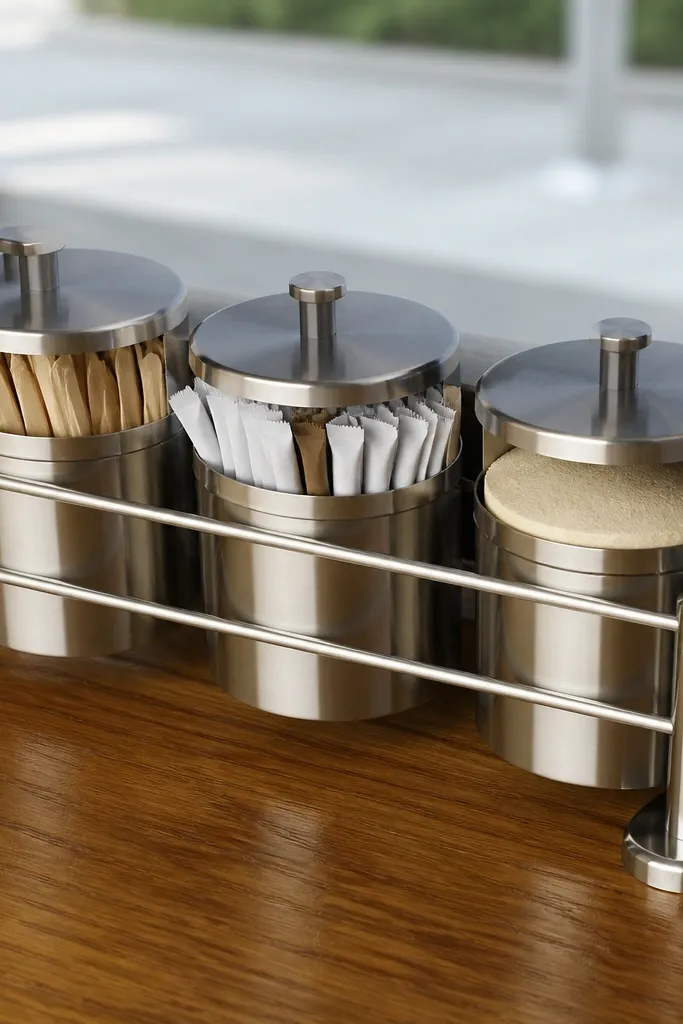
Mount a satin-finish rail near your coffee machine, aiming for cup height at around 42 to 45 inches from the floor. Attach small labeled condiment cups to the rail hooks or clips. Use consistent cup sizes so the station looks uniform. Place stir sticks in one cup, sugar in another, and creamer in a third, then label each cup on the front. Add a small tray under the rail edge to catch any drips while you refill.
This is a clean, modern way to make add-ins look like part of the decor. A satin-finish rail holds condiment cups so everything stays visible but contained, which is what most coffee stations fail at. Labeled cups keep sugar, creamer, and stir sticks from turning into a mixed mess. The low-maintenance part is that the cups are easy to remove and wash, and the rail keeps them aligned. Great for stations that serve espresso, tea, or multiple drink styles and need quick add-in access.
Skip thisAvoid cups with rough interiors — they hold sticky residue and the station looks dirty even when it’s “clean.”
Editor's noteChoose cups with smooth rims so you can wipe sugar dust without scraping.
18. Stovetop-proof heat mat with a built-in scoop rest
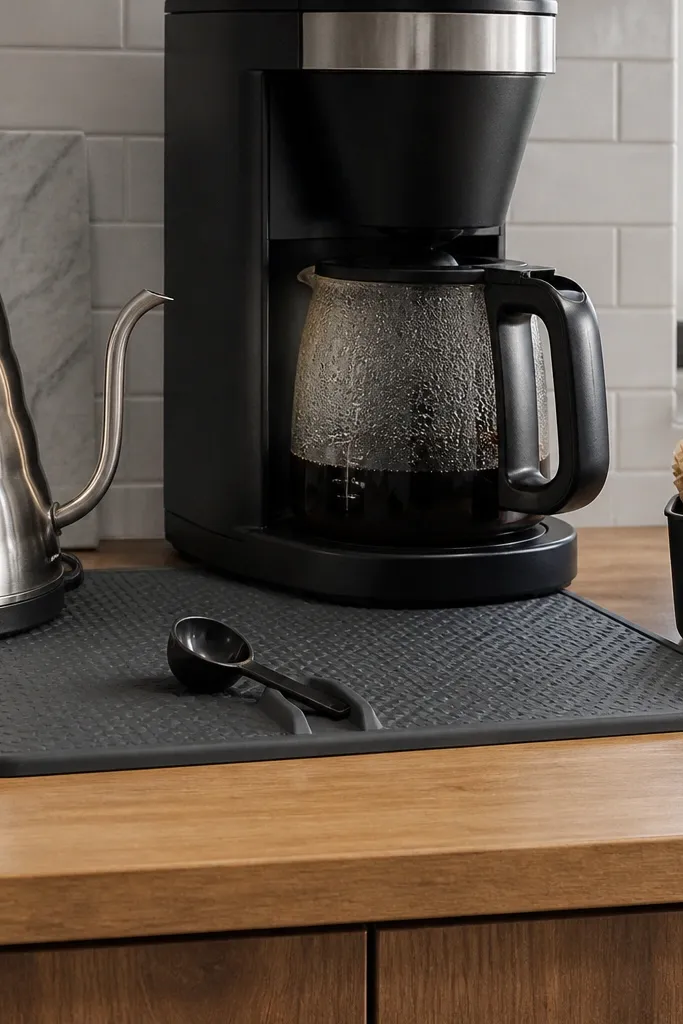
Choose a heat mat that’s large enough to cover the space where you set the kettle plus a few inches of buffer, usually 12x18 inches or bigger. Add a scoop rest feature by buying a mat with a molded rest or attaching a small silicone scoop cup. Place the mat directly beside your coffee machine so your workflow stays straight. Add a small lidded container for filters on the mat corner, keeping it within reach. Wipe the mat after use and let it dry so coffee oils don’t build up.
Heat mats are practical, but you can also make them look intentional. A heat-safe mat gives you a defined landing zone for your kettle, drippy pour-over parts, and the scoop rest, so mess stays controlled. When the mat has a molded scoop rest or a built-in groove, the scoop never ends up on the counter edge. This keeps the station looking neat even during messy mornings. It’s low-maintenance because the mat wipes down and protects surfaces from heat rings and drips. Ideal for pour-over setups or anyone who uses a kettle daily.
Skip thisAvoid mats that are too small — drips hit the counter edge and ruin the whole “low-maintenance” idea.
Editor's noteKeep a spare scoop on the mat rest so you never leave it wandering.
19. Glass cloche display for creamer and sugar with a hidden refill bin below
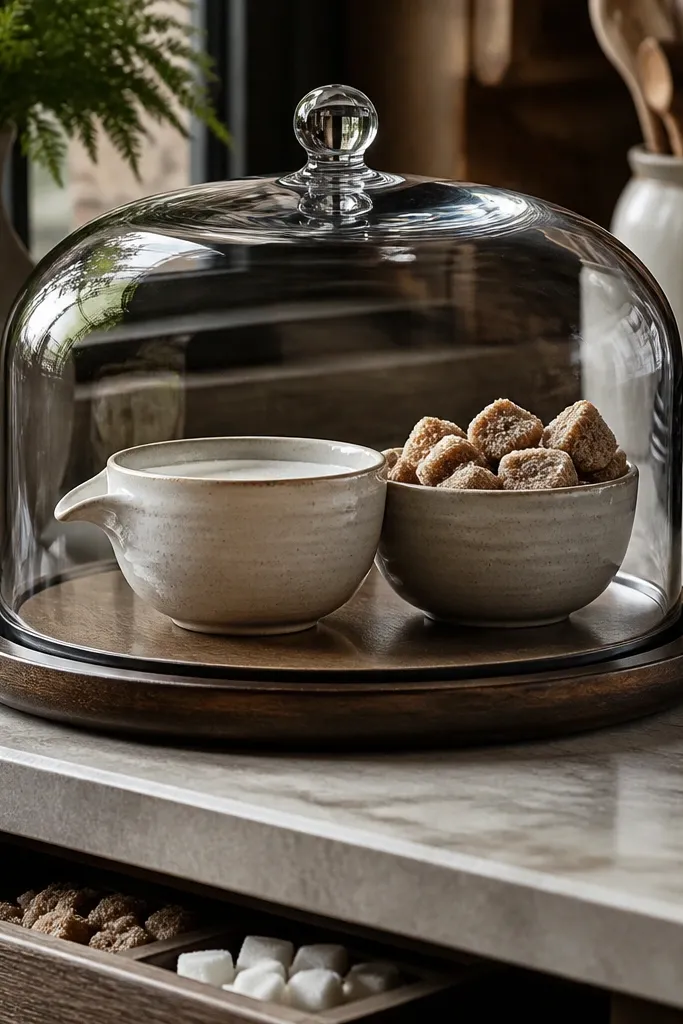
Use a small glass cloche with a base wide enough for two items — sugar and creamer — plus a small tray. Place a hidden bin underneath the cloche base on a shelf or inside a cabinet compartment. Keep only the “current” daily portions under the cloche, and store backups in the hidden bin so you don’t overfill. Label the hidden bin so refills are quick and correct. Clean the glass with a streak-free cleaner and dry it so it keeps looking crisp.
If you want the station to look like decor, a cloche does that instantly. You keep creamer and sugar visible under glass so the station looks styled, but you still get low-maintenance refills by hiding backups in a bin underneath the display. The cloche also reduces dust and keeps sticky spills from settling on surfaces. It’s photogenic because glass catches light and makes the station look intentional. Works best when you use a small set of add-ins daily and want them to look neat even when the rest of the kitchen is chaos.
Skip thisAvoid filling the cloche with mixed items — it looks cluttered fast under glass.
Editor's noteUse matte labels inside the hidden bin so you don’t have to open the display to identify supplies.
20. Magnetic chalkboard menu behind the coffee maker with matching utensil cups
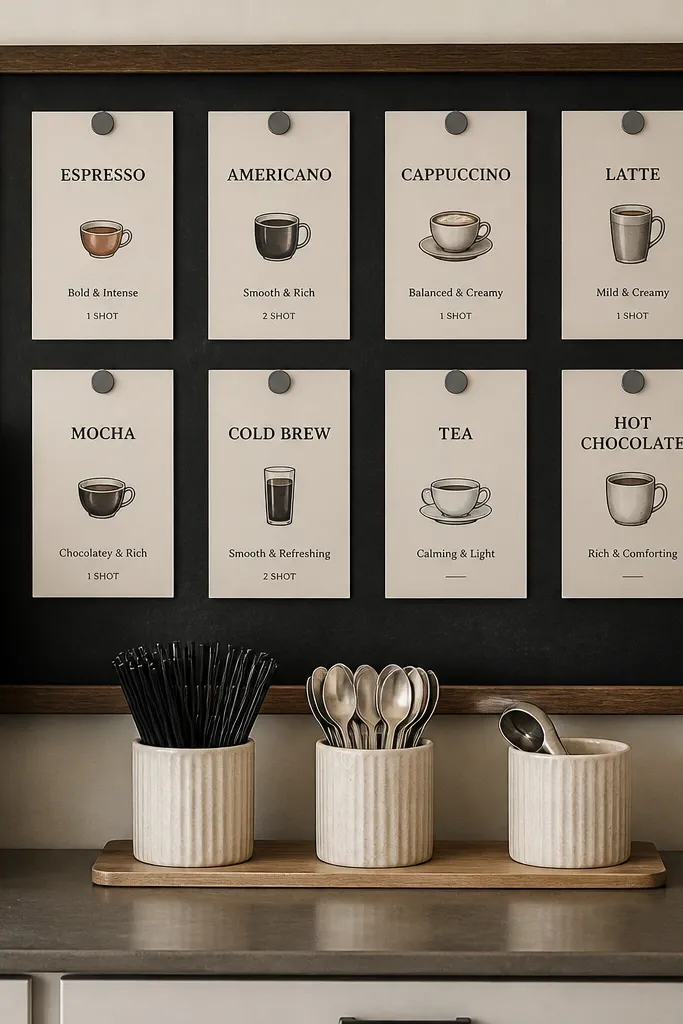
Mount a small magnetic chalkboard or magnetic whiteboard behind the coffee maker at eye level. Add magnetic label pieces for coffee, decaf, and add-ins, then keep one set of labels for each category. Place two to three utensil cups on a tray in front of the board so they align with the menu. Label cups directly or label only the board and keep cup contents consistent. Wipe the board weekly and keep the cups on a tray base so small spills don’t travel.
A coffee menu board makes your station look like it has a purpose, not just storage. It also reduces the “what’s in here?” moment, which is where clutter starts when you can’t find the right jar or packet. Pair it with matching utensil cups for add-ins so everything looks coordinated. This is low-maintenance because you wipe the board and swap magnetic labels instead of rewriting on paper. It suits households where multiple people use the station and want consistent drink setup.
Skip thisAvoid changing the labels constantly — stick to a small set of categories so the station stays consistent.
Editor's noteUse thick magnets so the board doesn’t rattle when you bump the counter.



