
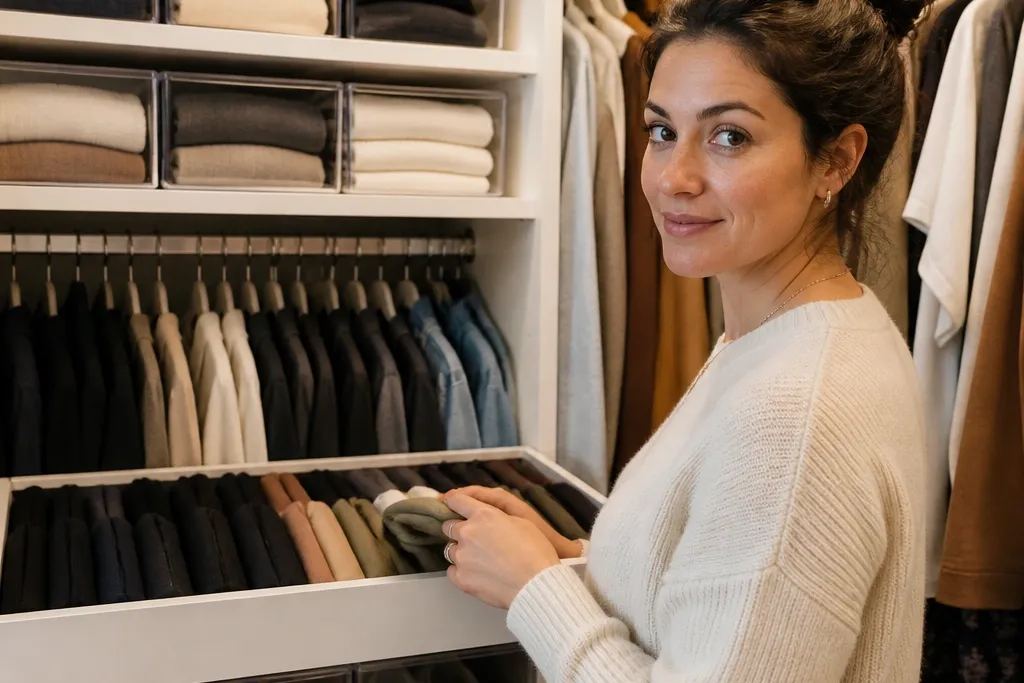
1. Face-Out Sweater Shelf with Matching Acrylic Lids
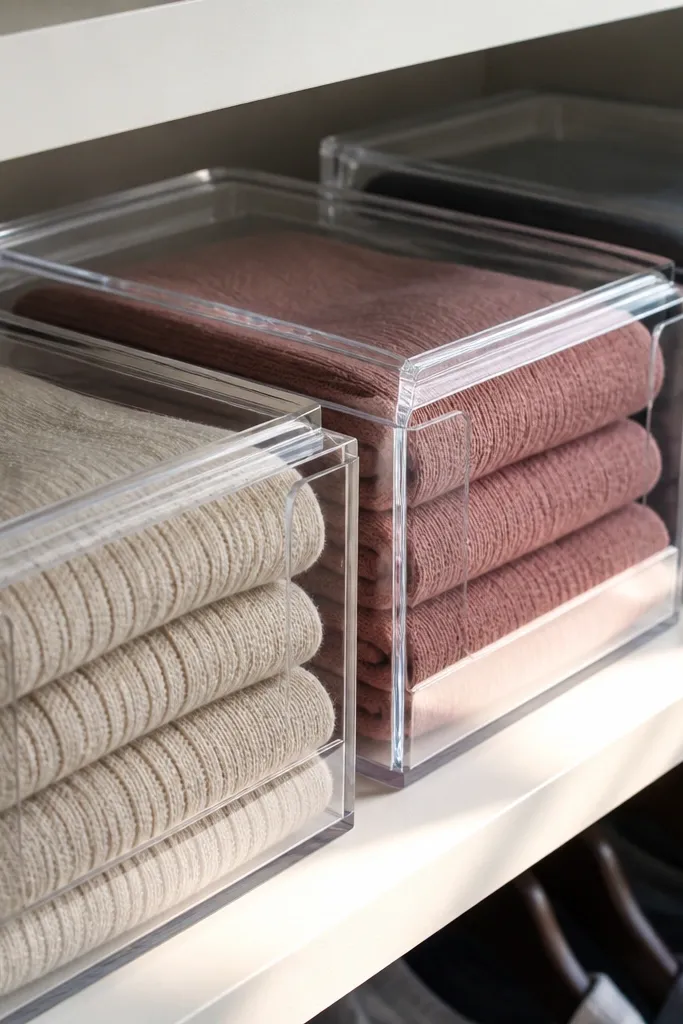
This is the cleanest way to keep sweaters looking intentional without turning your closet into a storage museum. Fold each sweater to the same width, then line them up so the front edge is visible through clear acrylic lids. The look is calm because the bins are uniform and the sweater colors create a soft gradient. It stays low-maintenance because you’re not searching — you’re scanning. This works best in closets with fixed shelving where you can keep a consistent shelf height.
Start by measuring your shelf depth and width, then buy clear acrylic bins with lids that fit inside the shelf footprint. Fold sweaters to a consistent rectangle using the same fold method each time, aiming for identical widths so they stack without gaps. Place the bins side-by-side, then arrange sweaters by color or thickness — thin on the ends, bulkier toward the back. Wipe the acrylic lids with a microfiber cloth before you load them so dust doesn’t dull the look.
Editor's noteUse painter’s tape to mark the “fold line” on a cardboard scrap so every sweater lands the same size.
Skip thisDon’t mix bulky and thin items in the same bin without a divider or you’ll lose the neat front edge.
2. Two-Tier Hanging Zone for Everyday Tops
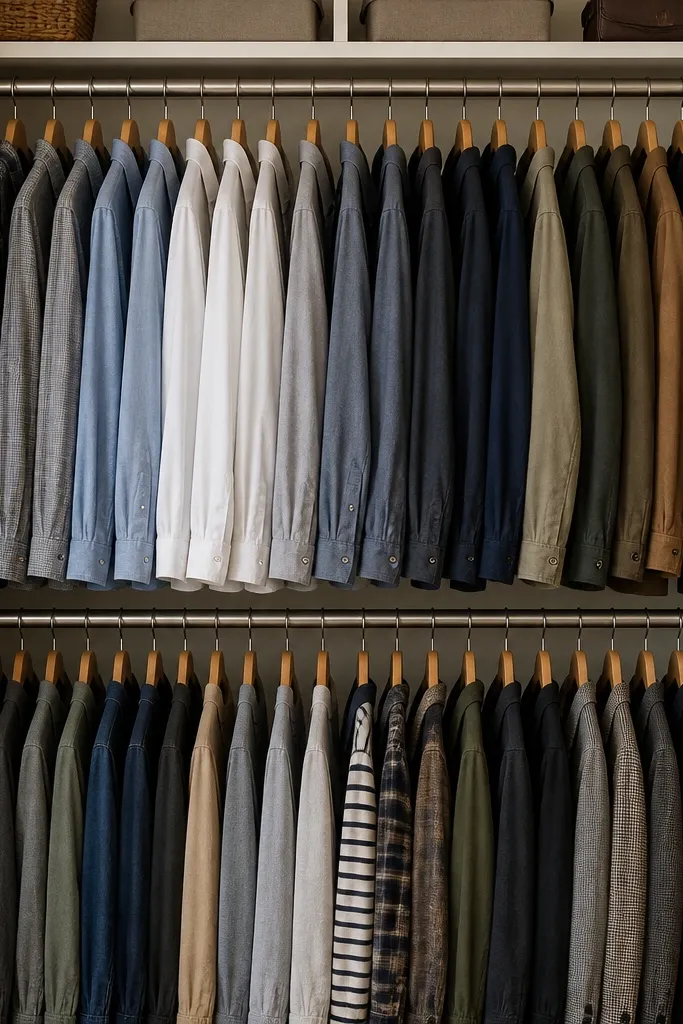
A two-tier hanging zone keeps daily items visible and prevents the classic problem of “everything gets shoved together.” You’re creating a vertical gallery: one tier for the items you reach for weekly and the other for rotation pieces. The aesthetic is sharper because hangers line up and the closet face looks symmetrical. It’s low-maintenance because you don’t need to hunt through a pile or unearth a jacket. This works especially well for narrow closets where floor space is limited.
Install a second hanging bar using a sturdy closet rod bracket system rated for the weight you’ll hang. Position the top tier for lighter tops — think tees, blouses, and thin button-downs — and keep the lower tier for heavier items like flannels so sagging stays minimal. Use matching hangers so the lines look intentional across both tiers. Hang by color or sleeve length, leaving a small gap between categories so you can spot what you need fast.
Choose hangers with the same hook height so tops don’t sit at different levels.
Don’t overload the upper tier with heavy knits — uneven weight makes the bar bow and the look gets messy fast.
3. Color-Blocked Pants Drawer Inserts
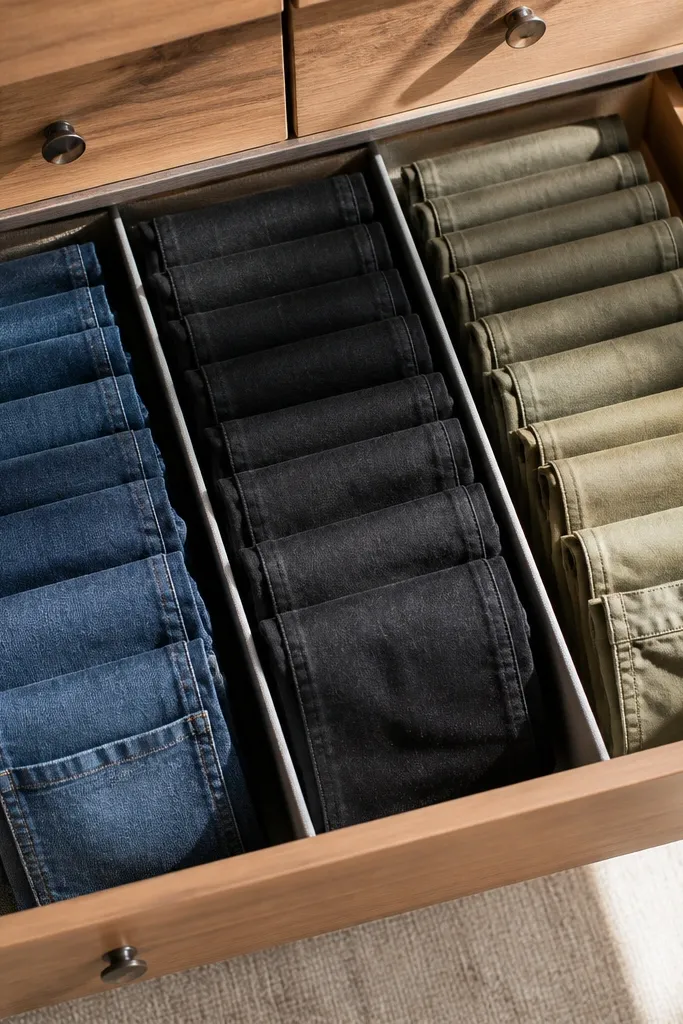
If your pants drawer always turns into a tangled mess, color-blocking with inserts changes the whole look. The visual payoff is big: you get clean bands of color that look curated, not cluttered. It’s low-maintenance because each pants type has a consistent slot, so you don’t have to re-fold every time. Use this for folded jeans, chinos, and sweatpants — anything that can be stacked neatly. It’s best in drawers with enough depth to lay folds flat.
Measure your drawer interior and cut or buy drawer dividers that match the width you want for each fold. Fold pants to a flat rectangle and keep the fold size consistent across denim and non-denim. Divide the drawer into sections — for example dark denim, light denim, neutrals, and black/charcoal — then load each section with the same fold direction. Add a simple label tag at the front edge of each section for quick returns.
Editor's noteUse a fabric tape measure to keep your fold width identical; even a 1-inch difference makes stacks look uneven.
Skip thisDon’t skip dividers. Without them, color-blocking collapses into a mixed pile.
4. Clear Shoe Cubby with One-Row Display
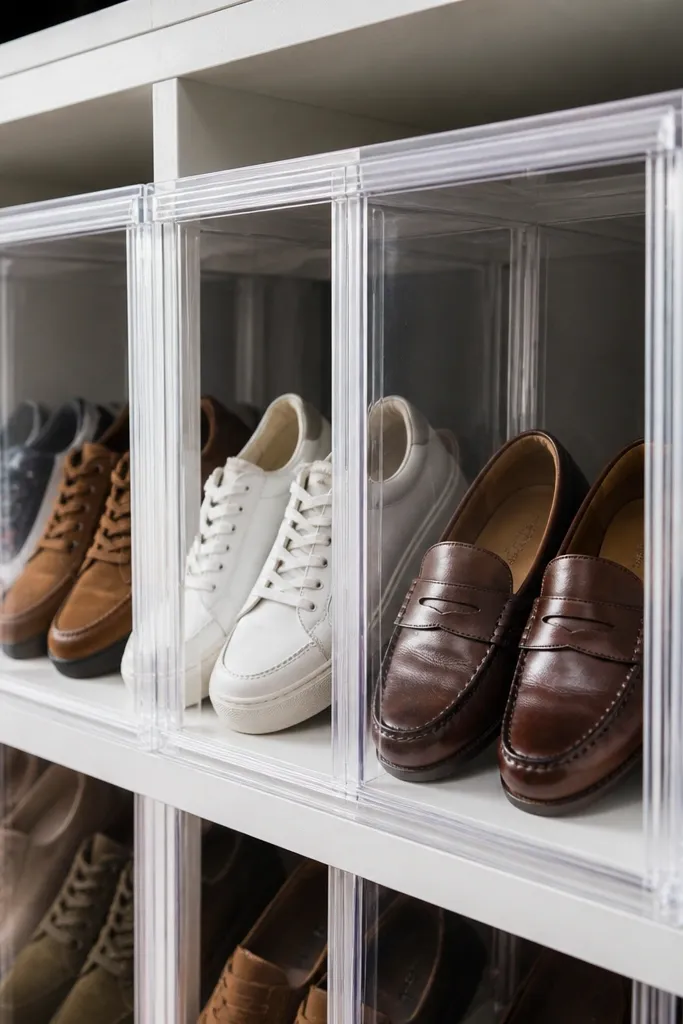
This is the closet version of a tidy storefront. Keep one row of shoes visible inside a cubby system and store backups behind or underneath, so the front stays clean. The look is photogenic because you’re controlling what people see: clean silhouettes, consistent heights, and a repeating pattern across cubbies. It stays low-maintenance because you can grab without moving half the pair shelf. Works best in entry-adjacent closets or any closet with a dedicated shoe shelf.
Build or install a cubby grid with consistent cell sizes, then measure your largest shoe width and height to set the cell dimensions. Use clear plastic shoe boxes or clear-front cubbies for the visible row so you can scan. Store one pair per cell, toes aligned, and keep the row limited to the season’s rotation. For backups, use opaque storage on a lower shelf or in a closed bin to keep the display uncluttered.
Wipe shoe soles before placing them in clear bins; dust shows up immediately through plastic.
Don’t mix boots and sneakers in the same row height unless you use risers — it ruins alignment.
5. Hanger Color Coding with Metallic Peg Clips
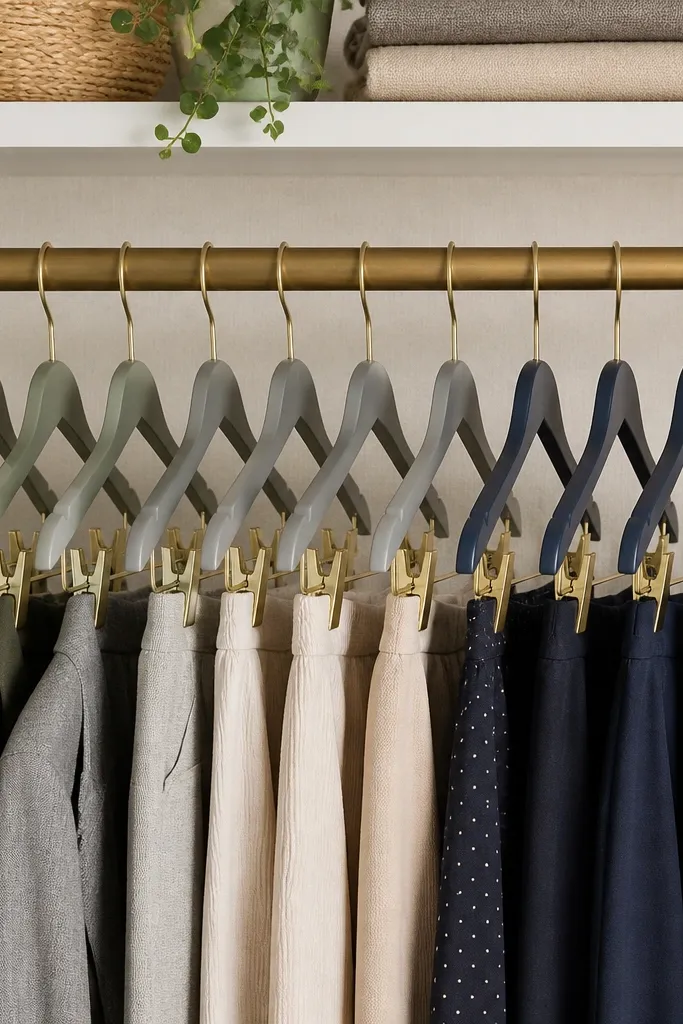
This is a low-effort system that still looks sharp. Use matching hanger colors and add small metallic peg clips to mark categories like work, casual, and weekend. The closet stays aesthetic because the clips create a consistent visual cue rather than random tags. It’s low-maintenance because returning items is fast: you clip and hang back in the right lane. This works best when you have enough hanging space to create clear sections.
Choose a small set of clip colors and assign them to categories. Use a single hanger type across the closet so the clips become the only variation. Group the closet into zones using a visual divider — even a simple shelf bracket or hanging rod spacing — then clip items as you hang them. When you do laundry, sort immediately into the correct category lane so nothing lands in the wrong section.
Editor's noteUse clips that grip tight enough to stay put when you slide hangers together.
Skip thisDon’t rely on paper labels clipped to hangers; they curl and look messy in weeks.
6. Fabric Bin Wall for Linen and Cleaning Supplies
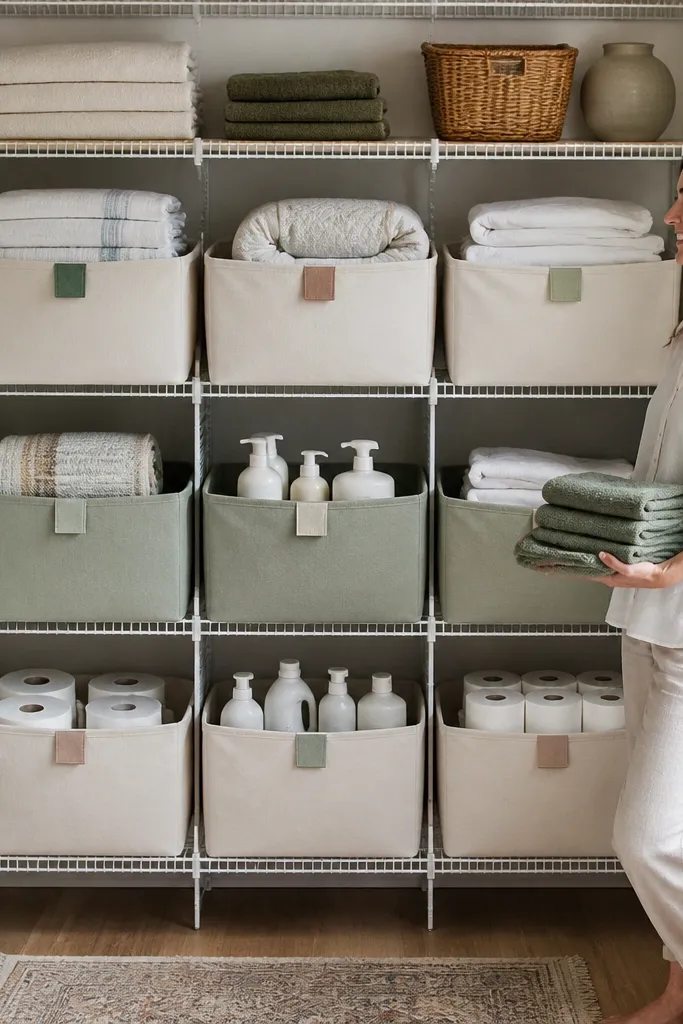
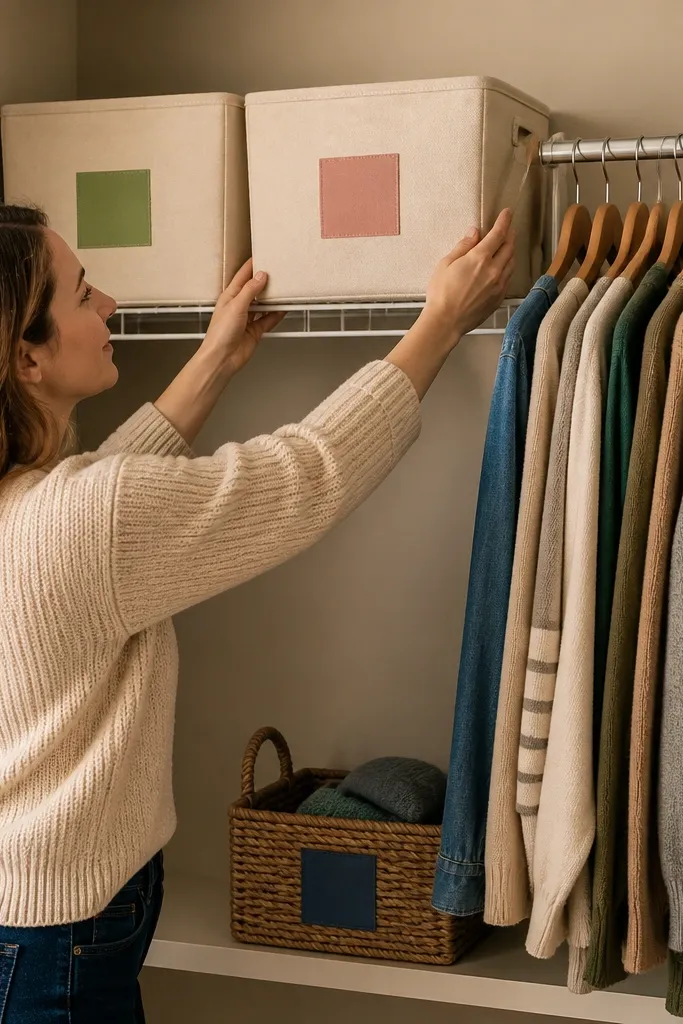
Your closet isn’t only clothes. A linen and cleaning bin wall keeps the back of the closet from looking chaotic, and it’s one of the most overlooked Low-maintenance Closet Organization ideas. Fabric bins look softer than plastic and photograph well because they hide clutter while still looking neat. Labeling is minimal — small tags at the front edge — so the shelf stays clean. This works in deep closets, utility closets, and hallway storage where you want everything tidy without constant re-stuffing.
Pick bins with stiff sides so they hold their shape, and measure your shelf width to choose the right bin sizes. Stack bins in matching heights and leave a small gap between stacks so the shelf lines read clean. Add labels on the front edge with a simple label maker or durable cardstock tags sealed with clear tape. Put frequently used items on the top row and seasonal backups on lower rows to reduce rummaging.
Use one bin style for every shelf level so the closet face looks intentional.
Don’t overstuff bins. When fabric bulges, the whole shelf looks sloppy fast.
7. Shoe Boot Stand with Vertical Display
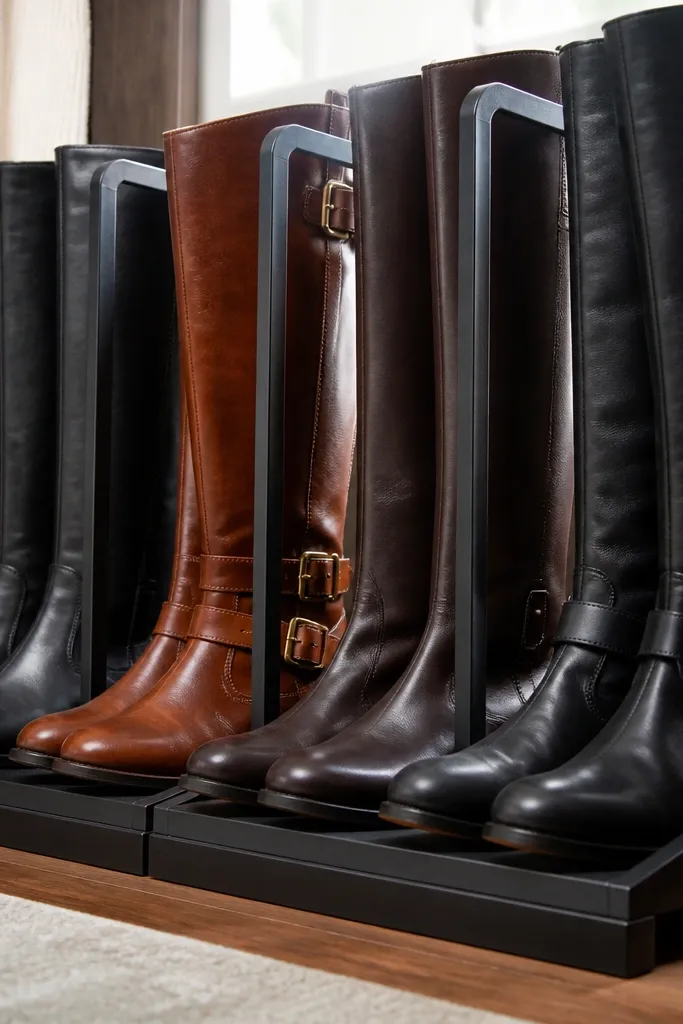
Boots are the closet’s visual mess when they’re shoved sideways. A vertical boot stand keeps shafts upright and makes the closet look styled instead of stuffed. It’s low-maintenance because you don’t need to “re-shape” boots after storage — the stand does it. The look is consistent because all boots share the same height and spacing. Best for closets with enough vertical clearance and a dedicated hanging or shelving area for boots.
Choose boot stands that fit your boot shaft width and height, then place them on a shelf or in a boot-specific rack. Insert the stand into each boot so the shaft stays vertical, then align the toe direction for a uniform row. Store only boots that match the display shelf height — if a boot is taller, use a separate row. Clean boot exteriors with a damp cloth before placing them in the stand so scuffs don’t show.
Use a soft brush to knock off dust before storage; dust on stands looks gray in photos.
Don’t store boots without a stand if you care about the look — leaning shafts ruin the whole line.
8. Stack-and-Slide Drawer with Shirt Dividers
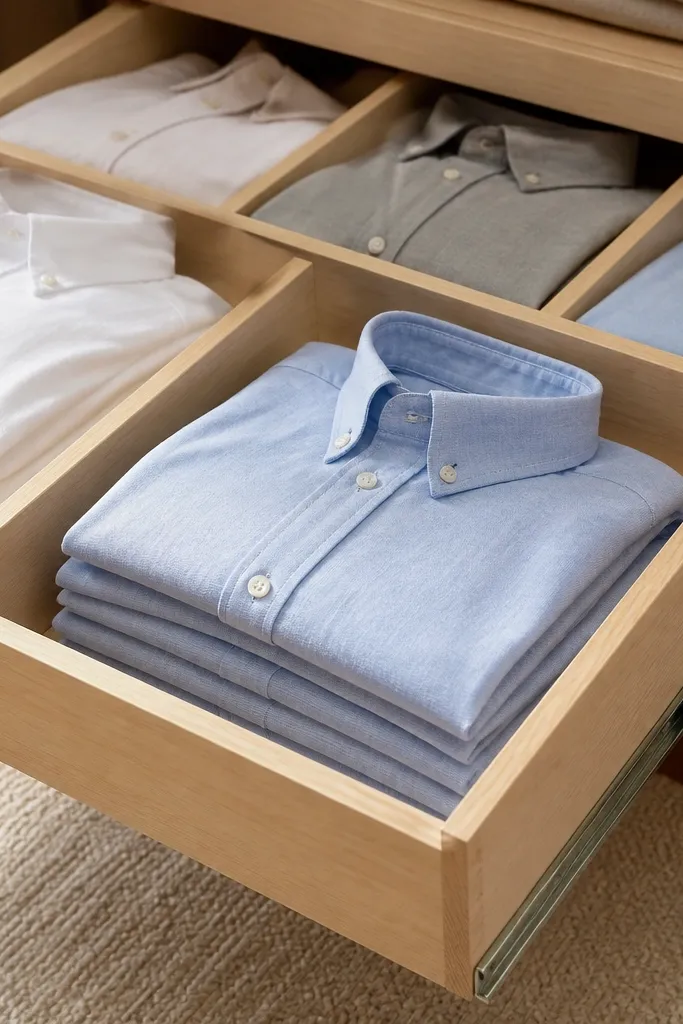
This is the drawer system that makes folded shirts look like they belong in a store. Dividers keep stacks square, and “slide” access means you pull one section forward instead of digging. It’s low-maintenance because you’re not refolding — everything stays aligned. The aesthetic comes from clean edges and repeated fold sizes. Use it for shirts, pajama sets, and lightweight sweaters in a dresser or closet drawers.
Measure drawer width and install dividers so each compartment matches your folded shirt width. Fold shirts using the same rectangle method every time, then stack each shirt with the hanger tag facing the same direction. Assign compartments by type — button-downs, tees, and casual shirts — and slide the most-used section to the front. Add a small label tag at the front edge so you can return quickly after grabbing a top.
Editor's noteKeep your fold size slightly smaller than the divider width so fabric doesn’t bunch at the seams.
Skip thisDon’t mix oversized T-shirts with crisp button-downs in the same compartment.
9. Under-Shelf Pull-Out Baskets for Workout Gear
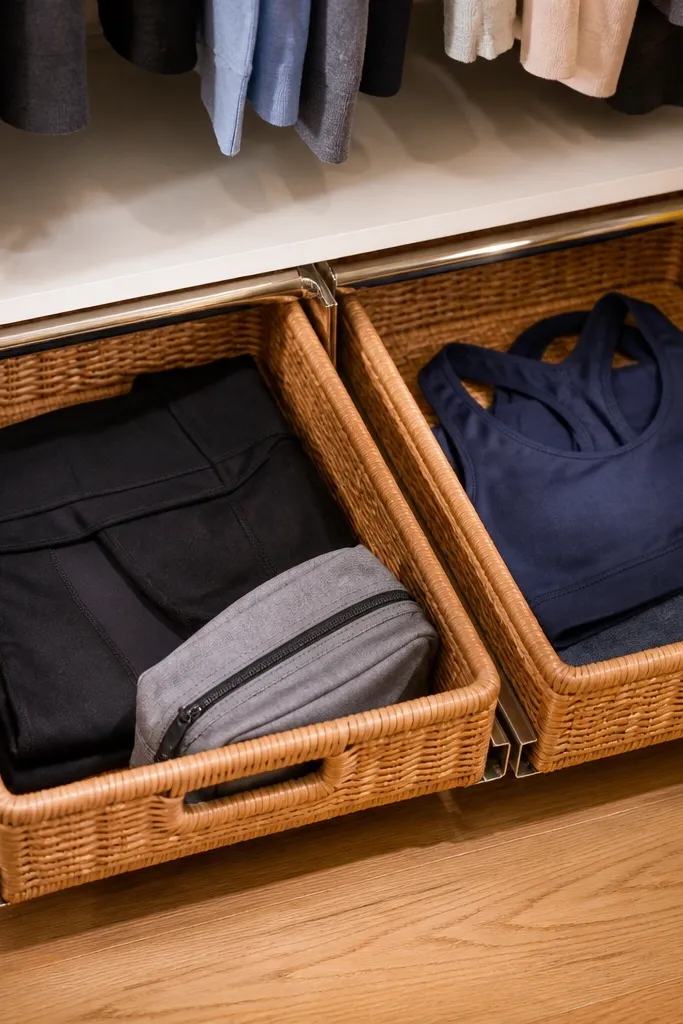
Workout clothes disappear fast because they’re used daily and tossed in bags. Pull-out baskets under the shelf solve the “where does it go” problem while keeping the closet front clean. The aesthetic payoff is that the hanging rod area stays uncluttered. It’s low-maintenance because baskets are easy to open, and you can toss items back without perfect folding. This works well for closets with a shelf above your hanging area.
Measure the clearance under the shelf and buy shallow wire or fabric pull-out baskets that fit without scraping. Install the slide hardware so the baskets pull out smoothly and stop before they fall forward. Use one basket per category — gym tops, leggings, and socks — and store items folded loosely, not compressed. Add a simple label on the basket front so you don’t have to think when you’re rushing.
Editor's notePut the basket handles at the same height so you can grab with one motion.
Skip thisDon’t use deep bins — they force digging and kill the low-maintenance part.
10. Turn One Rod into a Tie and Belt Gallery
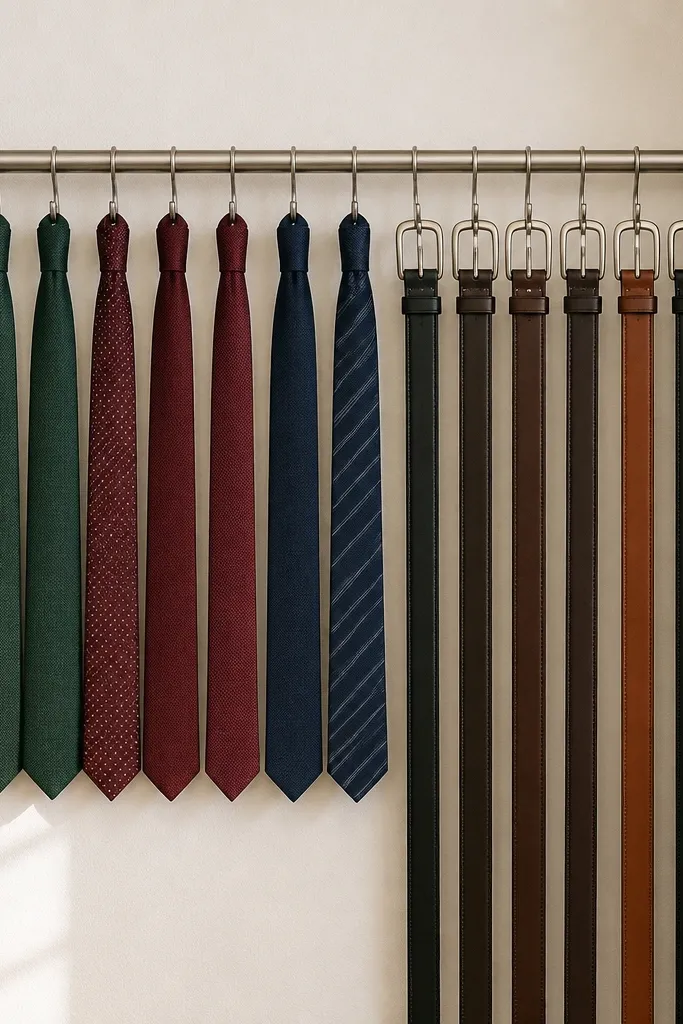
Ties and belts are small items that wreck the look of a closet because they tangle. A single rod setup with clips or hooks turns them into a clean, visible gallery. It’s low-maintenance because you hang them once and the system keeps them separated. The aesthetic is sharp because each tie hangs straight and belts line up at the same angle. This works best when you have at least a couple feet of wall space or a side rod next to your main hanging area.
Install a small secondary rod or use a wall-mounted rail at belt and tie height. Use evenly spaced clips or S-hooks so each belt or tie has its own gap. Sort by color family or by how often you wear them, then hang the most-used pieces closest to the front edge. For belts, hang by the loop or buckle so the leather sits flat without creasing.
Editor's noteUse felt-lined clips for leather belts to prevent scuff marks.
Skip thisDon’t fold ties into bins; they end up wrinkled and you lose the straight, styled look.
11. Clear Lid Bin Set for Socks and Underwear
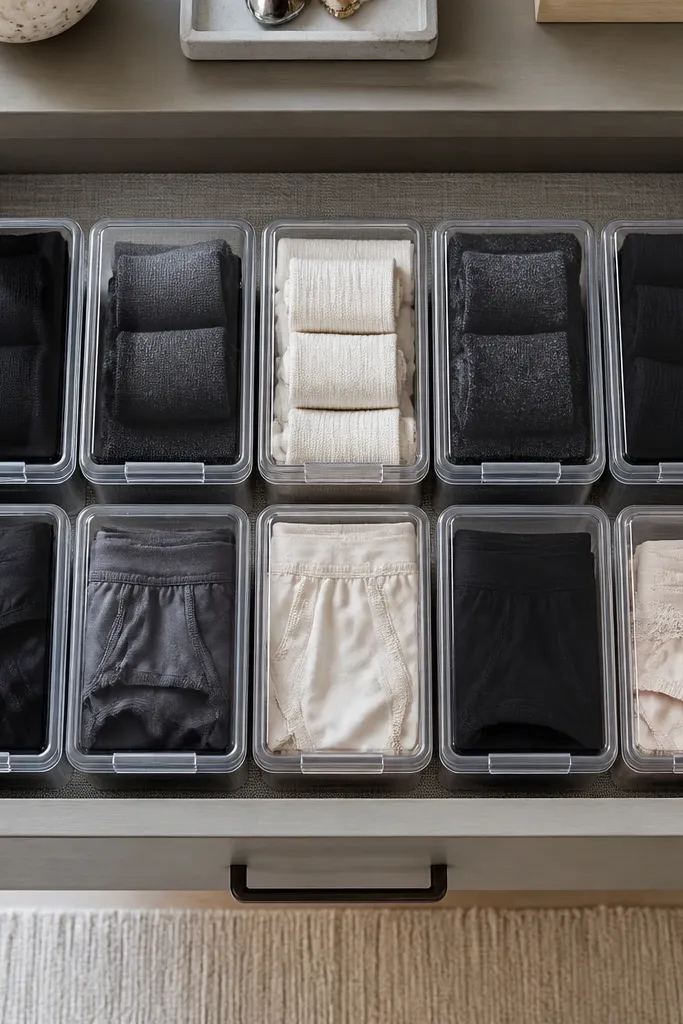
Socks and underwear are the fastest way to make a closet feel messy, even when clothes look tidy. Clear lid bins keep the drawer or shelf face clean and let you scan without opening multiple containers. The look is cohesive if you use the same bin sizes and lid colors across categories. It’s low-maintenance because you can replace items in the same slot every time. This works for dresser drawers, closet shelves, and any spot you want to keep visually calm.
Pick two or three bin sizes that fit your drawer width and leave a small gap so lids open easily. Fold socks to a consistent roll or rectangle, then place one category per bin — everyday socks, dress socks, underwear. Arrange bins in a grid so the front edges line up. Add labels on the bin front so you don’t have to read through clear plastic.
Use a thin divider card inside each bin so small items don’t slide into the wrong pile.
Don’t mix socks and underwear in the same bin; it increases rummaging and looks chaotic.
12. Clothesline-Style Hanging for Scarves and Light Layers
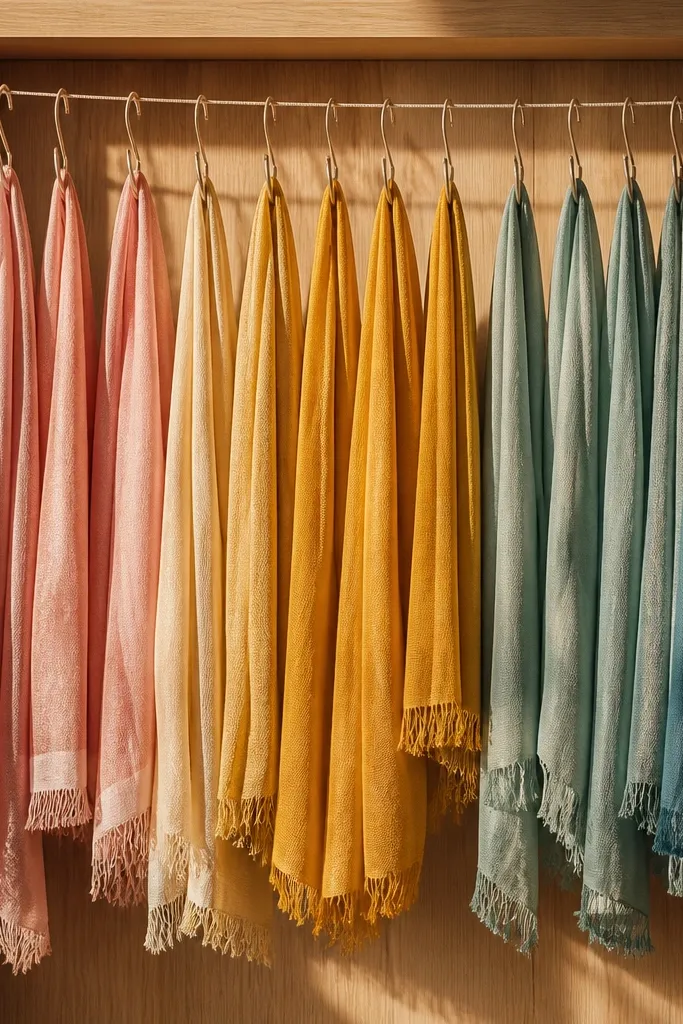
Scarves and light layers are usually shoved into a drawer and then wrinkled. Hanging them on a dedicated line of hooks keeps them smooth and makes the closet look styled. The aesthetic comes from the movement and color — you can arrange scarves in a gradient or theme. It’s low-maintenance because you can grab one without pulling everything out. Best for closets with a shelf above or a side wall where you can mount hooks at consistent spacing.
Mount a row of hooks or a small rail at a height where scarves hang without brushing the floor. Spread hooks evenly across the width of the area so scarves don’t pile. Use clothespins or small rings to hang scarves flat, then arrange by color or fabric weight. Store only light layers on this line — heavy coats belong in hanging zones with more support.
Editor's noteSteam or press scarves before hanging so the drape looks intentional from day one.
Skip thisDon’t hang bulky scarves on hooks meant for thin fabric; they’ll sag and the row looks uneven.
13. Drawer for "Go-To" Clothes with One-Grab Layout
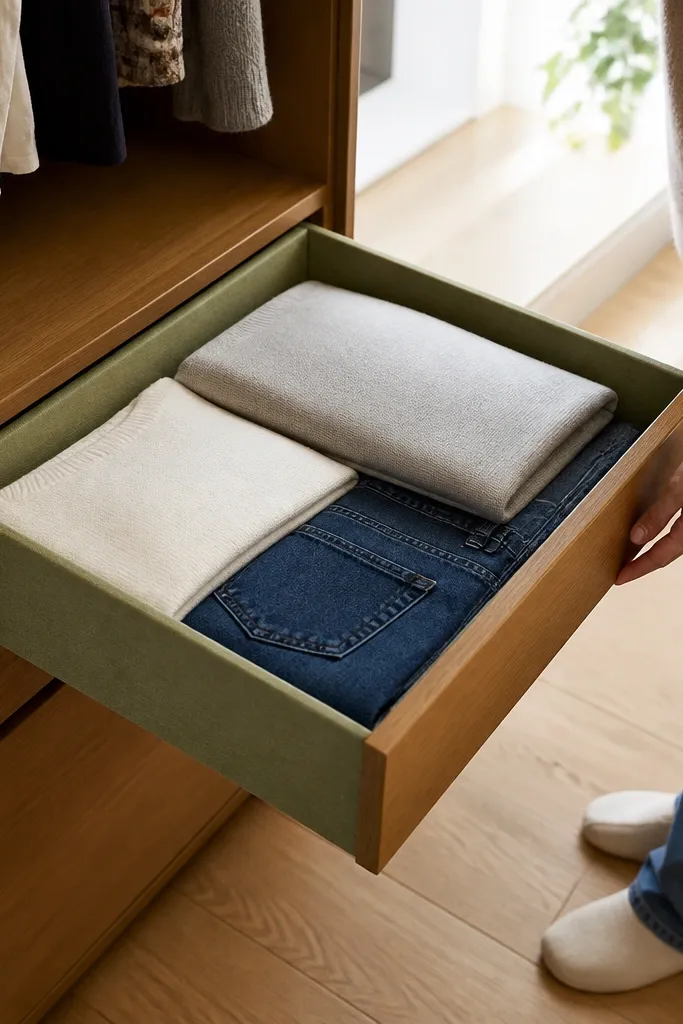
This is the low-maintenance solution for mornings that start with chaos. Create a small drawer zone for your most-used tops and bottoms, arranged so you can grab a full outfit with minimal thought. The aesthetic is clean because the drawer front shows only your go-to stacks, not random laundry. It stays functional because you refill that drawer from the rest of your closet on a schedule. Works best in a dresser drawer or a closet drawer system.
Choose one drawer and reserve it for a tight set: for example 6-10 tops and 4-8 bottoms. Fold shirts and pants into consistent sizes and place them in a front-to-back order based on your routine. Use dividers so each item has a spot, even if the drawer is only partially full. Label the drawer with a small tag like “Go-To” so you remember what belongs there.
Refill the drawer once per week when you do laundry so it never becomes a catch-all.
Don’t let the go-to drawer become a landing zone for random items.
14. Pegboard Backing Behind Hooks for Visual Clean Lines
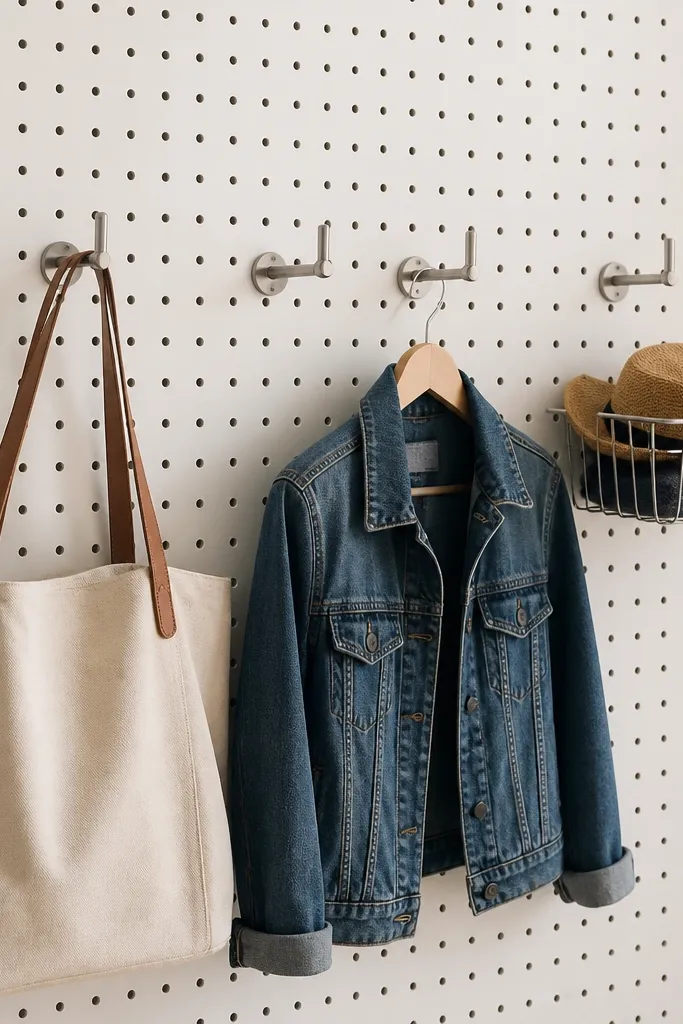
Pegboard behind your hanging hooks turns a clutter-prone area into a designed wall. The look is photogenic because the grid creates order, and the hooks line up perfectly. It’s low-maintenance because everything has a home and you can see instantly where items belong. Use it for everyday bags, hats, and casual jackets that you want to grab quickly. This works best in closets with open wall space where you can mount hooks.
Measure the wall area and cut pegboard panels to fit your closet wall or closet door side. Paint or stain the pegboard in a matte finish that matches your closet hardware so it doesn’t look stark. Mount the pegboard with firm anchors, then mark hook spacing so rows are straight. Hang items by category — bags on one row, hats on another — keeping the most-used items at eye level.
Use a laser level or a long straight edge to align the first row of hooks. Everything looks better when the first row is perfect.
Don’t cram hooks too close. Crowding makes the wall look messy even when items are hung.
15. Hanging Garment Bags for Special Occasion Items
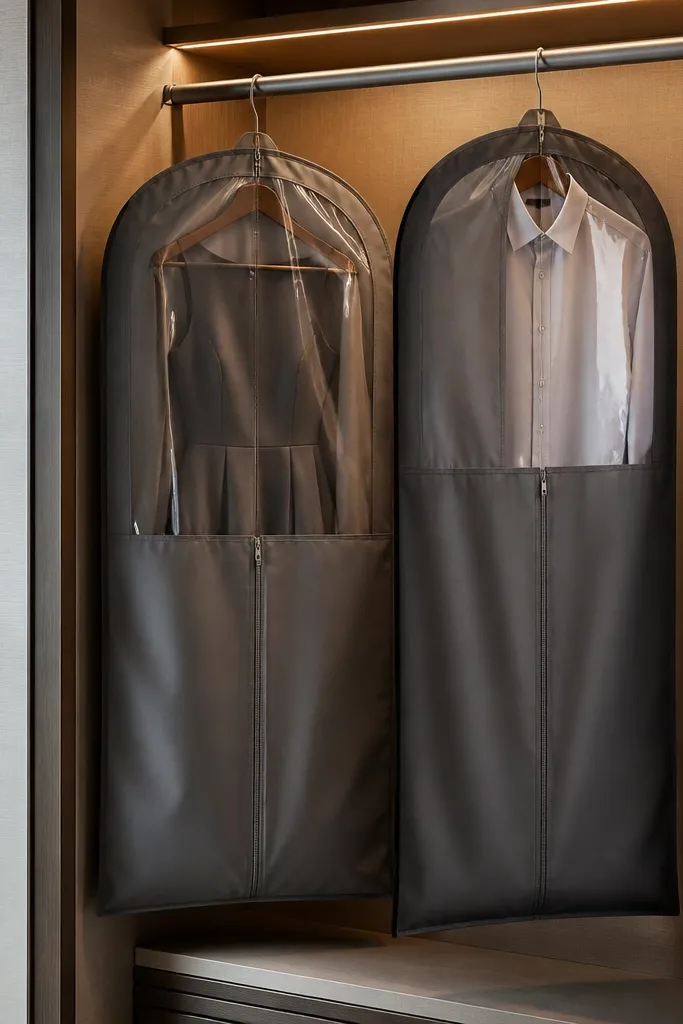
Special occasion clothes are the reason many closets look cluttered. Garment bags keep them clean, reduce wrinkling, and keep the closet face tidy even when you rotate rarely. The aesthetic is refined because the bags hang in a consistent line and the hangers match. It’s low-maintenance because you can put a piece away without worrying about dust or fabric snagging. Best for event dresses, suits, and coats you don’t wear weekly.
Use breathable garment bags with a zipper and choose a consistent length that fits your longest item. Hang them on the same rod as your regular clothes or in a separate zone so the front of the closet stays visually calm. Add a small label tag on the bag handle or top corner for quick identification. Store the bags with enough spacing so fabric doesn’t press against each other, then wipe the closet rod before hanging to keep everything looking clean.
Editor's noteHang garment bags with the zipper facing the closet wall so the front stays smooth.
Skip thisDon’t use plastic dry-cleaning covers for long-term storage; they trap moisture and can make the look feel grimy.
16. Shelf Dividers for Rolled Towels and Household Textiles
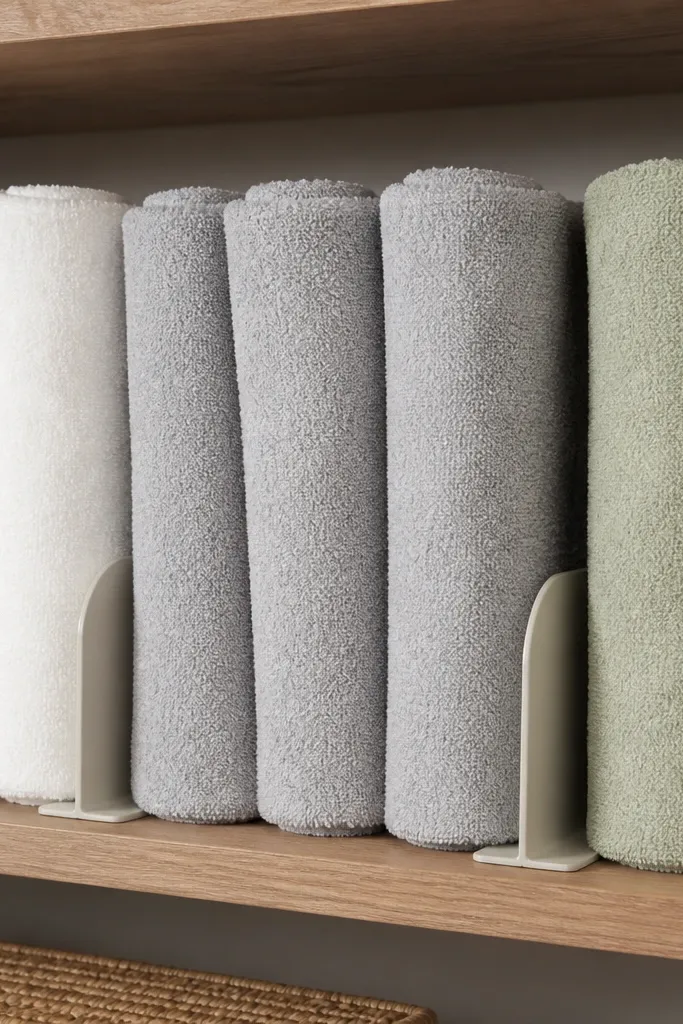
Textiles like towels and linens look messy when they’re stacked randomly. Dividers let you stand rolled items upright so the closet looks organized and like it belongs in a spa. It’s low-maintenance because you can grab one roll without disturbing the rest. The aesthetic is clean: uniform rolls, consistent spacing, and a controlled color palette. Best for linen closets and closet shelves where you can fit a divider grid.
Install shelf dividers or use adjustable ones that create upright compartments. Roll towels to the same diameter so they sit snugly without slumping. Arrange by color family or by size — bath towels on one side, hand towels on another. Leave a small gap at the front edge of each compartment so you can pull one roll out without snagging.
Editor's noteUse a fabric-friendly label on the front edge of each compartment so you don’t have to open anything.
Skip thisDon’t roll towels too tight — tight rolls look neat but compress the fabric and collapse over time.
17. Wall-Mounted Bin Rail for Kids Clothes or Rotation Sets
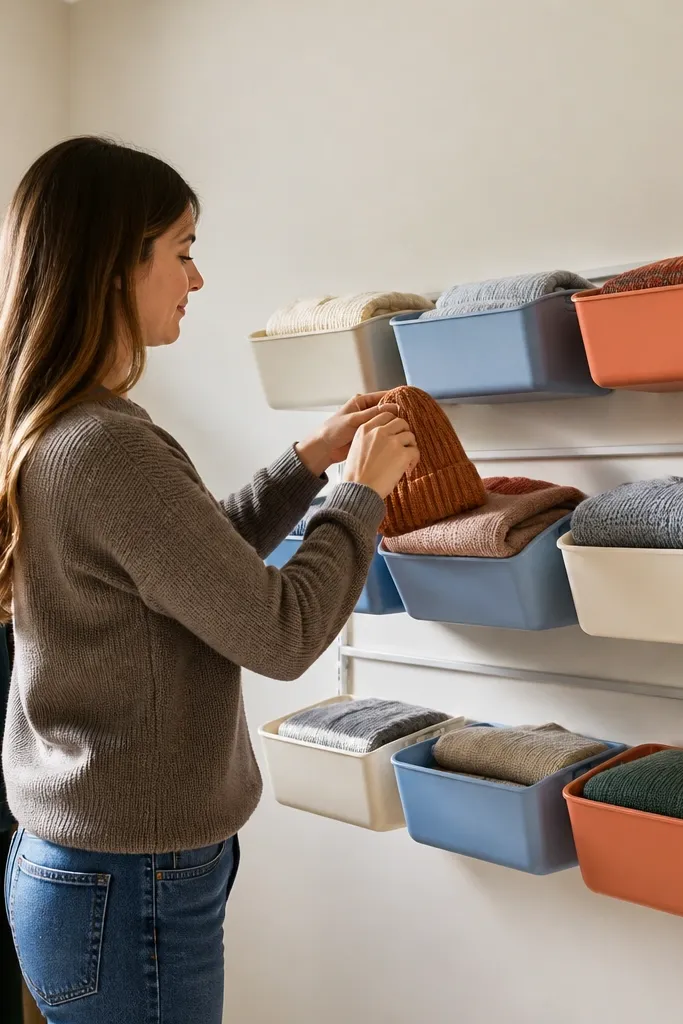
Rotation sets are where closets go from cute to chaotic fast. A wall-mounted bin rail with shallow bins keeps seasonal or size-based items sorted and easy to swap. The aesthetic is bright but controlled because bins line up and you can see what’s inside at a glance. It’s low-maintenance because changing seasons becomes a quick bin swap, not a full closet rebuild. Works in closets used for kids, guest linens, or anyone with seasonal rotations.
Mount a bin rail system at a height where you can access bins without pulling everything down. Choose shallow bins that fit the fold size you use, then measure your tallest folded item to set bin depth. Sort items by size or season and place one category per bin, keeping bin labels at the front. When you rotate, remove the entire bin group and replace it with the next set so the closet stays visually consistent.
Use the same fold size for every piece in a bin, even if it’s a different fabric weight.
Don’t stack bins on top of each other; the top bin becomes a hidden pile.
18. Matte Black Wire Shelf Liners for a Clean Color Base
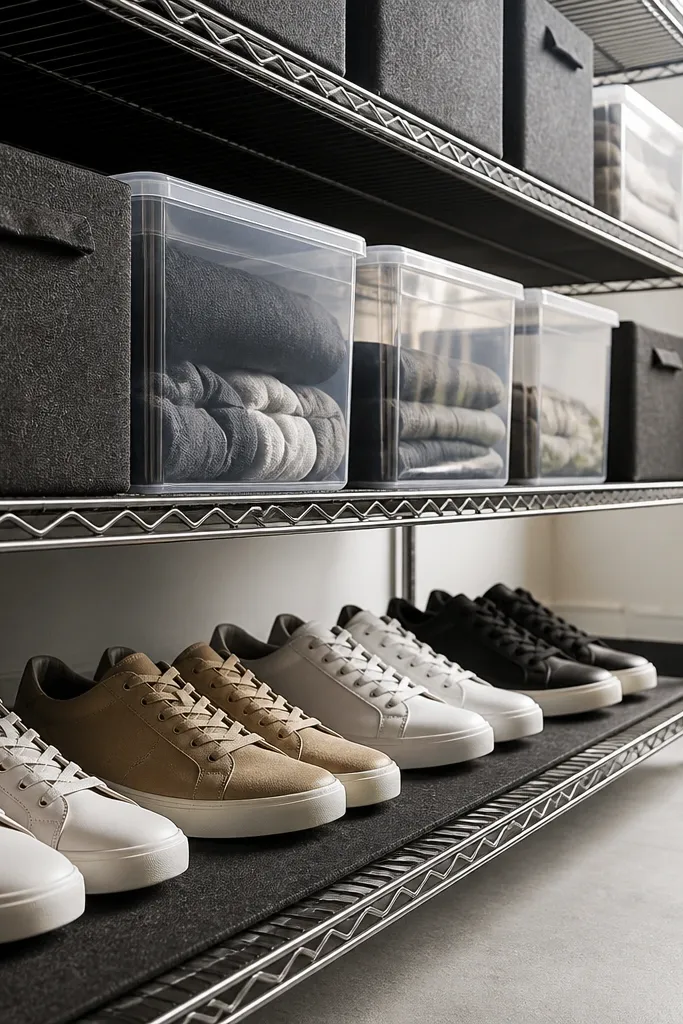
Wire shelves can look unfinished, even when everything is organized. Shelf liners in a matte black or deep neutral color create a clean base that makes bins and shoes look intentional. The aesthetic payoff is that your closet looks styled because the visual noise is reduced. It’s low-maintenance because it hides dust and small debris that would otherwise show through. Best for closets with wire shelving where you want a more design-forward look.
Measure each shelf section and cut liners to fit with clean edges. Use adhesive shelf liner or removable liner sheets depending on whether you want to avoid residue. Place bins, folded stacks, and shoe displays on top so the liner becomes a consistent background. Wipe liners with a damp cloth during your quick weekly reset so the look stays crisp.
Editor's noteChoose liners with a textured finish; smooth liners show dust smears quickly.
Skip thisDon’t use glossy liners. They reflect light and make the closet look uneven and messy.
19. Over-Door Organizer with Color-Matched Labels
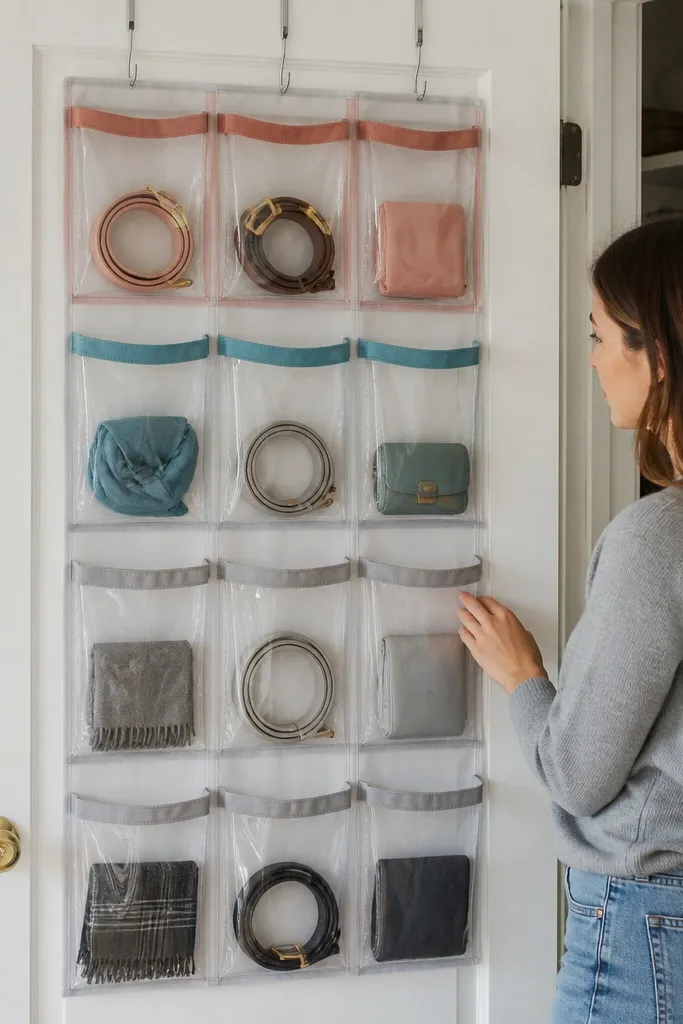
Over-the-door organizers are underrated because they turn unused space into a neat, visible storage zone. Add color-matched labels and you get a clean, aesthetic look instead of a random pocket wall. It’s low-maintenance because small items like hats, belts, and accessories always return to the same pocket. Choose an organizer with rigid pockets so it holds shape and looks tidy. This works for closets with doors that swing into a hallway or for apartments with limited wall space.
Hang the organizer on the back of the door using the included hardware and confirm it clears the closet frame. Sort items into categories based on how often you grab them, then assign each category to one pocket line. Label the pockets with small tags at the top of each pocket so you can scan quickly. Keep the heaviest items in the lower pockets so the organizer doesn’t sag.
Use label tape that matches the organizer color so the pockets look designed, not taped together.
Don’t store bulky items in the highest pockets; gravity makes it fold and the look drops fast.
20. Minimalist Laundry Bag Station with Two Compartments
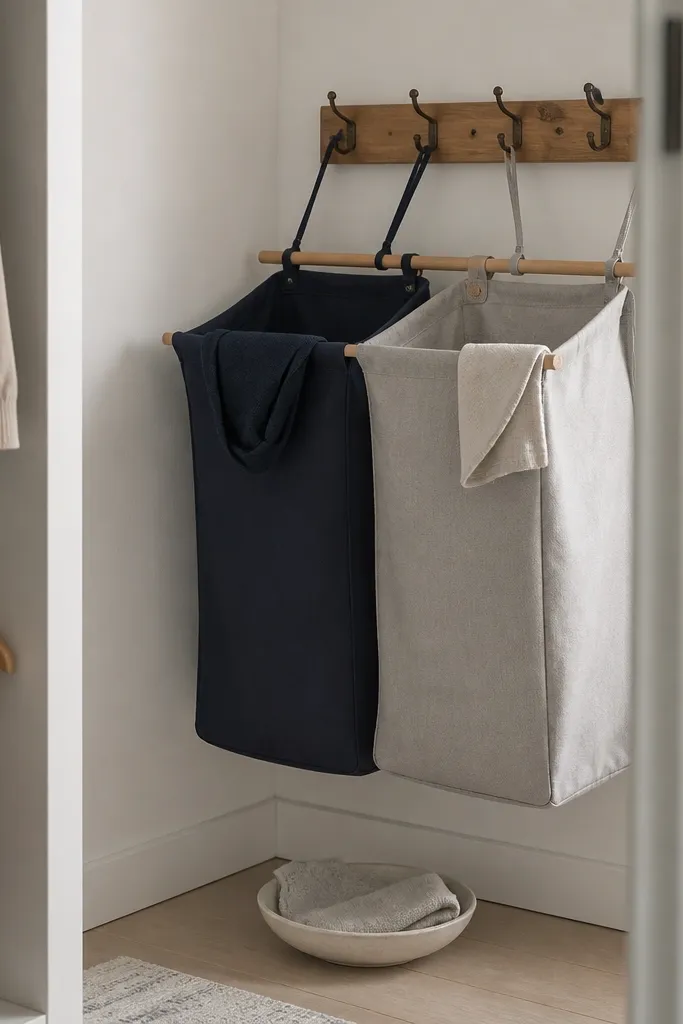
A laundry station inside the closet keeps clothes from becoming “temporary piles” that ruin the look. Two compartments — one for darks, one for lights or one for clean-but-waiting and one for dirty — makes sorting effortless. The aesthetic is clean because the bags hang neatly and you control the labels. It’s low-maintenance because you handle laundry immediately instead of carrying it around. Best in closets near bedrooms or hallways where you already end up dropping clothes.
Mount two hooks or a small rail inside the closet near your main hanging area. Use bags with stiff frames or structured openings so they hang straight and don’t collapse. Label the bags clearly on the front with small tags. Place them at a comfortable reach height so you can toss items without opening the whole closet.
Choose bags in neutral fabric colors so they blend with your closet instead of looking like an afterthought.
Don’t place the station too low. If you have to bend, you’ll start delaying laundry and piles return.
21. Sliding Drawer for Seasonal Accessories with Clear Front
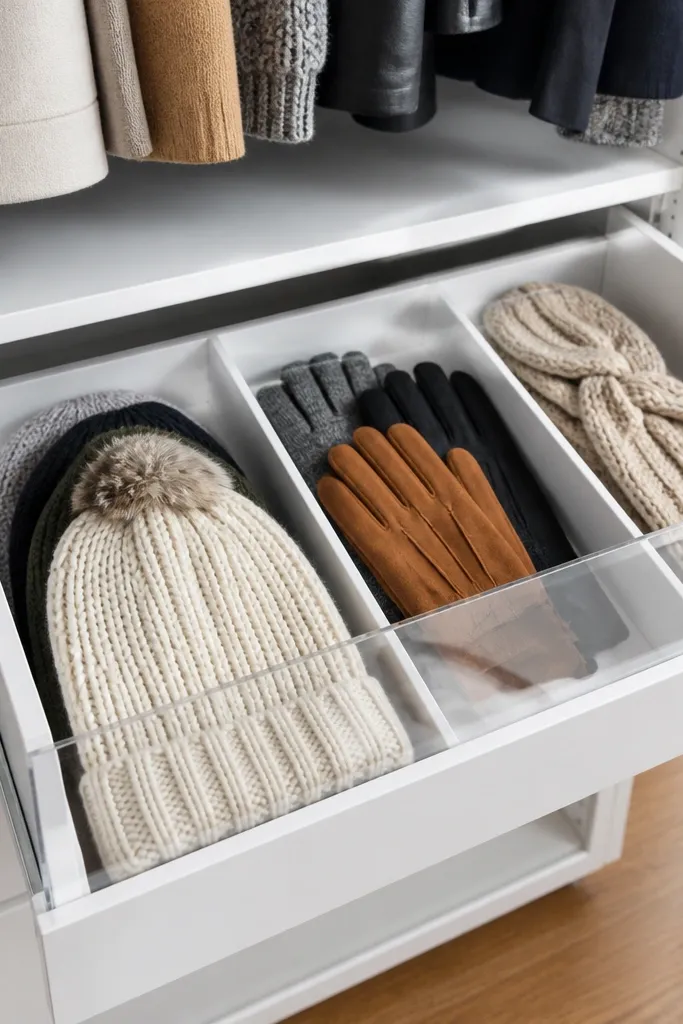
Seasonal accessories are the stuff that makes closets look cluttered because it’s stored “somewhere.” A sliding drawer with a clear front keeps the look tidy while still showing what’s inside. It’s low-maintenance because you pull it out, grab what you need, and slide it back without digging. The aesthetic is clean because the drawer stays closed most of the time. This works well for gloves, hats, scarves, and sunglasses in winter or summer rotations.
Install a shallow drawer system or use a ready-made rolling drawer that slides smoothly into the closet. Add a clear front panel or use a drawer box with a clear lid so you can scan. Sort accessories into small bins by type — beanies, gloves, sunglasses — then place the bins inside the drawer. Label the bins on the inside front edge so the drawer stays visually clean when closed.
Editor's noteUse felt or foam liners under the bins to stop small items from rattling and shifting.
Skip thisDon’t overfill the drawer. If items compress, you’ll end up digging and the look goes messy.
22. Rolled Belt + Watch Valet in a Clear Acrylic Tray
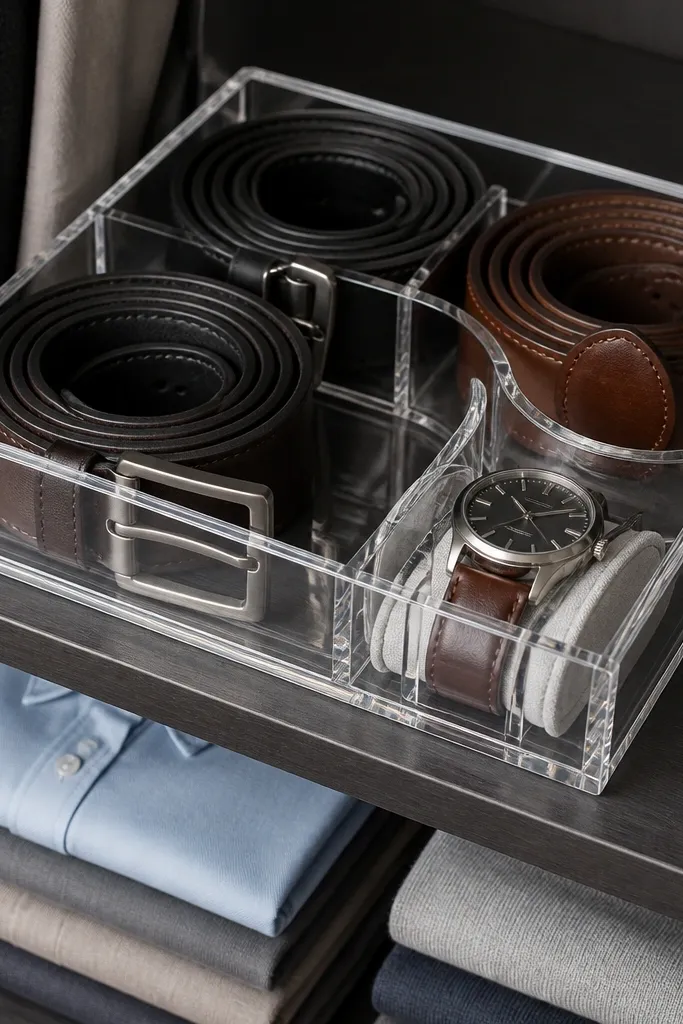
This fixes the annoying mess where belts fold wrong, watch bands tangle, and everything looks cluttered even when your clothes are neat. A clear acrylic tray makes the organization photogenic because you can see everything at a glance — and it looks intentional, not hidden. Use shallow compartments so belts roll tight and sit flat instead of slumping. This is low-maintenance closet organization ideas you can keep up with because you’re not re-folding — you’re just rolling once and returning to the same spots. It’s a great fit for a small shelf near your mirror, a closet dresser top, or the inside of a closet door where you want “styled” storage without extra effort.
Measure the shelf or door space first, then buy a clear acrylic tray with a flat base or make one from acrylic sheets (3/16 in is stiff enough). Add removable dividers using acrylic strips cut to height so each compartment is about 2 to 2.5 in wide for belts and 1.5 to 2 in wide for watch bands. Sand cut edges with 220 then 400 grit so they don’t look cloudy and won’t snag fabric. Arrange belts by rolling from the buckle end, then tuck the tail under the roll so it holds its shape. Finish by wiping with isopropyl alcohol on a microfiber cloth so the acrylic stays crystal-clear.
Editor's noteUse felt pads under the tray corners so it doesn’t slide and you don’t get scratched shelf edges.
Skip thisDon’t make compartments too narrow — belts bunch up and the tray stops looking clean.
23. Magnetic Spice-Strip Style Labeling for Closet Zones
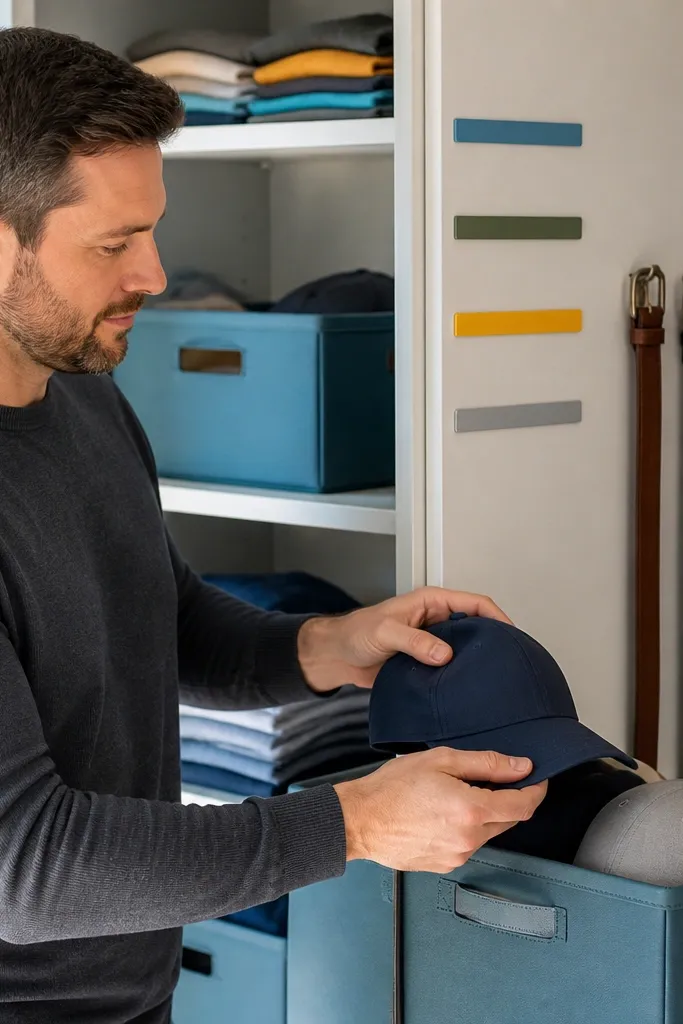
If your closet looks aesthetic but still feels chaotic, it’s usually because you can’t tell where things go in two seconds. Magnetic label strips create a tidy visual system that matches how closets actually get used — quick decisions, fast returns. The look is clean because labels line up in the same font size and sit at consistent height across bins and drawers. This is low-maintenance closet organization ideas because the labels are changeable when you rotate seasonal items. It suits anyone who does clothing swaps, kids' closets with multiple categories, or a shared closet where everyone needs the same rules.
Buy magnetic sign strips or thin magnetic tape strips and cut them to the width of your closet shelf fronts or bin fronts. Print labels on cardstock and seal them with clear laminate so they wipe clean; keep label text short like “DENIM,” “WORK TOPS,” “SOCKS,” “WINTER HATS.” Mount the magnetic strips with 3M command strips or small screws into a wood backing so the label line stays straight. Place the label strips so the bottom edge sits about 2 in above the bin rim or drawer handle height. Add a small key strip at the side that lists abbreviations if you use categories like “LT” for long-sleeve.
Choose a label color that matches your bin color — white labels on black bins look crisp and stay readable.
Don’t center labels too low — if they sit near the bin’s opening, the bin blocks the text and you stop using the system.
24. Pegboard Drawer Insert for Flat Clutches and Makeup Bags
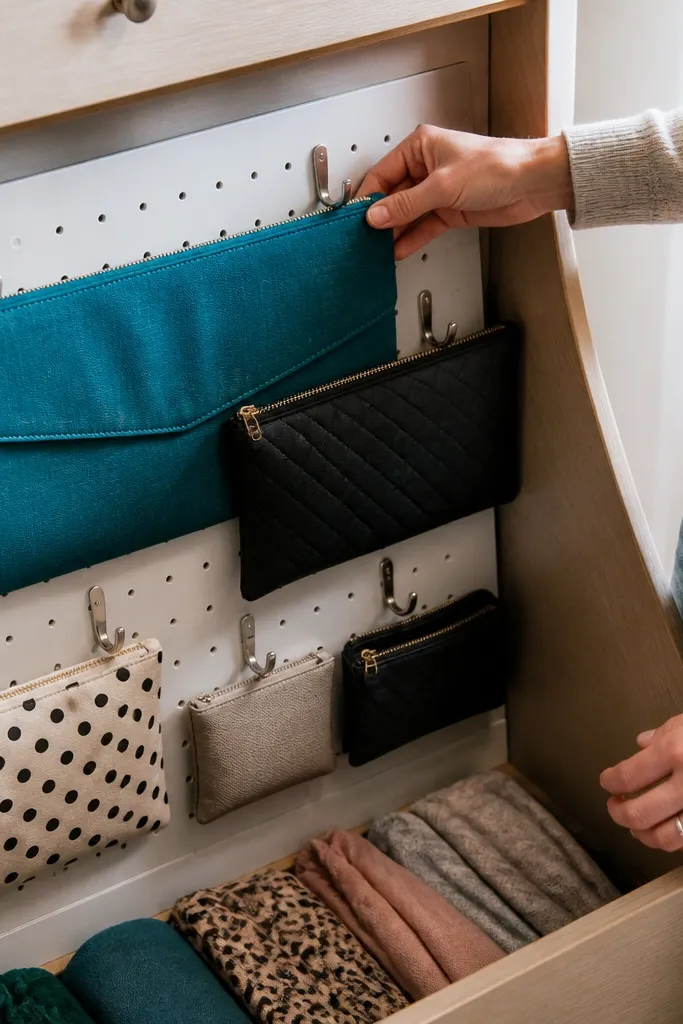
Flat clutches and makeup bags are the closet chaos category — they slide, wrinkle, and pile up where you can’t see the shape. A pegboard-backed drawer insert gives each bag a hook point, so everything hangs flat and stays photo-ready. The pegboard also creates a clean grid look, which makes the inside of your drawer look styled instead of stuffed. This is low-maintenance closet organization ideas because you grab the bag by its edge and hang it back without folding. It works best in a dresser drawer inside the closet, a vanity drawer, or any drawer you want to turn into a “grab-and-go” station.
Cut pegboard to fit your drawer footprint, leaving a 1/4 in gap on each side so it doesn’t scrape; use 1/4 in hardware cloth screws or wood trim to secure it. Add a thin plywood base under the pegboard if your drawer bottom is too flimsy; 1/2 in plywood is solid without adding too much height. Install small cup hooks or peg hooks in a pattern — one hook per bag, spaced about 2.5 to 3 in apart for clutches and 3 to 4 in for larger makeup pouches. Paint the pegboard with matte spray paint (light coats) so the holes stay sharp and the finish looks intentional. Line the drawer edges with adhesive felt so the insert doesn’t rattle.
Hang by the top seam edge, not the strap — straps pull and twist the bag, and it looks messy fast.
Don’t use glossy paint on pegboard — it catches light and makes the interior look shiny and cluttered.
25. Two-Layer Shoe Shelf with Rotating Heel-to-Toe Display
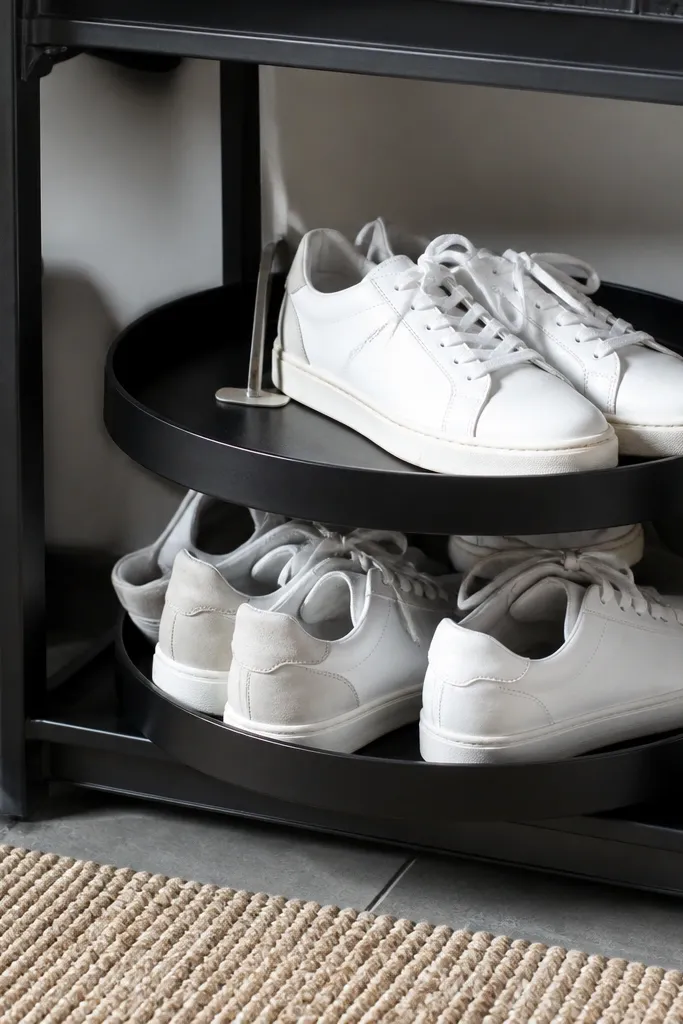
Shoes are the quickest way to ruin the “aesthetic closet” look because pairs stack unevenly and boxes hide your best items. A two-layer shelf with a rotating display face fixes that by showing one pair at a time in a neat heel-to-toe line. The rotation part matters — you can swap the visible pair without rearranging the whole shelf. This is low-maintenance closet organization ideas because you’re only changing the front display while the rest stays put. It fits entry closets, bedroom closets with shoe access, and anyone who hates digging through a pile to find the right pair.
Build a shelf frame using 1x2 lumber and set the top and bottom tiers at 7.5 in and 8.5 in clearance for sneakers and flats; add 3/4 in back stops so shoes don’t slide forward. Install a shallow “display platform” on the front tier using a lazy susan bearing or a small rotating turntable insert sized to hold one pair footprint (about 10 to 12 in wide). Add a fixed back row for the rest of the shoes so they stay aligned behind the rotating front. Paint the wood with a satin finish or stain then seal; satin shows scuffs less than flat paint. Finish by mounting the shelf securely to studs and adding felt pads under shoe contact points.
Editor's noteUse a thin anti-slip mat on the rotating platform so the shoe sole grips and doesn’t creep between rotations.
Skip thisDon’t set tiers too tight — shoes lean forward and look messy unless you leave enough clearance for the toe box shape.



