

1. Felt-Lined Cigar Box
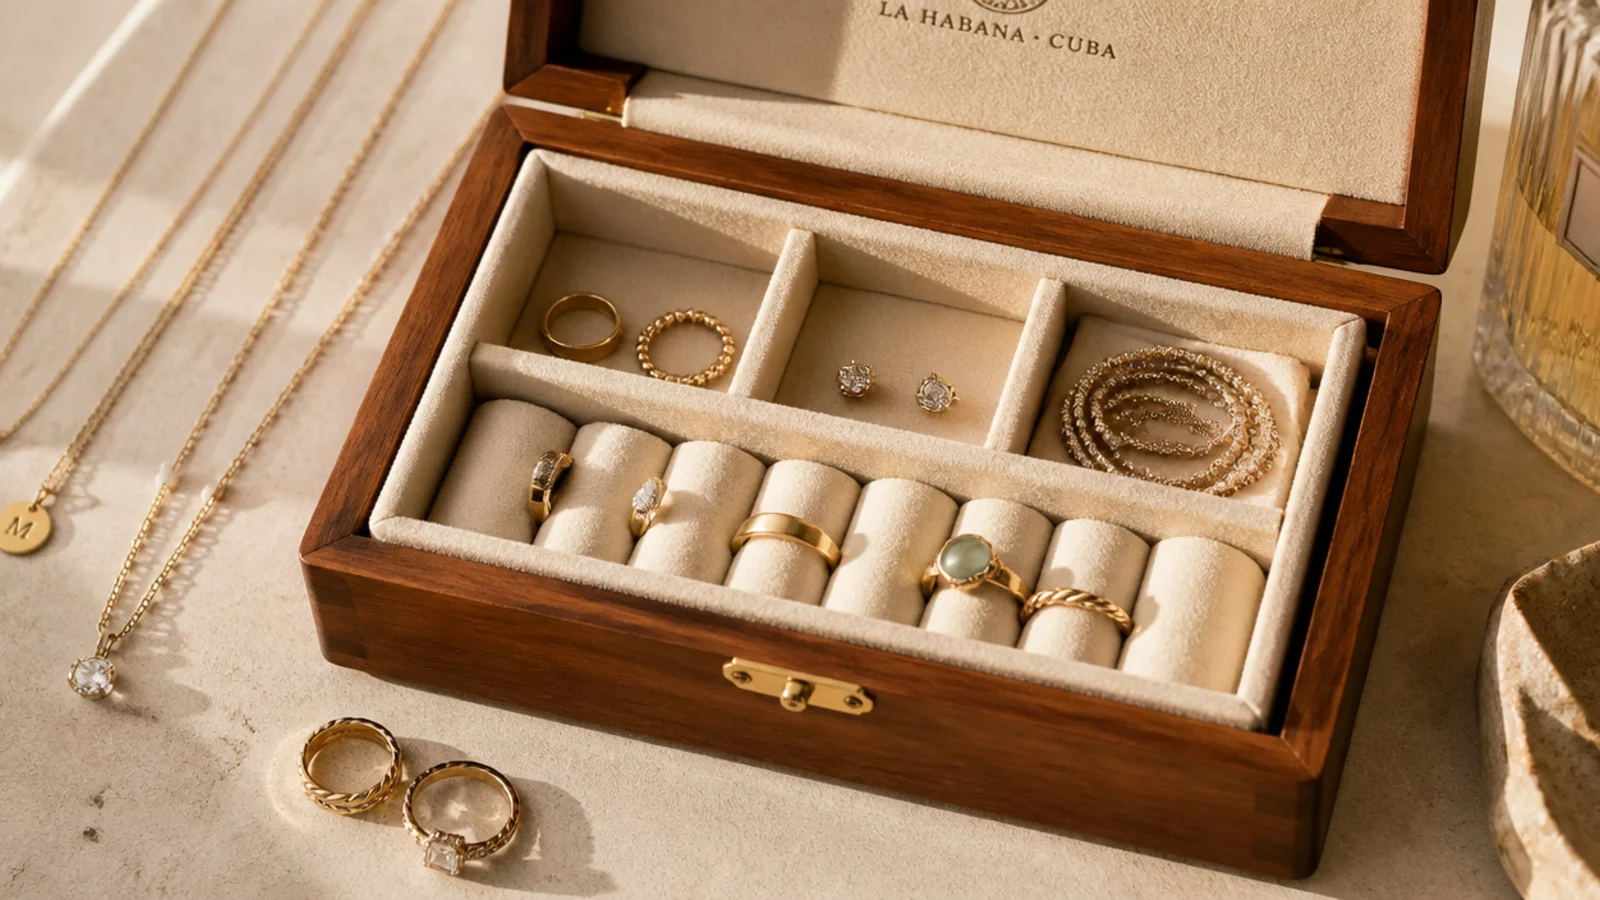
This is the easiest box to start with — a cigar box is already hinged, sturdy, and the right depth, so you just line and divide it. Often free from a tobacco shop, it upgrades instantly. It suits anyone wanting a lidded box with zero building.
Wipe the cigar box clean and line the base and lid with adhesive cream felt cut to fit. Cut foam board strips, wrap them in felt, and slot them into a lattice for compartments. Add small hooks inside the lid for a couple of necklaces if you like. Keep daily pieces in the front squares. Seal the outside with a wipe of clear if the wood is rough.
Add two small cup hooks inside the lid so a necklace or two can hang while the small pieces sit in the base.
Don’t skip the felt on a raw wood box; bare wood scratches soft metals and leaves them dull.
2. Divided Shoebox Insert
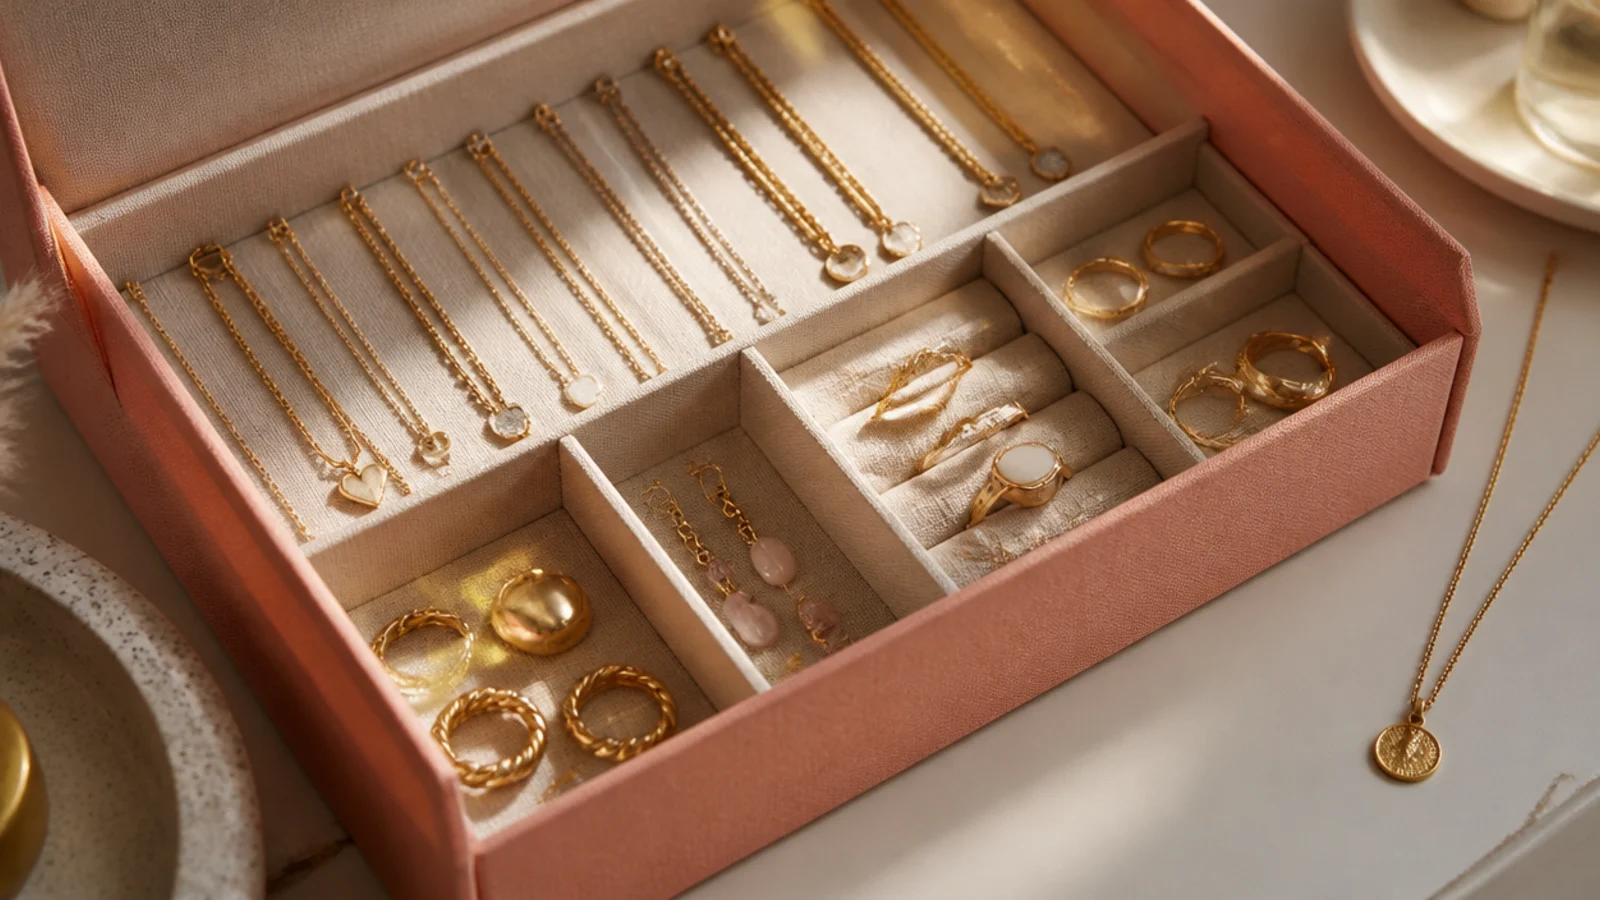
A shoebox becomes a sorted drawer insert with a fabric lining and cardboard dividers — all free. It’s the ultimate no-cost starter. It suits a drawer and anyone testing a layout before building something permanent.
Cut the shoebox down to your drawer depth. Line it with fabric or felt glued to the base and sides. Cut cardboard strips, notch them, and slot them into a grid for compartments sized to your pieces. Set it in the drawer. Because it’s free, you can remake it once you know the layout you want, then upgrade to foam board or wood.
Editor's noteCut the box to a snug drawer fit so it doesn’t slide around every time you open and close the drawer.
Skip thisDon’t use flimsy thin cardboard for a box that’ll get daily use; a sturdy shoebox lasts, a cereal box collapses.
3. Matchbox Drawer Tower
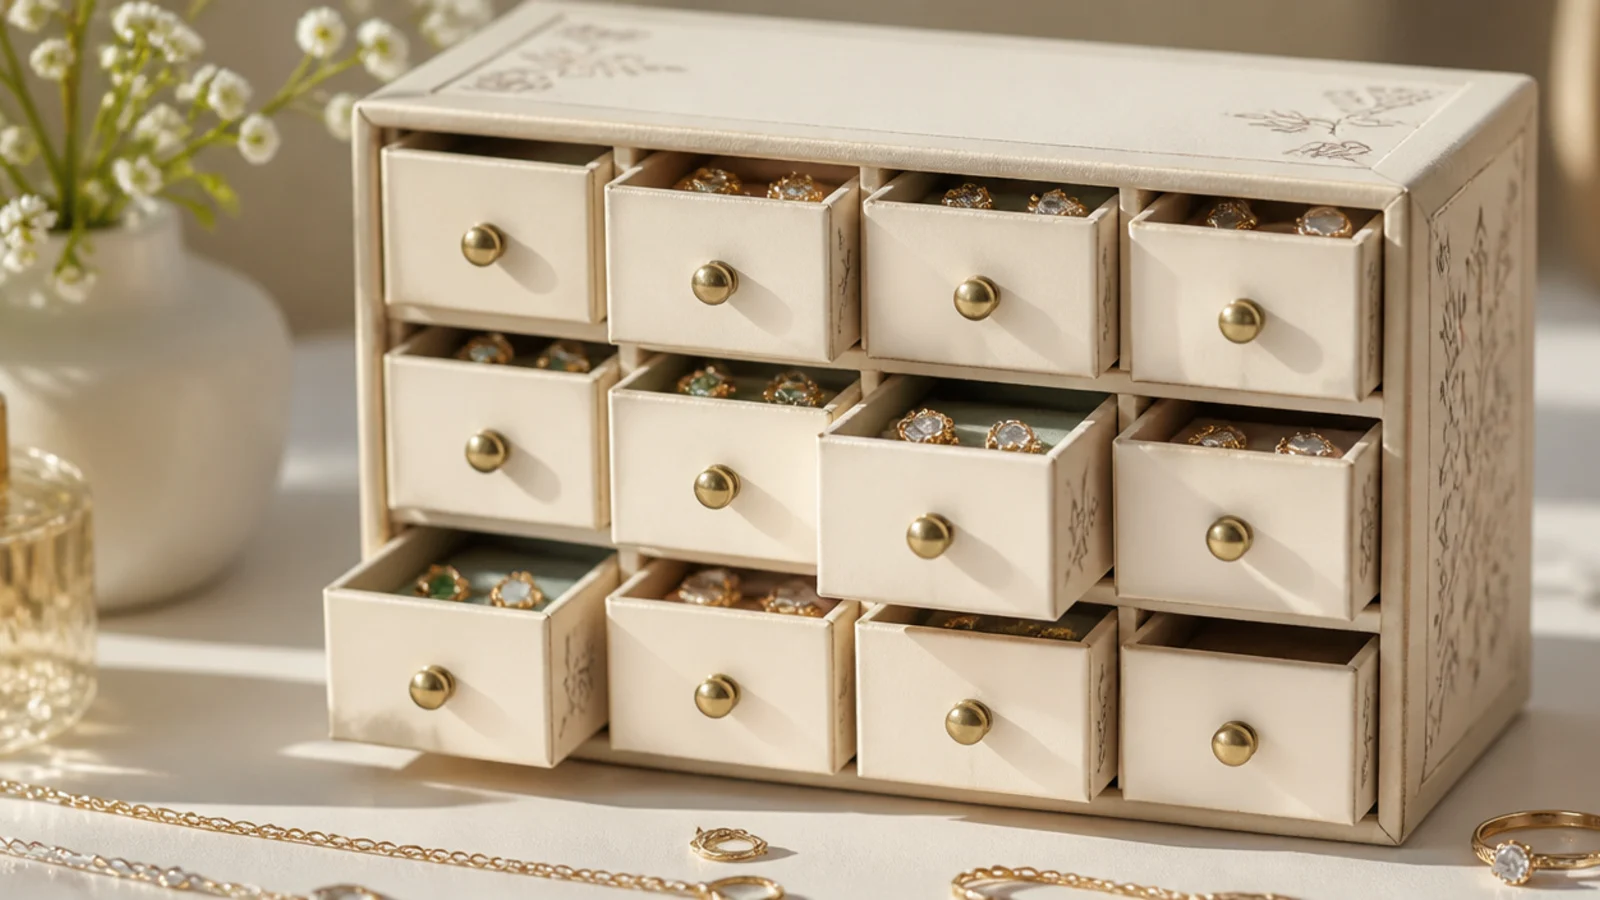
Gluing matchboxes into a tiny chest of drawers makes an adorable mini organizer for studs and rings. Each little drawer pulls out. It suits a small collection and anyone who loves a miniature project.
Glue several empty matchbox trays' outer sleeves together in a block, stacked and side by side, so the inner trays slide like drawers. Paint the whole block one color and add a bead or pin as a knob on each drawer front. Line each tiny tray with a scrap of felt. Use each drawer for one type — studs, rings, tiny pendants. Set it on a dresser.
Add a tiny bead knob to each drawer front so you can pull the little trays out without prying at the edges.
Don’t overfill the tiny drawers; matchbox trays are small, so keep to studs and rings, not bulky pieces.
4. Stacking Jar-Lid Tins
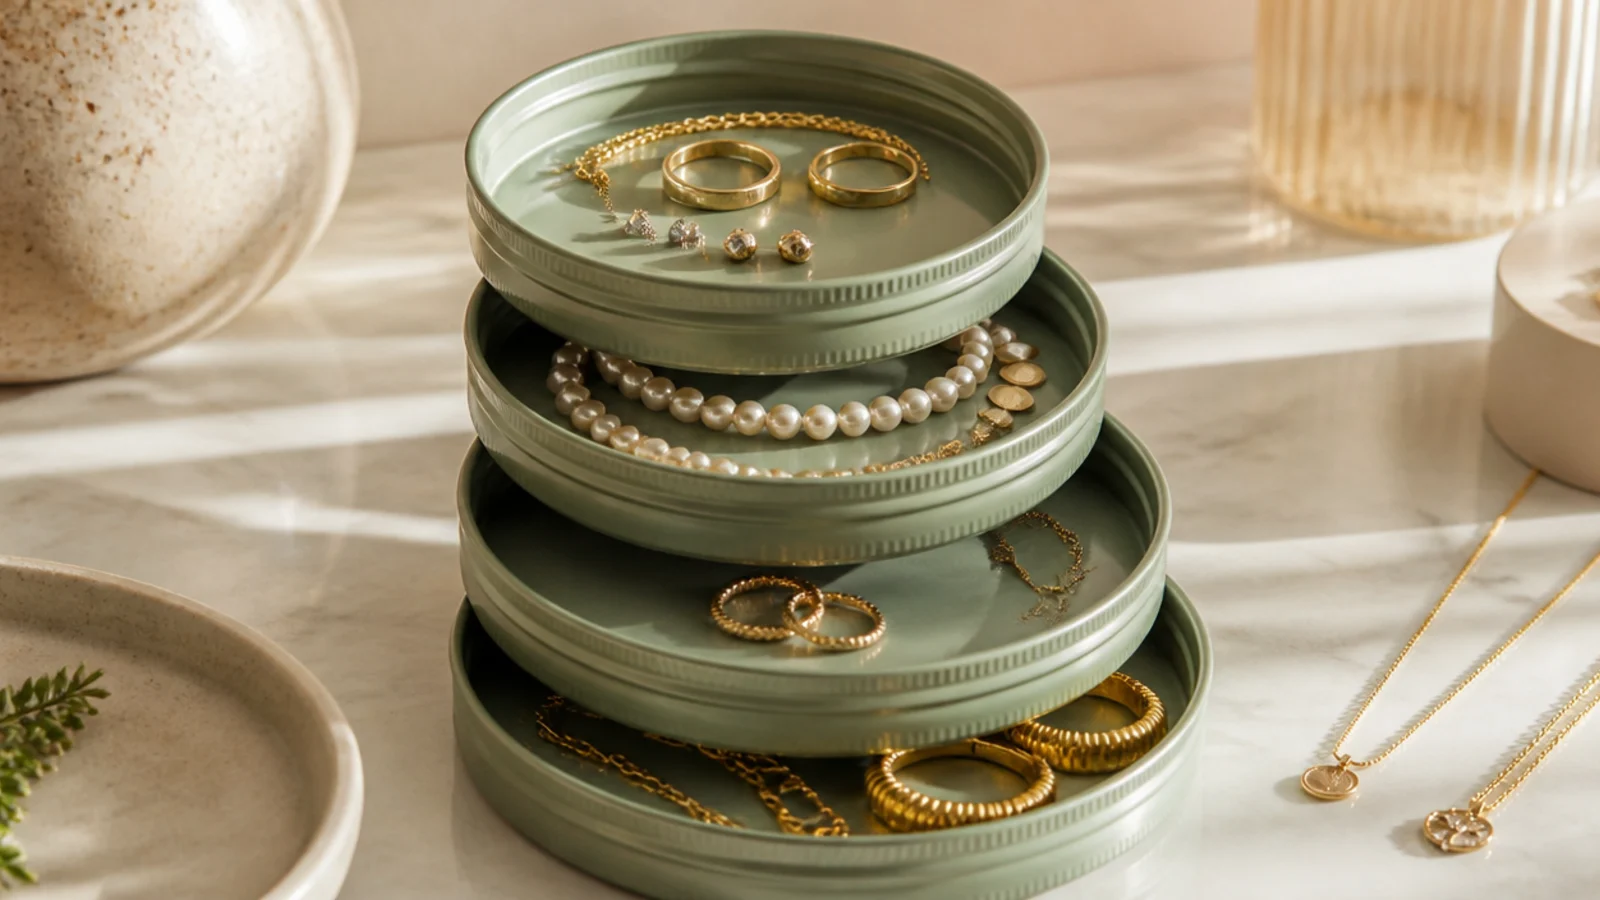
Shallow round tins that stack make a compact tower for small pieces. Each layer twists off to reach the next. It suits a tiny surface and a small sorted collection.
Use shallow tins or screw-band jar lids with discs to make stacking round layers, or repurpose small stackable tins. Line each with a felt circle. Paint the outsides one color for a matched tower. Stack them and put one type per layer. Because they stack, they take up almost no surface. Keep the heaviest on the bottom so the tower is stable.
Editor's noteLine each tin with a felt circle cut with the lid as a template so it fits perfectly and pieces don’t rattle.
Skip thisDon’t stack too many; a tall tin tower tips easily, so keep it to three or four layers on a flat surface.
5. Padded Altoids Tin
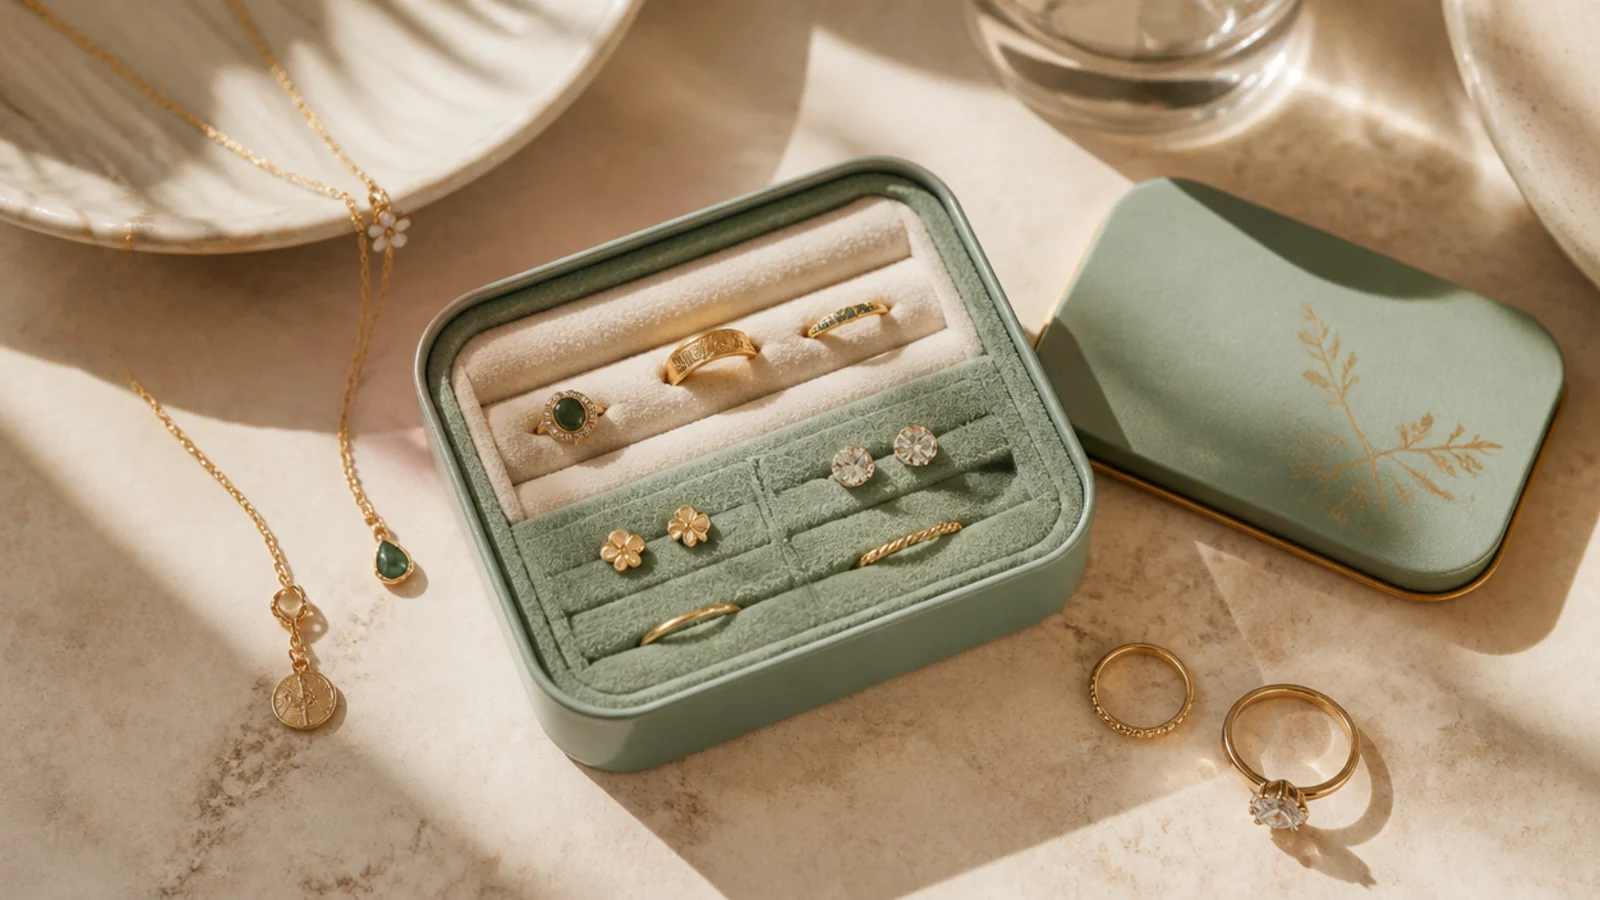
A mint tin lined with foam becomes a pocket-sized travel box for rings and studs. It snaps shut and slips in a bag. It suits travel and anyone who wants a tiny grab-and-go box for free.
Clean a mint tin and cut a piece of upholstery foam to fit inside. Make knife slits in the foam to hold rings and stud pairs upright, and glue a felt scrap to the lid to cushion the top. Slot pieces into the slits so they can’t rattle. The tin snaps closed for travel. Paint or decorate the outside so it doesn’t look like a mint tin.
Editor's noteCut the foam a hair oversized so it presses snug against the walls and pieces stay put when the tin is jostled.
Skip thisDon’t leave the metal edges bare inside; foam and felt keep the tin from scratching your rings in transit.
6. Small Wooden Crate Box
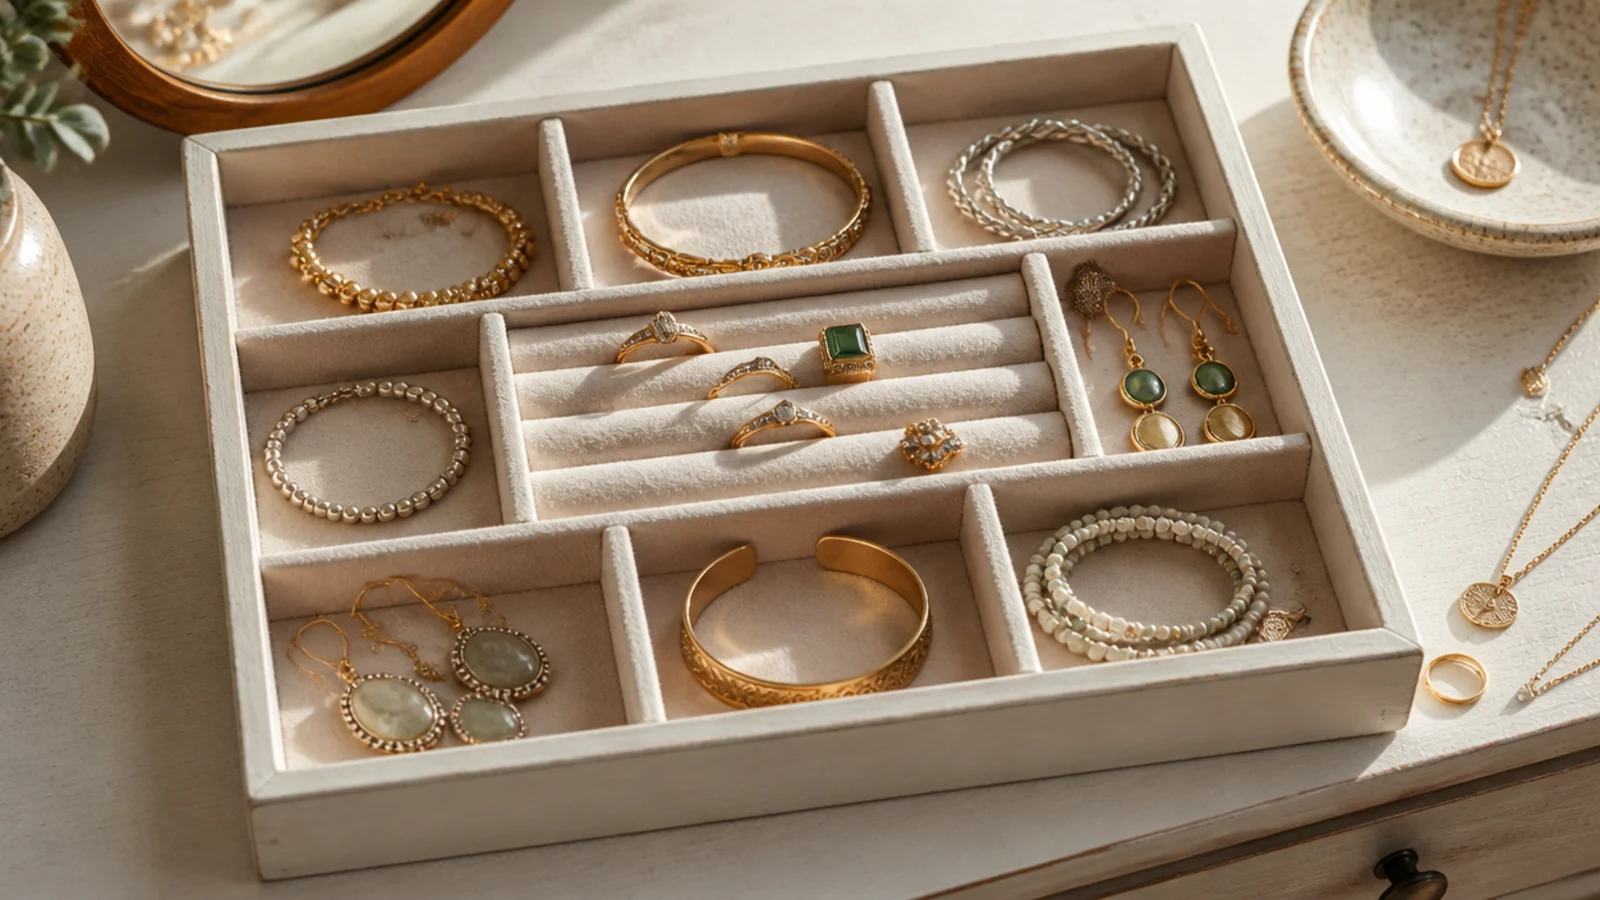
A small wooden crate makes an open-top box with a rustic, sturdy feel. Dividers turn it into sorted sections. It suits a farmhouse dresser and a medium collection you want on show.
Sand a small wooden crate smooth and paint it one flat color, sealing with matte clear. Cut foam board or balsa dividers, wrap in felt, and slot them into sections. Line the base with felt. Use the long sections for bracelets and small squares for rings and studs. Keep it open-topped on the dresser for grab-and-go access. Add a rope handle if you want to move it.
Editor's noteSeal the painted crate with matte clear so daily handling doesn’t wear the paint at the edges.
Skip thisDon’t leave crate slats gappy; back the base with felt-covered board so small pieces can’t fall through the slats.
7. Fabric-Lined Shadow Box
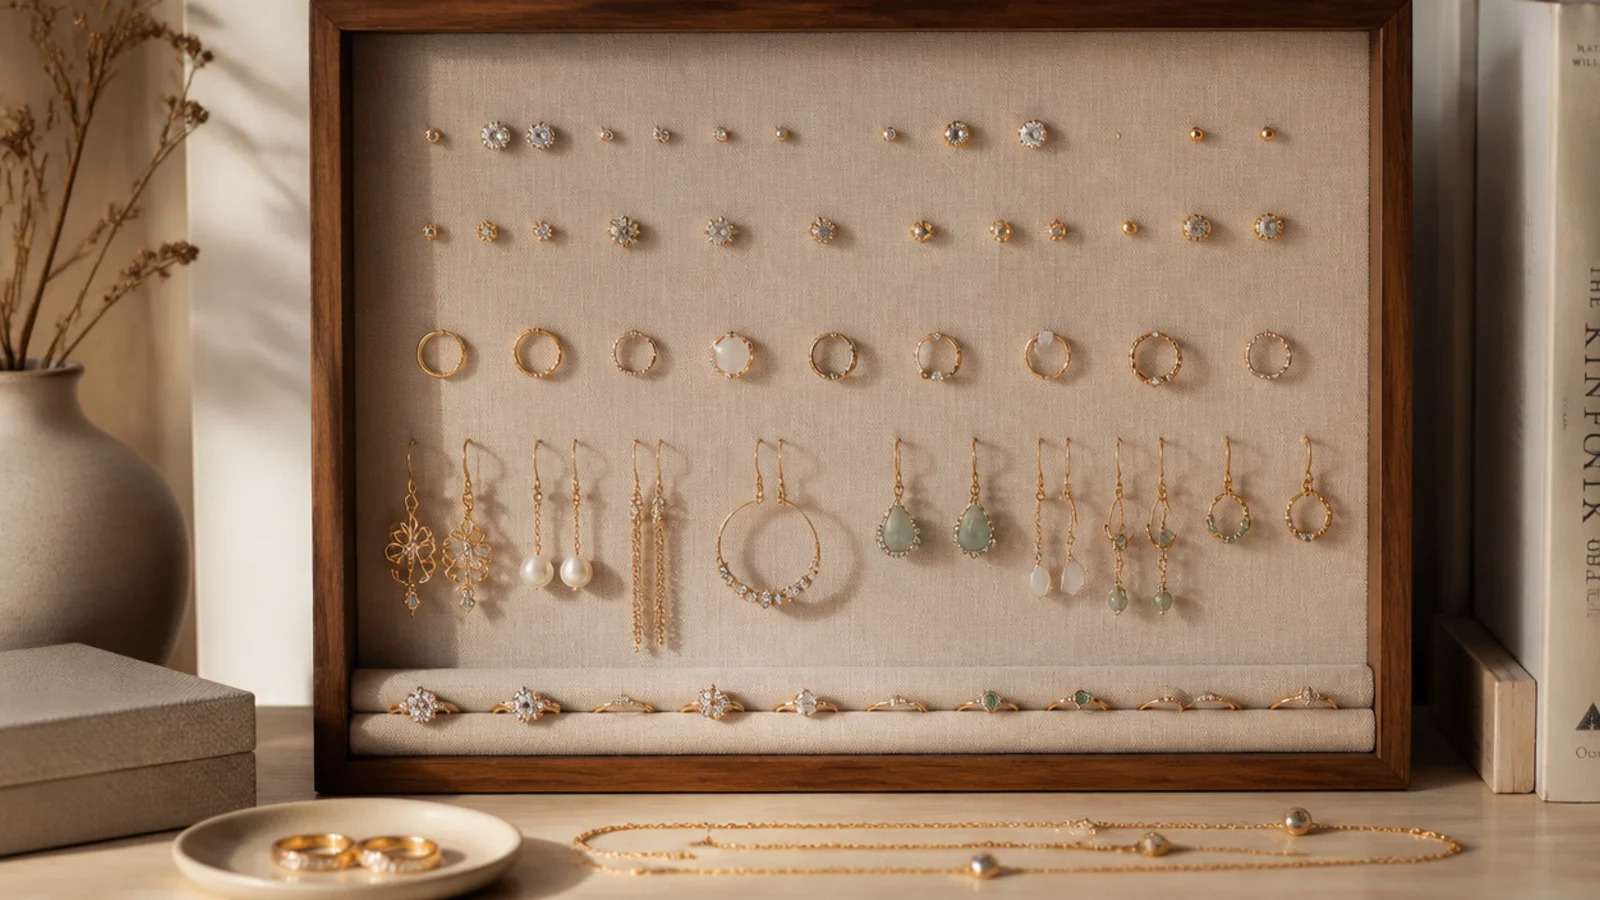
A deep shadow box lined with fabric doubles as a display case you can stand or hang. Pieces pin into the padded back. It suits anyone who wants storage that looks like framed art.
Pad the back of a deep shadow box with a thin layer of batting and stretch linen over it. Stand the box on a dresser or hang it. Pin studs and brooches into the padded back and add a couple of small hooks for earrings and short necklaces. Keep the arrangement spaced so it reads as a display. The glass front, if kept, keeps dust off.
Editor's noteLeave the glass off if you reach in daily, or keep it on and hang the box for a dust-free display piece.
Skip thisDon’t pin heavy necklaces to the fabric back; the weight pulls the batting loose, so hang those on hooks instead.
8. Ice Cube Tray Box
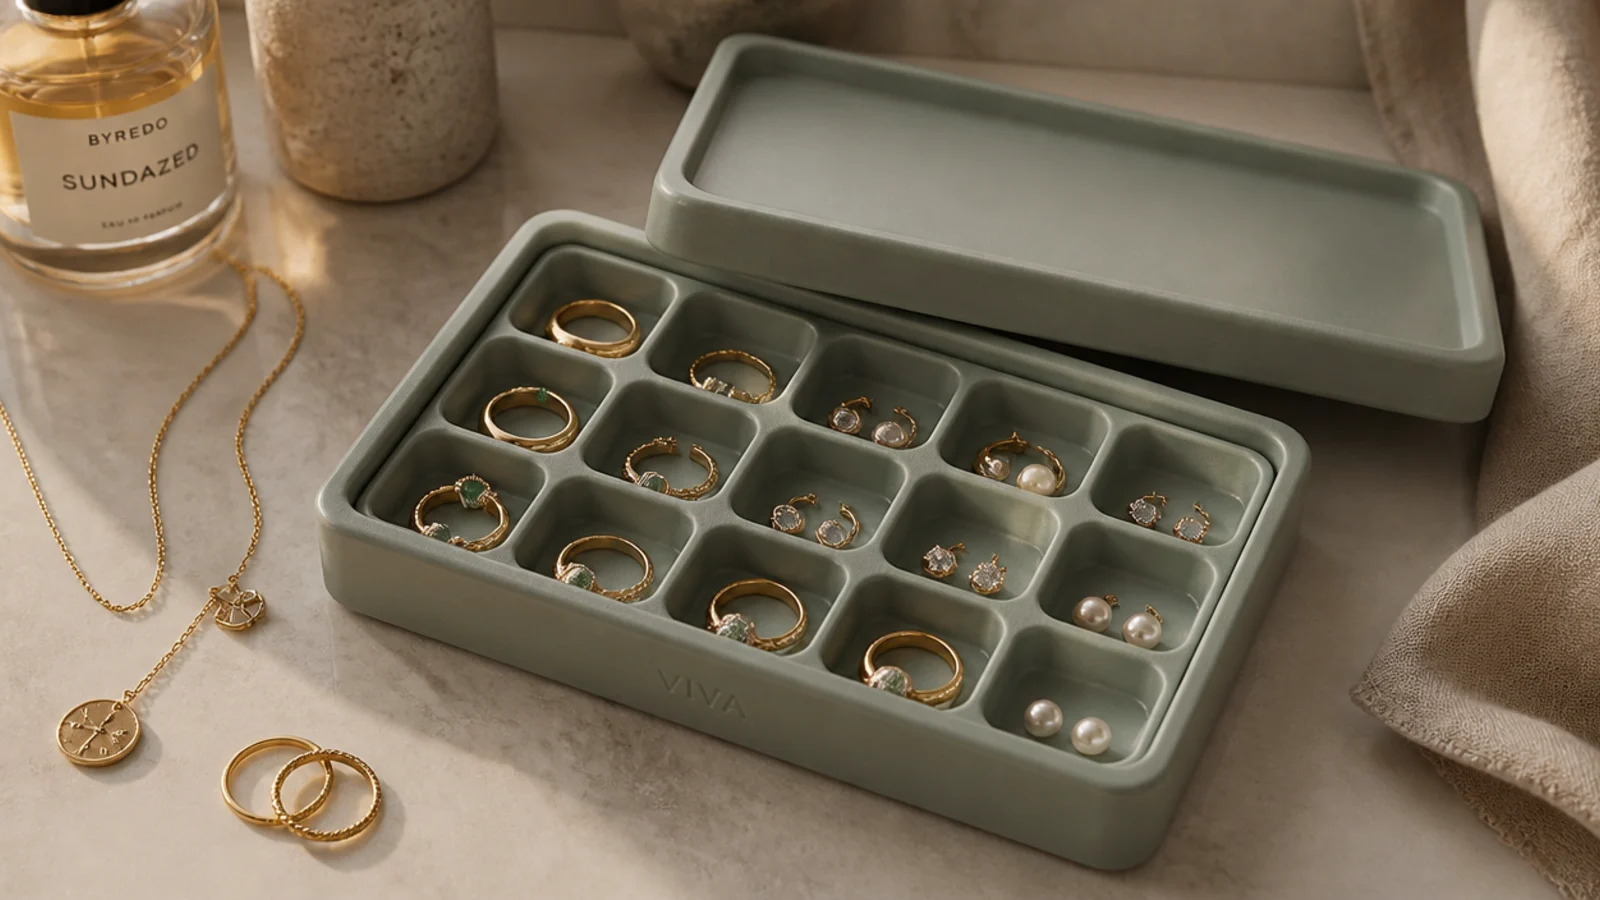
Dropping an ice cube tray into a shallow lidded box gives instant compartments plus a lid to close. It’s two cheap items combined. It suits studs and rings you want sorted and covered.
Find a shallow lidded box that fits an ice cube tray snugly. Line the box base and set the tray in. Put one ring or pair of studs per cell. Line cells with felt circles if pieces are precious. Close the lid to keep dust out. Because both parts are cheap, you can add a second tray box as your collection grows. Label the lid if you stack several.
Choose a tray with square cells; they hold more and keep flat pieces from tipping compared with rounded cups.
Don’t force a too-big tray into a small box; a rattling tray shifts and mixes your sorted pieces together.
9. Painted Silverware Tray
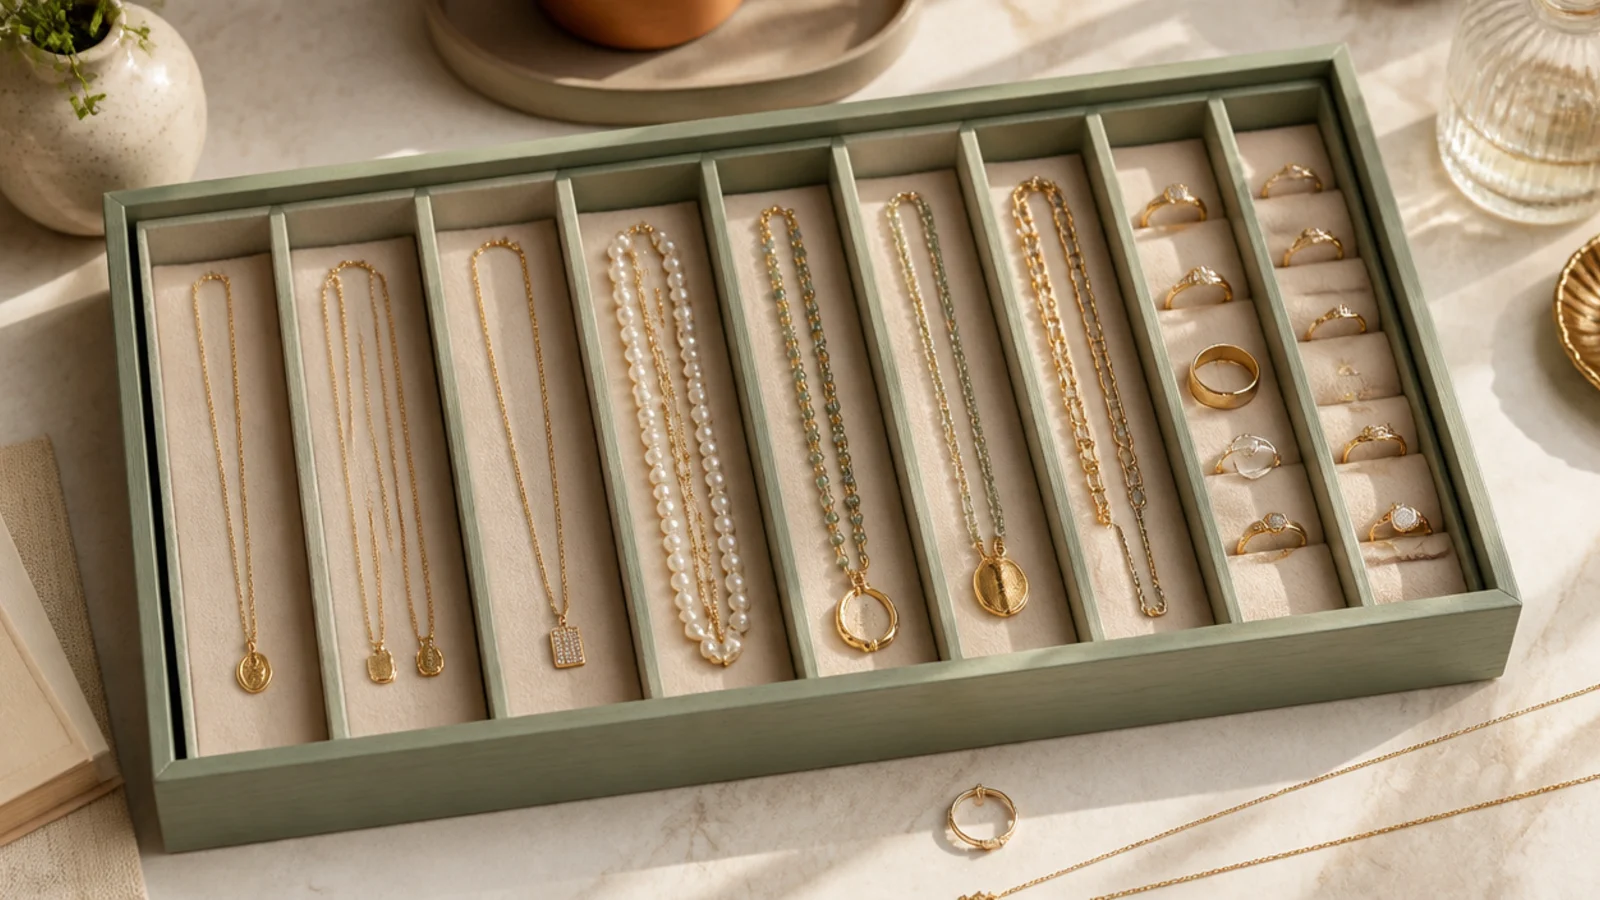
A cutlery tray is already divided into perfect channels for a jewelry drawer. A coat of paint and felt makes it look bought. It suits a drawer and a collection with lots of bracelets and chains.
Sand and paint a wooden cutlery tray one flat color and seal. Line each channel with felt. Use the long slots for bracelets and laid-flat necklaces and the small end sections for rings and studs. Set it in a drawer or leave it out. The ready-made channels mean no divider building at all. Add a slit foam strip in one channel to stand rings upright.
Editor's noteDrop a slit foam strip into one long channel so a row of rings stands upright and visible instead of piled.
Skip thisDon’t use a raw wooden tray; unsealed wood snags fine chains and stains, so paint and felt it first.
10. Upcycled Bead Storage Box
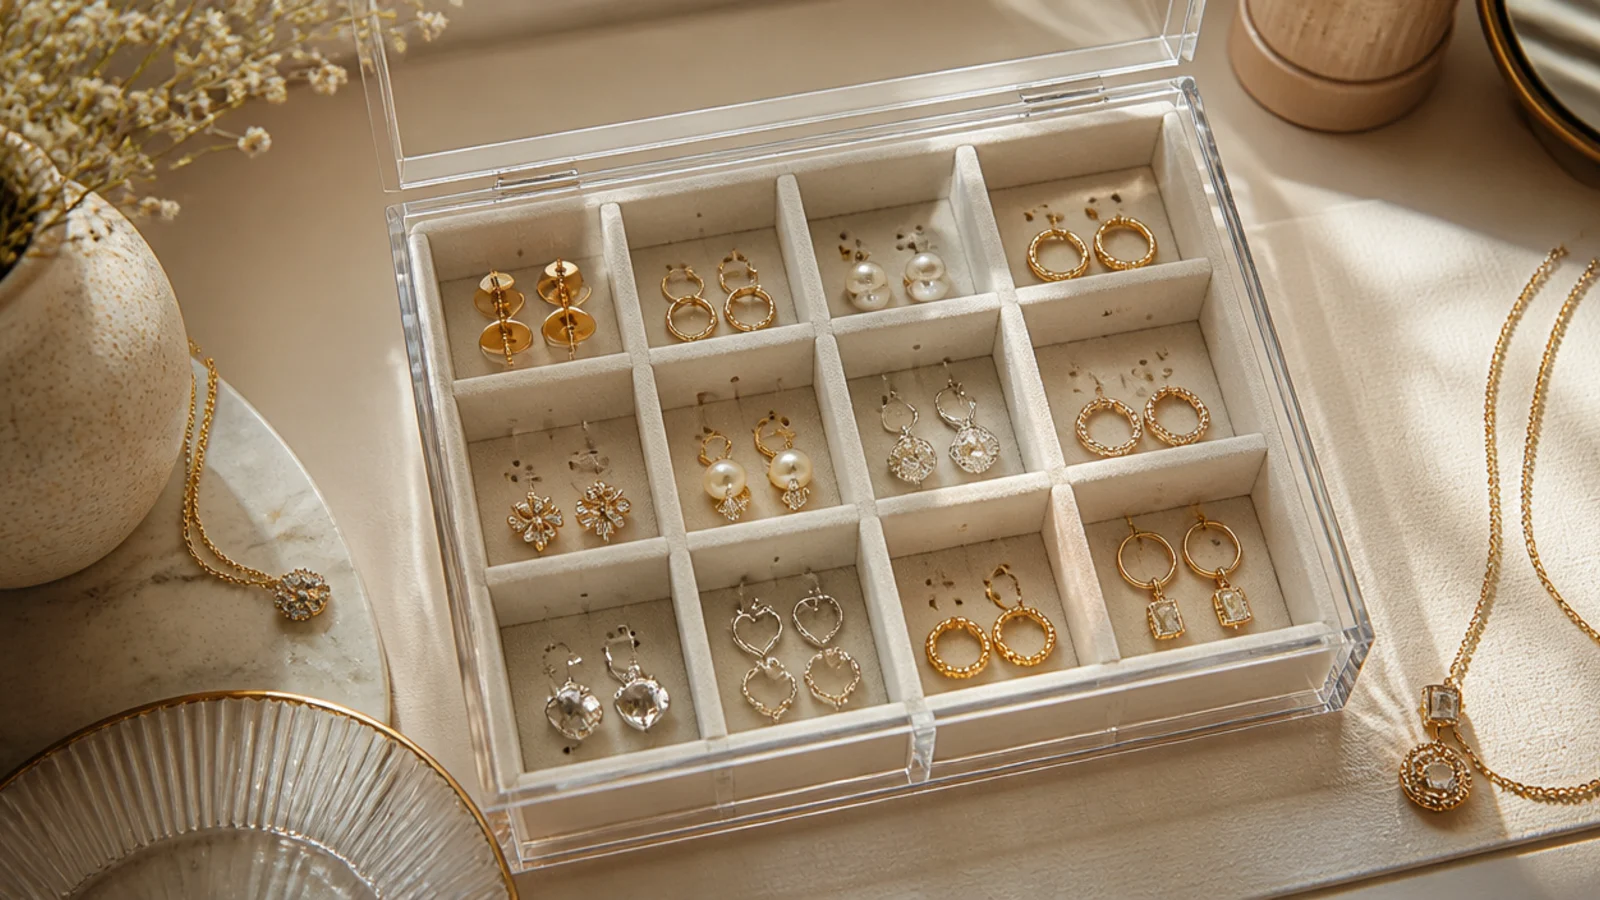
A clear bead or craft storage box has adjustable compartments and a snap lid, ready-made for small jewelry. You see everything through the lid. It suits studs and small pieces and anyone who wants cheap, portable sorting.
Buy or repurpose a clear divided bead box with movable divider walls. Arrange the dividers to your piece sizes — tiny cells for studs, bigger for rings and pendants. Line cells with felt dots if needed. Snap the lid to keep everything in place, even upside down in a bag. Because the dividers move, you re-size compartments as your collection changes.
Editor's noteSet the movable dividers snug against the pieces so nothing shifts between cells when you carry or tip the box.
Skip thisDon’t leave gaps at the divider walls; tiny studs slide under loose dividers and mix, so seat them tightly.
11. Vintage Tackle Box
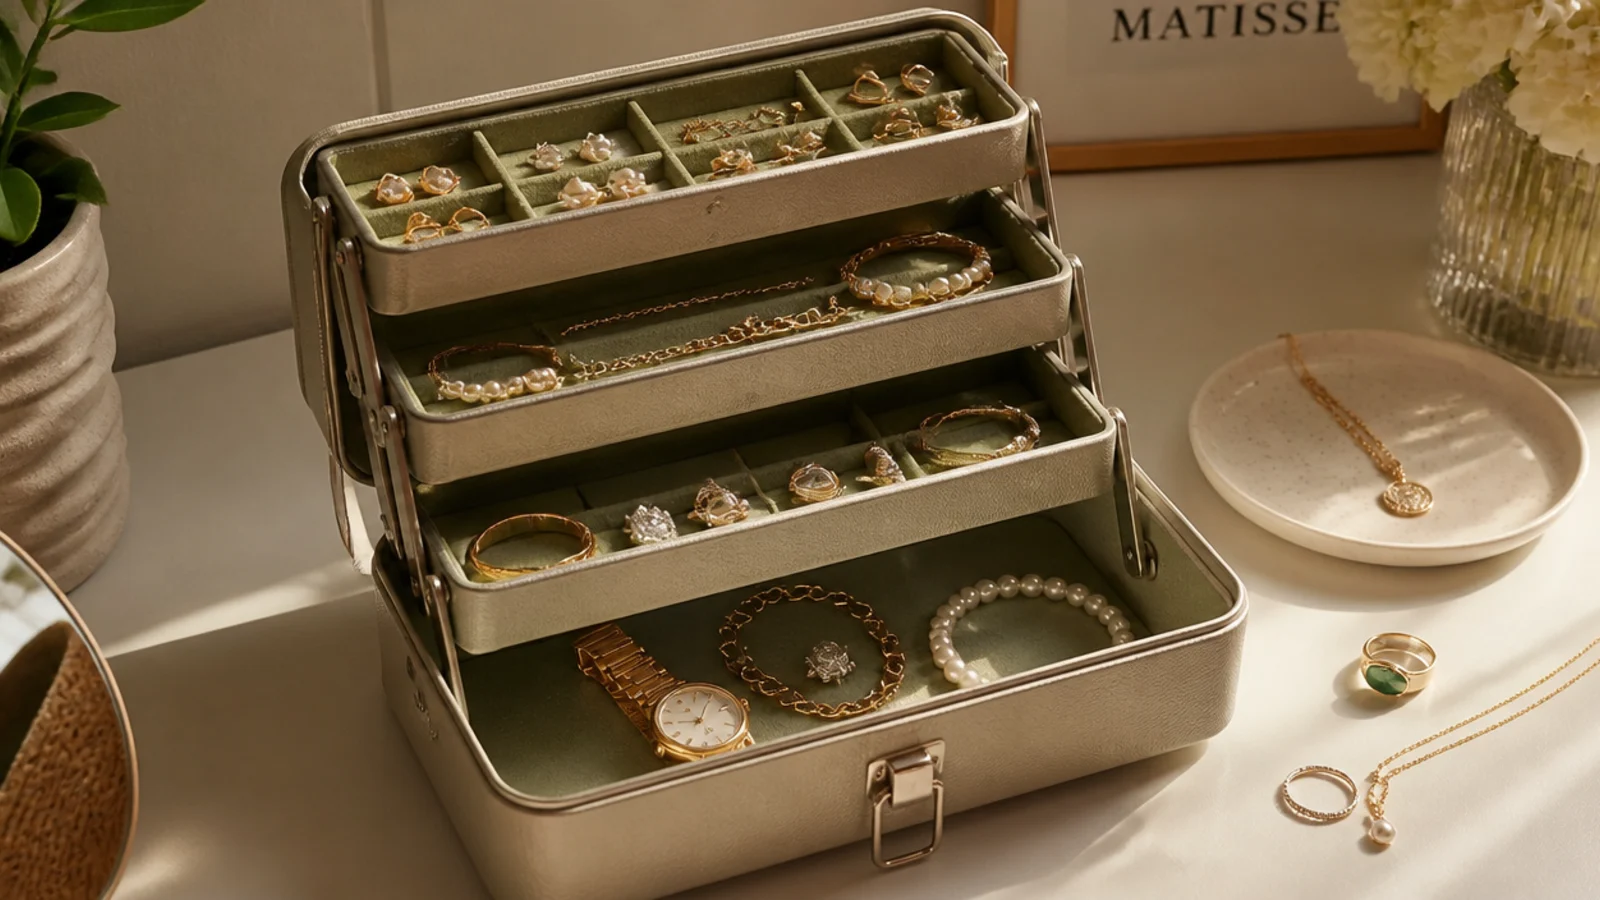
A tackle box’s fold-out tiered trays make a portable, high-capacity organizer. It opens into stepped compartments. It suits a large collection and anyone who wants it all to fold up and carry.
Thrift a tackle box with cantilever trays. Clean it and line each compartment with felt cut to fit. Sort by tier — earrings up top, rings and studs in the middle, bracelets in the deep base. The trays fold out so everything’s visible at once, then fold shut to carry. Paint the outside if you want to hide its fishing past. Keep heavy pieces in the base.
Keep the heaviest pieces in the deep bottom well so the folded box is balanced and the trays close smoothly.
Don’t load the fold-out trays with heavy cuffs; the cantilever arms strain, so keep weight low in the base.
12. Photo Box with Dividers
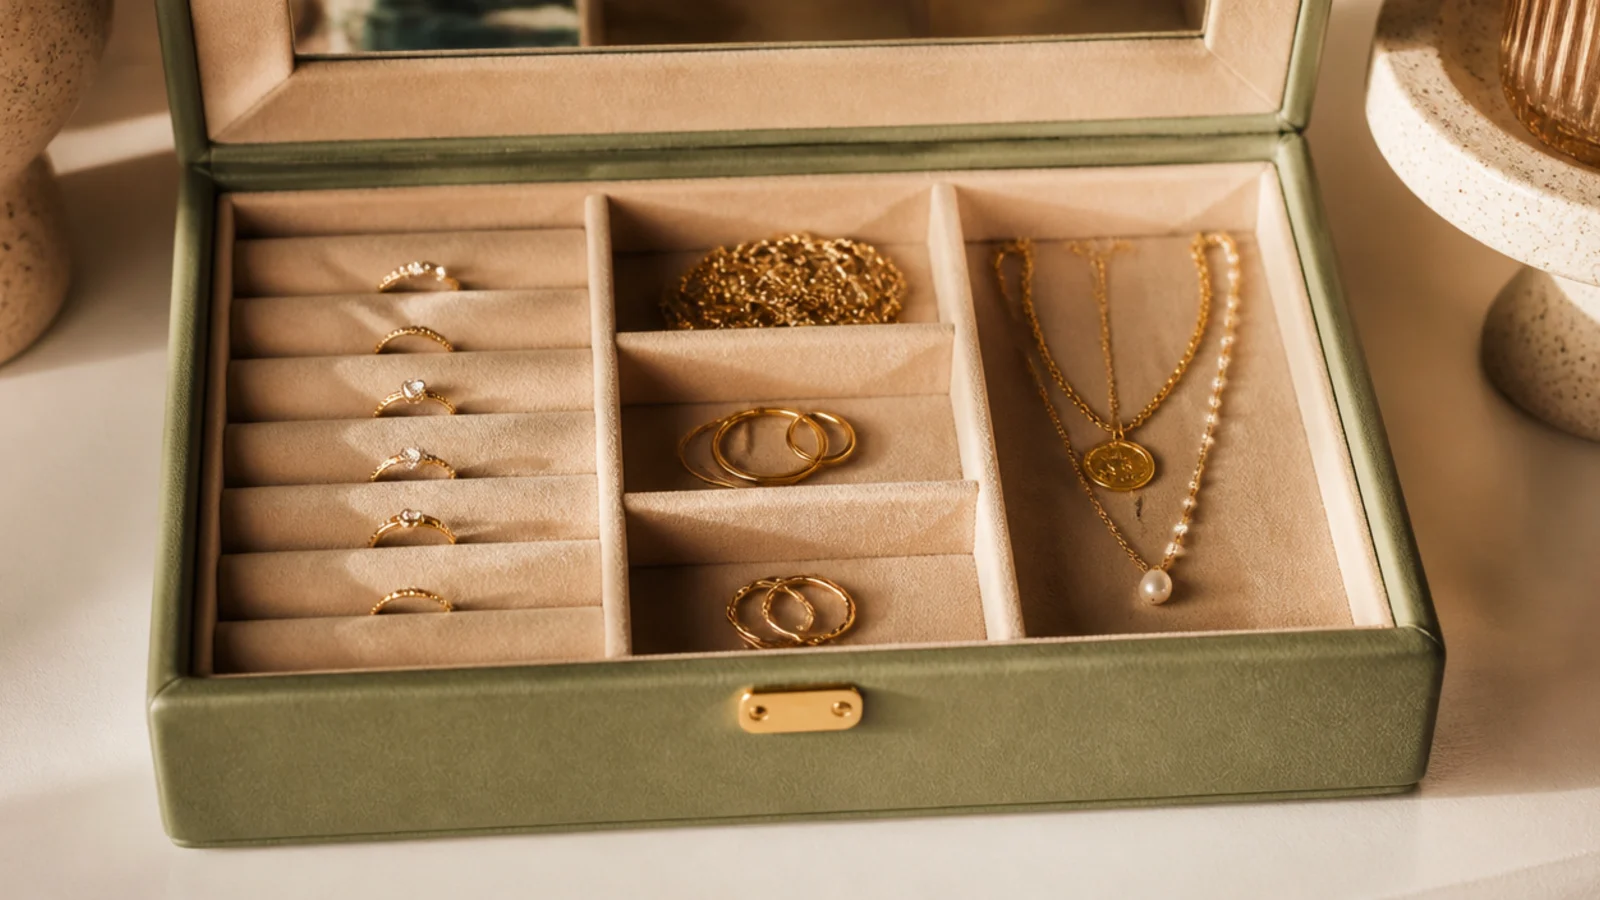
A pretty lidded photo box hides a divided jewelry organizer behind a decorative exterior. It looks like storage decor on a shelf. It suits anyone who wants their jewelry box to blend into the room.
Take a sturdy decorative photo box and line the base with felt. Build a felt-wrapped foam board divider grid to lift out. Sort pieces into the compartments and put the lid on. Because the outside is already attractive, it sits openly on a shelf without looking like a craft. Choose a box color that matches your room. Add a slit foam strip for rings.
Editor's notePick a photo box whose lid lifts fully off rather than hinges, so you can reach every compartment easily.
Skip thisDon’t choose a floppy-sided fabric photo box; it won’t hold dividers square, so pick one with rigid walls.
13. Painted Egg Carton Insert
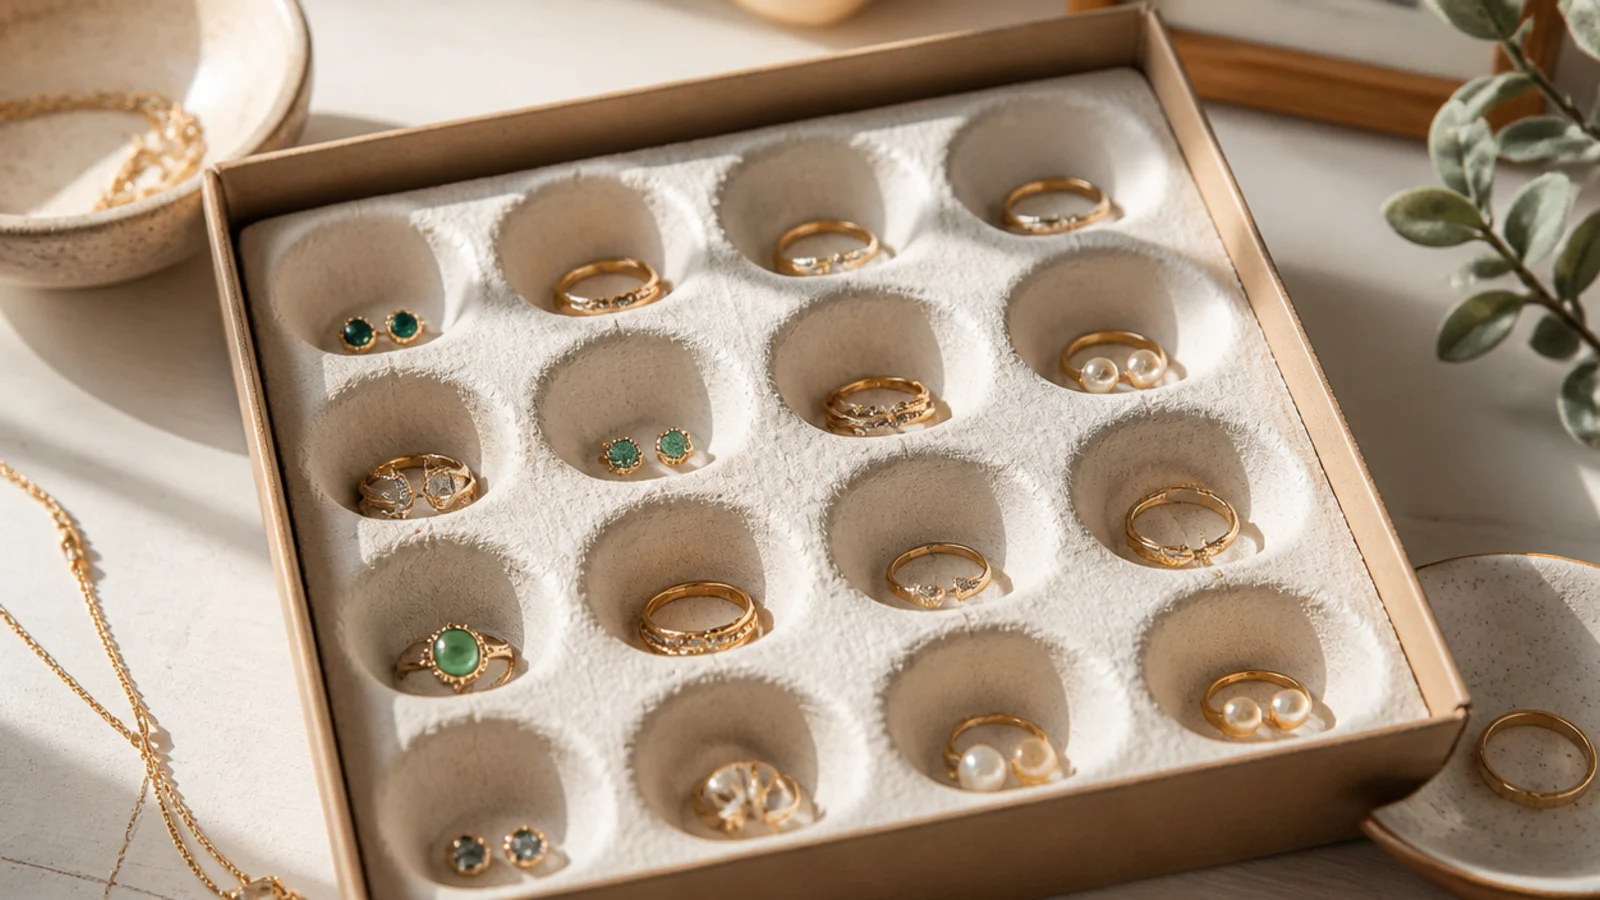
A painted egg carton is a free divider insert for a box or drawer, with a cup per pair. It’s the cheapest sorting there is. It suits studs and rings and a quick tidy-up.
Cut a clean egg carton to fit inside a shallow box or drawer. Paint the cups one soft color and seal with clear so they hold up. Set it in the box and place one ring or pair of studs per cup. For a firmer version, brush a coat of glue-water over the pulp first. Remake it any time for free. Keep it in a dry room, not a humid bathroom.
Editor's noteBrush a coat of watered-down glue over the pulp before painting so the cups stiffen and resist crushing.
Skip thisDon’t keep this in a damp bathroom; pulp absorbs moisture and softens, so use it in a dry bedroom drawer.
14. Stackable Clear Boxes
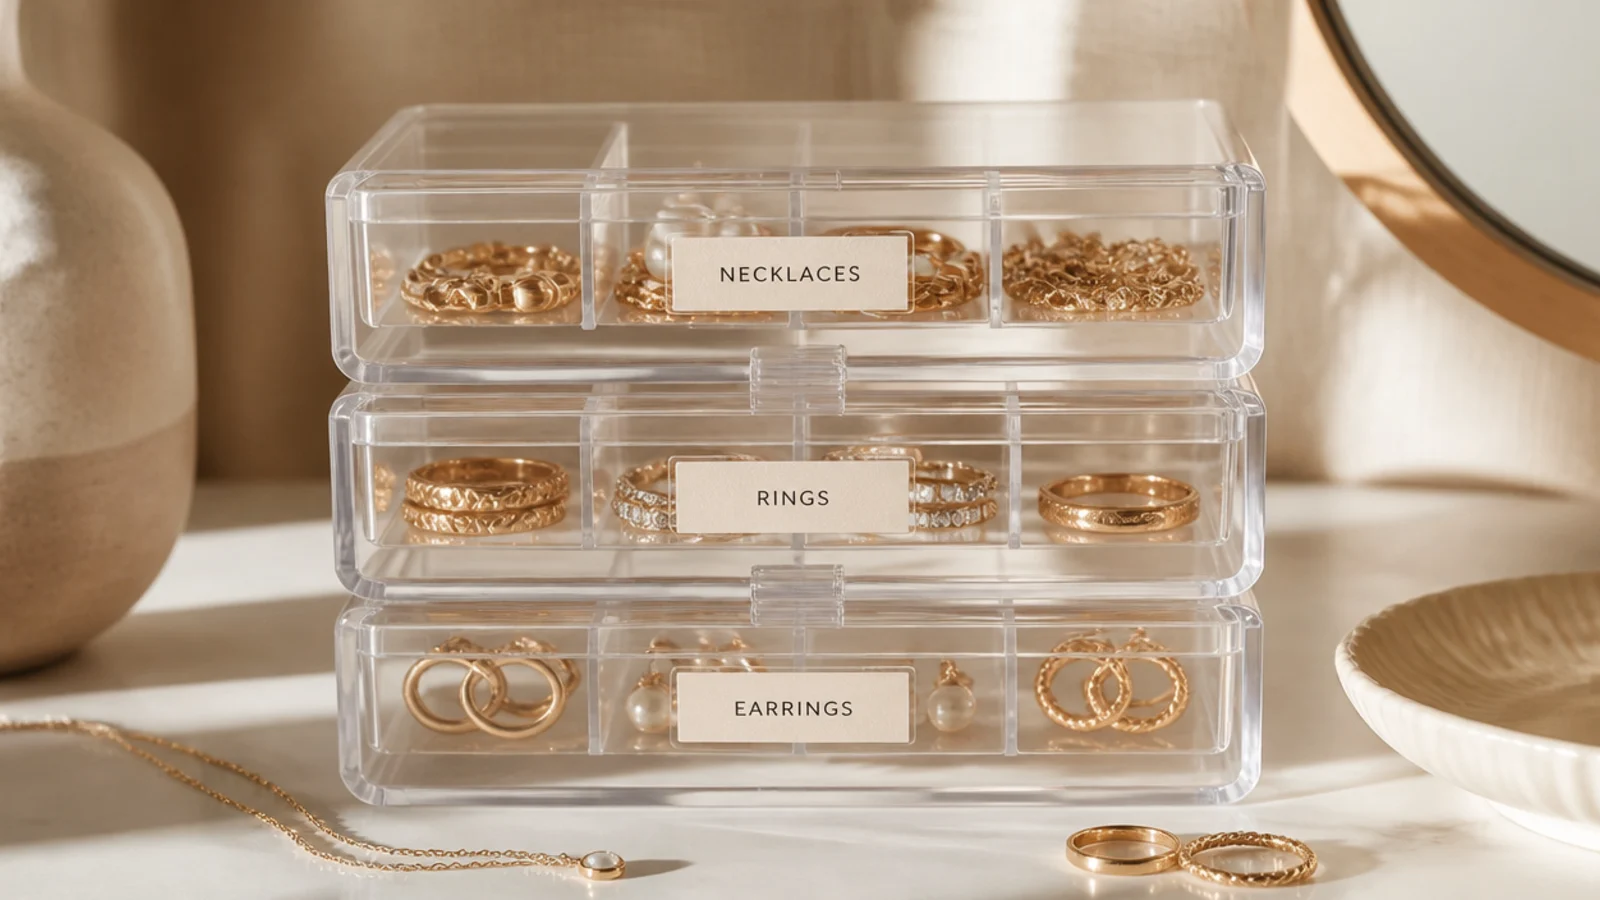
Small clear stacking boxes let you build a see-through tower sorted by category. You spot what you need without opening them. It suits a growing collection and tight shelf space.
Use small clear plastic boxes with lids that stack. Add felt-wrapped dividers or bead-box inserts to each. Assign each box a category — one for earrings, one for rings, one for necklaces coiled flat. Stack them on a shelf, most-used on top. The clear walls show contents so you don’t rummage. Label the ends if you stack several the same size.
Editor's notePut your most-used box on top of the stack so you’re not unstacking the tower every morning.
Skip thisDon’t coil delicate chains loose in a clear box; give each its own compartment or they tangle when stacked.
15. Velvet-Lined Keepsake Box
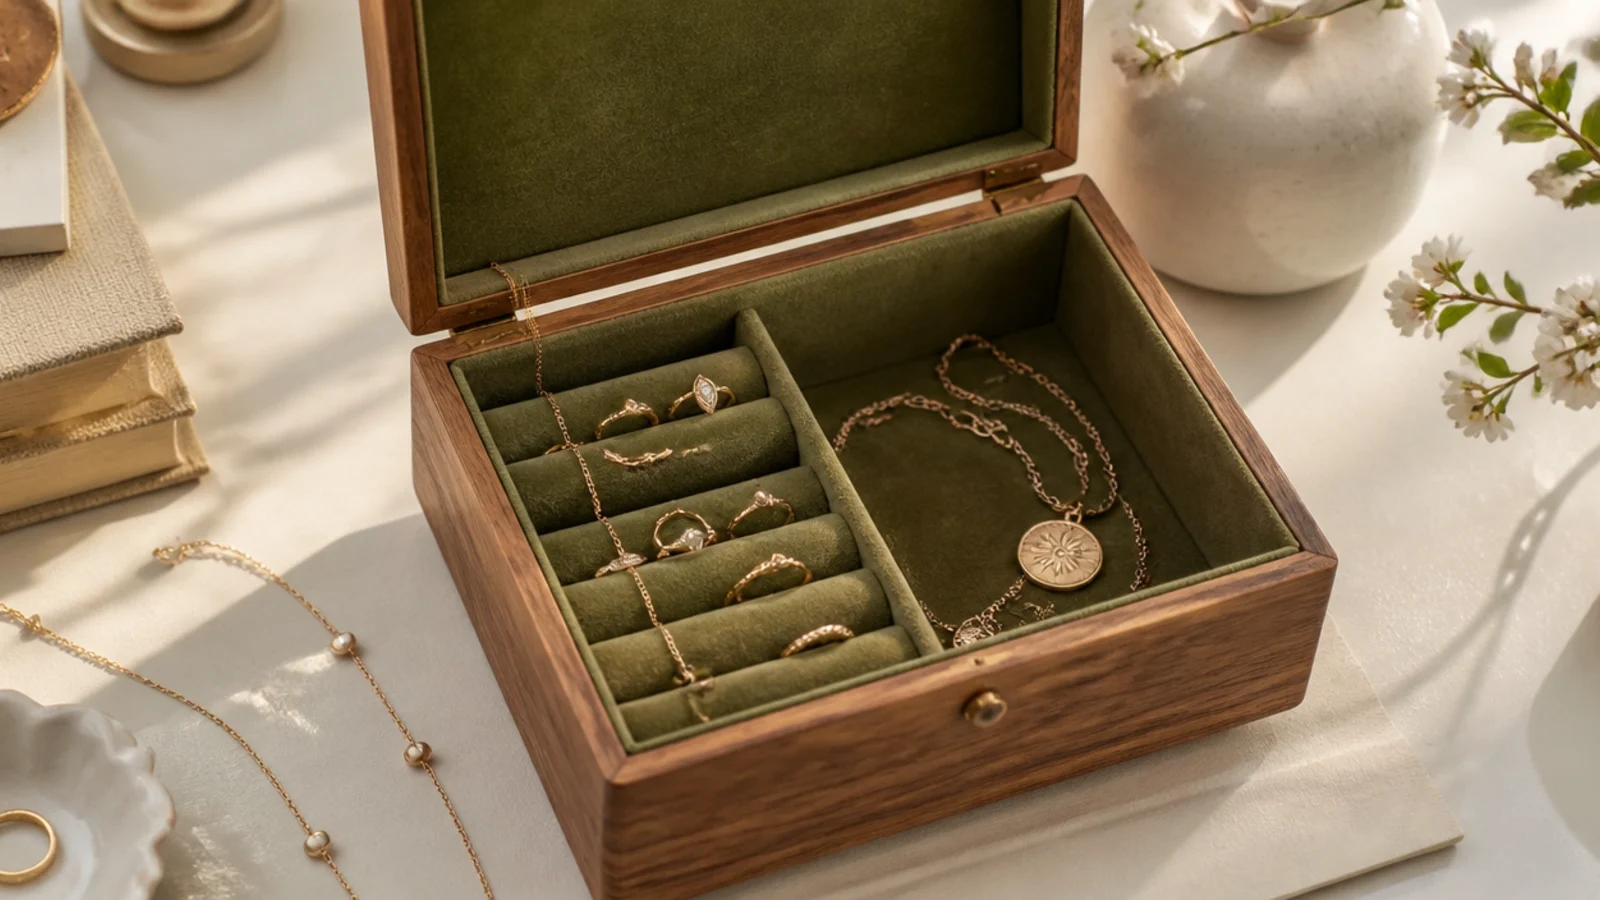
Lining a plain wooden box in velvet gives a jeweler’s-case feel on a budget. Padded ring rolls hold rings upright. It suits fine pieces you want cushioned and a little luxe.
Line a small hinged wooden box with adhesive velvet on the base, sides, and lid. Add padded ring rolls — velvet-wrapped foam strips — across one section so rings tuck upright between them. Build a shallow lift-out tray for the top and keep chains in the base below. Choose a muted velvet tone. Seal the outside wood. The velvet turns a $3 box into something that looks bought.
Use matte velvet, not shiny satin; the matte nap looks expensive and hides creases under vanity light.
Don’t glue velvet over lumps of dried glue; smooth the base first or every bump shows through the fabric.
16. Repurposed Makeup Palette
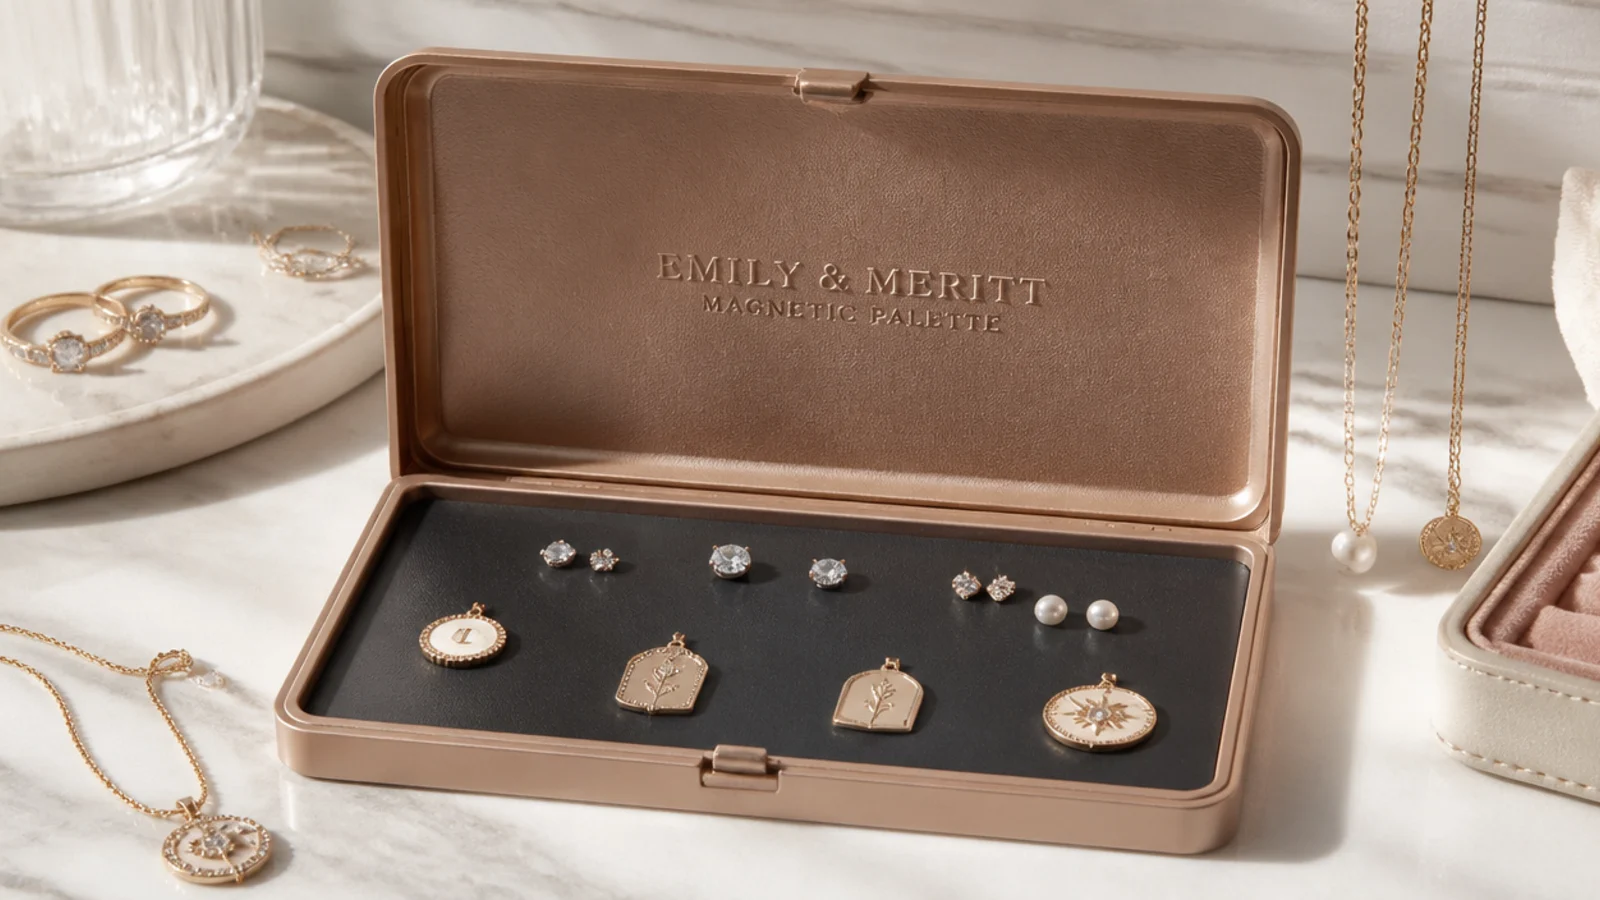
An empty magnetic makeup palette holds studs by their steel backs and lies flat in a drawer. The magnet keeps pairs put. It suits a stud collection and anyone reusing an old palette.
Clean an empty magnetic makeup palette. Press stud earrings onto the magnetic base by their steel backs so pairs sit side by side. Lay small flat pendants in too. Close the palette to keep dust out and carry it flat. Because it’s slim, it stacks in a drawer with others. Keep non-magnetic pieces elsewhere since only steel backs grab.
Editor's noteLine up pairs side by side on the magnet so you grab both at once instead of hunting for the match.
Skip thisDon’t expect it to hold gold or brass studs; only steel and nickel backs stick, so sort those out first.
17. Tea Box Compartment Organizer
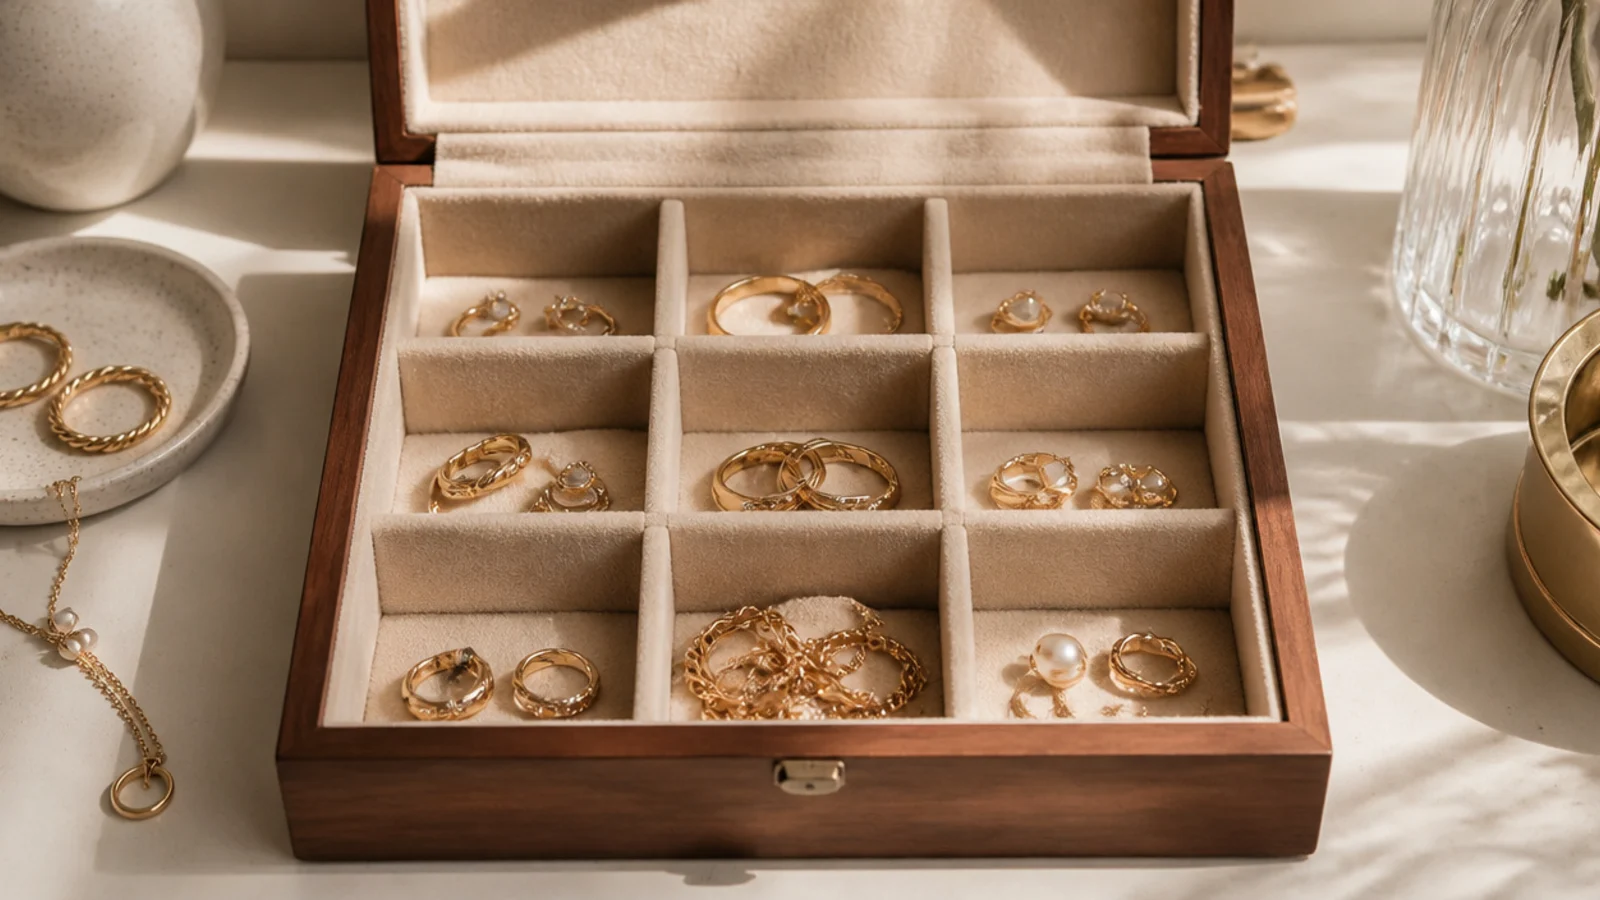
A wooden tea box comes pre-divided into neat squares, perfect for rings and studs. Just line it and go. It suits small pieces and anyone who has a tea box gathering dust.
Empty a compartmented wooden tea box and line each square with a felt piece cut to fit. Use one square per type or per pair. The hinged lid closes it up, and many have a glass or slotted top so you see in. Paint the outside if you like. The ready-made squares mean no divider building. Keep the most-worn pieces in the front row.
Cut felt squares using one compartment as a template, then mass-cut the rest so they all fit uniformly.
Don’t cram chains into the small tea squares; they’re sized for rings and studs, so hang necklaces elsewhere.
18. Cigar Box with Lid Hooks
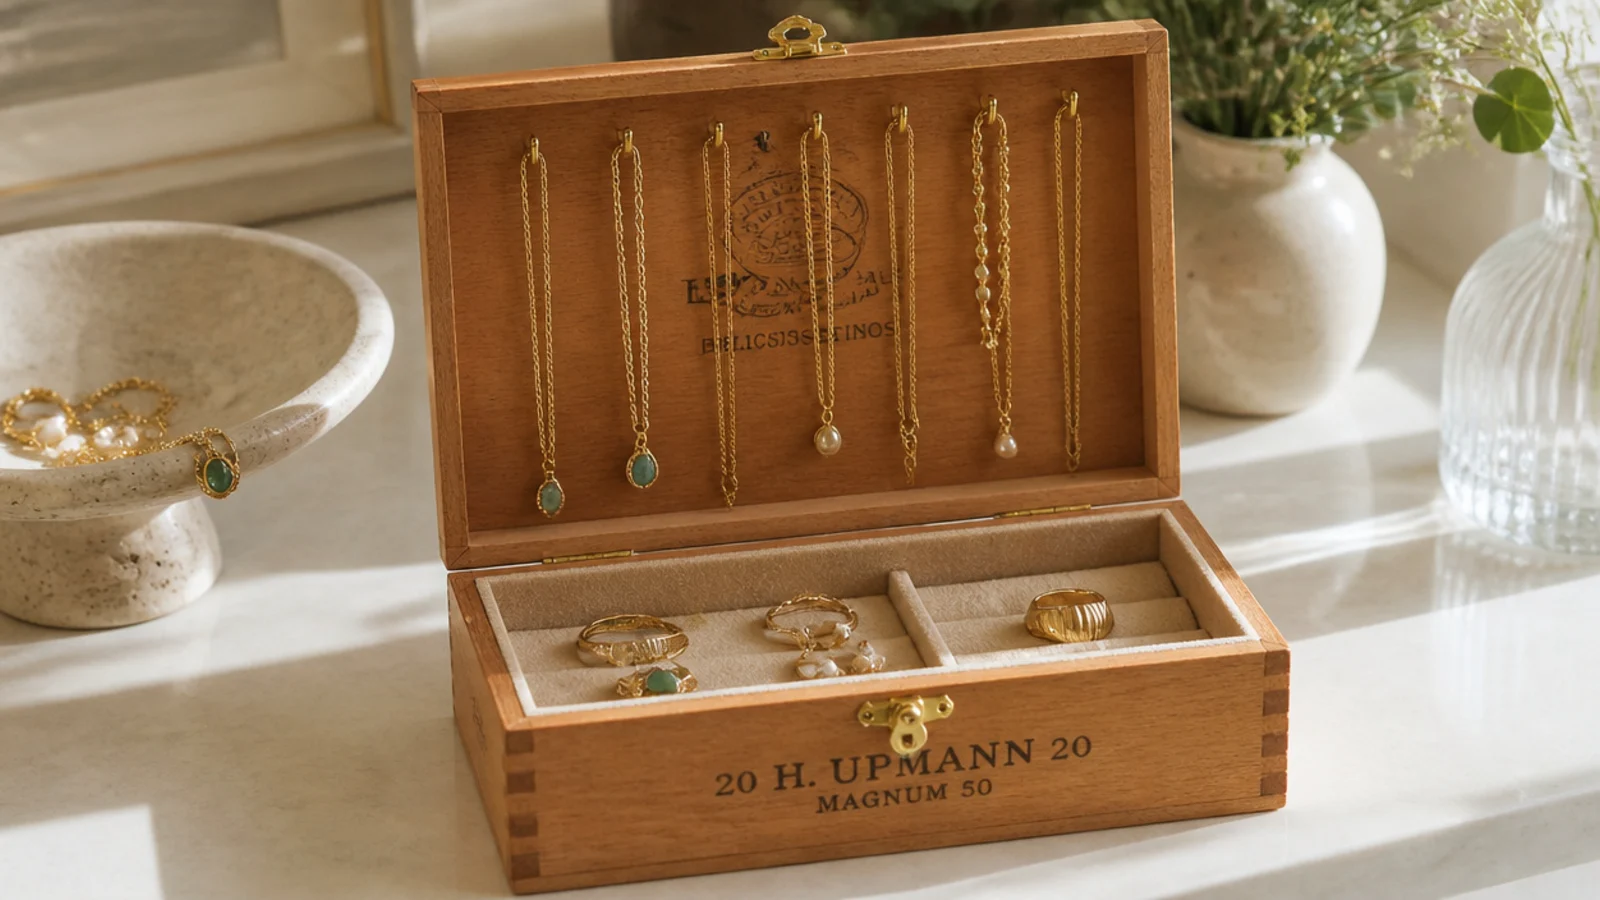
Standing a cigar box on end with hooks in the lid holds hanging necklaces plus a base of small pieces. One box does two jobs. It suits a small collection needing both hooks and compartments.
Stand a hinged cigar box on its long edge so the lid opens sideways like a cabinet. Screw small cup hooks into the inside of the lid for necklaces. Line the base with felt and add small divider squares for rings and studs. Necklaces hang down the lid, small pieces sit in the base. Add a small stand or feet so it sits upright steadily.
Editor's noteAdd small feet or a stand to the base so the upright box doesn’t tip forward when the loaded lid swings open.
Skip thisDon’t hang heavy necklaces on lid hooks in a lightweight box; the weight tips it, so keep the lid load light.
19. Spare Drawer Conversion
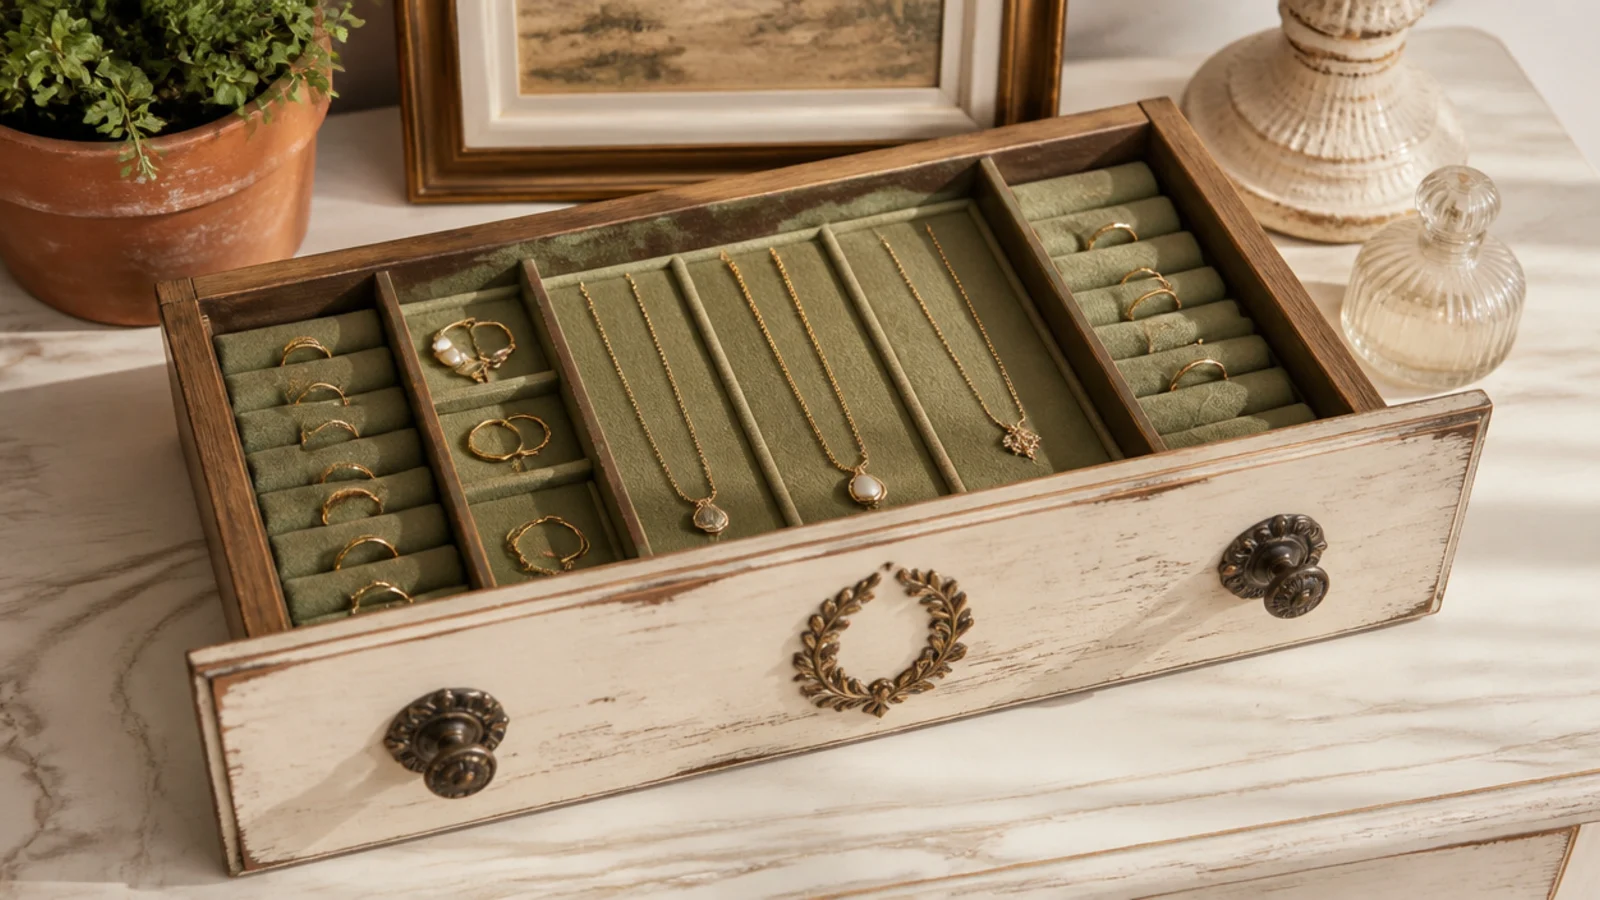
A single spare drawer becomes a large open jewelry box you set on a shelf or dresser top. It’s roomy and free. It suits a big collection and a leftover drawer from a broken dresser.
Take an orphan drawer, sand and paint it, and seal. Line the base with felt and build a felt-wrapped divider grid to lift out. Set it on a shelf or dresser as an open tray. The drawer’s existing sides make the box; you only add dividers and lining. Use the space for a full mix — a bracelet channel, ring squares, and a necklace lane. Add small feet underneath if you like.
Editor's noteAdd four small stick-on feet underneath so the converted drawer sits level and lifts easily off the shelf.
Skip thisDon’t leave old drawer runners sticking out the sides; remove or trim them so it sits flat on the shelf.
20. Hollow-Book Jewelry Box
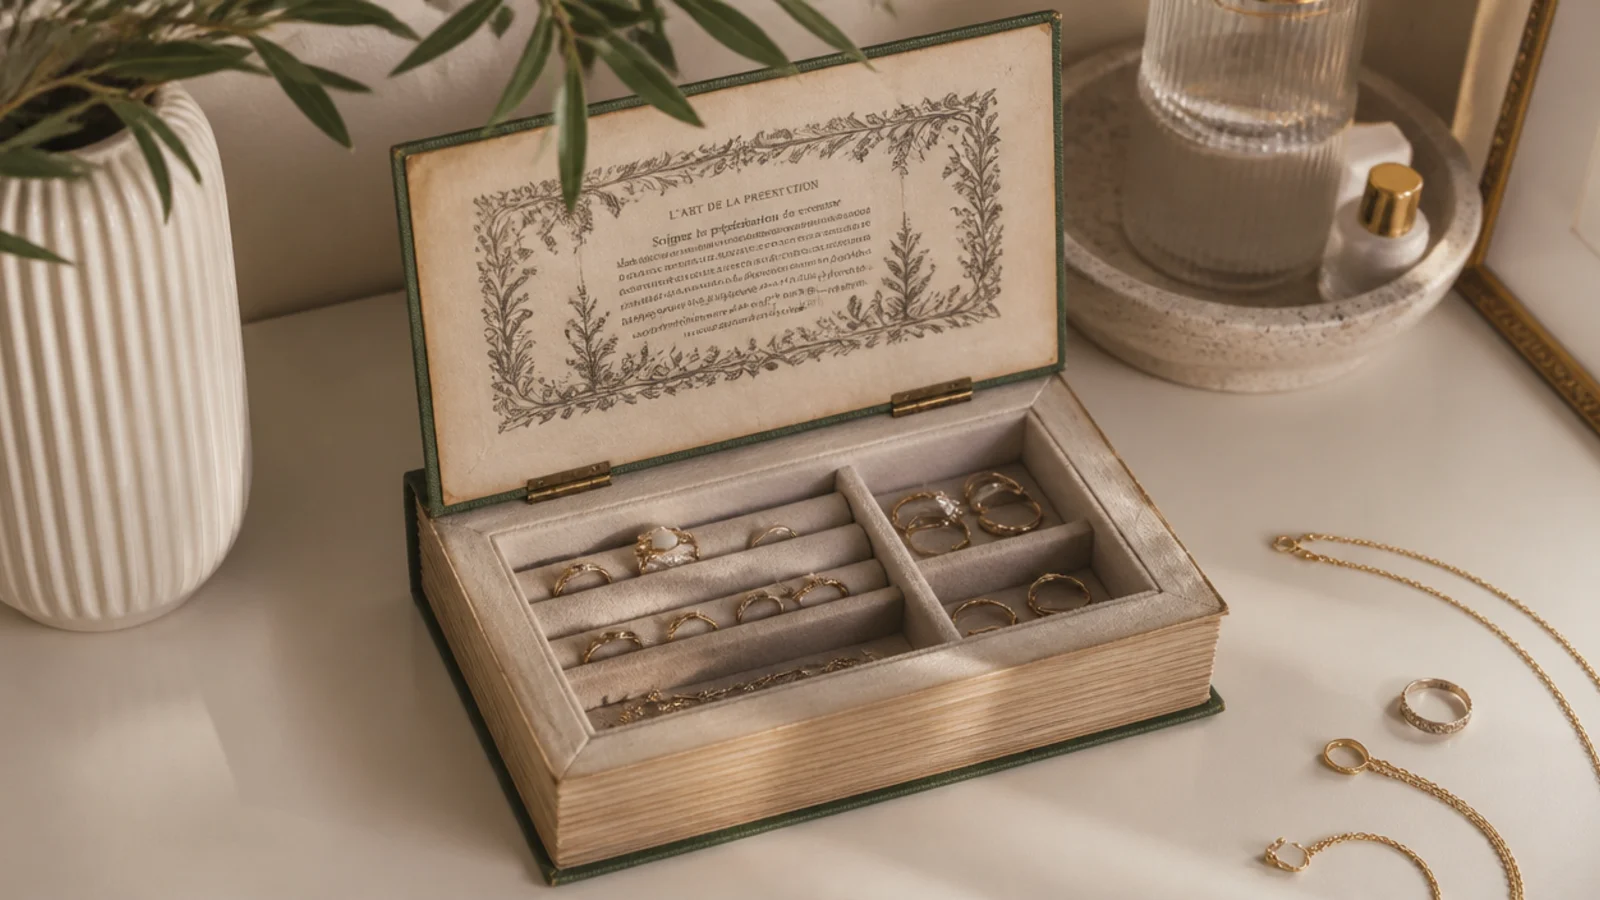
A hollowed-out book hides jewelry in plain sight on a shelf. It’s a clever disguise and a fun upcycle. It suits a few special pieces you want tucked away discreetly.
Take a thick hardcover book you don’t mind altering, glue the page edges together, and cut a rectangular cavity through the block with a craft knife. Line the cavity with felt. Store rings and small pieces inside and shelve it among other books. Because it looks like a book, it’s discreet. Keep it for a modest number of pieces, not your whole collection.
Editor's noteGlue the outer page edges before cutting so the block stays solid and the cavity walls are clean and firm.
Skip thisDon’t store your entire collection in one book safe; keep it to a few pieces so the book still closes flat.
21. Cutlery Caddy Carry Box
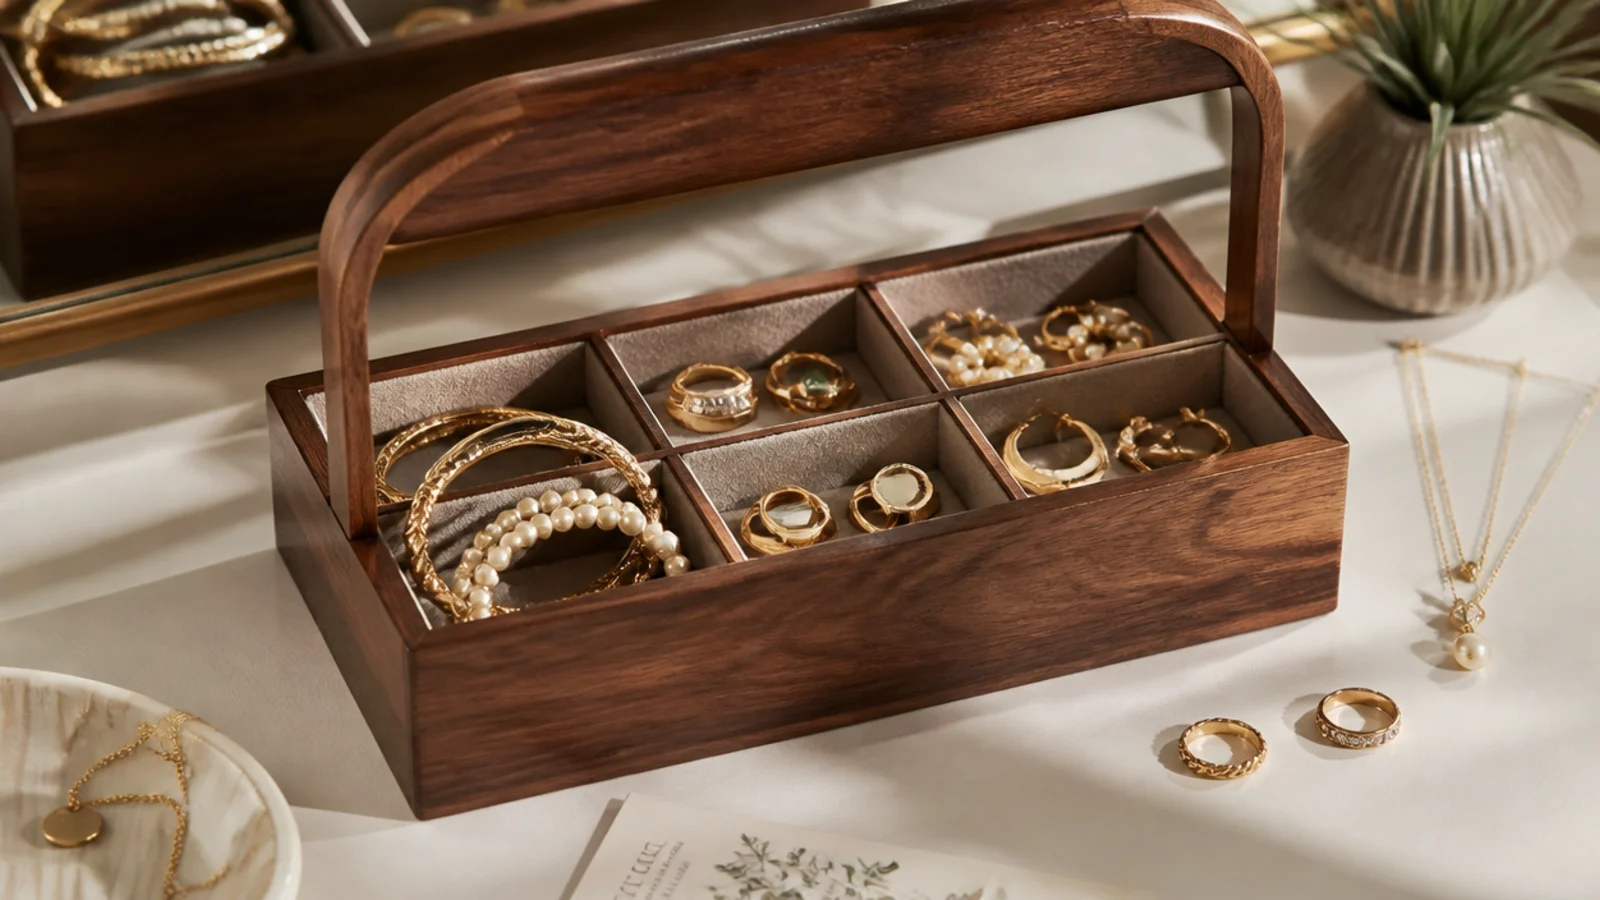
A cutlery caddy with a center handle is a divided box you can carry room to room. The handle makes it portable. It suits someone who gets ready in different spots or wants a movable kit.
Paint and seal a wooden cutlery caddy and line each section with felt. Use the deep end sections for bracelets and coiled necklaces and the shallow ones for rings and studs. The center handle lets you carry the whole thing to a mirror or table. Add a slit foam strip for rings in one section. Keep it light enough to lift comfortably when full.
Editor's noteKeep heavier pieces in the sections nearest the handle so the caddy balances when you pick it up.
Skip thisDon’t load a caddy so heavy it’s a strain to carry; the point is portability, so keep the total weight sensible.
22. Painted Hardware Organizer
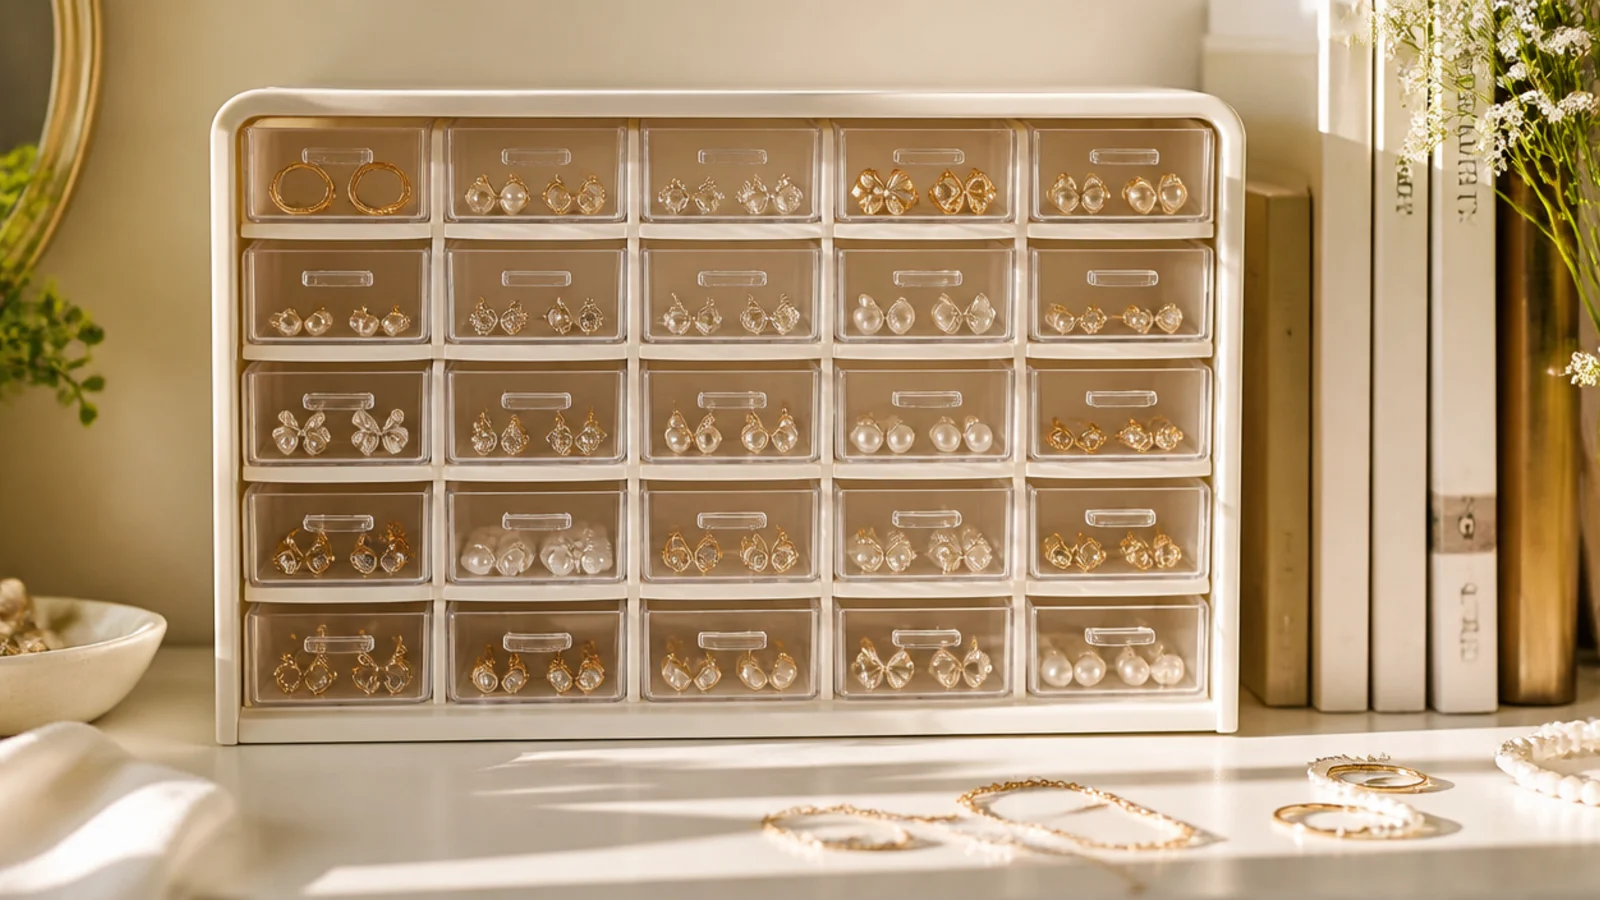
A small-parts hardware organizer has rows of tiny drawers, ideal for studs, charms, and rings. A coat of paint hides its garage origin. It suits a big collection of tiny pieces that need many slots.
Take a plastic small-parts organizer with clear drawers and paint the frame and drawer fronts one color, leaving a viewing strip if you like. Line each drawer with a felt scrap. Sort one type per drawer — studs, charms, spare backs, rings. The many small drawers keep tiny pieces from mixing. Label discreetly if needed. Set it on a dresser or shelf.
Leave a small unpainted window on each drawer front so you can still see what’s inside at a glance.
Don’t paint the drawer runners; paint on the sliding tracks makes the little drawers stick and jam.
23. Nesting Gift-Box Set
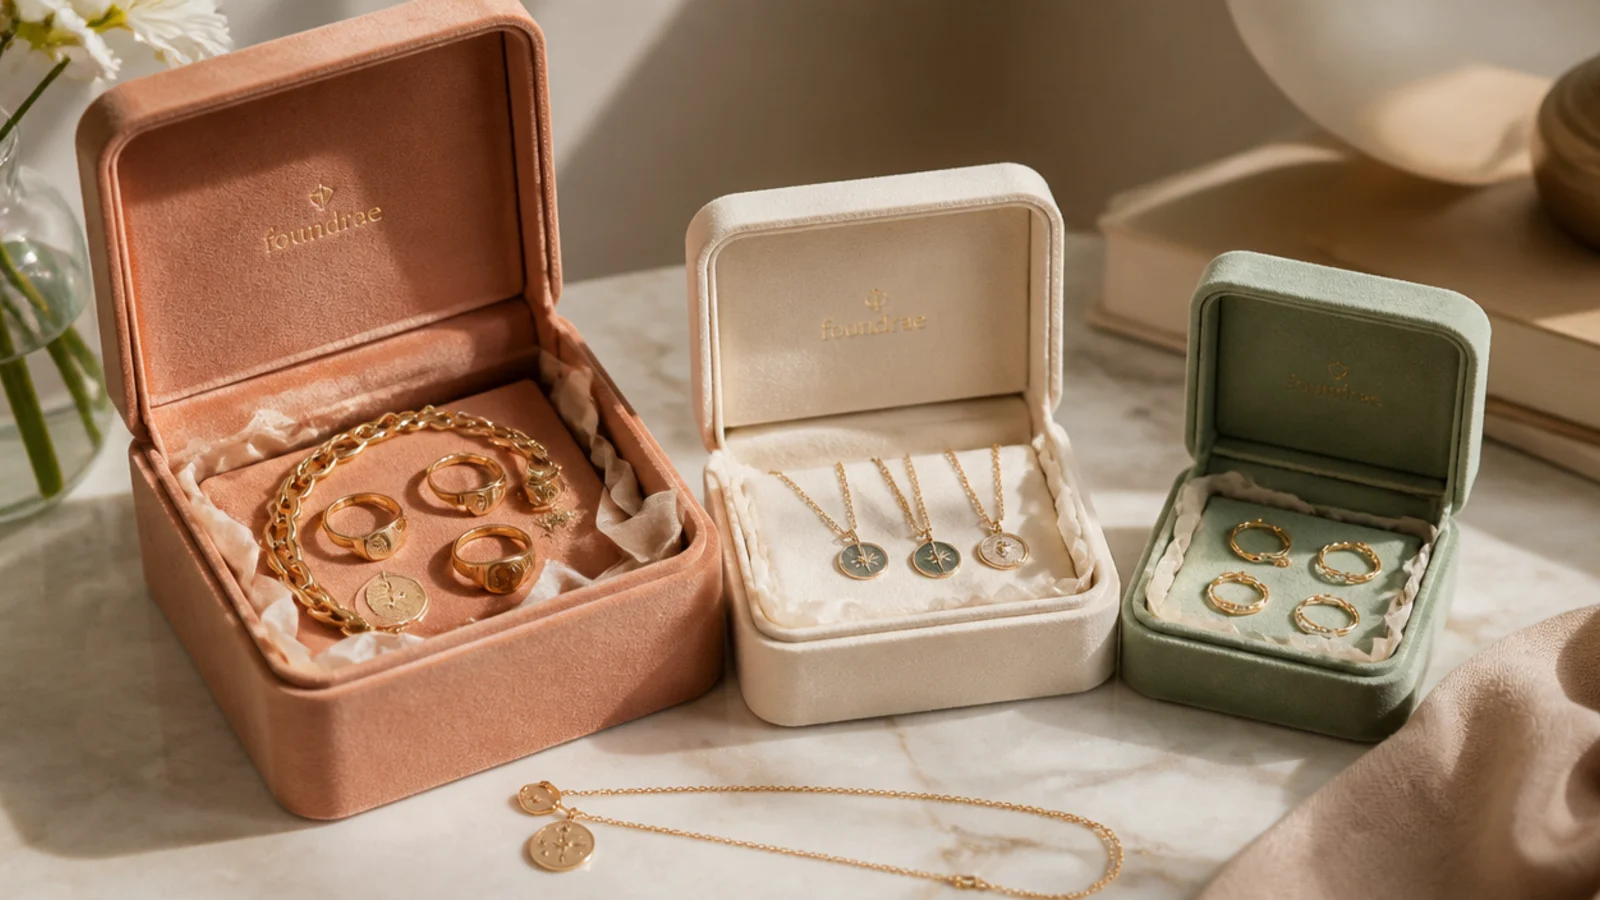
A set of nesting gift boxes gives you graduated lidded storage that tucks away small to large. They nest to save space. It suits a modest collection and anyone reusing pretty gift boxes.
Take a set of sturdy nesting gift boxes and line each with felt over the base. Assign each size a category — the largest for bracelets and necklaces coiled flat, the middle for rings, the smallest for studs. Stack them nested when not in use or line them up in a drawer. Because they have lids, everything stays dust-free. Choose boxes in one color family.
Editor's noteCoil necklaces flat in the largest box with tissue between layers so they don’t tangle or scratch.
Skip thisDon’t use thin single-use gift boxes; they crush fast, so pick rigid ones that hold their shape with a lid.
24. Matchbox-Slot Ring Drawer
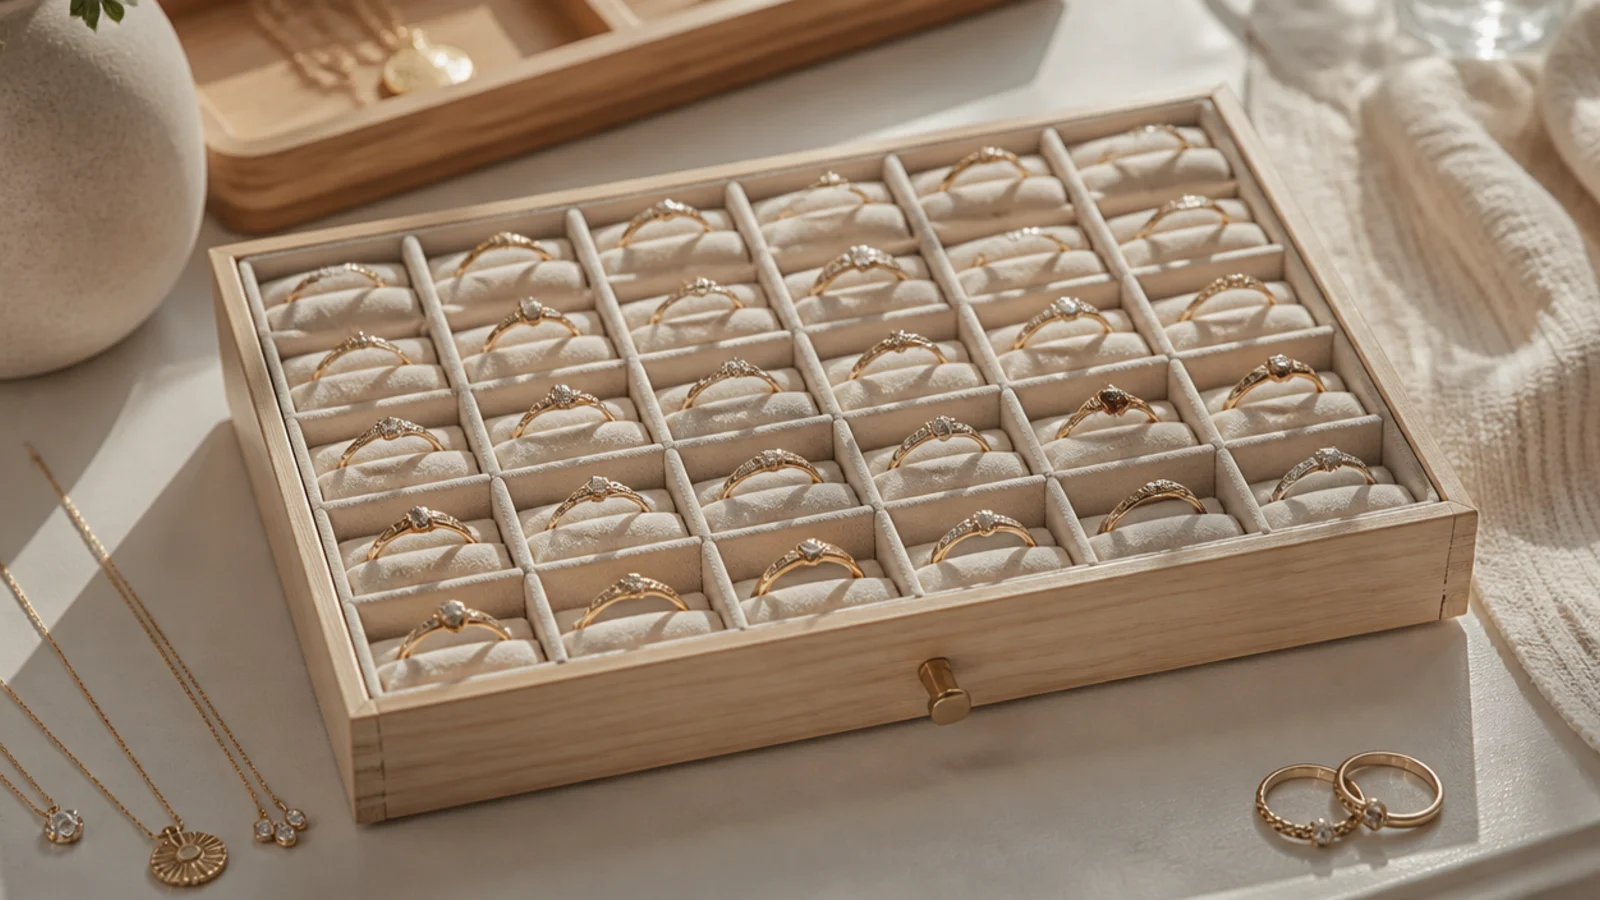
Rows of small slots in a shallow box stand rings up individually so you see them all. It’s like a ring display case for pennies. It suits a ring lover with many bands.
Fit a shallow box with a grid of small slots made from felt-wrapped cardboard or foam strips, each just wide enough for one ring to stand on edge. Line the base with felt. Tuck each ring into its own slot so it stands upright. The rows show every ring at a glance. Size the slots to your band widths. Keep it in a drawer or on the vanity.
Editor's noteMake the slots just wider than your ring bands so each ring stands firmly instead of leaning or falling flat.
Skip thisDon’t make the slots too deep; rings should stand with their tops visible, not sink out of sight.
25. Clear Acrylic Stacking Box
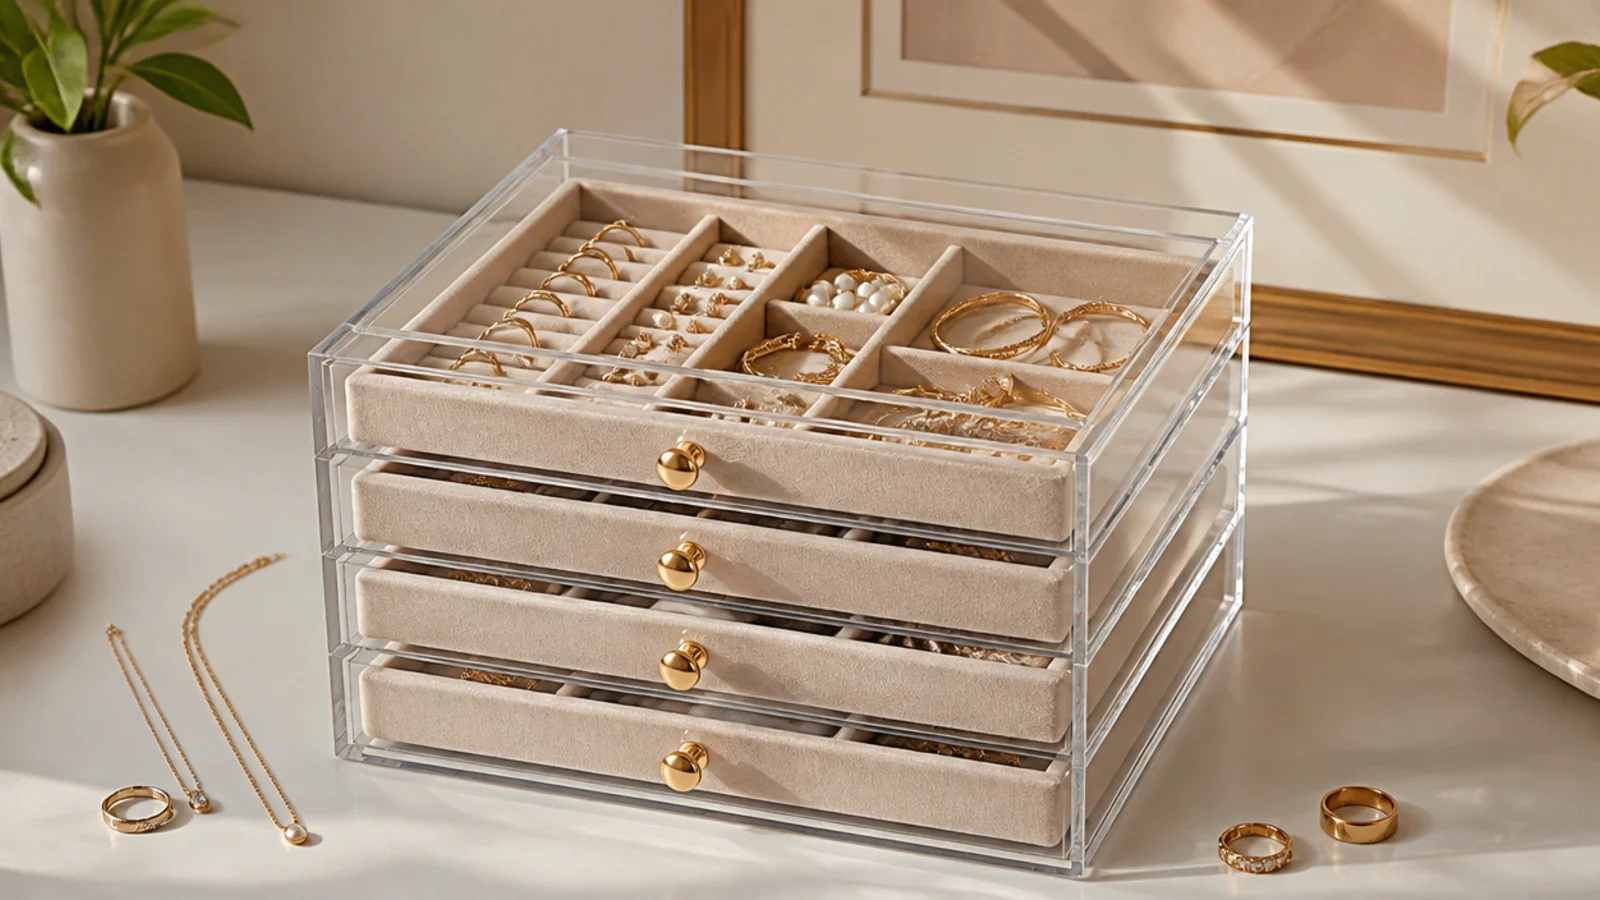
A clear acrylic box with stacking velvet trays shows everything and looks modern. The trays lift out to reach lower layers. It suits a display-minded person who still wants dust protection.
Use a budget clear acrylic box with removable trays, or add velvet-lined inserts to a plain one. Line each tray with velvet. Sort by tray — rings and studs up top, bracelets below. The clear walls show contents; the lid keeps dust off. Keep fingerprints wiped so it stays crisp. Because it’s transparent, style the trays neatly since everything’s on view.
Editor's noteKeep the acrylic wiped clean with a microfiber cloth; on a clear box every fingerprint shows and dulls the look.
Skip thisDon’t overfill the trays; since everything’s visible through the acrylic, a crammed box looks messy at a glance.
26. Two-Layer Keepsake Box
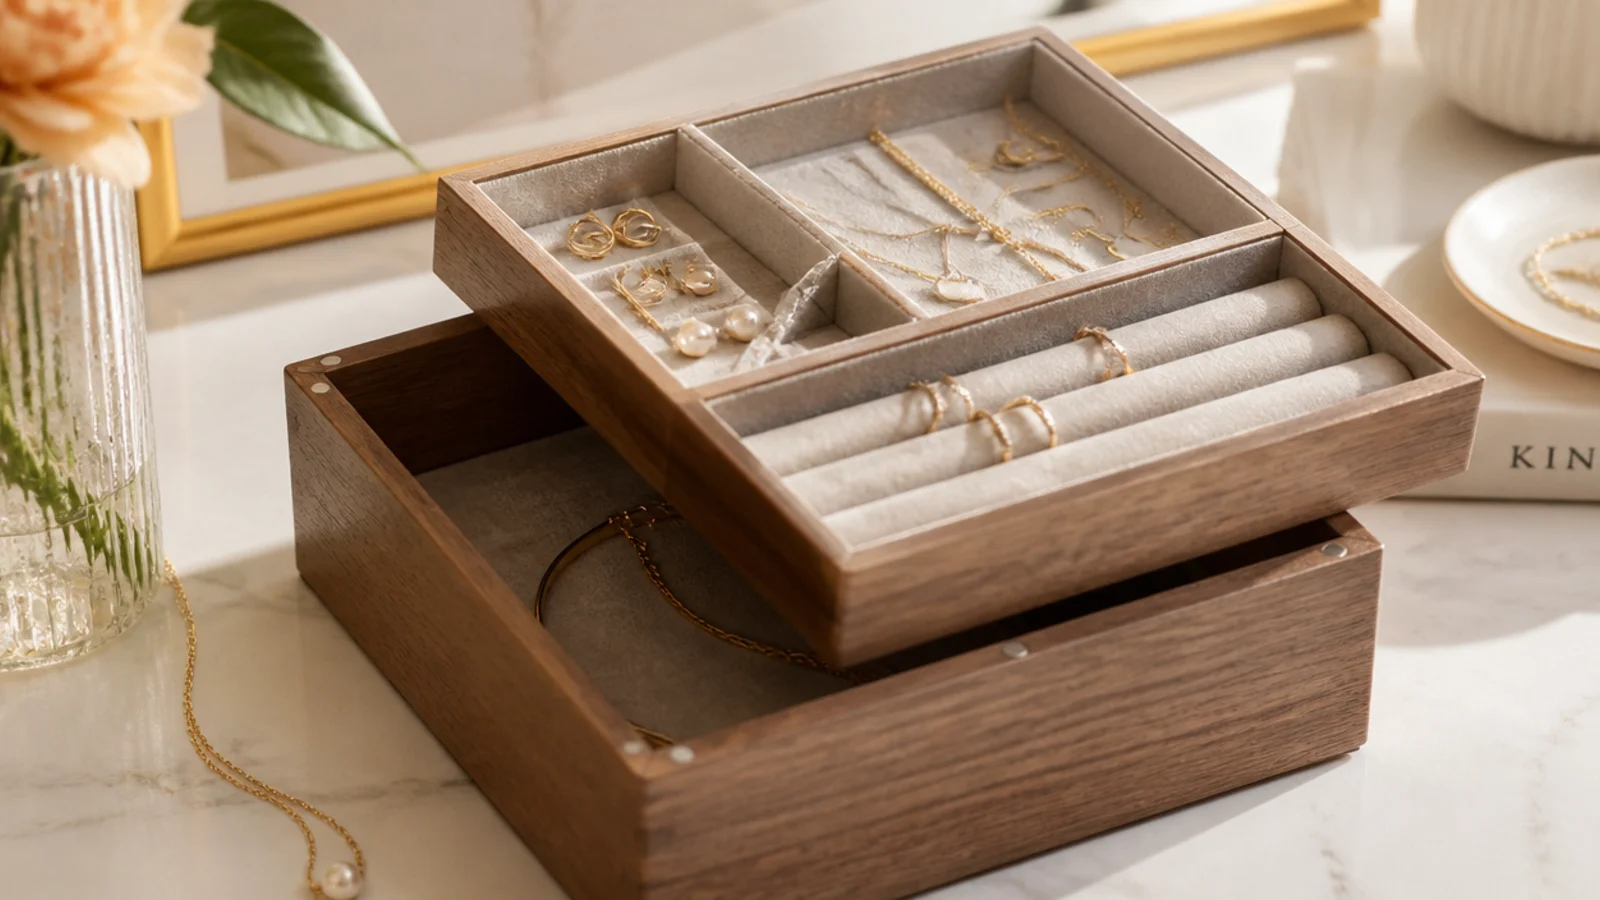
A box with a lift-out top tray sorts daily pieces up top and occasion pieces below. Two layers double the capacity. It suits a mixed collection you want split by how often you wear it.
Fit a deeper hinged box with a shallow lift-out tray that rests on inner rails or ledges. Line both the tray and the base with felt and add dividers to each. Keep daily rings, studs, and a bracelet in the top tray; store occasion necklaces and heirlooms in the deeper base. Lift the tray out to reach below. Seal the outside wood for a finished look.
Editor's noteSet the top tray on thin ledges glued inside the box so it lifts out cleanly and sits level when in place.
Skip thisDon’t make the top tray a tight friction fit; it should lift out easily, not need prying every time.
27. Repurposed Desk Organizer
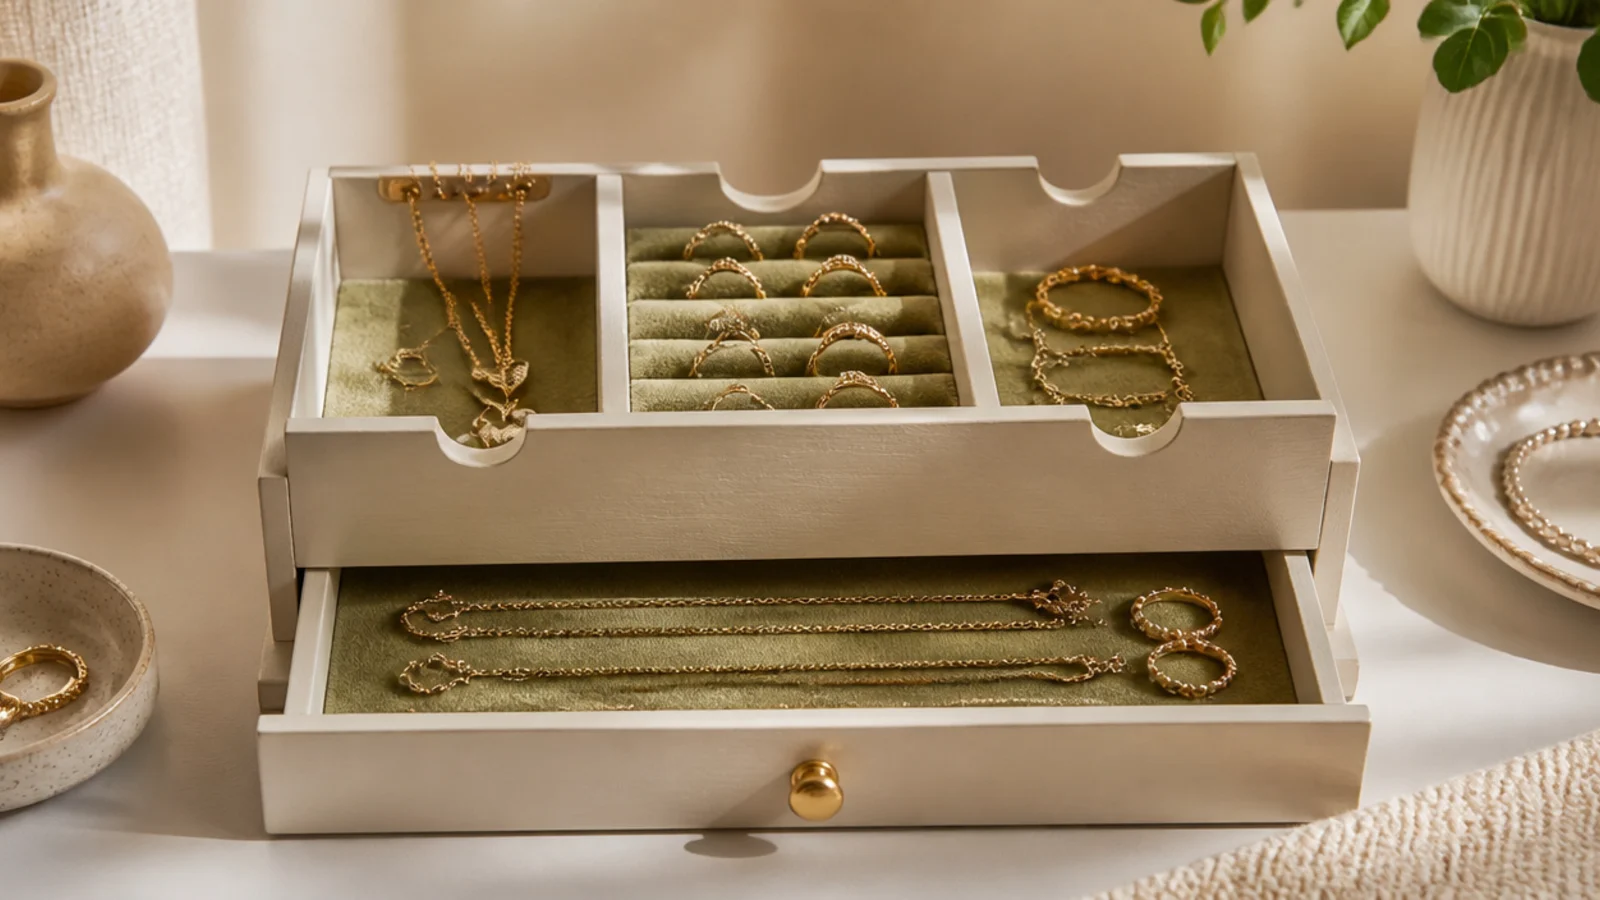
A desk organizer’s mix of open cubbies and a small drawer sorts several jewelry types in one unit. It’s built for small items already. It suits a dresser and a collection with variety.
Paint and seal a wooden desk organizer and line the compartments and drawer with felt. Use the open cubbies for coiled bracelets and a ring dish, the pen slots for standing rings or bar earrings, and the drawer for studs. The built-in variety of spaces handles different types without any building. Set it where you get ready so each piece has a home.
Editor's noteUse the narrow pen slots to stand rings or bar earrings on edge so they’re visible instead of piled.
Skip thisDon’t leave the pen slots bare; line them with felt or thin pieces slide down and scratch at the bottom.
28. Stacked Tray Storage Box
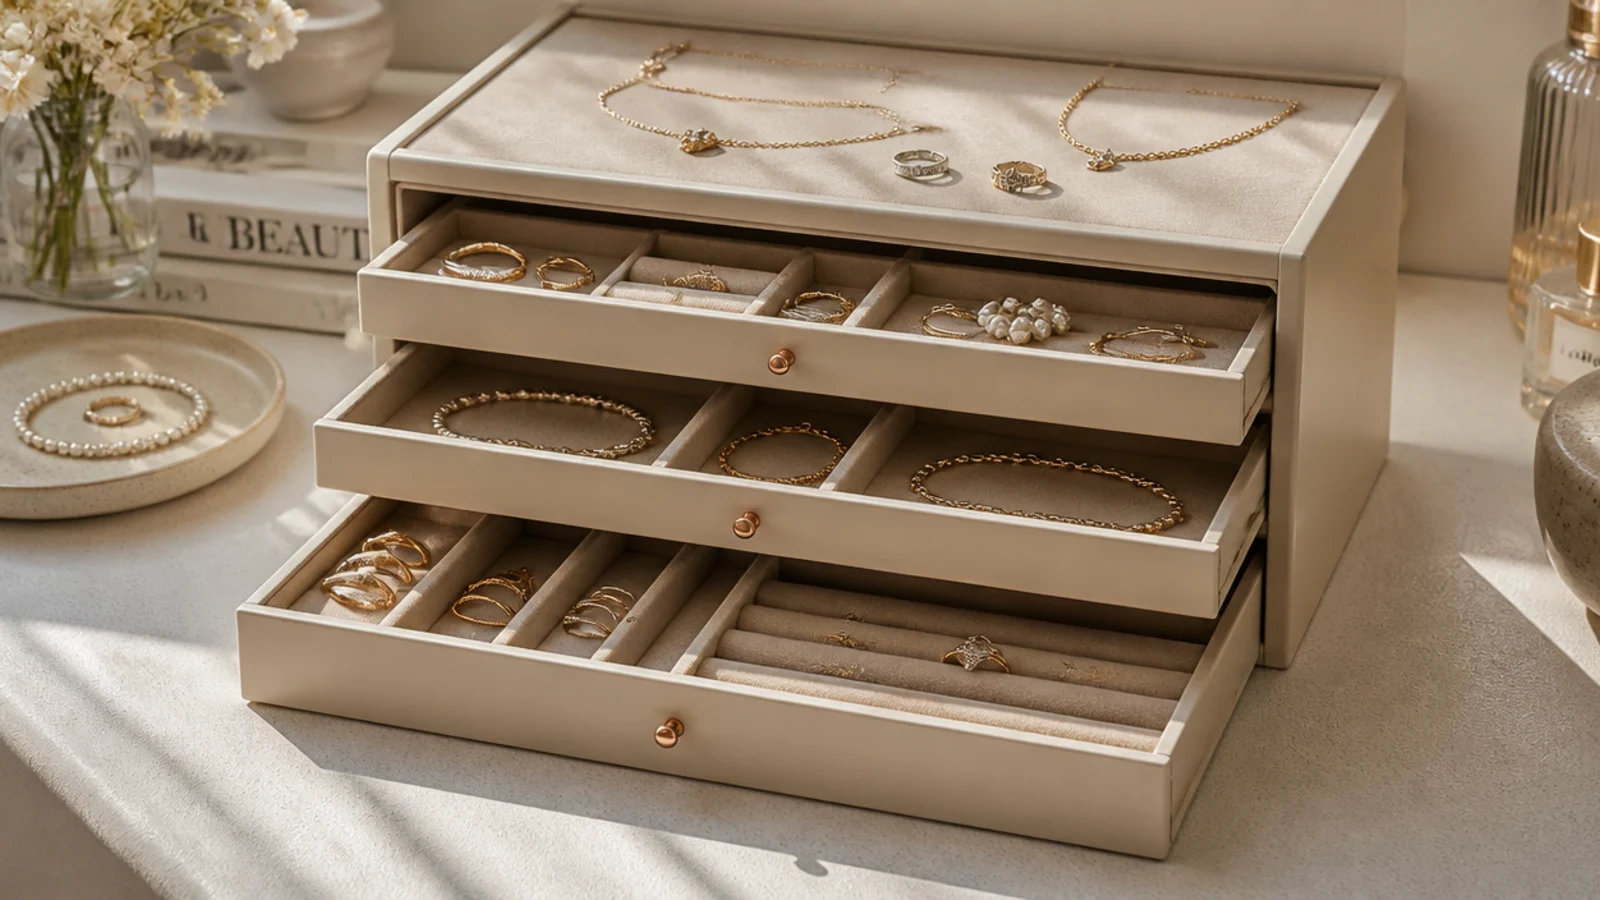
A frame holding several shallow pull-out trays gives lots of sorted layers in a small footprint. Each tray slides out to view. It suits a large collection that needs many flat compartments.
Use a box frame with shallow stacking trays, or build one from thin boxes on rails. Line each tray with felt and add dividers. Sort by tray — earrings, rings, bracelets, necklaces coiled flat. Pull out one tray at a time to see its contents. Because they stack, the whole thing takes little surface. Keep the heaviest tray at the bottom for stability.
Editor's noteDevote one flat tray to necklaces laid straight in individual lanes so chains stay untangled between layers.
Skip thisDon’t stack the trays so high the tower tips when you pull the top one; keep it low and put weight at the base.
29. Pill-Organizer Travel Box
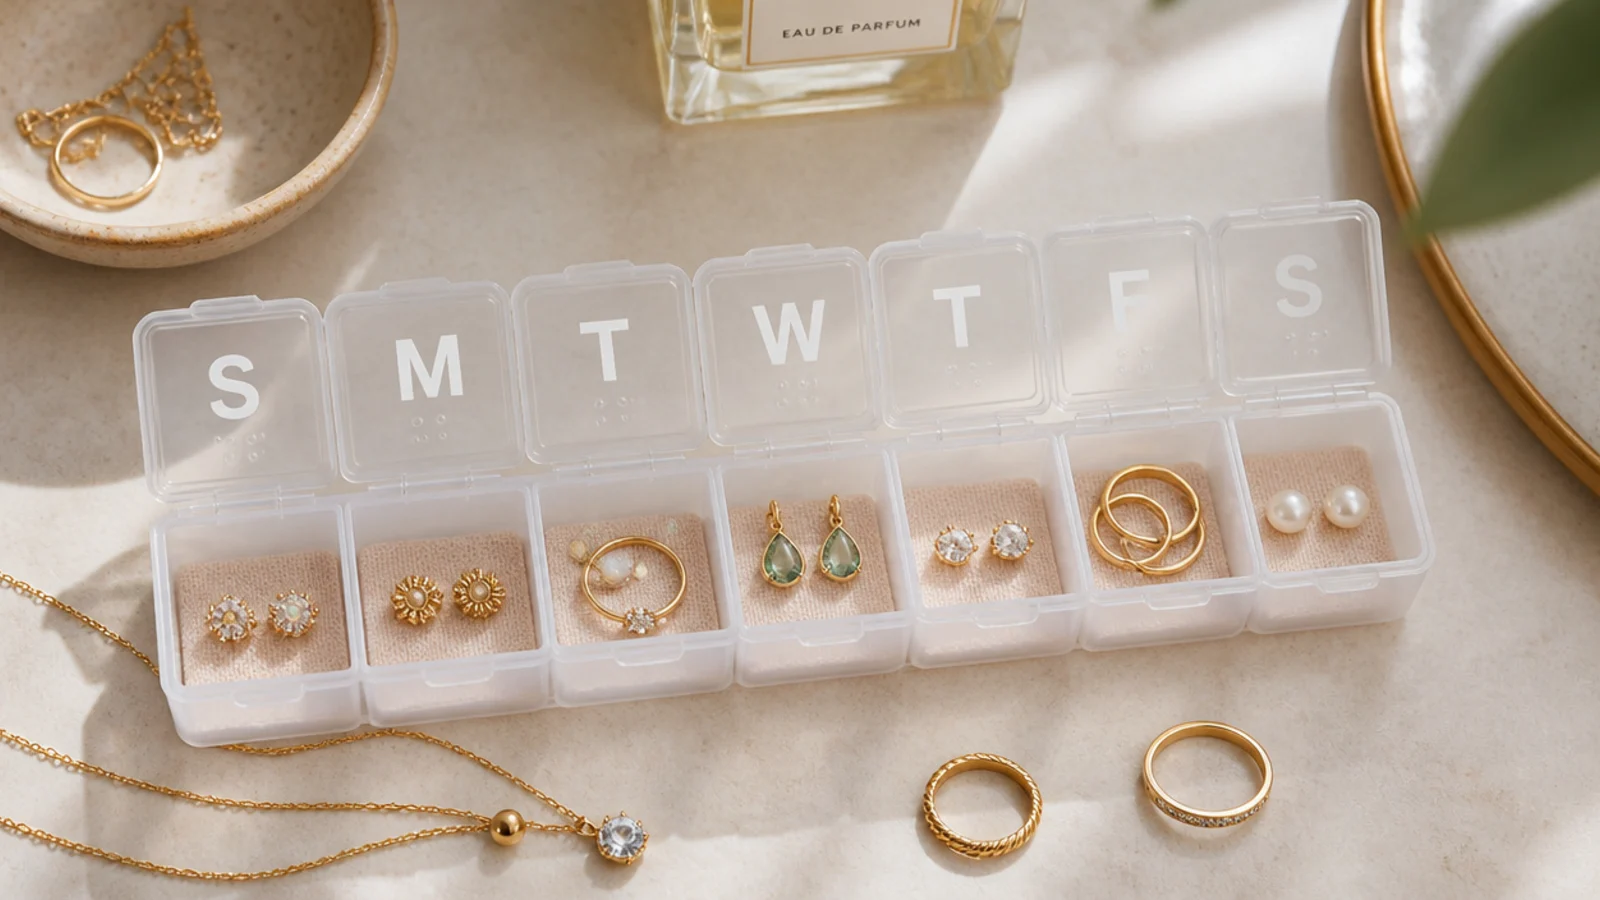
A weekly pill organizer’s snap-lid compartments are perfect tiny travel cells for studs and rings. Each lid keeps its pair secure. It suits travel and small pieces on a truly tiny budget.
Clean a weekly pill organizer and use each compartment for one pair of studs or a ring, snapping the individual lids shut. The separate lids mean pieces can’t migrate between cells in a bag. Line cells with a felt dot if you want extra cushioning. It’s slim enough to slip in any pouch. Detach the days into separate mini boxes if the organizer allows.
Snap each compartment’s own lid so pairs stay together even if the whole organizer gets tossed in a bag.
Don’t use it for anything bigger than studs and slim rings; larger pieces won’t let the small lids close.
30. Glass-Lid Display Box
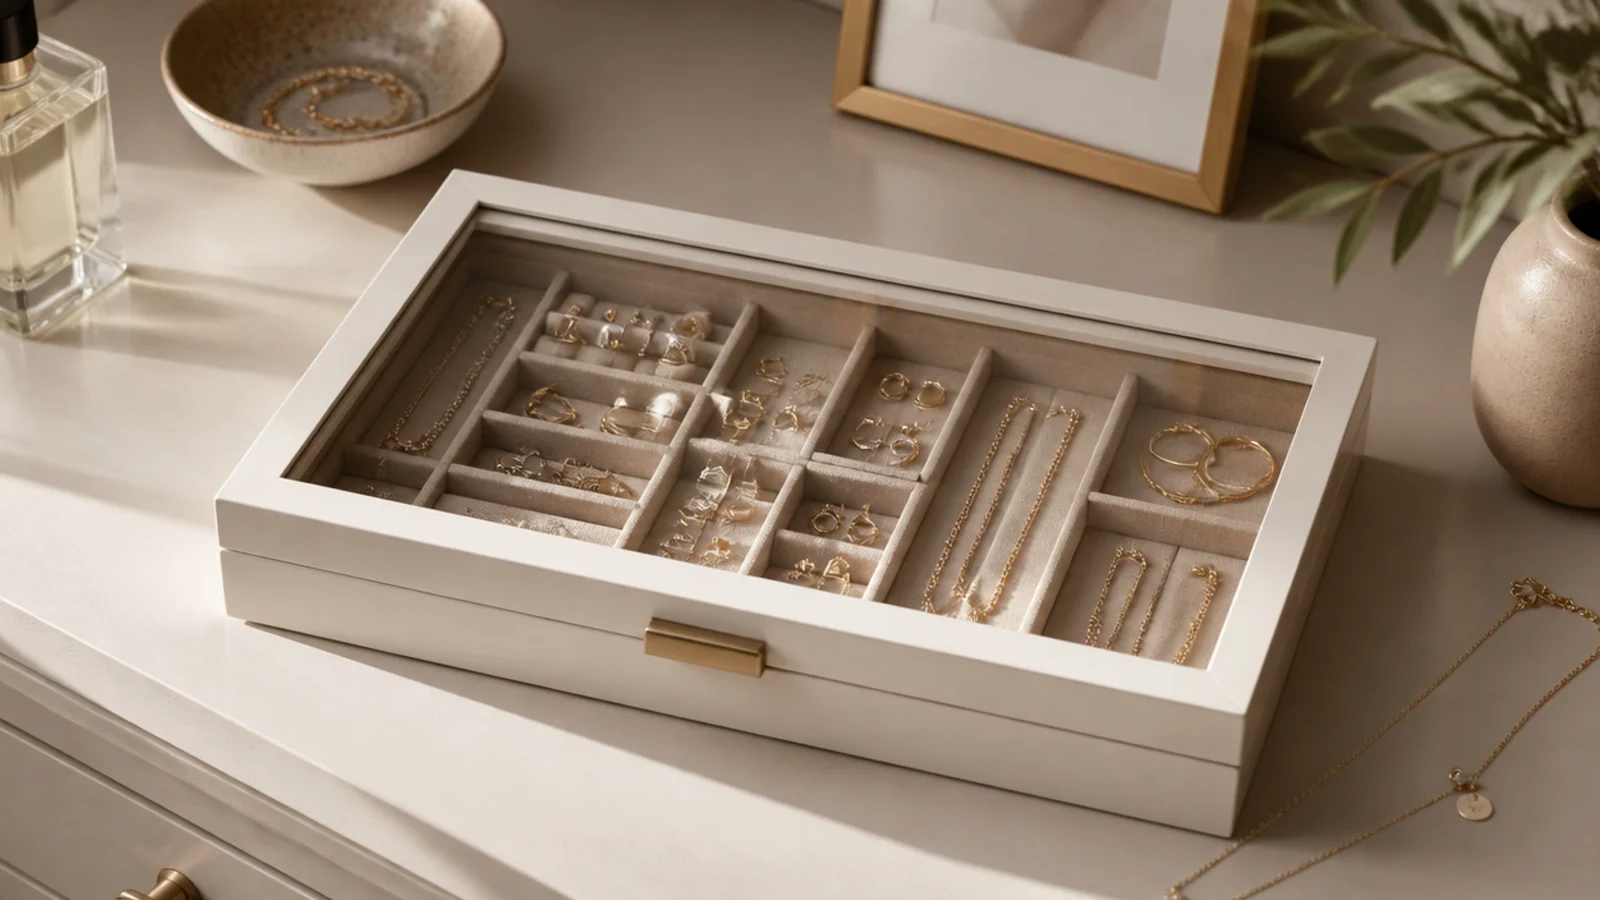
A shallow box with a clear lid shows your collection like a shop case while keeping dust off. You see everything without opening it. It suits a display-and-store combo on a dresser.
Fit a shallow box with a clear acrylic or glass lid and line the base with felt. Build a felt-wrapped divider grid so each type has a compartment, arranged neatly since it’s all visible. Add padded ring rolls in one section. Close the clear lid to keep dust off while keeping the display in view. Keep the layout tidy because the lid shows any mess.
Editor's noteArrange pieces by color or type in the compartments so the view through the lid looks like a curated case.
Skip thisDon’t overfill the compartments; with a clear lid, an overpacked box looks cluttered rather than displayed.



