

1. Framed Cork Earring Board
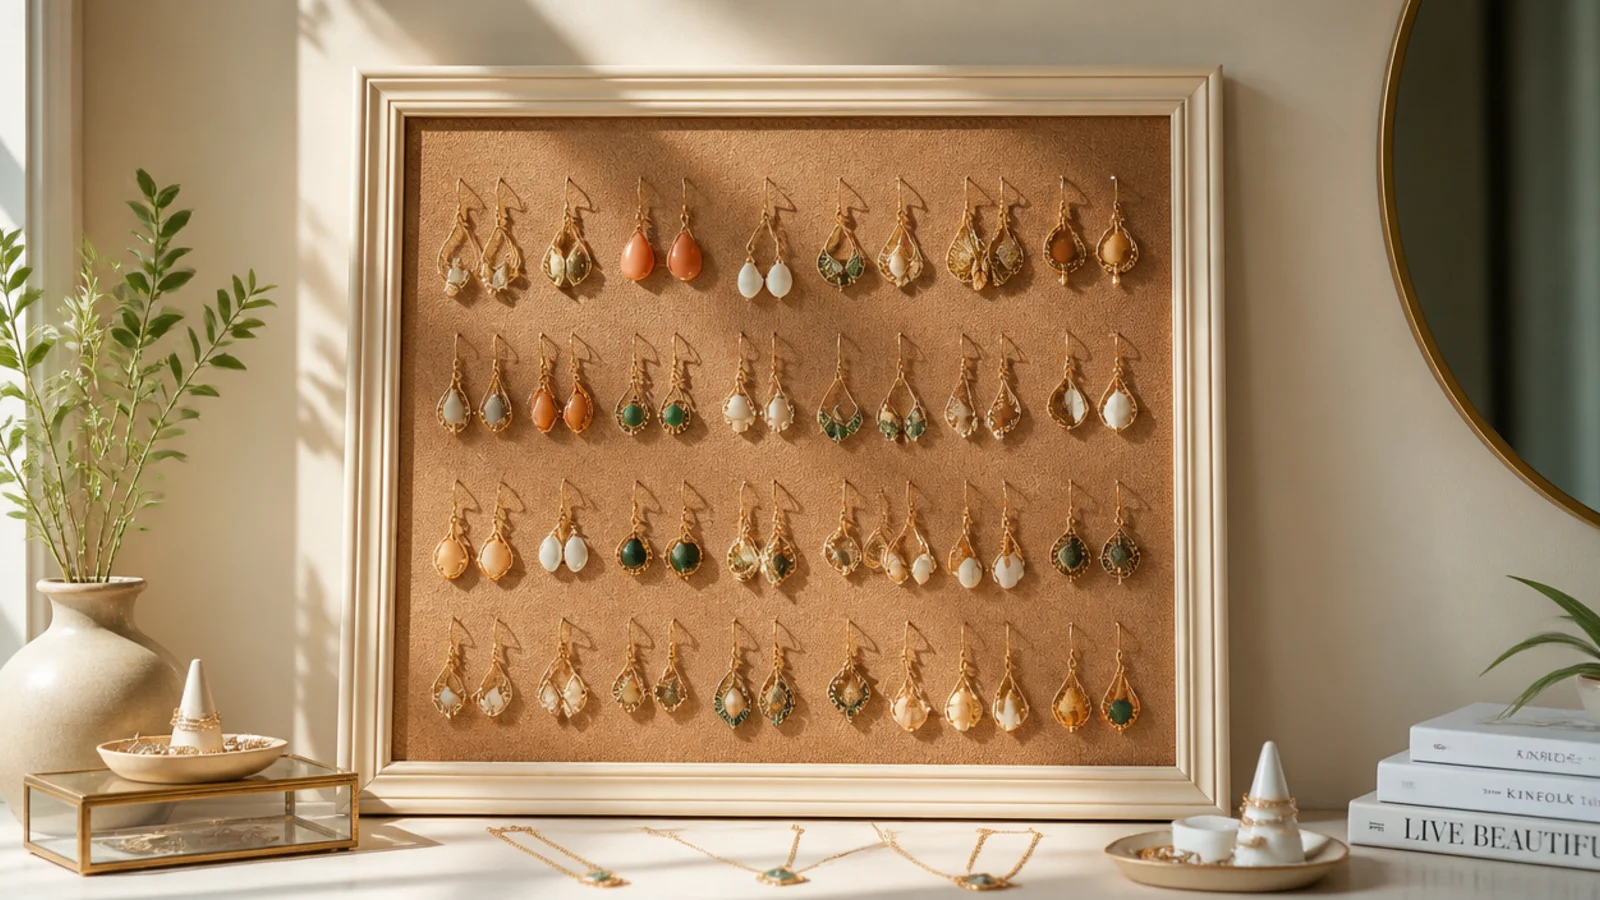
This is the easiest organizer that still looks styled, and it holds a surprising number of dangle earrings. You drop a cork tile into a picture frame and push the earring hooks straight through the cork. It suits anyone with a growing pile of hooks and studs, and a soft cream or sage frame keeps it from looking like an office board.
Buy a thrifted frame and a cork tile or roll to match the opening. Cut the cork with a craft knife so it sits snug behind the glassless frame, and hot glue it to the backing board. Hang the frame with two 5-pound picture strips, leveling it first. Push dangle earrings through the cork in even rows about an inch apart, and use the bottom edge for studs pushed straight in.
Leave the glass out and keep the backing — the backing gives the earring posts something firm to bite into so they don’t sag.
Don’t use a thin foam sheet instead of real cork; foam tears at the pin holes and earrings start falling within a week.
2. Ice Cube Tray Drawer Insert
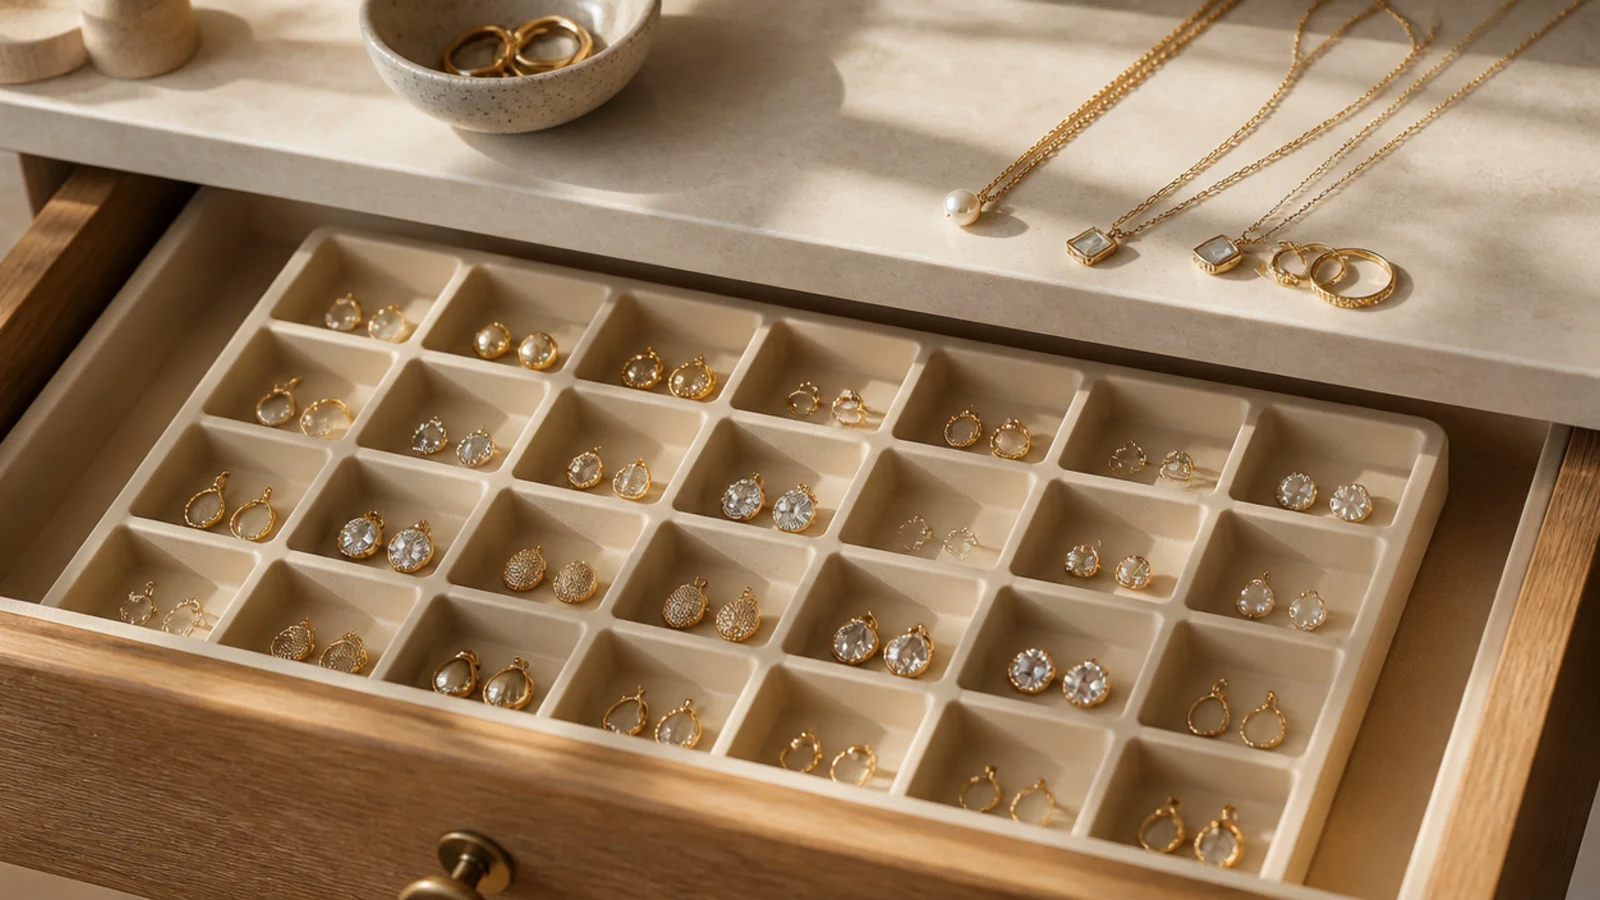
An ice cube tray turns a messy drawer into sorted compartments in about two minutes, and it costs almost nothing. Each cell holds one pair of studs, a ring, or a small pendant so nothing rolls together. It’s the best fix for people who keep jewelry in a drawer and just want to see it at a glance.
Choose a silicone or rigid tray that fits your drawer depth — measure the drawer first. Line each cell with a small circle of felt if you want to protect soft metals, cutting them with a hole punch. Set the tray in and, if it slides, stick a few dots of museum putty underneath. Group by type — studs in one row, rings in another — so you’re not hunting.
Editor's noteUse a tray with square cells rather than rounded ones; square compartments hold more and keep flat pieces from tipping.
Skip thisDon’t overfill a single cell with tangled chains — trays are for small pieces, and necklaces still need to hang.
3. Mug Tree Bracelet Stand
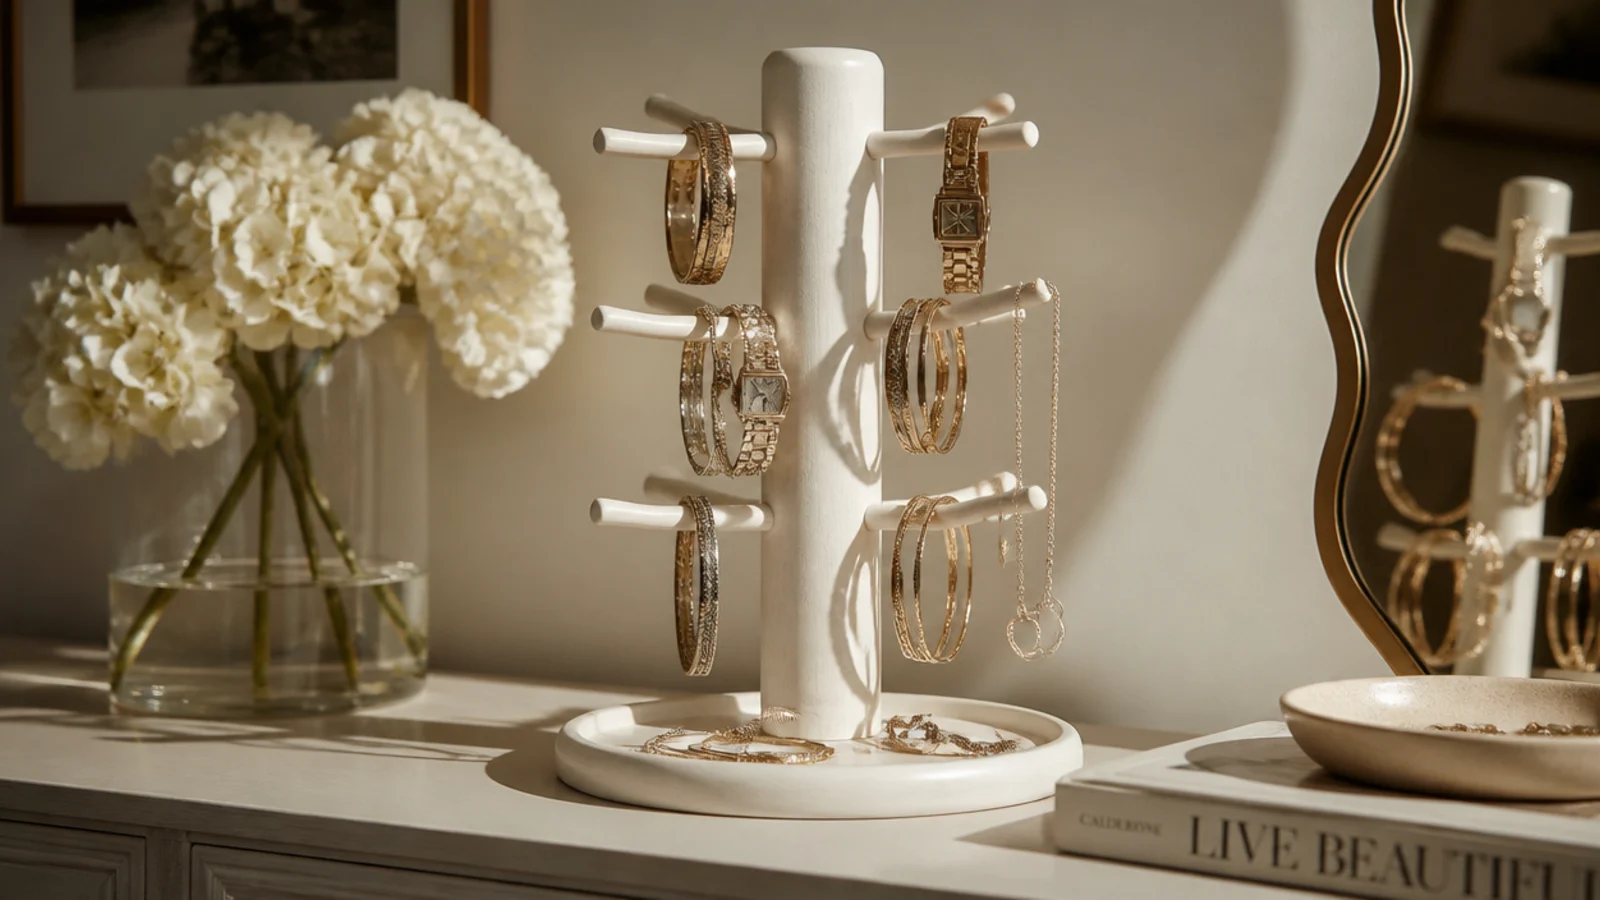
A mug tree is already the perfect shape for bracelets and bangles — you just slide them over the arms. It keeps a stack of bangles from scattering and lets you grab one without knocking the rest off. Paint it one calm color and it reads as a jewelry stand, not a kitchen leftover.
Find a wooden or metal mug tree at a thrift store. Wipe it clean, then, if painting, prime and add two thin coats of acrylic in a flat color and seal with matte clear. Slide bangles and watch straps over the arms, heaviest at the bottom. For thin bracelets, stack them by color so the arm looks deliberate rather than random.
Editor's notePut a small ring dish at the base of the tree to catch the earrings and rings you take off at the same time.
Skip thisDon’t overload one arm with a dozen bangles; the tree gets top-heavy and tips, so spread the weight around the base.
4. Wire Mesh Frame Earring Holder
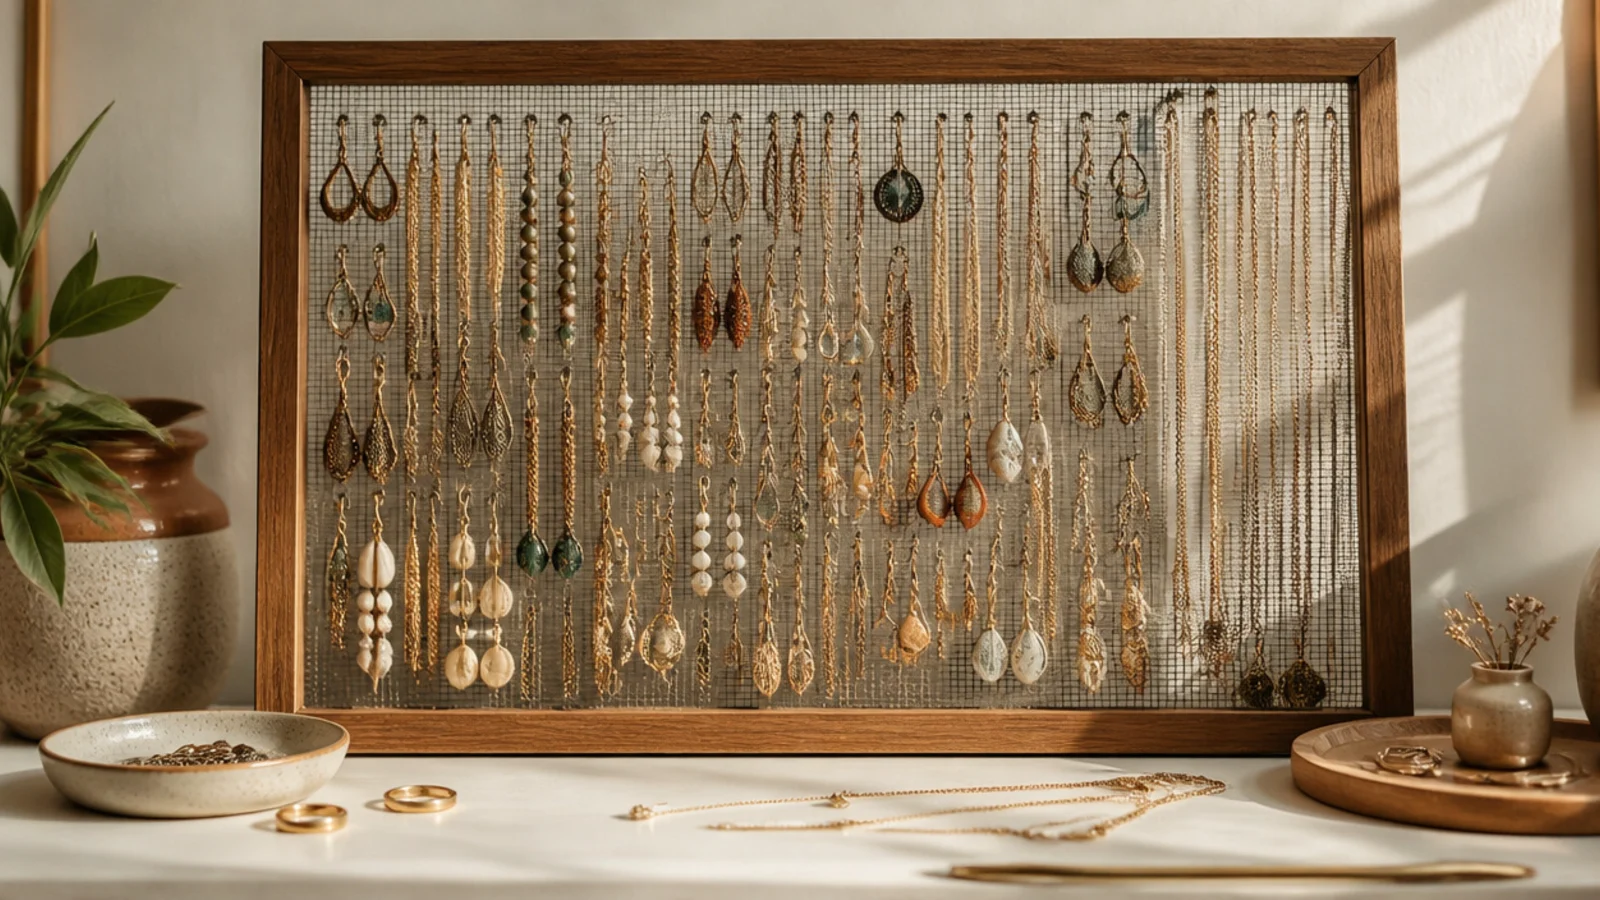
A frame backed with wire mesh holds far more earrings than cork and looks crisp and modern. The tiny squares let you hook dangles and push studs through anywhere. It’s ideal once your earring collection has outgrown a small board and you want everything visible at once.
Take a frame and cut a piece of fine metal mesh or hardware cloth an inch larger than the opening. Fold the edges back and staple or hot glue the mesh to the back of the frame so it sits taut across the front. Hang with two anchors or strips, level it, then hook earrings into the squares in columns. Add small cup hooks along the bottom rail for necklaces if you like.
Editor's noteChoose mesh with holes about a quarter-inch wide — big enough for earring hooks, small enough that studs don’t slip through.
Skip thisDon’t leave sharp cut mesh edges exposed; fold them fully behind the frame so you don’t scratch your hand or the wall.
5. Shaker Knob Necklace Rack
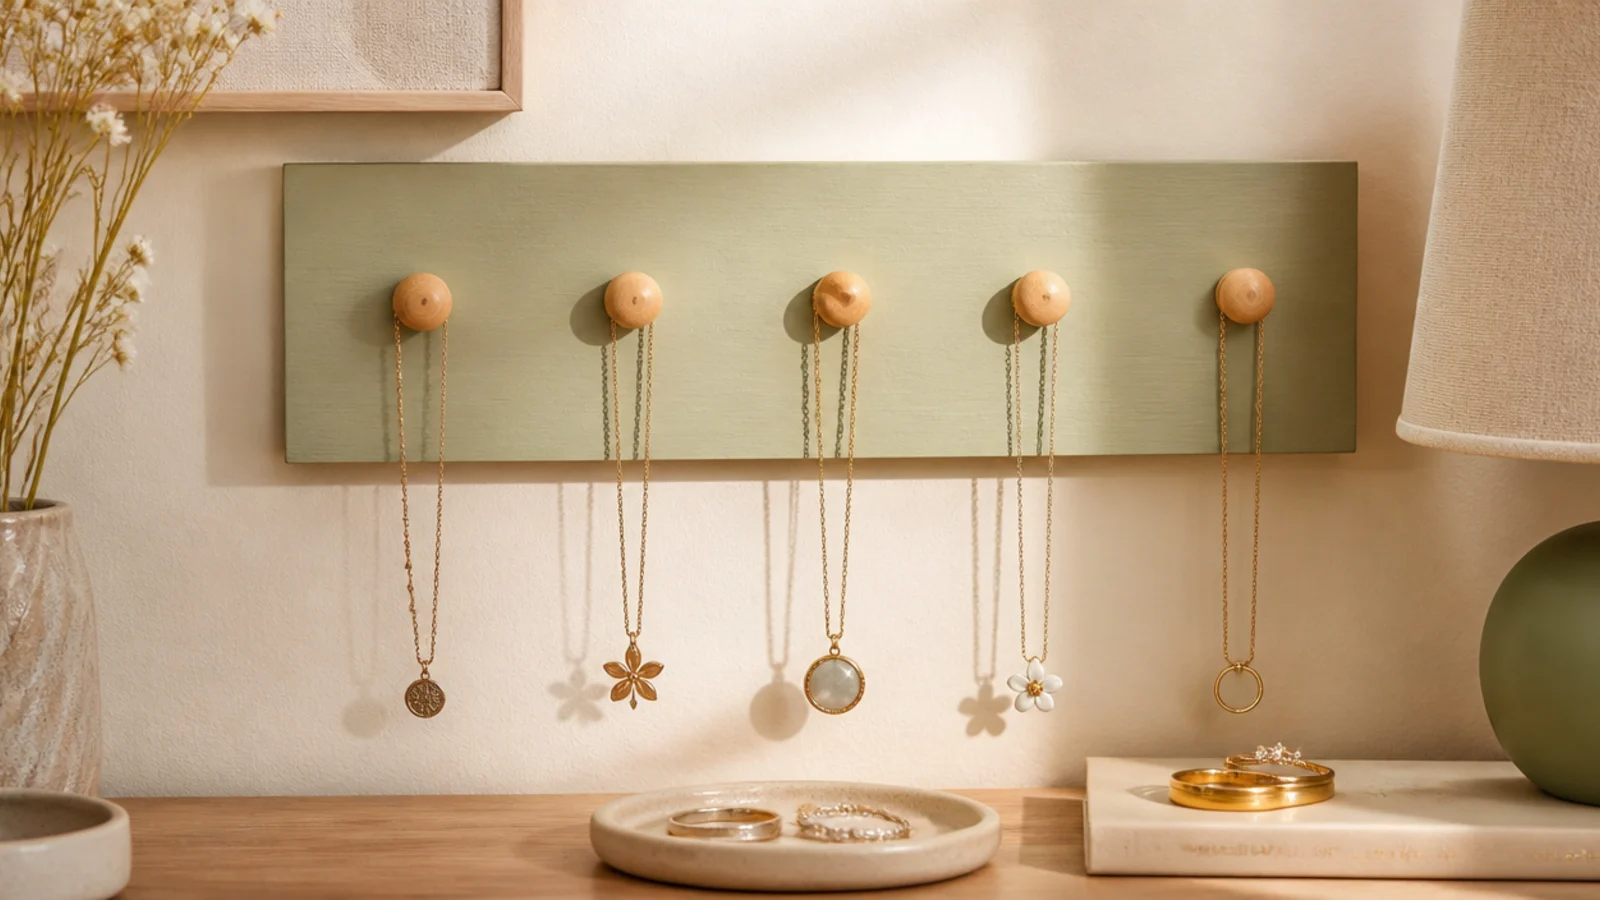
A board with a row of wooden knobs gives each necklace its own peg so nothing tangles. The rounded knobs are gentle on chains and look far warmer than metal hooks. It’s the fix for anyone whose necklaces live in a knotted heap on the dresser.
Cut or buy a wood board about 4 inches tall and as wide as your space. Sand, prime, and paint it, then mark knob positions every 3 inches with a pencil and level line. Drill a pilot hole at each mark and screw a Shaker knob in from the back, or use screw-in knobs from the front. Mount the board with two anchors, hanging longer necklaces on the outer knobs.
Editor's noteSpace the knobs a full 3 inches apart — closer than that and long chains swing into each other and still tangle.
Skip thisDon’t hang a heavy loaded board on a single nail; use two anchors so it can’t pivot and dump the necklaces.
6. Egg Carton Ring Keeper
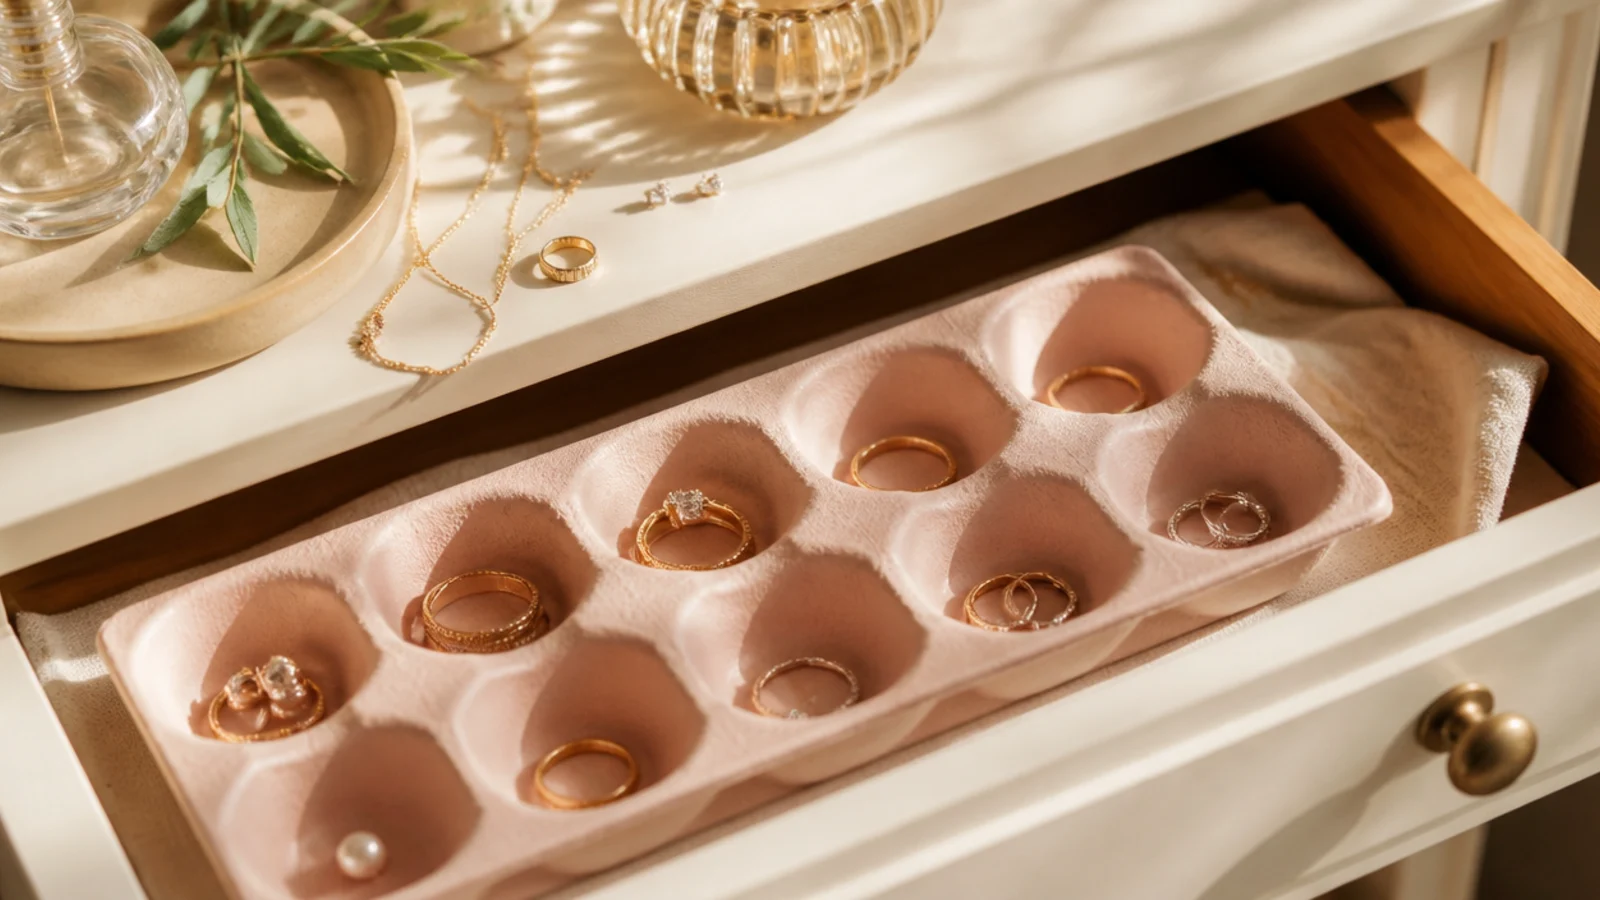
An egg carton is a free, instant divider for rings and studs, and a coat of paint makes it look intentional. Each cup keeps one ring or pair separate and cushioned. It’s a great two-minute fix for a junk drawer, and you can toss and remake it any time.
Take a clean cardboard or molded-pulp egg carton and cut it down to fit your drawer. Paint the inside and lid with two thin coats of acrylic in one soft color and let it fully dry. Set it in the drawer and place one ring or one pair of studs per cup. For a firmer version, brush a coat of clear sealer so the cups don’t crush.
Editor's noteCut the lid off and keep just the base if your drawer is shallow — the cups alone hold plenty and take up less height.
Skip thisDon’t store good rings in a damp bathroom carton; cardboard holds moisture, so keep this one in a dry bedroom drawer.
7. Upcycled Muffin Tin Tray
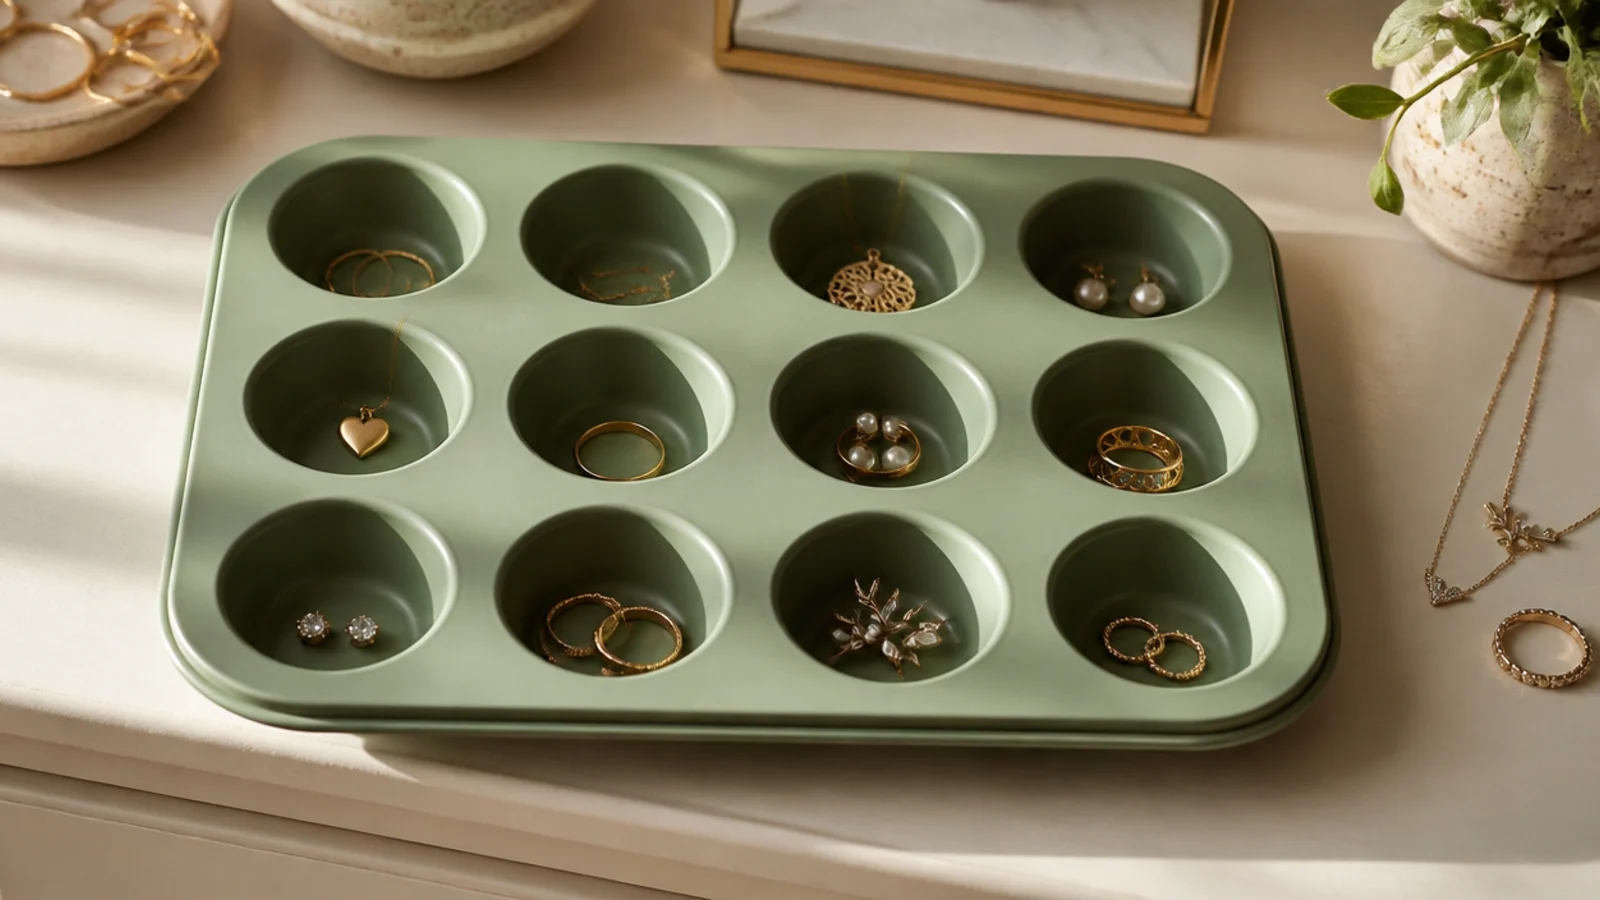
A muffin tin gives you a dozen sturdy compartments in one solid piece you can lift and move. The metal cups keep rings and studs from sliding and look great painted a soft matte color. It suits anyone who wants an open countertop organizer rather than a hidden drawer insert.
Clean and lightly sand a metal muffin tin so paint grips, then prime and paint the outside with two thin coats and seal. Leave the cups bare metal or line each with a felt circle cut to fit. Group pieces by cup — rings in one, studs in another, a watch coiled in a third. Set it where you get ready so you can drop pieces in as you take them off.
Editor's noteA six-cup tin fits a nightstand better than a twelve-cup; measure your surface before you commit to the bigger size.
Skip thisDon’t skip sanding before painting metal; unsanded paint chips off the rim within days of dropping rings in.
8. Ribbon Frame Dangle Hanger
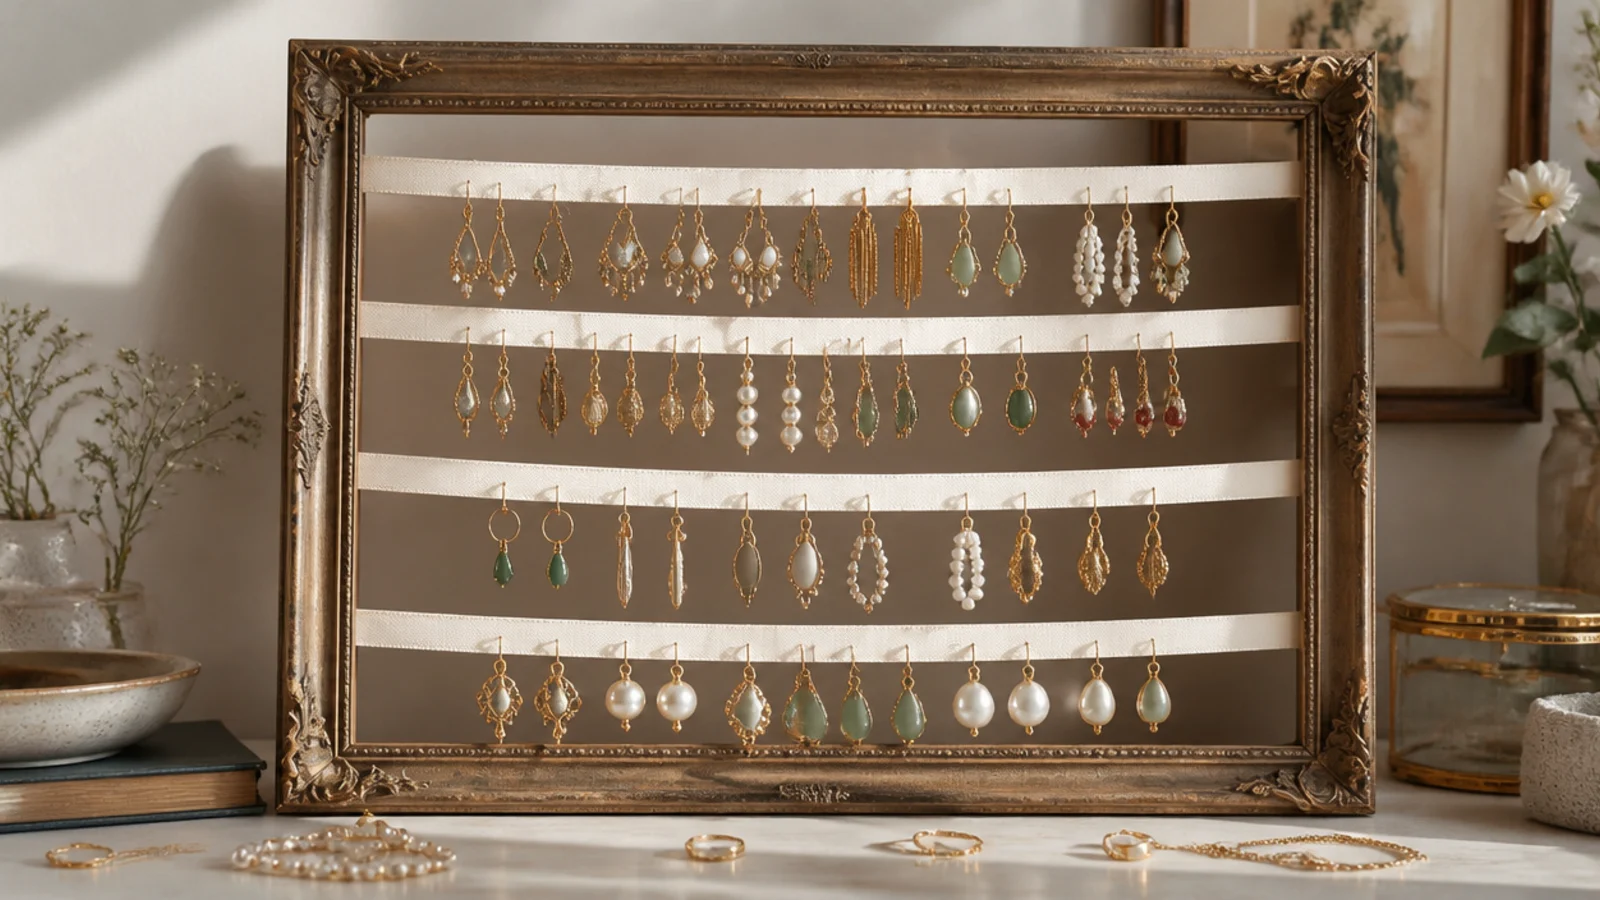
Rows of ribbon strung across an open frame make soft, pretty rails for dangle earrings. You just hook each pair over a ribbon. It’s gentle, looks romantic on a vanity, and costs only a frame and a spool of ribbon.
Remove the glass and backing from a frame. Cut lengths of grosgrain or linen ribbon to span the opening plus an inch, and staple or hot glue each end to the back of the frame, spacing rows about 2 inches apart. Pull each ribbon taut so it doesn’t sag under weight. Hang the frame and hook dangle earrings over the ribbons in rows.
Editor's noteUse grosgrain or another ribbon with a bit of grip — satin is too slippery and earrings slide to the middle and bunch up.
Skip thisDon’t space the ribbons too close; if rows are under 2 inches apart, long earrings from the upper row rest on the one below.
9. Driftwood Branch Necklace Hanger
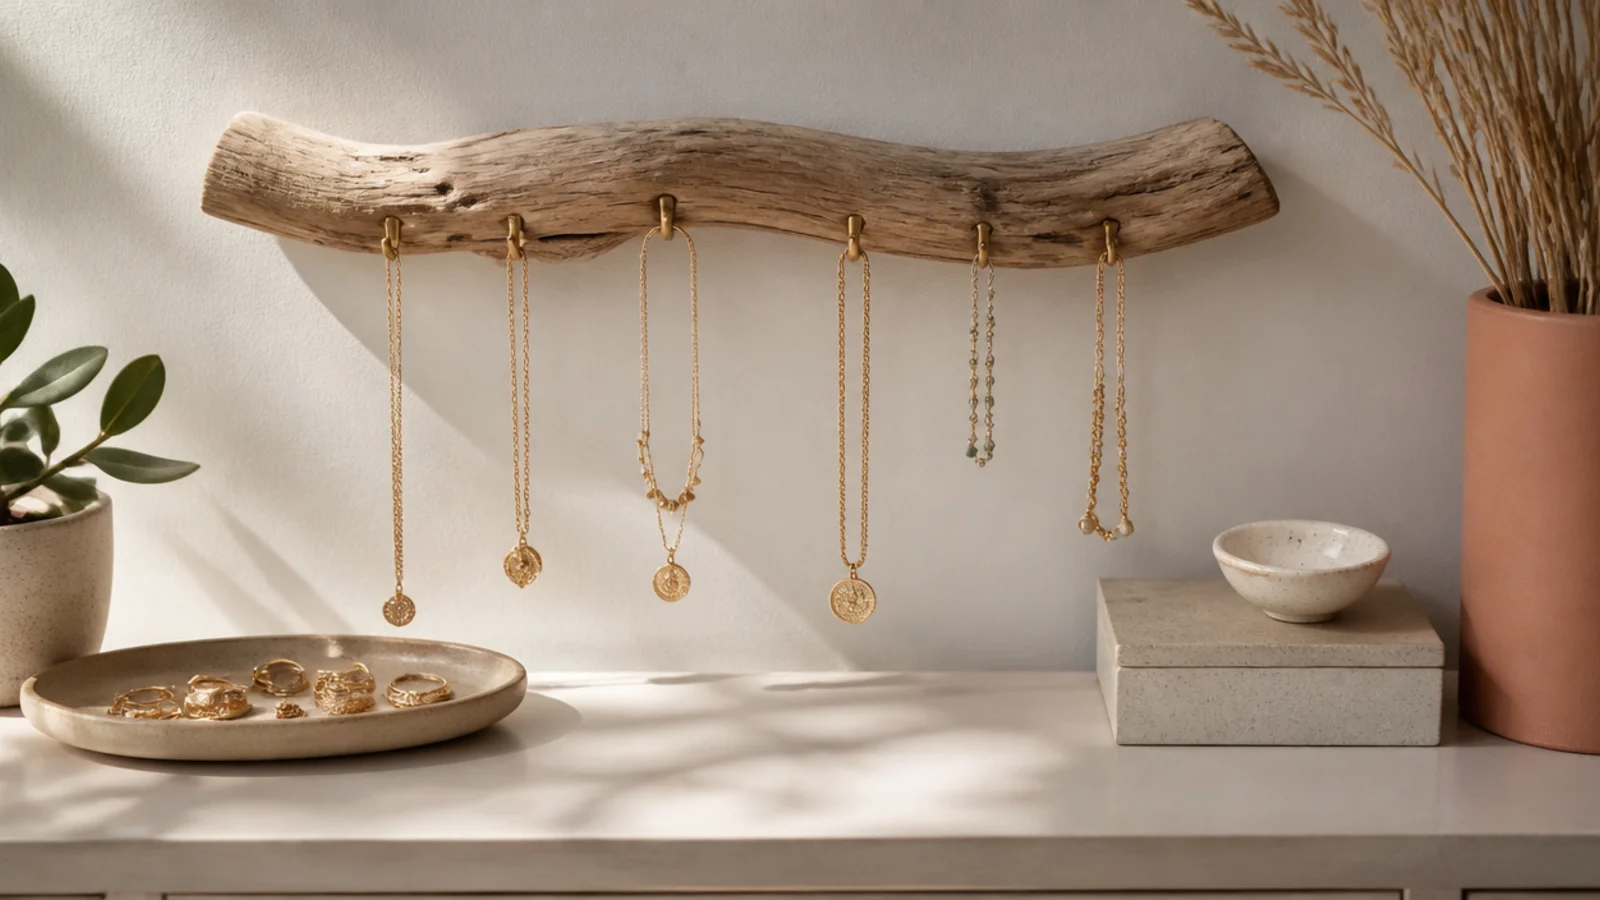
A single branch on the wall turns necklace storage into a natural focal point. Small hooks along the underside hold each chain separately. It suits a calm, organic room and makes even a few necklaces look like an intentional display.
Find a smooth branch or piece of driftwood about 18 inches long. Sand any rough spots and wipe clean, optionally sealing with a matte clear. Screw small brass cup hooks into the underside every 2 to 3 inches, drilling tiny pilot holes first so the wood doesn’t split. Mount the branch with two sawtooth hangers or wire loops screwed into the back, level, then hang necklaces on the hooks.
Editor's notePick a branch that’s fairly straight and flat on the back so it sits flush to the wall instead of rocking.
Skip thisDon’t screw hooks in without pilot holes; dry branches split, and a cracked branch drops your necklaces.
10. Cheese Grater Earring Holder
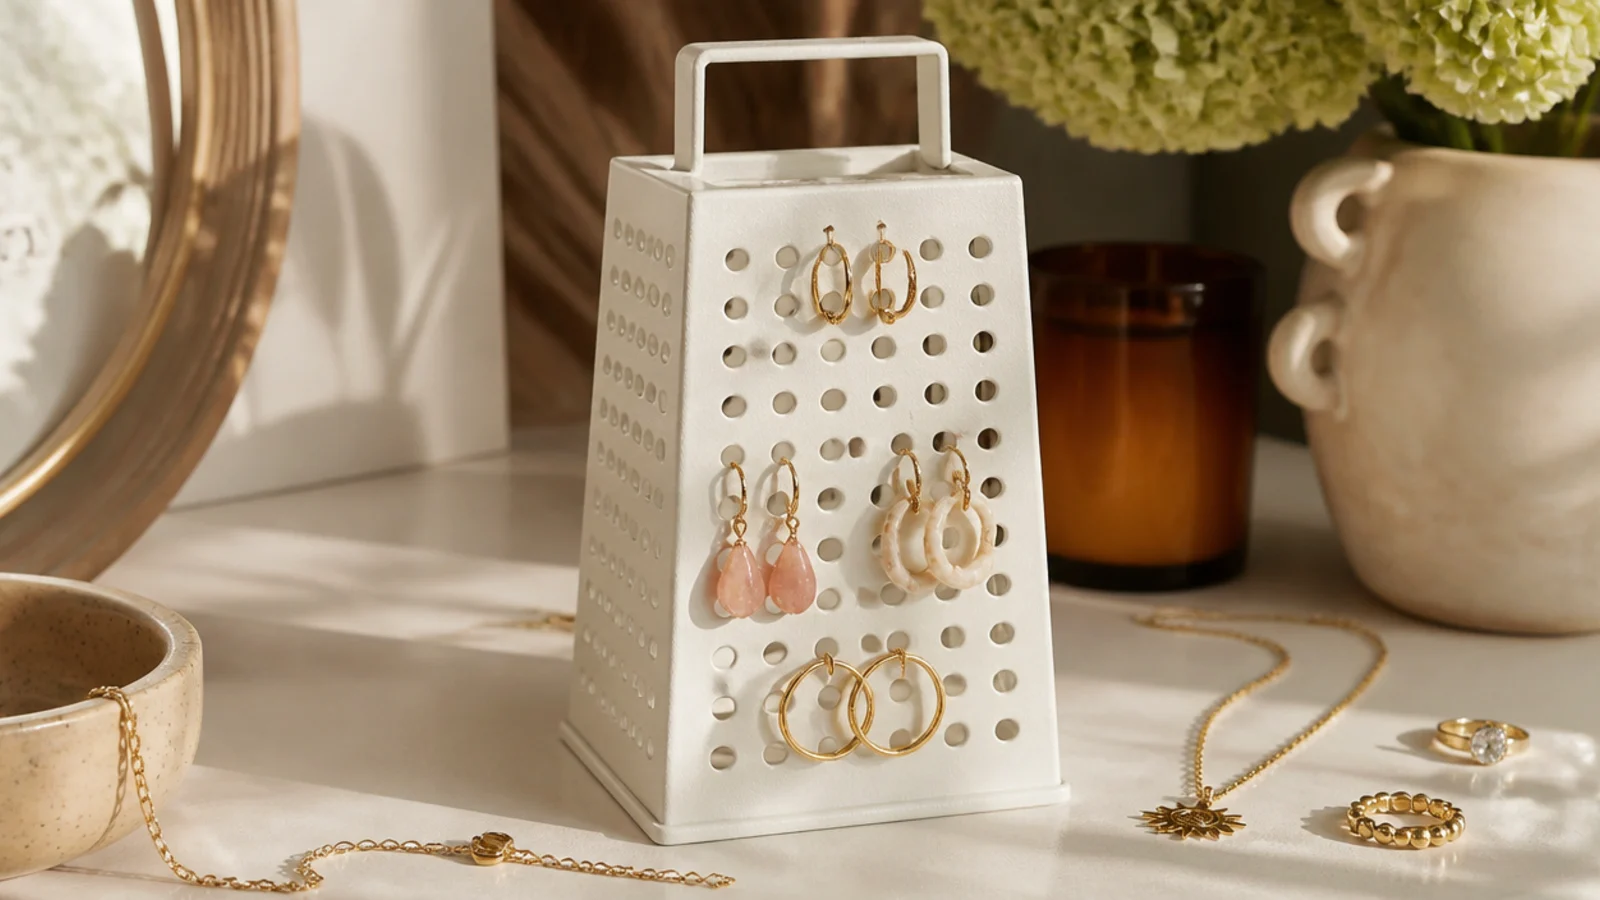
A box grater is a quirky upcycle that works beautifully — the punched holes are perfect for earring hooks. Spray-painted one color, it looks intentional and holds a lot in a small footprint. It’s a fun way to reuse a grater you were about to toss.
Clean and dry an old box grater and spray it lightly with a metal primer, then two coats of spray paint, letting each dry. Set it on a dresser or slip a small dish inside the base to catch rings. Hook dangle earrings into the holes on all four sides, and drape a couple of necklaces over the handle. The grater’s weight keeps it from tipping.
Editor's noteTurn the finest-hole side to the back and use the larger diamond holes at the front where most earring hooks fit best.
Skip thisDon’t skip primer on the shiny metal; spray paint slides right off ungripped stainless and scratches at the first use.
11. Mini Ladder Bracelet Bar
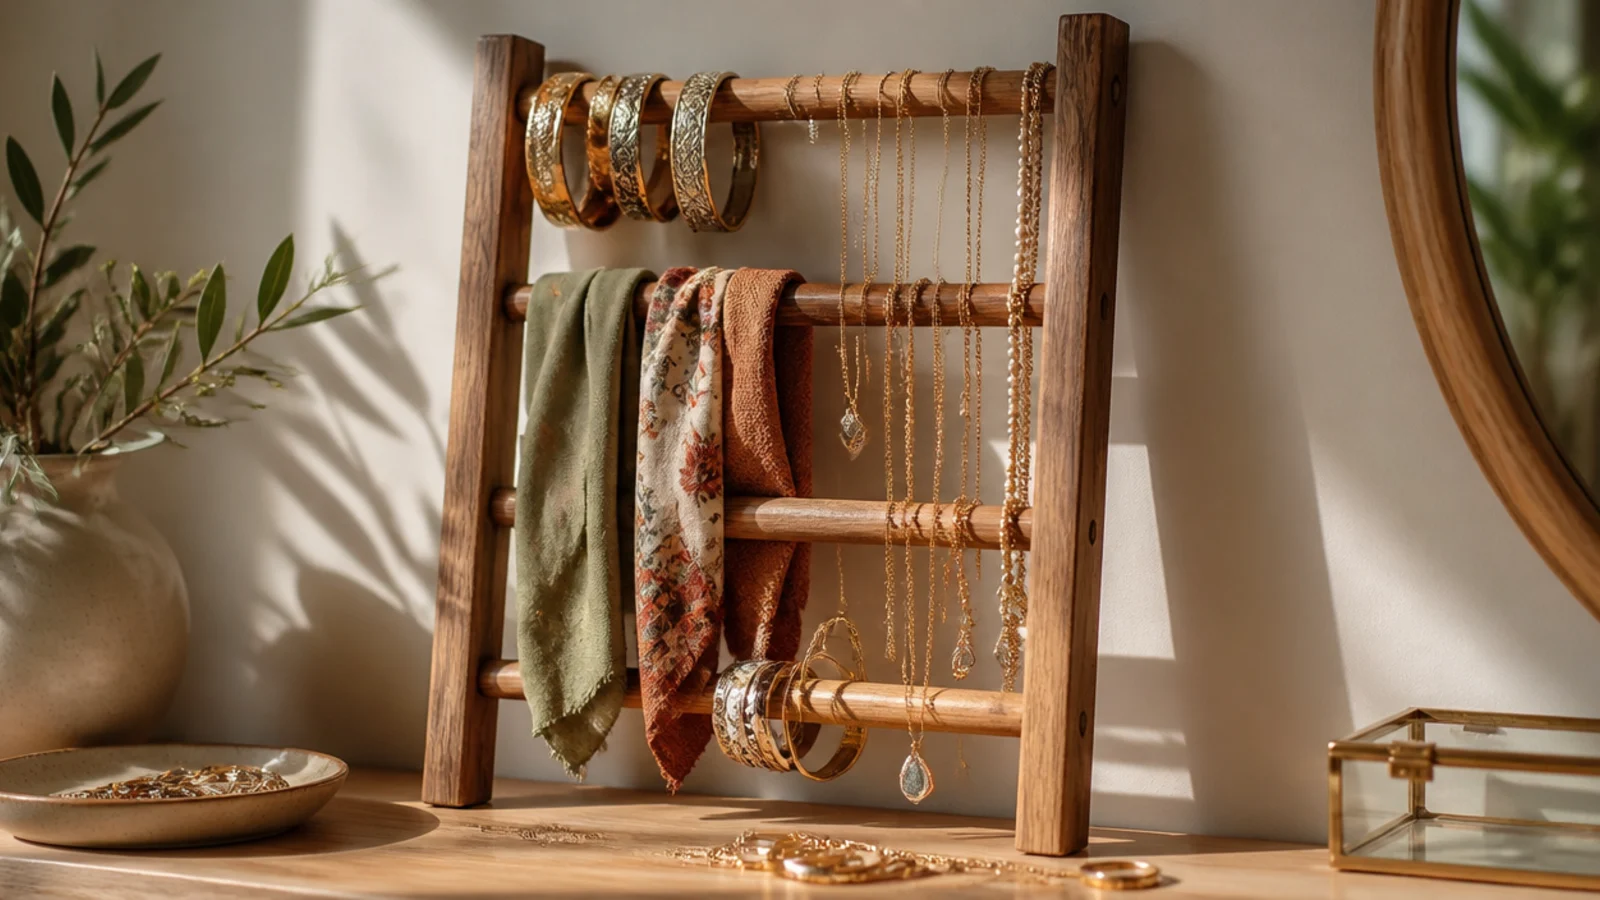
A small leaning ladder gives bangles and bracelets their own home on horizontal rungs. You slide stacks over each rung and they stay put. It suits a corner of the bedroom and doubles as a spot for scarves and hair ties.
Build or buy a mini decorative ladder about 3 feet tall, or make one from two side rails and dowel rungs glued into drilled holes. Sand, paint one flat color, and seal. Lean it securely against the wall, and for safety add a small L-bracket or a strip of hook-and-loop tape at the top so it can’t slide. Slide bangles onto the rungs, grouped by color.
Anchor the top to the wall with one small bracket or a Command strip; a leaning ladder walks forward as you add and remove bangles.
Don’t load a lightweight craft ladder with heavy watches and cuffs; it bows, so keep heavy pieces low or use a sturdier build.
12. Bud Vase Ring and Chain Holder
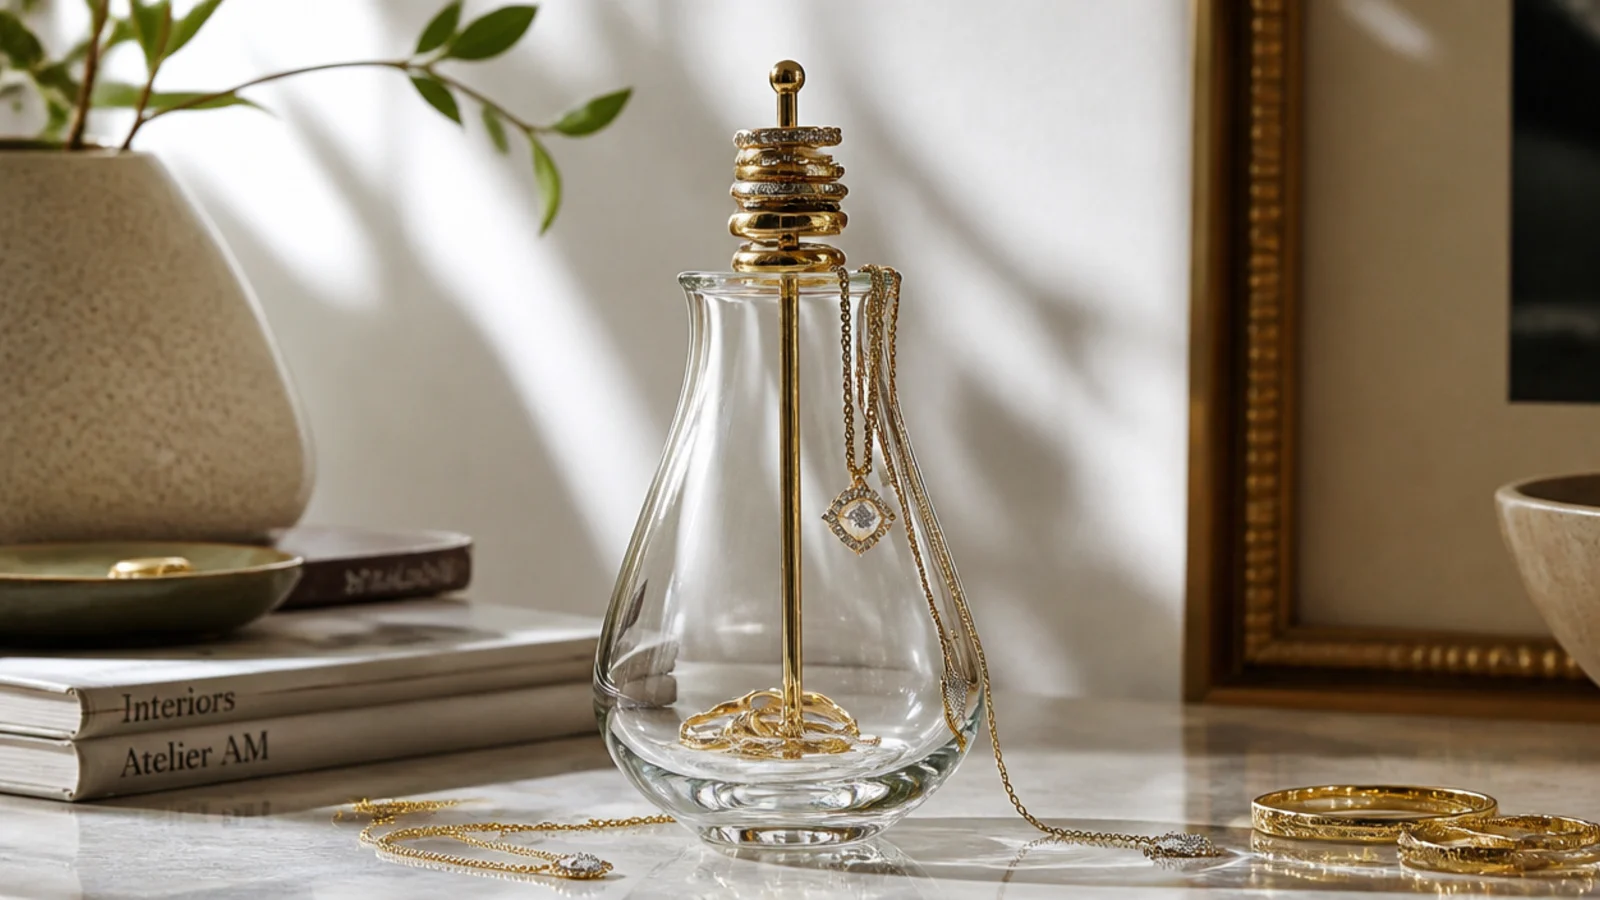
A narrow bud vase becomes a tiny ring tower when you stand a slim dowel inside it. Rings slide down over the dowel and stack neatly, while the vase mouth catches earrings. It’s a pretty, minimal option for a small collection on a nightstand.
Choose a slim glass or ceramic bud vase and a thin wooden dowel or skewer cut to stand a few inches above the rim. Add a little sand or a few glass beads to the vase base to hold the dowel upright and centered. Slide rings down the dowel and drape thin chains around the rim. Keep it on a dish so a knocked vase doesn’t scatter rings.
Wrap the dowel with a thin strip of felt or ribbon so rings grip slightly and don’t rattle down to the bottom in a clump.
Don’t use a top-heavy dowel with a light vase; without sand ballast it tips the moment you load a few rings on.
13. Pegboard Jewelry Wall
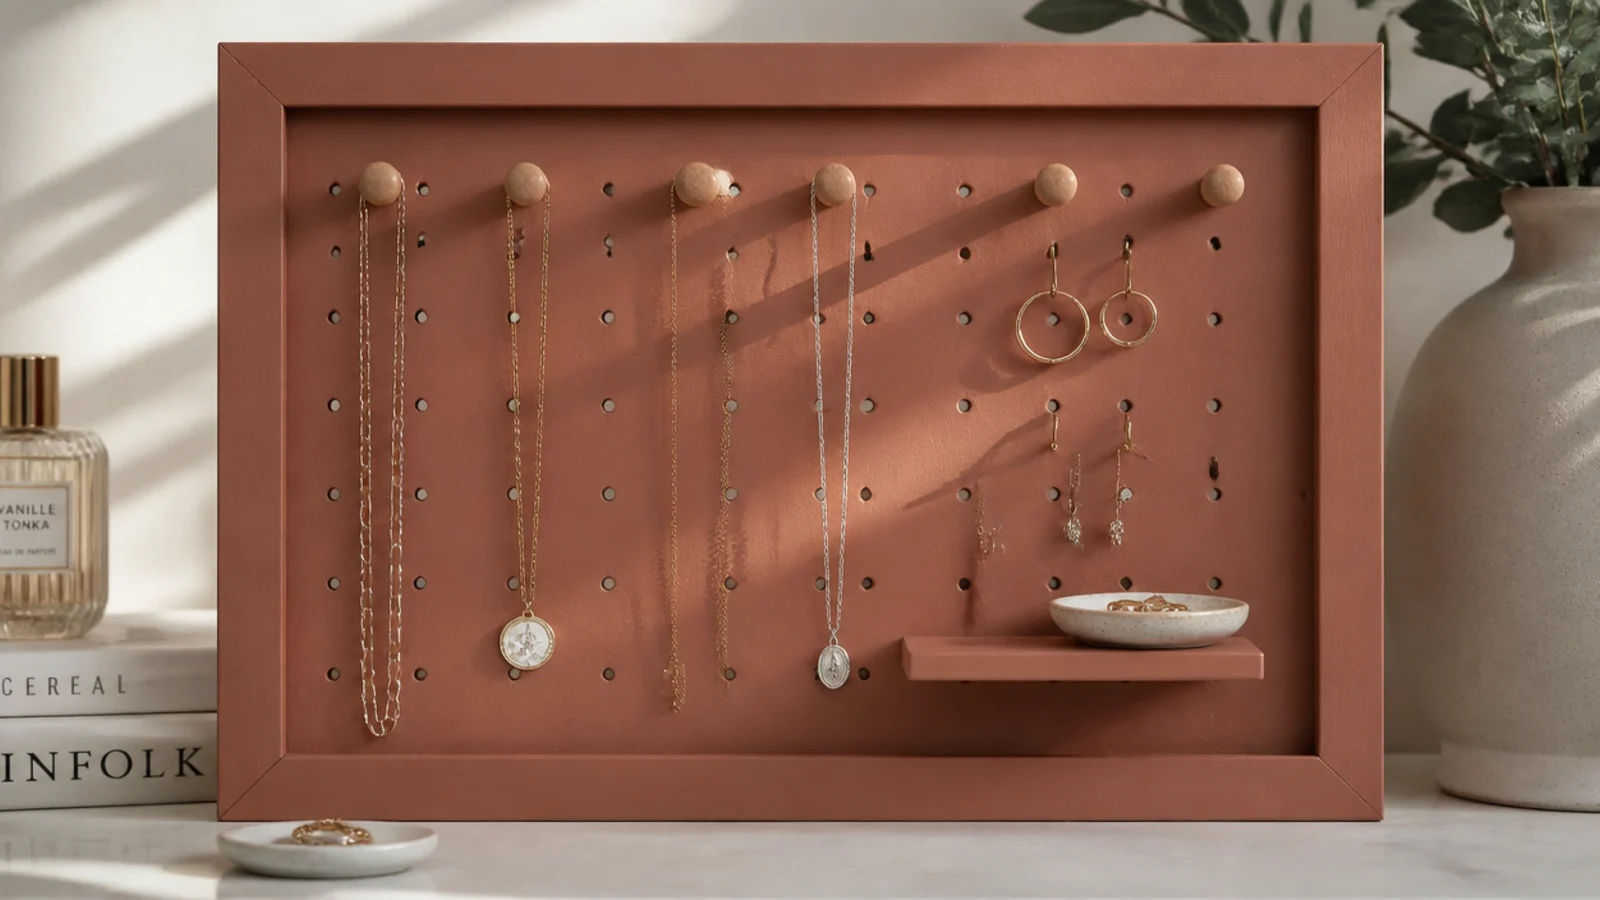
A pegboard is the most flexible organizer here — you rearrange pegs, hooks, and shelves as your collection changes. It holds every type of jewelry on one wall. It suits a large or growing collection and anyone who likes to restyle their space often.
Cut a pegboard to size and paint it one flat color, framing the edges with thin trim for a finished look. Mount it with spacers so pegs have room behind, using anchors at the corners. Add peg hooks for necklaces, a small peg shelf for a ring dish, and a strip of mesh clipped on for earrings. Move pieces around until each type has a zone.
Group by type in vertical zones — necklaces on one side, earrings in the middle, a shelf for dishes — so getting ready is one sweep.
Don’t mount the pegboard flat against the wall; without spacers the peg hooks won’t seat, and they pop out under weight.
14. Pinch-Pot Clay Ring Dish
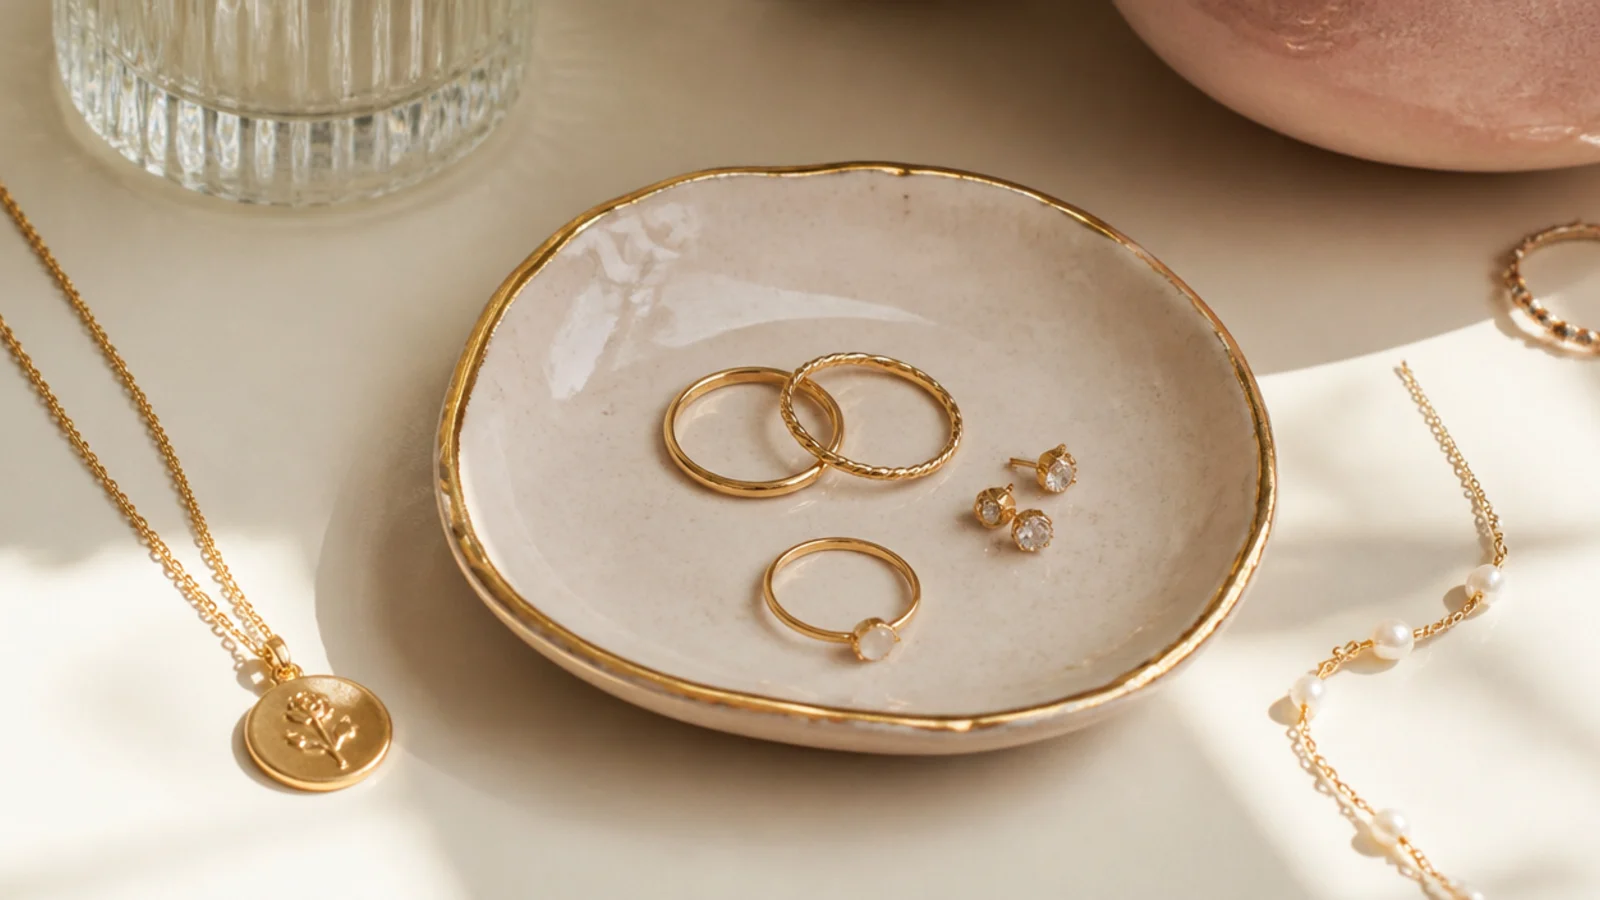
A little clay dish is the perfect catch-all for the rings and studs you take off last thing at night. You make it by hand from air-dry clay, so it’s genuinely one of a kind. It suits a nightstand or a spot by the sink and takes five minutes of shaping.
Roll a ball of air-dry clay, press your thumb into the center, and pinch the walls up into a shallow dish about 3 inches across. Smooth the surface with a damp finger and let it dry fully for a day or two. Paint the inside a soft color, add a thin gold rim with a paint pen, and seal with a clear varnish so it wipes clean. Set it where you undress.
Editor's notePress the base flat on the table while the clay is soft so the finished dish sits level and doesn’t rock.
Skip thisDon’t skip sealing an air-dry clay dish; unsealed clay absorbs skin oils and lotion and stains within weeks.
15. Vintage Plate Necklace Rack
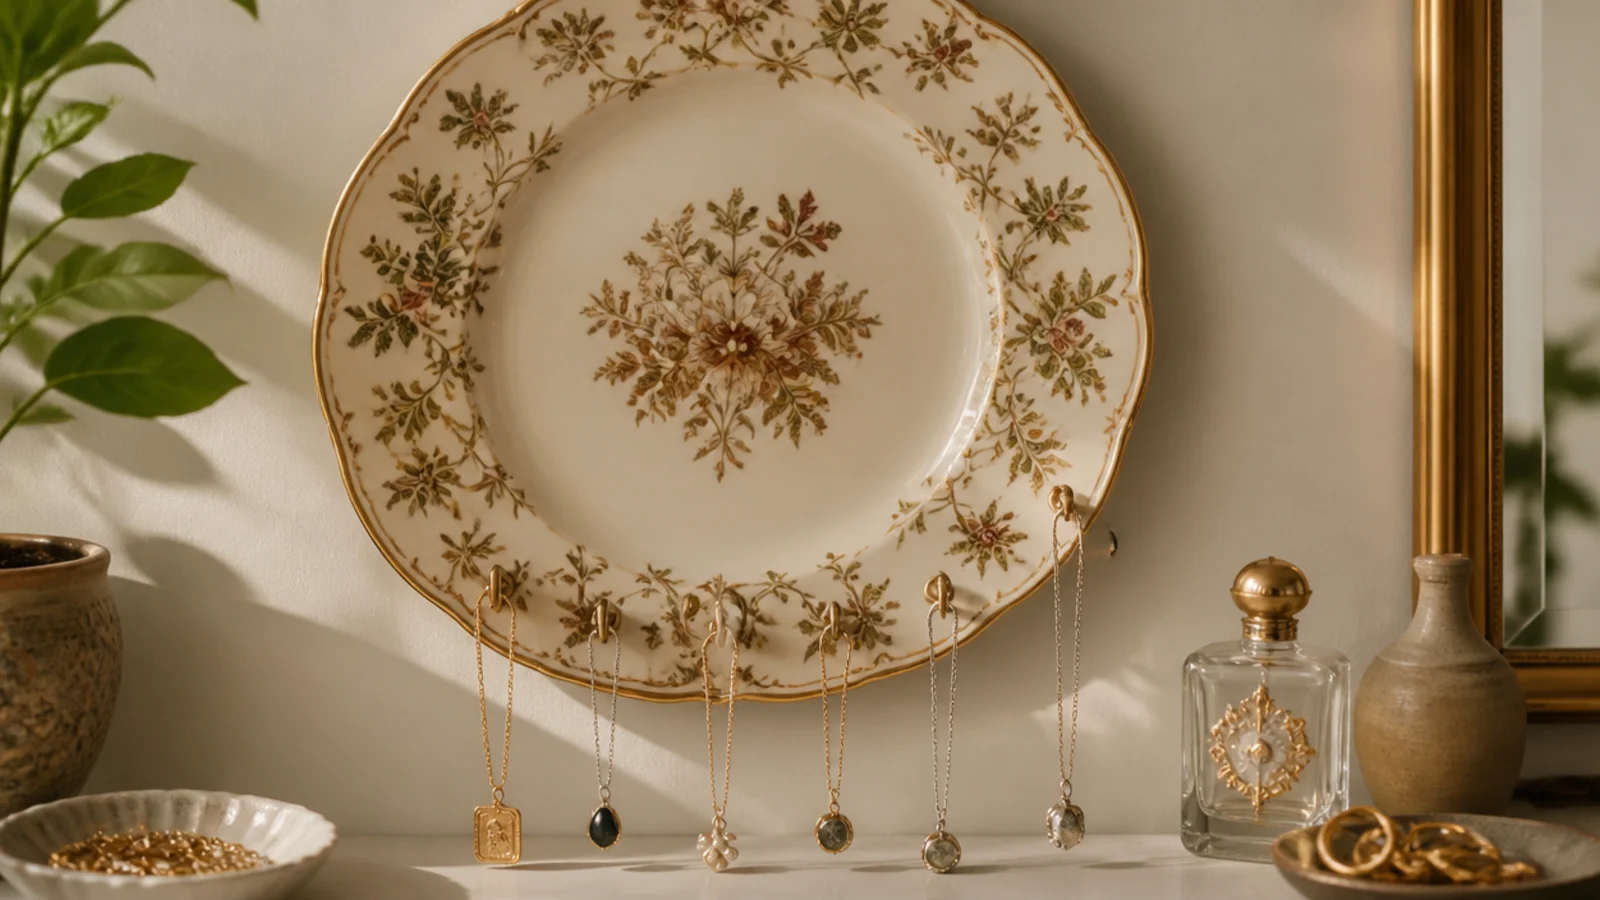
A pretty thrifted plate becomes a wall rack when you add hooks along the bottom. The plate acts as a decorative backdrop for the necklaces. It suits a maximal or cottage room and turns a $2 plate into a display piece.
Choose a lightweight decorative plate and mark evenly spaced points along the lower rim. Attach small adhesive hooks or, for a permanent version, epoxy tiny cup hooks to the rim and let them cure overnight. Hang the plate with a spring plate hanger sized to it. Once secure, hang delicate necklaces from the hooks, longest at the outer edges.
Use a proper spring plate hanger rather than a single adhesive disc; the weight of necklaces pulls a weak hanger off the wall.
Don’t hang heavy statement necklaces on epoxied hooks; they can peel off the glaze, so keep this one for fine chains.
16. Felt-Lined Drawer Dividers
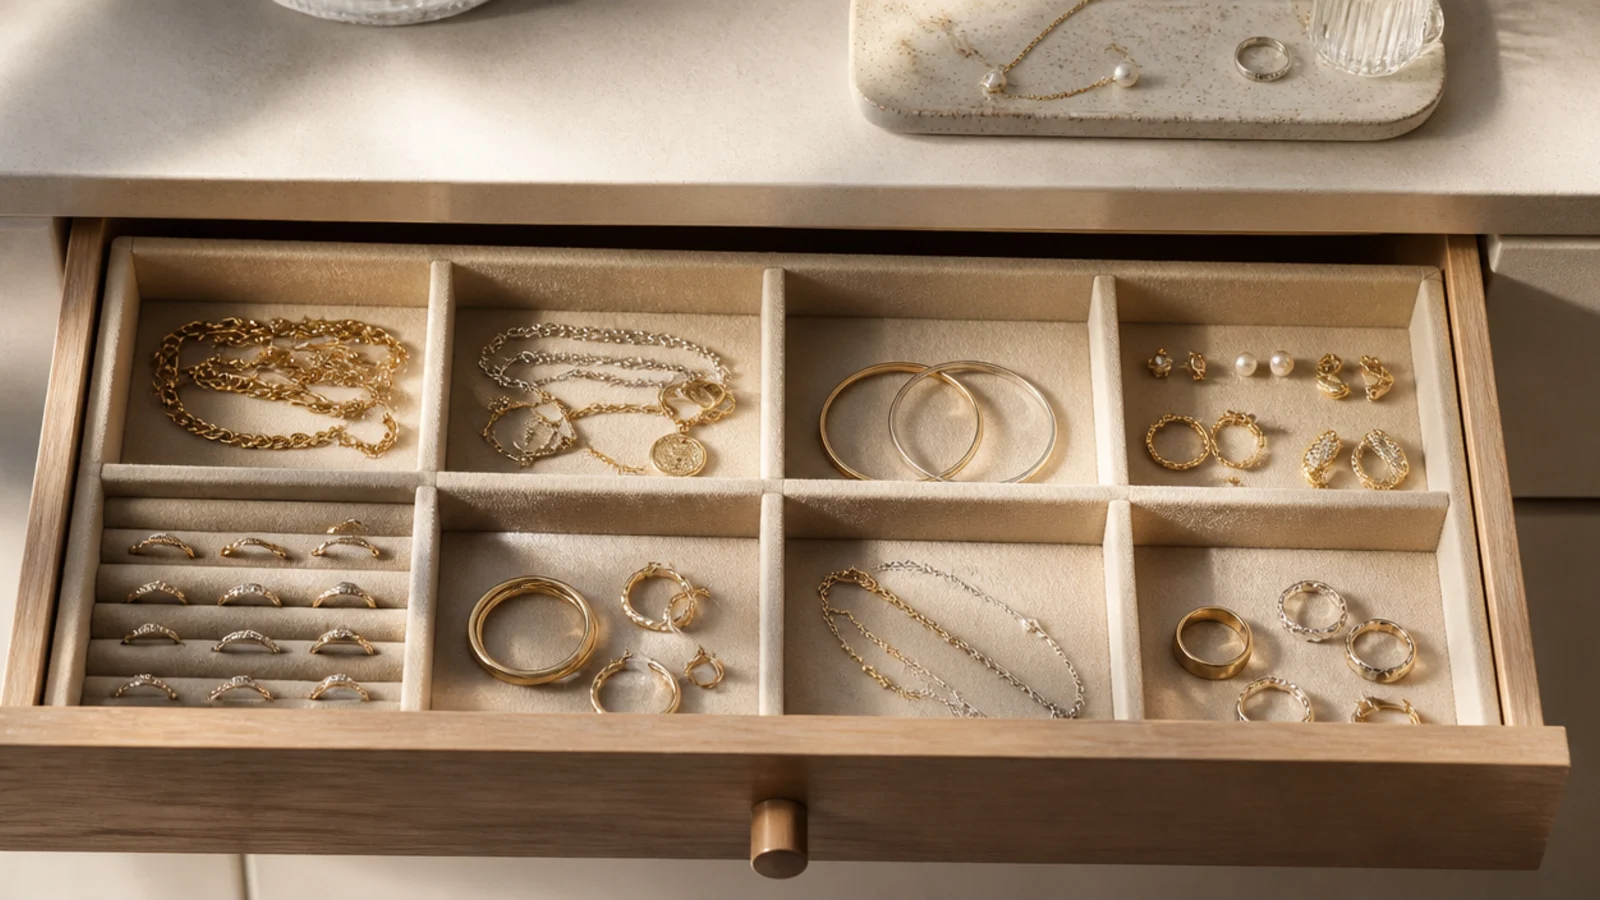
Custom dividers turn any shallow drawer into a jewelry drawer with sections sized to your pieces. Felt lining keeps everything from sliding and scratching. It suits people who prefer everything hidden and dust-free rather than on display.
Measure the drawer and cut foam board or thin plywood strips to make a grid of compartments. Wrap each strip and the drawer base in adhesive felt, then slot the dividers together in a lattice so they lift out for cleaning. Size the sections to your piles — a long channel for bracelets, small squares for rings and studs. Add a row of foam slits to stand rings upright.
Cut a strip of foam with knife slits every half inch and set it in one channel to hold rings upright and visible.
Don’t glue the dividers into the drawer permanently; make them lift out so you can clean and re-sort as your collection changes.
17. Magnetic Strip Stud Board
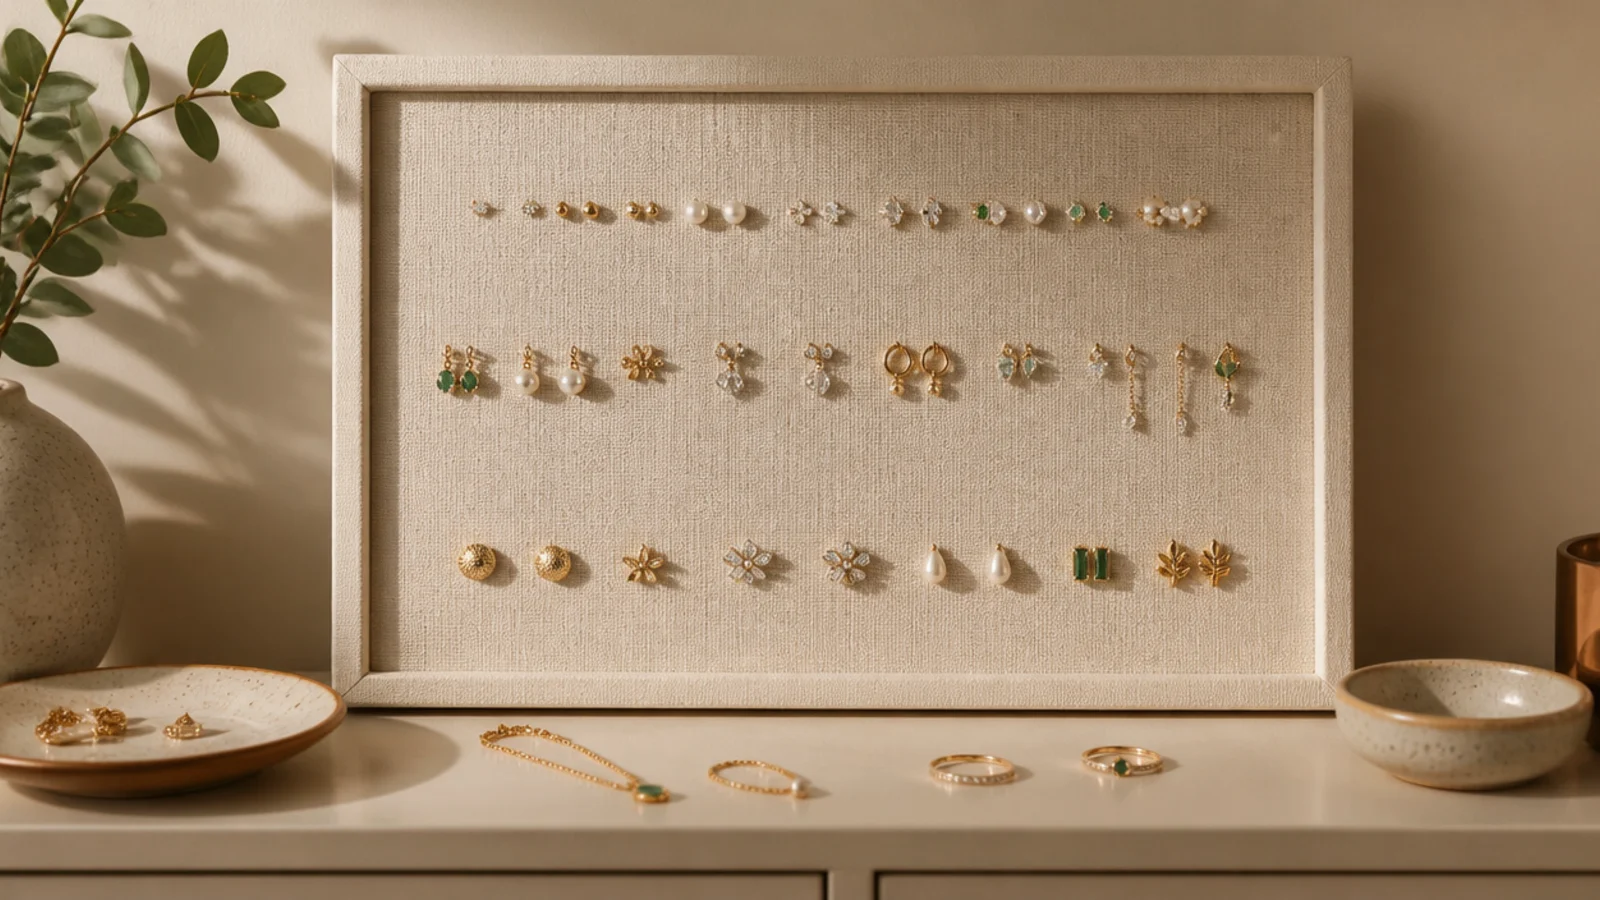
A magnetic strip behind fabric holds stud earrings by their steel backs so pairs stay together and visible. It’s the cleanest way to store studs, which are otherwise impossible to organize. It suits anyone with a big stud collection who’s tired of losing backs.
Glue a magnetic strip or a row of strong magnets to a piece of stiff board, then stretch a piece of linen over the front and staple it to the back so the magnets pull through the fabric. Frame it if you like. Hang it on the wall, then press each stud’s metal back to the fabric where it grabs the magnet. Line up pairs side by side.
Editor's noteTest the magnet strength through the fabric before committing; you want studs to hold firmly but still pull off easily.
Skip thisDon’t use this for gold or brass studs with non-magnetic backs; only steel and nickel backs will grab, so keep those in a dish.
18. Tiered Cake Stand Display
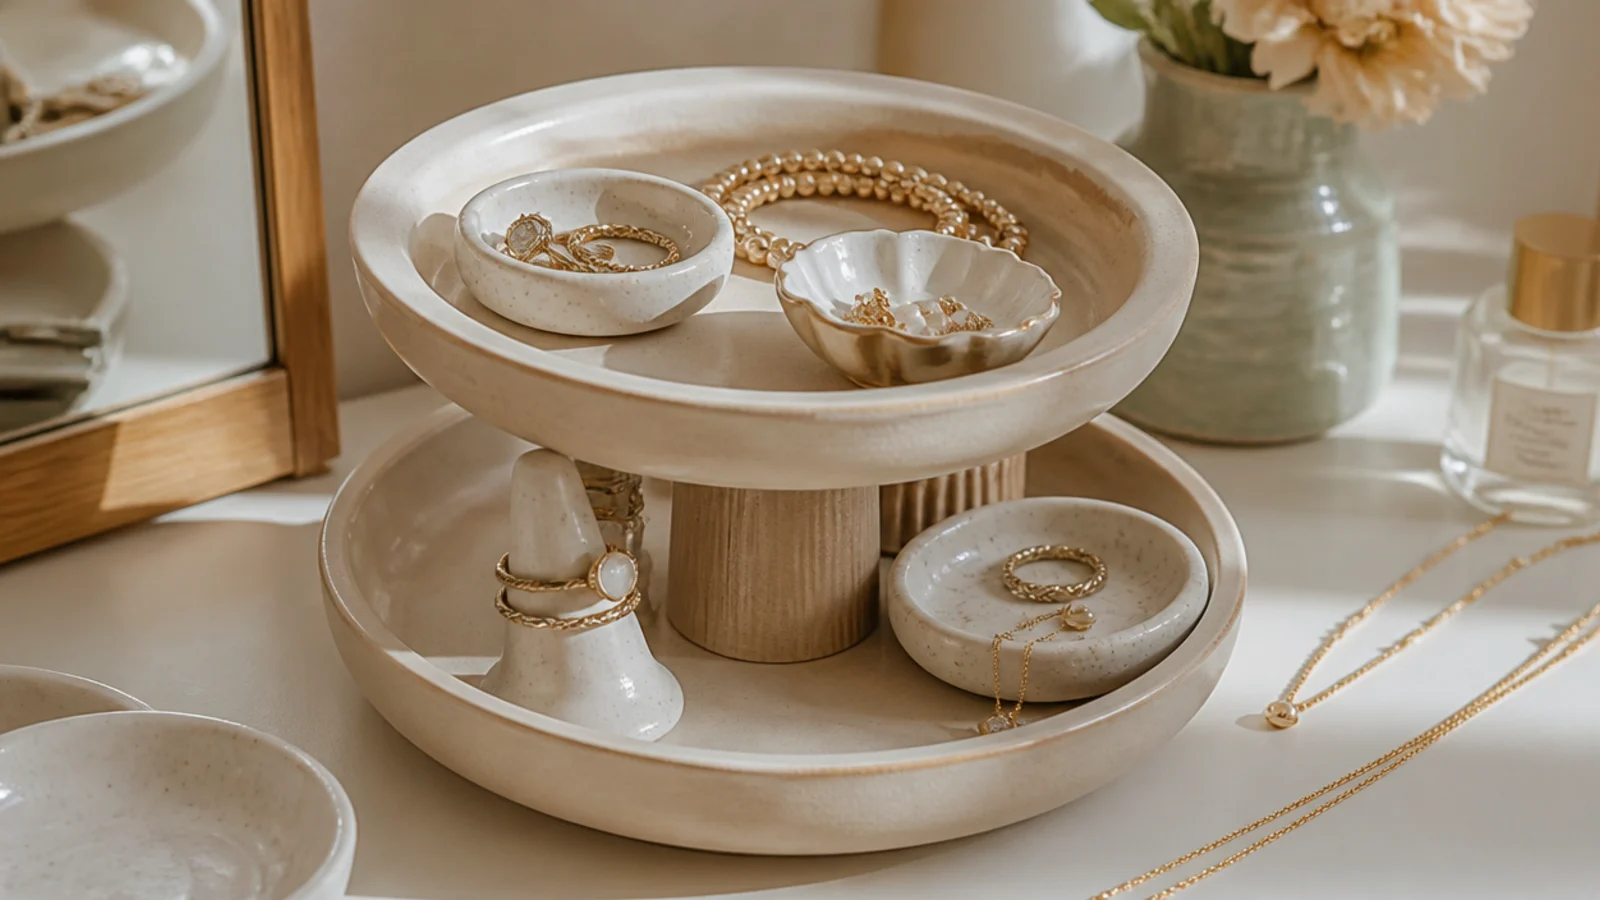
A tiered cake stand gives you two or three levels of open display on a small footprint. Each tier holds dishes, coiled bracelets, or a pile of rings. It suits a vanity where you want your favorite pieces out and pretty rather than hidden.
Use a thrifted two- or three-tier stand, or make one by joining plates with a center hardware rod kit from a craft store. Clean it and, if joining plates, epoxy the rod fittings and let them cure fully. Set small ring dishes on the tiers, coil bracelets on the edges, and put a shallow bowl of studs on top. Keep heavier pieces on the bottom tier for stability.
Editor's notePut your everyday pieces on the top tier where they’re easiest to grab and your occasion pieces below.
Skip thisDon’t overload a glued-plate stand with heavy items near the top; keep the weight low so the center joint doesn’t loosen.
19. Embroidery Hoop Earring Hoop
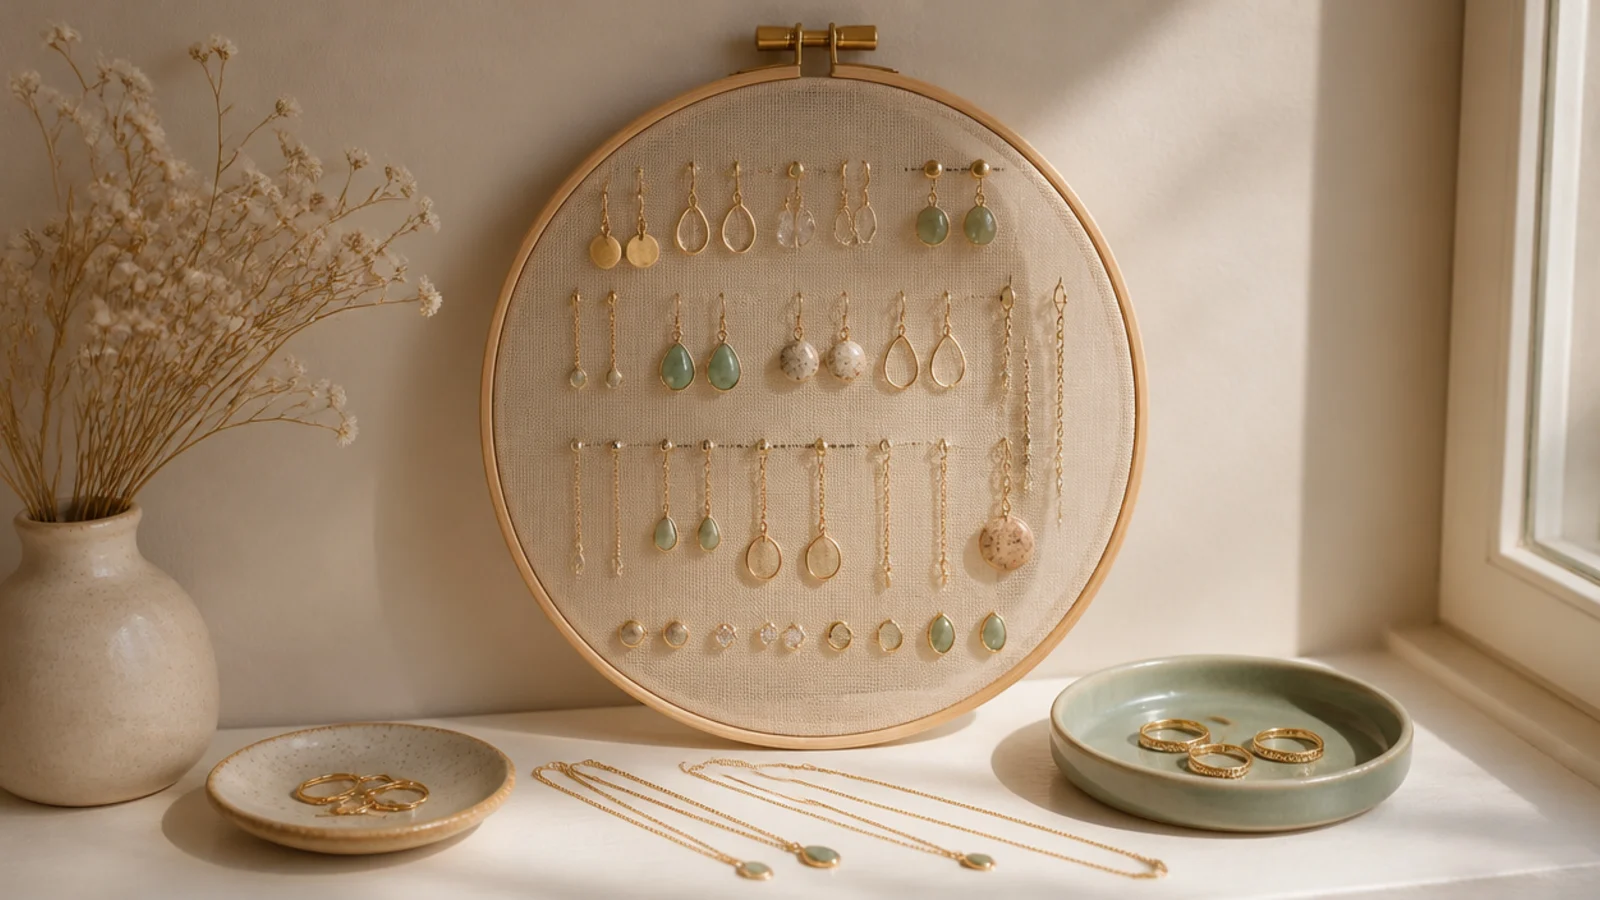
An embroidery hoop with mesh or lace stretched inside makes a soft, circular earring holder. The fabric grid holds studs and hooks alike. It suits a feminine room and is one of the cheapest boards you can make.
Stretch a piece of tulle, plastic canvas, or lace inside a wooden embroidery hoop and tighten the screw so it’s drum-taut. Trim the excess fabric close to the hoop. Hang it from the hoop’s screw hardware on a small nail or hook. Push studs through the fabric and hook dangles over the weave, keeping the arrangement loosely symmetrical.
Choose tulle or plastic canvas over loose lace; the tighter, even holes hold stud backs securely where lace lets them slip.
Don’t stretch the fabric loosely; a slack hoop sags in the middle and earrings slide to the center and pile up.
20. Hanging Mason Jar Organizer
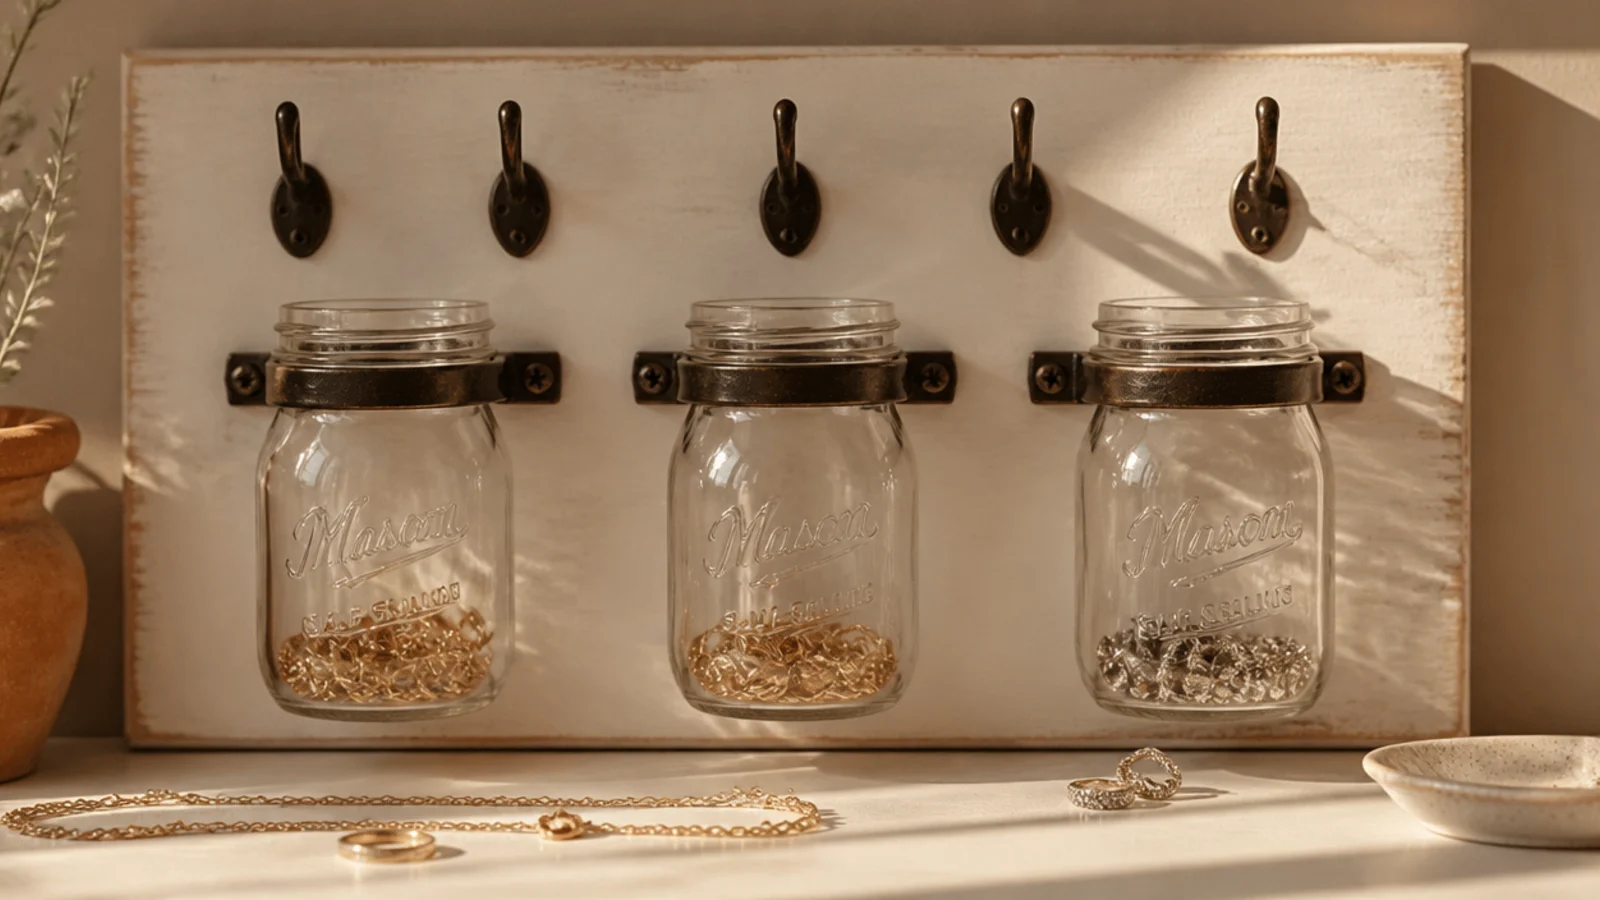
This combines hooks for necklaces up top with jars below for small loose pieces, so one board handles several types. The jars corral rings, studs, and safety pins that would otherwise scatter. It suits a busy dresser that needs to hold a bit of everything.
Paint a wood board and mount pipe clamps or hose clamps along the lower half, spaced to hold small mason jars. Screw a row of cup hooks along the top for necklaces. Mount the board with two anchors, level it, then twist the jars into the clamps. Drop rings and studs into the jars and hang necklaces above.
Use wide-mouth half-pint jars so you can reach in and grab a ring without tipping the whole jar out.
Don’t overtighten the clamps on the glass; snug is enough, and cranking them can crack the jar rim.



