
1. Warm wreath halo with a slim RGBW ring (kept in warm mode)
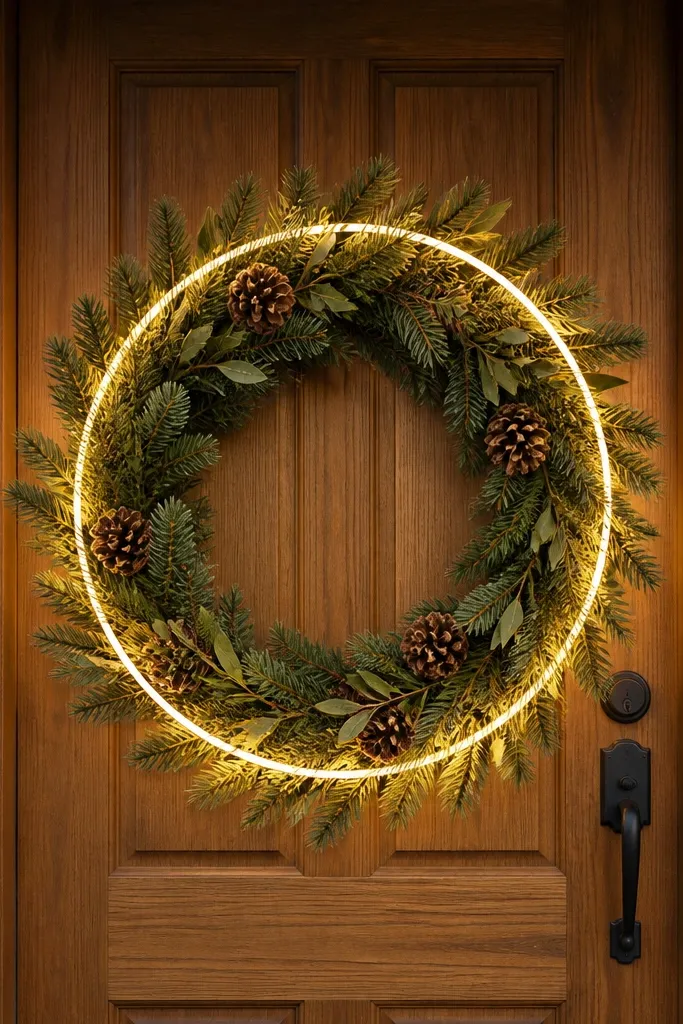
Start by choosing a wreath LED ring sized to your wreath diameter — measure the outside edge of your wreath form and buy a ring that matches within about 1-2 inches. Then mount the wreath as you normally would, and attach the ring behind the greenery using the included clips or zip ties through the frame. Finally, route the power cable to your outlet or timer, leaving a drip loop before you secure the cord along the trim with paintable cord clips. Set the controller (if your ring has one) to warm white around 2700K and keep brightness moderate so the door panels still show detail instead of washing out.
This setup is the easiest “main door themed with lights” look because the wreath instantly becomes the hero. A slim LED ring around the wreath gives you an even halo — no hotspots, no messy string-light dots. Keep the ring in warm white mode so it flatters wood grain, painted panels, and brass or black hardware. It’s also forgiving if your porch has uneven sunlight, since the ring defines the shape even at dusk. Skill level is beginner-friendly and the install is usually under two hours for a typical front door with an existing wreath hook or mounting bracket.
Skip thisDon’t run the ring in bright cool white if your hardware is warm metal — the metal will look dull and the wreath glow will look harsh.
Editor's noteUse a timer plug with a sunrise/sunset schedule so the halo turns on right when porch shadows get dramatic.
2. Two matching black sconces with warm bulbs and a door-panel glow
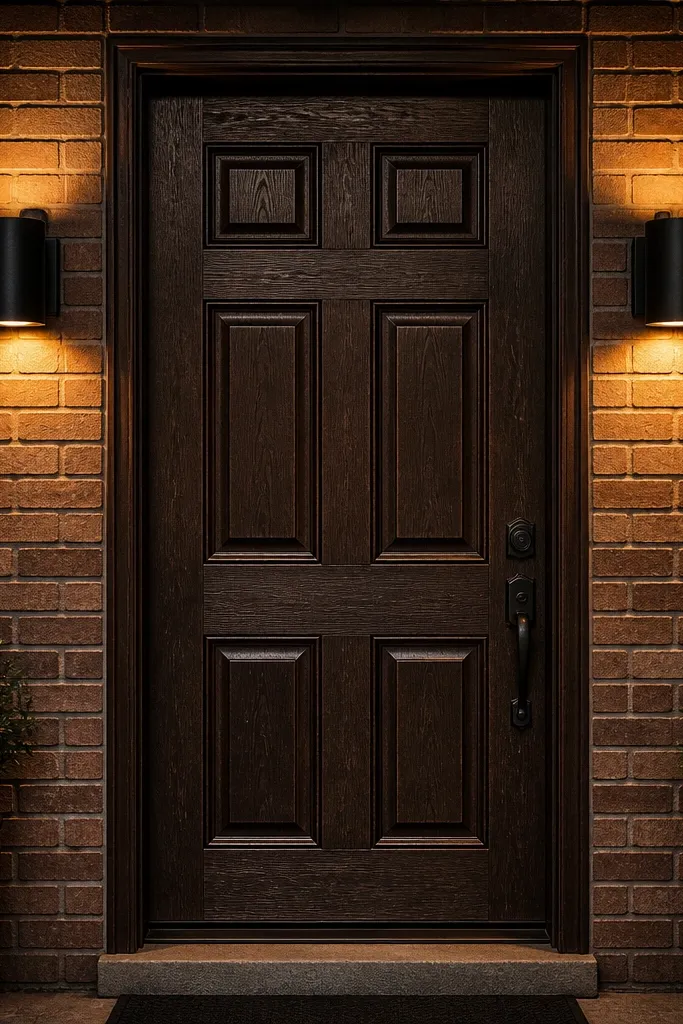
Measure from the porch floor to where you want the sconces so the light hits the upper half of the door, not the bottom threshold. A solid target is mounting the lamp center around 65-70 inches from the floor, then aiming the light slightly downward toward the door panels. Install the fixtures using exterior-rated junction boxes and weatherproof connectors, and use 2700K bulbs in the fixture’s wattage limit. After mounting, check the beam direction at night and adjust aim so the glow lands on the door, not the siding above it.
If you want the entrance to look “finished” without adding clutter, two matching sconces are the cleanest move. They frame the door symmetrically, which reads intentional from the street, and warm bulbs make the door color look richer instead of gray. This look works especially well on paneled doors because the sconces cast gentle light across the raised areas. It also helps if your current lighting is overhead-only; sconces reduce shadow pooling around the handle and lock area. Installation is a mid-level DIY task if you’re wiring new mounts, but if you already have exterior boxes, it’s a straightforward swap.
Skip thisDon’t place the sconces too low — you’ll light the doormat and miss the door’s texture.
Editor's notePick sconces with diffusers or glass covers so the bulbs don’t create glare spots on the door.
3. Door edge glow using slim LED tape in a 1x2 trim channel
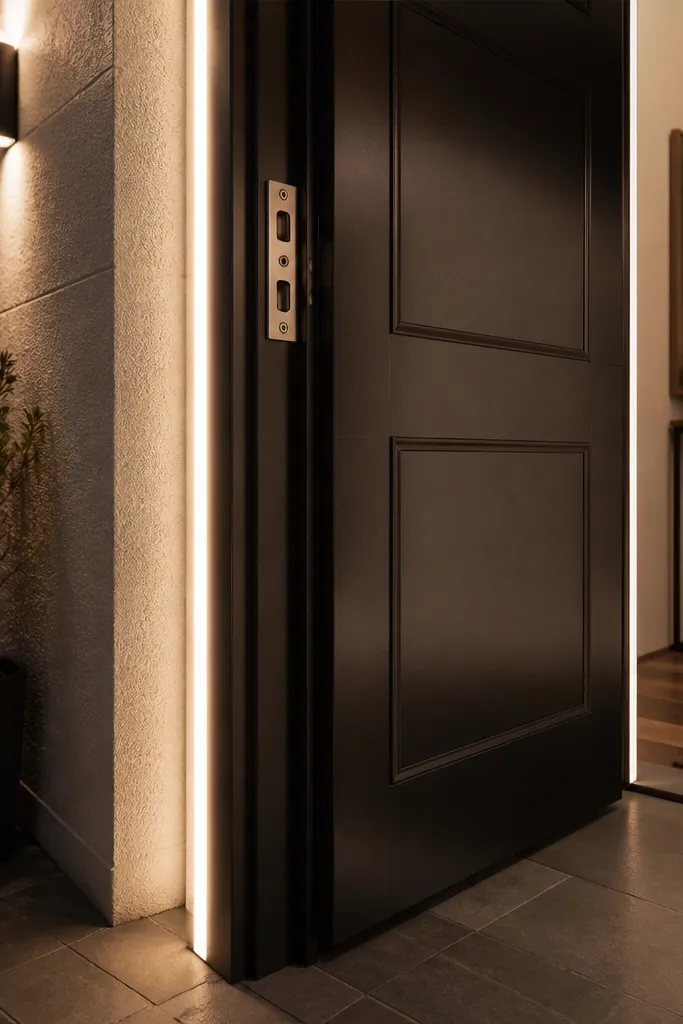
Remove any loose trim pieces around the frame only if needed to fit a channel; otherwise measure the channel length you can mount directly to the existing frame. Cut a 1x2 or similar low-profile aluminum channel to match the inside perimeter of the door opening, then dry-fit to confirm the light line stays consistent at corners. Install outdoor-rated LED tape inside the channel, connect with an appropriate outdoor connector, and seal end caps so water can’t wick into the tape. Finally, test the glow before closing anything up, then secure the channel with exterior-rated screws and paint the channel or use trim paint to match.
This is the “architectural” option for people who hate visible string lights. A slim LED tape installed in a small channel gives you a clean edge glow that outlines the door frame and makes the whole entry look custom. Because the light is concealed, you avoid glare and the glow feels intentional even from close range. It’s also a great match for modern doors with simple lines where you want the light to trace the geometry. Plan for about half a day if you’re comfortable cutting channels and running tape neatly around corners.
Skip thisDon’t stick LED tape directly to raw wood or painted surfaces without a channel — it peels faster in heat and rain.
Editor's noteUse a diffuser channel (frosted cover) so the edge glow looks like a line, not a row of dots.
4. Brick-and-wood porch uplights: two small spikes aimed at the door
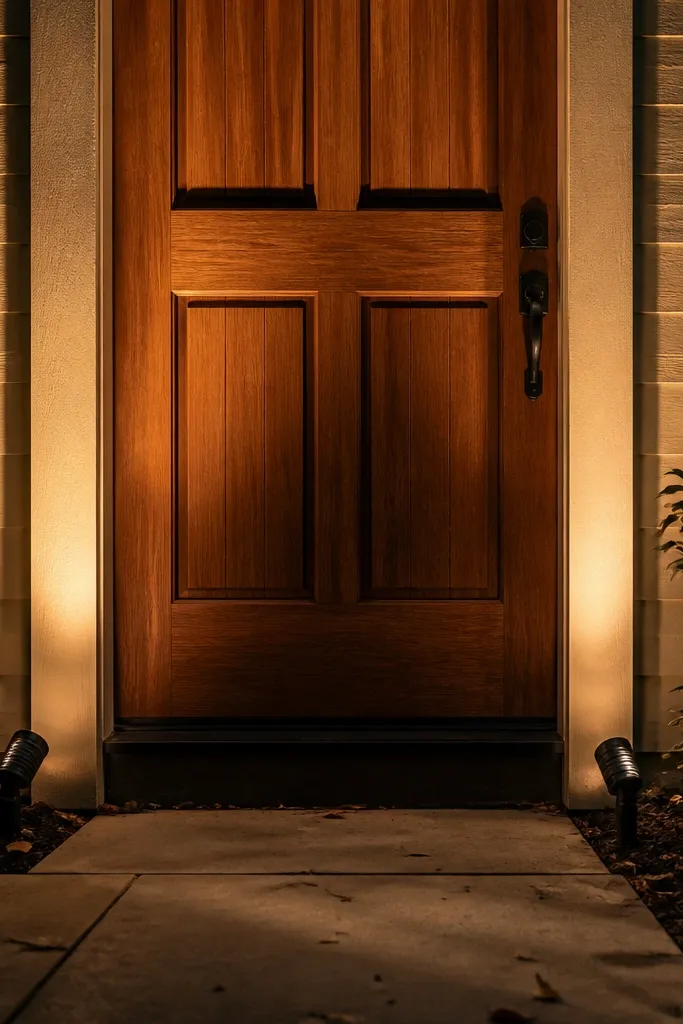
Place two uplights about 18-30 inches away from the door on each side, then angle the heads so the light hits the door at about mid-height. Start with a warm bulb color around 2700K and keep brightness moderate so you don’t blow out the door color. Plug them into a weather-resistant outdoor outlet or use a timer plug, and route cords along the ground edge where they won’t get kicked. Aim at night by turning the fixture slightly until the brightest spot sits on the door surface, not the wall above it.
Uplighting is a fast way to make a main door feel dramatic without decorating the whole porch. Two small LED uplights placed low on either side of the door throw light upward across the panels and trim, giving you depth and a warm, cinematic look. This works best when you have mulch beds, concrete walk edges, or brick steps where you can hide the spikes. The biggest win is texture: wood grain, carved panels, and even paint sheen show up at night. It’s beginner-friendly because most uplights are plug-and-play, and you only adjust aim until it looks right.
Skip thisDon’t point uplights straight up — you’ll light the siding and create harsh glare instead of a door-shaped glow.
Editor's noteAdd a small piece of landscape fabric or a flat stone base under the spike to keep it stable and reduce wobble.
5. Transom glow with a hidden rope light behind the top trim
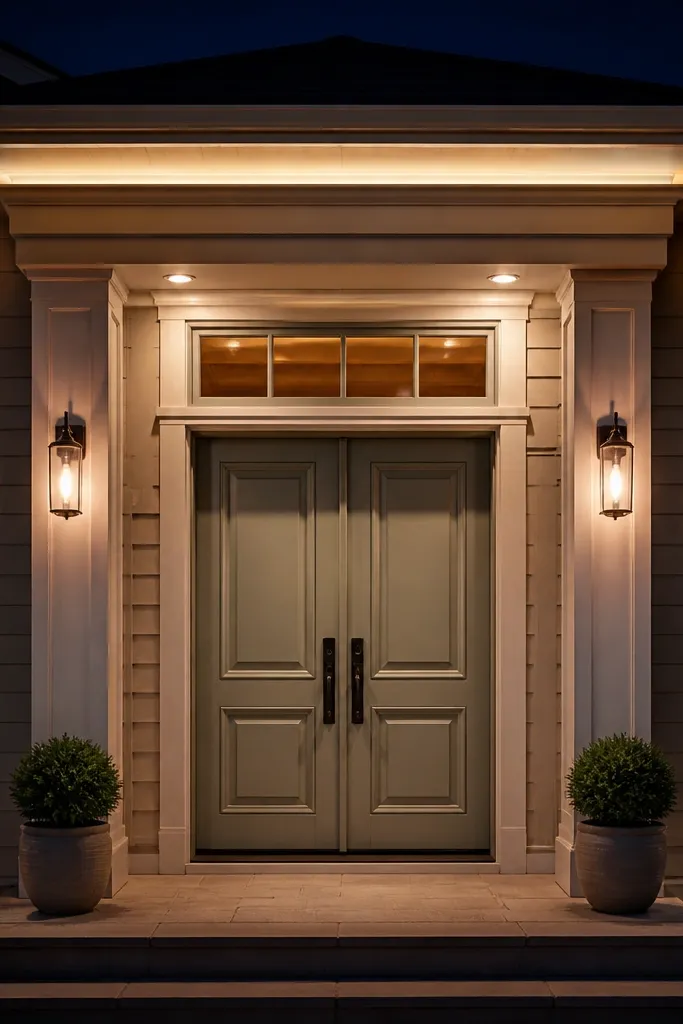
Measure the inside width of the transom opening and buy a rope light designed for outdoor use with a diffuser so the glow stays even. Remove or loosen the top trim only as much as needed to slide the rope light behind it, then mark the run path with painter’s tape. Cut and connect using the rope light’s approved cut points and connectors, then test before you fully reassemble anything. Secure the rope light with clips or small screws along the hidden surface, then route the cord to your power source with strain relief and a drip loop.
If your entry has a transom window, this look is the cleanest way to use it. A concealed rope light behind the top trim creates a soft band of light that draws the eye to the upper architecture while keeping the door itself readable. It’s also great for making the entrance look intentional in photos because the glow frames the window and doesn’t clutter the sides. This setup is best for houses where the transom has enough clearance behind the trim to hide a diffuser. Skill level is intermediate mainly because you need careful measuring and neat routing, but the payoff looks high-end.
Skip thisDon’t trap the rope light in a way that blocks heat dissipation — keep it in the manufacturer’s recommended mounting method.
Editor's noteChoose a rope light with an even diffuser and run it at warm white; it makes glass look clear instead of milky.
6. Porch rail lanterns with warm bulbs and a matching door wreath
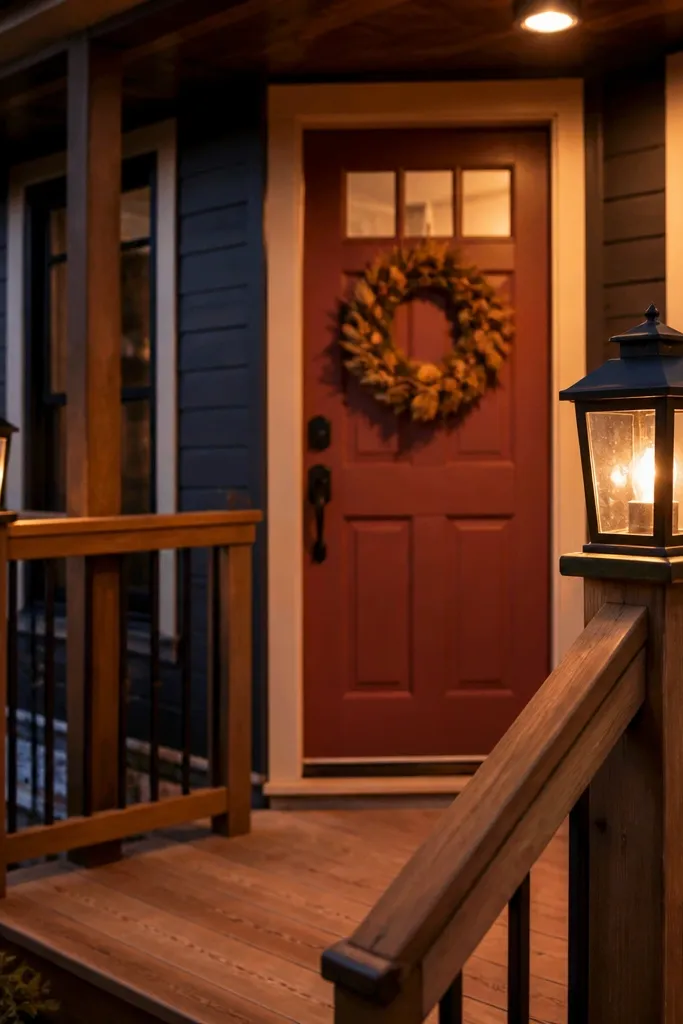
Pick lanterns with outdoor-rated LED candles or bulbs rated for enclosed fixtures, then decide spacing based on your rail length. Mount the lanterns so the light source sits around the same height as the wreath center, then use weatherproof mounts or clamps that don’t wobble. Install a wreath with either a plain warm halo ring or a simple battery LED strand inside the greenery, then keep all lights at 2700K. Finally, run cords along the underside of the rail using cord clips, and add a timer plug so the whole look turns on together.
This is the “cozy but still styled” option when you want a whole entry mood, not just one light feature. Lanterns on the porch rail add height and movement, and warm bulbs make painted doors and natural wood look inviting at night. Pair them with a simple wreath that matches the same metal finish (black, bronze, or brass) so the entrance looks like a set. It’s photogenic because the lantern light creates multiple planes: door, wreath, and rail. This is a moderate DIY because you’ll mount lanterns securely and route cords without sagging, but it’s very doable in a day.
Skip thisDon’t mix lantern finishes with the door hardware — mismatched metals make the whole look feel accidental.
Editor's noteIf your lanterns have glass panels, wipe them before install — smudges show up as dull halos on camera.
7. String lights in a clean grid: two vertical lines down the doorway
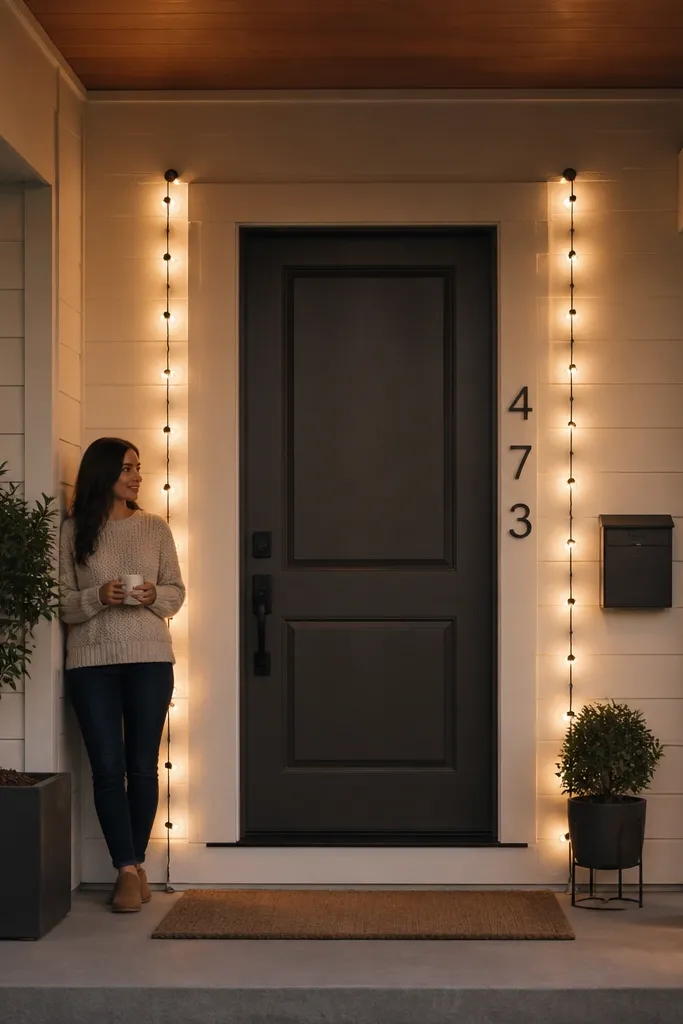
Choose warm white outdoor string lights rated for wet locations and pick a cable length that reaches from power to the top anchor points with slack for adjustment. Install two anchor points on each side of the doorway (top and bottom), then run the string lights vertically using small hooks or clear clips so the line stays straight. Keep bulb spacing consistent and aim for a gentle arc only if your columns force it; otherwise keep it straight for a clean grid look. Finally, connect to a timer plug and test from the street to confirm the lights frame the door handle area instead of drifting off-center.
String lights get a bad rap because people hang them messy. Used correctly, they make a main door look like a themed installation without looking like a holiday decoration. Two vertical lines on either side of the door creates a tidy frame, and a warm white bulb color keeps it classy. This works well on covered porches with columns, where you can anchor lines without pulling across the door itself. It’s beginner-friendly, quick, and very adjustable — you can tighten spacing until it looks symmetrical.
Skip thisDon’t wrap string lights around the door handle area — you’ll create glare and the light will fight the door hardware.
Editor's noteUse clear command-style outdoor clips or painted hooks so the line looks invisible during the day.
8. Solar wall-washers with a manual override and warm filter film
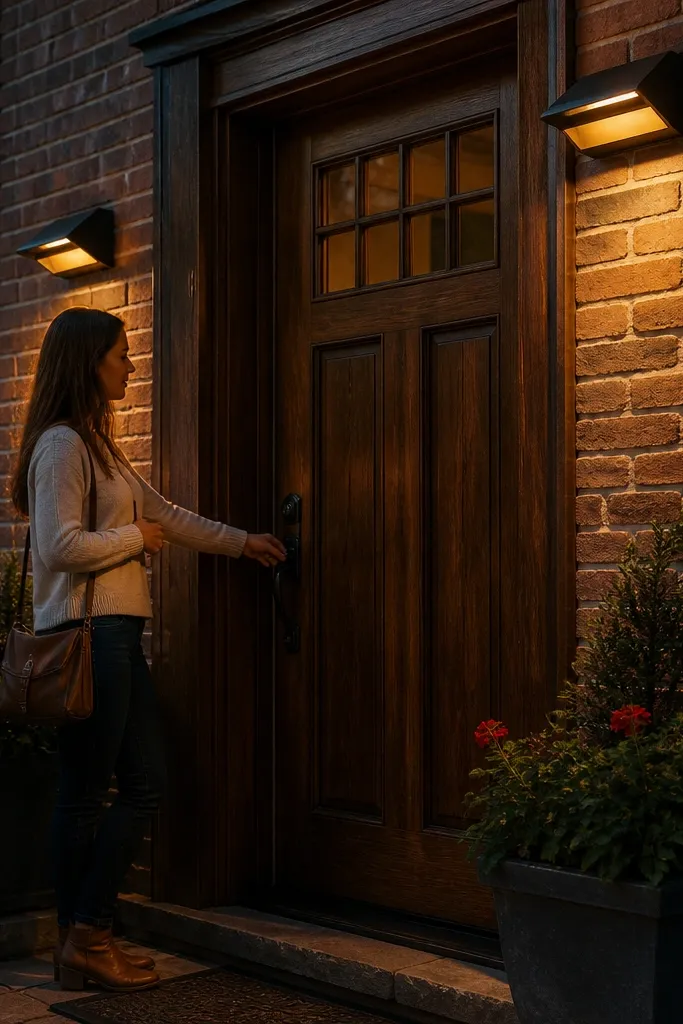
If wiring is a headache, wall-washers are the practical path to a themed entry. Even with solar options, you can get a cleaner look by controlling the light direction and warming the color so it matches door hardware. A wall-washer aimed at the door plane creates a soft wash that makes the whole entry feel cohesive, especially on stucco or brick. The key is to treat it like a design decision, not a gadget: placement and color control matter more than brightness. Skill level is low because most units mount with screws and you’re only dialing in angle.
Mount two wall-washers on either side of the door at a height that hits the middle of the door panels, then set the angle so the brightest part lands on the door, not the wall above. If the unit uses a cool white LED, apply a warm filter film rated for outdoor use inside the fixture housing or on the diffuser if the manufacturer allows it. Add a manual override timer or a plug-in option if the unit supports it so you’re not stuck with solar timing. Test at dusk, then fine-tune aim until both sides look symmetrical from the street.
Use the same model and settings on both sides; different solar outputs create uneven color and the door looks lopsided.
Don’t chase extra brightness — it turns the wash flat and hides door texture.



