
1. Two-tone door with a crisp white surround
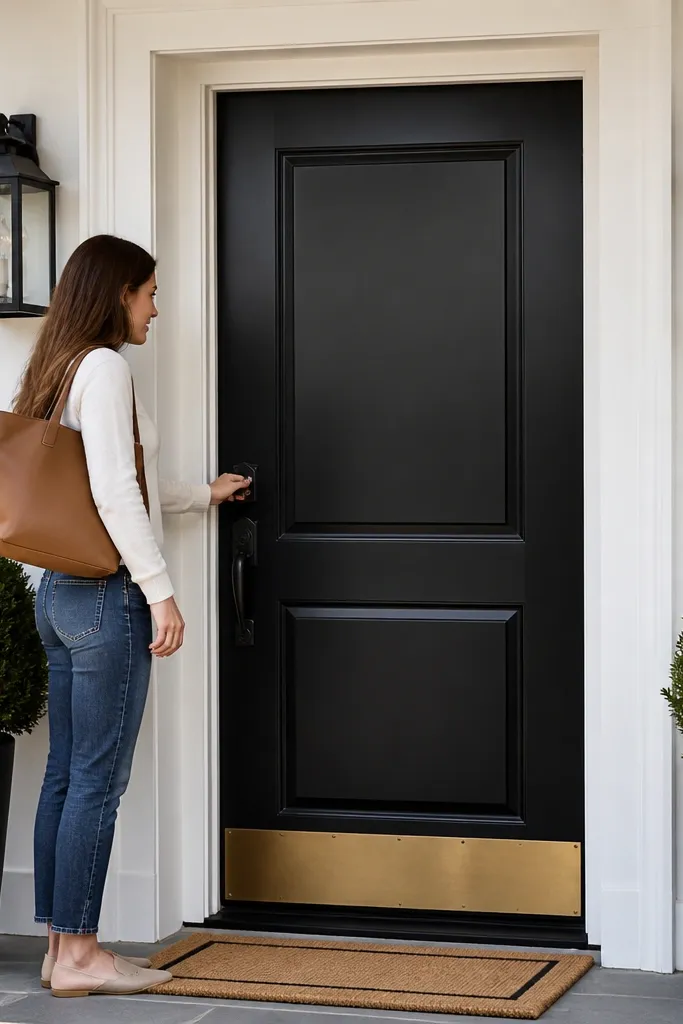
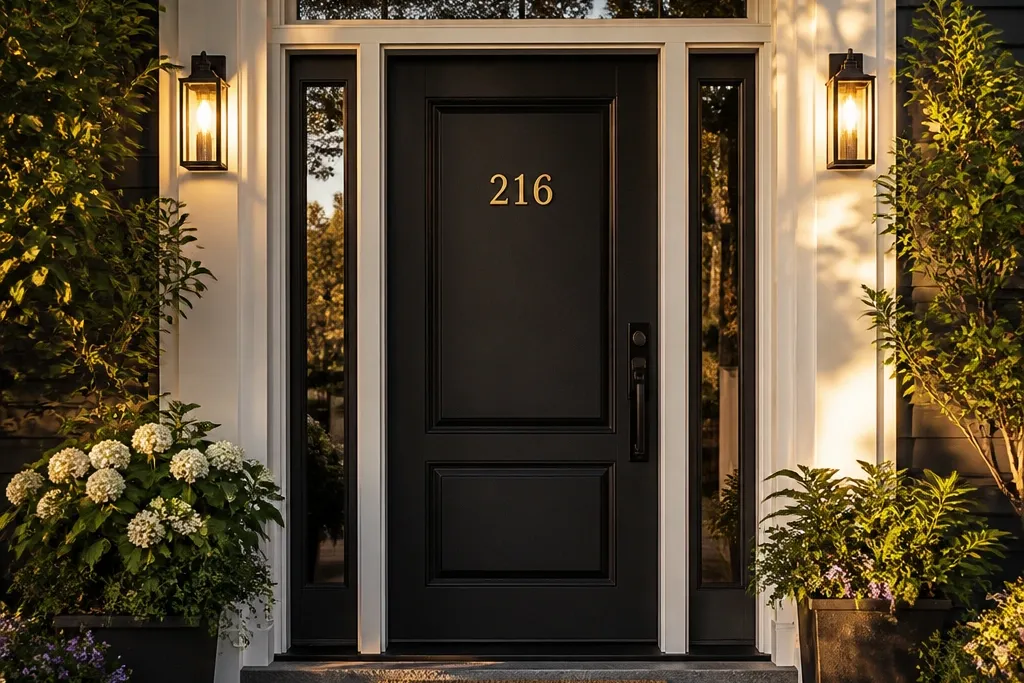
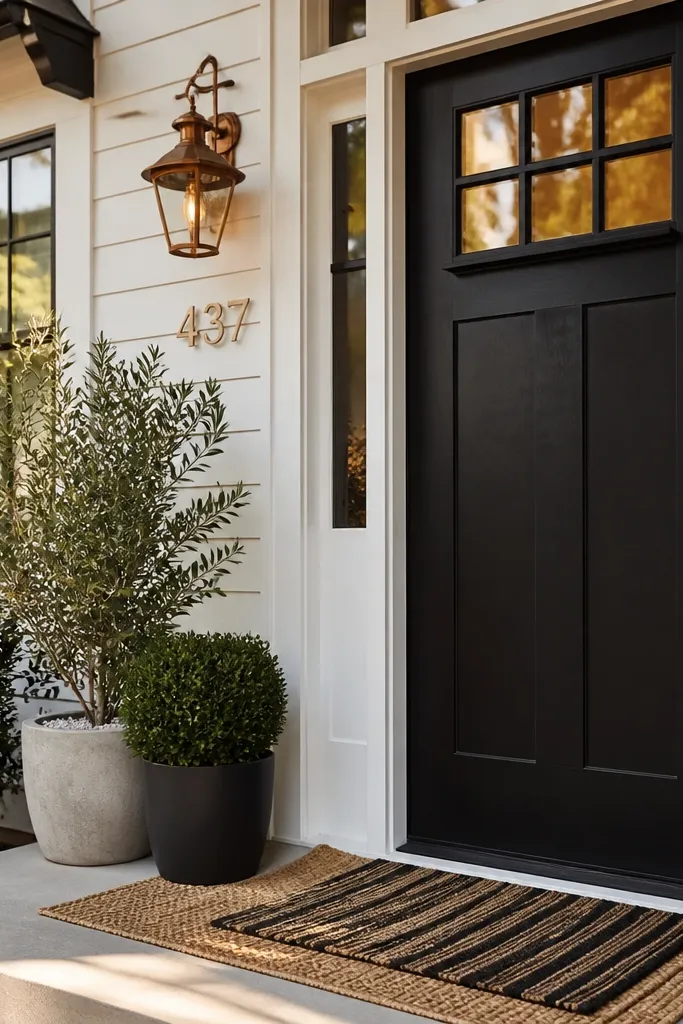
A two-tone door setup makes the entrance feel designed because it gives the door a clean rectangle your eye can latch onto. Choose a deep main color for the door leaf (blackened green, charcoal, or true black) and keep the surround a bright, durable white. This makes the door look sharper in daylight and more intentional at night when lights hit the trim. It also hides minor wall texture differences because the white frame becomes the visual anchor. Skill level is beginner-friendly if you’re using trim paint and a brush + foam roller kit, and it usually takes a long weekend.
Start by taping off the existing surround cleanly and removing loose caulk or flaking paint. Scuff the surround with 180-grit sandpaper, wipe with degreaser, then prime with an exterior bonding primer. Paint the surround with exterior trim paint in satin or semi-gloss, keeping a 1/8 in. Crisp edge at the door seam. Next, paint or refinish the door leaf in your chosen deep color, using thin coats and letting each coat cure before removing tape. Finish by re-caulking the edges with paintable exterior caulk.
Use painter’s tape with a hard edge tool (plastic putty knife) to prevent paint bleed at the door seam.
Don’t paint over chalky trim — scrape and prime first or the white will look patchy fast.
2. Matte black hardware upgrade with a thicker pull
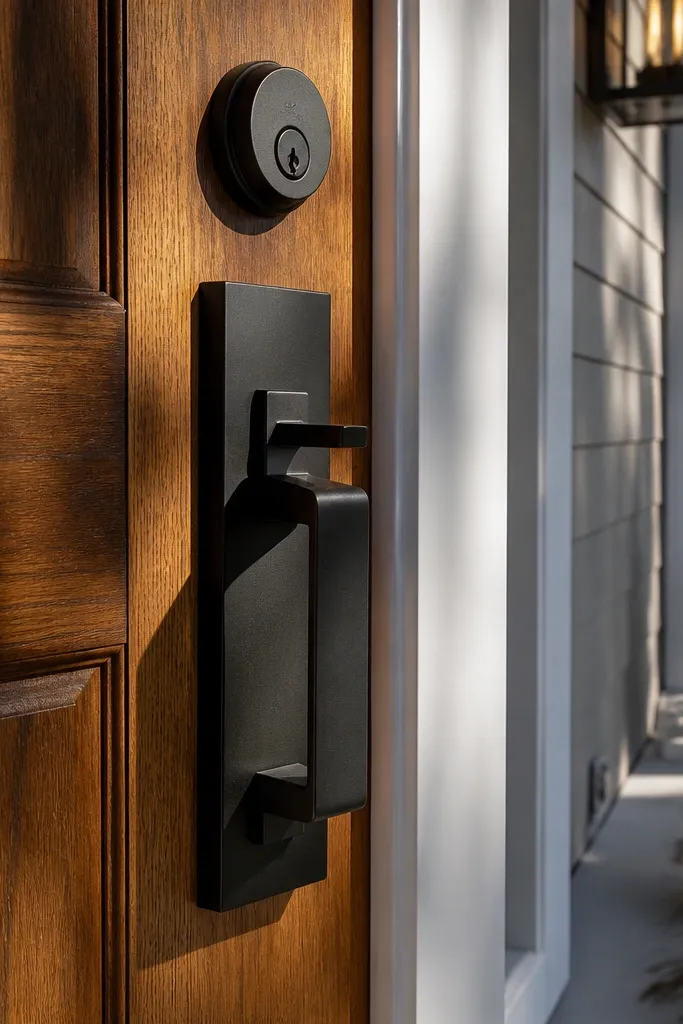
Measure the existing knob/lever spacing and the backset (common is 2-3/8 in. Or 2-3/4 in.). Buy a matching exterior-rated matte black set that fits your backset and door thickness (often 1-3/4 in.). Remove the old interior and exterior hardware plates, then install the new latch and strike plate first. Align the lever and tighten screws evenly, then test the latch throw before covering anything. If your strike plate is worn, replace it and adjust with thin shims so the door closes smoothly.
Hardware is the quickest way to make a main door look more expensive because it changes how light reflects and how the door reads up close. Matte black looks clean with most door colors, especially warm woods and cool grays. A thicker pull or lever silhouette makes the whole entry feel sturdier, even if the rest of the porch is unchanged. This project is also low mess and fast, and it’s one of the best “before you paint” steps because you’ll see the look immediately. Most of the work is measuring and aligning so the new hardware sits level.
Skip thisDon’t reuse a mismatched strike plate — it causes misalignment and makes the door look crooked.
Editor's noteUse painter’s tape to mark the screw holes so the plates don’t shift while you tighten.
3. Sconce pair on a mirrored height line
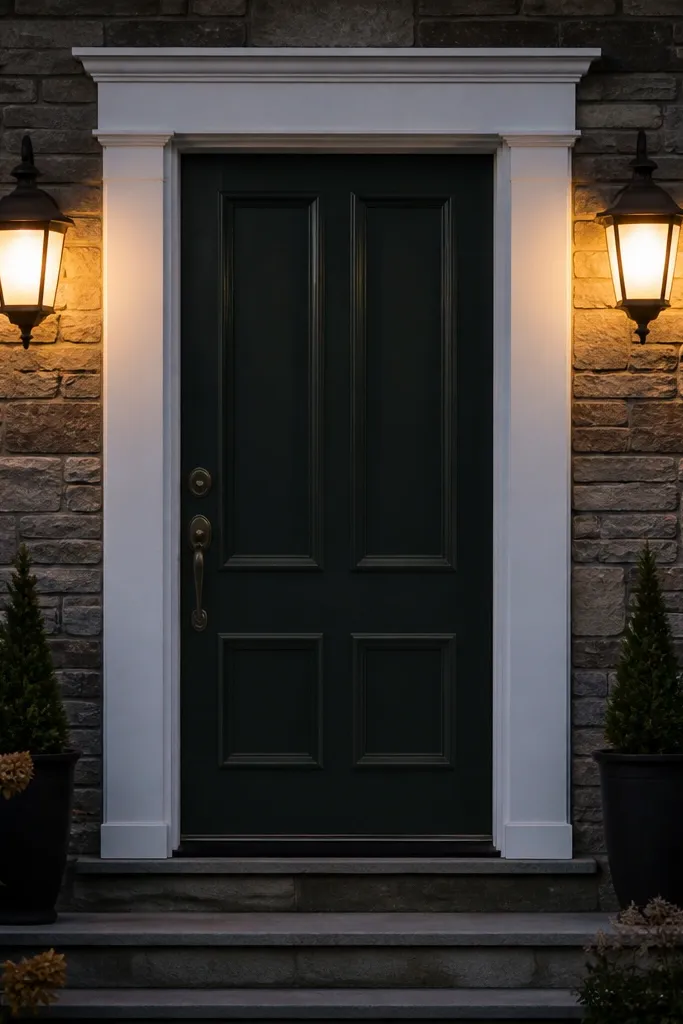
Pick sconces rated for outdoor use and match the electrical box size or plan for a licensed electrician if wiring changes are needed. Measure from the finished floor to the center of each sconce — aim for 60-66 in. Depending on porch height and door size. Turn off power, remove existing covers, and mount a weatherproof mounting plate with exterior-rated screws. Connect wires using wire nuts and a weatherproof junction box, then attach the sconce body and glass. Install LED bulbs at 2700K and test before final tightening.
A matching sconce pair turns a plain entry into a framed composition. The trick is symmetry and height: if both lights sit on the same visual line, the door looks balanced even when your house facade is busy. Warm bulbs (around 2700K) make the door color look richer and reduce harsh shadows. Choose lantern-style glass or fabric-like diffusers for a softer glow that photographs well. This works for narrow porches too because sconces don’t require floor space.
Skip thisDon’t mix different sconce sizes — the doorway will look off even if the door paint is perfect.
Editor's noteIf your wall siding is uneven, use a mounting spacer shim so the sconce sits flat and level.
4. Door canopy with slatted wood ceiling
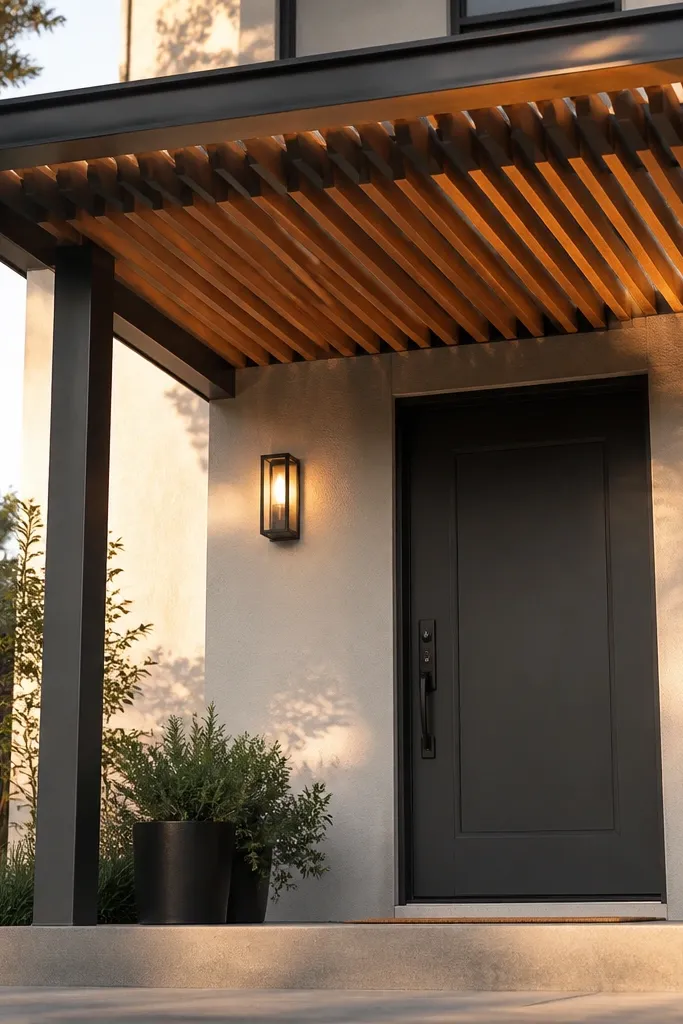
A canopy adds instant structure and makes the entrance feel sheltered and finished. Slatted wood ceilings look modern without feeling sterile, and the gaps create light-and-shadow patterns that look great in photos. This project also lets you hide wiring for a small overhead light and gives you a clean “top frame” for the door. Choose exterior-grade cedar or pressure-treated lumber, stained for weather resistance. It’s a mid-level DIY because you’re building a frame, but the visual payoff is huge.
Plan the canopy width so it extends 6-10 in. Beyond the door on each side. Build a simple rectangle frame with 2x4 or 2x6 treated lumber, then attach to wall studs with exterior lag bolts. Add rafters or joists every 12-16 in. So the slats won’t sag. Install slats (1x3 or 1x4) with small gaps for drainage, then stain or seal with exterior penetrating oil. Finally, attach drip edges and add one centered ceiling light fixture rated for wet locations.
Pre-drill all slat holes and use stainless screws so the slats don’t split and the canopy lasts.
Don’t skip drip edges — water will wick into the framing and ruin the look quickly.
5. Rustic wood entry trim with modern straight lines
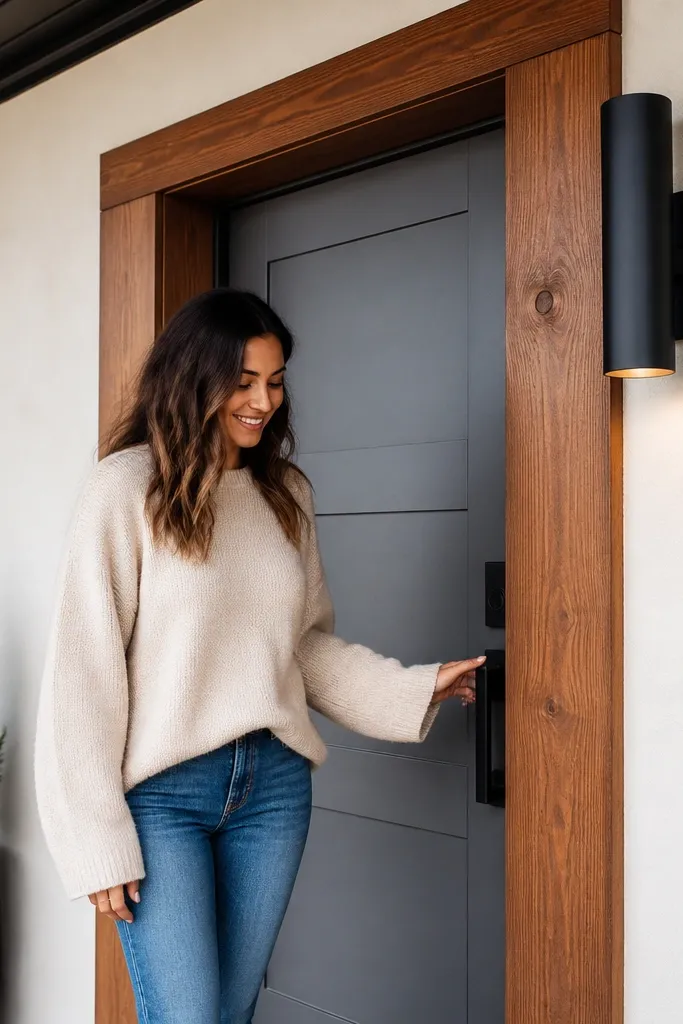
You can make a main door look custom without changing the whole facade by adding straight, boxy wood trim around it. The mix of rustic wood and clean geometry reads “intentional” instead of messy. It also gives you a place to mount lights and a surface that photographs warmly. Use exterior-stainable composite or cedar boards for stability and weather resistance. This is ideal when your house has stone, stucco, or brick and the door area looks too bare.
Measure the door opening and decide on trim width — 2-3 in. Looks balanced for most entrances. Cut boards for the sides and top using a miter saw (45-degree corners) so the frame forms one clean rectangle. Attach to substrate with exterior construction adhesive plus screws into studs or solid backing. Stain the boards after installation if you want exact edge control, or stain first for easier coverage and fewer drips. Seal with a clear exterior finish and caulk the seams where the trim meets the wall.
Use a 1/8 in. Reveal gap between trim and siding so it looks crisp, not stuck on.
Don’t mount trim only to hollow areas — find studs or use solid backing blocks.
6. Stone-look tile threshold landing
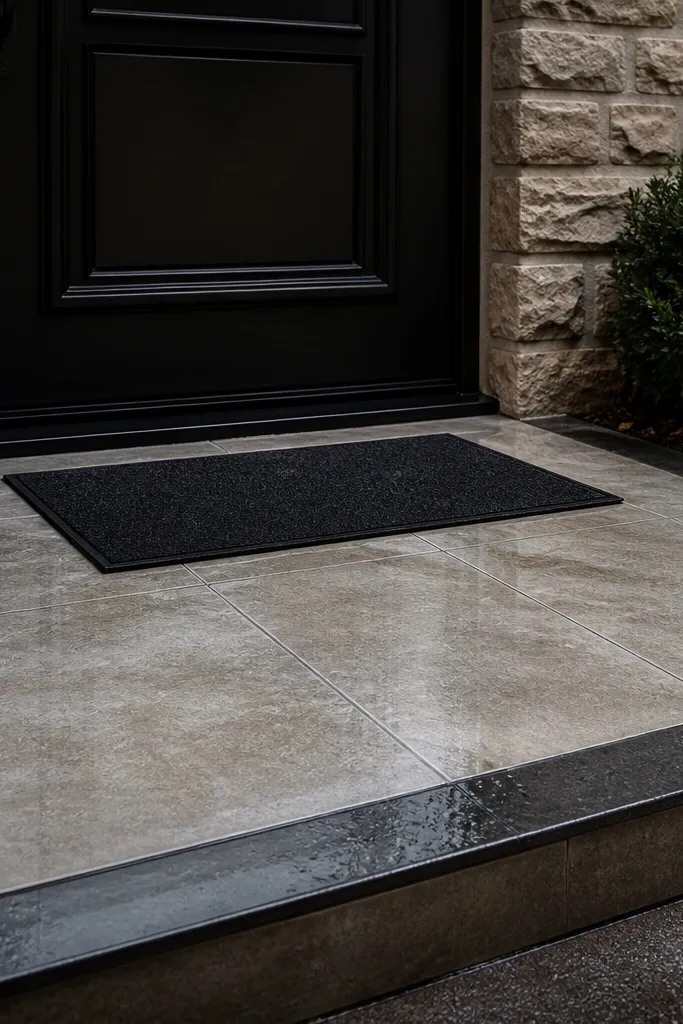
Measure the landing area and plan a layout that keeps cuts minimal at the outer edge. Use exterior-rated thinset and porcelain-rated tile, plus a foam backer board if the surface is not solid. Dry-lay first, then spread thinset with a notched trowel and set tiles, using spacers for consistent grout lines. Let set, then grout with a cementitious grout made for outdoor use. Seal grout if the product calls for it and slope or check that water sheds away from the door.
A good-looking House Main Door entrance is often ruined by a rough threshold. Tile the landing and you instantly create a polished “landing zone” for the door, which reads clean from the street. Stone-look porcelain is durable and doesn’t demand constant sealing like natural stone. Add a simple border strip in a slightly darker tone for visual depth. This project is great when your porch floor is cracked, uneven, or stained, and you want the door area to look new.
Skip thisDon’t use interior grout on outdoor thresholds — it will stain and crack faster.
Editor's noteUse a leveling system (like wedges) on larger tiles so the surface stays flat for a sharp look.
7. Wrought-iron style door grille in a clean frame
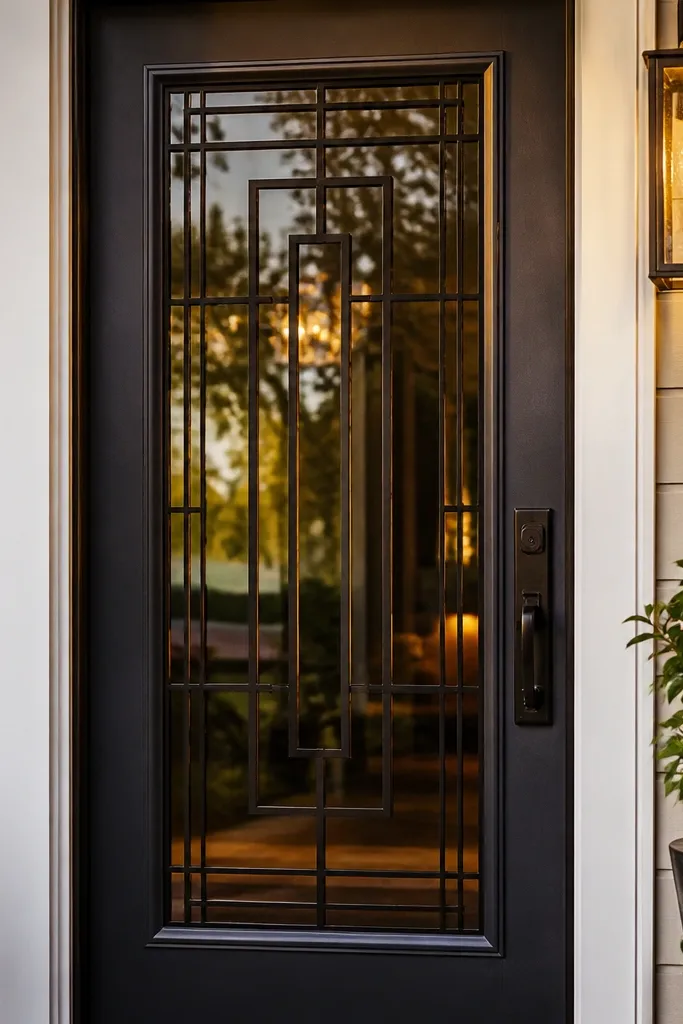
If your door has a glass panel, adding a grille frame makes it look architectural instead of basic. Think wrought-iron style bars but installed in a straight, measured pattern so it doesn’t look accidental. This is a strong option for renters because many grille inserts come as surface-mounted kits. It also improves privacy while keeping the entry bright. The look photographs well because the bars catch shadows at different angles.
Measure the glass panel opening and choose a grille kit sized for it, including the bar thickness and mounting method. Clean the glass and frame area thoroughly, then dry-fit the grille to confirm alignment. Install with the included adhesive or screws depending on the kit — for screws, pre-drill tiny pilot holes to avoid cracking. Seal edges with clear outdoor silicone if the kit allows, then test that the door closes without rubbing. Finish by adding a small trim strip if the kit leaves a visible gap.
Use a level and mark reference lines with painter’s tape before committing adhesive.
Don’t center the grille by eye — one millimeter off shows up instantly in photos.
8. Exterior paint refresh with a matte door finish
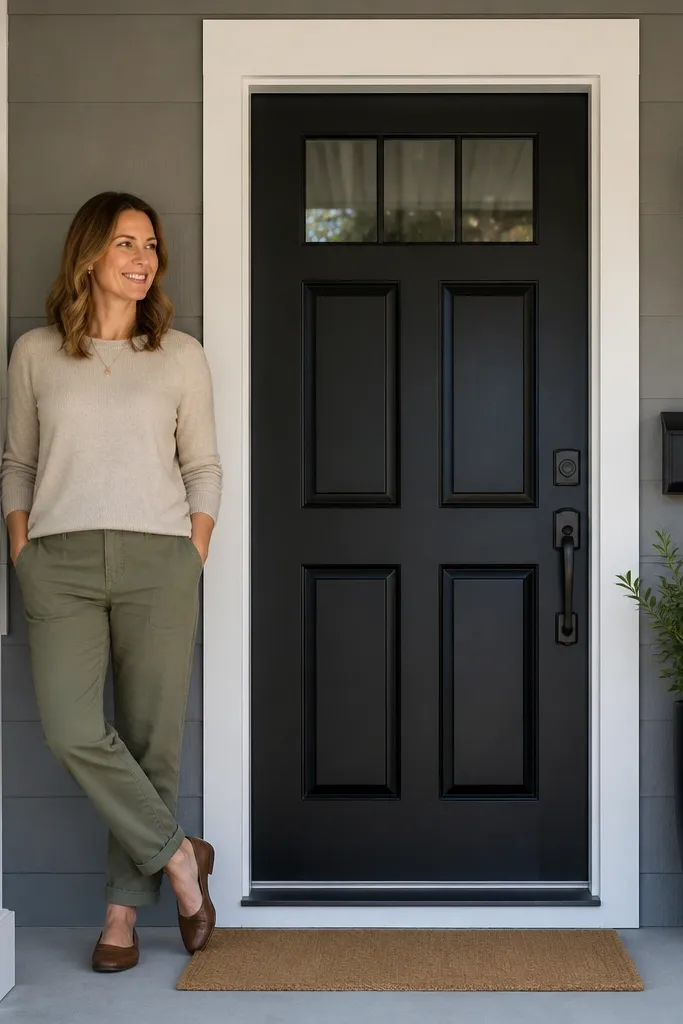
A proper door paint job is the foundation for House Main Door good-looking. Gloss hides imperfections but can look harsh; matte absorbs light and makes the color look richer and more modern. Choose an exterior-rated matte or satin door enamel and keep the sheen consistent across the door leaf. This update also fixes faded areas around the lock where grime accumulates. It’s a strong DIY because it’s mostly prep and patience, not special carpentry.
Remove the door if it’s easy or work in place if you can tape carefully. Clean with a degreaser, sand with 180-grit, and scrape peeling paint down to sound layers. Fill dents with exterior wood filler, sand smooth, then wipe dust completely. Prime with an exterior bonding primer, then apply two to three thin coats of door enamel using a foam roller for smoothness. Let cure fully before reinstalling hardware and touching up edges.
Use a small angled brush for the recessed panels so the matte finish doesn’t show streaks.
Don’t rush cure time — matte paint scuffs easily if you re-handle the door too soon.
9. Front door color matched to house trim undertone
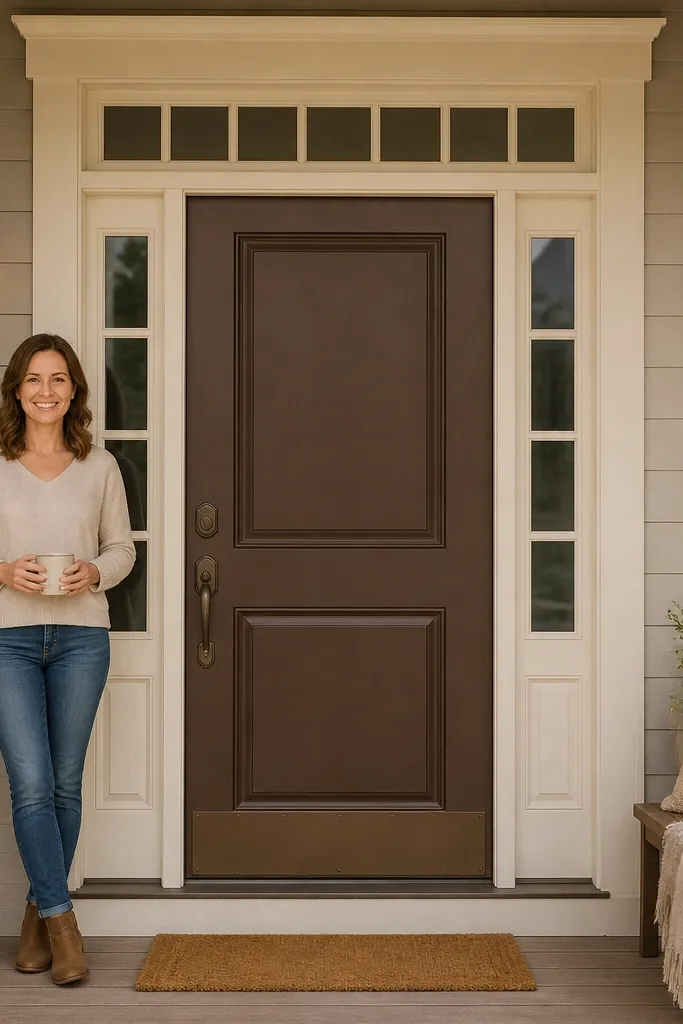
The best House Main Door good-looking entrances don’t fight the rest of the facade. Match your door color undertone to your trim: warm undertones pair with warm whites and bronze hardware; cool undertones pair with cool grays and chrome or blackened steel. When the undertone matches, the door looks like it belongs and the entry feels cohesive. This is one of the few “design” projects that changes everything with no construction. It’s also cheap compared to a remodel.
Look at your trim and siding in shade and in direct sun — that’s where undertones show. Pick a door color that shares the same temperature (warm or cool) and choose a finish that stays consistent (matte or satin). If you’re unsure, test a 12x12 in. Sample on the door and observe for two days: morning, afternoon, and evening. Once you choose, prep and paint the door leaf as a standard exterior paint refresh with primer. Finish by matching hardware tone and adding one accent element like a doormat color that ties back to the door.
Bring a scrap of your trim paint chip to the store and compare under the same lighting.
Don’t pick a door color that clashes with your brick undertone — you’ll see it every time you pull into the driveway.
10. Tall planter box with a clean edge and hidden irrigation

Planters make the entry look finished, but the difference is in the structure. A tall, straight-edged planter box with a clean rim looks modern and frames the door without clutter. Add a hidden reservoir or simple drip setup and the plants stay healthy, which keeps the look consistent week to week. Choose dark planter material (charcoal or black) for contrast against light walls, or warm wood stain for a softer vibe. This works for houses with little porch space because it brings vertical height and reduces the need for extra decor.
Build or buy a tall planter box with exterior-grade wood or composite and a flat rim. Line it with a waterproof barrier and drill drainage holes at the bottom, then add a small reservoir layer. For a clean look, keep the planter opening consistent and use matching soil depth around 10-12 in. Plant with one tall evergreen or grass plus a trailing or seasonal filler to keep the silhouette. Water using a simple drip line or watering tube so you don’t soak the rim and stain the wall.
Use a dark mulch or decorative stone to hide soil shrinkage and keep the top layer looking sharp.
Don’t choose a planter that wobbles — a crooked planter line makes the whole entry look sloppy.
11. Slim planter shelf on the wall beside the door
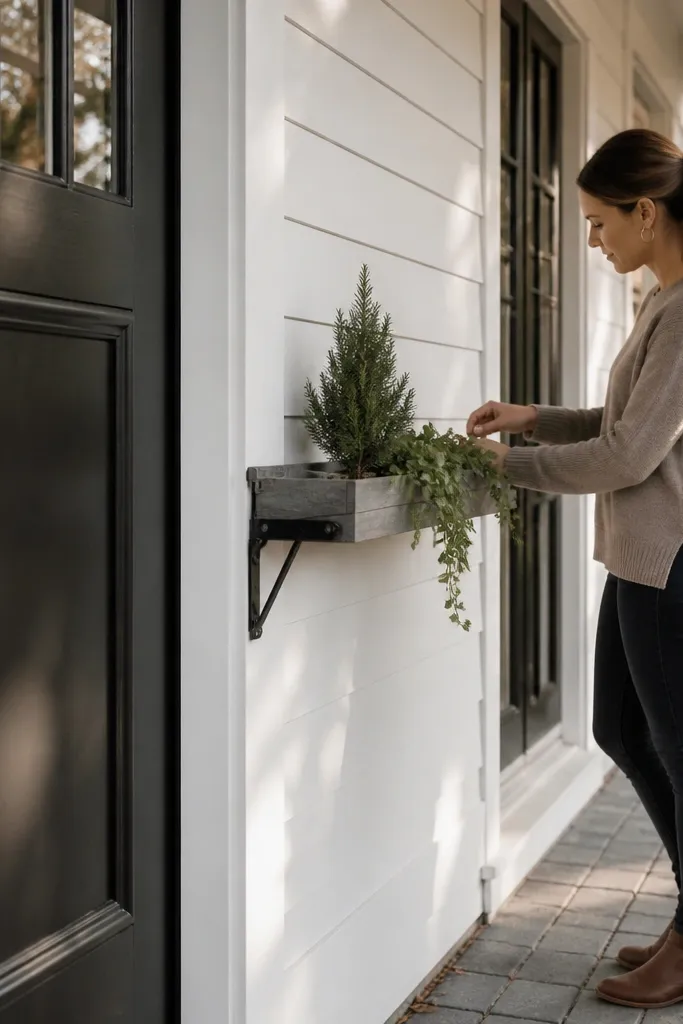
Measure the side wall next to the door and find the studs so brackets can anchor securely. Seal the shelf board with an exterior finish, then install brackets level with a laser or long level. Use a shelf depth of about 6-8 in. So pots fit without overhang. Place matching pots and use a drip tray under each one. Route watering by hand with a small spout so water stays in pots, then wipe the shelf after watering.
If you’re short on porch floor space, a wall-mounted planter shelf gives you the framed, styled look without blocking the walkway. It also lets you control height so greenery sits at door-eye level, which photographs better than low pots. Use an exterior shelf bracket system and a sealed shelf board so water doesn’t ruin the finish. This idea is perfect for narrow entries, townhomes, or covered porches where you want a clean, modern line. The result looks intentional even when plants aren’t in bloom.
Skip thisDon’t mount the shelf too low — low greenery makes the door feel boxed in.
Editor's notePick one pot shape and one color — the shelf looks designed instead of random.
12. Door wreath hanger rail with hidden hooks
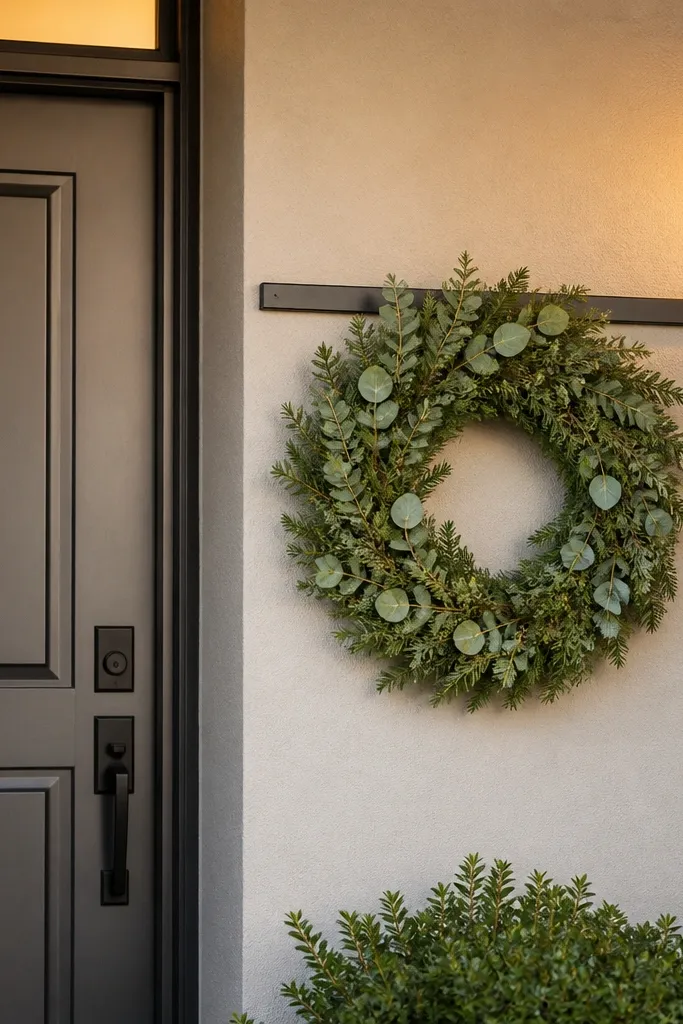
Choose a narrow rail or two-piece bracket system rated for outdoor use and match the metal tone to your hardware. Find studs or use proper anchors if mounting into masonry. Mark a centerline beside the door and install the rail so the wreath hangs at the height of the door knob or slightly above. Add hooks spaced so a wreath sits without twisting. Use a weather-resistant wreath hook backing or protective sleeve to keep the metal from rusting.
A wreath can look messy if it’s hung by hooks that twist or leave visible hardware. A small hanger rail beside the door gives you a clean, repeatable spot for seasonal decor, and it keeps wreaths centered for a balanced look. The hidden hooks keep the focus on the wreath, not the mounting system. This is great for people who change decor often and want the entry to look good year-round. It’s also a small project that makes a big visual difference.
Skip thisDon’t use thin nails into siding — they loosen and the wreath ends up crooked.
Editor's noteInstall the hooks with a slight tilt so the wreath sits flat and doesn’t swing.
13. Front door sidelights with removable fabric shade panels
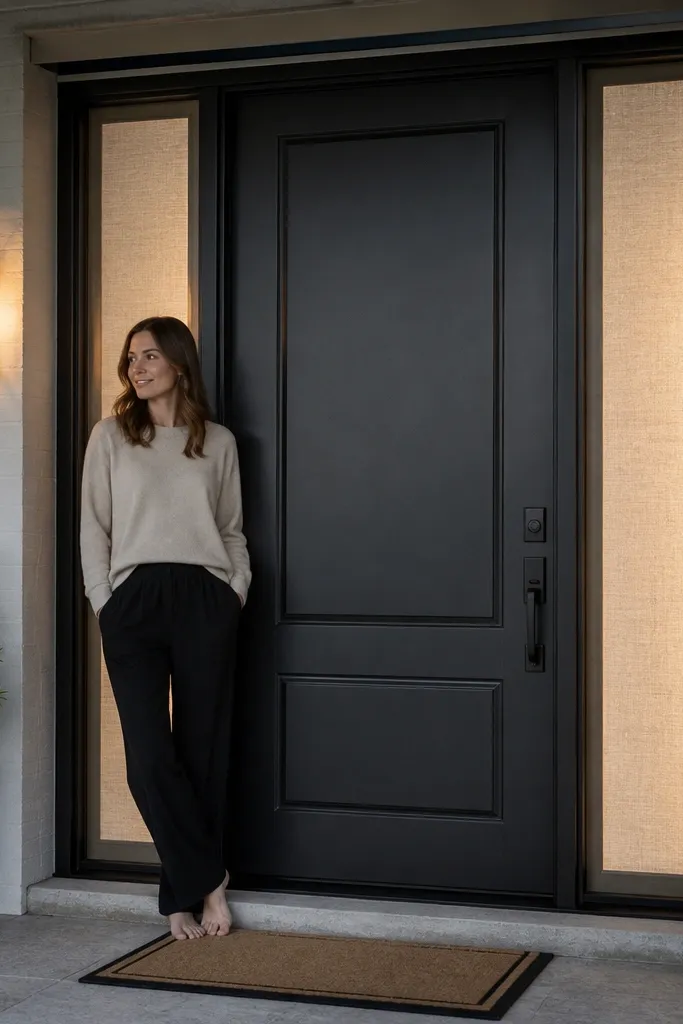
Measure each sidelight window and pick a panel material that handles outdoor conditions (UV-stable vinyl or outdoor fabric with a rigid frame). Create a simple frame using thin trim boards or buy a pre-made kit sized to your window. Attach with removable clips or hook-and-loop so you can remove panels for cleaning. Seal any gaps with clear outdoor silicone if you’re using a rigid frame. Test the panel fit by closing the door and checking for any drafts that shift the panel.
If your door has sidelights, you can make the entry look softer and more styled by adding translucent shade panels. The panels reduce glare, add a gentle texture, and make the door area look cozy without changing your architecture. Removable fabric or vinyl panels are also practical because you can swap them seasonally. This is a strong path to House Main Door good-looking when the main problem is harsh light or busy reflections on glass. It looks good in photos because it creates an even, calm background around the door.
Skip thisDon’t pick a heavy blackout material — it makes entrances look dark and flat.
Editor's noteUse a semi-sheer panel in a warm white tone so the light coming through flatters skin and door color.
14. Recessed entry lighting at the porch ceiling edge
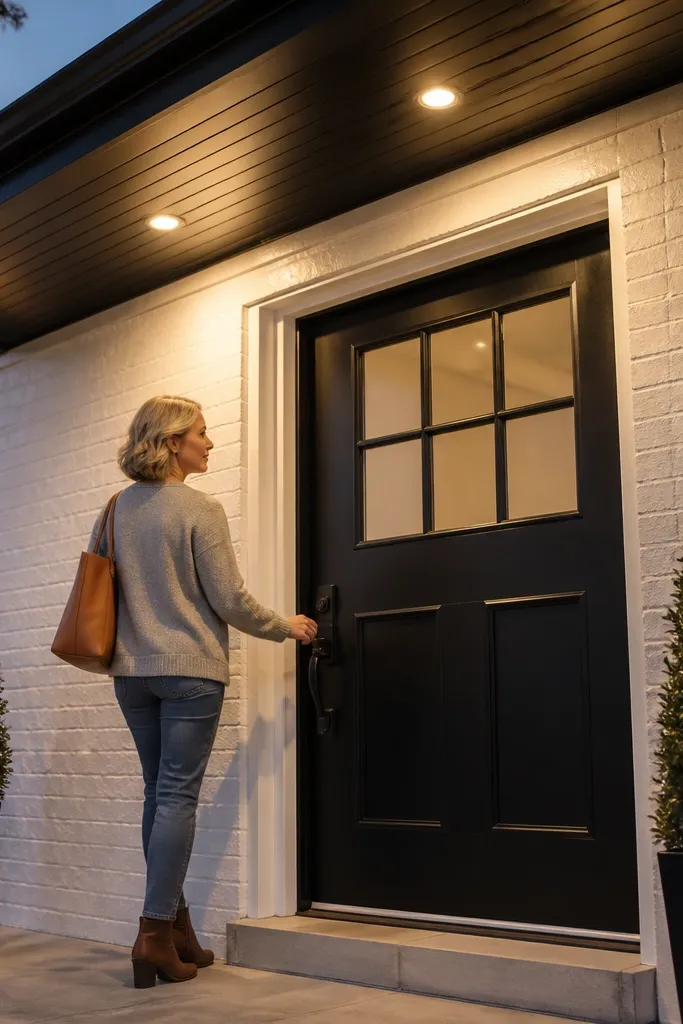
Choose wet-rated recessed fixtures and decide the spacing so the light covers the door width. Turn off power and confirm you can access wiring paths in the soffit area. Cut openings to the fixture template size, then mount housings securely to framing. Connect with proper outdoor-rated junctions and strain relief, then install trim rings and bulbs at 2700K. Test, then caulk around trim edges if the fixture requires it for weather sealing.
Side sconces are great, but recessed or soffit-style lighting makes the door look intentional because it lights the whole entry plane. When the light comes from above and slightly forward, you reduce harsh shadows under the door and make the wall texture look nicer. This is a visual upgrade that makes your main door look good even on cloudy days. It’s best for covered porches where you can access the soffit area. The project is medium difficulty because wiring and mounting must be done correctly.
Skip thisDon’t use cool 5000K bulbs — the entrance will look gray and flat.
Editor's noteKeep fixtures on a dimmer if you can — it makes the entry look better in photos and evenings.
15. Exterior door mat zone with a two-layer look
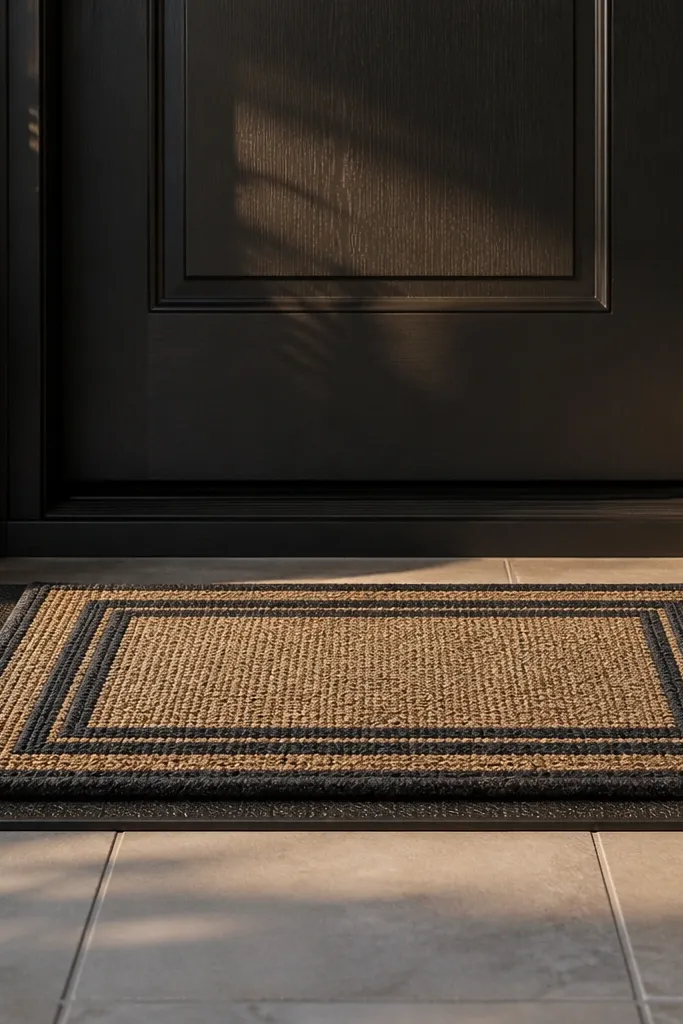
A lot of “good-looking” entrances fail at the ground. A two-layer mat setup cleans up the visual chaos: one dark base mat for function and one nicer top mat for style. The base helps with scraping and water control, while the top mat adds texture and color that frames the door. This makes the entry look styled without extra decor clutter. Choose coir or rubber for the base and a flat-woven or coir top for a crisp look that stays photogenic.
Measure the door swing area and pick a mat width that covers the landing while leaving room for the door to open fully. Place a rubber scraper mat on the ground first, then add a secondary top mat on top once it’s dry. If your porch is sloped, keep the top mat centered so it doesn’t shift. For color, match the top mat to either your door hardware or one accent color from the trim. Replace mats when they curl or fade instead of trying to “revive” them.
Use a low-profile top mat so it doesn’t bunch underfoot and look messy in photos.
Don’t stack two thick mats — the doorway looks bulky and uneven.
16. Modern house number plate centered at eye level
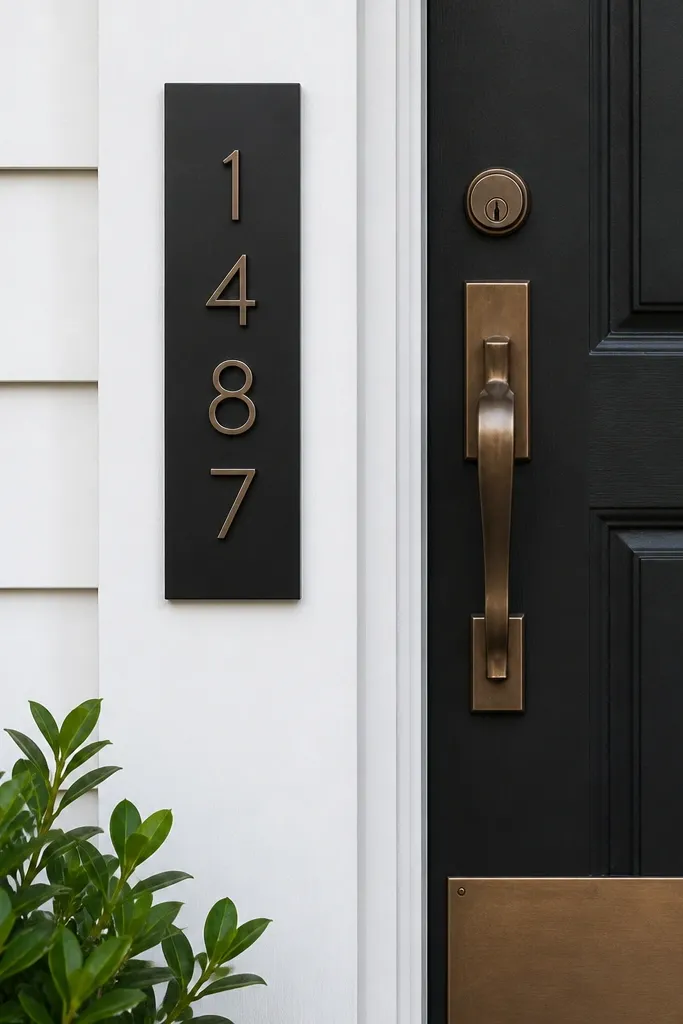
Measure the door width and decide the plate size so the numbers are readable from the street. Mount the plate so its center is around 60-66 in. From the floor, adjusting for porch steps. Remove old numbers, fill holes if needed with exterior filler, then sand smooth. Install with stainless screws and use a level to keep it perfectly centered. Seal around screw holes with paintable exterior caulk to prevent water intrusion.
A house number plate is a design element, not just signage. Centering it properly and choosing a style that matches your hardware tone makes the entry look complete. Black metal plates look sharp against light walls and pair well with matte black hardware. If your current number is small or off-center, it draws the eye the wrong way and makes the door area feel unfinished. This is a quick upgrade that takes about an hour once you have the right plate.
Skip thisDon’t mount numbers too low — the entry looks visually cramped.
Editor's noteIf you’re drilling into brick or stone, use a masonry bit and vacuum dust before inserting anchors.
17. Replace a plain doorbell with a wall-mounted lantern bell
Turn off power at the doorbell transformer if you can access it. Remove the old doorbell button and check the wire connections — take photos so you can match polarity if needed. Install the new lantern-style doorbell base using the provided mounting screws and weather gasket. Connect wires, mount the front cover, and test the button. If the wires are too short or damaged, replace with outdoor-rated low-voltage wire and secure with proper connectors.
A doorbell is small, but it shows up in every entrance photo because it sits at face height near the door. Swapping a cheap button for a lantern-style doorbell makes the entry look cohesive with the rest of your lighting theme. Choose a doorbell with a clear lens or frosted glass and a metal finish that matches your sconces or hardware. This works especially well when your entry lights are already upgraded but the doorbell is still basic. It’s a simple electrical project if you’re comfortable with low-voltage wiring.
Skip thisDon’t leave any exposed wire — water gets in fast and corrodes the connection.
Editor's noteUse a low-voltage transformer that matches the doorbell’s requirements so the button stays responsive.
18. Shiplap-style door surround paneling
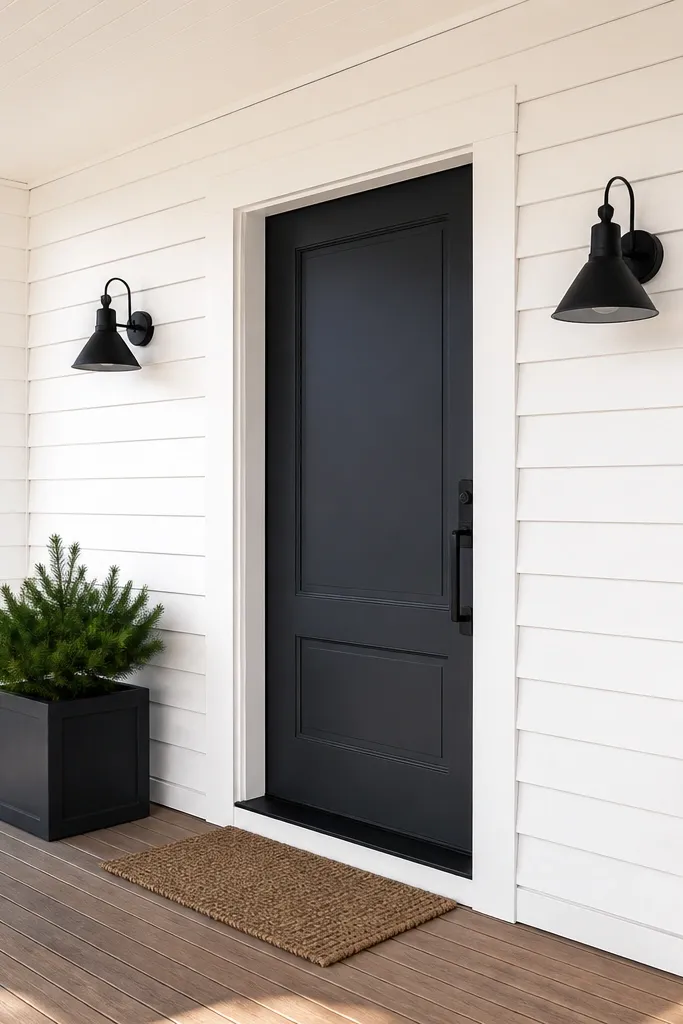
Measure the wall area around the door and decide the panel depth — typically 2-3 in. Of visual border beyond the door frame looks right. Cut exterior shiplap boards to fit and plan for 1/8 in. Gaps at corners for caulk. Attach boards to studs or solid backing with exterior screws, then fill nail holes. Prime and paint with exterior trim paint in semi-gloss for easy cleaning. Caulk the panel seams and edges so the border looks crisp rather than wavy.
Paneling around the door adds depth and texture, which makes the door area look high-end even if you keep the door color simple. Shiplap-style boards create strong horizontal lines that look good in daylight and soften shadows at night. Paint it bright white or a warm off-white, and use exterior-rated boards so it survives weather. This is a great fix when your main door looks lost against a blank wall. It takes more time than paint alone, but it’s still DIY-friendly if you can measure and cut boards.
Skip thisDon’t skip caulk at edges — water and dust get into gaps and the surround looks messy.
Editor's noteUse a level to keep the first board perfectly straight; everything else depends on that first line.
19. Stone or faux-stone accent column at one side
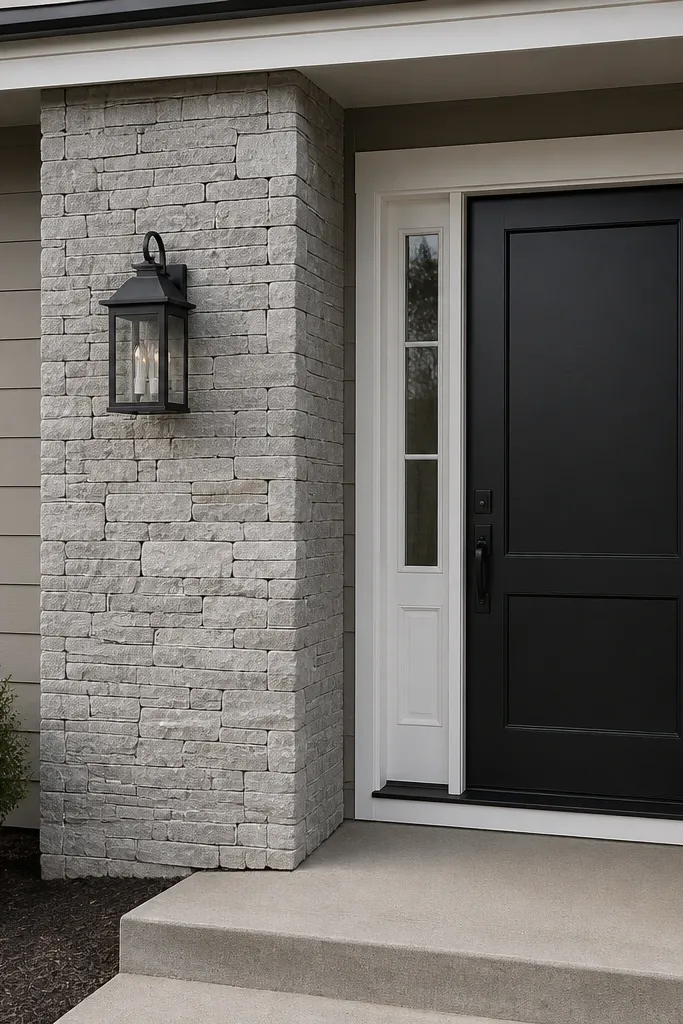
Pick faux-stone panels made for exterior use and match the thickness to your wall surface. Plan the column width about 10-14 in. Depending on door size, then mark a level line. Apply exterior construction adhesive to the back of panels and press firmly, starting from the bottom and working up. Stagger seams like real masonry so the pattern doesn’t look tiled. Grout or fill joints with the provided mortar mix, then seal the panels if the product calls for it.
A single accent column gives the door a “hero” side and adds weight to the composition. You don’t need full stone cladding everywhere — one vertical block on the side of the door frames the entry and makes the door look more grounded. Faux-stone panels are DIY-friendly and let you match the look of real stone if you want a high-contrast facade. This is ideal when your house has flat siding and the main door feels too light or too centered. The photos look good because the texture creates shadow depth.
Skip thisDon’t glue over peeling paint or loose siding — the panels will pop off.
Editor's noteDry-lay a few panels first so you can pick the most consistent face stones for the front edges.
20. Glass privacy film with a geometric pattern
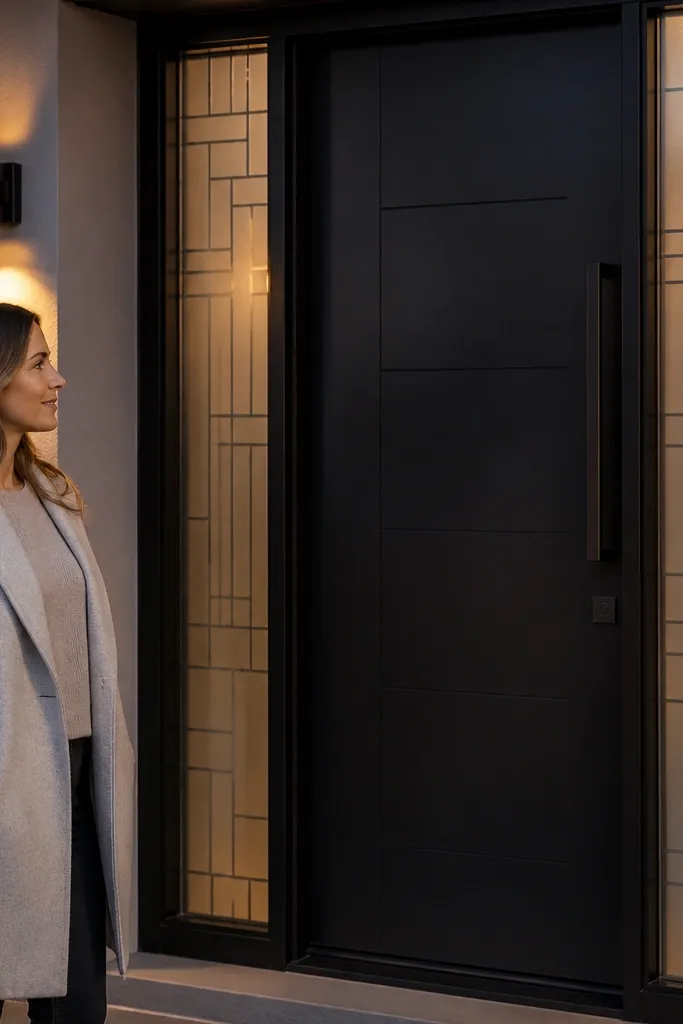
Clean glass thoroughly with an ammonia-free cleaner and dry completely. Measure each panel and cut film using a sharp blade, leaving a small margin for trimming. Spray the application side lightly with the included solution, then position the film and squeegee from center outward to remove bubbles. Trim edges with a razor blade and wipe away excess solution. Let the film set for the recommended time before exposing to heavy moisture.
Geometric privacy film makes a glass door or sidelights look designed instead of plain. It adds pattern, softens reflections, and keeps the entry bright without showing interior clutter. The best-looking films have sharp lines and a matte finish that reads clean in daylight and at night with porch lights. Choose a pattern that frames the door — like a subtle grid or half-arched motif. This works when your existing glass looks too exposed or when you want the entrance to look styled without changing the door.
Skip thisDon’t apply film to dusty glass — grit creates tiny bumps that ruin the geometric look.
Editor's noteUse a bright flashlight at a low angle to spot bubbles — pop them with a pin and re-squeegee.
21. Trim paint refresh with a two-inch shadow reveal
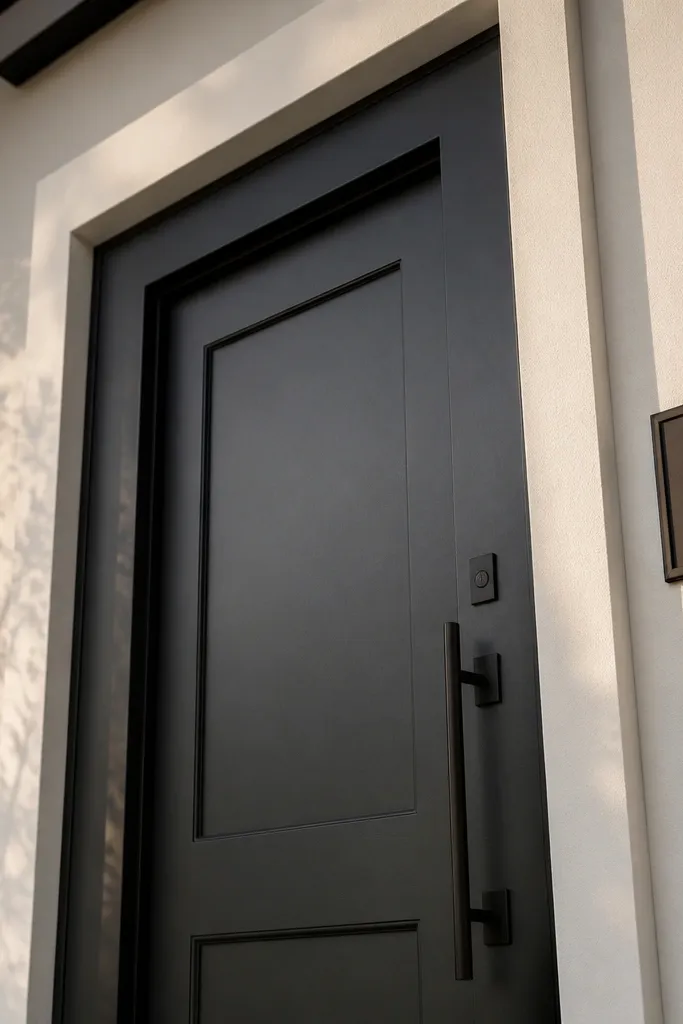
Inspect your existing trim and decide where you can create a clean reveal — often around 1/8 to 1/4 in. If you have existing molding. Use a putty knife to remove old caulk and scrape loose paint. Prime any bare wood and fill gaps with paintable exterior caulk. Paint with an exterior trim paint in semi-gloss, using foam rollers for flat areas and angled brush for edges. After the final coat cures, touch up the reveal edge with a fine brush for a razor line.
A shadow reveal is the small gap that makes trim look like it floats. When you paint trim and keep a consistent, narrow reveal, the door area looks custom and crisp. This is especially good for older homes where trim is present but the lines are dull from years of paint layers. The look is photogenic because it creates separation between the door surround and the wall. You keep the project within painting and caulking, so it’s doable for most DIYers.
Skip thisDon’t paint over thick, cracked caulk — remove and re-caulk or the reveal will look lumpy.
Editor's noteCut caulk lines with a damp cotton swab so the reveal edge stays sharp.
22. Outdoor rug runner matched to door color
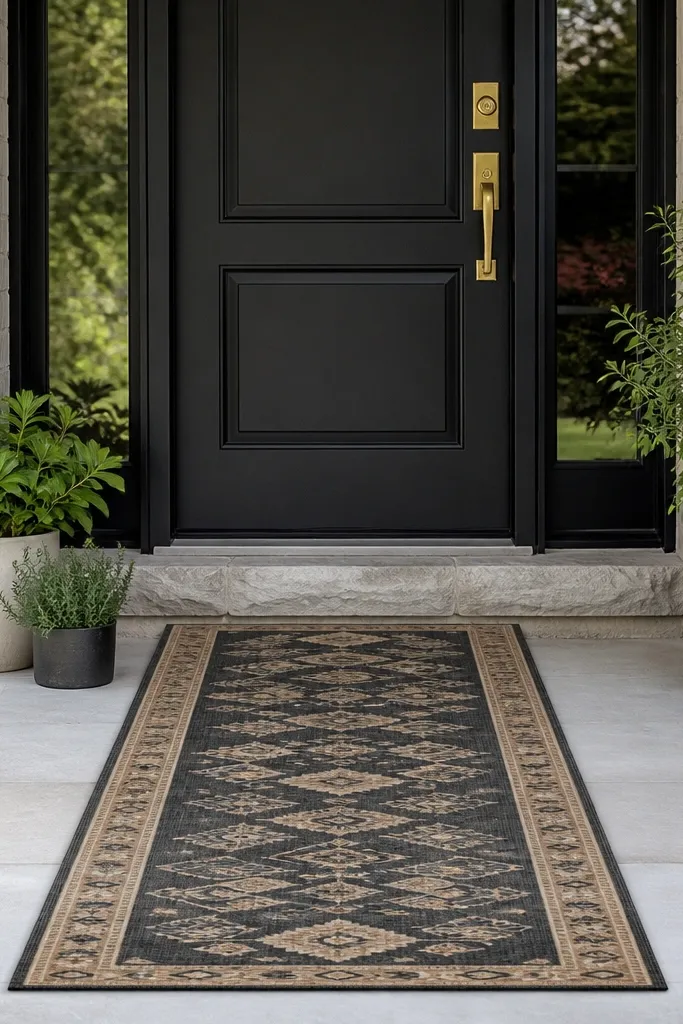
Measure the distance from the edge of the porch to the door threshold and choose a runner that leaves about 4-6 in. Of clearance on both sides. Use a rubber outdoor rug pad underneath if your porch is smooth so the runner doesn’t slide. Center the runner so the border pattern aligns with the door. Pair with a simple doormat at the threshold so dirt stays in one place. Shake or rinse the runner as needed and replace when the border frays.
An outdoor rug runner adds a styled path to the door and makes the entry feel intentional even with minimal decor. The best ones for House Main Door good-looking are low-pile and have a border pattern that guides the eye toward the threshold. Match the rug accent color to something already on the door — hardware tone, door color, or the planter rim. Place it on a clean, flat porch surface so it doesn’t bunch. This works for covered porches and shallow steps where you want a “designed walkway” look.
Skip thisDon’t use a long-pile indoor rug — it traps moisture and looks worn fast outside.
Editor's notePick a rug with a flat border stripe — it looks cleaner and reads better in photos than busy all-over patterns.
23. Door wreath shelf made from a single exterior board
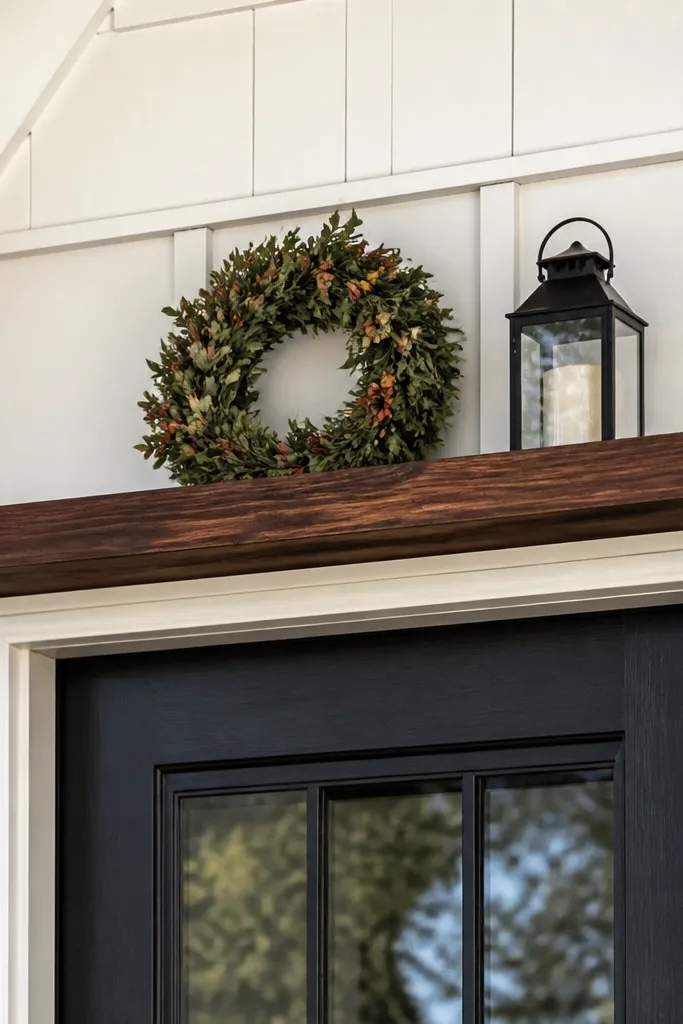
Choose a board sized so it extends 6-10 in. Beyond the door width. Seal the board with exterior stain or paint, then install hidden brackets anchored into studs. Mount the shelf so the bottom edge sits about 2-4 in. Above the top of the door casing. Add a small wreath hook system or use lantern hooks depending on your decor. Seal bracket penetrations with exterior caulk to prevent water intrusion.
A simple shelf above the door creates a dedicated spot for wreaths, lanterns, or a small seasonal arrangement. It’s more controlled than hanging decor on hooks, and it keeps the door area from looking scattered. A single exterior board with a clean finish looks modern, especially if you use hidden brackets and a consistent stain. This is ideal for entries where a canopy is too much but the top of the door still feels blank. The look is also very photogenic because it adds height and a layered “top frame.”
Skip thisDon’t mount into just siding — the shelf will pull away as the wood expands and contracts.
Editor's noteUse a template to place brackets at equal distances so the shelf stays level and doesn’t tilt.
24. Matte white porch ceiling beams around the door
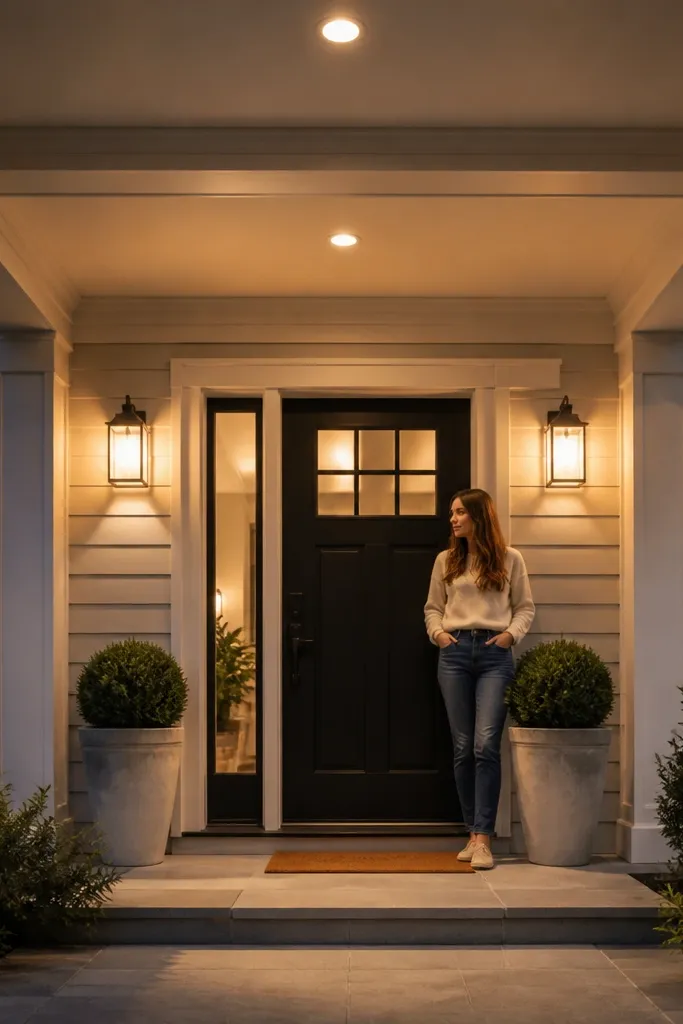
Find ceiling framing points and decide where the beams will form a rectangle around the door. Install 1x2 or 1x3 trim boards for beams, using exterior-rated screws if you’re in a damp area. Use construction adhesive on the ends for extra hold, then clamp until set. Caulk seams and nail holes, then prime and paint with exterior ceiling paint in matte or eggshell. Add a small overhead light fixture if you want extra glow toward the door.
Ceiling framing is one of those upgrades people forget, but it makes the doorway look finished from every angle. Simple beams or trim lines around the entry area create a visual border above the door, which helps the door feel like the center of the composition. Paint it matte white or eggshell so it doesn’t glare in sunlight. This works best on covered porches where you can access the ceiling area. It takes carpentry work, but it’s straightforward: measure, cut, install, paint.
Skip thisDon’t skip primer on raw wood — the beams will soak paint unevenly and look blotchy.
Editor's noteUse a laser level to keep the beam lines parallel so the entry looks crisp.
25. Front door glass accent in stained-look film
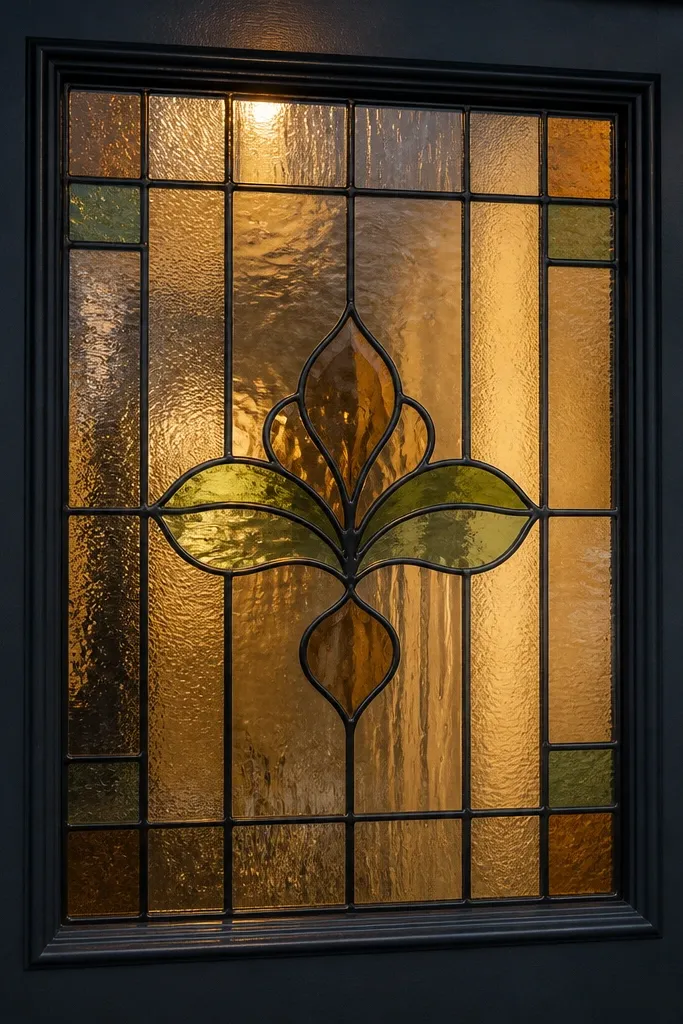
If your door has a glass panel, stained-look film gives you that old-world charm without replacing the door. The key is restraint: pick a film that has subtle lead lines and a limited color palette so it doesn’t look like Halloween decor. This makes the door look more handcrafted and it adds color highlights when light passes through. It’s also renter-friendly if you apply with removable film and can remove it cleanly later. Great for entryways that feel too plain but don’t need a full paint job.
Measure the glass panel and choose a film kit sized for it, including any pre-cut lead-line sections. Clean the glass and cut the film carefully, leaving a small margin for edge trimming. Apply using the wet method with squeegee to remove bubbles. Trim edges with a razor and wipe off solution. Seal edges with clear removable film edge tape if the kit includes it, then test how it looks when porch lights turn on.
Choose one color that matches your house trim undertone so the stained effect looks intentional.
Don’t pick a film with overly bright saturated colors — it reads cheap in daylight.
26. Exterior wall paint in a door-spot color block
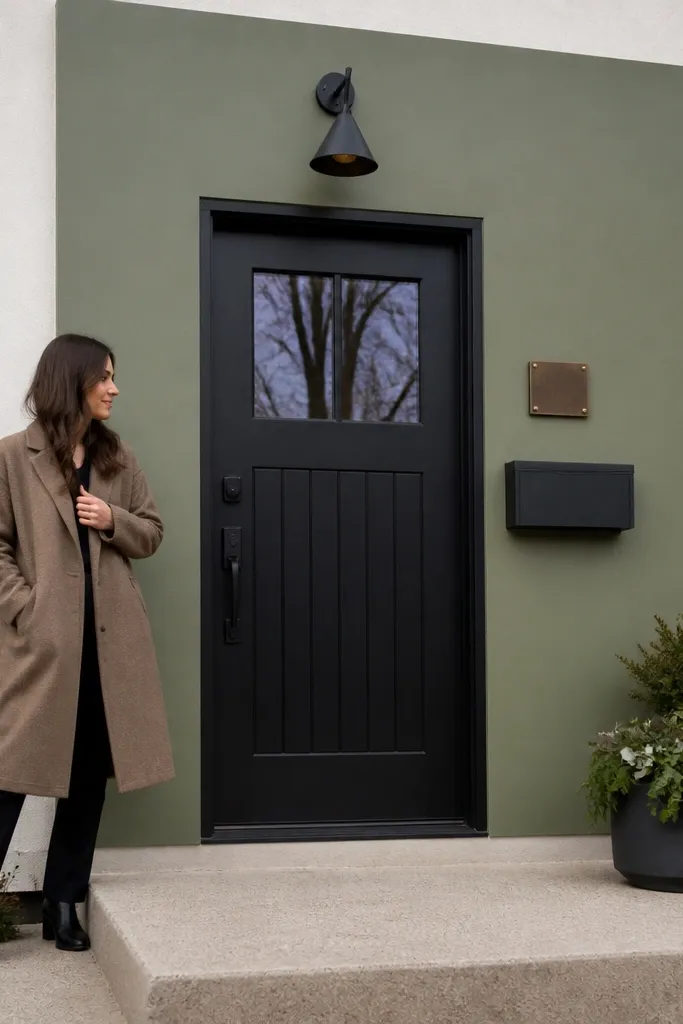
Painting a color block around the door area makes the entrance look like a designed feature wall. It’s a strong way to make a House Main Door good-looking when your door color alone isn’t enough. Choose one wall color that complements the door and use a crisp border so it looks architectural, not accidental. A block also hides old stains or uneven wall texture because the new paint plane becomes the focus. This is a mid-level DIY because you must tape and cut paint edges cleanly.
Mask the door, trim, and windows, then measure the color block area so it’s centered and symmetrical. Use painter’s tape and a second line of tape to create a controlled border thickness, typically 1/4 in. To 1/2 in. Sand and prime the wall first, then roll paint with an exterior roller and finish edges with a brush. Apply two coats, remove tape while paint is slightly tacky, and touch up with a small brush. Caulk any border gaps after cure if needed.
Use a sample card for the wall color and test a 2x2 ft area in full sun before committing.
Don’t paint a huge block without a sharp border plan — soft edges look messy fast.
27. Doorside screen planters with matching lanterns
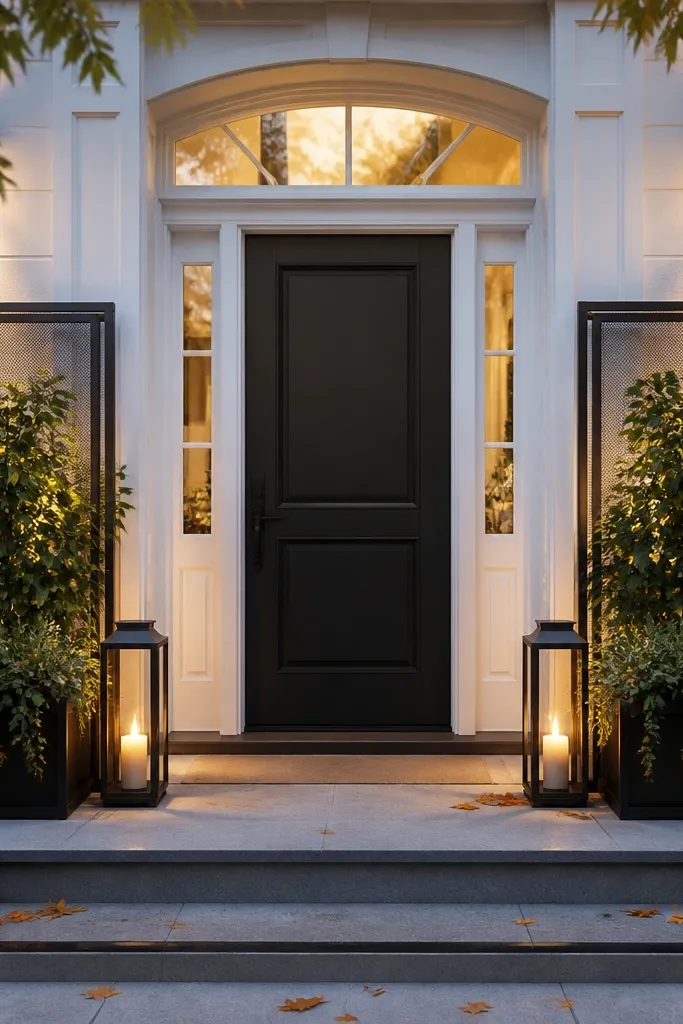
When you want a styled, photogenic entry without clutter, lanterns plus matching planters create a balanced “pair” look. The planters give height and greenery, while lanterns add warm light and a focal point. Choose a matching metal finish for both lanterns and keep the shapes consistent. This is especially good for entries where the door is centered but the sides feel empty. The look reads cohesive because the pair repeats the same visual elements on both sides.
Select lanterns sized so they sit about 8-12 in. Above the planter rim, then place planters at equal distance from the door. Use outdoor-rated lanterns with either candles (rated for outdoor use) or battery LED tea lights. Anchor planter boxes so they can’t shift and use consistent soil and plant shapes for symmetry. Add a small seasonal filler like evergreen tips or ornamental grass so the lanterns look grounded. Keep the color palette to two tones: one metal finish and one plant color family.
Use LED lanterns with a warm flicker setting to avoid dealing with smoke and weather.
Don’t mix lantern heights — one higher lantern makes the entrance look unbalanced.
28. Replace hinges and add a door kick plate
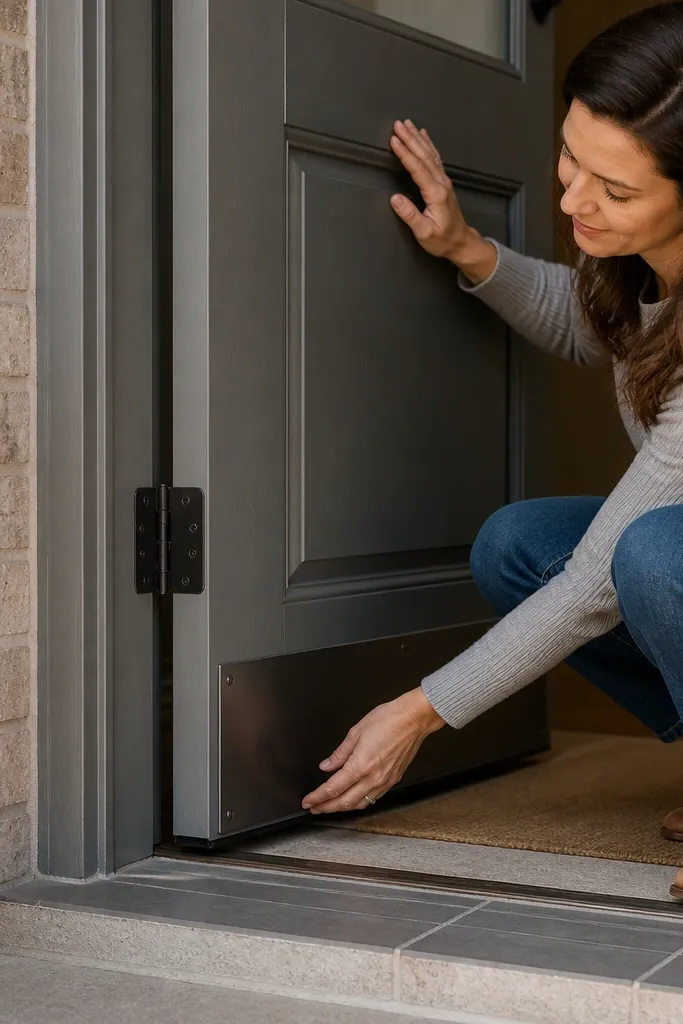
This is the quiet “quality” upgrade that makes a door look cared for. Worn hinges and a scuffed bottom edge pull down the whole impression, especially on painted doors. A new door kick plate also protects the finish and keeps the bottom edge looking clean. Choose a metal that matches your hardware tone for a unified look. This project is small, but it makes the entry look sharper because the eye catches hinges and the lower third instantly.
Remove the hinge pins or unscrew the hinge screws depending on your hinge type. Take a hinge measurement (width and screw spacing) and buy exterior-rated hinges in the same finish as your hardware. Install the hinges carefully, keeping the door aligned so it doesn’t sag. Next, measure the bottom door edge height and install a kick plate using the correct screw length. Tighten evenly and test the door clearance so the kick plate doesn’t scrape the threshold.
If the door has paint buildup, scrape the hinge areas clean so the plates seat flat.
Don’t use a kick plate that overlaps weatherstripping — you’ll create gaps that leak air and water.
29. Door surround with a vertical slat panel backdrop
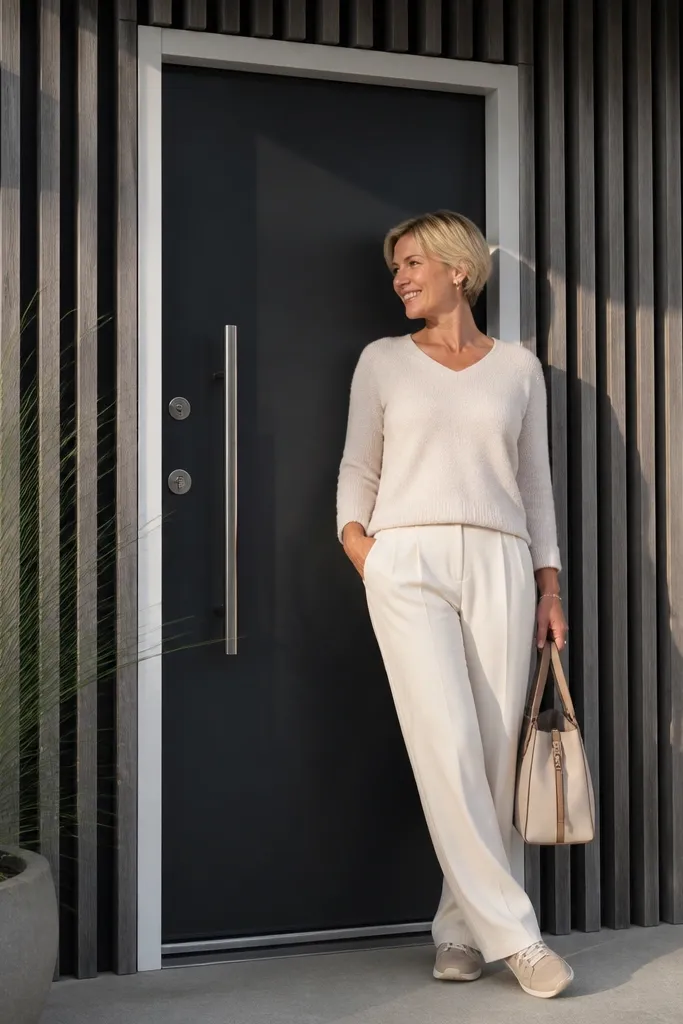
Vertical slats behind the door create a strong, modern backdrop that makes even a simple door color look like a feature. The shadow lines from vertical slats add depth and make the entry look good at multiple times of day. This is a great option for homes with plain siding where the door feels flat. Use exterior slats and keep the panel width tight so it frames the door instead of surrounding the entire facade. It’s a DIY-friendly carpentry project if you can cut straight lines and attach to solid backing.
Decide the slat panel width and height, usually spanning the door casing plus a small border. Use treated lumber or exterior composite slats cut to equal lengths, with a consistent spacing gap (about 1/2 in. Visually). Attach a backing frame to studs, then screw slats into the frame using stainless screws. Stain or paint the slats and seal with an exterior finish. Caulk the edges where the panel meets trim and add a top and bottom cap board for a clean look.
Use a spacer block to keep slat gaps identical — that consistency is what makes it look designer.
Don’t leave slats unsealed — they will warp and the gaps will look uneven.
30. Add a storm door in a clear, clean frame
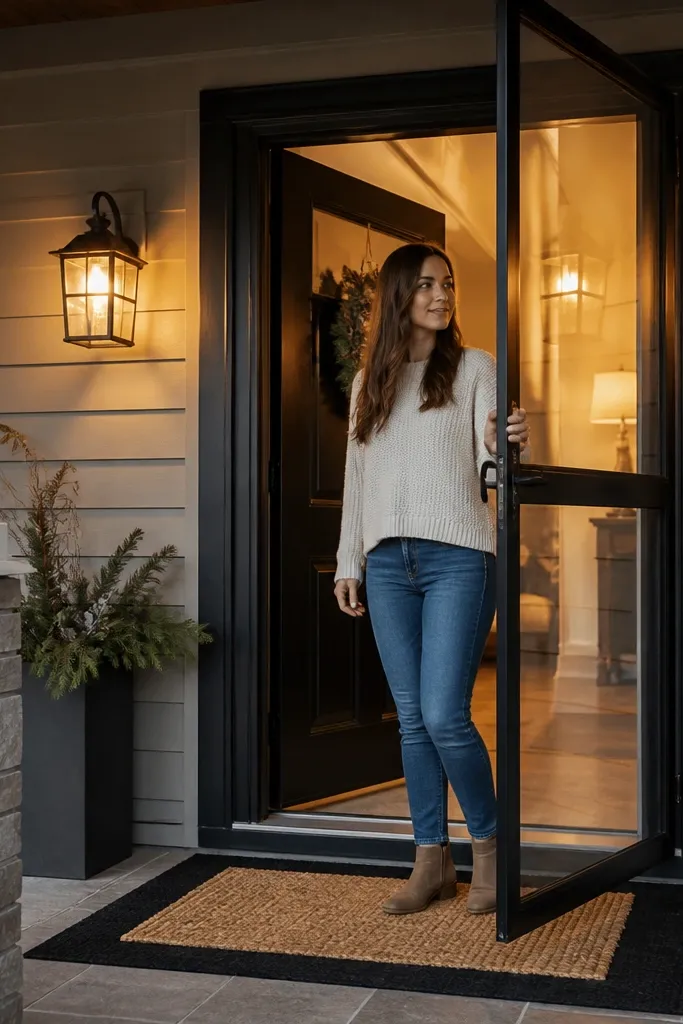
Measure the door opening width and height, including the frame depth. Buy a storm door kit that matches the opening and choose a finish that aligns with your hardware. Install side jambs first, then mount the top closer frame and hang the door panel. Adjust the hinge tension so the door closes smoothly and the latch aligns. Install weather stripping and adjust sweep height so it seals against the threshold.
A clear storm door can make a main door area look fresher and more intentional because it adds a second clean frame around the door. It also protects the main door finish from weather, so the “good-looking” part lasts longer. Choose a storm door with a clean aluminum or black frame that matches your hardware tone. If your existing door looks tired from sun fading, a storm door can visually reset the entry while you plan bigger changes. This project is beginner-friendly if the opening size matches a standard kit.
Skip thisDon’t install without checking for square — a slightly crooked storm door makes the whole entrance look off.
Editor's noteTest the door sweep height with a thin strip of paper — if it pulls, your seal is too loose.



