
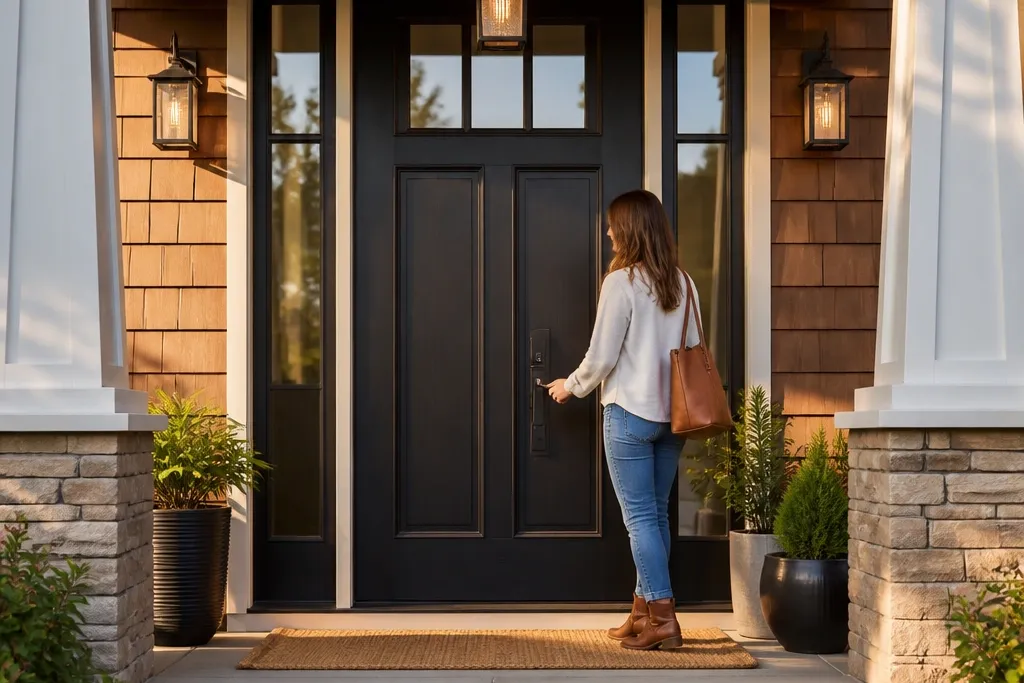
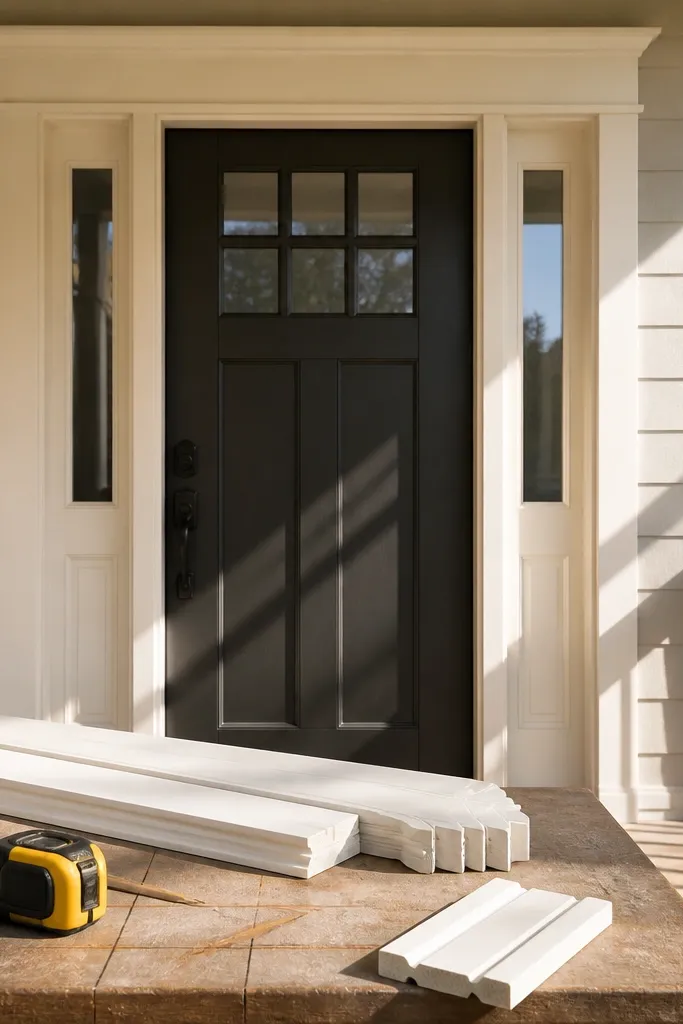
1. Classic 6-Panel Walnut-Effect Door with Satin Black Hardware
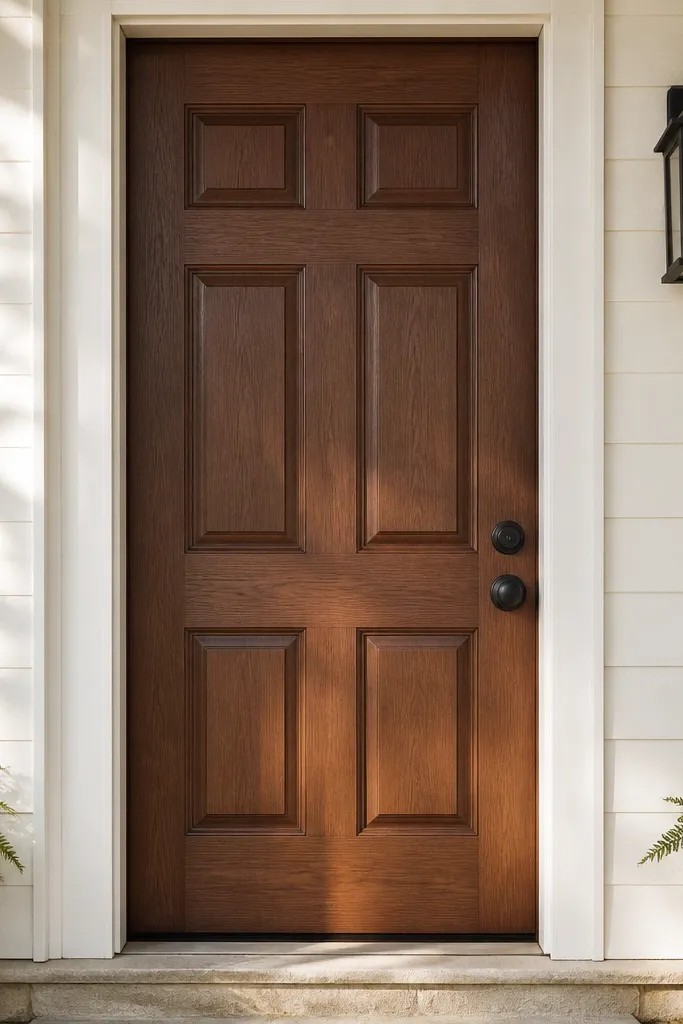
This is the easiest “grand entrance” look because the panel grid already reads like architecture. A walnut-effect finish gives warmth without needing real hardwood, and the satin black hardware creates sharp contrast that pops in daylight. The key is keeping the panel spacing even so the door face looks symmetrical from the curb. Choose a door slab with six raised panels or add matching decorative overlays if you have a flat slab. Finish it with a satin topcoat so the paint reflects light softly instead of glaring.
Step 1: Measure your existing slab width and height, then use a 1/2 in to 3/4 in panel-style overlay plan so the grid stays proportional. Step 2: Install MDF panel moldings on a flat door using wood glue and finish nails, then fill nail holes with matching wood filler. Step 3: Prime with a bonding primer, sand smooth (180-220 grit), then apply a walnut-effect stain or a walnut-toned paint system and top with satin clear or satin topcoat. Finish by mounting a satin black deadbolt, lever, and knocker at standard heights.
Editor's noteDry-fit every panel molding before glue — mark the centerlines so your vertical rails don’t drift.
Skip thisAvoid painting over dusty filler spots; they’ll show as tiny matte islands around the panels.
2. Modern Shaker Door with Deep Casing Frame Outline
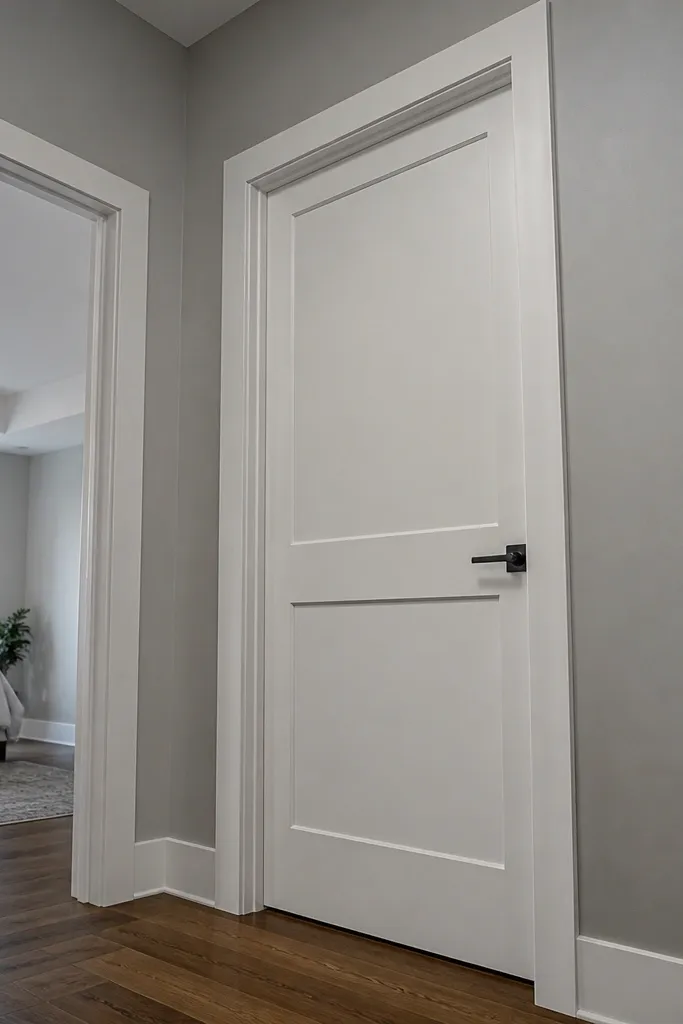
Shaker style wins because it creates a clean grid and strong shadow lines without complicated curves. The “grand” part comes from the frame outline: thicker casing around the slab makes the doorway look taller and more intentional. White paint on the door and casing makes the trim rhythm clear, while matte black hardware keeps it modern. This style works in brick, stucco, and siding because the geometric lines read from far away. It also photographs well because the shadows in the recesses add dimension even in flat light.
Step 1: Choose a door slab with either shaker grooves or add 1x2 to 1x3 in flat-rail trim strips spaced evenly to form the shaker rectangles. Step 2: Build a casing frame around the door opening using primed MDF or finger-jointed pine, keeping the outer casing thickness consistent on all sides. Step 3: Prime all trim, caulk every seam, then paint the door and casing in the same white system; install hardware last so you don’t mar the finish.
Editor's noteUse a 10-12 in level to check the casing line — small tilts show up fast in photos.
Skip thisDon’t leave gaps between trim pieces; hairline seams look messy once painted.
3. Arched Top Door with Split-Glass Lite and Bronze Frame Trim
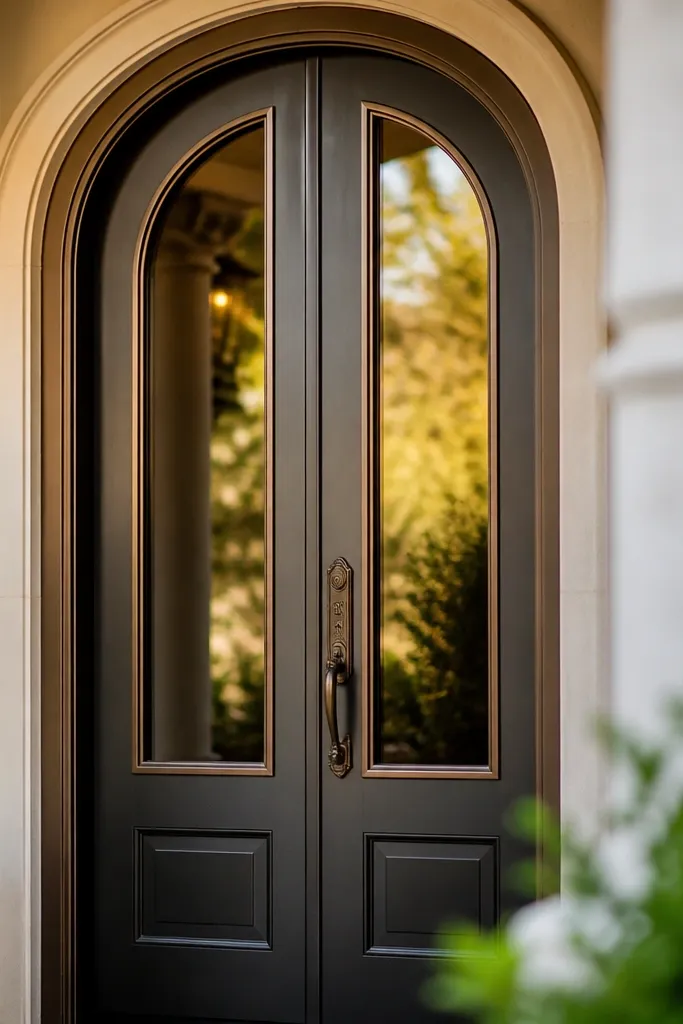
An arched top immediately reads “grand entry” because it adds a vertical focal curve. The split-glass lite (two panes) keeps the look structured instead of busy, and bronze trim adds warm contrast that looks expensive. This design is great when you want traditional charm without heavy carving. It also helps daylight in the entry without giving up privacy if you use textured or seeded glass. If your house has an arched window nearby, matching the arch radius makes the whole facade feel designed.
Step 1: Verify your rough opening height and select an arched-top slab, or install an arched header and frame kit if you’re remodeling. Step 2: Fit the lite insert using the glazing beads provided with your slab or trim kit, then seal the glass with glazing compound. Step 3: Prime and paint the door, then apply bronze-finish trim pieces around the lite and frame; mount bronze hardware at standard heights.
Choose frosted glass with a visible texture — flat clear glass makes the arch feel less intentional.
Avoid cheap bronze spray paint; it wears fast around handles and the color looks off in daylight.
4. Tall Vertical Slat Door with Charcoal Finish and Black Screened Porch Light
Vertical slats make the doorway feel taller and more modern, especially when the slats are consistent in width and spacing. Charcoal paint hides minor imperfections better than bright white, and it pairs cleanly with black lighting and hardware. The light placement matters: a screened porch light near the top third adds a “designed” look even if the door build is simple. This entry style suits modern farmhouses, brick homes, and anything with vertical lines in the siding. It also stands out in photos because the slat shadows create a striped texture.
Step 1: If your slab is flat, attach vertical lattice-like strips made from 1x2 MDF or primed wood, spacing them evenly using scrap spacers. Step 2: Sand the edges smooth, fill seams, prime, then paint charcoal; keep a consistent paint thickness so the slat edges stay crisp. Step 3: Install black porch lighting and mount hardware, then add a door sweep after the paint cures so you don’t scratch the finish.
Use the same spacer for every slat — switching spacer thickness makes the slat rhythm look crooked.
Don’t skip sealing the slat ends; unsealed end grain drinks paint and dulls the edges.
5. Cross-Mullion Door with Crown Trim Over the Top Rail
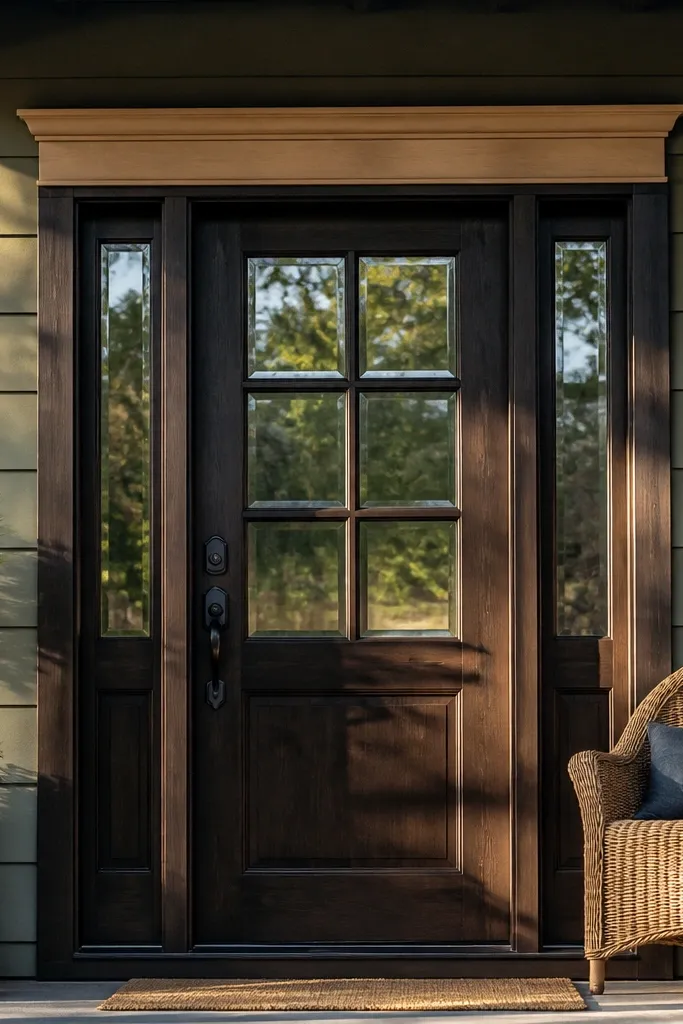
A cross-mullion glass pattern looks traditional but stays clean when the lines are sharp and evenly spaced. The crown trim above the top rail is the “grand” trick — it frames the door like a picture. Pair this with warm wood-tone trim or a deep painted door for contrast. This design works well if you have sidelights or plan to add them later, because the mullion grid will match the window rhythm. In photos, the crown creates a strong top anchor that makes the entry feel taller.
Step 1: Choose a door slab with a glass lite grid or add wood muntin strips to a glass insert using glazing beads. Step 2: Build a crown trim piece (simple ogee or straight profile) sized to the door width, and center it above the top rail with consistent reveals. Step 3: Prime and paint or stain everything, then install the door and hardware; seal around the glass and trim seams with paintable caulk.
Cut muntin strips slightly longer than the glass area so you can fine-tune the fit before final fastening.
Avoid uneven reveals around the crown; tiny differences look huge in front-facing photos.
6. Farmhouse Accent Door with X-Backer Panels and Dark Stain
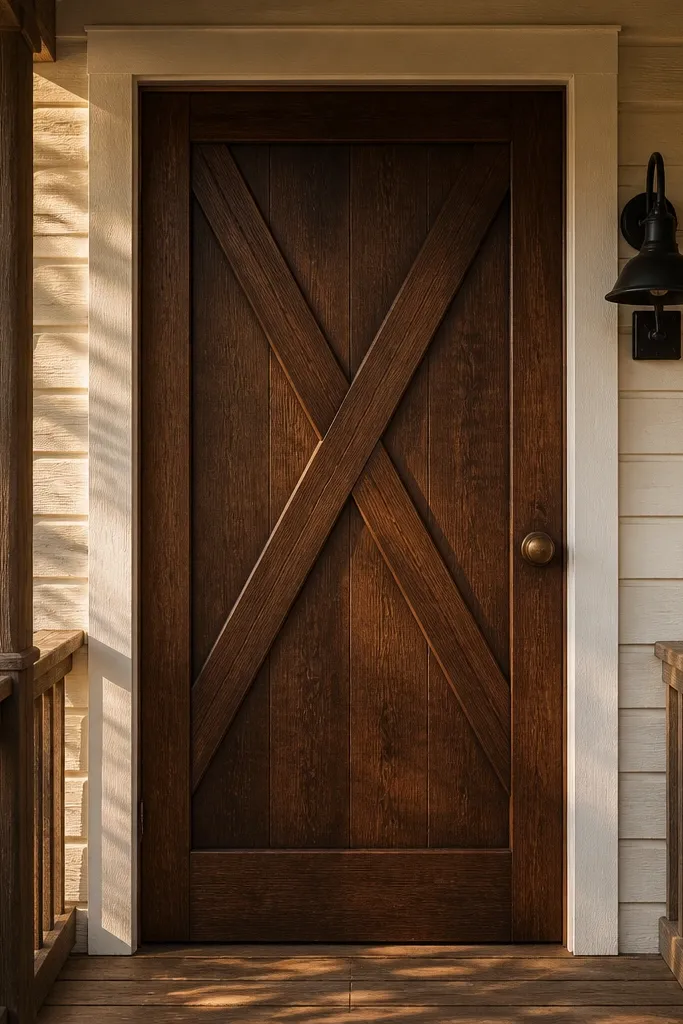
The X-backer panel look is farmhouse, but it reads “grand” when the diagonals are bold and the door finish is deep. Dark stain adds depth and makes the diagonal pattern feel dimensional. Keep the rest simple: one X per door face, centered, with no extra busy trim. This is a good pick if your house has porch columns or a gable roof — the diagonals echo those strong shapes. It also photographs well because the X creates strong leading lines.
Step 1: Mark a centerline grid on the door, then cut diagonal backer strips from primed wood or MDF with consistent width (start with 1x2). Step 2: Glue and nail the strips into an X, then add a thin frame border around the panel area to make it look intentional. Step 3: Sand smooth, stain, and topcoat with clear exterior finish; mount hardware after the topcoat cures.
Use painter’s tape to hold the diagonals while you check symmetry from eye level.
Avoid thin, flimsy strips; they flex and create wavy lines after paint.
7. Two-Tone Door with Light Casing and Dark Slab Panels
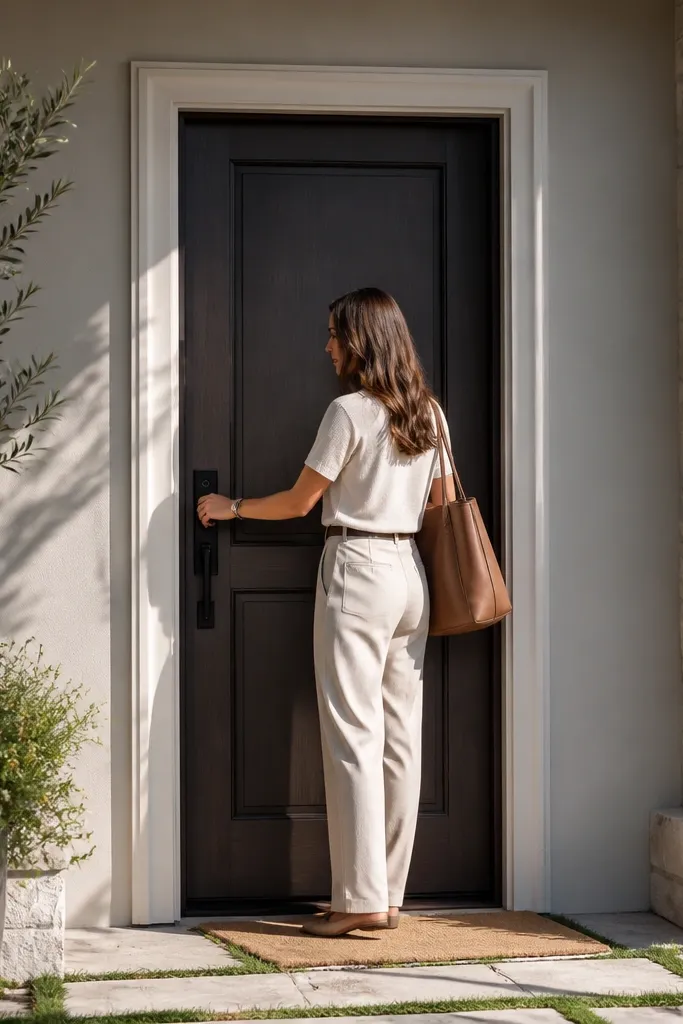
Two-tone is one of the most reliable ways to make a main door look custom without doing complex carpentry. The trick is separating the door and the frame visually: paint the door slab dark (charcoal, espresso, or deep blue) and the casing trim light (warm white or greige). This makes the doorway read as a framed object, not a single flat slab. It also hides small imperfections because the contrast defines edges. Photos love it because the frame outline pulls the eye straight to the door.
Step 1: Mask and remove hardware, then prime both the door and casing trim with compatible primer. Step 2: Paint casing first in light color, then paint the door slab in dark color after masking edges cleanly. Step 3: Reinstall hardware and add a matching doormat and light to lock the look together; caulk seams and touch up before final cure.
Use foam painter’s tape for the door edges — it gives cleaner lines than standard crepe tape.
Don’t choose a cool white for the casing if your exterior trim is warm; mismatched undertones look cheap fast.
8. Metal-Inspired Door Panels with Raised Grid Overlay
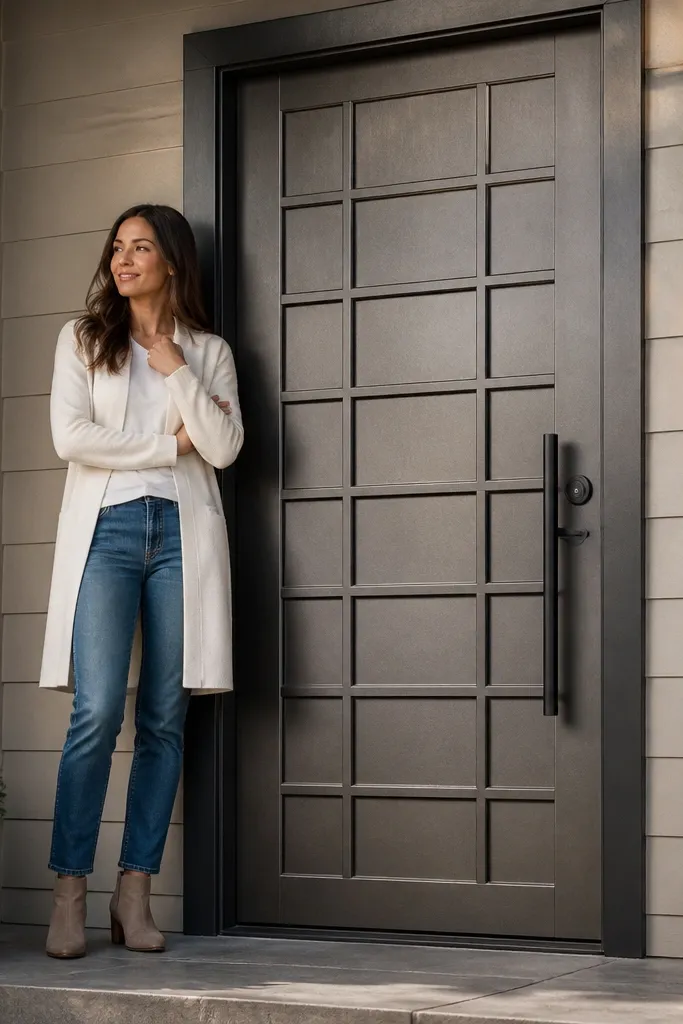
A raised grid overlay gives you that metal-industrial look without buying a full metal door. The goal is strong, crisp lines with shallow depth so it still looks elegant, not bulky. Use a brushed steel or gunmetal paint system for the slab, then keep hardware matte black or oil-rubbed bronze. This style looks great on modern homes with clean siding and simple porch posts. It also photographs well because the grid casts tiny shadows that show even in shade.
Step 1: Create a grid pattern using thin MDF strips (about 1/2 to 3/4 in wide) mounted to a flat door face, using spacers to keep the grid square. Step 2: Fill nail holes, sand flush, and prime with a bonding primer made for trim and glossy surfaces. Step 3: Spray or roll on a metallic paint system, then apply a clear topcoat made for exterior metal finishes.
Editor's noteKeep strip heights consistent; one strip that sits proud makes the whole grid look off.
Skip thisAvoid sanding through primer on metallic projects; it creates dull patches that won’t match.
9. Cedar Board-and-Batten Door with Whitewashed Edges

Board-and-batten looks grand when the battens are slightly wider and the finish has contrast. Cedar brings warmth, and whitewashed edges make it feel crafted instead of plain. This design works especially well on homes with cedar siding or a rustic porch. It’s also forgiving for beginners because board-and-batten hides minor sanding sins better than smooth shaker panels. The key is even spacing and a consistent stain/whitewash mix so the door face looks cohesive.
Step 1: Build the door face with vertical boards and battens using primed exterior wood, keeping battens centered over board seams. Step 2: Sand, then apply cedar stain and wipe back to control darkness; let it dry fully. Step 3: Brush whitewash glaze on the edges of boards and battens, then seal with exterior clear coat so rain doesn’t muddy the look.
Use a foam brush for whitewash glaze — it leaves a cleaner streak pattern than a bristle brush.
Don’t skip sealing the end grain of boards; it drinks moisture and warps the door face.
10. Geometric Hex Insert Door with Matte Black Frame
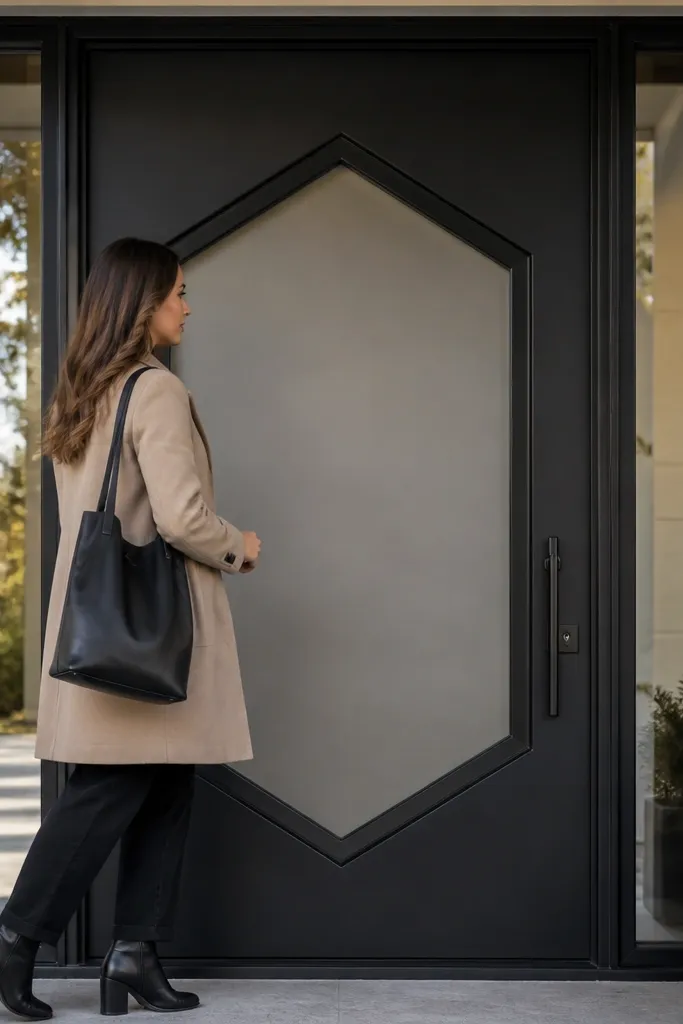
A hex insert makes the door feel custom because it’s not a standard panel pattern. Keep it photogenic by limiting it to one big center shape and using matte black framing around it. This design works in modern and mid-century homes, and it pairs well with simple sidelights so the geometry stays the focus. Use a contrasting color for the insert — like warm wood tone, terracotta, or a deep green — so the hex reads instantly. It also adds depth because the insert can sit slightly recessed.
Step 1: Mark and cut a hexagon opening on the door face for an insert panel, using a template made from cardboard or plywood. Step 2: Build a frame around the hex from MDF strips, glue and nail it in place, then install the insert panel and caulk seams. Step 3: Prime and paint the door and frame matte black, then paint or stain the insert color; let cure before mounting hardware.
Editor's noteMake the hex template from 1/4 in plywood so your cut line stays accurate and repeatable.
Skip thisAvoid making the hex too small; small geometry disappears at curb distance.
11. Tall Sidelight Frame Look with Mirrored Panel Door
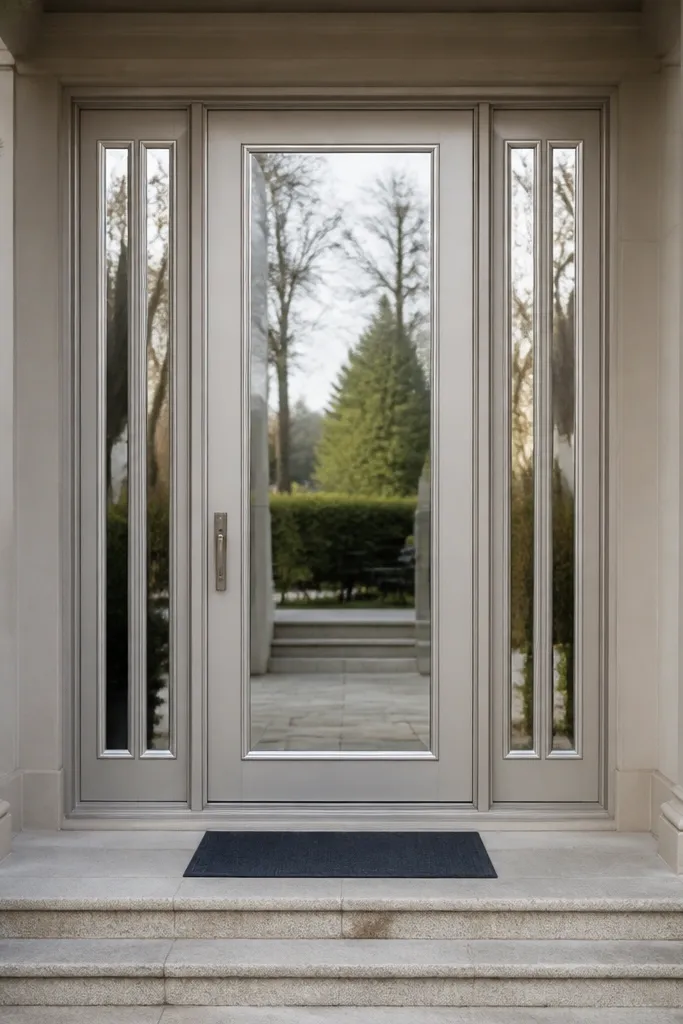
Even if you aren’t installing full sidelights, you can fake the look with tall, framed panel shapes and a reflective center finish. Mirrored-style panels bounce light and make the entrance feel more open, especially on north-facing homes. The grand part is the vertical framing: tall side “columns” around the door create that cathedral entry feel. Pair the door with simple black hardware so the reflective surface doesn’t look flashy. This is a great style when your entry is dim and you want it to look brighter in photos.
Step 1: Add tall vertical trim columns either by installing side casing extensions or by building two narrow trim “pilasters” beside the door. Step 2: Create a center reflective panel using a decorative glass insert or a reflective acrylic panel rated for exterior use, secured with glazing beads. Step 3: Paint the trim columns in a contrasting color (matte black or deep green) and finish the door around the reflective panel; caulk around glass and allow full cure.
Choose reflective material with a subtle texture so it hides smudges from the street.
Avoid glossy paint on trim near glass; it creates glare that washes out the pattern.
12. Raised Quarter-Round Panel Door with Gold Brushed Knocker

Curved trim makes a door look expensive because it catches light on edges. A raised quarter-round panel pattern gives you soft dimension without complex carving. Use a matte or satin base paint so the quarter-round edges stand out, and add a brushed gold knocker for a warm focal point. This style suits classic facades and entryways with stone or brick. In photos, the curved trim reads as depth instead of flat paint, especially in afternoon sun.
Step 1: Cut quarter-round trim pieces and build a panel frame on the door face, starting with the outer border and then filling with curved sections. Step 2: Glue and nail trim pieces, then sand any glue squeeze-out flush. Step 3: Prime, then paint the base color in satin; finish by adding brushed gold hardware and sealing around any edges where trim meets the slab.
Use a thin bead of glue and clamp with painter’s tape; thick glue creates bumps you’ll see after paint.
Avoid mixing quarter-round profiles; one off-profile piece makes the whole pattern feel handmade in a bad way.
13. French Door-Style Glazed Main Door with Grid and Black Iron Hardware
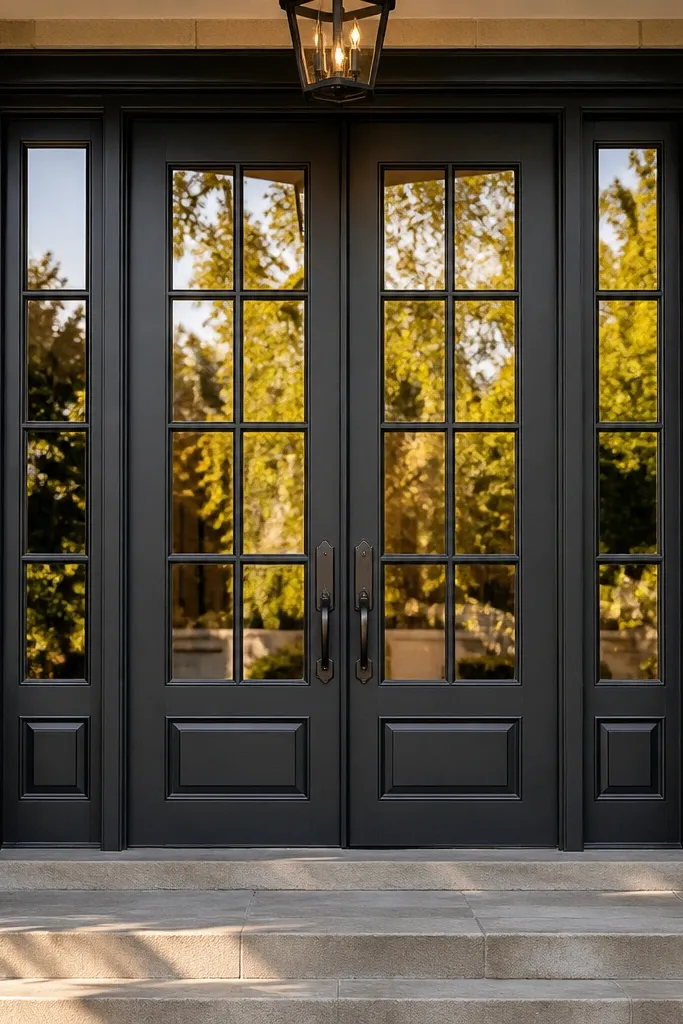
A glazed main door with a grid makes the entrance feel open and styled, even if you live in a private neighborhood. The French-door vibe works best when the grid is neat and the hardware looks iron-like. Choose either two vertical lites or a single large lite divided into four or six panes. Add a matching black iron deadbolt and pull so the hardware echoes the window divisions. This is a strong pick for beginners because glass inserts and grid dividers often come in kits with straightforward mounting.
Step 1: Select a door slab with a glass kit that includes muntin bars or plan for removable muntins that attach to the glass. Step 2: Install glazing beads, set the glass, then seal and tighten according to the kit instructions. Step 3: Prime and paint around the glass, then mount black iron hardware at standard heights and alignment.
Editor's noteBefore final tightening, run a finger around the glass to confirm there are no gaps — leaks and drafts show up later.
Skip thisAvoid silicone-only sealing; it can make future glazing repairs messy and uneven.
14. Oversized Center Panel Door with Side Casing Steps
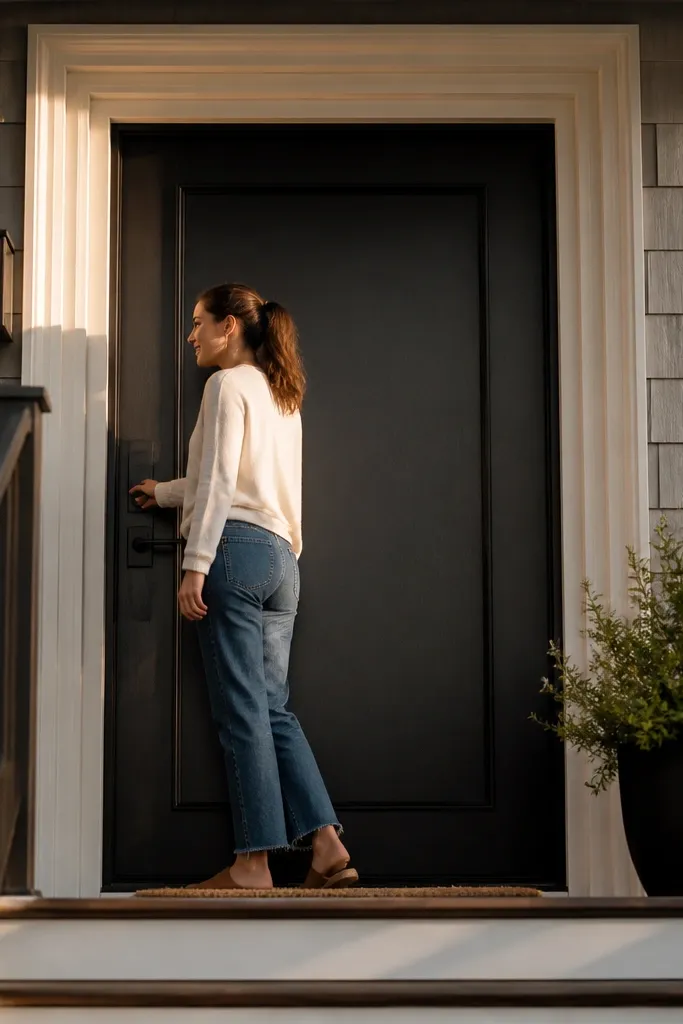
This design is grand because it simplifies the door face into one big focal panel. The stepped casing on the sides adds depth and makes the doorway look layered, like a custom millwork job. Use a dark door slab with lighter casing to create a clear frame. This style suits houses with simple architecture where you want the door to carry the visual weight. It also photographs clean because the center panel gives the eye a single target.
Step 1: Add an oversized center panel using flat MDF rectangles raised by 1/4 to 1/2 in blocks or spacers behind the panel edges for a shadow gap. Step 2: Build side casing steps by stacking two casing widths on each side, offset by a consistent reveal. Step 3: Prime, caulk, and paint the door and casing; mount hardware and add a matching address plaque if you want extra curb read.
Use a router only for the shadow gap if you have one; otherwise, spacers behind the panel edges look just as good.
Avoid a center panel that’s too tall; it should feel balanced within the door height, not stretched.
15. Diamond-Pattern Overlay Door in Warm Gray with Brass Pull
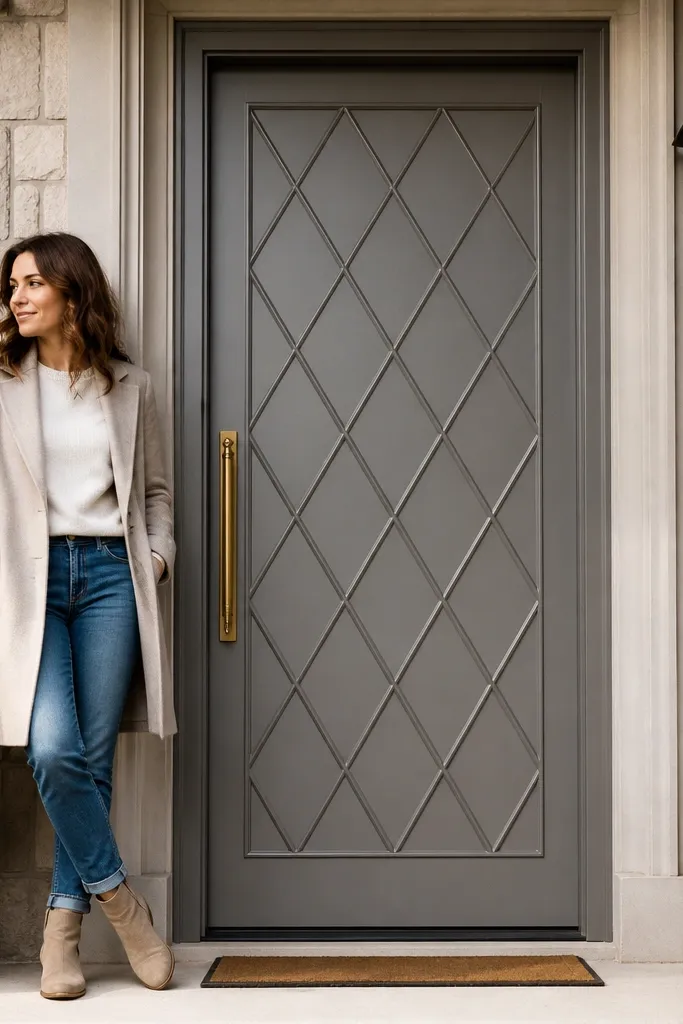
Diamonds are visually interesting without being overly ornate, and they photograph well because each edge catches light. Warm gray keeps the pattern elegant, while a brass pull adds a classic, inviting feel. The grand effect comes from making the diamond grid crisp and centered, with enough spacing to show shadows between lines. This works great with modern porches and also with older homes when the trim lines are clean. If you want a door that looks “designed” but still friendly, diamond overlay is a strong bet.
Step 1: Create a diamond grid template by marking the door center, then drawing a repeating diamond pattern with painter’s tape. Step 2: Cut trim strips to form the diamond frame, glue and nail them in place, and fill seams where needed. Step 3: Prime, paint warm gray, then seal with an exterior clear topcoat; mount brass hardware after the paint cures fully.
Check symmetry by measuring from each corner to the nearest diamond edge — don’t eyeball it.
Avoid making diamonds too close; packed diamonds look like texture, not a planned pattern.
16. Herringbone Accent Door with White Trim and Oil-Rubbed Bronze Hardware
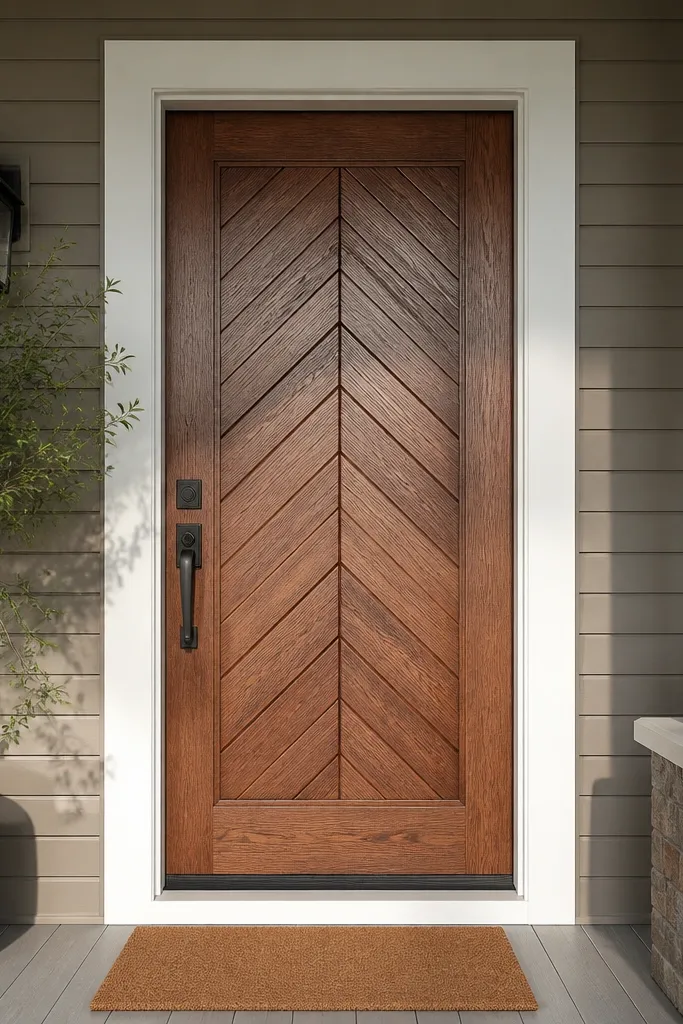
Herringbone gives you motion and texture, and the center accent keeps it from looking like a craft project. A white trim border makes the pattern feel framed, and oil-rubbed bronze hardware adds depth that matches the texture. This style is ideal for entryways that need a little personality without going full carved wood. In photos, the herringbone catches light from the side and looks dimensional even when the door is closed. It’s also a great way to use leftover trim pieces because you can plan the pattern in sections.
Step 1: Cut small strip pieces (like 1/2 to 3/4 in wide) and lay them into a herringbone pattern on the door in pencil first, then transfer the layout. Step 2: Glue the strips onto a prepared base panel area and secure with finish nails, keeping the angles consistent. Step 3: Add a white trim border around the accent area, prime, paint, and then mount bronze hardware once everything is cured.
Editor's noteDry-lay the herringbone on a flat table first; it’s faster than fixing angle mistakes on the door face.
Skip thisAvoid using random-width scraps; uneven strip widths make the pattern look messy.
17. Vertical Panel Door with Shadow-Gap Casing Reveal
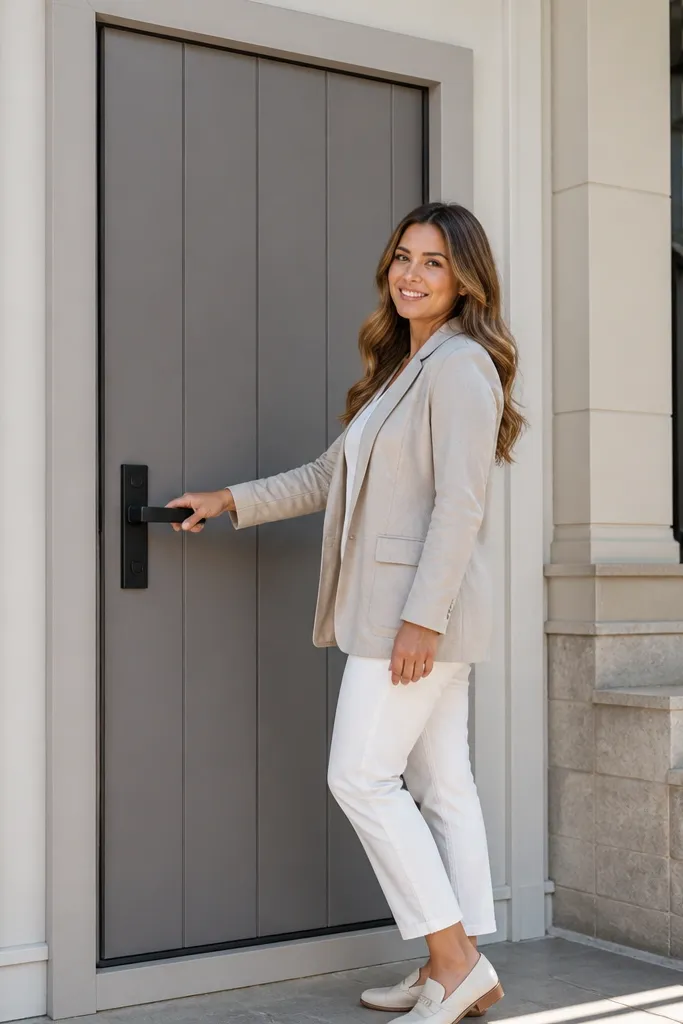
This is the “designer shadow” look: you build a crisp reveal so the casing doesn’t sit flush against the door. With vertical panels on the slab and a shadow gap around the frame, the doorway reads layered and expensive. Keep the casing color slightly lighter or darker than the door so the gap shows up in photos. This works in many styles because the core shapes are simple. It also hides minor door slab irregularities better because the reveal defines the edge visually.
Step 1: Add vertical panel moldings to the door slab using uniform strips, then sand everything smooth. Step 2: Install outer casing with a spacer behind it so you create a consistent shadow gap (often 1/8 to 1/4 in). Step 3: Caulk only at the casing-to-wall seams, prime, and paint; finally mount hardware and check the gap for evenness before the paint fully dries.
Editor's noteSet your spacer with a sacrificial test piece and confirm the gap width on both sides before you install full length casing.
Skip thisAvoid caulking the gap; it fills the shadow line and kills the layered look.
18. Matte Black Door with White Inset 'Picture Frame' Panels
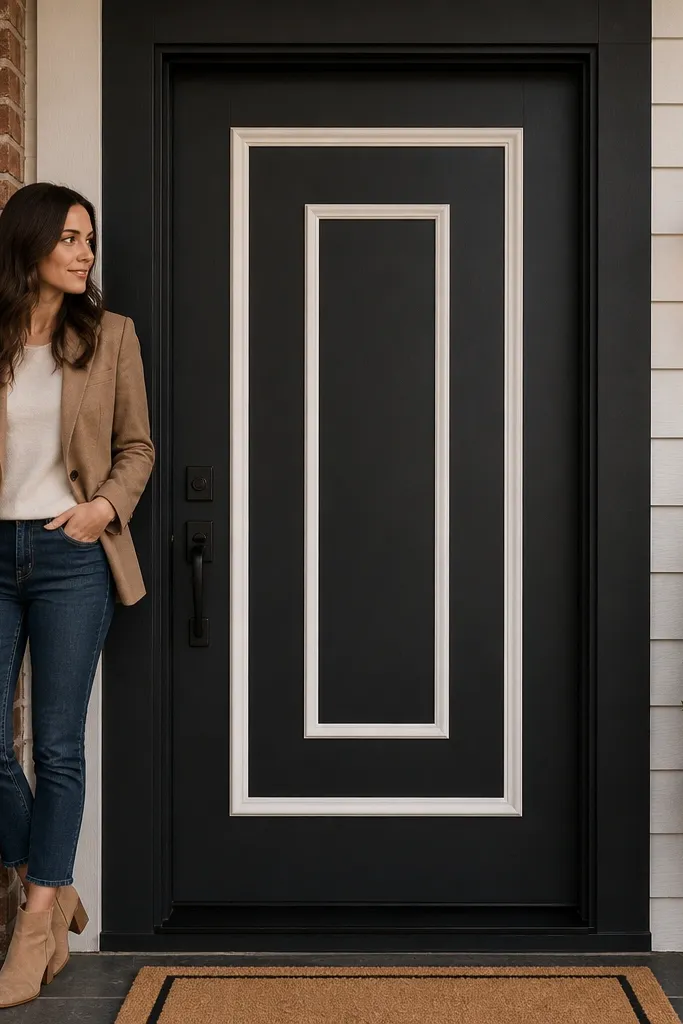
Matte black reads bold and modern, but it can look flat unless you add light-colored insets. White inset picture frames create a clean, gallery-like structure that makes the door feel designed. This is a great beginner build because you’re basically building rectangles: outer border, then one or two inset frames. Keep the hardware in a light metal (brushed nickel or stainless) so it doesn’t fight the black. This door style looks fantastic against beige, gray, or brick walls because the white frames pop.
Step 1: On a flat door, install a border frame using MDF strips, leaving an inset cavity for the white panels. Step 2: Add one or two nested inset rectangles, glue and nail, then fill and sand flush. Step 3: Prime, paint the entire door matte black, then mask and paint the inset frames white; mount hardware after the paint is fully cured.
Editor's noteMask edges with a thin strip of cardboard as a spacer; it gives you a straight line when painting insets.
Skip thisAvoid thick glue lines under inset frames; they telegraph as raised ridges after paint.
19. Stone-Look Entry Door with Faux Slate Panels and Warm Bronze Hardware
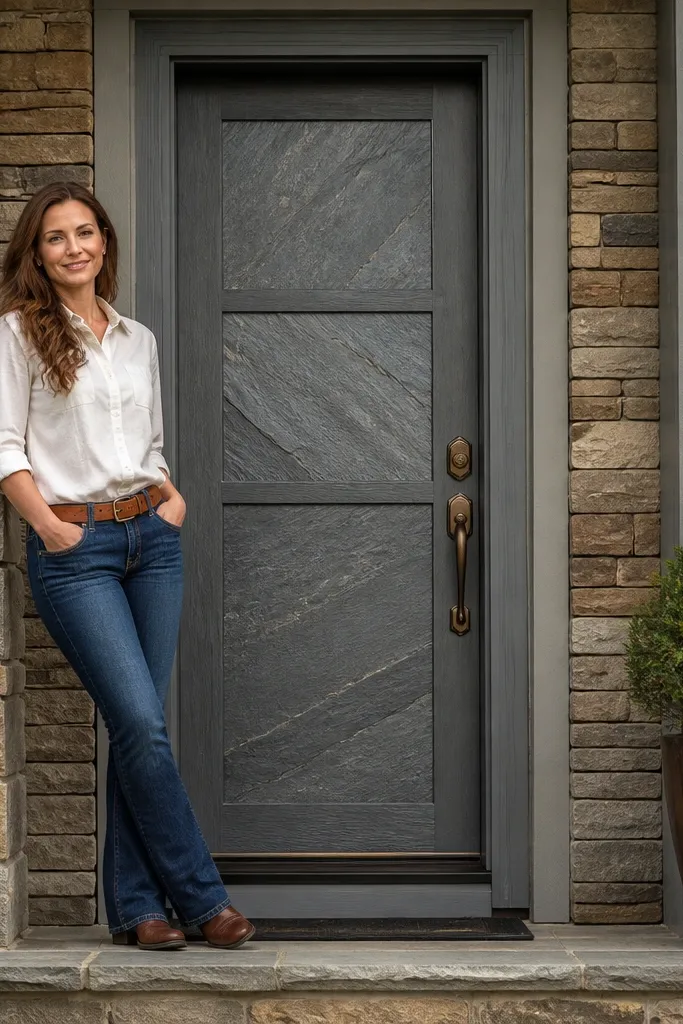
If your entry area feels plain, a faux slate panel finish makes the door look like it belongs on a high-end stone facade. The technique uses paint layers and texture to mimic slate edges and variation, while the frame trim keeps it from looking like random texture. Warm bronze hardware ties the stone look together and adds that “old world meets modern” vibe. This design is best when you want a statement door without complicated carpentry. It’s also very photogenic because the texture shows up even in low-angle light.
Step 1: Build or attach a few large recessed panel areas using MDF strips so you have “slate tiles” zones, then prime thoroughly. Step 2: Apply a base gray, then use a sponge and a darker gray glaze to create irregular stone blotches; finish with a dry-brush lighter gray on edges. Step 3: Seal with an exterior clear topcoat made for painted finishes, then install warm bronze hardware and a matching address plaque.
Editor's noteUse a vinyl glove to dab texture — it controls pressure and keeps the stone variation natural.
Skip thisAvoid glossy topcoat; it turns slate texture into an obvious fake shine.
20. Roman Column Frame Door with Fluted Side Trim
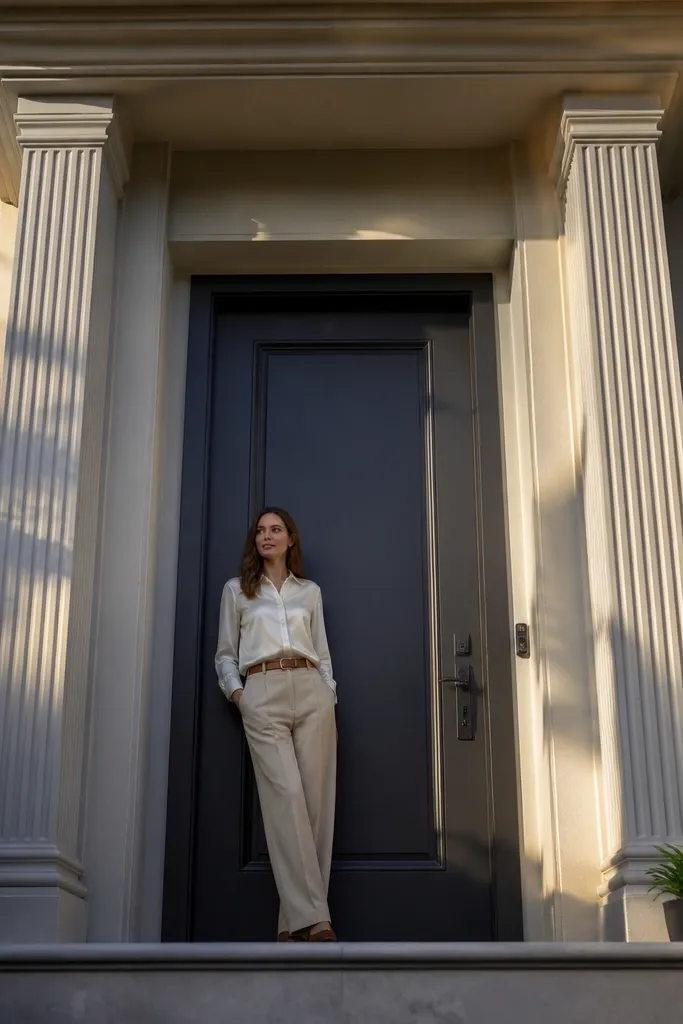
Roman-column trim makes a main door look like it has its own architectural frame. You get a grand feel without carving by using pre-made fluted casing profiles or building flutes from stacked trim strips. Pair the fluted sides with a simple door slab — either plain or with one raised center panel — so the columns stay the hero. This style works especially well on entries with porch columns or classical window trim. In photos, the flutes catch light along their ridges and create a strong vertical rhythm.
Step 1: Install side fluted trim pieces on each side of the door opening, centered to match the door height and keep the spacing equal. Step 2: Add a top entablature or simple header casing piece across the opening to complete the “column frame” look. Step 3: Prime, caulk, and paint the entire trim system, then install a door slab in a contrasting color and mount hardware last.
Use a laser level or a long straightedge for the fluted trim — even slight misalignment looks wrong with flutes.
Avoid fluting that overhangs the door casing edges; it looks careless when viewed straight on.
21. Panel-in-Panel Door with Contrasting Inset Border
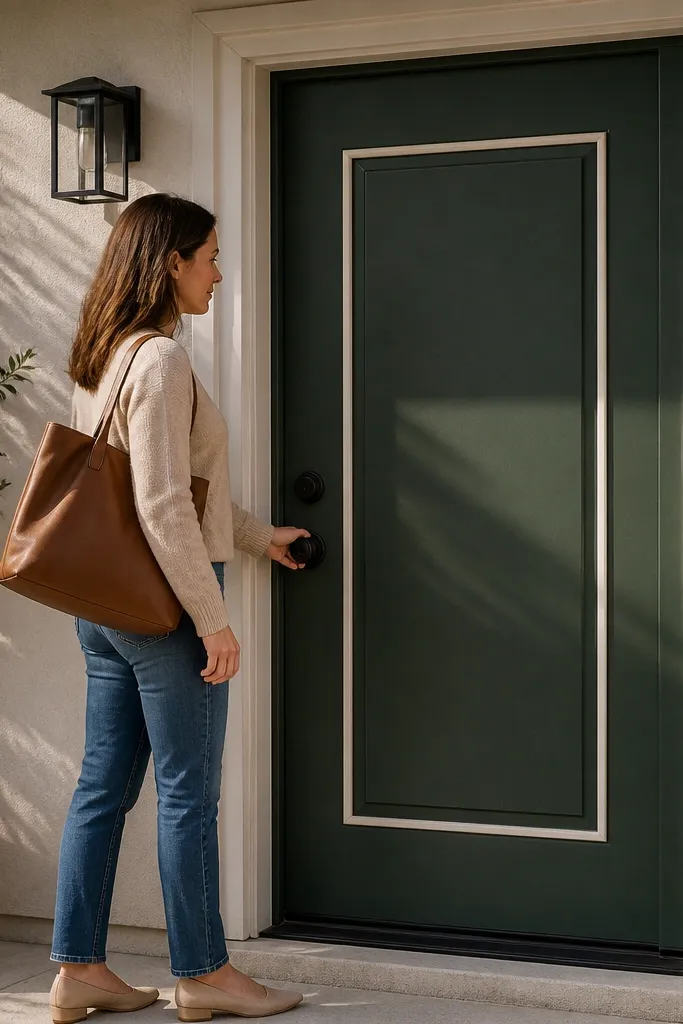
Panel-in-panel is how you get that stacked, custom-millwork vibe with simple geometry. The idea is to build an outer raised panel, then add a smaller inset border inside it. Use contrasting colors so the layers read clearly: for example, a deep green slab with a light inset border. This door style is forgiving for beginners because you can adjust proportions by changing border widths. It’s also very photogenic because each layer creates a thin shadow line that shows up in daylight.
Step 1: Attach a large center raised panel on a flat door using MDF strips and spacers to create a consistent reveal. Step 2: Add a second, smaller inset border inside the center panel area, keeping the border width even around all sides. Step 3: Prime, paint base color, mask and paint inset border, then seal and install hardware.
Editor's noteUse a scrap spacer cut to your reveal width so every layer has the same depth visually.
Skip thisAvoid uneven border widths; one narrow side makes the stacked look collapse.
22. Glass-Top Door with Wainscot Lower Panel and Brass Knob
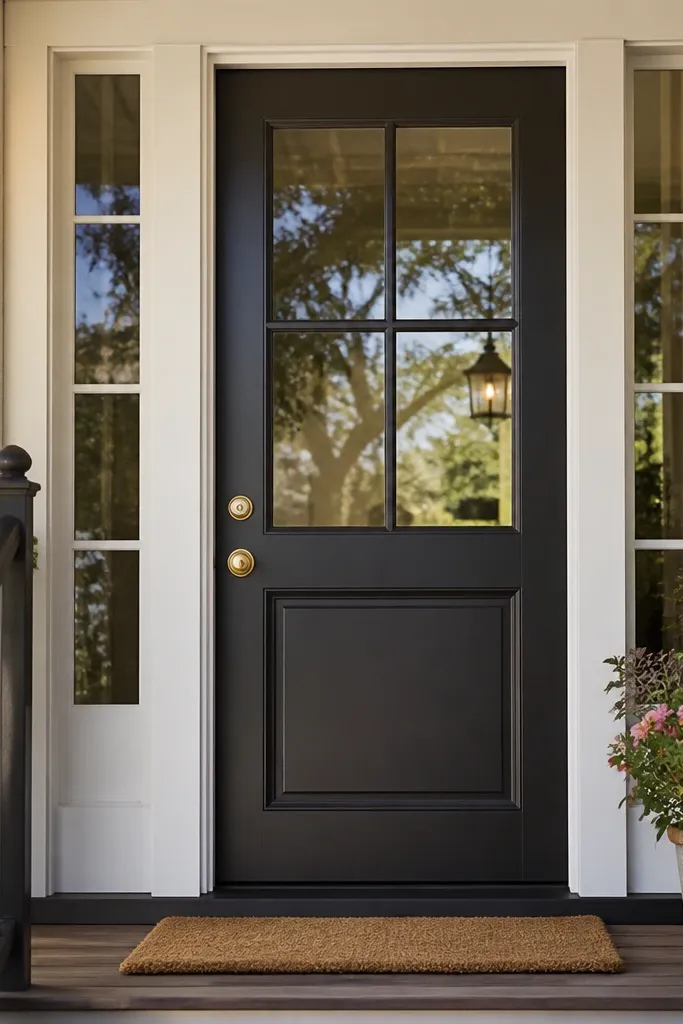
A glass-top plus wainscot lower panel looks grand because it combines two classic references: entry light and interior trim. The lower wainscot gives structure, while the glass top adds brightness and a sense of height. Brass hardware ties the trim and glass section together, and it looks warm against dark paint. This design works well for homes that need privacy but still want daylight. It’s also beginner-friendly if you buy a door slab with a divided glass section, or if you add an insert panel kit.
Step 1: Split your door face into a top glass section and a lower wainscot panel area, using a door slab kit or adding trim rails to frame the insert. Step 2: Build the wainscot with two raised panels separated by a mid-rail, keeping panel proportions consistent. Step 3: Prime and paint the door, seal around the glass insert, and mount brass knob and deadbolt after cure time.
Pick textured glass for the top section so fingerprints don’t show as clearly from the street.
Avoid painting over unsealed glass edges; moisture intrusion causes bubbling and peeling.
23. Chevron Door Face with Recessed Center 'Cartouche'
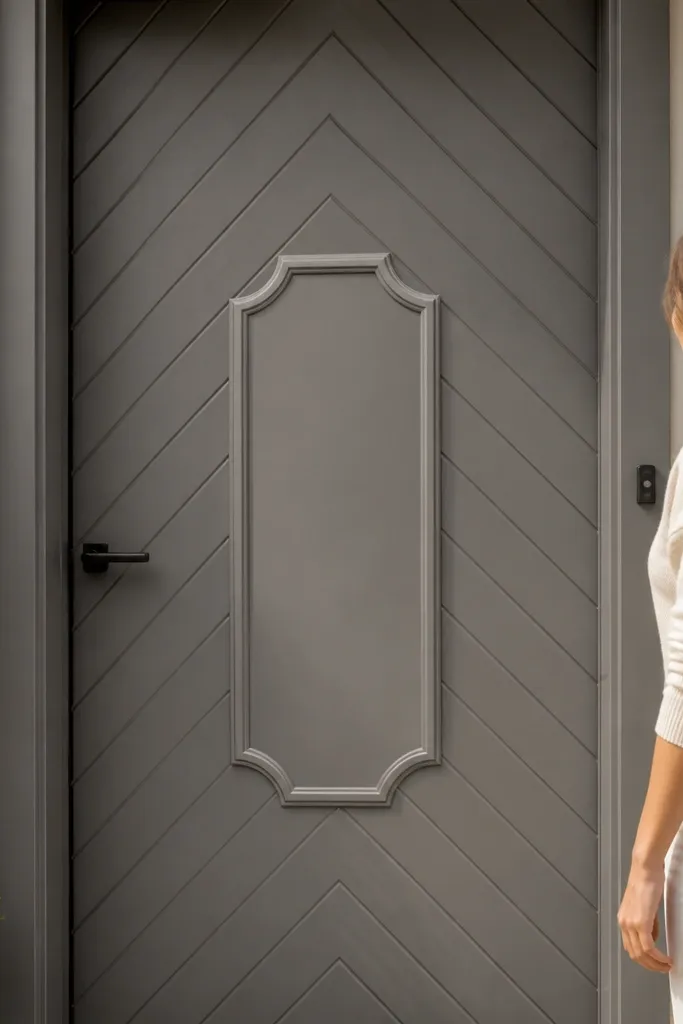
Chevron is bold, but it looks refined when you keep it confined to a door face and add a centered recessed cartouche frame. The cartouche gives the eye a calm focal point and keeps the chevron from feeling chaotic. A neutral paint base (warm gray, greige, or deep navy) makes the pattern feel elevated. This style is best for modern homes or entryways with simple architecture, where the door can carry the design. In photos, chevron shadows look crisp and graphic, especially with satin or matte paint.
Step 1: Plan the chevron layout with a taped centerline and mark the V points so the pattern stays symmetrical. Step 2: Glue chevron strips onto the door face in the marked pattern, then add a recessed cartouche frame by building a shallow border around the center. Step 3: Prime and paint the door base, then paint the cartouche border in a contrasting color; seal edges and mount hardware.
Cut chevron strips with a consistent miter angle and dry-fit the first row before gluing the rest.
Avoid painting chevron designs in glossy finish; it highlights small surface waves.
24. Raised Keystone Center Panel with Matching Frame Casing
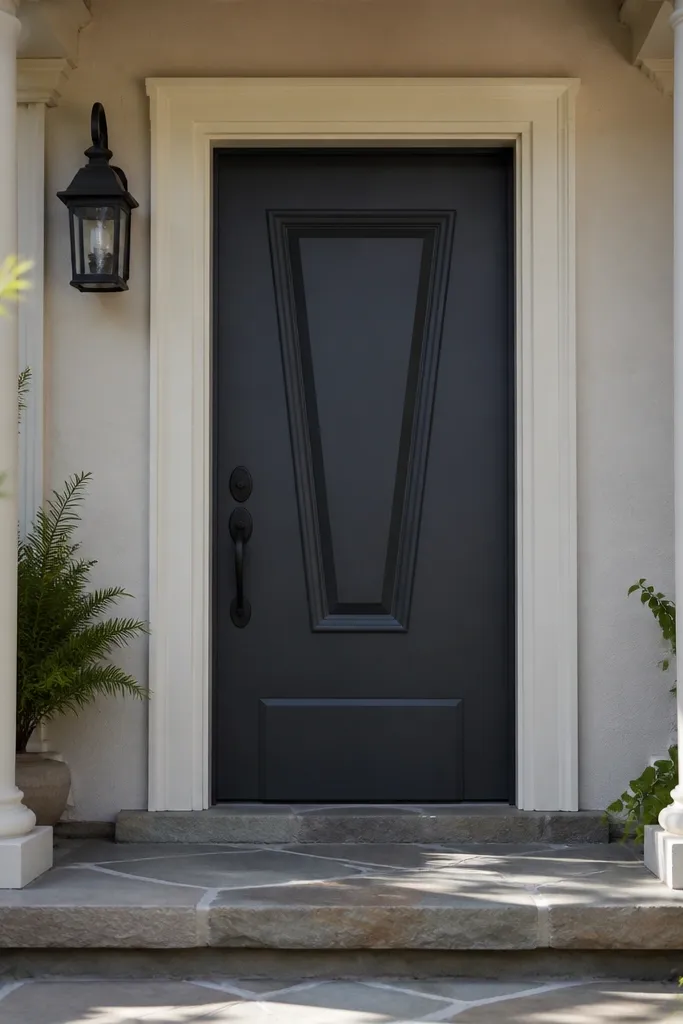
A keystone-shaped center panel instantly reads “grand” because it echoes classic masonry shapes. Keep the rest clean: a simple raised center keystone, framed by a matching border casing. This works on traditional homes and also on modern homes that like a single strong motif. Pair a dark door with light trim so the keystone stands out. It’s also a good entry for beginners because the keystone is one shape you can template and repeat accurately.
Step 1: Build or attach a rectangular outer frame on the door face using MDF strips, then cut and install a keystone-shaped center piece. Step 2: Glue and nail the keystone, fill seams, and sand smooth so the shape looks crisp. Step 3: Prime and paint the door; paint the border frame in a contrasting color, then apply a satin topcoat and mount hardware at standard heights.
Editor's noteMake the keystone template from thicker cardboard and trace it twice; the second tracing catches mistakes.
Skip thisAvoid a keystone that touches the outer frame; leave a small gap so the shape reads separately.
25. Oversized Casing 'Picture Frame' Door with Address Niche
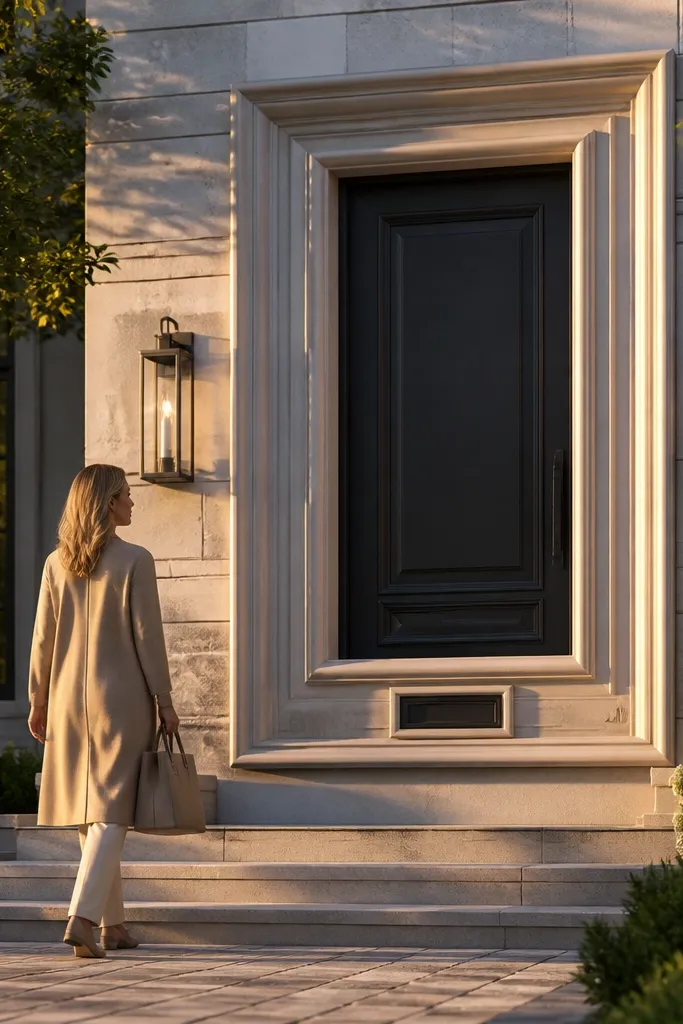
This design is grand because it treats the door like a framed artwork. The oversized casing creates a bold border around the slab, and an address niche adds a functional, photogenic detail. Choose a door slab that’s simple so the frame does the work: flat slab or basic panels. The niche makes the entry look custom and organized, especially when paired with a wall sconce. It’s a great pick when you want curb appeal without adding complex panel overlays.
Step 1: Install a thick casing border around the opening, keeping the reveal consistent on all four sides. Step 2: Build an address niche box into one of the lower casing areas, using exterior plywood or MDF and sealing all cut edges. Step 3: Prime and paint the casing system, then mount a house number plate in the niche and install hardware after paint cure.
Measure the address plate height using the actual numbers you plan to buy; standard plaques vary by 1/2 in.
Avoid building the niche too deep; deep niches cast shadow that makes numbers hard to read.



