
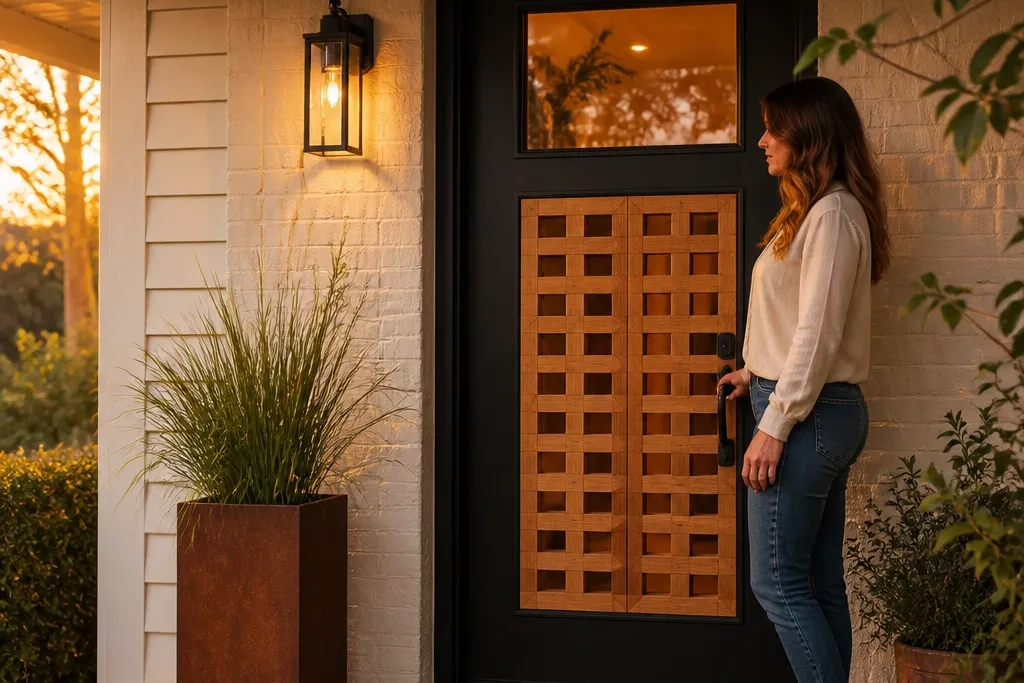

1. Matte Black Door With 2-Tone Oak Lattice Inset
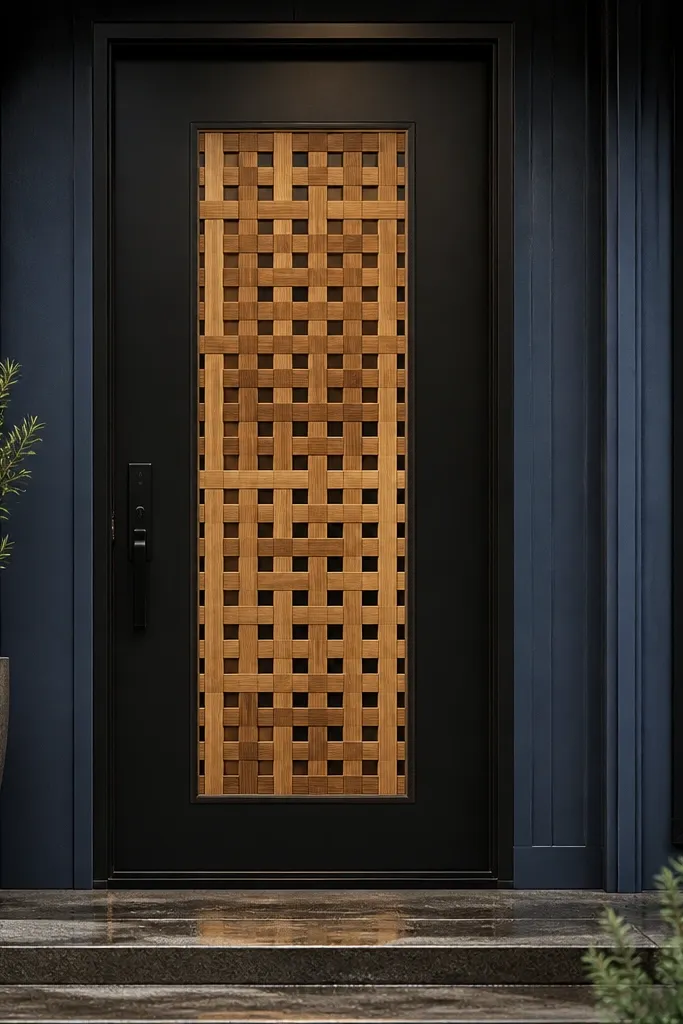
This look works because it mixes a hard, modern background with a warm, handmade-feeling center. The matte black hides minor DIY imperfections, while the oak lattice creates depth that shows up in daylight and porch lighting. You’re basically turning a flat door into a framed focal point without doing full custom carpentry. It’s beginner-friendly because the lattice is modular — you can cut and fit pieces to a panel frame rather than trying to carve anything. Plan for about a weekend if you’re starting from a standard door and you already have basic tools.
Step 1: Cut a rectangular panel frame from 1x2 pine or poplar so it fits inside your door opening area, leaving a 1/4-inch reveal for a shadow gap. Step 2: Build the lattice by spacing slats at 1.5 to 2 inches on center, then glue and pin them to the frame; sand everything flat. Step 3: Prime and paint the door matte black, then stain the lattice pieces with a warm oak stain and clear coat. Finally, attach the lattice panel with wood screws from the back or sturdy construction adhesive and check it’s centered before the glue cures.
Editor's noteUse painter’s tape to mark a consistent 1/4-inch reveal all the way around — it keeps the lattice from looking crooked.
Skip thisDon’t skip sanding the door surface; glossy factory finishes cause paint to chip around the edges.
2. Shaker-Trim Door Frame With Fresh Eggshell White
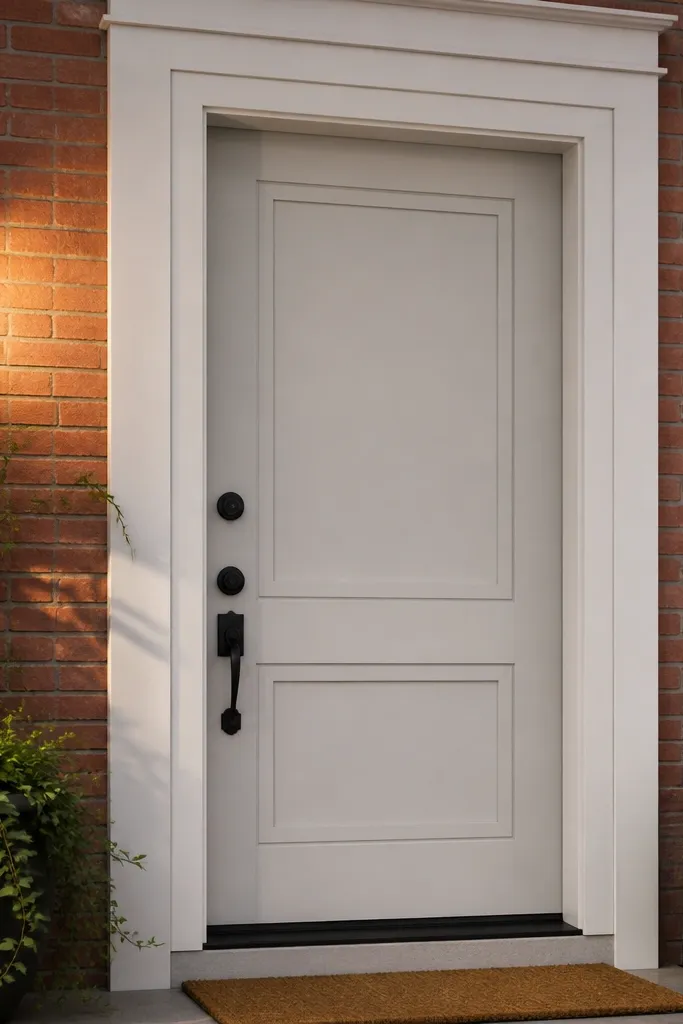
Shaker-style trim makes a front door look built-in because it creates repeated rectangles and clean shadow lines. Eggshell white keeps it bright without the glare of satin, which helps it look high-end in photos. This design is forgiving for beginners because you’re working with straight pieces and simple measurements. It also hides patchy areas on older doors since the trim frames the center. It suits classic homes, modern farm looks, and entryways with lots of natural light.
Step 1: Measure the door center area and mark a border that leaves 3 to 4 inches from the edges of the existing door panel. Step 2: Cut trim strips (about 1x2 or 1x3, depending on your door scale) and assemble a rectangle frame using wood glue and brad nails. Step 3: Add two horizontal or vertical rails inside for a shaker grid, keeping all corners square with a speed square. Step 4: Paint the entire door eggshell white after priming, then caulk the trim seams and touch up.
Dry-fit every piece on the door before glue — tiny gaps look huge on white.
Don’t use glossy paint; it highlights uneven trim gaps and makes DIY seams obvious.
3. Rust-Colored Vertical Slat Accent Over a Dark Navy Door
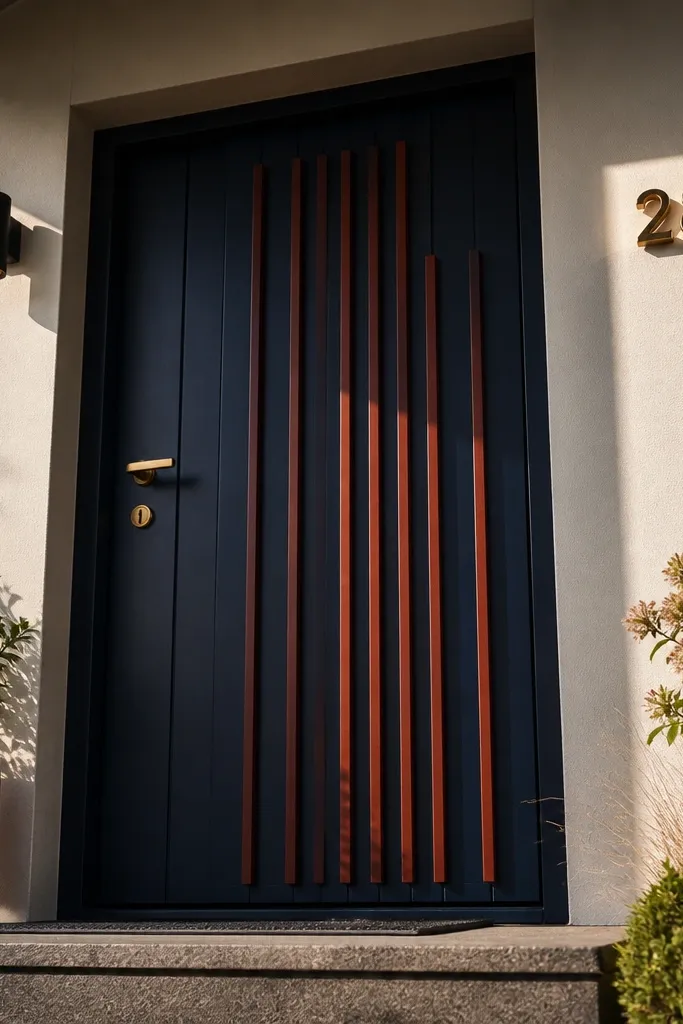
Vertical slats add height and make the door read more architectural. Dark navy anchors the look, while rust-orange slats bring warmth and color without going loud. This is a great House Main Door beginner-friendly option because slats are easy to cut and spacing is simple. The finished door looks intentional even if your door surface has small dents, since the slats visually dominate the center. Expect a clean, modern farmhouse vibe that photographs well.
Step 1: Prime and paint your door dark navy (matte or eggshell both work), then let it cure fully. Step 2: Cut slats from 1x2 stock, then cut them to the height of your center panel area minus 1/4 inch top and bottom. Step 3: Space slats at 2 inches on center and attach them to a thin backing board so the assembly stays straight. Step 4: Stain or paint the slats rust color, then mount the whole slat panel to the door using construction adhesive plus screws through the backing.
Paint slats on sawhorses and rotate them while drying so the edges don’t get streaky.
Don’t attach slats directly one-by-one if you’re new; a backing board keeps spacing crisp.
4. Clear Glass Upper Lite With Black Grid Trim
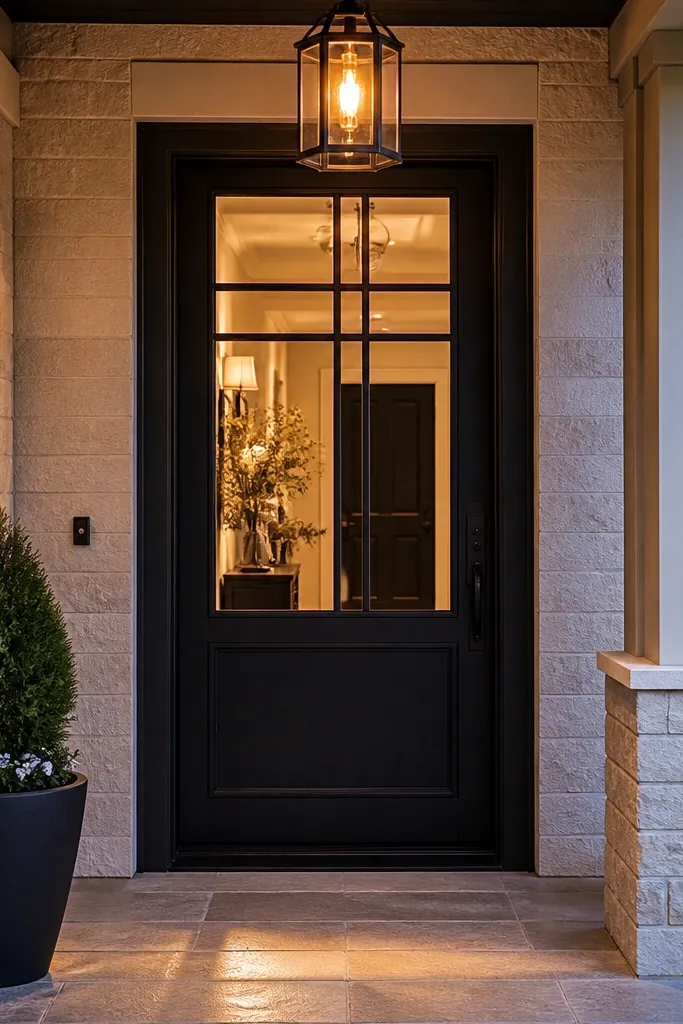
A clear glass upper lite makes an entry door look expensive because it brings light and adds a defined architectural section. The black grid trim creates a strong graphic that reads clean in daylight and at night when porch lights glow through. This design is beginner-friendly if you’re using a pre-made glass insert or a door with existing glass — retrofitting a door to cut glass is where beginners get stuck. If your door already has a glass area, this is a fast upgrade that transforms the look with minimal structural work.
Step 1: If you have an existing glass panel, remove hardware around the glass and sand the frame lightly for adhesion. Step 2: Apply bonding primer to the glass frame and trim surfaces that will be painted. Step 3: Cut grid strips (1x2 or 1x1) and mount them to the glass frame with small screws or adhesive, keeping the grid lines evenly spaced. Step 4: Paint the grid and frame matte black, then reinstall any trim pieces and add new weatherstripping if needed.
Editor's noteUse a 1/16-inch spacer when mounting grid strips so gaps stay consistent.
Skip thisDon’t paint bare metal without primer; glass-adjacent paint chips fast when it’s exposed to moisture.
5. Beadboard Center Panel With Warm White Trim
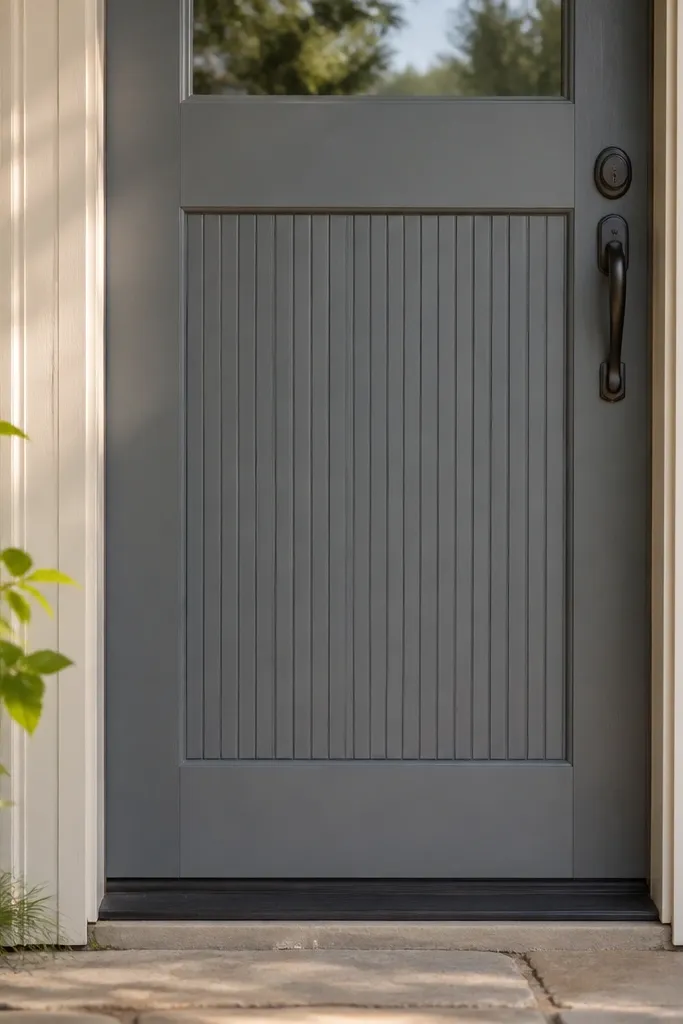
Beadboard instantly reads “crafted” because the tiny grooves catch light and create texture. Warm white trim makes the door look welcoming and hides minor surface irregularities. This design is beginner-friendly because beadboard panels can be cut and mounted as one piece with a clean border frame. It suits entry doors that are plain, hollow-core, or metal doors where you want a softer look. It also works great with brass hardware.
Step 1: Choose a beadboard sheet thickness about 1/4 inch and cut it to fit your door’s center area, leaving a 1/4-inch reveal around the edges. Step 2: Build a simple border frame from 1x2 or 1x3 and attach the beadboard to the frame using wood glue and brad nails. Step 3: Prime the door and paint warm white, then mount the beadboard panel to the door with adhesive and screws through the frame. Step 4: Caulk the perimeter and touch up paint where caulk shows.
Editor's notePre-sand beadboard edges; the factory bevel catches dust and makes paint look patchy.
Skip thisDon’t skip caulk around the panel border; gaps telegraph DIY work on white.
6. Cedar Slab Door Face With Clear Exterior Finish
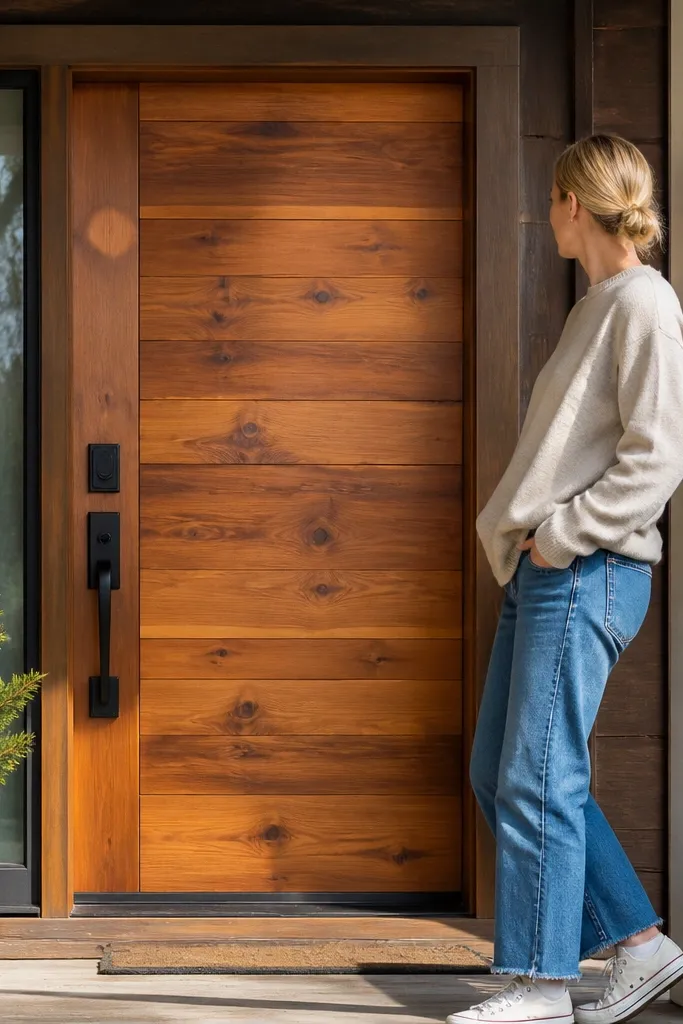
If you want the “wow” without heavy trim, cedar boards give you texture, grain, and warmth all at once. A clear exterior finish keeps the wood look while protecting it from sun and moisture. This is still beginner-friendly because you’re attaching boards to a door face rather than building a full door from scratch. It’s ideal for covered porches or entries with partial shelter, since cedar needs proper finishing. The result looks custom and photogenic because the grain lines are the design.
Step 1: Remove the door hardware and sand the existing door surface so it’s dull and clean; wipe with a degreaser. Step 2: Cut cedar boards to the door face size and attach them with exterior-rated construction adhesive plus screws at the edges of each board. Step 3: Fill visible screw holes with exterior wood filler, then sand smooth. Step 4: Apply a clear exterior finish in thin coats, including primer if your cedar is untreated.
Stagger board seams by at least 2 inches so the pattern looks intentional, not patchy.
Don’t use indoor clear coat; it turns cloudy and peels under weather.
7. Modern Rectangle Panel Inserts With Contrast Paint
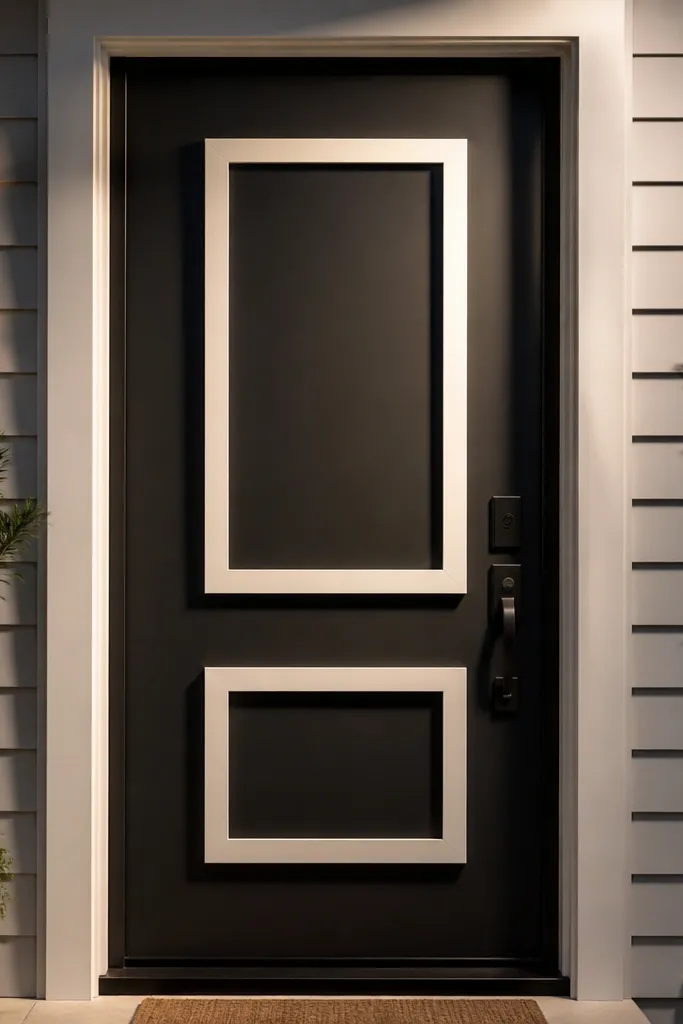
Layered rectangles create depth and a modern look that reads “designer” even when you’re working with a basic door. The trick is contrast: paint the background one color and make the inset rectangles either lighter or darker. This is beginner-friendly because it’s mostly measuring and cutting flat strips — no complex joinery needed. It also hides dents since the center becomes a new visual surface. Great for people who want clean lines without the fuss of trim everywhere.
Step 1: Mark three rectangle inset areas on the door center, leaving a 1/4-inch border around each. Step 2: Cut thin MDF strips or 1x2 trim boards for the frame around each rectangle and assemble with glue and brads. Step 3: Prime and paint the door background, then paint the inset frames a contrasting color. Step 4: Caulk the edges where frames meet the door and add a clear topcoat if you’re using semi-gloss paint.
Editor's noteUse painter’s tape to create crisp inset edges; press the tape down hard along the line before painting.
Skip thisDon’t make rectangles too small; tiny shapes look fussy and magnify alignment errors.
8. Wrought-Iron Look Panels With Black Metallic Paint
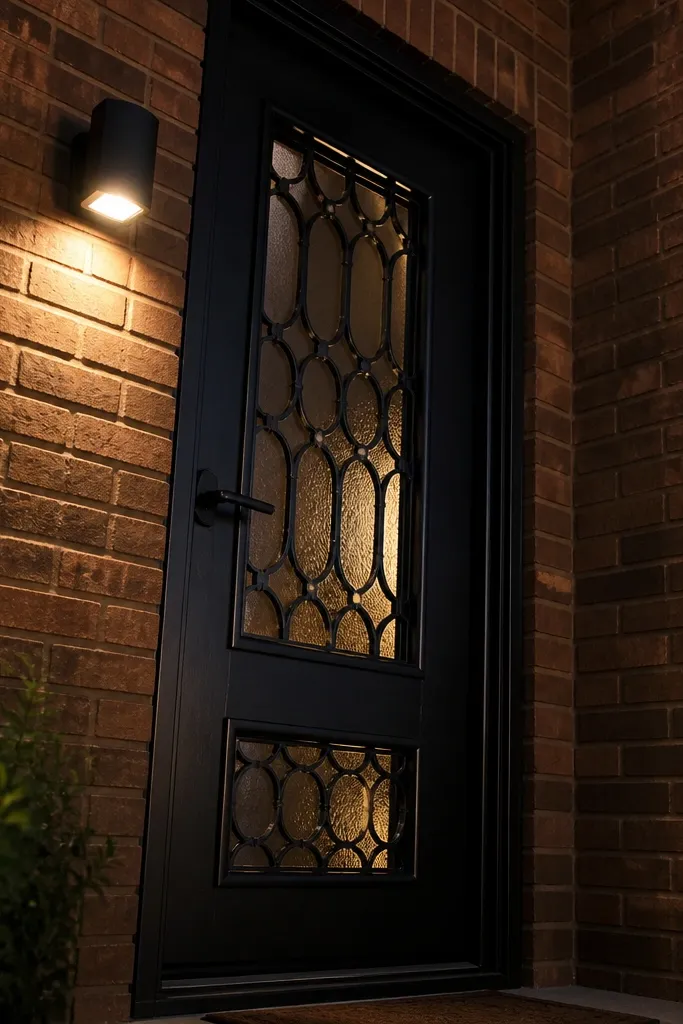
You get an ironwork look without actual ironwork weight or cost by using decorative metal panel kits or pre-cut mesh inserts. Black metallic paint adds depth and makes the pattern pop in photos. This design is beginner-friendly because the panels are pre-designed; your job is placement and paint durability. It’s perfect if you want a secure, classic look but don’t want to build a full metal door. It also pairs well with warm wood floors and bronze hardware.
Step 1: Clean the door and prime with metal bonding primer if you’re on metal, or bonding primer if you’re on glossy factory paint. Step 2: Install the decorative panel insert using the kit’s hardware or adhesive designed for the substrate, then check it’s centered. Step 3: Mask around the panel and spray or roll black metallic paint, keeping coats even. Step 4: Seal with an exterior clear topcoat so the metallic doesn’t dull or flake.
Spray in light passes rather than thick coats; metallic paint shows roller marks when you go heavy.
Don’t paint over loose rust spots or flaking — scrape to solid material first.
9. Herringbone Wood Accent on the Lower Door
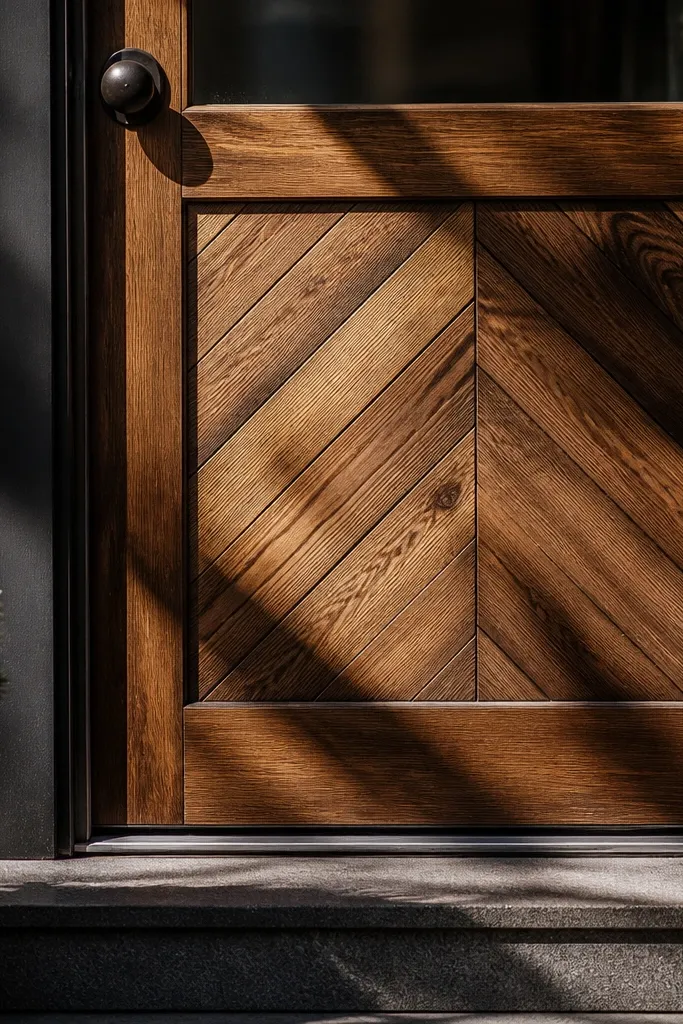
Herringbone reads fancy because the diagonal pattern creates movement, and the lower placement frames the entry step. Natural stain keeps it warm and makes the wood look like a custom inlay. This is beginner-friendly if you build the herringbone on a backing board first, so you’re not trying to align tiny pieces directly on the door. The finished look is great for doors that are otherwise plain and for homes with warm exterior siding tones.
Step 1: Cut a backing board to the lower panel size and mark a center line. Step 2: Build the herringbone by cutting small strips at consistent lengths and arranging them in a V pattern around the center line, then glue them to the backing. Step 3: Sand the surface flat, stain to your desired tone, and seal with exterior clear coat. Step 4: Mount the finished accent panel to the door with construction adhesive and screws through the backing behind the panel edges.
Use a jig board or pre-marked spacing blocks so every strip hits the same angle.
Don’t rush sanding; raised strip edges catch sunlight and make the pattern look uneven.
10. French Country Door: Raised Panels With Antique White
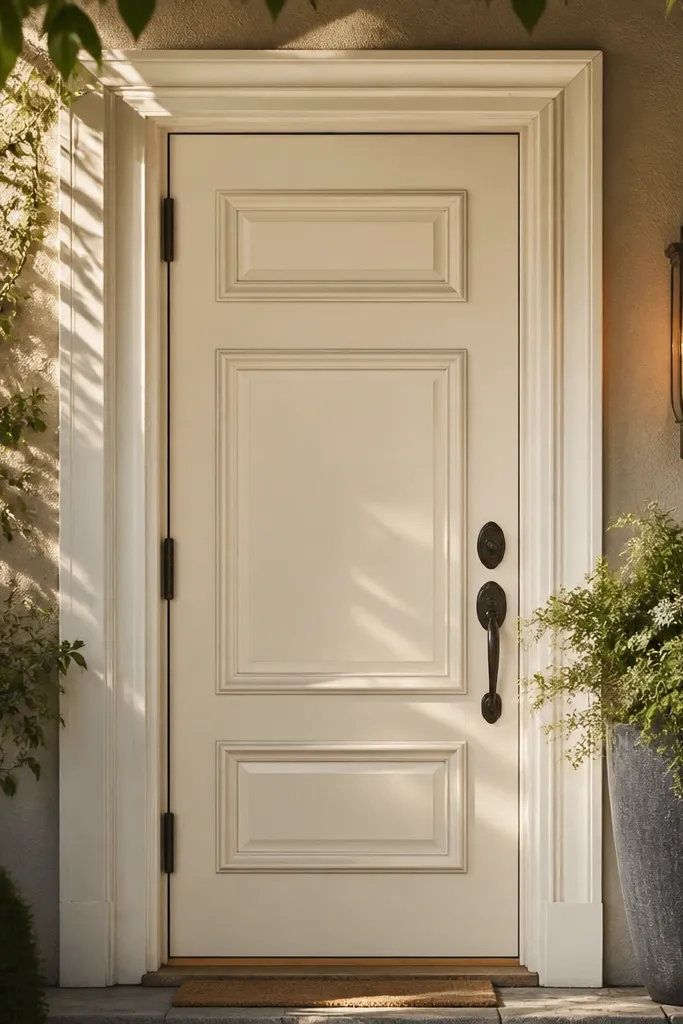
French Country style is about softness and dimensional molding, not fancy hardware. Antique white (not bright pure white) gives a lived-in, photogenic finish that works with wood trim and lanterns. The raised panel look can be done with pre-made molding strips or MDF raised panel inserts. This design is beginner-friendly because it’s mostly layering flat trim pieces into panel shapes. It’s a strong match for entries that already have warm stone, brick, or creamy siding.
Step 1: Sand the door and prime all surfaces, then paint a base coat in antique white. Step 2: Cut molding strips and build a rectangular panel grid on the door center, keeping consistent spacing and a 1/4-inch border around the perimeter. Step 3: Glue and nail the molding to create raised depth, then caulk the seams. Step 4: Apply a second paint coat and lightly distress edges with fine sandpaper for a soft antique look.
Use a satin topcoat on antique white; it keeps the finish smooth without glare.
Don’t use sharp distressing; patchy scuffs make it look accidental.
11. Two-Color Door With a Horizontal Shadow-Line Divider
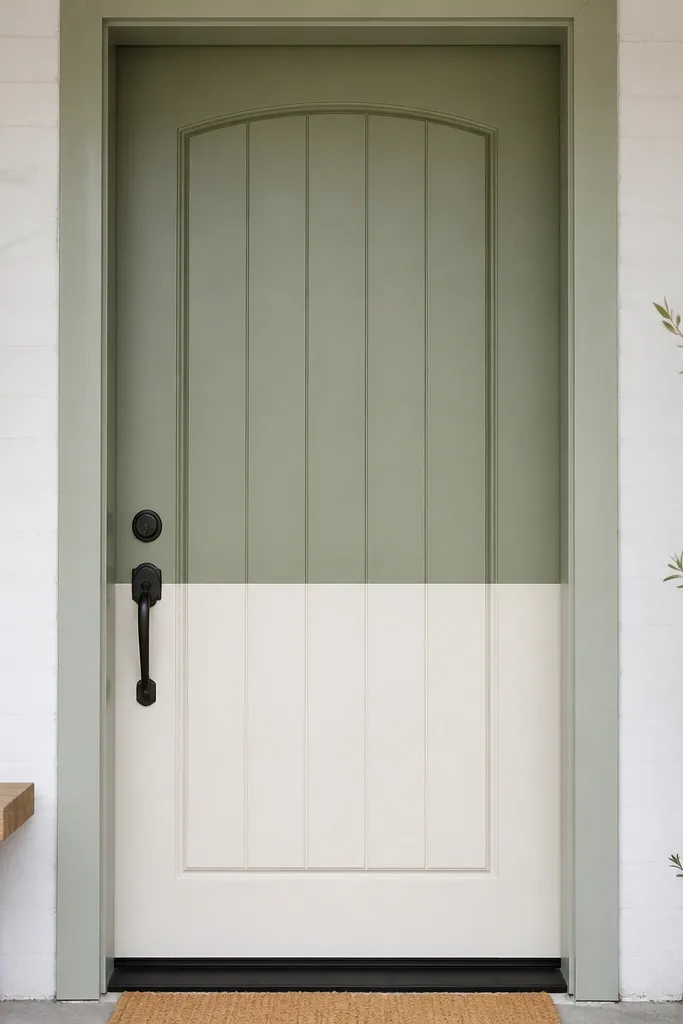
A clean two-color split looks sharp because it creates graphic clarity. The secret is the shadow line: a small 1/4-inch gap or trim strip that separates the colors so the edge looks intentional. This is beginner-friendly because painting is straightforward once your divider line is straight and level. It works on almost any entry door, including metal, because you’re not relying on complex carpentry. Pick colors that match your exterior — navy and cream, charcoal and white, or deep green and warm beige.
Step 1: Decide your split height, usually around 36 to 42 inches from the bottom for a balanced look on standard doors. Step 2: Install a thin divider strip (about 1/4 inch thick) along your level line using screws and construction adhesive, or use a pre-made trim bead. Step 3: Prime the whole door, then paint the bottom color first, let cure, and mask cleanly. Step 4: Paint the top color, remove tape carefully, and seal with an exterior clear topcoat.
Use a laser level or a long level — a slightly off line shows up in every photo.
Don’t paint both colors wet-to-wet; the boundary edge gets ragged.
12. Half-Round Wood Trim Canopy Over a Glass Insert
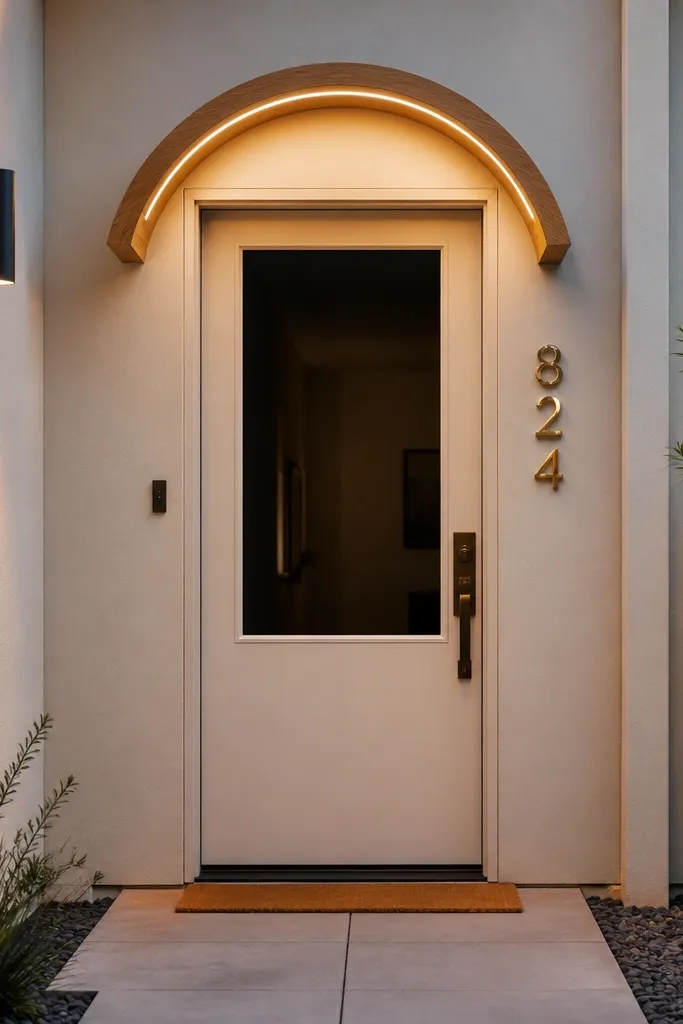
This style adds a focal element above the entry glass area, so even a plain door looks custom. The half-round trim reads like a tiny porch detail pulled up onto the door, and it photographs well because it creates a curved highlight. It’s beginner-friendly because you can buy flexible trim or use pre-cut radius pieces and attach them with adhesive plus finish nails. You get instant charm without changing the whole door. It fits cottage, craftsman, and transitional exteriors.
Step 1: If your door has glass, measure the glass width and mark a center point above it, then plan a half-round trim piece that spans about 70 to 80 percent of the glass width. Step 2: Prime the door and glass frame areas, then attach the half-round trim using construction adhesive and finish nails. Step 3: Paint the canopy and surrounding trim the same color, or contrast it with the door background for a more graphic look. Step 4: Seal edges with exterior caulk and add weather stripping if the trim creates new gaps.
Editor's noteSand and paint the trim before installation so you don’t fight hard-to-reach seams.
Skip thisDon’t mount the canopy crooked — the curve makes misalignment more obvious.
13. Vertical Board-and-Batten Door Face With Light Stain
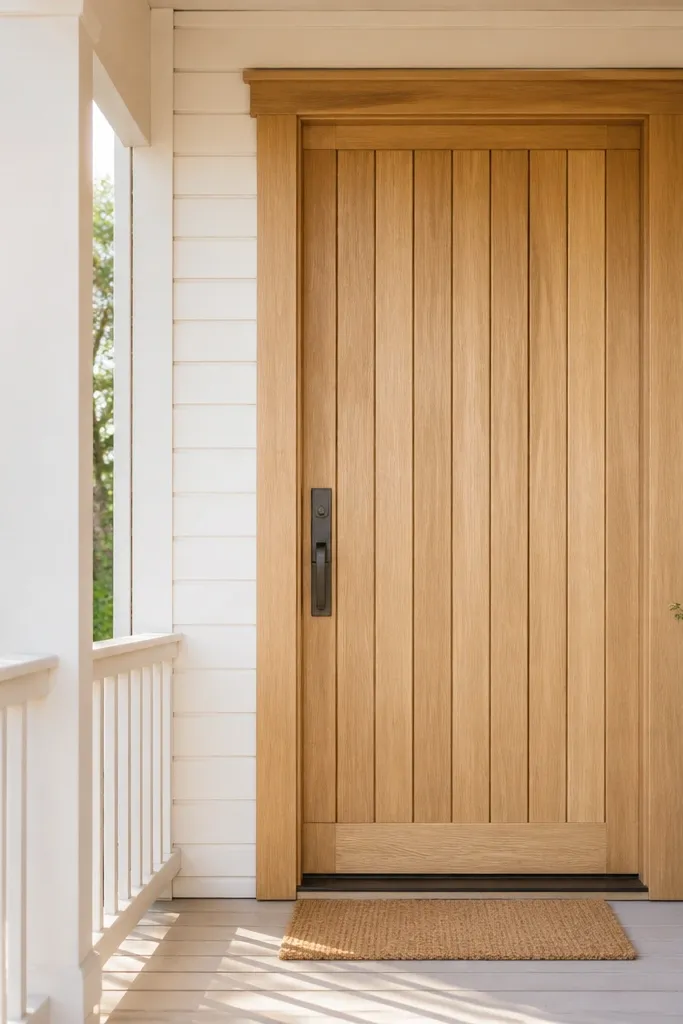
Board-and-batten gives you that farmhouse architecture look with simple geometry. A light stain keeps it bright and lets the wood grain show, so it feels warm instead of heavy. This design is beginner-friendly because the battens cover seams and alignment issues — you’re drawing the pattern with strips. It’s a great choice for doors that are currently flat and boring. Expect a clean, tall look that works well with white trim and black hardware.
Step 1: Cut vertical boards from 1x3 or 1x4 stock and attach them to the door face with adhesive and screws through the back or edges. Step 2: Space boards with a consistent gap for expansion, then install battens over the seams, usually about 1/2 to 3/4 inch wide. Step 3: Fill screw holes, sand, and apply a light stain, then seal with exterior clear coat. Step 4: Paint or stain the door frame and hardware mounts so everything matches the final finish.
Editor's noteKeep battens the same width across the door — that consistency is what makes it look built, not patched.
Skip thisDon’t use glossy stain; it shows brush marks and looks plastic outdoors.
14. Dark Charcoal Door With Brass Crossbars and Rope Detail

This is a nautical-inspired entry look that still reads clean and modern. The dark charcoal background makes brass hardware pop, and the rope-like detail adds texture without needing carved wood. It’s beginner-friendly because you’re mostly mounting hardware and adding a small accent line, not rebuilding the whole door. The result looks styled and photo-ready, especially with warm porch lighting and a textured doormat. It suits coastal homes and anyone who wants a statement without going complicated.
Step 1: Prime and paint the door charcoal matte, then mark the crossbar locations with a level so they’re parallel. Step 2: Install brass crossbars or decorative metal bars using the included screws; add rope detail as a mounted accent using small metal hooks or adhesive designed for exterior use. Step 3: Seal any drilled holes with a dab of exterior clear caulk before final tightening. Step 4: Add new brass hardware if your existing handles don’t match the finish.
Editor's noteDry-fit all hardware with tape first so you can see proportions before drilling.
Skip thisDon’t skip sealing drilled holes — water gets into entry doors and causes rust.
15. Crisp White Trim Frame With Black Wreath-Ready Center Panel
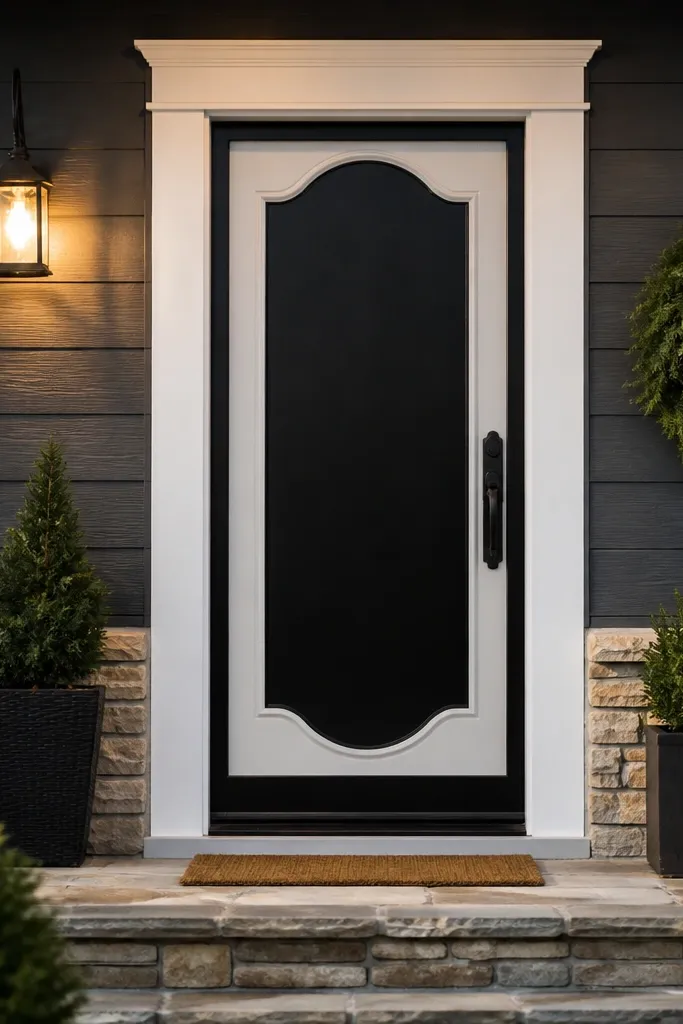
A wreath-ready center panel is a practical design trick that still looks good year-round. You’re creating a dark, clean “stage” for a wreath, lantern, or seasonal greenery, which makes your front door look styled without constant DIY. The crisp white trim frames the door so it photographs bright and tidy. This design is beginner-friendly because it uses a single center panel and a simple border. It’s a strong pick if your entry tends to look cluttered or if you want a consistent look with minimal effort.
Step 1: Prime and paint the door white (eggshell). Step 2: Cut a center panel insert from thin plywood or MDF and paint it matte black; mount it with construction adhesive so it sits flat and centered. Step 3: Build an outer trim frame around the black panel using 1x2 strips, leaving a 1/8 to 1/4 inch reveal for shadow. Step 4: Caulk all trim seams and touch up paint; install updated hardware in a finish that matches your exterior lighting.
Choose the center panel height so the wreath sits at eye level; measure from the ground to keep it consistent.
Don’t make the black panel too small; it needs enough space to look like a designed feature.
16. Boho-Modern Sunburst Trim in a Warm Clay Color

Sunburst trim turns a plain door into a focal point fast because the rays create movement and sparkle under light. Warm clay paint keeps the look modern and welcoming instead of overly rustic. This is beginner-friendly because you can build the sunburst from pre-cut wooden strips or thin lattice pieces and attach them to a backing circle. It’s best for doors with a mostly flat center area where the pattern can be centered cleanly. The finished look is photogenic from angles because the rays cast shadows.
Step 1: Cut a backing circle from 1/4-inch plywood (or MDF) sized to fit your door center area, then sand edges smooth. Step 2: Cut thin rays (about 1/2 inch wide) and arrange them from the center outward at equal spacing; glue and nail them to the backing. Step 3: Prime the door, paint the door background warm clay or a neutral, then paint the sunburst a contrasting color like cream or deep olive. Step 4: Mount the sunburst panel to the door with adhesive and screws through the backing, then seal edges with exterior caulk.
Use a simple paper template to mark ray spacing so the pattern stays symmetrical.
Don’t use ultra-thick paint on the rays; it fills tiny grooves and kills the shadow effect.
17. Two-Tone Wainscot Style With Chair-Rail Trim
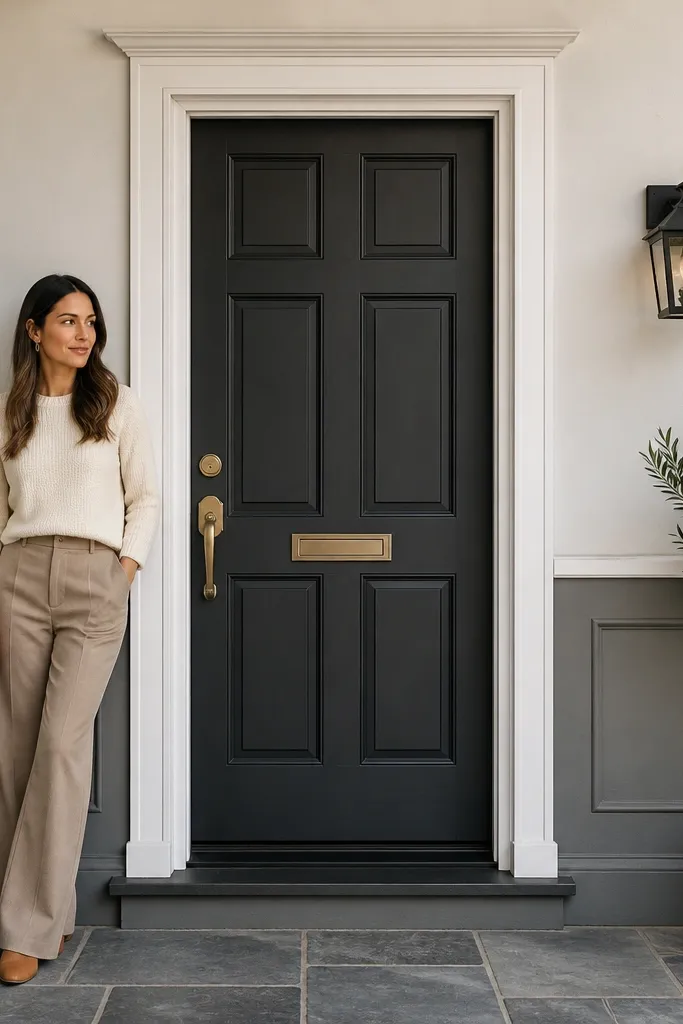
Wainscot-style doors look built-in because chair-rail trim adds a horizontal anchor line and creates a classic panel structure. A two-tone paint scheme keeps it clean: one color for the upper section and one for the lower panel area. This design is beginner-friendly because you’re working with long straight trim pieces and a simple panel layout. It also helps hide uneven door surfaces since the trim defines the visual zones. It’s great for entries that already have trim around windows or siding accents.
Step 1: Measure your door height and choose a chair-rail line around 42 to 48 inches from the bottom, then mark it level. Step 2: Install chair-rail trim (about 1x3 or 1x2) along the line with adhesive and brads, then add vertical corner posts if you want a more framed look. Step 3: Prime the door, paint the upper section first, mask, then paint the lower section. Step 4: Caulk around the trim and touch up; finish with an exterior clear topcoat if your paint is satin or semi-gloss.
Use the same sheen for both colors so the border doesn’t look accidental.
Don’t stack trim too thick; bulky trim makes a small entry door look cramped.
18. Wood Veneer Peel-and-Stick Panel With Border Frame
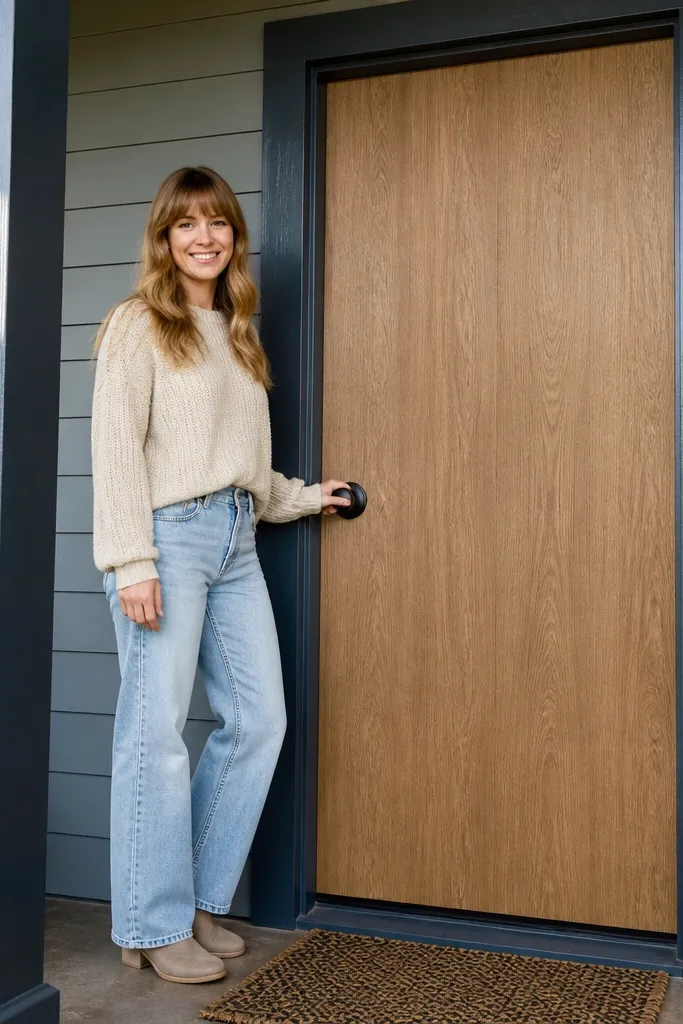
This is the fastest way to get a wood-look front door without sanding and staining a full door. Peel-and-stick wood veneer panels look realistic when you use a border frame that hides the edges. This design is beginner-friendly because it’s mostly alignment and smoothing, not building. It works well when you want the look of expensive wood panels but your door is metal or already painted. The border frame also makes the design look intentional instead of like a sticker.
Step 1: Clean the door surface with a degreaser and dry completely, then measure the center panel area and cut the veneer to size. Step 2: Apply the veneer slowly from one edge, using a squeegee to push air out as you go. Step 3: Build a painted border frame around the veneer using 1x2 trim, leaving a thin gap so the border reads crisp. Step 4: Seal the veneer edges with a clear exterior sealant made for vinyl/adhesive surfaces, then prime and paint the trim frame.
Editor's noteWarm the veneer with a hair dryer before applying so it lays flat and doesn’t lift at corners.
Skip thisDon’t apply to dusty or slightly greasy surfaces; adhesion fails at the edges.
19. Geometric MDF Cutout Insert With Exterior Paint
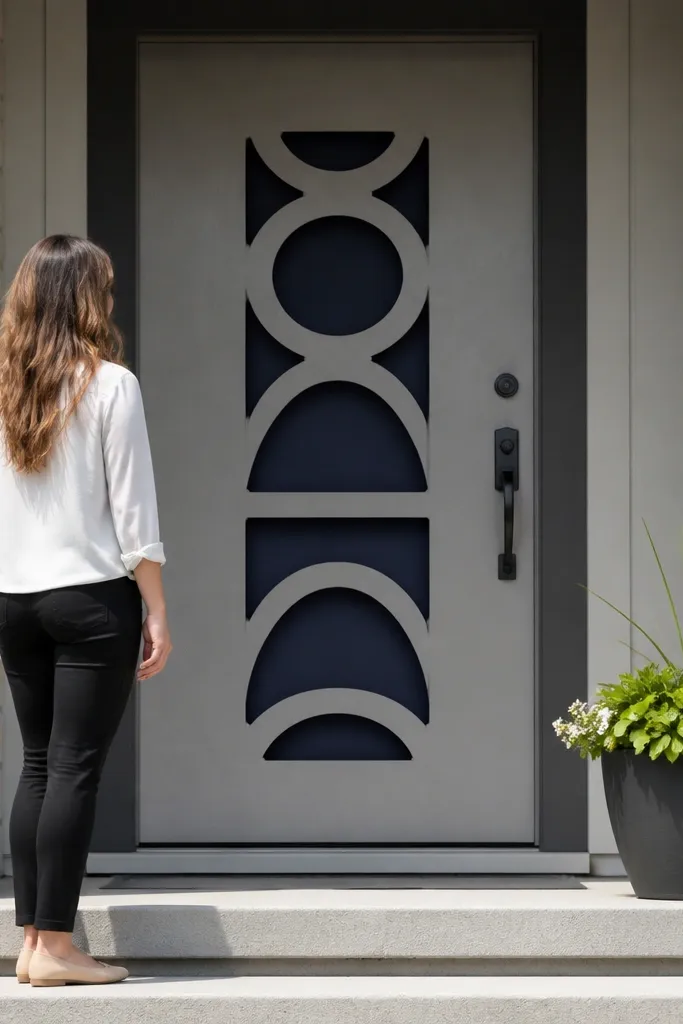
Geometric cutouts make a door look modern because they create crisp negative space and shadows. Using MDF cutouts is beginner-friendly because MDF is easy to cut with a jigsaw and sand smooth for paint. You get a clean, graphic look that photographs well from straight-on angles and from the side. This works for plain doors where you want a statement panel without changing the entire structure. Plan for a couple of days because you’ll want clean priming and drying time.
Step 1: Cut a geometric panel shape from 1/2-inch MDF (start with a rectangle and carve triangles or rectangles inside) so it fits your door center area. Step 2: Prime the MDF with an adhesion primer and sand lightly after the primer dries so the paint lays smooth. Step 3: Paint the cutout insert a contrasting color to the door, then seal with exterior paint or clear topcoat. Step 4: Attach the insert to the door with construction adhesive and screws through pre-drilled holes hidden behind the insert edges.
Seal all MDF edges with primer and a thin topcoat; edge absorption causes paint to look dull.
Don’t skip sealing MDF edges; moisture ruins the look fast outdoors.
20. Glass Block-Look Window Grid With Exterior Film
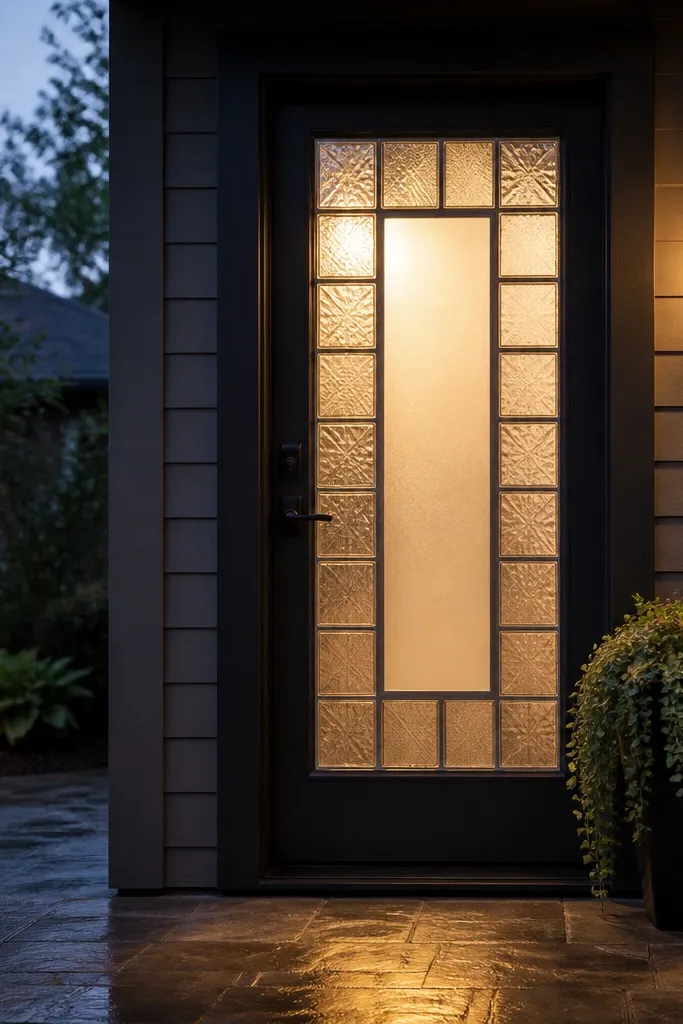
If you want privacy and style without replacing a door, exterior film can create a glass block look. The grid lines make it look architectural, and a frosted center reads soft and modern. This is beginner-friendly if you’re applying film to an existing glass panel; the hardest part is getting it smooth without bubbles. The final look impresses because it adds a pattern that catches porch light at night. Best for side entrances, offices, or homes where you want privacy without curtains.
Step 1: Clean glass thoroughly and measure your film size with a small overlap for trimming. Step 2: Apply the film using the included wet application method (solution + squeegee) so you can reposition before it sticks. Step 3: Trim edges with a sharp utility knife, then apply a grid strip kit or cut vinyl grid lines to match the glass pane. Step 4: Let it cure flat for the recommended time and check corners for lifting.
Use a microfiber cloth and a plastic squeegee — paper towels can scratch film and leave streaks.
Don’t apply film on a cold glass surface; it traps moisture and bubbles show through.
21. Reeded Glass-Look Overlay With Brass Pull Handle

Reeded glass texture makes an entry door look high-end because it diffuses light and adds movement. Pairing it with a brass handle gives you a clean contrast that looks intentional in both daylight and night photos. This is beginner-friendly if your door has a glass panel you can cover with a reeded glass film or a pre-cut overlay. The texture hides small glass imperfections and makes the door feel more “designed” than a flat clear pane. It’s especially good for doors facing street glare where plain glass looks harsh.
Step 1: Clean glass and measure the panel; cut the reeded overlay film to exact size with a little trimming allowance. Step 2: Apply using wet method for repositioning, then squeegee from center outward to push out air. Step 3: Install or replace the door handle with a brass pull or lever; drill holes carefully and seal around the hardware base with exterior caulk. Step 4: Clean edges and let the film cure so it stays tight and wrinkle-free.
If your glass has imperfections, choose a textured film with stronger opacity so the texture hides flaws.
Don’t use interior-only film; it cracks and peels at door temperatures.
22. Vertical Metal Accent Strips With Matte Black Hardware
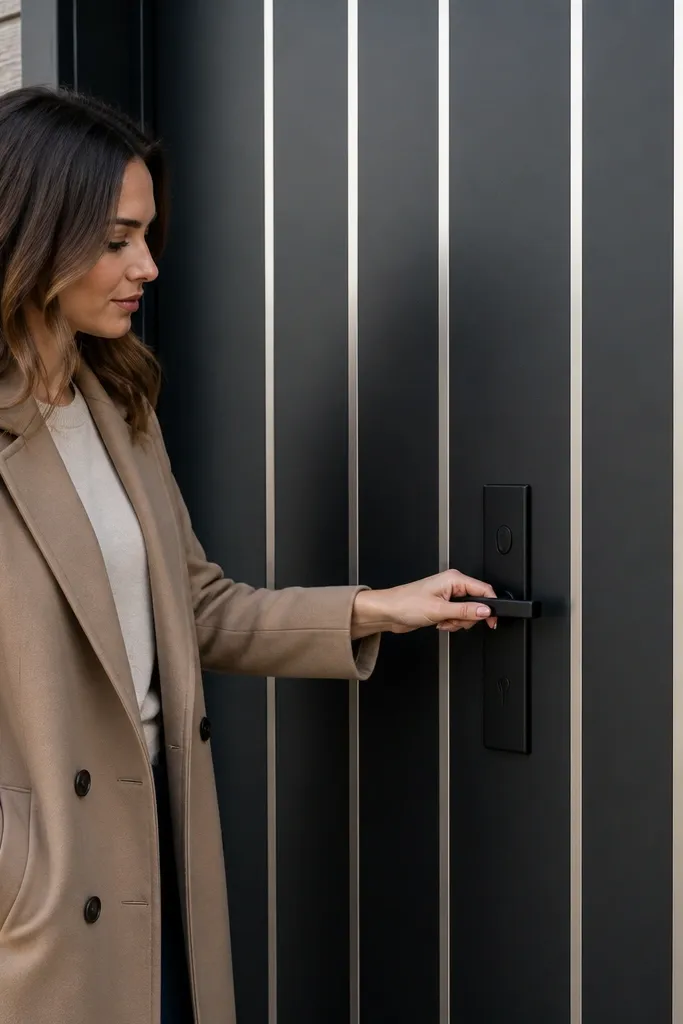
Metal accent strips give you a sharp, modern look because they reflect light in thin lines. If you keep the door matte black and finish the handle in matte black too, the metal strips look clean instead of flashy. This is beginner-friendly because metal strips mount with screws or adhesive brackets, and you don’t need fancy woodworking. It also works on both wood and metal doors, as long as the surface is properly prepped. The result is sleek and photogenic from the street.
Step 1: Mark three to five strip locations on the door center, spaced evenly and aligned with a level. Step 2: Prime and paint the door matte black if needed, then let it cure. Step 3: Mount metal strips using screws through pre-drilled holes or adhesive brackets, then check alignment from straight-on. Step 4: Install hardware and seal screw holes with exterior clear caulk to protect against water.
Keep strip ends 2 inches above and below the existing panel edges so it looks proportional.
Don’t mount strips without checking door swing and clearance; you can hit trim or weather seals.
23. Cottage Arch Trim Above a Plain Door Panel
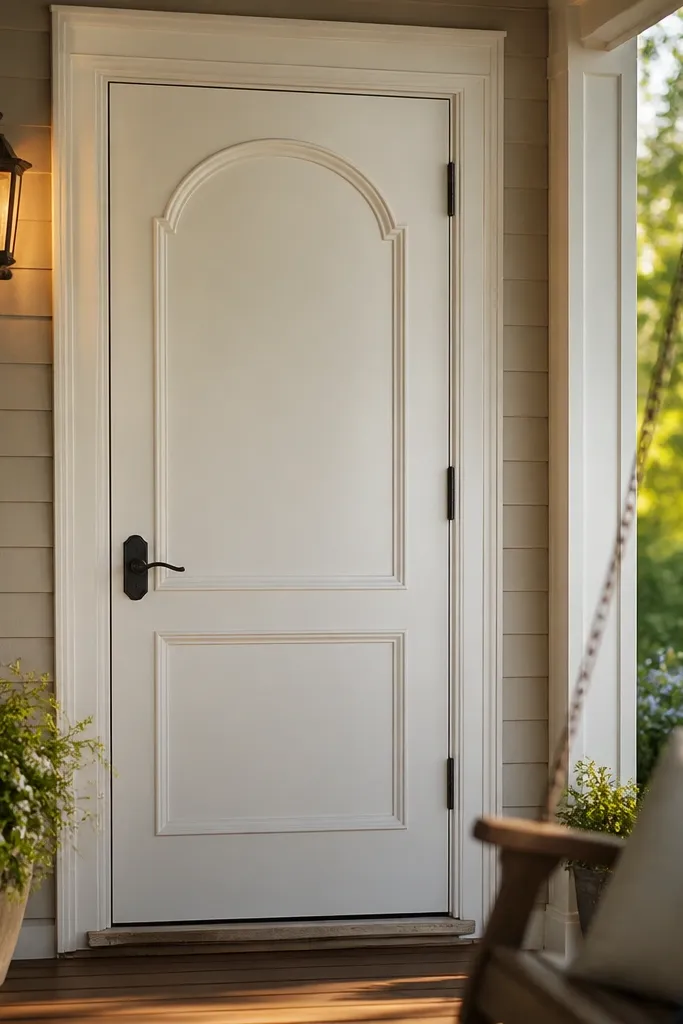
An arch trim detail instantly turns a flat door into a cottage-style focal point. It works because the curved element draws the eye upward and frames the entry. This design is beginner-friendly because you can cut the arch from plywood or use a pre-cut radius template, then attach it to the door with trim adhesive and brads. Paint it the same color as surrounding trim or contrast it slightly for a more graphic look. It’s a great pick when your door is already solid but visually boring.
Step 1: Choose the arch size — for a standard door, keep the arch width around 70 percent of the door width and center it above the main panel. Step 2: Cut the arch from 1/2-inch plywood or MDF, sand smooth, and prime. Step 3: Paint the arch and door trim, then mount the arch with construction adhesive and finish nails. Step 4: Caulk around the arch edges and touch up paint where caulk shows.
Use a flexible measuring tape to confirm the arch center lines up with the door handle and lock.
Don’t choose an arch that’s too small; tiny curves look like an afterthought.
24. Bold Color Door With Oversized Geometric Door Knocker Plate
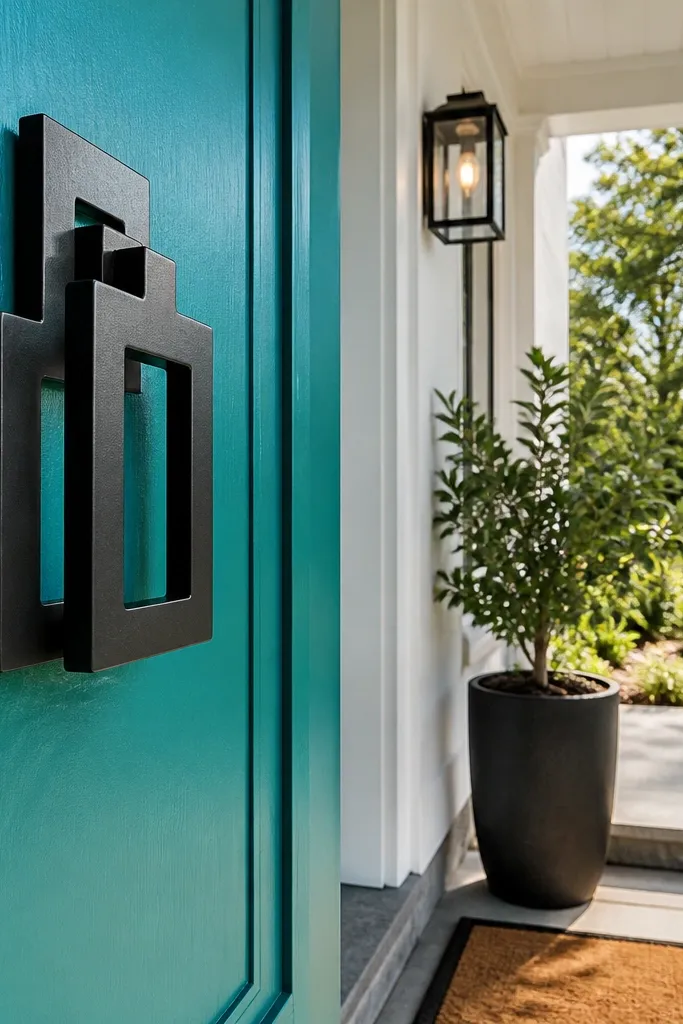
This is the “minimum work, maximum impact” design: use a bold door color and add one oversized hardware focal point. The trick is picking a door color that flatters your exterior and pairing it with a knocker plate that has strong geometry. It’s beginner-friendly because you’re painting and installing hardware, not building trim all around. The door photographs well because the hardware creates a clear center point. Choose this if you want a quick upgrade that still looks styled.
Step 1: Sand and prime the door, then paint with an exterior-rated color like deep green, bright red, or cobalt blue in matte or eggshell. Step 2: Mark knocker plate placement using the template that comes with the hardware, then drill carefully and avoid splintering by drilling from both sides. Step 3: Install the knocker with the included bolts and seal the backside with exterior caulk to prevent water intrusion. Step 4: Finish by adding coordinating hardware like a matching deadbolt cover and handle plate.
Test door color by painting a small sample area next to the door trim; undertones matter in porch light.
Don’t buy hardware that’s too small for the door; it looks lost and cheap.
25. Stone-Look Tile Insert Framed In Painted Trim

A stone-look tile insert makes a front door look custom because tile has real weight and texture. Framing it in painted trim keeps it cohesive and stops the insert from looking like a random patch. This is beginner-friendly if you use a pre-cut tile insert kit or small-format tile pieces and you’re comfortable with careful measuring. It’s photogenic because grout lines and tile variation show up clearly. This works best on doors with a recessed center area or panels where you can create a flat mounting surface.
Step 1: Build a recessed or framed opening using 1/2-inch plywood or trim so the tile sits flush or slightly proud; seal the backing with primer. Step 2: Dry-fit tile pieces and plan grout spacing, then apply thinset or exterior-rated adhesive designed for tile on your substrate. Step 3: Let it cure, grout the seams if needed, and seal grout with a penetrating sealer. Step 4: Paint the surrounding trim, then caulk the tile perimeter to keep water out.
Editor's noteUse spacers that match your tile size; grout lines that are inconsistent look messy in photos.
Skip thisDon’t skip sealing grout; outdoor moisture stains grout quickly.



