
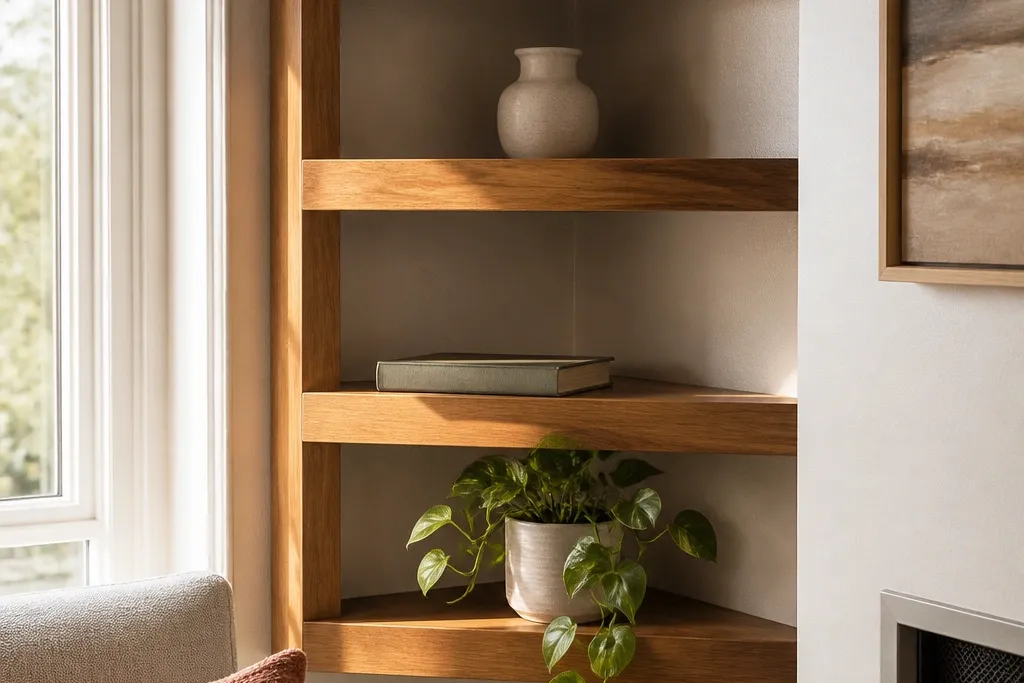
1. Walnut Tri-Panel Corner Float with 6mm Shadow Gap
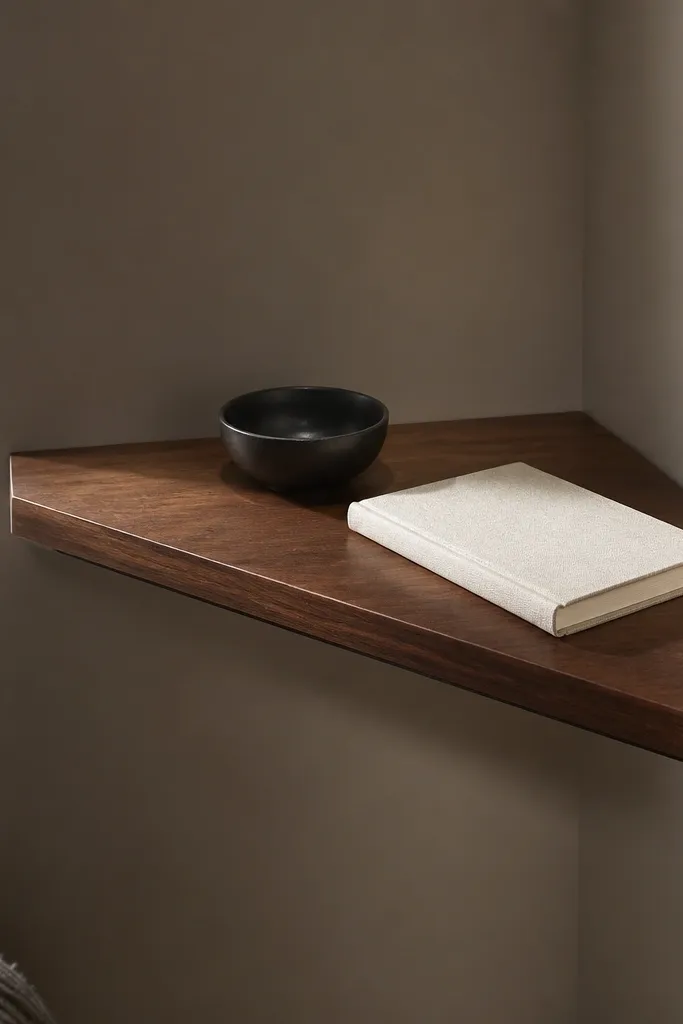
This is the “custom built” look for a corner that needs instant warmth. The shelf is made from three panels that meet at the corner, so the wood grain keeps flowing instead of stopping at a single miter seam. A 6mm shadow gap creates a crisp line that reads expensive even when the room lighting is messy. Finish it in walnut with a satin topcoat so the wood stays warm, not shiny. This project looks best in living rooms, entry nooks, and reading corners where you want the shelf to act like a focal trim piece.
Cut three shelf boards: one long board for each side and one small return panel for the corner edge, keeping the face thickness around 32mm (about 1.25 in). Build a back cleat that runs along both walls, then mount it to studs or blocking with 2.5 in screws. Install spacers that hold the shelf 6mm off the wall, then attach the shelf underside to the cleat through concealed screws. Sand the face edges, apply walnut stain evenly, let it dry fully, then add two satin polyurethane coats with a light 220-grit scuff between coats.
Use a scrap spacer cut to exactly 6mm to keep the reveal consistent while you fasten the shelf.
Don’t rely on wall anchors for the cleat — the shelf will sag and the seam line will look off.
2. White Oak Corner Ladder Shelf with Rounded Face
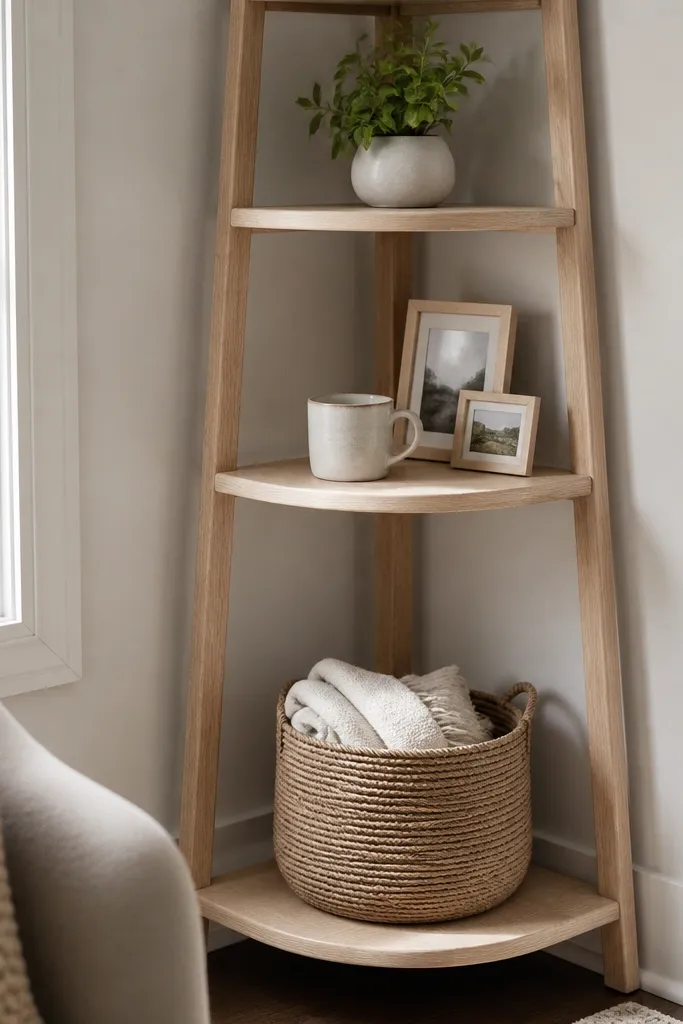
If your room is bright but feels empty, a white oak ladder shelf warms the corner without going dark. The ladder format keeps it airy, so it won’t visually crush a small room. Rounded edges are the secret: a gentle round-over makes the shelf look handcrafted and softens the corner geometry. Finish in a clear, warm white oak stain so the grain stays visible, then topcoat with a matte finish to avoid glare. This style fits kitchens, small living rooms, and sunrooms where you want display space but also breathing room.
Rip two side rails from 3/4 in (19mm) white oak boards and cut 5-7 evenly spaced rung shelves from 3/4 in stock, leaving a consistent 2 in (50mm) rung depth. Mark the corner layout so the rails meet with a clean miter at the corner, then dry-fit before assembly. Use wood glue plus 1.25 in pocket screws for the rungs, keeping the rung faces flush with the rails. Mount the ladder using a back ledger board fixed to studs, then stain and seal: wipe-on stain, dry, scuff sand, then matte clear topcoat.
Dry-fit the corner miter with painter’s tape holding it together so you can see the seam line before gluing.
Avoid overloading the top rungs — ladder shelves look best when the top feels lighter than the bottom.
3. Espresso V-Groove Corner Shelf with Hidden French Cleat
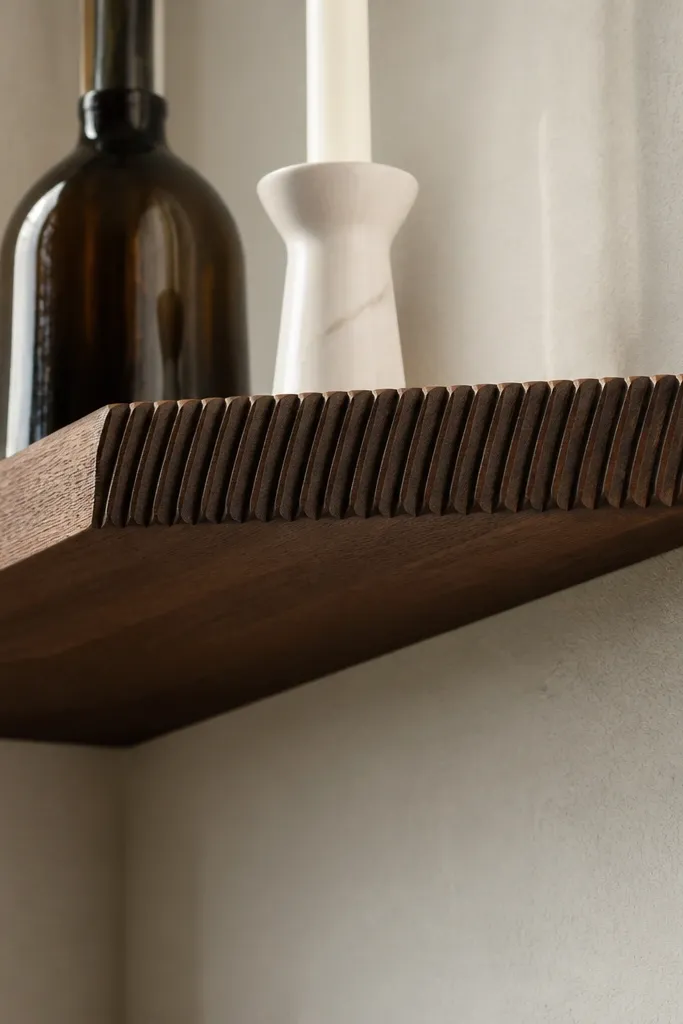
This one reads high-end because the face has texture without looking busy. A shallow V-groove pattern on the front board catches light and hides minor sanding marks, which is great if you’re building at home. The hidden French cleat keeps the look clean — no brackets visible, so the shelf feels built-in. Espresso stain makes the grooves look deeper and more dimensional. It’s ideal for entryways and hall corners where you want a sleek, minimal shelf that still looks expensive.
Use a single wide face board (6-8 in / 152-203mm) and cut a shallow V-groove using a router with a V-groove bit set to about 1/16-1/8 in depth. Build a boxy shelf frame from 3/4 in plywood or solid wood, then attach the grooved face board to the front edge. Cut a French cleat: one side mounted to the wall studs, the matching side screwed to the shelf underside. Hang the shelf so it sits tight to the wall, then sand the face, apply espresso stain, and finish with two coats of satin polyurethane.
Do a test groove on scrap and stain it before routing the real face board to confirm depth and color.
Don’t paint the grooves — stain must penetrate or the texture disappears.
4. Two-Tone Maple and Walnut Corner Shelf with Picture-Ledge Lip
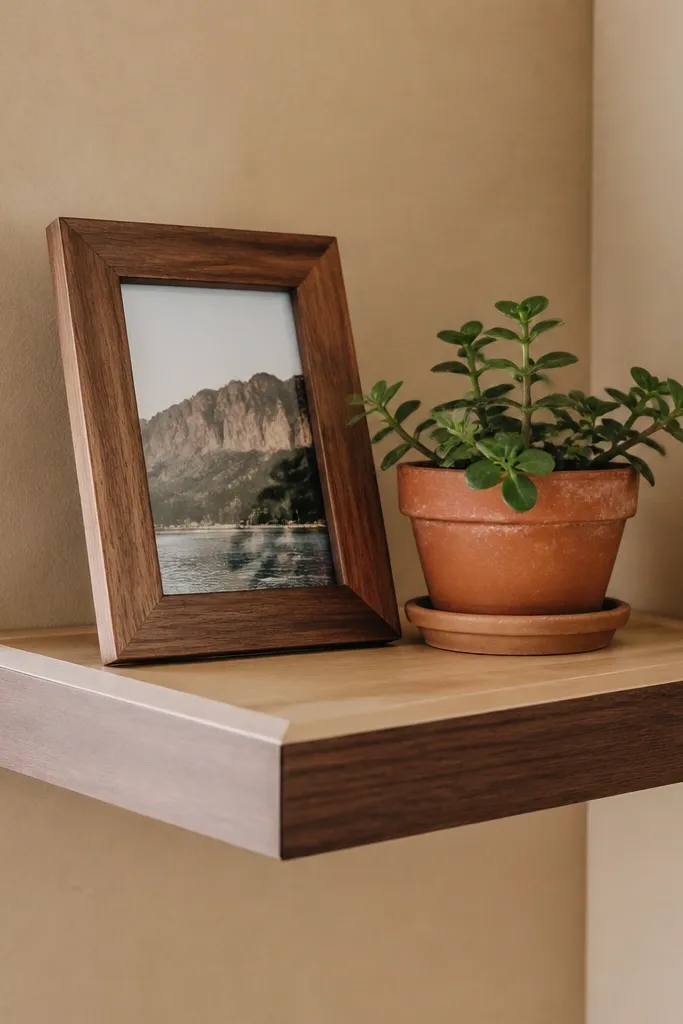
Two-tone shelves look tailored because the eye gets a clear boundary. Use maple for the main shelf body and walnut only on the face lip so the corner reads warm but still crisp. The picture-ledge lip (a small protruding edge) keeps frames, candles, and small planters from sliding forward. This is a great option for display-heavy corners where you want things to sit in a neat line. Finish with a matte topcoat so the maple doesn’t go yellow and the walnut stays rich.
Cut the main shelf from maple plywood or solid maple, sized to your corner with a clean edge at the corner joint. Rip a walnut strip to form the picture-ledge lip, then glue and screw it under the front edge so it projects about 3/4 in (19mm). Build a back support cleat and mount it to studs, then attach the shelf underside to the cleat with concealed screws. Sand all visible edges, stain the walnut lip separately from the maple, then seal both with matte clear.
Editor's noteMask the maple before staining the walnut lip so the tones stay distinct and photogenic.
Skip thisSkip thick glue lines — squeeze-out on the edge shows up after staining.
5. Charred Oak Corner Shelf with Bracketed Corner Support
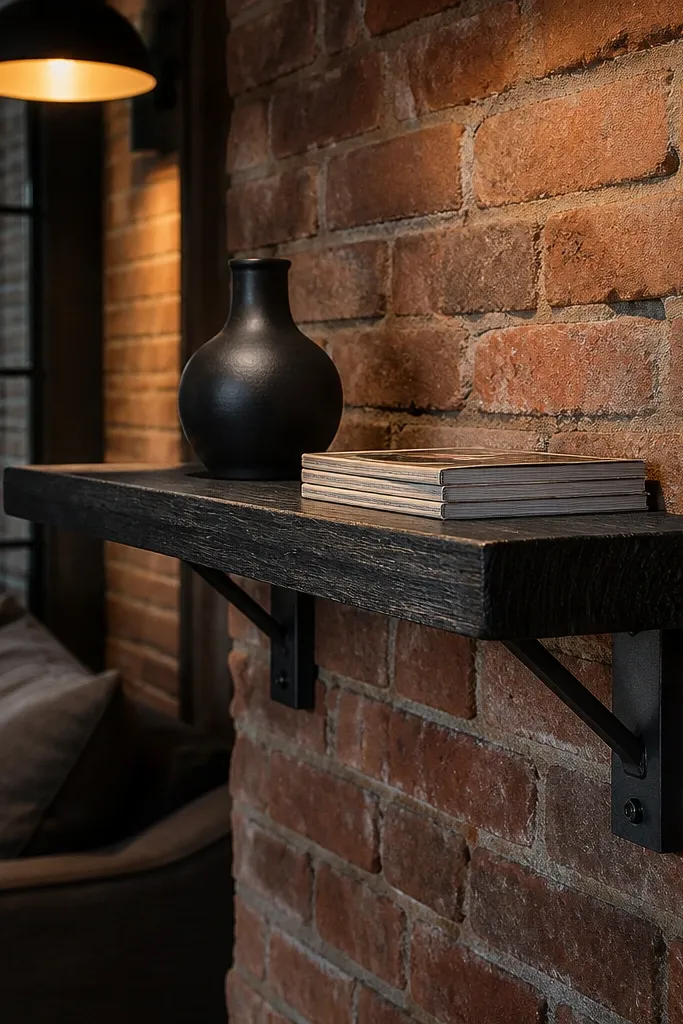
Charred oak gives you drama without needing a complicated shape. The blackened surface with visible grain reads premium, especially when you keep the shelf face simple and the brackets tidy. Use a medium-wood bracket finish like oil-rubbed bronze or blackened steel so it matches the char. This looks best in industrial-modern rooms, but it also warms minimalist spaces. Place it in a corner that already has a strong visual line, like near a fireplace surround or a dark wall.
Use oak (not pine) and char the surface with a torch until the grain darkens, then brush off loose soot. Sand lightly to smooth high points, then apply a clear hardwax oil to protect the charred look. Build shelf sides from 3/4 in stock and a solid top board about 1 in thick for weight and stability. Mount two L-brackets into studs with 3 in screws, then add a small back stop strip so objects don’t roll toward the corner joint.
Editor's noteTest your char level on a scrap first; too far and the grain disappears under soot.
Skip thisDon’t use cheap brackets with thin metal — they flex and the shelf looks shaky.
6. Walnut Corner Shelf with Carved Scroll Edge
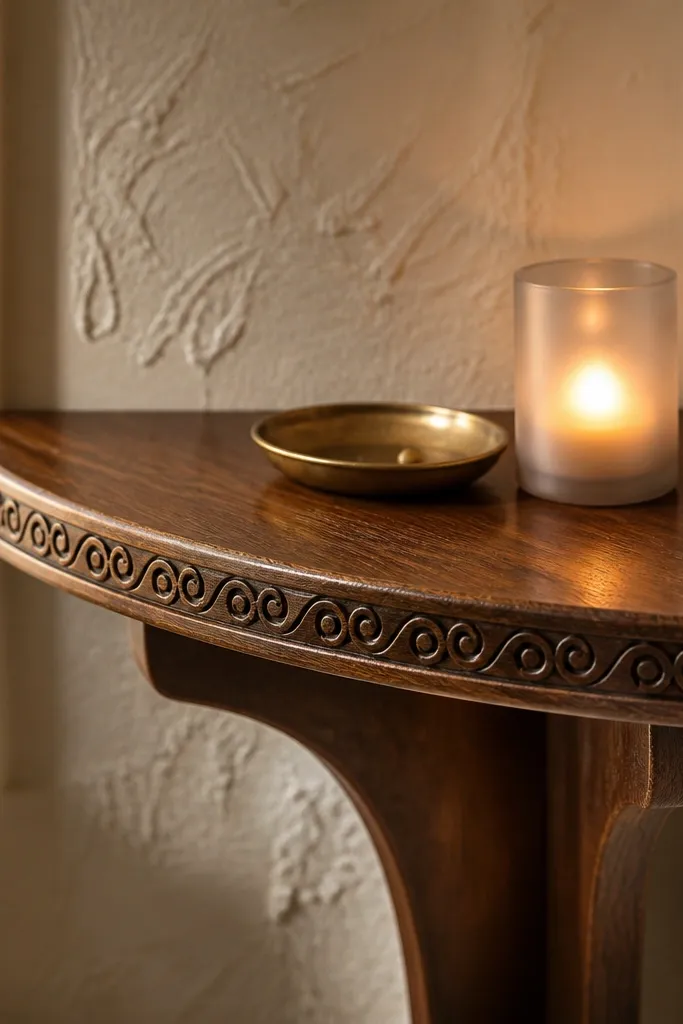
This is for corners that need a little personality. A carved scroll edge turns an otherwise simple board into something that looks like furniture, not a basic DIY shelf. Keep the carve shallow and consistent so it looks intentional, not overdone. Walnut stain plus a satin clear topcoat makes the carved edge read warm and detailed. Use this for display niches where you’ll keep decor light — think small framed photos, a ceramic vase, or stacked books with a decorative top.
Cut a thick shelf top from 1 in walnut (or walnut veneer over a solid substrate) and rip it to your corner width. Use a router template or a small hand-carving bit set to create a shallow scroll profile along the front edge only. Build a back cleat and spacer system to keep the shelf floating 1/4 in off the wall, then mount the cleat to studs. Sand the face lightly, stain evenly, and seal with satin polyurethane, focusing on edge protection where chips happen.
Round over the back edge slightly so small items don’t catch on sharp corners.
Avoid deep carvings — they look messy once you fill gaps with stain.
7. Natural Pine Corner Shelf with Clear Hardwax Oil
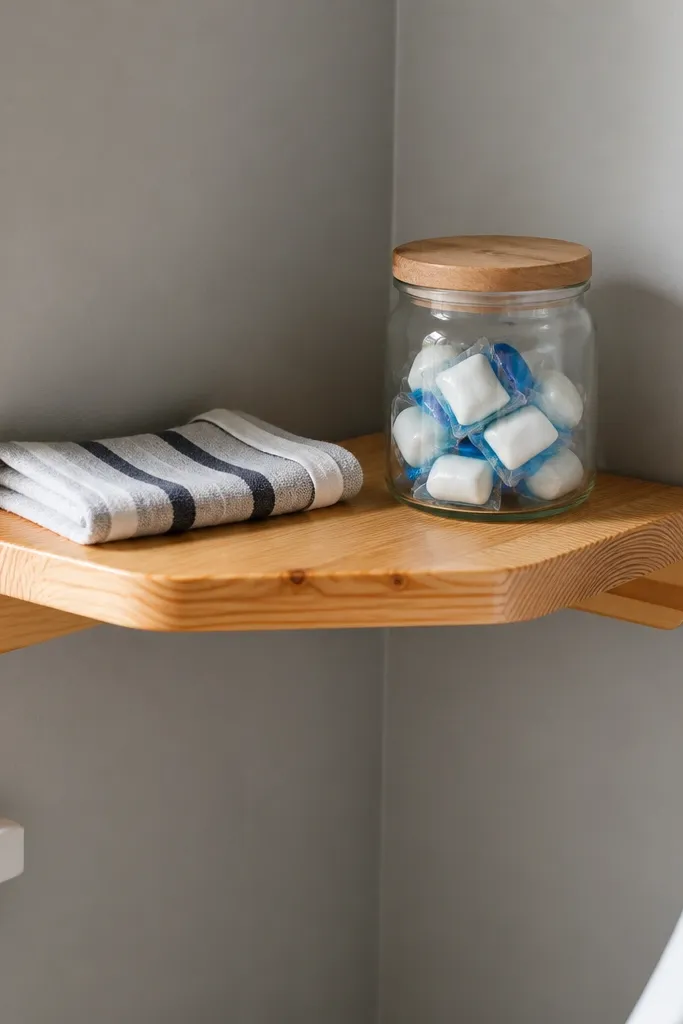
Pine is underrated for warm corners because it reads cozy and casual, not heavy. A clear hardwax oil finish keeps the grain natural while protecting the surface, so the shelf stays photogenic in daylight. Choose a simple silhouette and let the wood do the talking. This style is perfect for kitchens and laundry rooms where you want functional display but don’t want dark furniture vibes. Keep the shelf uncluttered and use it for baskets, jars, or a single plant.
Select straight-grain pine and cut the top board to the corner width, aiming for at least 1 in thickness so it doesn’t look flimsy. Build a back support cleat and add a diagonal corner brace under the shelf for stiffness if your span is wider than 18 in. Sand up to 180 grit, then apply hardwax oil with a rag, letting it soak and then buff off excess. For mounting, use studs or add a plywood blocking strip behind drywall, then screw the cleat in with 2.5-3 in screws.
Editor's noteApply hardwax oil in thin coats; thick coats trap dust and look uneven.
Skip thisDon’t stain pine heavily — it goes blotchy fast unless you use a conditioner.
8. Walnut Corner Shelf with Built-In Cable Channel
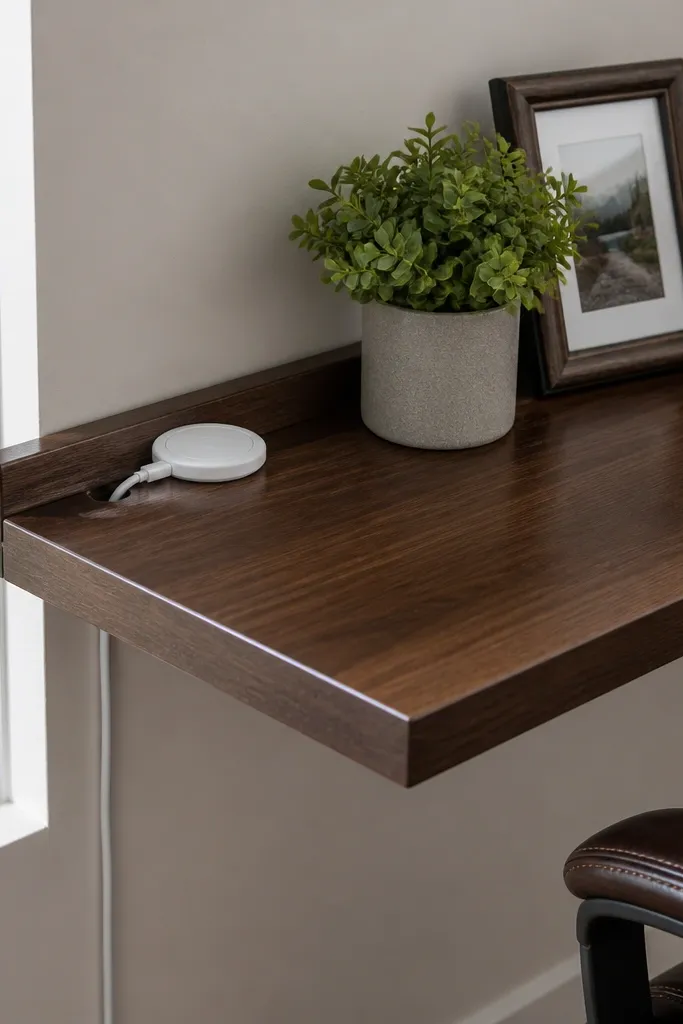
This is the corner-shelf version of “clean lines.” A built-in cable channel keeps chargers and small electronics from turning your corner into a wire nest. The shelf looks high-end because the back edge is tidy and the channel disappears when you’re styling decor in front. Use walnut or dark oak for warmth and pair with a satin finish so the wood doesn’t glare. Great for entry consoles with a phone charger or a living room corner with a small lamp and outlet.
Plan a shallow channel along the back underside of the shelf top, about 1/2 in wide and 1/4 in deep, using a router and straight bit. Build the shelf on a simple frame so the channel stays hidden under the top face board. Install a back cleat into studs, then mount the shelf so the front face sits flush and the back edge aligns with the wall. Finish by sealing the channel edges too, then test routing a charging cable before styling.
Editor's noteUse a flexible grommet or cable pass-through insert so the cable doesn’t saw into the wood over time.
Skip thisDon’t route the channel too close to the front edge or you’ll weaken the shelf face.
9. Olive Ash Corner Shelf with Curved Side Reveal
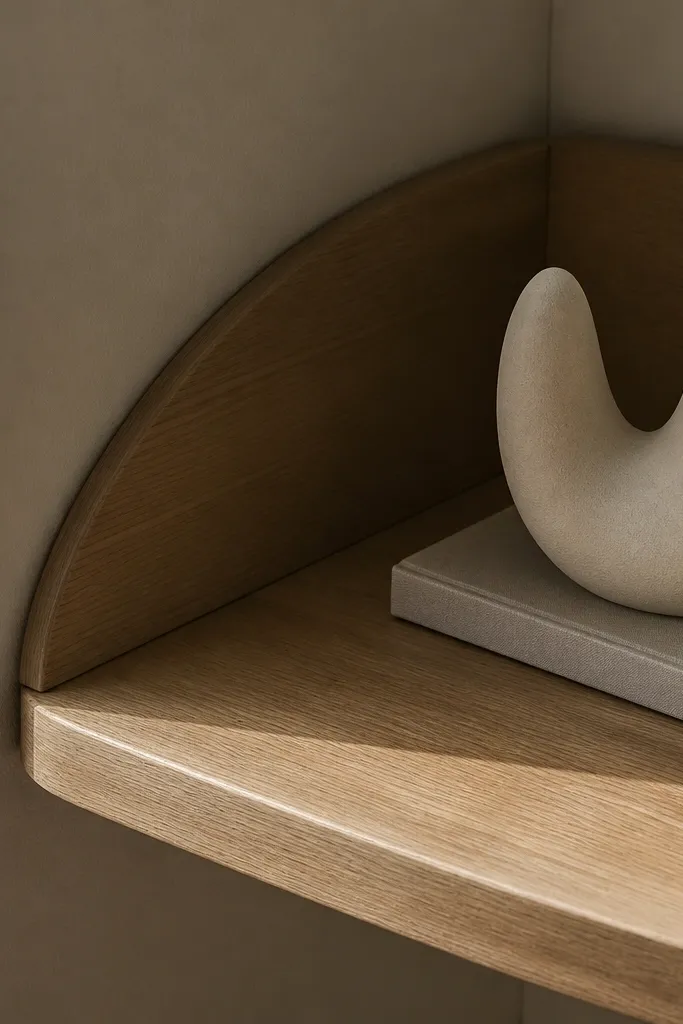
Curved reveals make corners feel softer and more expensive because the eye doesn’t land on sharp seams. Olive ash (or any light ash) keeps it warm, and a curved side reveal hides tiny gaps where the shelf meets the wall. This style looks best in modern homes with neutral paint colors because it adds gentle shape without clutter. Keep the shelf face simple and let the curve do the work. Use it for small decor and books, and keep the shelf depth around 6-7 in so it reads balanced.
Cut the shelf top from 3/4 in ash with a 1 in thick front edge strip glued on for strength and a premium face. Shape the side corner reveal by routing a shallow quarter-round profile on the underside where it meets the corner joint. Build a back mounting cleat with a spacer system so the curved reveal doesn’t scrape the wall. Pre-drill and screw from the underside into cleat, then sand, apply a warm ash stain, and finish with matte clear.
Use a template for the quarter-round so both sides match perfectly — asymmetry kills the high-end look.
Skip trying to force the shelf tight into a bowed corner; shim behind the cleat instead.
10. Reclaimed Barnwood Corner Shelf with Limewash Finish
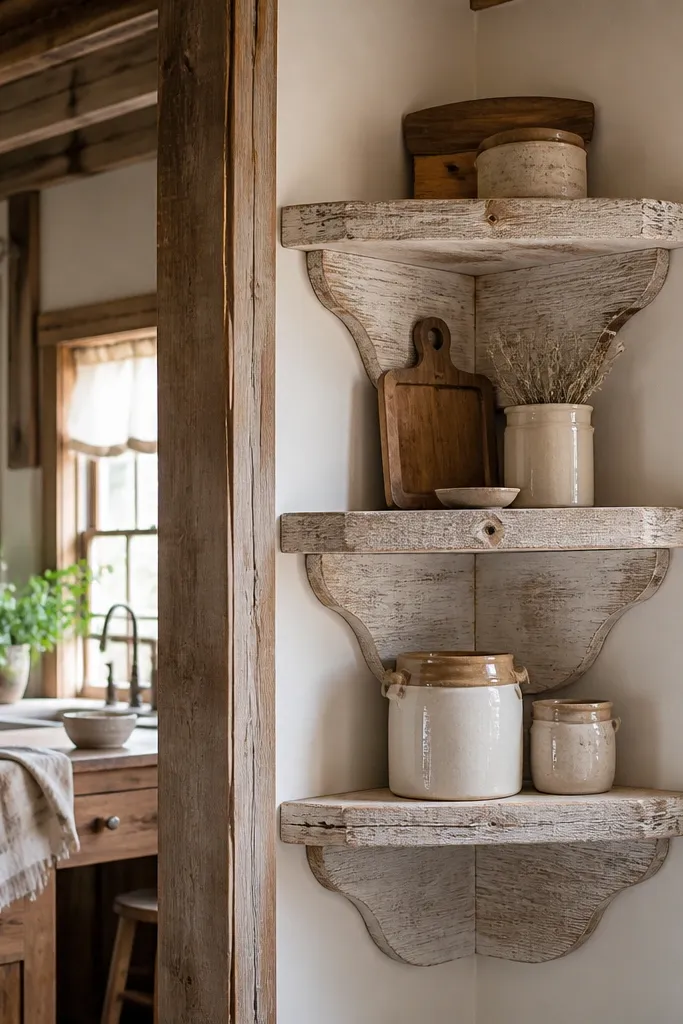
Reclaimed barnwood plus limewash looks warm and lived-in, but still intentional. The key is controlling the limewash so you get texture without turning the shelf into a chalky mess. This style works when your corner already has character — exposed beams, rustic accessories, or a textured wall. The shelf looks photogenic because the grain and nail holes (if present) create depth. Use this for entry corners, kitchens, or a cozy reading nook.
Choose reclaimed boards and cut a stable top section, then plane or sand the surface until it’s smooth enough to finish. Seal any flaky areas with a thin clear sealer before limewash so the finish doesn’t soak unevenly. Apply limewash in thin coats, then lightly distress edges after it dries so the wood still shows through. Mount using a hidden cleat and shims; then seal with a matte wax topcoat for durability.
Editor's noteWork limewash in small sections and wipe back quickly — slow application makes blotches.
Skip thisDon’t skip sealing before limewash; soft reclaimed wood drinks unevenly.
11. Sapele Corner Shelf with Brass Rod Supports
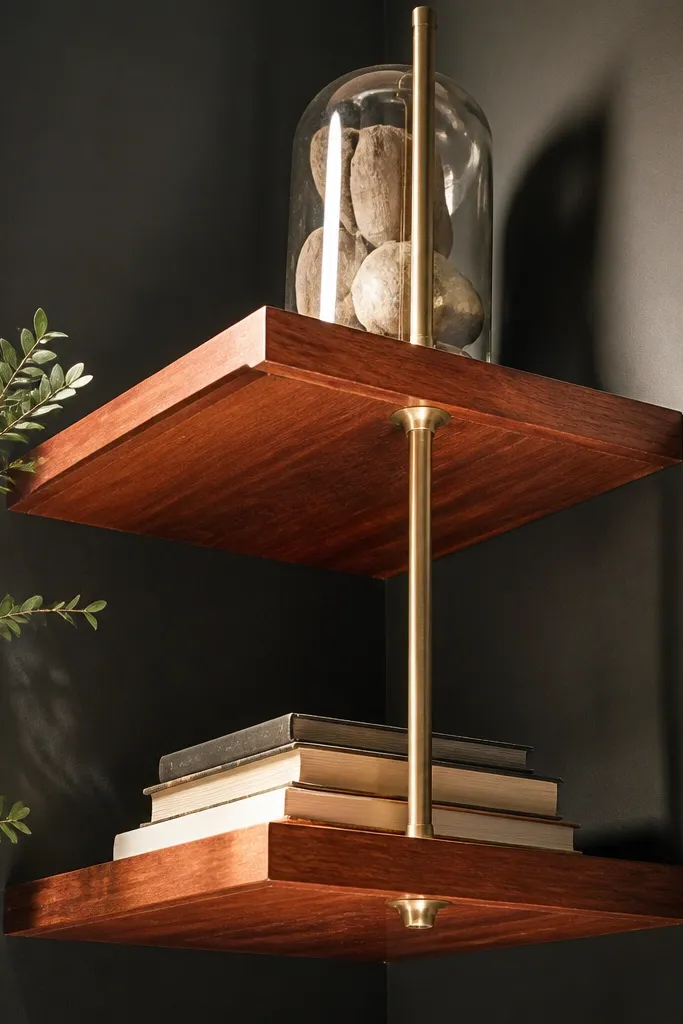
Brass rods make corner shelves look designer because they create a visible, intentional structure. Sapele is the move here: it has natural reddish warmth that reads “high-end wood” even before finish. Keep the shelf top thick and solid so the rods don’t look like decoration — they should look like the actual support. This looks incredible under warm lighting and pairs well with black walls, cream tile, and modern brass fixtures. It’s a showpiece for living rooms, bathrooms, and entry corners.
Cut the shelf top from sapele at least 1 in thick, then drill two vertical rod holes on the underside near the ends. Install matching brass rod holders into studs or a reinforced backing board, using the correct anchor hardware for your wall type. Attach the rods to the wall brackets, then secure the shelf to the rods with threaded connectors. Sand, stain lightly if needed, then seal with satin clear. Keep the rod spacing symmetrical so the shelf looks balanced in photos.
Editor's noteUse a level and a temporary cardboard template on the wall to place rod holes before drilling.
Skip thisDon’t mount rods only into drywall — the shelf weight will pull the hardware loose.
12. Smoke-Tinted Oak Corner Shelf with Recessed Back Panel
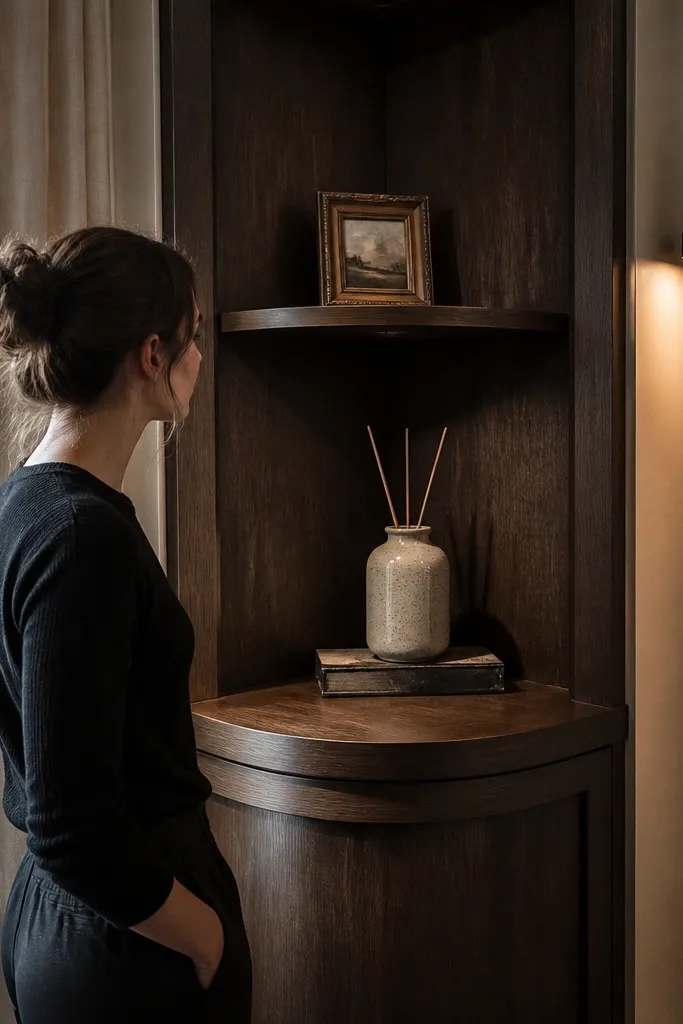
Recessing the back panel adds depth, and depth reads expensive. This project uses an oak shelf top with a slightly darker recessed back panel so the corner doesn’t look flat against the wall. Smoke tint makes the wood feel warm and moody without turning it fully espresso. The recessed area also hides any wall texture or paint lines, which is a real win if your corner isn’t perfect. Use it in a living room corner, dining nook, or bedroom where you want the shelf to look like a built-in feature.
Build a shelf box: a solid oak top, then a back panel set back about 1/2 in from the front edge. Cut the back panel from a darker wood or apply a darker stain to plywood, then attach it inside the box so it creates a visible recess line. Mount to a back ledger cleat fixed to studs and add side supports at least 6 in long for stiffness. Sand the oak top, apply smoke tint stain evenly, then seal with a satin topcoat.
Editor's noteKeep the recess line consistent across both sides so the corner joint looks intentional.
Skip thisAvoid rushing stain on oak; uneven tint makes the recess line look patchy.
13. Modern Walnut Corner Shelf with Cutout Handles (No Hardware Look)
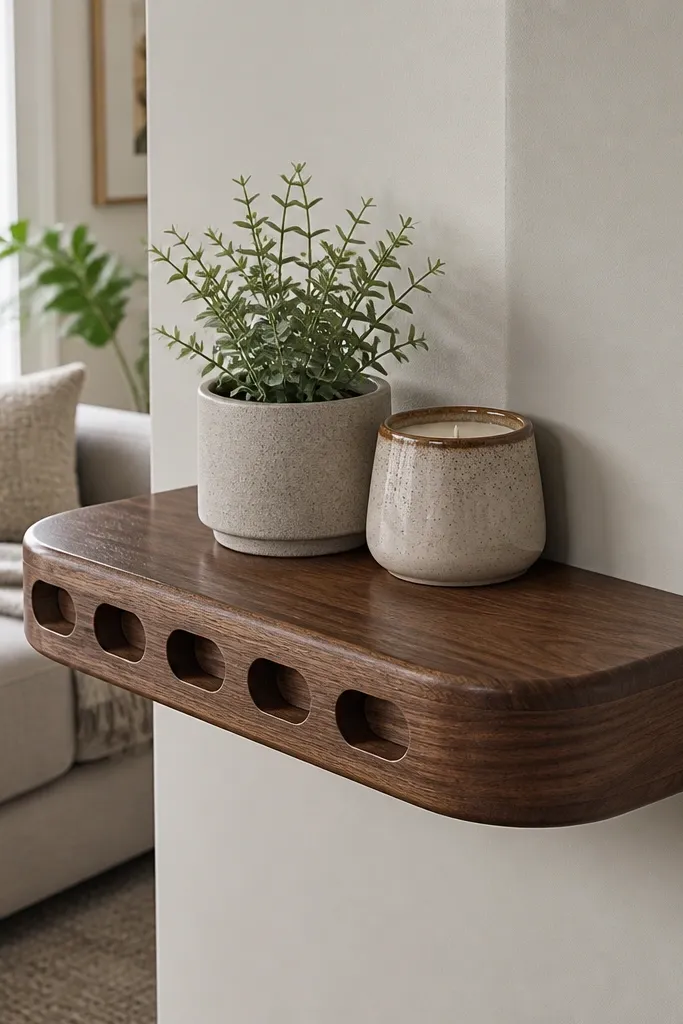
Cutout handles are a smart way to make a shelf look custom without adding visible hardware. They also give you grip points so you can lift and reposition decor without smudging the finish. The rounded cutouts catch light and add a clean rhythm along the shelf face. Use this design when you want the shelf to look modern but still warm. Walnut with satin finish makes the grain pop and keeps the cutouts looking crisp instead of muddy.
Cut the shelf top from 1 in walnut and mark two semicircle cutouts on each side near the front, sized to fit your hand comfortably (about 2.5-3 in wide). Drill starter holes and cut the semicircles using a jigsaw, then smooth edges with sandpaper and a small round-over bit. Build a back cleat system and mount the shelf underside with concealed screws. Seal the entire piece, then add two coats of satin polyurethane, sanding lightly between coats for a smooth feel.
Editor's noteAfter cutting, run a strip of masking tape along the cut edge — it helps prevent tear-out on walnut.
Skip thisDon’t cut too close to the shelf edge; you need at least 3/4 in wood around each cutout for strength.
14. Light Oak Corner Shelf with Floating Corner Block
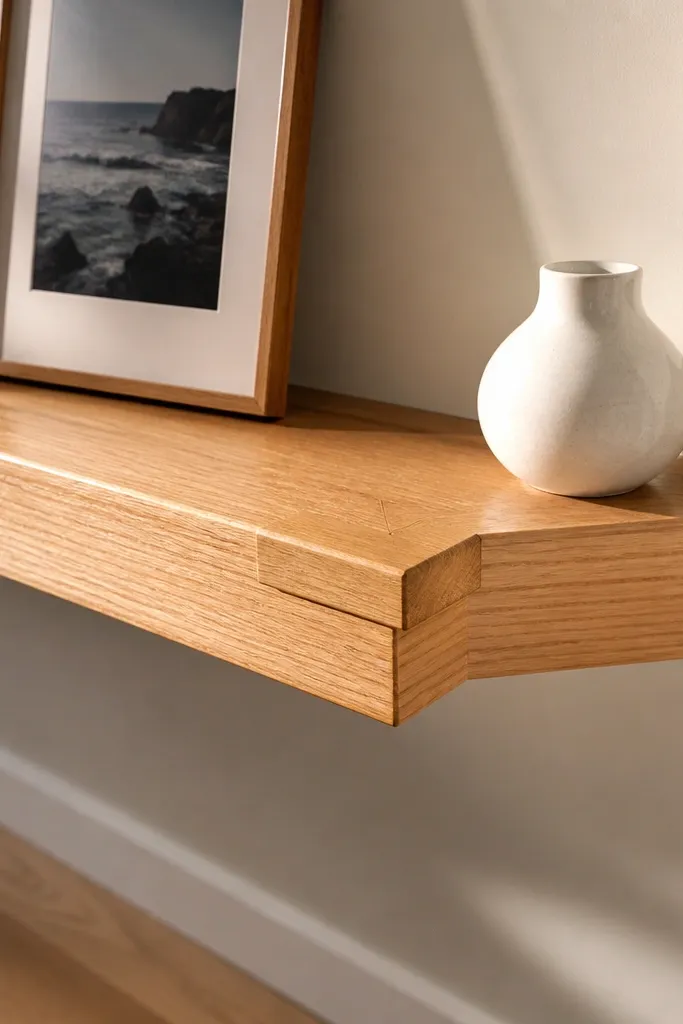
Corners look best when the seam has a “frame.” This design uses a small floating corner block that visually ties the two shelf arms together, so the miter joint doesn’t look like a mistake. Keep the shelf in light oak and finish with a warm clear coat so it brightens the room while still looking premium. The block also creates a tiny shadow pocket where you can place a small plant or decor that looks like it belongs there. This is perfect for small bathrooms and entry corners where every detail shows.
Cut two shelf arms from 3/4 in light oak with a precise 45-degree miter at the corner. Make a separate corner block from matching oak, sized to cover the seam and sit proud by about 1/4-1/2 in. Mount the shelf arms to a back ledger with spacers for a consistent floating gap, then glue and pin the corner block so it hides the joint. Sand, stain, and seal everything together so the block and arms match in color.
Editor's noteUse a brad nailer for the corner block during glue set; it keeps alignment without visible fasteners later.
Skip thisAvoid sloppy miters; the block can hide the seam but it can’t fix a big alignment shift.
15. Teak-Style Corner Shelf with Laminated Edge Banding
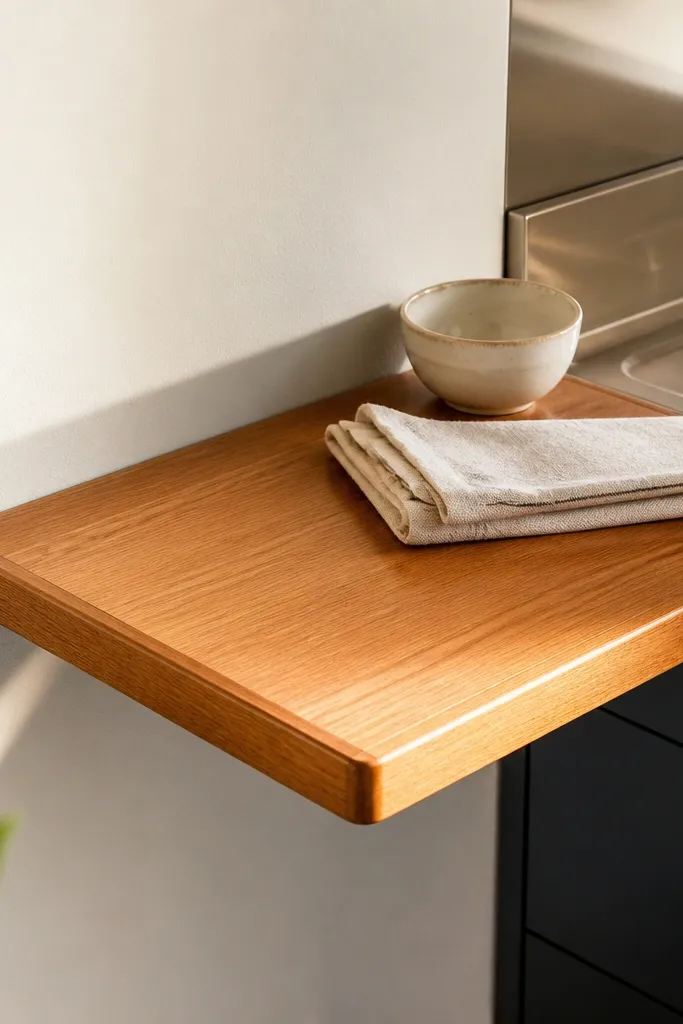
Edge banding is what makes a shelf look like it came from a furniture shop. This build uses a contrasting band along the front edge so the shelf face looks thicker and more finished than a basic plank. Even if you use an affordable wood for the core, the visible band makes the whole project look “high-end wood corner shelves” style. Finish it in a teak-style warm honey tone, then seal with satin. This works in kitchens and living rooms where you want warmth but still want clean, modern lines.
Choose a stable core board like birch plywood or poplar for the shelf top, then rip a thin edge band (about 1/2 in wide) from a contrasting wood like walnut or dark ash. Rout a shallow rabbet on the front edge so the band sits flush, then glue and clamp it until dry. Shape the front edge lightly with a small round-over so the band and top feel like one piece. Mount with a back cleat into studs, then sand and apply teak-style stain, followed by satin protective topcoat.
Editor's noteClamp with cauls so the band doesn’t bow and create a wavy edge line.
Skip thisDon’t skip clamping time; edge banding gaps show up immediately under satin sheen.
16. Cherry Corner Shelf with Live Edge Corner Accent
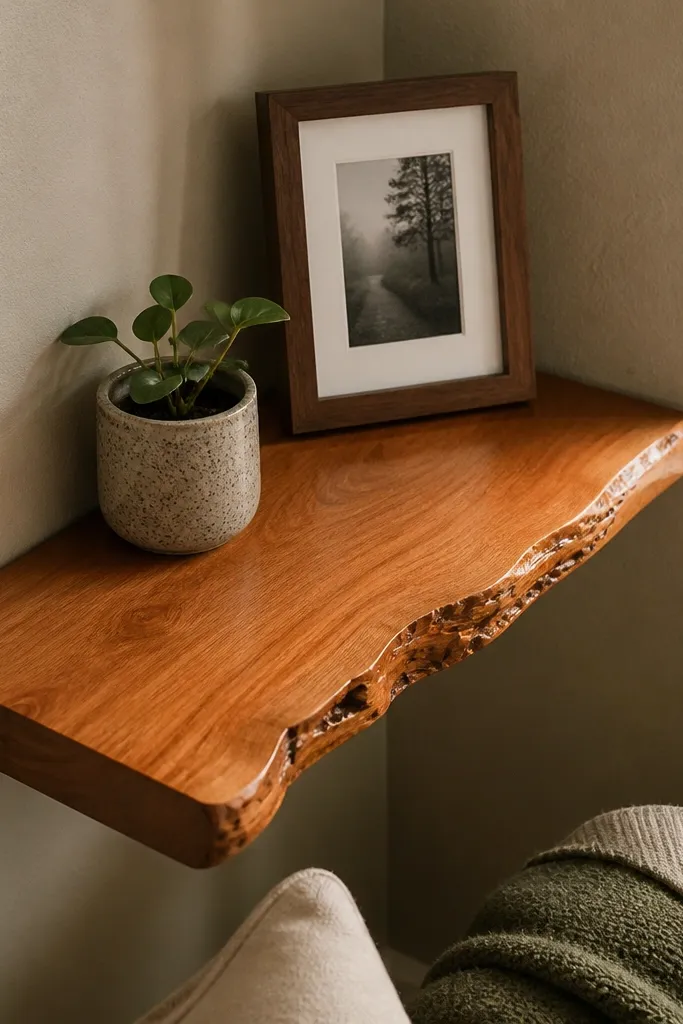
Live edge accents add warmth fast because they show character. For corners, you don’t want a full live edge shelf everywhere — it can look messy. Instead, keep the shelf top clean and flat, then add a live-edge accent piece only at the corner where the two arms meet. Cherry wood with a warm finish makes the live edge look intentional and smooth, not rustic clutter. This is a strong choice for dining rooms and cozy reading corners where you want one standout detail.
Cut two matching shelf arms from 3/4-1 in cherry and miter them for the corner joint. Create a live-edge corner accent by cutting a small slab section and trimming it so it sits over the miter joint without covering the shelf face. Glue and pin the accent in place after dry-fitting, then mount the shelf with a stud-fixed cleat and concealed underside screws. Sand the flat faces smooth, but leave the live edge lightly finished with a clear oil so it keeps texture, then topcoat the shelf faces.
Editor's noteStabilize the live edge with a couple thin coats of clear sealer before final topcoat so it doesn’t shed during styling.
Skip thisDon’t let the live edge touch the wall; leave a tiny gap so it doesn’t trap moisture.
17. Matte Black Shelf Backer with Wood Face Corner Shelves
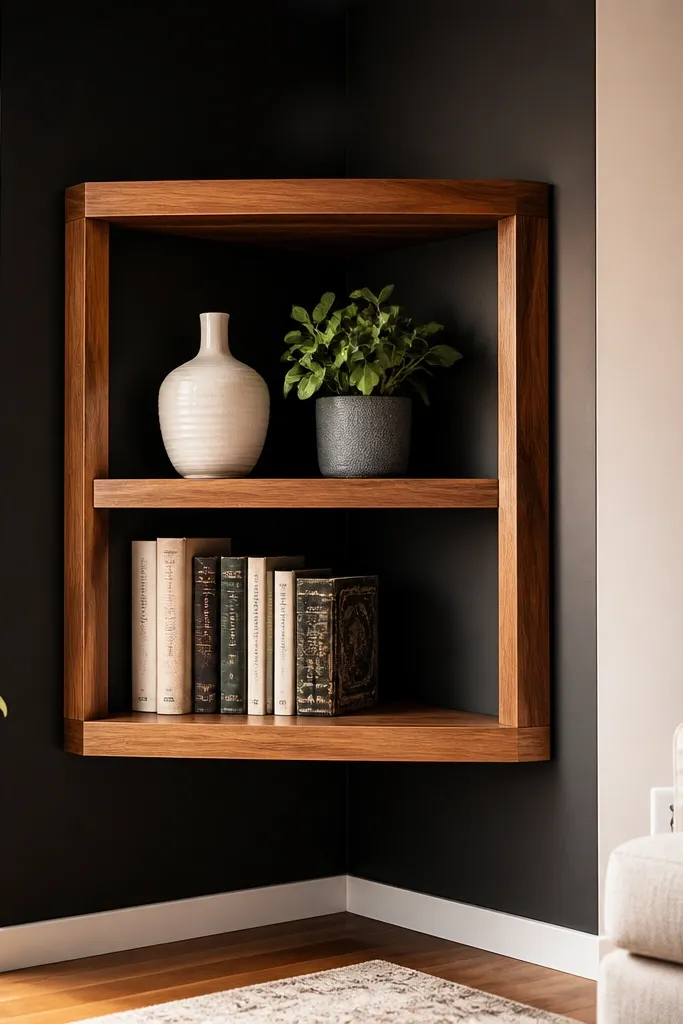
Contrast makes corners look designed, even when the geometry is simple. This build uses a warm wood face board and a matte black backer board recessed behind it, so the wall behind the shelf turns into a clean backdrop. The result looks high-end because objects on the shelf pop — ceramics, plants, and books look more defined against the black. Use it in bedrooms, bathrooms, and small living rooms where you want a dramatic but tidy corner. Go with walnut or dark oak for the face so it stays warm, not gray.
Build a shallow shelf frame from plywood, then recess a matte black backer panel inside the frame by about 1/2 in. Attach a warm wood face board to the front, keeping the face thickness at least 1 in so it looks substantial. Mount with a back cleat into studs and add two hidden support screws per shelf arm. Sand, stain only the wood face, then seal with matte clear; keep the black backer paint or finish separate so it stays uniform.
Use a satin-black backer finish that doesn’t reflect light — glossy paint makes the shelf look cheaper.
Don’t let the black backer peek unevenly; measure the reveal line from both sides before final screws.
18. Two-Tier Corner Shelf with Brass Inlay Strips
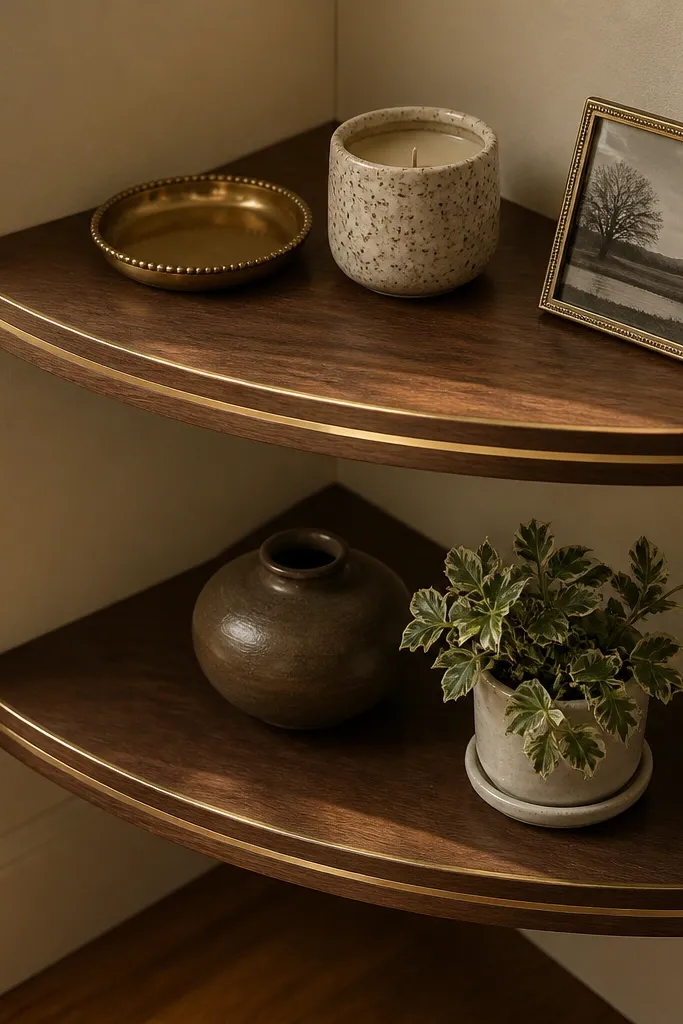
Two tiers make the corner feel complete, and brass inlay makes it feel intentional. The inlay strips act like jewelry for wood — they catch light at a different angle than the stain, so the shelf looks higher-end in photos. Keep the inlay thin (about 1/8 in wide) so it looks crafted, not loud. This is a perfect option for entryways and living room corners where you want height and organization without clutter. Use medium-dark wood like walnut or mahogany-style stain with satin topcoat.
Cut a two-tier shelf top assembly: two boards sized for each side, plus a shared corner mounting block. Route two shallow grooves along the shelf face where the brass strips will sit, keeping the grooves consistent in width and depth. Dry-fit brass strips, glue them in with wood-safe adhesive, then sand flush so the wood and brass feel level. Mount the entire assembly to a stud-fixed ledger with two support points per tier, then stain and seal with satin polyurethane.
Before gluing brass inlay, run a dry test and check the flush by dragging a fingertip across the grooves — it should feel perfectly even.
Don’t use thick brass — it creates gaps and looks like a sticker after sanding.
19. Sanded-Face Corner Shelf with Micro-Bevel Reveal (Ultra Clean)
If you hate clutter and you want the shelf to look like it belongs with modern trim, this micro-bevel design is the move. The front edge has a tiny bevel that makes light hit the wood consistently, which is why it looks “factory finished.” Pair it with a tight 1/8-1/4 in reveal from the wall so the corner doesn’t look stuck on. This style looks best when your room has clean lines: flat paint, simple baseboards, and minimal hardware. Use it for small books, a framed print, or a single plant with a simple pot.
Cut the shelf top from 3/4-1 in wood and sand to 150-180 grit. Rout a micro-bevel along the front edge using a small chamfer bit set to a very light cut, then sand again to remove any router fuzz. Mount with a back ledger into studs and add spacers to keep a consistent reveal from the wall. Apply stain, let it dry, then seal with two coats of satin polyurethane, scuff sanding between coats.
Wipe the wood with a tack cloth before stain — dust in the bevel makes it look dull and cheap.
Avoid thick gloss topcoat; it emphasizes tool marks and makes the bevel look uneven.
20. Smoked Walnut Corner Shelf with Scalloped Bottom and Brass Pin Pins
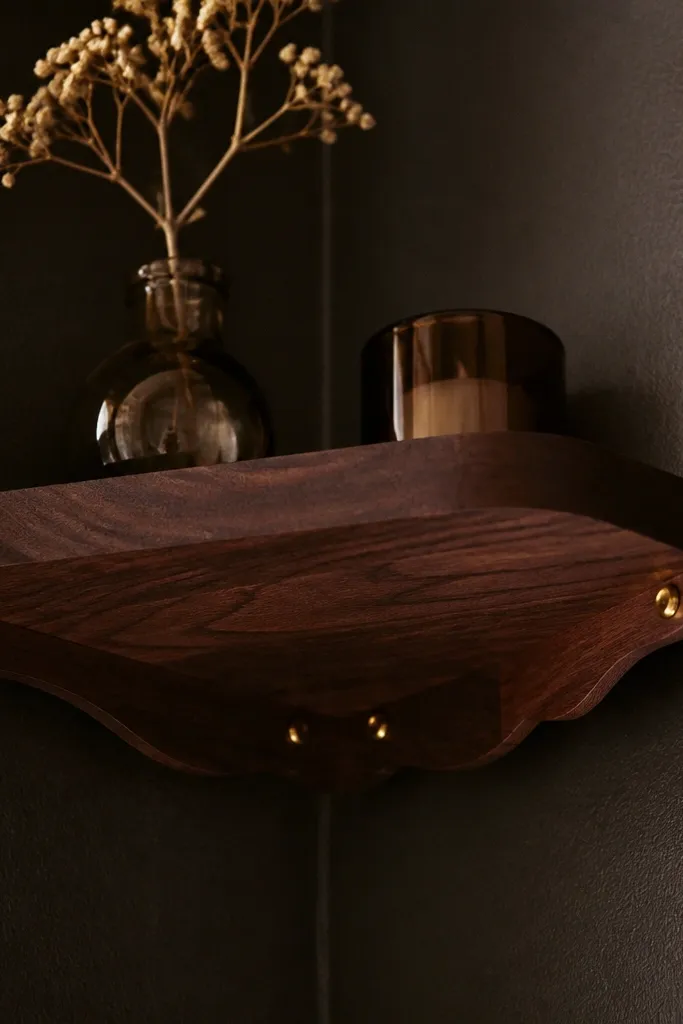
This one warms a room because the underside shape catches shadow. The scalloped bottom makes the shelf look softer than a straight plank, especially in corners where light hits at an angle. I’d build it with smoked walnut so the wood reads deep brown with a slightly purplish tint, then top it with a thin satin finish so it doesn’t glare. It’s also a clean way to add a “high-end wood corner shelves” look without a lot of hardware showing — the brass is small and intentional. Skill level is mid — you need a steady hand with a jigsaw or router and you’ll spend time on sanding curves. It fits living rooms, entry nooks, and reading corners where you want warmth and a little sculptural detail.
Cut a walnut board to a 12 in (30.5 cm) depth by 10 in (25.4 cm) width per side, then rip it square on both faces. Mark the scallops on the underside with a simple template: 1.75 in (4.5 cm) radius arcs spaced about 2.25 in (5.7 cm) apart across the front edge, keeping 3/4 in (19 mm) of flat wood at each outer corner so it stays strong. Cut the scallops with a jigsaw, then clean them with a 1/2 in round-over sanding block and 120/180/220 grit. For the support, drill two blind holes from the underside into the wall-side edge for 1/4 in (6 mm) brass pins: use a brad-point bit, then test-fit with a pin stub before final assembly. Finish the shelf after shaping: sand to 220 grit, wipe on a 2-3 coat satin wiping varnish or hardwax oil, and let it cure fully before mounting.
Editor's noteMake the scallop template from scrap MDF and clamp it to the underside — it keeps the curves even so the shelf looks expensive instead of handmade-chaotic.
Skip thisAvoid mounting before the finish cures; soft finishes imprint around the screw holes and pins.



