
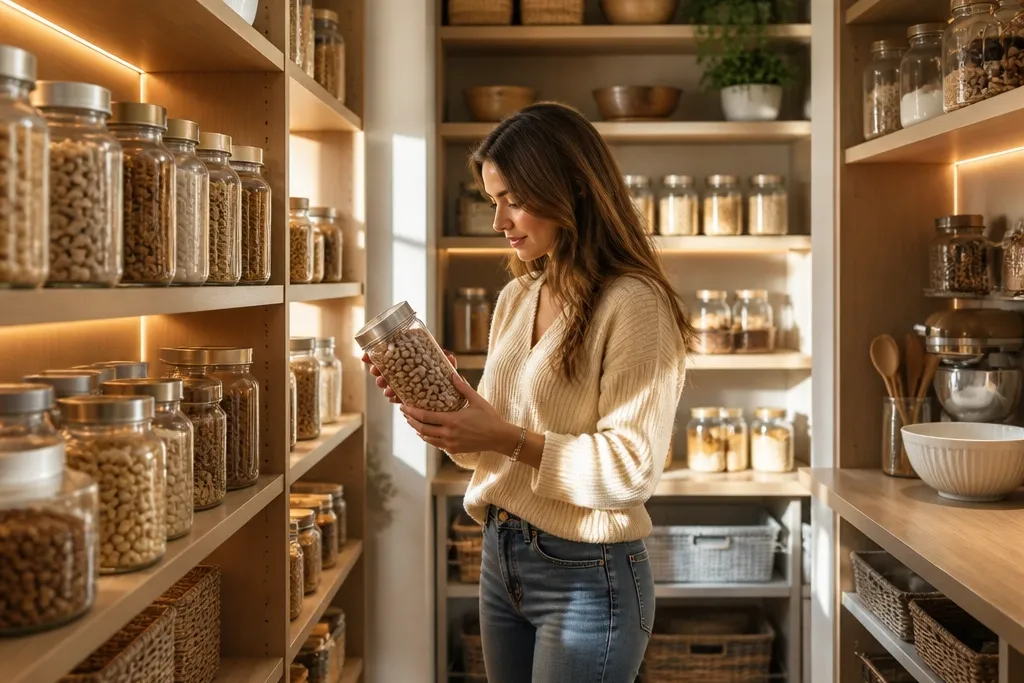
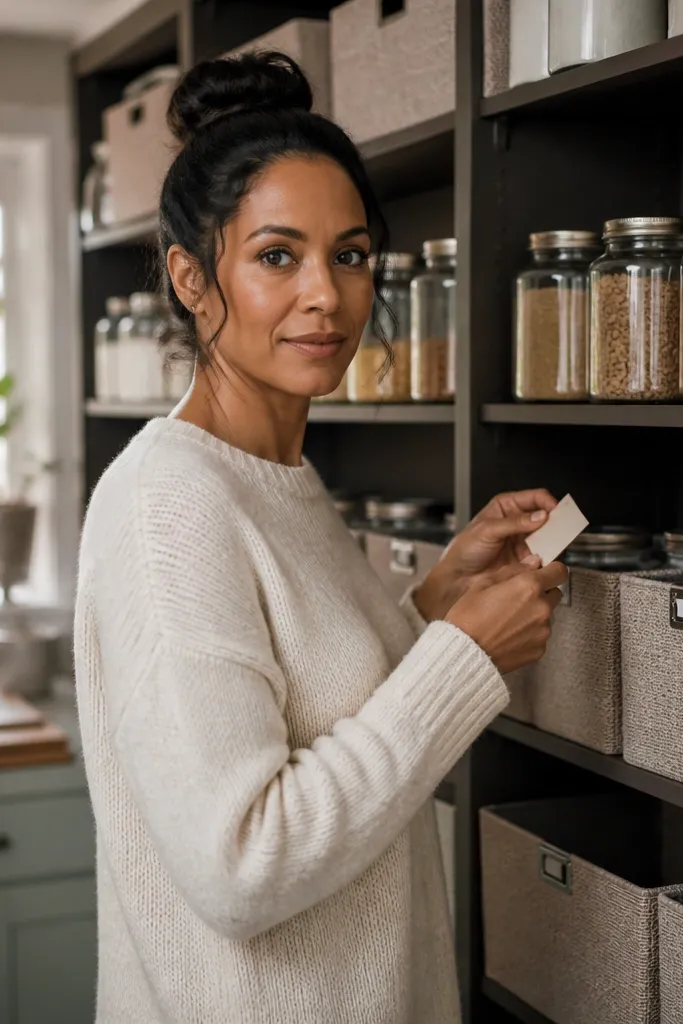
1. Front-Row Glass Jar Wall with Satin-Lid Labels
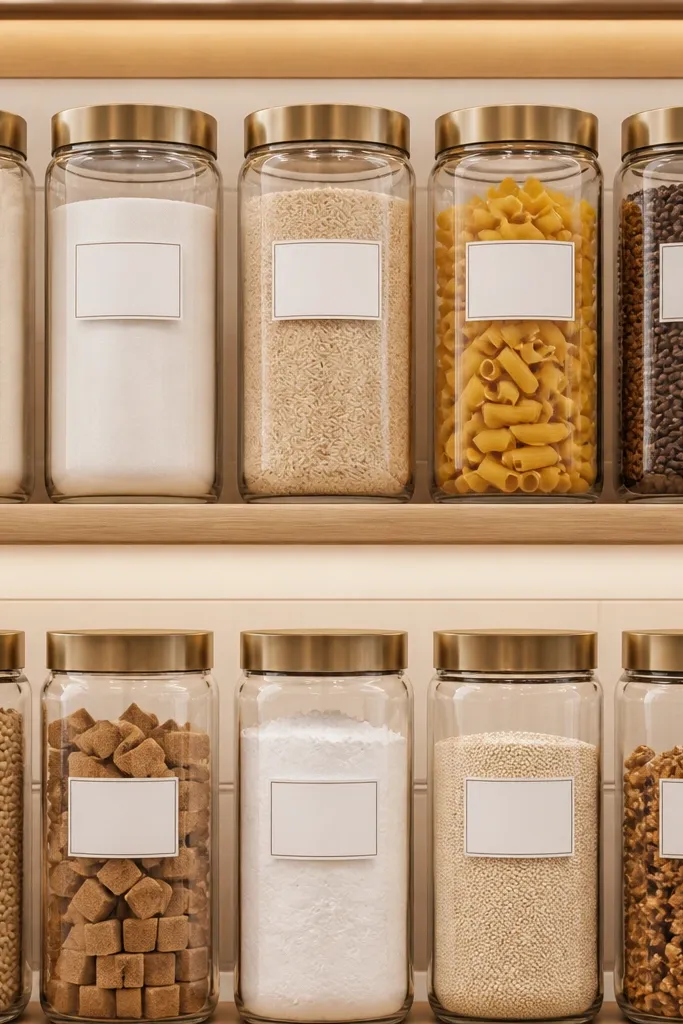
This is the fastest way to get the luxe pantry look because glass + matching lids creates instant uniformity. Put your most-used dry goods here: flour, sugar, rice, pasta, coffee beans, and baking powder. Use jars that stack cleanly without weird gaps, and keep label placement consistent so the wall reads like one design. The satin lids hide fingerprints better than shiny chrome, and they look expensive in both daylight and warm under-shelf lighting.
Start by measuring the shelf depth and spacing so jars fit without squeezing. Then choose jars with the same footprint and buy enough to fill the front row first, leaving blank space for future categories. After that, add printed labels with matte paper and a simple font, then wipe the jars and mount them so the lid alignment is level across the row. Finally, seal the shelf surface with a wipeable finish and install under-shelf LED lights angled slightly upward.
Print labels in small sizes but keep the same height for every jar so the line stays straight.
Don’t mix jar heights and lid finishes on the same shelf — it breaks the luxe look.
2. Hidden Appliance Garage with a Flip-Up Liner Shelf
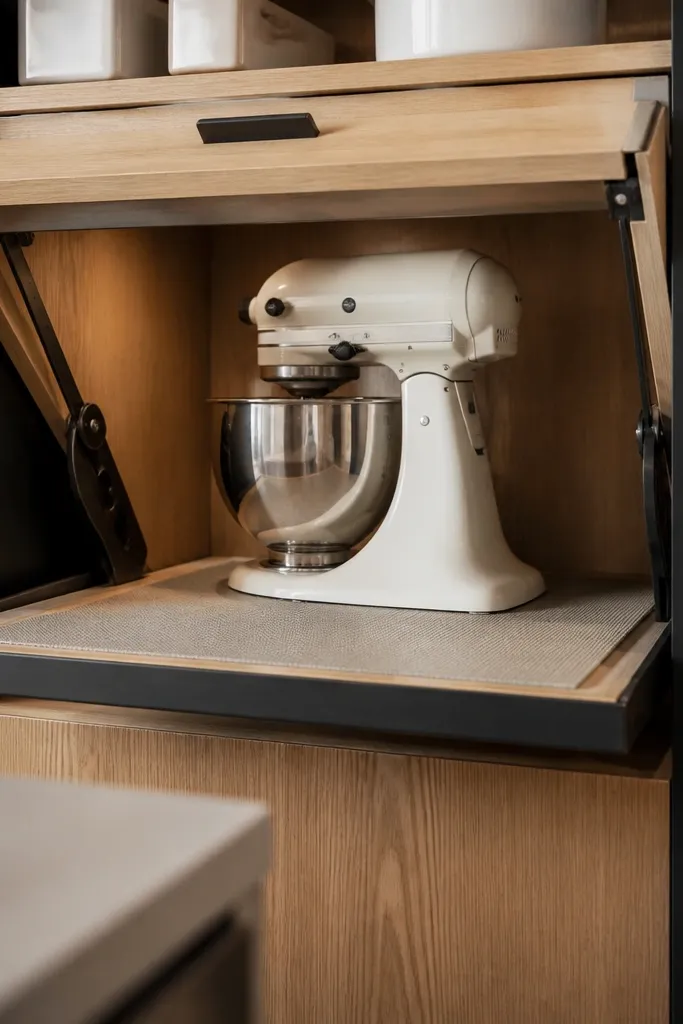
A pantry that looks luxe has empty-looking surfaces. If you store a stand mixer, waffle maker, or slow cooker inside, a flip-up “garage” shelf keeps it out of sight while still giving you quick access. The key is a liner that protects the appliance base and makes the inside look finished, not like a utility nook. Choose a door finish that matches your pantry millwork so the closure looks intentional.
Editor's noteUse a soft-close door and a latch that holds firmly — the “tight closure” reads high-end.
Pick an appliance category and measure the footprint including cords, then plan a shelf that sits 1-2 inches above the appliance base when closed. Install a hinged shelf or flip-up platform inside the pantry behind a door, using heavy-duty hinges and a soft-close mechanism for the door. Line the cavity with a wipeable mat or thin cabinet liner so spills don’t stain the surface. Mount a small cord channel so cables don’t hang in front of the view.
Skip thisDon’t leave appliances on bare wood — grease and crumbs ruin the look fast.
3. Adjustable Shelf Rails in Matte Black with Matching Dividers
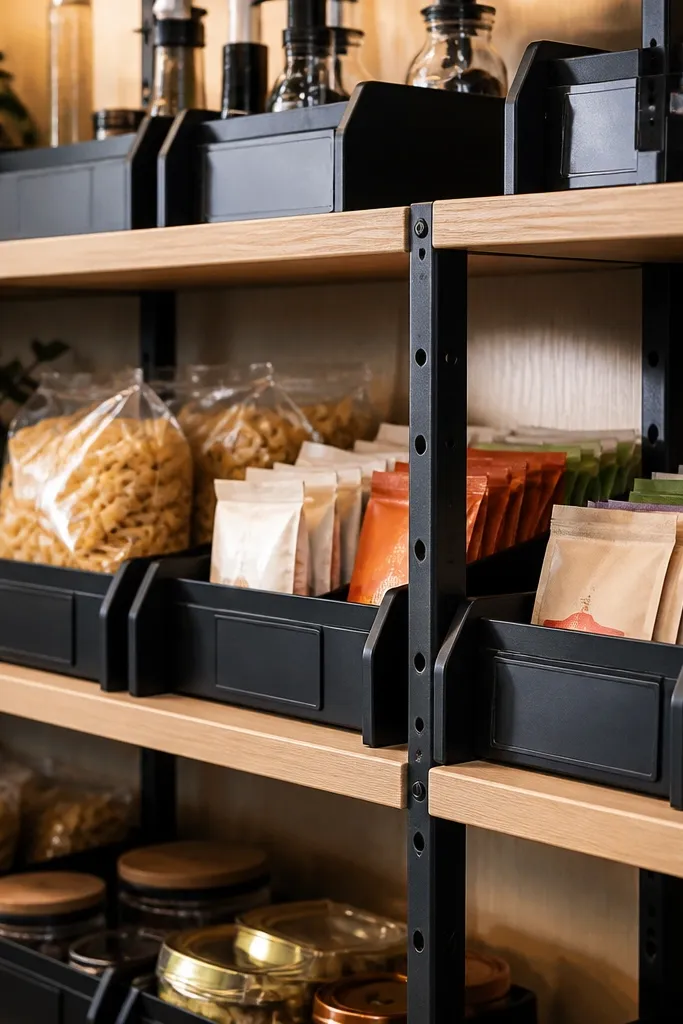
Luxe pantries aren’t messy because shelf height changes are controlled. Adjustable rails let you reconfigure without tearing everything down, and matte black adds a designer contrast against light shelves. Add matching dividers so bins don’t drift or rotate, which is what makes shelves look sloppy. When your bins always land in the same spot, the pantry stays photogenic even after busy weeks.
Editor's notePre-mark rail holes with painter’s tape so your spacing stays straight before you drill.
Remove existing shelves and install continuous shelf rails across the side walls at consistent spacing. Decide bin sizes first, then set rail positions so each bin sits with a small reveal gap (about 1/8 inch) for clean sightlines. Install slim divider panels between rails so each bin has a defined cell. Finish by adding a shelf lip or stop so bins don’t slide out over time.
Skip thisDon’t eyeball divider spacing — crooked cells make the whole shelf look cheap.
4. Woven Front Baskets with Matching Label Tags
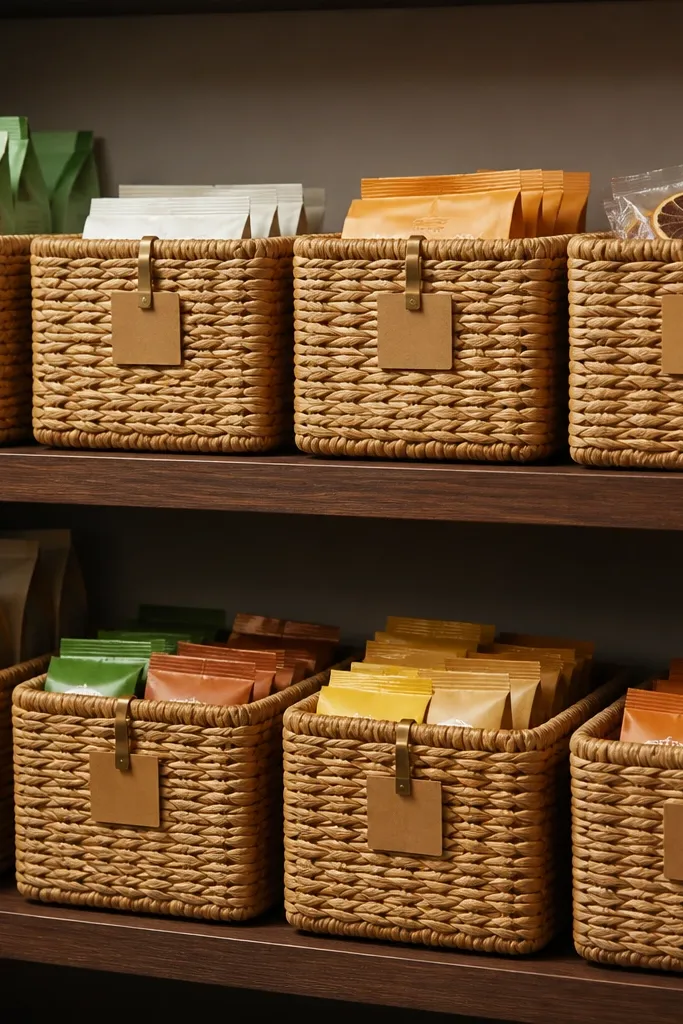
Woven baskets look warm and luxe when they’re consistent in color and shape. Use them for snacks, tea bags, small packets, and produce-adjacent items that don’t require perfect airtight storage. The look comes from repetition: same basket weave tone, same tag size, and same shelf placement. If your pantry lighting is warm, the texture reads expensive instead of rustic.
Editor's noteUse the same label tag color for every basket so the shelf reads like one design block.
Choose baskets with a similar height so they sit level and don’t create a “staircase” effect. Measure the shelf opening width and leave a uniform 1-2 inch border so baskets don’t touch the edges. Add small label tags on a simple twine or adhesive label holder so the text doesn’t curl. Finally, store only dry, shelf-stable items inside and keep a separate airtight system for anything that attracts moisture.
Skip thisDon’t use mixed weaves and sizes on one shelf — it looks like random storage.
5. Matte Ceramic Canister Set for Baking Staples
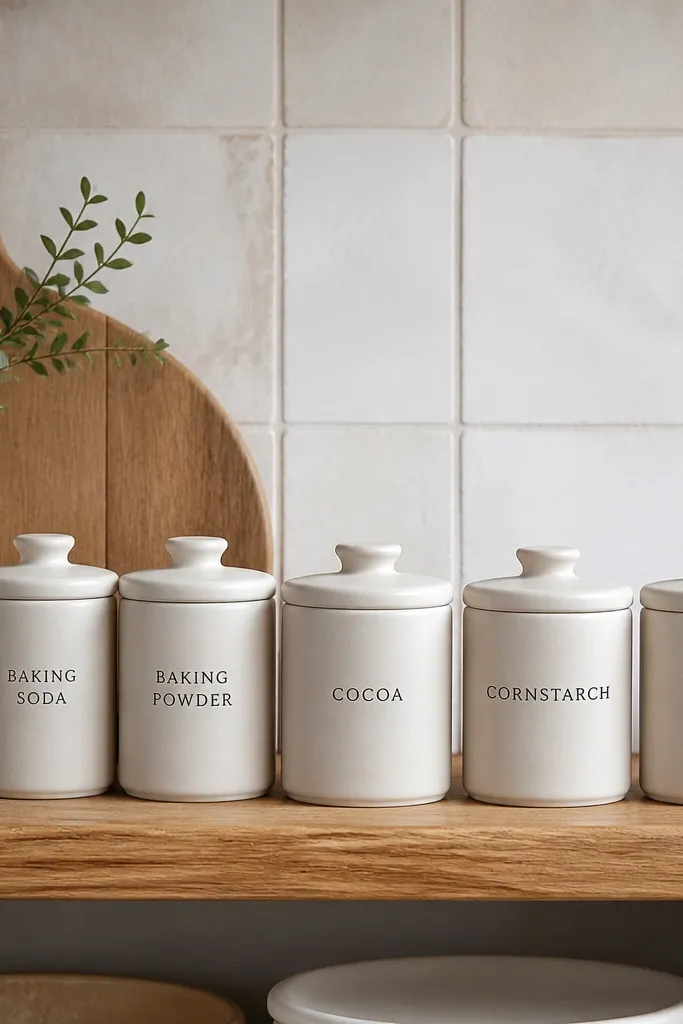
Ceramic canisters read luxe because they look substantial and hide clutter inside. Keep baking staples here: baking soda, baking powder, cocoa, cornstarch, and vanilla sugar. Matte finishes reduce glare, which matters if your pantry has bright overhead light. Pair them with a darker shelf or a warm wood tone so the ceramic has contrast and looks intentional.
Editor's noteKeep the canisters away from steam sources like near a coffee machine or dishwasher line.
Pick canisters that match in height so the shelf line stays clean, then assign each one to a fixed spot. Clean your shelf and apply a wipeable topcoat if it’s raw wood. Add labels on the canisters or use removable matte label stickers that won’t peel with humidity. Store refills in a deeper concealed bin so the front row never turns into a mess of open bags.
Skip thisDon’t place every baking item in canisters — too many different shapes kill the designer look.
6. Deep Drawer for Bulk Bags with Sliding Liners
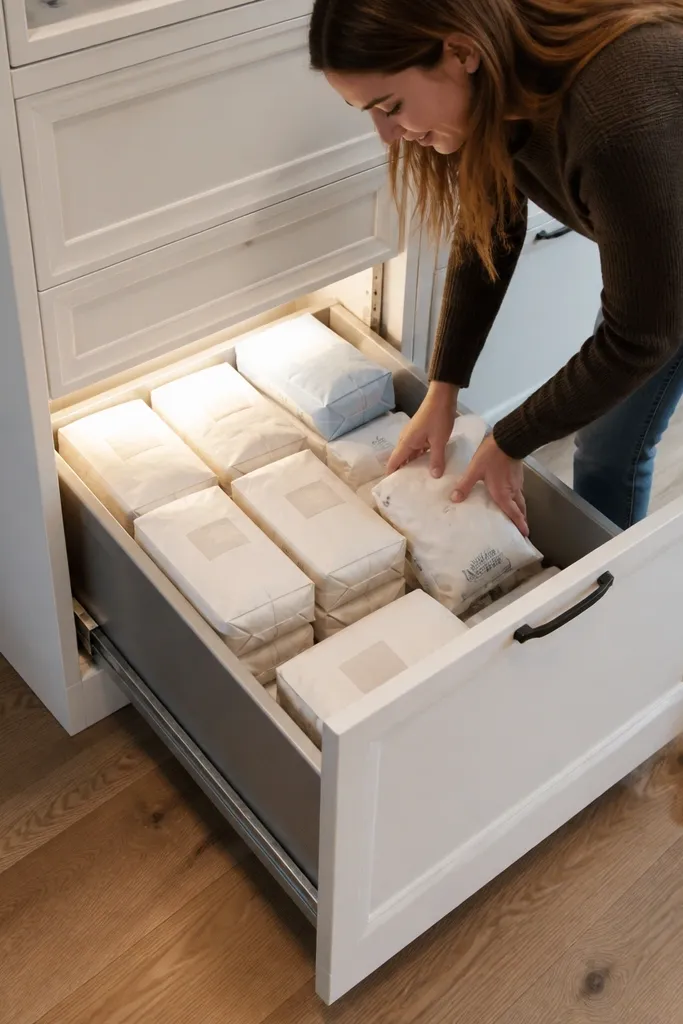
If your pantry fills up with 5-pound bags, a drawer is how you stop the visual chaos. Bulk bags look ugly in open shelving, but they look fine when they’re contained and stacked. A sliding liner keeps the bags from snagging and makes it easier to pull everything forward without tipping. Luxe comes from the drawer face staying clean and the contents staying square.
Install a drawer system rated for pantry weight, then measure the drawer internal depth for bag sizes. Add a removable liner with enough friction that bags don’t slide forward when you open the drawer. Use fixed insert walls or adjustable dividers so bags stack without leaning. Keep one “rotation” spot near the front for the newest bag so you don’t dig through the back.
Choose a liner with a low-absorbency surface so spills don’t stain and smell doesn’t linger.
Don’t use a slick liner — bags slide and you’ll end up with toppled stacks.
7. Label-Forward Spice Tower with Clear Front Doors
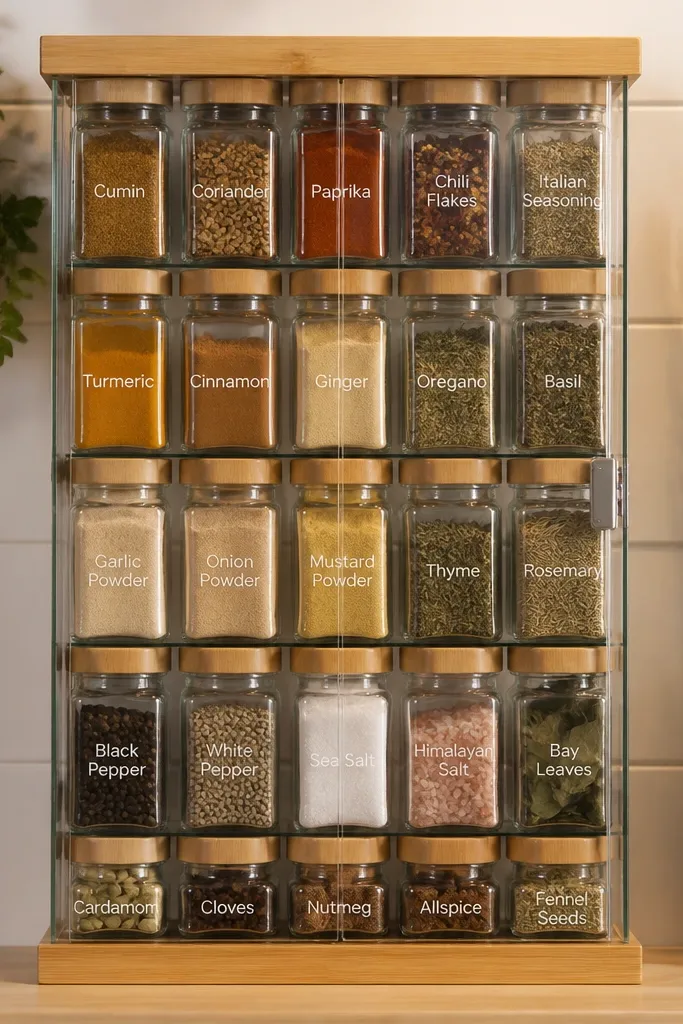
A spice tower looks luxe when labels are readable and jar alignment is perfect. Put it at eye level so you’re not hunting, and keep the rest of the pantry calmer. Use a vertical system so you don’t waste shelf space, and add a clear front panel to protect from dust while keeping the “designed” look. The tower also makes refills feel organized because you can see what’s running low.
Editor's noteUse the same jar size for every spice, even the ones you use rarely, so the tower stays uniform.
Choose a vertical rack that fits your pantry height and measure for door clearance if you’re adding a front panel. Insert matching spice jars so the label faces one direction and sits at the same height. Add a clear cover panel or door to keep dust down. Finish by adding a small shelf behind the tower for replacements so the tower never becomes a jumble of loose jars.
Skip thisDon’t mix jar brands — different lid heights break the clean vertical rhythm.
8. Color-Coordinated Pantry Door Panels with Magnetic Bin Faces
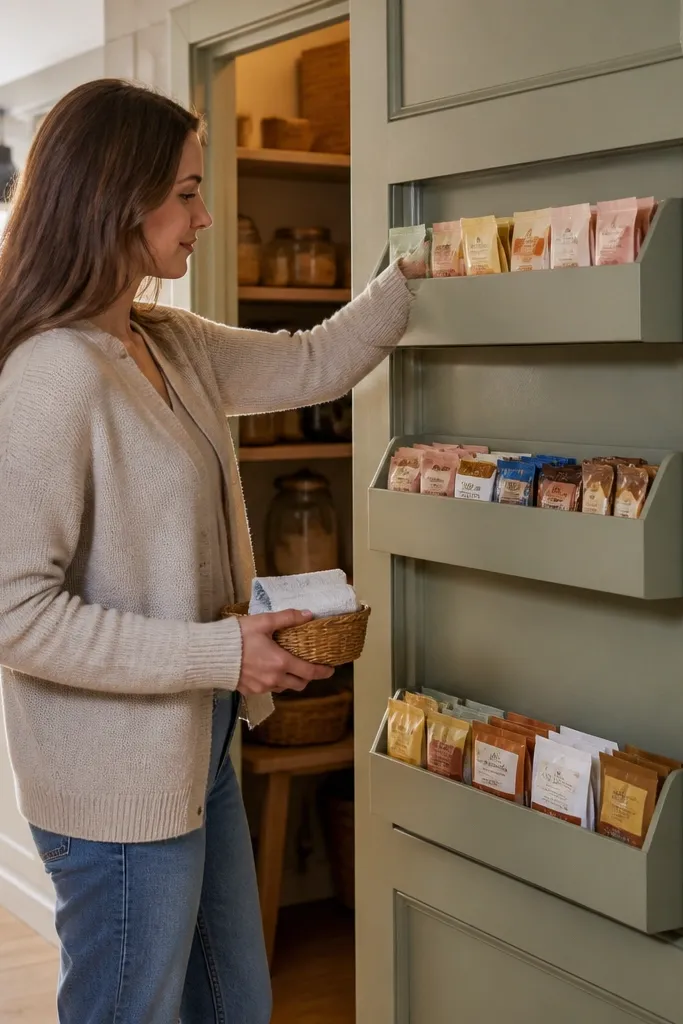
If you want luxe, you use the door space without making it look like a junk shelf. Magnetic bin faces let you store small items like packets, tea, and snack bars while keeping the front surface tidy. Choose a door panel color that matches the rest of the pantry trim so it looks built-in. This is also one of the best ways to reduce clutter on the main shelves where sightlines matter.
Remove the door hardware if needed and measure the inside door frame width and height. Install a thin magnet strip or magnetic backing sheet on the panel area where bins will attach. Choose bins with flat backs that align neatly and won’t sag. Add small label cards or tags on the bin fronts, then test open/close clearance so nothing catches on the door swing.
Use one bin size on the door so the panel looks intentional, not like a collage.
Don’t overload the door bins — a few neat cells look luxe; a crowded panel looks messy.
9. Under-Shelf Lighting with Aluminum Channels and Warm 2700K LEDs
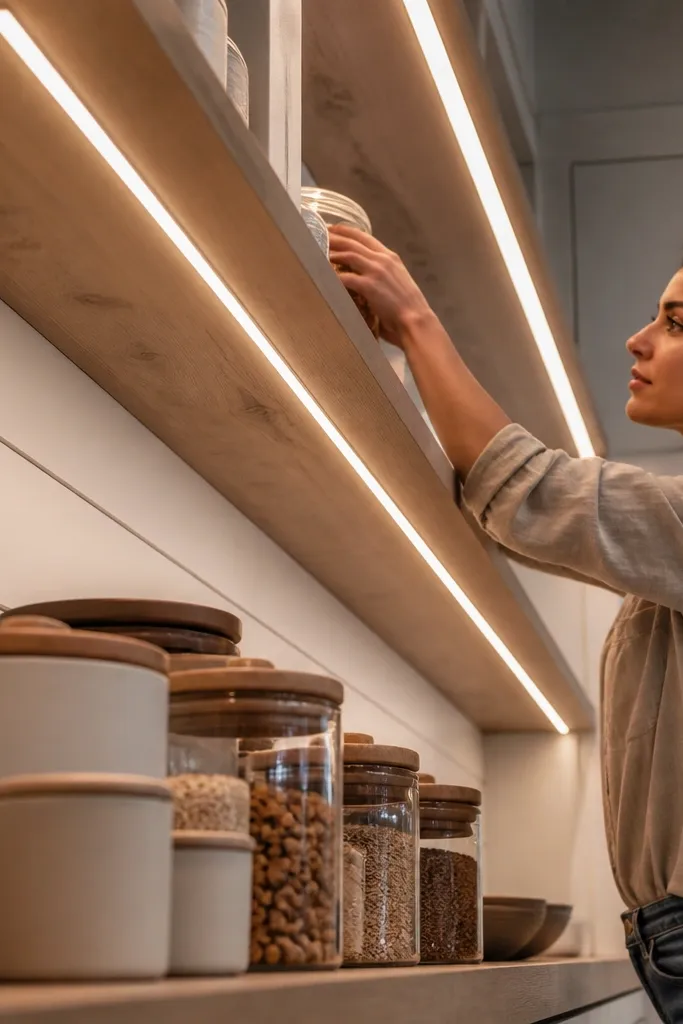
Lighting is the cheat code for luxe. Under-shelf LEDs make glass, ceramic, and metal hardware look sharper and hide dust shadows that happen with overhead-only lighting. Use aluminum channels so the light line is straight and doesn’t look like a strip glued to the underside. Warm 2700K LEDs keep the pantry from looking cold, especially if you have white shelves or light wood.
Editor's noteAngle the LED slightly so the light hits the labels, not the ceiling — it looks cleaner on camera.
Plan your lighting before you install final shelves. Cut aluminum channels to length, mount them under each shelf line, and run low-voltage wiring along the side walls. Choose 2700K LEDs with a driver rated for the total wattage. Add a switch or dimmer so you can control brightness, then test with shelves loaded so you can adjust placement for even light.
Skip thisDon’t use cool 4000K bulbs — labels look gray and the pantry looks institutional.
10. Wipeable White Slat Back Panel for a Clean Label Wall
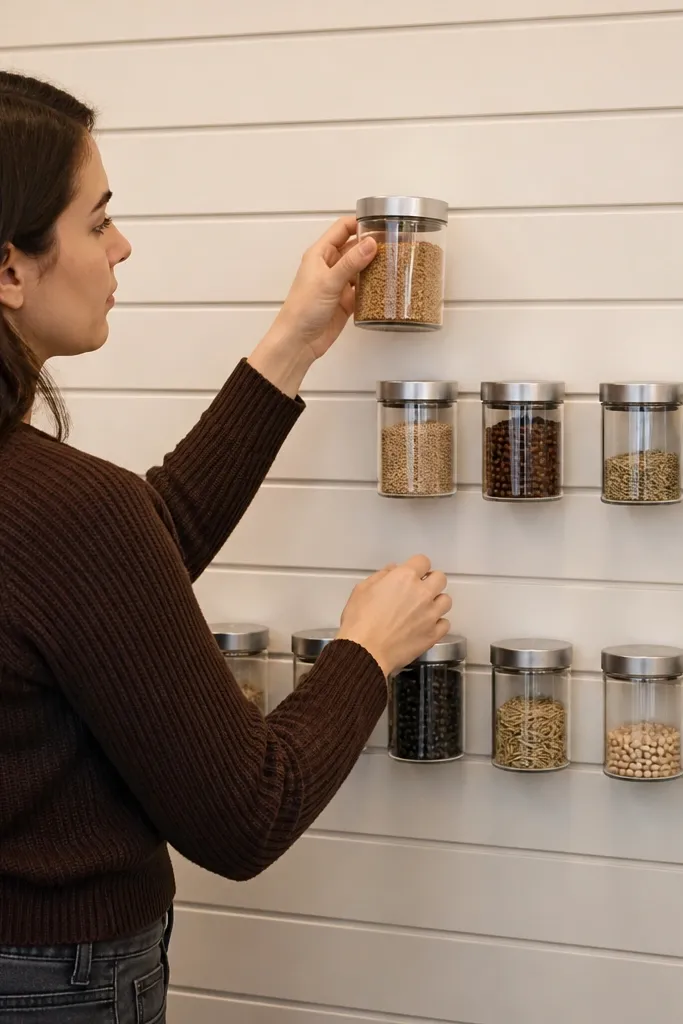
A back panel turns your pantry from “shelves in a room” into a designed storage wall. White slats also create shadow lines that make jars look crisp and organized. This matters because even perfect bins look bland without a backdrop. Choose a wipeable finish like a PVC laminate or painted, sealed panel so crumbs don’t turn into stains.
Measure the back wall area and cut slat panels to fit, leaving a small gap at edges for expansion. Install with a level line so the slats stay straight from shelf to shelf. Seal the surface with a wipeable topcoat if you’re painting, then mount shelf brackets onto the back panel supports. Finally, place jars and bins so the label fronts line up facing forward.
Keep the back panel color consistent with your shelf finish so the pantry looks built-in, not assembled.
Don’t leave raw wood behind open shelves — it absorbs spills and looks tired fast.
11. Sliding Pantry Rack for Cans with a Brass-Finish Stop
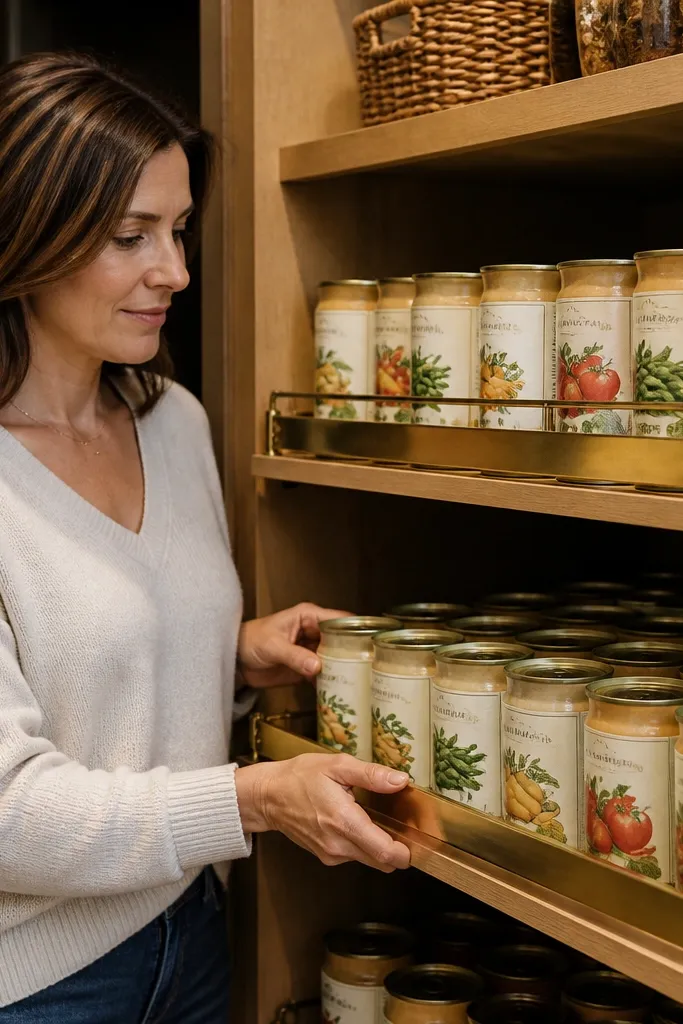
Cans look luxe when they’re lined up and easy to rotate. A sliding rack keeps you from shoving cans to the back, which is where the visual mess starts. Add a brass-finish stop piece so the rack face looks intentional and doesn’t look like a generic metal shelf. This setup also helps you use what you buy because the newest can comes forward cleanly.
Measure the can rack width and height based on your biggest can size plus clearance for the door. Install the sliding track to the shelf base with secure anchors, then add the rack rails so cans sit level. Add a brass-finish stop at the front so cans don’t roll out. Load with uniform can sizes and keep a second shelf behind for overflow in closed bins.
Use a small rubber bumper on the stop so the rack glides quietly and doesn’t clank.
Don’t mix can sizes on the same track — gaps make the rack look sloppy.
12. Two-Tier Serving Tray Shelf with Cork Coasters
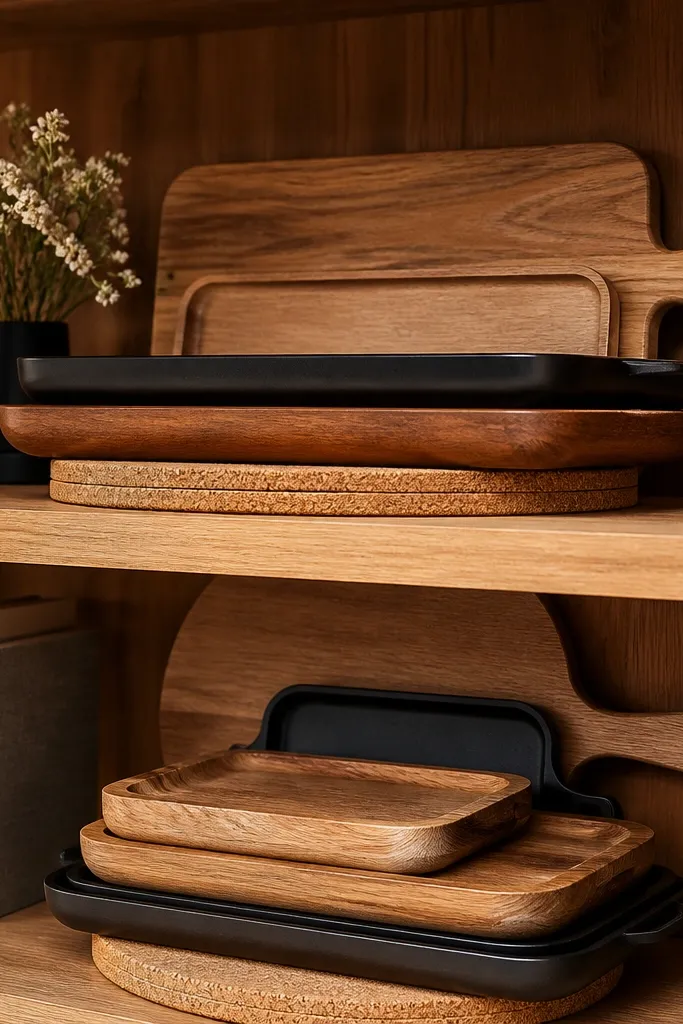
If you entertain or just like tidy counters, a pantry tray shelf makes everything look more curated. Store serving trays, cutting boards, and small platters in a dedicated rack so they don’t crowd your kitchen. Cork coasters under the trays prevent scratches and reduce rattling, which keeps the shelf looking calm. It’s a small project with a big visual payoff because trays are always “display items.”
Pick two tray sizes and measure for their footprint, then build a two-tier shelf bracket system so the top tier has clearance for handles. Add cork sheets to the shelf surface where trays rest. Use a light-colored shelf finish so trays stand out, and add small stop lips so items don’t slide forward. Store only items you actually use so the shelf stays neat.
Mount a thin label strip on the inside so you remember where each tray belongs when you put it away fast.
Don’t store random sheet pans here — the tray shelf should look intentional.
13. Stainless Pull-Out Basket for Produce-Adjacent Items
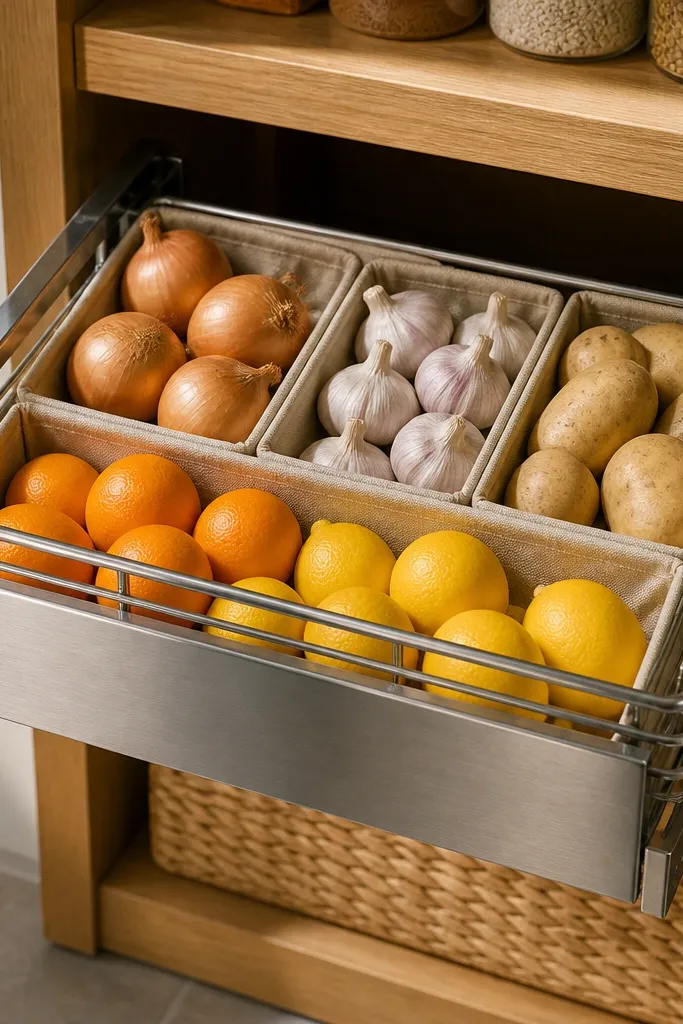
A stainless pull-out basket looks luxe because it reads “built-in hardware.” Use it for items that need airflow or frequent checking: onions, garlic, potatoes, citrus, and produce-adjacent snacks. The basket prevents those items from sitting in a damp pile on wood shelves. Keep it tidy with a shallow liner and a simple category rule so the basket doesn’t become a dumping zone.
Editor's noteUse a small moisture-safe container for garlic and keep it separate so odors don’t spread.
Measure your pantry lower shelf height and choose a pull-out basket sized for that cavity. Install slides to the shelf frame, then secure the basket so it sits level when extended. Add a ventilated liner or a thin, wipeable mat to keep moisture from contacting wood. Put the most-used items at the front and keep heavier items on the bottom so the basket doesn’t tip when pulled.
Skip thisDon’t put flour or sugar in an airflow basket — it invites humidity and mess.
14. Behind-Door Pantry Organization with Swing-Out Shelves
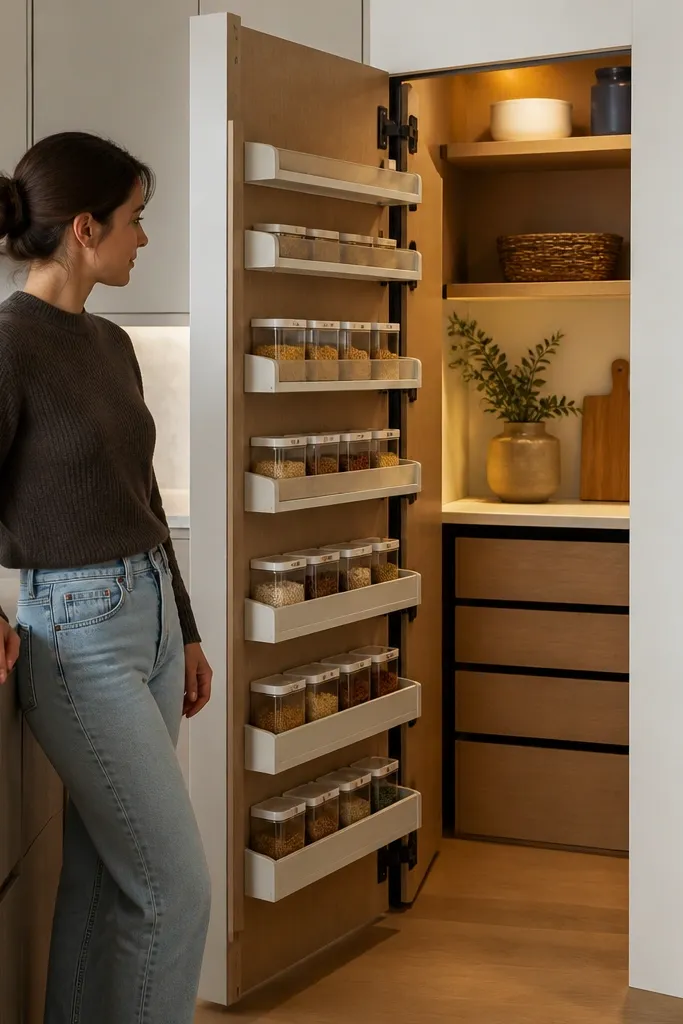
When you open the pantry door, you’re seeing the inside instantly. Swing-out shelves let you store small items in a controlled view, so you don’t have to stack them on main shelves. This looks luxe because the bins sit flat and aligned, and the door itself hides the mess. It’s ideal for narrow pantries where side shelves are limited and you need every inch.
Measure the door opening and choose swing-out shelf hardware rated for the load you plan to store. Install the mounting brackets to the door frame or inside wall with solid anchors. Add adjustable shelf heights so you can fit bins of different sizes. Finish with a consistent label style and keep items grouped by category so the bins aren’t mixed.
Add a door stop so shelves rest perfectly flat — uneven angles look cheap.
Don’t skip test fitting with full bins — hardware alignment can shift by a fraction.
15. Wooden Shelf Trays for Instant 'Curated' Front Display
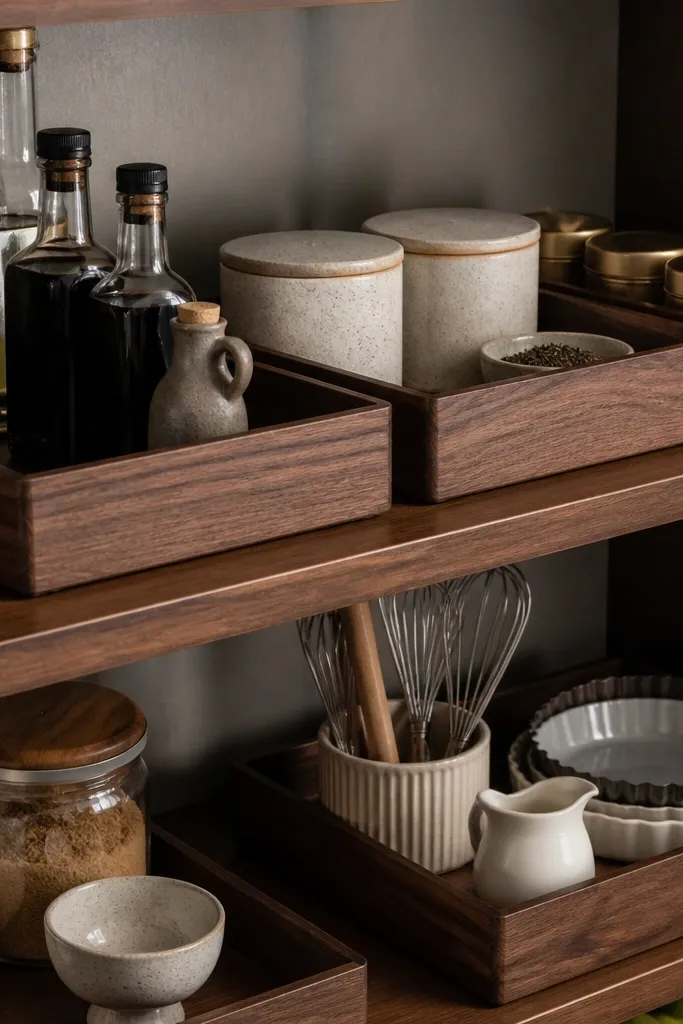
Trays create visual structure. Instead of scattering jars across shelves, you group them into a few tidy rectangles so the shelf looks styled even when it’s stocked. Use trays for oils, vinegars, sauces, tea canisters, and small baking items. Go for a satin-finished wood or walnut tone so it reads warm and expensive, and match tray size across shelves for consistency.
Choose tray sizes that fit your shelf depth with a 1 inch margin on each side. Sand and seal trays with a wipeable finish if you’re using raw wood so spills don’t stain. Place trays first, then arrange items inside with consistent spacing — aim for 1/2 inch gaps between labels. Keep one “refill basket” behind the tray so you can restock without breaking the arrangement.
Use the same tray finish across the pantry so the wood tone doesn’t shift shelf to shelf.
Don’t place trays on every shelf — two or three hero shelves look designed; too many looks cluttered.
16. Matte Black Pegboard Wall for Utensil Storage with Glass Jars
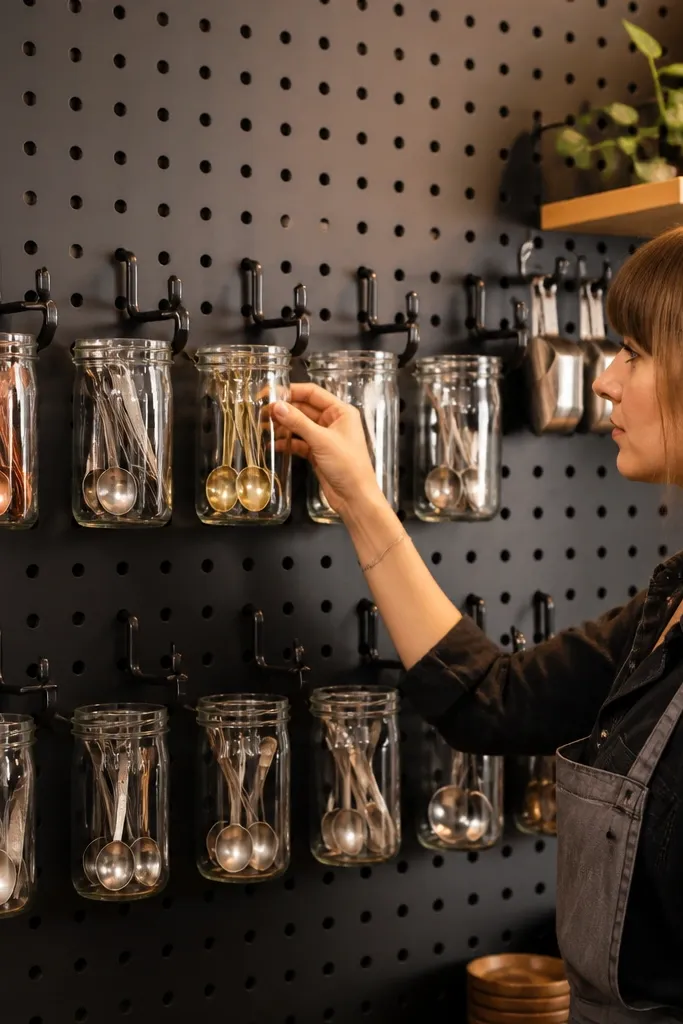
Pegboard sounds DIY, but matte black and glass jars make it look intentional. Store measuring spoons, spice scoops, small funnels, and tasting spoons in jars mounted to hooks. The luxe look comes from clean grid spacing and consistent jar heights — the pegboard becomes a design backdrop. This is a smart setup for pantries with a cooking zone where you’re constantly grabbing tools.
Editor's noteUse only one jar size for tool jars so the grid stays uniform.
Install a pegboard panel on the pantry wall at a height where tools are easy to reach, usually 48-60 inches. Sand and prime the pegboard if needed, then spray with matte black cabinet paint. Mount hooks and jar holders on a grid so everything lines up, then add small glass jars with matching lids. Add a bottom shelf or tray for tools that don’t fit on hooks.
Skip thisDon’t overload the pegboard — leave negative space so it reads clean.
17. Built-In Corner Shelf with Lazy Susan and Labeled Bins
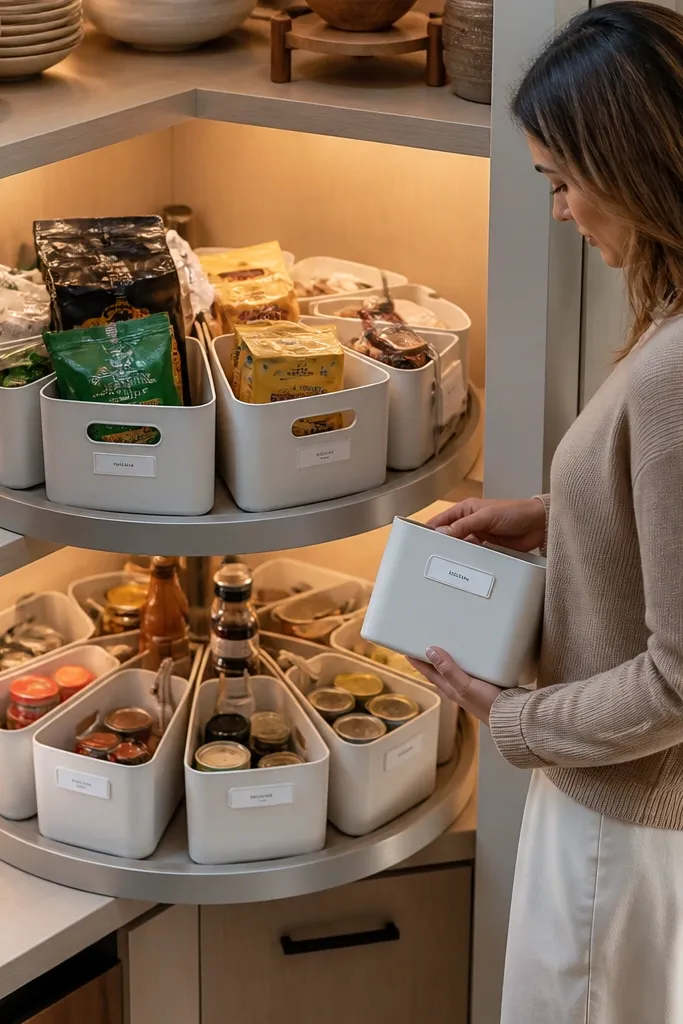
Corner dead space is where pantries get ugly. A lazy susan in a corner shelf lets you use the space without stacking random boxes. Luxe happens when the bins are labeled and the bin fronts face outward in a neat circle. Choose bins with a consistent color and finish — matte white or light gray looks clean against wood or painted panels. Keep the items light enough to spin smoothly.
Editor's notePut the most-used oils and vinegars in the top section so you don’t spin past them every time.
Measure the corner opening and select a lazy susan insert that fits without wobble. Install the base level, then add three to five labeled bin zones depending on shelf diameter. Use bins with flat fronts so labels stay readable and don’t rotate away from the view. Finally, add a center stop or magnet so the susan rests in a consistent “view” position each time.
Skip thisDon’t store heavy bulk in the lazy susan — the motion will loosen everything over time.
18. Airtight Canister Station with Refill Drawer Underneath
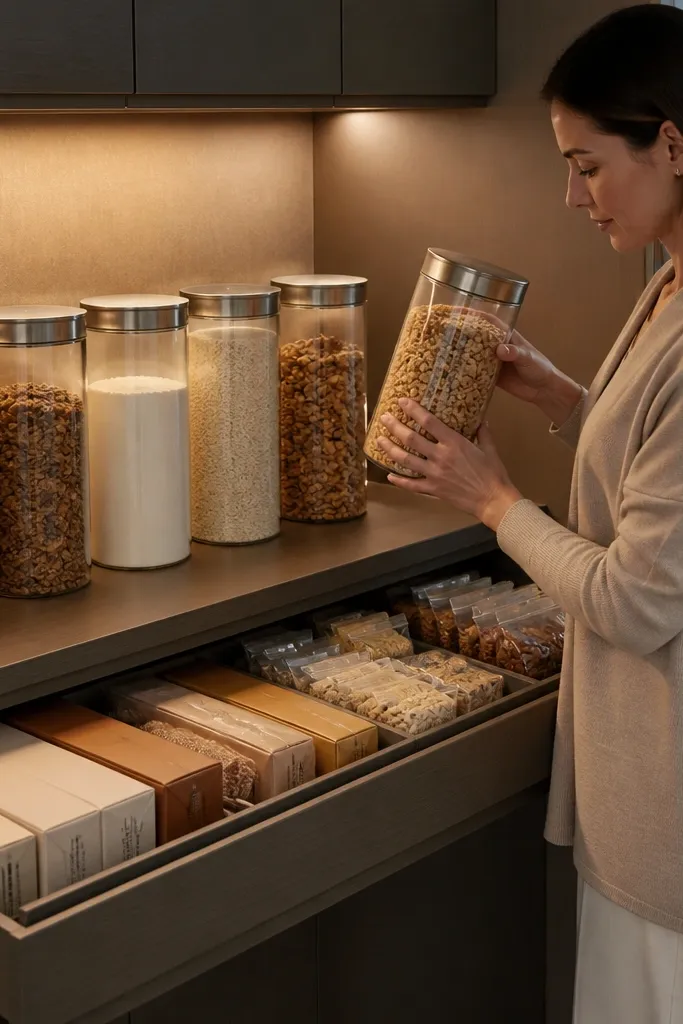
This setup keeps your pantry looking luxe because the front shelf stays uniform while the supply lives out of view. Put airtight canisters on top for daily use — cereal, granola, flour, rice, or snacks. Underneath, install a drawer with refill bags or unopened boxes so you don’t end up with open packages sitting around. The visual rule is simple: only identical containers on the shelf, everything else behind the drawer face.
Choose canisters with matching footprint and lids so the shelf looks like a design wall. Mount them on a shelf at the reach height you want, then build or install a drawer directly beneath with a smooth slide. Add a divider insert in the drawer so refills don’t crush each other. Label the canister lids and drawer categories so you can restock in under two minutes.
Use a drawer label that matches the canister label text so refills go back in the right spot fast.
Don’t mix open boxes with canisters — the shelf loses the luxe “controlled” look.
19. Color-Matched Lid Storage for Bulk Herbs and Seasonings
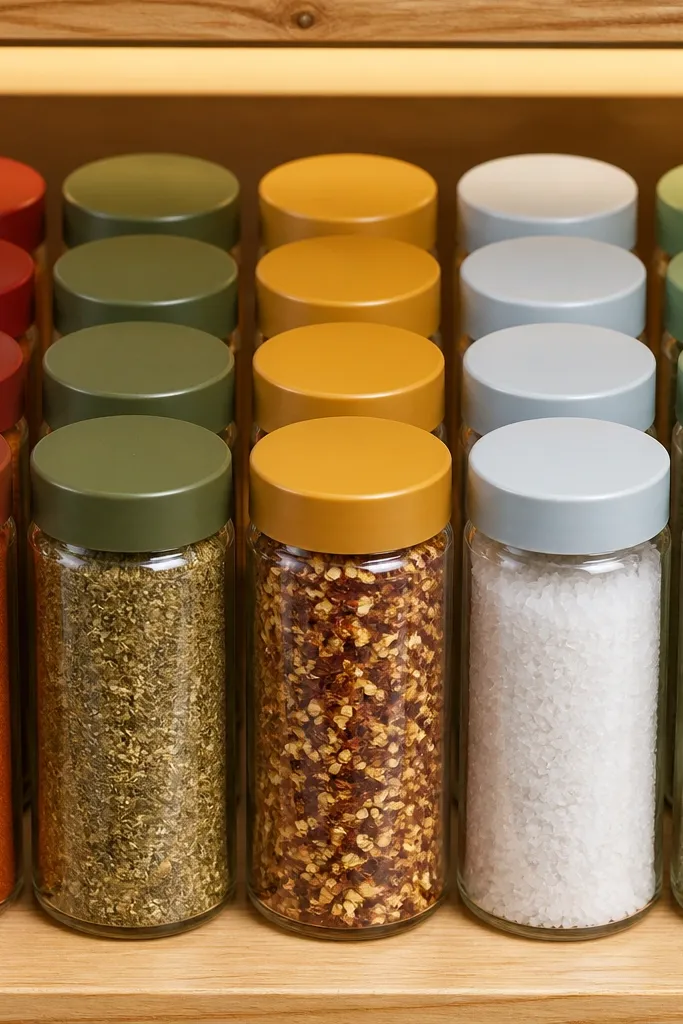
Seasonings get messy because lids and spoon accessories multiply. Color-matched lid storage fixes that by making every jar part of the same visual system. Use it for herbs, spices, and specialty salts: smoked paprika, za’atar, chili flakes, flaky salt, and dried herbs. When jars align in rows with consistent lid colors, the pantry looks “styled” instead of “sorted by necessity.”
Editor's noteIf you use magnetic spice labels, stick to one label size so the row looks uniform.
Buy jars with removable lids and pick a lid color system that matches your pantry hardware finish. Label each jar with a small matte label and keep all labels facing forward. Store scoops or mini funnels in a shallow tray behind the jars, not loose on the shelf. Measure your shelf length and set the number of jars per row so the arrangement stays symmetrical.
Skip thisDon’t let extra scoops sit in front of jars — they ruin the clean front line.
20. Inset Pantry Pull-Out for Cleaning Supplies with Matching Cabinet Face
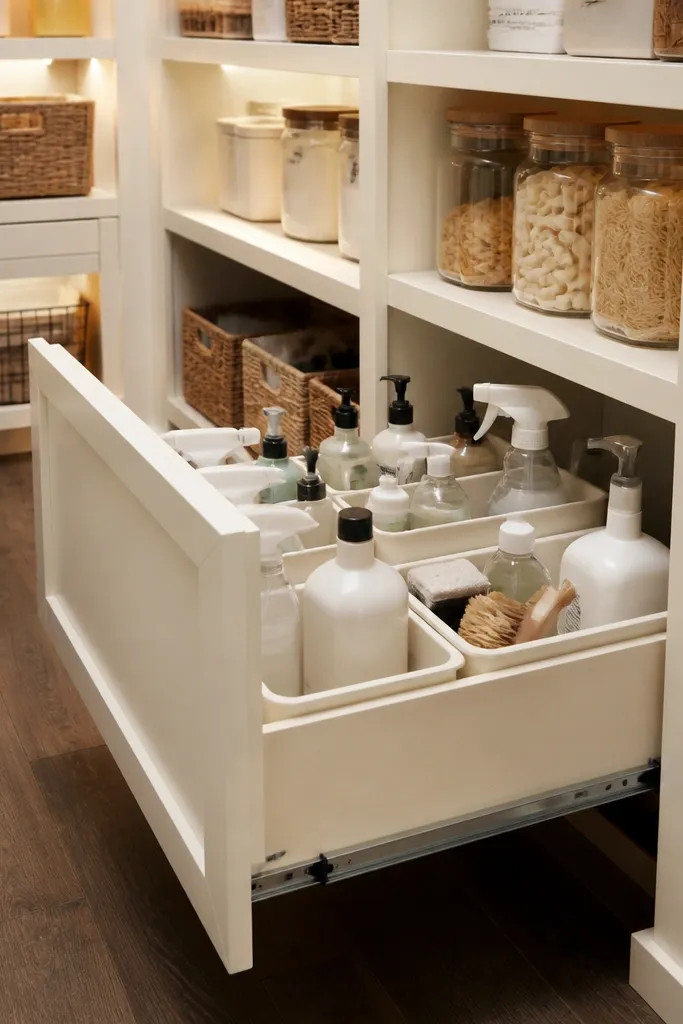
Cleaning supplies kill the luxe look because they’re utilitarian and label-heavy. If your pantry holds extra cleaners, move them into an inset pull-out with a matching cabinet face so they disappear visually. Keep the drawer organized with a tray system and a clear front only if you need it. This project makes the pantry look like a food storage room, not a catch-all.
Measure the cavity and choose a pull-out drawer system with a face panel that matches your pantry door. Install the slides first, then mount the face panel so it sits flush. Add pull-out trays for sprays, sponges, and refills, with separate compartments for liquids and powders. Finish by labeling the drawer categories and keeping only one category open at a time.
Use a waterproof tray under any bottle that might leak so shelf surfaces stay pristine.
Don’t store cleaners in open bins on upper shelves — the labels show instantly.
21. Floating Shelf with Hidden Bracket Clips and Glass Oil Bottles
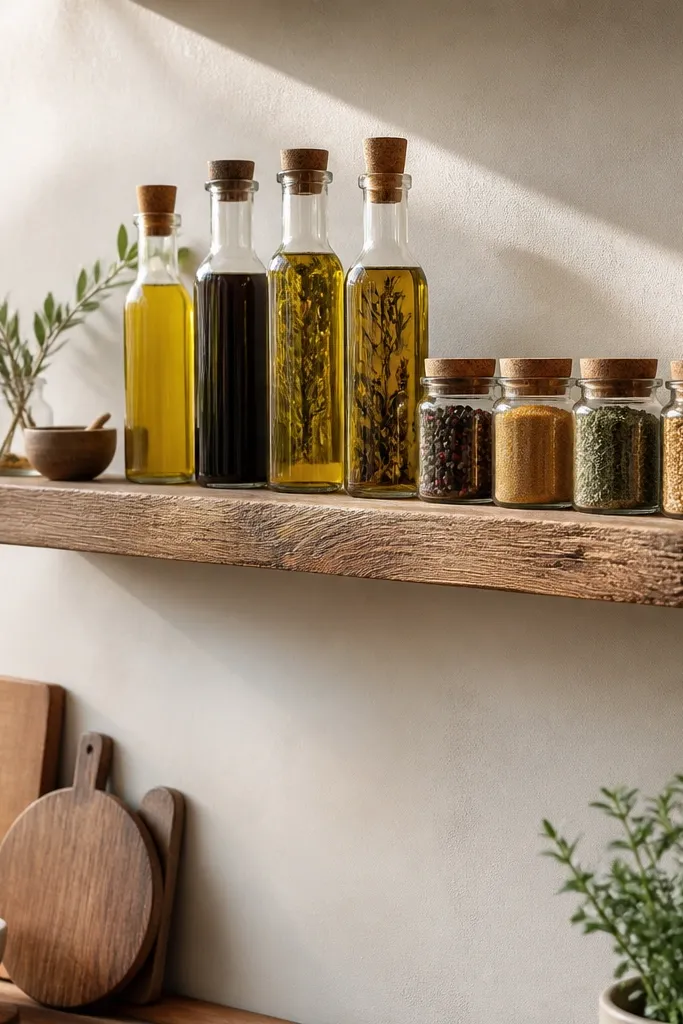
A floating shelf looks high-end because the brackets disappear and the items look like they’re on display. Use it for oils, vinegars, and sauces you want to grab fast without rummaging. Glass bottles look great under warm lighting, especially when the bottles share a similar color range like clear bottles with dark caps. Keep the shelf to a small number of items so it reads as curated display, not a product shelf.
Choose a floating shelf board width that matches your pantry wall and cut it to fit without touching side trim. Install hidden bracket clips at the stud locations and level carefully so the shelf doesn’t tilt. Seal the shelf surface with a wipeable finish, then add a small lip or silicone feet so bottles don’t slide. Arrange bottles with consistent spacing, then store bulk refills in closed bins below or behind a door.
Use bottle labels that are matte and simple; glossy labels reflect and look messy in bright pantry light.
Don’t put heavy bottles on a shelf without stud anchors — sag makes the whole pantry look unfinished.
22. Behind-Glass Door Cabinet for Baking Tools and Serving Sets
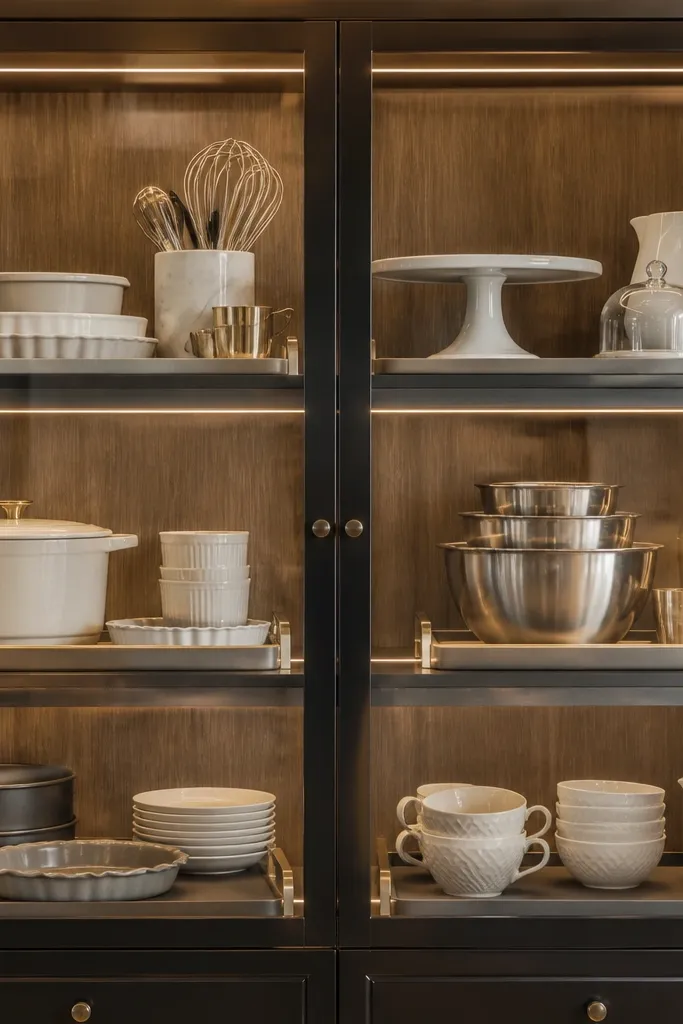
If you want luxe, you control what’s visible. A cabinet with glass doors lets you display baking tools and serving sets without making them look exposed and dusty. Choose glass that doesn’t exaggerate fingerprints, and keep the interior organized with matching trays or bins so everything still looks “designed.” This is one of the best ways to hide clutter while still showing off your nicest items.
Editor's noteWipe glass doors with a microfiber cloth before styling so the view stays crisp.
Measure the cabinet opening and install a glass door frame with proper hinges and a soft-close if available. Add interior shelf supports and choose tray inserts sized to the shelves. Arrange items by category and keep the front row consistent in height so the door view looks tidy. Seal the cabinet interior surfaces so spills wipe clean without staining.
Skip thisDon’t put loose items directly on shelves behind glass — dust and clutter show immediately.
23. Pantry 'Recipe Zone' with Vertical Cookbook Stand and Slim Storage
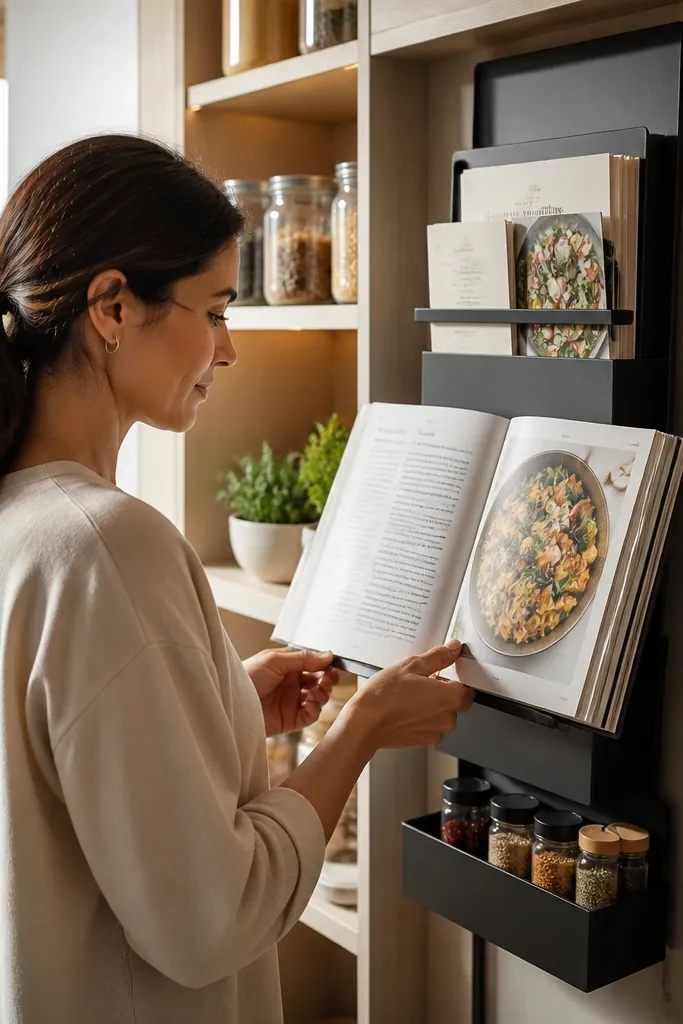
A pantry can feel luxe when it has a clear purpose on the inside walls. A recipe zone gives you a dedicated spot for cookbooks, printed cards, and frequently used ingredients for that week’s meals. Use a vertical stand so the items take less horizontal shelf space and look intentional. Pair it with slim storage for parchment, foil, and bag clips so the area stays neat and visually organized.
Choose a shelf height where you can see the recipe cards without crouching, then place a vertical cookbook stand at the back or side of the shelf. Add slim organizers next to the stand for paper goods and clips, using consistent heights so the layout stays aligned. Keep only a small stack of recipes visible and store the rest in a drawer. Label the slim organizers so you can restock without breaking the order.
Use a matte clip or holder for recipe cards; shiny metal reflects light and looks less upscale.
Don’t make it a catch-all for random papers — the zone must stay focused.
24. Marble-Look Contact Shelf Ledges with Gold-Tone Front Trim
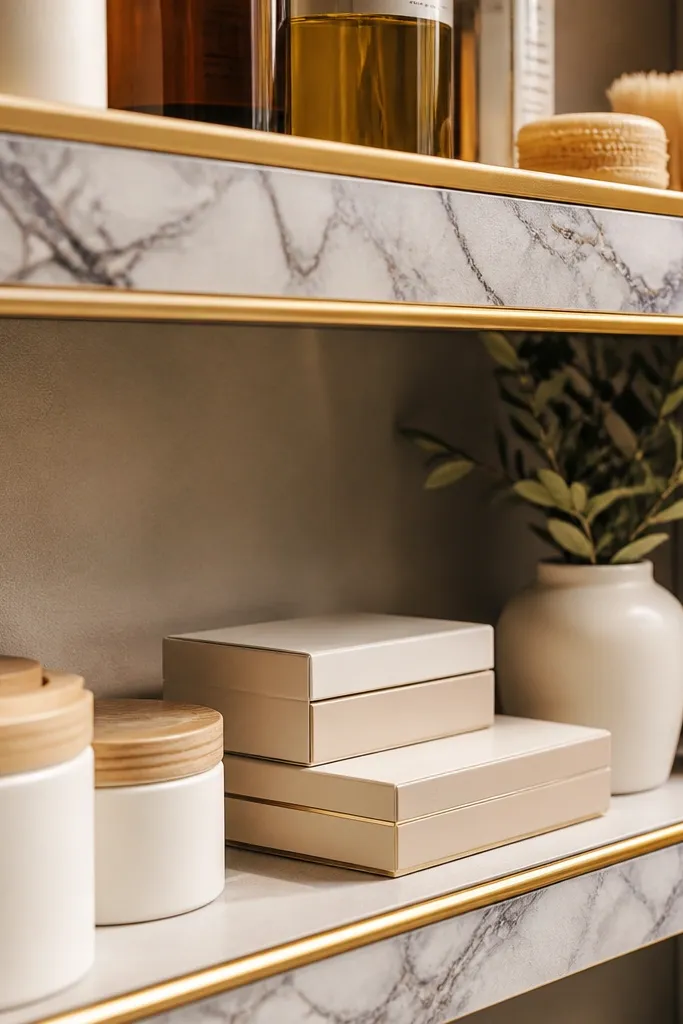
This is the fastest way to make a walk-in pantry look expensive without rebuilding the whole system. The trick is a clean, consistent front edge on every shelf so the jars and boxes look like they’re displayed in a boutique shop. A marble-look wrap on the shelf ledge gives that high-end countertop feel, while thin gold-tone trim keeps everything looking intentional instead of DIY. It also solves a real visual problem: plain plywood shelf fronts make everything above look messy. This suits walk-in pantries with open shelving where you want a luxe label-and-jar wall effect but don’t want custom cabinetry.
Editor's noteUse a metal ruler and craft knife to trim the contact paper edges cleanly — neat lines are what sell the “high-end” look.
1) Cut a 1-inch-wide strip of marble-look contact paper for each shelf front, sized to the shelf depth minus 1/16 inch so it doesn’t curl at the edges. Add a thin gold-tone aluminum trim strip (about 1/2-inch wide) centered over the paper seam so the edge looks finished. 2) Clean the shelf front with denatured alcohol, then apply the contact paper starting at the back corner, smoothing with a plastic squeegee and working slowly to avoid bubbles. 3) Attach the gold trim using a thin, clear construction adhesive or 3M VHB tape, then press for 30 seconds along the full length. 4) Seal only the very front edge with a clear matte shelf-safe topcoat (water-based poly works) if your pantry is humid, and let it cure fully before loading heavy items.
Skip thisDon’t wrap the contact paper over the underside or back edge; it peels first there and ruins the front-edge look.
25. Full-Height Linen Cabinet Panels with Hidden Magnet Bins
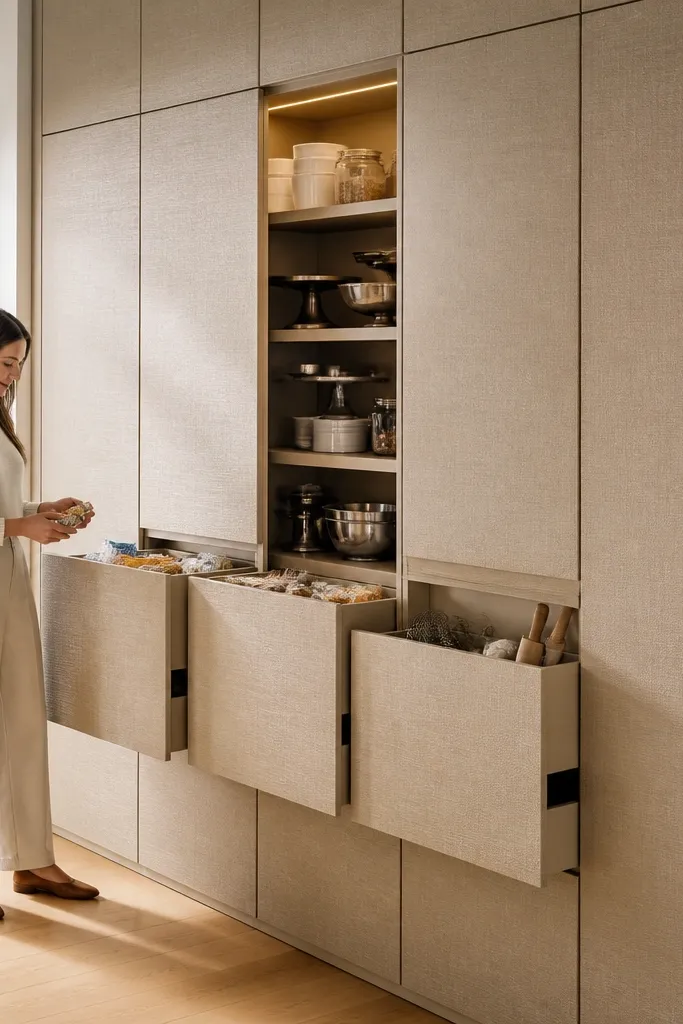
If your pantry has plain doors or mismatched drawer fronts, this is the luxe fix that changes the whole room. Linen-texture panels make the pantry look like built-in furniture, and magnet-mounted bins keep the organization visible without exposed hardware. The bins let you pull out snacks, wraps, or baking tools cleanly while the doors stay looking styled. It also prevents the common problem where bin labels look cluttered because you’re forced to use bulky clear containers. This works best in walk-in pantries with cabinet fronts you can cover or replace and enough clearance for door swings.
Editor's notePick bins with magnetic backs that sit 1/8 inch off the door so you can wipe the door face without pulling everything out.
1) Choose linen-look adhesive vinyl or linen-texture peel-and-stick panels sized to your door faces, then remove hardware and degrease the surface with a kitchen-safe degreaser followed by isopropyl alcohol. Measure each door face width and height, cut panels with a sharp blade, and apply from top to bottom using a squeegee to avoid wrinkles. 2) Inside each door, mount a thin steel mounting plate or strip (about 1/16 inch thick) where bins will land, using screws into the door frame or strong adhesive rated for indoor use. 3) Use small powder-coated metal bins with built-in magnets, then align one bin at a time so the face sits flush and the label is level. 4) Finish by reinstalling hinges and doing a slow open/close test to confirm bins don’t scrape and magnets hold under vibration.
Skip thisDon’t mount the magnets so high that the bin hits the door top trim; leave a 1/2-inch clearance for smooth closure.



