


1. Ceramic Soap Dish + Matching Toothbrush Cup Set
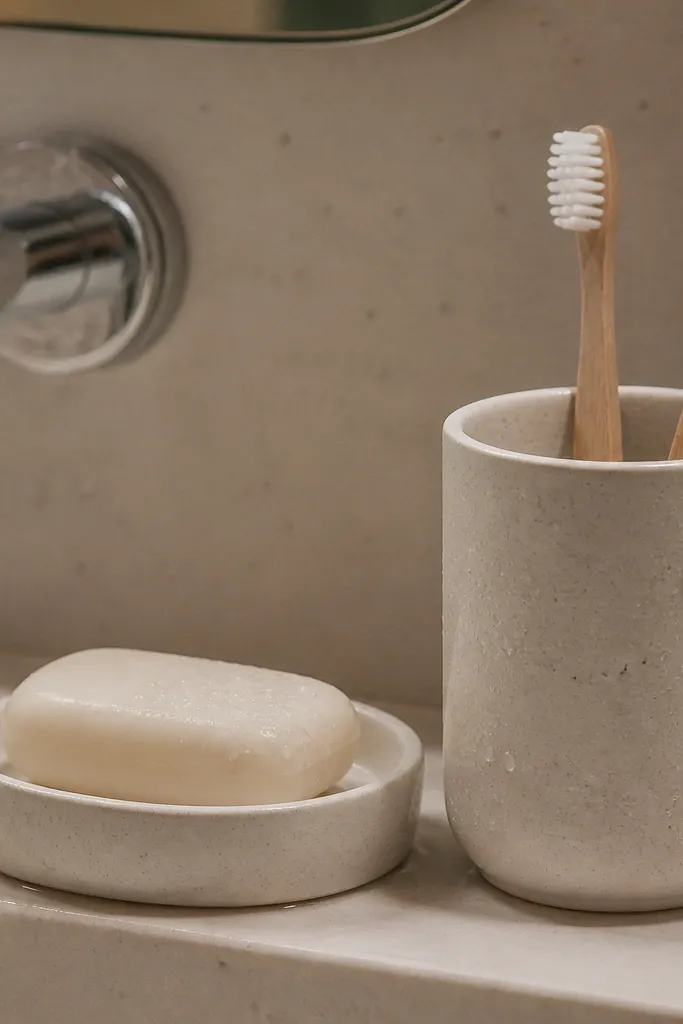
This setup cleans up the mess that always forms around sinks: soap bars sliding, toothbrushes standing at weird angles, and water rings on random surfaces. A matching ceramic dish and cup look intentional because they share the same finish and thickness, which makes your counter look styled instead of improvised. Matte white or warm ivory also hides small splashes better than glossy finishes. It’s best for counters with limited space because the footprint is compact and the items stay in one tidy zone.
Start by wiping the vanity top completely dry, then place the soap dish where it won’t get direct faucet splash. Set the toothbrush cup behind it, centered, so the handles line up and don’t lean into the sink area. If you’re using a bar soap, keep it on a draining dish with small drainage grooves; if you’re using liquid soap, choose a dish that has a recessed tray so drips don’t run. Finally, align the set with the front edge of your counter so it looks symmetrical from the mirror.
Use felt pads under the cup if your vanity top is stone or laminate to prevent micro-scratches and shifting.
Avoid mixing glossy ceramic with matte metal — the different finishes make the whole cluster look mismatched.
2. Brushed Metal "Daily Tray" for Counter Essentials
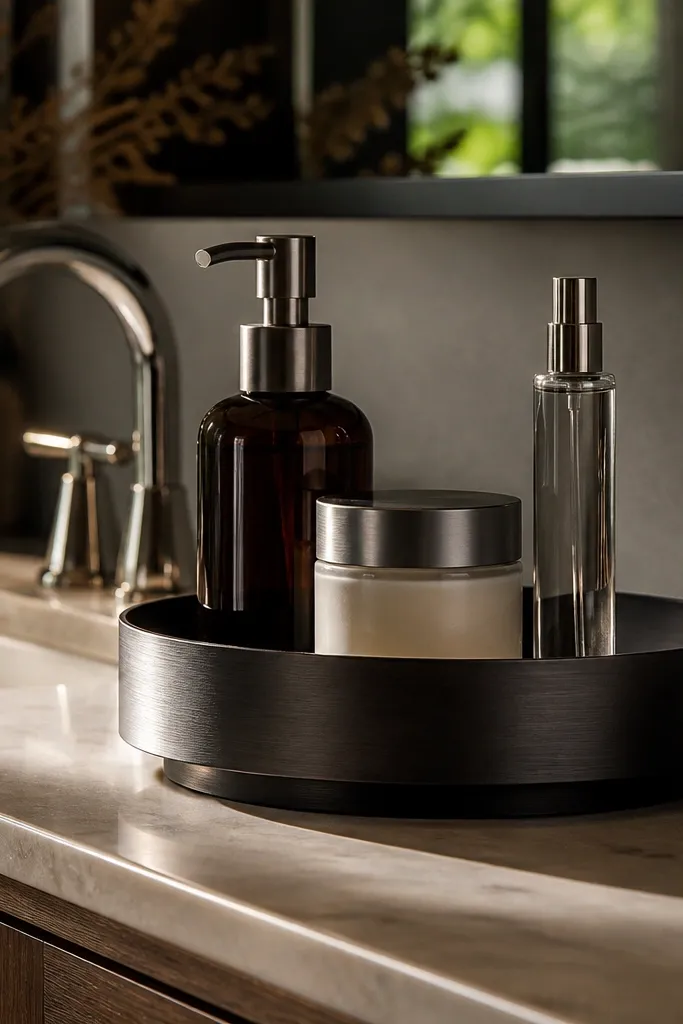
A daily tray is the fastest way to make a vanity top look high-end because it turns scattered items into a single design block. Choose a tray with a raised rim so bottles don’t sit flat and look messy. Brushed metal in black, champagne, or brushed nickel reads upscale, and it matches common faucet finishes. This idea works best when you keep only the items you touch twice a day on the tray — everything else moves to drawers.
Measure your counter depth and pick a tray that leaves 1 inch of clearance from the sink and at least 2 inches from the mirror line. Place the tray slightly off-center toward the side you use most, then add one pump bottle for soap or lotion and one small jar for cotton pads or q-tips. Add a slim insert or small divider to keep bottles from leaning; even a folded silicone mat under items helps them stay put. Finish by wiping the tray and arranging the tallest item at the back edge of the tray for clean sightlines.
Editor's noteIf your tray is metal, use a microfiber cloth with a tiny bit of dish soap to remove water spots without scratching.
Skip thisDon’t fill the tray with every product you own — the tray should look curated, not crowded.
3. Frosted Acrylic Organizer with Hidden Back Row
Frosted acrylic gives you that “designer display” look because it shows shapes without letting messy labels dominate. The trick is compartment layout: keep visually noisy bottles in the back compartment and store smaller items in front sections where they’ll be easy to reach. This setup is ideal for people who want their daily skincare visible but refuse the clutter look. It’s also easy to wipe down — acrylic doesn’t trap residue like porous ceramics can.
Choose an organizer with at least three compartments and frosted sides, not clear — clear acrylic shows every fingerprint and smudge. Arrange products by height: back compartment gets 4 to 6 inch bottles, front compartments get 2 to 3 inch items. Use small paper labels on the bottom of compartments if you want to keep the layout consistent. Place the organizer on a tray or mat so it doesn’t slide, then wipe it dry after each use.
Cut a thin piece of non-slip shelf liner and place it under the organizer to stop micro-movement.
Avoid clear acrylic with bright labels — it makes your counter look busy even if the items are neatly arranged.
4. Stackable Vanity Shelf Ledge for Vertical Space
When countertop space is limited, the clean look comes from moving height upward without making the counter feel crowded. A small shelf ledge mounted just above the vanity keeps bottles vertical and readable, while also freeing the sink zone. Use it for items you don’t need at arm’s length — backups, hair styling tools, or extra skincare. The shelf looks high-end when it has a slim profile and consistent spacing between items.
Find a mounting location with at least 2 inches of clearance above the counter and avoid placing directly over frequent splash areas. Use a level and mark two mounting points, then install shelf brackets rated for the load you’ll place on them. Add a slim shelf board or pre-made ledge in a finish that matches your hardware. Place a single row of items, then set one taller container at the back of the shelf so nothing blocks the mirror.
Editor's noteIf you’re drilling into tile, use a carbide bit and go slow — cracked grout ruins the clean look fast.
Skip thisDon’t mount shelves too low — if they sit within the splash zone, you’ll create more cleaning work.
5. Wood Slat Tray with Leather Edge Band
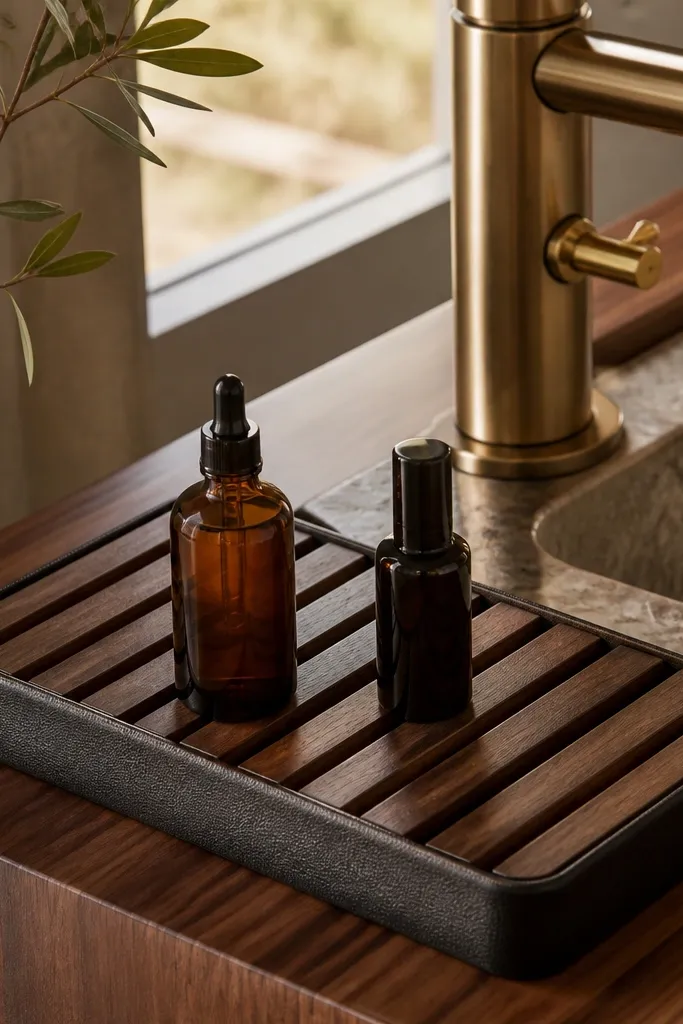
Wood slats look warm and expensive, but the way they’re finished matters. Pair a slatted tray with a leather edge band so the piece looks intentional and doesn’t feel like a cheap cutting board. This is a strong choice for bathrooms with warm wood tones or brass fixtures because the materials visually “match” without needing identical hardware. It keeps items separated so bottles don’t touch and transfer water rings or residue.
Pick a tray size that fits your daily cluster — a 10 to 14 inch length works well for one side of a typical vanity. If you’re making it, use sealed hardwood or a waterproof wood finish, then add a thin leather strip along the front edge with adhesive made for leather. Arrange items in zones: cotton pads and q-tips in one corner, lotion/pump in the center, and a small brush or comb in the other corner. Set the tray on a silicone mat to prevent slipping on smooth stone or laminate.
Editor's noteUse a matte leather finish or lightly waxed leather so it won’t look shiny under bathroom lighting.
Skip thisAvoid untreated wood — it warps and stains quickly around sink splash.
6. Lazy Susan for the Vanity Drawer Top
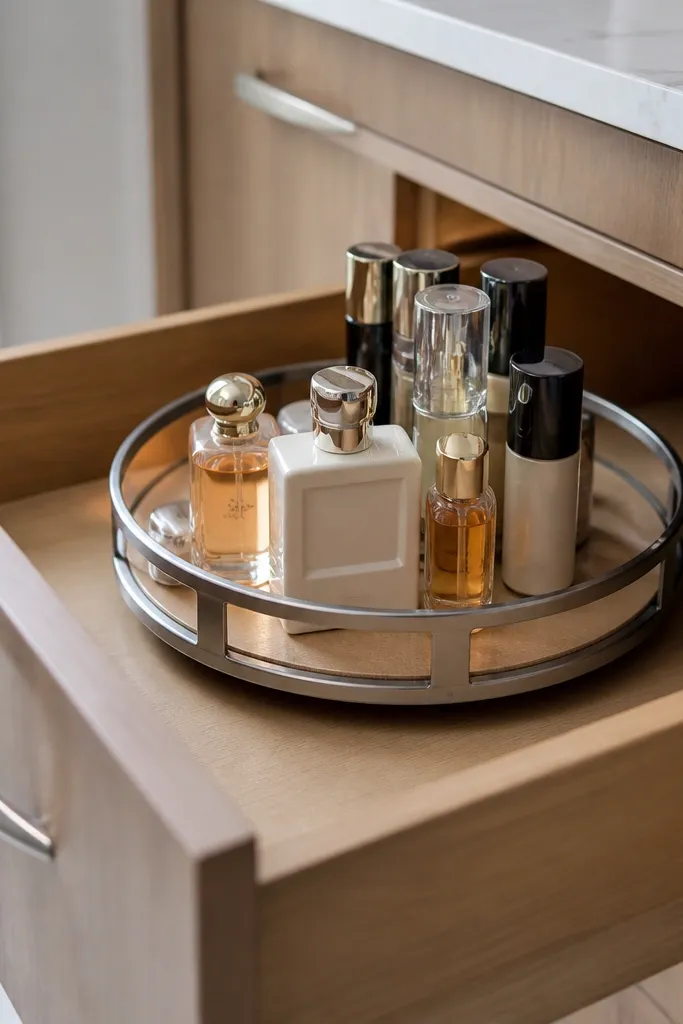
A lazy Susan inside a drawer gives you countertop cleanliness without sacrificing access. The visual win is that nothing sits on the top surface, but you still get a tidy system where products face the same direction. Choose a small rotating tray that fits your drawer dimensions and has a lip so bottles don’t roll. This works especially well when you have a shared vanity and multiple people need quick access to their own items.
Measure your drawer interior width and depth, then subtract about 1/2 inch from both sides to allow smooth rotation. Choose a lazy Susan tray with a non-slip base or add a thin rubber mat underneath. Group items by category on the rotating surface — cleanser and toner together, moisturizer and SPF together. Pull the drawer open and rotate so the item you use most sits closest to the front edge.
Editor's noteLabel the underside of each section with a small strip of masking tape so you can reset the layout fast.
Skip thisDon’t overload the rotating tray — if bottles are jammed, they tip and the system stops looking tidy.
7. Two-Tier Cup Rack for Hair Tools and Styling Products
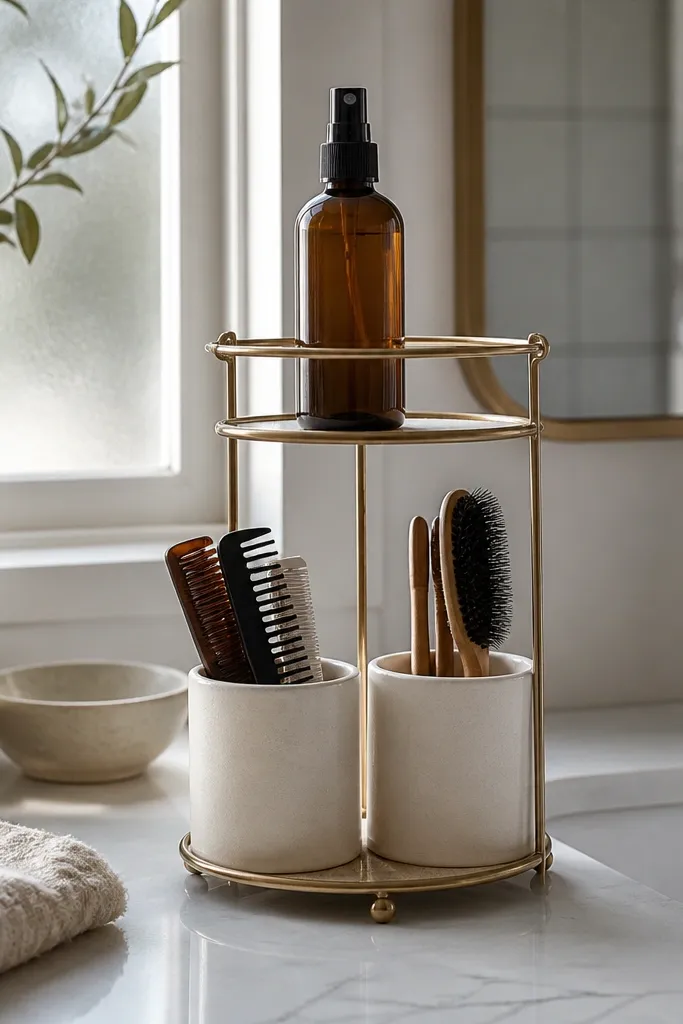
If your vanity top collects hair tools and small styling bottles, a two-tier rack turns chaos into a clean display. The second tier keeps sprayers and taller bottles from leaning forward, which creates a flatter, more “designed” look. Use cups or small holders so items don’t touch metal and create scratches. This idea is great for bathrooms where hair care lives on the counter because it keeps the mess contained in one vertical block.
Choose a two-tier rack with a stable base and a footprint that still leaves a clear path to the sink. Place it on a tray or mat so drips don’t stain the vanity top. Put small items like hair ties, clips, and brushes in the top cups, then place sprays or thicker bottles on the lower tier. Keep the front edges aligned — if one cup sits forward, the rack looks crooked.
Use a lint roller on the cups before styling — hair dust makes matte surfaces look dull.
Avoid open racks without cups — exposed containers make your counter look like a storage unit.
8. Stoneware Catchall with Divided Sections
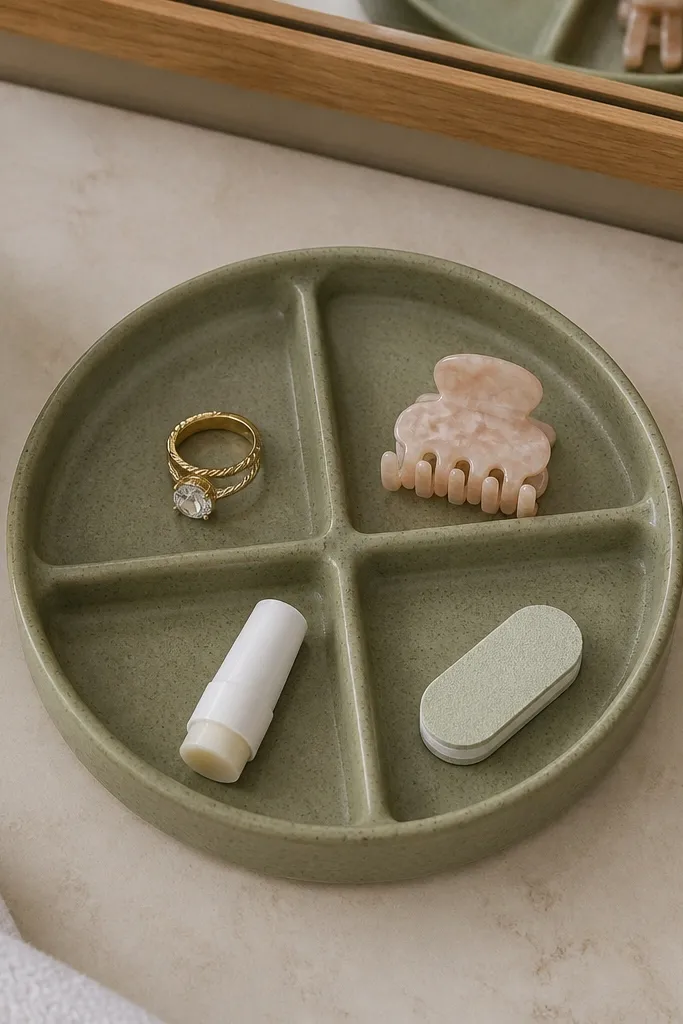
A divided stoneware catchall is the fix for tiny daily clutter that spreads across a vanity: rings, hair clips, lip balm, and small tools. The division keeps items separated, so you don’t get the “everything mixed together” look. Stoneware in a muted glaze — speckled gray, sage, or warm sand — looks high-end because it looks handmade and hides minor scuffs. This works best on vanities where you want jewelry and small essentials to stay visible but controlled.
Pick a catchall with at least 3 compartments and a slightly raised base so water doesn’t pool. Place it on a spot where you naturally set things down, not next to the sink splash. Add a small tray insert or use the built-in dividers to separate jewelry from lip products and from hair accessories. Wipe the catchall dry after each use, especially if it sits near the faucet.
Editor's notePut lip balm and small tubes in one compartment only, so the rest stays clean and ring-free.
Skip thisDon’t choose a catchall with deep, narrow dividers — small items get stuck and the setup turns messy.
9. Magnetic Razor Holder on Side Panel
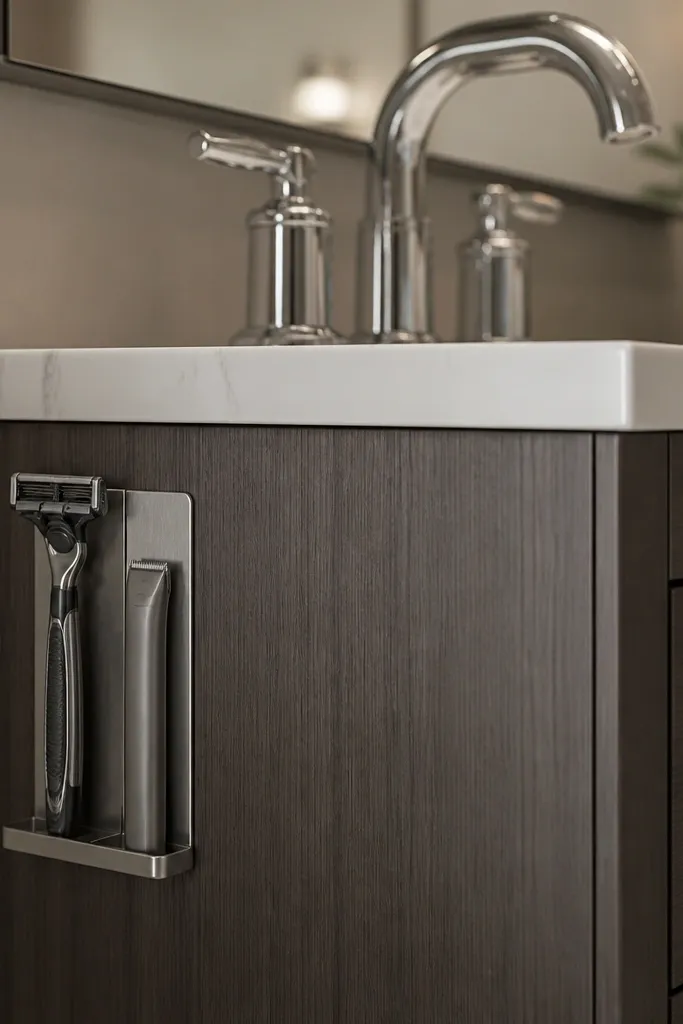
Shaving clutter makes a vanity top look messy fast, mainly because razors and trimmers don’t sit neatly on trays. A magnetic razor holder mounted on the side panel removes that mess from the countertop completely. It also looks clean because it’s vertical and aligned with the vanity edge. Choose a holder with a drip-safe design or a small catch area so water doesn’t run down the panel.
Clean and dry the vanity side panel, then mark the height so the razor sits above any splash line from the faucet. Use a level to install the holder with screws if possible, or a strong adhesive mount if you’re in a rental. Keep the holder near where you shave, but not where it blocks cabinet doors. Add a small wipeable mat underneath if the holder design can’t catch drips.
Editor's noteMatch the holder color to your faucet hardware so it blends instead of looking like an add-on.
Skip thisAvoid mounting too close to the front edge — you’ll bump it with your hands and it will look messy quickly.
10. Clear Cup Insert for Q-tips and Cotton Rounds
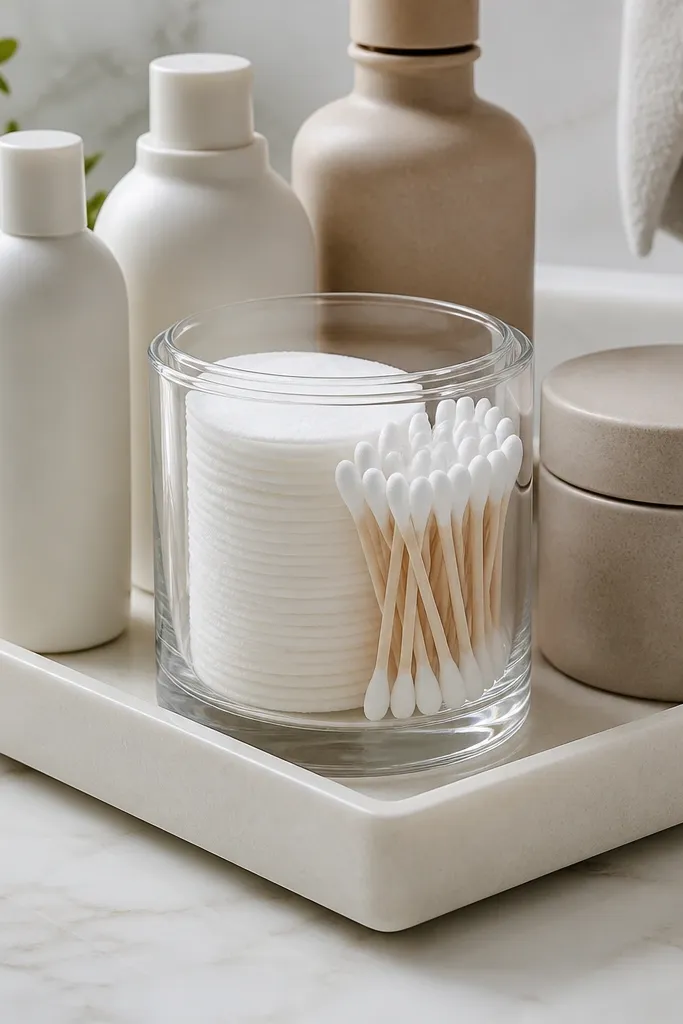
A clear cup sounds basic, but the high-end look comes from how you contain it. Use a clear cup inside a larger tray so the cup is the only “transparent” element on the counter. That way, you get the clean, organized vibe without seeing every label and bottle at once. For best results, use a cup with thick walls and a flat base so it doesn’t look flimsy. This is perfect for bathrooms where you want cotton products visible for convenience.
Pick a cup diameter that fits your tray spacing; 3 to 4 inches is a sweet spot for cotton rounds and q-tips. Place the cup toward the back or side of the tray so it doesn’t block the sink. Fill it with cotton rounds first, then add q-tips in a separate smaller cup if your tray has room. Finish by wiping the cup dry so water droplets don’t leave streaks.
Editor's noteIf you use a clear cup, use frosted cotton round bags inside so the contents look uniform.
Skip thisAvoid mixing multiple clear cups of different sizes — the counter looks like a storage shelf.
11. Lidded Small Jar for Daily Makeup or Skincare

Open jars look cute until labels, wands, and caps create a visual mess. A lidded jar fixes that by hiding the worst-looking parts — the top mess. Choose a jar with a smooth lid and a matte finish so it doesn’t show fingerprints. Put it on a tray with one or two surrounding items max, and you get a clean, gallery-like look. This idea works well for makeup touch-ups, lip products, and daily skincare you don’t want constantly out.
Choose a jar that’s tall enough to store items without stacking, usually around 3 to 5 inches tall. Place it on the center of your daily tray as the anchor piece. Add one pump bottle or tube holder next to it, then stop there. Keep the lid clean — wipe the underside and the rim so it stays crisp-looking.
Editor's noteUse a small microfiber cloth to clean the lid rim; that’s where fingerprints show first.
Skip thisAvoid jars with overly textured lids — dust and water collect in the grooves.
12. Stacked Drawer Dividers with Front-Facing Labels
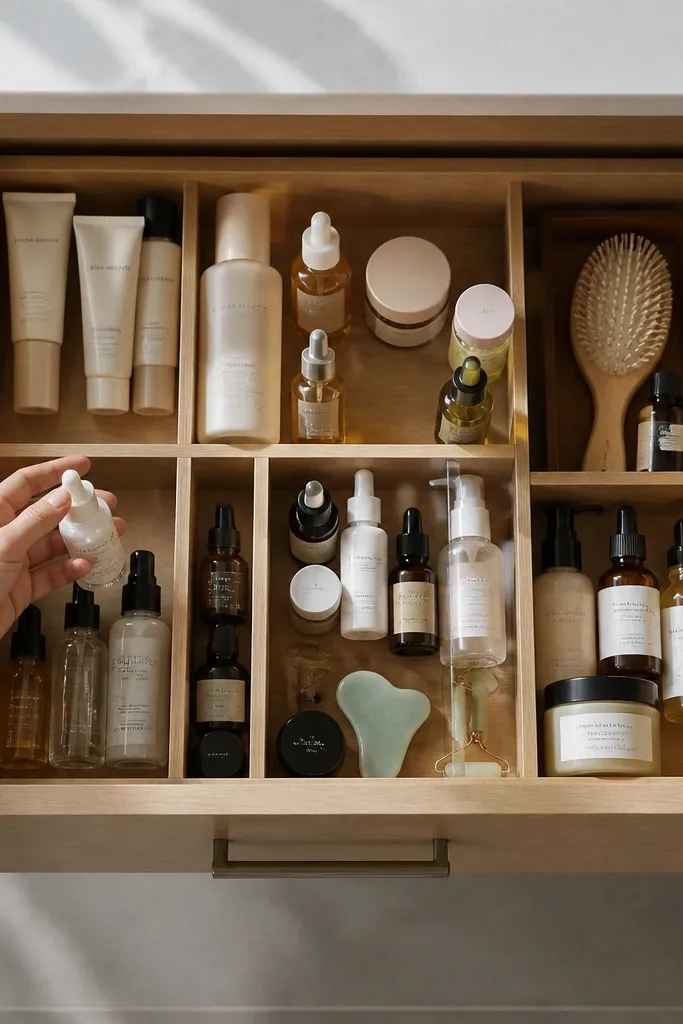
High-end vanity top organization depends on what’s hidden. A drawer layout that forces products to stand front-facing keeps the counter clean because you’re not reaching for loose items. Use dividers that separate categories and keep bottles upright so labels don’t get scuffed or smeared. The look is clean even when you open the drawer because everything lines up like a small boutique shelf. This is best for vanities with drawers you can dedicate to skincare and grooming.
Measure your drawer internal width and pick dividers that snap or screw in place without gaps. Start with the largest divider for bottles, then add smaller inserts for tubes and tools. Arrange items so the front label faces the same direction; if you use pump bottles, keep them in one row so they don’t tip. Add a thin label strip on the front of each divider using a vinyl label or printed label protected with clear tape.
Editor's noteUse dividers with a slightly grippy bottom so they don’t slide when you pull the drawer.
Skip thisAvoid “freeform” drawer bins — if items can roll, the counter will get messy.
13. Under-Sink Pull-Out for Backups and Spares
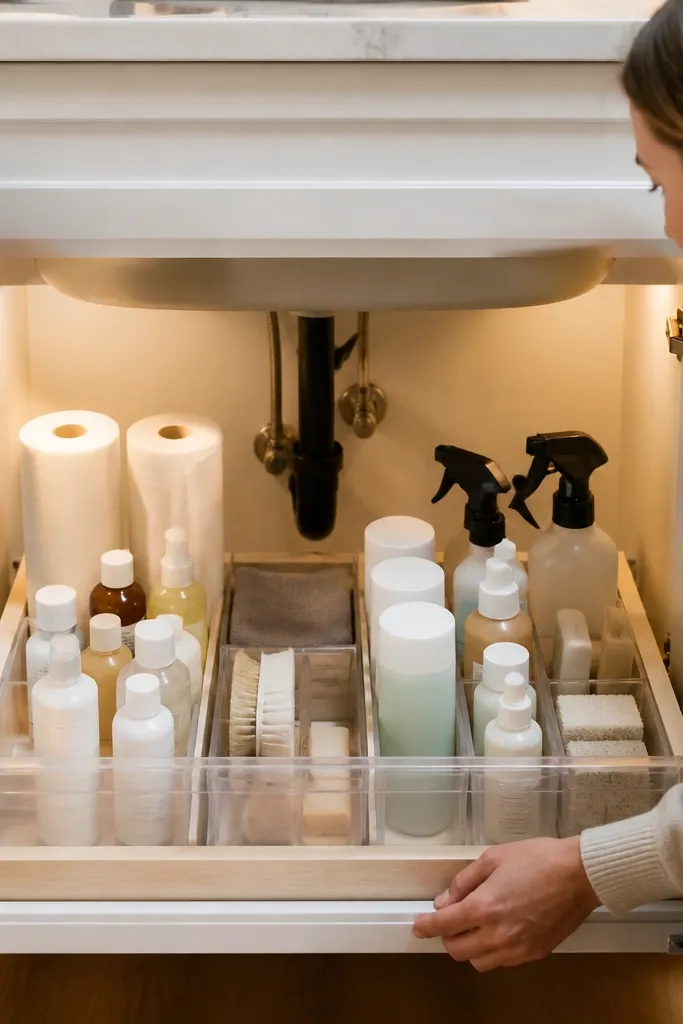
The under-sink area is where clutter hides, and messy hiding still shows. A pull-out organizer makes backups easy to store without turning the cabinet into a black hole. Choose pull-out bins that are easy to wipe and have clear fronts or labels so you can put items back fast. This supports the clean look because your countertop stays limited to daily-use items. It also improves the bathroom vibe because the cabinet doesn’t leak grime onto the vanity top when you search.
Measure the under-sink cabinet width and depth, then choose slide-out organizers that match those dimensions with a little clearance. Install rails or use a freestanding pull-out base depending on your cabinet style. Put heavy backups on the bottom bins and lighter items on the top bins so nothing shifts when you open the door. Add a removable bin for cleaning supplies and keep it separate from toiletries.
Editor's noteLine the cabinet floor with a waterproof mat so any drips don’t stain and smell.
Skip thisAvoid stacking bottles loose in the cabinet — they get knocked around and the mess migrates upward.
14. Mirror-Edge Tray for Hair Bands and Small Tools
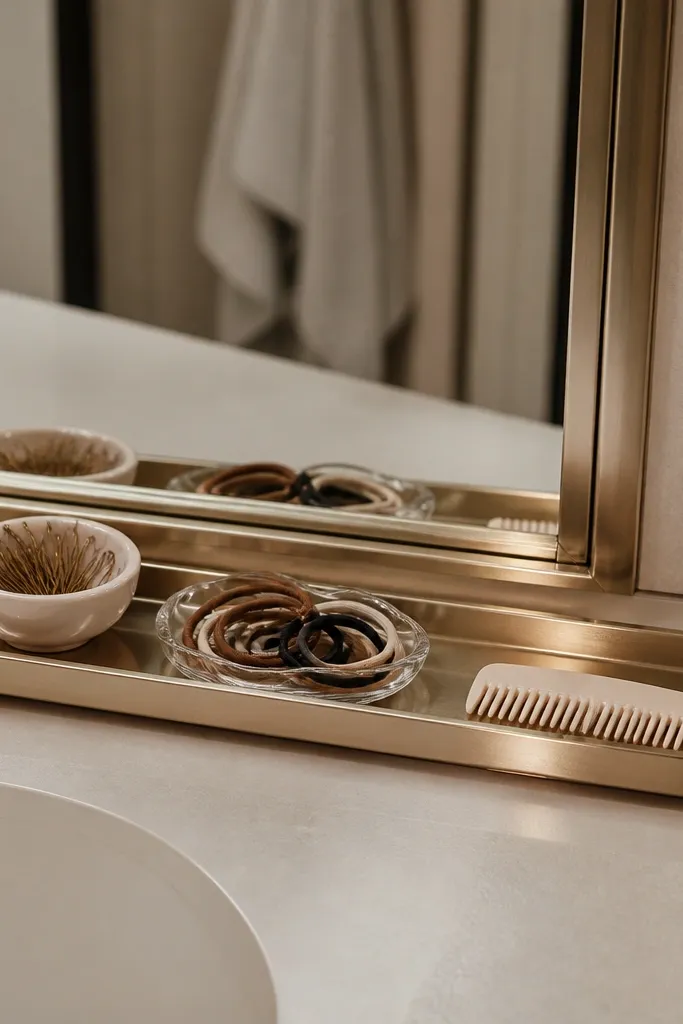
A slim mirror-edge tray makes a huge difference because it controls the “middle of the counter” chaos. People drop hair ties, bobby pins, and small tools right where they stand, so the clean look collapses in that strip. A slim tray fixes it by creating one dedicated home for those items. Choose a tray that’s narrow enough to keep the sink zone open and wide enough to hold items without spilling over. The result is a counter that looks styled every time.
Measure the strip of counter between the mirror line and your daily tray or sink edge. Pick a slim tray with a straight front edge so it looks crisp, not rounded. Add a small cup for bobby pins and hair tools, then keep hair ties in a shallow dish. Keep everything in one row so the tray reads as a clean frame around your daily items.
Editor's noteUse a small brush to sweep bobby pin dust out of the tray corners weekly.
Skip thisAvoid trays that are too deep — they push items into your sink splash zone.
15. Silicone Mat + Matching Bottle Stand for Wipe-Down Clean
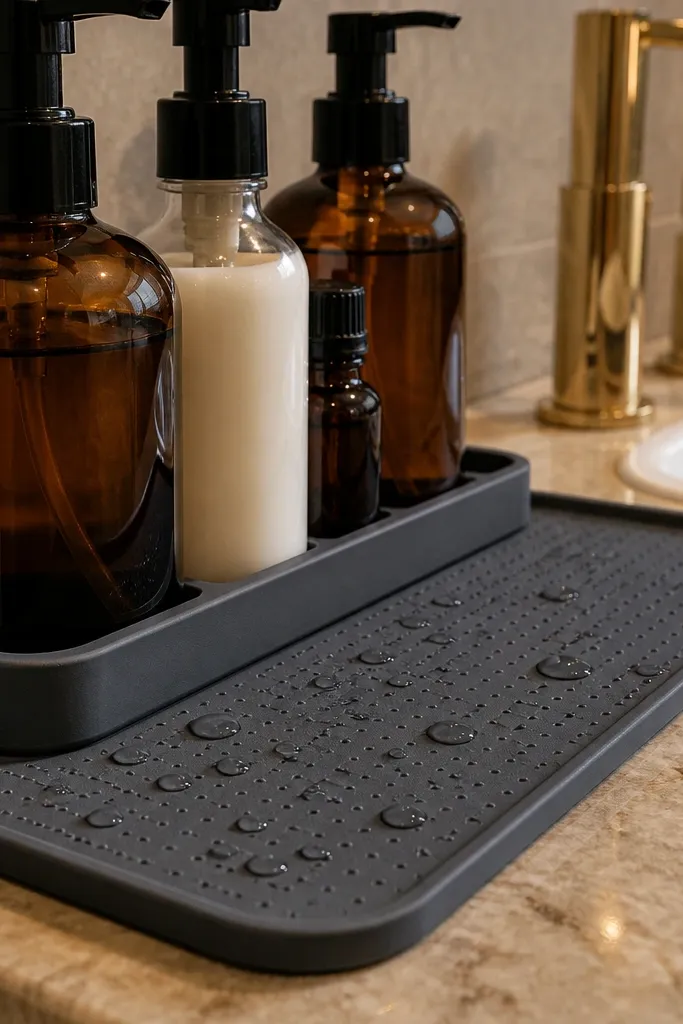
Water spots are the enemy of a high-end look because they create a “dirty” impression even when the counter is clean. A matte silicone mat under your daily cluster absorbs minor drips and makes it easier to wipe down quickly. Pair it with a bottle stand so pumps don’t slide and caps stay aligned. This approach looks intentional because the mat is the base layer for everything, not a random coaster. It’s a strong choice for bathrooms with hard water or lots of splash.
Choose a silicone mat that fits your daily tray footprint or place it as the base layer under a tray. Set the bottle stand on top and align the front edges with your mirror line. Arrange bottles so labels face forward, then wipe the mat dry so it stays crisp-looking. If you use a bar soap dish, place it on a raised spot so water drains onto the mat instead of pooling.
Editor's noteUse a mild soap and warm water to clean silicone; let it dry fully before placing bottles back.
Skip thisAvoid glossy silicone mats — they show grime and streaks more than matte.
16. Two-Color Counter System with Matching Trays
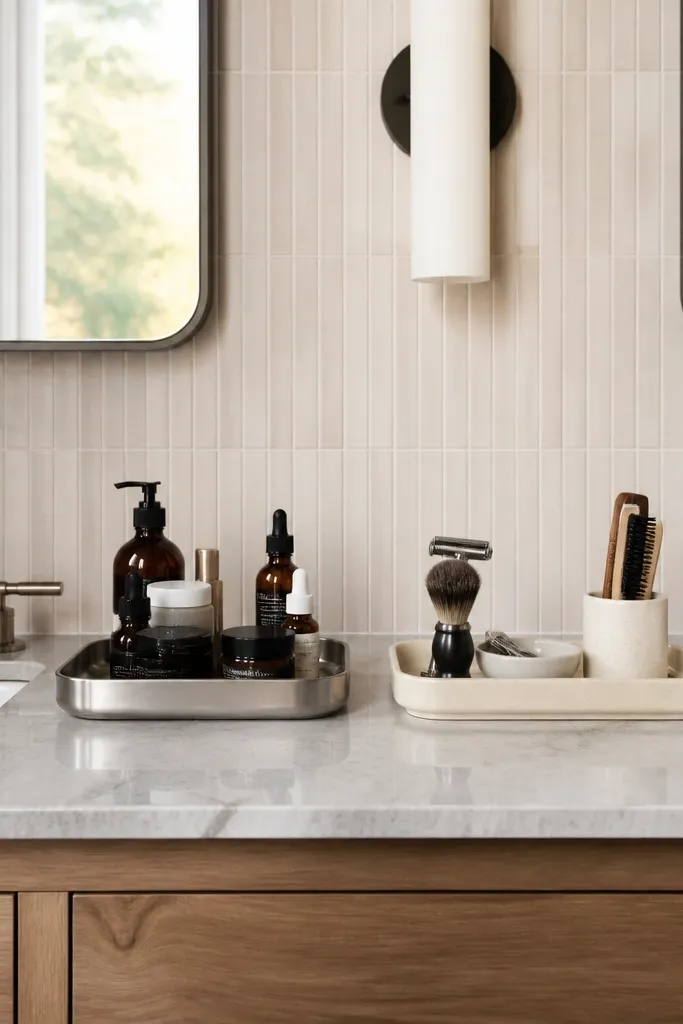
A high-end look comes from repeating materials and color, not from using ten different containers. Build a two-zone system with matching trays: one tray for skincare products and one for grooming tools. Keep each tray in a consistent finish so the counter reads organized from across the room. This is especially effective if you share the bathroom and need separate areas that still look cohesive. Choose colors that match your hardware — black trays for black fixtures, warm beige trays for brass.
Pick two trays with the same finish and similar rim height, even if sizes differ. Place the skincare tray on the side with your mirror reflection line, then place the grooming tray near the other side. Use dividers or small cups inside each tray so products stay upright. Leave one open space on each tray so the arrangement looks breathable, not jammed.
Editor's noteIf you’re mixing product textures, unify them with matte containers — matte hides the chaos of glossy packaging.
Skip thisAvoid mixing tray heights across zones — it makes the whole counter look uneven and “accidental.”
17. Tiered Counter Organizer with Hidden Base Catch
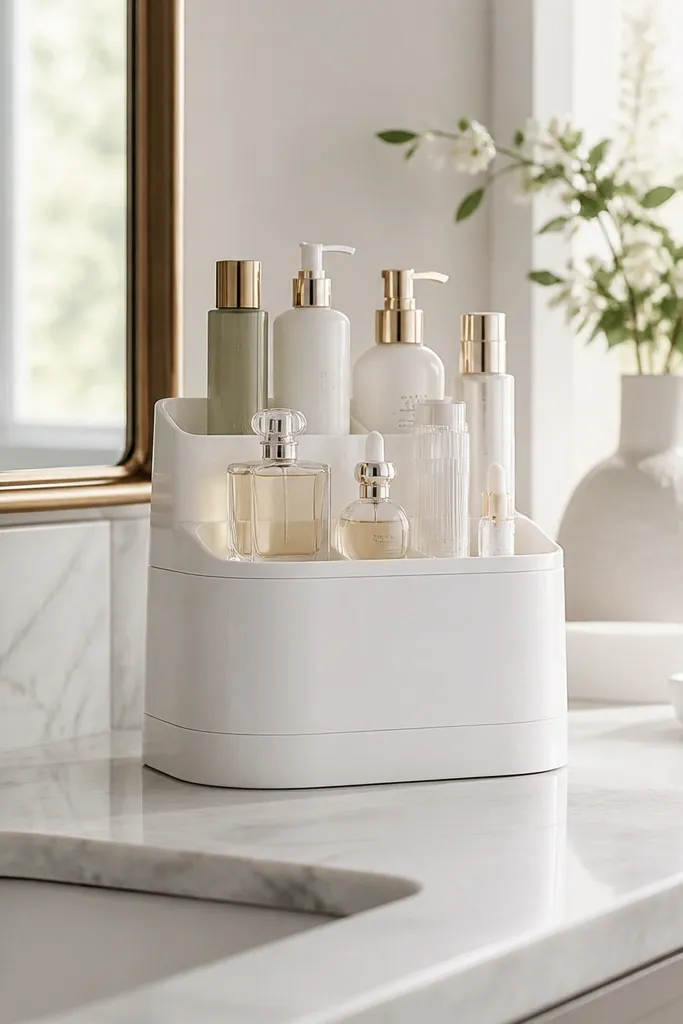
Tiered organizers look luxurious because they create a display shape, but they can get messy if the base is open. Choose a tiered organizer with a closed base or a drawer-style bottom so tiny clutter stays hidden. Put daily bottles on the top tiers and keep backup items in the closed base. This gives you the height and structure of a boutique display while still maintaining a clean, calm surface. It’s great for larger countertops where you want a strong focal point.
Select a tiered organizer with at least two levels and a base that seals or closes to keep small items out of sight. Place it centered on the counter within the “safe zone” away from splash. Arrange tall bottles in the back of the upper tier and short items in front so everything lines up. Store only daily-use items on the tiers; put backups in the closed base so the look stays consistent day after day.
Editor's noteWipe the underside of the tier before filling; crumbs and dust make the organizer look dull.
Skip thisAvoid open-tier bottoms — that’s where clutter collects and the high-end look disappears.
18. Built-In Vanity Rail with Hanging Acrylic Pouches

This is the clean look you get when everything stops living on the counter edge and starts hanging in a straight line. A slim rail under the mirror keeps cotton pads, hair ties, and mini skincare backups visible but controlled — no loose stacks, no random piles. Use clear acrylic pouches so the contents read at a glance, and the hardware stays visually light. The build is straightforward carpentry and basic hardware mounting, and it takes a weekend including paint or stain drying. It fits best on bathrooms with a mirror that has a little dead space under it, or any vanity where the top is always crowded but the wall is underused.
Measure the mirror width and plan a rail that runs just inside the outer edges — leave 1/2 in (12 mm) gap at each end so it doesn’t look squeezed. Cut a 3/4 in (19 mm) x 1 1/2 in (38 mm) wood strip for the rail, then sand to 220 grit and finish with semi-gloss paint or stain + polyurethane. Mark 3 mounting points along the rail (center plus two evenly spaced), predrill pilot holes, and screw into studs or use heavy-duty wall anchors rated for at least 50 lb (22.7 kg). Attach small metal cleats or a continuous slotted track to the underside of the rail, then hang clear acrylic pouches with metal grommets using S-hooks. Install the rail 2 1/2 to 3 in (64 to 76 mm) below the mirror bottom so items don’t hit the mirror frame when you open the pouches.
Editor's noteUse a level and put painter’s tape strips on the wall first — it prevents the rail from creeping off straight after drilling.
Skip thisDon’t mount into drywall alone unless you’re using anchors rated for the load and spacing — sagging makes the whole system look messy.
19. Marble-Effect Contact Paper Drawer Front Inserts for "No-Label" Jars
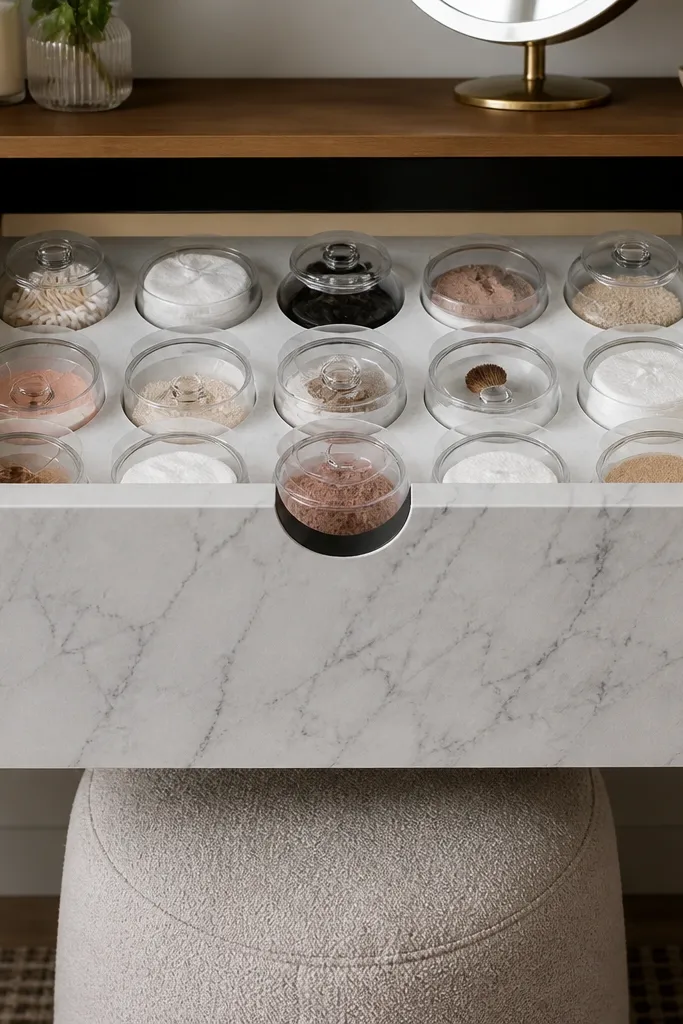
This one cleans up the mess you can’t see until you open the drawer. Instead of labeling everything with permanent labels, you line the drawer front with marble-effect contact paper so the jars look intentional and the drawer still reads neat from the outside. The jars sit inside matching cutouts, so they align in a grid and you stop playing drawer Tetris. It’s a low-skill project that looks high-end because the visual rhythm is consistent and the materials look like they belong together. It works in any vanity with drawers that hold backups, travel sizes, or tools you grab daily.
Remove the drawer and measure the inside width and depth, then decide on a layout — 2 columns of jars looks sharp for most vanities. Choose jars with the same footprint (for example, 4 oz to 6 oz clear glass) and measure their diameters, then transfer those measurements to the drawer liner. Cut contact paper into a front insert panel that covers the drawer front area you can see when the drawer is closed, plus a second sheet for the inside liner. Apply the inside liner first: clean the wood, spray with a light mist of soapy water, squeegee the contact paper flat, then trim edges with a sharp utility knife. Add the jars in the cutout grid and use small foam dots under each jar base to stop sliding and reduce chatter.
Editor's noteWarm the contact paper with a hair dryer before smoothing — it reduces bubbles and helps corners lay flat.
Skip thisDon’t use jars with different heights — even if the drawer looks tidy, mismatched jar tops break the clean grid.
20. Magnet-On-Glass Vanity Organizer for Metal Tools

If your counter is cluttered with metal tools like tweezers, nail clippers, and scissors, this is the cleanest visual fix. Mount a thin glass panel beside or behind the mirror and attach magnets so the tools hang in a straight, vertical line — no countertop footprint at all. The glass keeps the look airy and glossy, and it’s easy to wipe down because everything is flat against the panel. This is a medium DIY because you’re working with glass and mounting hardware, but the result looks like a store-bought vanity accessory. It’s best for bathrooms where you want tools visible but controlled, and where the wall surface can take a secure mount.
Buy pre-cut tempered glass panel with rounded edges, sized to fit your space — a common win is 10 x 14 in (254 x 356 mm). Clean the mounting area and the glass with rubbing alcohol, then mark two mounting points at the top corners using a level. Install a metal mounting rail or two standoff brackets on the wall, then set the glass onto the brackets and tighten evenly. For the tools, use small neodymium magnets with a strong adhesive backing, then place them on the glass in a measured row (start with 1 magnet per tool). Press each magnet firmly for 30 seconds, then test tool weight by gently lifting and releasing — adjust magnet position before the adhesive fully cures.
Editor's noteUse a strip of painter’s tape as a temporary “tool guide” on the glass — it keeps magnet placement straight while you test spacing.
Skip thisDon’t place magnets too low — if tools hang near the sink splash zone, they’ll get wet and look streaky fast.



