
1. Shaker Door Shoe Cabinet with Raised Toe-Kick
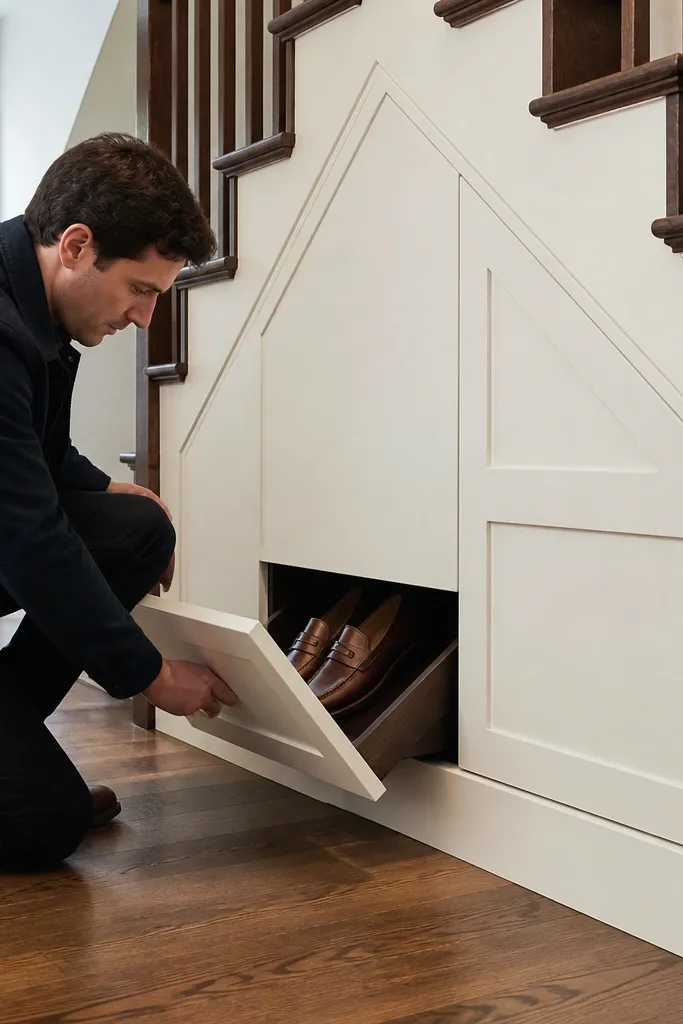
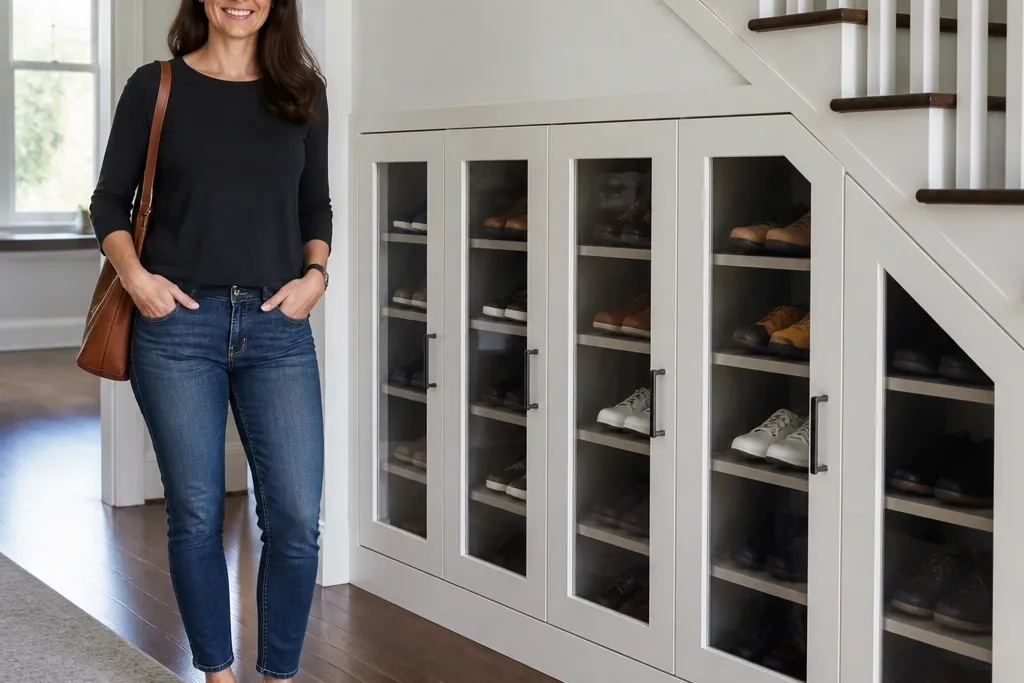
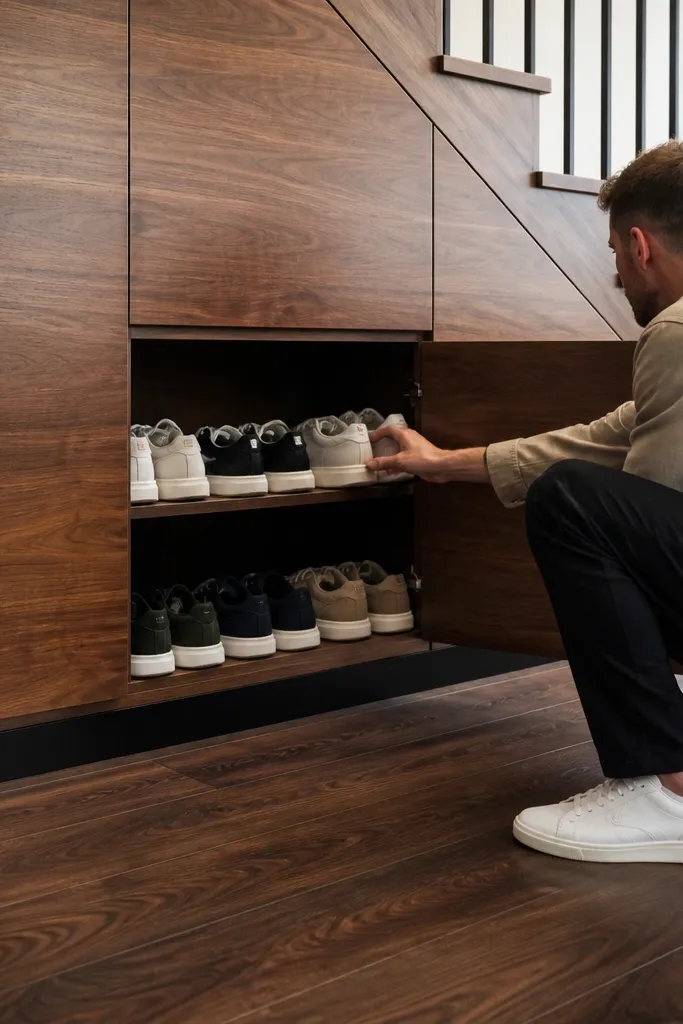
This build makes under-stairs shoe storage look like real built-in furniture, not a storage hack. The raised toe-kick gives you a clean break between cabinet and floor, which makes the whole run look sharper in photos and easier to clean. Use shaker-style doors so the lines match common trim styles, and keep the interior simple with adjustable shelves or fixed cubbies sized to your shoes. For the high-end look, paint the cabinet body and doors in the same sheen, and use a soft-close hinge so the doors close quietly and feel solid. It’s best for entryways and hallways where you want doors to hide daily clutter.
First, build a carcass from 3/4 in plywood or cabinet-grade MDF, sized to the narrowest part under the stairs. Frame the front with 1x2 face-frame strips, then add two or three shoe compartments by installing fixed dividers that match your shoe heights. Next, hang shaker doors on concealed hinges, set a 1 in (2.5 cm) toe-kick clearance, and finish with primer plus a durable cabinet paint. Finally, add a toe-kick panel or trim to cover the gap and set pulls so they sit centered on each door panel.
Editor's noteInstall a magnetic catch or soft-close hinge with a consistent gap so the doors align even if the wall is slightly out of square.
Skip thisSkipping a toe-kick makes the cabinet look stuck-on and collects dust at the base.
2. Flip-Top Bench with Hinged Shoe Trays
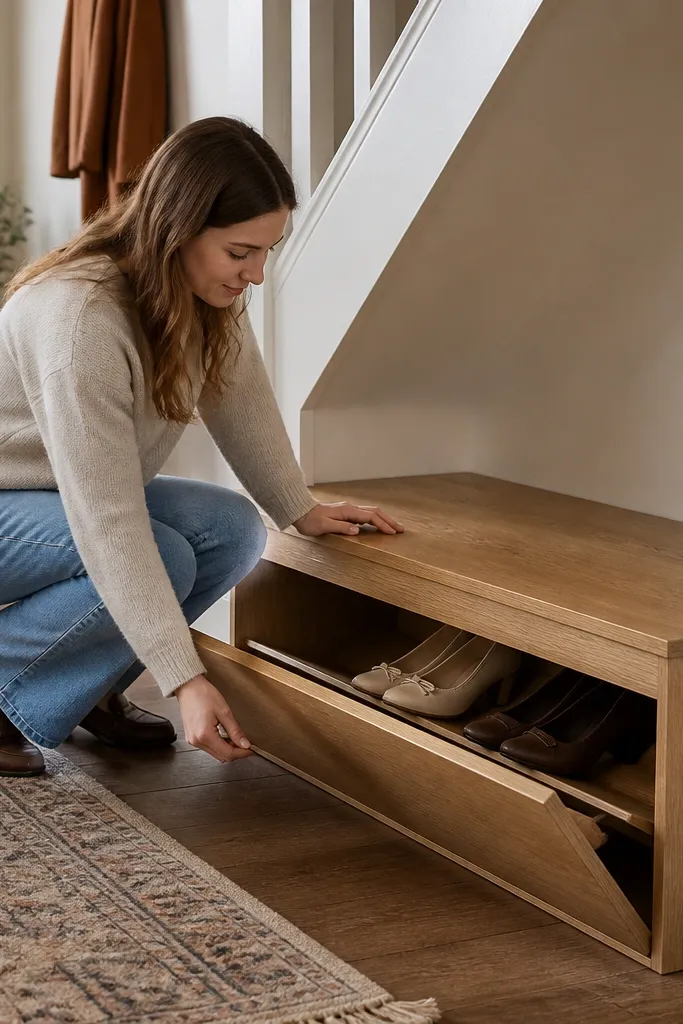
If you want the most satisfying “everything disappears” moment, use a flip-top bench with hinged shoe trays. The bench top reads like seating or a landing shelf, but the underside hides a clean storage system that keeps pairs from lining up visually. Hinged trays are great because shoes sit flat and you can remove one tray to clean or swap seasons. Choose a top finish that matches nearby trim or flooring, like a stain-and-clear top or a paint-matched lid, so it looks intentional. This works best where you need a place to set bags or parcels while still controlling shoe clutter.
Start with a bench frame built from 2x2 or 2x3 lumber, anchored to studs through the face frame. Install a plywood lid panel on piano hinges or strong concealed hinges, then build several hinged trays from 1/2 in plywood with a small back stop lip. Cut each tray slot opening so a pair sits with the toe area aligned and leaves clearance for laces. Mount the trays to the underside of the lid and add soft-close hinges or a supported lid prop. Finish the top with a durable clear coat or cabinet paint, then add weather-resistant rubber feet if the bench sits near a door.
Add a thin felt or rubber gasket under the lid edges so it closes quietly and doesn’t rattle.
Making the trays too shallow — shoes need real clearance so they don’t jam when you flip the lid.
3. Glass-Front Display Nook for One "Good Pair"
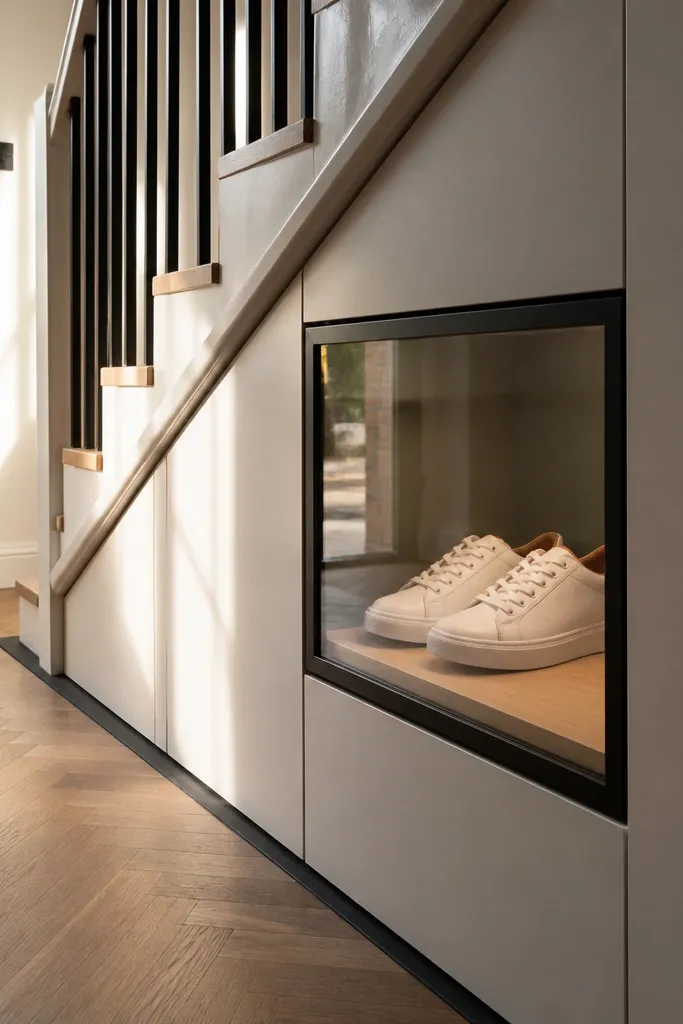
This is for the under-stairs space that you want to look like a design feature. You dedicate one section to “display shoes” — like a neat row of heels, loafers, or clean sneakers — and you hide everything else behind solid doors. The glass front makes the storage look curated without needing open shelving everywhere, and it keeps the visual clutter down because you only display what you want seen. Use tempered glass with a simple metal frame or wood surround, and keep the interior matte so shoes don’t glare in harsh light. It’s a strong option for entry halls where natural light hits the stairs.
Build a carcass section as usual, then separate it into zones: one glass-front zone and one solid-door zone. Install a wood or metal frame for the glass door and use tempered glass sized to fit with a consistent reveal. Inside, add a base panel and a row of adjustable dividers so each shoe sits at the same angle and spacing. Add a small LED puck light on a switch inside the cabinet so the glass looks good without lighting the whole hall. Finish by painting the interior with a matte cabinet paint and sealing the wood edges.
Editor's noteUse a matte interior paint color like warm greige or soft charcoal so leather doesn’t reflect like a mirror.
Skip thisUsing clear plastic or thin doors — it looks cheap and warps the “high-end” feel.
4. Angled Sneaker Cubbies with Brass Pulls
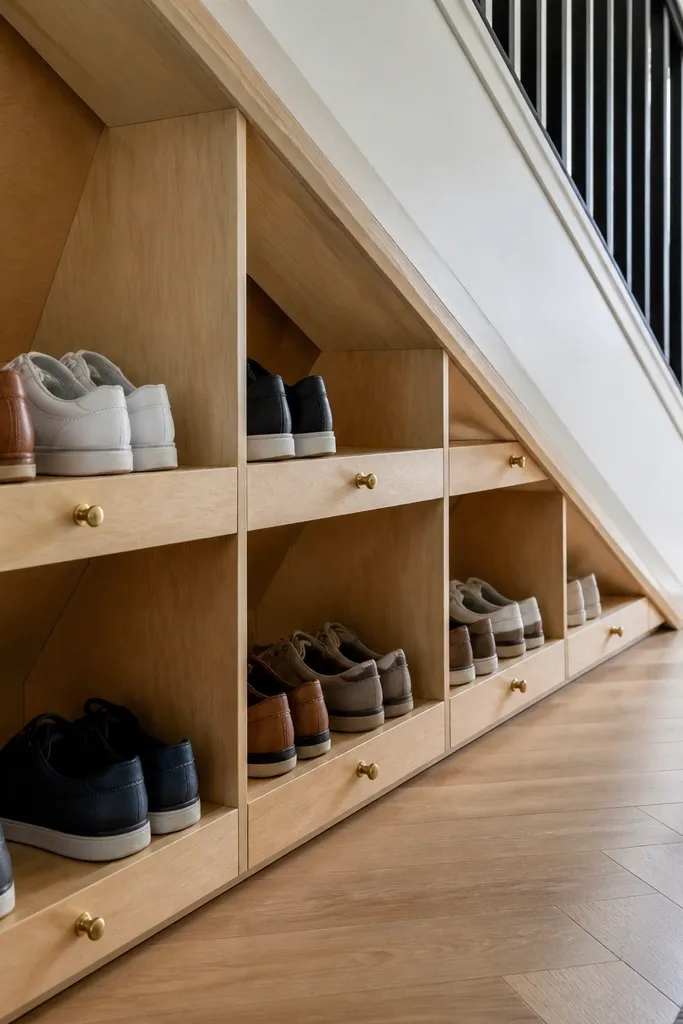
Angled cubbies make shoes easier to see and grab without turning your head into a messy tangle. The angle also makes the storage look like a designed feature — the face lines stay tidy while shoes sit neatly. You can build these as open cubbies with a matching back panel, or add small hinged fronts if you want them hidden. Brass pulls make the whole run feel more expensive, especially against white or warm wood finishes. This is best for sneaker-heavy households where you rotate pairs frequently.
Start by building a grid of cubby frames from 3/4 in plywood, then set each cubby face at an angle of about 15-25 degrees so the shoes tilt toward the opening. Use a fixed divider height that matches your tallest sneaker pair, then add a back stop strip so shoes don’t slide down. Mount the cubby unit to the wall studs and level the top rail first — the angle only looks right if the base is square. Add brass cup pulls or finger pulls aligned to each cubby. Finish by painting the carcass and installing a matching base trim to hide the bottom gap.
Make the back stop removable with screws so you can adjust spacing if your shoe sizes change.
Leaving cubbies perfectly vertical — the shoes disappear visually and clutter comes back fast.
5. Tall Boot Wardrobe with Adjustable Shelf and Side Hooks
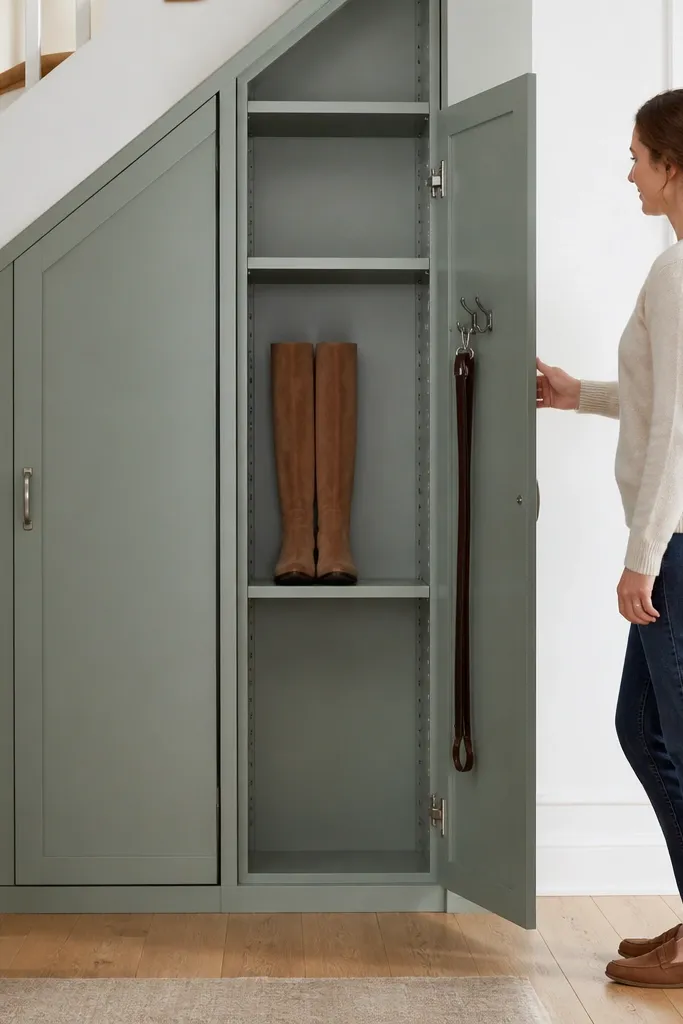
Boot storage is where most under-stairs builds fail visually, because boots are tall and awkward. A tall wardrobe-style cabinet with doors keeps the space clean, and adjustable shelves let you switch between boot heights and smaller shoes. Add side hooks inside for belts or bag straps, so you get more use out of the cabinet without adding more clutter. The look stays high-end when you treat it like closet cabinetry: matching doors, consistent reveal lines, and hardware that doesn’t look random. This works for entryways and mudrooms where boots are part of the daily routine.
Measure for the tallest boot you own and plan for at least 1 in clearance at the top so the boot doesn’t press the door. Build a tall carcass with a base panel lifted 1 in off the floor, then install a fixed vertical divider if you want two boot zones. Add adjustable shelves using a drilled track system or shelf pins, spaced to match your boot shaft heights. Install door hardware with concealed hinges and set a consistent reveal around each door. Finish with primer and paint or a matching stain topcoat, then add a small vent slot on the back panel if you store wet boots.
Editor's noteAdd a small rear vent gap and a charcoal deodorizer cup so the cabinet doesn’t smell like damp leather.
Skip thisStoring boots directly against unfinished wood — it stains and scuffs quickly.
6. Slim Drawer Bank for Laces, Insoles, and Everyday Shoes
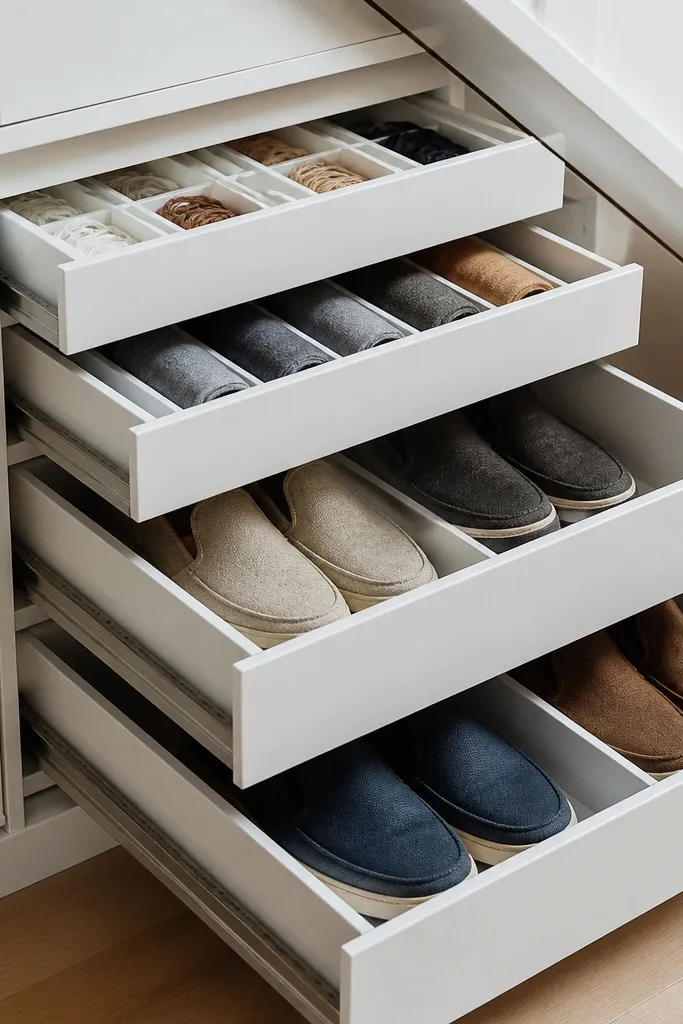
A drawer bank is the fastest way to cut visual clutter because drawers hide the mess. Use shallow drawers for laces, socks, insoles, and shoe care, and medium drawers for slip-on shoes you grab daily. The front looks clean because you get aligned rails and consistent drawer sizes, which reads high-end even in a narrow under-stairs run. It also prevents the common under-stairs problem: shoes pile up behind doors and you end up searching. This is ideal for small entryways where you want function and a furniture look.
Build a drawer-ready carcass with 3/4 in sides and a level mounting rail. Install drawer slides rated for the weight you expect and mount them at a consistent height so the drawer fronts align. Create drawer boxes from 1/2 in plywood with a 3/4 in face frame overlay so the fronts sit flush with the cabinet. Plan drawer depths around 10-12 in for slip-ons and 6-8 in for care items. Finish by painting drawer faces and adding slim metal pulls centered on each drawer.
Editor's noteUse removable drawer organizers (thin bins) so small items don’t spread and ruin the clean look.
Skip thisOverstuffing drawers — if drawers are packed, you’ll stop using them and clutter returns.
7. Open Cubbies with Fabric Dust Covers on a Track
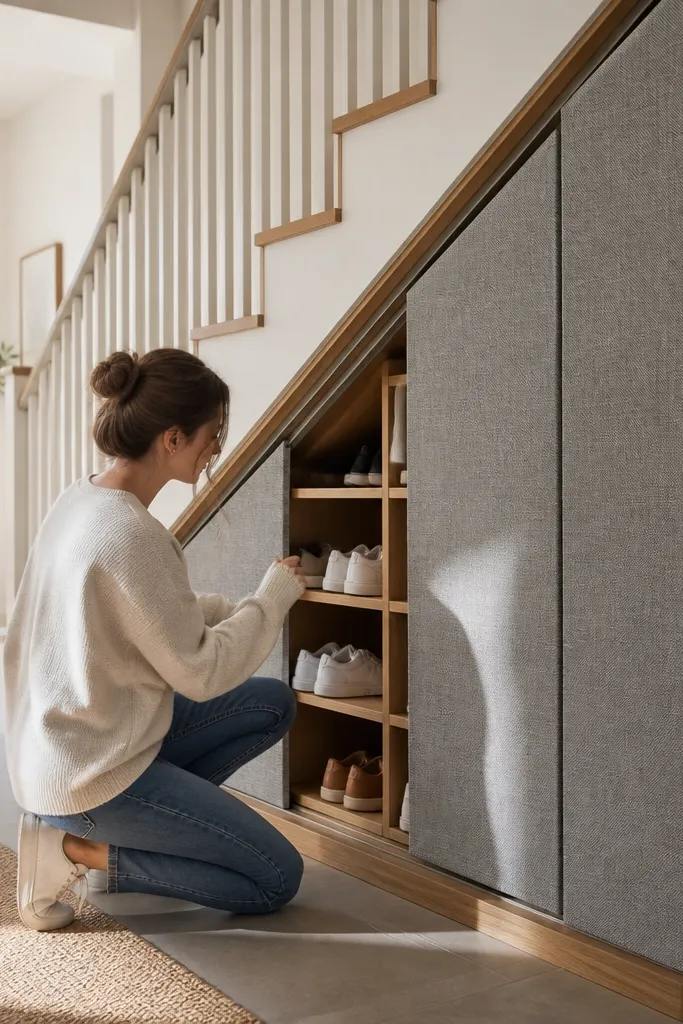
If you like the easy access of open cubbies but hate the dust and visual mess, add fabric dust covers on a simple track. The storage stays open and quick when you need it, then the covers slide closed so the space looks tidy. Fabric reads softer and more designer than rigid doors, especially if you choose a textured neutral like linen-look canvas. This is a great compromise for renters or anyone who wants a high-end look without full door hinges. It’s best when you store a few pairs you rotate often and you want them hidden between uses.
Install a cubby frame as open compartments, with dividers so each shoe pair sits in its own bay. Add a top and bottom track rail using small metal brackets screwed into the frame. Hang the fabric panels using Velcro strips or curtain rings so each panel covers one or two cubbies cleanly. Choose a fabric thick enough to hold shape and keep light from showing shoe silhouettes when closed. Finish the frame with paint, then test the covers for smooth travel before securing the bottom stops.
Editor's noteUse snap-on magnetic catches at the ends so the fabric stops exactly aligned each time.
Skip thisUsing thin sheers — they won’t block dust and they still show a messy silhouette.
8. Wicker Basket Inset with Painted Frame
This design is one of the prettiest ways to hide shoes without heavy doors. Wicker baskets look warm and intentional, and the painted frame makes it feel like built-in cabinetry. Each basket holds a pair or two, plus it’s easy to pull out when you need cleaning or a seasonal swap. The basket texture hides scuffs better than smooth plastic tubs, so the storage looks good longer. Put this in a hallway or entry space where you want a cozy, high-end feel.
Build a cubby frame with 3/4 in plywood or MDF and leave openings sized to your baskets with about 1/2 in clearance for easy pull-out. Install a face frame front so the painted edges look crisp. Line the baskets with a washable fabric liner if you want extra odor control. Paint the cabinet frame in semi-gloss or satin, then seal it so wicker doesn’t shed onto the surface. Finally, add a small stop strip at the back so baskets don’t slide out when you pull one forward.
Choose baskets with flat bottoms and tight weaving so shoes sit stable and don’t tip forward.
Baskets that are too tall — they reduce usable height and you’ll end up with wasted space.
9. Mirrored Door Cabinet for Space-Boosted Entry
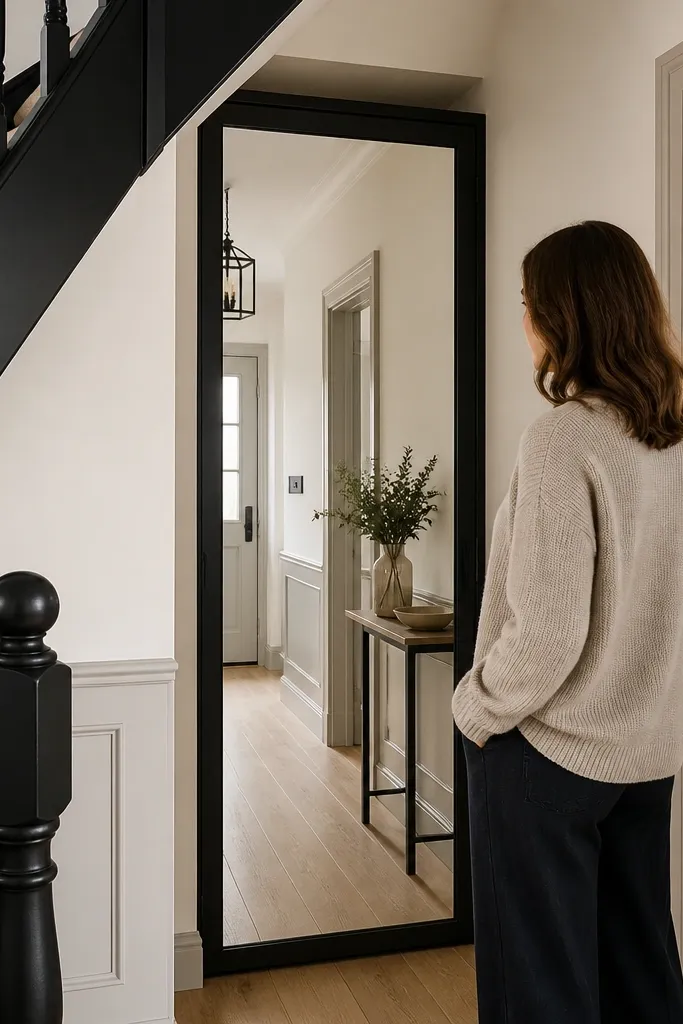
A mirrored door cabinet turns under-stairs shoe storage into something that brightens the entry instead of shrinking it. The mirror hides the shoes when closed and makes the area feel bigger and cleaner, which helps with the clutter problem because your eye stops seeing the storage. Use a cabinet frame with a consistent reveal and install safety-backed mirror so it feels solid. This is high-end-looking in a small hall because the mirror reflects light and makes the cabinet feel like a wall feature. It works best when the under-stairs area is visible from the doorway.
Build a standard carcass and face frame, then order mirror panels sized to fit the door openings with a small gap for expansion. Use safety mirror backing and install with a mirror adhesive rated for glass panels. Hang doors on concealed hinges and keep the mirror seam lines aligned across the door width. Inside, use dividers to create shoe slots and a removable base panel for cleaning. Finish the frame and edges with primer and paint so the mirror borders look crisp.
Add a black or charcoal backing behind the mirror edge to hide any small gaps or adhesive lines.
Mirrors without safety backing — they feel risky and look less finished.
10. Under-Stairs Shoe Wall with Slatted Fronts
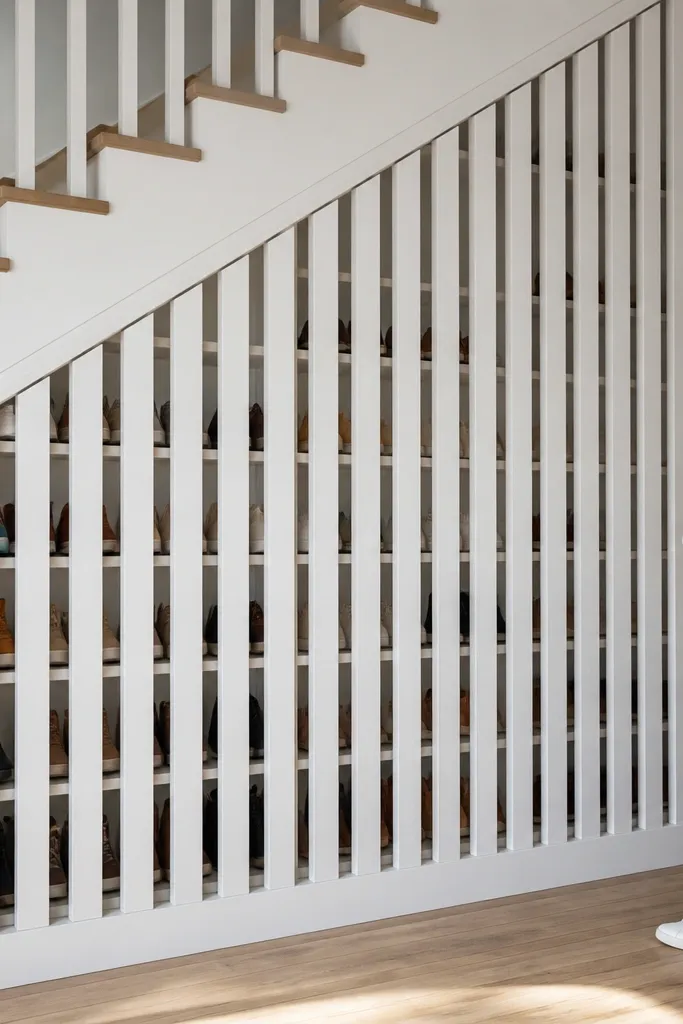
Slatted fronts give you airflow for shoes while still hiding visual clutter. The look is clean and architectural, and it reads high-end because the slats create a pattern instead of random doors. You can build it as a full-width shoe wall with multiple compartments behind each slatted panel. Add a matching base trim and you get a built-in look even in an odd under-stairs shape. This is great for sneaker and athletic shoe storage where ventilation matters.
Frame the under-stairs storage compartments first using 3/4 in plywood and install fixed dividers at shoe-pair widths. Cover the front with slatted panels built from thin plywood slats or solid wood strips, spaced 3/4 in apart for airflow. Mount the slatted panels on hidden hinges or removable clips so you can access shoes. Keep the slat length consistent and square to the face frame so the pattern looks intentional. Finish with paint or stain and clear topcoat, then add a toe-kick for a clean base line.
Editor's noteUse a consistent slat width across the whole run; small changes show up instantly in photos.
Skip thisWide slats that let shoes silhouette through — you lose the “hidden clutter” effect.
11. Riser Shelves for Airflow and Cleaner Lines
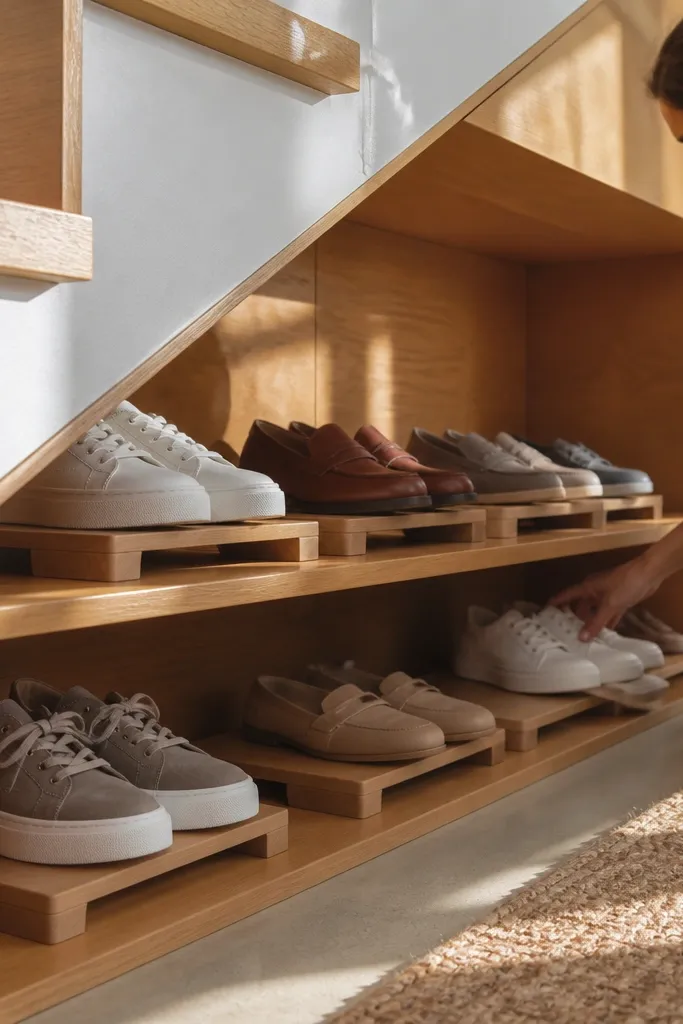
Riser shelves solve two issues at once: shoes stop looking piled, and air can move under them. Instead of one flat shelf, each slot has a small riser so you can store pairs with space between and keep the front line tidy. It looks good because the shoes sit at a consistent height and you don’t see messy soles stacked on each other. This design works when you want open storage but still want it to look controlled. It’s ideal for houses with a shoe rotation system and a cleaning routine.
Build a shelf carcass with fixed side panels and a consistent face frame. Install riser blocks under each shelf section, spacing them so shoe soles sit with a small gap from the surface beneath. Use dividers to separate left and right pairs so the line stays straight. Finish the shelves with a scuff-resistant paint or hard-wearing laminate so the surface doesn’t show scratches. Add a matching top rail and toe-kick trim to keep the whole run looking furniture-grade.
Use a matte finish; glossy shelves show every scuff and smear from everyday use.
Risers that are too tall — you waste height and end up with fewer shoe slots.
12. Hidden Pull-Out Shoe Tower Behind a Pantry Door
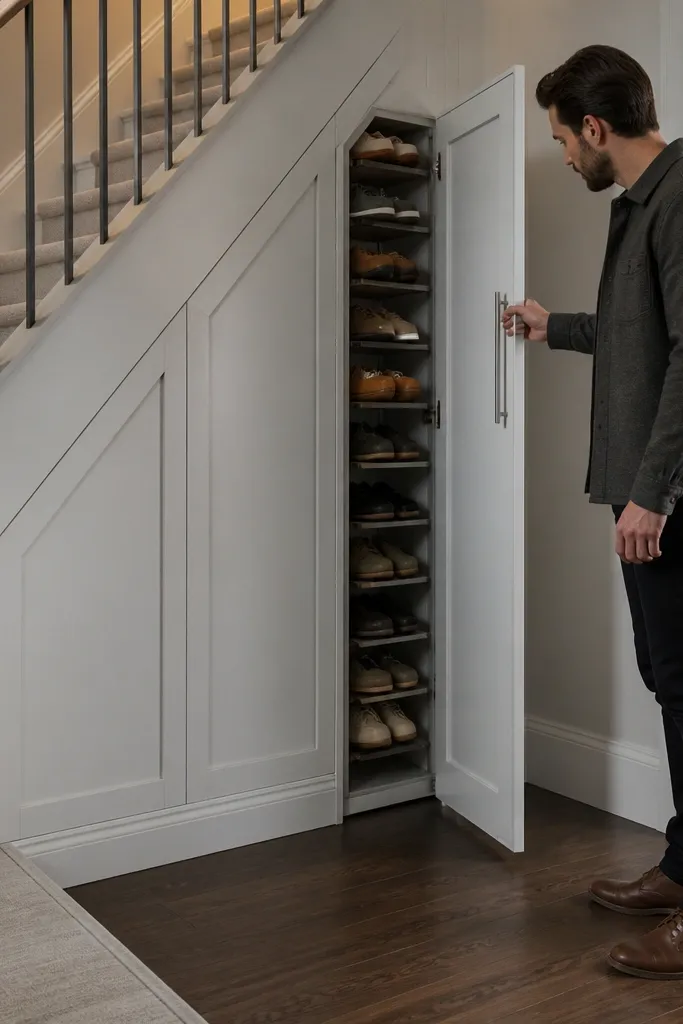
A pull-out shoe tower is one of the cleanest ways to store shoes in a narrow under-stairs pocket. When the door is closed, everything disappears into a flat, high-end cabinet face. When you open it, the tower gives you full visibility and you can grab pairs without digging. This is especially good for small spaces where you can’t fit wide drawer banks. Choose a classic finish and hardware so the outer look matches the rest of your trim.
Install a tall cabinet opening with a face frame and a door sized to cover the pull-out tower. Use a metal pull-out shoe rack system or build your own with side rails and fixed wire shelves, but keep it smooth on the slide. Anchor the rails into studs and add a bottom support so the unit doesn’t sag when loaded. Cut shoe shelves to match your pair sizes and add a stop bumper at the bottom. Finish by installing the door, aligning the reveal, and sealing the cabinet interior with paint or a durable liner.
Editor's noteAdd a soft-close door hinge so the cabinet doesn’t slam and shake the tower.
Skip thisOverloading wire shelves — if the rack flexes, shoes fall and the system stops being worth it.
13. Wallpapered Back Panel with Light Wood Shoe Trays
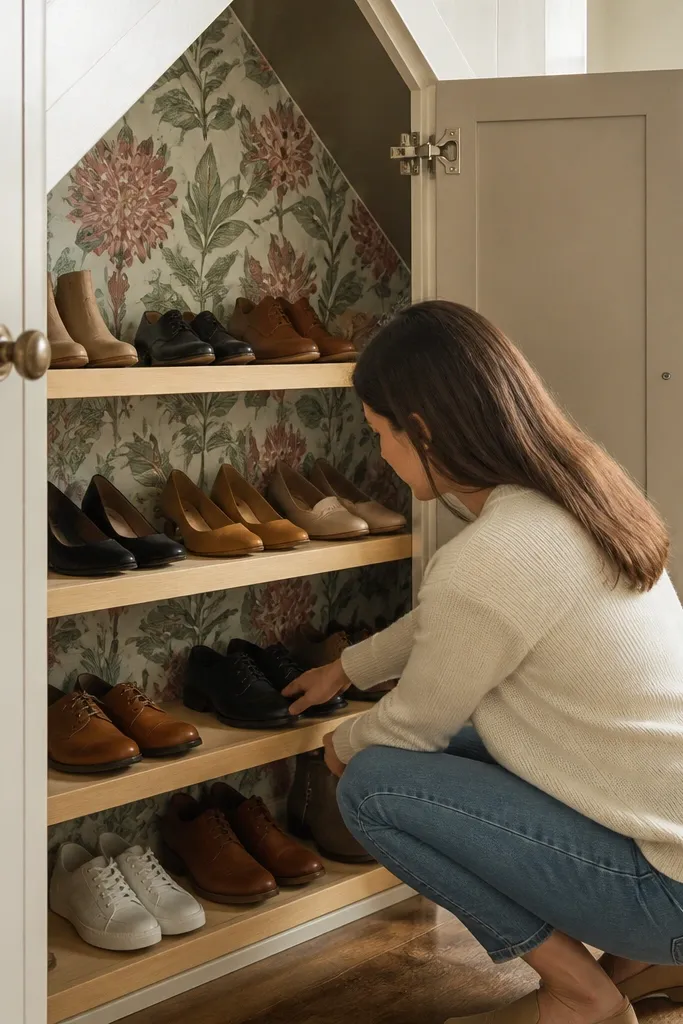
This is the “pretty but practical” option. You keep the storage behind doors or partial fronts, then add a statement wallpaper panel on the back so the inside feels designed when you open it. Light wood trays keep shoes from sliding and make the interior look warm instead of institutional. The clutter control comes from enclosed storage, while the aesthetic comes from the pattern you only see when you access it. It’s a great choice for a landing under stairs where you can add one bold design without committing the whole hallway to it.
Build your shoe storage carcass and decide where the back panel sits — behind the dividers so it’s visible. Paint or prime the interior surfaces first, then apply wallpaper to a flat panel that fits the back opening. Seal the wallpaper with a clear matte sealer so it wipes clean. Install light wood trays or shelf platforms inside each compartment to keep shoes stable. Finish by adding doors or partial fronts with consistent reveals and install hardware that matches nearby finishes.
Editor's noteUse wallpaper on a removable back panel so you can replace it if you change your mind later.
Skip thisWallpaper directly on rough MDF edges — it peels at seams and looks messy fast.
14. Cabinet with Fabric Lined Drawer Pull-Out for Boots
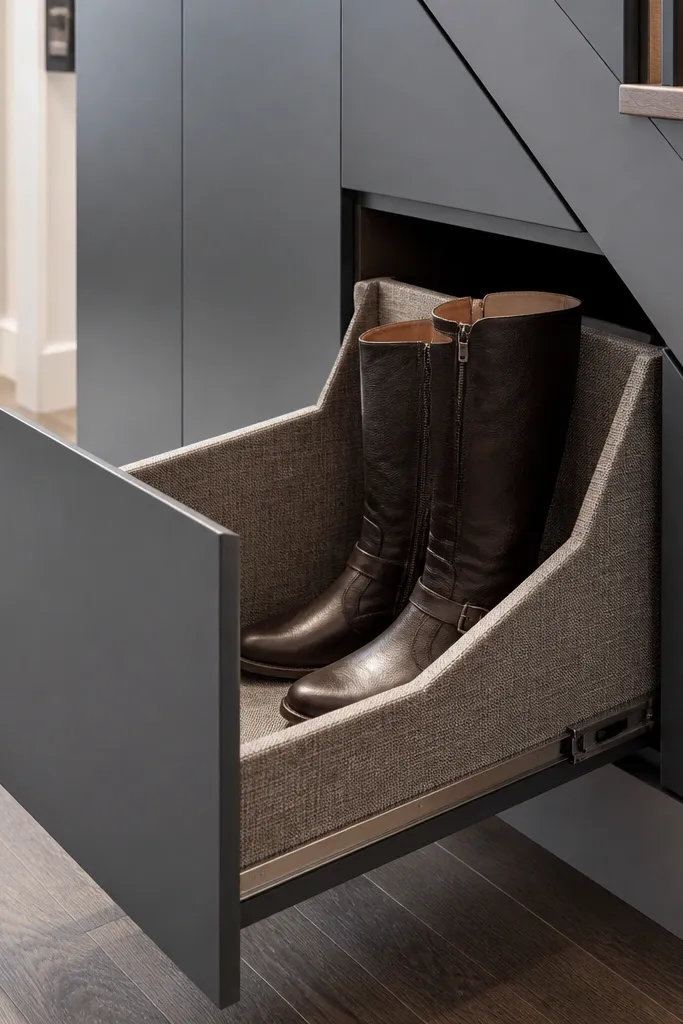
This one makes boots look neat because the boots sit in a shaped drawer with soft lining instead of hard shelving. Fabric lining reduces scuffs and keeps the boots from sliding when you open the drawer. The drawer front also hides the bulky silhouette that usually makes under-stairs storage look chaotic. Add a slim shelf above for smaller shoes, and the whole run looks balanced. This build is best for a mudroom or entry where boots are the main shoe type and you want a clean, furniture-like look.
Build a tall carcass with a drawer opening and install heavy-duty drawer slides anchored to studs. Make the drawer box from 3/4 in plywood sides and a 1/2 in base panel, then add a raised side rail to keep boots from tipping. Cut a fabric liner panel for the base and sides, and staple it to a removable backing board so it’s easy to replace. Add dividers inside the drawer so you keep one boot per side and stop the “pile” look. Finish the drawer front with paint and add a handle centered vertically for a clean line.
Editor's noteUse a removable liner board so you can vacuum and refresh it without rebuilding the drawer.
Skip thisSkipping dividers — boots will slump and the drawer will look messy again quickly.
15. Stair Stringer Side Storage with Slim Tie and Shoe Compartments
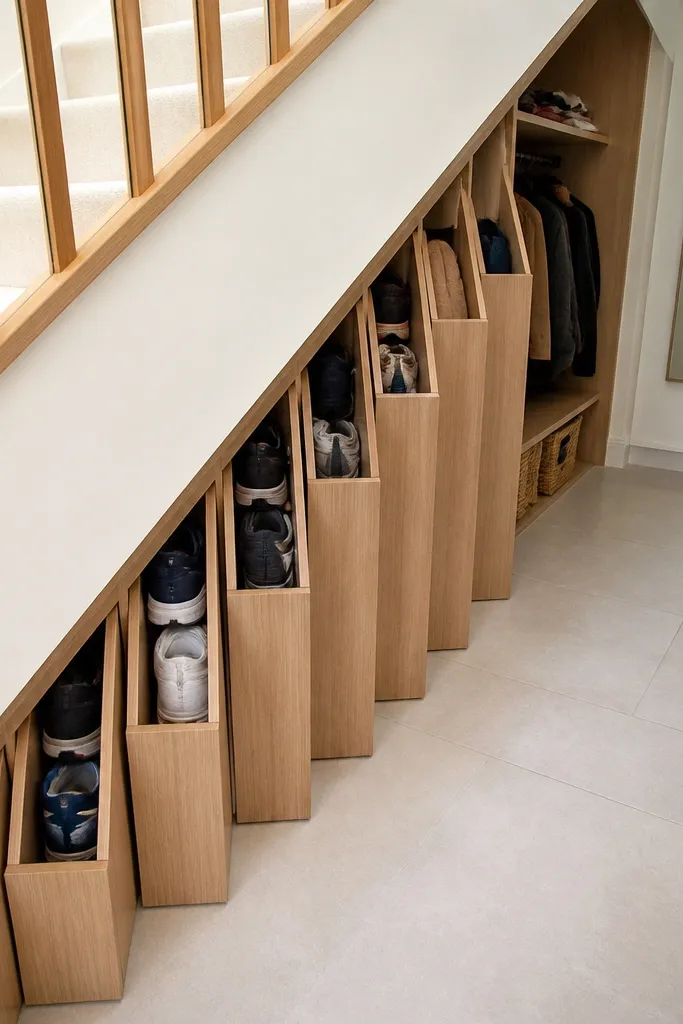
If your under-stairs space is awkwardly narrow because the stair stringer takes up room, you still can get high-end storage by going slim and vertical. This design uses the side space for shoe tops and accessories, then keeps the main under-stair bay for pairs. The look is clean because the compartments line up with the stair geometry and share the same face frame. Add slim doors or a slatted front for airflow, and it stops the “tucked-in chaos” look that narrow spaces create. It’s perfect for hallways where the under-stairs area is visible from multiple angles.
Measure the side pocket width at the narrowest point and build slim frames from 3/2? Actually, use 3/4 in plywood for the sides so it stays rigid and doesn’t bow. Install a face frame that matches the main storage face, then add dividers spaced for your shoe types — 6-8 in for small pairs and 10-12 in for larger sneakers. Use slim doors with concealed hinges if you want full hiding, or slatted panels if ventilation matters. Anchor the unit to studs and add a base trim to cover any floor gaps. Finish with paint or stain so the side storage matches the main built-in run.
Editor's noteKeep hardware aligned with the main cabinet hardware so the whole stair run reads like one piece.
Skip thisTrying to fit deep shelves into narrow pockets — you’ll lose access and the clutter returns.
16. Built-In Boot Racks with Leather-Friendly Pull Handles
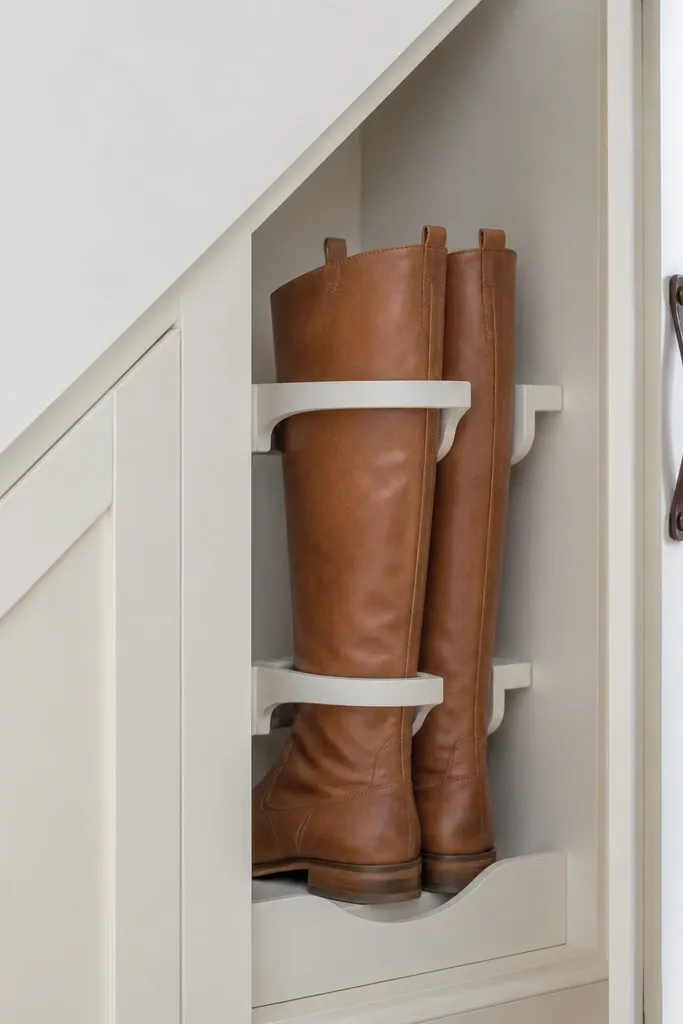
This is a boot-first system that keeps shafts supported without crushing. Behind a cabinet door, you install boot racks that hold each boot by the shaft with a gentle curve, so the boots keep their shape and you don’t end up with collapsed tops. The pull handles make it easy to grab a pair without yanking straps or rubbing leather against wood edges. The look stays high-end because you’re not showing a tangle of boots — you’re showing a flat door face with neat interior spacing. Great for families with tall boots and a door-facing entry where clutter is visible.
Build the cabinet carcass and install a door with concealed hinges and a consistent reveal. Inside, mount boot rack supports using screws into back rails, leaving enough clearance for the boot shaft without bending. Add a bottom shelf that lifts off the floor by 1 in and includes a small ventilation gap in the back panel. Install pull handles on the rack supports so you can slide the boot forward slightly for access. Finish by sealing the wood and using a soft rubber edge guard where the boot may contact the rack.
Editor's noteUse rubber edge guards on contact points — they stop scuffs and keep the interior looking new.
Skip thisRacks that clamp too hard — they crease shafts and ruin the look of boots over time.
17. Corner Under-Stairs Shoe Nook with Rounded Face Frame
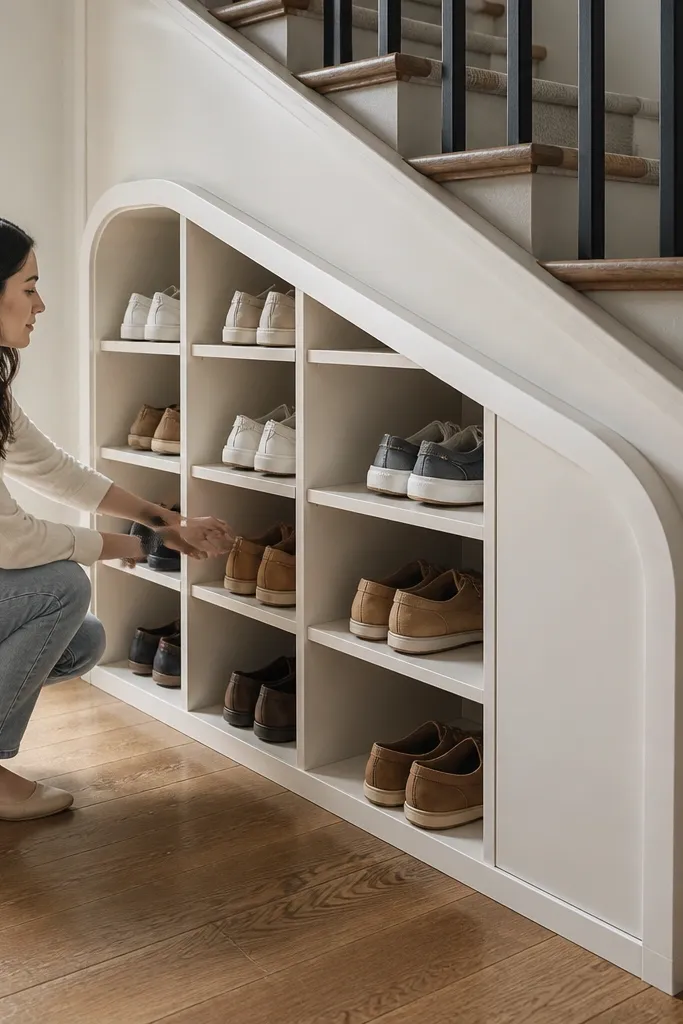
Corner under-stairs areas look messy when the face frame is square and the interior is blocked by awkward angles. A rounded face frame softens the geometry and makes the whole storage feel custom, not patched in. Inside, keep cubbies aligned to your shoe sizes so the clutter doesn’t reappear as uneven piles. Rounded edges also hide minor wall bumps and photo angles that make corners look rough. This is ideal for staircases with a visible corner pocket where you want the storage to look like design, not repair.
Build your carcass to fit the corner pocket and then create a face frame using mitered curved strips or a pre-made radius trim profile. Install the face frame to studs and shim to keep the reveal consistent. Add dividers inside to create equal-width bays for each shoe pair. Use a toe-kick base trim that follows the curve so the bottom line stays clean. Finish with paint and smooth caulk lines so the rounded edges look crisp.
Use flexible caulk along the curve, not hard filler, so tiny wall movement doesn’t crack the finish.
Trying to force flat trim around a corner without shimming — gaps show immediately.
18. Two-Tier Shoe Wall with Swing-Out Side Panels
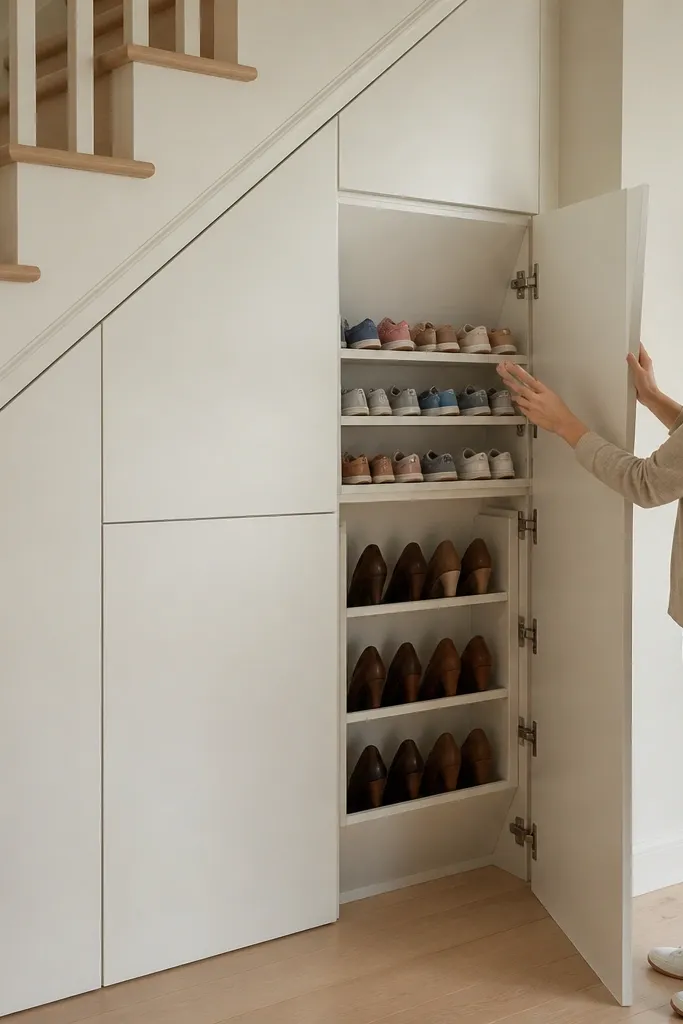
Swing-out side panels keep the front looking tidy while letting you access shoes without crouching. This layout uses a two-tier interior so you store most pairs in the lower section and reserve the upper section for smaller shoes or rotation. The aesthetic comes from the clean front face and the fact that side panels open like a cabinet, not like random doors. It’s a smart choice when your under-stairs depth is limited and you need easy access to the back row. Great for busy entries where people grab shoes fast.
Build the main carcass and install internal dividers for two levels, keeping lower slots about 10.5 in tall and upper slots slightly lower. Fit swing-out side panels on hinge brackets so they open outward and clear the shoe area. Add stops so panels don’t swing too far and hit the wall trim. Install a toe-kick and front face trim to hide the underside and wiring or gaps. Finish with paint and align pulls so both panels feel part of one set.
Editor's noteAdd a felt bumper on the side panels so they close softly and don’t chip paint at the edges.
Skip thisHinges mounted too shallow — panels sag and the opening becomes awkward.
19. Ladder-Style Shelf with Hidden Bottom Drawer
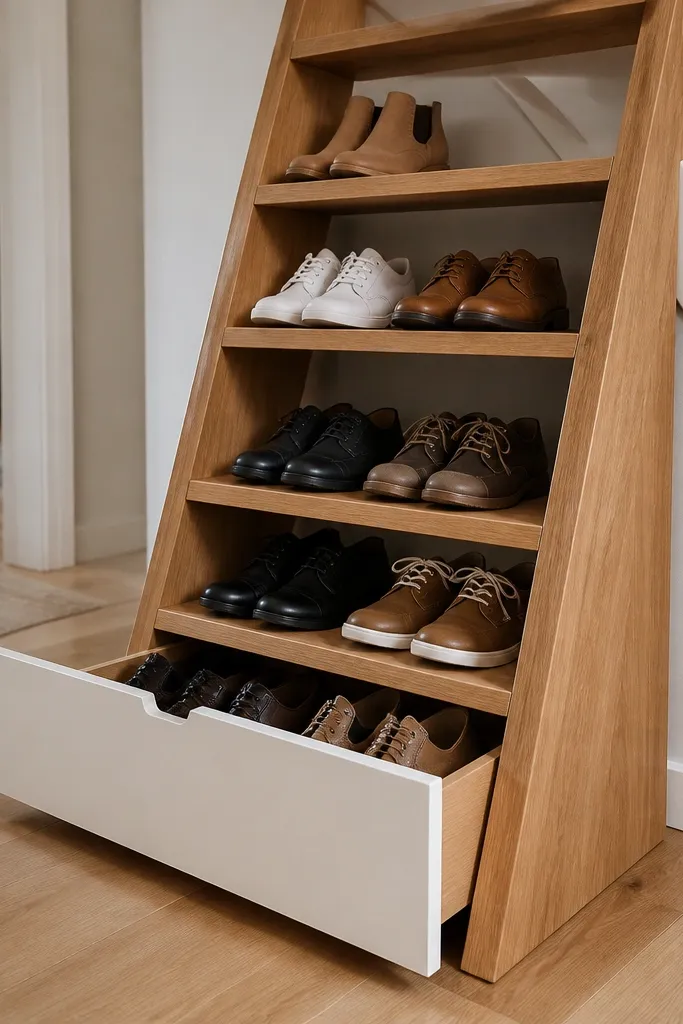
A ladder-style shelf looks airy and modern, but the trick is hiding the clutter with a bottom drawer. You display the shoes that look good (clean pairs) on the open ladder rungs, and you tuck the rest into a concealed drawer so the space stays calm. This design works visually because the ladder lines lead the eye upward, and the drawer adds one clean closed zone for mess. Use a consistent finish and avoid mixing hardware styles. Best for stair landings where the under-stairs storage is visible and you want it to look like furniture.
Frame the ladder shelf supports from 3/4 in plywood and install rungs spaced for shoe widths, usually 8-10 in between vertical supports. Mount the ladder unit to studs and add a face frame to hide the underside. Build a drawer below with slides mounted to the carcass sides, and make the drawer front flush with the face frame. Finish the open rungs with a sealed paint or clear coat, and line the drawer with wipeable fabric or thin vinyl. Add a pull that matches the rest of your hardware.
Editor's noteUse a matte finish on the open rungs so dust doesn’t look like a gray film in daylight.
Skip thisLeaving the drawer gap too visible — it ruins the clean, high-end look.
20. Under-Stairs Shoe Ledge with Removable Catch Trays
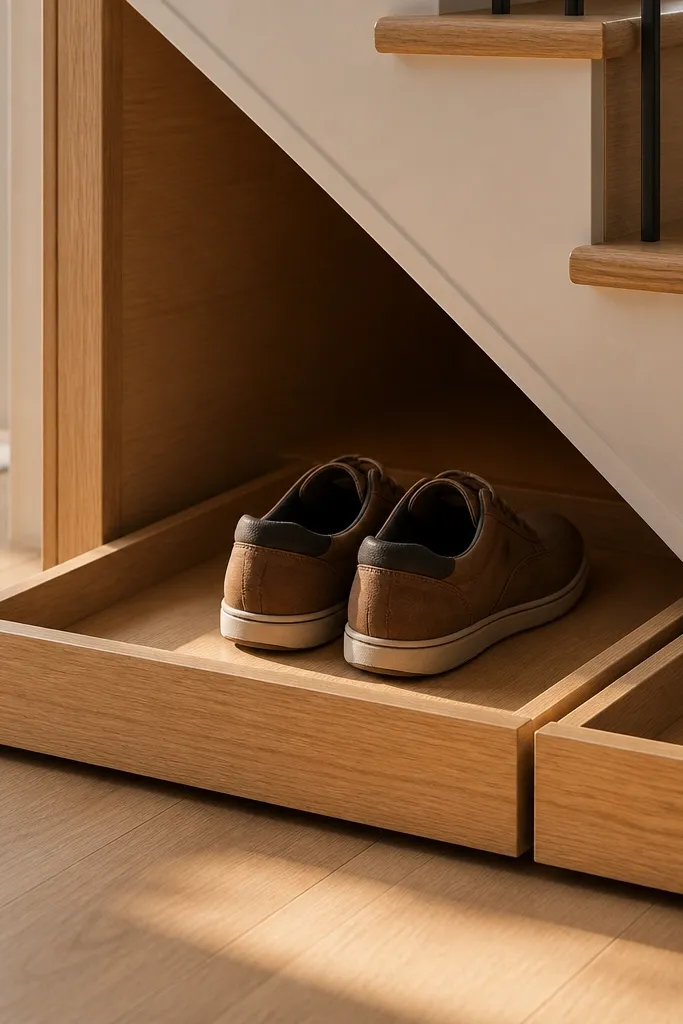
This is a practical, good-looking system for people who set shoes down quickly and then forget about them. The ledge gives you a clean front line, and removable catch trays keep shoes from sliding and keep the floor area tidy. The high-end look comes from the tray edges aligning with the face frame, so the storage looks designed even though it’s simple. Use a wipeable finish on trays and a sealed cabinet body so scuffs don’t show. Works best for daily-use shoes near an entry door.
Build a ledge carcass with a face frame and install a shelf panel at the height of comfortable shoe placement, usually around 12-14 in from the floor. Create catch trays from 1/2 in plywood with a thin lip at the back so shoes don’t roll forward. Make each tray removable by using small runners or a simple lip-and-slot fit at the sides. Seal the tray surface with a durable topcoat and line with a non-slip mat if needed. Finish the face frame and add a small trim piece at the bottom to cover the under-ledge gap.
Editor's noteAdd a non-slip mat inside the trays so shoes don’t migrate and create a messy pile.
Skip thisTrays without a back lip — shoes slide and the ledge becomes clutter again.



