
1. 48-Inch Tall Panel Grid With a Crown-Top Rail
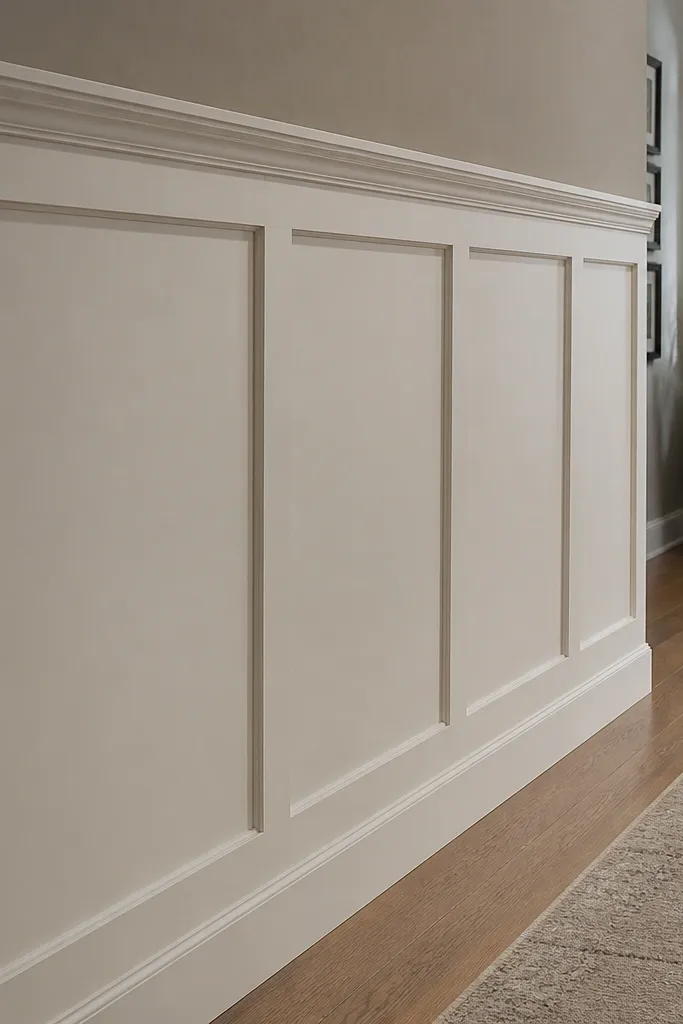
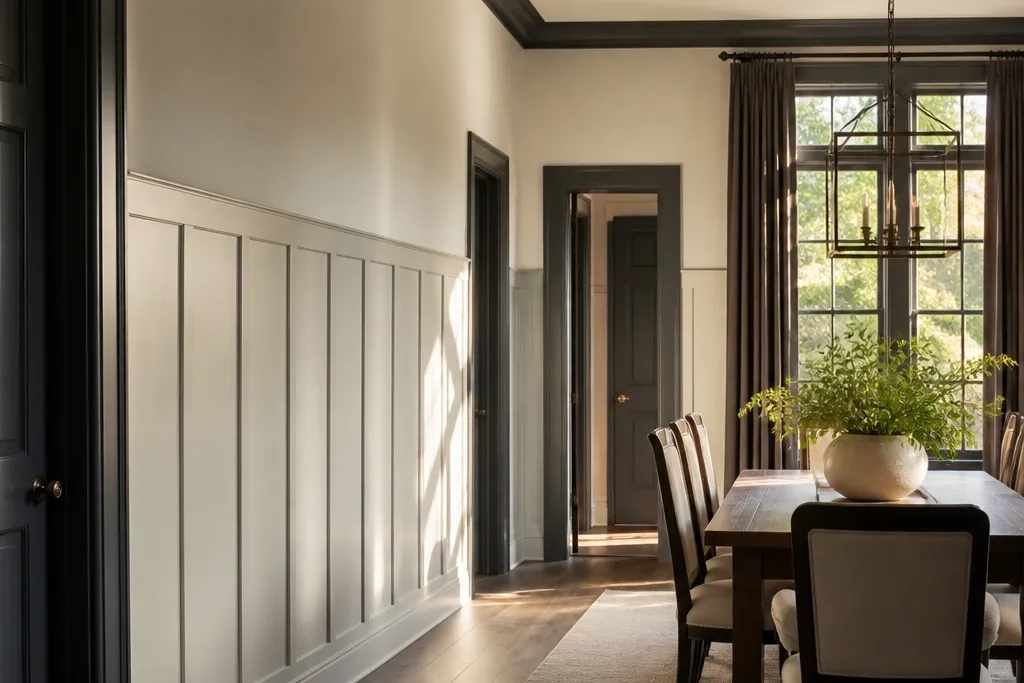
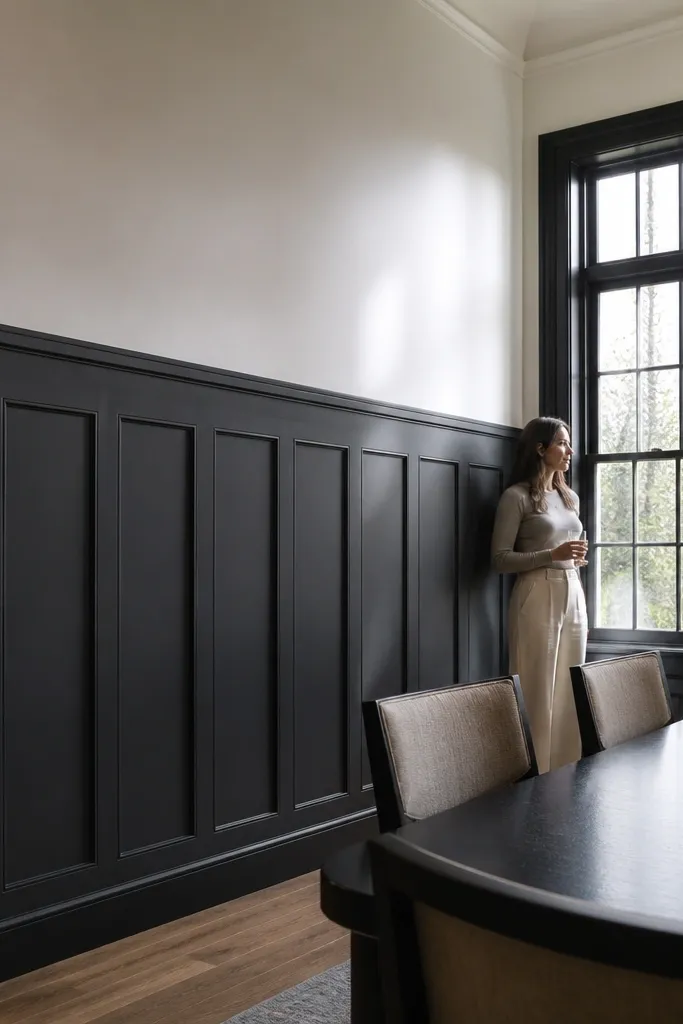
This is the cleanest path to high-end tall wainscoting ideas because it reads like a custom built-in. The trick is the top rail: keep it bold enough to cast a shadow, but not so wide that it feels heavy. Panels should be proportioned so their height matches the wall’s rhythm, not random rectangles. Finish it in a dead-flat wall paint with a satin trim paint for the rails, and the contrast makes the panels look deeper. It’s a great fit for dining rooms and hallways where you want height without adding clutter.
Editor's noteBuild one test panel section on scrap and measure its shadow depth by sighting from the doorway before committing to the whole wall.
Start by marking a level base rail line that lands around 8-10 inches above the floor (adjust for your baseboard). Then measure the total wainscot height to your target top rail, typically 48 inches, and lay out a uniform panel grid with equal panel widths and consistent vertical spacing. Install bottom rail, vertical stiles, and the top rail in that order, using a laser level for straight runs. Finally, fill nail holes, caulk all seams, and prime raw edges before painting satin on rails and semi-gloss on any crown-like profile.
Skip thisDon’t let panel widths vary by more than 1/4 inch across the wall.
2. Two-Story Wainscot Look With Vertical Board-and-Batten Panels
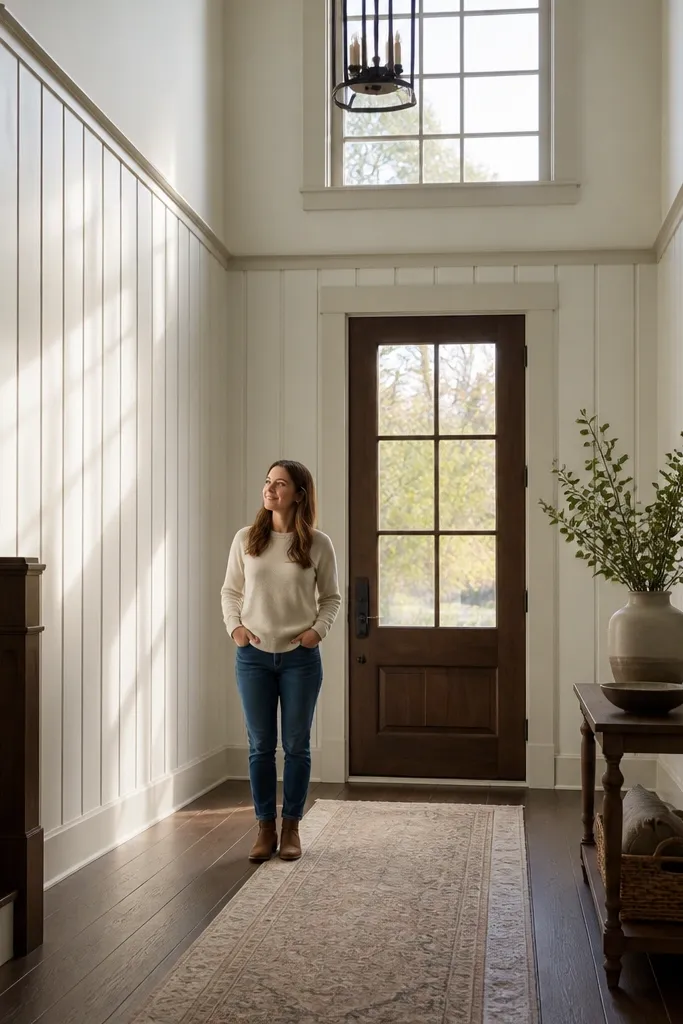
If you want ceilings to look taller, vertical board-and-batten panels are the visual cheat code. Tall wainscoting works best when the pattern has strong vertical lines, so the battens should run from bottom rail to top rail with minimal interruptions. Use a clean frame around the battens so it doesn’t read like construction lumber. This style looks extra expensive when the battens are evenly spaced and the edges are sharp. It fits modern farmhouses, transitional rooms, and any space where you want height without ornate carving.
Start by choosing your wainscot height between 52 and 60 inches and mark both rail lines. Install the bottom and top rails first, then add vertical battens with consistent spacing using a spacer block cut to your exact gap. Use 1x2 or 1x3 primed stock for battens depending on how thick you want the visual line, and keep all battens square to the rails. Finish by sanding flush at any high spots, caulking the batten edges, priming, then painting everything in the same white family so the lines look intentional.
Use a scrap spacer block at the same thickness as your intended gap; it prevents “drift” when you install fast.
Skip wide, random batten spacing; it reads sloppy instead of architectural.
3. Beaded-Panel Wainscot With a Narrow Chair Rail Base

Beaded panels give you that high-end “furniture” vibe without going heavy on ornament. The bead detail catches light and makes the surface feel dimensional even under flat paint. Keep the chair rail part narrow and the panel frames crisp, so the bead becomes the star instead of competing trim. This works especially well in entryways and stair halls where you want a classic look that still feels tall and modern. The result is photogenic because the bead line creates micro-shadows along the whole run.
Editor's notePaint a small test strip first and check it under morning light; beaded profiles look different when the light hits from the side.
Start by installing a narrow base rail at about 36-40 inches if you want a chair-rail-like visual anchor, then extend the panel field up to 54-58 inches with a second top rail. Use actual beaded panel molding or a beaded MDF profile for consistent bead spacing across panels. Cut and install stiles and rails to frame each beaded section, then dry-fit to confirm the bead line aligns across seams. Prime everything thoroughly, then paint with satin trim paint so the bead texture shows clearly.
Skip thisDon’t skip sanding and edge-breaking on the bead corners; rough edges make the bead look cheap.
4. Raised-Panel Wainscot With a Shadow-Gap Top Edge
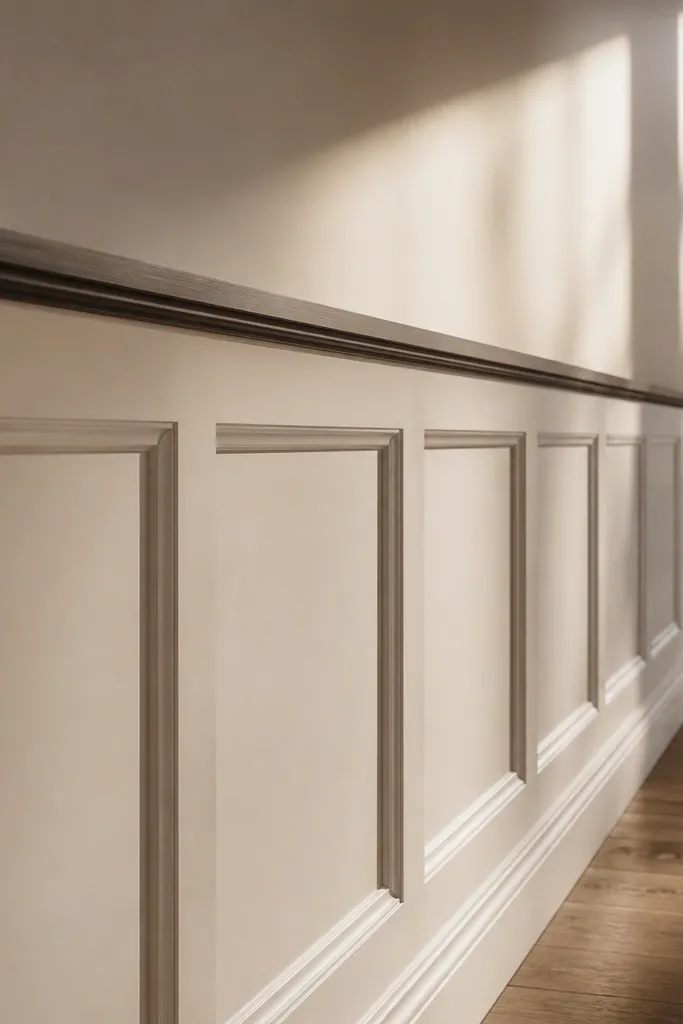
This look is all about the shadow line. A shadow-gap top edge makes tall wainscoting feel built-in and separates the wainscot from the wall so your ceiling reads higher. Use raised panels (not flat) so the light creates depth, then keep the top transition clean with a thin reveal. When done right, photos look expensive because the shadow line stays crisp even after multiple coats of paint. It suits living rooms and offices where you want a polished, tailored feel without heavy molding.
Editor's noteUse painter’s tape to mask the shadow gap line before painting; it keeps the reveal razor-straight.
Start by laying out your wainscot height around 56 inches and mark the top reveal line. Install the top rail with a small spacer or backer strip to create a consistent shadow gap, then build the frame so raised panel inserts seat evenly. Add raised-panel sections using pre-milled profiles or cut-and-glue raised inserts for tighter seams. Caulk the outer edges only, leave the shadow gap clean, prime, then paint the rails and panel frames in satin while keeping the wall paint flat for contrast.
Skip thisDon’t fill the shadow gap with caulk; it kills the effect.
5. Mirrored Tall Panels for a One-Wall "Gallery" Effect
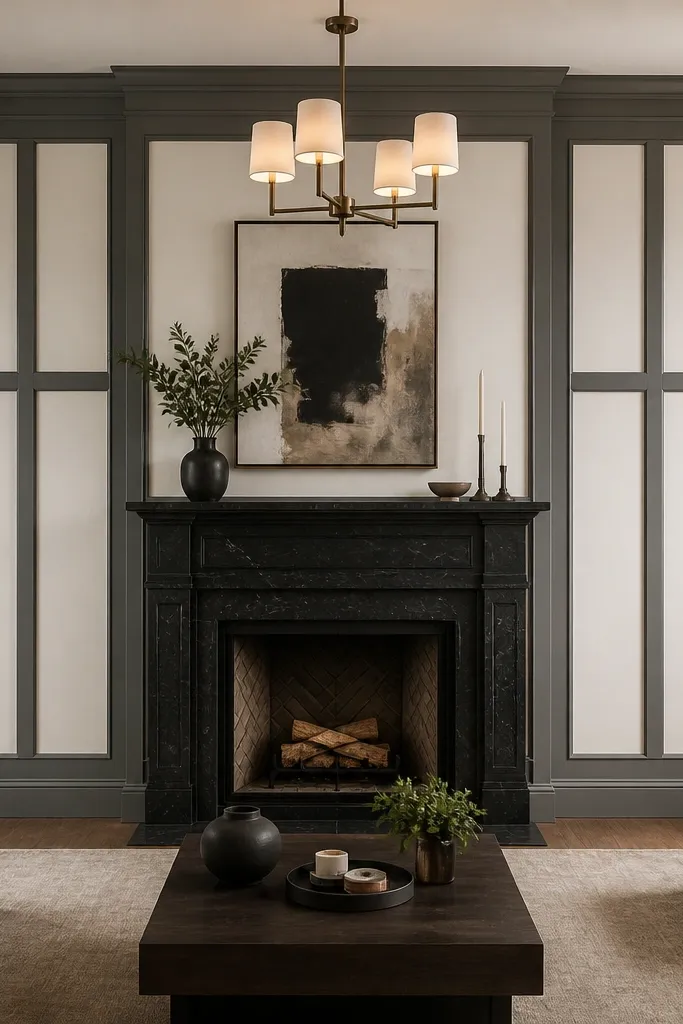
This is how you get a truly high-end look with zero fuss: symmetry. Choose a center line (often the middle of a fireplace, light fixture, or focal wall) and mirror the panel grid left and right. Tall wainscoting ideas look best when the panel widths are deliberate and the pattern feels designed, not installed. Keep the panel count low enough that each panel looks substantial. This style photographs well because it creates strong lines and a clear focal center.
Find your wall’s center point and mark it with a vertical line using a laser. Decide your panel width and install the center stiles first, then work outward with equal measurements so each side mirrors the other. Set the wainscot height to 50-58 inches, install bottom and top rails, then attach vertical stiles and panel frames. Finish by sanding seams, caulking, priming, and painting with a consistent trim sheen so the mirrored pattern stays sharp.
Dry-fit the corner panels and confirm your final outer panel width before you nail anything permanently.
Don’t let the centerline drift off; even 1/2 inch shows up in photos.
6. Wainscot Rectangle Panels With a Wide Flat Rail Frame

Wide flat rails make tall wainscoting look expensive because they create a clean, modern border around the panel field. Instead of busy profiles, you get a crisp rectangle framework that reads architectural. The panels stay simple, so the height feels purposeful and not cluttered. This design is great for modern homes where you want height and order. Photos pop because the flat rails reflect light softly and the panel rectangles stay visually consistent.
Start by selecting a wainscot height around 54 inches and install a wide flat top rail first to lock your geometry. Then install a matching wide bottom rail, and frame the interior with vertical stiles that match your panel width plan. Use consistent spacer blocks to keep all joints aligned, and cut tight miters if your corners demand it, otherwise use simple butt joints with a clean corner trim. Prime and paint the entire system in satin trim paint, and keep the wall paint flat so the flat rails stand out.
Use a router flush-trim bit only after the panels are fully installed; it lets you correct tiny alignment issues without sanding everything forever.
Avoid overly thin rails; they flex and ruin the straight, high-end lines.
7. Tall Wainscot With a Double Rail Band at 36 Inches
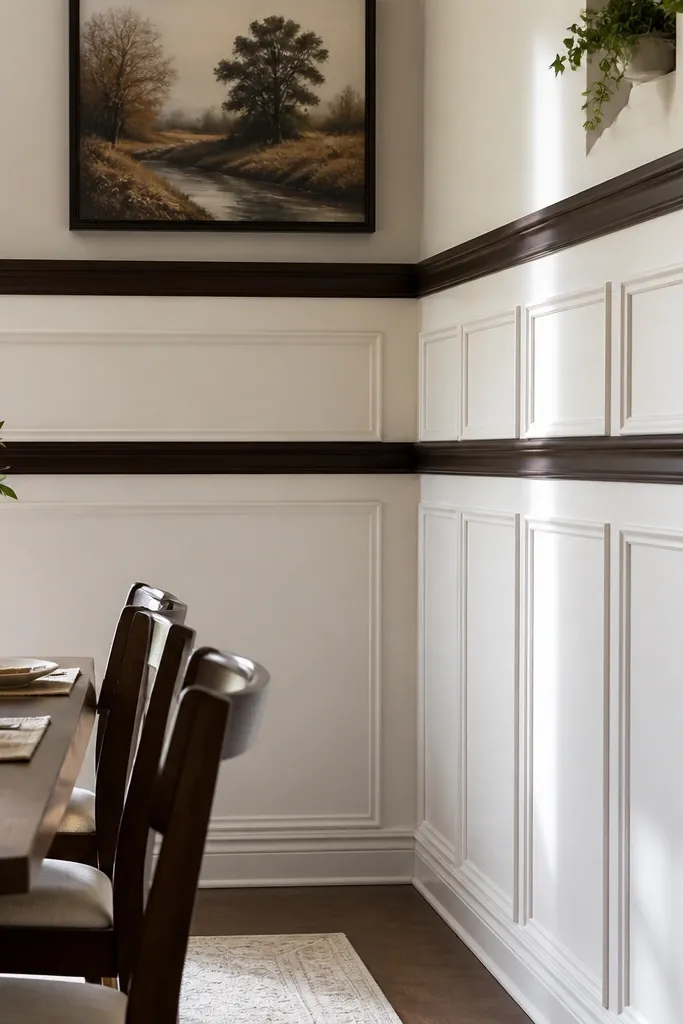
A double rail band gives you a designer look because it adds one extra horizontal layer. The eye reads that band as a refined transition, then the tall panel field pulls the look upward. This is a strong option when your room already has some horizontal trim, like baseboards or window casing, and you want the wainscot to match the architecture. Keep the rails close together and use consistent spacing so it looks intentional, not accidental. It’s ideal for stair landings and dining rooms where you want structure.
Editor's noteMeasure rail spacing from the same reference face each time; mixing “edge” and “center” measurements creates a visible band misalignment.
Mark your first rail at about 36 inches and add a second rail 1 1/4 to 1 1/2 inches above it so the band reads as one composed detail. Install the double band, then build the panel field from the top of the upper rail to your overall wainscot height of 56-60 inches. Use vertical stiles at equal intervals and frame each panel with the same rail width. Caulk the seams, prime everything, then paint the rails satin and the panels semi-gloss for a clean light catch.
Skip thisDon’t make one rail wider than the other; the band loses the high-end, composed look.
8. Ogee-Profile Top Rail for a Classic Tall Finish
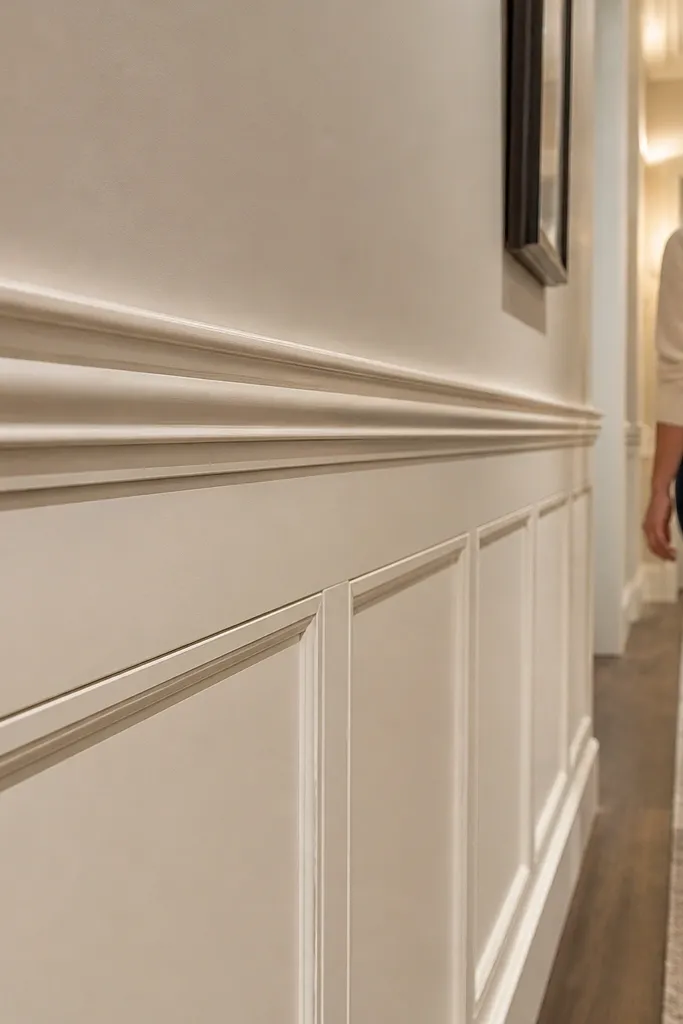
If you like classic, high-end tall wainscoting ideas, an ogee-profile top rail makes the wall feel tailored. The curve catches light along its edges and adds depth without forcing you to carve anything by hand. Keep the rest simple: rectangle panels with clean stiles and rails so the ogee becomes the focal trim. This style works well in formal dining rooms, libraries, and entryways where traditional proportions look right. It also photographs well because the top rail reads like a framed cornice line.
Editor's noteDry-fit ogee corners on scrap first; profile corners can slip if your saw bevel is off by a hair.
Choose a wainscot height between 52 and 58 inches so the ogee rail sits comfortably below the ceiling. Install the bottom rail first, then frame the panel field with vertical stiles and straight rails. Use the ogee molding as the top rail, mitering corners cleanly and fastening with finish nails into studs or solid backing. Fill nail holes, caulk edges, prime, then paint with satin trim paint so the profile’s curve stays visible after multiple coats.
Skip thisDon’t use glossy paint on ogee trim; it looks plasticky and kills the soft shadow line.
9. Tall Wainscot With Vertical Fluted Inserts
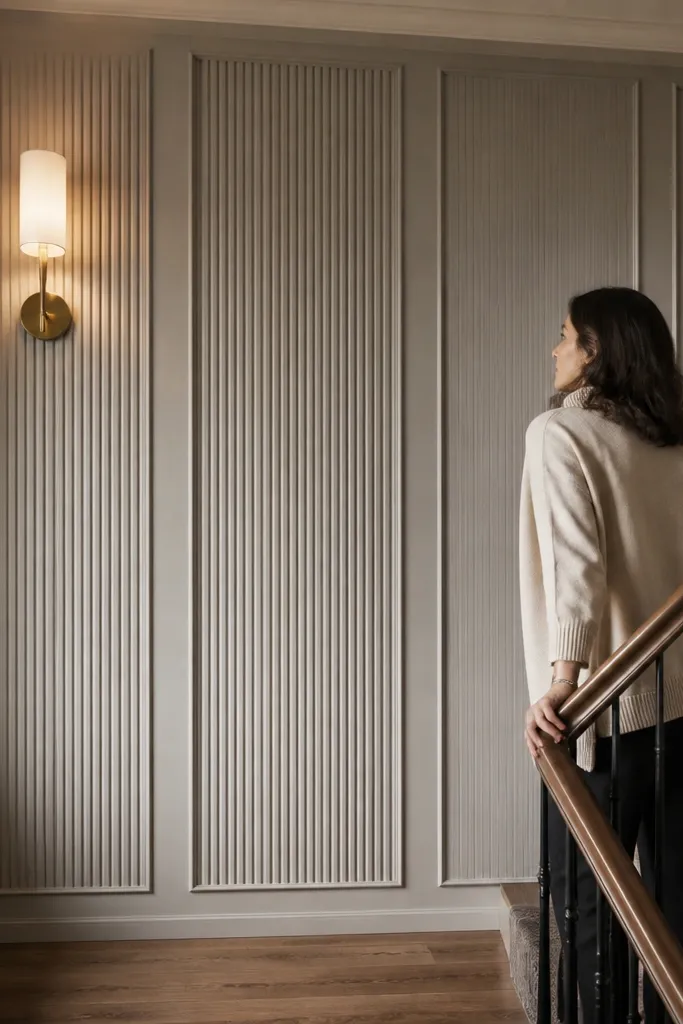
Fluted inserts give you high-end texture that reads premium in photos, especially with side lighting. The key is restraint: flutes should live inside a frame so they don’t spread texture everywhere. Tall wainscoting works well when the flutes run from bottom rail to top rail, creating a strong vertical cadence. This style fits entry halls, formal living rooms, and any space where you want a “statement wall” without adding furniture. The flutes create a gradient of light and shadow across each panel, which is why it looks expensive.
Editor's noteUse a small foam roller for the flat areas and a brush for flutes; rolling alone leaves uneven paint in the grooves.
Start by planning your wainscot height at 54-60 inches and mark the rails. Install bottom and top rails, then frame each panel opening with flat stiles and rails. Use pre-milled fluted trim inserts or fluted MDF strips cut to panel height, then glue and nail them into each framed opening. Sand at seams, caulk the frame edges, prime, then paint satin so the flutes show their ridges without turning chalky.
Skip thisAvoid mixing fluted insert widths; keep flute spacing consistent across the wall.
10. Narrow-Grid Tall Panels for a Modern Luxury Look

A narrow-grid pattern looks high-end because it creates fine, controlled lines. You get height from the tall panel field, and you get luxury from the density of consistent rectangles. This is the option for people who want the wall to look like custom millwork. Keep the frames slim so it doesn’t feel heavy, and use a paint finish that holds crisp edges. It’s especially good in narrow hallways because the pattern gives visual structure without shrinking the space.
Pick a wainscot height of about 50-56 inches and decide your panel grid size, like 6-8 inch wide rectangles. Install the bottom and top rails, then add vertical stiles and horizontal rails to create each opening. Use a table saw or miter saw with an accurate stop block so all pieces repeat the same length. Prime all faces and edges, then paint with satin trim paint and lightly sand between coats if you want ultra-sharp lines.
Label each piece by position (left-to-right) before cutting; it prevents mix-ups when the grid gets busy.
Don’t make the grid too large; big rectangles look unfinished at this height.
11. Tall Wainscot With a Beveled Panel Frame Reveal
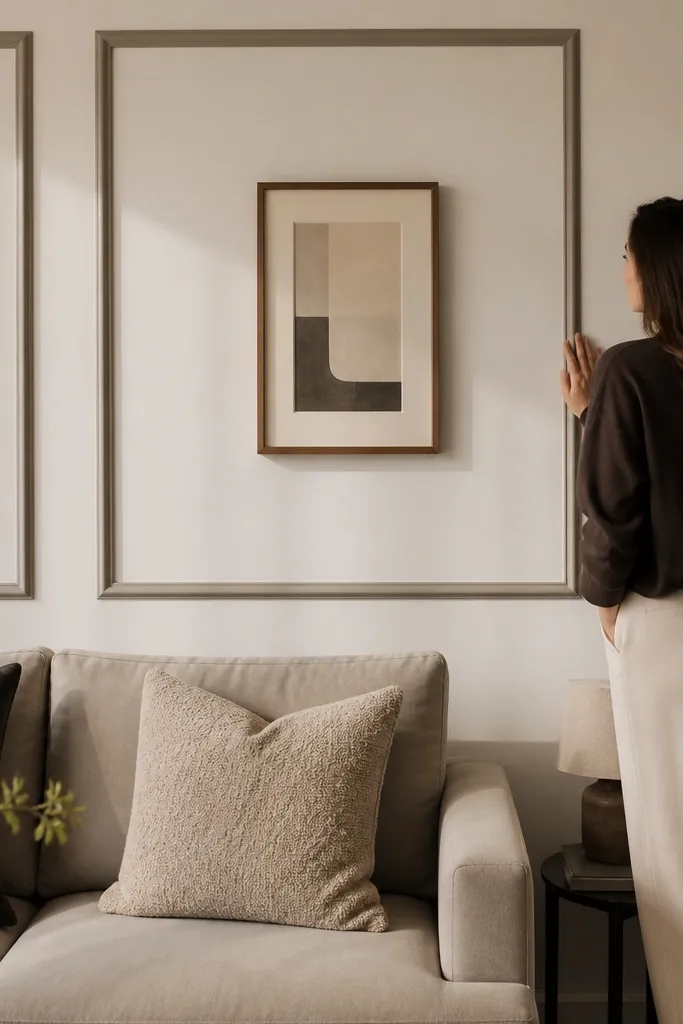
A beveled frame reveal makes panels look like they’re floating, which reads expensive instantly. Instead of flat frames that blend into the wall, the bevel creates a clean edge that catches light and shows depth. Keep the bevel narrow and consistent across every opening. This style works in modern and transitional homes because it’s not overly ornate, but it still looks dimensional. It’s a strong choice if you want high-end tall wainscoting ideas that don’t rely on heavy molding profiles.
Start by setting your wainscot height at 52-58 inches and mark your bottom and top rails. Build simple rectangle openings using flat stiles and rails, then add beveled trim pieces to the inside edges of each opening. Use a consistent bevel angle, like a shallow 45-degree or a dedicated beveled molding profile, so the reveal line stays uniform. After assembly, caulk only the outer seams, prime everything, and paint with satin so the bevel edge stays visible.
Use a sharp blade and slow feed rate when cutting beveled trim; dull cuts round off the edge and reduce the light-catching effect.
Don’t over-caulk into the reveal line; it turns the bevel into a flat smear.
12. Tall Wainscot Wrap With Corner Panel Continuity
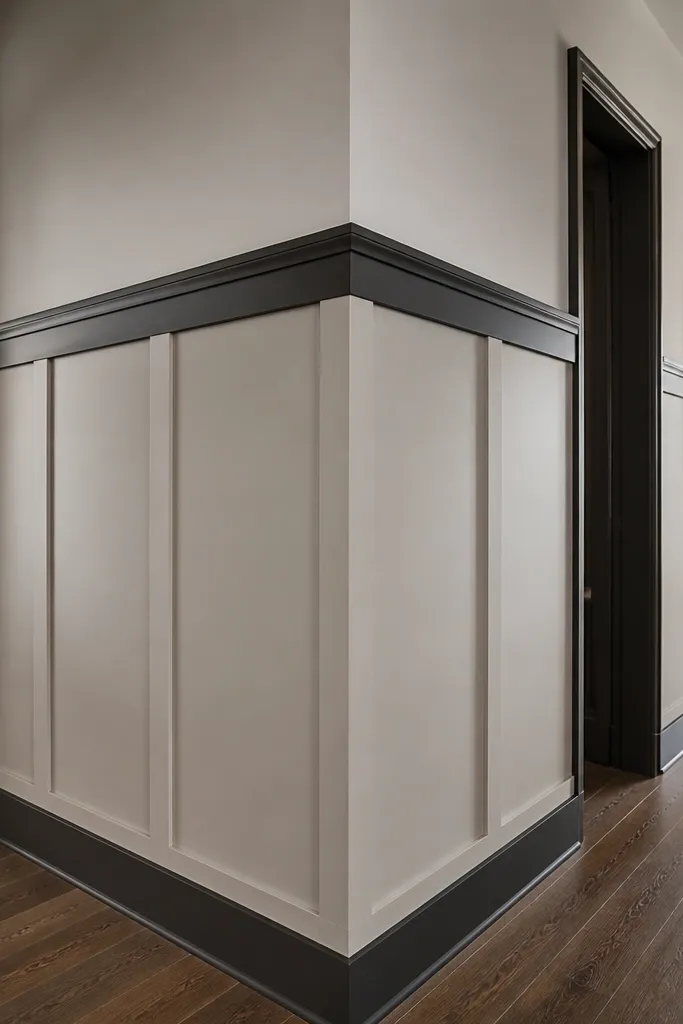
A lot of DIY tall wainscoting ideas fail at corners. The high-end version is about continuity: panels should align across the corner so the wall reads like one continuous surface, not two separate installs. This is the idea for people who want a polished look even in messy layouts with multiple doorways. Use a wrap plan so the top rail and panel grid keep their alignment as they turn. It’s particularly photogenic because corners show precision immediately.
Start by deciding how many panels you want across each wall run and calculate the panel widths so the corner panel lands at a clean width instead of a skinny leftover. Install the bottom and top rails around the corner first, then frame panels on one wall and use that layout as the template for the next wall. For inside corners, use consistent reveal lines and make sure the rails land at the same heights on both sides. Prime, caulk, and paint, then touch up the corner seams with a small angled brush so the lines stay crisp.
Set your panel grid using a laser across both walls; checking level by eye at the corner is where alignment slips.
Don’t cut corner panels last if you can avoid it; corner sizing after the fact looks like patchwork.
13. Tall Wainscot With Horizontal Ledge and Vertical Panel Mix
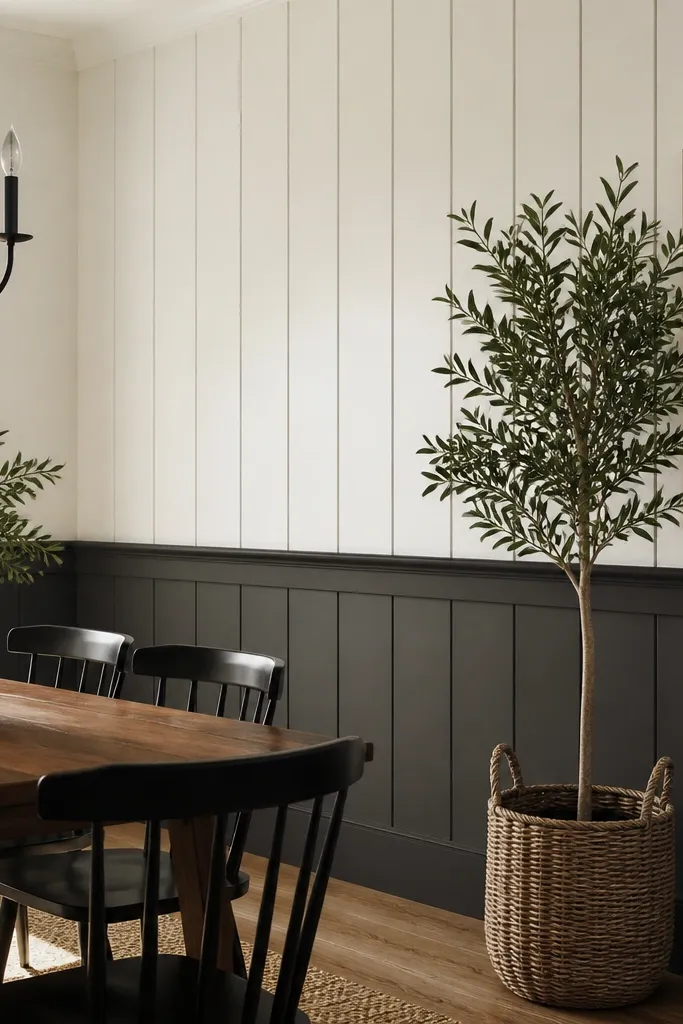
This design gives you a tailored, custom-mill look by mixing one strong horizontal ledge with a vertical panel field. The ledge adds a refined stopping point at mid-height, and the vertical panels pull the eye up to the ceiling. Keep the ledge profile simple and shadowy so it looks intentional, not chunky. This works great in living rooms and bedrooms where you want something more interesting than a basic rectangle grid but still clean. The contrast between the ledge and vertical lines is what makes ceilings look higher.
Set your overall wainscot height between 56 and 60 inches, then place a horizontal ledge rail around 40-42 inches from the floor. Install bottom rail and the ledge rail, then build vertical panels between the ledge and top rail. Use consistent stile spacing and keep panel heights uniform so the vertical rhythm stays clean. Caulk and prime the entire assembly, then paint the ledge and rails in satin while keeping the panel fields slightly different sheen if you want extra depth.
Dry-brush paint into the ledge corners; it prevents dull, missed spots that show in flash photos.
Avoid adding too many horizontal lines; the look turns busy and loses its height effect.
14. Tall Wainscot With Raised Rectangle Panels and Slim Stiles

Raised rectangle panels plus slim stiles is the path to a crisp, high-end look that still feels light. Slim stiles keep the wall from looking heavy at tall heights, while raised panels create real shadow depth. The result reads like furniture panels mounted on the wall, which is why it photographs so cleanly. This works well in modern traditional spaces where you want classic detail but not thick, ornate trim. It’s also a smart choice if your room is narrow and you don’t want wide molding eating visual space.
Start by choosing a wainscot height around 54 inches and install a bottom rail and top rail with slim, paint-grade profiles. Frame openings with 1x2 or similar slim stiles, then add raised panel inserts using pre-made raised panel sheets or milled inserts. Keep the raised panel edges aligned so the shadow lines look even across the wall. Fill, sand, caulk, prime, then paint with satin trim paint and allow full cure time before you assess the sheen under different lighting.
Use painter’s tape to mark the reveal width around raised panels; it keeps all panel frames consistent.
Don’t use oversized stiles with raised panels; it makes the wall feel crowded.
15. Tall Wainscot in Dark Paint With Light Panels
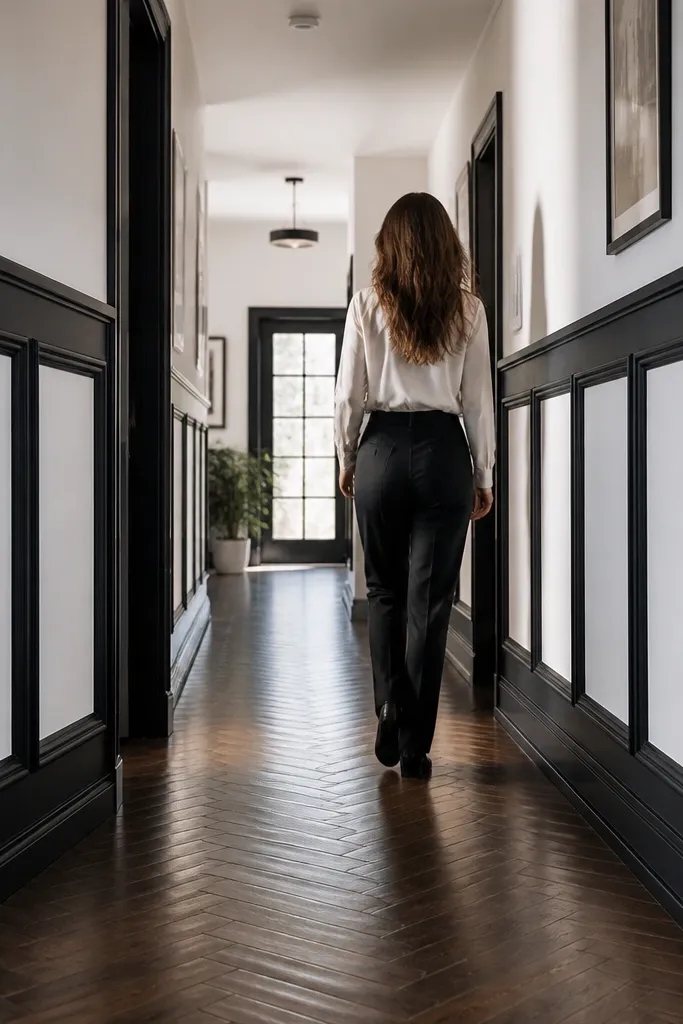
Color is the fastest way to make tall wainscoting look high-end. Use a deep color on the rail frames and a lighter tone inside the panels so the wall has built-in contrast. This makes the panel shadows pop and draws attention upward, especially when the upper rail sits close to the 58-60 inch range. Pick a deep neutral like charcoal, ink blue, or forest green — colors that still read classy under warm lighting. The look is dramatic in photos and still feels tailored, not trendy.
Editor's noteUse the same brand and sheen for both colors; mismatched sheens create a cheap-looking halo around panel edges.
Decide on a wainscot height around 58 inches and keep the panel grid simple so the color split stays clean. Paint the wall background first, then mask off the interior panel surfaces and paint the rails and frames in your deep color. After the deep color cures, remove tape, then paint the panel interiors in a lighter tone (same sheen, typically satin). Finish by lightly sanding between coats where masking edges lifted, then caulk any tiny gaps with matching paintable caulk.
Skip thisDon’t rush masking — tape pulled too early causes jagged edges that are impossible to hide.
16. Tall Wainscot With Open-Frame Panels and Minimal Backing
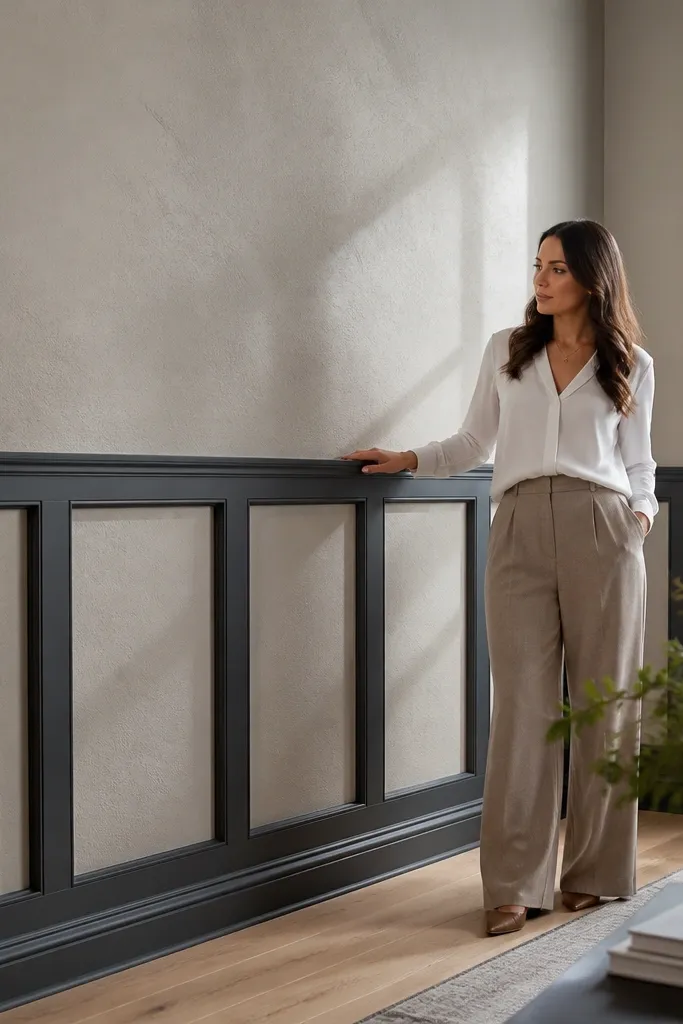
This is a high-end trick for rooms that already have texture or great wall paint. Instead of filling every panel with a separate board, you use open frames so the wall surface shows through inside the rectangles. The result feels lighter and more custom because the wall paint becomes part of the design. Tall wainscoting ideas like this still create height because the frames run up to a consistent top rail. It’s perfect for modern spaces with wallpaper-free walls or for people who want the millwork look without covering everything.
Editor's noteIf your wall has any dents or unevenness, fix them before installing frames; open panels expose flaws.
Start by choosing your wainscot height, usually 50-56 inches, and install bottom and top rails. Then build a grid of vertical stiles and horizontal rails, but leave the interior open so you only install the trim frame pieces. Use straight, paint-grade boards sized to frame openings evenly; check each opening width with a spacer block. Caulk where the frame meets the wall, prime the trim, then paint the trim in satin while leaving the interior as the wall finish.
Skip thisDon’t use very thin trim if your wall is uneven; it telegraphs gaps.
17. Tall Wainscot With a Picture-Frame Feel Using Wide Inner Borders
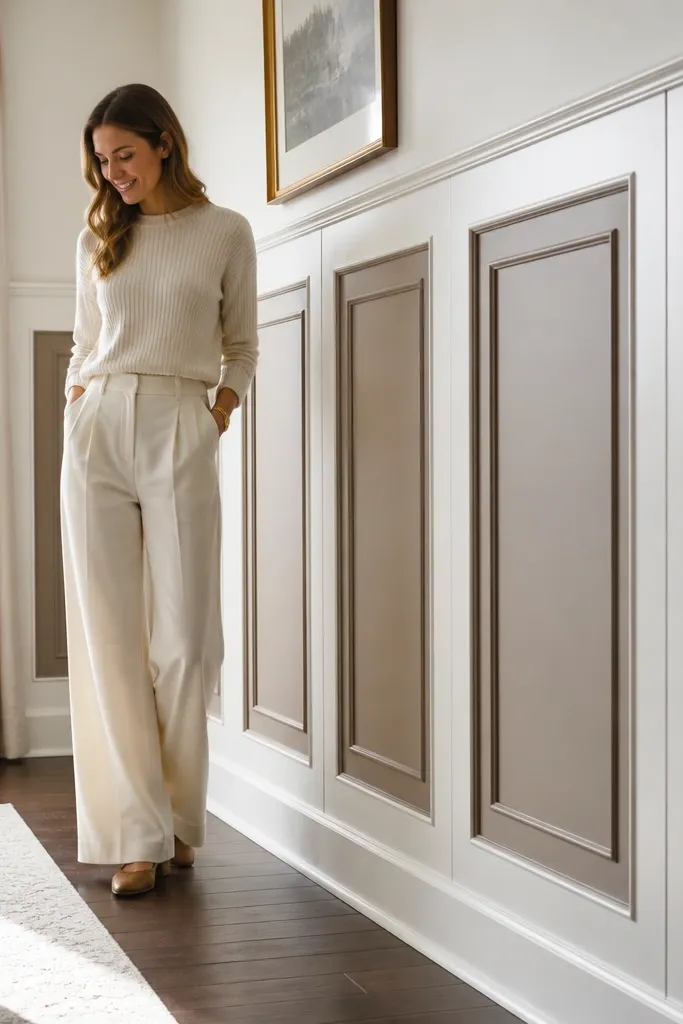
Picture-frame borders look expensive because they create a second layer of framing inside each rectangle. The tall version keeps those inner borders consistent up to around 54-60 inches, which makes ceilings feel higher by adding complexity in the upper half of the wall. Keep the inner border width uniform and the outer border slightly wider, so you get depth without a cluttered look. This style is great for living rooms and dining rooms where you want the wall to feel like a gallery. It photographs well because each opening has a clear “frame within a frame” edge.
Start by setting your wainscot height at 56 inches and install the outer bottom and top rails. Frame each opening with outer stiles and rails, then add a second, narrower inner border around the inside perimeter of each opening. Use a consistent miter or butt-joint strategy at corners based on your trim thickness so edges stay tight. Prime the full trim assembly, caulk the outer edges, then paint with satin so the two-layer border creates visible depth.
Cut inner border pieces with a stop block so every inner frame matches length and the grid stays visually even.
Don’t make the inner border too thin; it disappears at normal viewing distance.
18. Tall Wainscot With a Built-In Shelf-Ledge at the Top Panel

A built-in shelf-ledge makes tall wainscoting look custom because it adds a practical, built detail. The ledge sits just under the top rail, creating a strong horizontal line while the panels run up to it. Use a shallow shelf profile so it doesn’t feel like furniture, and keep it painted the same as the rails for a seamless look. This style works in entryways and dining rooms where you want a spot for small decor without adding wall clutter elsewhere. In photos, the ledge creates a highlight strip that makes the whole wall feel taller.
Editor's noteAdd a thin backer strip under the ledge if your wall is slightly out of plane; it prevents rocking and keeps the ledge straight.
Pick a wainscot height around 58 inches and mark the top rail position, then add your ledge 2-3 inches below it. Install the bottom rail and vertical stiles first, then secure the ledge board to studs with construction adhesive plus finish nails. Frame the panel field so it visually feeds into the ledge, then cap with the top rail to hide seams. Prime all trim, caulk where ledge meets the trim frames, and paint satin on the ledge and rails.
Skip thisDon’t place the ledge too high; if it sits above the panel field, it reads random instead of intentional.
19. Tall Wainscot With a Vertical Roman Shade-Like Center Panel
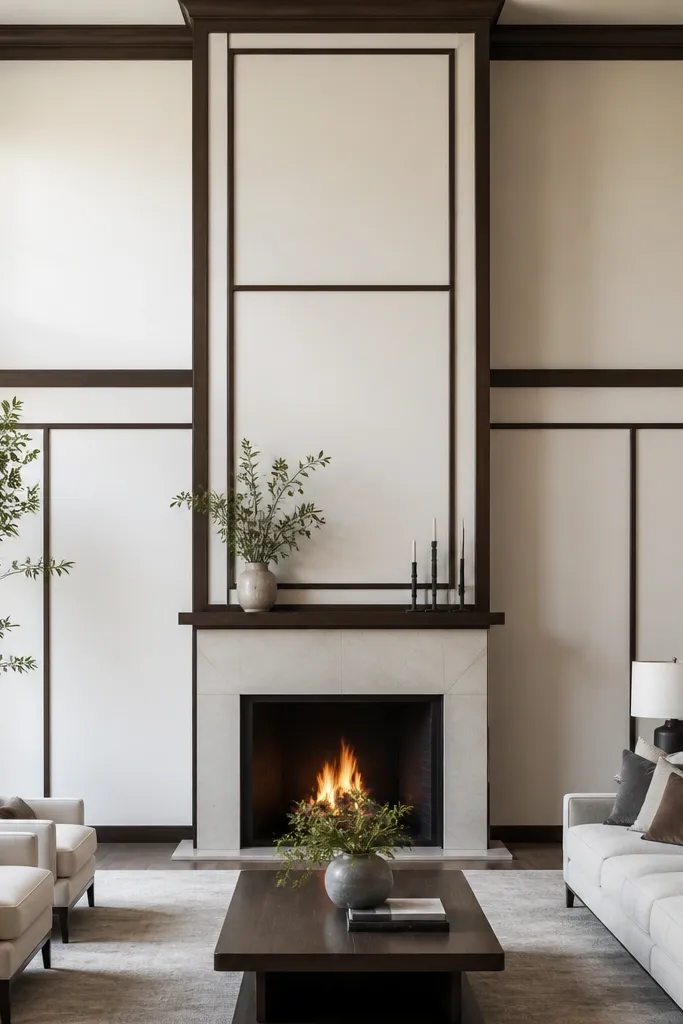
This design uses one tall center panel to pull the eye upward. The center panel should be taller or wider than the side panels, but keep the rails aligned so it still feels structured. It’s one of the best high-end tall wainscoting ideas for rooms with a focal point like a fireplace or large art wall. The asymmetry is controlled, so it looks designer, not random. It’s also photogenic because the center panel creates a clear vertical line.
Start by choosing a wainscot height of 52-60 inches and determine your focal center point. Install the bottom and top rails across the whole wall, then frame a larger center opening and two smaller side openings with matching rail widths. Keep vertical stiles aligned to the centerline so the pattern feels deliberate even with different panel sizes. Prime, caulk, and paint in satin for rails and semi-gloss for panel fields if you want extra depth.
Use the same panel-depth build across all three openings so the shadows match; depth mismatch looks like an unfinished install.
Avoid making the center panel drastically different; small variations look intentional, big jumps look patched.
20. Tall Wainscot With Vertical "Shadow-Laminate" Strips and a Float-Top Crown
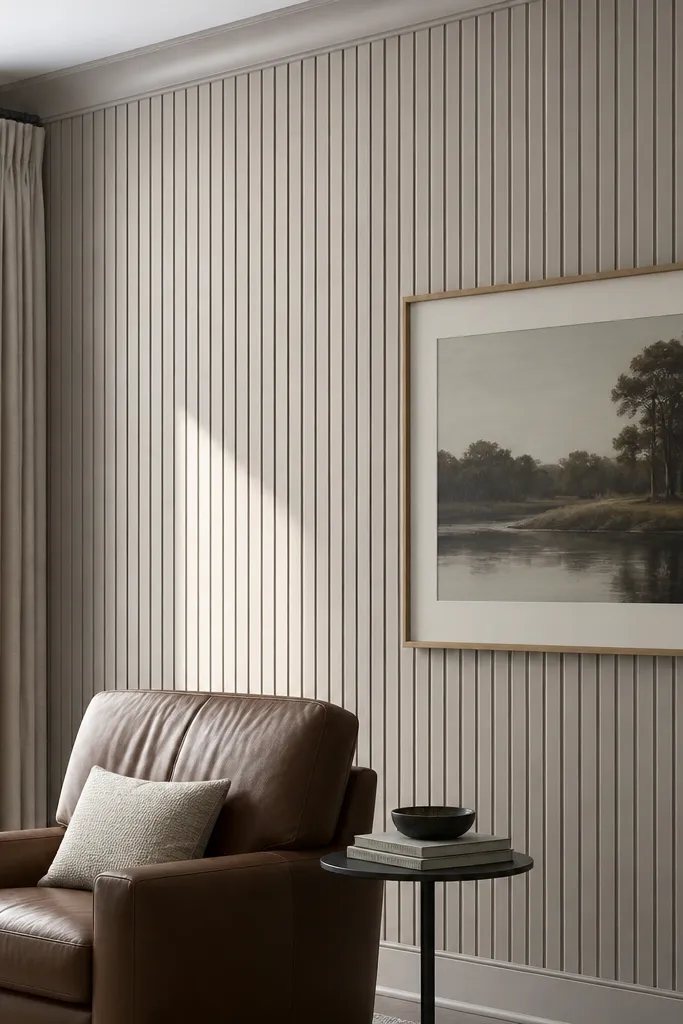
This design makes ceilings feel higher because the wall breaks into tall, narrow columns and the top trim sits slightly proud, casting a long shadow line. The trick is the “shadow-laminate” strips — thin battens that run full height inside a tall field, so your eye reads vertical first. Use medium-density MDF for the face and strips, then paint it a crisp semi-gloss while keeping the wall eggshell so the edges pop. It looks high-end in a hallway, dining room, or primary bedroom because it reads architectural without needing expensive molding sets. Skill level is mid — you’re cutting repeatable lengths and keeping reveals straight, not carving anything ornate. Plan for a couple of weekends if you’re doing a full wall, plus time to sand and caulk until the shadow gaps look intentional.
Step 1: Mark your layout from the ceiling down. Pick a final height like 54-60 inches, then set a 1-inch tall shadow gap under the float-top crown rail so the top feels airy; cut a continuous crown rail and spacer blocks to maintain that gap. Step 2: Build the panel field and vertical strips. Install a backing ledger level with your base line, then glue-screw 1/4-inch MDF “field panels” (or 1/2-inch if your wall is wavy) and add 2-inch-wide vertical strips made from 3/4-inch MDF, centered on your layout marks. Leave a 1/8-inch reveal between each strip and the field so the lines stay crisp after paint. Step 3: Add the float-top crown and finish. Apply construction adhesive and screws for the crown, but mount it to the wall using spacer blocks so it rides off the wall and creates the shadow line; fill nail holes, caulk the reveal edges, sand to 180 grit, then prime and paint in two coats with semi-gloss trim paint.
Cut all vertical strips from the same MDF board and keep their grain direction consistent; it makes the paint finish look uniform across the whole wall. Use a 1/8-inch spacer between strips while the adhesive sets so the reveals stay the same even if your wall isn’t perfectly flat.
Don’t glue the crown rail directly to the wall — you lose the shadow line that makes the ceiling read taller.



