
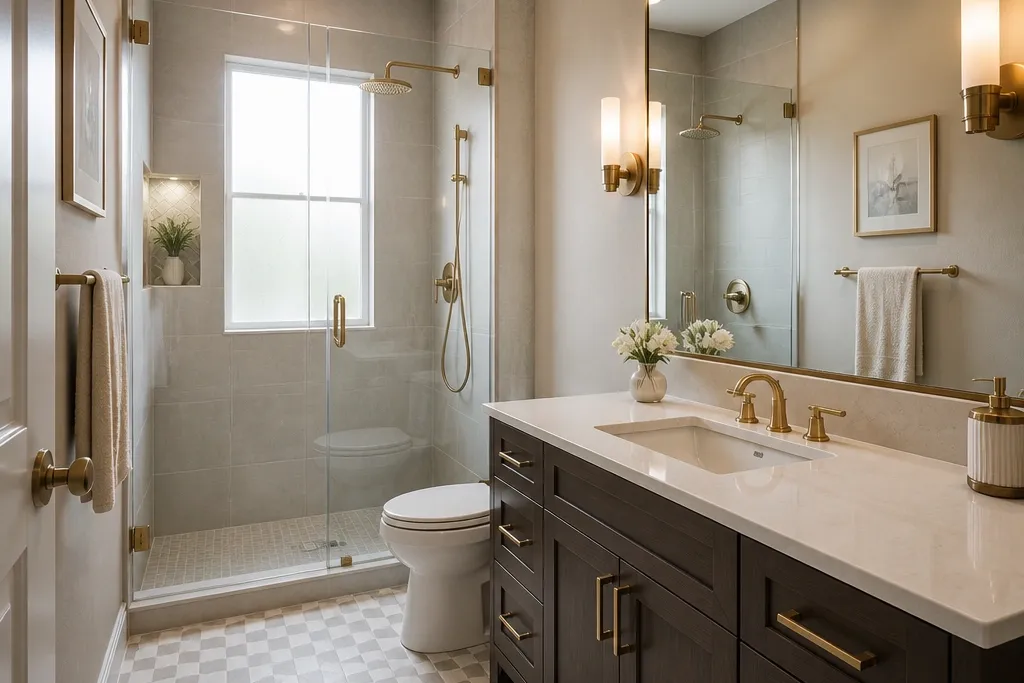
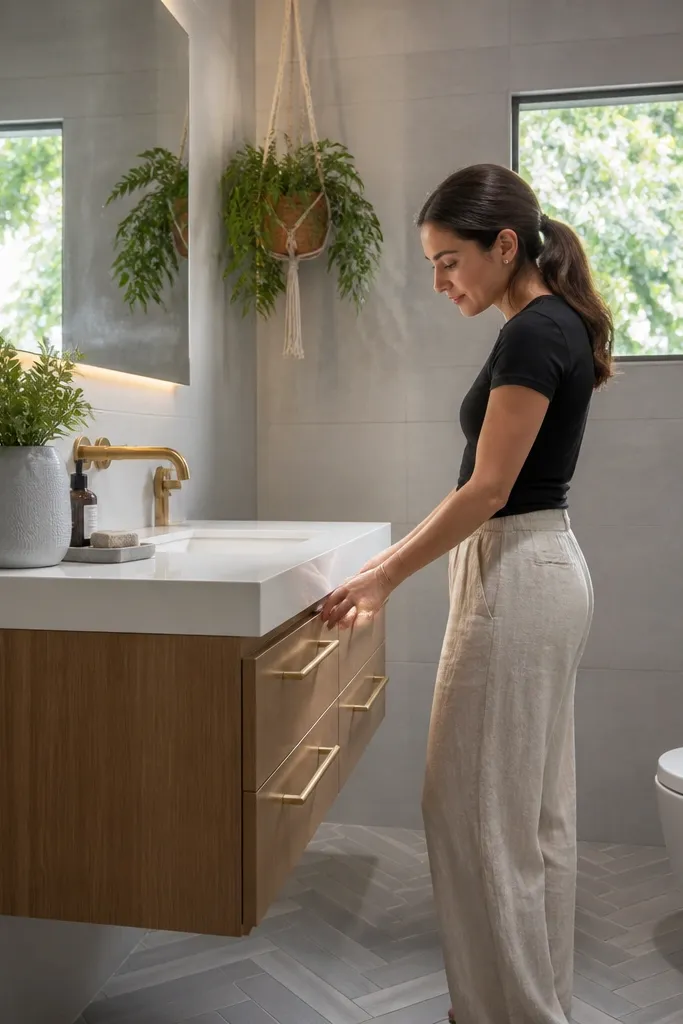
1. Brushed brass framed mirror over a floating vanity
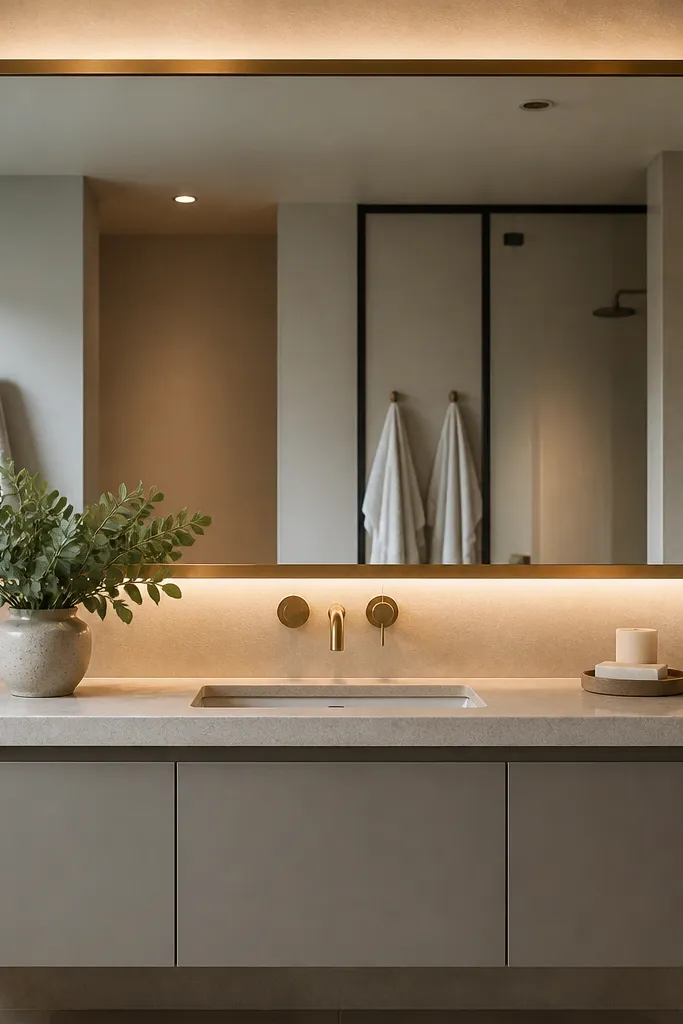
This look reads high-end because it adds a crisp border to the biggest reflective surface in the room. A framed mirror also hides the messy wall area where plumbing and wiring usually land, so the whole wall looks intentional. Pair it with a floating vanity in matte or satin finish so the floor stays visually open, which makes the bathroom feel larger. Keep the hardware in brushed brass and use warm white bulbs so the metal doesn’t look yellow or harsh. The final effect is clean, boutique, and very photogenic from the doorway angle.
Editor's noteUse a laser level for the mirror — 1/8 inch off shows up instantly in a framed design.
Start by mounting the vanity on a solid wall stud layout and screwing a ledger strip level for the first pass. Then install a moisture-resistant backer board behind where the mirror bracket will sit, and run the electrical to a junction box centered at mirror height. Finish by leveling the mirror frame, tightening the mounting screws evenly, and using a 2700K or 3000K bulb in the vanity light or mirror light source.
Skip thisDon’t mount a floating vanity into drywall anchors only; the wobble ruins the whole “custom” look.
2. Full-height wet wall in large-format porcelain with a thin reveal
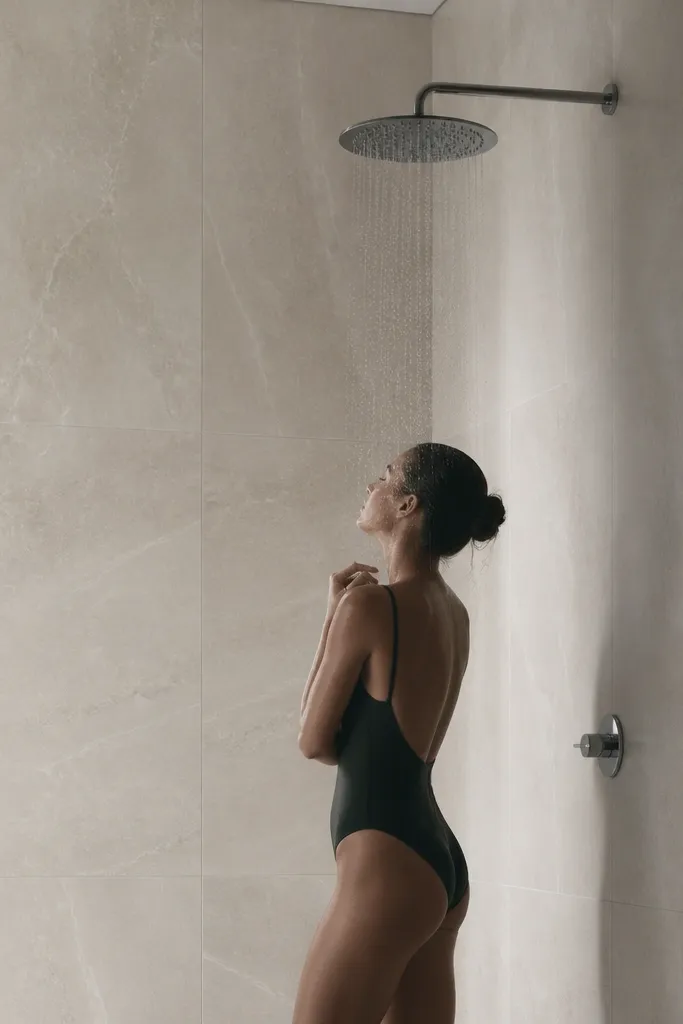
Large-format porcelain makes small bathrooms feel calmer because there are fewer grout lines interrupting the eye. A full-height wet wall reads more expensive than a half-wall because it gives the room a defined, tailored backdrop. The thin reveal edge — where tile meets trim or adjacent material — is what makes it look like a designer installed it. Choose a porcelain that mimics stone veining but stays subtle, so it doesn’t fight with the rest of the fixtures. This is a “big visual change” project even when the room footprint stays the same.
Editor's noteDry-lay 10-15 tiles around the vanity and shower corners before you mix thinset — it saves days of rework.
Start by removing the old wall surface and building a waterproof substrate system rated for wet areas. Then lay out the tile dry first and adjust so you avoid narrow chips at the corners; keep a consistent reveal line where the wet wall meets the painted or dry area. Finally, set tile with a correct thinset for porcelain, grout after the cure window, and seal only if the product instructions require it.
Skip thisDon’t rely on random corner cuts; pencil-mark your layout and keep the same edge orientation throughout.
3. Matte black shower fixtures with a white subway tile border
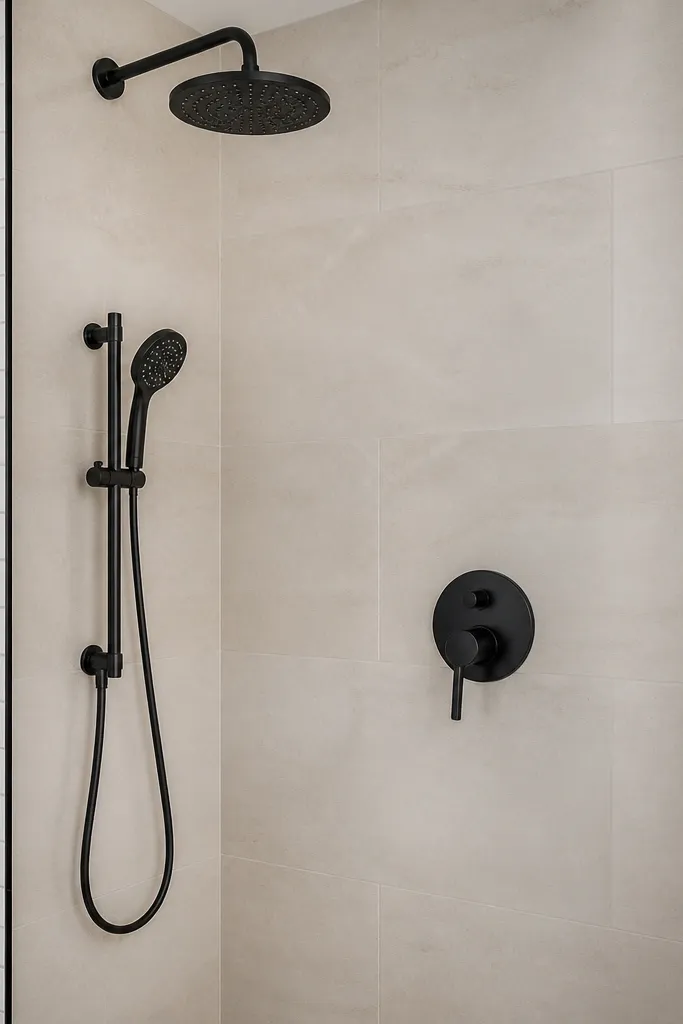
Matte black hardware looks high-end in small bathrooms because it gives strong contrast against light tile and brightens the overall color story. The trick is not using subway tile everywhere — use it as a border or accent line so it frames the shower instead of cluttering the room. A white subway with a slightly warm tone reads cleaner than cool gray-white and photographs better under mixed lighting. Add a simple niche or shelf in the same tile body so the border doesn’t feel like an afterthought. This look is modern, sharp, and easy to copy without a full gut.
Editor's noteUse 1/8-inch spacers for the border and keep the tile orientation identical across the whole run.
Start by installing waterproofing on the shower walls and adding cement board or waterproof backer as required by your system. Then tile the shower in your main format, and create a border strip at the eye-line height with white subway tiles cut consistently. Finally, install the matte black fixtures after tile is fully cured, and use a plumber’s tape and gasket in the right order so you don’t get leaks.
Skip thisDon’t use a different grout color for the border than the rest of the shower; mismatched grout makes the design look patchy.
4. Warm greige paint + 2-inch marble-look floor tile
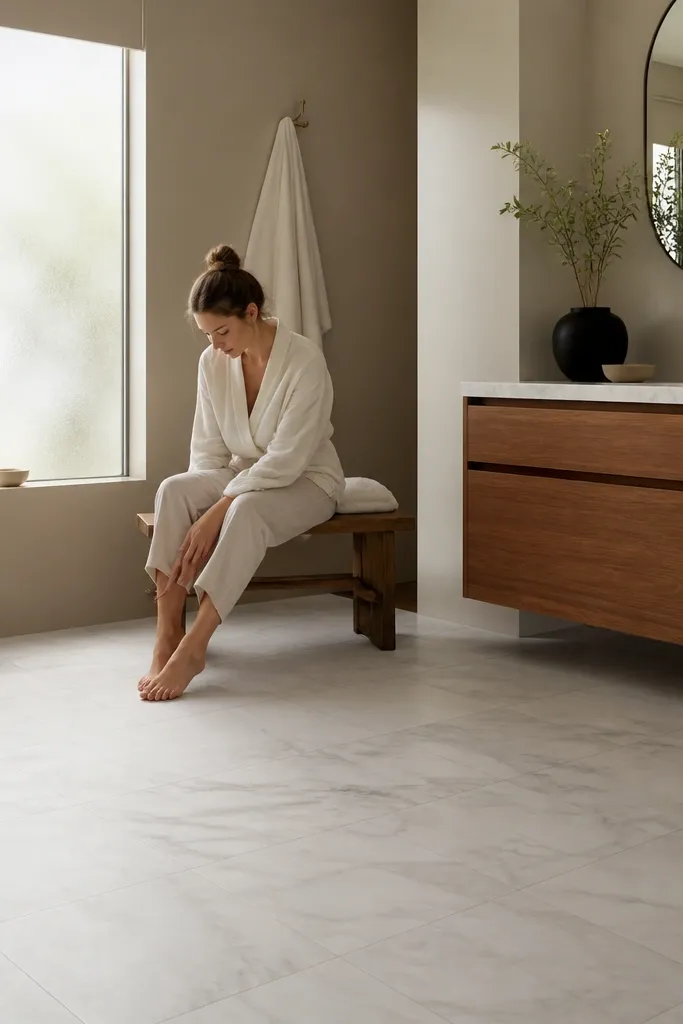
Paint is where most DIY small bathrooms fall apart, but it’s also the fastest way to get a high-end look. A warm greige wall color with a marble-look tile floor keeps the room from feeling cold or flat. The floor tile choice matters: a smaller format like 2-inch square marble-look with consistent veining direction makes the bathroom feel styled, not generic. Pair it with simple baseboards and a clean caulk line at the tub or shower edge. This combo works because it adds subtle texture without adding visual noise.
Start by patching and sanding the walls smooth, then prime with a bathroom-rated primer so the greige tone stays true. Paint two coats at the correct dry time, and cut in with painter’s tape you remove while paint is still slightly tacky. Then install the marble-look floor tile with a leveling system if your subfloor has dips, and grout with a matching warm gray so it blends instead of standing out.
Choose a grout color slightly warmer than you think; it makes the veining look more natural.
Don’t skip primer — greige shades go patchy when the wall has old stains or uneven absorption.
5. Herringbone shower niche in the same tile as the wet wall
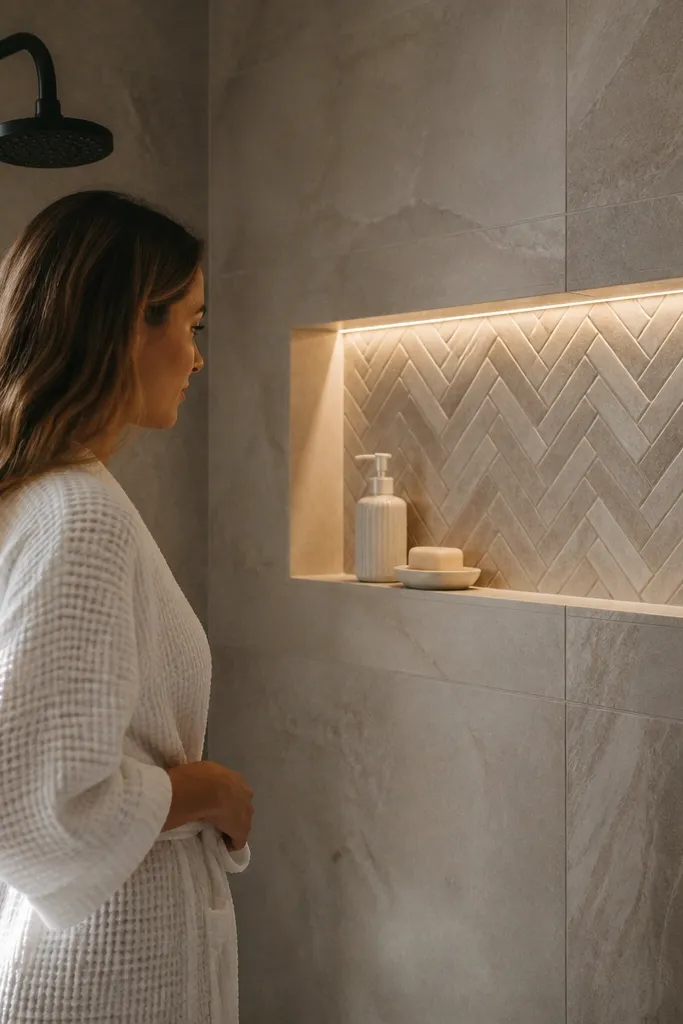
A niche is practical, but the high-end part is the way the niche finishes look like they were designed from the start. Using herringbone inside the niche creates a focal point without covering the whole room in pattern. Keep the niche tile in the same collection as the main wall — just change the layout — so the bathroom stays cohesive. This design photographs well because it creates depth and a strong line of interest at arm height. It also makes the shower feel custom even in a small footprint.
Editor's noteUse a laser to align the niche center height — it’s the difference between “nice” and “designed.”
Start by building the niche frame into the waterproof wall system and verifying it’s square with a level. Then tile the shower walls and niche separately: install the main wall tile first, then cut the niche tile so the herringbone meets the border lines cleanly. Finally, grout and seal the niche, then apply waterproof sealant at any seams where niche meets waterproof membrane.
Skip thisDon’t place the niche too high; if the shelf is above eye-line, it looks awkward and feels less useful.
6. Stone-look shower bench with a matching floor runner effect
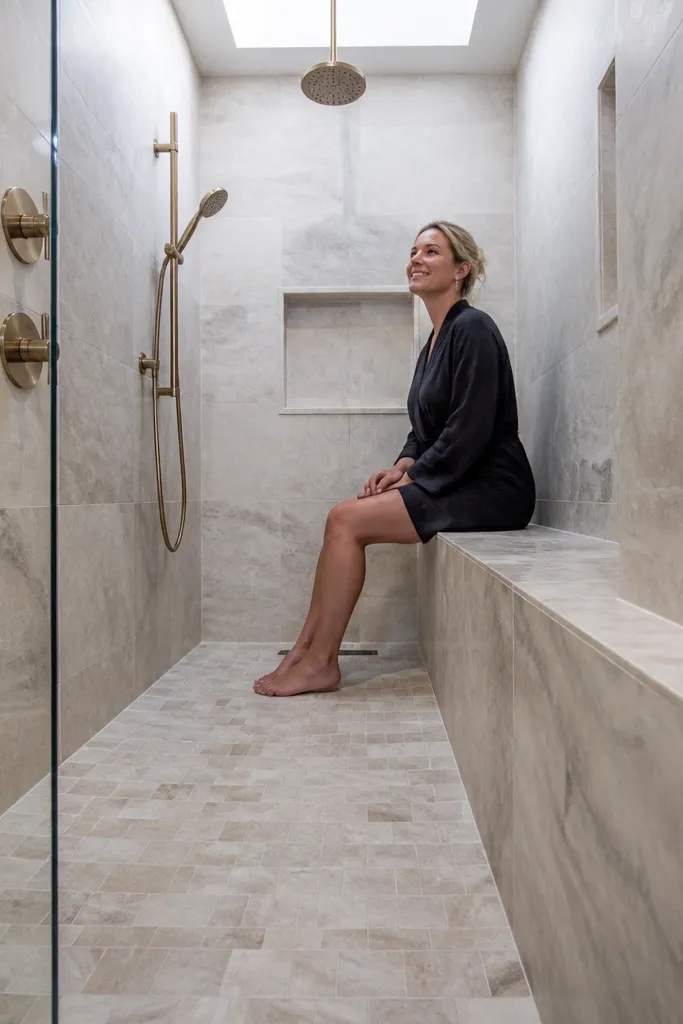
A built-in bench instantly upgrades the perceived quality of a shower, especially in a small bath where space is tight. When you match the bench tile color and tone to the floor, you get a subtle “runner” effect that makes the room feel longer. Use a stone-look tile with small-scale movement so the bench doesn’t become a busy visual block. This look is also practical: it gives you a place to shave or rest without adding a separate piece of furniture. It reads high-end because it looks built-in, not added later.
Editor's noteSlope the bench top by planning before tile — a perfectly level bench will hold water and look dirty fast.
Start by framing the bench on top of waterproof backer, then waterproof the entire shower area including bench surfaces and corners. Tile the bench using thinset rated for wet areas and keep the top surface slope correct so water drains. After the shower is complete, coordinate floor tile layout so the visual movement lines up toward the bench — then grout and caulk with a color that matches the stone-look tone.
Skip thisDon’t grout the bench top with standard grout if your system calls for a sealed approach — follow the product instructions.
7. Black framed glass shower door with a clean header line
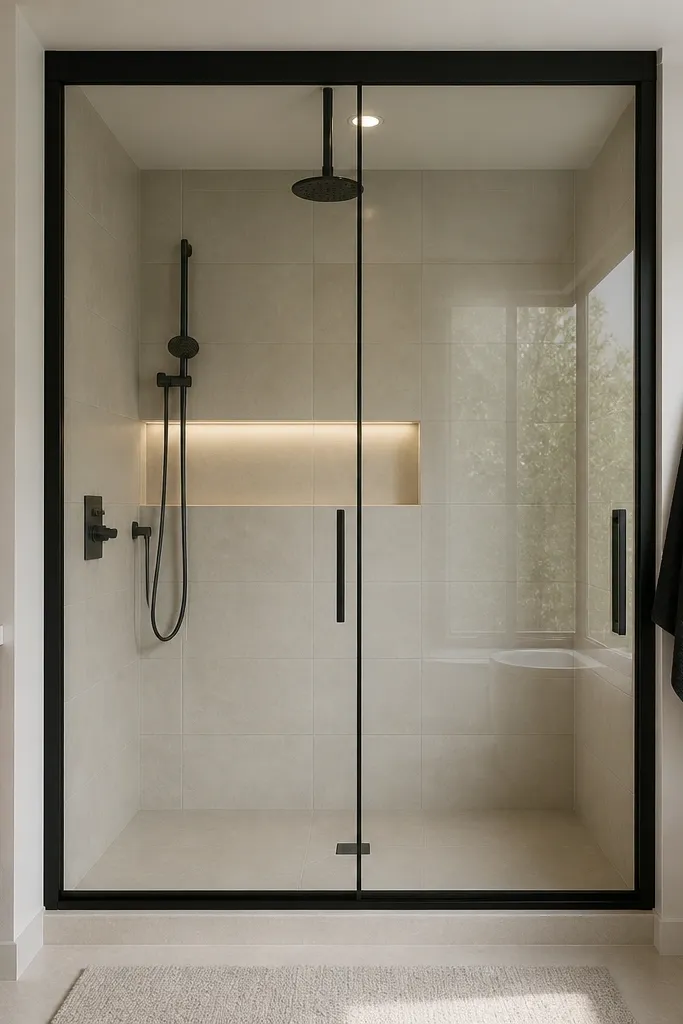
Glass doors make small bathrooms feel bigger, but the high-end part is the frame style and line placement. A black framed door gives a strong architectural edge that matches matte black fixtures and creates a crisp boundary for the shower. The “clean header line” look comes from installing the door plumb and aligned so the frame doesn’t tilt visually. Choose tempered glass with a minimal hardware layout and keep the track finish consistent. This is a fast, high-impact remodel upgrade that changes the whole room’s geometry.
Editor's noteDry-fit the frame without glass first and check for wobble; fix wall issues before you install panels.
Start by measuring the shower opening width at three heights and confirm the wall surfaces are square enough for the frame. Then install wall anchors and mount the header and side supports per the manufacturer’s instructions, using shims to keep everything plumb. Finish by setting the glass panels, tightening seals, and applying waterproof sealant where the frame meets the shower pan and walls.
Skip thisDon’t guess the opening measurements from the floor; measure at multiple heights because small bathrooms rarely stay square.
8. Ceiling-height tile column behind the toilet
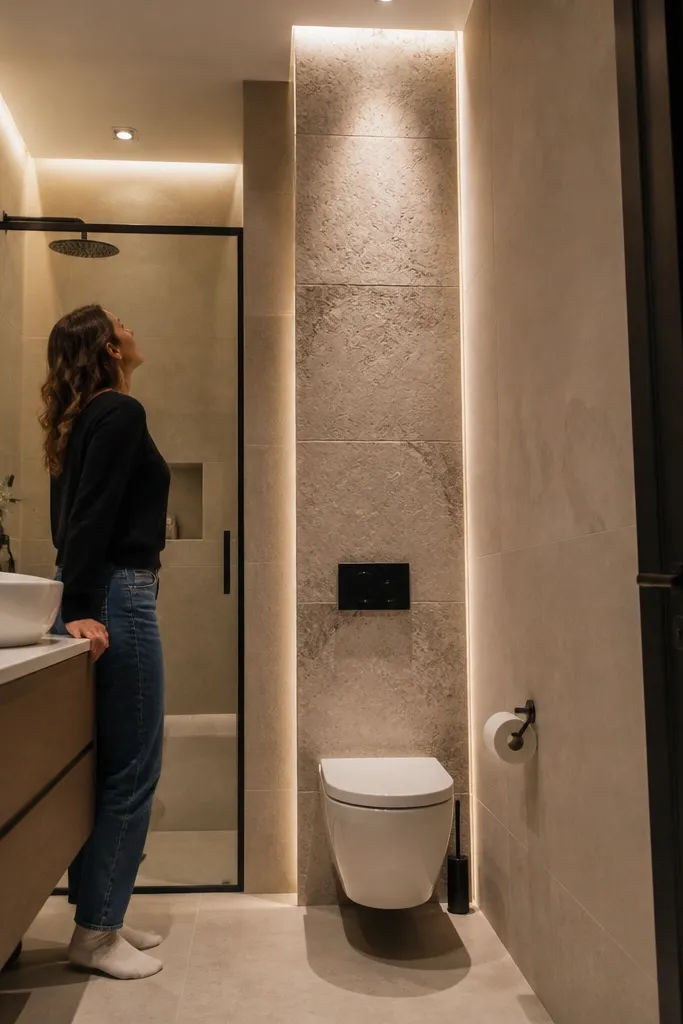
That awkward toilet wall is where small bathrooms either look intentional or unfinished. A ceiling-height tile column gives you a vertical line that pulls the eye up and makes the space feel designed. Keep the column narrow, around 12-18 inches wide, and use the same tile as the shower wall for a consistent material story. Add a simple wall-hung toilet or a compact tankless style if possible, but the column still works even with a standard toilet. This is a strong “designer trick” because it adds structure without taking up floor space.
Start by finding the centerline behind the toilet and planning your column width so you don’t end up with tiny side cuts. Then install tile on cement board or waterproof backer, keeping the grout lines straight with spacers and a level guide. Finish by caulking the top and edges with a paintable bathroom caulk and using a matching trim piece at the column ends.
Use an L-shaped tile layout jig or a scrap straightedge to keep the column edges perfectly vertical.
Don’t tile over weak drywall — the column looks great until it starts cracking around the edges.
9. Floating linen cabinet with vertical slat doors
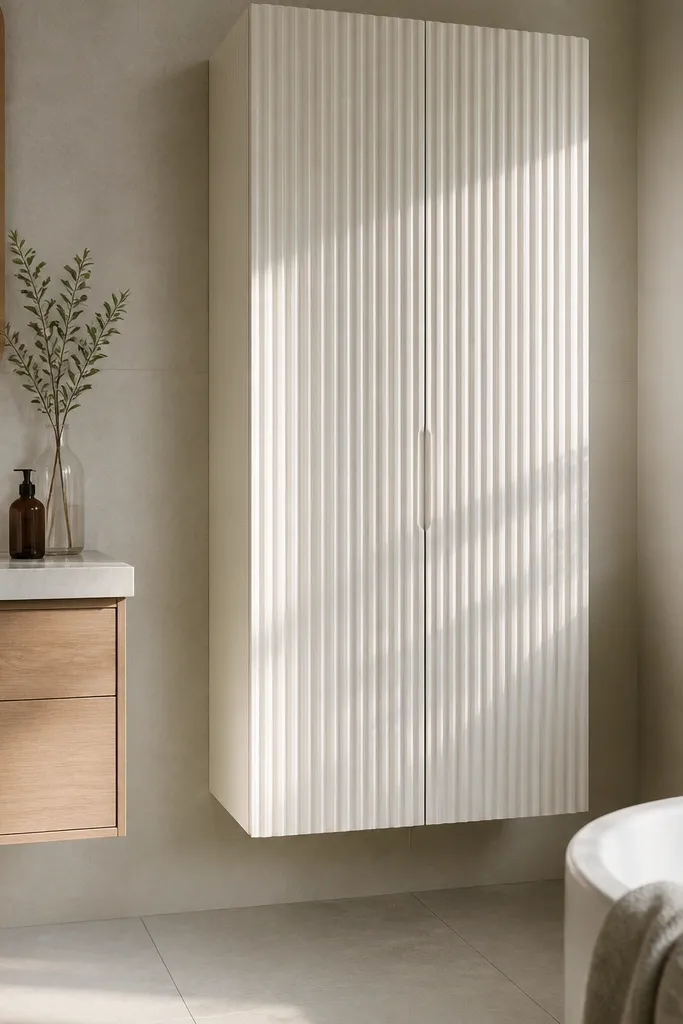
Storage is where high-end small bathrooms win, and slat doors add texture that reads expensive in photos. A floating linen cabinet keeps the floor visible, which stops the room from feeling boxed in. The vertical slats also help hide clutter because you can’t see everything through the gaps, even when the cabinet is open. Choose a warm wood tone or a painted off-white with a satin finish so it doesn’t look flat. This project hits the goal because it makes the bathroom look styled while solving the “where do towels go” problem.
Editor's noteMount the cabinet slightly above the towel bar line so your eye reads one clean storage stack.
Start by finding studs and mounting a ledger at the cabinet height so the box stays level while you screw it in. Build or buy a cabinet sized for the wall space, and add a backer board behind the mounting points if your wall is thin. Then install the cabinet, add the slat door hardware, and finish with a soft-close hinge if the doors are heavy. Seal any cut edges if the cabinet is MDF and will see humidity.
Skip thisDon’t use glossy paint on a cabinet — it shows fingerprints and streaks under bathroom lighting.
10. Vanity with integrated toe-kick LED strip
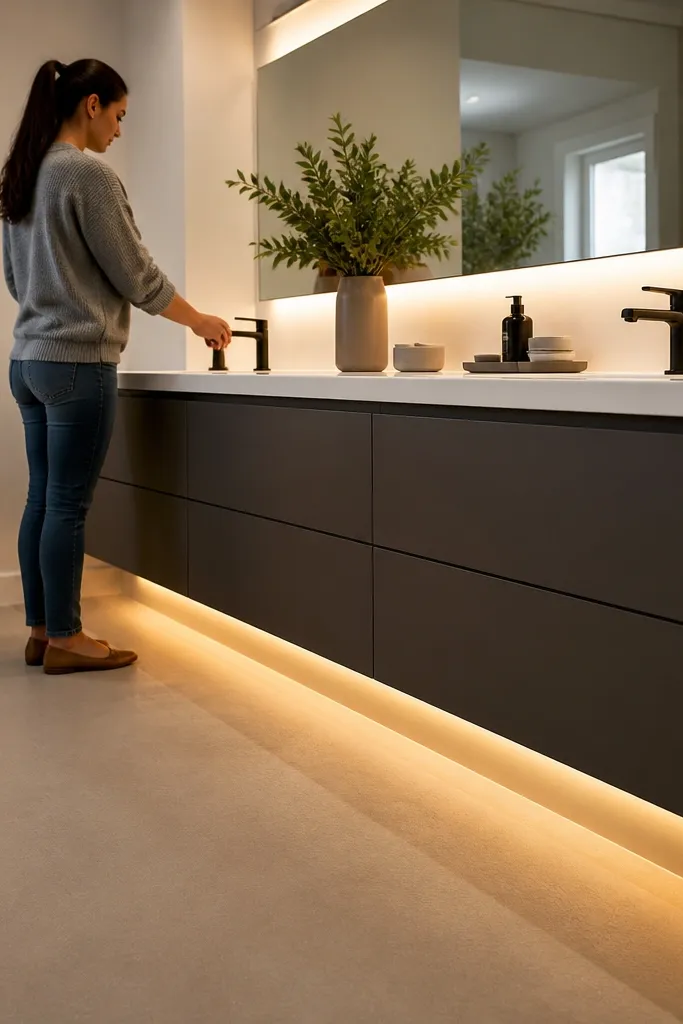
Under-vanity lighting is one of the most photogenic upgrades in a small bathroom because it adds depth without adding objects. A toe-kick LED strip makes the floating base look like it’s levitating, and it also helps you see the floor at night. Keep the LED warm, around 2700K, so it doesn’t turn skin gray in photos. This look works best when the vanity has a clean channel or built-in recess so the light is controlled and doesn’t glare. It’s high-end visually because it looks intentional, not like a random strip taped on.
Start by choosing a vanity with a recessed channel or plan to add a shallow aluminum LED track under the toe-kick opening. Then wire the LED strip to a dimmable driver and run the cable to a junction box in the wall, keeping all connections accessible. Finally, test the light before closing panels, set the diffuser so it spreads evenly, and use silicone to secure the track so it doesn’t rattle.
Use a diffuser cover — bare LED strips create hot spots that look cheap in close-up photos.
Don’t stick the LED directly onto dusty surfaces; wipe and dry-fit first so it bonds cleanly.
11. Oversized round mirror with a thin champagne frame

Round mirrors soften the geometry of small bathrooms and make the room feel less boxy. A thin champagne or brass-tone frame reads upscale because it’s delicate, not chunky. Go oversized — around 30-36 inches diameter — so it dominates the wall the way designer bathrooms do. This look also works with both modern and classic vanities because the frame stays minimal. If you want a high-end copy that doesn’t require demolition, this is one of the best upgrades.
Editor's notePick a frame finish that matches your faucet stem, not just the hardware color on the vanity.
Start by measuring the vanity width and choosing a mirror that covers at least two-thirds of that span. Then install a backer board on the wall where the mirror mounts so you’re not relying on drywall. Finally, level the mirror, confirm the bottom clears the faucet splash zone, and install bulbs or a wall light that sits slightly off-center above the mirror.
Skip thisDon’t choose a mirror that’s too small — tiny round mirrors look like a last-minute replacement.
12. Matte porcelain wall tile with corner-to-corner bullnose trim
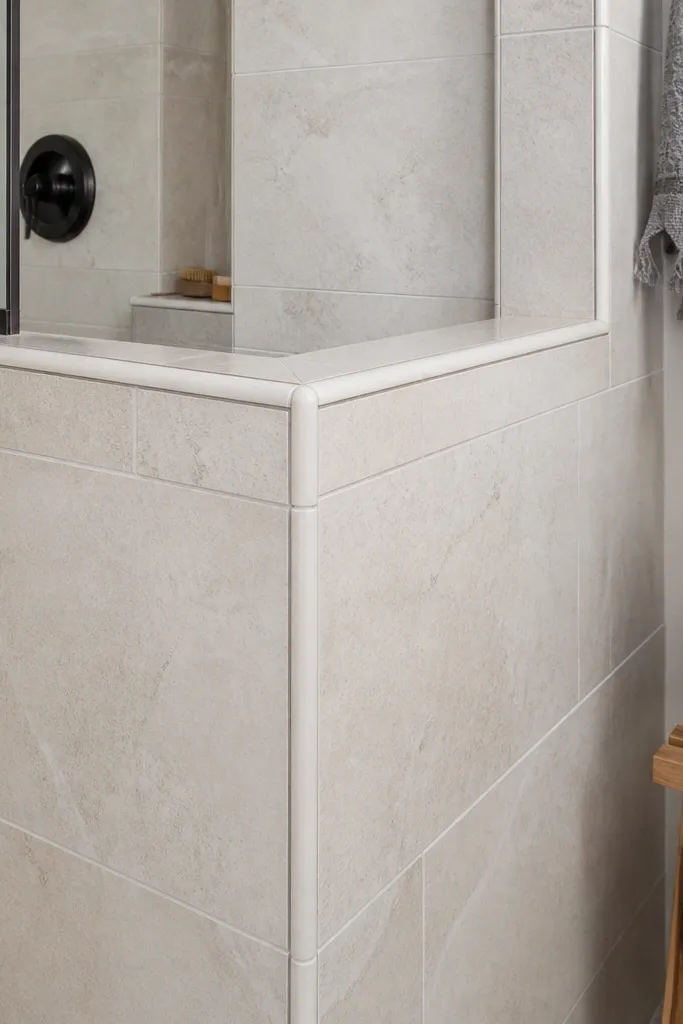
Bullnose trim is the detail people notice even when they can’t name it. On matte porcelain, bullnose corners look smooth and intentional, which makes the bathroom feel finished instead of DIY. The key is using bullnose consistently at major corners so edges look continuous. Keep grout tight and consistent, and pick a tile with a low sheen so it doesn’t glare under overhead light. This is a strong choice for small bathrooms because it adds polish without adding visual clutter.
Start by planning your tile layout so bullnose pieces land on the corners you want to highlight, usually the entry-facing edges. Then install the tile with the correct thinset and use spacers to keep grout lines uniform. Finish by setting bullnose trim pieces at the same plane, then grout after the tile sets and wipe clean with a microfiber cloth to avoid haze.
Use a grout haze remover appropriate for porcelain if you see any film after curing.
Don’t mix trim types — if you use bullnose in one corner and sharp cuts elsewhere, it looks mismatched.
13. Textured limewash wall on the dry side with waterproof wet wall
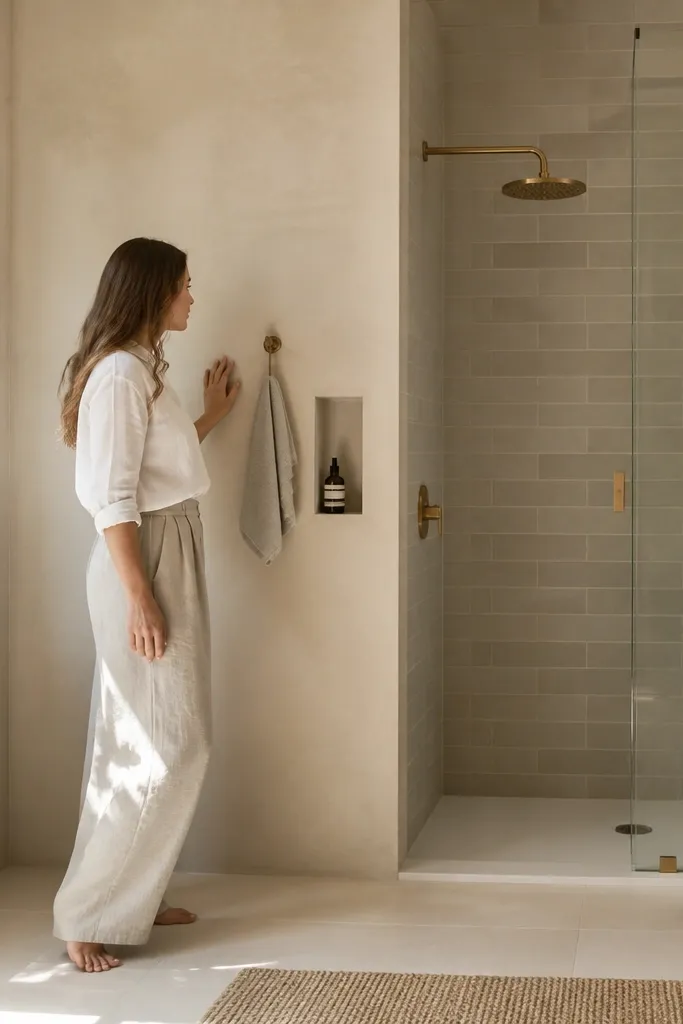
Limewash-style walls add a soft, expensive texture that flat paint can’t match. The look works because the wet area stays fully waterproof and finished in tile, while the dry wall gets the breathable texture. In small bathrooms, this contrast makes the room feel designer — the shower reads crisp and the rest feels warm and lived-in. Choose a light tone like warm white or pale greige so the room still feels bright. It’s a great option if you want high-end aesthetics without changing the plumbing.
Start by waterproofing the shower zone and keeping that area fully tiled or sealed per your system. Then prep the dry wall with patching and a bonding primer so the limewash texture doesn’t flake. Apply limewash in thin layers with a brush technique that keeps the texture even, letting each layer dry before the next. Finish with a bathroom-safe topcoat only if the product instructions call for it; otherwise, keep it limited to the dry side.
Test your limewash on a small scrap of drywall — one coat can look totally different once dry.
Don’t put limewash in direct spray zones; keep it on the dry wall only.
14. Two-tone vanity: dark base with light quartz top and waterfall edge
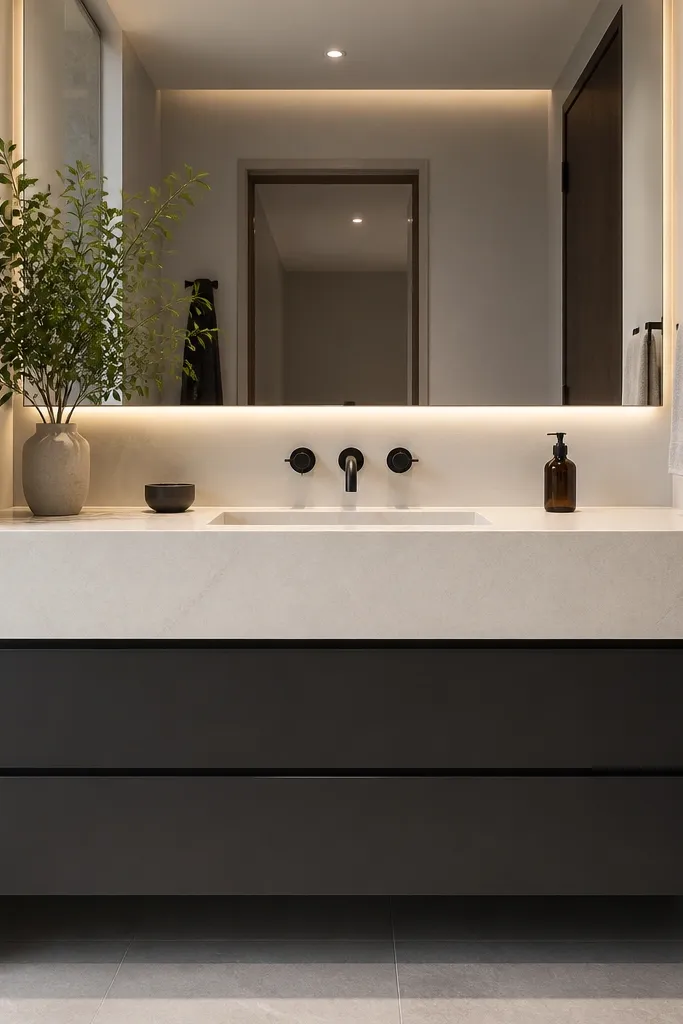
Two-tone vanities photograph like a magazine because they create contrast and a clean focal point. A dark base makes the room feel grounded, while a light quartz top brightens the center of the bathroom. Go for a waterfall edge on the quartz — it frames the sink area with a continuous line that looks custom-made. Keep the backsplash minimal so the top edge remains the star. This look is perfect for small bathrooms because it gives you a high-end center without needing extra square footage.
Start by selecting a vanity width that fits the wall and leaves at least 30 inches of clearance in front of the toilet or door swing. Then choose a quartz top with a waterfall edge profile and confirm it will clear the faucet and plumbing rough-in. Install the vanity level, set the quartz top, and seal the edges per the fabricator’s instructions. Finish by adding a backsplash only if needed for water splash, using a thin strip that matches the quartz tone.
Order the quartz with the faucet holes and undermount sink details already planned; cutting changes and delays get expensive fast.
Don’t pick a waterfall edge that’s too thick for the vanity scale — it should look proportional, not bulky.
15. Patterned floor tile with a solid, calm wall
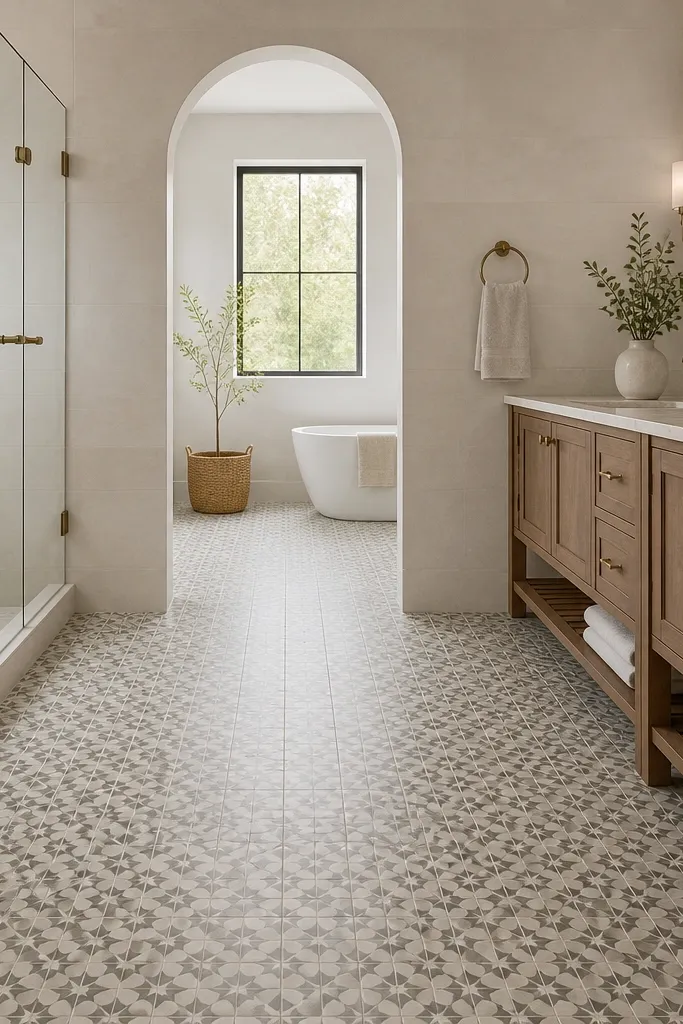
This is the cleanest way to add drama without turning a small bathroom into a busy showroom. A patterned floor tile gives you the “high-end look” at the lowest cost per square foot because it anchors the whole room visually. Keep the walls solid and smooth — painted plaster look or a simple large-format tile — so the floor pattern has room to breathe. Choose a pattern with a limited palette, like black and warm white, so it stays cohesive with fixtures. It’s photogenic because the floor pattern pulls the eye forward when you enter.
Start by laying out the floor tile with chalk lines so the pattern is centered under the vanity and not cut off unevenly at the doorway. Then install with thinset and use a leveling system if the subfloor isn’t perfect. Grout with a color that matches the light or midtone in the pattern, not the darkest line. Finally, caulk the perimeter and seal the grout if your tile or grout requires it.
Dry-fit the first row and mark tile orientation — patterned floors look wrong fast when tiles flip direction.
Don’t add patterned wallpaper or patterned wall tile at the same time; you’ll overload the room.
16. Slim vertical tile on the vanity wall for a tall, custom feel
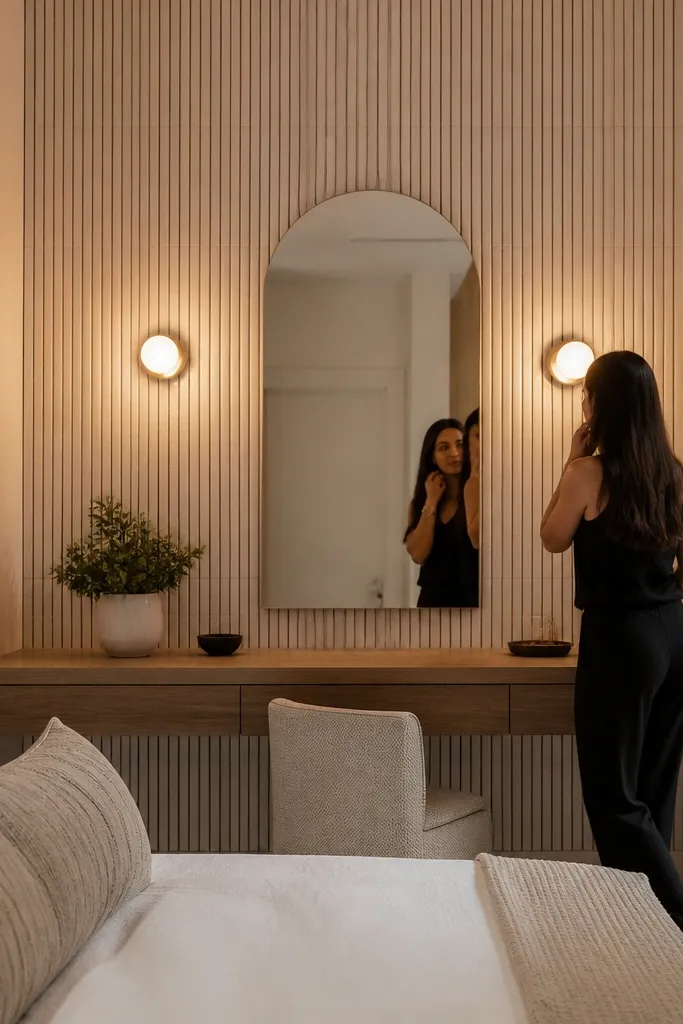
Vertical tile strips give you a tall, tailored look that suits small bathrooms where ceilings may feel low. The trick is keeping the tiles slim and using a consistent grout width so the lines look engineered. This design also makes the vanity area feel like a built-in feature instead of a random fixture placed on a wall. Choose a tile with subtle sheen or texture that catches light gently. It’s high-end because it creates a strong backdrop without adding clutter.
Editor's noteUse a laser level for the first tile row — once the top line is straight, everything below looks intentional.
Start by marking the tile area behind the vanity and confirming the layout avoids tiny slivers on the sides. Then apply a moisture-resistant backer and set the slim vertical tile starting from a level reference line at the top. Use spacers to keep grout uniform and check plumb with a level often. Finish by grouting, wiping clean, and installing a simple trim or edge profile at the outer corners.
Skip thisDon’t go too glossy on small walls; reflections can make imperfections look worse.
17. Matte white tub deck with brass drain cover and simple tile surround
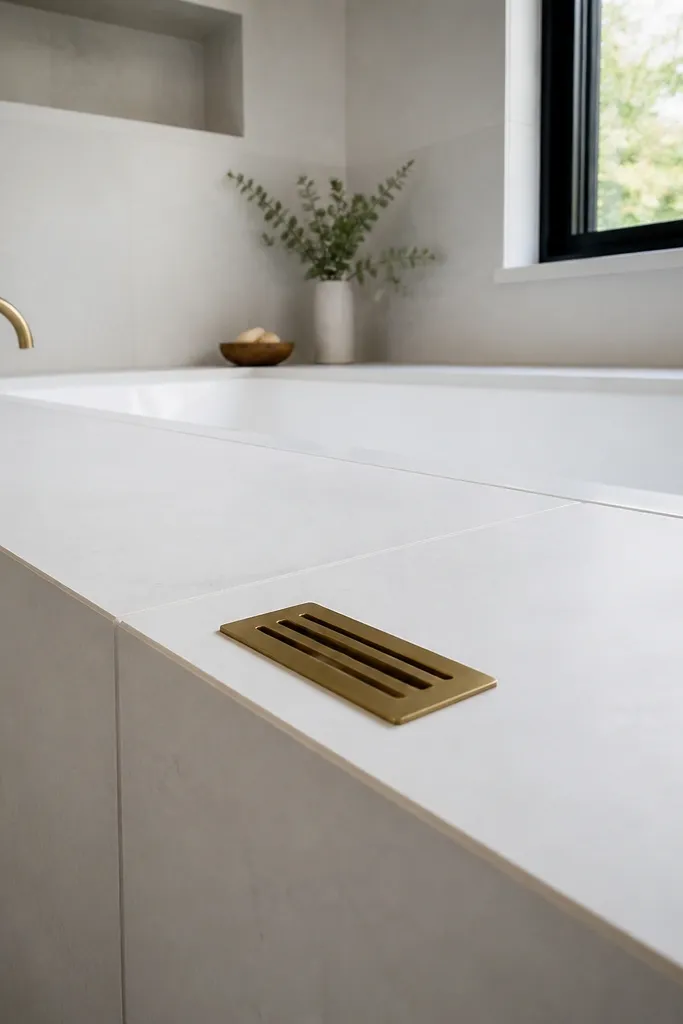
A tub surround can look high-end without ornate details if the materials are clean and the edges are crisp. Matte white on the tub deck keeps it bright, and a brass drain cover adds a warm focal point. Pair that with a simple tile surround in a large format — fewer grout lines, fewer distractions. Keep the trim minimal and consistent around the tub. This look works in compact bathrooms where a shower-tub combo is the only option. It’s photogenic because the tub reads like a showroom product, not a builder-grade fixture.
Start by installing waterproof backer on the tub surround area and verifying the tub is level so tile doesn’t crack. Then tile the surround with a large-format porcelain or ceramic and keep the grout consistent across the entire perimeter. Finish by sealing seams at the tub edge with a high-quality bathroom caulk and install the brass drain cover after everything cures.
Use a caulk that matches the grout tone closely; the seam line is visible in photos.
Don’t tile over an uneven tub — the wave shows through the grout line every time.
18. Ceiling-to-floor curtain-free look with a pivot glass panel
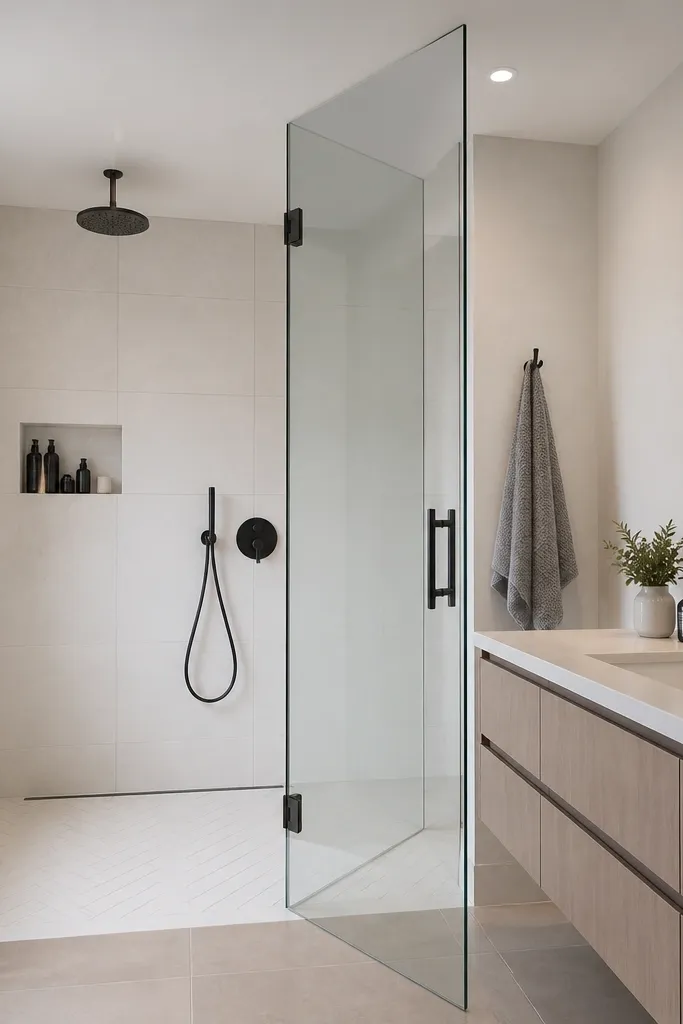
If your goal is a high-end, photo-ready bathroom, frameless glass elements win because they remove visual bulk. A pivot glass panel creates a clean, open look and makes the shower feel integrated into the room. In small bathrooms, that openness matters — it keeps sight lines clear from the door to the vanity. Pair frameless glass with simple chrome or brushed brass fixtures so the metal tones stay consistent. This look is especially good when you want the shower to feel like it belongs to the architecture, not like an add-on.
Start by verifying the shower opening dimensions and checking that walls are plumb where the hardware mounts. Then install the pivot panel hardware on the correct anchors and seal all mounting points with waterproof sealant. Finally, adjust the door alignment so it closes evenly and doesn’t leave gaps that leak. Finish by cleaning the glass and sealing any edges that need it per the manufacturer.
Order the glass with the correct clearances for your tile thickness so the panel closes without forcing.
Don’t mount hardware to cracked tile; find the solid substrate before you drill.
19. Wall-hung toilet with a concealed tank and matching tile backer
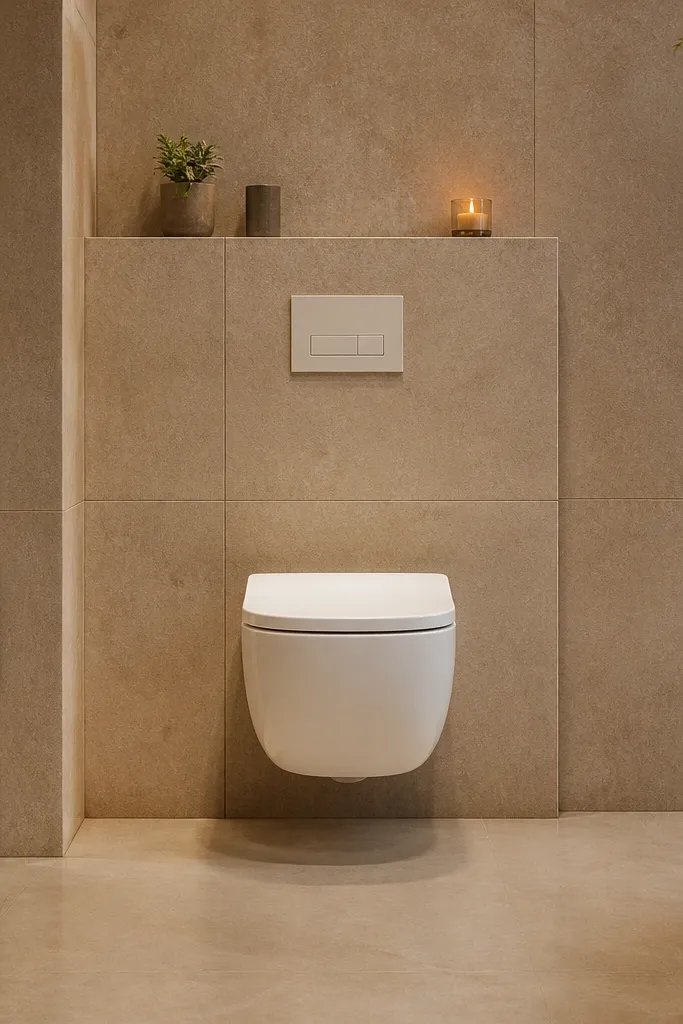
A concealed-tank wall-hung toilet gives you instant “high-end built-in” vibes because the floor stays open and the wall looks finished. In a small bathroom, that visual openness matters more than people expect. The tile backer behind the toilet should match the surrounding wall so the wall doesn’t look patched. Pair it with a simple, modern flush plate in matte black or brushed brass. This look is dramatic, but it’s also a practical upgrade because it’s easier to clean the floor around the fixture.
Start by installing the concealed frame at the correct height and confirming it’s level and secure to studs. Then cover the frame with cement board or approved backer and waterproof as required. Tile the wall behind the toilet to match the rest of your design, leaving the flush plate opening clean and aligned. Finally, install the toilet bowl and flush plate, then test flush operation and check for leaks.
Measure twice for the seat height and keep the bowl centered; small misalignment is noticeable in photos.
Don’t rush tiling around the flush opening — sloppy edges make a premium fixture look cheap.
20. Textured wall tile in a single accent band behind the vanity
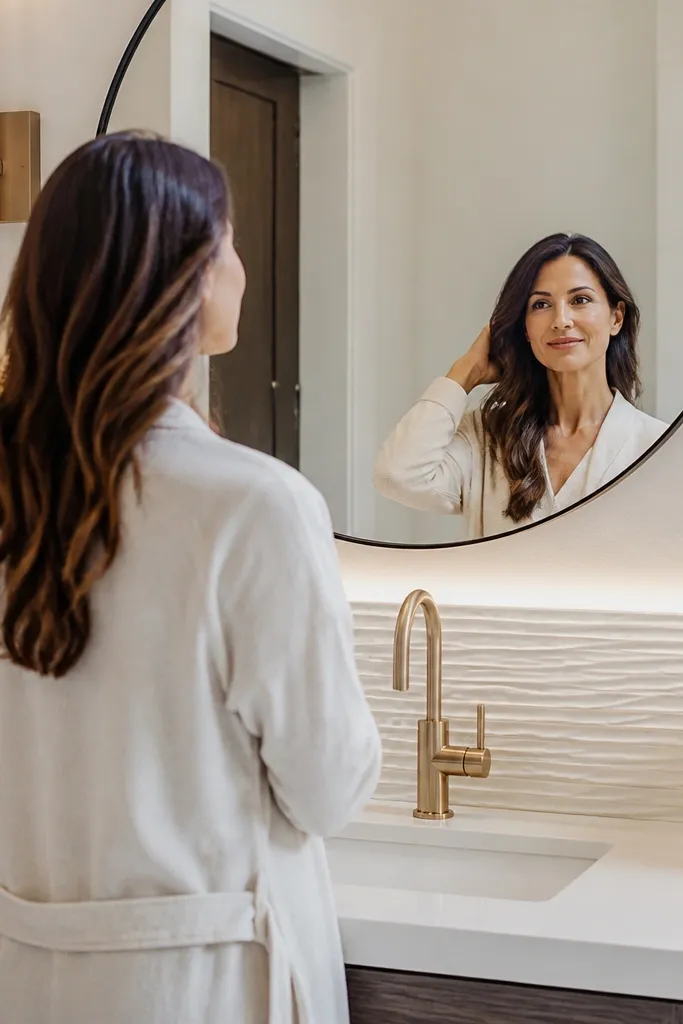
A single accent band gives you the designer look without covering every inch. Use a textured tile band — like a subtle 3D wave or micro-rib — behind the vanity at backsplash height so it catches light and adds depth. Keep the rest of the wall smooth and light so the room stays bright. This works because the texture is concentrated where your eyes focus when using the sink. It’s high-end because it looks like intentional material layering, not random decoration.
Editor's noteUse painter’s tape to control the paint line, but remove tape before the paint fully dries for a sharper edge.
Start by choosing the band height, typically around 18-24 inches, and mark a perfectly level line for the top edge. Then install the textured tile with consistent spacing so the pattern doesn’t drift, and keep the surrounding paint area masked cleanly. Finish by grouting the accent tile, then repaint the smooth wall edges carefully after curing. Caulk the perimeter where the tile meets trim for a crisp seam.
Skip thisDon’t stretch the accent band too tall; in small bathrooms, texture over a big area makes walls feel heavy.
21. Warm wood vanity slats with white countertop and black faucet
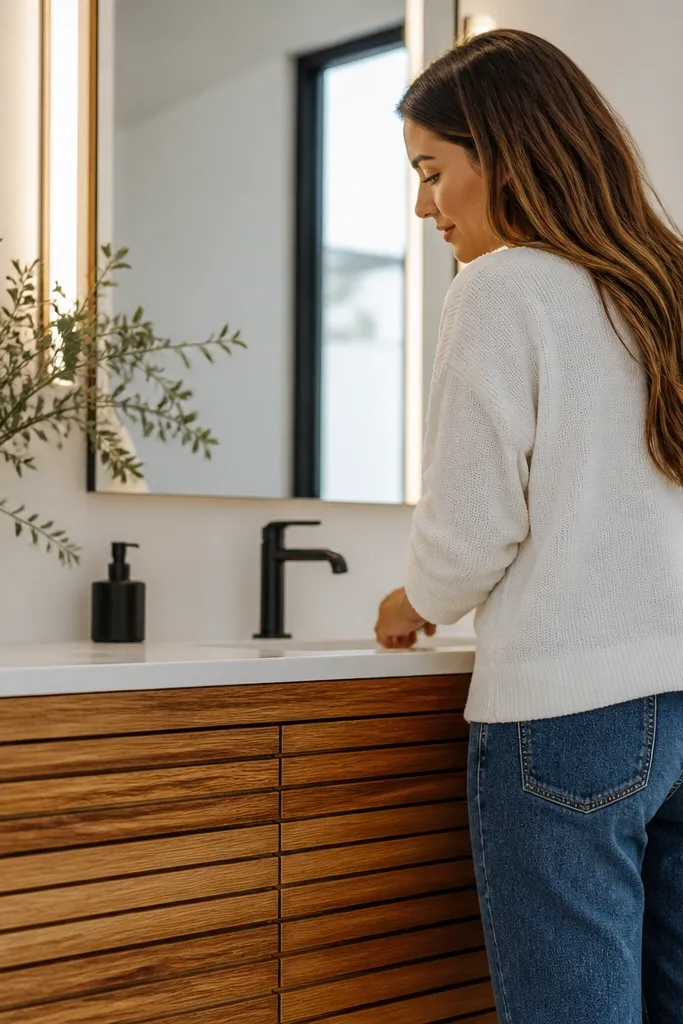
Warm wood slats look high-end because they add a handcrafted texture that reads like furniture. Keep it paired with a light countertop so the wood doesn’t darken the room. A black faucet ties the look together and keeps the contrast modern. This design works in small bathrooms because it adds texture without adding clutter and it creates a strong center focal point. It also photographs well because the wood grain gives a natural highlight under bathroom lighting.
Start by choosing a vanity with real wood veneer or a wood-look cabinet that’s rated for bathroom humidity. Then select a white or very light quartz countertop with a clean edge profile and undermount sink if you want a more custom look. Install the vanity level, connect plumbing, then mount the black faucet and set the countertop with the correct sealant type. Finally, add a simple matching tray or soap dish in a metal finish that matches your faucet.
Seal any cut or drilled areas on wood-veneered vanities to prevent swelling around hardware.
Don’t ignore the underside — unfinished cabinet interiors can warp in steamier bathrooms.
22. Geometric floor tile with a matching shower curb tile
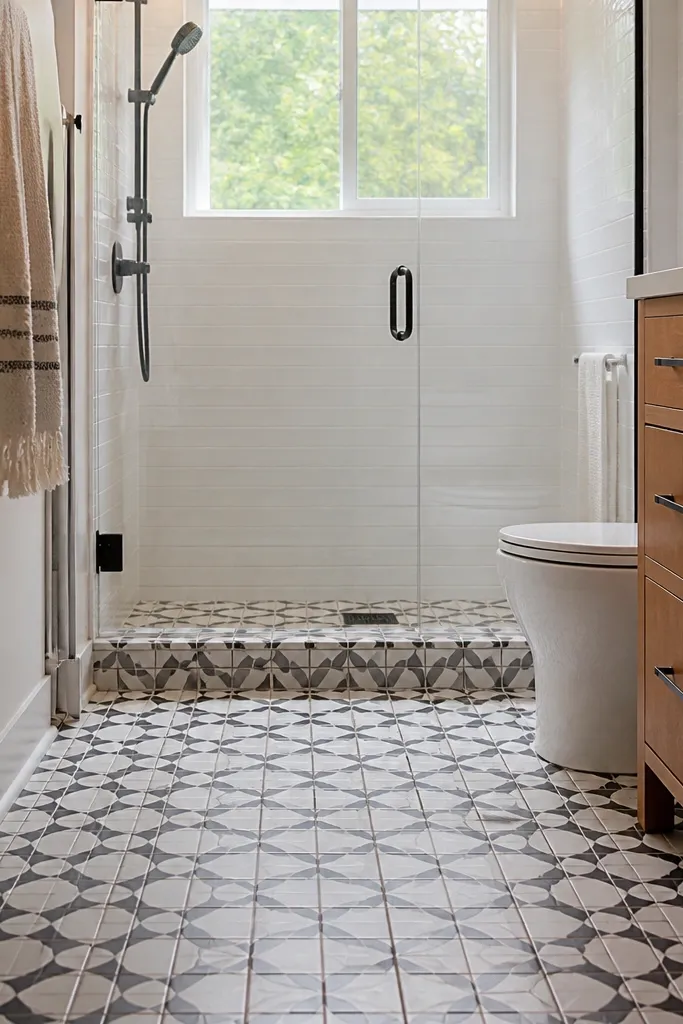
Matching the shower curb tile to the floor creates a “designed system” look that’s hard to fake. The floor gets the fun geometry, and the curb repeats it so the room feels cohesive instead of random. In small bathrooms, that repetition makes the space feel intentional and expensive. Choose geometric shapes with a limited palette so it doesn’t fight with the vanity and mirror. This is a great copy idea if you want pattern without wallpapering the whole room.
Editor's noteUse a wet saw and label tile pieces by orientation so pattern repeats stay consistent.
Start by selecting one geometric tile and planning where the pattern lines will align at the doorway and under the vanity. Then install the shower curb with the same tile and keep the curb face straight and square — geometry shows every wobble. After the shower is waterproofed and tiled, grout and seal as required, and finish with a clean caulk line where the curb meets the shower pan. Finally, keep the wall tile plain so the floor pattern stays the hero.
Skip thisDon’t use two different grout colors between curb and floor; the mismatch makes the repetition look accidental.
23. Two-sconce vanity lighting with glass shades and brushed brass accents
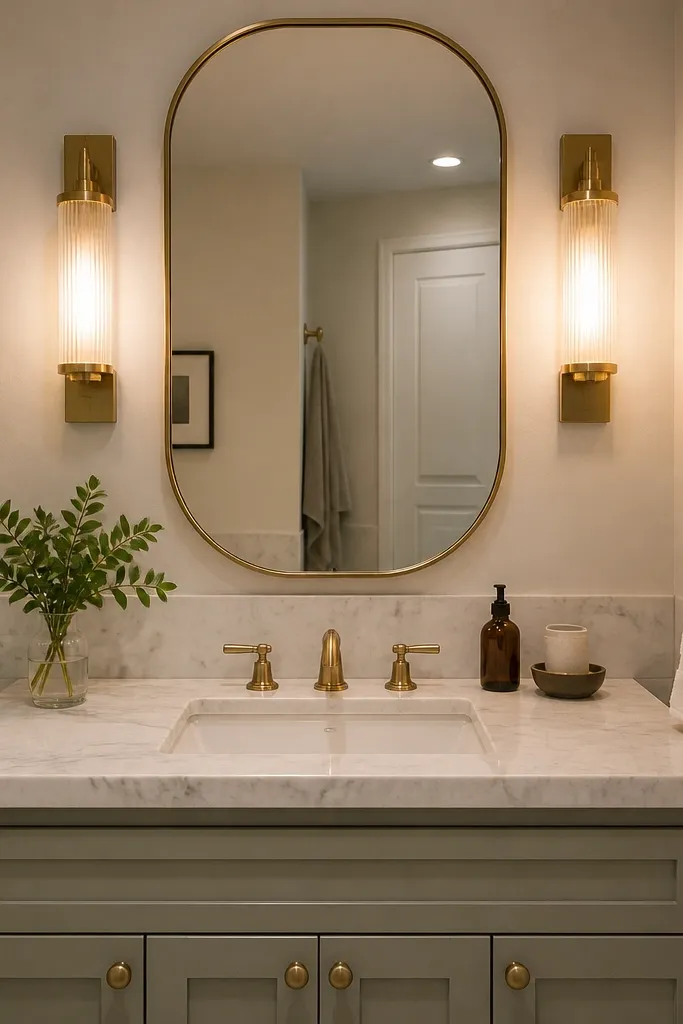
Lighting is the easiest way to make a small bathroom look custom, and two matching sconces are the cleanest method. They give even illumination across your face, which makes the mirror wall feel expensive in photos and in real life. Glass shades soften the light and reduce harsh reflections off tile and chrome. Brushed brass accents tie the lighting to faucets and cabinet hardware for a coordinated look. This upgrade also helps you avoid ugly shadows that make everything else seem lower-end.
Editor's noteChoose bulbs with CRI 90+ for the most flattering bathroom lighting.
Start by placing the sconces so the light centers align with your eyes when standing at the sink, usually around 60-66 inches from the floor. Then wire a proper junction box behind the wall finish and install mounting plates with the correct electrical clearance. Finish by attaching the glass shades and using 2700K or 3000K bulbs with a high CRI so skin tones look natural. Finally, check for glare by turning off the overhead light and looking at reflections in the mirror.
Skip thisDon’t mount sconces too high; high placement creates top shadows that look harsh in mirror photos.
24. Matte white herringbone backsplash behind the vanity sink
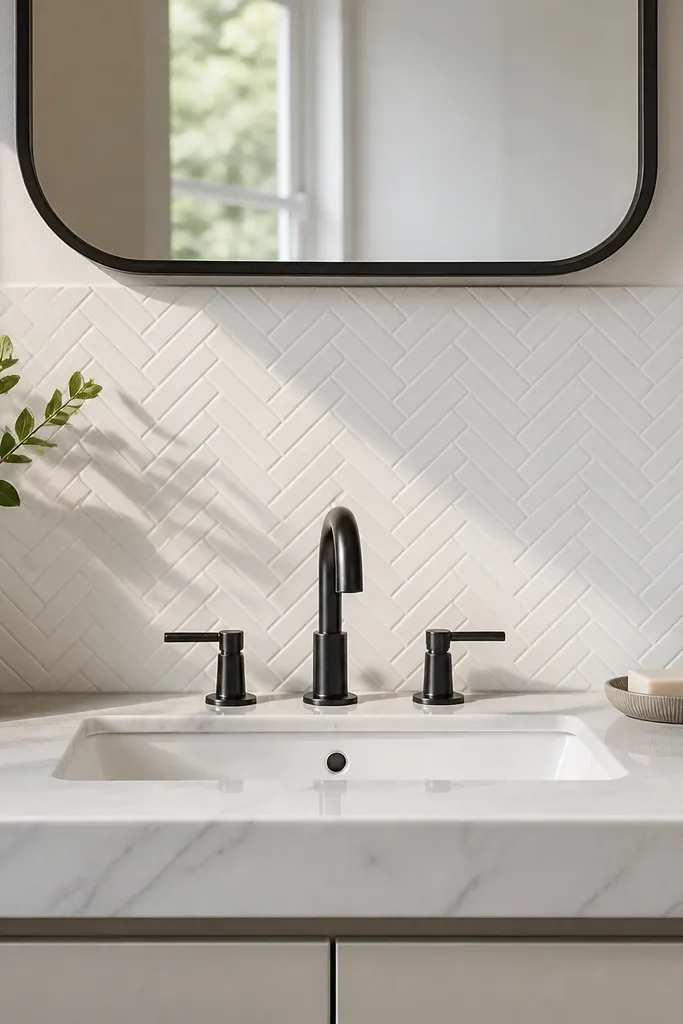
A herringbone backsplash adds motion and sophistication without taking over the whole room. In a small bathroom, keeping the backsplash limited to behind the sink area makes the look feel designed rather than busy. Matte white tile also hides minor wall texture differences better than glossy tile. The pattern creates a subtle “tailored” look around the mirror and vanity, which is exactly where people look first. This is one of the most reliable ways to make a basic vanity feel high-end.
Start by cleaning and priming the wall, then mark the backsplash rectangle so the herringbone stays centered and level. Install the tile with a small amount of thinset and keep the pattern orientation consistent; use spacers and check diagonals frequently. Grout after the tile cures, then caulk the bottom seam where backsplash meets countertop. Finish by wiping grout haze with a damp microfiber cloth and sealing grout only if your product requires it.
Dry-lay a few rows on the counter first to confirm the angle and spacing before you commit.
Don’t grout immediately after setting; rushing causes tile movement and uneven pattern alignment.
25. Ceiling-high painted paneling look with simple trim lines
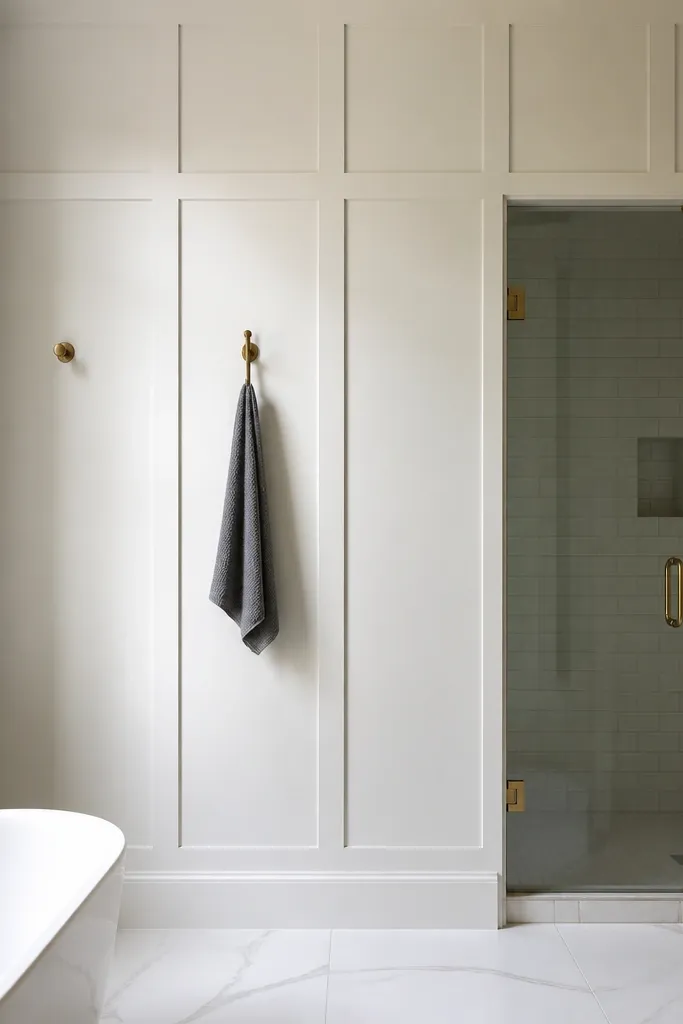
Paneling makes small bathrooms look custom because it creates structured lines and a sense of architecture. Use simple trim — straight rails and stiles — and keep the color bright and consistent, like a warm white with a satin finish. This look works especially well when the shower is fully tiled so the paneling stays on the dry side. Add a framed mirror and brushed brass fixtures and the whole room reads like a boutique hotel suite. It’s photogenic because the trim lines catch light and create depth without pattern overload.
Editor's notePaint trim after installation, not before; small scuffs hide better once the seams are filled.
Start by mapping trim locations with a level and measuring from a consistent datum line so all panels line up across the room. Install moisture-resistant MDF trim rated for bathrooms using construction adhesive and finish nails into studs. Fill nail holes, caulk seams, and sand smooth before painting. Finally, paint two coats and keep the panel edges crisp with careful tape removal.
Skip thisDon’t run paneling into the shower splash zone — water will creep behind trim and ruin the look.



