
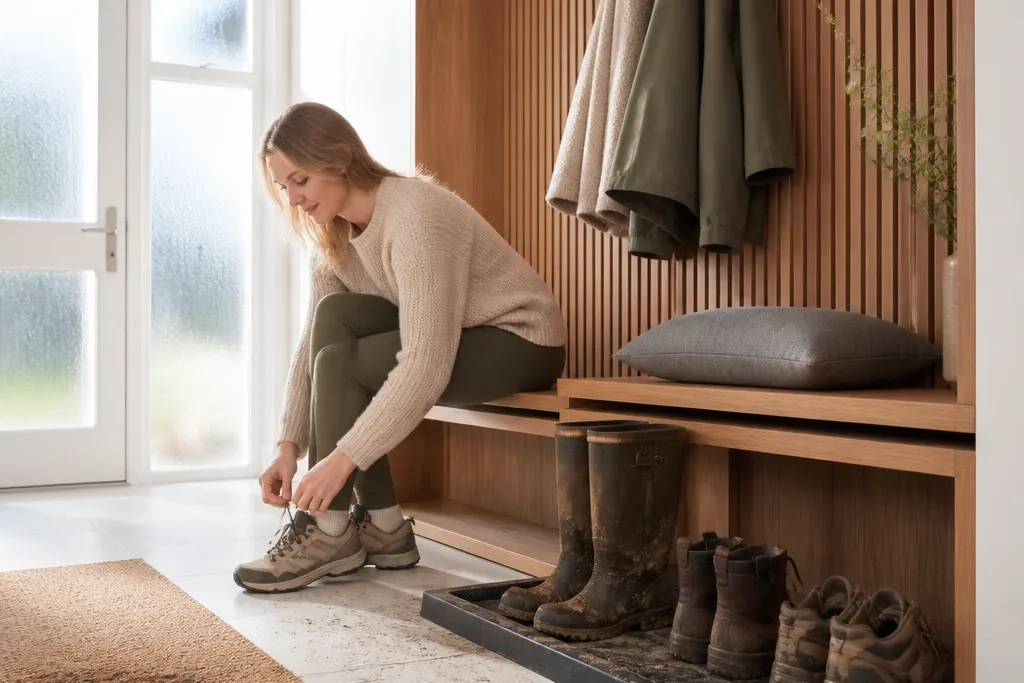
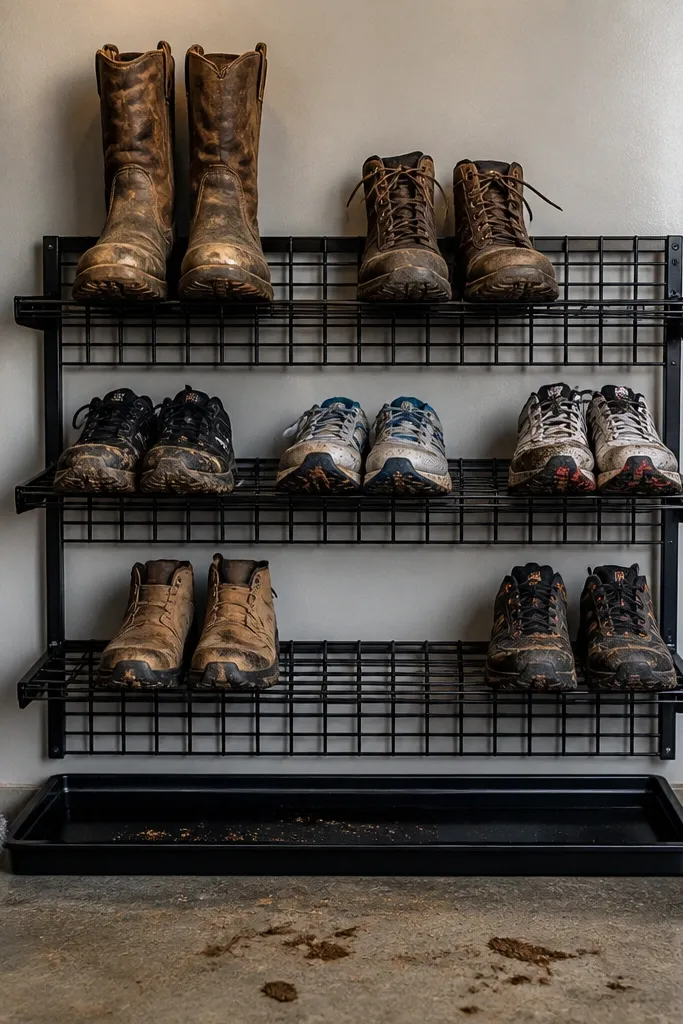
1. Slatted Oak Boot Wall with Air Gap Backing
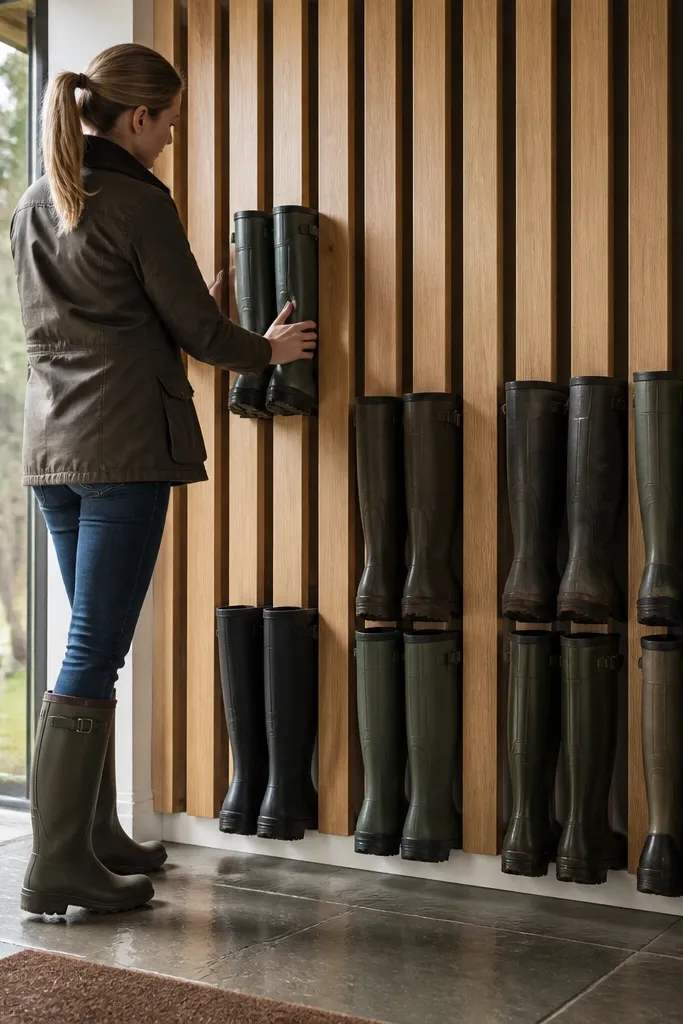
This is the mudroom storage look that reads expensive even when you’re building it yourself. A slatted oak face hides the messy shoe sides while keeping airflow moving behind the boots through a deliberate air gap. You get a clean vertical rhythm that looks good from the doorway, and boots stay upright because each boot has a dedicated “slot” height. Use it in entryways where boots come in wet and you want them to dry without turning the wall into a damp mess.
Start by ripping and sanding oak boards for the face, then cut spacers to create a consistent 1-inch air gap between the slats and the back panel. Fasten a back frame to studs using 2x2 cleats, then mount the back panel (sealed plywood) and screw the slats over it. Install boot stop rails at the bottom with a 1/2-inch lip so boots can’t slide forward. Finish with a matte clear coat so scuffs don’t look shiny.
Editor's notePre-finish the oak slats before assembly; it makes the final wipe-down look flawless.
Skip thisSkipping the air gap makes the back panel trap moisture and you’ll see warping and smell.
2. Matte Black Steel Shoe Grid with Removable Drip Tray
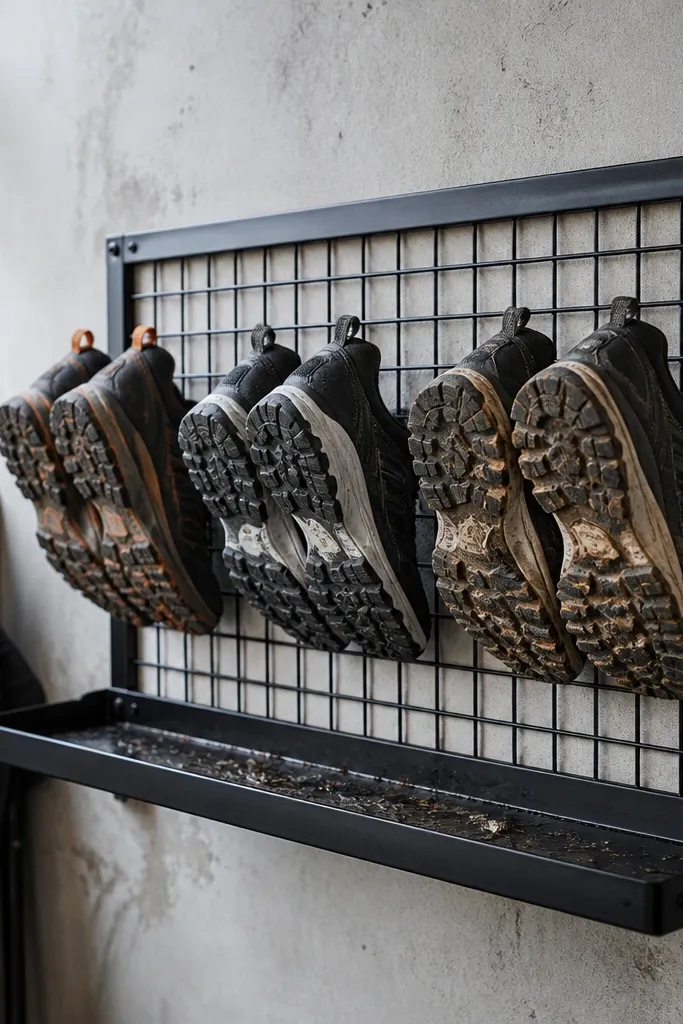
A grid rack looks modern and tidy, and the removable drip tray is what makes it practical for mudrooms. Shoes hang slightly off the wall, so air moves around them instead of trapping dampness. The black steel finish hides scuffs from zippers and buckles, and the open grid keeps the storage visually light. Put this where shoes land most — near the bench or the door — so you don’t end up with pairs on the floor.
Build a simple rectangular frame from 1-inch square steel tubing or buy a pre-made frame and cut to size. Add wire grid panels, then attach them with concealed brackets so the grid stays straight. Slide a shallow tray under the lowest row using cabinet-style drawer slides rated for at least 50 lbs. Seal the tray with epoxy paint and add a small lip so water can’t run out when you pull it.
Editor's noteUse a tray with a slight slope toward the drain edge so puddles don’t sit.
Skip thisMounting it without a tray makes wet shoe water collect on the wall and floor.
3. Bench-Top Shoe Pullout Drawers in Sealed Plywood
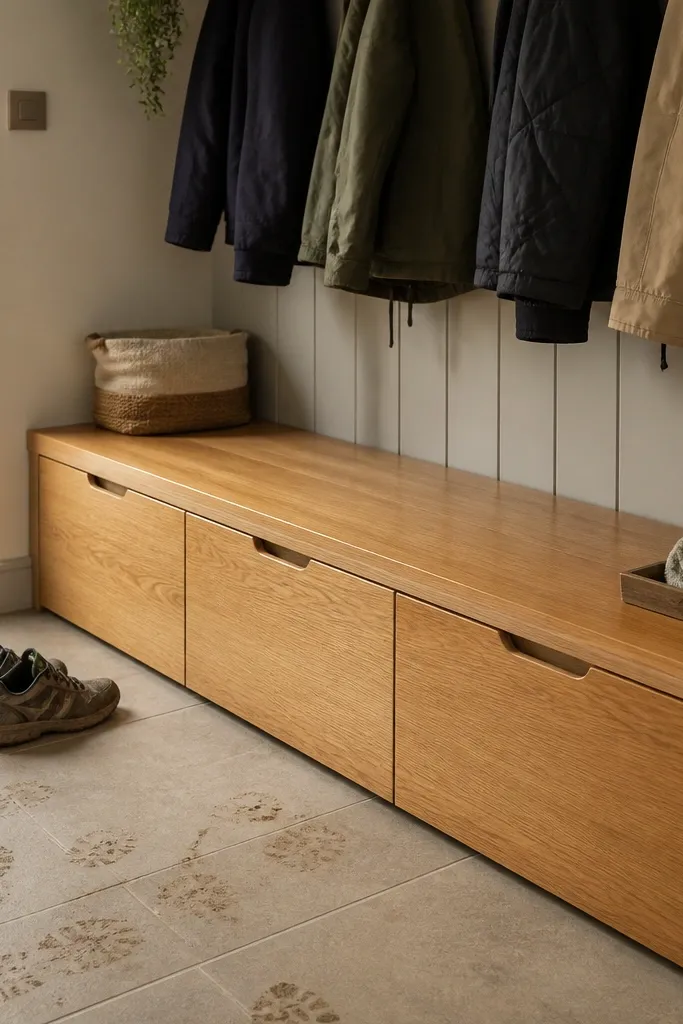
If your mudroom gets cluttered fast, drawers are the cleanest visual solution. These pullouts hide shoes completely, but the design still looks high-end because the bench front is smooth and the hardware is minimal. Sealed plywood with a durable topcoat is the key for mudroom abuse — you can wipe off grit without the surface getting rough. This works best for families who want the floor to stay clear and don’t want to see pairs stacked in cubbies.
Build the bench frame first using 2x4s anchored to studs, then cut sealed plywood drawer boxes sized to fit with 1/8-inch clearance. Install full-extension drawer slides rated for 75 lbs so heavy boots don’t bind. Add a thin ventilation strip inside each drawer face — a 1/4-inch gap at the top — so moisture can escape. Finish the bench top with a hardwearing topcoat like two-part polyurethane and add a toe-kick to keep dirt from collecting.
Editor's noteUse drawer fronts cut from the same plywood sheet orientation for consistent grain and a calmer look.
Skip thisUsing unsealed MDF in drawers — it swells and turns gritty after wet shoes.
4. Tall Boot Storage with Vertical Felt-Lined Channels
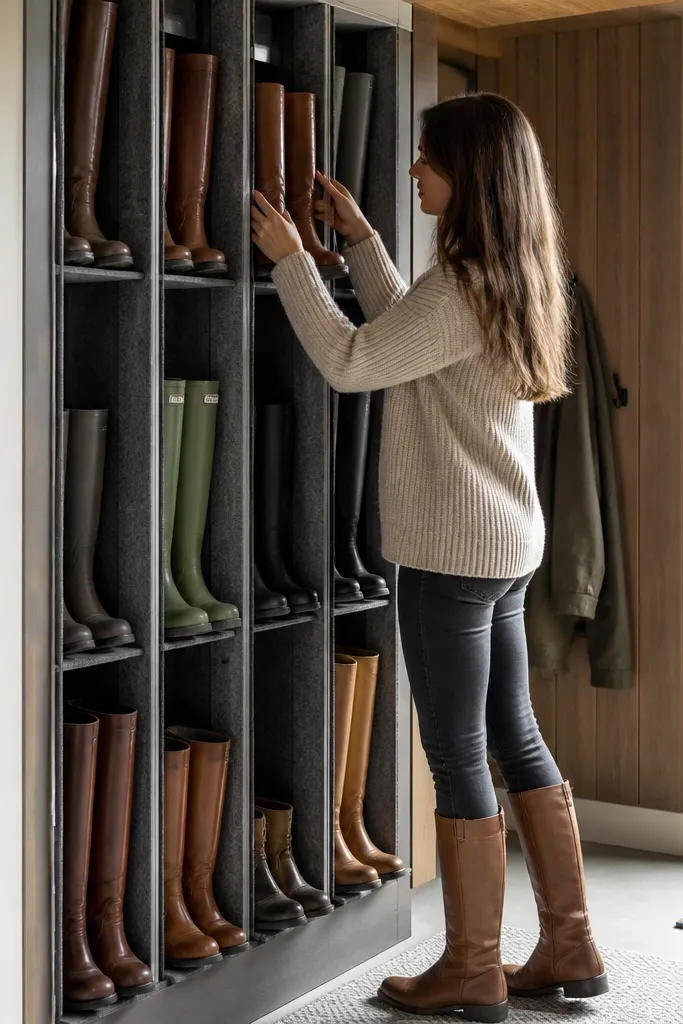
This idea looks soft and designer because the boot contact points are padded and the channels keep boots from rubbing and slumping. Felt lining protects leather and reduces scuffs, so your boots stay looking better longer. The vertical channel layout also makes it easier to grab the right pair without knocking other boots. Install it in a narrow mudroom where you need height storage but still want a calm, styled wall.
Cut a backer panel from sealed plywood, then measure boot widths and set channel spacing with 1 inch between adjacent boots. Add thin wood strips to form the channels and screw them into a stud-backed frame. Line each channel with felt panels cut to fit, then trim edges with a narrow wood cap strip for a clean border. Add a closed base panel at the bottom with small ventilation slots drilled every 4 inches.
Editor's noteUse felt with a tighter weave so it doesn’t shed fibers into boots.
Skip thisMaking channels too tight — boots jam and you’ll end up forcing them and bending shafts.
5. Shiplap Cubbies with Slanted Fronts and Clear Lids
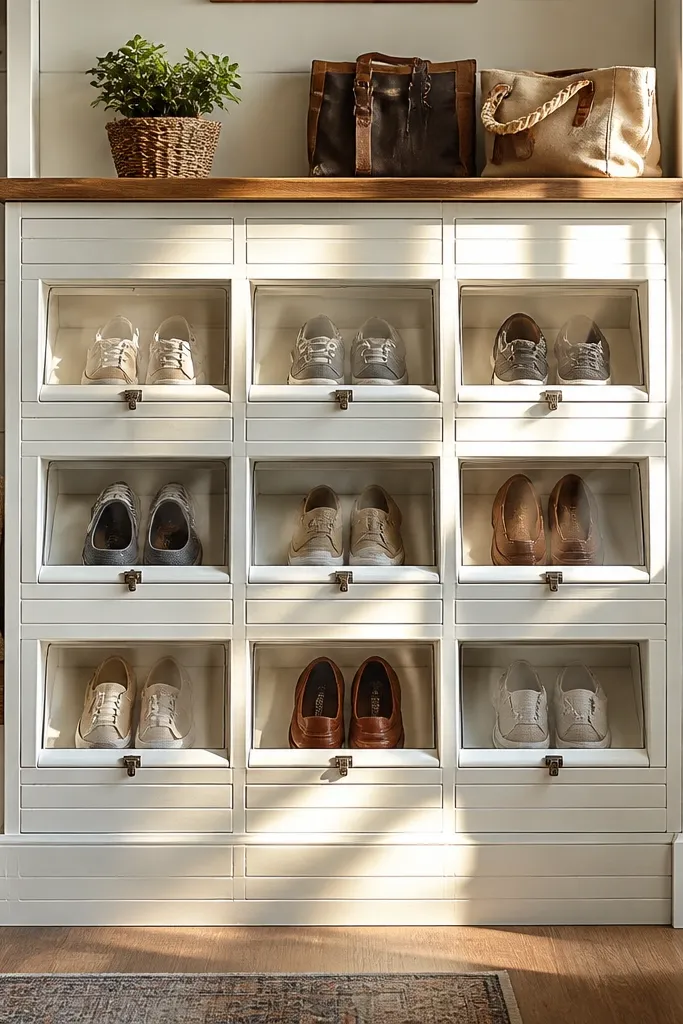
Cubbies look great, but plain square cubbies turn into a jumbled mess. Slanted fronts keep shoes visible and easier to grab, and clear lids add a polished, high-end feel without fully hiding everything. The shiplap face gives texture that photographs well, while the slant helps prevent shoes from sliding out. This works for seasonal shoes and daily pairs you want to see without making the floor look chaotic.
Frame each cubby with a back panel and side walls, then install a 15-degree slanted shelf front so shoes rest against the back. Use sealed plywood for interiors, then attach shiplap boards to the outer face. Add clear polycarbonate lids on small friction hinges so you can open them without wrestling. Finish with paint rated for trim and seal the edges so moisture doesn’t soak into the wood.
Editor's noteLabel the underside of the lid with a tiny stamped tag so you don’t break the clean look with visible labels.
Skip thisUsing fully enclosed cubbies for wet boots — condensation builds under lids.
6. Rattan + Wicker Drawer Inserts for Small Shoes
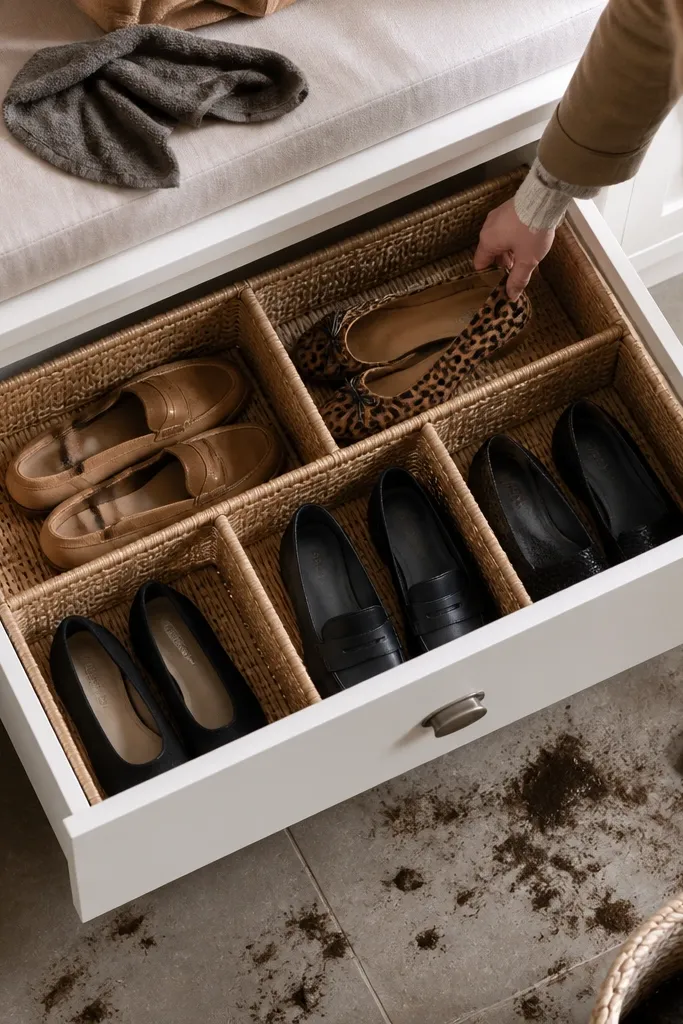
For the pairs that vanish in a pile — flats, loafers, kids' shoes — woven inserts make everything look intentional. The texture reads warm and expensive, and the open weave helps air move through so shoes don’t sit sealed in a damp box. Use this inside a bench drawer or a cabinet with shelves so you get both hidden storage and a styled interior. It’s best for mudrooms where you already have base storage but need a nicer organization system inside.
Measure your drawer interior depth and build a simple plywood or birch frame insert that fits snugly with 1/4-inch clearance. Line the insert base with a thin sealed sheet so grit doesn’t stain the drawer bottom. Install rattan or wicker baskets inside the frame and anchor with small brads so they don’t slide. Add a fabric strip or cork strip at the front edge so shoes don’t scrape when you pull the drawer open.
Choose inserts with straight sides so they stack cleanly and don’t warp over time.
Skipping a sealed base — muddy grit will soak into woven material and stay.
7. Wall-Mounted Ladder Shelf with Flip-Down Boot Stops
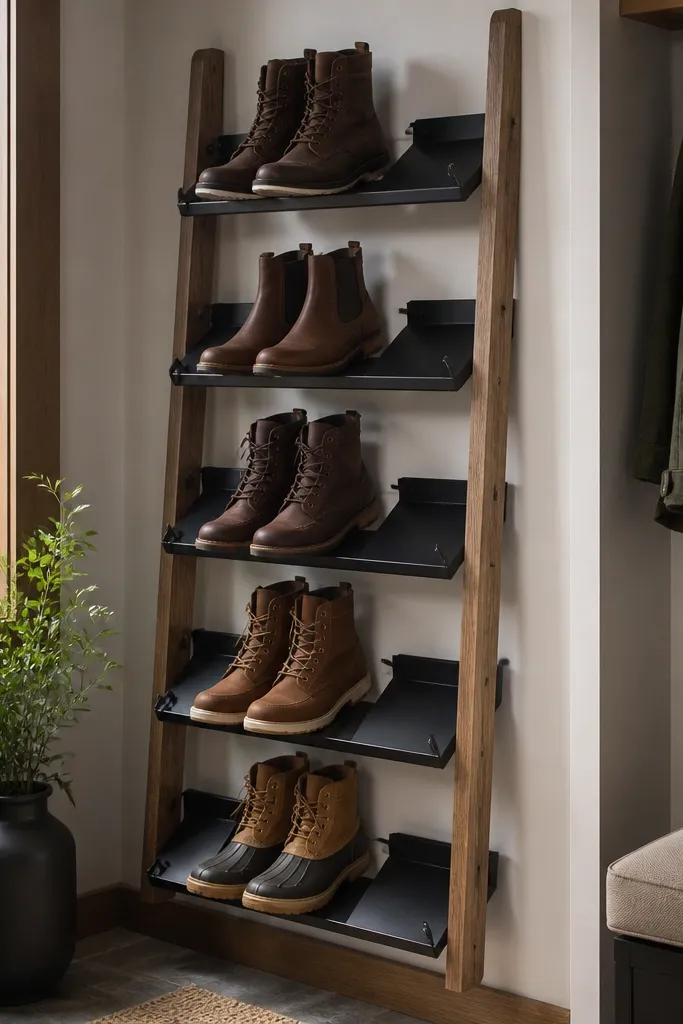
A ladder shelf is one of the quickest ways to get that high-end “designed wall” look, but the trick is preventing boots from sliding. Flip-down stops create a controlled landing point so every pair sits at the same angle. The open shelves show shoes like a display, and the matte finish keeps the wall from looking glossy and cheap. Use this for a mudroom where you want a feature wall, not a hidden storage corner.
Cut ladder side rails from 2x2 or buy metal ladder rails, then mount into studs with a ledger and level it carefully. Add shelf boards spaced 10-12 inches apart for sneakers and 14-16 inches for boots. Install small flip-down stops using a hinge and a magnetic catch so they stay open when you load shoes. Seal the shelf boards with a scuff-resistant clear coat and add a small toe rail at the front for extra grip.
Stagger shelf depths by 1 inch so boots don’t all sit in the same footprint and create a visual jumble.
Skipping stops — gravity makes boots drift and the wall looks messy fast.
8. Perforated Steel Pegboard Shoe Stations with Leather Strap Handles
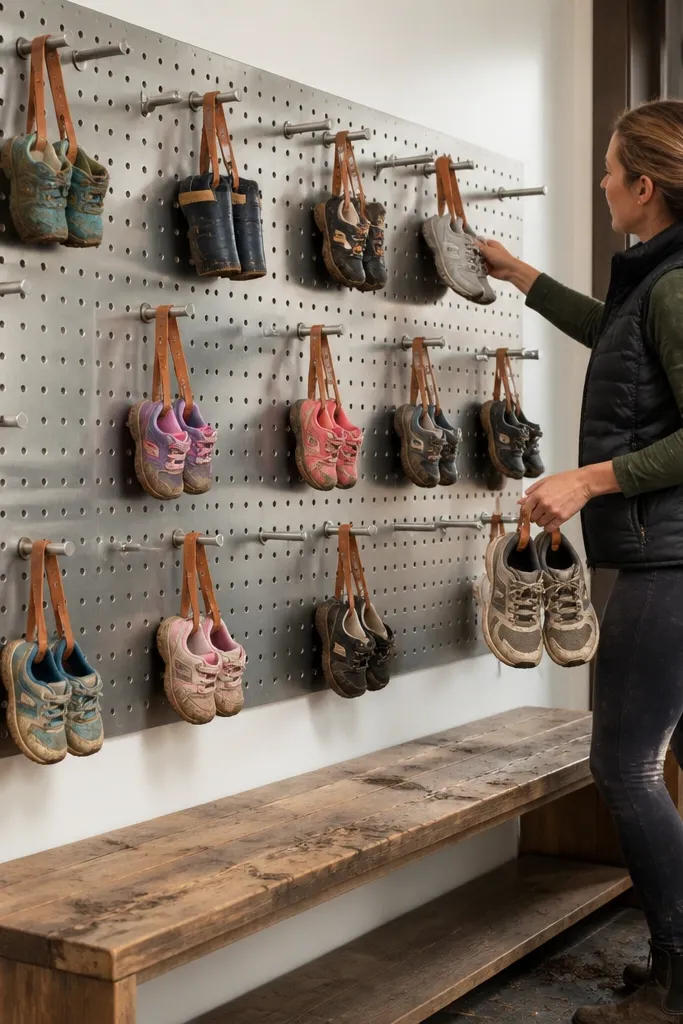
This looks like a boutique display, but it’s built for real mudroom use. Pegboard lets you adjust spacing as your family changes shoes, and the perforated steel finish wipes clean after muddy days. Add leather strap handles for a warm detail that makes the whole wall feel intentional. This is perfect for kids' shoes, sandals, and daily sneakers where you want quick grabbing and a neat wall.
Mount a perforated steel sheet to studs using spacer standoffs so air can circulate behind it. Attach modular shoe hooks or small shelves made for pegboard, then add a strap handle to each module using riveted leather strips. Keep spacing tight for small shoes but leave at least 2 inches between rows so pairs don’t overlap. Seal any cut edges with a metal primer and paint so rust doesn’t start.
Editor's noteUse a tray under the lowest hooks for tiny grit — it keeps the floor clean.
Skip thisHanging heavy boots from pegboard alone — use modules rated for weight.
9. Stone-Look Tile Backed Shoe Cubbies with Hidden Vent Grilles
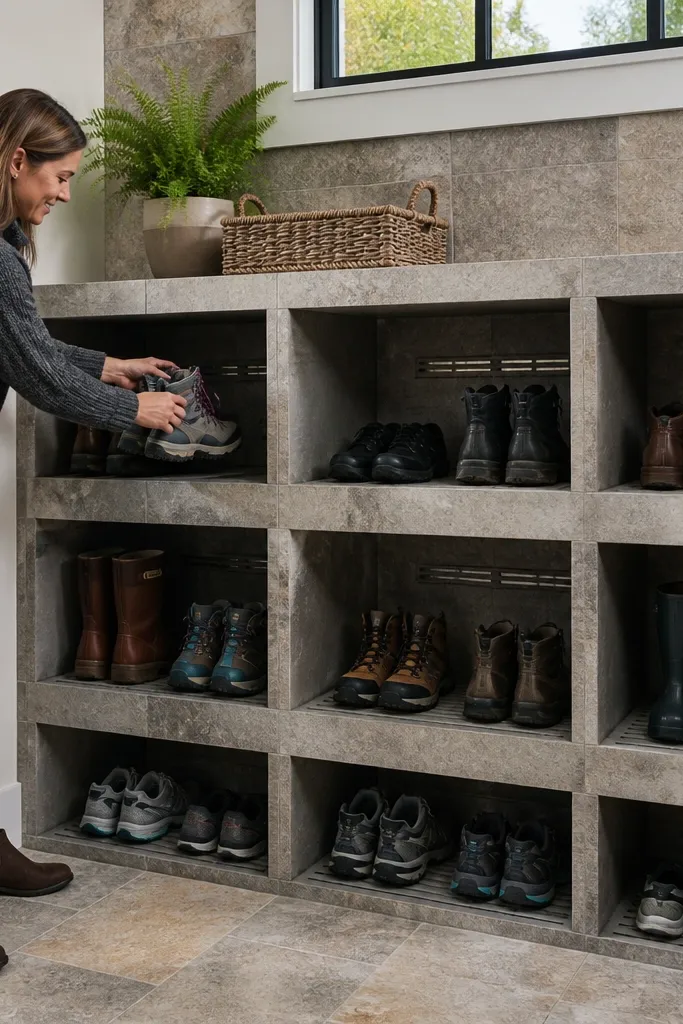
If you want the mudroom to look like it belongs in a magazine, tile-backed cubbies do it. The tile surface wipes down instantly, and it handles wet shoe bottoms without absorbing grime. Hidden vent grilles keep airflow moving so shoes dry instead of sitting damp in a box. This is best for a dedicated shoe wall where you want closed storage that still breathes.
Build a cabinet frame from 2x2s and plywood and cover the interior back panel with cement board. Tile the back panel, then install a vent grille near the top of each cubby that routes air into a small rear channel. Add a sealed door or face frame if you want a cleaner look, and use magnetic latches for easy access. Finish by sealing grout and edges so mud doesn’t stain the tile.
Editor's noteSet cubby heights to match your most common shoe size — 7-8 inches for sneakers, 12-14 inches for boots.
Skip thisSkipping cement board behind tile — standard drywall fails around wet mudroom splashes.
10. Clear Acrylic Shoe Fronts on Lower Cubby System
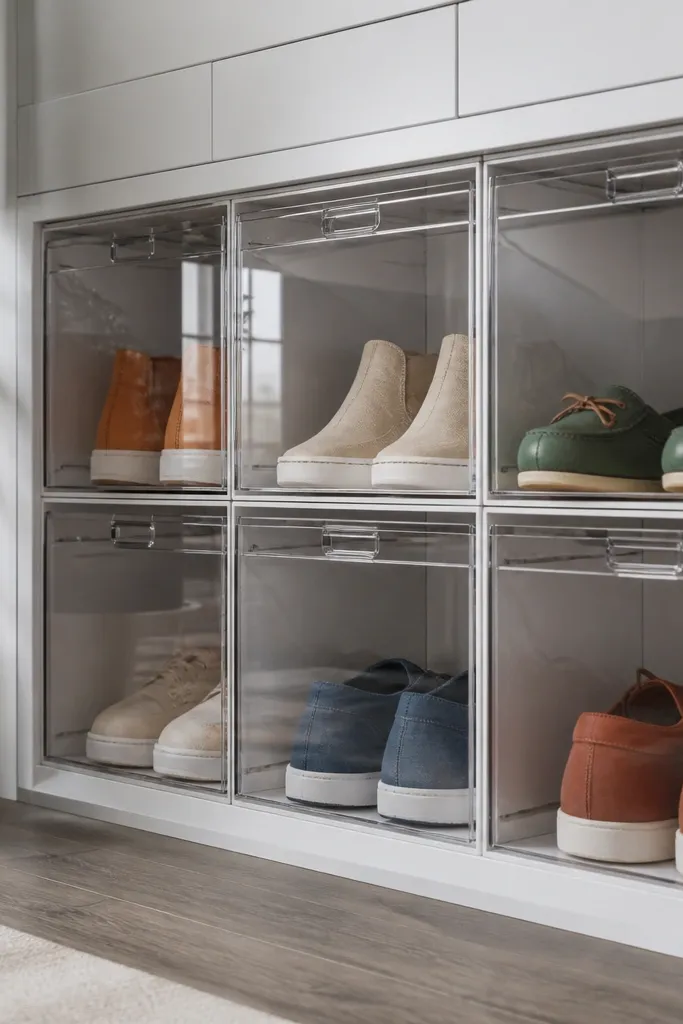
Clear fronts give you a display look without leaving shoes fully exposed. The acrylic keeps dust off, but it still lets you see color and pair placement, which makes the whole mudroom look styled. Lower cubbies also help keep shoes from creeping onto the floor because each pair has a designated slot. This is ideal for entryways with kids or roommates where shoes multiply and you need a system that’s visible and easy to follow.
Construct a base cabinet with open cubbies, then measure each cubby opening precisely for acrylic panels. Use a thin frame around the cubby opening and mount acrylic with gaskets so it doesn’t crack when you tighten screws. Add a slanted shelf inside so shoes rest at a consistent angle. Seal the cabinet with a durable paint, then attach the acrylic fronts with removable clips for cleaning.
Use U-channel edging on acrylic to protect corners and keep it looking crisp.
Over-tightening acrylic — it can craze or crack after temperature swings.
11. Reclaimed Wood Bench with Under-Bench Shoe Drying Racks
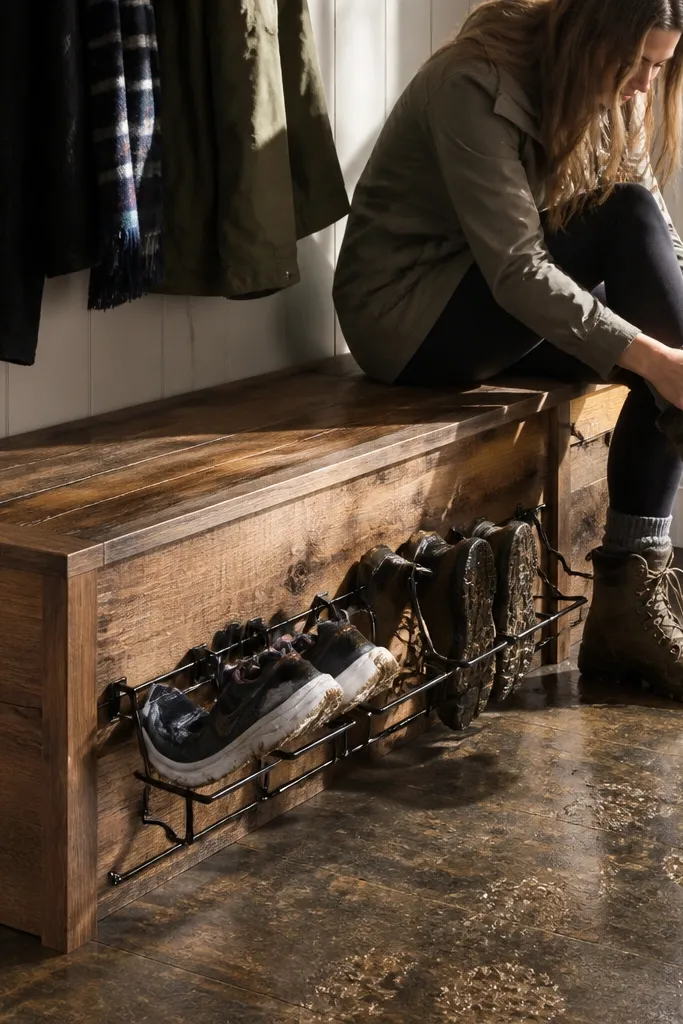
This one looks high-end because the bench top is the feature, and the storage does its job underneath. Under-bench drying racks keep shoes elevated so moisture doesn’t sit on the bottom panel. The reclaimed wood look adds warmth, but the key is protecting it with the right finish so it doesn’t absorb mud. Use it when you want a real landing spot to sit and tie shoes while also keeping wet footwear from making a mess.
Build a bench frame with 2x4 legs and add a sealed plywood base panel under the top. Create a drying rack using slats spaced 3/4-inch apart so water can drain and air can flow. Leave a 2-3 inch gap between the rack and the base panel so airflow moves under shoes. Seal the reclaimed top with a hard clear finish and add rubber pads under feet to stop scraping.
Use slats with rounded edges so shoes slide in without catching.
Using flat boards as a “rack” — water pools and the smell comes back.
12. Rotating Shoe Carousel Cabinet for Tight Corners
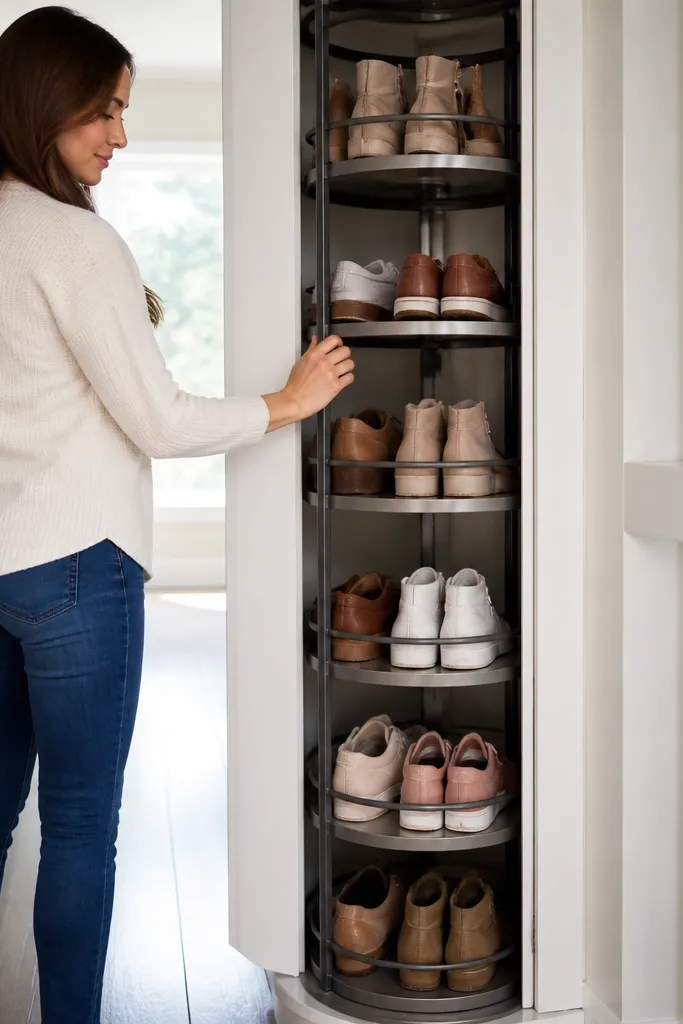
A rotating carousel looks clean and feels premium because it turns storage into a neat column of pairs. It also solves the problem of narrow mudrooms where doors and hallways block normal shelves. Each pair has its own spot, so you don’t end up with shoes stacked on the floor. This works best for apartments or small homes where you need maximum storage density without sacrificing a tidy look.
Buy a carousel insert made for cabinets, then build a cabinet box around it with a base that supports the weight. Anchor the cabinet to studs through the back frame so it doesn’t wobble when rotated. Use sealed plywood for the cabinet interior and add small ventilation holes near the top. Install a door with a tight seal if you want the “hidden” look, or keep it open if your mudroom has strong airflow.
Editor's noteChoose a carousel size that matches your most common shoe count so the unit stays balanced and easy to spin.
Skip thisMounting a carousel to drywall only — the weight will loosen fast.
13. Two-Tone Wall Cabinet with Bottom Boot Drawer and Top Shelf
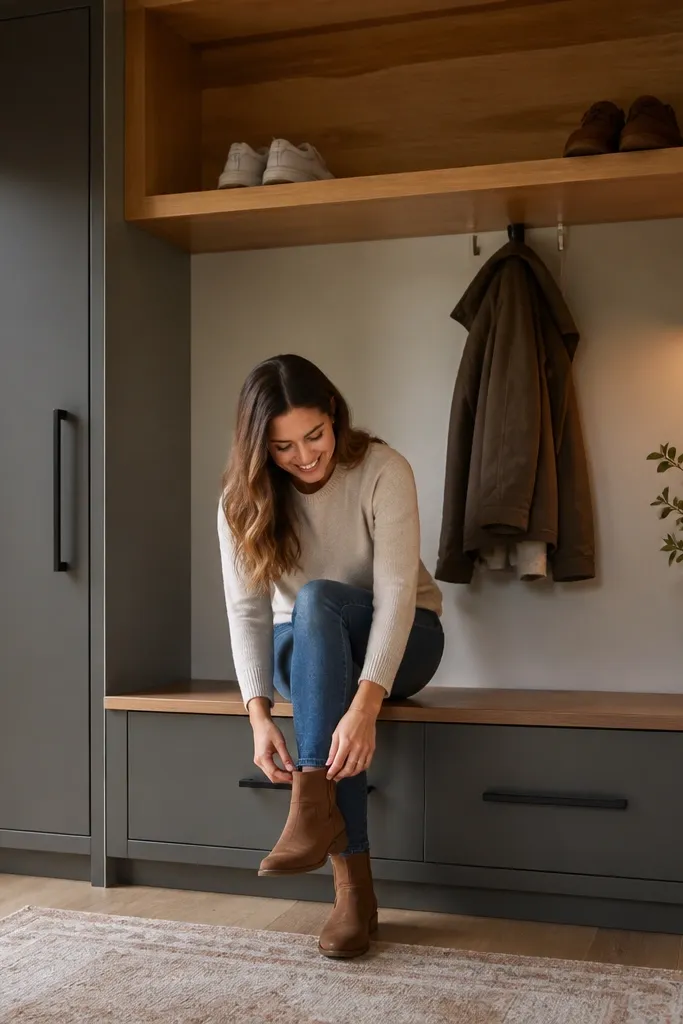
Two-tone cabinetry reads custom when the materials match and the lines stay clean. Put boots in the bottom drawer so they don’t visually clutter the shelf, then keep a top open shelf for daily pairs you want to grab quickly. The bottom drawer can be sealed and easier to wipe, while the top shelf stays airy. This works well for mudrooms with a wall you can see from the hallway.
Build a wall cabinet frame using plywood and 2x2 reinforcement, then mount it to studs at a comfortable height. Install a bottom drawer with full-extension slides and a sealed plywood interior. Create an open top shelf with a slanted back panel so shoes sit neatly without sliding forward. Finish the exterior with two coordinated paint colors and seal the drawer interior with a hard topcoat.
Editor's noteMatch drawer pulls to the hardware on your coat hooks so the whole mudroom looks like one set.
Skip thisPainting the inside of drawers with standard wall paint — it scuffs and holds stains.
14. Herringbone Tile Shoe Bench Cubbies with Brass Pulls
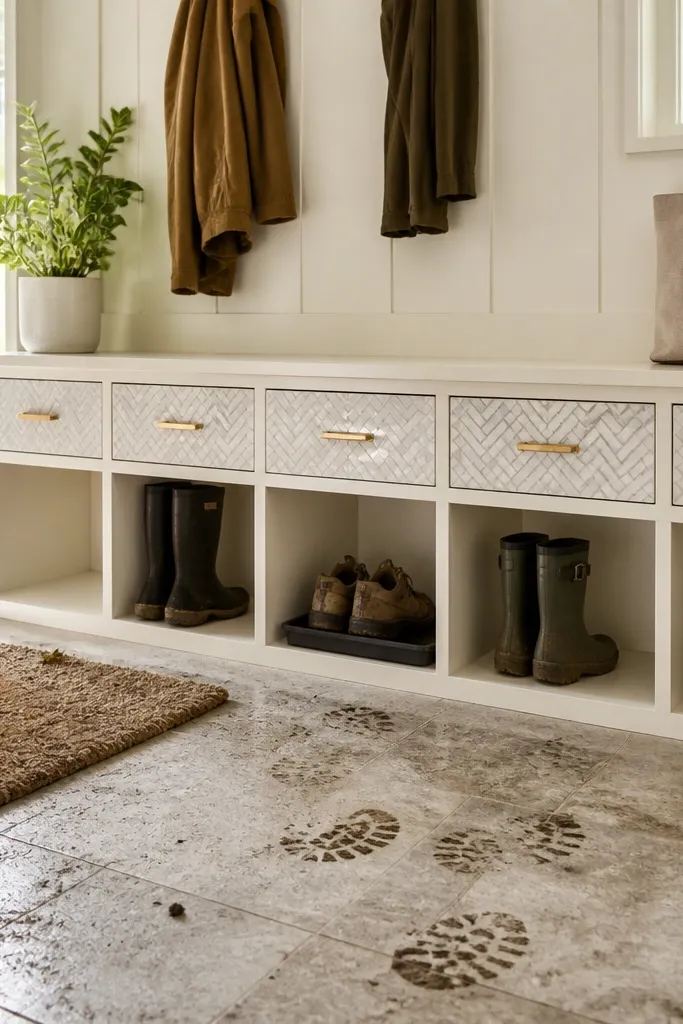
This is the most “designed” look on the list because the tile pattern becomes the focal point. Herringbone tile on the cubby fronts makes even plain storage feel architectural, and the surface wipes clean when kids drag mud in. Brass pulls add that warm contrast that reads high-end. Use it for a mudroom bench wall where you want storage plus a seat, and you want the front to look intentional.
Build a bench base with cubby openings, then frame each cubby front with a tiling substrate like cement board. Cut and lay herringbone tile on the cubby fronts, then grout and seal. Install brass cup pulls centered on each cubby door or drawer face. Add ventilation holes behind the cubbies and finish the bench top with a durable sealed clear coat.
Editor's noteKeep cubby doors aligned using a straightedge and shims before you tile to avoid crooked lines.
Skip thisSkipping grout sealing — muddy water stains tile and the front looks dirty.
15. Leather-Wrapped Boot Rails on a Clear-Coated Wood Rack
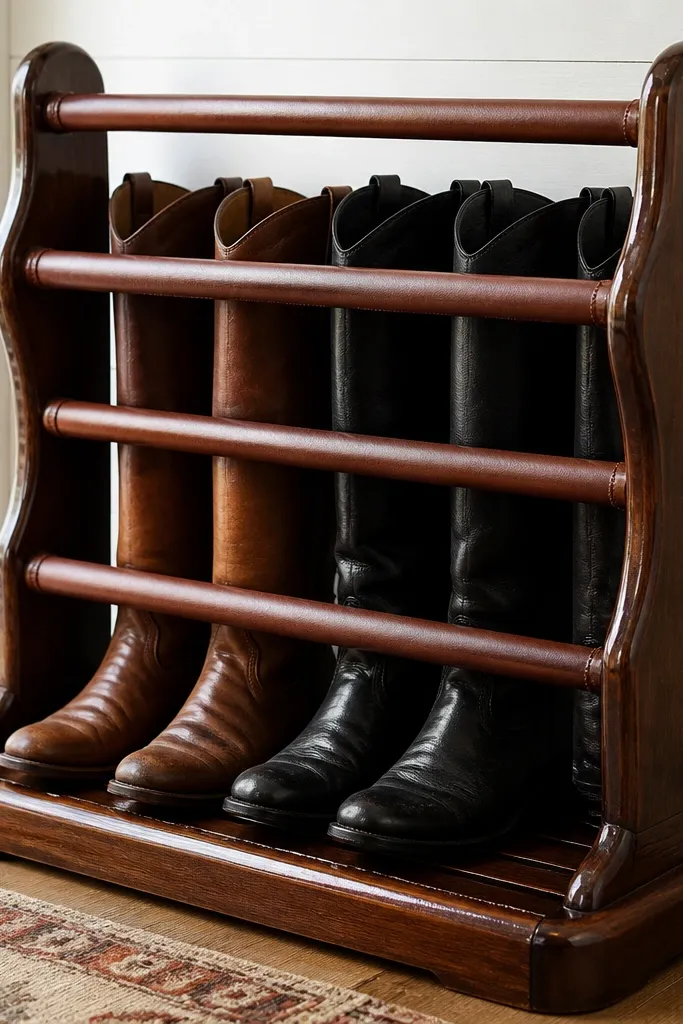
Wood racks look warm, but leather rails are what make this feel premium and protect boots. The leather grips the boot shaft just enough to keep it upright without scuffing, and it also hides minor wear from buckles. The clear-coated wood keeps a clean, polished look, and the open rack dries fast. This works best for entryways where boots are part of the style and you want them visible without looking messy.
Cut vertical rack posts and horizontal rails from hardwood, then sand and clear-coat the wood for a smooth finish. Wrap leather strips around the rails where boots rest, then staple or screw leather to the back side of the rail so the contact surface stays neat. Mount the rack to studs with a top ledger and install rails at boot-shaft heights you measured from your tallest pair. Add a bottom base panel with a small raised edge so water doesn’t soak into the floor.
Editor's noteCondition the leather once after installation so it stays supple and grips better.
Skip thisUsing bare wood rails — boots slide, and you’ll get scuffs and scratches.
16. Peg-Look Shelf with Hidden Cable-Style Shoe Tension Stops

This project gives you that “gallery wall shelves” look, but it fixes the real problem: shoes tip and drift. The hidden tension stops act like a gentle backstop, so each pair sits at the same depth and angle. The shelves stay visually clean because the stops are inside the shelf face, not sticking out. Use this for a mudroom where you want a sleek wall display that still handles daily chaos.
Build shelves from sealed plywood with a front lip, then install a backing strip inside the shelf for mounting. Thread a small cable or spring system behind the shelf face and attach it to internal stop points that pull the shoe back into place. Mark stop positions based on your most common shoe sole width, then secure the stops so the tension doesn’t change. Finish the shelf front with paint or clear coat and add a small toe rail for extra stability.
Editor's noteSet the stop tension so a shoe can be slid in by hand without forcing — that keeps daily use easy.
Skip thisOver-tensioning — shoes will fight back and people stop using the system.
17. Stacked Vertical Slat Tower with Removable Bottom Pan
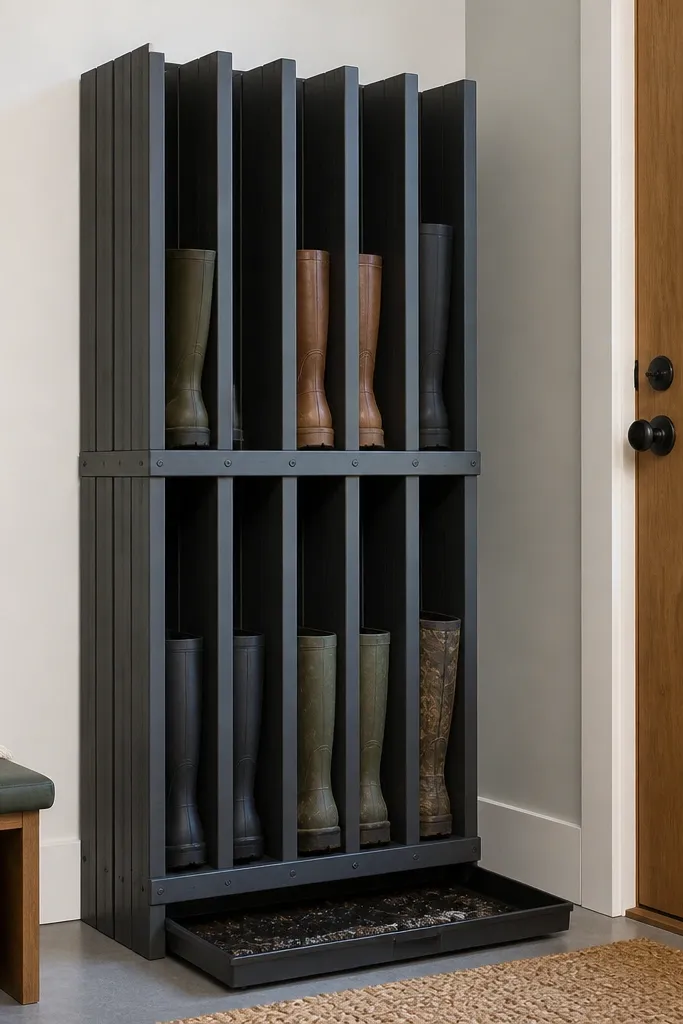
A tower storage unit looks sculptural and keeps shoes visible, while the removable pan solves the mudroom water problem. Vertical slats separate pairs so air can circulate and shoes don’t mash together into one damp pile. The bottom pan catches grit and moisture so you can clean the unit without scrubbing every surface. This is great for entry corners where you want a statement piece that still does hard work.
Build a tall frame from 2x2s, then attach vertical slats spaced 1.25-1.5 inches apart for sneakers and 2 inches for boots. Add a sealed back panel so the tower doesn’t trap dirt behind it. Install a removable bottom pan using a drawer-slide approach so you can pull it out to clean. Finish with a matte exterior coating that hides scuffs and seal the interior edges.
Editor's noteCut slats to exact uniform lengths and sand the ends — uneven ends make the whole tower look cheap.
Skip thisLeaving the bottom open to the floor — grit and water end up under the unit.
18. Cabinet Door Shoe Storage with Perforated Inserts and Magnetic Latches
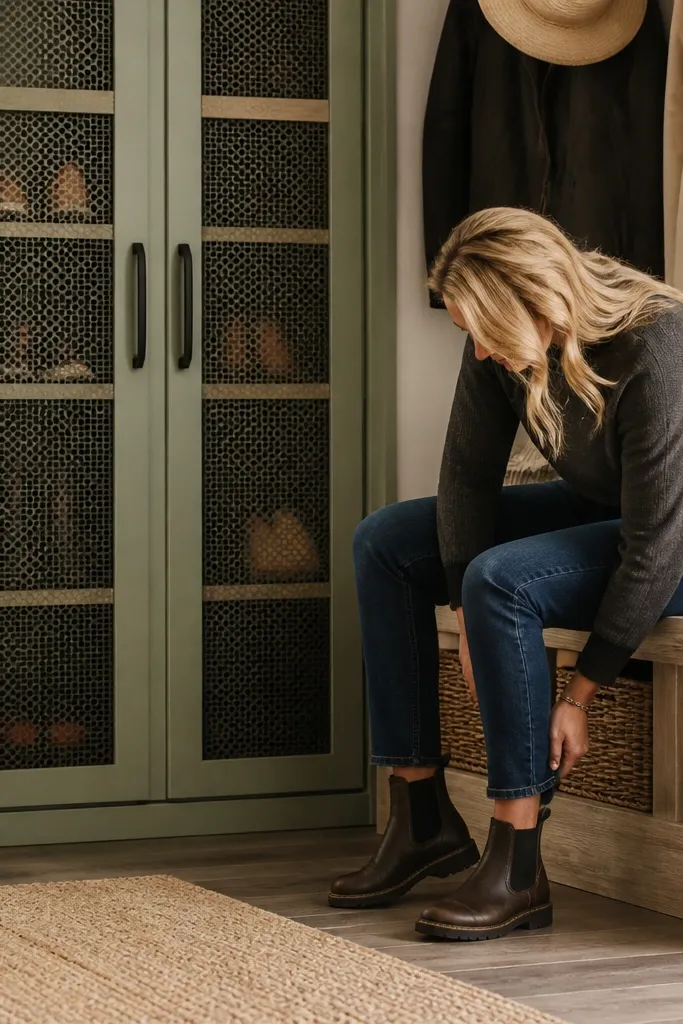
Closed cabinet storage looks tidy, but the danger is trapped moisture. Perforated inserts inside each compartment keep airflow moving, and magnetic latches make the doors easy to use with muddy hands. This gives you the clean look of a cabinet wall without the stink of a sealed box. It’s ideal for mudrooms where the storage needs to disappear visually but still handle wet shoes.
Build a cabinet frame with adjustable shelves, then cut perforated metal or ventilated plastic inserts that fit each shoe bay. Add perforations across the insert surface and leave a 1-inch gap between insert and cabinet back for airflow. Install magnetic catches and soft-close hinges if you want a high-end feel. Seal the cabinet interior and paint the exterior with a durable cabinet enamel.
Editor's noteUse adjustable shelf positions so you can store boots one season and sneakers the next.
Skip thisUsing fully solid inserts — shoes dry slower and you get odor buildup.
19. Wide Slanted Entry Rack with Removable Liners
A slanted entry rack is one of the best ways to control where shoes land. The slope keeps shoes from stacking into a messy pile and encourages water to drip down into a cleaning-friendly area. Removable liners make it practical because you can pull them out and rinse or replace them instead of scrubbing wood. This works in busy mudrooms where shoes are coming in constantly and you need a system that stays neat under pressure.
Build a rectangular frame and cut slats for the top surface, then set the rack at a 20-25 degree tilt. Add a catch lip at the bottom so shoes don’t slide off and remove the liner panel easily. Use sealed plywood for the frame and attach removable rubber or silicone liners on top of the slats. Finish the exterior with a matte sealant and round all edges so shoes slide in without snagging.
Cut liners to match the rack shape exactly so corners don’t trap grit.
Making the slope too shallow — shoes pile up and the rack looks messy.
20. Corner Wall Shelf with Drop-Front Shoe Access
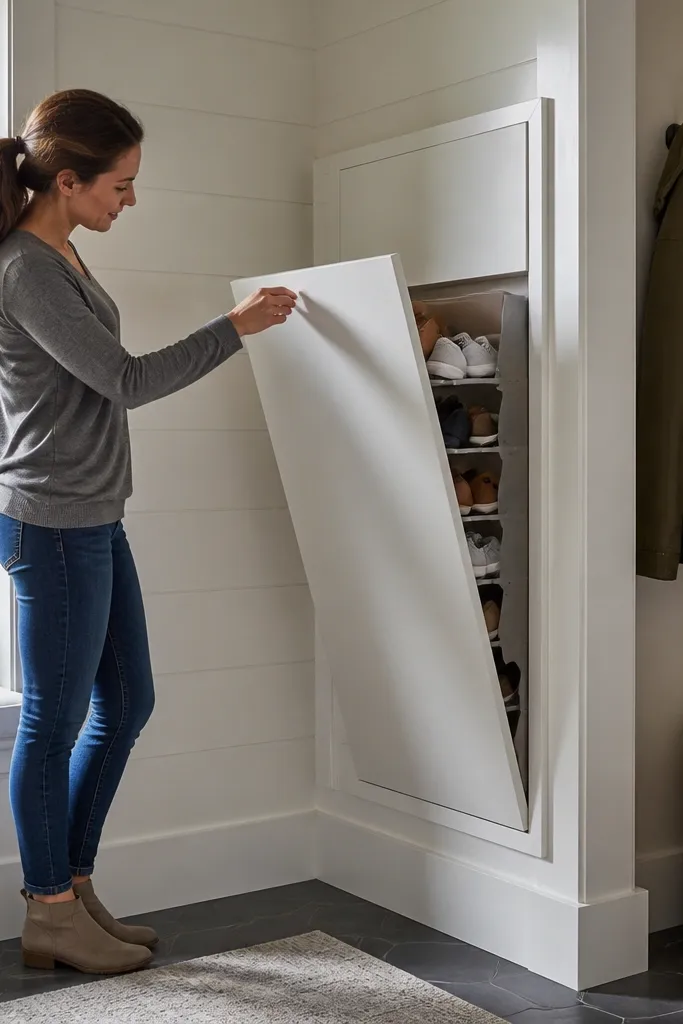
Corner mudrooms are tricky because normal shelves waste space and doors get in the way. A drop-front cabinet on a corner gives you access without swinging doors, and it keeps the front clean when closed. Inside, you can create vertical dividers so pairs don’t drift into each other. The look is crisp because the front panels line up in the corner — it reads built-in, not like random storage.
Frame the corner cabinet using a right-angle plywood box and mount it to studs with a back ledger. Install a drop-front panel on each compartment using hinges and a magnetic hold so it stays shut. Add vertical dividers inside each bay with sealed plywood strips, spaced to match your shoe widths. Finish with a smooth painted exterior and add a small toe kick inside the cabinet base to protect the bottom from scuffs.
Editor's noteUse soft-close hinges only if you have room — they help keep panels from slamming and chipping paint.
Skip thisUsing weak corner anchors — a corner unit feels solid only when it’s anchored into studs.



