
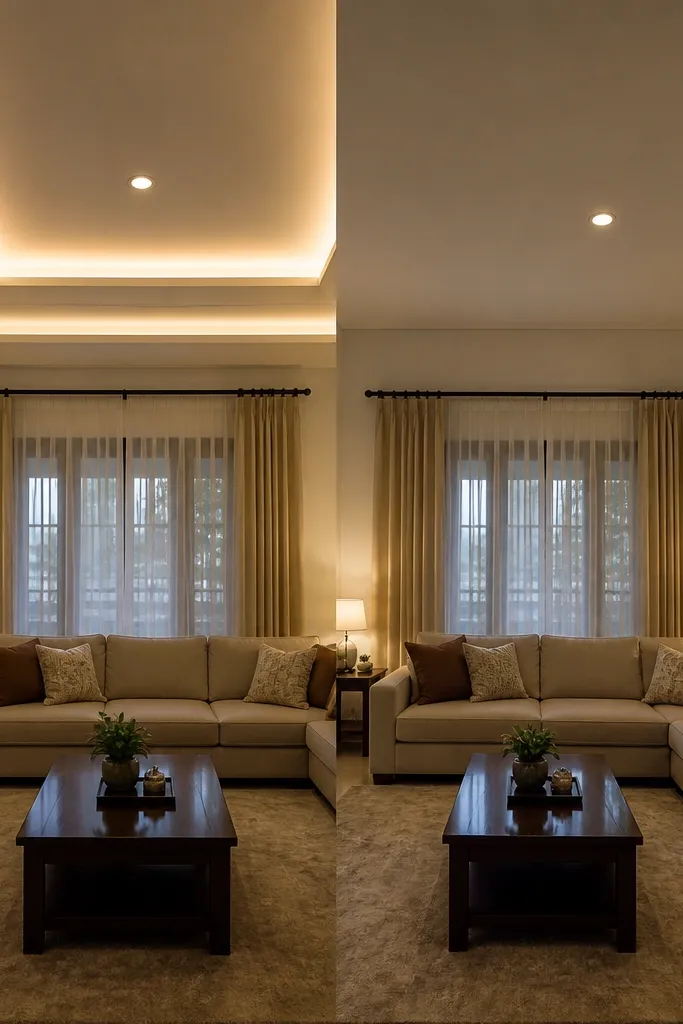
1. Perimeter floating cove with 70 mm shadow gap
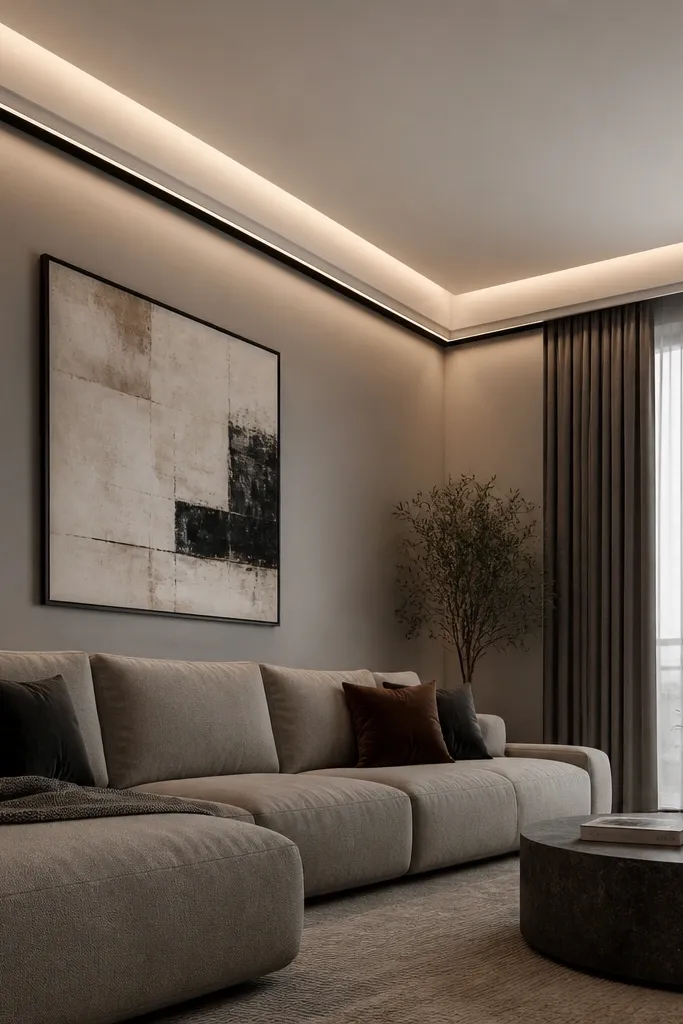
This is the cleanest path to a high-end False Ceiling Living Room look because it frames the entire space with one continuous line of light. The ceiling drops only around the edges, so the room still feels tall while the glow adds depth. Use a simple stepped profile: the inner face holds the LED, and the outer face blocks direct glare. It photographs well because there’s no busy pattern, just a smooth gradient that makes the ceiling read “custom.”
Start by measuring the room perimeter and marking a level line 70-90 mm down from the ceiling for the first drop. Build a box-like gypsum/POP frame with a 50-80 mm shadow gap from the LED line to the face that catches light. Install aluminum LED channel or a recessed strip holder, then close the lower face with a 12-15 mm board so the glow is controlled. Finally, prime everything, sand edges crisp, and paint with the same matte/semi-matte finish as your walls to avoid a shiny “halo.”
Use a frosted diffuser or a channel designed for indirect lighting so you don’t see LED dots at any angle.
Don’t mount the LED too close to the face; if the shadow gap is under 40 mm, it looks like a visible strip.
2. Two-level perimeter with stepped "shadow staircase"
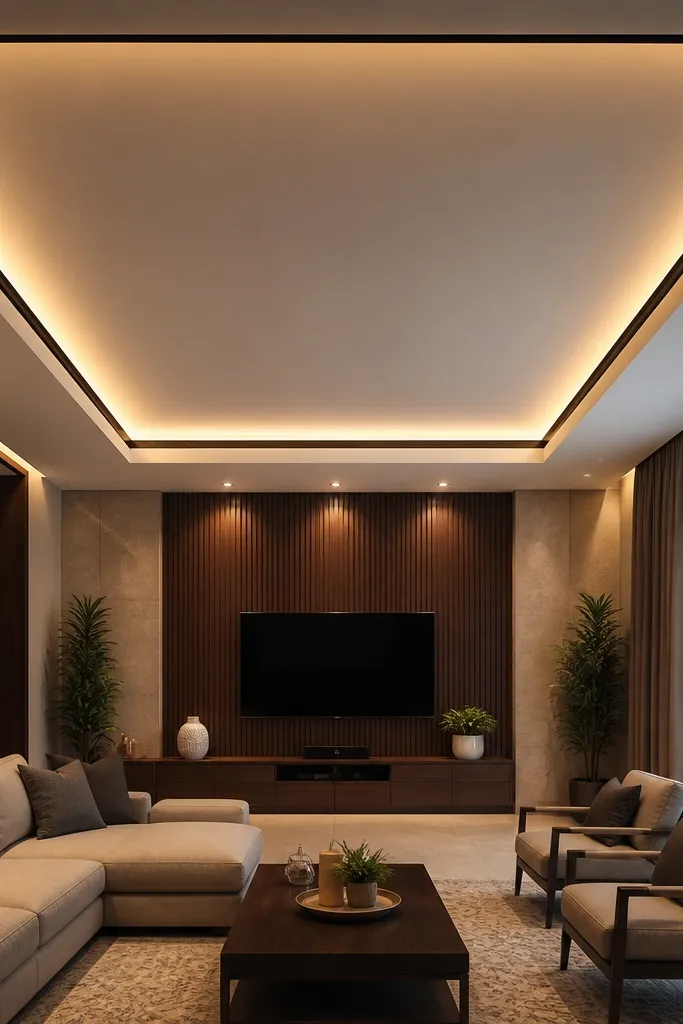
If you want “designer” without adding a big centerpiece, do a two-level perimeter. The outer frame drops slightly more, while the inner frame floats with a tighter glow line. This creates layered depth and makes the ceiling look taller than it is. The look works especially well in rectangular living rooms because the concentric lines correct the visual flatness of a plain ceiling.
Mark two levels: one outer drop at 90-110 mm and an inner ring at 60-80 mm from the original ceiling. Keep the light slot on the inner ring with a 60-80 mm shadow gap and a stepped lower face that blocks direct beam. Run LED strips continuously across the perimeter, keeping the same channel depth everywhere so the glow thickness stays even. Seal joints, fill nail holes, sand, prime, then paint in two coats to stop the stepped edges from showing through.
Editor's notePlan your LED driver location before board closing so you can service it without cutting the ceiling later.
Skip thisDon’t let the inner ring drift off-level; even a 5 mm slope shows up as uneven glow thickness.
3. Center medallion with starburst profile recess
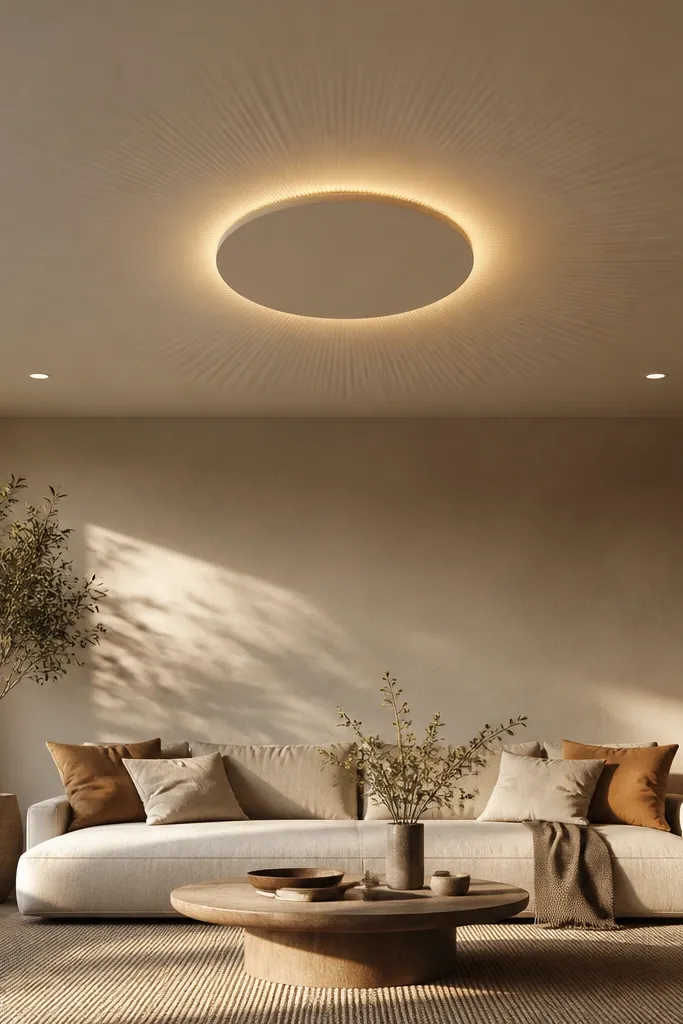
A center medallion makes a living room feel intentional, and the starburst profile adds that high-end False Ceiling Living Room “wow” in photos. The glow radiates from a recessed ring, so it looks like the ceiling is lit from within. Keep the starburst shallow so it reads as light texture rather than a heavy sculpture. This setup works best when you have a sofa focal point or a TV wall opposite the entrance.
Draw the medallion layout on paper first: choose a diameter about 55-65% of the room width. Build a recessed circular ring drop of 70-90 mm for the outer medallion and add radial profile fins at 80-120 mm spacing. Put the LED along the base of the recess with a diffuser, then cap the face so the light exits sideways into the room. Finish by smoothing the radiating edges and painting the recess interior a slightly deeper white/gray than the ceiling for contrast.
Editor's noteUse 12 mm gypsum for the fins and keep them all the same angle; inconsistent angles create uneven starburst intensity.
Skip thisDon’t stack too many radial fins; if it’s dense, you’ll see a mottled glow instead of clean rays.
4. TV wall cove with angled light returns
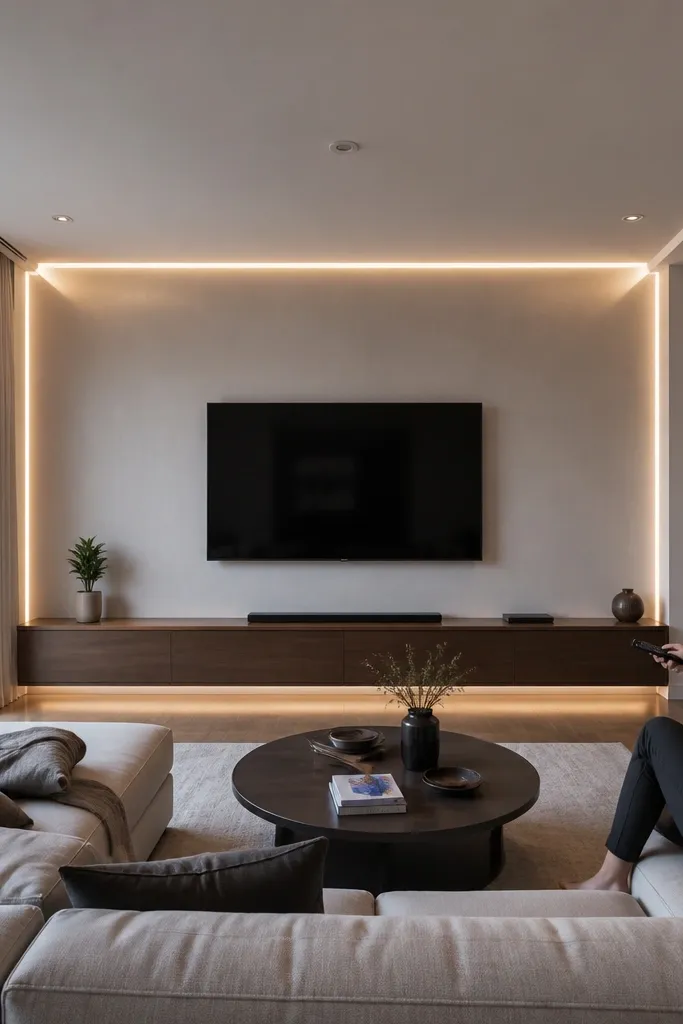
This idea is built for the most common living room layout: TV on one wall, seating opposite. A perimeter cove above the TV with angled returns makes the ceiling feel like it wraps toward the focal wall. The result is a high-end False Ceiling Living Room look that frames your media without adding clutter. It also reduces harsh overhead glare because the light hits the wall and bounces softly into the room.
Mark a rectangular cove area above the TV wall, then set the drop at 80-100 mm in that zone. Create a stepped profile where the light channel sits on the underside and the return face is angled 15-25 degrees toward the room. Keep a 60-80 mm shadow gap so the LED isn’t visible from seated eye level. Finish with a continuous LED run across the TV zone and add a small cross-cut section for cable access before closing the board.
Editor's noteMatch the TV wall paint sheen to the lighting intensity; matte walls reduce glare and look smoother under indirect light.
Skip thisDon’t point the LED straight down; direct beams show as bright spots above the TV.
5. Geometric grid ceiling with recessed LED ribs
A geometric grid is the fastest way to make a ceiling look custom and architectural. Instead of one glow line, you get repeated recessed ribs that create depth and pattern. For a high-end False Ceiling Living Room, keep the grid spacing consistent and avoid mixing too many shapes. The grid reads luxurious because the light is controlled inside the ribs, not sprayed across the ceiling.
Choose a grid size that fits your room: start with 600x600 mm modules if your ceiling is large, or 500x500 mm if it’s smaller. Build a shallow frame drop of 50-70 mm, then add ribs (12-15 mm board thickness) that form each module. Install LED strips in the rib recess with a diffuser and keep a 50-60 mm shadow gap between the rib face and the opening. Prime and sand the ribs so the edges are sharp, then paint the grid and the ceiling in the same color to keep the pattern crisp.
Use a laser level for the grid lines; small misalignment makes the whole ceiling look “handmade” in a bad way.
Don’t use wide ribs with tiny gaps; it kills the light pattern and makes the ceiling look heavy.
6. Floating wave band across the ceiling
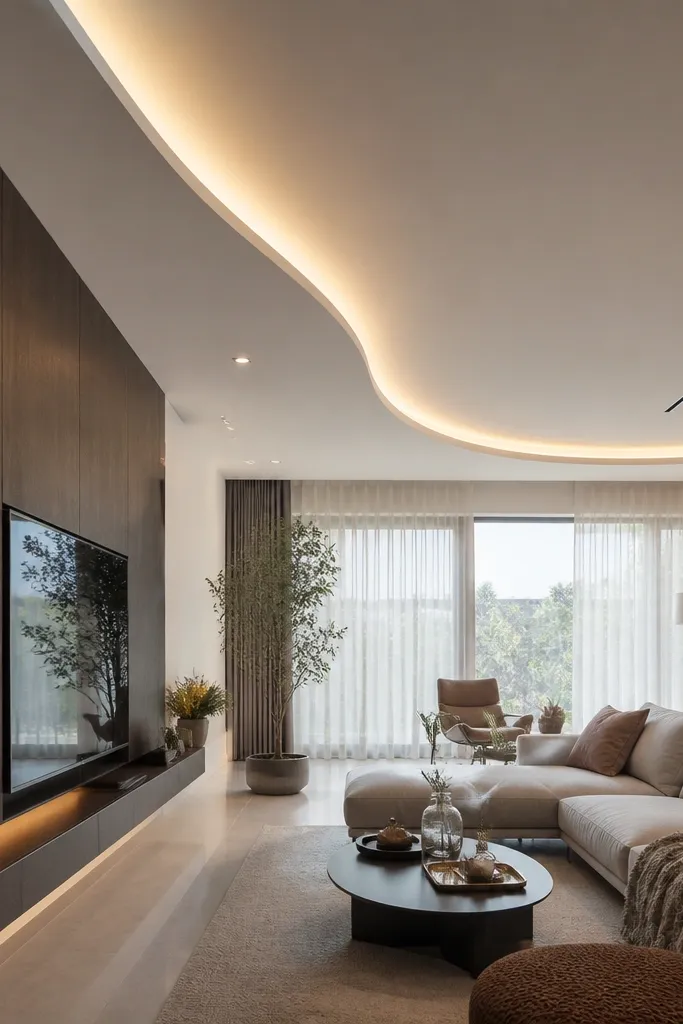
A wave band adds motion to a living room without turning the ceiling into a gimmick. The glow line follows the curve, which creates a soft, high-end False Ceiling Living Room effect that works in modern and transitional interiors. Build it as one continuous band so it stays elegant. This is also forgiving in rooms with minor ceiling irregularities because the curve visually “organizes” the space.
Pick the wave width first: keep the band around 500-800 mm wide depending on room size. Mark a centerline and create a template for the curve on plywood or MDF. Build two parallel rails for the wave: one for the upper face and one for the lower face that hides the LED. Set a 60-80 mm shadow gap and install LED strips along the wave channel, then close the lower face with a consistent 12-15 mm board thickness. Sand and paint with two coats so the curve doesn’t show patchy light.
Pre-bend gypsum on a form or use proper scoring so the curve stays smooth and doesn’t crack later.
Don’t make the wave too thin; a narrow band makes the LED look like a line, not a floating glow.
7. L-shaped corner cove with mirror-like glow control
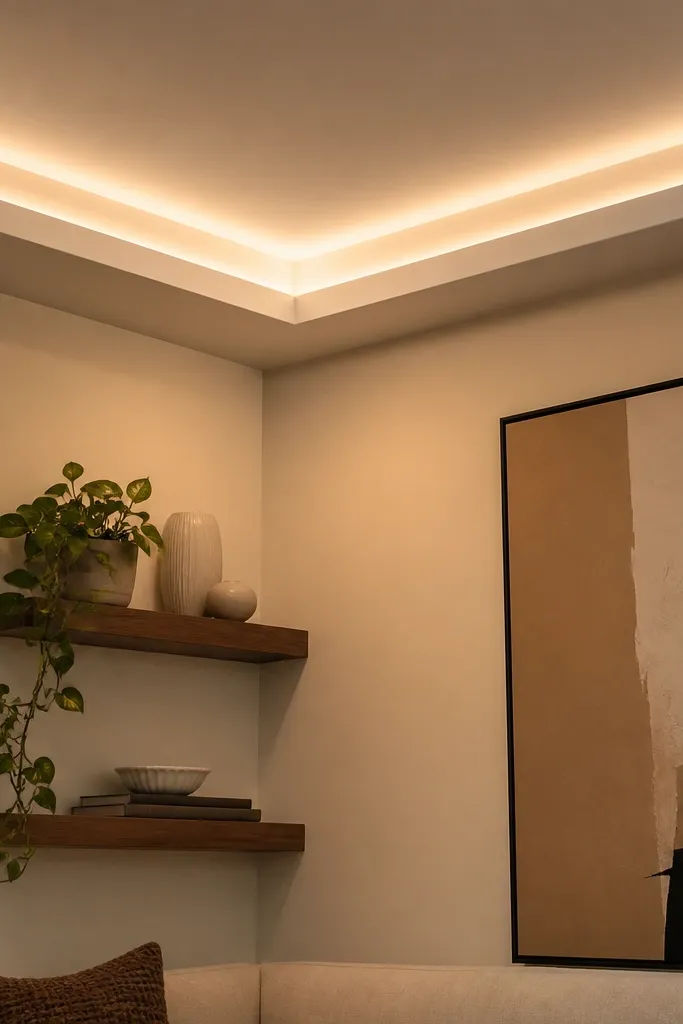
Corner lighting is a cheat code for depth. An L-shaped corner cove creates a high-end False Ceiling Living Room look because it makes the corner feel designed, not accidental. The glow also helps hide ceiling-to-wall transitions where paint lines usually show. Use this when your living room has a strong corner feature, like a reading nook or a plant wall.
Mark an L-shaped perimeter segment on two adjacent walls and set the drop at 80-100 mm along that run. Build the cove with a 50-70 mm shadow gap and a lower face that overhangs the LED by 10-20 mm to block direct sight. Install LED strip in an aluminum channel for straight light. Seal joints and apply primer before final paint; corners show defects faster than flat runs.
Use corner LED connectors or plan your cut points so you don’t end up with a visible LED solder bulge inside the cove.
Don’t run the LED without a channel; loose strips create uneven intensity along the corner.
8. Backlit ceiling shelves with thin fascia
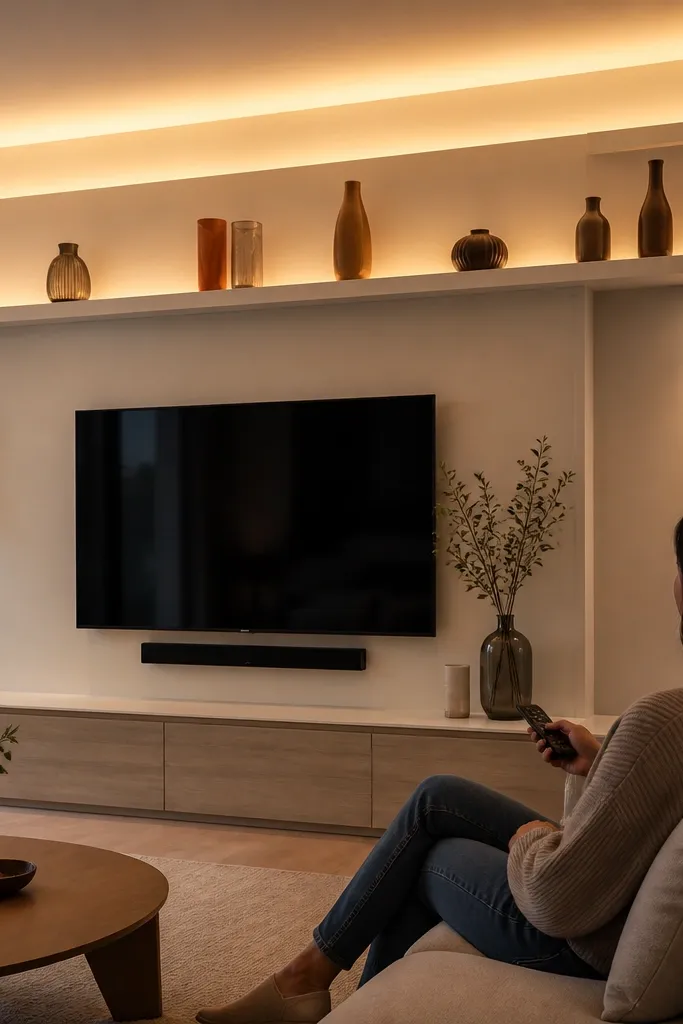
Backlit shelves give you that high-end layered look without a huge drop. The shelf face is thin and crisp, so the room reads “architectural.” This works well when you want profile lighting but don’t want to lose ceiling height. The glow hits the wall and reflects upward, giving a softer, more expensive feel than a single perimeter cove.
Plan one or two shelf lines above eye height areas — typically 200-300 mm away from the wall junction. Build a fascia panel 12-18 mm thick and recess the LED behind it with a diffuser. Keep a 60-80 mm shadow gap between LED and visible fascia edge. Install vertical supports, fix the board, and make sure the shelf underside is perfectly level so the glow line stays straight. Finish with primer and paint in the same sheen as the ceiling for a uniform look.
Use a matte white paint for the shelf underside; glossy paint makes the LED glow look dirty and shows dust.
Don’t make the fascia too thick; thick fascia hides the glow and turns it into a dark block.
9. Recessed linear "floating frame" around ceiling center
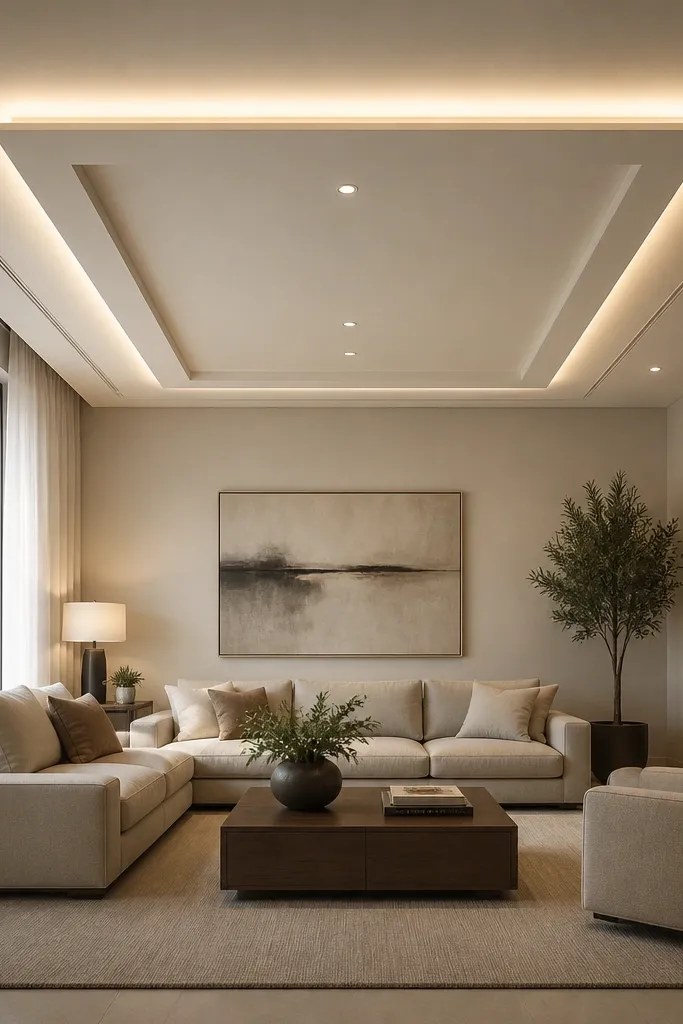
This is a modern high-end False Ceiling Living Room idea that feels clean and expensive. You get a recessed rectangular frame that outlines the ceiling center, with light spilling into the room. It looks great over a dining table or a seating cluster where you want subtle structure. The frame also makes your ceiling feel bigger because the glow sits inside the recess rather than on the surface.
Measure the ceiling center area and build a rectangular recess frame that is about 65-75% of the room width. Drop the recessed area 60-80 mm and keep the outer perimeter frame drop around 90-110 mm if you want extra depth. Place LED strips inside the recess with a 50-80 mm shadow gap and a diffuser to hide the strip. Close the outer face with crisp board edges and keep the paint coverage consistent across the recess so the glow doesn’t look patchy.
Editor's noteUse the same LED channel depth across all sides; the glow thickness changes if one side is shallower.
Skip thisDon’t leave the recess interior rough; any texture turns into a visible shadow pattern under backlight.
10. Ceiling bay with inward curved profile ribs
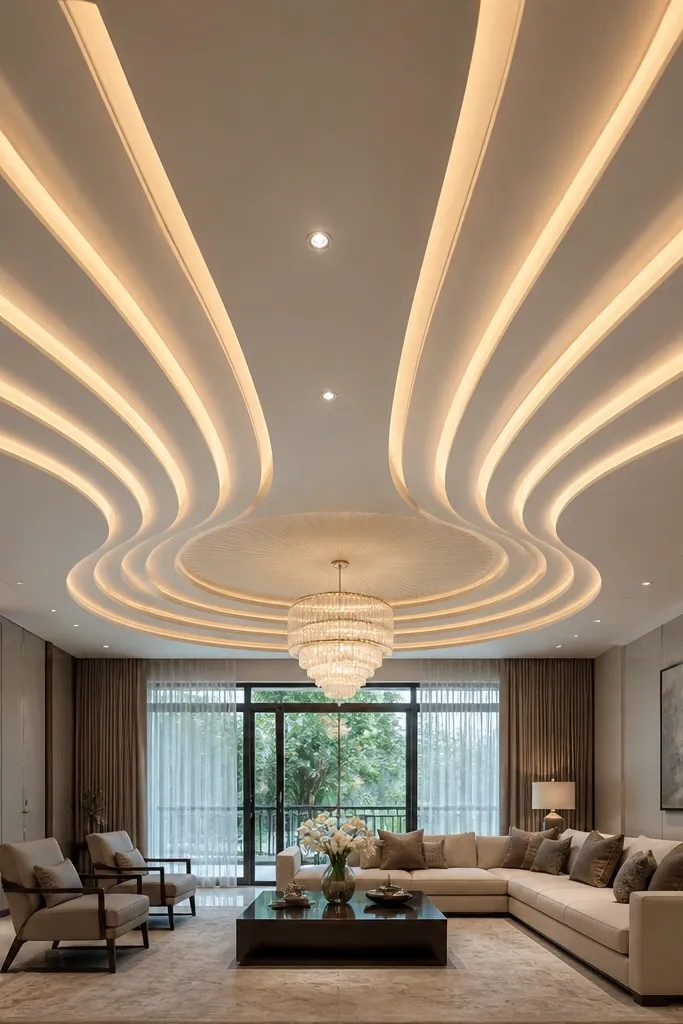
A ceiling bay with inward curved ribs reads luxurious because it creates a bowl-like depth. The ribs pull the eye toward the center and make the room feel layered. For a high-end False Ceiling Living Room, this works when you want a focal ceiling feature without a big medallion. Keep it symmetrical so the curves look intentional rather than random decoration.
Mark a central bay area and decide the bay width at about 70% of the room’s shorter side. Build a shallow base drop of 70-90 mm, then add curved ribs (12 mm gypsum) that angle inward. Space the ribs 120-180 mm apart and install LED strips behind each rib’s shadow face with a 60-80 mm gap. Use a template for curve radius so all ribs match, then sand and prime the whole bay before painting.
Make the ribs slightly taller than you think (within reason); low ribs don’t block enough light and the effect looks flat.
Don’t rush the curve templates; one rib with a different radius ruins the symmetry under light.
11. Perimeter with corner triangles and micro-spot accents
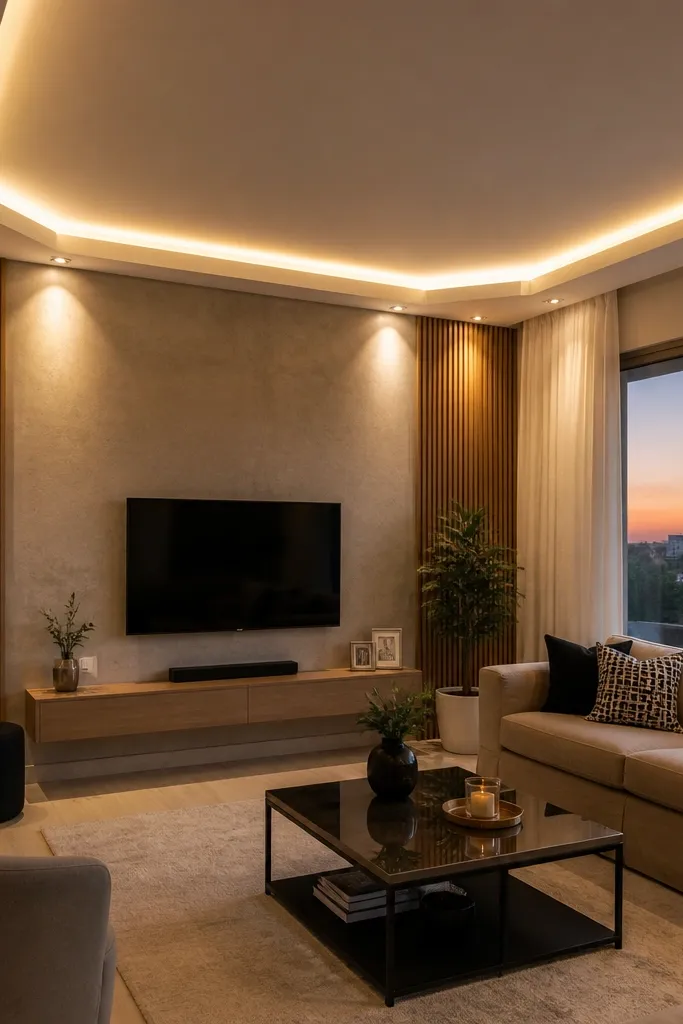
This idea adds high-end detail without turning the ceiling into a maze. The perimeter cove stays simple, but you introduce corner triangles and tiny spot accents that sparkle subtly. It looks great in living rooms with artwork or a feature wall because the spots can graze surfaces. The triangles also hide LED joints and create clean “design corners.”
Build your main perimeter cove with a 70 mm drop and 60-80 mm shadow gap. At each corner, add a triangle wedge panel (board thickness 12-15 mm) that bridges the two cove edges and hides the LED end caps. For micro spots, cut recesses for 35-50 mm spot housings and place them so they aim across the room, not at the ceiling. Prime and paint, then test the spot angles before final closing so you don’t end up with glare.
Use the same color temperature for spots and cove LEDs so the ceiling glow and sparkle match.
Don’t place spots too close to the cove opening; they create a bright hotspot right at the edge.
12. Gypsum stepped ceiling with concentric rectangle rings
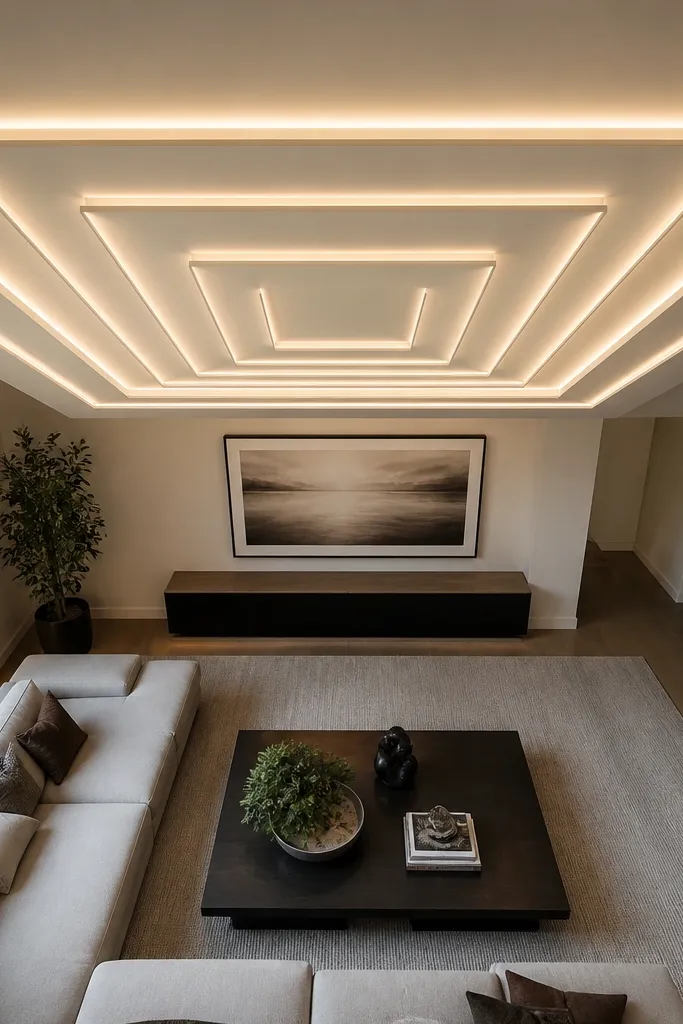
Concentric rectangles feel high-end because they look like planned architecture, not a random drop. The glow travels along each ring and adds depth without clutter. In a living room, it works especially well above a coffee table zone or where you want symmetry. This is a strong option if you’re using gypsum and want crisp edges that hold their shape.
Plan three rectangles: outer ring drop 90-110 mm, middle ring drop 70-90 mm, inner ring drop 50-70 mm. Keep a consistent 60-80 mm shadow gap for each LED channel so the glow width stays uniform. Install LEDs in each ring’s recess with diffusers, then close the facing boards so light exits sideways. Sand edges sharply and apply a bonding primer before final paint to prevent joint lines from flashing under light.
Mark LED channel outlines with pencil before fixing boards so you don’t end up moving channels after the frame is closed.
Don’t change drop depths randomly; uneven rings turn into visible steps when the lights come on.
13. POP frame with wide LED channel and soft gradient finish
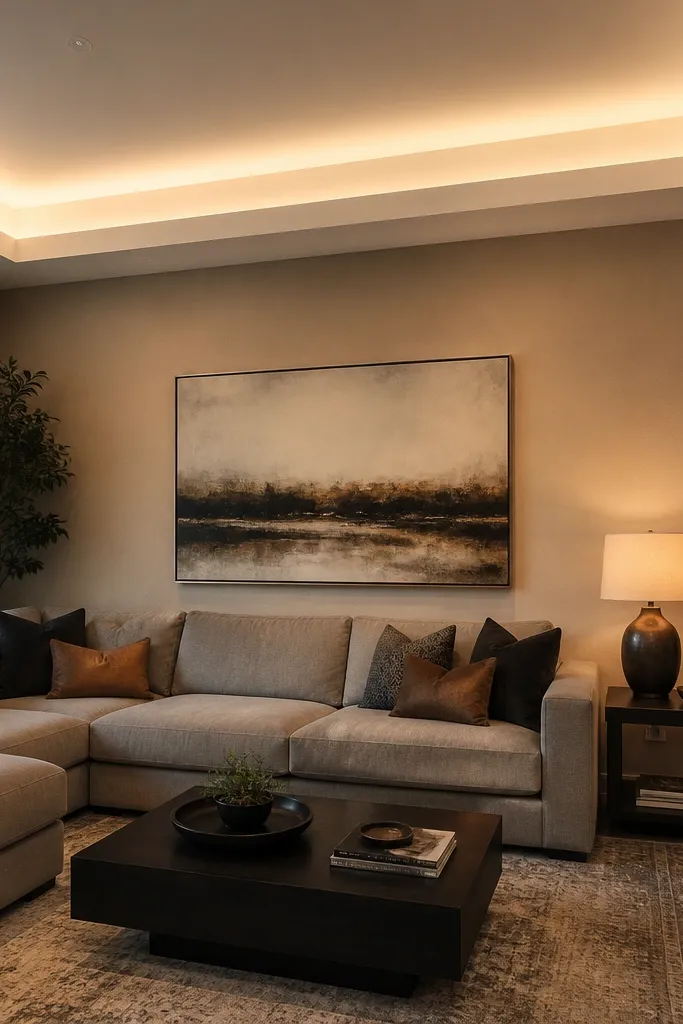
POP can look expensive if you use it for a clean frame and control the light spread. This design uses a wider channel recess so the glow becomes a soft gradient, not a sharp strip. It’s ideal when you want a single statement frame around the room or a section above the seating area. The high-end look comes from finishing quality: smooth surfaces and crisp shadow lines.
Build a simple rectangular frame with a drop of 90-110 mm, leaving a 60-80 mm shadow gap for the LED. Use a wide recess so the LED is not visible and the glow spreads evenly. Apply POP layers in smooth coats, let it cure fully, then sand until the frame is truly flat and edges are sharp. Prime thoroughly and paint with a consistent sheen; uneven paint gloss exaggerates shadows.
Use a white primer tinted slightly warmer if you’re painting over dark stains; it reduces patchy glow under LED.
Don’t skip sanding to flat — POP frames show imperfections fast once backlit.
14. Ceiling arch with hidden linear LED inside the curve
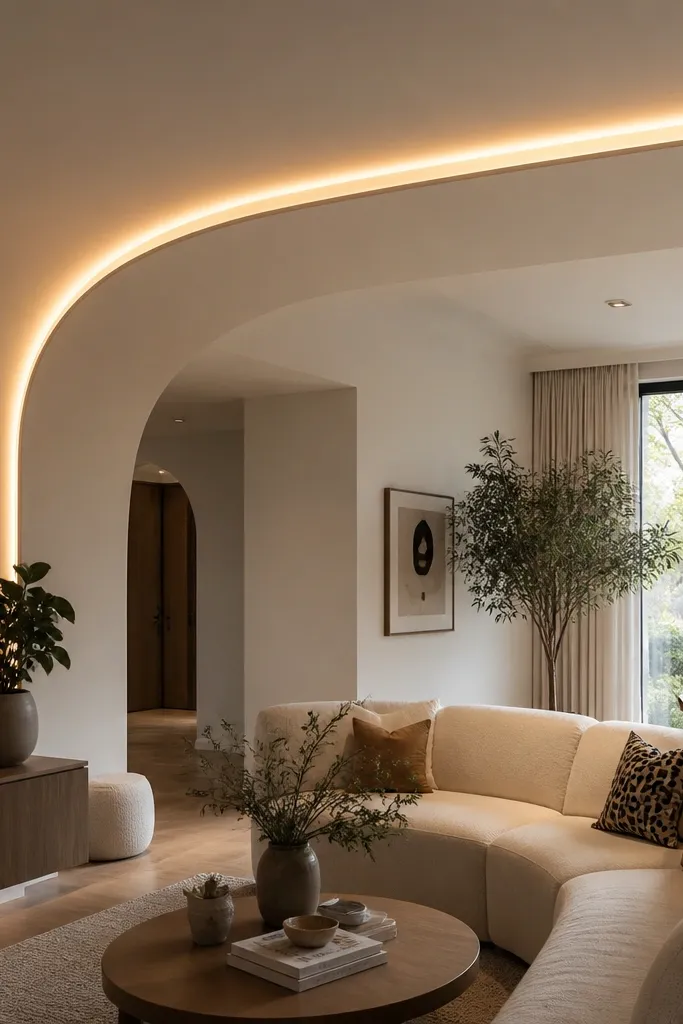
An arch profile adds softness and a premium feel, especially in living rooms with curved furniture lines or arched openings. The glow sits inside the arch, so it looks like the ceiling is breathing light. This is a great choice when you want one strong ceiling feature but your layout makes medallions look awkward. It’s also easier to execute than it looks when you keep the arch radius consistent.
Choose the arch span based on your seating area, then mark a centerline and draw the arch template on plywood. Build two arch rails and a back support frame, then set the arch drop at 80-100 mm. Add a linear LED channel inside the arch recess with a 60-80 mm shadow gap and a diffuser. Close the visible face with a clean board edge and paint two coats, letting the arch underside stay the same color as the ceiling.
Before final paint, turn the LEDs on and check for dark spots along the curve; fix channel alignment before closing permanently.
Don’t use a tight arch radius with thick board; it creates edge waviness and uneven glow.
15. Floating zigzag border with hidden LED strip
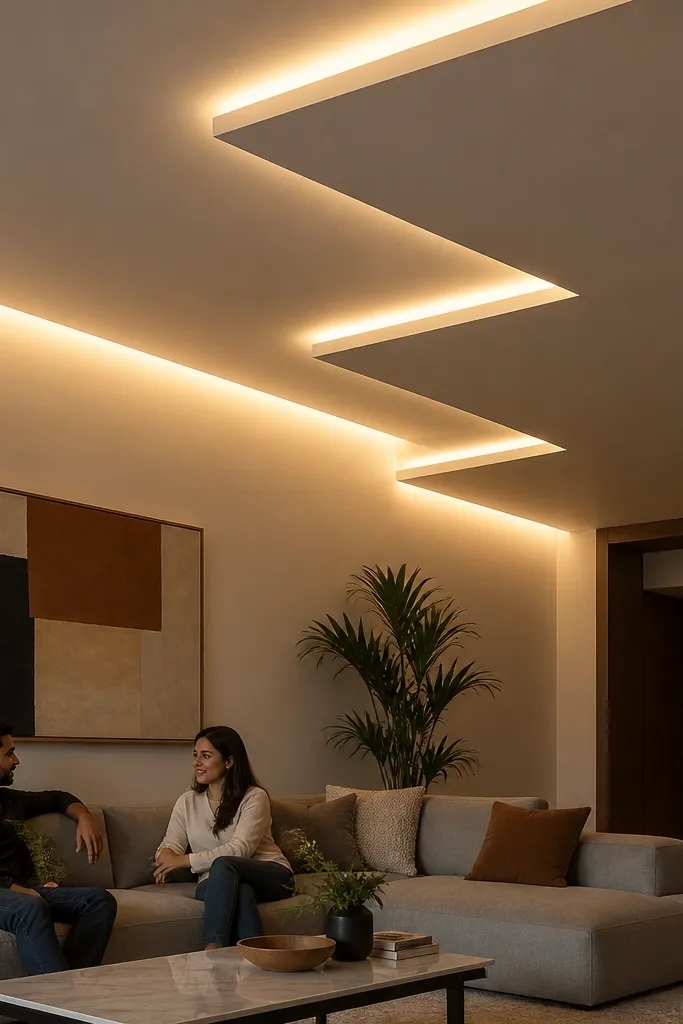
Zigzag borders look modern and high-end when the lines are sharp and the LED is fully hidden. The trick is to keep the zigzag as a border feature, not a full ceiling pattern. This makes the ceiling feel designed while still reading clean from a distance. It’s also a good option for living rooms with a lot of straight lines in furniture, because the zigzag adds controlled contrast.
Mark a perimeter border and decide zigzag frequency: use 300-450 mm zigzag segments so the pattern looks intentional, not chaotic. Build the border with a stepped face where the lower face blocks direct view of the LED. Install LED channel behind the stepped face with a 50-70 mm shadow gap and diffuser. Fix board edges tightly, sand sharp corners, prime, then paint with consistent coverage so the zigzag doesn’t show patchy light.
Editor's noteUse a jigsaw or CNC template for the zigzag profile so every corner angle matches.
Skip thisDon’t make the zigzag too close to the wall; tight spacing makes the light look like glare instead of a border glow.
16. Ceiling "halo" ring with small recessed downlights
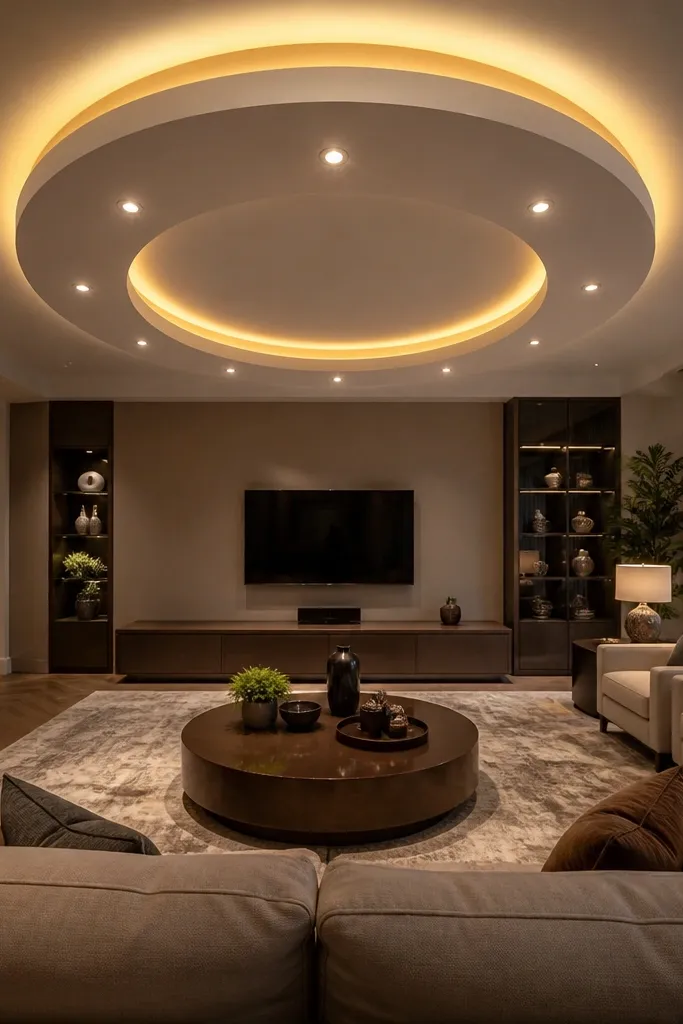
A halo ring gives a clean focal point without a heavy centerpiece. Pair it with small recessed downlights and the living room gets layered lighting: indirect glow from the ring, plus focused brightness where you need it. This is a strong high-end False Ceiling Living Room option if you have a seating cluster and want the ceiling to look styled from the entrance. Keep the halo ring diameter moderate so it doesn’t overpower the room.
Mark the halo ring diameter at about 55-70% of the ceiling’s center area width. Build a recessed ring drop of 70-90 mm with a 60-80 mm shadow gap around the LED channel. Install LED in the ring for the halo glow, then add 4-6 recessed downlight housings spaced evenly between the ring and ceiling center. Aim downlights slightly off-center so they don’t create a bright spot under the halo.
Editor's noteUse a dimmable driver for the LEDs and separate dimming for downlights if you want flexible moods.
Skip thisDon’t place downlights too close to the ring edge; the halo glow and downlight glare will fight each other.
17. Cross-shaped profile light frame for modern living rooms
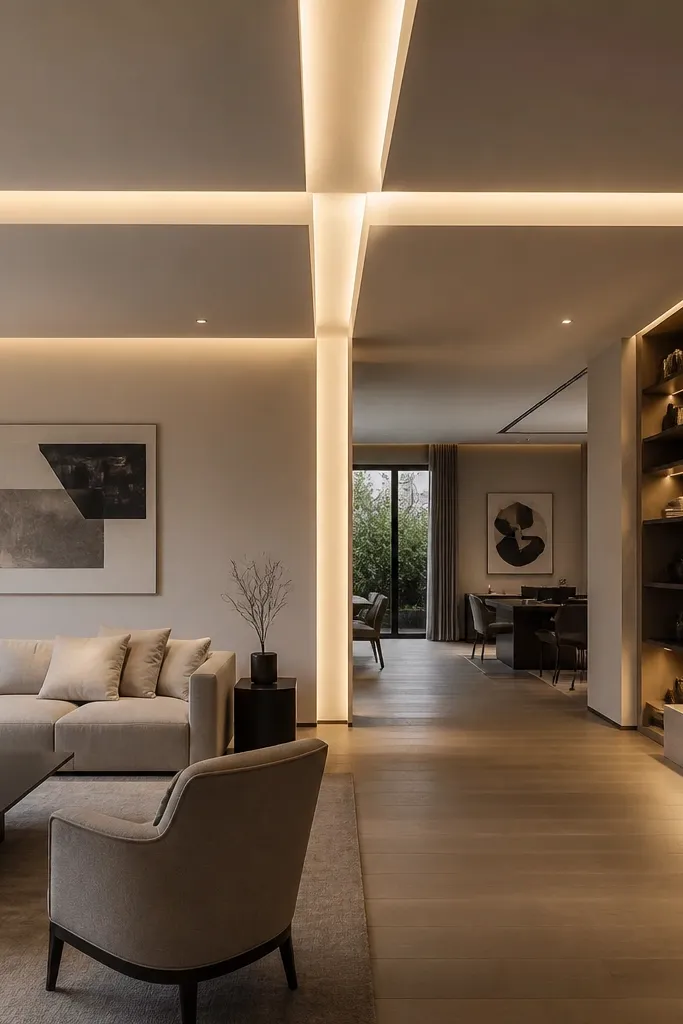
A cross-shaped profile is dramatic and still controlled when the frame is recessed with hidden LEDs. It adds structure for modern living rooms and helps define zones — seating, walkway, and dining — with light rather than furniture. The high-end look comes from symmetry and clean recess edges. It’s photogenic because the cross frame creates strong directional shadows that read well even in low light.
Pick a cross frame size that fits your room proportions, usually 60-75% of the room width for the overall cross. Build a recessed grid with a main drop of 80-100 mm and a secondary recess of 60-80 mm for the cross arms. Place LED strips inside the recess with diffusers, keeping a 60-80 mm shadow gap so the light spreads. Finish by sanding the recess edges and painting the interior recess slightly darker white if you want the cross to pop.
Editor's noteUse identical channel lengths and verify the cross arms are the same width before closing boards.
Skip thisDon’t make one arm longer; uneven arms show instantly once the LEDs turn on.
18. Ceiling panel quilt using small square light pockets
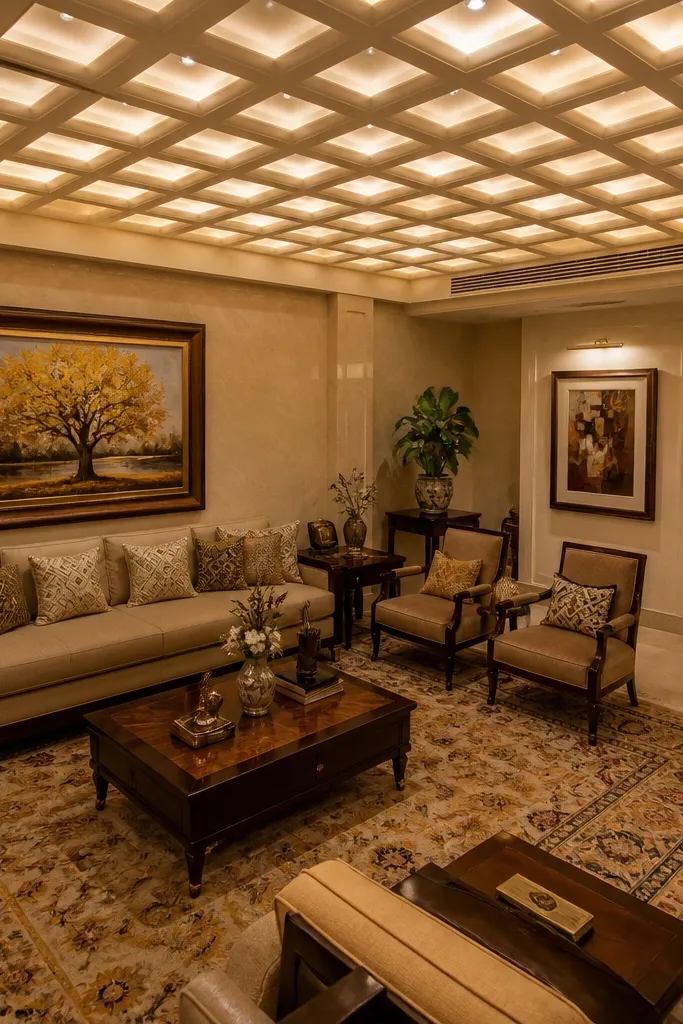
Small square light pockets create a quilt effect that looks high-end when the spacing is tight and the LEDs are properly diffused. This design adds texture without big shapes, so it works in living rooms that already have strong wall features. It also hides minor ceiling imperfections because the pattern draws attention upward. For the best look, keep the pocket size consistent and avoid mixing pocket depths.
Mark a grid of squares and choose pocket size around 250-350 mm for a living room ceiling. Build a shallow base drop of 50-70 mm, then cut and frame each pocket recess with 12-15 mm board. Install LED strips or small LED modules inside each pocket recess with a diffuser and a 40-60 mm shadow gap. Prime all surfaces, sand the pocket edges flush, then paint with uniform coats so each pocket glow looks even.
Editor's noteTest one pocket first with the exact diffuser before you build the full grid to confirm brightness and glow width.
Skip thisDon’t skip diffuser; bare strips inside small pockets look harsh and uneven.
19. Long rectangle runway with hidden LED and side glow
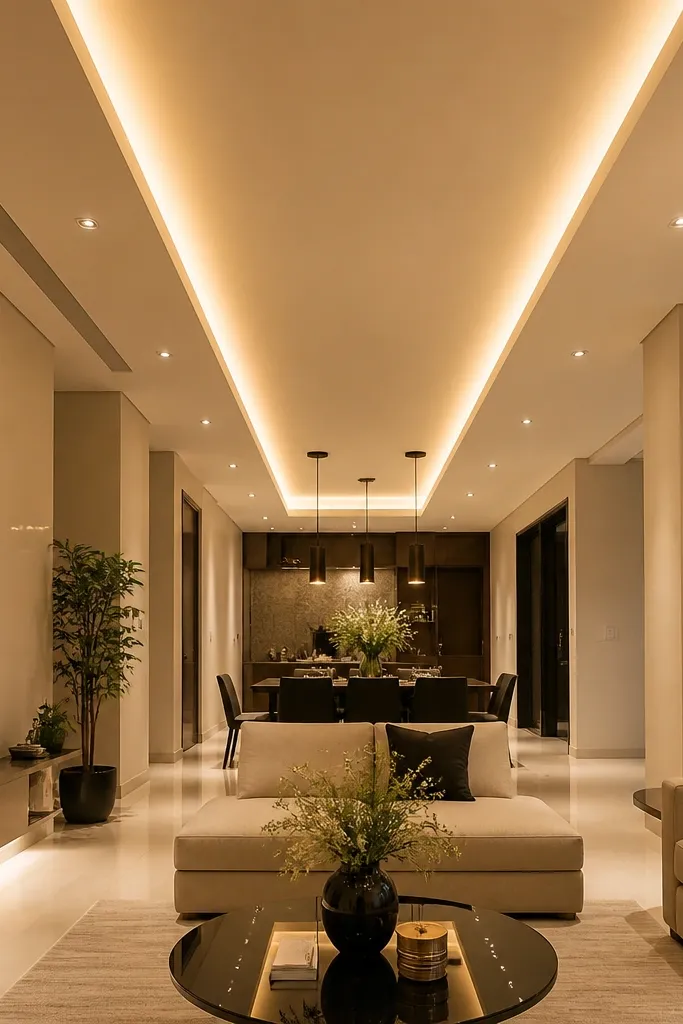
A long rectangle runway is a clean, high-end False Ceiling Living Room look when you want emphasis over a seating or dining line. The side glow creates a subtle gradient that makes the ceiling feel longer and more expensive. It’s also a smart solution for open-plan living rooms where one ceiling feature needs to guide the eye across different zones. Keep the runway straight and level — this one lives or dies on alignment.
Measure the space line you want to emphasize and set the runway width at 400-700 mm depending on room size. Build a recessed channel drop of 70-90 mm with a 60-80 mm shadow gap. Install LED strip on the inner recess with a diffuser so the light exits sideways. Close the visible face with a crisp straight board edge, prime, sand, then paint two coats. Add a cable access hatch at one end before closing the final board.
Editor's noteUse a continuous LED driver run and label your circuit before painting so troubleshooting is quick.
Skip thisDon’t run the runway with a visible LED seam; seams show strongly on long straight glow lines.
20. Raked Coffered Beams with Slot LEDs
This is a high-end false ceiling living room look that adds depth without covering the whole ceiling in heavy ornament. You get angled, raked gypsum beams that catch light like architecture — then thin slot LEDs inside each beam line up to make the room feel taller. It works especially well for living rooms with long sightlines where you want the ceiling to read like a designed feature, not flat paint. Build it in warm white (2700K-3000K) and use a diffuser so the light stays soft and clean on camera. Skill level is medium: it’s not hard carpentry, but layout and plaster finishing take patience, and the job usually takes 3-4 working days depending on ceiling size and how many beams you cut.
Step 1 — Layout the raked beam lines and levels: mark a reference line level across the room, then set your beam “rise” so the beam tops slope upward toward the focal wall by 50-80 mm over the run. Use a laser level to transfer marks to all four corners, then snap chalk lines for each beam. Step 2 — Build the beam soffits: cut gypsum boards for the beam faces and the bottom “lid” that hides the LED slot, and frame them with GI channel and battens. Keep the LED slot opening to 12-15 mm wide and 35-45 mm deep, and leave a 20-25 mm service gap above for wiring and driver access. Step 3 — Install slot LED strips and diffuser: mount LED strips on aluminum channel if you have it, then cover with a frosted diffuser strip so you don’t see diode dots. Finish with 2 coats of joint compound, sand flat, and prime before painting the beams matte white and the ceiling a shade slightly warmer so the light glow looks expensive.
Editor's noteDry-fit one beam section with the diffuser before committing to plaster — you’ll see instantly if the slot width is too tight and will glare.
Skip thisSkipping a diffuser is the fastest way to turn this into a harsh, dotty light strip instead of a clean profile glow.



