

1. Linear wall wash along the entry reveal
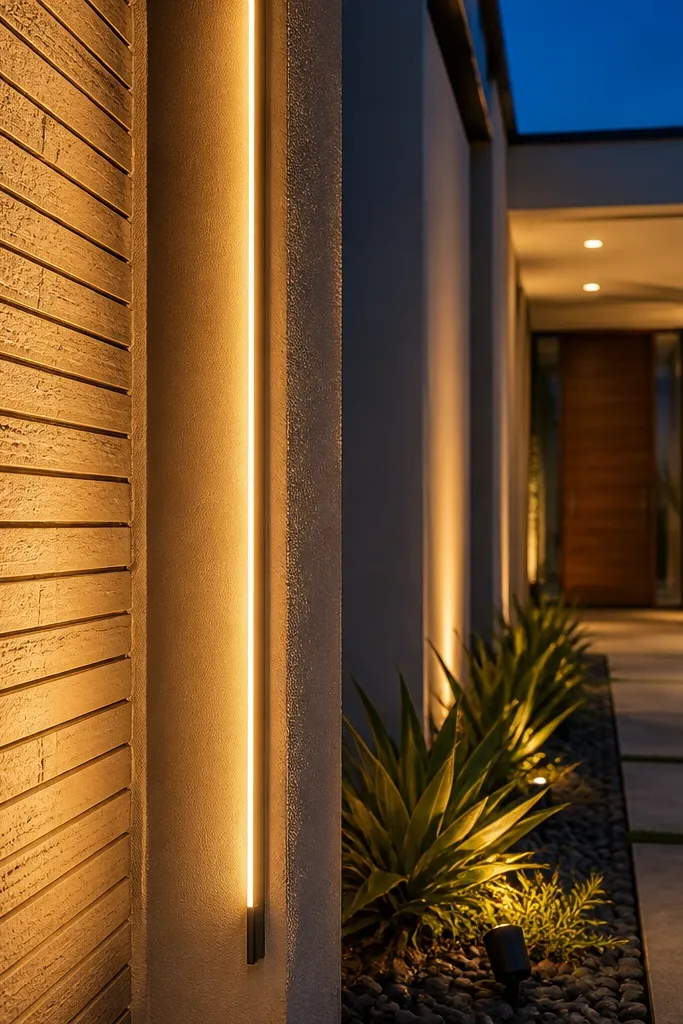
This look makes the entrance read expensive because the light spreads evenly across the vertical reveal instead of bouncing off trim. Use a slim linear LED wall washer with a hood so you get a smooth gradient on stucco, concrete, or painted brick. In photos, the reveal edge becomes a crisp line of light, which is what modern facades need. It also hides minor surface texture issues because the wash is broad and forgiving.
First, measure the reveal height and length, then choose a linear fixture length that spans the wall section with minimal gaps. Mount the fixture 2-4 inches inside the reveal line, aimed slightly upward so the beam hits the face of the wall, not the door glass. Then set the spacing by test-aiming one fixture at night and adjusting the tilt until the wall looks evenly lit from top to bottom.
Editor's notePaint the inside mounting surface the same color as the wall so any light spill looks like part of the architecture.
Skip thisDon’t mount it flush outside the reveal — you’ll get glare and hot spots around the door.
2. Recessed step lights with a shadow gap
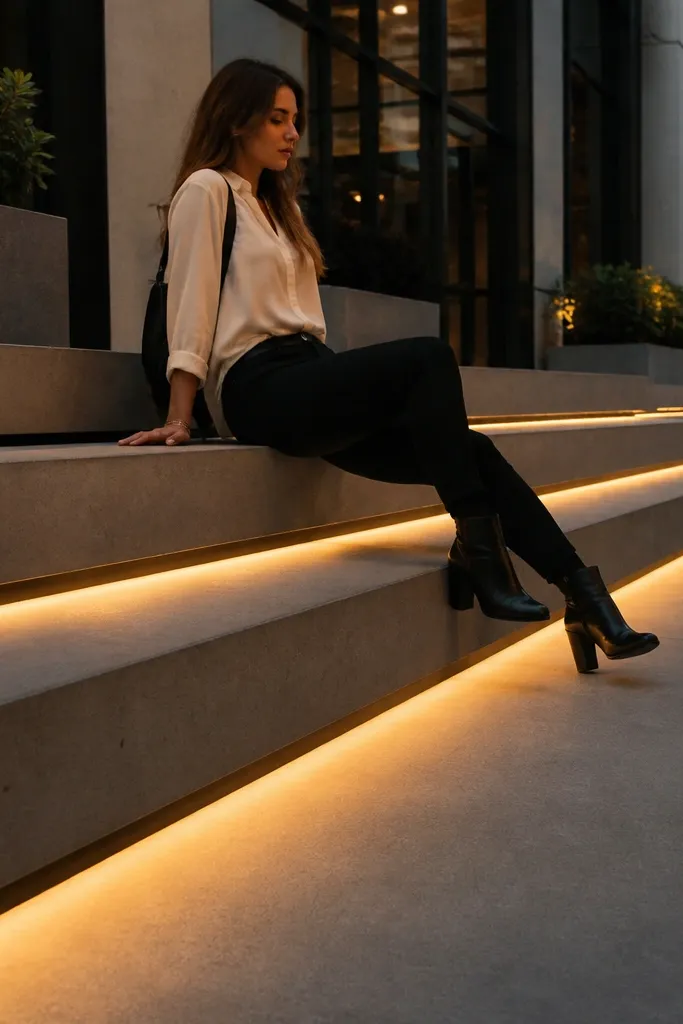
Step lighting looks high-end when it creates a line of illumination without visible LEDs. A recessed step light gives you a controlled beam that lights the tread edges and keeps the walkway readable after dark. The shadow gap makes the light feel integrated, like it belongs to the concrete, not bolted on. It’s especially photogenic on dark pavers or light stone because the contrast shows up in every angle.
Start by choosing recessed step lights with a cut-off lens or shield, sized for your tread thickness. Cut or core the openings at the riser or side face depending on your step design, keeping the top edge aligned so the light line is straight. Then install, set the light direction to wash the tread edge, and seal with exterior-rated caulk around the trim to stop water intrusion.
Editor's noteUse a consistent faceplate color (matte black or brushed nickel) so the recess looks intentional in daylight.
Skip thisSkip cheap “bare LED” step lights — visible chips ruin the modern look instantly.
3. Uplights grazing a stacked stone column
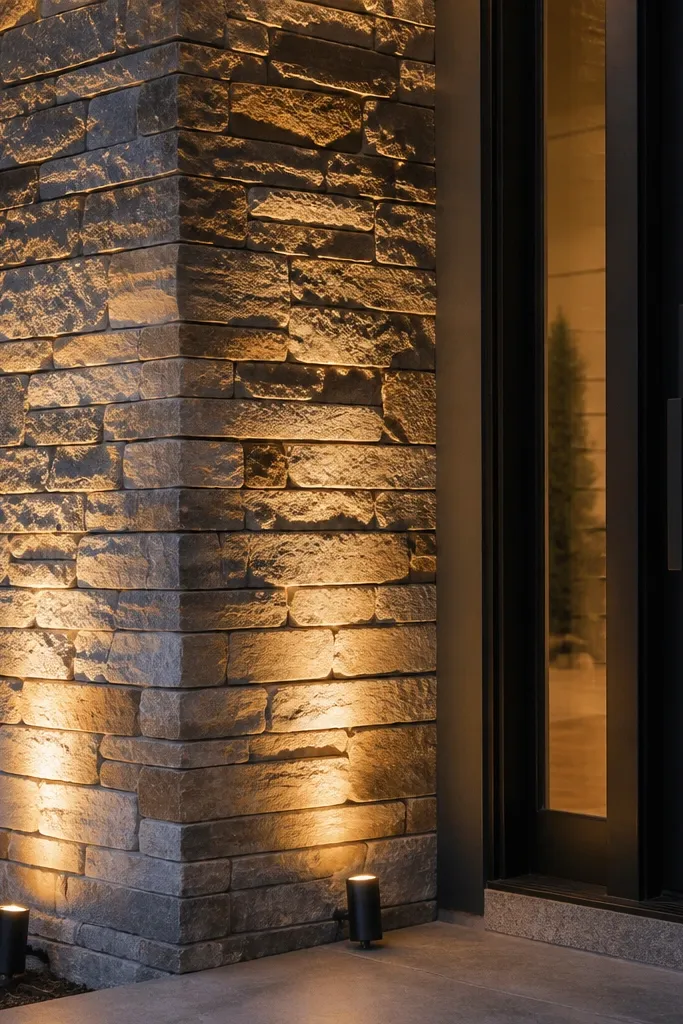
Grazing uplights make texture look richer, and stacked stone is the perfect surface for that. Instead of blasting the column, you skim light across it so the shadows in the grout lines show up. This is one of the fastest ways to make a facade feel designed because the wall texture does the work for you. In photos, it creates depth and a “designer” look without needing fancy fixtures.
Place two or three uplights at the base, angled so the beam skims the stone from bottom third upward. Keep fixtures slightly set back from the column edge to avoid direct glare and to spread the light across the width. Then fine-tune aiming at dusk, adjusting tilt until you see bright texture highlights without a glowing circle on the ground.
Choose 2700K if you have natural stone — it keeps the grout from looking gray.
Don’t aim straight at the stone — that turns texture into glare and looks flat.
4. Ceiling canopy grazing under a porch soffit
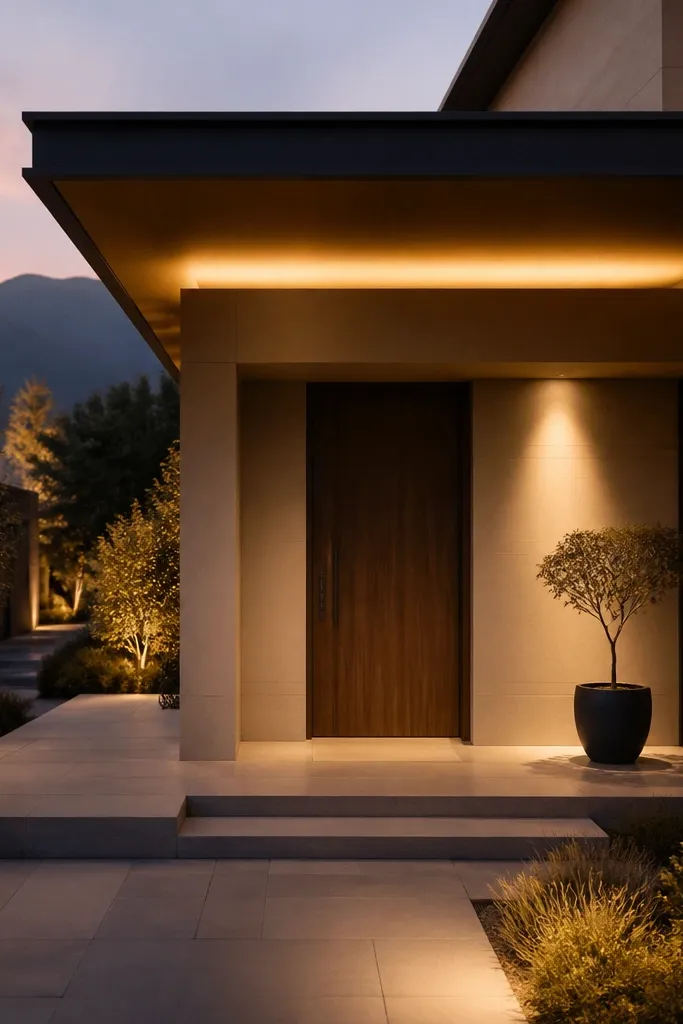
Under-canopy lighting is a modern facade cheat code. When you graze the soffit, the ceiling glows softly and the entrance zone looks framed. This makes the front feel “finished” because it ties the porch ceiling, door, and nearby wall into one visual field. It also reduces harsh shadows around the door area, which makes the house look calmer and more upscale.
Install a linear or small wall washer under the soffit, mounted on a concealed bracket so the lens stays hidden. Aim the beam so it hits the soffit surface near the far edge, not the doorway. Then confirm the light spread by standing where you’d park and checking reflections in any nearby windows.
Use a dimmer-friendly driver rated for low voltage LED systems so the glow stays smooth at night.
Avoid placing the fixture where you can see the lens from the street.
5. Spotlight accents on vertical fins with narrow beams
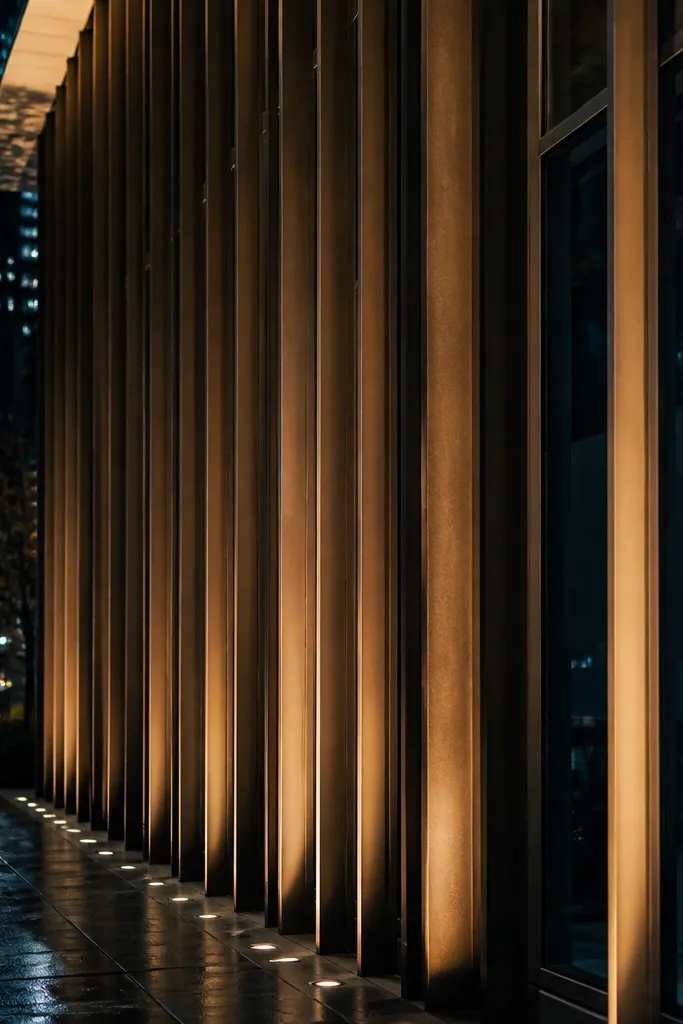
Vertical fins love narrow-beam spotlights because the separation between fins creates crisp shadows. That shadow pattern is what makes modern facades look architectural instead of “lit.” Use fixtures with tight optics (around 10-20 degrees) so the light lands on the fins and doesn’t spill into windows. In photos, this reads as intentional design because the fin rhythm becomes a visual stripe.
Mark fin spacing and mount two spotlights at the base or from a side planter, keeping them aimed horizontally toward the fins. Set the tilt so the beam hits mid-height first, then adjust upward until the top of the fin line is lit without washing the wall behind. Finally, lock the aim and install weatherproof covers for exterior wet locations.
If you have multiple fin rows, stagger fixture counts so each row gets its own beam, not one wide flood.
Don’t use wide flood optics — you’ll lose the shadow pattern that sells the look.
6. Step-and-wall path lighting in a single family
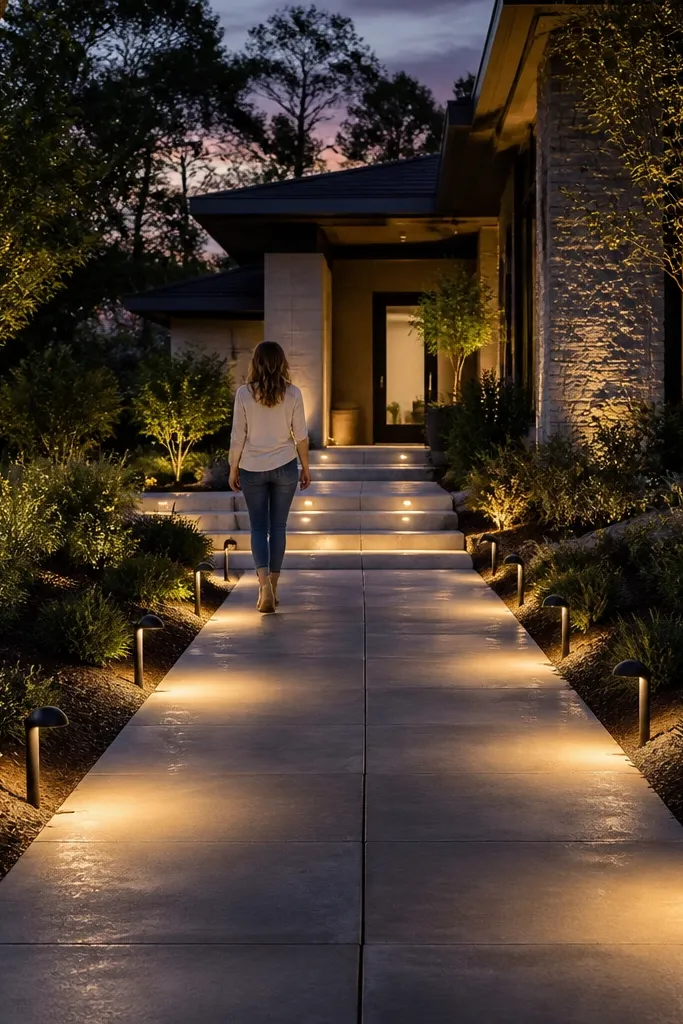
High-end facades don’t just light the architecture; they light the approach like a designed route. A cohesive path system uses matching fixtures along the walkway and steps so the eye reads a continuous plan. The key is low glare: use shielded path lights with a low mounting height so they illuminate the ground instead of your eyes. This also makes the front look safer in photos because you see a clear path without harsh spots.
Choose path lights with a defined cutoff and warm output, then space them based on the walkway width and desired brightness. Mount them at consistent intervals starting from the house corner, keeping the light direction slightly toward the center of the path. Then add a dimmer so you can keep the path subtle while still readable at night.
Use the same finish and same lens style for path and steps — mismatch is what kills the “designer” feel.
Don’t place path lights too high — anything over about knee height starts looking like yard lighting.
7. Channel light in a horizontal belt course
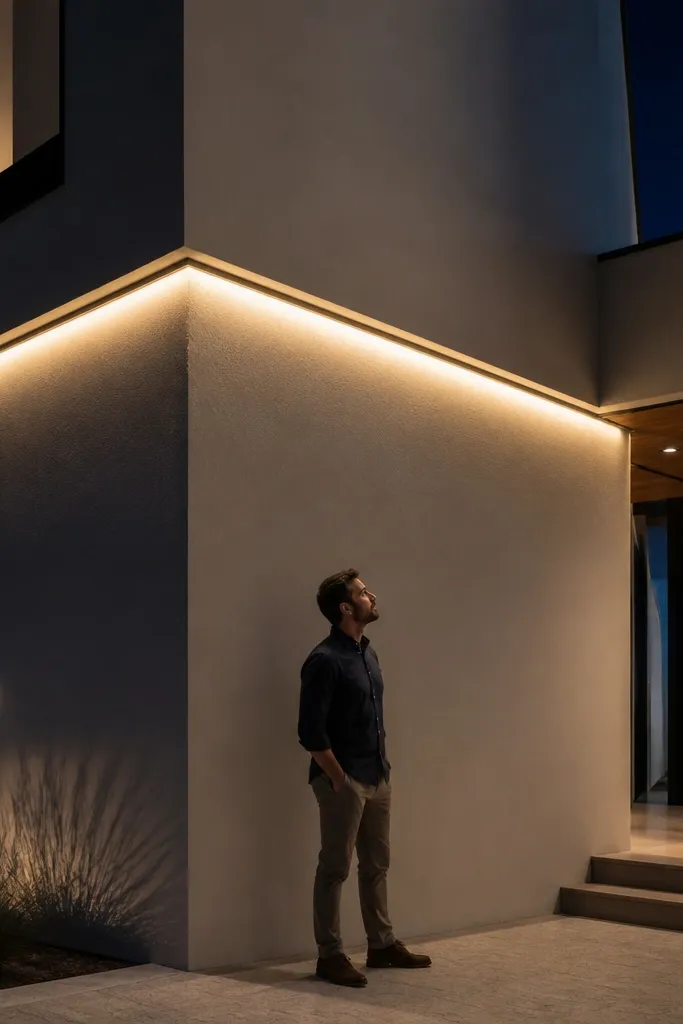
A hidden channel in a belt course makes the entire facade look taller and cleaner. Because the LED is recessed behind a diffusing cover, you get a continuous line of light with no visible dots. This is one of the most photogenic modern looks because it turns a horizontal architectural element into a glowing frame. It works great on concrete, smooth stucco, and painted brick.
Cut a shallow recess or use an architectural channel system under the belt course edge. Install the LED strip or module with a diffuser, then wire to a low-voltage driver rated for outdoor use. Finally, test brightness at night and adjust the diffuser position so the line looks even without hotspots.
Editor's noteUse a rigid aluminum channel with heat sinking — strips that run hot fade unevenly within a year.
Skip thisSkip flexible tape without proper mounting hardware; it warps and creates uneven brightness.
8. Backlit house numbers in brushed metal
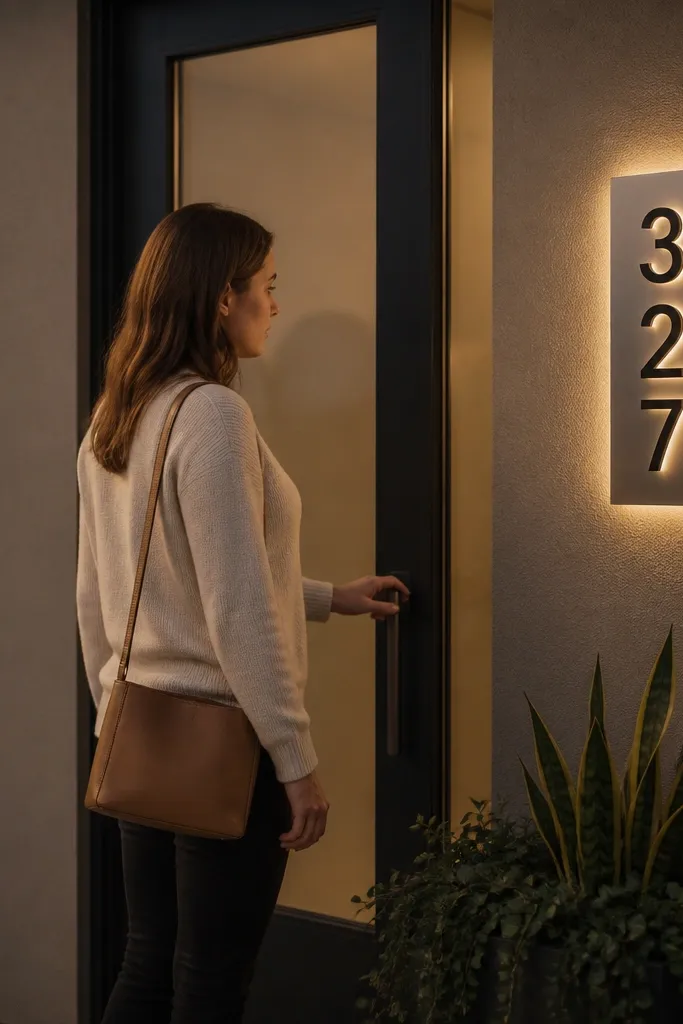
House numbers sound small, but backlit numbers look expensive because they’re crisp and readable. When the numbers are mounted in a brushed metal or anodized face with a concealed light source, you get a clean halo that matches modern hardware. This is a quick win for curb appeal because it’s one of the first things people notice in photos. It also solves the practical problem of readability without flooding the entry area.
Pick a number plate with a backlit diffuser and mount it at about eye level near the door or gate. Run exterior wiring to a low-voltage driver or a compatible transformer depending on the fixture type. Then seal the mounting points, check the beam spread for even glow across each character, and adjust any internal diffuser if the kit allows it.
Editor's noteMatch the finish to your door hardware — brushed nickel with brushed nickel, not black with silver.
Skip thisDon’t use unshielded LEDs behind numbers; you’ll see dots and it looks DIY in a bad way.
9. Gated wall wash with a concealed soffit strip
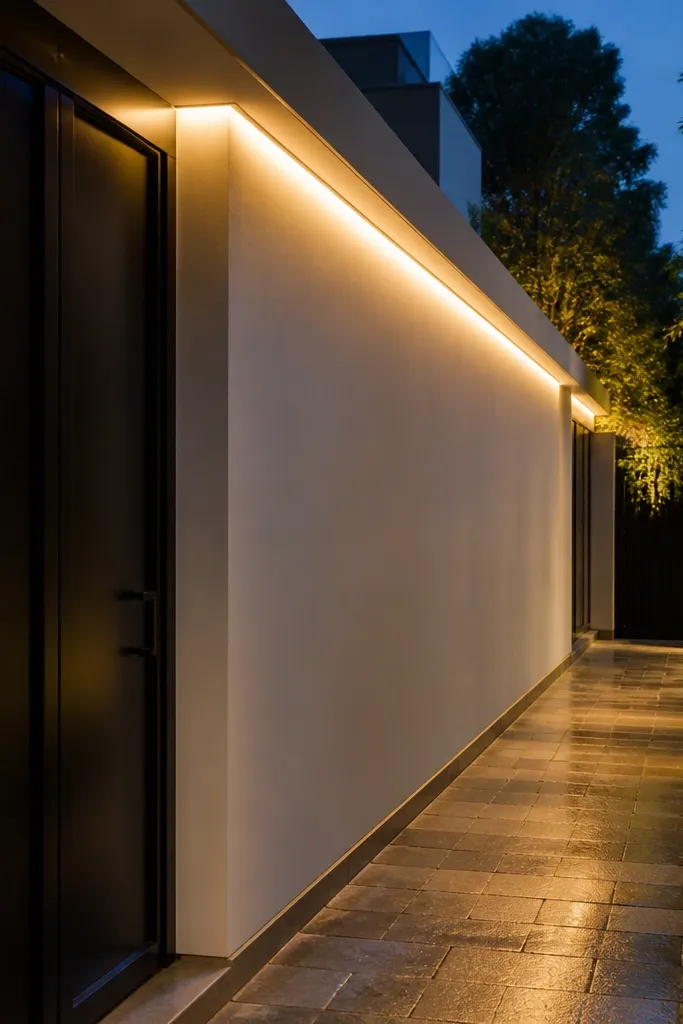
If you have a side gate or long entry wall, a hidden strip that washes the wall turns it into a controlled backdrop. The glow makes the pathway feel intentional and keeps the area from looking like a dark corridor. In a modern facade, this reads as “architecture first” because the light follows the wall line. It also reduces shadowy corners where people stumble.
Mount a low-profile linear fixture in a concealed channel under the top edge of the gate wall or a small soffit recess. Aim it so the beam hits the wall about 1/3 of the way down, then spreads upward and downward evenly. Wire to an outdoor-rated dimmer or controller and test at night to confirm the wall is smooth without visible LED dots.
Editor's noteUse a frosted diffuser lens so the fixture reads like a continuous glow, not a row of points.
Skip thisAvoid mounting too close to the wall surface; you’ll get a bright band instead of a wash.
10. Wall-mount linear sconces flanking the front door
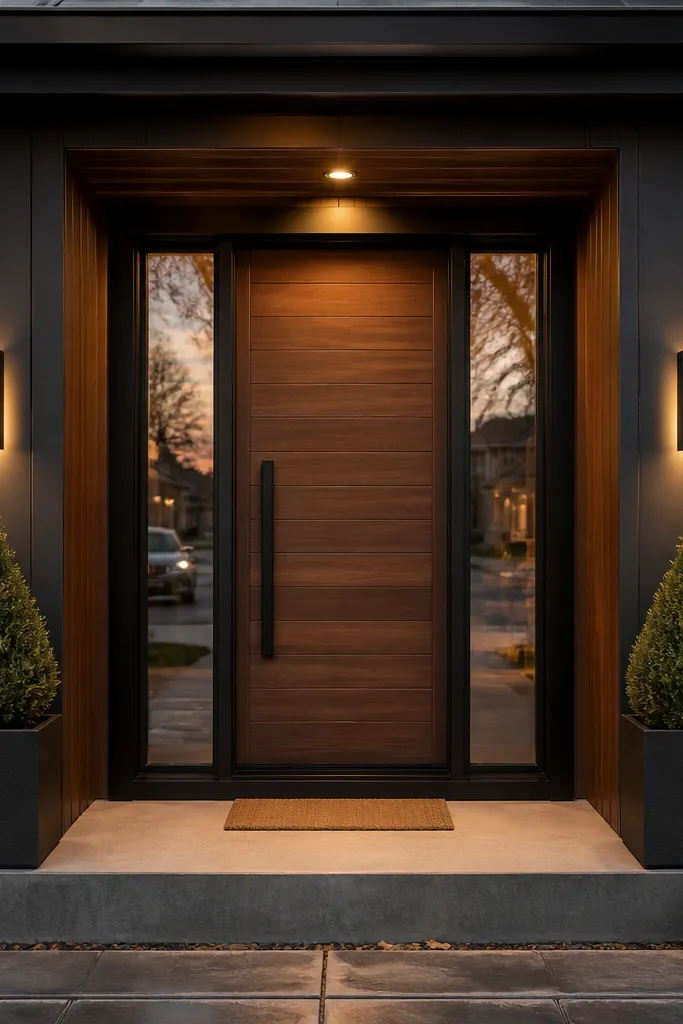
Flanking sconces are the cleanest way to frame a door without making it look like a porch light. Choose linear fixtures with a flat, shielded face so the light goes forward and spreads across the door area. This creates symmetry, and symmetry is what makes modern facades look “designed” fast. In photos, the door becomes the focal point, and the surrounding wall has enough glow to look smooth.
Measure the door height and place sconces so the centerline is around 60-66 inches from finished floor, adjusted for porch steps. Mount the fixtures on either side with matching spacing from the door frame so the beams overlap slightly on the wall. Then tune the aiming if the fixtures allow it, and add a dimmer so the brightness doesn’t overpower daytime-looking exteriors.
Use 2700K for a door zone — it makes wood and stone look warmer without turning skin tones orange.
Don’t pick fixtures with exposed bulbs; visible filaments read casual, not modern.
11. Tall vertical uplights for glass and cantilever shadows
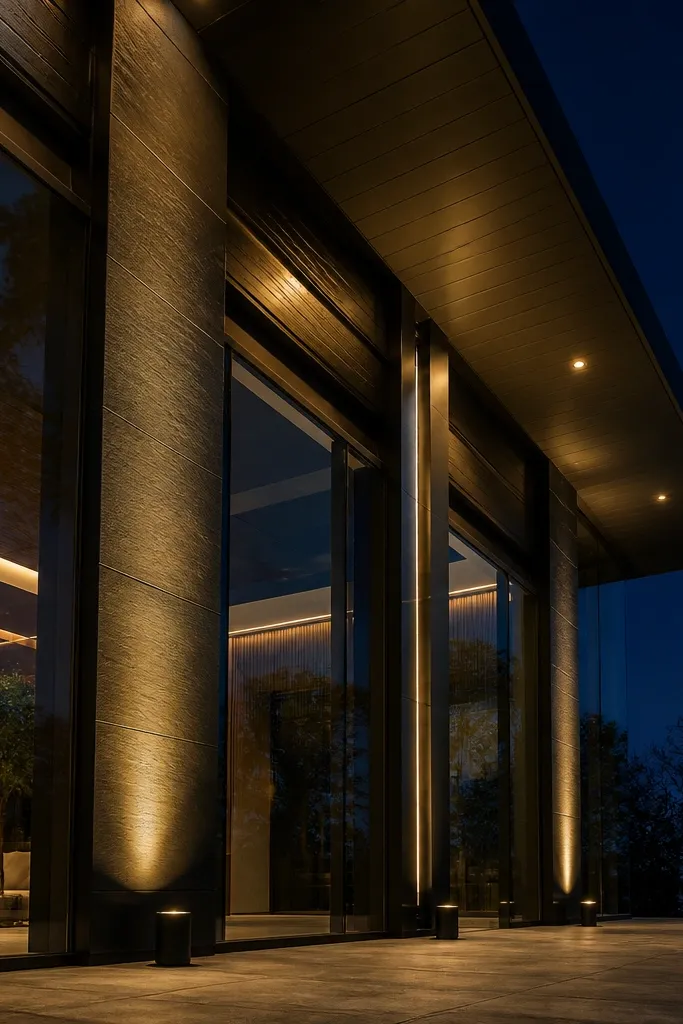
Glass and cantilevers look best when light is tall and vertical, not just sideways. Use uplights with narrow-to-medium optics aimed upward along the wall plane so you get a clean vertical glow. This highlights architectural lines and makes the facade feel dimensional even when the house is dark. It’s especially effective when your facade has long vertical surfaces like smooth render or tall windows.
Place uplights at the base of the wall plane, spaced so their beams overlap without creating bright stripes. Aim the fixtures upward to land on mid-height first, then adjust until the top of the window zone is softly lit. If you have a cantilever, aim just enough to catch the underside edge without lighting the ceiling directly.
Choose housings with glare shields so the beam stays controlled from street level.
Don’t place uplights too far from the wall — you’ll get visible beam cones in photos.
12. Planter uplights aimed at the facade edge
Planters are built-in hiding places for lighting, and that’s why this looks expensive. Uplights inside a planter cast light onto the facade edge, creating a crisp boundary line that makes the wall look sharper. The plants also break up glare, so your lights don’t look like hardware. In modern homes with clean lines, this technique makes the facade feel intentional instead of “decorated.”
Set uplights in the planter bed so the fixture is below the top of the soil line and aimed slightly upward. Keep the beam aimed at the facade edge (where wall meets trim), not at leaves, then trim plants so they don’t block the beam path. Seal connections with outdoor-rated junction boxes and test the beam from the driveway before you backfill.
Editor's noteUse a low-voltage system with proper outdoor-rated cable so you can adjust fixture positions without ripping up hardscape later.
Skip thisDon’t bury the fixture too deep; you’ll lose aiming control and end up with random light spill.
13. Deck railing downlights with cut-off lenses
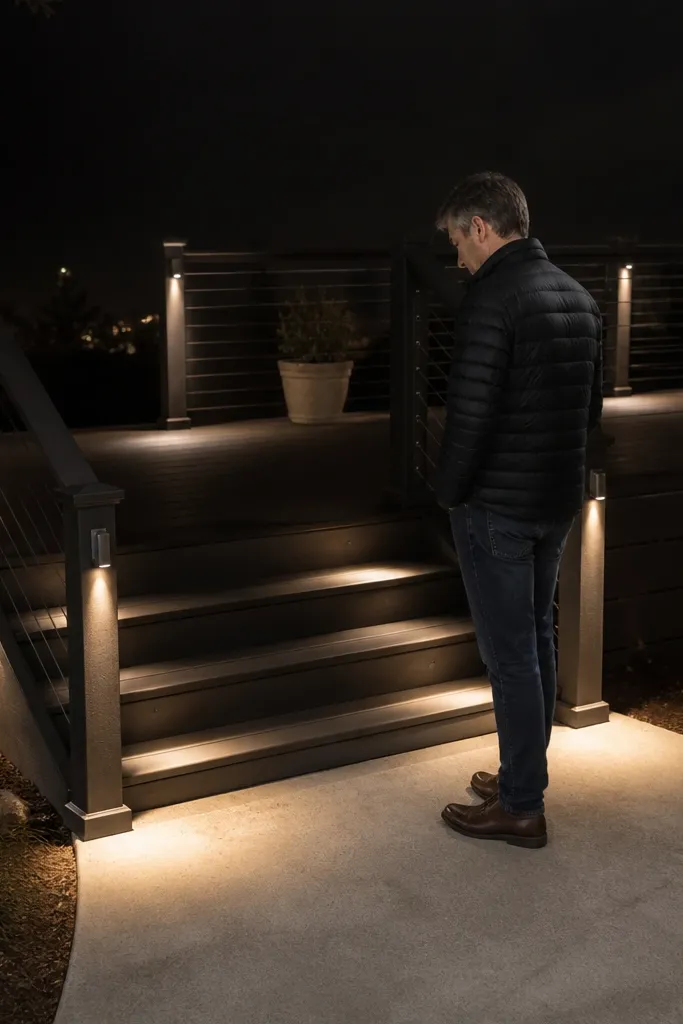
If your facade includes a deck or balcony, railing downlights make the whole front look more premium. The light sits low and points down, so it lights the ground and steps without glare. That makes the approach safer and makes the architecture look staged, not accidental. It also photographs well because you see a smooth, controlled glow under the structure.
Choose downlights designed for outdoor rail mounting with a cut-off lens to prevent direct viewing of the LED. Install them under the railing at consistent spacing, keeping the beam centered on the walkway area below. Wire to an outdoor-rated driver and add strain relief at the fixture entry so vibration doesn’t loosen connections over time.
Use stainless or powder-coated housings if you live near salt air; regular black finishes can chalk in 1-2 seasons.
Avoid open-bowl fixtures; they throw light sideways and create harsh glare.
14. Mirror-polished stainless edge lights on concrete steps

Edge lighting on steps looks high-end when the fixtures match the modern metal language of the home. Stainless edge lights create a crisp line that follows the concrete geometry, which is exactly what modern facades need. The glow is subtle but readable, and the metal finish catches light in daylight without looking flashy. This is a great choice for minimalist exteriors where the wall has few details.
Pick edge lights with a narrow housing and a shielded lens so they don’t show the LED. Install along the step side faces at a consistent height, usually about 1-2 inches above the tread surface line, depending on the fixture. Drill and anchor using exterior-rated hardware, then seal around the housing with a waterproof exterior sealant.
Editor's noteClean the metal finish before final install; fingerprints show under warm light at night.
Skip thisDon’t mix stainless edge lights with matte black wall lights — the mismatch reads like different projects.
15. Backlit soffit under a second-story overhang
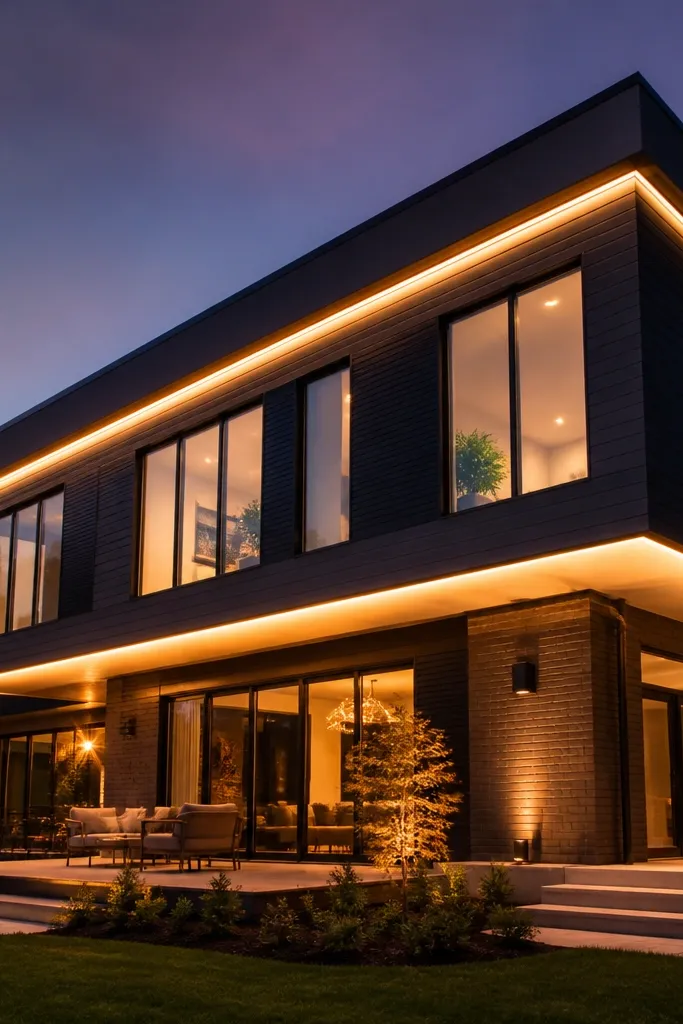
A backlit soffit makes a two-story facade look taller and more architectural. When the overhang underside is softly lit, the facade has a floating feel, and the windows look framed. This technique also hides uneven soffit texture because the diffuser spreads light. In photos, it’s the kind of lighting that makes the house look like it was designed by someone who thought about angles.
Install a recessed LED strip or linear module inside the overhang soffit with a diffuser cover. Keep the light shielded so you see glow, not the LED chips. Wire to a weatherproof driver, then set brightness low enough that the window reflections look soft rather than blown out.
Editor's noteUse a diffuser rated for outdoor exposure so it doesn’t yellow and turn the glow uneven.
Skip thisAvoid high brightness — an overlit soffit looks like a streetlight and kills the modern mood.
16. Corner light stacks for a clean facade junction glow
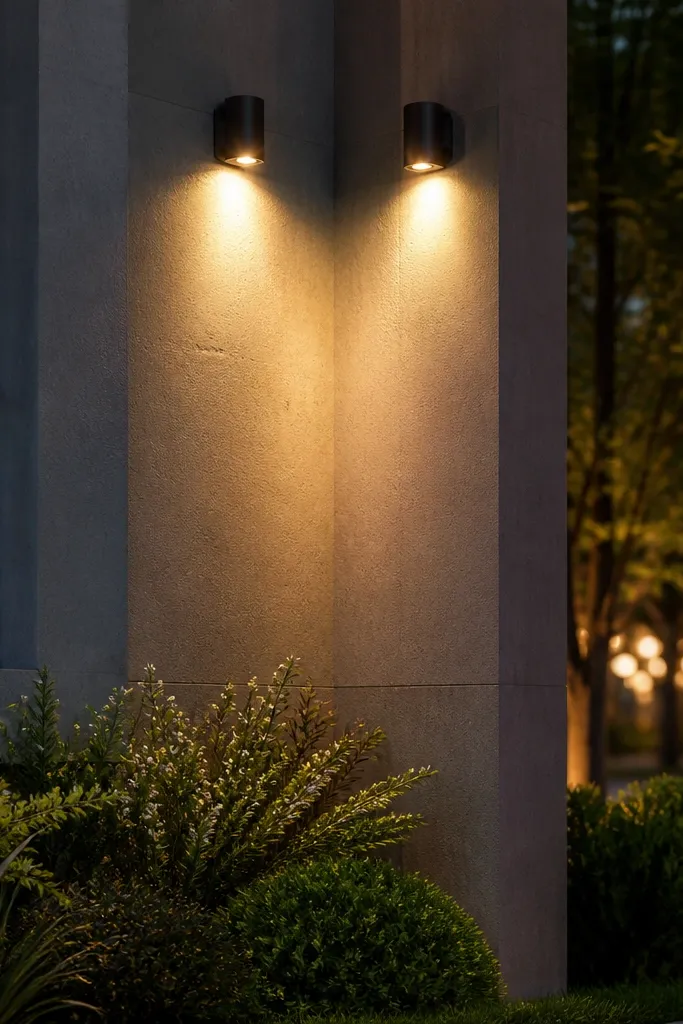
Lighting corners correctly makes modern facades look crisp instead of flat. Use a pair of fixtures near the junction where two wall planes meet, aimed so the beams overlap slightly on the corner line. That overlap makes the junction glow and visually sharpens the house geometry. It’s also great for L-shaped facades because it gives each plane a designed highlight without lighting the whole front equally.
Mount two wall washers or small uplights on either side of the corner, with aiming directed toward the corner seam. Adjust so the brightest point sits on the corner line, not on the adjacent wall field. Then lock fixtures in place and verify coverage from multiple viewpoints because corners often look different from the driveway vs. Sidewalk.
If your facade is painted, test with the wall lights off — you’ll see how color temperature affects paint sheen.
Don’t place both fixtures too far back — the overlap won’t land on the seam and you’ll get two separate pools of light.
17. Glass-door transom grazing with a low glare fixture
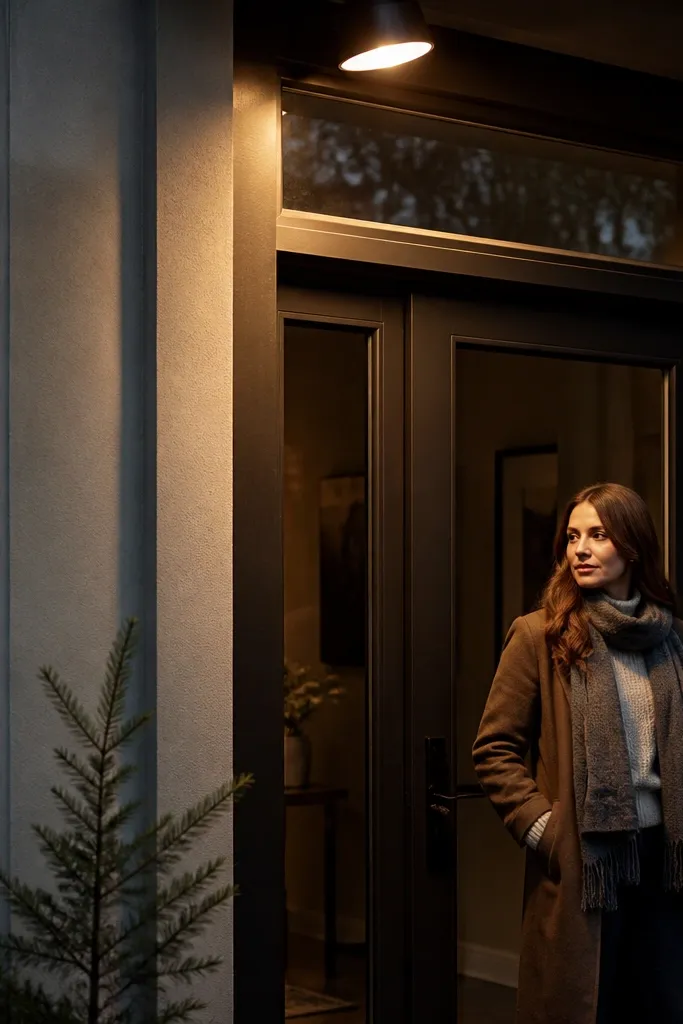
Grazing a transom or glass door panel reads high-end because it creates a soft highlight line rather than a bright hotspot. This is the best approach when you want the entry to look premium but you don’t want glare in door glass. Choose a fixture with a hooded lens and aim it to wash the transom surface. The result is a modern glow that makes the entry feel clean and calm.
Mount a small wall washer or narrow linear fixture under the transom line, using a concealed bracket if you need to hide the lens. Aim the beam so it hits the transom surface and stops before it reflects into the door glass from street level. Then check the reflection at night and adjust tilt until the glass looks like it’s softly lit, not glaring.
Use 2700K for glass — it makes reflections look warm and less harsh.
Avoid placing the light too close to the glass — you’ll get a bright reflection stripe.
18. Mirror-like path lights with warm downlight for the driveway edge
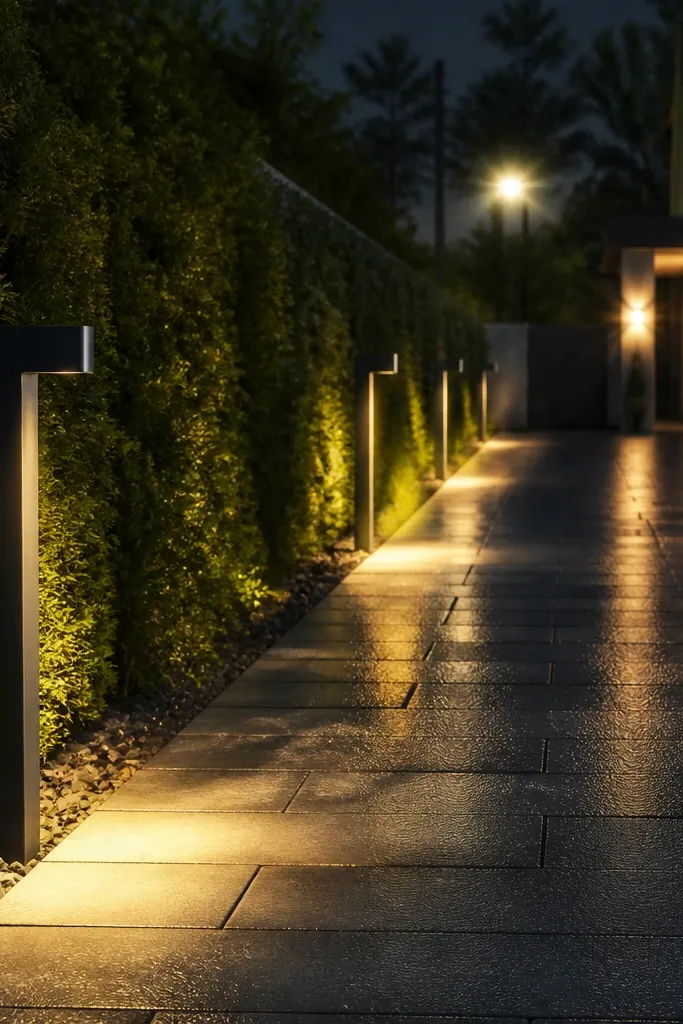
Driveway edge lighting is where modern homes look expensive because it controls how the front is perceived while you approach. Use sleek path lights with a downlight pattern and a warm temperature so the ground glow is soft. The “mirror-like” part comes from the housing finish and lens — when it’s clean and minimal, it reads architectural. In photos, the driveway becomes a leading line into the facade.
Mark a straight line along the driveway edge and choose a path light spacing that keeps the glow continuous without bright dots. Install fixtures flush or slightly recessed so the lens isn’t visible from the road. Then connect to an outdoor-rated transformer or low-voltage driver, test at night, and adjust any aiming so the light lands on the ground rather than the wall.
Editor's noteUse matte housings with a smooth diffuser; glossy plastic lenses yellow and look cheap fast.
Skip thisDon’t use random garden solar stakes — the look never matches modern architecture.
19. Architectural bollard lighting with a hidden shield
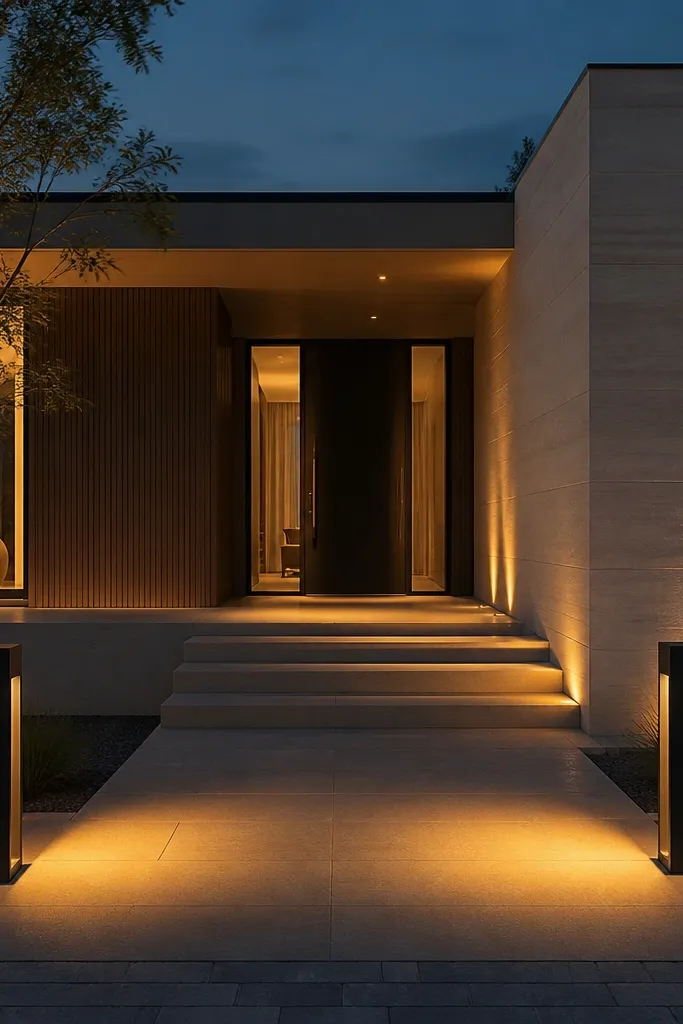
Bollard lighting works when it’s treated like architecture, not yard decoration. The shielded glow keeps the LED from being visible and makes the fixtures look like solid design objects. A modern bollard placed at entry corners creates a framed approach and balances wide facades that otherwise feel too dark. It also photographs well because the light reads as a clean vertical column of brightness.
Choose bollards with a clear cutoff and warm output, then set spacing so the walkway is evenly lit without pools. Install on a level base, anchor with exterior-rated hardware, and route wiring in conduit. Aim or adjust the internal optics so the light drops onto the path area, then check coverage from the front door and from the street.
Pair bollards with wall lighting at the same color temperature so the whole facade reads one system.
Don’t pick tall, wide-emitter bollards; they create glare and flatten the modern look.
20. Spotlight ring effect on a feature wall using multiple micro spots
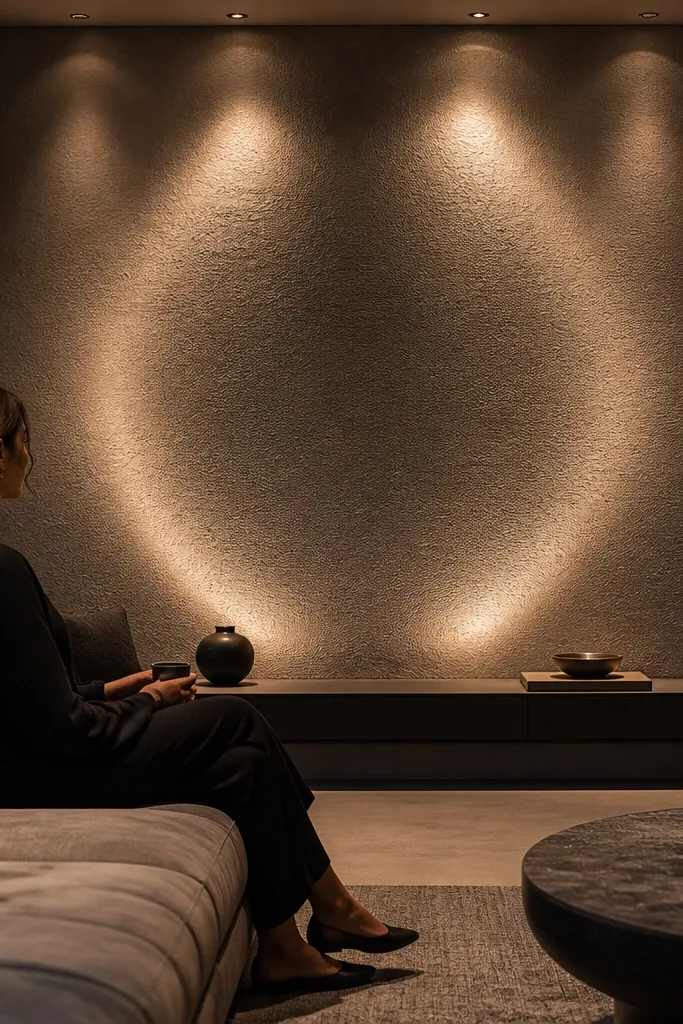
A ring effect is dramatic and very photogenic when you do it with micro spotlights and controlled angles. The idea is to light a feature area from several points so the center stays darker and the edges glow — that contrast makes the feature wall look sculpted. You’ll see it immediately in photos because the eye catches the circular glow. It works on feature panels, wall niches, and smooth concrete surfaces.
Plan the feature shape first and mark a circular or semi-circular layout for micro spotlights. Mount fixtures in a hidden planter, soffit pocket, or wall recess, aimed inward at the feature edge. Then power up and adjust each aim slightly until the glow forms a clean ring with no bright single spot dominating the circle.
Editor's noteUse fixtures with adjustable yokes so aiming changes are small and controlled.
Skip thisDon’t use one wide projector — you lose the ring texture and it turns into a flat wash.



