
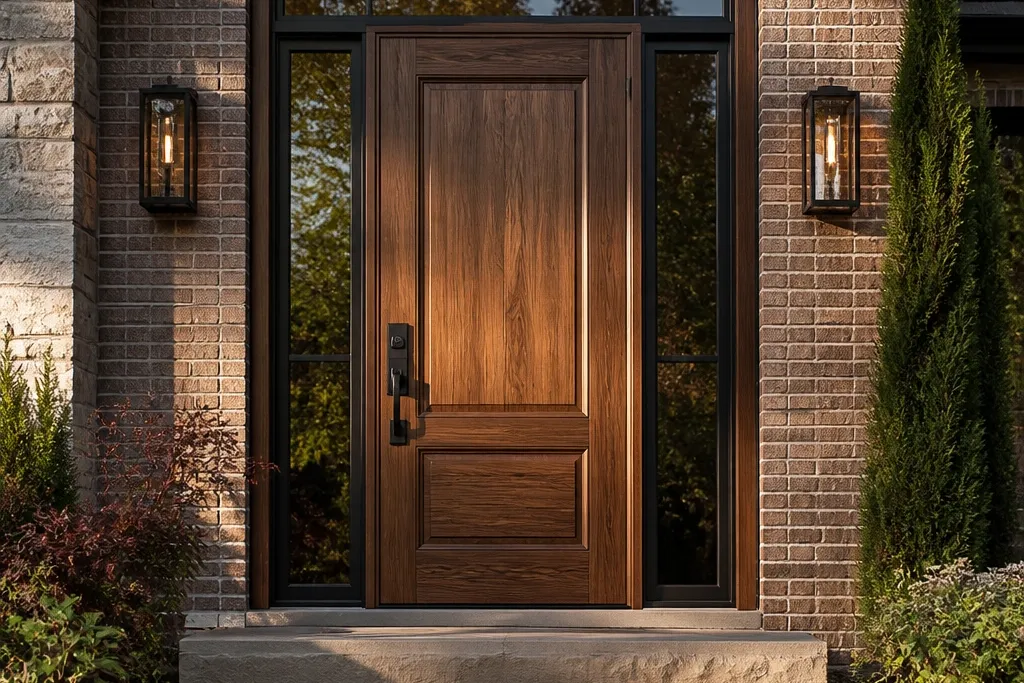
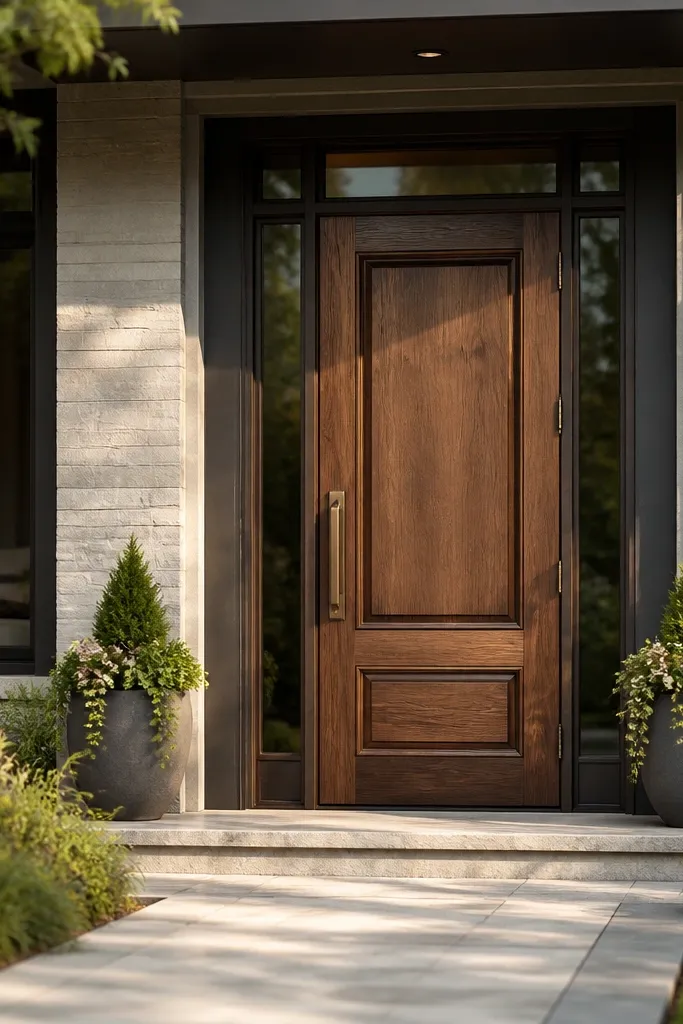
1. Walnut stain door with modern 3-rail panel grid
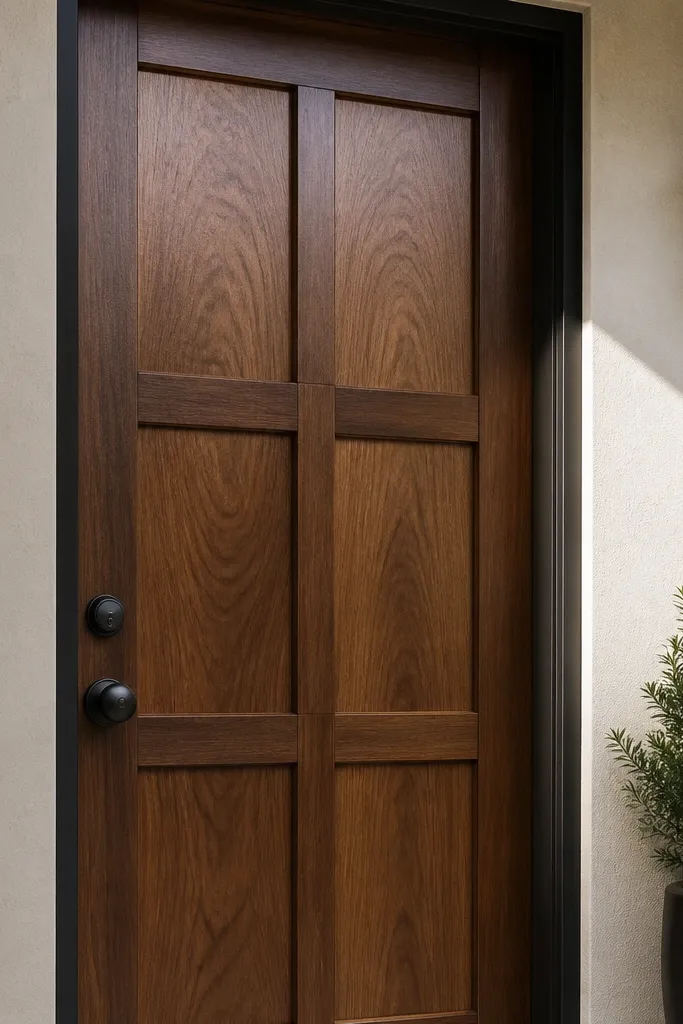
This look is all about controlled contrast. A warm walnut stain makes the grain look layered, and the 3-rail layout gives you that architectural rhythm from street distance. Keep the panel edges crisp so the grid reads as intentional, not decorative. Use a satin exterior topcoat so the door catches light without turning shiny and cheap-looking. This works best on entries with simple siding or brick where you want the door to be the star.
Measure your door slab width and height, then plan panel sizes so the rails are even and the vertical stiles match. Use a router with a straight bit to cut shallow, consistent grooves where the panel lines will sit, then glue and pin trim strips over those grooves. Sand the entire face flush, stain evenly in thin coats, and finish with two exterior satin topcoats, sanding lightly between coats. Finally, install a matching deadbolt and lever set so the metal tone doesn’t fight the walnut warmth.
Editor's noteSand to 180 grit before staining and wipe with a tack cloth right before the first coat to avoid grain speckling.
Skip thisDon’t let panel gaps vary — uneven lines make the “custom” effect disappear.
2. Black painted door with recessed shaker squares
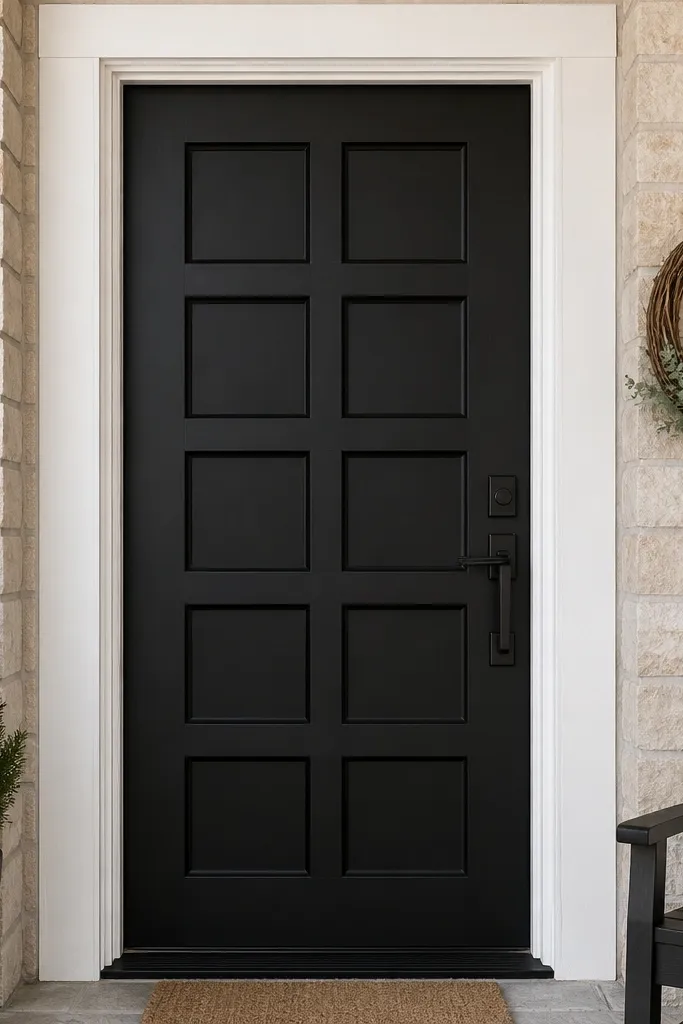
A black shaker door reads high-end because the recesses create shadow even in flat daylight. The recessed squares make the door look deeper than it actually is, which is what expensive doors do. Paint also lets you hide small surface flaws better than stain, as long as the base is smooth. Use a matte or low-sheen exterior paint so the door looks tailored, not glossy. This style suits modern houses, craftsman facades that need a cleaner look, and entries with minimal ornamentation.
Start by filling dents and sanding flat, then prime with an exterior bonding primer. Mark a grid of square recesses using a level and painter’s tape as guides, and rout shallow channels or install thin applied trim strips to create the recess lines. Glue and nail the shaker pieces, then fill nail holes and sand flush. Paint in two to three coats, keeping strokes consistent, and topcoat with an exterior clear only if your system requires it for durability.
Use a foam roller for paint — it avoids brush marks on the recessed edges.
Skip heavy caulk in the seams; it looks gummy and cracks faster than thin trim lines.
3. Herringbone wood applique on the lower half
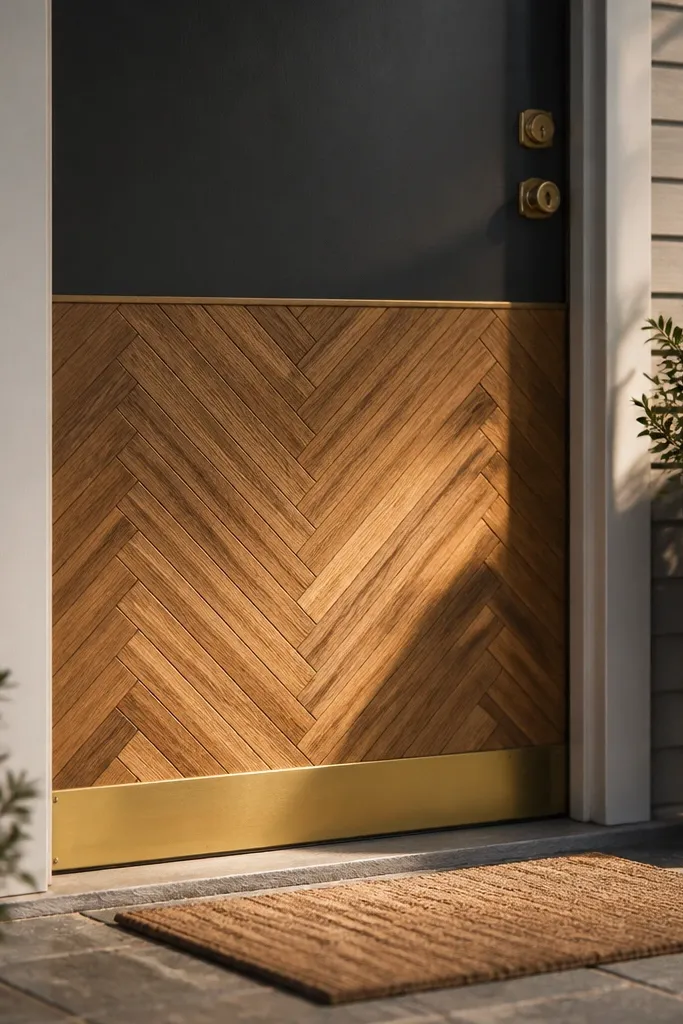
This is a high-end trick: the lower half gets texture and motion, while the top stays clean and calm. A herringbone applique reads premium because the pattern is tight and deliberate, like furniture. Keep the rest of the door minimal so the pattern is the focal point, not clutter. For best results, use wood strips that match your door wood tone and seal them well for exterior moisture. It’s perfect for entries with a porch light and a bit of foot traffic, because the pattern holds attention as people walk up.
Cut a herringbone section template by marking a rectangle on the lower door face. Use thin strips (about 1/4 in to 3/8 in wide) and pre-miter or use a jig so the angle lines stay consistent. Glue each strip in place, clamp lightly, and let the adhesive cure fully before sanding the surface flush. Seal the entire door with an exterior sealer, then finish the door topcoat over everything so the pattern doesn’t look “stuck on.”
Editor's noteDry-fit three rows first and adjust the strip angle before you glue — it saves you from a wavy pattern.
Skip thisDon’t use thin soft pine strips outdoors without sealing; they warp and open up.
4. Tall arched top with divided glass and warm oak frame
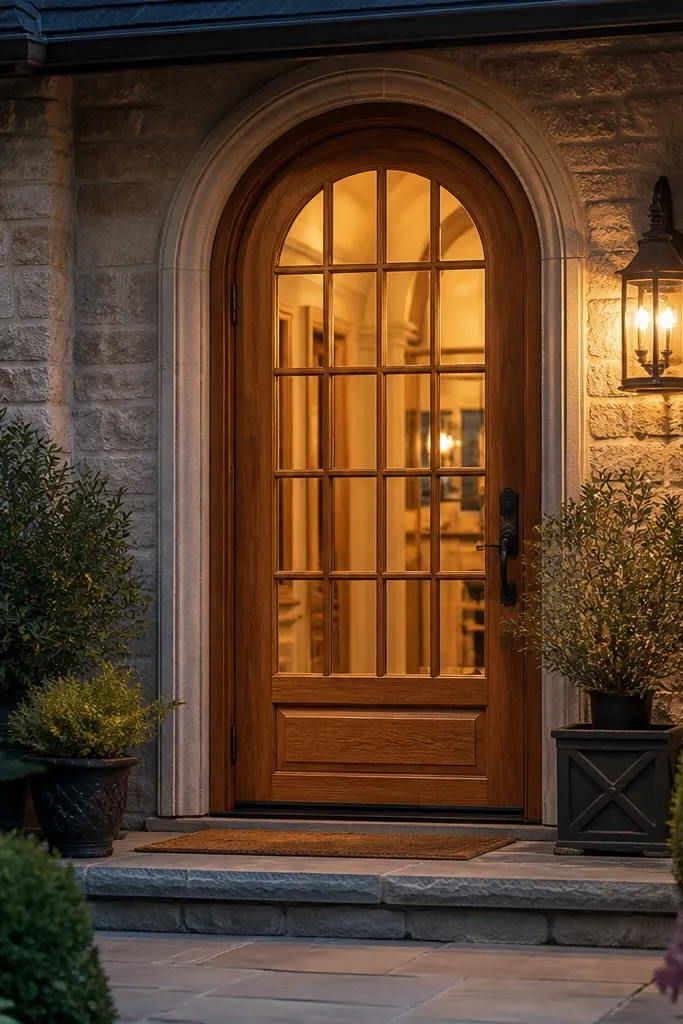
An arched top instantly reads upscale because it changes the door’s silhouette. The divided glass adds a light-catching geometry that looks expensive at night under a porch light. Use warm oak or a honey-toned stain so the glass area looks inviting, not cold. The frame detail matters — a slim frame makes it look cheap, while a slightly thicker reveal makes it feel built-in. This works especially well on traditional facades, front porches with columns, and homes with existing trim lines.
Choose an arched door size that matches the opening and plan the glass insert area so the muntins have equal spacing. If you’re modifying a slab, cut a clean opening using a jigsaw and finish the edges with a router template. Install an exterior-rated glass insert with glazing tape and weather seals, then add muntin strips with tight miters. Stain the wood, then seal around the glass edge with a paintable exterior sealant and finish with two topcoats.
Editor's noteUse glazing tape on both sides of the glass for a cleaner look than caulk lines.
Skip thisDon’t skip edge sealing around the glass cutout; water intrusion shows up fast.
5. Reeded wood vertical lines for a modern luxury look
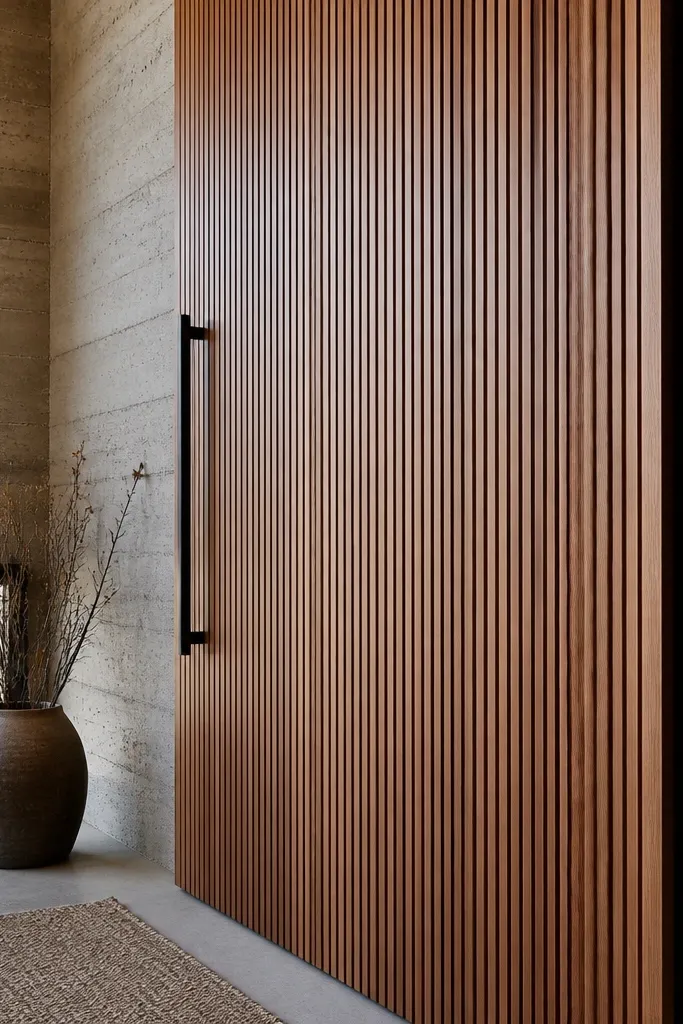
Reeded grooves look high-end because they create a surface that catches light from the side. It’s not a pattern you can fake with random sanding; it needs consistent spacing and depth. Keep the door otherwise simple so the reeding becomes the texture. Finish in a satin clear over a medium stain, so you see the grain and the shadow lines. This style fits modern exteriors, Scandinavian siding, and entries with clean trim where you want one strong textural move.
Mark your reeded layout with a spacing guide so the grooves are even across the door width. Use a router with a V-groove or straight bit to cut shallow, consistent channels, then sand to soften the edges without rounding the groove bottoms. Apply stain evenly, then topcoat with satin exterior clear. Install hardware with a slightly brushed finish so it doesn’t look too glossy next to the reeded texture.
Editor's noteCut one test groove panel first and check it under side light before you commit to the whole door.
Skip thisDon’t make the grooves too deep — exterior wood movement can telegraph cracks.
6. Two-tone door: black frame with warm wood center panels
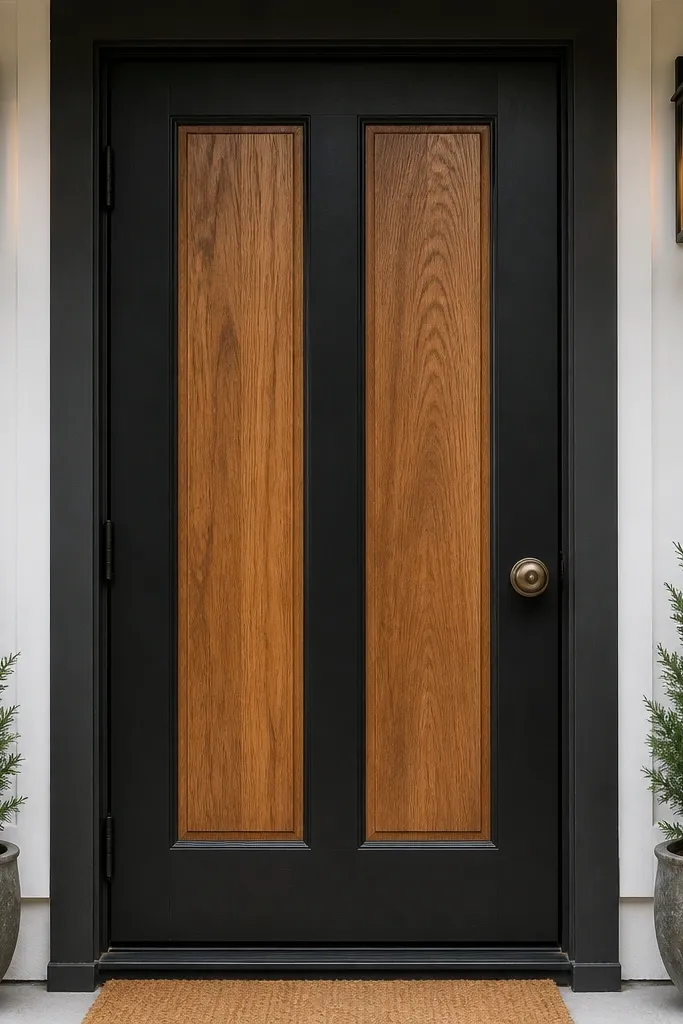
Two-tone doors look designer because they separate the door into zones. A black outer frame gives a crisp border, while warm wood center panels keep it from feeling harsh. This also hides minor imperfections because paint is more forgiving than stain on flat areas. The key is clean separation lines and a consistent sheen: keep both finishes satin so they don’t look mismatched. It suits modern houses, townhomes, and entries that need a more “tailored” look than plain black.
Decide which areas get paint and which stay stained, then mask carefully using fine-line tape along your separation edges. Prep the whole door: sand, clean, and prime painted surfaces with an exterior primer. Stain the center panels, seal them, then paint the frame panels after masking. After curing, remove tape to reveal sharp edges, then topcoat everything with compatible exterior finishes.
Let stain cure fully before painting nearby — otherwise you get bleed-through at the tape line.
Don’t mix oil-based stain and water-based paint without a compatible bonding primer.
7. Deep shadow-gap frame reveal with simple slab door
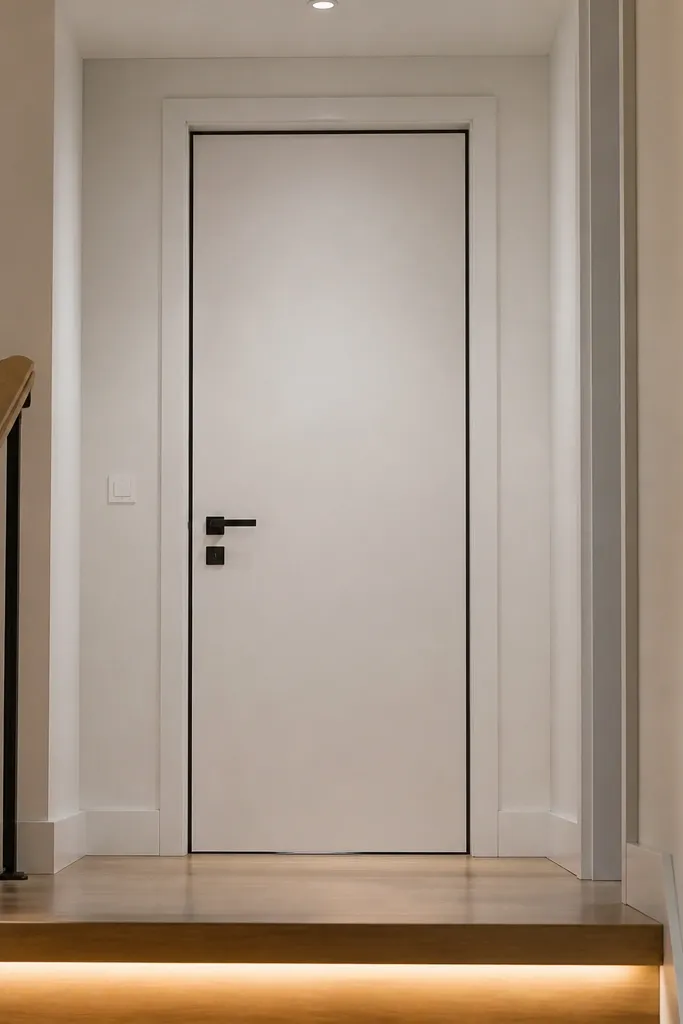
You can get a high-end main entrance door design look without complex paneling by building a deep reveal around the door. The shadow gap makes the door look thicker and more custom, like it’s set into a built-in surround. This is especially effective on modern entries where you want clean lines and minimal decoration. Use wood trim or engineered boards for the surround so the edges stay sharp. Finish the door and frame in the same color family so the reveal reads as intentional.
Measure the existing door opening and decide the reveal depth, aiming for a shadow gap of about 3/8 in to 1/2 in. Install a trim surround with spacer blocks so the gap stays consistent all around. Use a router on the surround edges if you want crisp profiles, then sand and prime before painting or staining. Seal all exterior joints and caulk the outside edges only, leaving the shadow gap uncaulked so it stays visually clean.
Editor's noteUse a laser level or long straightedge to keep the surround reveal even — small misalignment shows up fast.
Skip thisDon’t overfill the gap with caulk; it kills the shadow-line effect.
8. Raised beaded panel door with satin clear finish
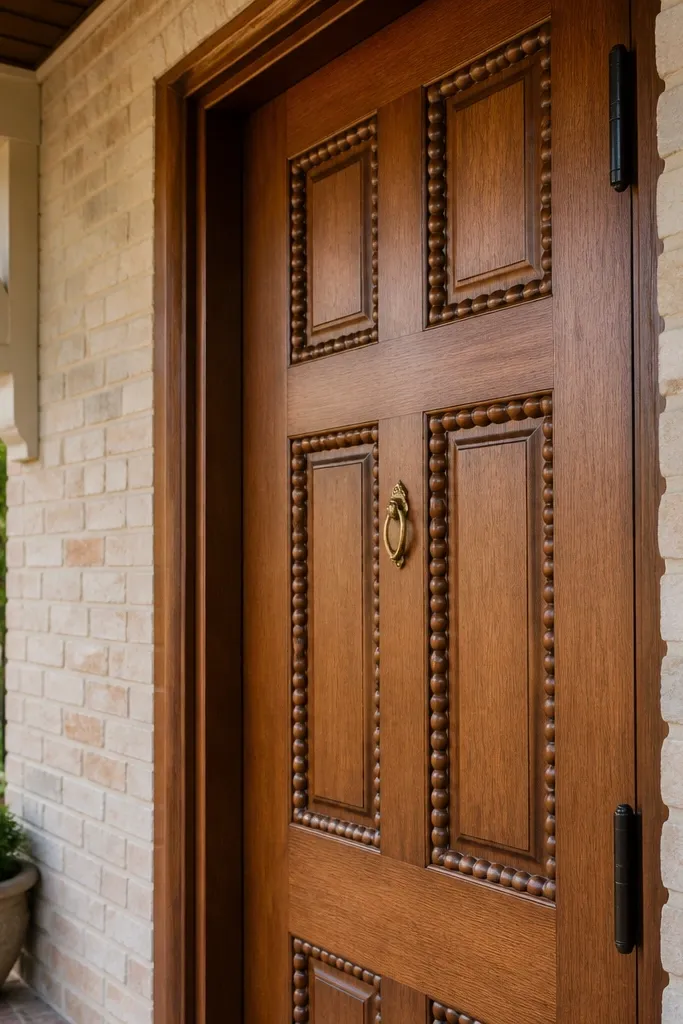
Beaded trim gives you that furniture-like detail without needing carving. When the beads are raised and the panel layout is balanced, the door looks handcrafted and expensive. A satin clear finish is the move here because it shows the wood tone while keeping the surface refined. This door design suits traditional homes, but it also works in modern entries if the wood tone is clean and the layout is simple. It’s a great pick if you want texture that still reads classic.
Build or buy a beaded trim profile that matches your desired bead thickness. Layout the panel rectangles, then install beaded strips with a miter saw for tight corners and wood glue for strength. Sand the face so bead edges feel crisp, not rounded, then apply a pre-stain conditioner if your wood is blotchy. Finish with an exterior satin clear system, sanding lightly between coats for a smooth, even sheen.
Use a brad nailer for trim — it keeps hands steady and reduces glue squeeze-out.
Don’t rush sanding around beads; rough edges catch dirt and look sloppy.
9. Monogram-style routed emblem on the center panel
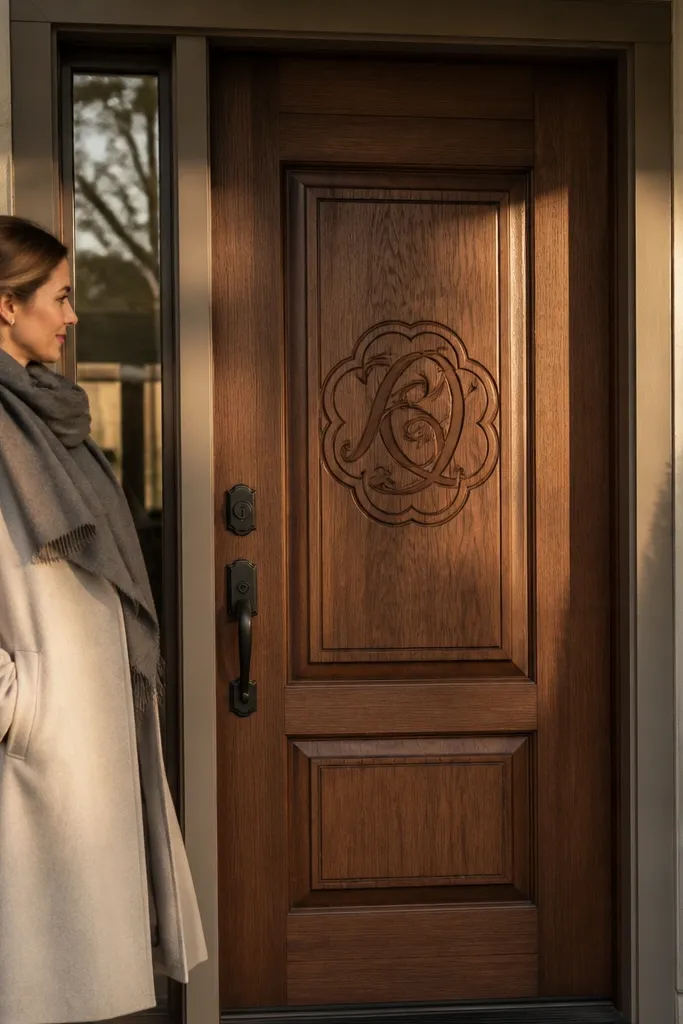
A routed emblem makes a door feel custom because it’s one exact focal point. You don’t need ornate scrollwork; a simple geometric monogram or house number inside a raised frame looks high-end and clean. The trick is depth control and crisp edges so it reads as intentional at a distance. Keep the rest of the door minimal with either flat panels or subtle shaker lines. This is perfect for entryways that already have strong siding colors and want a personal, refined detail.
Choose an emblem size that fits the door — aim for about 10-14 in wide for most front doors. Transfer your design onto the door with a stencil and center it using measurements, not eye-balling. Use a router with a template guide to cut shallow relief grooves, then clean up corners with a sharp chisel. Apply stain or paint to the whole door, then seal the emblem area with extra care so it doesn’t collect moisture.
Seal the emblem edges first with a thin clear coat before the final coats so it stays crisp.
Don’t make the emblem too deep; thick relief can trap water and grime.
10. Cedar board-and-batten with vertical alignment and warm stain
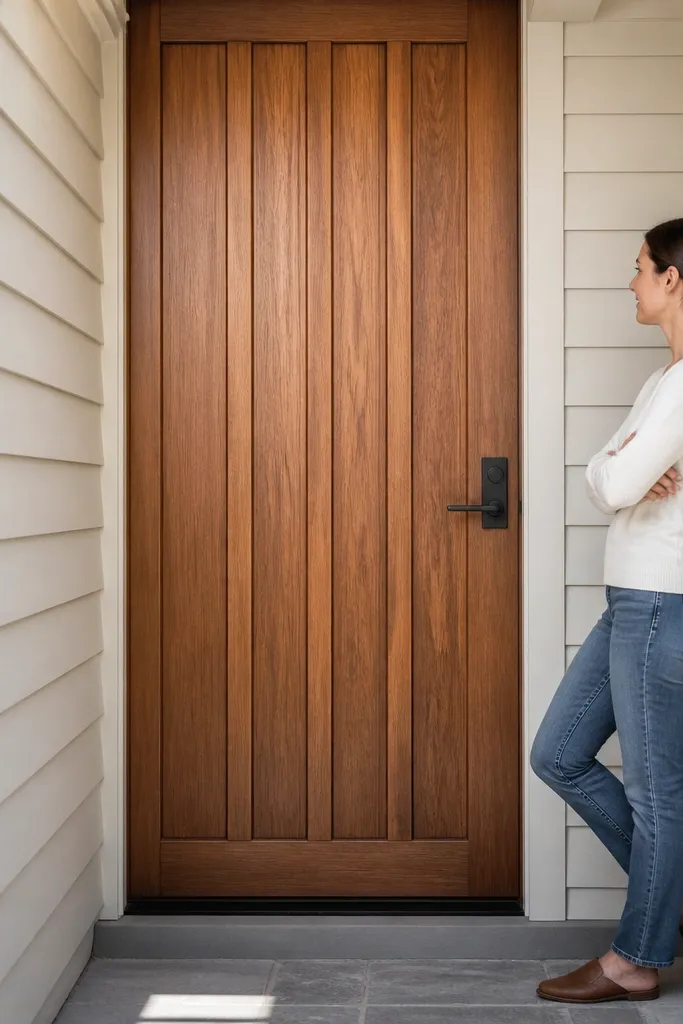
Board-and-batten looks expensive when the battens are perfectly aligned and the wood tone is uniform. Cedar adds natural texture, and a warm stain makes it look rich without going dark and heavy. The vertical lines also visually stretch the entry, which helps on narrow entryways. This idea works well if your facade already has vertical lines or if you want the door to add structure. Keep the top and bottom trim simple so the battens stay the focal point.
Cut battens to consistent width and plan your spacing so the pattern repeats cleanly from edge to edge. Glue and nail the battens onto the door slab, keeping them aligned with a long straightedge and clamps. Sand flush at the edges and fill nail holes, then apply a cedar-friendly exterior primer if required. Stain in thin, even coats and finish with a satin exterior topcoat that includes UV protection.
Use a track or straight guide for your first batten strip — every other batten depends on that first line.
Don’t vary batten widths; irregular spacing reads sloppy in photos.
11. Oak veneer flat-panel door with a thin metal reveal strip
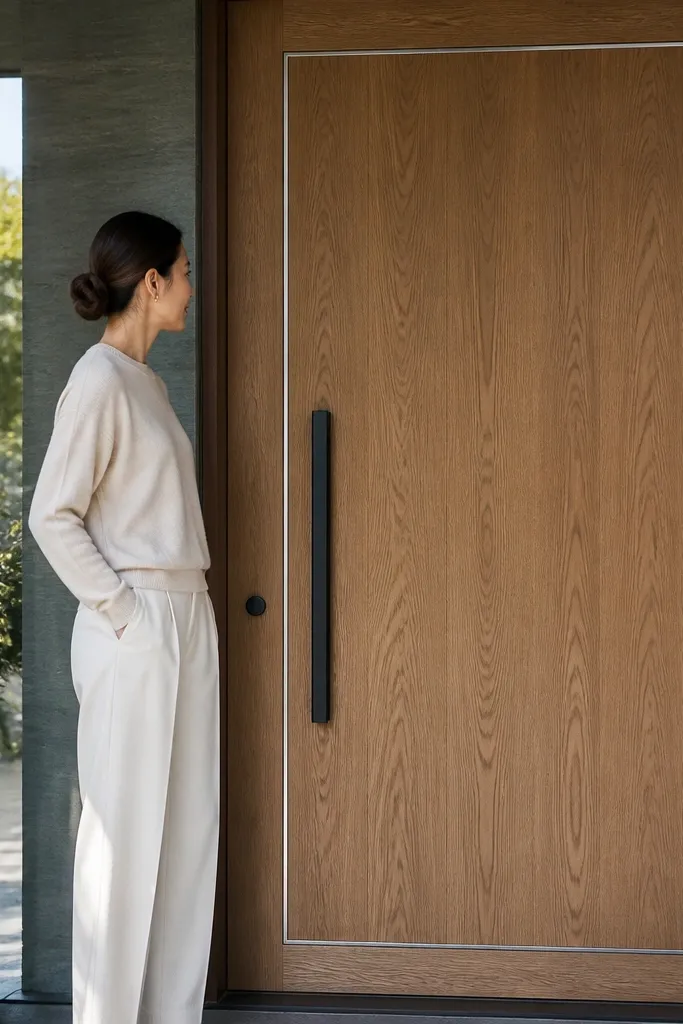
This is a “quiet luxury” door. The door face stays mostly flat, with oak veneer for warmth, then a thin metal reveal strip adds a sharp, modern edge. The metal line makes the design look custom because it creates a crisp boundary around the door. Finish the veneer with satin clear so the grain stays readable. This suits modern homes where you want minimal ornament but still want the entry to look high-end.
Choose a veneer thickness that stays flat outdoors and pre-seal the door substrate if needed. Apply oak veneer, trim edges clean, and sand to a smooth finish. Install a thin metal reveal strip around the panel perimeter using exterior-rated adhesive and mechanical fasteners if the strip requires it. Seal the edges, then apply satin clear over the veneer while keeping the metal clean and dry.
Test the veneer finish sheen on a scrap piece so the metal line doesn’t reflect too harshly.
Don’t rely on caulk to attach the metal — it peels when temperature swings hit.
12. Geometric diamond inlay on the center panel
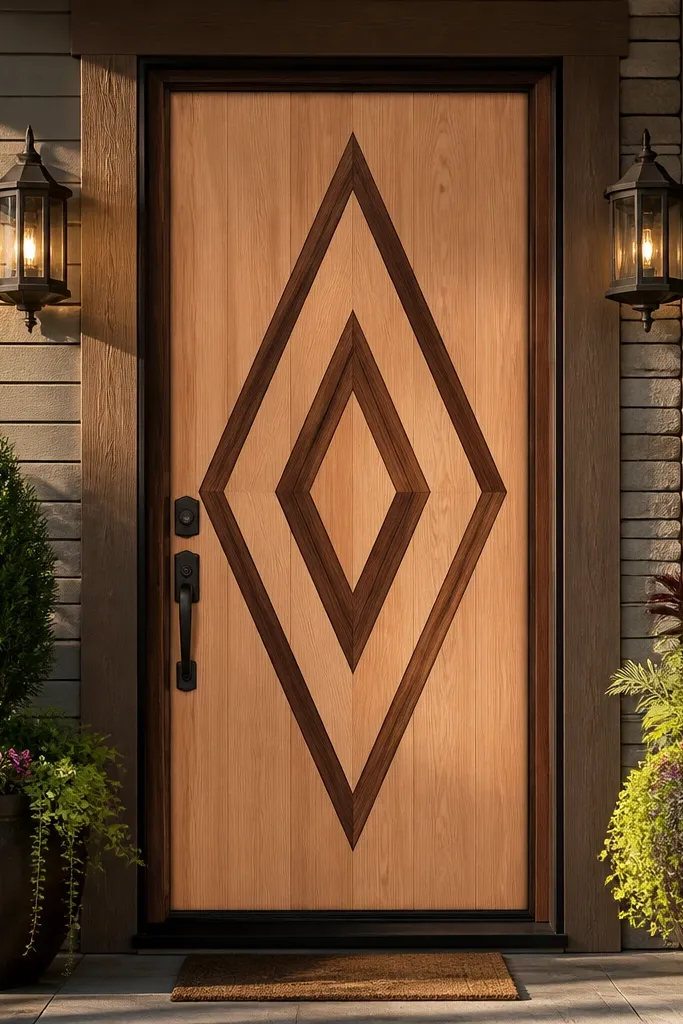
Diamond inlay reads premium because it adds controlled geometry without needing carving. It also looks great under entry lighting because the inlay creates tiny shadow gaps and highlights the pattern. Use a contrasting wood tone like walnut or dark stained maple against a lighter base. Keep the inlay contained to the center panel so it doesn’t overwhelm. This works for traditional-to-modern hybrids where you want a refined detail that still feels architectural.
Pick your base panel area and lay out a diamond grid with consistent angles (45 degrees is the cleanest). Cut thin inlay strips using a miter saw or table saw sled, then dry-fit the pattern first. Glue the pieces into a shallow recess or onto a stable panel, then sand flush carefully. Stain or paint the surrounding door face, then seal the inlay with an exterior clear so the contrast stays crisp.
Use painter’s tape to hold diamonds during dry-fit so you can check symmetry before glue hits.
Don’t skip dry-fit; one rotated diamond ruins the whole look.
13. Oversized farmhouse arch panel at the top
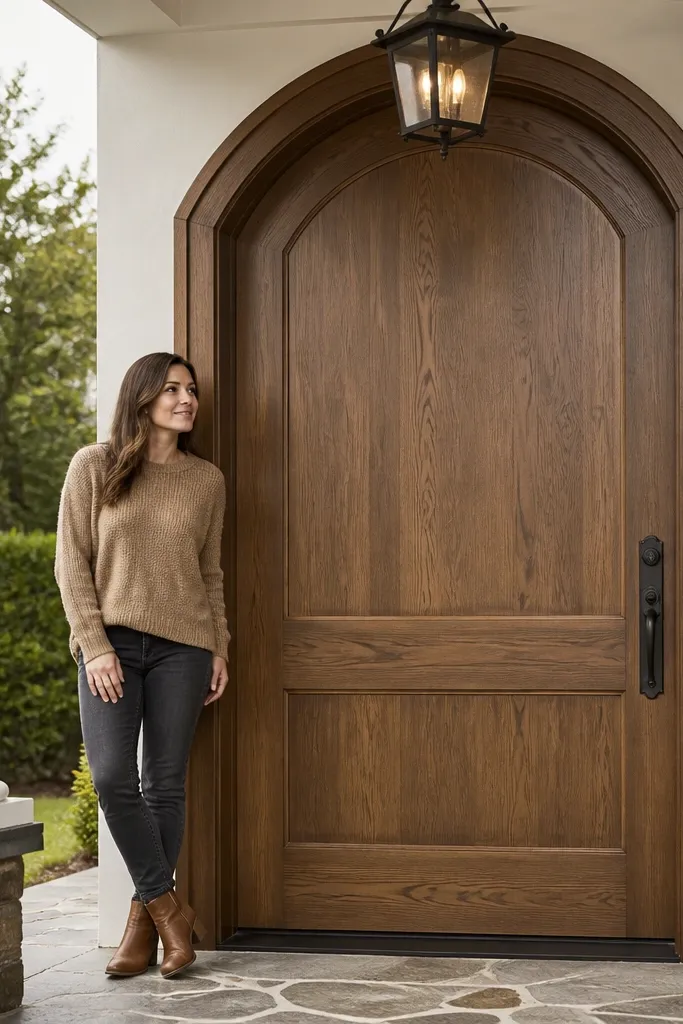
An oversized arch panel is a strong design move because it changes the door’s silhouette while still feeling warm. The top arch draws the eye upward and looks expensive when the curve is smooth and the panel frame is thick enough to cast shade. This look pairs well with black hardware and a warm stain so the door feels grounded. If your entry has a porch light and a simple wall color, this door becomes the focal point instantly. It’s also forgiving if your facade style is mixed, like brick plus modern siding.
Mark the arch centerline and use a template or a flexible batten to trace a smooth curve. Cut the arch frame pieces first, then build the interior panel area with rails and stiles that match the arch angle. Install frame trim with glue and brads, keeping the outer edges straight and consistent. Sand, stain or paint, then apply an exterior topcoat with enough build to resist scuffs near the handle.
Make a cardboard arch template and test it against the whole door before cutting wood.
Don’t make the arch too shallow; it reads like a mistake instead of a design.
14. Two vertical glass sidelights with matching wood mullions
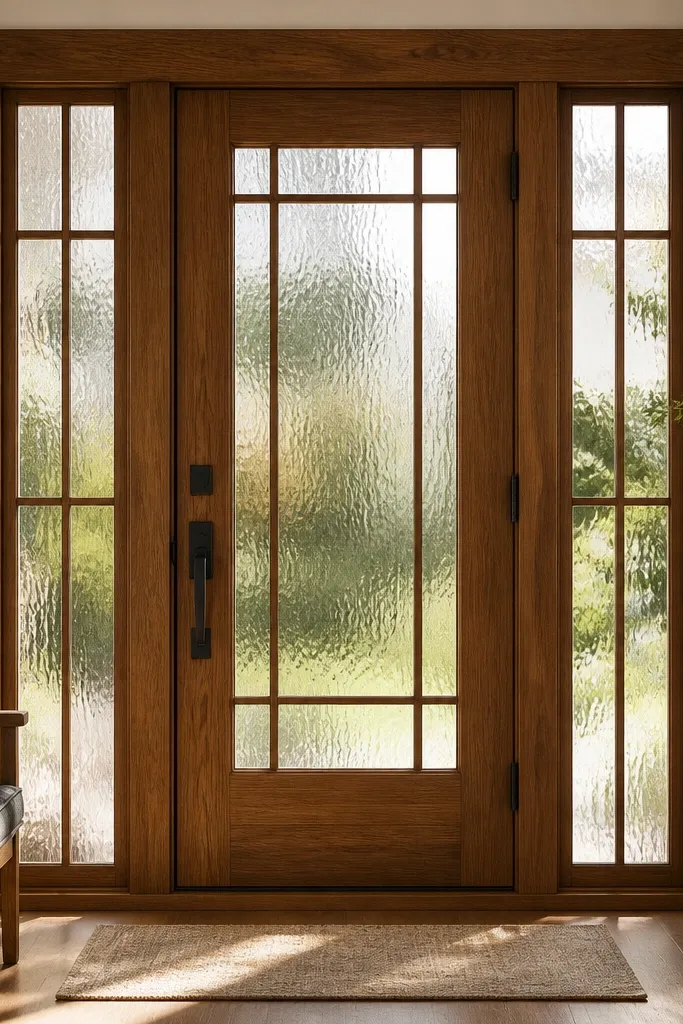
Divided glass doesn’t have to be only at the top. Adding two vertical glass panels on the sides of the door creates a tall, high-end frame effect that makes the entry feel custom and brighter. The wood mullions tie the glass to the door design and prevent it from looking like an add-on. Use seeded or low-privacy textured glass for a warm, architectural look without losing privacy. This is a strong pick for narrow entries where you want light and style without wide sidelights.
Plan the glass openings and measure mullion spacing carefully so both sides match. Cut the door openings with a jigsaw and finish edges smooth with a router. Install exterior glazing tape and glass inserts, then attach muntin/mullion strips to cover seams. Seal all joints and finish the wood with stain and two exterior topcoats, paying extra attention around the glass edges.
Editor's noteUse a consistent mullion thickness everywhere so the glass looks intentionally framed.
Skip thisDon’t leave raw end grain around the glass cutout; it drinks moisture fast.
15. Textured wood slats with a vertical ribbed pattern
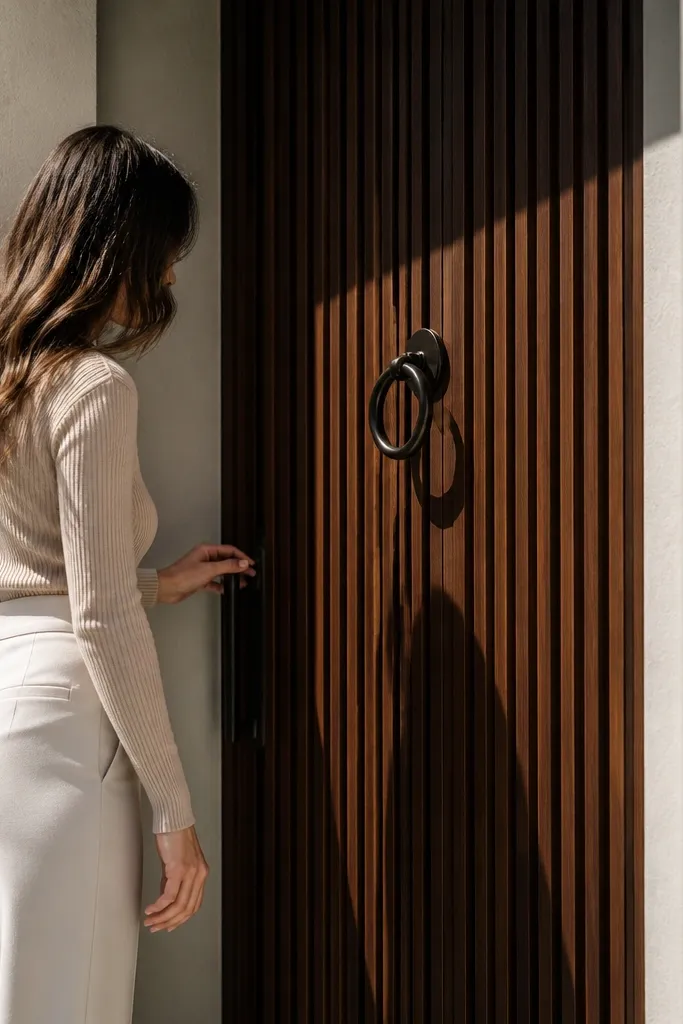
Vertical slats add depth and texture that reads expensive even when the color is simple. It’s the same idea as reeding, but with a bolder, modern rhythm. Keep the slats straight and evenly spaced so the pattern looks engineered, not handmade. Finish with a satin stain and clear coat so the ribs catch light and don’t look dusty. This works great on modern entries and on homes where you want the door to look like it belongs to a custom front elevation.
Lay out slat positions across the door width and cut slats to uniform width and length. Glue and nail slats onto the door face with spacers to maintain even gaps, then sand the surface so slat edges are clean. Stain evenly, then seal with an exterior satin topcoat in at least two coats. Install hardware after finishing so you avoid damaging the finish with drill chips.
Use plastic spacers or thin shims during installation so gaps stay identical from top to bottom.
Avoid wide gaps — they collect water and grime in rainy climates.
16. Classic raised panels with a thick surround border
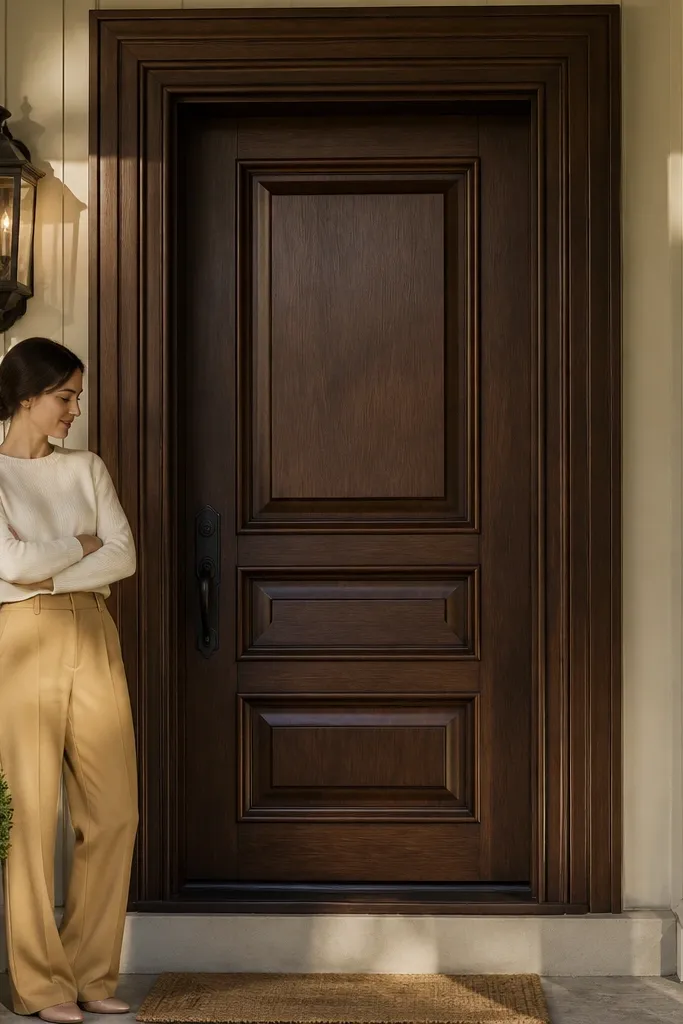
This is the “expensive door” look because the border adds structure. Classic raised panels create depth, and a thick surround frame makes the door read like it’s built into a custom millwork opening. The border should be proportionate — too thin looks cheap, too thick can feel heavy. Finish in either a deep stain or a warm off-white paint with satin topcoat. This works on traditional homes, brick entries, and front doors that need to match existing trim.
Choose a raised panel layout with evenly sized rectangles, then add a thick outer border using trim boards cut to consistent widths. Build the border first so you can align the panel lines inside it. Sand all edges so the raised profiles are smooth, then stain or paint evenly across the entire door. For exterior durability, seal the underside edges and the border corners with an extra coat of exterior topcoat.
Dry-fit the border and panels on the floor before you glue — you catch sizing mistakes early.
Don’t paint over rough end grain at the trim corners; it shows as tiny bubbles.
17. Light oak door with inset metal handle plate and matching hinges
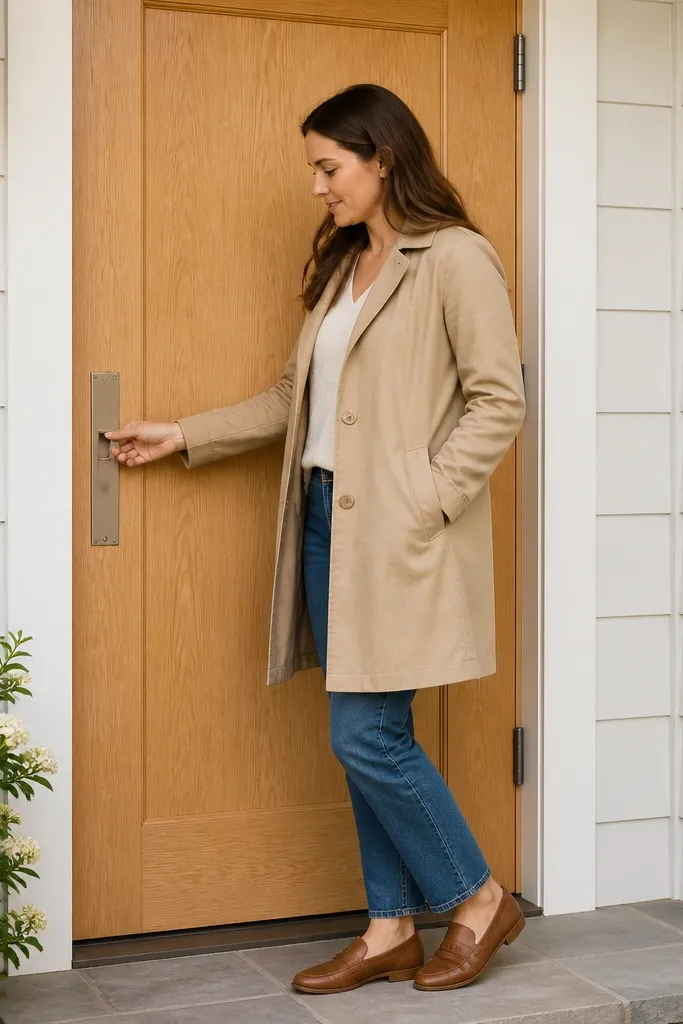
Sometimes “high-end” is about hardware integration. A light oak door with a recessed handle plate looks like it came with custom millwork because the metal sits flush and framed. Pair it with hinges that match the same finish tone so the entry reads cohesive. Keep the door face simple with either a flat panel or subtle shaker — let the hardware detail do the work. This is best when your facade is busy and you want the door to look refined rather than loud.
Mark the handle location and cut a shallow recess for the handle plate so it sits flush with the door face. Install the handle and deadbolt after drilling through cleanly and sealing exposed wood edges with a thin sealer. Choose hinge plates that match your metal finish and align them using a hinge template. Finish the door with satin clear over oak, then do a final wipe-down before hardware goes on.
Use masking tape around the drill bit area to reduce tear-out on veneer or finished surfaces.
Don’t mount hardware over thick paint or uneven sanding; it creates a gap that looks cheap.
18. Walnut door with vertical slat upper half and solid lower half
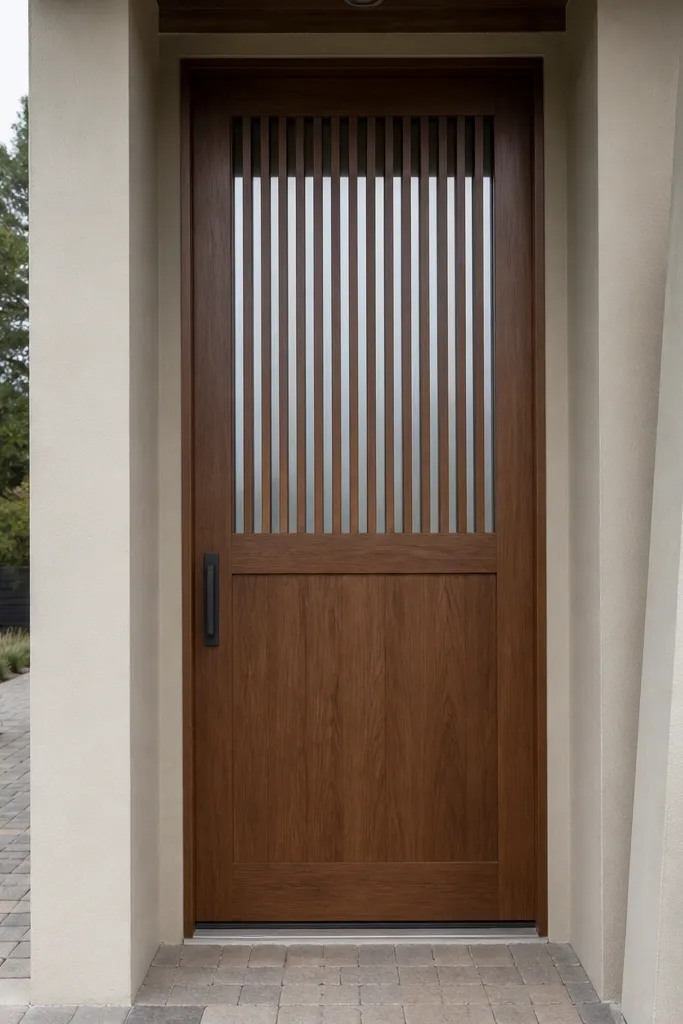
Split-face doors look designer because they balance transparency and solidity. Put vertical slats on the upper half for light and visual interest, then keep the bottom solid for a clean, grounded look. Walnut gives warmth, and the slat texture reads premium because it’s uniform. This idea works especially well when your entry lighting is directional, because the slats cast nice shadows at night. It suits modern exteriors and homes with a sheltered porch where the door gets good light.
Measure your door height and decide a split line, like keeping the slats in the top 40-45% of the door. Cut and install slats with consistent spacing and straight alignment using spacers during glue-up. Build a solid panel section below with trim rails so the split line is crisp. Sand, stain the whole door, then seal with two exterior satin topcoats, paying close attention to slat edges.
Editor's noteCheck slat straightness with a long straightedge from both sides — small twists show on camera.
Skip thisDon’t leave the slat bottoms unsealed — water sits there and ruins the ends.
19. Carved-looking relief border using shallow router channels
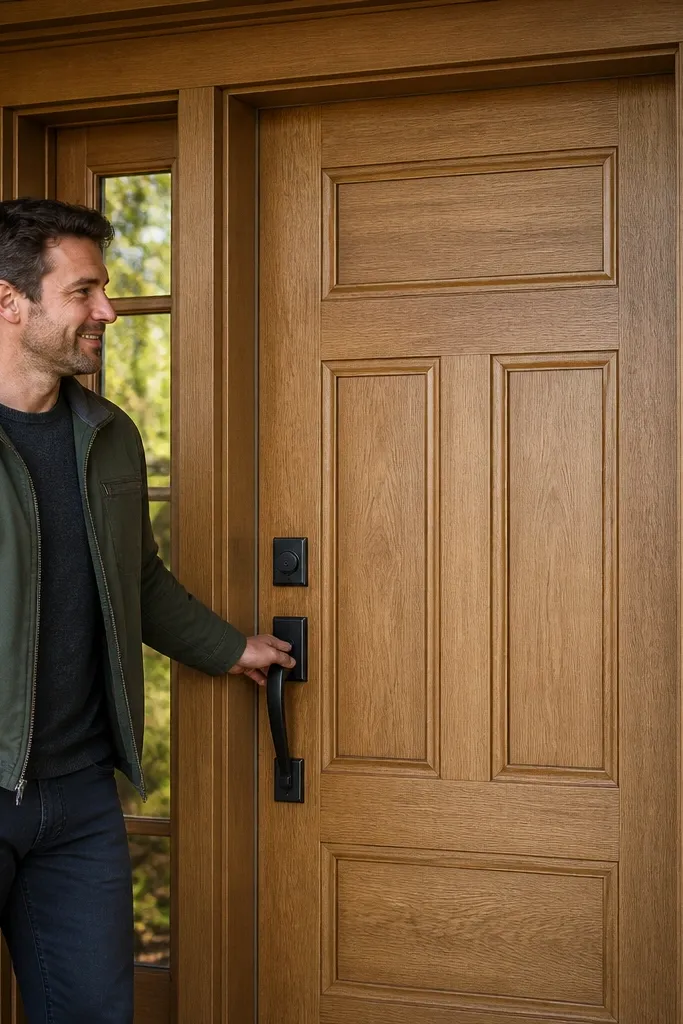
You can get a carved look without deep carving by using shallow router channels for a relief border. The border frames the panels and makes the door look like it was made by a millwork shop, not assembled from flat boards. Keep the grooves consistent and shallow so the door stays durable outdoors. Finish in a satin clear over a medium stain to make the relief lines visible. This works well when your entry has strong wall colors and you want the door to add a touch of craftsmanship.
Mark a border layout around your panel rectangles, leaving a consistent margin. Use a router template to cut shallow channels for the border lines, then clean the edges with a sharp chisel for crisp corners. Sand the door face so everything is smooth, then apply stain evenly and seal with an exterior satin topcoat. After curing, install hardware and check that the door closes smoothly without scraping the new finish on the frame.
Editor's noteUse a template guide with a bearing so your groove width stays identical along curves.
Skip thisDon’t over-sand the relief channels flat — the effect disappears.
20. Stained glass window grid with wood mullions and warm stain
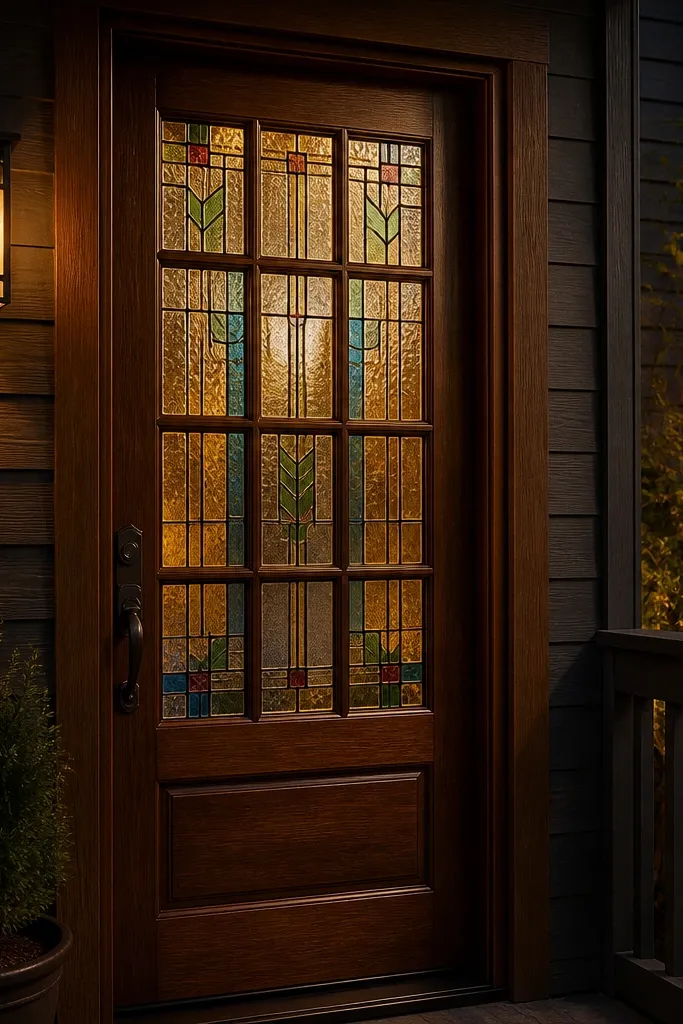
A stained glass grid makes a wooden door look expensive because it adds color depth and handcrafted detail. The key is restraint: choose a simple grid pattern and keep mullions slim-to-medium so the glass reads as the feature. Warm stain on the wood makes the colors feel rich without needing dark paint. This design is photogenic at dusk because the glass glows under exterior lighting. It suits traditional homes, entryways with a covered porch, and houses where you want the front door to feel like a centerpiece.
Select stained glass panels that fit a grid size you can measure exactly, then design mullion spacing around standard glass dimensions. Cut and frame the opening in the door, using exterior glazing system components to prevent moisture issues. Install muntins with tight miters, then seal the glass edges with glazing tape and sealant where the system requires it. Stain the wood, let it cure, then topcoat with exterior satin clear for durability.
Plan your lighting temperature; warm-white bulbs make stained glass look richer than cool white.
Don’t use decorative glass without proper exterior glazing — indoor glass systems fail outdoors.



