
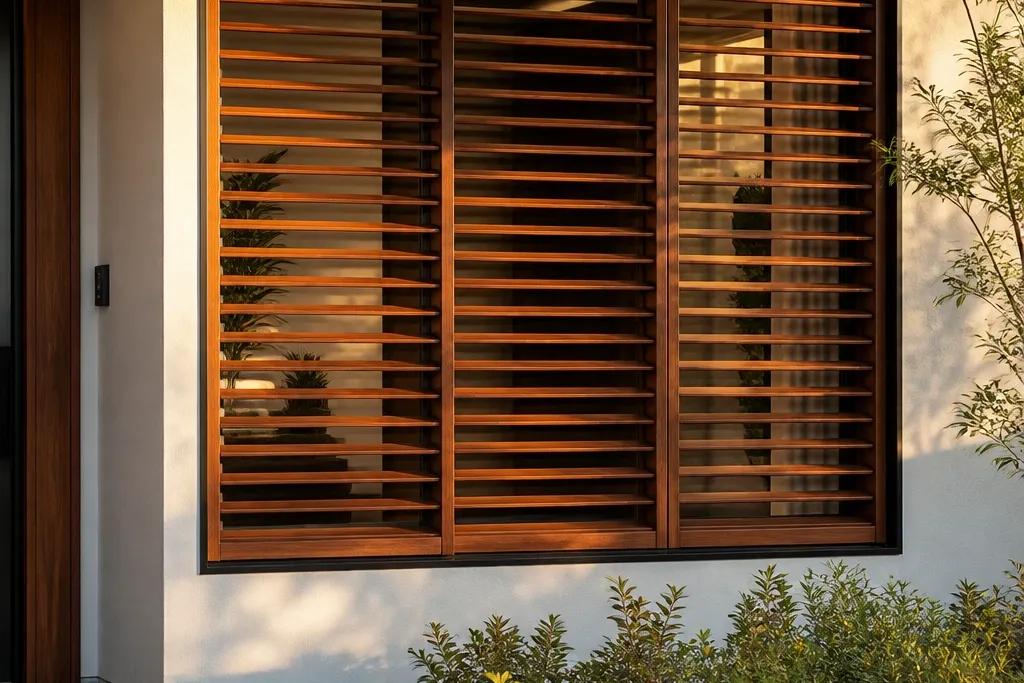

1. Walnut Shadow-Frame Herringbone
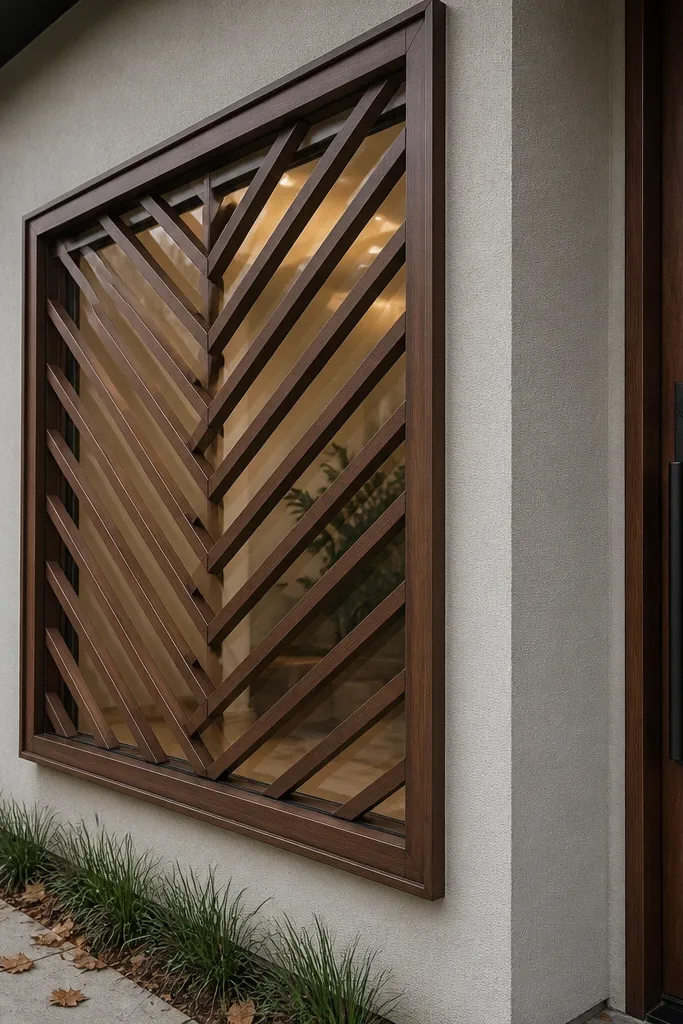
This design looks warm because walnut stays brown and inviting even under exterior light. The herringbone pattern gives motion without turning into a busy lattice, and the shadow frame makes the slats feel “floating.” It’s a strong pick for front doors, street-facing windows, and any room where you want privacy without blocking daylight completely. Build it with a crisp frame and tight, repeatable angles so the pattern looks custom instead of handmade-by-chance.
Start with a rectangular outer frame sized to your window recess, then cut inner rails so you can leave a 1/4 inch shadow gap for depth. Cut slats to a consistent width, mark your herringbone layout on a flat jig board, and screw the slats to the inner rails using spacers so every angle matches. Finish by sanding to 180 grit, then apply a warm stain (walnut tone) followed by two coats of exterior satin clear. Pre-drill for hardware and install the frame level before you attach any decorative slats.
Editor's noteMake a simple plywood angle jig for the herringbone so you never “eyeball” the diagonal.
Skip thisDon’t vary slat widths — one mismatch makes the whole pattern read messy.
2. Light Oak Vertical Slats with Satin Frame
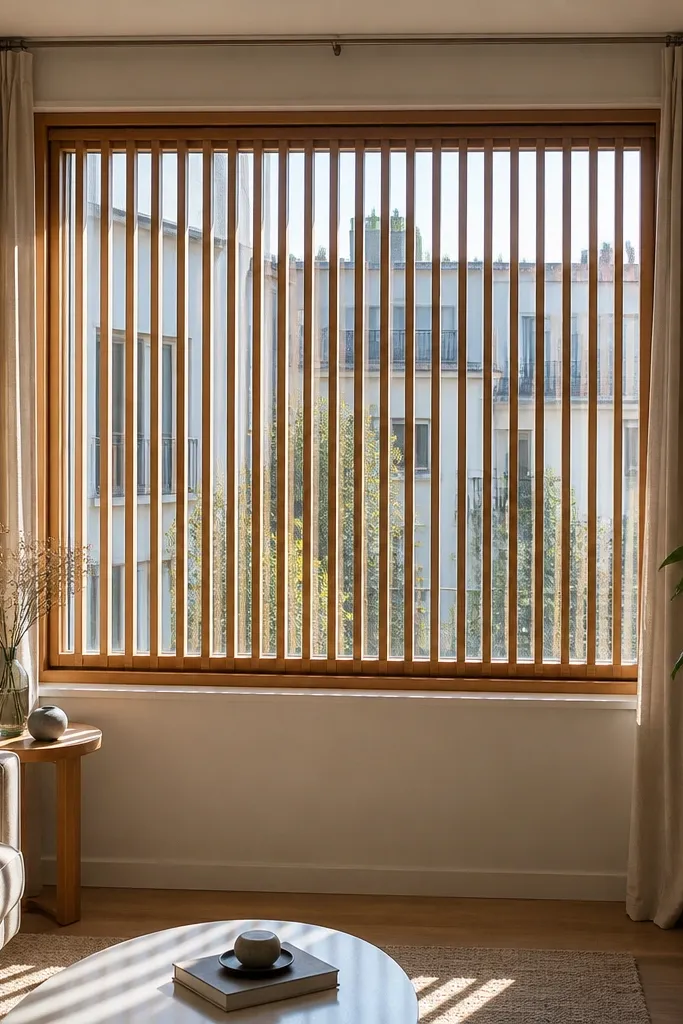
If you’re chasing that cozy, high-end look, light oak is the easiest way to get warmth without dark heaviness. Vertical slats elongate the window visually and keep the grid modern, not old-fashioned. This style also works well in small spaces because it doesn’t create a dense web; you still get airflow and light. The satin frame finish keeps it from looking like a glossy interior piece.
Build a square outer frame with a shallow chamfer on the front edge so light picks up the bevel. Cut slats to an even width, then space them using identical spacers to keep gaps consistent across the entire width. Assemble by attaching slats to the back of the inner rails first, so the faces stay clean. Sand to 180 grit, apply a warm oak stain, then finish with two coats of exterior satin clear.
Editor's noteUse 1/8 inch spacers for a refined look; bigger gaps feel more casual.
Skip thisDon’t skip chamfering — sharp square edges look harsh in daylight.
3. Teak Board-and-Batten Modern Grid
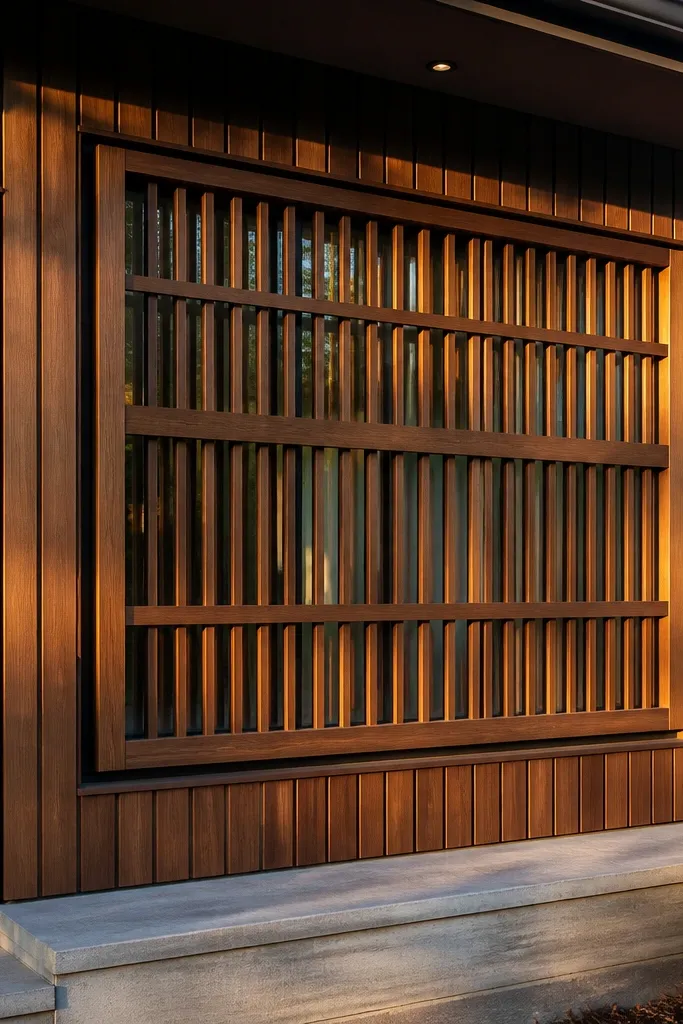
Teak tone reads luxury because it has natural warmth and depth even before heavy staining. The board-and-batten grid gives you structure: thick rails plus slimmer battens. It’s a good choice if you want privacy but still want a breathable, airy pattern from the street. This one looks especially good on wide windows because the rails create a clean rhythm.
Cut two thicker horizontal rails and two thicker vertical posts to frame the grill, leaving room for a 1/4 inch shadow gap behind the front face. Install slimmer battens perpendicular to the rails at equal spacing using a spacer comb. Pre-drill every connection and screw from the back so you don’t see hardware heads. Sand, then use a teak-tone stain or teak dye, and finish with a satin exterior clear coat that resists UV.
Editor's noteIf your window is wider than 48 inches, add a center rail so the slats don’t sag over time.
Skip thisDon’t make the grid too tight — it starts to look like a solid panel.
4. Walnut + Brass Inlay Stripes
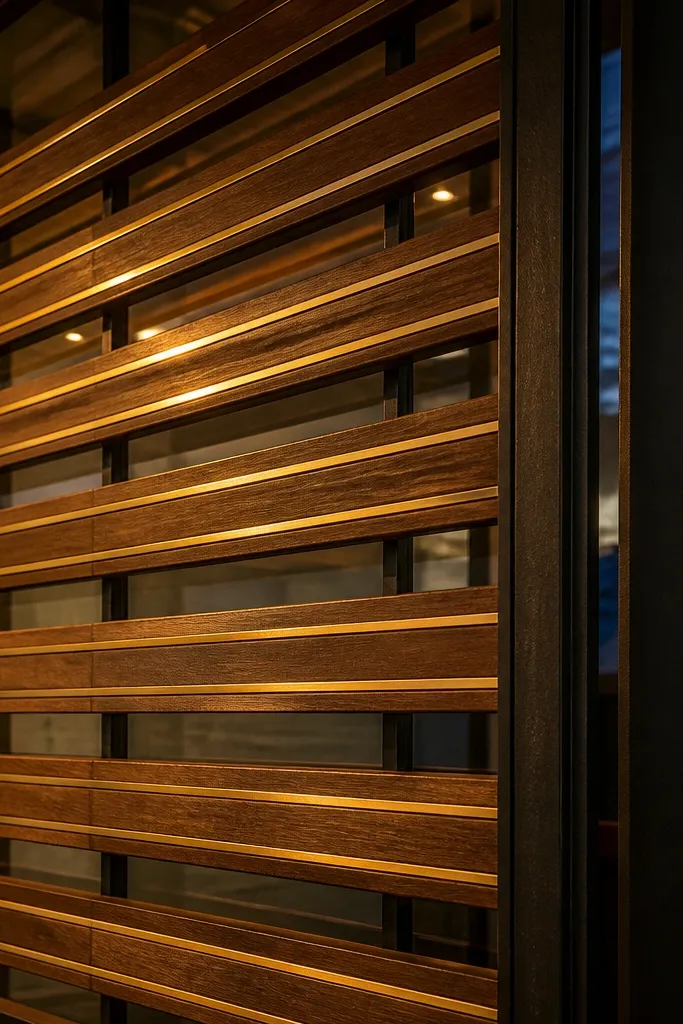
This design feels high-end because the warm walnut is broken up by thin metallic inlay lines that catch light at different angles. The pattern stays modern by using straight, parallel stripes, and the brass gives the “luxury” read without needing complicated geometry. It’s ideal for contemporary homes, especially if your window trim or hardware has brass tones. Build it carefully because clean inlay lines are what separate “DIY” from “designer.”
Cut the main slats from walnut and add shallow channels where the brass strips will sit, aiming for a tight fit. Use a router with a straight bit and depth stop so the channels are consistent across the window width. Press in brass strips, then sand flush so the surface stays smooth to the touch. Finish with a walnut stain and two coats of satin clear, letting each coat cure fully before installing.
Dry-fit every brass strip first; if it binds, you’ll crack walnut trying to force it.
Don’t go thick on the brass — wide metal lines make the grill look heavy.
5. Smoked Oak Diagonal Ladder
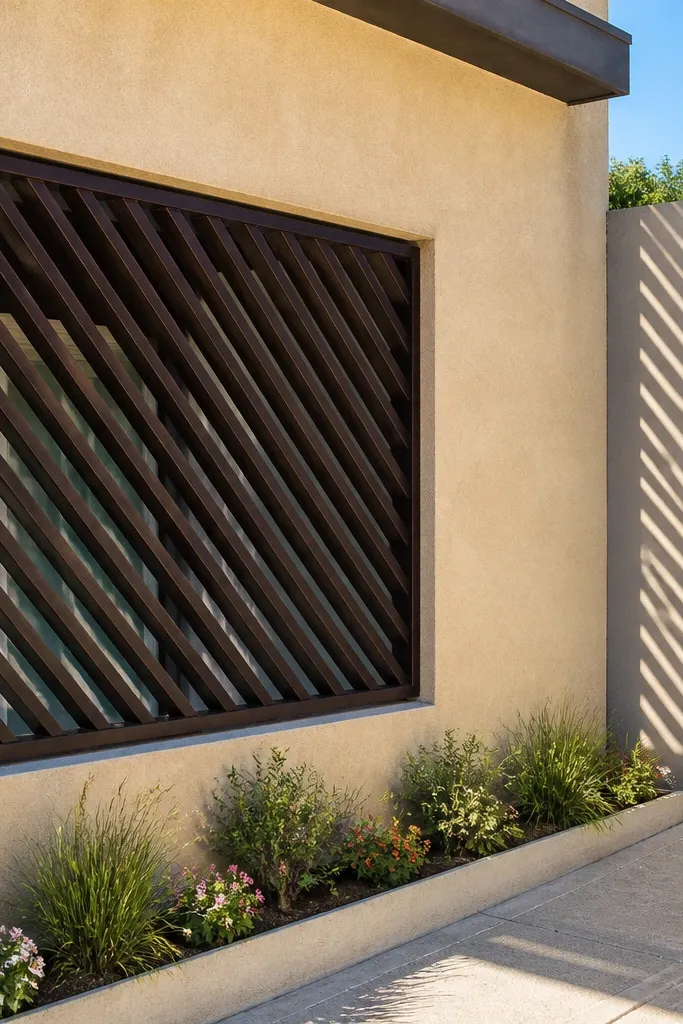
Diagonal ladder patterns feel warm because they create repeating light-and-shadow without becoming a full lattice. Smoked oak keeps a brown tone but adds depth, so the grill looks finished even if you’re not staining it super dark. This is a great pick for windows that face harsh sun — the diagonal bars soften the glare. It’s also visually interesting up close, which matters if the window is near a porch or seating area.
Plan a diagonal layout with a consistent angle, then build a frame with a 1/4 inch shadow gap. Use two main diagonal rails and add slimmer rungs crossing between them at equal intervals. Make a paper template for the rung spacing so your angles stay consistent when you transfer measurements. Sand to 180 grit, apply a smoked oak stain, then seal with exterior satin clear.
Editor's noteMark the diagonal reference line on a jig board so each rung hits the same angle every time.
Skip thisDon’t mix stain tones on the same grill; match every board batch.
6. Walnut Radius-Edge Frame with Slim Slats
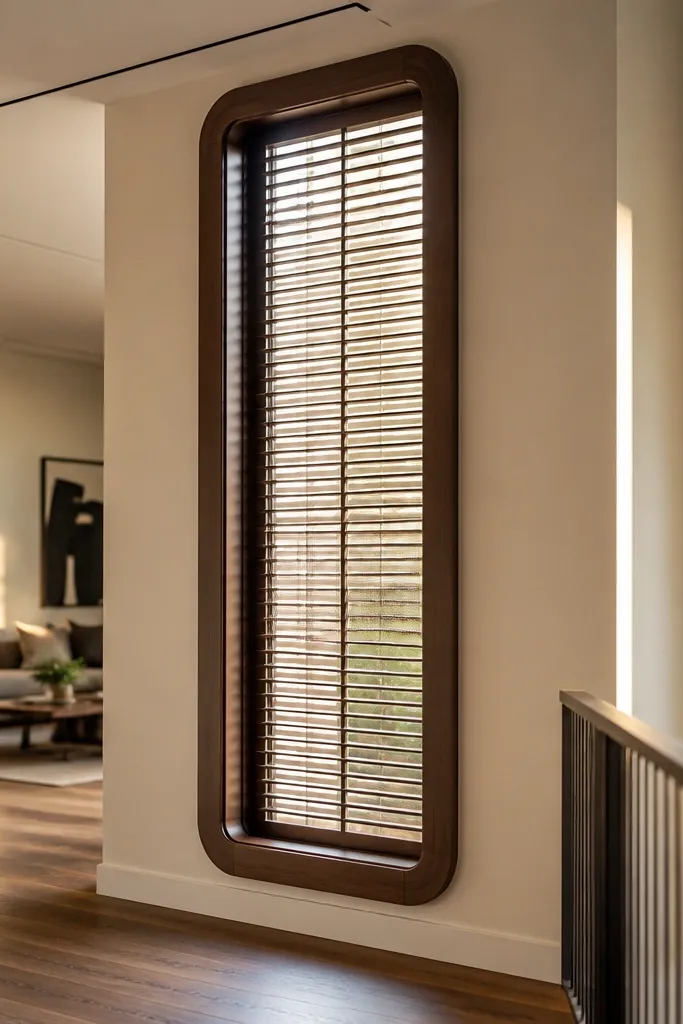
Radius edges read expensive because they soften the geometry while the slats keep it modern. Slim slats give a refined, high-end feel because you see more light through the pattern. Walnut keeps it warm and cozy, and the rounded frame makes it less “industrial” than sharp-corner designs. This works well on tall windows where you want the grill to look light, not bulky.
Cut a frame with a consistent radius on the front edge using a router roundover bit, then sand smooth so there are no sharp transitions. Build inner rails and attach slim slats vertically with uniform spacers. Keep the slat ends flush and pre-drill to prevent splitting at the corners. Stain walnut to your target color, then apply two coats of exterior satin clear, sanding lightly between coats for smoothness.
Editor's noteUse 1/2 inch spacers or a slat jig to keep every gap identical across tall openings.
Skip thisDon’t use super-thick slats — radius frames plus thick bars looks bulky.
7. Chestnut Grid with Open Center Squares
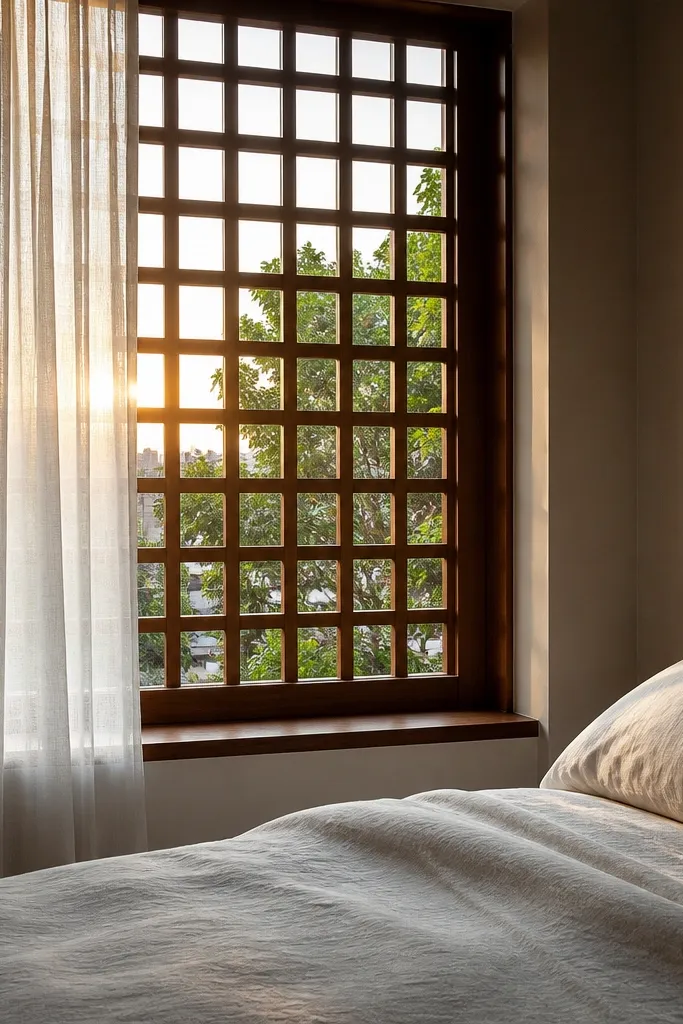
This one feels warm because chestnut brown is friendly, and the open center squares keep it airy. The grid is modern when the lines are straight and evenly spaced, and the open squares let light through so rooms don’t look boxed in. It’s a strong option for living rooms and bedrooms where you want privacy but still want daylight. The trick is keeping the square sizes consistent so the pattern looks designed.
Measure the opening and choose a square size target, like 3-1/2 inches, then calculate slat spacing from that. Build a frame with a 1/4 inch shadow gap, then install horizontal and vertical rails so they intersect cleanly. Use spacers at every crossing to hold alignment while you screw from the back. Sand, stain chestnut tone, and seal with exterior satin clear.
If you want the squares to look extra crisp, use a router to create uniform rail thickness before assembly.
Don’t let the grid drift — check level and square at the halfway point, not at the end.
8. Walnut and Ash Two-Tone Chevron
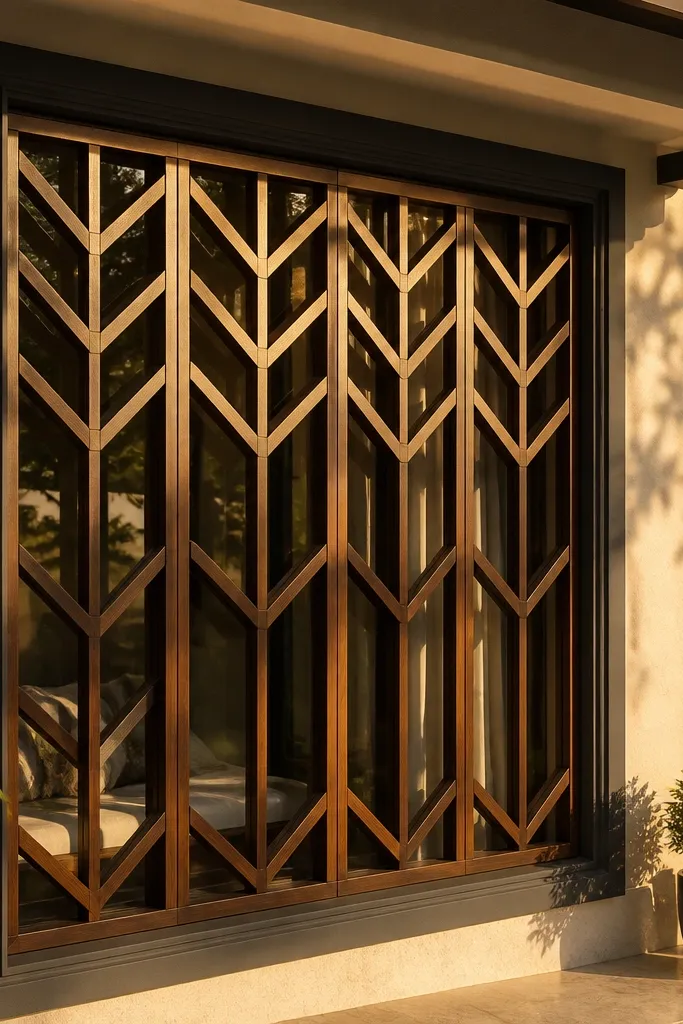
Two-tone chevron reads luxury because your eye tracks color contrast, not just pattern. Walnut gives the deep warm base, while ash keeps bright, airy highlights. The chevron shape adds movement and makes the grill look custom without needing complex joinery. This style is perfect for front windows where you want a statement but still keep it modern and clean.
Pick ash and walnut boards with stable grain and cut chevron slats in alternating colors. Build a shadow-box frame first, leaving a 1/4 inch gap so the chevron sits visually forward. Lay out the chevron on a flat jig board, then attach each slat to inner rails with consistent spacing. Finish by sanding to 180 grit, staining walnut only (keep ash lighter), and applying satin exterior clear to both tones.
Keep ash and walnut in the same sheen level; gloss mismatch makes the contrast look cheap.
Don’t stain ash the same color as walnut — it erases the whole two-tone effect.
9. Smoked Oak Horizontal Slats with V-Cut Edges
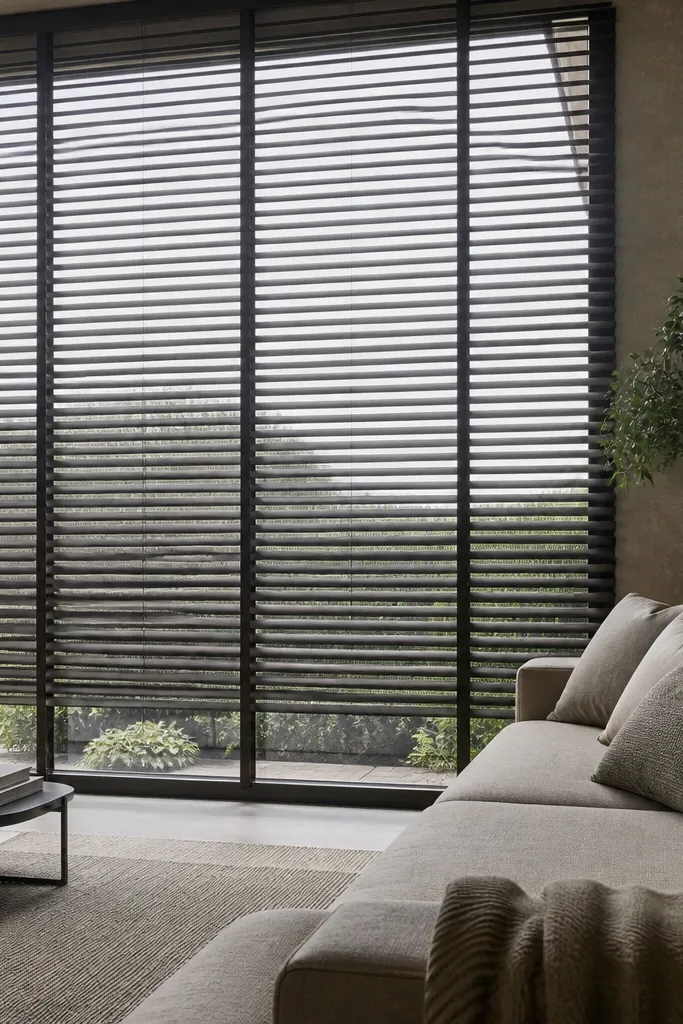
Horizontal slats feel modern, and the V-cut edges make them look more dimensional than flat boards. The smoked oak tone adds warmth and hides minor wood imperfections. This is a great option for large windows because the long lines visually widen the opening. From the street, the V grooves create tiny shadows that look “finished,” not DIY.
Build a frame with a 1/4 inch shadow gap and mount points planned before you cut slats. Cut horizontal slats and run a V-groove along the front edge with a V-bit router, keeping depth consistent across boards. Assemble slats to inner rails using spacers so the gaps are uniform. Sand, apply smoked oak stain, then seal with exterior satin clear, paying attention to the V-grooves so they don’t look dry.
Editor's noteTest the V-groove depth on scrap; too deep makes the slats look thin and fragile.
Skip thisDon’t leave the grooves unsealed — water sits in them and dulls the finish.
10. Walnut Box Frame with Center Star Pattern
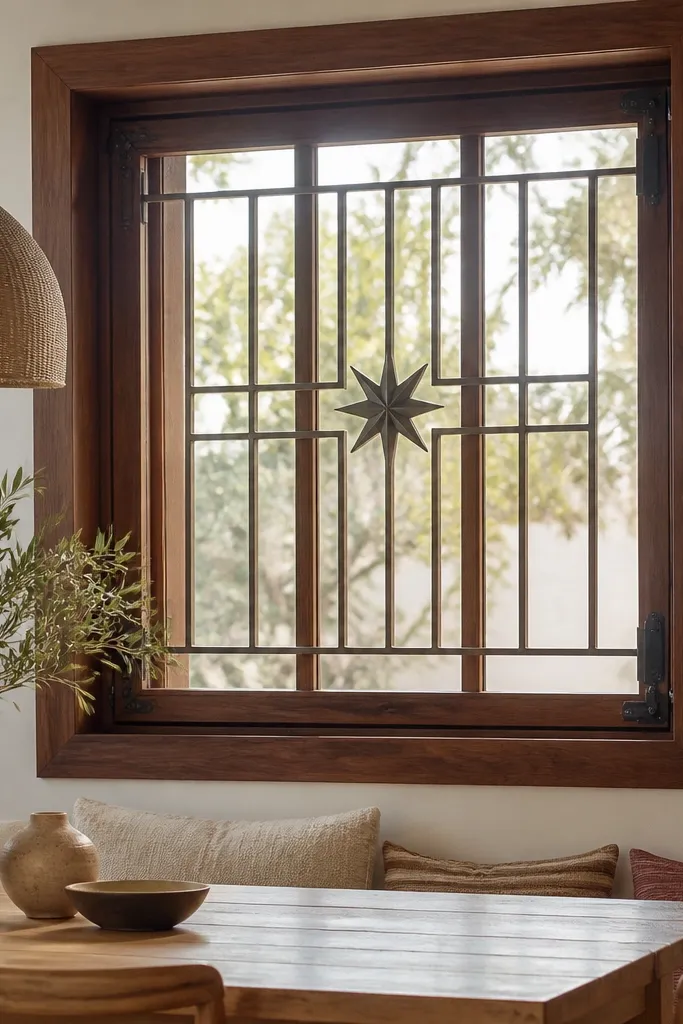
This is the warm-luxury compromise between modern and decorative. A walnut box frame keeps it contemporary, while a small center star motif adds charm without turning into a full-on lattice. It looks amazing when the star sits at eye level because the pattern becomes a focal point. Use it when you want the grill to feel personal, not generic.
Start with a clean outer frame and inner rails that hold slim slats or rails around the star opening. Cut and assemble a centered star using pre-measured triangles or angled pieces, then mount it to the inner framework. Keep the star small enough that the rest of the grill stays simple and modern. Sand thoroughly, stain walnut, and finish with satin exterior clear, then install using corrosion-resistant screws through the frame back.
Make the star from the same wood as the frame so the motif looks intentional, not pasted on.
Don’t go too big on the star; large decorative shapes look old-fashioned fast.
11. Cedar Slats with Bronze Hardware Spacers
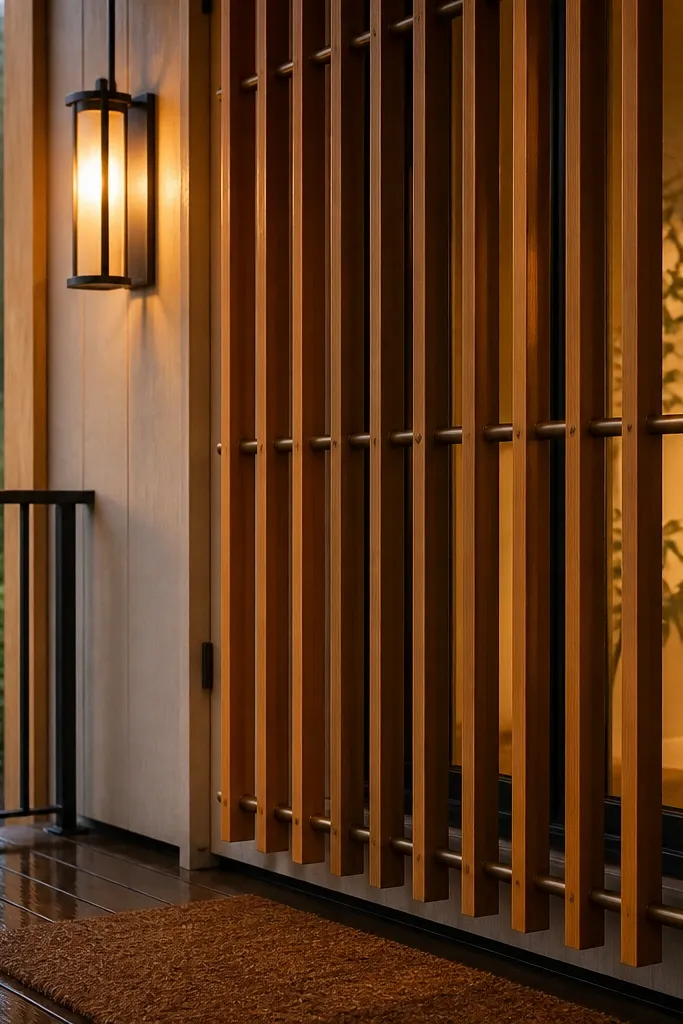
Cedar is warm by default, and it carries a soft honey tone that looks great under porch lights. Bronze hardware spacers add a modern luxury detail without needing inlay work. The slats stay clean and straight, so the grill reads contemporary while the hardware makes it feel custom. This style is best for exterior windows where you want the grill to age gracefully.
Cut cedar slats to a uniform width and build a frame with a 1/4 inch shadow gap. Mark drill holes for bronze spacers so each slat has identical spacing and alignment. Use pre-drilled holes and stainless or bronze-compatible screws from the back. Sand to 180 grit, apply a cedar-friendly exterior sealer tinted warm, then finish with satin clear to protect the wood.
Editor's noteUse a spacer template made from scrap MDF so every hole lands in the same spot across slats.
Skip thisDon’t mix metals — bronze plus mismatched screws can look messy after a few months.
12. Walnut + Blackened Steel Rail Lines
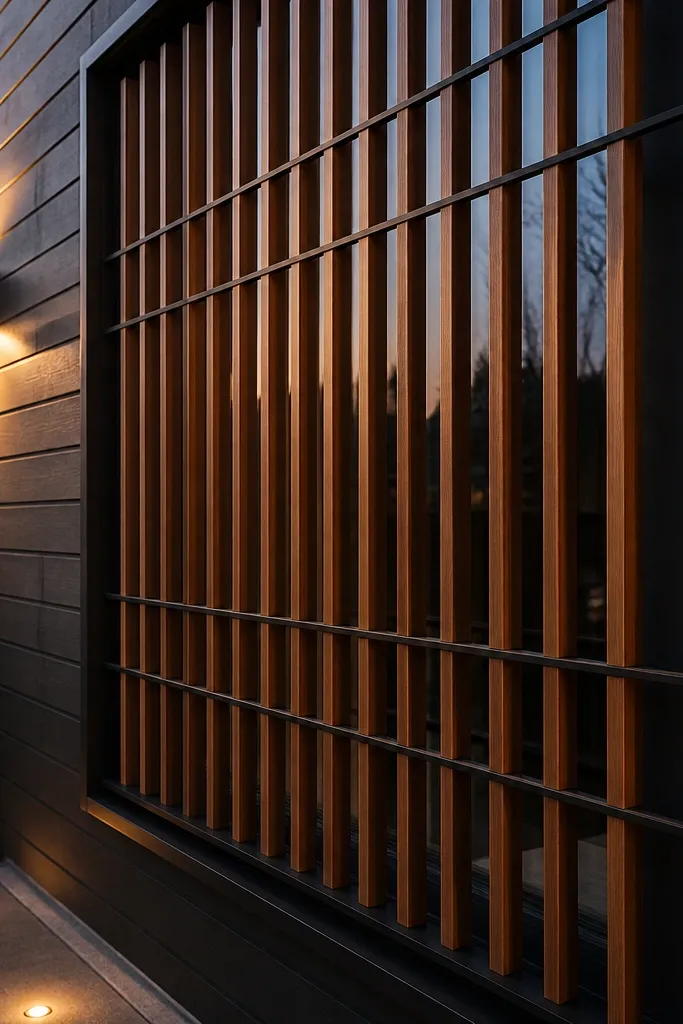
The warmth is walnut; the modern edge is thin blackened steel rails. This design looks high-end because it uses contrast in a controlled way — straight steel lines break up the wood without turning the whole piece into metal. It’s ideal for homes with black window frames or black exterior lights. The steel also helps visually anchor the pattern so it doesn’t feel “all wood.”
Build the wooden frame first and leave the 1/4 inch shadow gap behind the front face. Cut walnut slats and plan where thin steel rails will sit, then create shallow mortises or screw-on channels depending on your tools. Attach steel rails with pre-drilled holes and corrosion-resistant fasteners. Sand walnut, stain if needed, then apply satin exterior clear; keep steel finish protected with a clear coat made for metal if required.
Keep steel rails narrow, around 1/2 inch, so the wood remains the dominant warmth.
Don’t let steel touch bare wood — seal contact points so you don’t get dark staining.
13. Pale Ash Slats with Off-White Frame
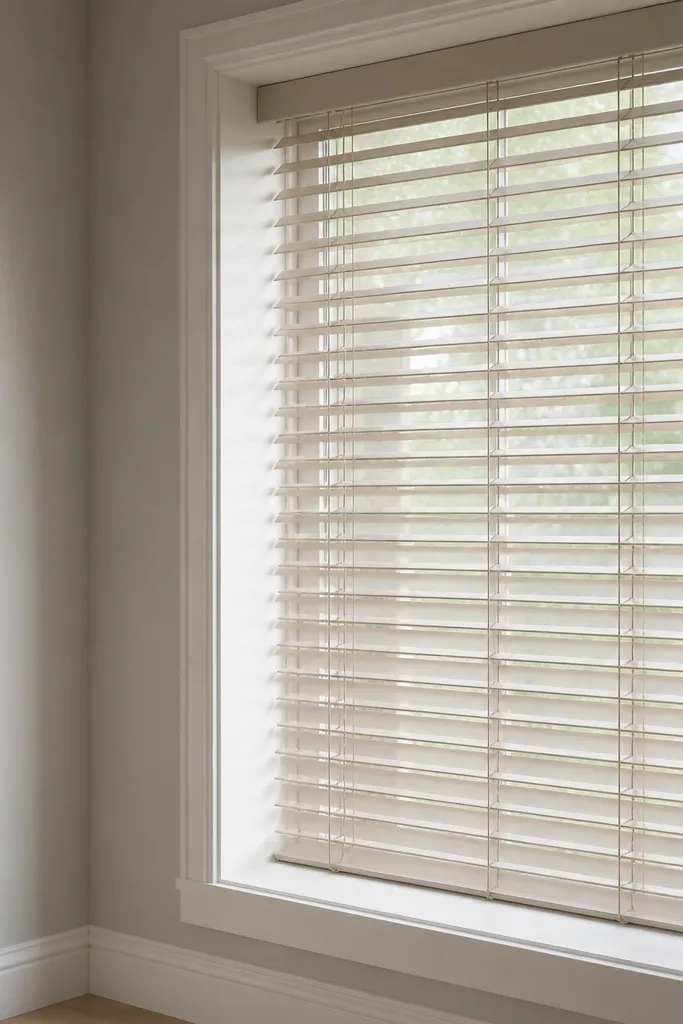
Warm doesn’t always mean brown. Pale ash with an off-white frame looks cozy because the contrast is soft, not harsh, and it stays bright in shaded areas. This is a modern luxury choice for Scandinavian-influenced exteriors. It also hides dust and weathering better than dark finishes. The slats should be thin and evenly spaced so the frame looks crisp, not bulky.
Cut an off-white frame with a 1/4 inch shadow gap and use a paint system made for exterior wood. Install pale ash slats vertically with consistent spacers, then sand ash lightly before finishing. Use a clear exterior sealer on ash to keep it light and warm, not yellow-green. Seal the whole grill with satin exterior topcoat, and install with pre-drilled, exterior-rated screws.
Use a satin paint sheen on the frame; eggshell reads too casual outdoors.
Don’t use glossy white — it reflects harshly and kills the warm feel.
14. Walnut Louvered Vent Style
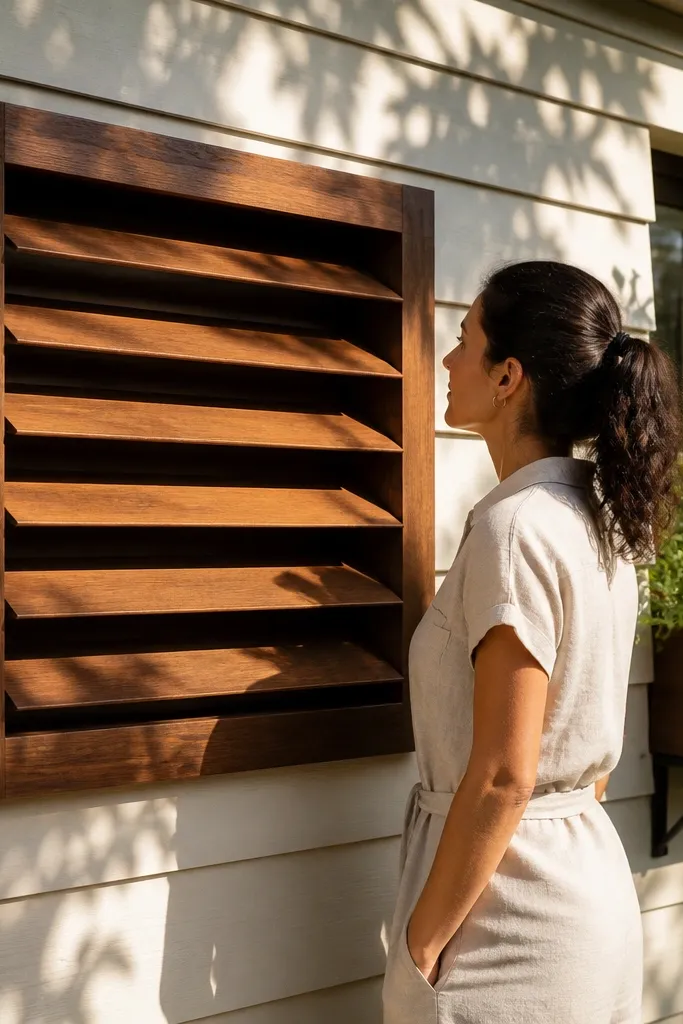
Louvered slats look high-end because they create elegant shadows and also help airflow. The slats are angled, so the grill doesn’t feel like a flat barrier. Walnut keeps the warmth even with angled geometry, and the modern louver feel works on both contemporary and craftsman-adjacent exteriors. This is a great pick if you want the grill to look like it belongs on a high-end renovation.
Build a sturdy frame, then cut slats to the same length with angled ends at a consistent bevel. Decide your angle based on how much privacy you want; start around 15 to 30 degrees and adjust. Mount slats to inner rails with hidden screws so the front stays clean. Sand, stain walnut, then apply satin exterior clear, making sure the bevel edges are sealed well.
Editor's noteUse an angle stop on your saw so every slat bevel matches perfectly.
Skip thisDon’t rely on random spacing — uneven louver gaps look unfinished fast.
15. Walnut Open-Frame Cross Braces
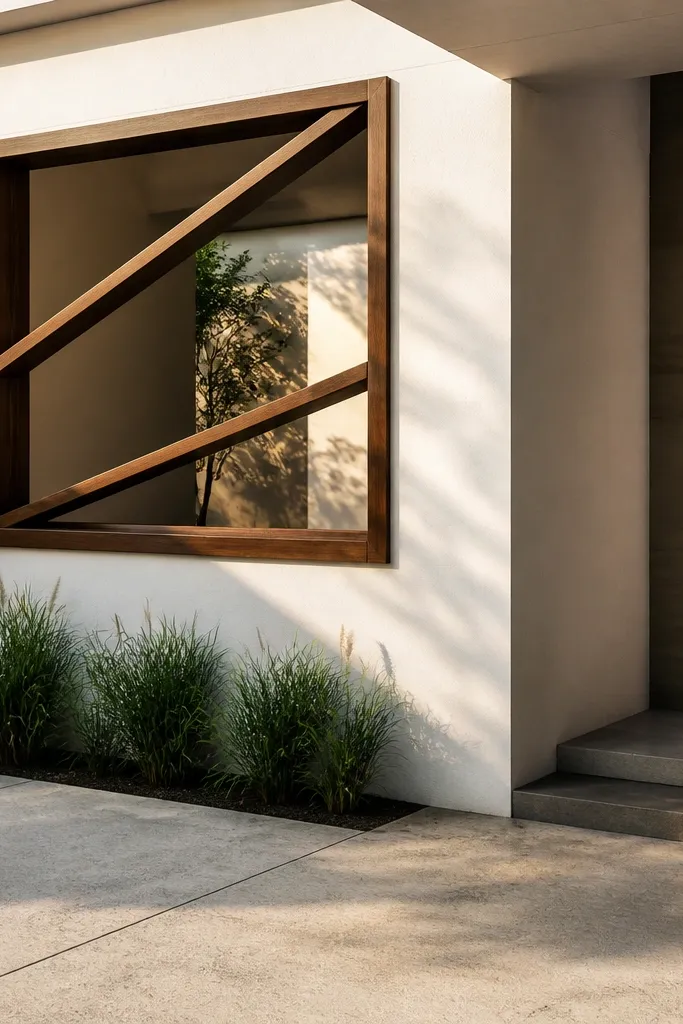
Minimal cross braces are modern and warm because they use negative space like design. Instead of filling the whole window, you place two diagonal braces in a clean, controlled arrangement. The result looks architectural and less heavy than dense lattices. Use this style when you want maximum daylight and a grill that photographs well from the street.
Create an outer frame with a 1/4 inch shadow gap and keep the inner area open. Cut two diagonal braces from walnut and mount them so they cross at the center with consistent alignment. Add slim vertical and horizontal rails only if you need extra stiffness — keep them narrow. Sand, stain walnut, and seal with satin exterior clear, then install level with appropriate anchors.
Editor's noteIf the opening is large, add one hidden center support behind the braces so the wood doesn’t warp.
Skip thisDon’t add extra lines to “fill space” — the negative space is the look.
16. Teak Lattice with Wide Borders
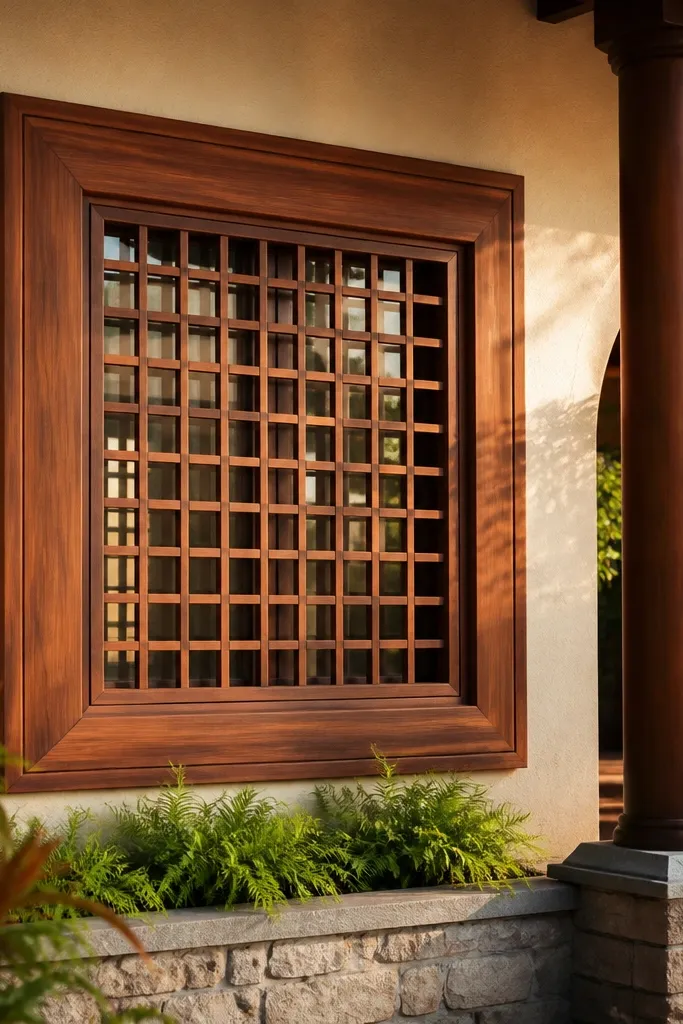
A lattice can look premium when you treat it like architecture: wide outer borders, tighter internal grid, and clean shadow lines. Teak tone stays warm and masks minor weathering better than many lighter woods. This design works on medium to large windows because the border gives the pattern a confident frame. It also looks good in both daytime and dusk because the grid casts soft shadows.
Build a wide outer border frame and leave a 1/4 inch shadow gap behind the front face. Cut intersecting lattice rails and install them with consistent spacing, using a spacer block to keep the grid square. Add internal supports on the back so the lattice stays rigid without thickening the front. Sand, apply teak-tone stain or dye, then finish with two coats of exterior satin clear.
Editor's noteMake your border rails thicker than your internal grid by at least 50% for a more luxe proportion.
Skip thisDon’t make the internal grid too wide; it turns decorative instead of protective.
17. Smoke-Toned Oak Framed Slat Bands
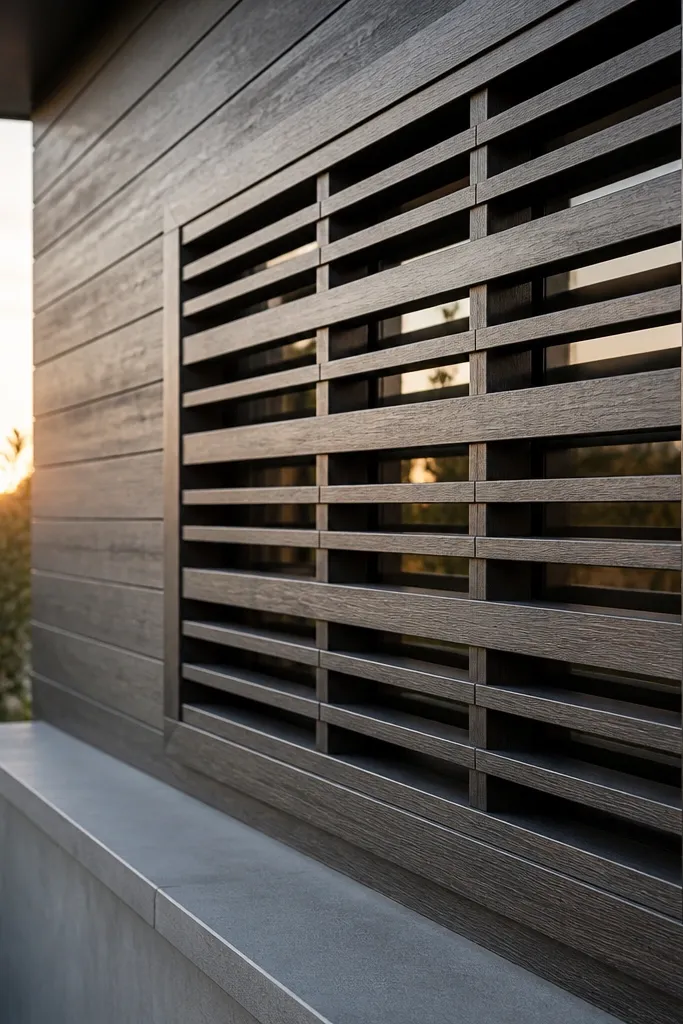
Banded slats feel modern and warm because they create sections instead of a full, uniform grid. Smoke-toned oak adds depth and makes the bands look intentional under changing light. This style looks especially good on windows where you want the grill to match horizontal architectural lines, like a facade with ledges or paneling. The key is proportion: thick bands and thin slats inside them.
Measure your window height and plan two or three horizontal band sections, leaving even spacing between them. Build outer frame and inner rails with a 1/4 inch shadow gap, then install thicker band boards first. Fill each band with slim slats spaced evenly, and keep the slat length consistent. Sand, apply smoke-toned oak stain, seal with satin exterior clear, and install using pre-drilled points to prevent splits.
Mark band heights with painter’s tape on the window recess before you build — it keeps proportions right.
Don’t stack bands too close; tight bands make the grill feel heavy.
18. Walnut Corner-Post Modern Panel
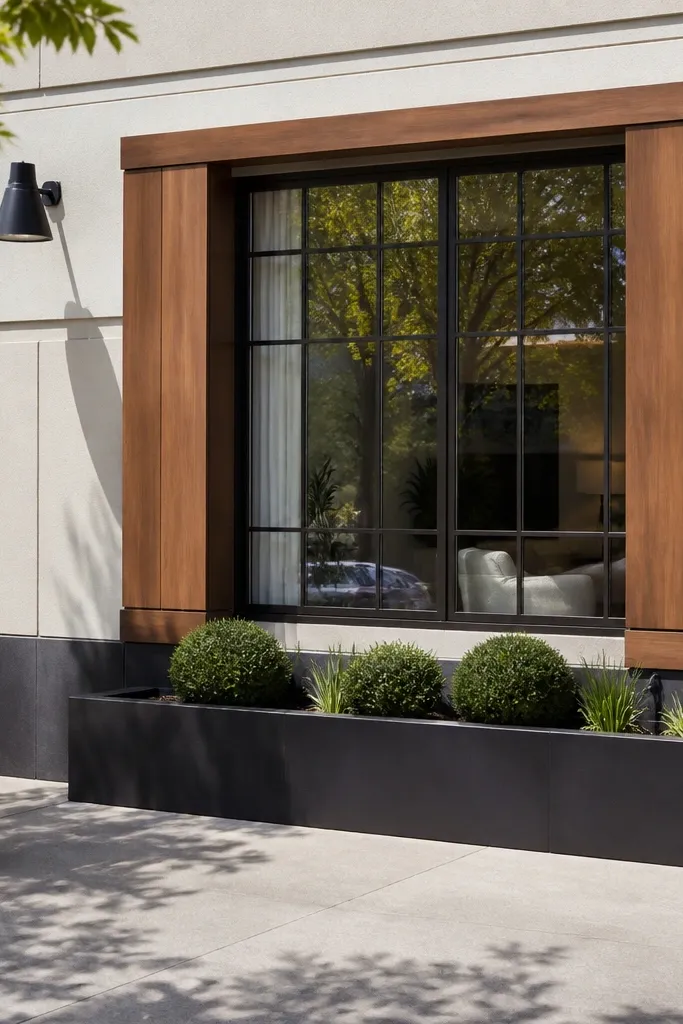
Corner posts are a modern luxury trick because they frame the window like furniture. Instead of filling everything with slats, you use corner posts and a simple internal grid that reads sleek from the street. Walnut keeps it warm, and the open center helps your window still feel bright. This design is a good fit for entrances where you want the grill to look like part of the house, not an add-on.
Build an outer frame and add four corner posts that extend slightly inward so they create a structured look. Create a simple internal grid with thin rails at measured intervals, leaving larger open areas in the center. Use spacers when installing rails so the grid stays perfectly straight. Sand, stain walnut, and seal with satin exterior clear, then mount the grill to the recess with corrosion-resistant hardware.
Use corner posts thicker than the internal rails for a sharper, designer proportion.
Don’t use too many internal lines; two to three rails per direction is enough.
19. Ash Slats with Floating Mid-Rail
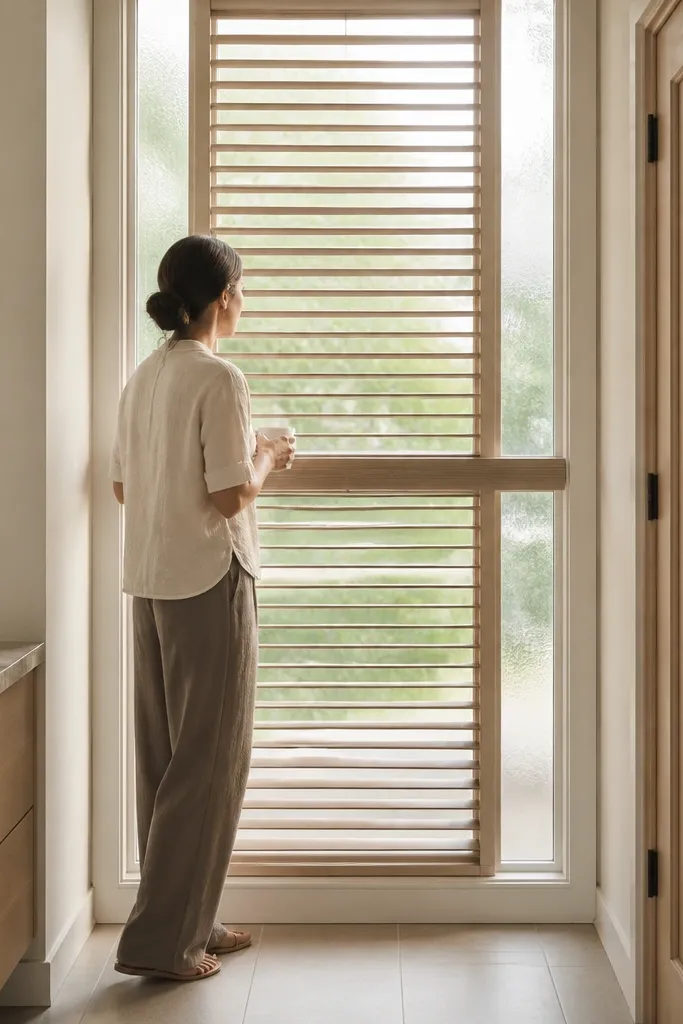
Floating mid-rails look expensive because they create a layered moment at eye level. Pale ash keeps the warmth light and airy, which is perfect for bathrooms, hallways, and windows that need to stay bright. The vertical slats maintain modern simplicity, while the mid-rail adds structure and a clean focal line. This one photographs well because the shadow gap shows depth.
Build a frame with a 1/4 inch shadow gap and install vertical ash slats evenly spaced. Add a mid-rail that sits slightly forward of the slat plane so it reads as floating, but keep it aligned with the frame edges. Use pocket holes or screws from the back to keep the front face clean. Sand, seal ash with a warm clear exterior sealer, then topcoat with satin exterior clear for durability.
Set the floating rail thickness so it’s visually about 1.5x the slat thickness.
Don’t let the mid-rail sit uneven; even a 1/8 inch slip shows immediately.
20. Walnut Diamond Panel in a Thin Frame
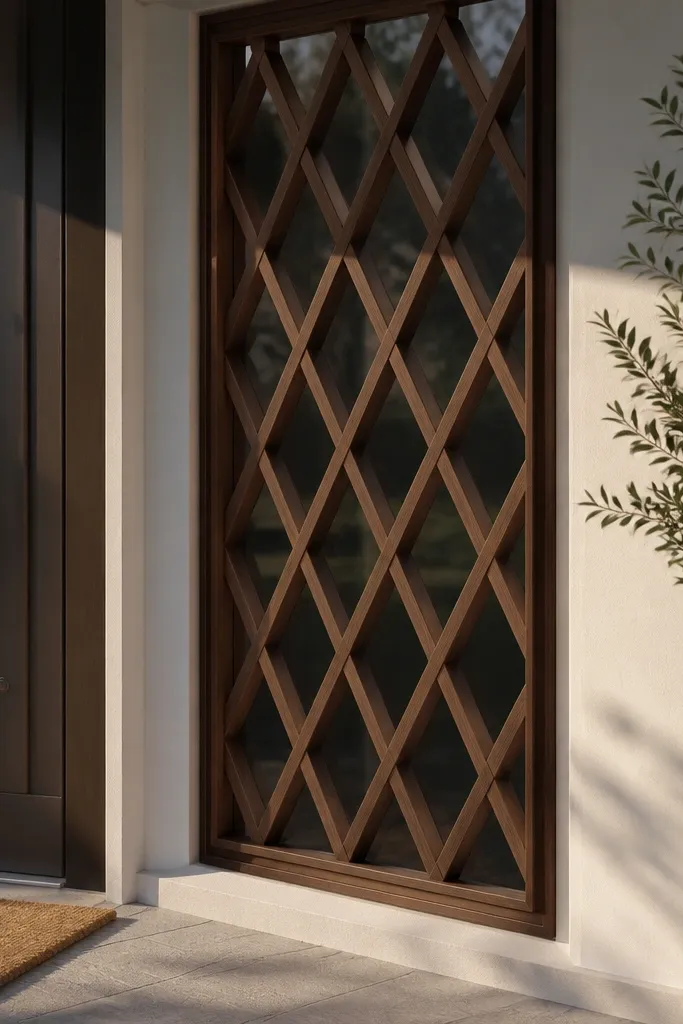
Diamond panels are warm and modern when the frame is thin and the diamonds are consistent. Walnut gives you that cozy brown tone, and the diamond geometry creates a soft sense of movement. This works well for windows that need a little design interest without becoming a full lattice. The look is also forgiving if your window isn’t perfectly square, because the diamond pattern hides minor misalignment when built carefully.
Build a thin outer frame with a 1/4 inch shadow gap and add inner rails that hold the diamond panel. Cut rails at 45 degrees to form a diamond grid, using a spacer jig so the diamond width stays constant. Assemble the diamond panel on a flat surface, then screw it into the inner rails from the back. Sand, stain walnut, and seal with satin exterior clear, checking for smoothness at the diamond points.
Editor's noteUse a sacrificial backing board when cutting 45-degree ends so edges stay crisp.
Skip thisDon’t make diamond points too sharp; sealant needs surface contact to last outdoors.



