
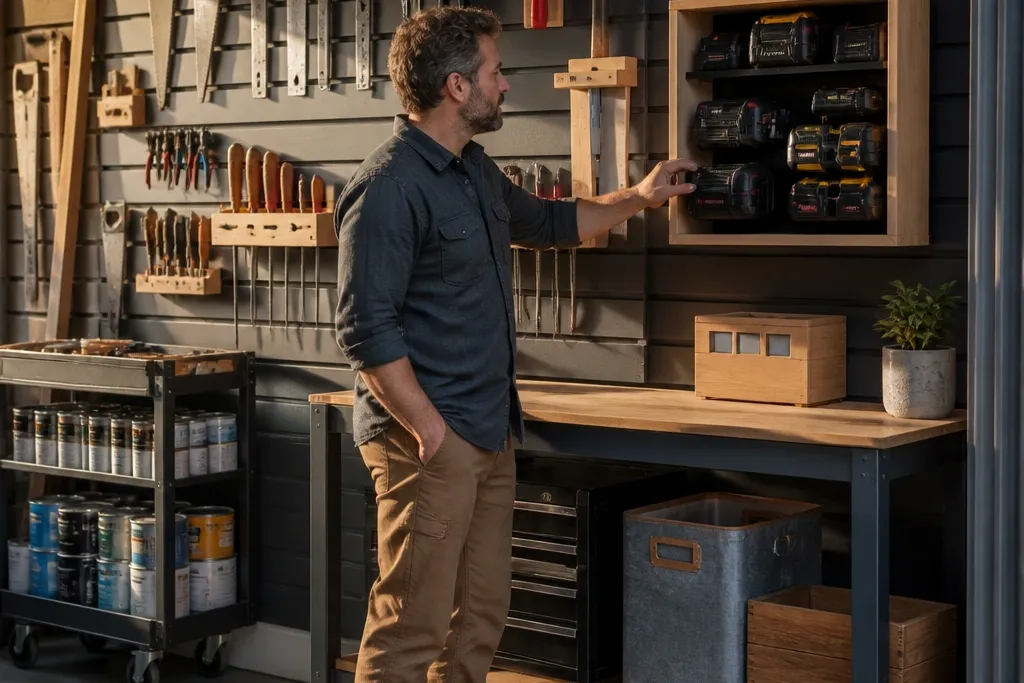
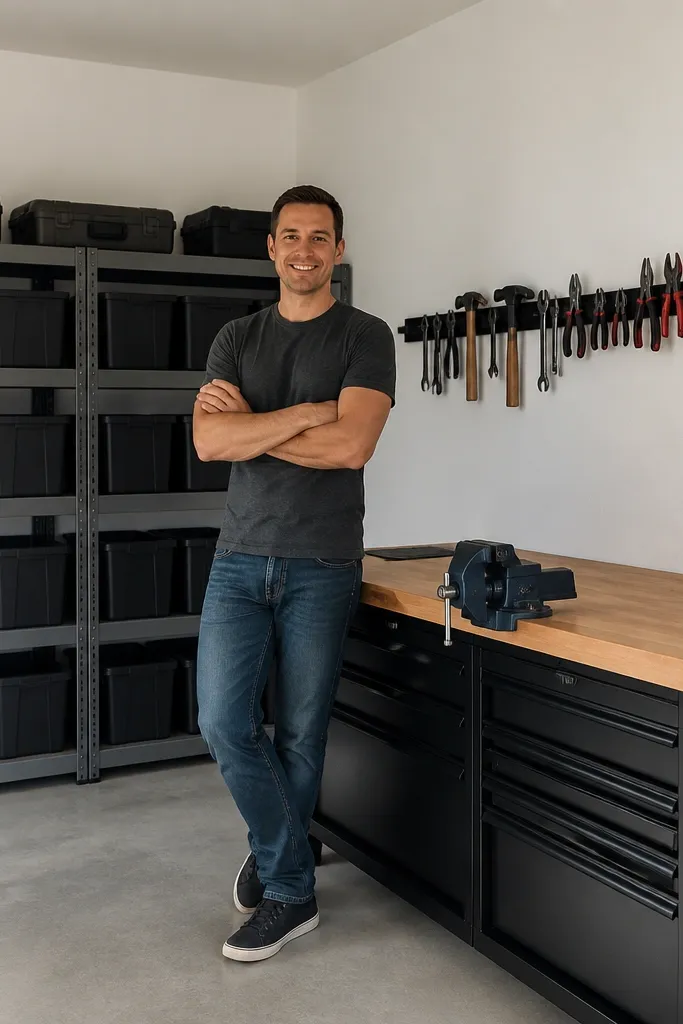
1. French cleat tool wall with a clean shadow-gap layout
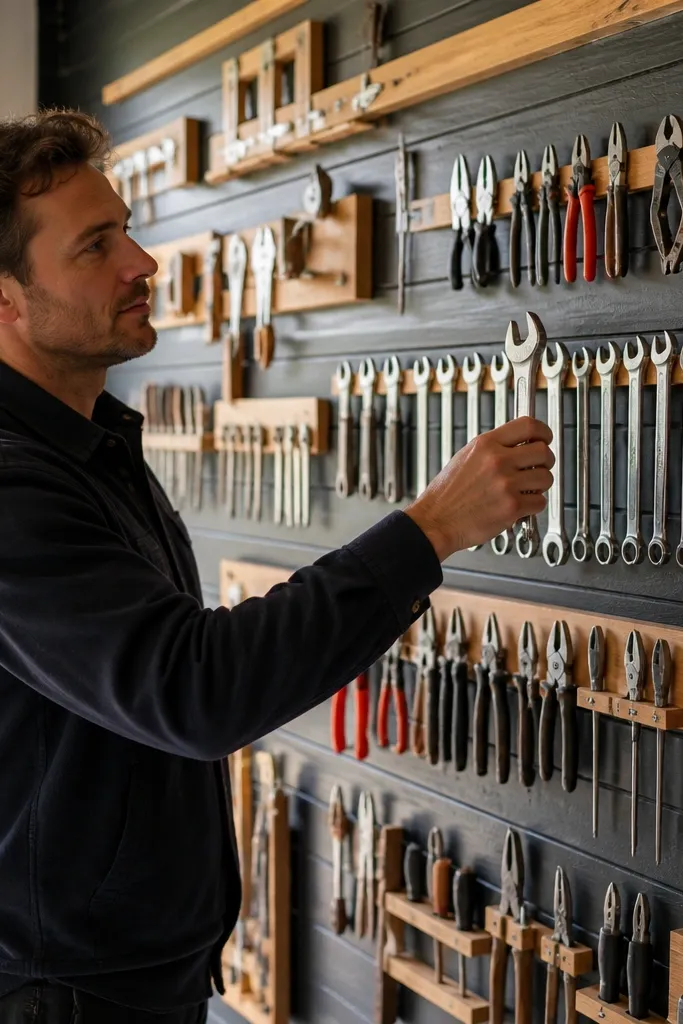
Start by marking stud locations and planning a two-cleat grid so the top cleat lines up for level hanging. Cut 1x lumber cleats (about 3/4 in thick) so the bevel faces down on the top run and up on the bottom run, then pre-drill and screw them into studs. Install the cleat runs at a consistent height — I’d use 48 in for the first rail so hand tools land at comfortable reach. Build or buy simple wooden tool trays, then hang them by sliding the tray bracket onto the cleat and locking it with a stop screw. Finish by adding labels on the tray faces and wiping the whole wall clean so you get that crisp, showroom look.
This is the fastest way to make a garage look expensive because the wall becomes a designed grid instead of scattered hooks. French cleats let you mount holders at repeatable heights, so your tools line up and stay put even when you add new stuff. Use a dark cleat finish with light wood holders for contrast — it reads high-end in photos and in real life. You also get flexibility: holders can move without patching drywall, which matters when your tool collection changes. This project is beginner-friendly if you can find studs and drive screws straight, and it usually takes a few hours plus drying time if you paint the cleats.
Skip thisDon’t mount cleats into drywall alone — the wall will sag and your holders will drift.
Editor's notePaint the cleats before mounting, then touch up screw holes with a small brush for a clean edge.
2. Pegboard with color-matched tool silhouettes and a framed border
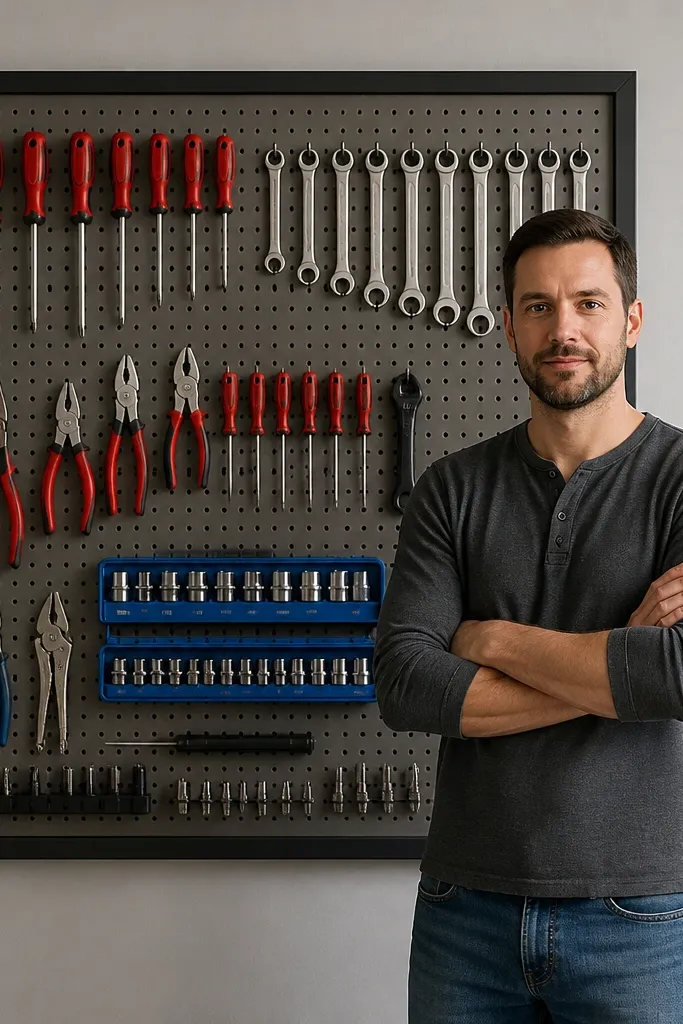
Pegboard gets a high-end upgrade when you add a border and treat it like a display. The border makes the pegboard look intentional, like a wall panel, and the silhouettes (wrenches in one zone, screwdrivers in another) create instant visual order. It’s photogenic because it turns boring storage into a neat, patterned wall. Use a smooth, matte finish on the board and keep hooks consistent so you don’t end up with a messy mix of hardware. This is a great weekend project when you already have tools you want to stop hunting for.
Mount a sheet of pegboard to studs, then frame it with 1x2 trim so the edges look finished. Prime and paint the pegboard in matte — white, warm gray, or off-black all photograph clean. Lay out tool positions on the floor first, then install hooks and holders in a grid so spacing is consistent. Add a label strip along the bottom with a simple font — use white label tape on dark background or dark tape on light background. Finish by stepping back and adjusting any crooked hooks before the paint fully cures.
Use only one hook style for the board; it looks calmer and is faster to maintain.
Avoid mixing hook brands and sizes — it creates clutter even when the tools are “sorted.”
3. Bench-top shadow box for chargers, cords, and small chargers
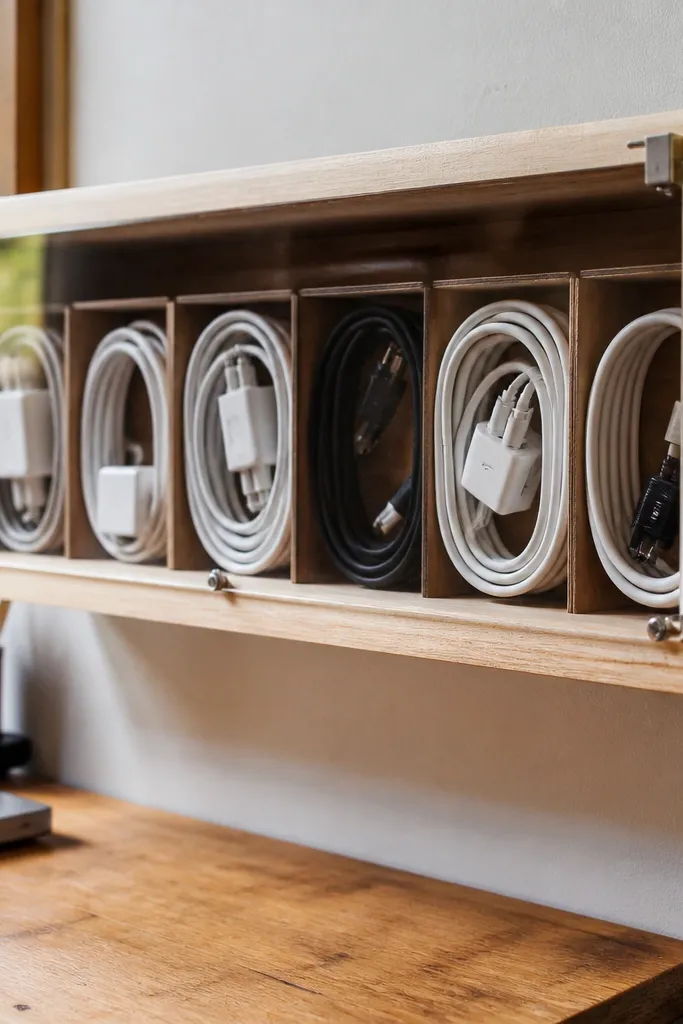
A shadow box on your workbench makes small electronics feel curated instead of scattered. The box hides the ugly part — cord tangles, random chargers, and mystery cables — while still keeping everything visible at grab-and-go distance. It also protects cords from getting crushed under tools, which keeps the whole bench area looking tidy. This project is perfect if your garage has a workbench that keeps getting “temporarily” messy. It looks high-end because you get clean lines, a finished frame, and labels that read like an organized system.
Build a rectangular frame from 1x2 or 1x3 lumber, then attach 1/8 in backing panel to create the box depth. Cut a backer panel and mount it inside the frame leaving a small gap (about 1/2 in) so cords can route behind without bending sharply. Install two or three cable anchor points on the back panel using adhesive cable clips or small screw eyelets. Add a row of label cards under each anchor so you know which charger goes where. If you want the cleanest look, paint the frame satin black or warm white and apply a clear coat to the wood edges.
Coil cords the same way every time — either clockwise or counterclockwise — so the bundle looks neat even without perfect folding.
Don’t mount anchors too close together; tight spacing makes cords kink and the box looks messy after a week.
4. Closed bin wall for car care products with matching lidded organizers
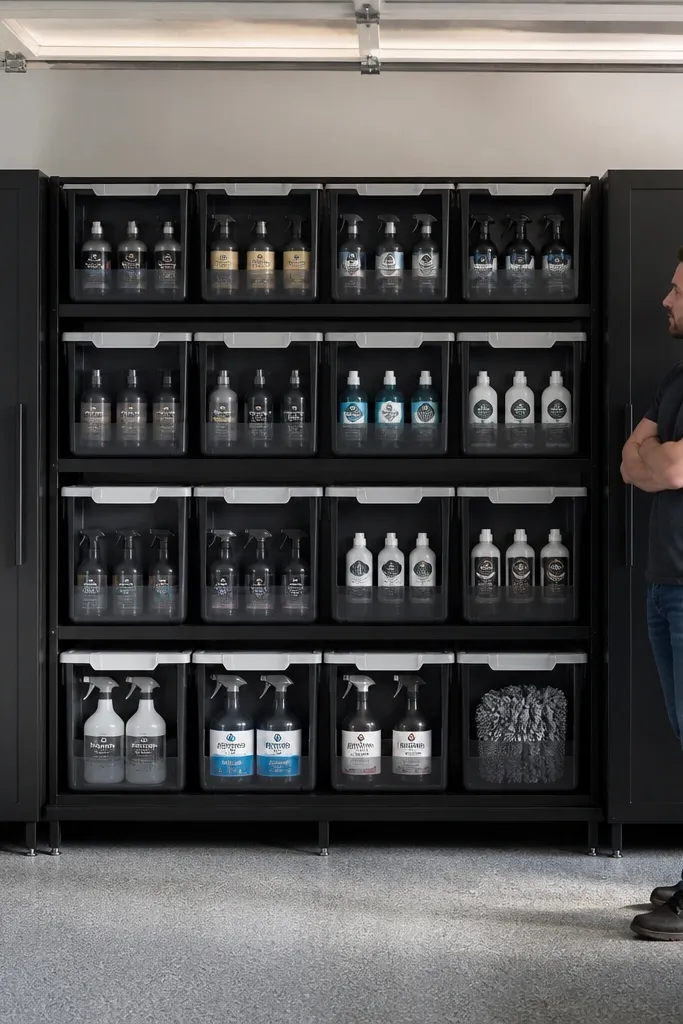
Car care clutter is one of the ugliest garage problems because bottles spill and labels get beat up. A closed bin wall solves it while keeping the products easy to grab when you need them. The high-end look comes from matching containers and consistent placement — no random sizes, no mismatched lids. You also get a cleaner floor because you stop stacking sprays and buckets. This is an easy weekend win if you can mount shelves or a peg board-like panel for bins.
Decide on your bin footprint first — pick one size and stick to it. Mount a simple plywood back panel to the wall, then install rail brackets so bins sit level and aligned. Use a level and measure from the floor — 18 in shelf height is a good start for eye-level access. Place bins in zones: wash tools in one row, chemicals in another, towels and mitts in the last. Label the front of each bin with a label maker and add a small “what goes here” icon using printed tape.
Use clear label tape on the bin fronts so the label stays legible even if a bottle leaks.
Avoid leaving cleaning chemicals in open bottles on shelves — residue makes dust look darker and the wall looks dirty.
5. Clear-lid drawer inserts for screws, nails, and fasteners on a cabinet
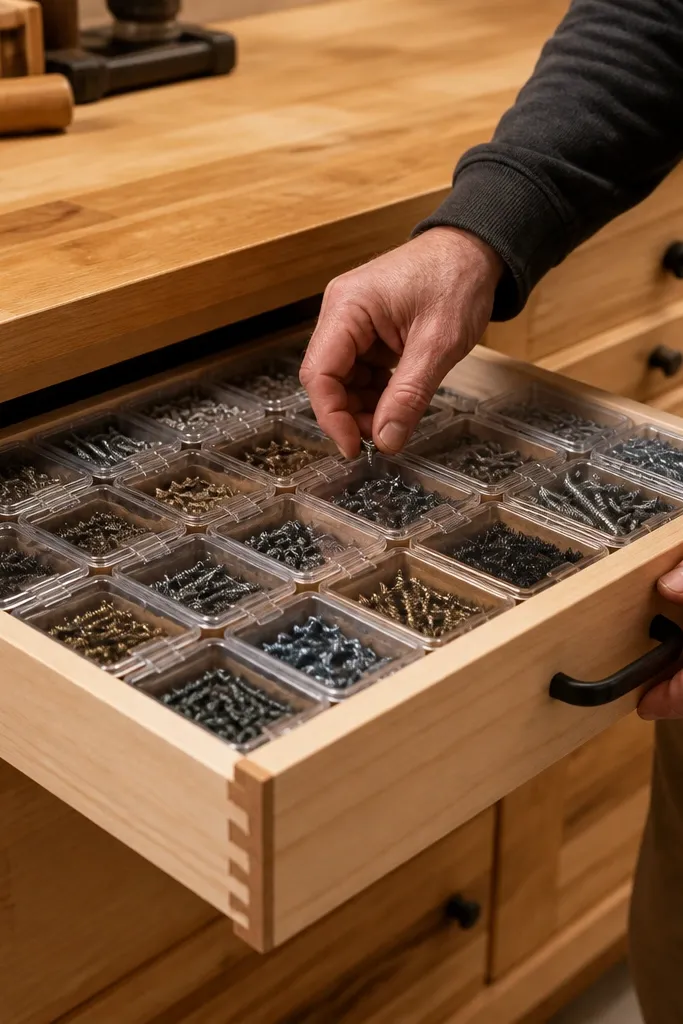
Measure the drawer interior width and depth, then choose bin sizes that leave a 1/2 in perimeter gap for easy removal. Arrange bins on paper first so you don’t end up with one weird leftover space. Cut a thin plywood base or use adhesive shelf liner to keep bins from sliding. Label each compartment with screw size and head type — for example “#8 x 1-1/4 deck screws” instead of “screws.” Add a simple divider strip if your drawer has long edges that want to bow or flex.
If your garage has a junk drawer problem, drawer inserts are the high-end fix because they remove visual noise. Clear lids let you find the right fastener instantly, and separate compartments stop the “one pile of everything” mess. The look is clean because you can align bins into a tight grid. It also improves workflow — you spend less time digging and more time building. This is weekend-friendly if you already have a cabinet or rolling drawer unit; the real work is measuring and fitting.
Skip thisAvoid mixing loose bins and no base — they slide around and the drawer stops looking neat fast.
Editor's noteUse a label format that includes both size and use, like “3/8 lag + washers,” so you don’t have to guess.
6. Wall-mounted ladder rack with a finished end cap
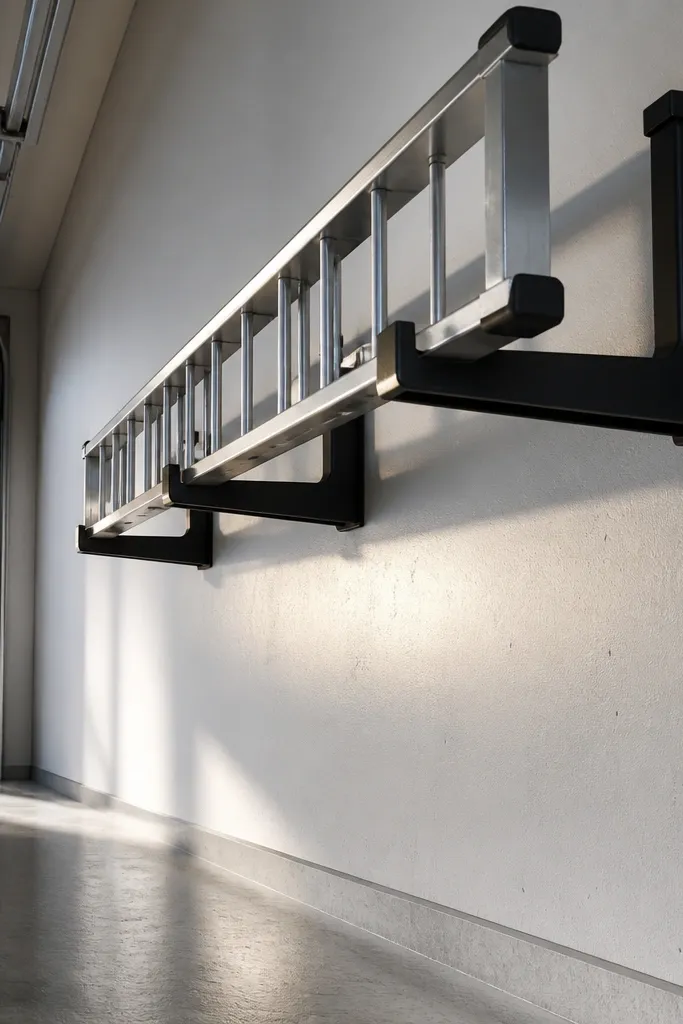
A ladder rack makes your garage look instantly intentional because it clears floor space and turns a bulky item into a clean wall storage moment. The high-end look comes from padding and finish details: padded contact points, a consistent bracket color, and a tidy end cap so the rack doesn’t look like hardware. You also get safer storage because the ladder is held securely and doesn’t tip. This project is ideal if the floor is cluttered with long items and you want a quick visual win.
Find the ladder’s center of gravity and measure its length and width so you can place two support points evenly. Use stud locations for the rack brackets and install them at an angle so the ladder sits stable. Add rubber or foam pads at contact points to prevent scuffs and reduce vibration. Build a simple end cap or trim piece from 1x2 lumber and stain or paint it to match your wall system. Finish by checking clearance to doors and making sure the ladder doesn’t scrape the wall when you remove it.
Wrap the contact pads with a thin layer of felt under the foam — it reduces rattling and looks cleaner over time.
Don’t mount rack brackets too high; you want easy lift-off without lifting the ladder like a circus act.
7. Toolbox-style rolling cart for paint + supplies with labeled drawers
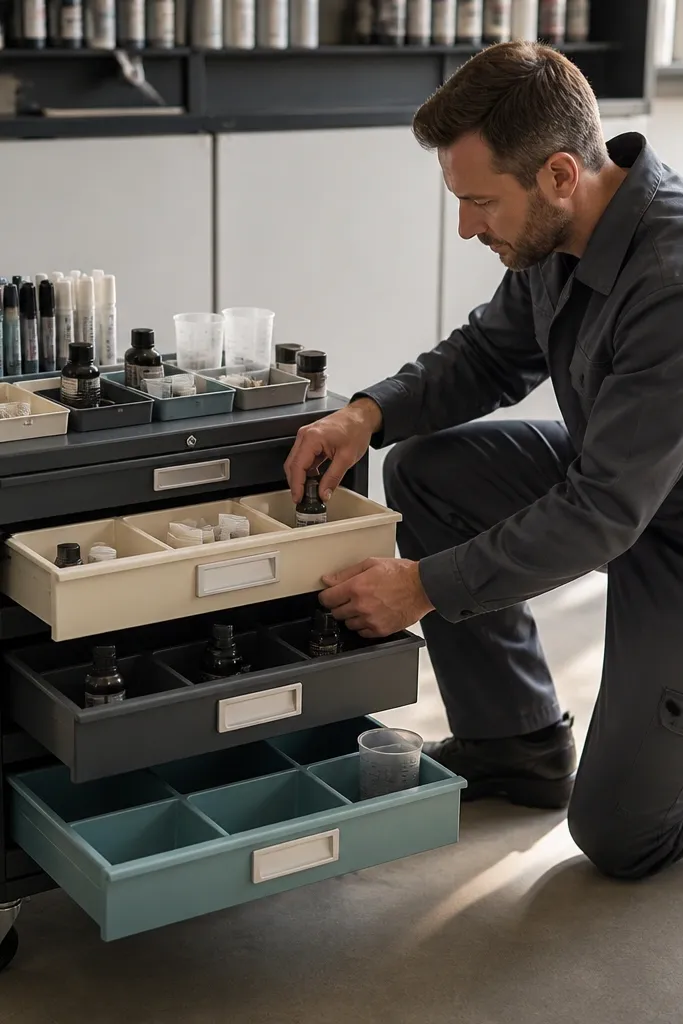
Choose a rolling cart with drawer fronts you can label — a 3-drawer setup works well. Measure each drawer’s usable interior and buy or build small bins that fit with a consistent 1/4 in clearance. Label each drawer by task: rollers and covers, brushes and trim tools, tape and drop cloths, mixing sticks. Line drawers with a thin rubberized mat or shelf liner so everything stays put. Put frequently used items on the top tray and keep chemicals in the bottom drawer with a tray lip to catch spills.
Paint and touch-up supplies create chaos because they spread across surfaces. A rolling cart makes your “paint zone” mobile, contained, and photogenic because everything is in labeled drawers and bins. The high-end look is about consistency: one cart, matching containers, and labels at the same height. It also saves time because you roll the cart to the job site and your garage bench stays clean. This is a solid weekend project if you’re willing to measure drawer space and commit to one organization layout.
Skip thisAvoid placing open paint cans loose in drawers; use spill trays or capped containers.
Editor's noteStore paint markers and labels in a dedicated “ID drawer” so you never guess what color you used last time.
8. Magnetic strip for drill bits and metal fasteners with a satin finish
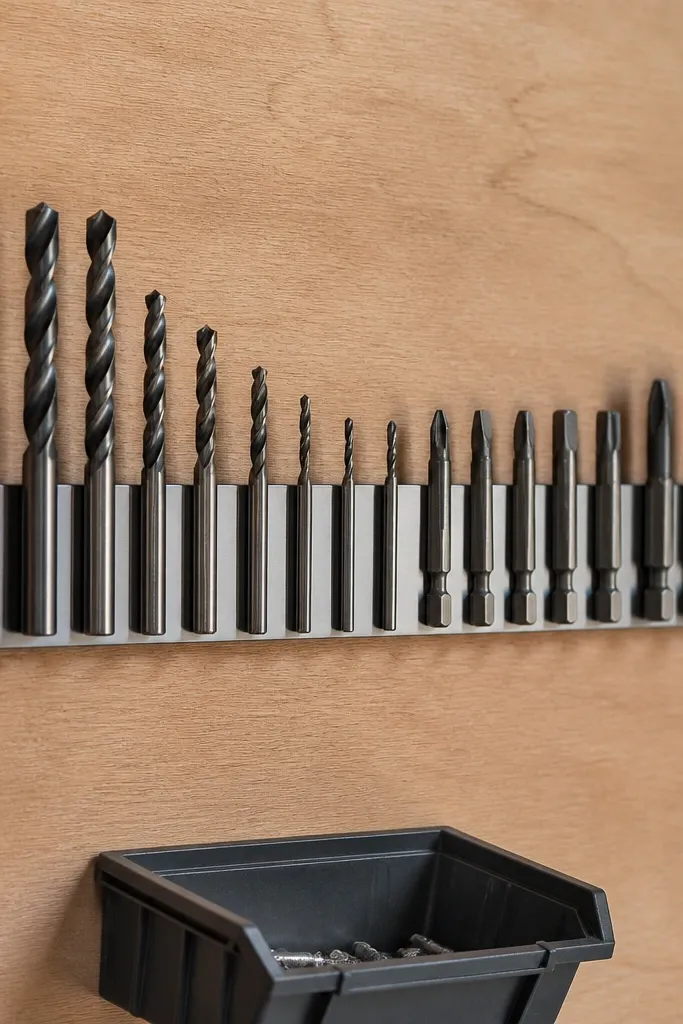
Pick a strip width that matches your tool lengths and mount it to a painted plywood backing for a clean wall finish. Mark mounting holes, pre-drill, and screw the backing into studs or into a French cleat system. Sort drill bits by diameter and arrange them so the largest bits sit at the far end — it keeps the layout consistent. For fasteners, use small magnetic holders or shallow trays so they don’t spill off the strip. Finish by wiping the strip and adding a printed label strip with size ranges like “1/8 — 3/8.”
A magnetic strip looks high-end because it turns metal storage into a clean, linear display. It’s also practical: you can grab the exact bit without opening anything. The satin strip doesn’t glare as hard as shiny chrome, so your garage photos look calmer. Use it for drill bits, nut drivers, and small steel fasteners that would otherwise mix in jars. This project is quick and looks great beside your drill station.
Skip thisDon’t magnetize everything; plastic-handled tools belong on hooks, not on strips.
Editor's noteUse a strip backing panel instead of mounting magnets directly to bare drywall — it looks finished and holds screws better.
9. Overhead storage with labeled bins and a front-access pull rope
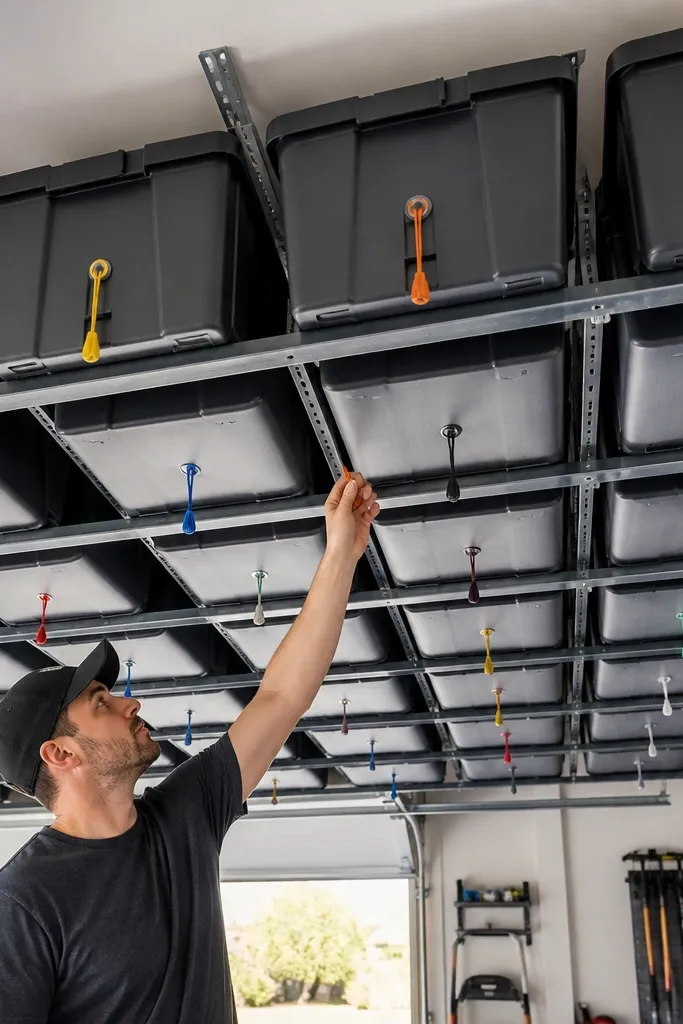
Overhead storage reads high-end when it’s orderly and accessible, not just shoved up there. Labeled bins keep seasonal items from becoming mystery boxes, and a pull rope gives you front access without climbing or digging. The aesthetic comes from consistent bin sizes and a uniform rack grid. This is a good weekend project if your floor is crowded but you still need to reach items occasionally. It works best when you keep bins light and group them by season or category.
Choose a rack system with solid rails and mount it to ceiling joists using the manufacturer’s hardware. Use uniform bins with lids and identical color where possible — black or clear lids look especially clean. Install a simple front-access pull rope: tie a rope to a bin handle or ring, then route it down to a safe reach point. Label each bin on the front with category and a short list like “winter gloves, ice melt mitts.” Before you lift everything, do a test pull on an empty bin to confirm the rope clears the rack and doesn’t tangle.
Keep heavy items off overhead bins; use overhead for light seasonal items so the system stays smooth.
Avoid mixing bin sizes — uneven gaps make the rack look chaotic in photos and in real use.
10. Shoe-style vertical organizer for extension cords and hoses
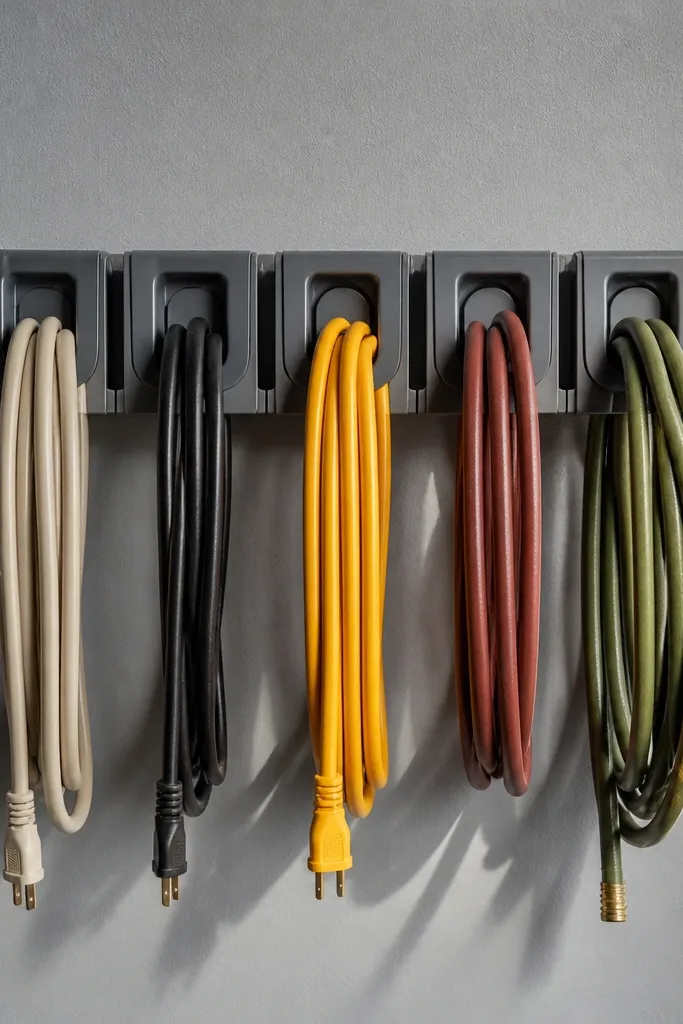
Build a vertical backer panel from plywood and cut evenly spaced dividers using 1/2 in strips. Create slots sized for your cords: leave enough room for the coil diameter plus a small gap so cords slide in without fighting. Mount the organizer on studs near the door or where cords are used. Label each slot with cord length and gauge if you know it, like “12/3 50 ft.” For hoses, use wider slots and add a soft strap or Velcro tie so the hose doesn’t spring out.
Vertical storage for cords and hoses looks sharper than floor coiling because it creates straight lines and repeated shapes. Instead of coils taking over the garage floor, you hang them in matching slots so they look like a design wall. It also reduces tangles because each cord has a dedicated place with a gentle curve. This is a weekend-friendly project if you can mount a panel and cut a few simple dividers. It’s high-end because the cords are contained and labeled, not draped and forgotten.
Skip thisDon’t rely on friction-only hooks for hoses; they slip and your organizer turns into a pile.
Editor's noteUse Velcro cable ties for the coils; they keep the spiral tight enough to look clean in a slot.
11. DIY cabinet face with magnetic sign-style label holders
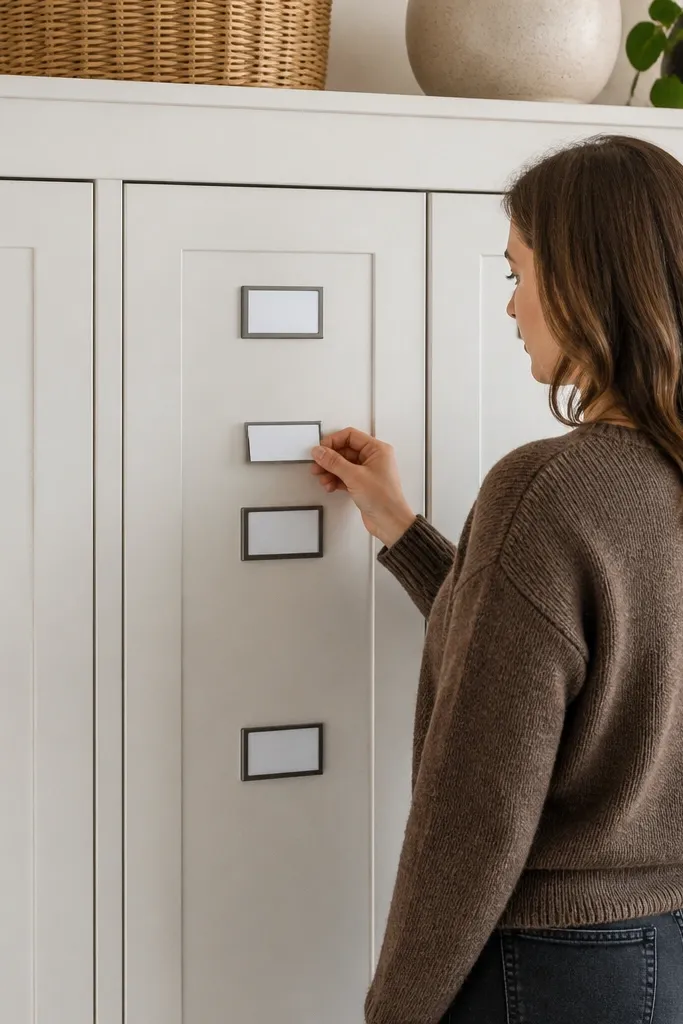
Pick a cabinet or build a small base cabinet from plywood and paint it satin white or matte black. Cut label card holders from thin plastic or acrylic strips and attach magnets to the back with a small adhesive. Use a simple label size like 2 in x 3 in so they line up neatly — measure the door width and distribute holders evenly. Add a magnetic “label strip” on each door so the cards sit flush. Finish by printing labels on cardstock and sealing them with clear tape so they handle garage humidity.
If you want the garage to look finished, label holders are the detail people notice. Magnetic label cards on cabinet doors let you swap labels without peeling tape every time you reorganize. The high-end look comes from the grid alignment and the uniform typography — it reads like a system, not a workaround. This is especially useful for chemicals, rags, and cleaning supplies where you change the contents seasonally. Build this if you have cabinets or shelving but labels are messy or temporary.
Skip thisAvoid label cards that stick out — they catch on clothing and make the whole setup look sloppy.
Editor's noteUse a consistent label template with the same order: item name, quantity, and where it goes inside the cabinet.
12. Corner workbench storage shelf with mitered trim and rounded bin edges
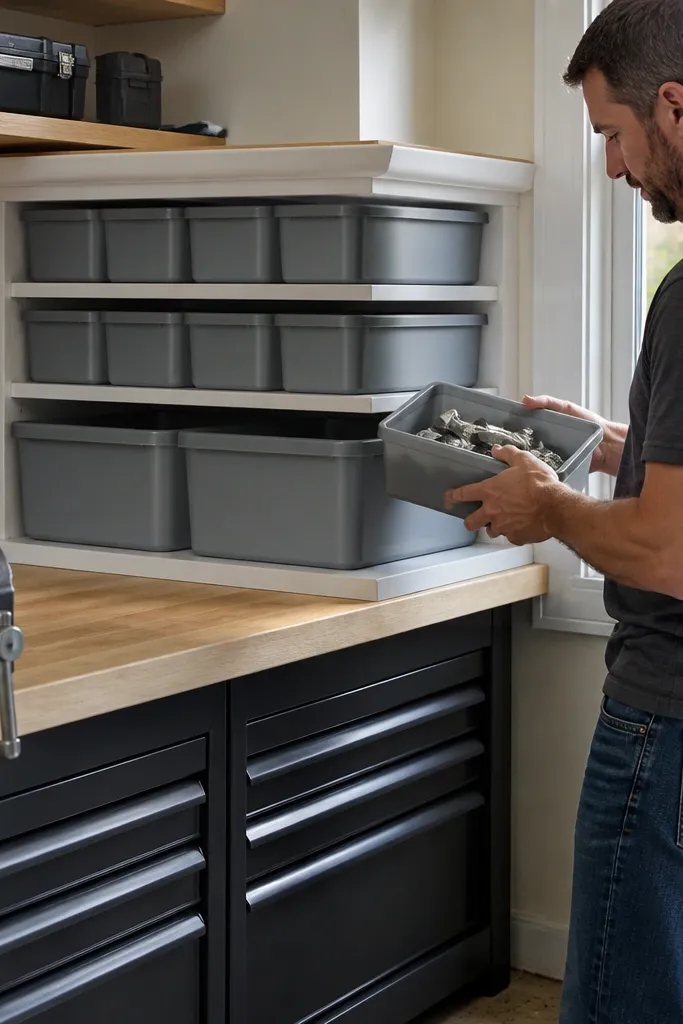
Corners are where garages look unfinished because stuff crowds together at odd angles. A corner shelf with mitered trim looks crisp and makes the corner feel designed instead of stuffed. Rounded bin edges matter because sharp plastic corners catch light and look cheap; rounded bins blend into the shelf line. This project is great for hardware, spray bottles, and small tools you want near your workbench. It’s also a weekend build that doesn’t require fancy joinery beyond careful measuring.
Measure the corner and decide shelf dimensions so you keep a clear path to the door. Cut a back triangle panel and two side supports, then build the shelf with plywood and trim pieces. Miter the trim corners at 45 degrees for a clean frame look. Install the shelf into studs or into a French cleat support panel so it holds weight. Place bins on the shelf and ensure a small gap (about 1/2 in) between bins so you can lift them out without scraping. Add label cards on the front faces and wipe the shelf so it looks showroom clean.
Use light-colored shelf paint or a clear coat — it reflects light and makes the corner feel bigger.
Avoid putting heavy bins on a thin shelf without stud mounting — corner shelves sag and look bad fast.
13. Wall-mounted broom and mop station with drip tray and color-coded hooks
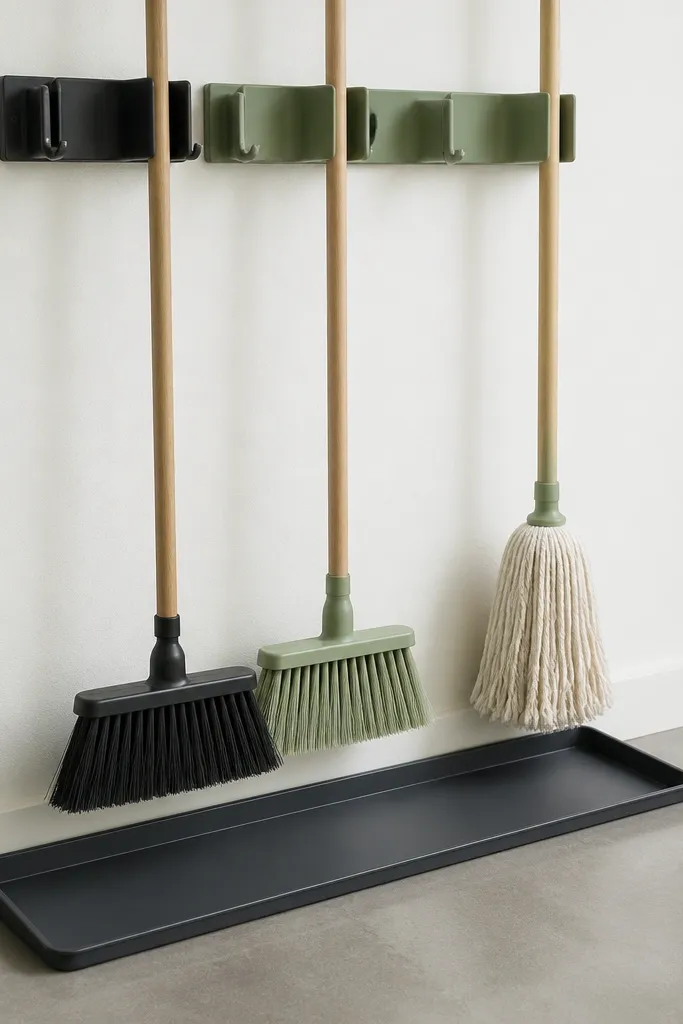
Mount two vertical rails or a single backing board to studs and install hooks at consistent spacing. Add a drip tray under the hook line, sized so the mop head and broom bristles land above it. Use hooks with rubber ends so the handles don’t scratch paint. Color-code by using different hook colors or by painting small hook caps — one color for mops, one for brooms. Finish with a simple label strip so kids or guests can hang things correctly without thinking.
Brooms and mops are ugly because of wet drips and random hook angles. A dedicated station with a drip tray fixes both: it keeps water off the floor and it makes the storage look uniform. The high-end look comes from color-coded hooks and a tray that matches the wall finish. This is a weekend project that directly improves how clean your garage stays. It also makes it easier to hang tools correctly, which keeps the wall looking neat.
Skip thisDon’t mount hooks too far apart; the tools will drift and the station looks messy even when “hung.”
Editor's noteMake the drip tray removable for cleaning — a tray you can lift out keeps the station looking fresh.
14. Clear bins in a pegboard-side rack for gloves, masks, and shop paper
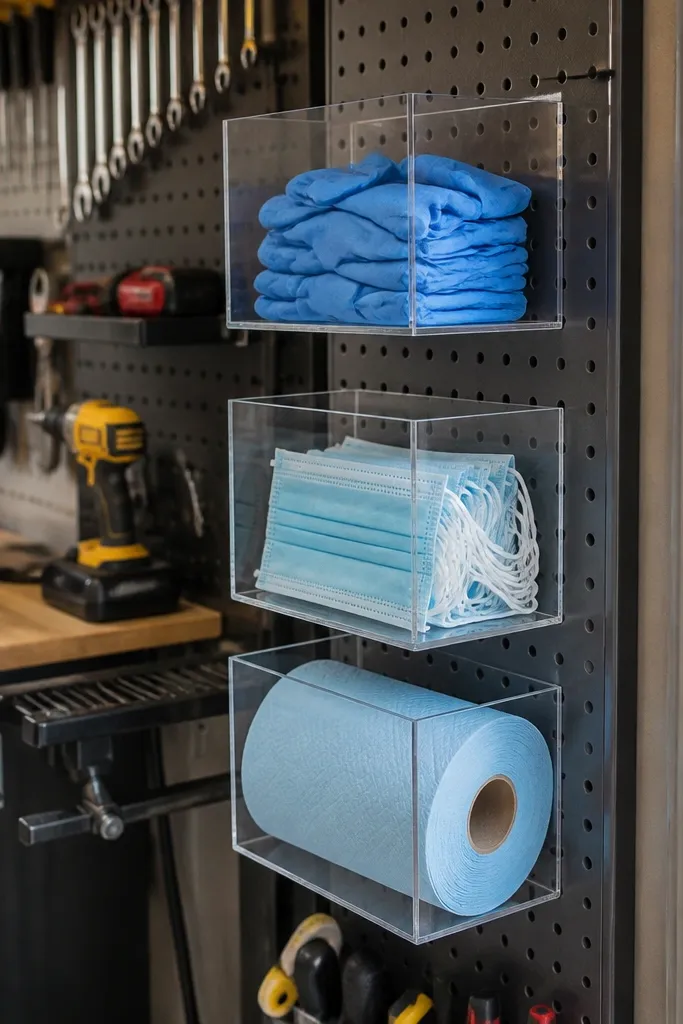
Mount a narrow pegboard panel to studs next to your tool wall or workbench. Attach shelf rails or small L-brackets to support clear bins at a consistent height. Choose bins with flat fronts so labels stay readable and the wall looks uniform. Add labels for each bin and a small paper roll holder if you’re storing shop towels or tape. Finally, put the most-used items at eye level and reserve the bottom for refills.
This is one of those small upgrades that makes the whole garage feel put together because it organizes the stuff you grab mid-task. Clear bins look clean and modern, and the pegboard backing keeps everything aligned with your tool wall. It’s photogenic because you get repeating shapes and a tidy column of labeled items. Use it for gloves, masks, safety glasses, and shop paper so your workbench stays free of loose packaging. This project takes a couple hours and works for both small and large garages.
Skip thisAvoid placing bulky items in clear bins; they block labels and ruin the clean grid look.
Editor's noteUse clear bins with lids for dusty items; open bins look fine for a day and then turn gray.
15. Coordinated shelf styling with 2-inch label bands and identical bin heights
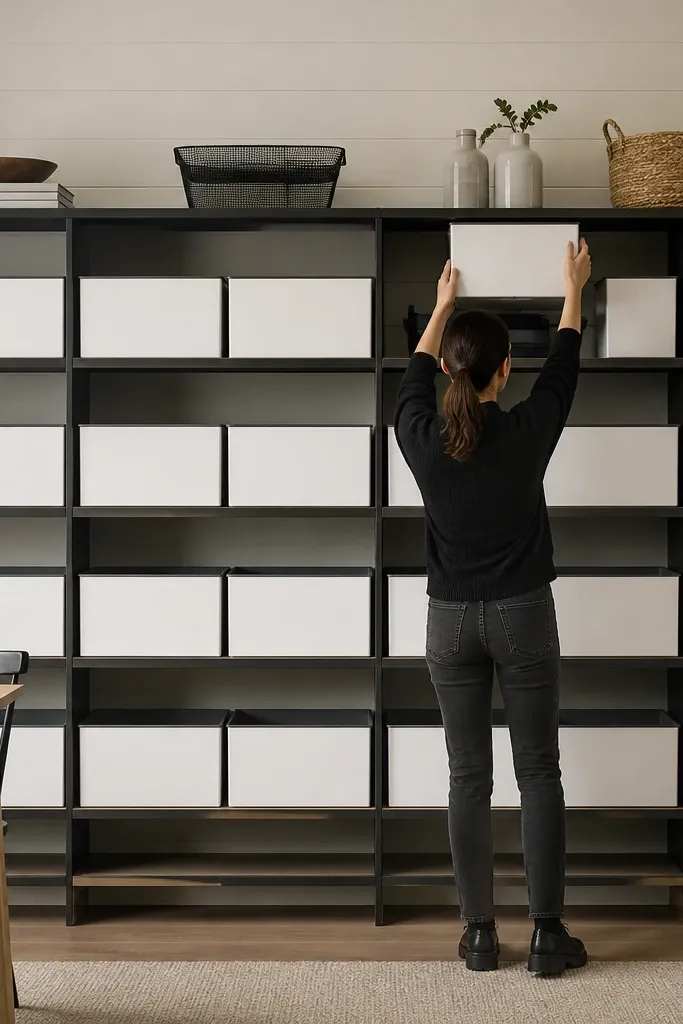
Most garage shelving looks messy because every bin is a different height and labels are random sizes. This project is basically visual discipline: identical bin heights, consistent label bands, and a clear top-to-bottom rhythm. The high-end look comes from the repeating rectangles — it makes the shelf look designed even if the contents are basic. It also makes maintenance easier because new items need to match the system. This is a weekend project if you already have shelves but they’re cluttered.
Measure the shelf depth and choose bins that fit snugly without forcing. Standardize on one bin height for the top two shelves first, then a second consistent height for lower shelves. Print labels on 2-inch wide tape or label stock and place them at the same height on every bin face. Group by function: “consumables” together, “seasonal” together, “tools” together. Step back and adjust bin placement until the front edges line up — the alignment is what sells the look.
Use one label color for categories and one label color for “refill” items to make the system readable at a glance.
Avoid leaving empty space with random objects; empty shelves look intentional, cluttered shelves look chaotic.
16. Garage door side storage using a slim cabinet with a tool-access false back
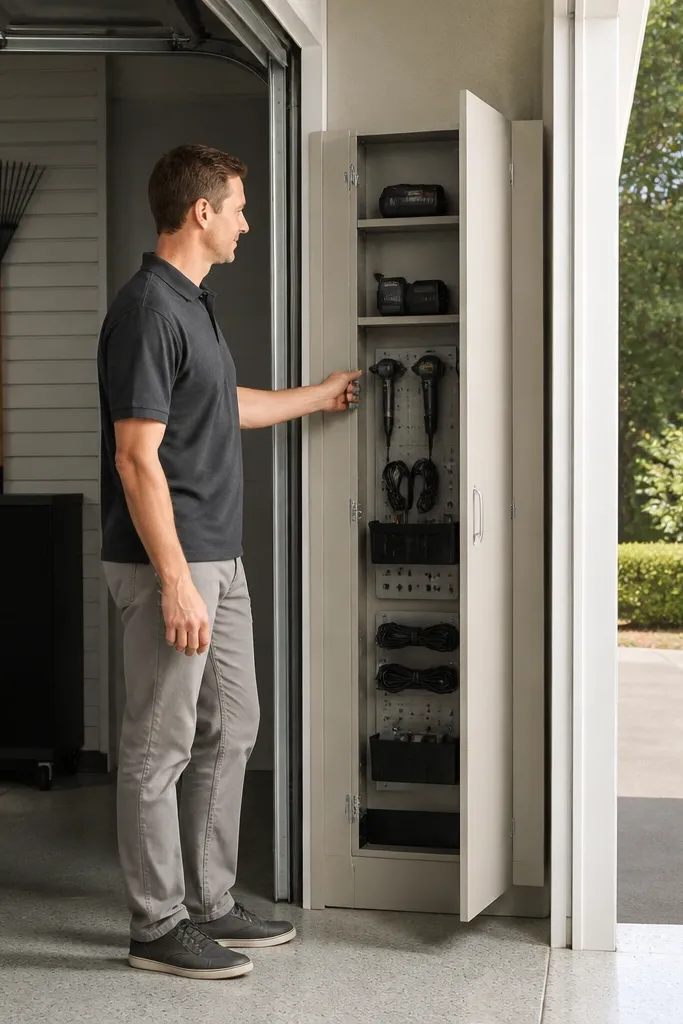
Measure the available width and choose a cabinet depth that doesn’t block the door swing — 10-12 in is a common sweet spot. Build a false back panel inside the cabinet with a small gap so cords can route behind without bending sharply. Install a vertical divider to make two zones: “daily access” and “seasonal backup.” Add a narrow shelf near the top for small tools and a deeper bin area at the bottom for gloves and accessories. Finish by adding label cards and painting the cabinet doors satin to match your other wall systems.
That skinny space beside the garage door is usually wasted. A slim cabinet with a false back makes it look built-in and hides cords, small chargers, and the junk that collects near the door. The aesthetic payoff is clean lines and a flush door front, plus labels on the inside compartments so you don’t forget what goes where. This project is great if you deal with entry clutter: gloves, ice melt tools, extension cords, and car wash items. It takes a bit of measuring but it’s still weekend doable.
Skip thisAvoid blocking ventilation or access to cords — if you can’t route cords cleanly, you’ll stop using the cabinet.
Editor's noteUse a magnetic catch or soft-close hinge if you have one; smooth door action makes the cabinet feel higher-end.
17. Wall-mounted bike and helmet station with padded hooks and a shelf lip

Bike storage can make a garage look chaotic fast, mainly because helmets, gloves, and tools get tossed on the floor. A wall-mounted station turns it into a clean display with padded hooks and a shelf lip that stops items from sliding off. The high-end look is about soft materials and controlled shapes — padded contact points and a shelf edge that frames the gear. This is perfect if you share the garage with bikes, scooters, or sports gear and want it visually tidy. It’s also a good weekend project because it’s mostly mounting and organizing, not building furniture.
Mount a sturdy overhead or wall bracket system for the bike frame using the manufacturer’s weight guidance and stud mounting. Install padded hooks for helmets and gloves at reachable height, then add a narrow shelf with a 1 in lip so items stay in place. Use a matching finish for hooks and shelf — matte black and warm wood trim look especially clean. Add a small label strip with “helmet” and “gloves” so the storage is obvious. Finish by placing a bin for bike accessories and aligning it with the shelf edge.
Use a fabric strap for helmet hangs; it prevents scuffs and looks softer than metal hooks.
Don’t hang bikes by random wall hooks; use the correct mounting points so the bike doesn’t shift.
18. Lidded floor-level rolling bin station under the workbench with a stop bar
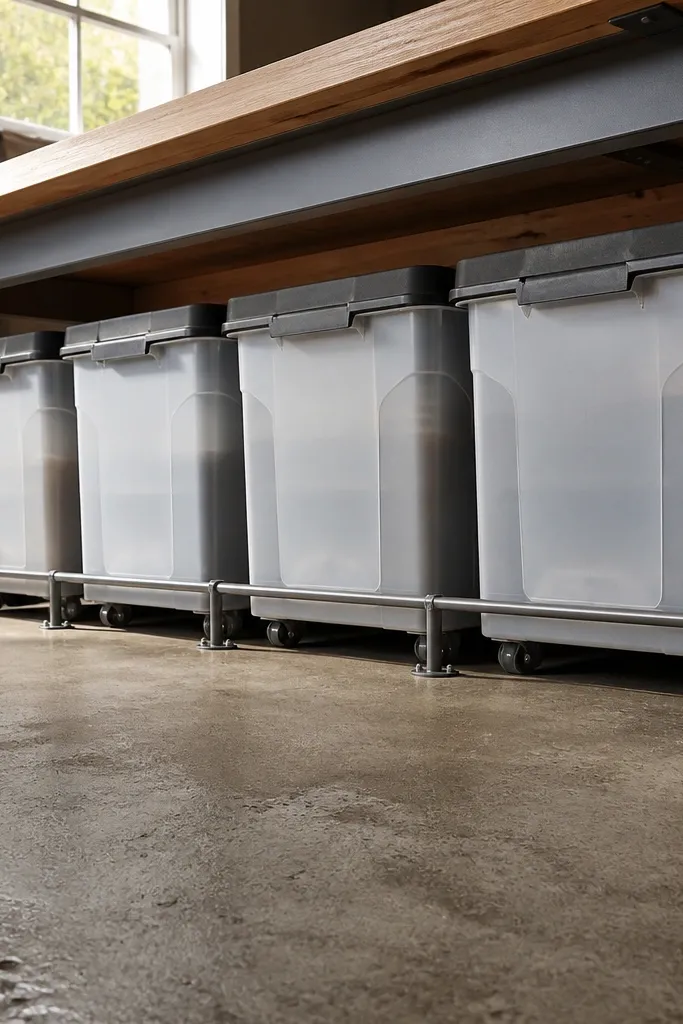
Floor-level storage looks high-end when it’s controlled. Rolling bins under the workbench keep clutter out of sight while still letting you access the items when you need them. The key is the stop bar — without it, bins drift and you end up with scuffed floors and uneven gaps. Lidded bins are photogenic because the surfaces are uniform and don’t spill visual noise. This project is ideal for garages where you have a workbench but the space underneath is a mess of bags and loose parts.
Measure the clearance under the workbench and choose rolling bins that fit with at least 1/2 in gap on both sides. Install a simple stop bar made from a 1x2 strip on the floor or underside edge so bins can’t roll out. Add a base mat or thin shelf liner to reduce noise and prevent slipping. Label each bin front — use 2-3 categories only so the system stays calm visually. Finally, line up the bins so their front edges match the workbench leg spacing.
Use bins with lids that have a slight lip; it helps you open them without pulling the whole bin forward.
Avoid open totes under the bench; dust and small parts make them look messy quickly.
19. Cabinet door pegboard insert for spray bottles and hand tools with neat grid spacing
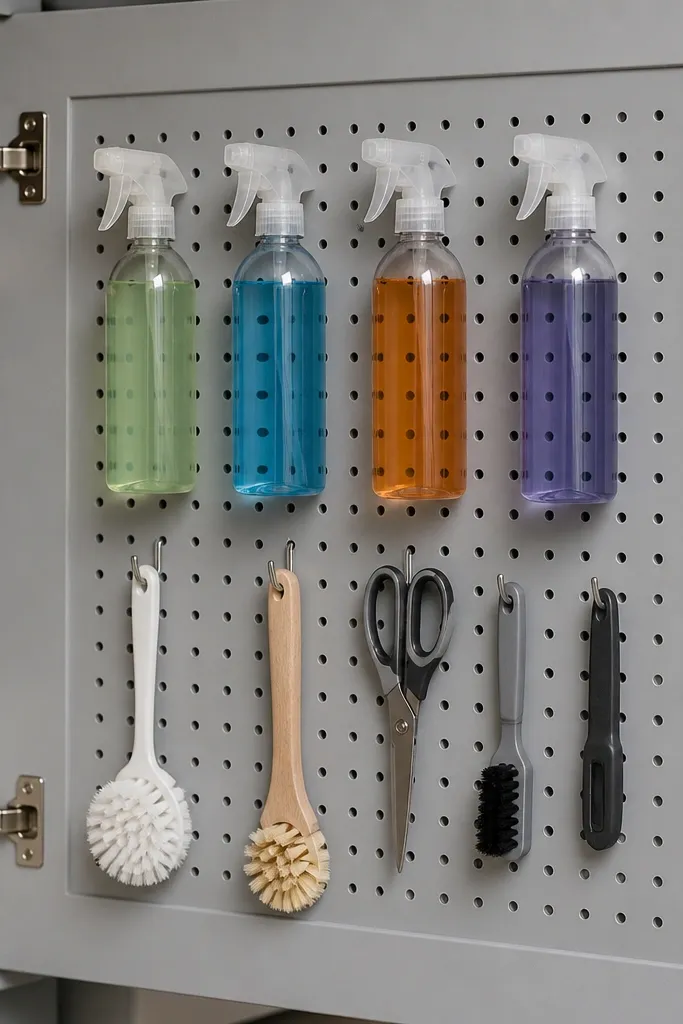
Measure the cabinet door interior and cut a pegboard panel to fit with a small clearance so it doesn’t rub. Attach the pegboard to a thin backing board for stability, then mount the assembly to the door with screws through the backing. Install bottle hooks or small cup holders on the pegboard and keep the spacing consistent — aim for a uniform grid. Add a few hooks for hand tools like mini screwdrivers and utility knives. Label bottle positions with a simple label strip so you always put things back in the same spot.
Inside-the-door storage is a high-end trick because it uses space you already have while keeping the main shelves clean. A pegboard insert on the cabinet door looks structured and makes spray bottles and hand tools easy to find. You also protect bottles from being knocked over on shelves, which keeps the cabinet area looking new. This is a weekend project if your cabinet doors are empty, half-used, or filled with random items. The look is sharp because the door becomes a labeled organization panel.
Skip thisAvoid overcrowding the door insert; if tools touch, it looks cramped and you’ll stop using it.
Editor's noteUse hooks sized for bottle bases so bottles sit upright and don’t tilt; tilted bottles look messy instantly.
20. Garage wall "parts station" with labeled bins on a vertical plywood grid
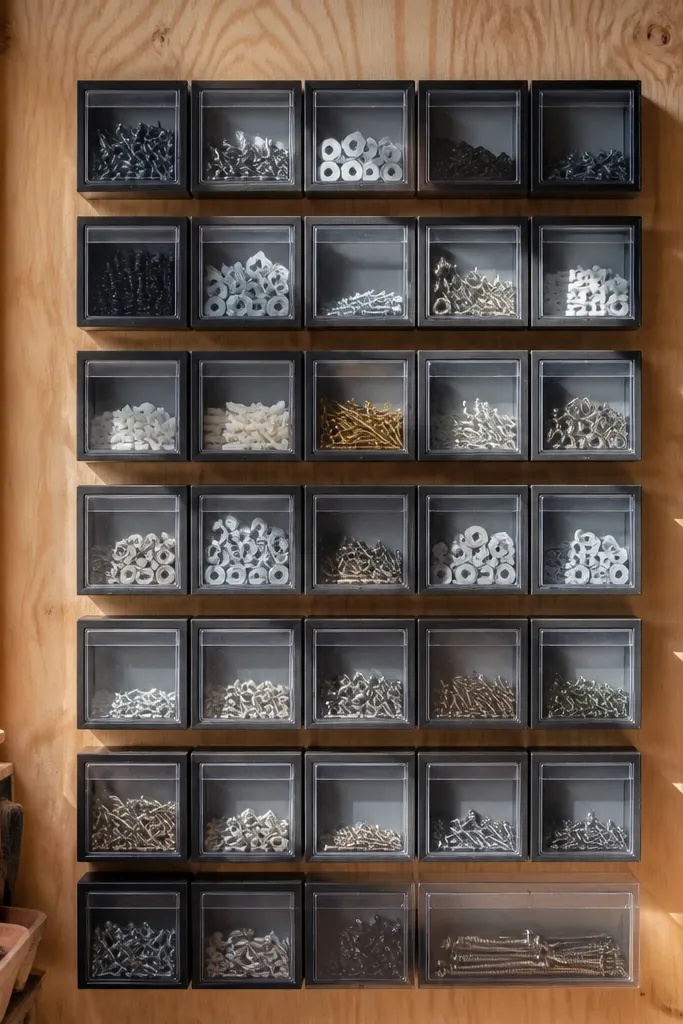
A vertical parts station makes small items look organized because it turns random parts into a readable grid. It’s one of the most photogenic garage setups because the bins line up, labels are consistent, and the wall looks like a system. This works especially well for hobby and DIY garages where you have screws, anchors, hooks, and small components. The high-end look is about repeatable spacing and a clean finish on the plywood — sand smooth, paint it, and keep the bin fronts aligned. You finish with a wall that stays tidy even when you’re mid-project.
Cut a vertical plywood panel and sand it smooth, then paint a matte finish so labels stay crisp. Mark a grid with equal spacing based on your bin sizes, then mount small shelf rails or cleats that align with those marks. Place bins so their front edges line up on a single plane. Label every bin with the part name and size, like “toggle bolts 1/4” or “fender washers 5/16.” Mount the station at a comfortable reach height — around 48-60 in for the main row.
Use bins with the same depth even if the heights differ; it keeps the whole grid looking uniform.
Avoid mixed-label styles; if half your labels are handwritten and half are printed, the wall looks inconsistent.



