
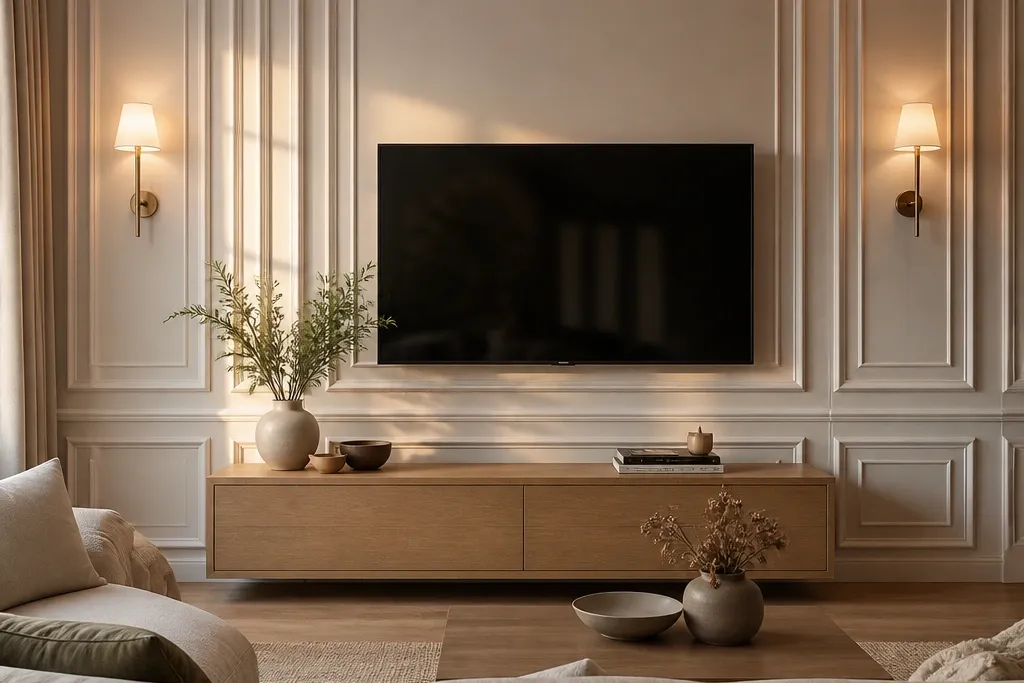
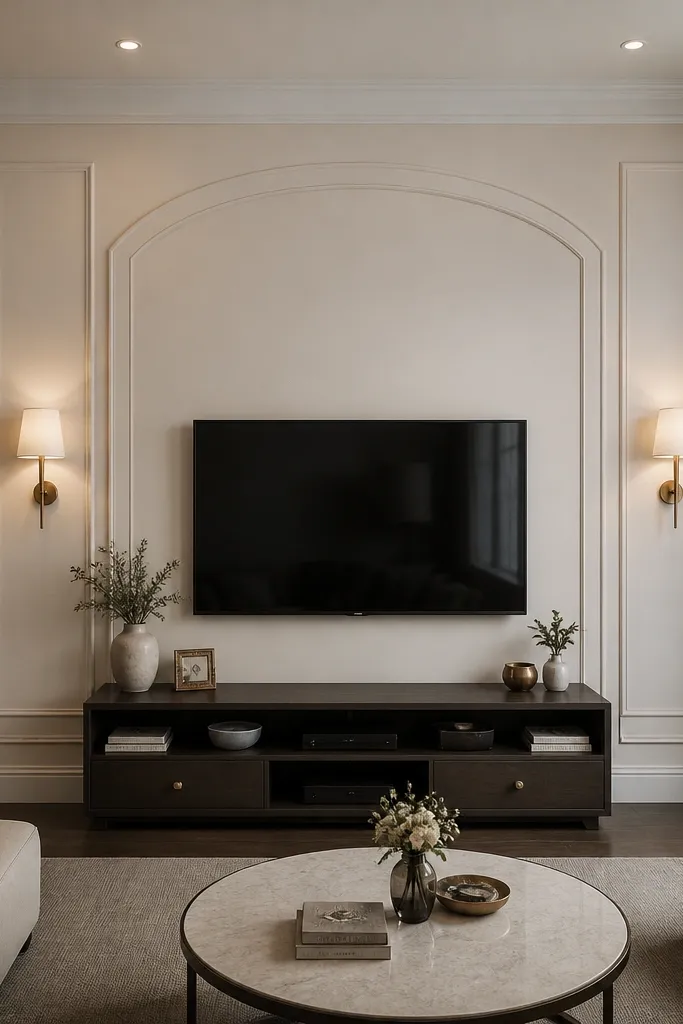
1. French Picture-Frame TV Panel with Dentil Edge
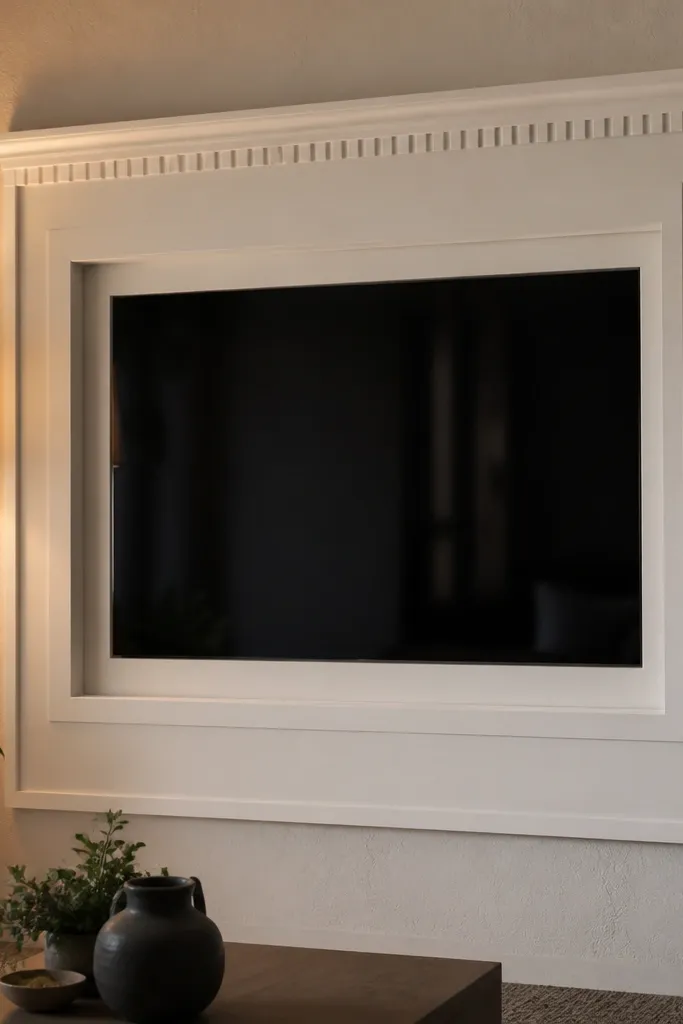
This is the cleanest “French” answer for a TV wall that feels unfinished. You build a centered rectangle that looks like a formal picture frame, then add a dentil-like micro-detail along the top border so the whole thing catches light. The raised paneling creates depth even when the room is dim, because the shadows sit in the moulded steps. It looks high-end with a white-on-white palette, especially if your existing trim is already painted. Skill level is moderate: you’re cutting repeated miters and keeping the inner reveal consistent.
Editor's noteDry-fit the frame pieces on the floor and mark the inside edges so your reveals stay the same after miters.
Step 1 — Measure the TV width and height, then draw a center rectangle where the outer frame sits 2-4 inches wider than the TV on each side. Step 2 — Frame the outer border with primed MDF moulding, then add an inner raised panel using flat MDF sheets cut to fit the opening. Step 3 — Install a small dentil-profile trim along the top border only, then fill seams with wood filler and caulk the edges before primer and paint.
Skip thisDon’t paint before caulking — tiny gaps shrink your moulding definition once the sheen hits.
2. Chair-Rail French TV Wall with Vertical Window Panels
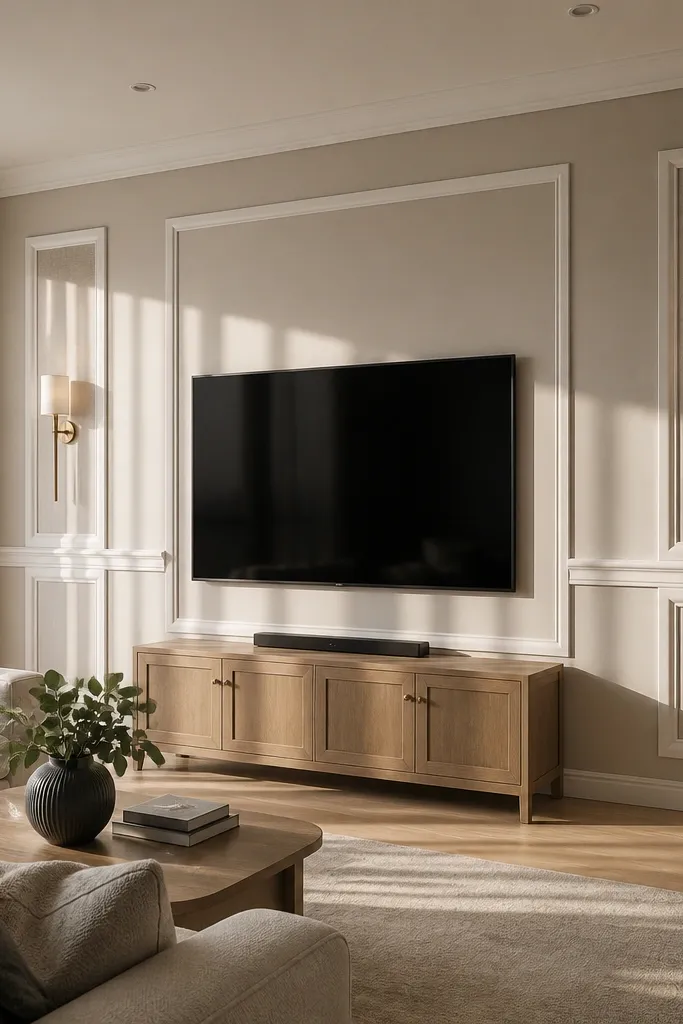
This style borrows from classic French interior rhythm: a strong horizontal band plus vertical “window” panels that visually stretch the wall. The TV sits inside a framed area, but the surrounding vertical rectangles keep the wall from looking like one flat box. It’s a great choice when your living room has existing chair rail or you want the wall to feel taller. The high-end look comes from consistent panel widths and crisp shadow lines between each vertical element. It suits medium to large living rooms where you can see the structure from several angles.
Step 1 — Pick a chair-rail height (commonly around 36 inches from the floor) and run a level horizontal moulding band across the wall. Step 2 — Build a centered TV surround below the band with a border frame, then add 3-5 vertical panels that split the space evenly left and right of the centerline. Step 3 — Use the same moulding thickness everywhere, keep panel gaps identical, then caulk and prime before painting.
Use a laser level for the chair-rail line; a 1/8-inch drift shows up instantly once paint dries.
Don’t vary panel widths to “use up scraps” — uneven paneling kills the French symmetry.
3. Mantel-Style French Surround with Scalloped Corners
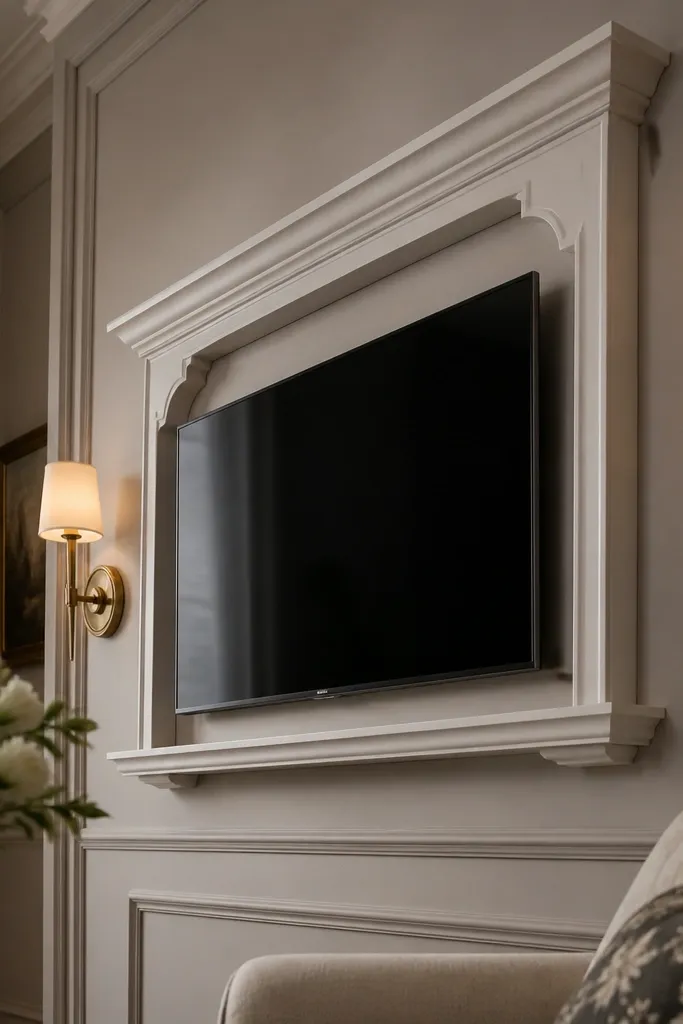
If you want the TV wall to feel like architectural furniture, this mantel-style surround is the move. The French look comes from the way the surround wraps the TV area, then softens at the corners with curved or scalloped trim pieces. It’s visually rich without going full baroque because the main structure stays simple and balanced. This is ideal if your room has a fireplace or mantel nearby and you want the TV wall to match that vibe. Expect a longer build because corners take careful measuring and filler work.
Editor's noteKeep a scrap card of your moulding thickness to check the reveal at every corner before you glue.
Step 1 — Set the TV centerline, then build a rectangular frame and add a thicker “mantel shelf” piece above it to create a horizontal crown. Step 2 — Install pre-made corner blocks or cut curved corner segments to connect the vertical sides to the top border cleanly. Step 3 — Add a lower trim band under the TV frame, fill gaps at corner seams, prime, and paint in satin for crisp edges.
Skip thisDon’t rely on spackle for corner seams that will be visible from across the room — use filler plus caulk for a smooth edge.
4. French Grid Panels with a Central Crown Medallion
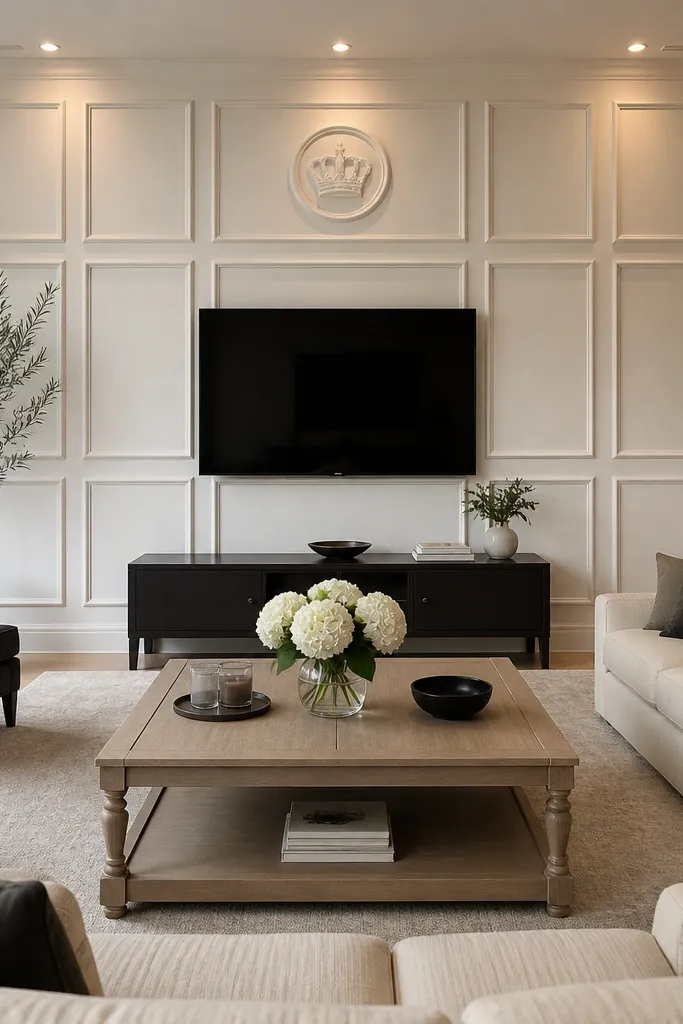
A grid wall reads expensive when it’s precise, and French grids are all about order. You frame the TV, then surround it with evenly spaced raised rectangles so the wall becomes a patterned surface. Place a small crown medallion above the TV center to pull the eye upward and make the composition feel intentional. This is a strong option for modern rooms with neutral décor because the moulding adds structure without changing your palette. It’s best for DIYers who can keep lines straight and measure twice.
Step 1 — Create a base rectangle around the TV with an outer border, then mark a grid of rectangles using consistent widths and gaps (choose one width and stick to it). Step 2 — Build each grid strip with MDF moulding strips, installing the perimeter first so inner pieces land square. Step 3 — Add the crown medallion centered above the TV, then fill seams, sand, prime, and paint with a satin sheen.
Number the grid lines on painter’s tape; it prevents the “which strip goes where” moment mid-install.
Don’t use random spacing — if the gaps aren’t uniform, the grid stops looking French and starts looking handmade.
5. Two-Tier Frame Surround with Inner Shadow Reveal
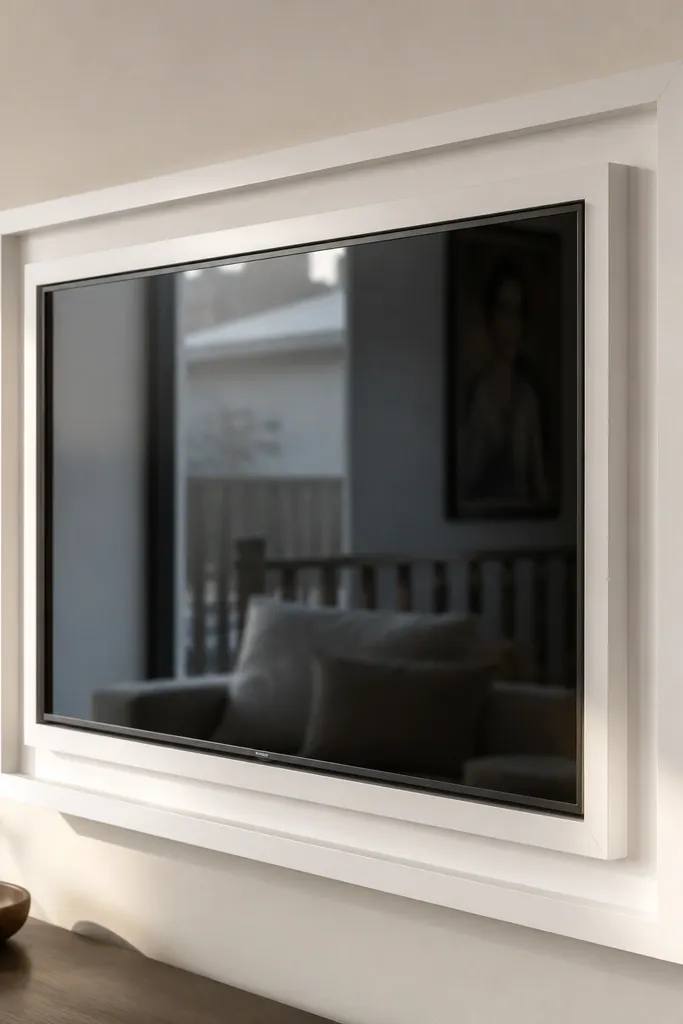
This is the high-end trick: layering frames so the inner border floats slightly and throws a deeper shadow. Instead of one border, you build two tiers — an outer frame and an inner frame — with a deliberate reveal between them. The TV area looks like it’s recessed into the wall, even though it’s all surface-mounted. It’s a great fit if you want a modern French look that still feels classic. The project looks clean when your reveals are consistent and your caulk lines are tight.
Step 1 — Build the outer frame first with MDF moulding set on a level grid around the TV. Step 2 — Install an inner frame using a second set of strips, leaving a consistent gap (a reveal) between inner and outer frames. Step 3 — Add a thin backing strip behind the inner frame if you want a stronger shadow, then caulk all frame edges and paint.
Cut spacer blocks from scrap MDF to keep the reveal gap identical while you glue the inner frame.
Don’t press the inner frame tight to the outer frame — you lose the shadow effect that makes it look expensive.
6. French Panel Boxes with Raised Center Insert
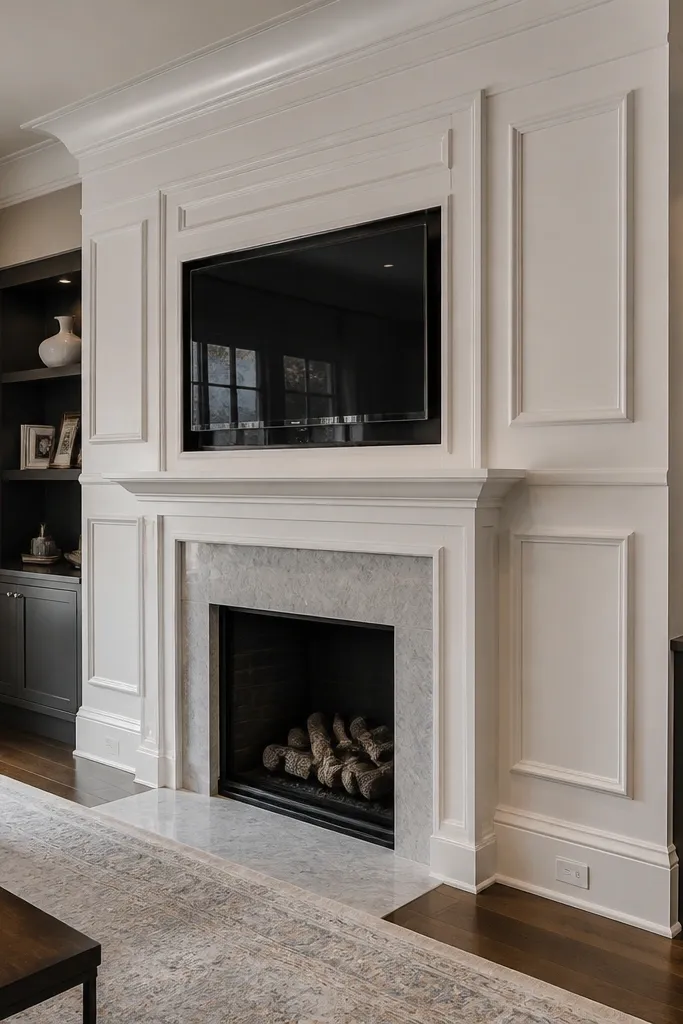
Panel boxes look luxe because they create multiple planes. You’ll build a surround that includes several raised rectangular boxes, then place a slightly taller raised insert behind the TV opening. This adds depth without needing heavy ornament. It’s perfect when your wall is plain and you want the TV area to read like a custom cabinet door. DIY difficulty is medium because you’ll be cutting and fitting several MDF pieces, but the steps are straightforward.
Step 1 — Frame the overall TV area with a border, then mark smaller rectangles inside the border for the boxes. Step 2 — For each box, build the outer edges first, then add the infill panel so the box has a raised lip. Step 3 — Create a taller center insert behind the TV opening using an MDF layer, then prime everything and paint in satin for clean highlights.
Use a straightedge and a router guide only if you’re comfortable; otherwise stick to flat MDF infill and focus on square edges.
Don’t skip sanding between primer coats — raised panel edges need a smooth transition or they look chalky under light.
7. French Arched Top Frame with Vertical Side Columns
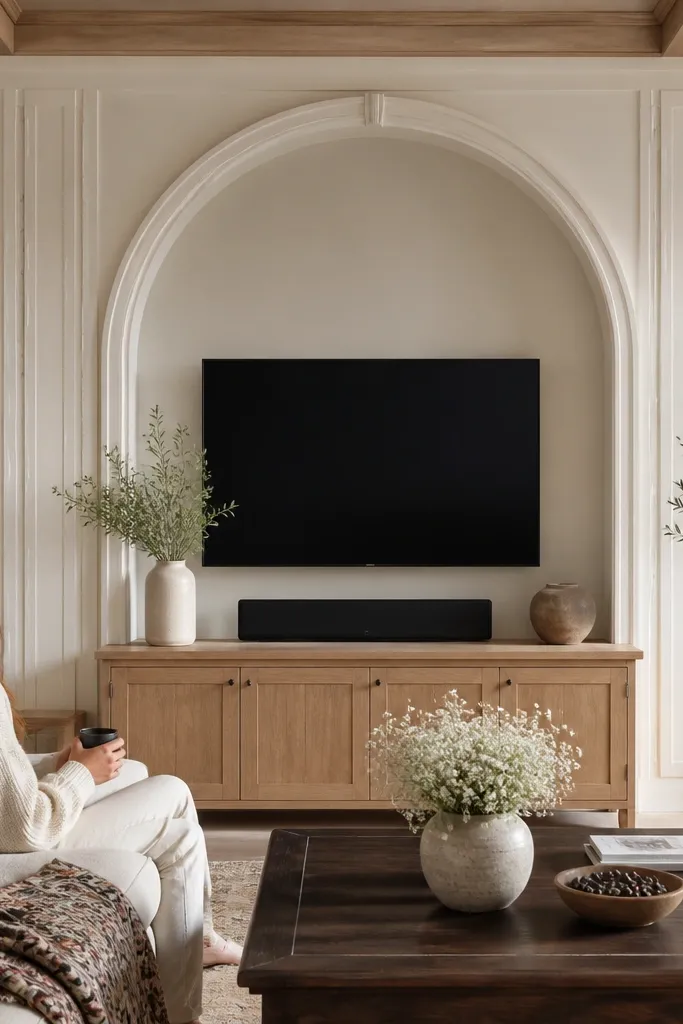
An arched top immediately reads French and gives your TV wall a focal flourish without clutter. The key is pairing the arch with straight vertical side columns so the overall shape stays balanced. This looks especially good when your TV is mounted at standard height and you want the wall to pull attention upward. It also works well in rooms with softer curves in décor, like rounded mirrors or arched lamps. Build time is moderate because curves require template cutting.
Step 1 — Build straight vertical side frames first, then measure the arch span across the top border and draw a template using cardboard. Step 2 — Cut the arched moulding pieces or use flexible MDF/radius trim if you have it, then secure the arch to the top frame. Step 3 — Add vertical column moulding strips down each side of the TV opening, then fill seams, prime, and paint.
Make the arch template twice — the second one is usually the one you trust for final cuts.
Don’t eyeball the arch height — a slightly off-centered arch looks crooked even if everything else is straight.
8. French Corner Pilasters Flanking a Center TV Panel
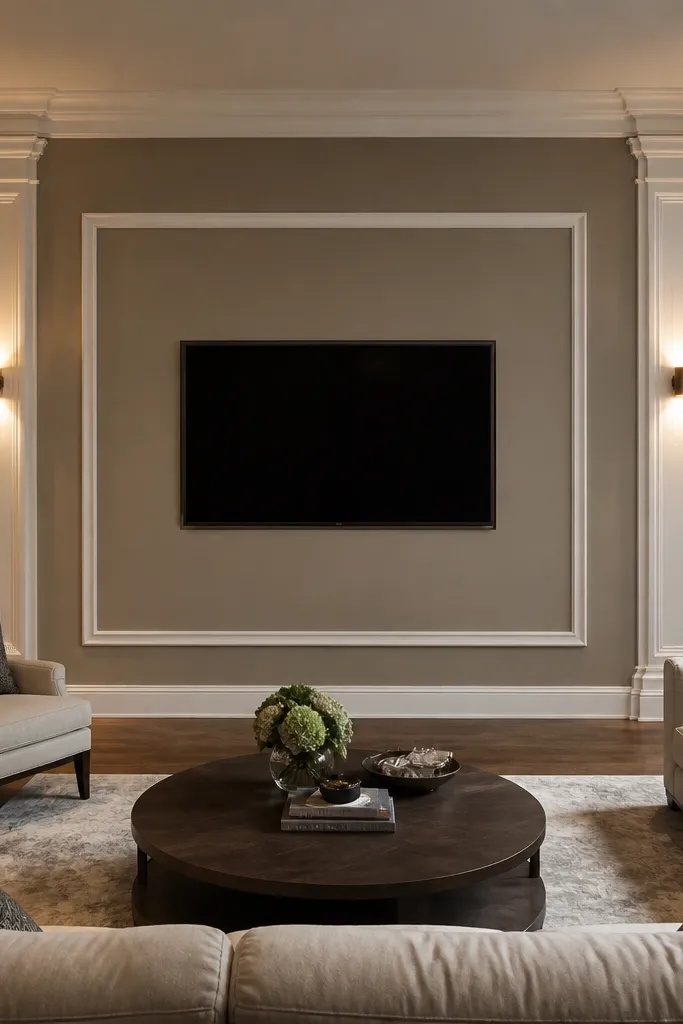
Pilasters add instant “palace hallway” energy because they read as structural columns. You keep the TV area simple with a central framed panel, then place pilaster-like moulding elements near the corners of the TV zone to frame it. This works when your room is longer or the wall has corners you want to emphasize. The look is high-end when the pilasters match the rest of your trim profile and the spacing feels intentional. It suits DIYers who want a dramatic result without building dozens of small rectangles.
Step 1 — Mark a central TV panel rectangle and build a border around it. Step 2 — Install pilaster moulding strips on both sides near the corners of the TV zone, keeping equal distance from the centerline. Step 3 — Add a top cap trim that ties the pilasters to the center frame, then caulk seams and paint in satin.
Use the same moulding profile for the pilaster bases and caps so the top and bottom read as one column.
Don’t mount pilasters too close to the TV frame — you need breathing room for the column silhouette.
9. French Scroll Bracket Detail Under TV Shelf
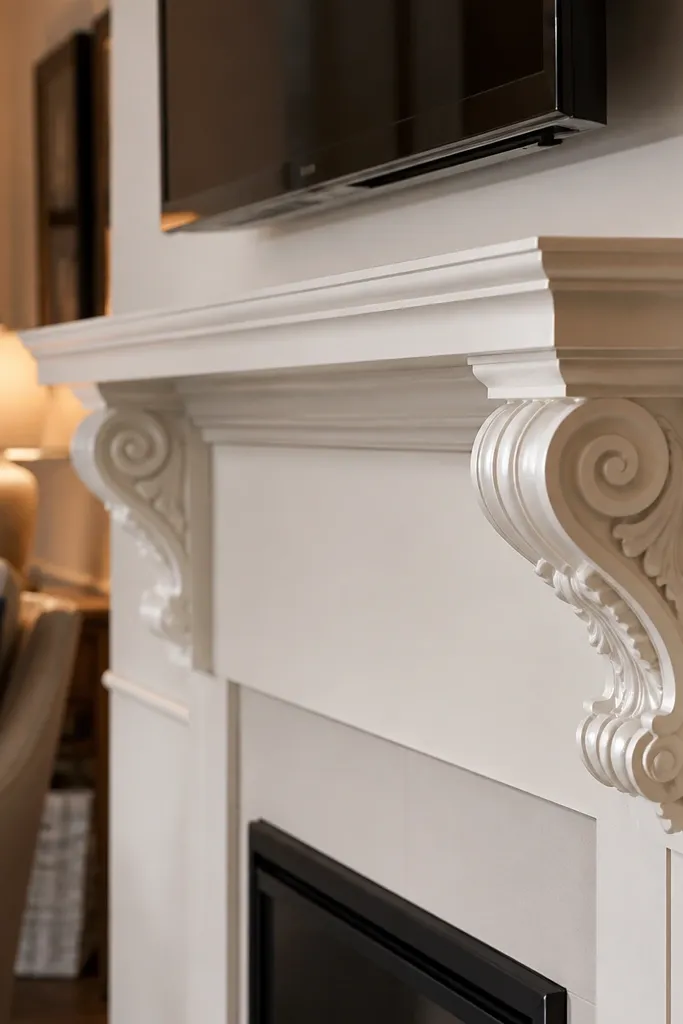
This is a “French furniture” approach: you make a TV shelf look like it belongs to a console table, then add scroll bracket details under it. The TV area gets a strong horizontal anchor, and the scroll elements add texture without turning the whole wall into a carved mess. This looks best when you can see the shelf from a standing height and when your room has some warm wood tones or classic metal accents. It’s medium difficulty, mostly because brackets need careful leveling and seam filling.
Editor's notePre-paint the shelf trim before install if you can — it reduces brush marks in tight corners.
Step 1 — Install a thick horizontal shelf trim above the TV center, leaving clearance for your TV mount and cables. Step 2 — Place scroll bracket pieces under the shelf at equal intervals, using a level and measuring from the centerline. Step 3 — Build a simple inner frame around the TV, then caulk bracket edges, prime, and paint.
Skip thisDon’t leave brackets uncaulked — tiny gaps around scrolls show up as dark lines after paint.
10. French Layered Crown Moulding Frame Around TV
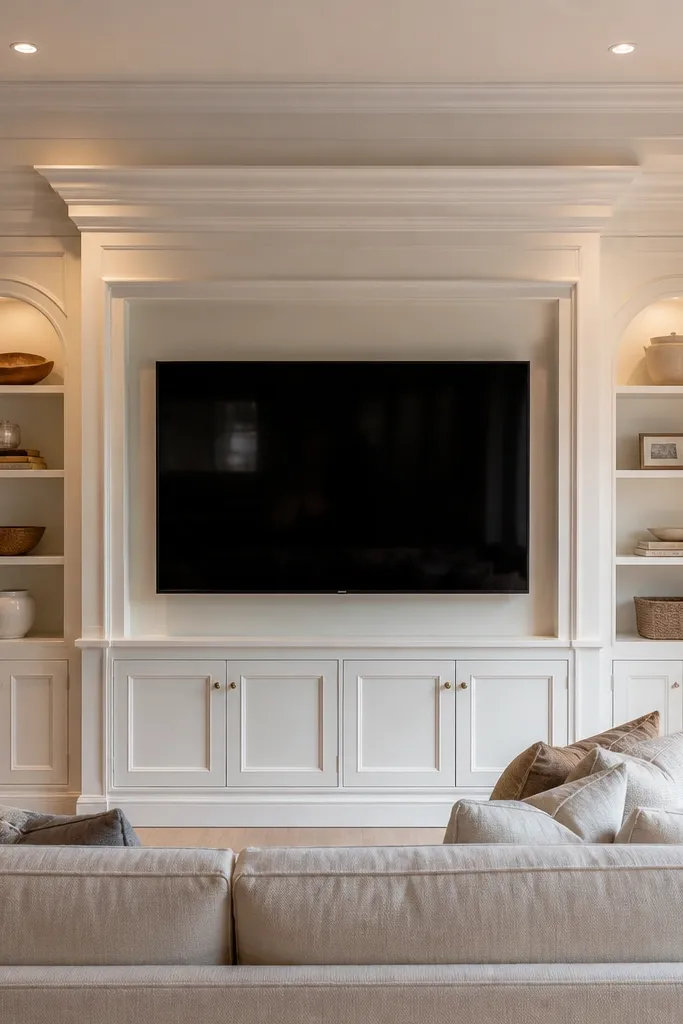
If you already have crown moulding elsewhere in the room, this approach makes the TV wall feel like it belongs to the same architecture. The TV surround uses layered crown-style trims on the top and sides, then closes with a boxed inner opening. It’s photogenic because the top layer throws a dramatic shadow line. The look is best in living rooms with higher ceilings or where you want the TV wall to feel like a statement panel. Build difficulty is medium: you’re cutting miters carefully and keeping the layers aligned.
Editor's noteUse a stop block on your miter saw so repeat cuts stay identical for each side layer.
Step 1 — Build the inner boxed frame first around the TV, keeping the opening clean and square. Step 2 — Add the crown-like trim layers on top and sides, aligning the profile height so the top overhang matches left and right. Step 3 — Fill miter gaps, caulk the outer edges, prime, and paint with satin to highlight the profile.
Skip thisDon’t stack layers with mismatched heights — one side will read taller even if it’s only 1/8-inch.
11. French Raised Rectangle Columns on Either Side of TV
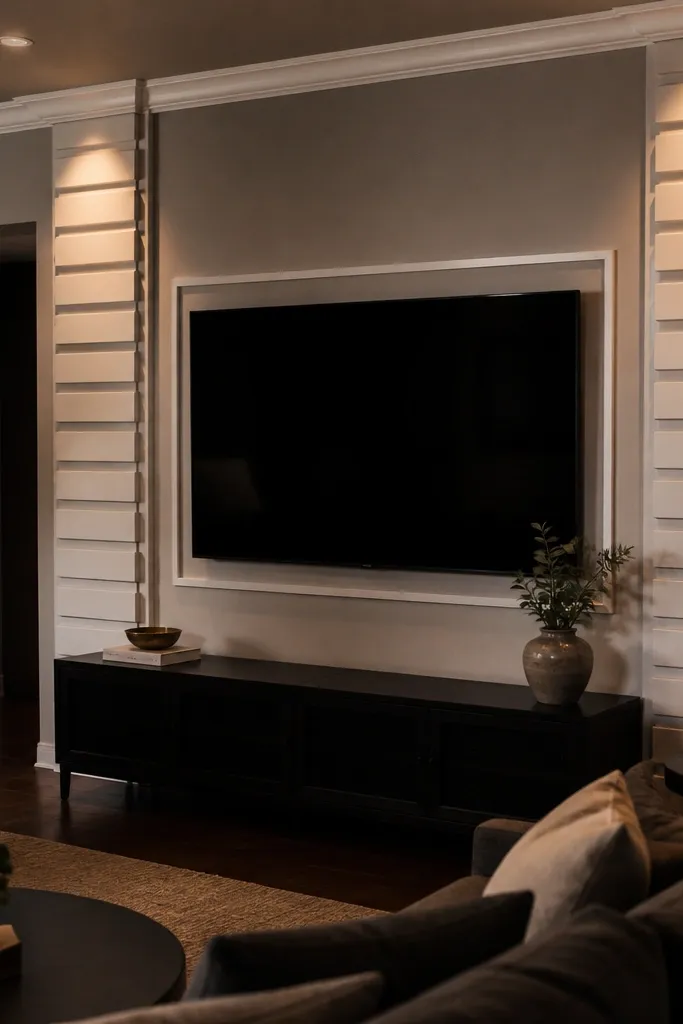
This idea gives you a French look with less carving and fewer ornate pieces. You install a thin border frame around the TV area, then build two vertical “columns” made from stacked raised rectangles. The rectangles catch light in bands, which makes the wall look tailored. It’s great for modern living rooms where you want French structure without scrollwork. The build is approachable: measure, cut, and repeat the same rectangle stack on both sides.
Editor's noteCut all rectangle pieces from one batch and label them left or right so you don’t mix sizes mid-stack.
Step 1 — Frame the TV with a thin MDF border moulding, then mark two column zones on left and right. Step 2 — Build each column from three or four stacked raised rectangles with equal gaps, using the same moulding strip width each time. Step 3 — Finish by caulking around every rectangle edge, priming, and painting.
Skip thisDon’t let the rectangle gaps vary — identical gaps are what make it look designed, not DIY.
12. French Arched Panel Grid with Small Center Rosette
This is a classic French pattern but scaled for a TV wall. You create an arched panel grid around the TV area, then add a small rosette detail at the top center to pull the eye. The arched segments make the wall feel more decorative than a straight grid, and the rosette keeps it from looking like a generic panel job. It’s especially pretty in rooms with warm lighting, because the shadows soften along the curves. Difficulty is medium-high due to arc templates.
Editor's noteUse a flexible tape measure to check the arc symmetry from both sides, not just the center.
Step 1 — Build the outer border around the TV zone, then create an arched panel template with cardboard and transfer it to MDF. Step 2 — Install the arched panel strips in a symmetrical layout, keeping equal distances from the TV centerline. Step 3 — Add the rosette above the center, then fill seams, prime, and paint in satin.
Skip thisDon’t skip dry-fitting the arches — once you caulk and paint, uneven arcs are permanent in the light.
13. French Shadow-Box Surround with Recessed Infill Panel
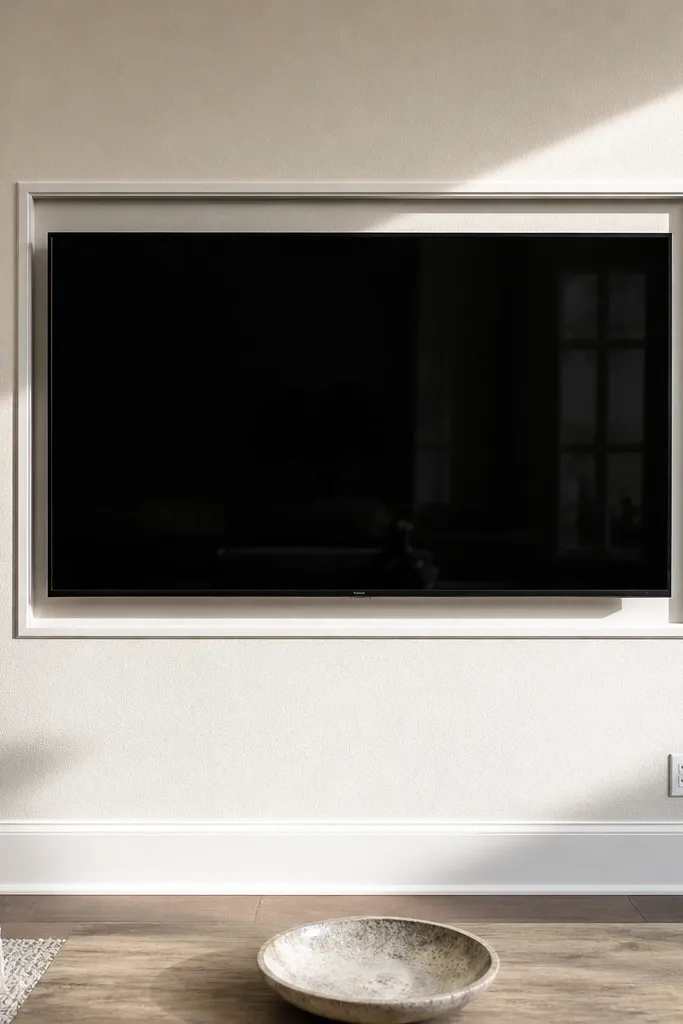
A shadow-box surround looks high-end because the TV area reads recessed. You build a French-style outer frame, then recess the infill panel so you get a darker inner shadow line. This is great when your wall has slight texture — the recessed panel hides it, and the moulding edges look razor-sharp. The style is clean and modern-French, with less ornament and more depth. Build time is medium because you need accurate recess depth and careful fastening.
Editor's noteTest your recess gap with a scrap strip — the reveal should be visible from across the room, not just under your nose.
Step 1 — Install the outer moulding frame and keep it perfectly level and centered around the TV. Step 2 — Recess the inner infill by using additional backing strips or setting the infill panel slightly behind the frame face to create a shadow gap. Step 3 — Caulk the frame edges, prime the entire assembly, then paint with satin for a crisp inner highlight.
Skip thisDon’t use thin, flimsy infill panels — they bow and ruin the shadow line.
14. French Double-Panel Border with Bottom Valance Strip
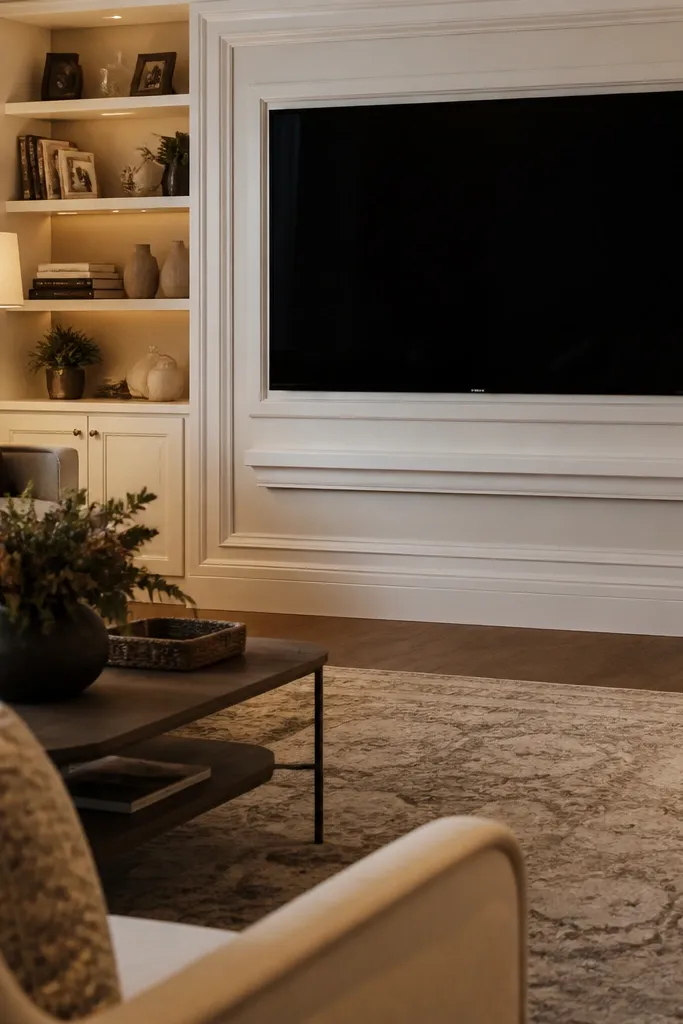
This one is all about the base. You frame the TV with a double border so the wall has a layered look, then add a bottom valance strip that stops the composition from floating. The French feel comes from the bottom trim — choose a profile with a gentle curve or small bead-like detail so it reads refined. It’s a strong choice for living rooms where the TV sits slightly lower and you want to visually ground it. The build is straightforward: repeat the same border line thickness and keep the valance centered.
Step 1 — Build a main outer frame around the TV area, then add a second inner border line with a consistent gap. Step 2 — Install a bottom valance strip across the width of the TV surround, centered and level, using a profile that matches your wall trim. Step 3 — Fill and caulk every joint, prime thoroughly, then paint.
Use painter’s tape as a temporary guide line for the valance so it doesn’t drift while you glue.
Don’t choose a valance profile that’s too tall — it will overpower the TV and look crowded.
15. French Vertical Lattice Panels with Center TV Frame
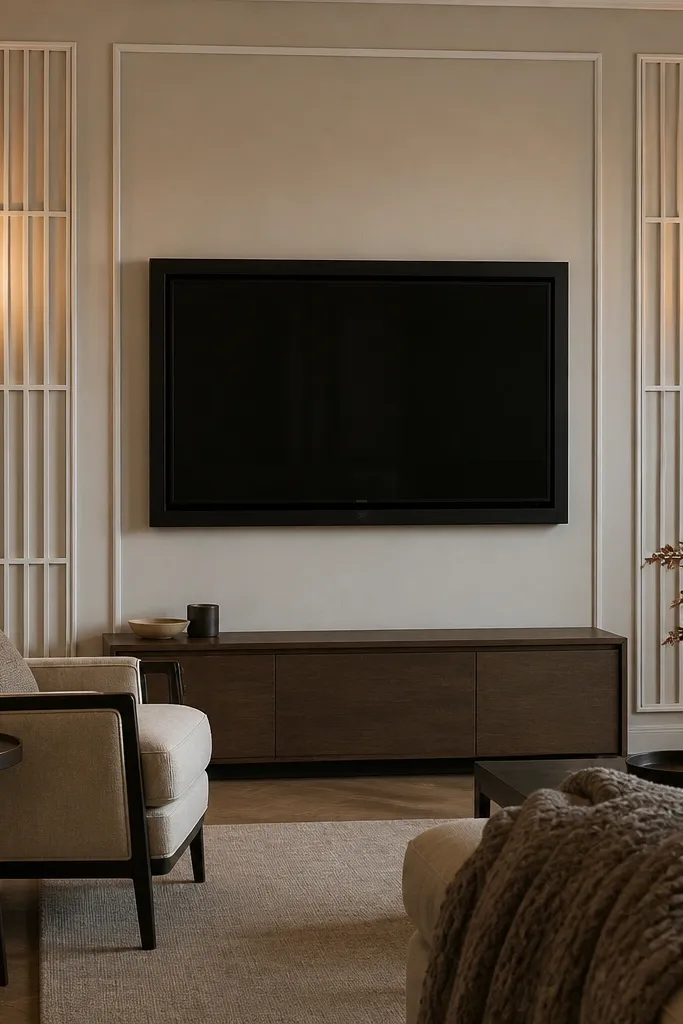
Lattice reads French when it’s controlled and symmetrical. Here, you keep a centered TV frame and build lattice-like vertical elements on both sides to create a decorative wall texture. The lattice adds movement because the thin strips throw narrow shadows, which looks especially good under warm lighting. This is a good pick if you want the wall to feel custom but you don’t want heavy carving. It suits DIYers who are comfortable repeating cut pieces and keeping strip spacing consistent.
Step 1 — Frame the TV opening with a simple border, then mark side zones for lattice panels. Step 2 — Install vertical strips spaced evenly, then cap the lattice top and bottom with matching horizontal trims. Step 3 — Caulk along the strip edges, prime, and paint in satin for sharp shadow definition.
Make a spacing jig from scrap plywood so every vertical strip lands at the same gap.
Don’t skip a top and bottom cap — open lattice strips look unfinished and sloppy.
16. French Corner Scroll Panels with Minimal Center Frame
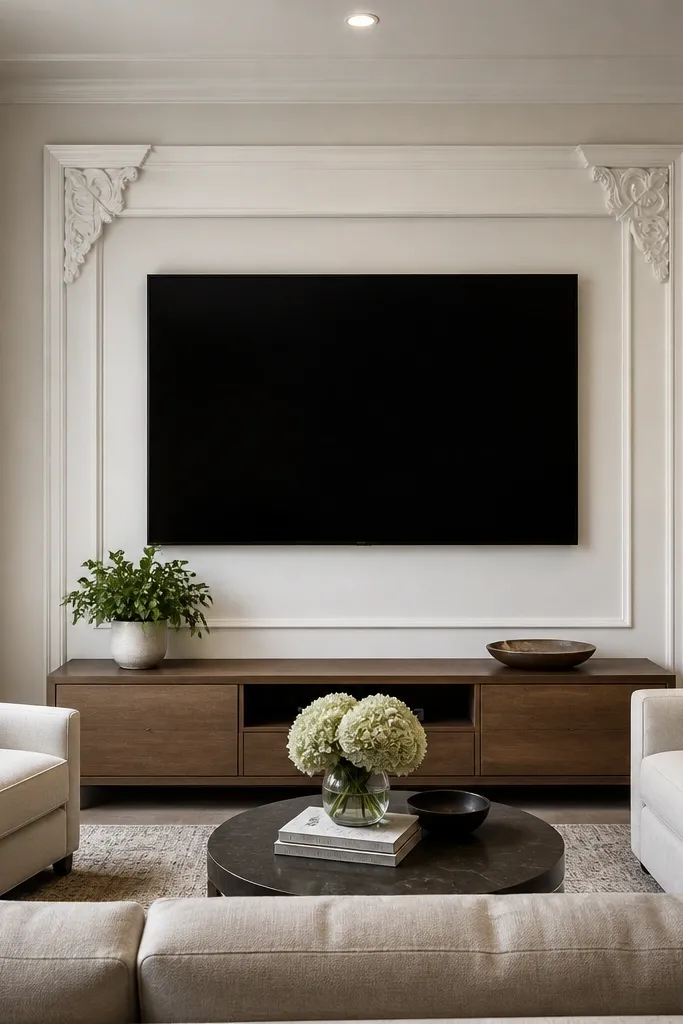
If you want French ornament but you hate the clutter look, place it where it belongs: corners. This design keeps the TV center frame clean and adds scroll-like corner panels only at the top corners of the surround. That creates a “designed” feel without turning the wall into a pattern explosion. It photographs well because your eye lands on the TV first, then catches the corner detail. Skill level is medium because corner pieces need precise alignment and filling.
Step 1 — Build a straightforward centered frame around the TV using MDF moulding and keep the border width consistent on all sides. Step 2 — Install pre-made corner scroll panels or cut corner ornament shapes, aligning them to the top border and to each other. Step 3 — Caulk and fill seams carefully, prime, then paint with satin so the scroll edges stay crisp.
Dry-fit corner ornaments with tape before any glue — you can adjust millimeters and avoid crooked symmetry.
Don’t place ornaments too low — if the scrolls sit near the TV, the wall reads heavy and busy.
17. French Panel Border with Small Beaded Rope Trim
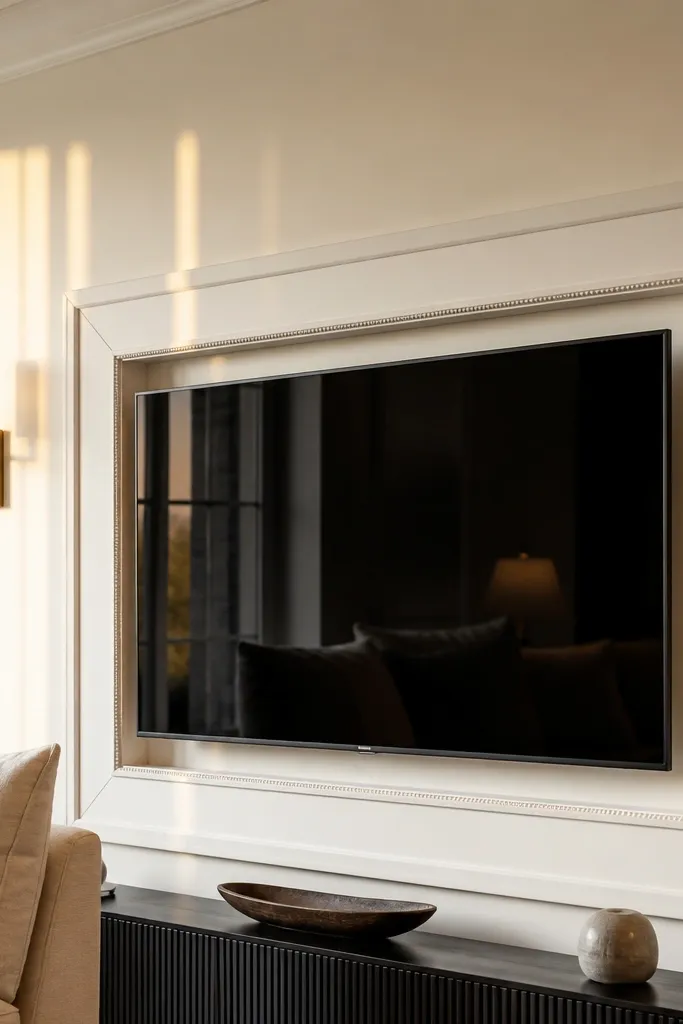
Beaded rope trim gives you that French boutique look because it creates a fine highlight line along the moulding. The trick is using it as an accent around a larger, simpler panel frame, not as the main structure everywhere. Your TV sits in a clean rectangular opening, then the beaded rope traces the inner boundary so the light catches the bead edges. This works great when your room is already modern and you want a refined texture without big profiles. It’s medium difficulty due to careful cutting and matching bead ends.
Editor's noteLabel your trim pieces by side (top, bottom, left, right) so your bead pattern lines up.
Step 1 — Build the main TV frame with standard MDF moulding, then reserve the inner border line for the beaded rope trim. Step 2 — Cut the beaded rope trim with clean miters and test-fit around the opening before fastening. Step 3 — Caulk only along the back edges where needed, prime, then paint; satin paint makes the bead line pop.
Skip thisDon’t rush miters — sloppy bead ends read instantly on a white wall.
18. French Tall Window Panels with a Centered TV Niché
This one makes the TV feel built-in. You create tall vertical panels that run up and down the wall area, then carve out a recessed niche where the TV sits. The “French” part is the vertical panel rhythm plus a framed niche border that looks like a window. It’s ideal for rooms with higher walls where you want the TV zone to feel grand. The look is high-end because the recessed niche hides cables and gives you a clean shadow outline around the TV.
Step 1 — Mark a niche rectangle around the TV and build the niche border frame first. Step 2 — Install tall vertical moulding panels on both sides of the niche, using equal spacing and matching moulding profiles. Step 3 — Recess the niche interior with backing and infill so the TV area sits behind the frame face, then caulk, prime, and paint.
Keep the niche recess shallow enough that your TV mount still has full screw access after backing goes in.
Don’t make the niche border too thin — a thin border makes the recess look like a mistake instead of a design.
19. French Stacked Half-Panels with Side Accent Frames
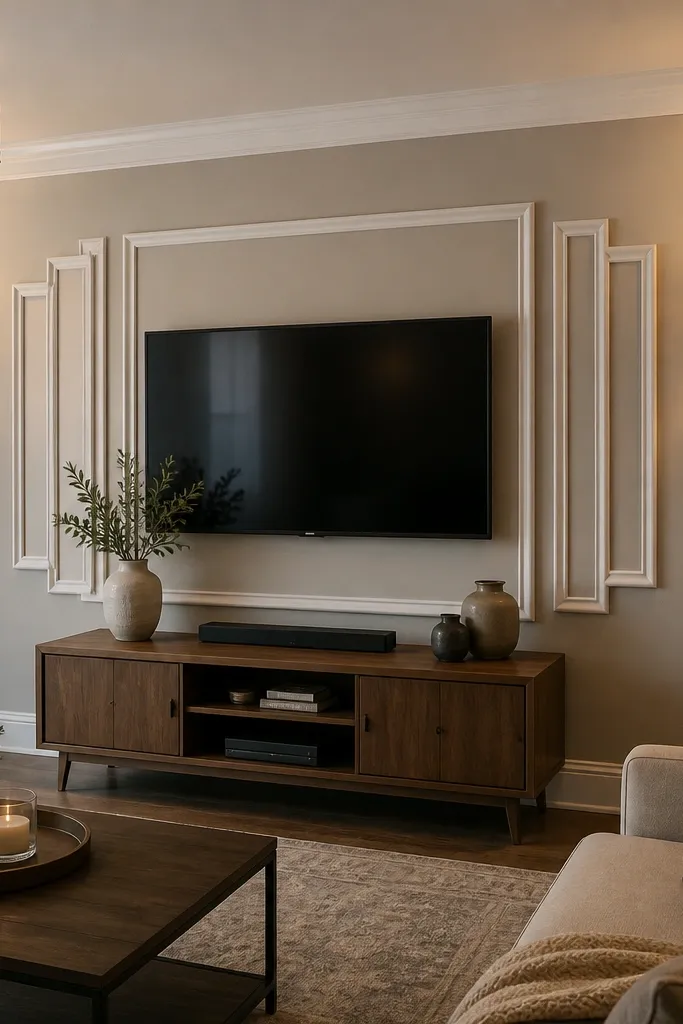
This is a smart way to get a layered French look without building an entire wall grid. You install a central TV frame and add stacked half-panels on each side, like shortened vertical panels that sit in layers. Then you add small accent frames near the outer edges to keep the symmetry and make the wall feel complete. It’s photogenic because the half-panels create staggered shadow bands. This works well in mid-size living rooms where you want detail but not full coverage across the wall.
Editor's noteUse one cutting plan for both sides so your half-panel stack lands at the same height on both left and right.
Step 1 — Frame the TV opening with a main border and decide the half-panel height (two stacked halves look best). Step 2 — Build the left and right half-panels using the same moulding strip width and equal gaps, then add small accent frames at the outer edge of each side zone. Step 3 — Caulk seams, prime, and paint in satin to highlight the layered shadows.
Skip thisDon’t change moulding thickness between the main frame and half-panels — it breaks the “one system” look.
20. French Symmetric Window-Style Frame with Top Crest
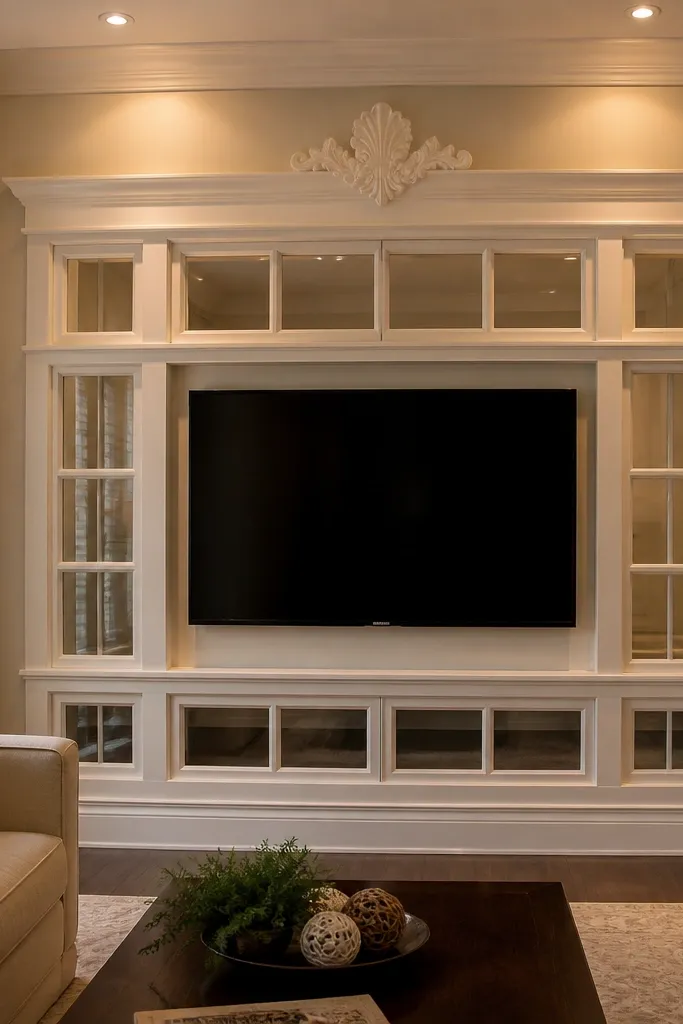
Window-style framing is French because it mimics the shape logic of traditional wall openings. You build a symmetrical frame around the TV that feels like a large window, then add a small crest element at the top center. The crest is the finishing touch that makes it look like a custom interior panel rather than a trim job. This looks best when your TV is centered on a clear wall and you have enough vertical space for the crest to breathe. Build difficulty is medium because you need clean symmetry and careful crest placement.
Editor's noteCenter the crest using the TV centerline, not the wall center if the TV is offset on the wall.
Step 1 — Frame the TV area like a window with top, sides, and a bottom sill trim, keeping the border widths consistent. Step 2 — Add vertical mullion strips inside the frame if you want the window effect, using equal spacing. Step 3 — Install a crest at the top center, then caulk and fill, prime, and paint in satin.
Skip thisDon’t pick a crest that’s too wide — a crest wider than the TV frame makes the TV look smaller.



