
1. Cast-iron style floor lamp with linen drum shade
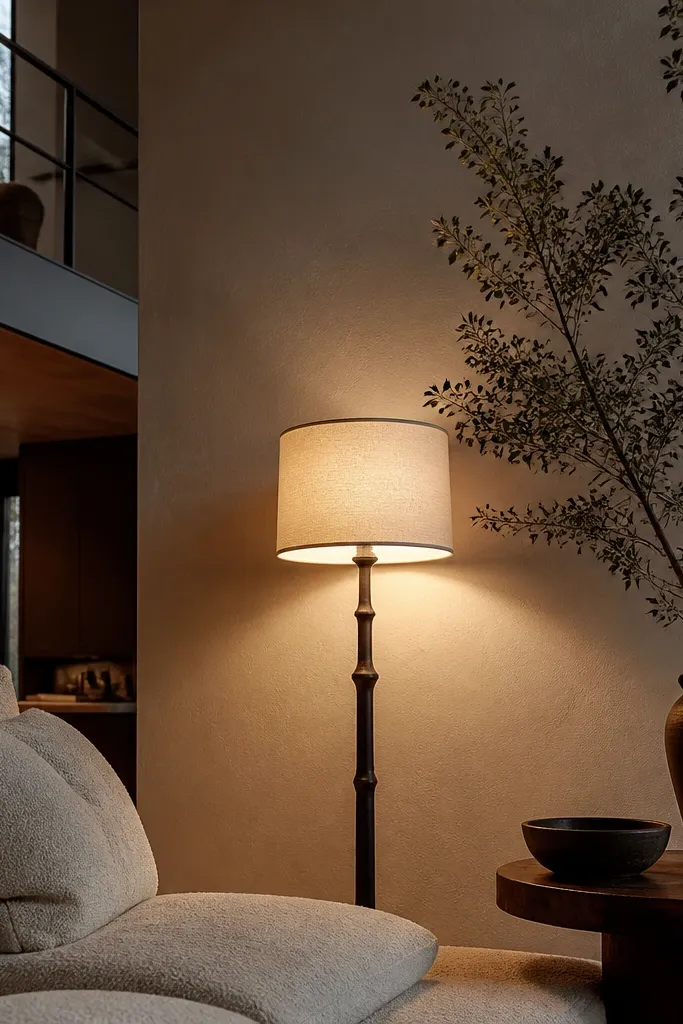
A tall drum shade is one of the cleanest ways to add a warm “base layer” in a double height living room. The shade spreads light softly, so it fills the lower half of the space without creating harsh hotspots on the wall. Choose a shade in off-white linen or thick cotton — the color should read creamy, not gray. Pair it with a bronze or black metal stem so it looks high-end against stone, wood, or dark trim. This is a strong DIY win because you’re mostly matching materials and proportions, not building complex optics.
Start by measuring from your sofa seat to the top of the shade — aim for the shade’s bottom edge around 18-24 inches above the sofa seat. Pick a lamp with a 12-18 inch diameter shade so the beam looks balanced in a tall room. Place it 18-30 inches from the main wall you want to brighten, then plug into a switched outlet or add a plug-in dimmer for control. Finally, use a 2700K dimmable bulb and test the glare by sitting down and checking what you see through the shade.
Editor's noteIf the shade looks too bright in photos, swap to a slightly warmer bulb (2700K) and lower the wattage rather than changing the lamp.
Skip thisDon’t choose a tiny 9-inch shade — it disappears in a double height room and leaves the bottom half dark.
2. Wall-wash track system aimed at artwork and textured panels
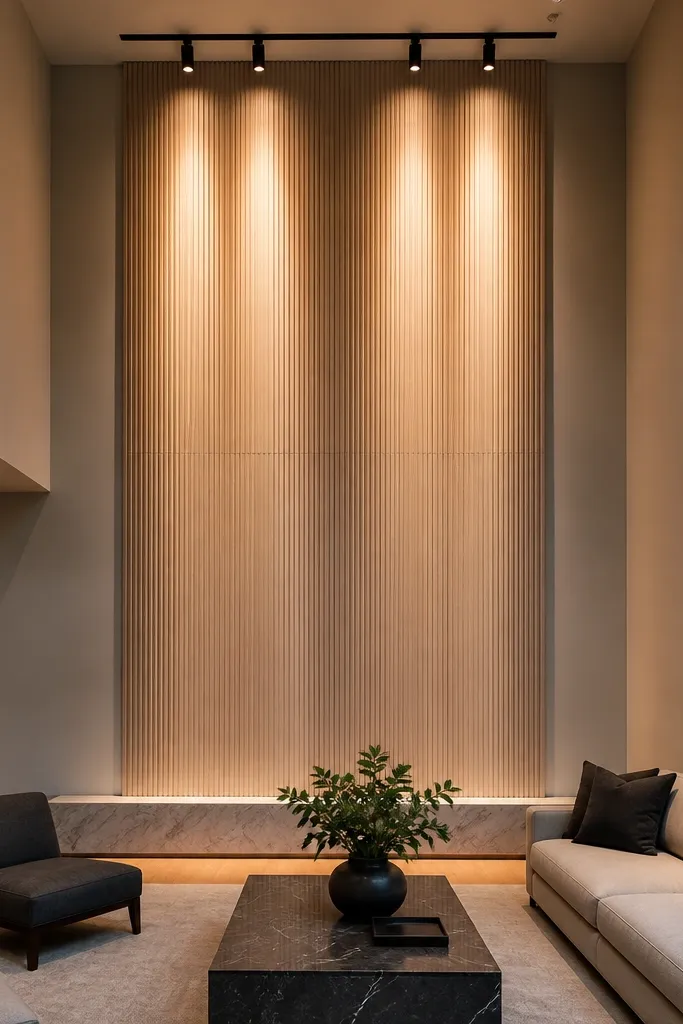
Track lighting looks expensive when it’s aimed like a spotlight and spaced like a wall wash, not when it’s just “mounted somewhere.” For double height rooms, you want the light to travel across the wall face so the vertical surfaces glow and the room feels dressed. Use it to highlight architectural texture like fluted plaster, wood slats, or stone — the light should reveal depth, not outline the whole room. This idea also gives you flexibility: adjust heads to fine-tune where the brightness lands as your furniture changes.
Pick a black or brushed nickel track that mounts flush to the ceiling or ceiling beam and choose heads with adjustable tilt. Layout matters: install the track so each head lands around 24-36 inches apart across the wall’s width. Aim each head slightly downward and inward so the brightest part lands at about eye level on the wall, then extend up to the higher section. Use 2700K bulbs, then dim and adjust until the texture looks glossy, not blown out.
Editor's noteTape a strip of painter’s tape on the wall to mark where the hotspot lands, then adjust the head before you tighten anything.
Skip thisSkip random aiming — if the hotspot hits blank paint without texture, the wall looks uneven and cheap.
3. Linear LED cove lighting behind top trim
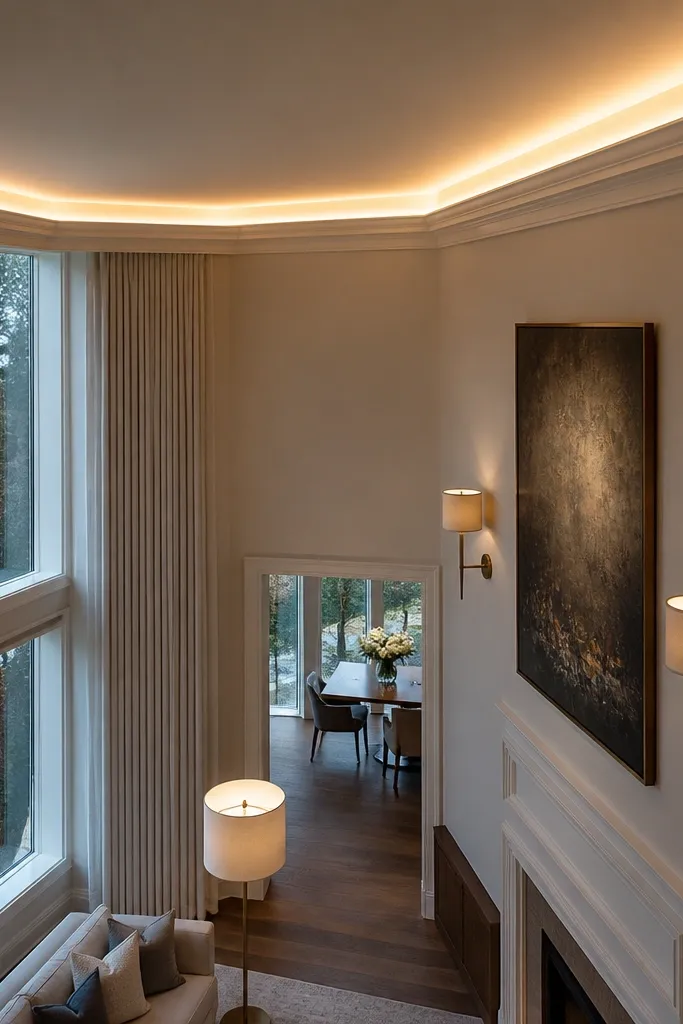
A cove line behind a top trim makes double height feel intentional because it creates a “floating ceiling” effect. The light bounces off the upper surfaces and softens shadows, so the room looks layered even when you turn off the main fixture. Use warm LED strips with a frosted diffuser so the glow reads as a continuous ribbon, not a row of dots. This is one of the most photogenic options because cameras love smooth gradients — your photos look clean instead of patchy.
Cut or install a cove channel along the perimeter at the top trim line, leaving enough depth for a diffuser. Use a 24V LED strip with a diffuser cover and aluminum channel for heat management. Start by dry-fitting the diffuser, then run low-voltage wiring to a driver mounted in an accessible spot. Test power before closing everything up, then seal gaps with paintable caulk so light doesn’t leak in ugly lines.
Use a diffuser rated for “frosted” or “opal” so you don’t see LED points from the sofa.
Don’t mount the strip too close to the opening — if the diffuser is tight, you’ll see glare edges in photos.
4. Large-scale chandelier with dimmable warm bulbs
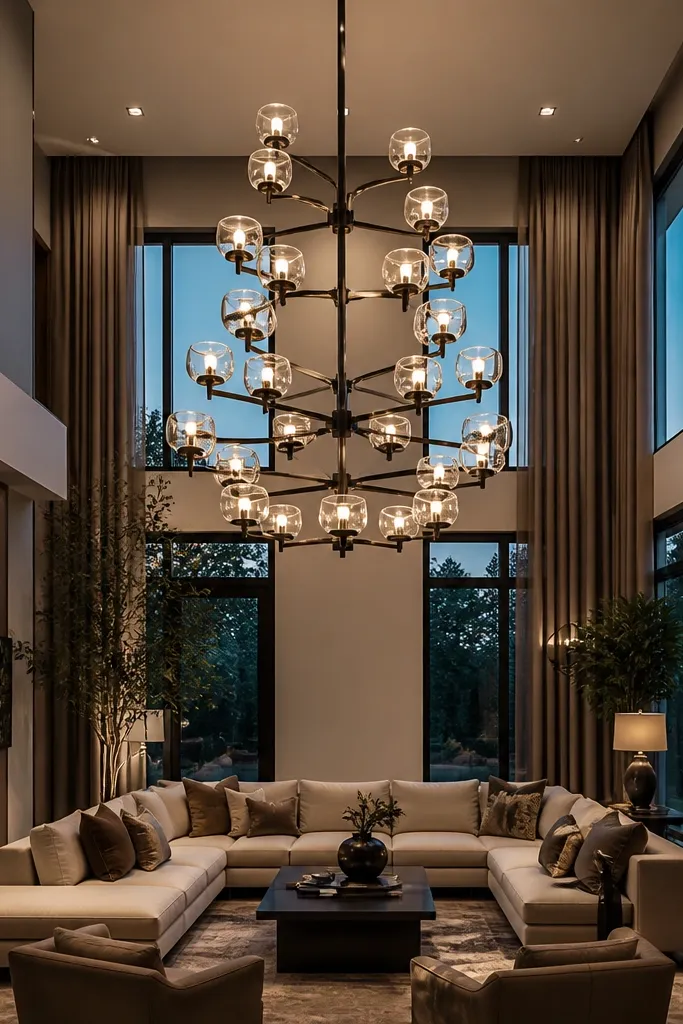
A chandelier works in double height when it’s scaled to the room and hung at a height that respects the vertical space. The goal is to anchor the eye without turning the center into a glare bomb. Choose a design with warm metal tones (blackened bronze, brushed brass, or matte black) and glass that diffuses light — clear glass can look too sharp. Dimmable warm bulbs are non-negotiable because double height rooms look best when the chandelier glow softens instead of blasting.
Measure the room and pick chandelier size using simple geometry: add room length and width in feet, then convert to inches for a rough diameter target. Hang it so the bottom of the fixture sits about 8-10 feet above the floor in the main seating zone. Install a dimmer rated for your bulb type and test with dimmed settings before finalizing bulb choice. Use 2700K dimmable bulbs and adjust any hanging chain length so the fixture reads centered from the sofa.
Editor's noteIf you’re unsure about scale, choose a wider fixture with fewer, larger elements instead of a tall skinny one.
Skip thisDon’t hang it at ceiling height — it looks like an afterthought and kills the vertical drama.
5. Pendant cluster over a floating console or seating nook
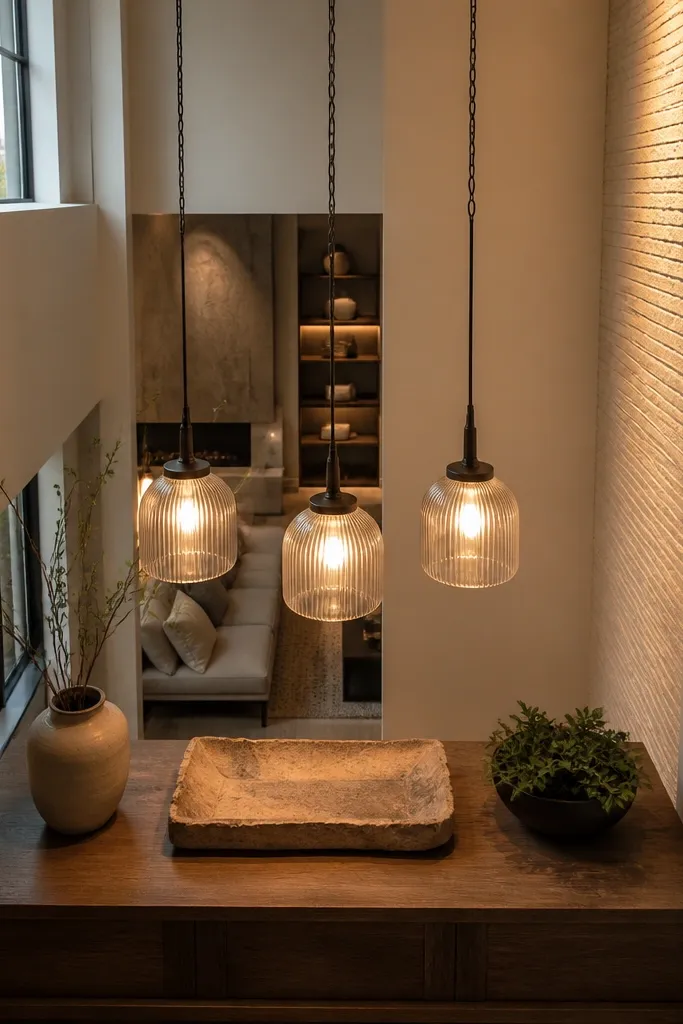
Pendant clusters give you a controlled “mini skyline” inside a double height volume. When you place them over a console, reading nook, or low credenza, you create a visual anchor that looks designed from multiple angles. The key is spacing: the pendants should feel intentional, not like random drops. Use matching glass shades or consistent metal finishes so the group reads as one object, then dim to create cozy contrast.
Pick three pendants with the same canopy finish and similar shade diameter. Hang the lowest pendant so it sits roughly 30-36 inches above the console surface, then keep the top pendant about 8-12 inches higher than the middle one for a gentle curve. Use a ceiling junction box that supports the total weight and run wiring cleanly in the canopy. Choose 2700K dimmable bulbs and set dimmer control so you can hit a low mood without flicker.
Use equal spacing between pendant centers — mark it with a tape measure on the ceiling before installing canopies.
Don’t mix different bulb colors or shade materials — the cluster looks mismatched even if the pieces are expensive.
6. Recessed uplights in floor-level niches
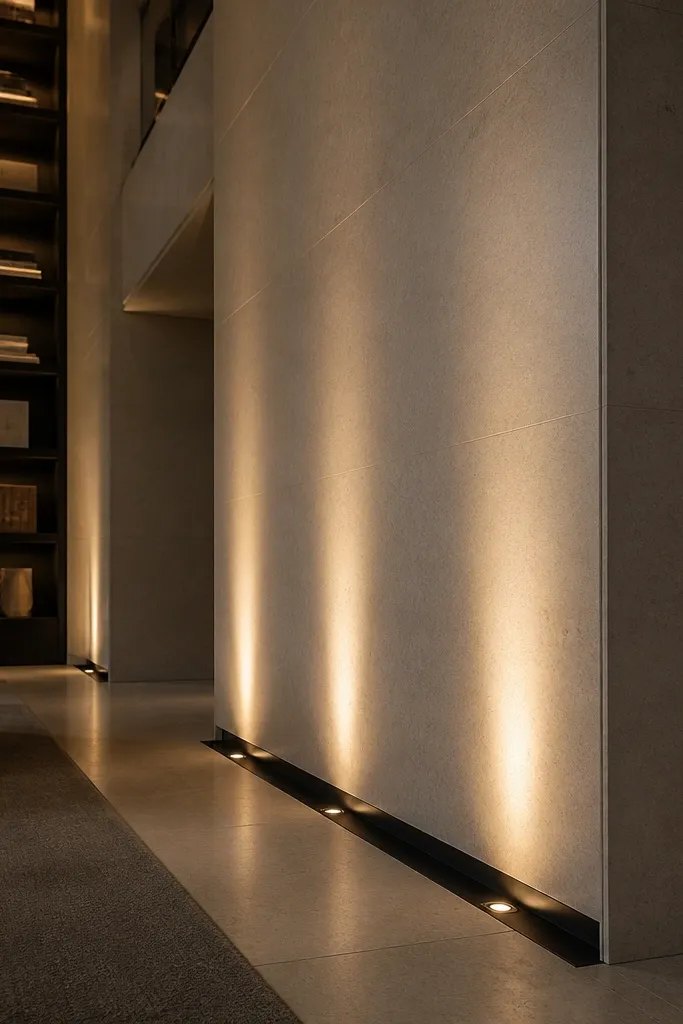
Uplights from low niches make double height rooms feel taller because they send light upward in a clean line. This is a “quiet luxury” move: it’s not flashy, but it looks expensive in photos because the glow is smooth and controlled. Put them near architectural edges — columns, bookshelves, or the base of stair openings — so the light outlines structure. Use warm LEDs and aim for a soft wash on the wall or ceiling rather than a direct glare beam.
Create or buy small floor-level niches at the base of the wall feature where you want vertical glow. Install recessed uplight fixtures with adjustable aim and use a 2700K LED module. Aim each uplight so the top of the glow hits the lower ceiling zone, not the very highest point. Wire to a dimmer and test the angle from the sofa to confirm you don’t see the LED source directly.
Editor's noteIf the wall is glossy, reduce brightness by using fewer uplights instead of aiming harder.
Skip thisDon’t place uplights too close to the wall edge — it creates a harsh line instead of a wash.
7. Stairwell wall sconces with warm glass shades
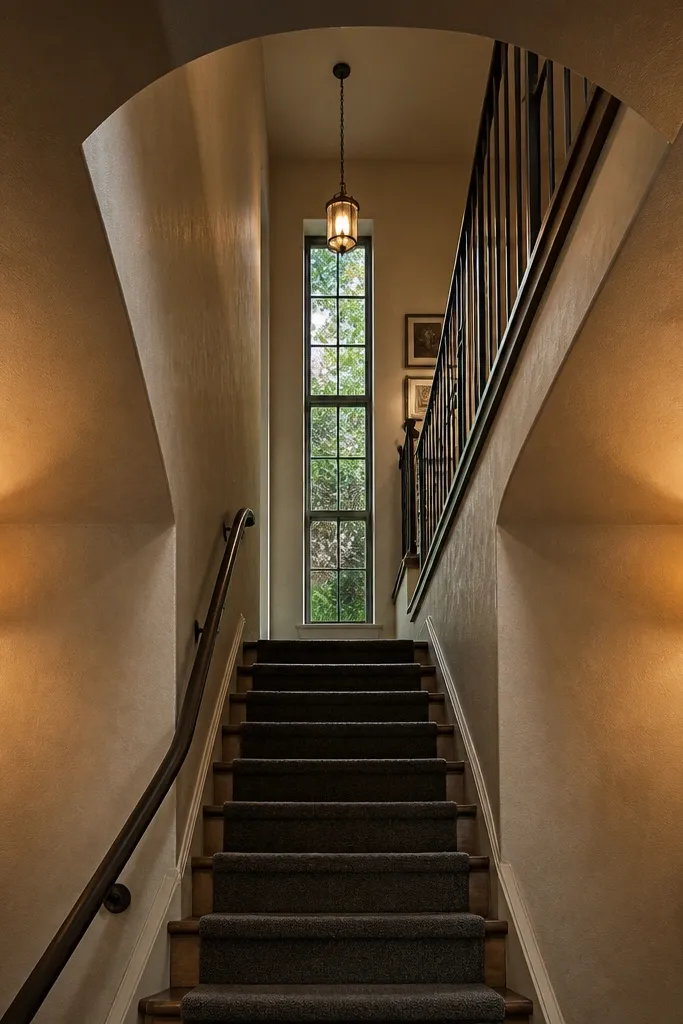
When a double height room has a stair opening, lighting that vertical circulation is what makes the whole space feel cohesive. Sconces with warm glass shades add a gentle, traditional glow that looks high-end without feeling outdated. Position them so the light hits the wall and the underside of the stair area, creating a soft gradient from mid-height to higher levels. This idea is also practical: it reduces shadowy corners that make the room feel unfinished.
Choose wall sconces with glass shades that diffuse light and a finish that matches your hardware. Mount at a height where the center of the shade sits around 60-66 inches from the floor for the main level. If you have two levels, add a second pair aligned to create a consistent vertical rhythm. Use dimmable bulbs at 2700K and confirm the wiring route before you mount so you don’t end up with ugly surface cords.
Editor's noteMatch sconce metal finish to your chandelier or hardware so the lighting looks like one design system.
Skip thisSkip open-bulb fixtures here — they glare through the stair opening and look harsh.
8. Backlit bookcase shelves with warm LED strips
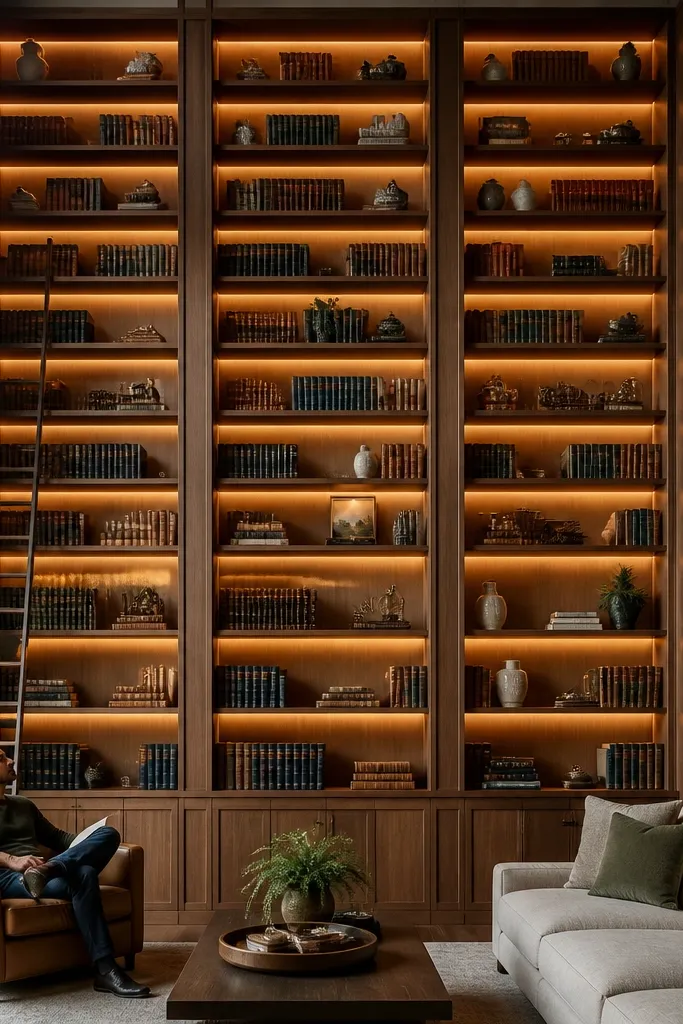
Double height living rooms often have tall shelving, and backlighting it turns a storage wall into a design feature. Warm LED strips behind shelves make books look richer and create a glow that softens the entire wall. The aesthetic payoff is big because the light changes how you perceive the room depth — shelves look like they’re floating. Use a diffuser so you get a continuous bar of light that doesn’t show LED dots.
Install aluminum channels behind the shelf surface and attach 24V LED strips with an opal diffuser cover. Cut wire runs neatly along the inside edges and route to a driver placed in a cabinet or rear access panel. Test the full brightness before closing the back or fastening fixed panels. Then set dimmer levels so the shelves glow at low mood without washing out your decor colors.
Editor's noteUse a strip density and diffuser meant for “no hotspots” so the light looks even across the shelf length.
Skip thisDon’t use bright white LEDs — 4000K makes books look flat and the room feel cold.
9. Oversized pendant with architectural canopy and textured shade
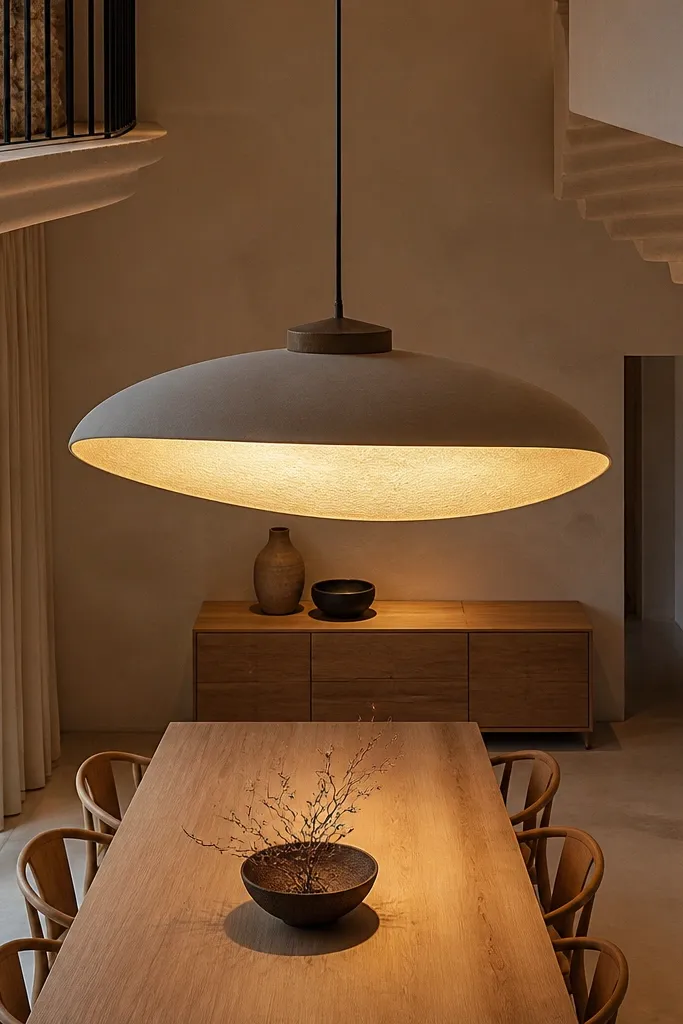
If you want a high-end look without a chandelier, an oversized pendant with a textured shade gives you sculptural drama. Texture matters because it breaks up the light and creates a soft halo instead of a single bright circle. Look for materials like ribbed glass, linen-like fabric, or sand-finished metal that diffuses. Hang it so it visually sits between the double height levels, making the vertical space feel “composed.”
Pick a pendant with a shade diameter around 18-28 inches depending on your seating area width. Install the canopy at a height that leaves 30-40 inches of clearance above the tallest seating surface in front of it. Use a dimmable bulb at 2700K, and test the beam direction by turning lights on at night. Secure the ceiling wiring with a proper junction box rated for the fixture weight and add strain relief where the cord enters the canopy.
Choose a shade that hides the bulb — a visible filament inside a textured shade looks messy in photos.
Don’t choose a glossy ceramic or polished metal shade — it creates glare bands.
10. Sculptural ceiling medallion light with candelabra-style lamps
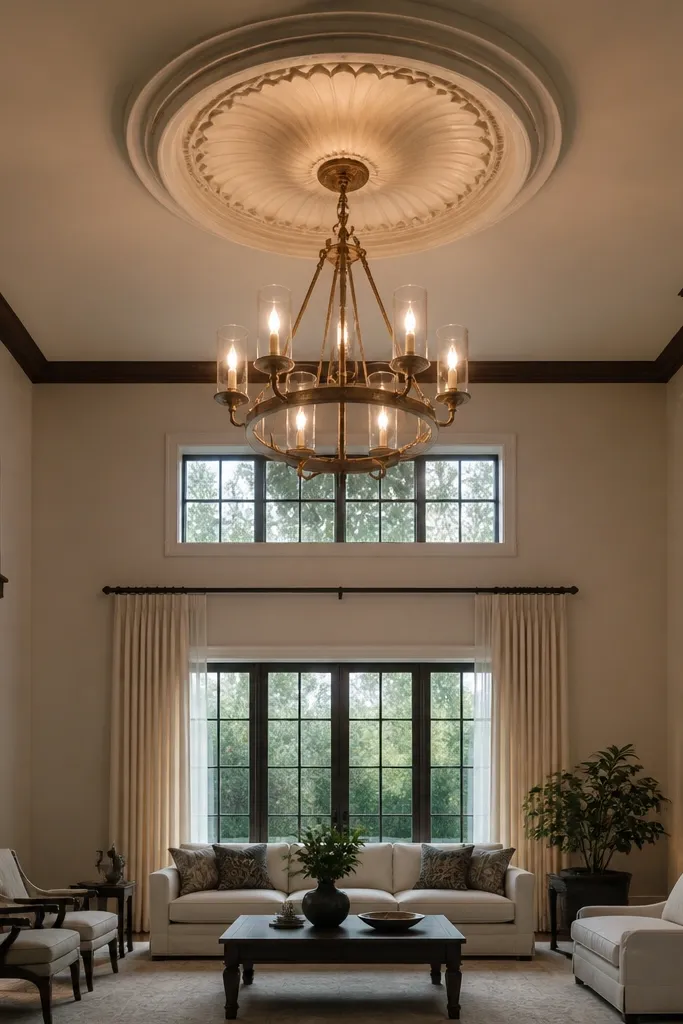
A ceiling medallion fixture is an underrated way to make double height feel finished when you want a classic look. The medallion frames the light and gives the ceiling an intentional focal point, especially if you have molding or a decorative ceiling plane. Candelabra-style bulbs add sparkle without looking like a basic flush mount. Use warm dimmable bulbs so the metal and glass glow softly instead of looking yellow-green.
Install a ceiling medallion fixture sized for the ceiling plane you’re lighting, then center it over the main seating axis. Keep the total drop height modest so the fixture doesn’t feel like it’s hanging too low. Use 2700K dimmable bulbs and set a dimmer for smooth control. If your room has crown molding, align the fixture’s outer ring with the molding line for a cleaner look.
Editor's noteSwap in bulbs with a consistent filament style so the sparkle reads even across the ceiling.
Skip thisDon’t use a fixture with mismatched bulb sockets — uneven brightness screams “cheap install.”
11. LED rope light under balcony or mezzanine edge
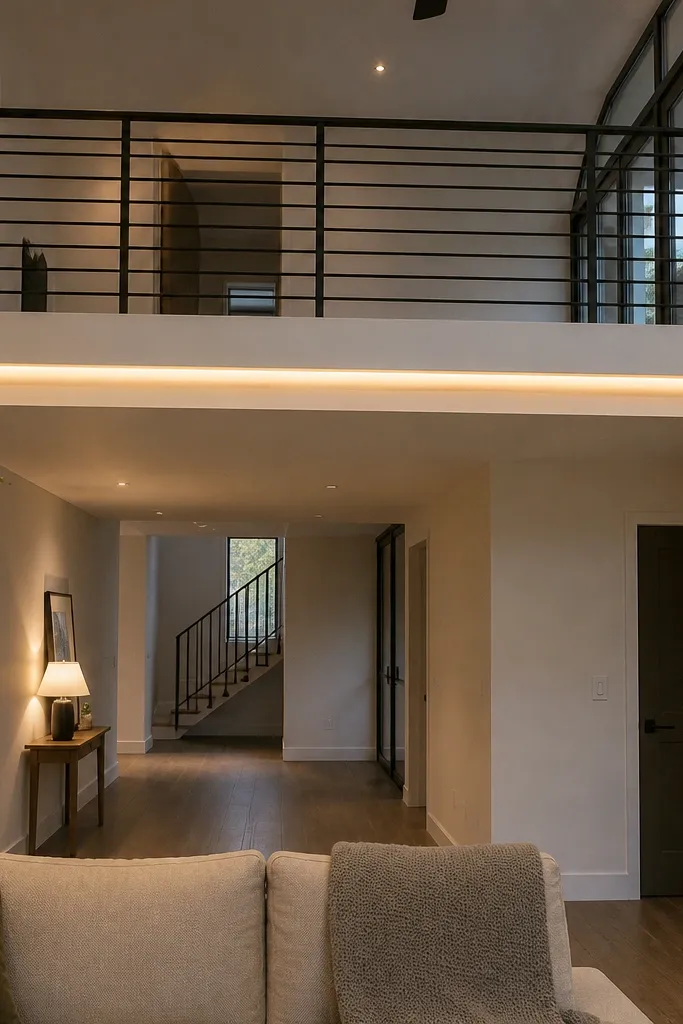
If you have a mezzanine, balcony, or upper ledge, a concealed LED rope line instantly makes the whole room feel designed. The glow outlines the architecture and adds a horizontal layer that balances the vertical volume. Rope light works best when it’s hidden behind a lip or channel with a diffuser, so you see light, not the source. Use warm, dimmable LEDs to keep the mood flattering on walls and furniture.
Install an aluminum channel under the ledge edge with an opal diffuser cover. Run the 24V LED rope inside the channel and route wiring back to a driver placed in an accessible void. Use a dimmer and verify the glow is even across the length by turning lights on before you close any cover panels. Aim for a soft outline — if the light is too strong, reduce brightness through the dimmer rather than changing angles.
Editor's noteUse a diffuser channel made for rope LEDs; generic plastic covers often show LED dots.
Skip thisDon’t leave the rope exposed — the visible line makes the room look unfinished.
12. Wall-mounted picture lights with adjustable heads
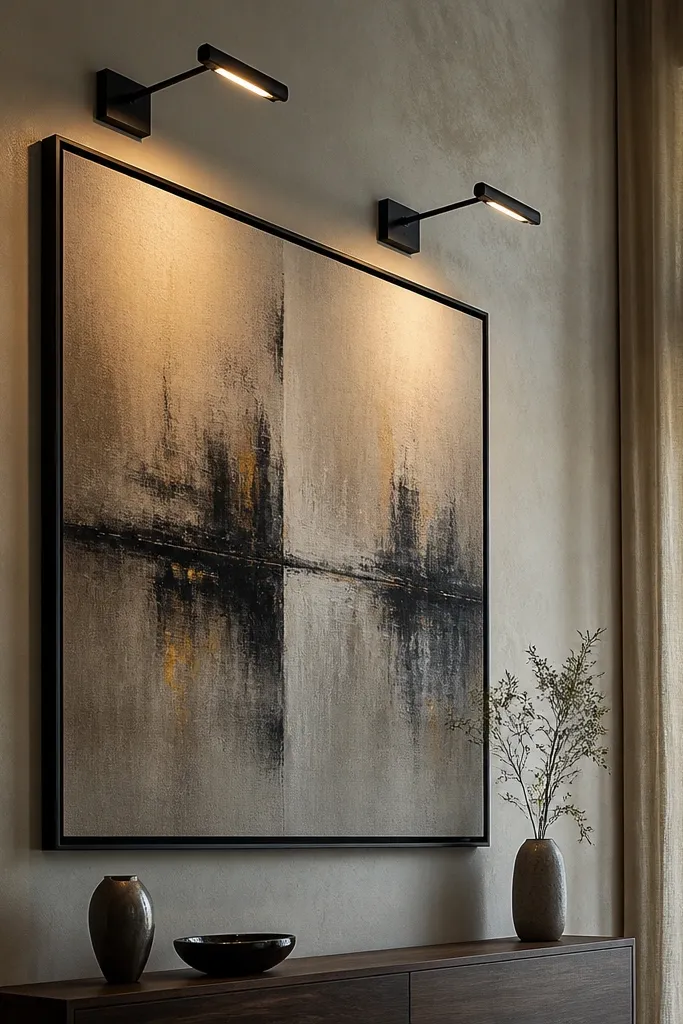
Large-scale art in double height rooms often gets the wrong lighting — either too dim or too directional so it looks flat. Picture lights with adjustable heads give you tight control and a clean museum look. The beauty is in the beam: it should illuminate the artwork evenly without spilling into the room. This also lets you swap art without changing the whole lighting plan, which is a big deal in living rooms where tastes evolve.
Choose picture lights with adjustable angle and a lens or reflector designed for even spreads. Mount so the beam lands near the top third of the art and the spill stays off adjacent walls. Use 2700K LED bulbs and keep the fixture close enough to artwork to avoid a harsh falloff. Test by turning lights on and checking if the frame edges glow more than the artwork surface.
Editor's noteIf you see hotspots, stop chasing it with dimmer — adjust the angle and distance first.
Skip thisDon’t mount picture lights too far away — you’ll get a bright center and dark edges.
13. Pendant + wall wash combo with synchronized dimmer control
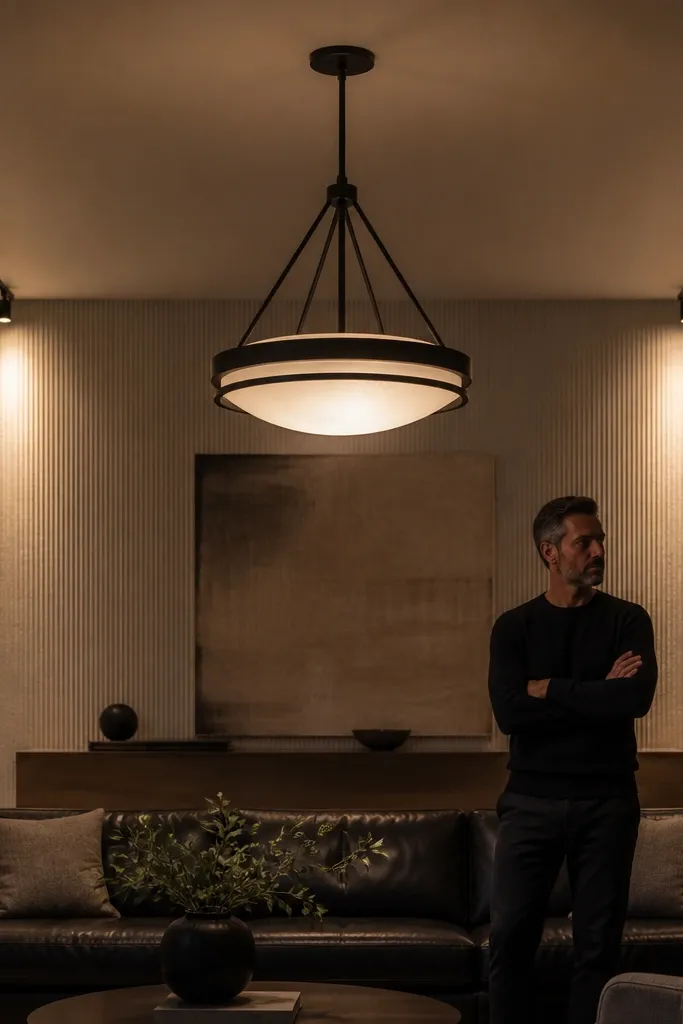
The room looks high-end when major light sources feel coordinated. Pairing a pendant (or chandelier) with wall wash lighting gives you both a focal anchor and soft background depth. The visual win is contrast: pendant light creates a warm center, while wall wash keeps walls from going gray and empty. Use one dimmer for the pendant and wall wash so the room transitions smoothly from bright hosting to low mood.
Install the pendant centered over your seating grouping and mount wall wash track or uplights aimed at textured surfaces. Choose fixtures that use the same color temperature range (2700K-3000K) and use dimmable bulbs rated for your dimmer type. Wire the circuits to a single multi-channel dimmer or use a dual-circuit dimmer system so both layers dim together. Set the initial brightness: pendant should be brightest, wall wash should be 20-40% lower to keep the center inviting.
Editor's noteLabel your dimmer switch with “Center” and “Walls” even if it’s one control — it saves you from guessing later.
Skip thisDon’t mix incompatible dimmer types — flicker ruins the look fast.
14. Modern sconce pair flanking a tall fireplace opening
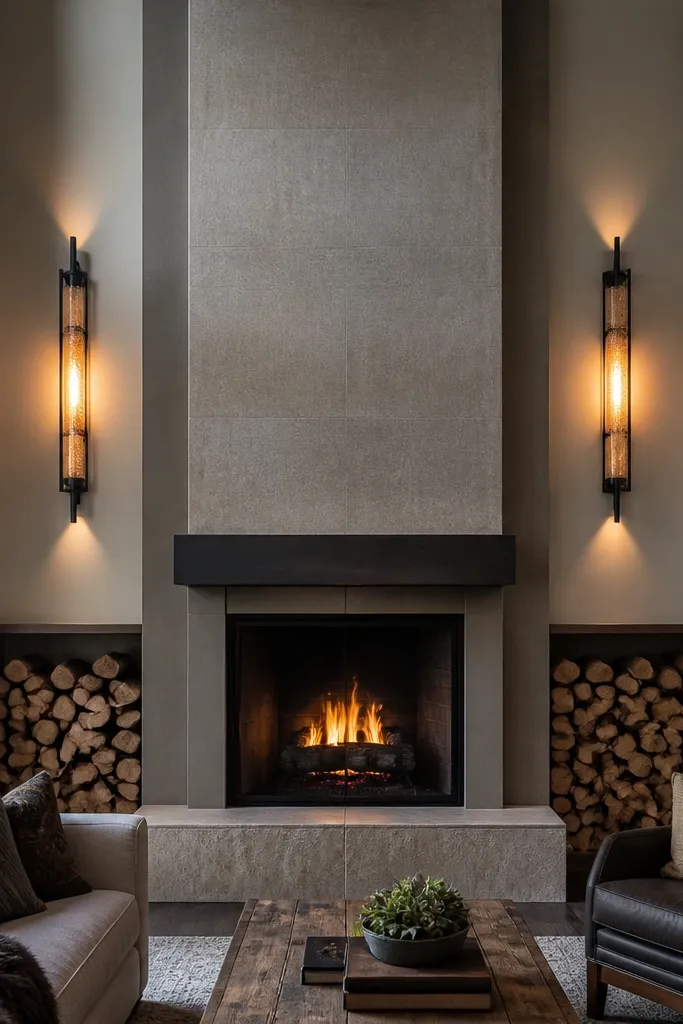
Fireplaces in double height living rooms can become shadow traps unless you light the vertical surfaces. A matching sconce pair flanking the opening adds symmetry and makes the whole feature feel designed, not incidental. Use shades that diffuse so the light wraps the fireplace wall and doesn’t blast directly into your eyes. This is one of the fastest ways to make a room look “done” because it frames a major architectural element.
Select two identical sconces with warm diffusing shades and finishes that match your fireplace trim. Mount them at the same height relative to the fireplace opening, aiming the light slightly upward so it grazes the stone or tile. Use 2700K dimmable bulbs and keep wattage moderate so the sconces look soft, not bright. Wire with a switch that lets you run sconces independently from the ceiling fixture for better mood control.
Aim for the light to hit the wall just above the mantel line; it adds vertical lift without glare.
Skip downward-only sconces — they make the fireplace look heavy and dark.
15. Glass block or frosted niche light in a side wall
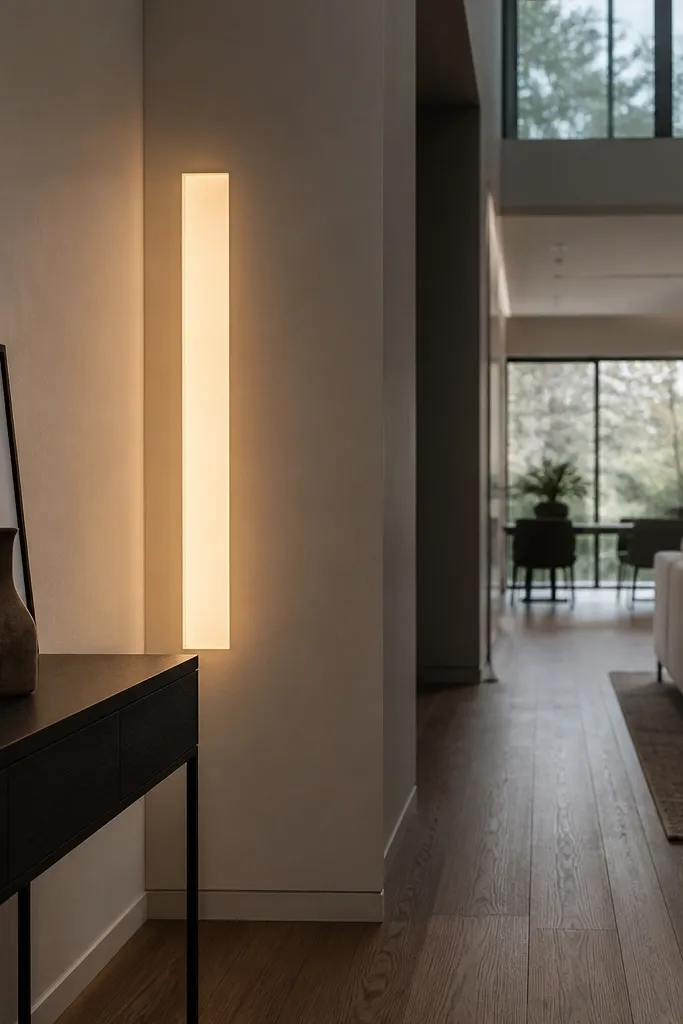
A frosted niche light is a clean way to add a hidden glow that photographs beautifully. It adds a soft pool of light without showing a bulky fixture, which is great in double height rooms where you don’t want more visible metal. Use frosted glass or a diffuser panel so the light reads as a luminous rectangle. Position it near seating or a console so it lights faces gently and adds warmth to the wall.
Cut a niche opening or use a pre-made wall niche form, then install a back box with a dimmable LED module behind the diffuser. Use a frosted acrylic or glass panel sized to cover the opening so the light doesn’t leak around edges. Run wiring to a driver and secure it behind the wall panel for access. Test the glow at full brightness and at dim levels to confirm it’s flattering and not too stark.
Editor's noteChoose a diffuser panel thickness that hides LED edges; thin panels show the light source.
Skip thisDon’t place it too high — if it’s near ceiling level, it just becomes a bright spot.
16. Candle-style chandelier with oversized glass drops
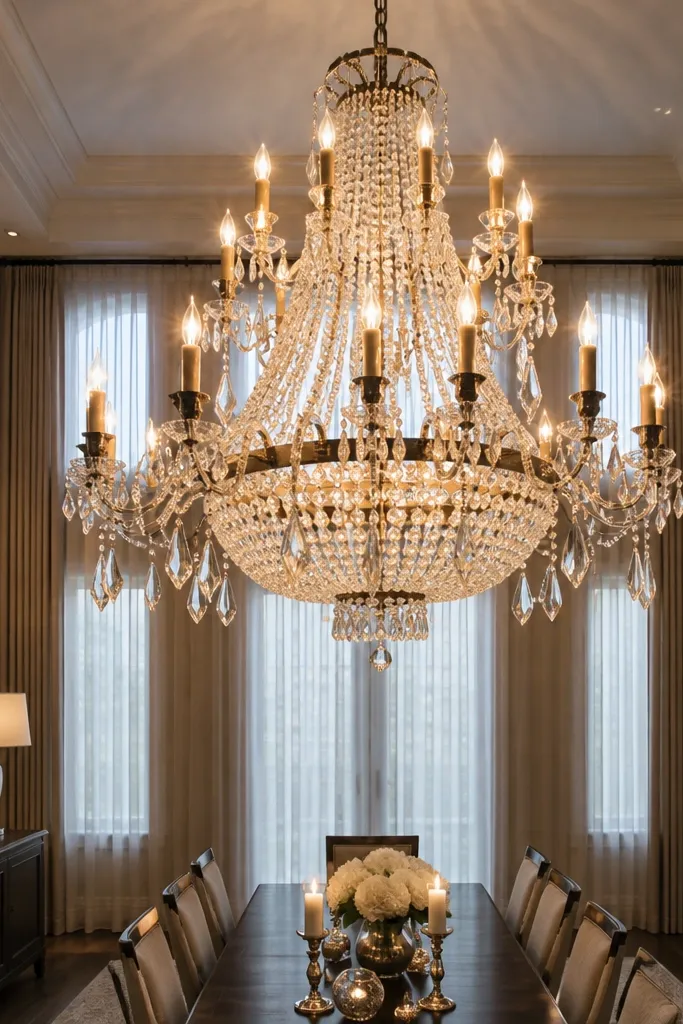
If you want maximum photogenic impact, use a chandelier that mixes warm metal candle sockets with oversized glass drops or beads. The point is sparkle and movement of light, but you need enough diffusion so it doesn’t look like a disco. In double height rooms, the chandelier’s scale should match the vertical volume — too small looks like a decorative afterthought. This setup looks luxe because the glass catches light from other fixtures and creates a multi-layer glow.
Choose a chandelier with enough drop height to clear the sightline from sofa while still feeling tall — aim for the chandelier bottom around 8-10 feet above the floor. Use dimmable 2700K bulbs and avoid ultra-bright wattages that turn glass into glare. Install with a properly rated ceiling box and check the fixture’s weight before mounting. Once installed, adjust the chain or rods so the drops hang evenly and don’t collide with the ceiling plane.
If glass looks too sharp, dim it first — the sparkle becomes flattering instead of harsh.
Don’t use frosted chandelier glass with cool bulbs; it turns dull and gray in photos.
17. Recessed wall grazing lights along the floor-to-mid height line
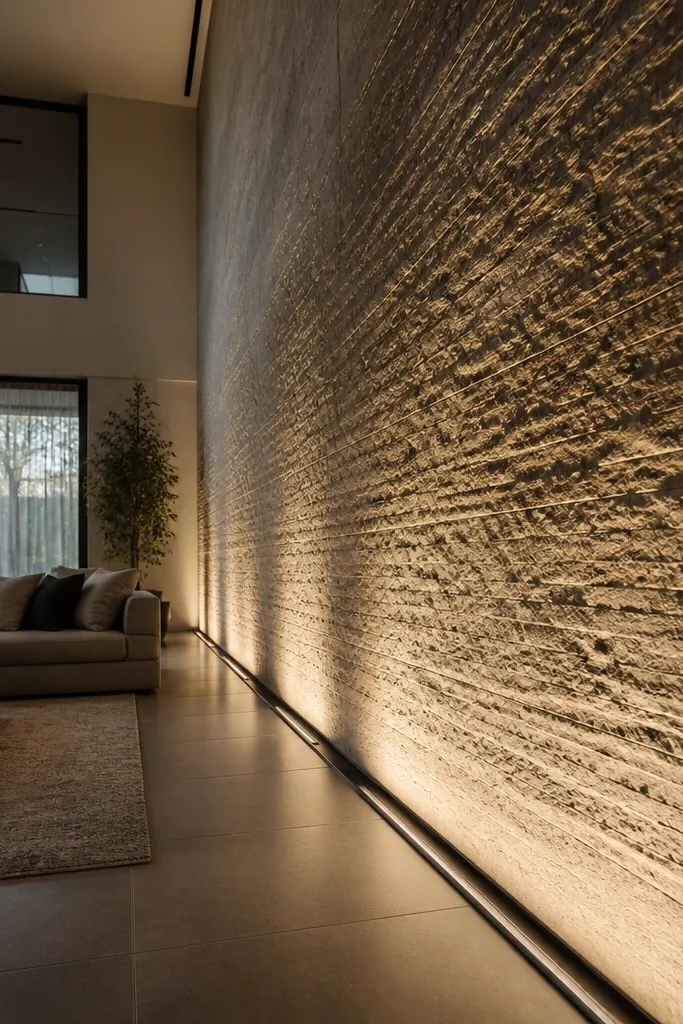
Wall grazing lights are a high-end trick: they make textured walls look like they’re glowing from within. In a double height room, grazing lights also reduce the “empty” feeling by filling the wall with depth and shadow detail. The look is subtle but powerful — you get a smooth gradient from light to shadow that reads luxurious in photos. This is best for walls with plaster, stucco, brick, or wood slats, where texture can catch the beam.
Install small recessed grazing fixtures at floor level or at the base of a panel, spaced so each beam overlaps slightly. Use optics that create a tight beam, and aim so the beam skims the texture at a shallow angle. Start with a low brightness and adjust aim until the wall has a soft sheen instead of a bright line. Wire to a dimmer and test from the sofa — if you see the LED source, lower the fixture or increase the shielding.
Overlap beams by about 20-30% for an even wall glow without hot spots.
Don’t graze glossy paint — it reflects too much and looks like a spotlight, not a wash.
18. LED step light at stair edge for a clean vertical glow
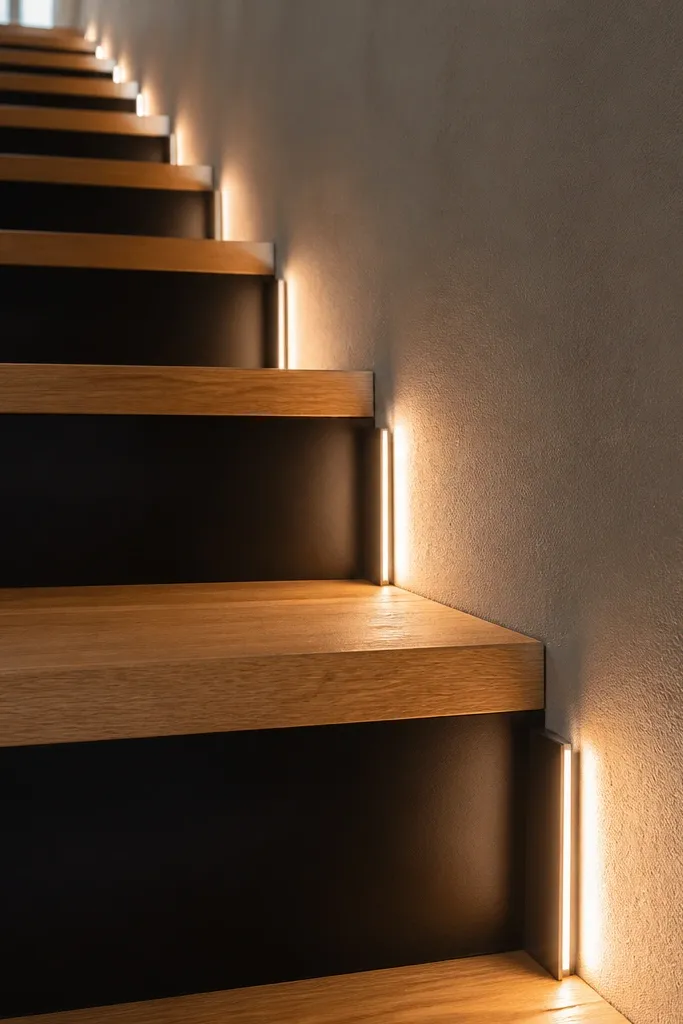
Stair edges in double height rooms are prime real estate for lighting that looks custom. Step lights create a continuous guide glow that makes the stair feel sculpted and safe without glare. The aesthetic is clean because the light source is low and controlled, and it adds a warm vertical line that balances the tall walls. It’s also practical: you get night-friendly illumination without lighting the whole room.
Choose recessed step lights or surface-mount LED channels designed for stair use, with frosted lenses for glare control. Install along the stair nosing edge and keep spacing consistent so the glow reads as one line. Run wiring through a junction box and connect to a driver rated for the total wattage. Test each step at night and adjust the angle so the glow illuminates the tread edge and wall lightly instead of blasting upward.
Use 2700K for stairs so the glow looks warm, not blue at night.
Skip cheap wide-angle housings — they create visible LED points and look messy.
19. Table lamp pair on contrasting bases for a balanced lower layer
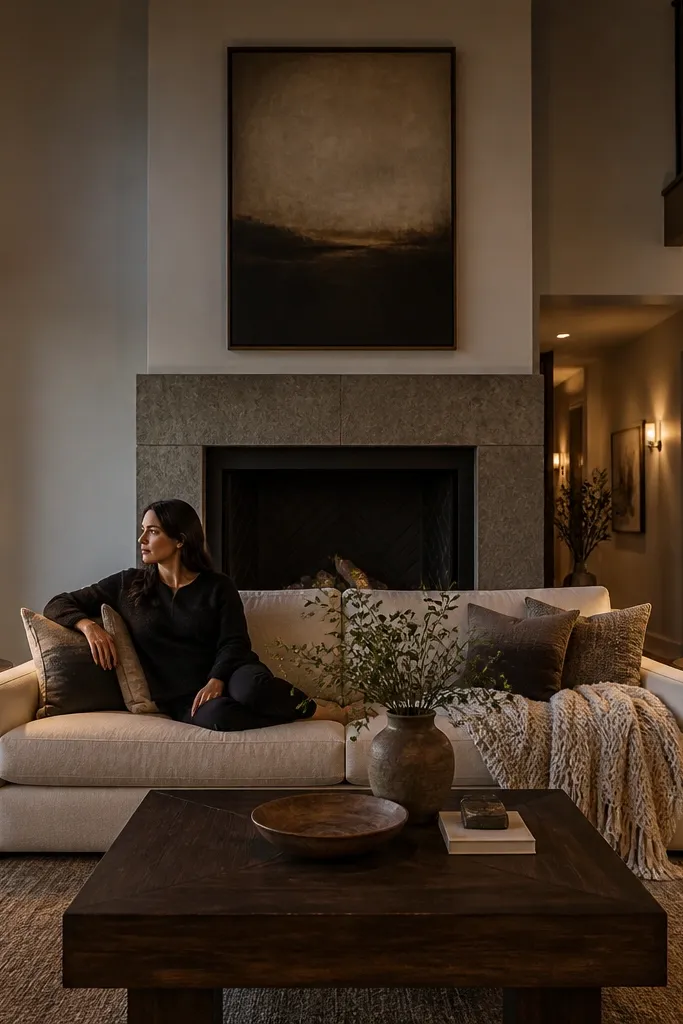
In double height living rooms, the lower half gets ignored because people chase ceiling drama. A matched pair of table lamps solves that instantly and looks upscale because it frames the sofa area and makes the room feel lived-in. Go for shades that are similar in color and size, then vary the base material slightly — like matte black bases with warm brass accents or light wood bases with dark linen shades. This approach photographs well because it creates symmetry without looking rigid.
Pick two lamps with the same shade diameter and the same shade height so the light level looks even across the seating. Place them 18-30 inches apart depending on your sofa width and keep the lamp shade bottom around 18 inches above the table surface. Use 2700K dimmable bulbs and add a two-outlet setup or smart plugs if you don’t want wiring. Turn on at night and check that the brightness doesn’t reflect into windows or mirrors behind you.
Choose linen or cotton shades — they soften the light and make skin tones look warmer in photos.
Don’t use different shade whites; even tiny differences show up instantly in double height lighting.
20. Ceiling downlights with adjustable trims for controlled brightness zones
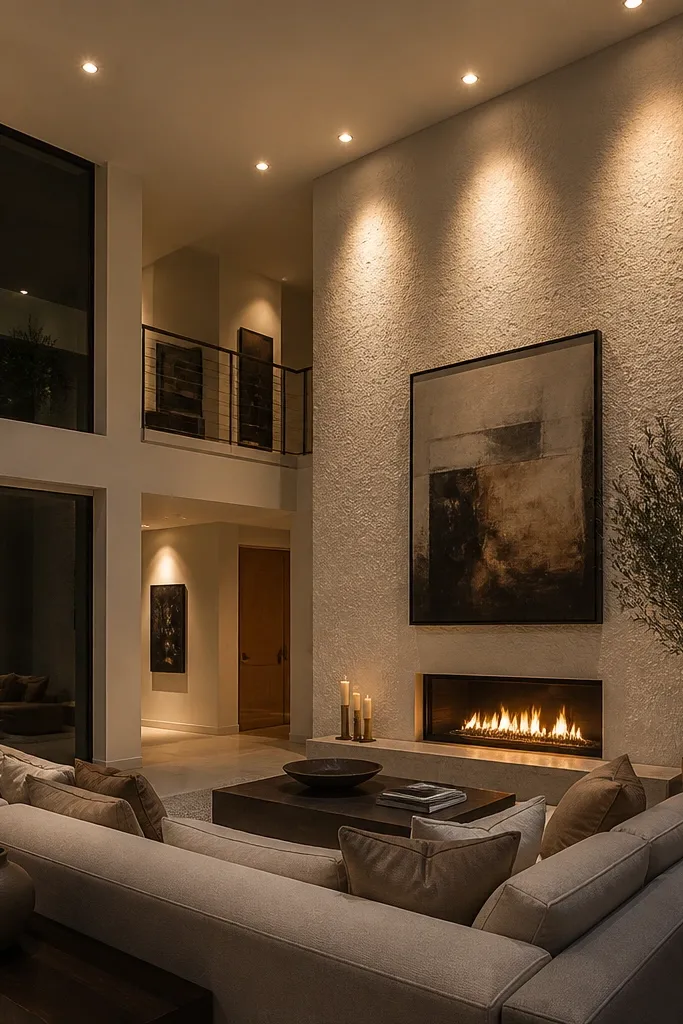
Downlights get a bad reputation because people install them like a grid and then wonder why everything looks flat. For double height rooms, adjustable trims let you create brightness zones that feel intentional. You can aim downlights slightly toward walls to create a soft bounce instead of lighting only the floor. This makes the room feel taller and more expensive because the brightness travels upward.
Plan a small group of adjustable downlights rather than lighting the entire ceiling — start with 4-6 units depending on room size. Install them with trims that allow beam angle adjustment, then aim to wash the upper wall sections first. Use 2700K dimmable LED modules and match the beam spread so you don’t get patchy circles. After installation, dim to test — you want the walls to glow while the ceiling stays calm.
Editor's noteAim first, then lock trims — once the ceiling finish is done, adjustment is a pain.
Skip thisSkip fixed, non-aimable trims — you lose control over where the light lands.



