
1. Classic Raised Panels with a Thin Chair Rail
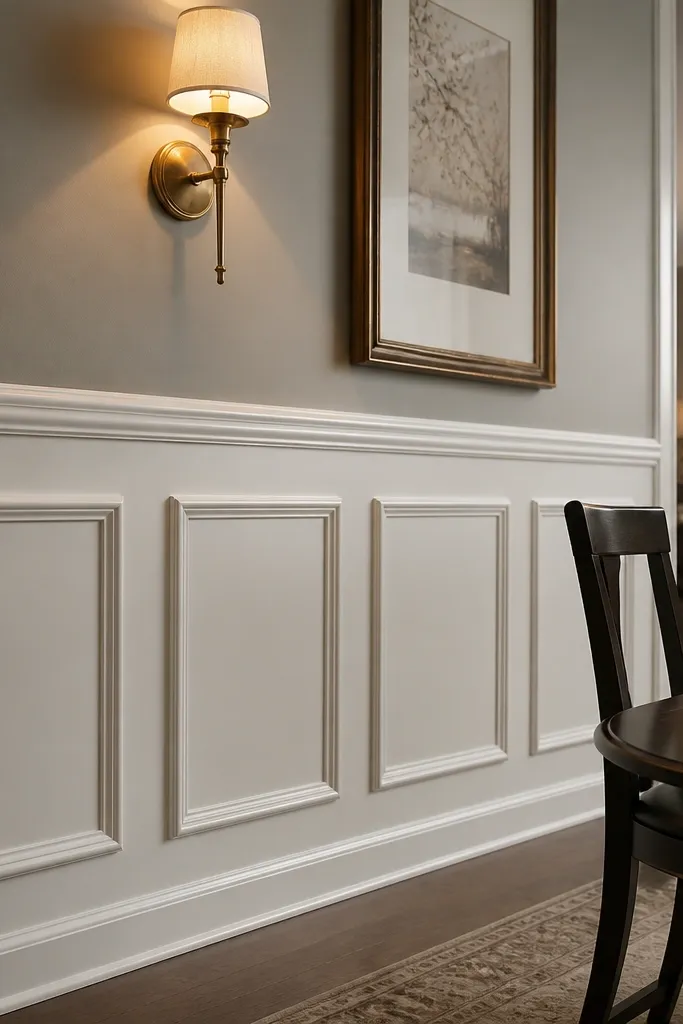
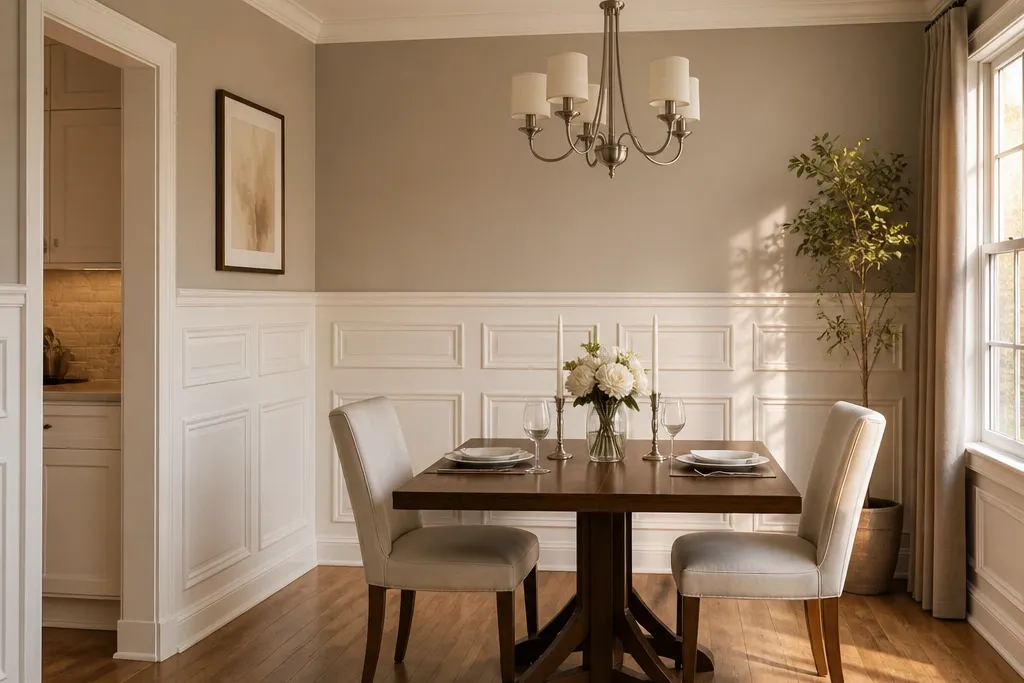
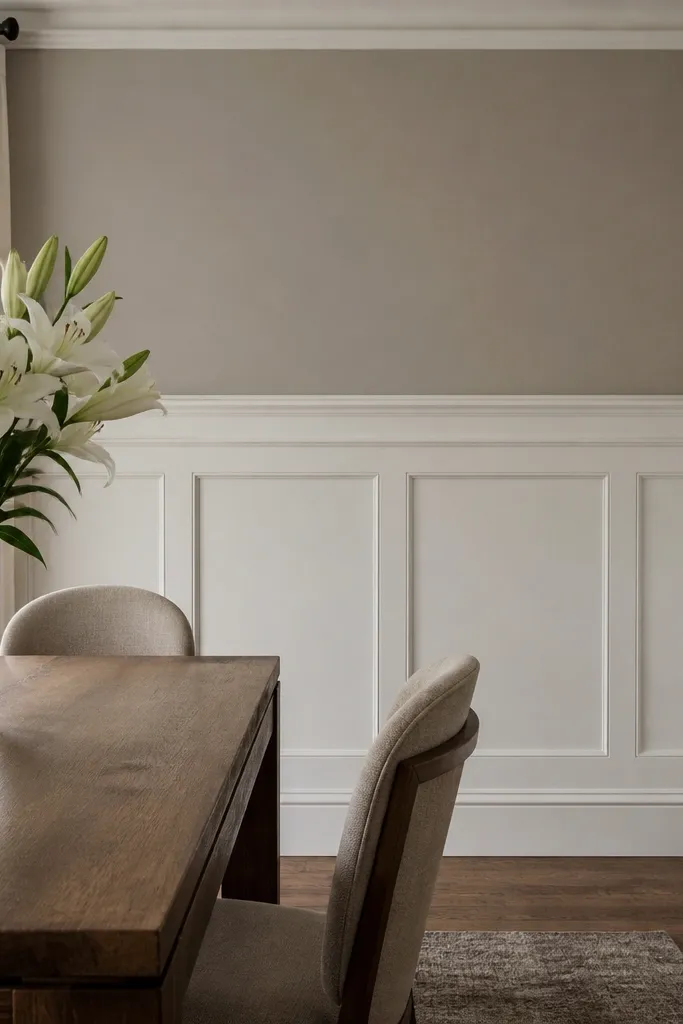
This look is the easiest way to get “high-end” without going ornate. Raised panels catch light in a way flat boards can’t, and a thin chair rail keeps the wall from looking heavy. Go with a two-tone scheme: paint the wainscot a brighter white than the upper wall, like warm white trim against a soft gray or greige wall. The panels also help hide minor wall imperfections because the shadows break up the surface. Skill level is moderate — you’re cutting and spacing panel frames — and the time is a real weekend plus drying time if you’re using MDF and paint.
Editor's noteDry-fit one full panel bay on the floor so your reveal widths match from bay to bay before you commit to wall cuts.
Start by marking a level chair-rail line at 38-40 inches from the floor, then decide your panel height so you land around 52-56 inches total wainscot height. Build or install a simple rectangular frame: outer stiles and top/bottom rails, then add panel moldings inside. Cut all MDF pieces with the same miter angles so the seams stay tight, and glue + nail into a ledger or studs. Prime all cut edges, caulk panel seams, then paint trim satin and the upper wall in eggshell for a clean contrast.
Skip thisDon’t make the chair rail too thick — chunky trim on a small dining room reads bulky in photos.
2. Beadboard with Picture-Frame Top Trim
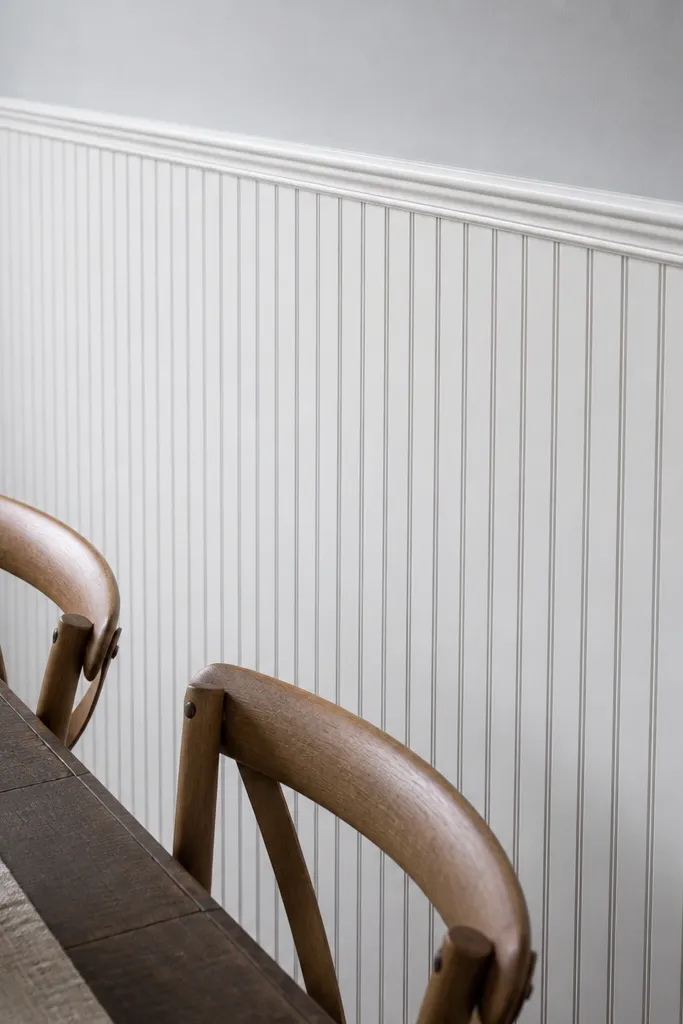
Beadboard gives you a crisp texture that looks clean under dining lighting, and the picture-frame border makes it feel designed rather than builder-basic. The beads create fine shadow lines, while the frame adds structure around the wall area you see every day. Keep the top border narrow and sharp so the beadboard stays the star. This is a great choice for dining rooms that need brightness — beadboard reflects light well and visually “lifts” the wall. It’s beginner-friendly if you use pre-milled beadboard panels and focus on straight lines.
Set your chair rail at about 36-38 inches from the floor, then place beadboard below it so the wainscot ends around 50-54 inches total. Install vertical furring or a ledger along the perimeter so the beadboard edges land cleanly and nail into wood. Add a thin picture-frame trim band just above the chair rail area: outer border with a smaller inner molding for a shadow gap. Prime, caulk the beadboard seams lightly, then paint beadboard and trim in the same white family for a polished look.
Use a 1/8-inch caulk bead and tool it with a damp finger so the seam disappears without smearing the bead texture.
Avoid wide gaps at the ends of beadboard panels — they look worse than a slightly imperfect field seam in photos.
3. Board-and-Batten with a Double Rail
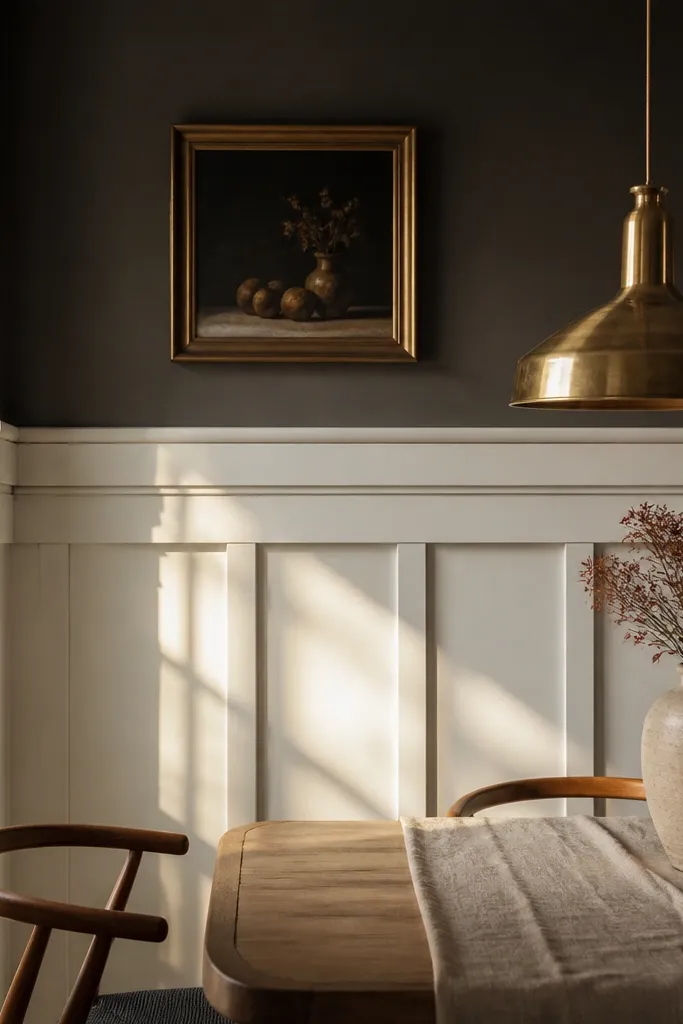
Board-and-batten reads architectural, and a double rail turns it into something that looks finished like custom cabinetry. The vertical battens create height and strong lines, while two horizontal rails give you a built-in “frame” for the wall. This style photographs especially well when the wall color above is darker, because the lighter battens look crisp and intentional. It’s also forgiving: you can cover uneven drywall with the battens and rails. Plan for a mid-level build because spacing must be consistent and cutting battens takes time.
Mark a level top rail line at 38-40 inches and a second rail at about 42-44 inches, then decide your total wainscot height around 56-60 inches. Install a ledger for the rails and nail battens into studs where possible, adding blocking between studs for consistent support. Layout your panel grid on the floor: choose a batten width (like 1x2 or 1x3) and a spacing reveal (often 1/4 to 3/8 inch) so each bay looks even. Caulk all seams, prime MDF, then paint with two coats so the battens look smooth and not thirsty.
Use a spacer block for the reveal width between battens so every opening matches without measuring every time.
Don’t rely on drywall anchors for the rails — the wall weight and paint thickness can loosen them and create tiny shifts.
4. Raised Panels in a Tall Wainscot for 9-Foot Ceilings
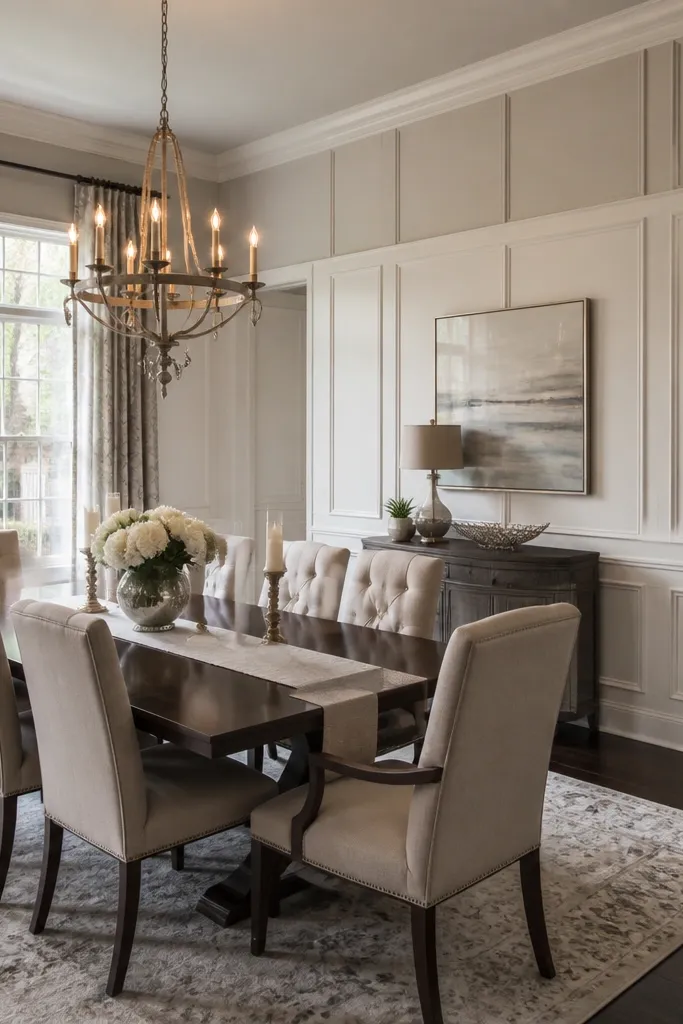
If your ceiling is 9 feet, you can make wainscoting feel dramatic by taking it higher than the usual chair-rail-only look. A tall raised-panel section pulls your eye upward and makes the dining room feel more “roomy” even with more trim. This style looks best with formal trim profiles and a clean paint contrast, like bright trim against a warm gray or soft blue wall. The raised panels also add depth without adding clutter. Expect a longer build because you’re working with more panel area and more trim pieces.
Place the chair rail around 40-42 inches, then set your total wainscot height at 72-78 inches so it stops with a deliberate top band. Use a consistent panel grid: stiles and rails sized so you get even panel rectangles across the wall, including around windows or doors. Install the outer frame first, then build the raised panel inserts within it, keeping reveal lines identical. Prime thoroughly, caulk corners, then paint with satin trim paint for the panels so the light catches the edges.
Before installing, label each molding piece by position (left bay, center bay, right bay) so you don’t mix profiles mid-project.
Don’t end the wainscot at a random height — the top termination line needs to feel intentional and level.
5. Symmetrical Panel Grid with Flat Center Panels
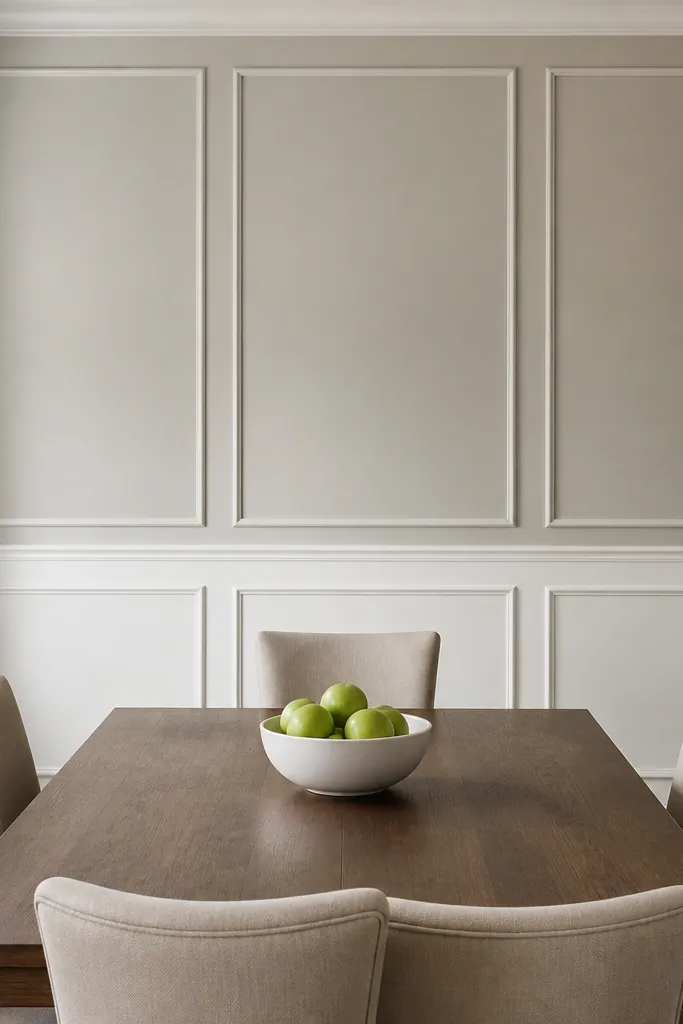
Flat center panels with a symmetrical grid look crisp and tailored, especially when you keep the moldings narrow. It’s a clean alternative to raised panels if you want elegance without deep profiles. The grid makes the wall feel designed and balanced, which matters in dining rooms where you see the wall from multiple angles. Use a smooth, paint-ready surface so the grid lines stay sharp. This is intermediate because the layout must be accurate and the trim spacing needs to repeat perfectly.
Choose a chair rail around 38 inches and a total wainscot height around 54-60 inches. Build an outer rectangle frame, then add vertical and horizontal rails to create panel rectangles. Keep the panel centers flat: install thin slats or panel boards behind the trim so the surface is smooth, then nail the moldings over the edges. Use a laser level for the horizontals and confirm measurements at both ends of the wall before you cut anything.
Mark panel boundaries with painter’s tape and a pencil line before any trim goes up so you can check alignment from across the room.
Avoid mixing molding thicknesses across the grid — it creates a subtle “off” feel that shows up in wide photos.
6. Beadboard with a Cove-Cap Cornice
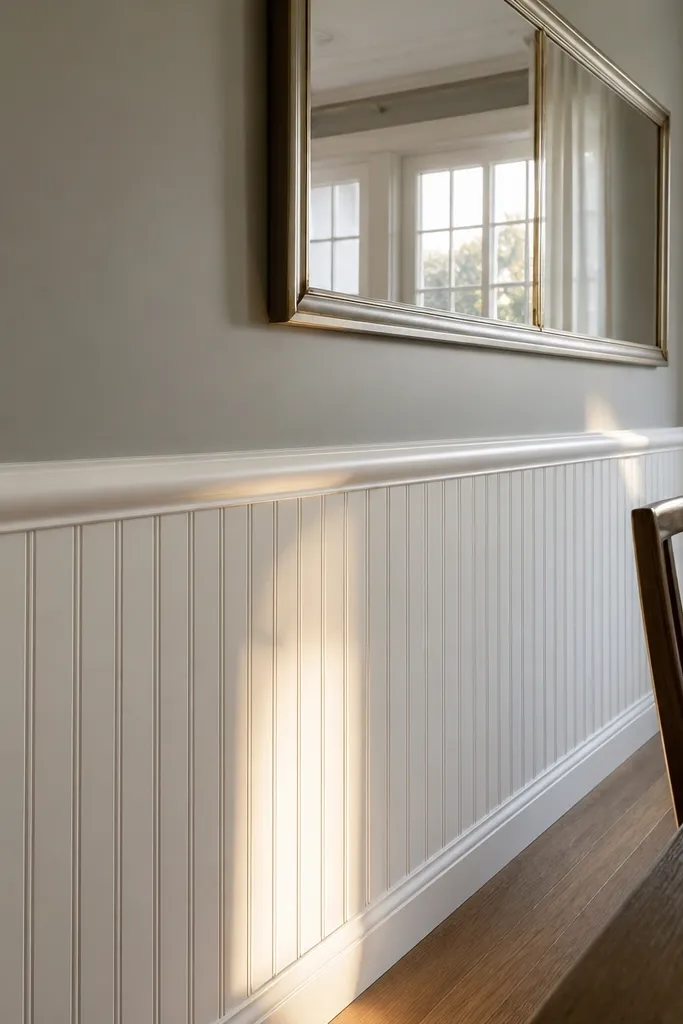
A cove-cap top gives beadboard a finished, built-in look. Instead of ending at a flat chair rail, you get a gentle rounded profile that makes the transition between wainscot and upper wall feel intentional. This is a smart option for dining rooms that have crown molding or a more traditional trim style already. The rounded edge softens the wall and looks great under warm light from pendant fixtures. It’s beginner-friendly if you use a pre-made cove molding and focus on clean caulking.
Install beadboard so it ends at your chair rail line, then add the cove-cap molding above it as the top termination. Set the chair rail around 36-38 inches, then aim for a total wainscot height around 50-54 inches. Use a level chalk line to keep the cove cap straight across the wall, and nail into studs or blocking behind the drywall. Prime, caulk the seam where the cove meets beadboard, and paint the cove with satin trim paint for a smooth sheen.
Sand the joint between beadboard and the cove cap until it’s flush before caulking so the curve doesn’t show a hump.
Don’t skip priming the inside edges of beadboard — unprimed cuts soak paint differently and show through.
7. Crisp Shiplap with a Formal Picture Frame
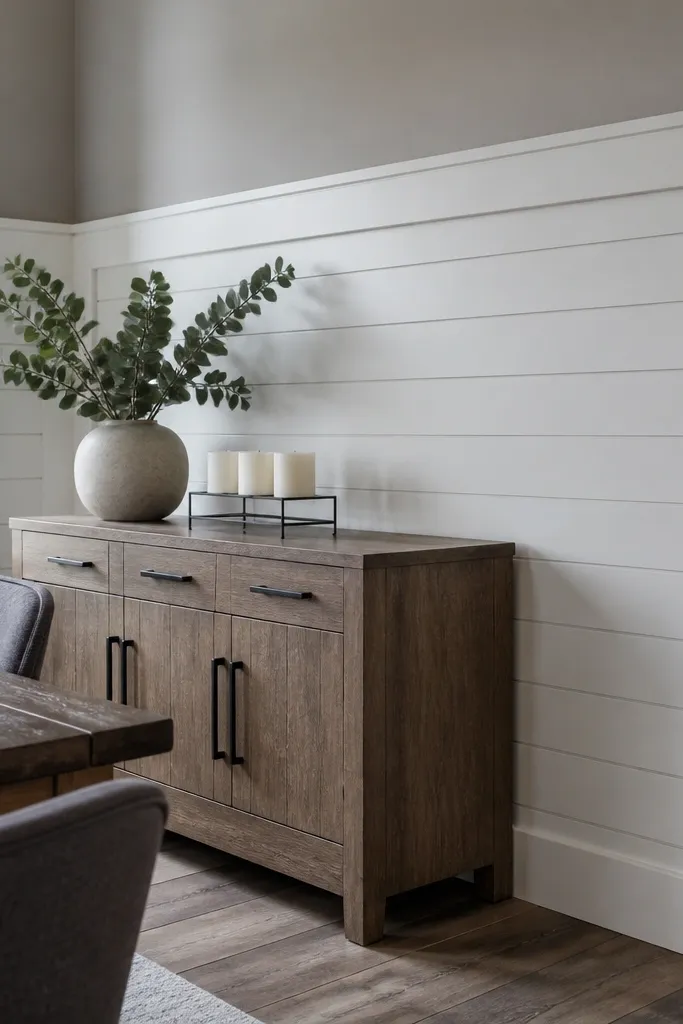
Shiplap can look high-end when you stop treating it like farmhouse decor and start treating it like millwork. The key is using tight joints and adding a formal picture-frame border around the whole wainscot section. Keep the shiplap runs perfectly level so the wall reads engineered, not rustic. This look is especially good if your dining room has modern furniture but you still want warmth. It’s moderate difficulty because shiplap alignment is unforgiving and requires careful spacing.
Editor's noteUse a long level and check every other board — one off board creates a visible “snake” line across the room.
Mark the chair rail at 38-40 inches and install shiplap panels below it so total height lands around 54-60 inches. Use a consistent shiplap reveal (like 1/8 to 1/4 inch depending on your board profile) and nail into studs with a finish nailer. Add a thick outer picture frame trim around the shiplap field and a thinner inner trim line to create a shadow gap. Prime everything, then paint the shiplap and trim in the same white family with satin on trim edges.
Skip thisAvoid wide shiplap spacing — it reads casual and breaks the elegant look.
8. Two-Tone Wainscot with a Narrow Shadow Gap

Two-tone wainscoting gets expensive-looking fast when you create a real shadow gap instead of just painting two colors next to each other. The shadow line makes the wall feel deeper and more architectural, like custom built-ins. Choose one color for the wainscot (clean white or warm cream) and a contrasting upper wall color like deep blue, charcoal, or muted green. This is a strong choice for dining rooms because contrast makes the dining chandelier and table linens look richer. The build is straightforward if you add a thin trim strip that creates the gap.
Editor's noteMask both sides of the shadow gap carefully and paint the gap area with a brush first so you don’t get bleed-through.
Set your chair rail height around 38 inches, then install the wainscot boards up to the rail line. Leave the transition area clean: add a thin spacer strip or backer molding (about 1/4 inch thick) so you can create a 1/8 to 1/4 inch shadow line between wainscot and upper trim. Install the top cap trim over the spacer, then paint in the correct order — lighter wainscot first, then upper wall. Caulk only at the trim-to-board joints, not across the shadow gap.
Skip thisAvoid caulking the shadow gap shut — you lose the depth effect.
9. Wainscot with a Brass-Ready Panel Accent Strip
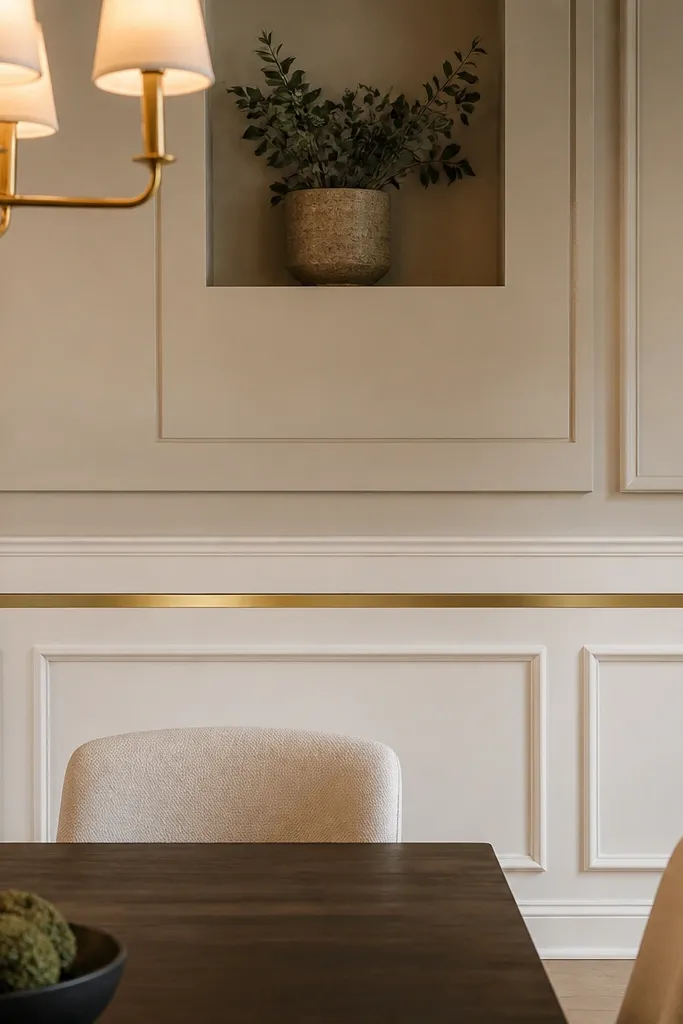
This is one of the simplest ways to make wainscoting feel high-end: add a narrow accent strip that visually mimics hardware or gallery detailing. Place it where the eye lands when you enter the room, usually centered on the main wall behind the dining table or centered on a large window. The accent strip should be a different finish — matte brass look, warm bronze, or a painted metallic effect — and it should sit inside clean molding lines. It reads intentional rather than decorative clutter. Build difficulty is easy to moderate because it’s mostly about placement and crisp edges.
Editor's noteUse painter’s tape to define the metallic strip edges, then remove tape while paint is still slightly tacky for a sharper line.
Build a standard wainscot field with either beadboard or flat panel grid up to 54-60 inches total height. Add outer trim and a center vertical accent: use a thin molding strip (often 1/2 to 3/4 inch wide) and install it centered between two vertical rails. Prime, paint everything, then apply the metallic finish to the accent strip after the main coats cure. Seal the metallic with a clear topcoat so it cleans easily if you touch the wall while dining.
Skip thisDon’t choose an accent color that’s too cool-toned — silver-gray metallics often look cheap against warm dining lighting.
10. Herringbone Panel Section with a Simple Chair Rail
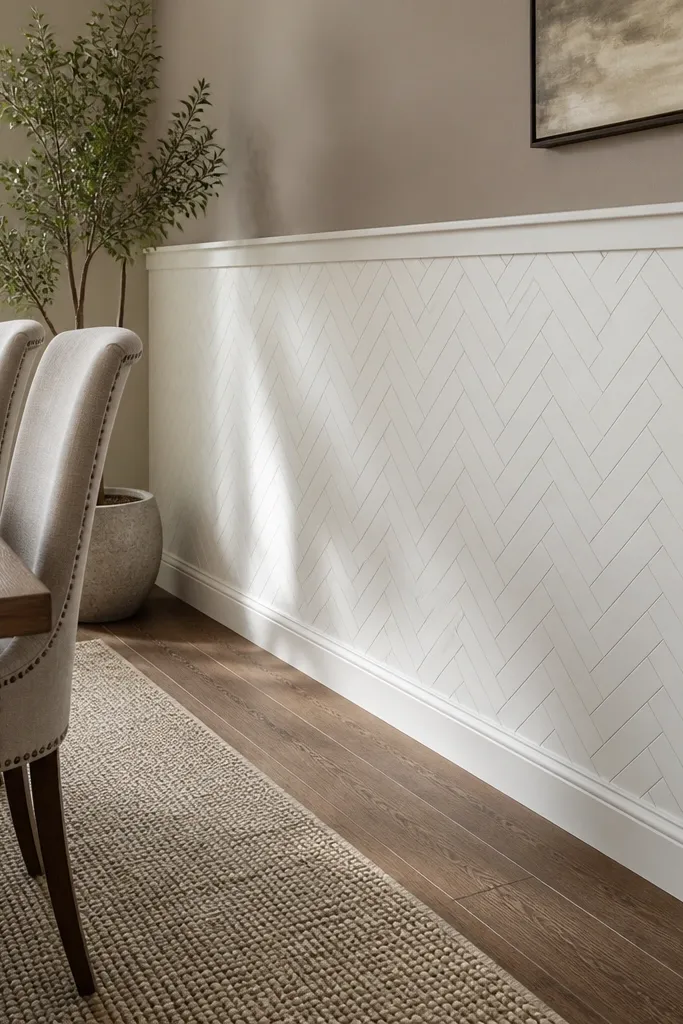
Herringbone inside a wainscot makes the wall look designer-made because the pattern creates movement even when the room lighting is low. Keep it scaled — use smaller boards or strips so the pattern doesn’t look busy. The chair rail stays simple to balance the pattern, so the wall doesn’t feel like wallpaper. This is a great choice when your dining room has solid-color paint and simple furniture, because the wall becomes the focal texture. Plan on intermediate carpentry because aligning a pattern requires patience and consistent spacing.
Editor's noteTape off a center reference line and check the angle on every row before nailing so you don’t drift and break the symmetry.
Decide your wainscot height first, then mark the chair rail at 38-40 inches and set total height around 56-60 inches. Build a rectangular frame in MDF or wood, then install herringbone strips inside the frame on a template or grid marked on the floor. Transfer the layout to the wall using a level line for the center, then work outward so the angles stay symmetrical. Prime, caulk the small seams, and paint in a bright white so the pattern casts crisp shadows.
Skip thisAvoid large-strip herringbone — it reads rustic and can look out of scale behind a dining table.
11. Crown-Like Top Trim Over a Simple Flat Wainscot

You can get a “suite hotel” feel by keeping the lower wall simple and spending your visual budget on the top trim. A crown-style cap over a flat wainscot makes the wall look custom because the cap creates a strong horizontal line that frames the dining area. This works when your room already has crown molding or strong ceiling trim, because the profiles connect visually. It’s also a good option for renters or DIYers who want fewer complicated panels. The build is moderate because you’re installing a lot of linear trim, not complex panel work.
Editor's noteDry-fit the molding sections and mark inside/outside corner cuts before you paint anything — molding gaps show after caulk dries.
Install a flat panel base up to about 54-60 inches total height, with a chair rail around 38-40 inches. Use MDF panel boards or flat slats behind the trim so the surface is smooth. Add a crown-like top cap: select a molding profile with a clear top edge and install it level across the entire wall, nailing into studs or blocking. Caulk the seams, prime all cut ends, and paint with satin trim paint so the cap reads sharp under light.
Skip thisDon’t use a tall cap if your dining room has low ceiling heights — it will visually crush the upper wall.
12. Shadow-Box Wainscot with Deep Set Panels
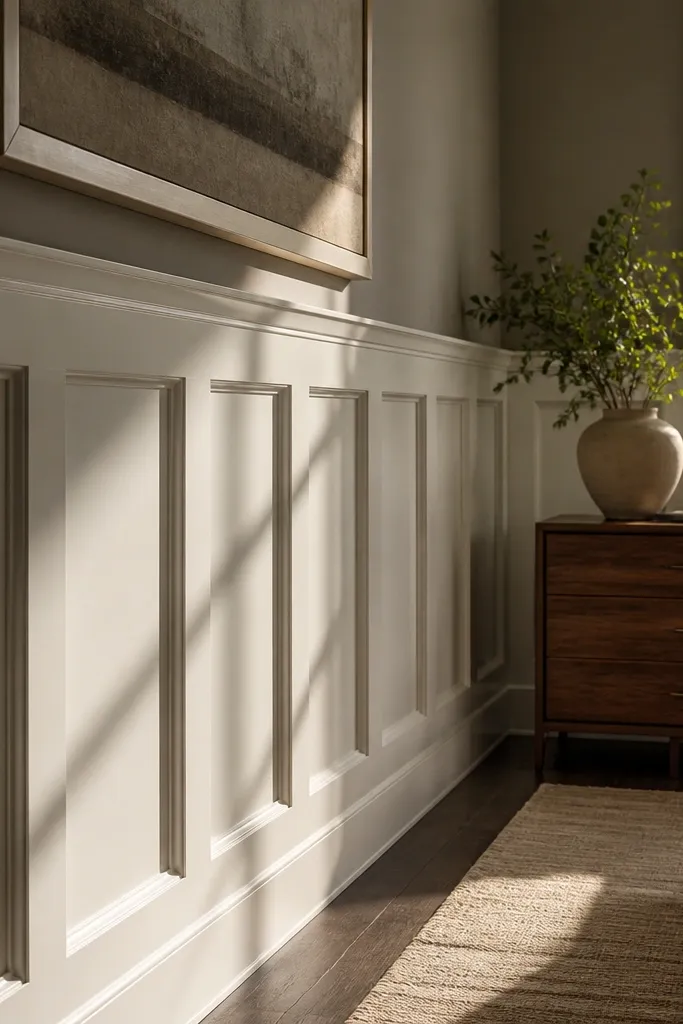
Recessed, shadow-box panels make a wainscot look like built-in architecture. Instead of shallow trim, you create depth by setting the panel field back with backing boards or thicker stiles. This is one of the most photogenic options because it produces real shadows that look good even in daylight. It also hides imperfections because the depth makes the wall surface less dependent on perfect flatness. This is intermediate to advanced because you’re building a box system and keeping spacing consistent.
Set your chair rail at about 40 inches, then plan total wainscot height around 58-62 inches. Build a perimeter frame and add a backing layer so the panel centers sit 1/2 to 3/4 inch recessed from the outer trim face. Install the inner panel surfaces (MDF panels work great) and then add outer trim moldings that frame the recessed field. Prime everything, caulk around the perimeter only, and paint with satin on the outer trim so the recess shadow stays crisp.
Use spacers while you install the recessed panels so every bay has the same depth — depth mismatch reads as sloppy fast.
Avoid shallow recesses — if you can’t see the shadow clearly, it won’t look high-end.
13. Beadboard Corner Columns with Fluted Inserts
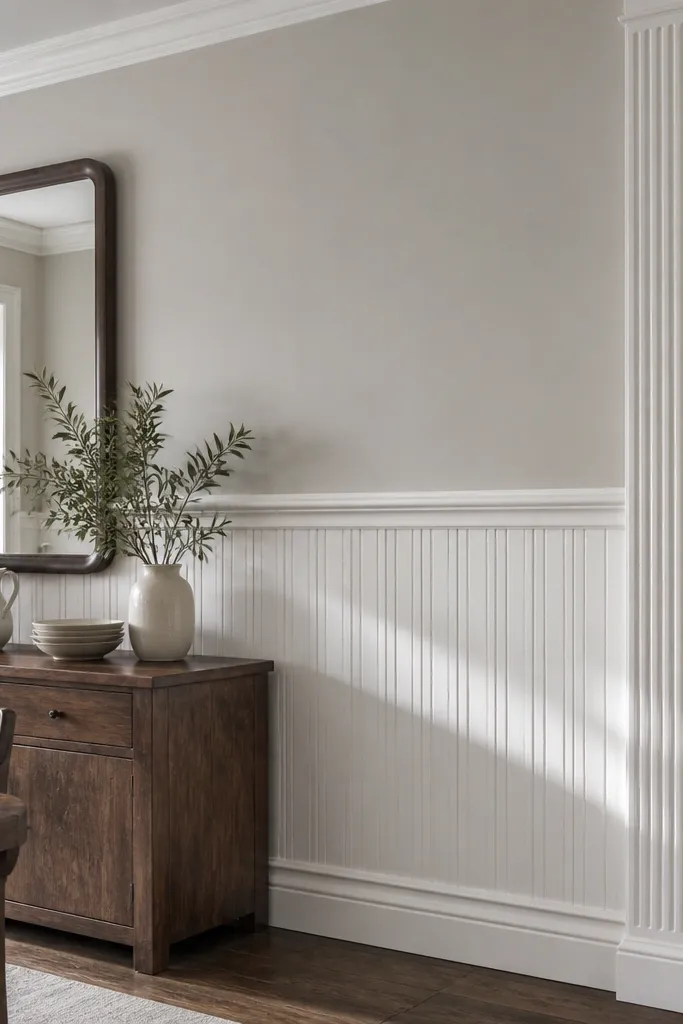
Fluted columns at the corners make a dining room feel styled like a showroom. Pair beadboard in the main field with fluted corner pilasters so the wall has vertical drama without turning the whole thing into one massive raised-panel project. This is a strong move if you have an entry to the dining room or a large corner that catches attention. The flutes cast fine shadows that look expensive under warm lighting. It’s intermediate because fluted trim needs careful alignment and consistent spacing.
Editor's noteCheck plumb at the corner columns with a level every time you add a section — fluted lines show any tilt immediately.
Install beadboard below a chair rail at 36-38 inches, then aim for total height around 52-56 inches. Add corner pilasters: use pre-finished fluted MDF columns or build with fluted casing pieces, then anchor them to studs. Keep the pilaster faces aligned with the outer edge of your wainscot frame so the geometry looks intentional. Prime and paint the entire system, then caulk where pilasters meet beadboard and trim for a seamless look.
Skip thisAvoid oversized pilasters — big flutes can overwhelm a dining room wall and make it feel cramped.
14. Double-Height Beadboard with a Mid Rail
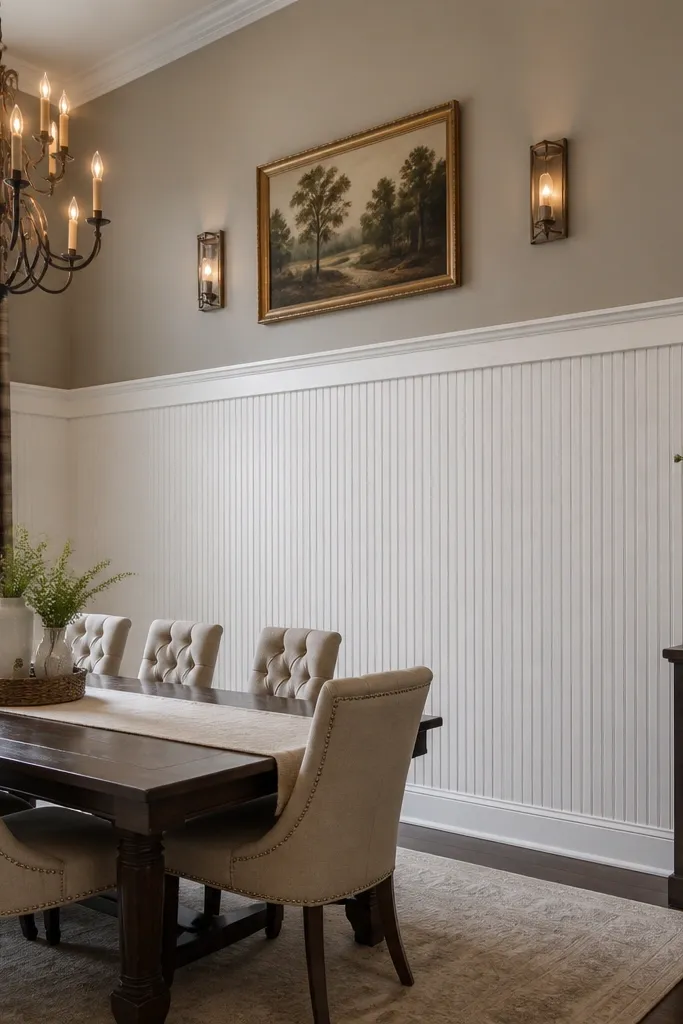
A mid rail turns beadboard into a more formal wall treatment and helps the room feel balanced from floor to ceiling. Instead of one chair rail line, you create two horizontal breaks that give the eye a place to rest. This look works in dining rooms with large wall spans where you want structure but don’t want deep panel work. Keep the rails thin and the beadboard consistent so the wall stays clean in photos. It’s beginner to intermediate because you’re mostly repeating straight cuts and nail lines.
Mark a mid rail at about 42-44 inches from the floor and a chair rail around 36-38 inches, then set total wainscot height around 60-66 inches. Install beadboard panels between the chair rail and the mid rail, then add a second beadboard section below or above depending on your layout. Frame the sections with thin molding so each beadboard area looks like a panel. Prime, caulk seams, and paint with a consistent sheen — satin on trim, eggshell on the wall field.
Use the same beadboard orientation across both sections so the texture direction doesn’t look random.
Don’t place rails at awkward heights that split furniture sightlines — keep the breaks aligned with how people stand and sit.
15. Mitered Frame Wainscot with Narrow Panels
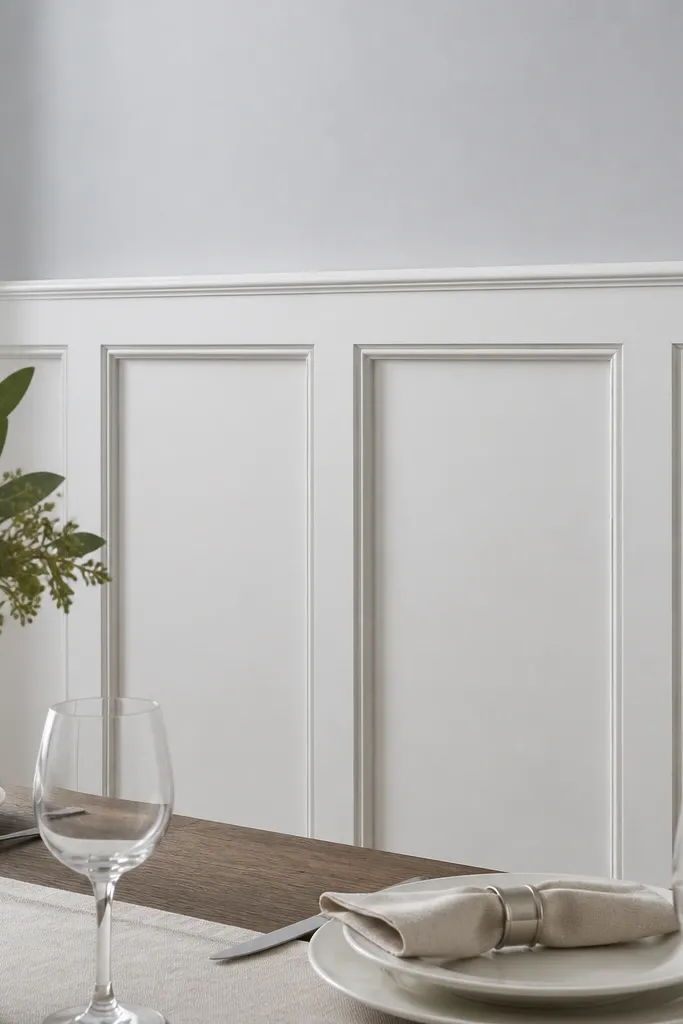
Mitered frames make wainscoting look like it was cut by a shop, not assembled from trim strips. The trick is narrow panels with clean mitered corners so the rectangles look sharp and symmetrical. This is especially good if your dining room has a modern vibe and you want a geometric wall that still feels warm. Use bright white trim and a softly colored upper wall so the frames pop. It’s advanced-ish because miter corners need precision and you can’t hide sloppy cuts under chunky caulk.
Set your chair rail at 38 inches and total wainscot height around 54-60 inches. Build an outer perimeter frame first, then create inner rectangles with narrow panel centers using MDF. Cut and install moldings with 45-degree miter joints at each rectangle corner, then glue and nail carefully so seams stay tight. Fill micro-gaps with wood filler, sand smooth, prime, caulk lightly, and paint with satin trim paint for crisp edges.
Cut miter joints at the same shop setting each time and label strips by position so you don’t mix small angle differences.
Avoid heavy caulk at miter corners — it makes corners look rounded and less “factory clean.”
16. Farmhouse-Modern: Flat Slats with a Thin Lattice Border

This is how you get a farmhouse-adjacent look without losing the elegant feel. Flat slats keep the wall smooth, while a thin lattice border adds a delicate pattern that reads refined instead of rustic. It looks great with sage, olive, or warm gray upper wall colors because the light bounces off the smooth slats. The lattice also frames the wall area nicely behind a dining table. Build difficulty is moderate because you’re installing a border pattern that must stay straight.
Editor's noteUse a laser line to keep lattice intersections aligned across the whole wall span.
Mark a chair rail around 36-38 inches and install flat slats below so total height lands around 54-58 inches. Create the lattice border using thin strips, like 1/4 to 1/2 inch thick wood or MDF strips, nailed to the perimeter frame. Keep the lattice spacing consistent by using a spacer gauge on the floor before you move it to the wall. Prime everything, then paint the lattice border and slats in crisp white so the pattern reads clean.
Skip thisAvoid thick lattice strips — chunky lattice makes the wall look like decorative screen panels, not wainscoting.
17. Corner-to-Center Panel Flow with a Window Seat-Like Frame
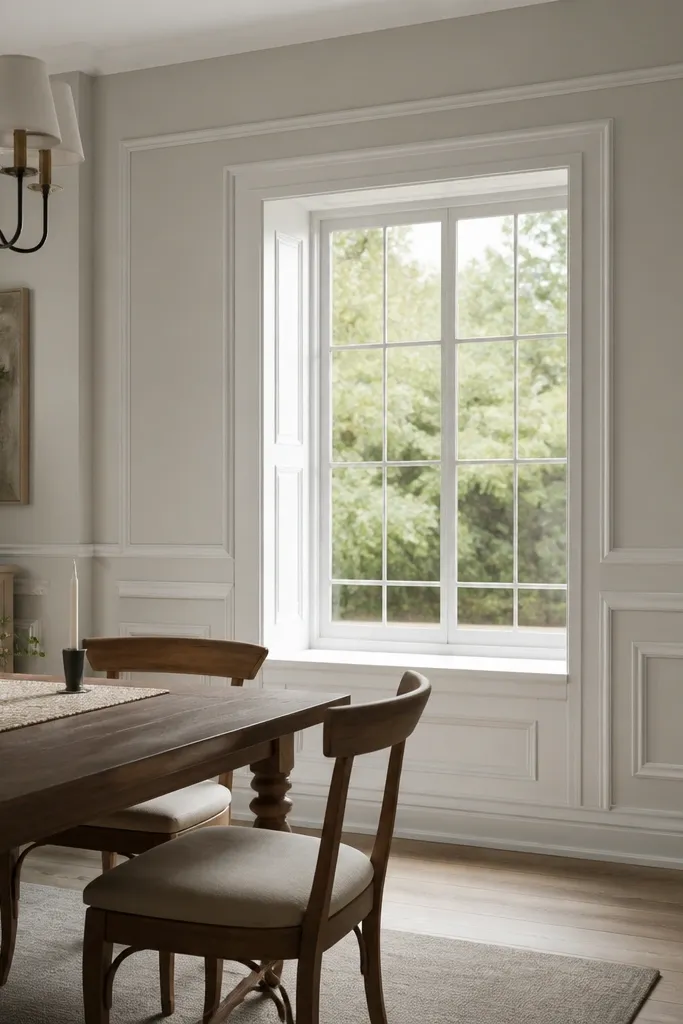
If your dining room has a window on the main wall, this style makes the wainscot look custom by letting the panel lines “flow” around the opening. A seat-like frame detail (even if you don’t build a seat) gives you that built-in furniture look people pay for in renovations. The result is elegant because the wall treatment respects the architecture instead of stopping awkwardly at trim breaks. It’s a great fix when photos show that your wainscot doesn’t feel aligned with the window. Intermediate build because you’re planning around the opening and maintaining consistent panel widths.
Editor's noteUse a flexible measuring tape and check panel widths at the window sill and at the top rail so you don’t get a narrow panel near the sill.
Start by mapping the wainscot grid on paper: decide panel widths so they divide cleanly on both sides of the window. Set the chair rail at 38-40 inches and run your wainscot up to about 58-60 inches total height, then stop and frame the window opening with matching trim. Install the outer perimeter first, then build the inner panel frames so the verticals align through the window area. Prime, caulk, and paint in two tones so the framed opening reads crisp against the wall field.
Skip thisAvoid changing panel width around the window — the eye catches those shifts immediately.
18. Modern Vertical Wainscot with Flat Baseboard Trim
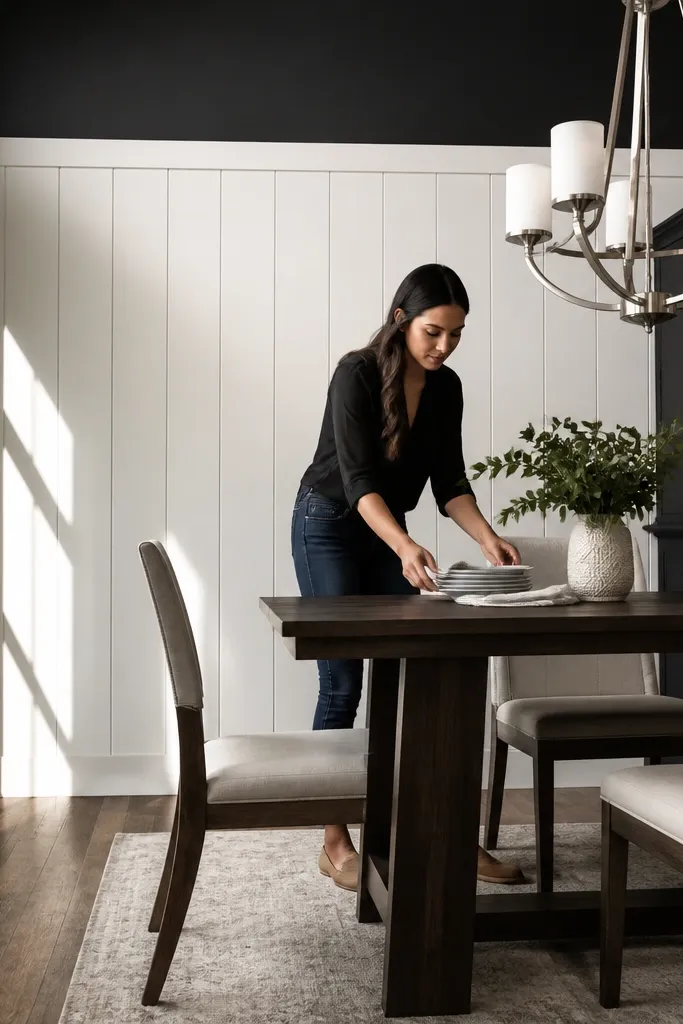
Not all elegant wainscoting needs to be traditional. Vertical wainscot boards with a clean baseboard-like bottom trim create a modern, tailored look that still reads high-end because of the line quality. This works well in dining rooms with a dark upper wall color where you want the wainscot to look like a bright column of detail. Keep the verticals narrow and evenly spaced so it looks designed, not improvised. It’s beginner-friendly if you keep your reference lines straight and use a ledger for the bottom edge.
Editor's noteUse a chalk line to mark your verticals before fastening so you don’t rely on measuring repeatedly at eye level.
Place the chair rail around 38 inches and set total height around 54-60 inches. Install a straight bottom trim strip first (like a baseboard profile), then add vertical panel boards from that line up to the chair rail. Space panels evenly using a spacer block and nail into studs or blocking. Prime and paint with satin trim paint so the vertical lines look crisp under chandelier light.
Skip thisAvoid wide uneven spacing — modern wainscot mistakes look louder because the lines are straight and obvious.
19. Classic Wainscot with a Top Frieze Band

A frieze band above the chair rail adds ornament without making the whole wall look busy. It’s the detail that reads like a high-end renovation because it creates a layered transition between the wainscot and the upper wall. Choose a simple frieze profile with a shallow groove or bead so it catches light but stays clean. This look is great for dining rooms with traditional molding styles or rooms that already have a more formal vibe. Build is moderate because you’re adding one continuous trim band and keeping it perfectly level.
Editor's notePre-cut frieze sections and dry-fit around corners so you can adjust miter angles before paint makes them unforgiving.
Set your chair rail at 38-40 inches and build the wainscot up to about 54-60 inches total height. Install the main wainscot field first, then add a frieze band above the chair rail at a consistent height across the wall. Use a laser level and nail into studs or blocking behind the drywall so the band doesn’t sag. Prime and paint everything, then caulk only the joints at trim intersections for a sharp, professional seam.
Skip thisDon’t pick a frieze that’s too busy — if it has lots of tiny grooves, it can look fussy up close.
20. Beadboard with a Raised-Panel Center Medallion
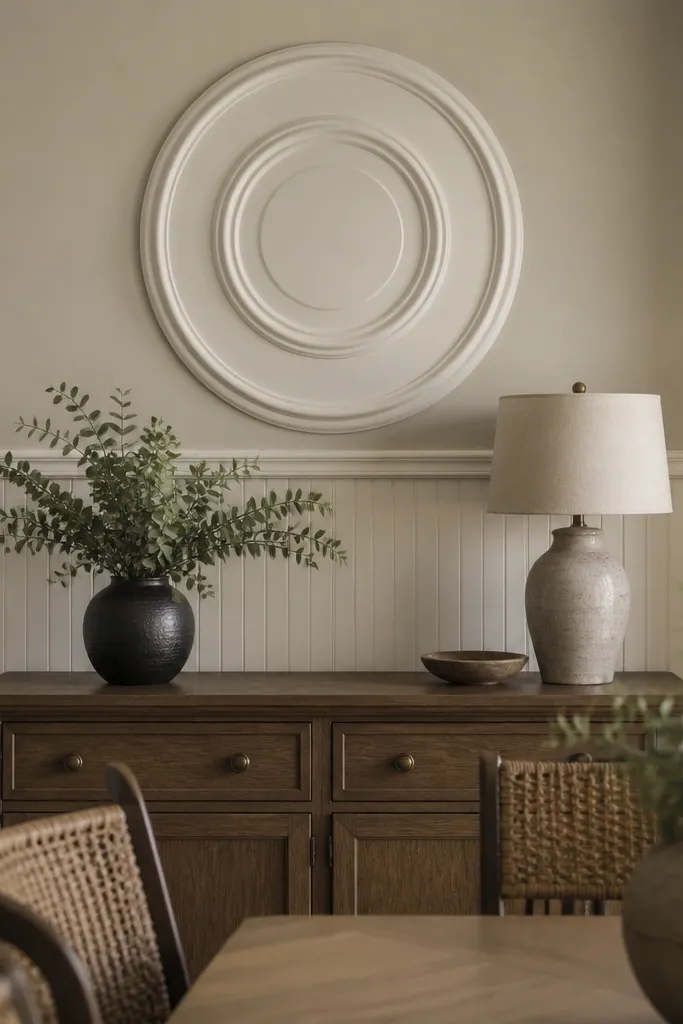
This is a smart way to add drama to a dining room wall without covering the whole thing in complex trim. Beadboard gives you the clean texture, and a raised-panel medallion in the center gives that “architectural focal point” effect. It photographs well because the raised center throws deeper shadows than the beadboard field. Place it on the main wall behind the dining table or centered on a larger blank section. Skill level is intermediate since you’re building one special feature piece.
Install beadboard below a chair rail at 36-38 inches and set total wainscot height around 52-56 inches. Mark the centerline of the wall and build a raised-panel rectangle or oval-like medallion using MDF: outer frame, inner panel molding, then a small top and bottom rail. Mount the medallion onto the beadboard field so it sits flush and centered, then caulk the perimeter. Prime, caulk, then paint the medallion and beadboard in the same bright trim color so the medallion detail reads crisp.
Use a cardboard template for the medallion shape so your center feature stays symmetrical before you cut MDF.
Avoid a medallion that’s too large — if it dominates, the wainscot stops reading elegant and starts reading decorative.



