
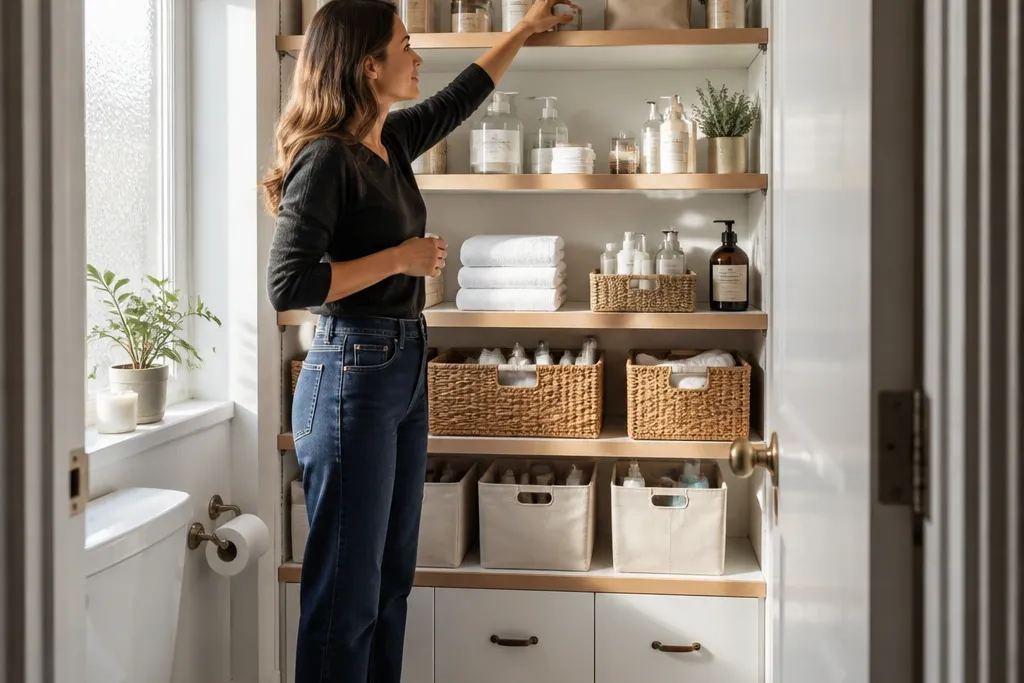
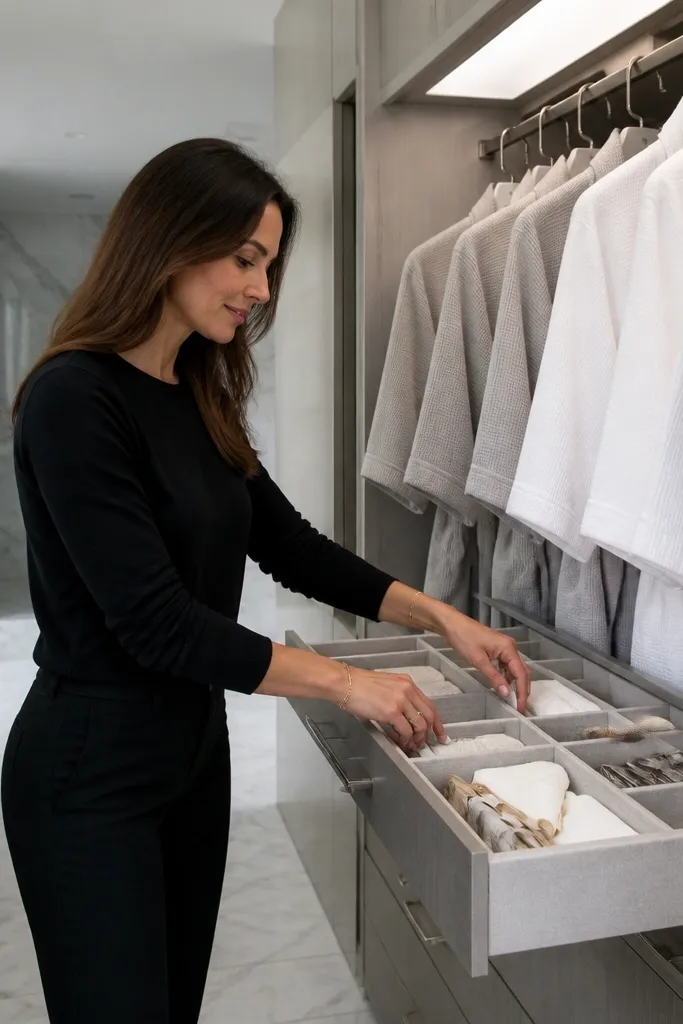
1. Sliding Under-Shelf Basket Track
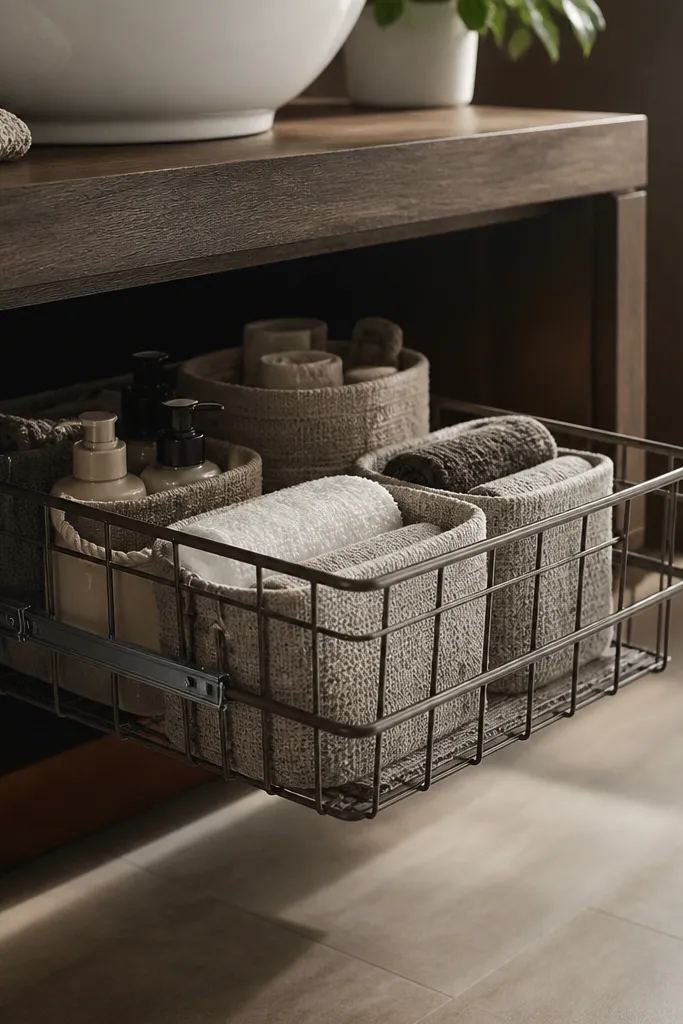
This is the highest-impact upgrade for deep bathroom closets because it turns dead space under shelves into a smooth pull-out drawer. The look is clean because the basket stays hidden until you slide it forward, so you don’t see a jumble of backups. Use wire or fabric baskets inside a wood frame so items are breathable, then add a matte finish rail for a built-in vibe. It saves space by letting you stack thinner items without trying to fit them behind taller bottles. Skill level is beginner to intermediate: you’re building a simple guide system and mounting it square.
Editor's noteUse drawer slides rated for at least 50 lb so the basket doesn’t sag after a few months of full bottles.
Measure the inside depth and decide how far the basket should slide out without hitting the closet door. Build a shallow frame from 1x2 lumber (or plywood strips) that matches your shelf color, then attach a pair of drawer slides or heavy-duty track rails to the underside of the shelf. Mount the basket to the frame using screws through the basket frame, test the slide for clearance, then sand edges and seal with a matte paint or clear coat. Finally, add a small finger pull at the basket front so it opens smoothly even with wet hands.
Skip thisDon’t mount the rails crooked — even a 1/8 in twist makes the basket scrape and look cheap.
2. Clear-Lid Acrylic Drawer for Tube Chaos
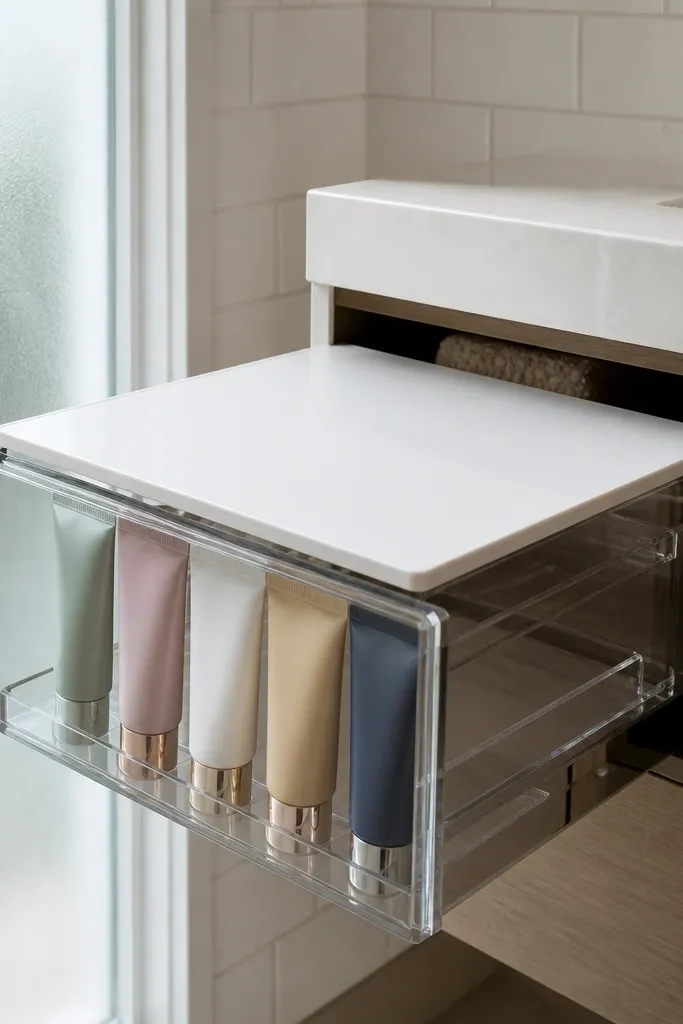
A clear-lid acrylic drawer looks high-end because you can see the contents without turning the whole closet into an open mess. It’s ideal for tubes, small serums, and makeup remover pads where everything rolls and mixes. The lid keeps dust off and also hides clutter when you’re not using it. This storage method saves space by letting you stack smaller items in a shallow footprint instead of spreading them across multiple shelves. It’s a quick build if you can source a ready acrylic box, and it looks intentional with matching labels.
Editor's noteStick labels to the drawer front, not the lid — it keeps the look clean and readable when the drawer is pulled out.
Choose an acrylic drawer box with a lid that fits your shelf depth; aim for a width that leaves a consistent gap on both sides. Cut thin foam or felt strips to line the bottom so tubes don’t rattle, then add a simple vertical divider using acrylic strips or thin wood strips sealed at the edges. Arrange tubes upright by size (tall at the back, short at the front) so the drawer stays tidy. Secure any dividers with clear adhesive or small screws through a hidden backing strip, then add a label strip at the front edge.
Skip thisSkip loose dividers that move — shifting bins make the drawer look messy fast.
3. Staggered Shelf Risers for Bottles
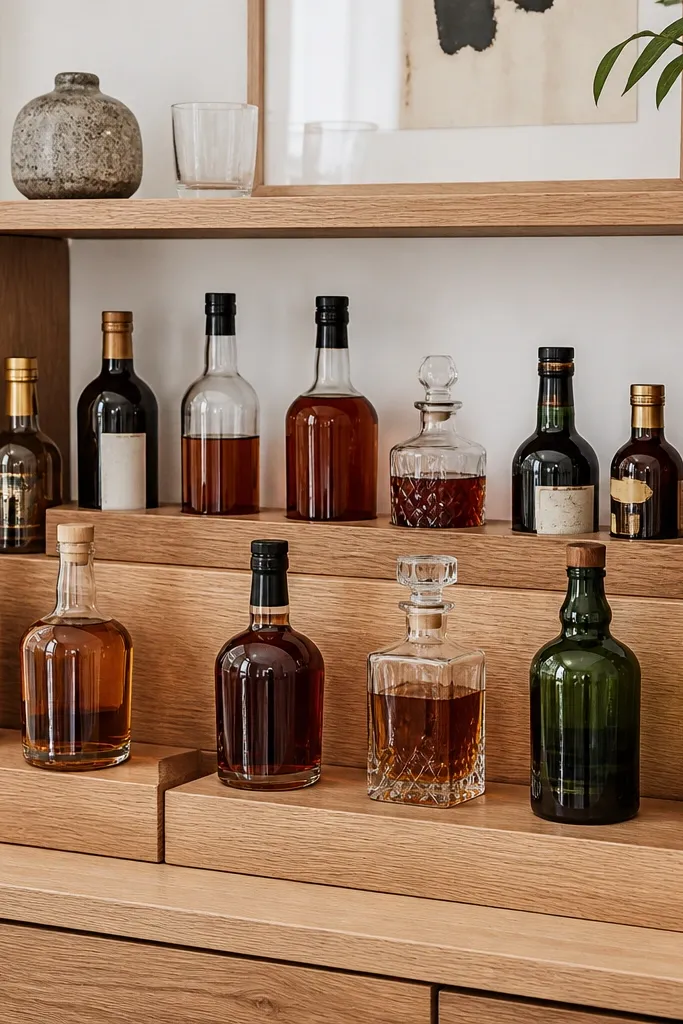
Staggered risers make bathroom shelves look styled instead of crammed. The idea is to give every bottle a “front row” so you can see labels and reach items without digging. It saves space because you stop wasting vertical space on flat stacks that block access. Use risers to create a gentle step layout: tall bottles sit at the back, shorter bottles sit forward, and small items stay in a tray on top. This project is great if your closet has multiple shelves and you’re tired of bottles hiding behind hair spray and backups.
Editor's noteUse a matte sealant on the risers so light doesn’t glare and make the closet look cheap.
Measure your shelf width and choose riser heights that match your item sizes; start with 1.5 in for small bottles and 3 in for taller ones. Cut riser blocks from plywood or hardwood, then sand and seal them to prevent moisture damage. Place risers in a staggered pattern with a consistent spacing gap (about 1/2 in) so bottles sit stable. Add a shallow lip trim at the front edge of each riser to stop bottles from sliding forward, then place a matching tray on the lowest shelf for small items.
Skip thisDon’t rely on friction alone — without a front lip, bottles slide and the arrangement falls apart.
4. Door-Mounted Vertical Organizer with Swing-Open Pockets
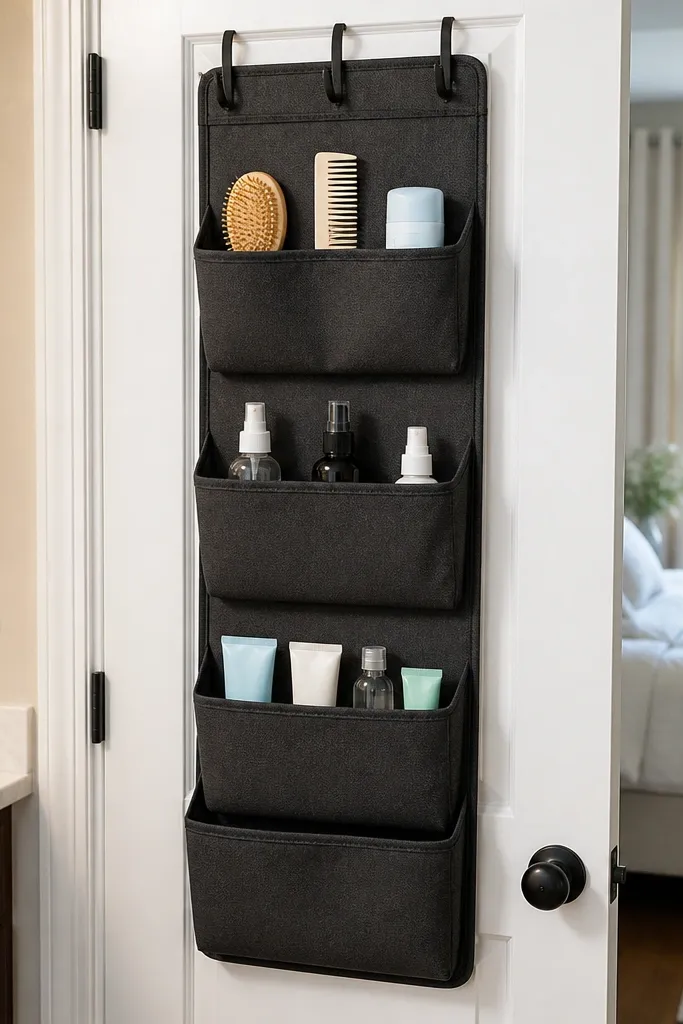
A door-mounted organizer looks high-end when it’s vertical, aligned, and uses pockets with stiff backing. It’s perfect for bathroom items you grab daily: hairbrushes, combs, deodorant, mini sprays, and backup travel-sized bottles. This saves space by moving the “frequent grab” items off shelves, freeing the shelf footprint for bulk storage. The swing-open pocket design also keeps items accessible without overreaching. You’ll get a clean look if the organizer color matches the closet interior and the pockets are evenly spaced.
Editor's noteUse short screws with washers so you don’t crush the door material and cause gaps.
Remove the closet door and mark the centerline of the inside face. Screw a thin mounting rail (1x2 painted wood or metal rail) into the door studs so it’s anchored, then attach vertical organizer pockets to the rail using brackets. Ensure the pockets clear the door hinges and any knobs when open, then test the swing for full closure. Seal the rail and edges, then add a small hook strip at the bottom for comb storage or a microfiber cloth.
Skip thisSkip sticky adhesive mounting — it fails in humidity and looks messy when it starts to peel.
5. Flip-Front Bin Cabinet for Cleaning Supplies
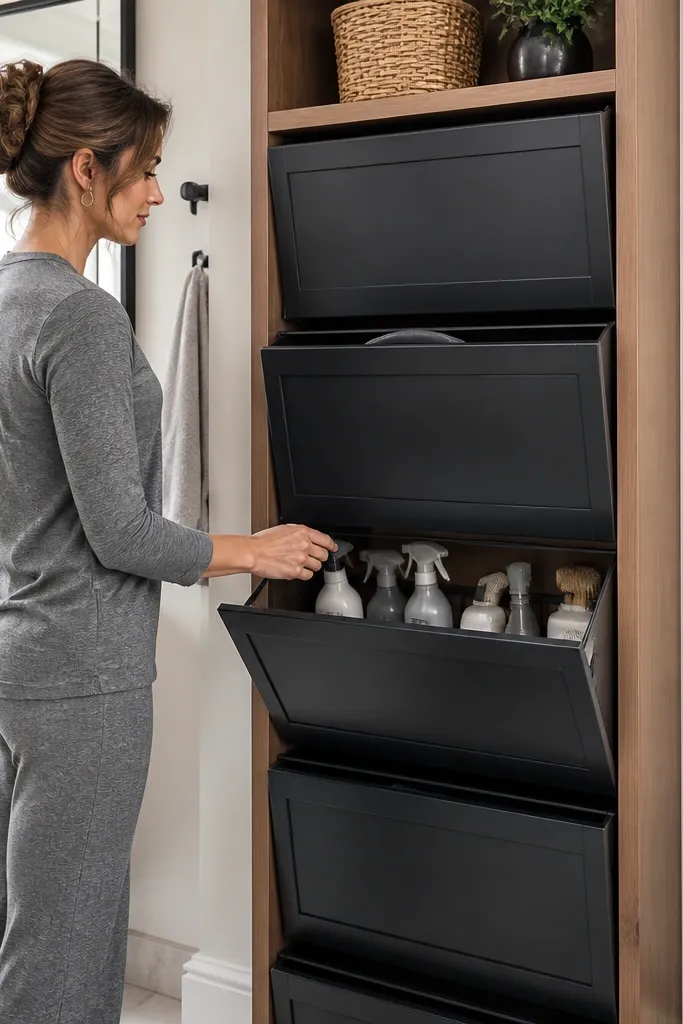
This is how you keep bathroom closet storage looking expensive: hide the cleaning clutter behind flip-front bins. You get fast access without leaving bottles exposed, and the closet stays photogenic even when you’re actively cleaning. It saves space because you can store tall sprays vertically while keeping smaller refills in the same bin system. The visual trick is consistent bin faces and a clean hinge line, not random baskets. This build works best in closets with doors or a cabinet interior where you can mount hinges and keep everything aligned.
Pick bin sizes based on your tallest cleaning bottles; measure bottle height and add 1 in clearance for the lid or front lip. Build a rectangular frame from plywood and attach hinge hardware to the frame so the bin front flips open smoothly. Mount the frame inside the closet and secure with corner blocks behind the shelves for strength. Finish with painted drawer pulls or simple knobs in matte black or brushed brass to match your bathroom hardware.
Use soft-close hinges if you can — the gentle stop makes the whole closet feel built-in.
Don’t mount bins only to shelf edges — the weight pulls and the doors start to sag.
6. Pegboard Spice-Style Wall Inside Closet
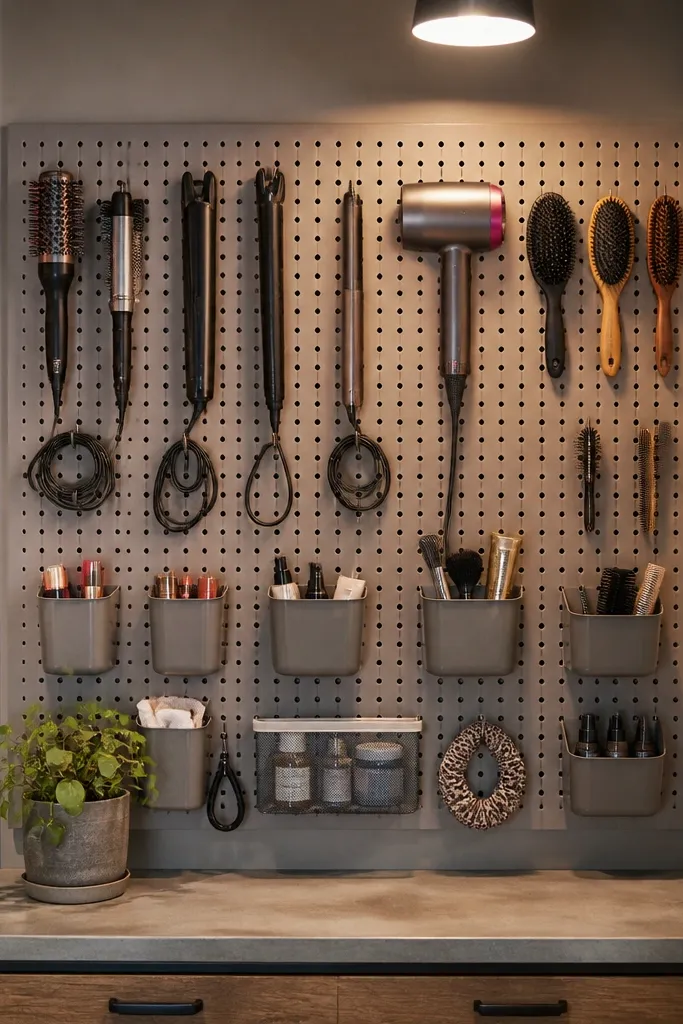
Pegboard is a closet cheat code because it lets you arrange bathroom tools like a curated station. The look is graphic and organized: rows of hooks, uniform spacing, and everything visible at a glance. It saves space by letting you hang items vertically instead of stacking them sideways. Use it for hair tools, brushes, styling clips, and small bottles that have flat backs or can hang safely. This is one of the most photogenic options because the layout reads intentional even from across the room.
Editor's noteUse a ruler and mark hook rows before drilling — straight lines make the whole closet look designer.
Cut pegboard to fit the inside back wall or a dedicated side panel, leaving 1/2 in clearance for installation gaps. Sand edges, then prime and paint the pegboard so it matches your closet interior. Install the board into studs or use heavy-duty anchors with a backing strip behind the pegboard. Add hooks and small holders first, then place items and adjust spacing so the “front row” aligns at eye level.
Skip thisAvoid mixing hook sizes randomly — it turns into a clutter wall.
7. Fabric Lined Drawer Inserts for Makeup and Tools
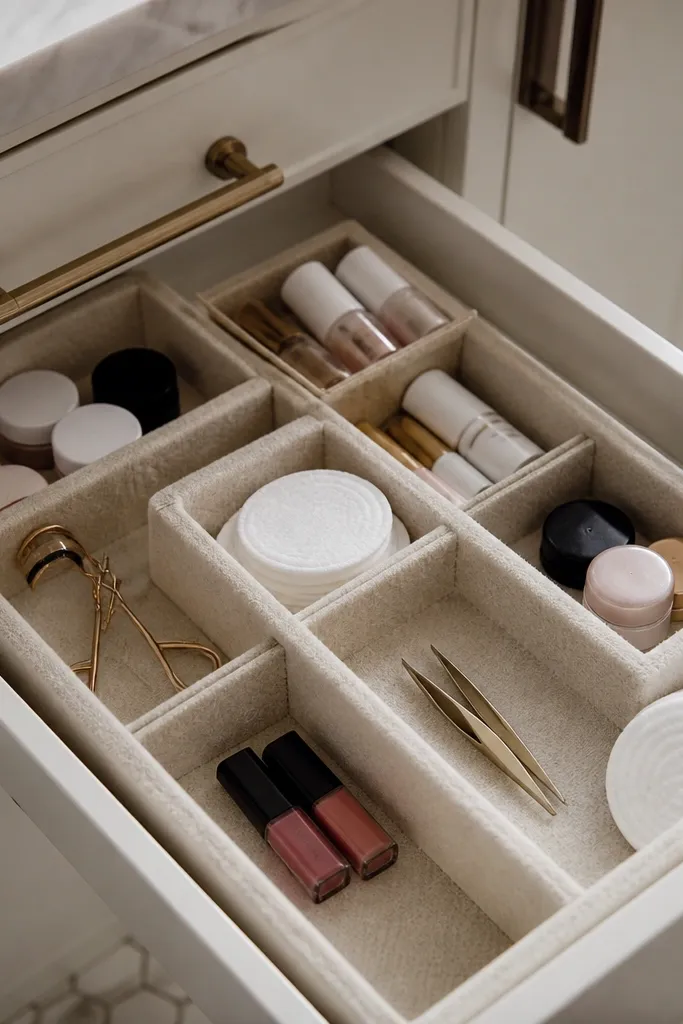
Fabric-lined drawer inserts make a bathroom closet feel boutique because they soften the look and keep small items from sliding. This setup is best for makeup, skincare minis, tweezers, and cotton products that get messy when they bounce around. It saves space by using shallow compartments instead of one big bin where everything piles. The visual win comes from consistent divider heights and a neat front edge so it looks tidy when the drawer is open. Skill level is beginner: you’re cutting foam or thin wood dividers and covering them.
Measure your drawer interior and cut a base insert from thin plywood or rigid foam board. Cut dividers to create 2-4 compartment sizes based on your items; keep tall dividers for bottles and short dividers for flat items. Cover the base and dividers with fabric using spray adhesive, then wrap edges so they don’t fray. Place a non-slip backing under the insert, and add a small tray for cotton pads or backups near the front.
Choose a fabric with a tight weave like cotton canvas and seal it lightly with fabric-safe spray to handle bathroom humidity.
Don’t use slippery satin fabric — items slide and the compartments look disorganized.
8. Vertical Spice Rack for Hair Products
A vertical spice rack format makes hair products look orderly and saves shelf space by using height instead of width. It’s ideal for styling creams, pomades, and small bottles that store well upright. The high-end look comes from uniform bottle alignment and a clean, framed rack face. You also get faster access because you can scan labels without pulling items forward. This works best on a side wall or inside a closet compartment where you can mount a narrow, framed rack.
Measure the width of the compartment and aim for a rack with spacing that matches your bottle diameters plus 1/4 in. Build a simple frame from 1x2s, then add vertical dividers from thin plywood strips. Sand, prime, and paint the frame so it matches the closet interior. Add a bottom stop lip to prevent bottles from falling forward, then mount the rack level using wall anchors or screws into studs.
Use adjustable dividers if you have mixed bottle sizes — it keeps the rack looking uniform over time.
Skip wide spacing — it makes bottles wobble and the whole shelf looks sloppy.
9. Mirrored Cabinet Door with Hidden Ledge
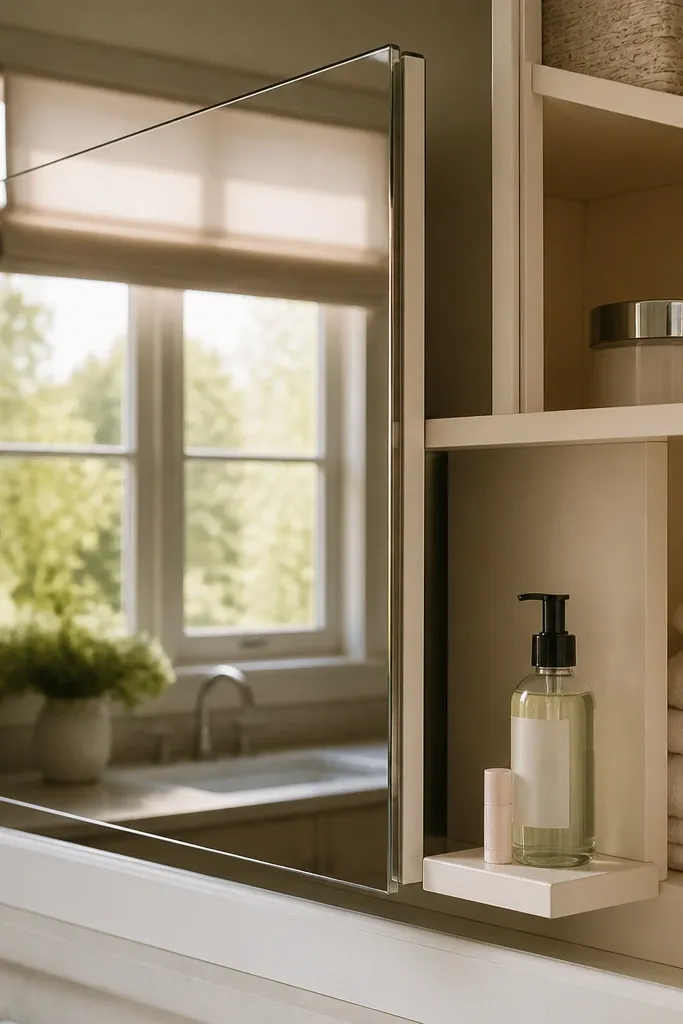
A mirrored cabinet door adds instant high-end polish because it doubles light and makes the closet feel intentional, not cramped. The hidden ledge is the functional twist: it gives you a landing spot for daily items like a cleanser, lip balm, or hand cream so they don’t live on the counter. It saves space by shifting frequently used bottles into a consistent spot with a closed front. This is best for bathrooms where the closet is near the sink and you want quick access without clutter showing. Skill level is intermediate because you need secure mounting and safe mirror installation.
Choose a cabinet door insert or mount a mirrored panel on an existing door using mirror-rated adhesive and safety clips. Add a small internal ledge by installing a short shelf bracket or trim rail at a comfortable reach height (about 36-40 in from the floor to the ledge). Paint and seal the ledge underside to keep it moisture-safe. Place a tray on the ledge so bottles don’t slide, and add a small strip of felt where lids touch.
Use mirror safety film on the back so it’s safer if the mirror ever chips.
Don’t mount a mirror directly to particleboard without sealing — bathroom humidity can warp the door.
10. Stackable Drawer Organizers for Overflow Towels
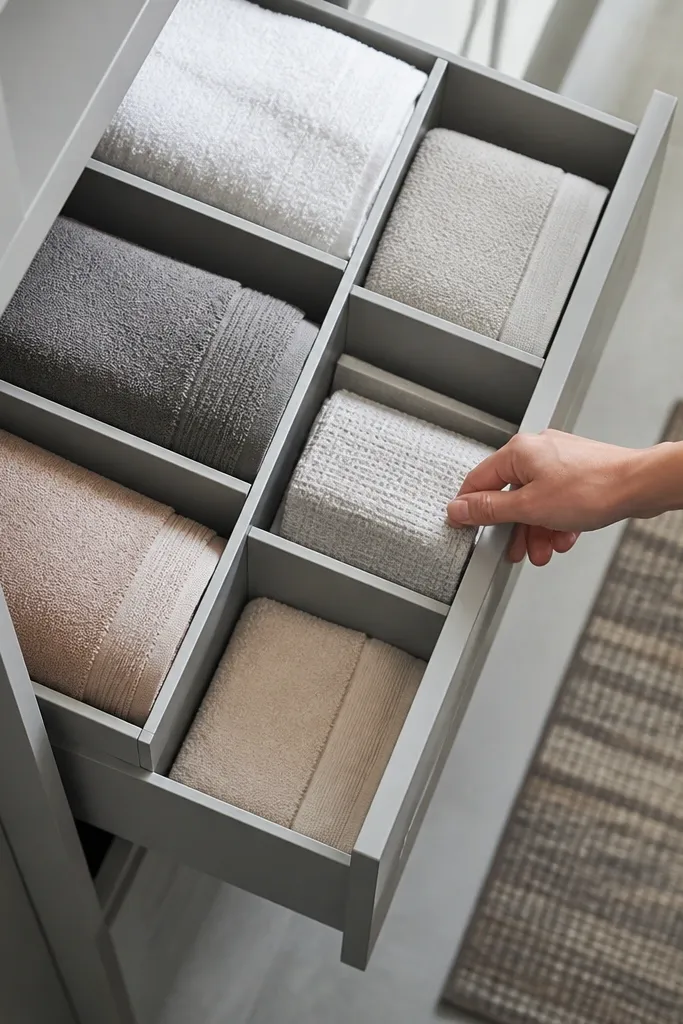
Stackable drawer organizers clean up towel overflow without turning the closet into a tall, messy pile. The look is neat because the fronts match and the drawer edges create a consistent grid. It saves space by using vertical stacking and keeping towels compressed and uniform. You also get better rotation because you can pull one drawer at a time instead of digging through piles. This works in closets with shelves deep enough for drawer units or in a cabinet with open shelving where you can mount glide rails.
Editor's noteFold towels into the same size rectangle every time — the drawer fronts look perfect when the contents match.
Pick drawer organizers with rigid fronts or add a simple frame so the drawers align visually. Measure shelf depth and set a drawer height that lets you stack two layers without crushing towel folds. Add a label rail at the top front edge of each drawer so you can see what’s inside. If you’re building, construct a shallow box from plywood, add fabric panels, then install glides for smooth pull-out.
Skip thisDon’t use floppy bins — they collapse and make the shelf look uneven.
11. Corridor-Style Narrow Pull-Out for Tall Bottles
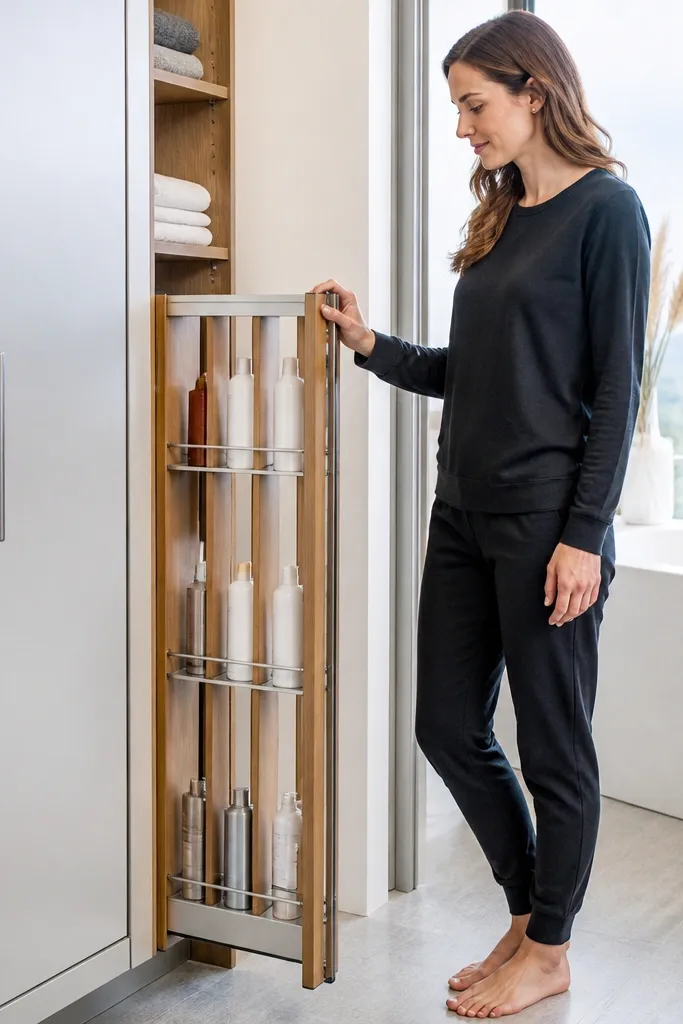
A narrow pull-out section is the best fix for closets where tall bottles block everything else. Think of it like a corridor: bottles go upright in a slim pull-out frame, and you slide it forward to access without moving other items. It saves space because the system uses depth efficiently while keeping the width narrow. The high-end look is in the front panel and consistent spacing — no exposed wire and no mismatched baskets. This is a stronger build than a simple shelf divider, but it’s worth it if you have lots of tall bottles.
Measure the narrowest interior width you can spare and build a pull-out frame from plywood that fits snugly with 1/4 in clearance on each side. Install heavy-duty drawer slides at the top and bottom so the pull-out stays level and doesn’t rack. Add bottle stops using small wood strips or a perforated backing with adjustable pegs. Finish with a matching front panel and a pull handle aligned with your closet hardware.
Add a small rubber mat at the base to stop bottles from clinking and sliding.
Don’t skip side stops — without them, bottles tip when you pull the frame out.
12. Lidded Clear Bins with Color-Matched Labels
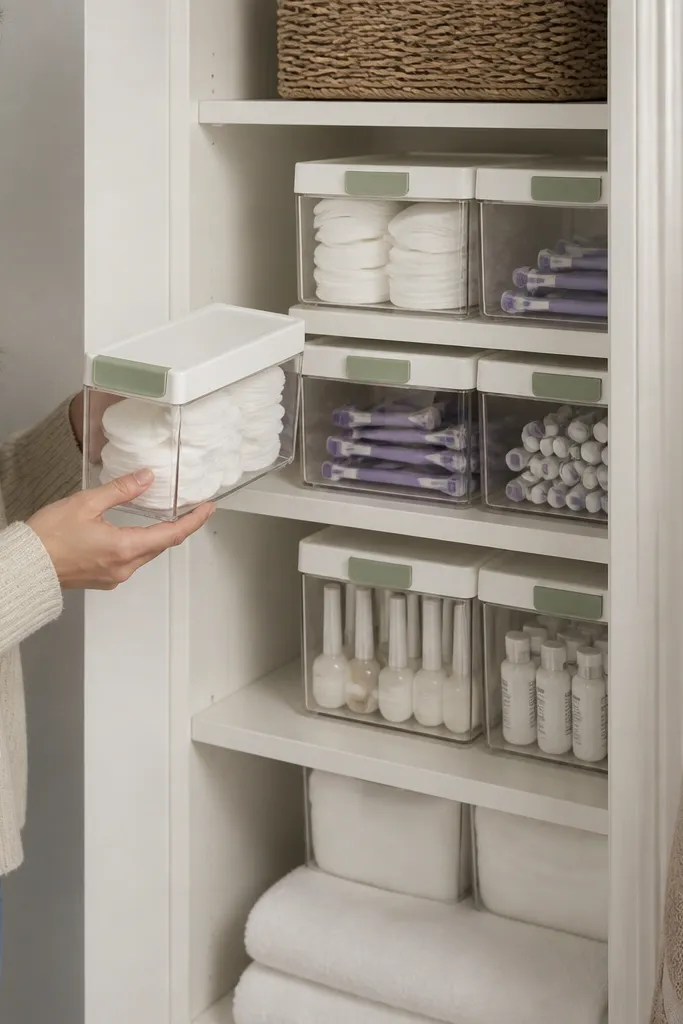
Clear bins with lidded fronts are the sweet spot for high-end Closet Organization ideas because you can see what’s inside while keeping the clutter hidden. Match the bin color — clear + matte white lids or clear + black lids — and the closet looks designed instead of random. This saves space by letting you stack bins by size and keep refills together. It’s perfect for cotton balls, backups, travel minis, and spare accessories that multiply in bathroom closets. The look is clean because labels align and the bin lids keep dust down.
Choose bins that fit your shelf depth and leave a 1/2 in margin at the back for airflow. Print labels on a consistent size format and mount them on the front lid edge so they’re readable when the bin sits on a shelf. If you’re building your own frames, use thin plywood to create a lip that holds the bin lid flush. Arrange by category and then by size: largest bins go on the bottom shelf, smaller ones on top, with labels at the same height.
Use a label color system: one accent color for skincare, another for hair, and keep the font and size identical.
Avoid mixing lid finishes — glossy lids catch light and make the closet look messy.
13. Peg + Shelf Combo for Styling Tools and Scissors
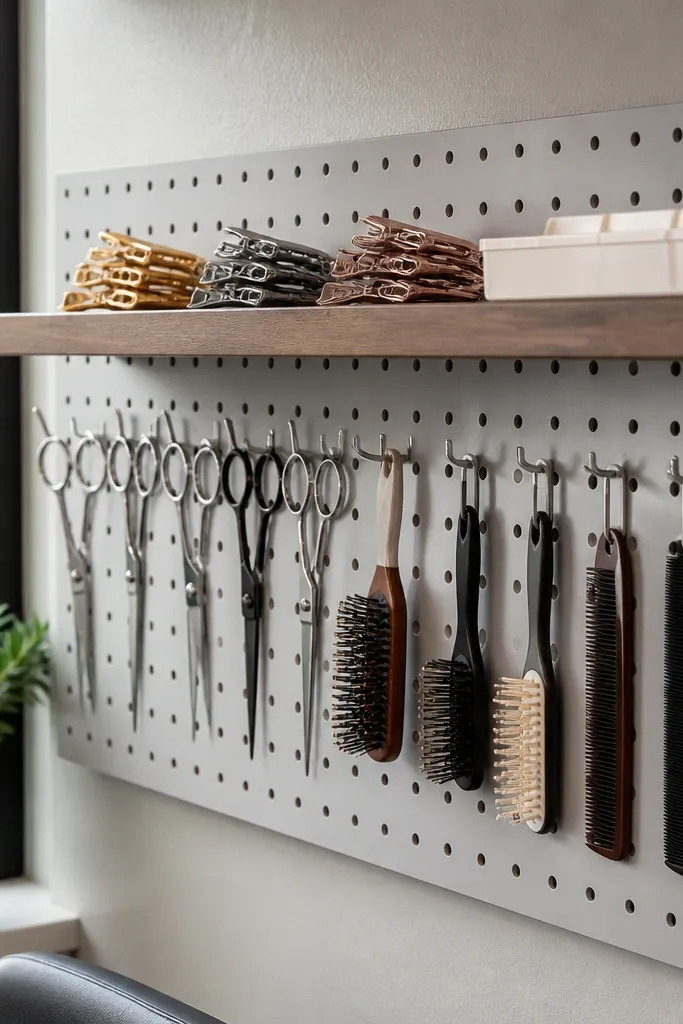
This combo gives you both display and function: a small shelf for flat items plus peg hooks for tools that need vertical storage. It’s visually striking because you get a tidy tool line — scissors in one spot, clips in another, brushes hanging straight. It saves space by removing tools from shelves where they take up width and snag on bottles. The high-end look is in the spacing and the “tool geometry” — everything has its place and aligns. This works best in small closets where you can dedicate a side wall to tools.
Install a narrow shelf on a side wall inside the closet at a comfortable reach height, then mount pegboard directly above or beside it. Paint both pieces the same color as the closet interior for a built-in feel. Add hooks sized for each tool: use J-hooks for brushes, small straight hooks for clips, and a longer hook for scissors with a sheath. Finally, add a small tray under the pegboard shelf for hair ties so they don’t fall behind items.
Mount hooks first, then place tools — ordering matters because tools determine spacing.
Don’t hang heavy tools on tiny hooks — they bend and pull the pegboard out of alignment.
14. Two-Tier Pull-Out for Backstock Refills
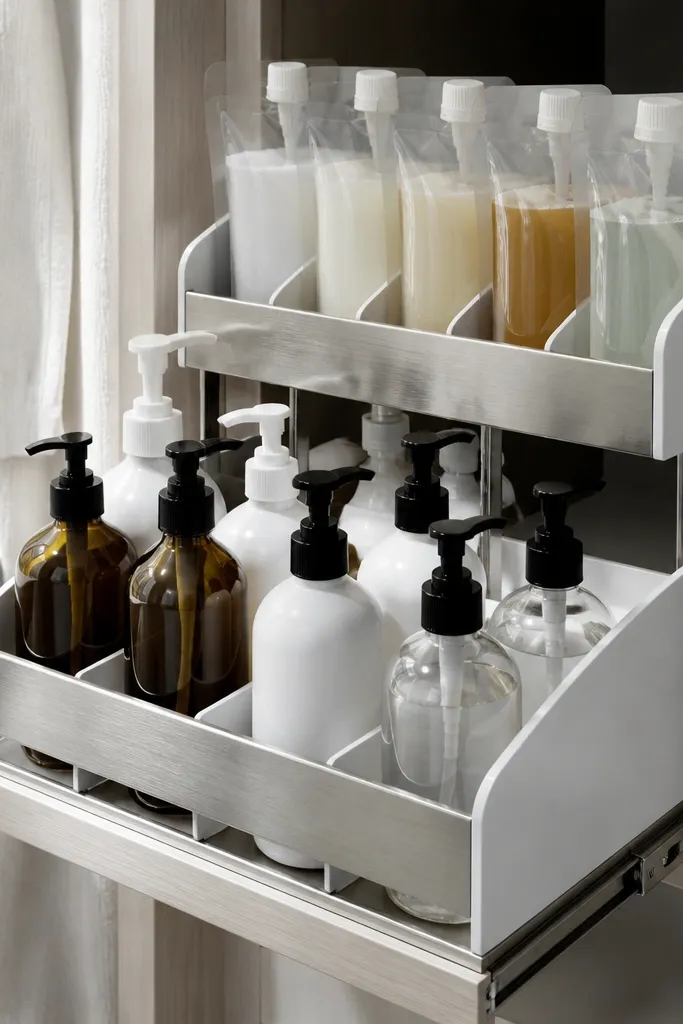
Backstock refills are what make closets look chaotic even when you “organize.” A two-tier pull-out solves that by giving refills their own vertical lanes — front tier for current bottles, back tier for backups. It saves space because you stack by function instead of mixing categories across shelves. The visual payoff is clean: a single pull-out section reads as intentional, not a pile of odds and ends. This build fits medium to large bathroom closets with enough depth for two levels.
Editor's noteAdd a stop block so the drawer never fully exits — it keeps the alignment perfect after repeated use.
Measure the closet depth and choose drawer slides long enough to handle both tiers without binding. Build a pull-out frame with two platforms: one top and one bottom, spaced so taller bottles clear the tier above. Attach dividers to each tier for consistent rows, then mount the frame using corner braces to prevent racking. Paint or seal the frame, then install a front face panel with a pull handle centered.
Skip thisDon’t overload the top tier — heavy bottles shift the balance and the drawer starts to sag.
15. Custom Shelf Liners with Raised Stop Ridges
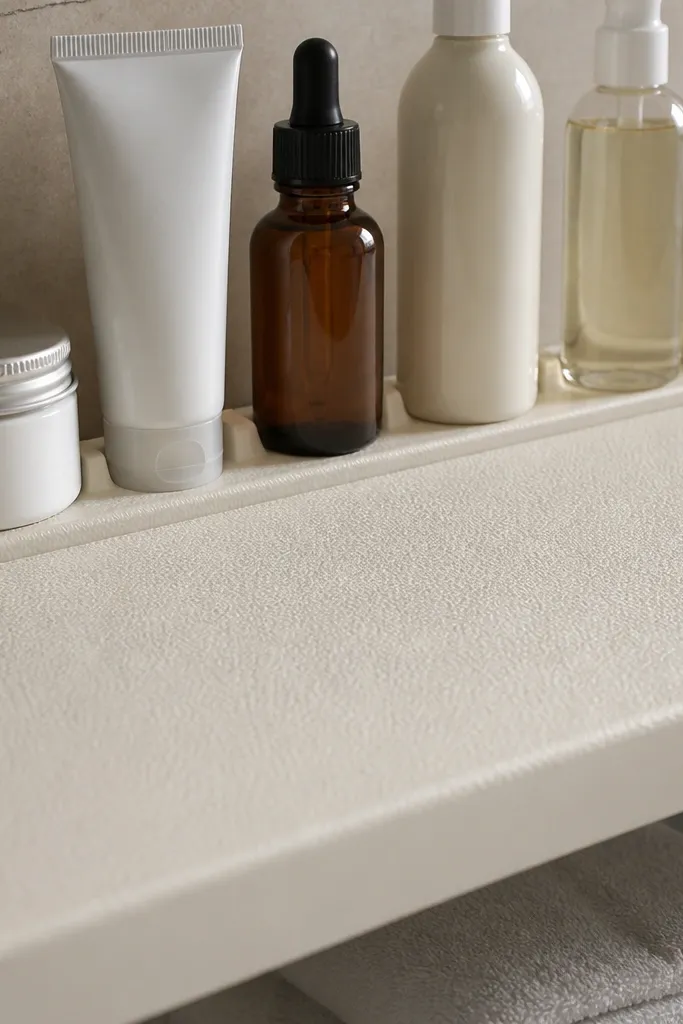
Shelf liners are where organization looks high-end when they’re not flimsy. Raised stop ridges stop bottles and tubes from sliding, which keeps the whole shelf looking aligned even when you’re rushing. This is a practical win for bathrooms because humidity makes everything slip — especially plastic bottles. It saves space by letting you store items closer together while still keeping them stable. The look is clean because the liner fits the shelf perfectly and the ridges create a neat front line. This is a beginner-friendly build with big visual payoff.
Measure each shelf’s interior and cut liner material to fit with 1/8 in clearance at the edges. Use moisture-resistant material like thin EVA foam or rubberized shelf liner, then seal cut edges if needed. Create raised stop ridges by gluing narrow strips of the same material along the front edge and any zones where bottles touch. Let it set fully, then test stability by placing bottles and gently bumping the shelf.
Use a non-slip top coat spray on foam liners to reduce slipping without making them shiny.
Skip oversized liners — wrinkles show immediately and make the closet look sloppy.
16. Stacked Hanging Organizer for Hair Dryers and Tools
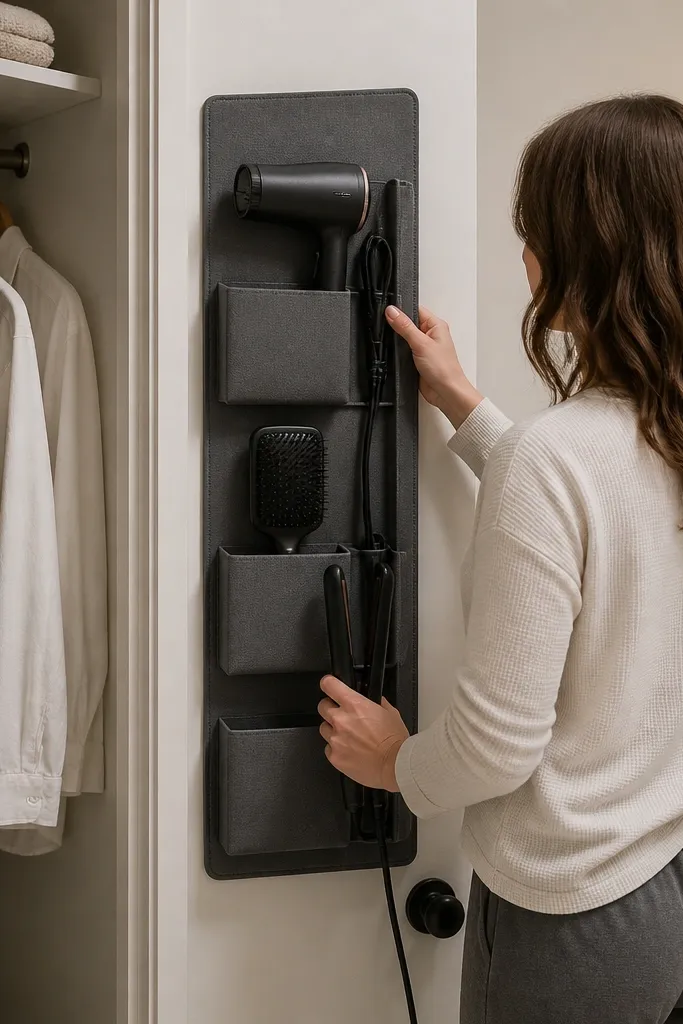
A hanging organizer looks sleek when it’s structured and aligned, not floppy. This one is for bulky tools like hair dryers, straighteners, and brushes that usually take up too much shelf depth. The stacked pocket layout saves space by using vertical wall area and keeping cords contained. For the high-end look, choose a structured fabric or a rigid backing panel so the pockets keep their shape. It’s also easier to keep the closet tidy because each tool has a pocket size that matches it.
Mount a vertical backing board or rail to the closet side using screws into studs or anchors. Attach hanging pockets with spaced brackets so the pockets line up and don’t sag. Use pocket sizes that match your largest tool first — start with the hair dryer pocket, then add smaller pockets for brushes and clips. Route cords into a small cord wrap hook so nothing drapes across the shelf where it tangles.
Add a small label tag to each pocket so you don’t have to guess where the tool goes when you’re in a hurry.
Don’t mount on thin door skin — the weight pulls the organizer down and ruins the clean lines.
17. Floating Shelf Ladder for Styling Products
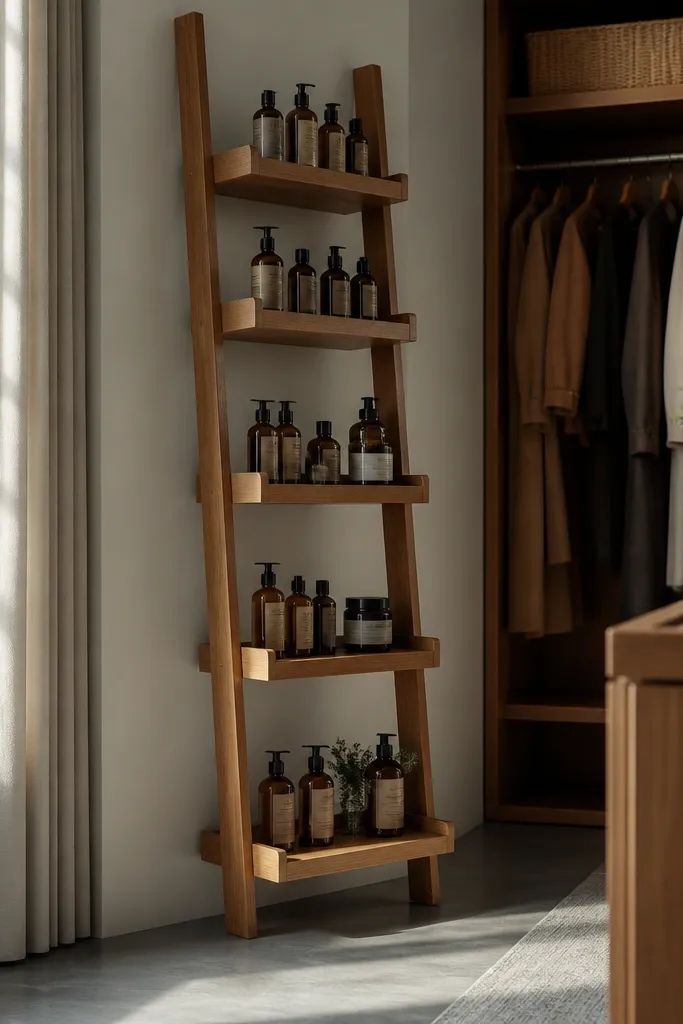
Floating ladder shelves make a bathroom closet look like a small boutique display. It saves space by using vertical height and by organizing products in a stepped layout that keeps labels visible. This is best for sets of styling products in similar bottle shapes, like matching jars and pumps. The high-end look comes from consistent shelf depth, clean edges, and a uniform finish on the supports. If your closet is small, this is one of the prettiest ways to store without making the space feel blocked.
Pick shelf spacing based on product heights; start with 5-6 in between levels for most styling bottles and jars. Cut side rails from plywood or hardwood strips and mark shelf support positions. Install the side rails securely to studs, then mount shelves on top using countersunk screws and wood filler. Sand and finish the shelves with a matte top coat, then arrange products by height so the front line stays clean and readable.
Use a single color finish across the ladder and the closet interior so it reads as one designed unit.
Avoid mixed shelf depths — uneven steps look accidental and cheap.
18. Bathroom Closet Label Rail with Color-Coded Tabs
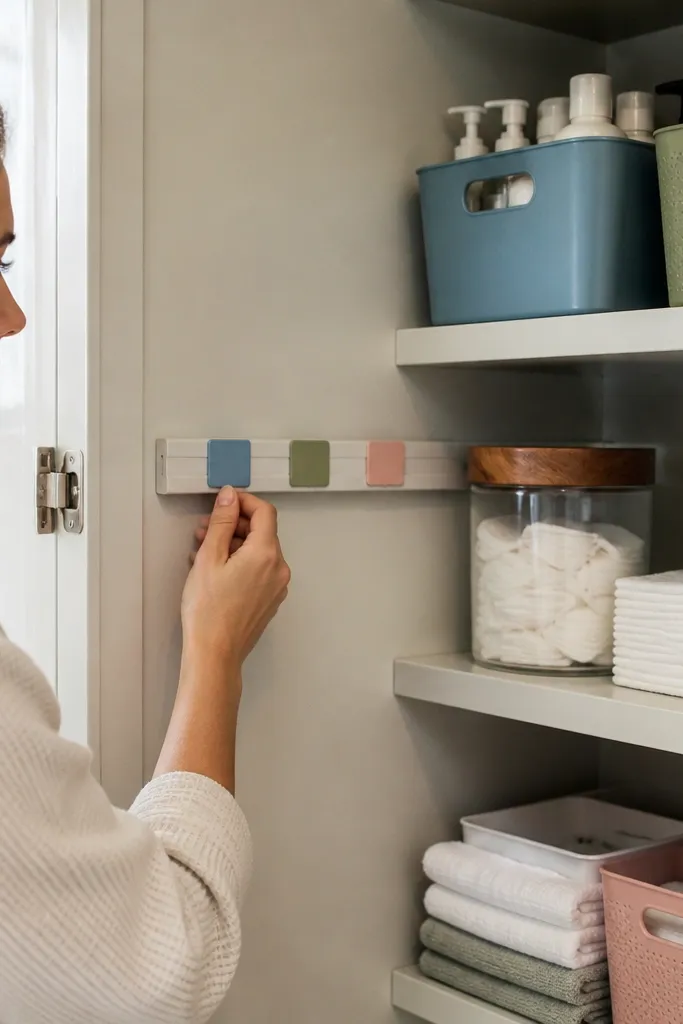
A label rail is the simplest way to make Closet Organization ideas look high-end because it turns storage into a system you can read instantly. It saves space by reducing “search time” — you stop pulling everything out to find a backup cleanser or cotton pads. The look is crisp and uniform when labels align at the same height and tabs use consistent colors. This is ideal if you already have bins or dividers and just need the final layer of order that makes the closet feel designed. It’s also a great project for renters because it can be mounted without major construction.
Choose a label rail material like painted wood strip or brushed metal, then cut it to fit the front width of your shelf zone. Mount the rail at a consistent height using screws and anchors so it doesn’t sag. Print small labels with the same font size and attach them to color-coded tabs. Install tabs on bin fronts and drawer pulls so everything has a visible ID at the same eye level.
Use three color categories max — skincare, hair, and backups — so the closet stays clean instead of looking like a craft project.
Don’t label everything with long sentences — short names look cleaner and faster to read.
19. Under-Sink-Style Roll-Out Tray for Small Items
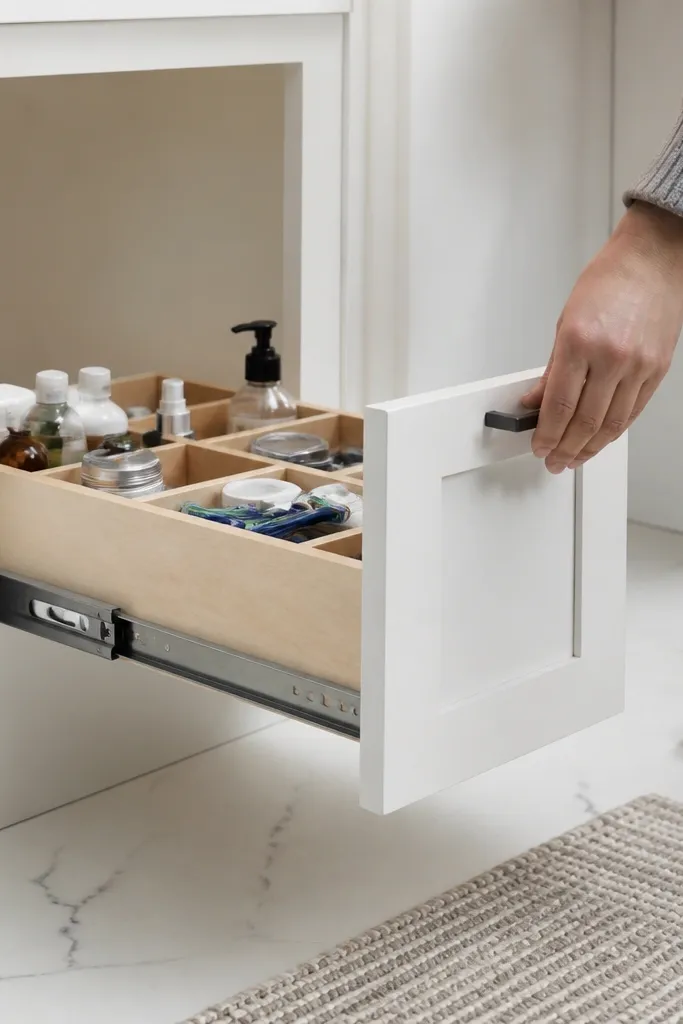
A roll-out tray gives you the best “grab and go” access for small items without cluttering shelves. It’s the same idea as under-sink organizers but scaled for bathroom closets, and it looks clean when the tray has a finished front. Store minis, backups, spare razors, and travel-size items in one place so they don’t spread across the closet. This saves space because you can keep a tight lineup of items that would otherwise need multiple shelves. Skill level is intermediate because you’re mounting slides and building a tray box.
Editor's noteUse a tray lip at least 3/4 in tall so items don’t fall forward when you pull it out quickly.
Measure your closet compartment depth and choose drawer slides that match that travel length. Build a shallow tray box from plywood and add a front panel with a centered pull handle. Install slides to the sides of the compartment, then attach the tray to the slides and test for smooth movement. Add a fitted organizer insert on top using small dividers or a removable tray so items stay in place.
Skip thisDon’t use weak slides — cheap slides stick and make the whole closet feel unreliable.
20. Recessed Drawer for Hair Clips and Accessories
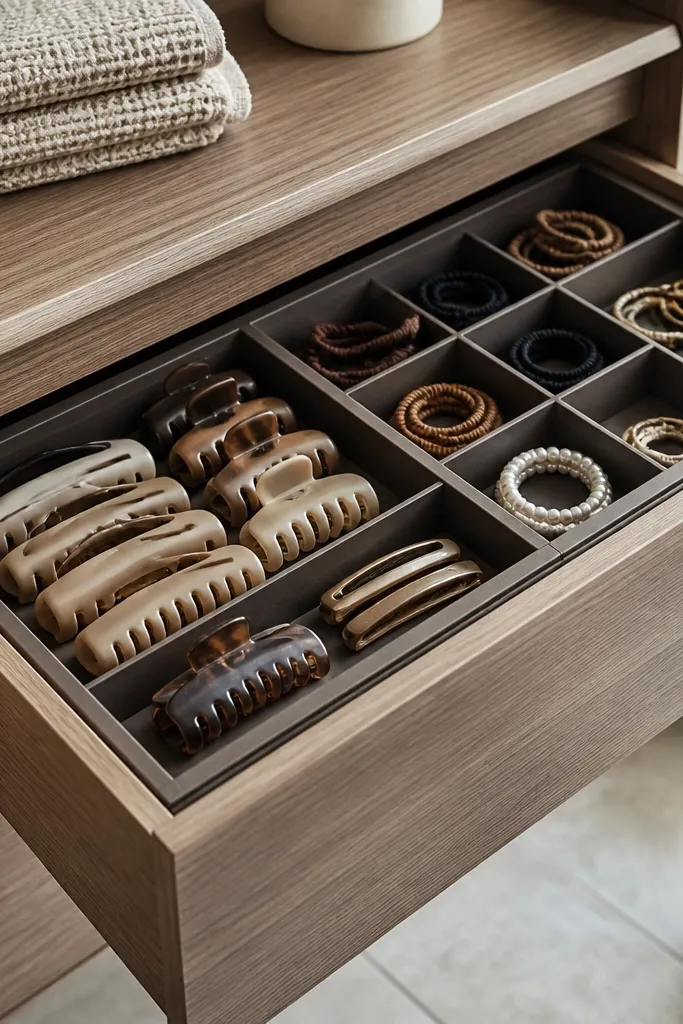
A recessed drawer for tiny accessories keeps the mess contained and makes the closet look expensive because the hardware line stays clean. Hair clips, elastics, and small accessories usually disappear into a bin where you can’t find anything. This drawer organizes by size and keeps everything visible through a tidy layout. It saves space because you store small items in a shallow drawer instead of using deeper shelf space. This works best in closets with at least one drawer-able bay or where you can add a small pull-out section.
Choose the drawer opening size and build a shallow box with sides at 2.5-3 in tall so accessories don’t pile. Install drawer slides and align the drawer front flush with the cabinet interior. Add small compartments using thin plywood dividers or acrylic strips, then cover the drawer base with felt for grip. Finish the front panel to match the closet and add a small label on the drawer handle area.
Use clear compartment dividers if you have mixed colors — it keeps the drawer looking neat even when you open it quickly.
Skip deep compartments — hair elastics tangle when they’re stacked too high.



